



A mat and a few square feet of floor space can do more for your core than a row of machines ever will. That sounds a little blunt, but it’s true. Floor work strips away the noise and forces your midsection to do its actual job: brace, resist, rotate, and keep your pelvis from wobbling all over the place.
That’s why so many core floor workouts look deceptively plain. Dead bugs. Planks. Reverse crunches. Side planks. None of them needs a fancy setup. All of them can expose lazy bracing, weak obliques, or a lower back that takes over the second your abs get tired.
And that’s the useful part. When an exercise is done well, you feel it in the right place fast. When it’s done badly, you feel your hip flexors grabbing, your neck yanking, or your low back arching off the floor. Not subtle. Not flattering either.
The trick is choosing moves that train the core from different angles, not just the same old crunch pattern with a new name. That’s where the floor gets interesting.
1. Dead Bug for Core Floor Workouts
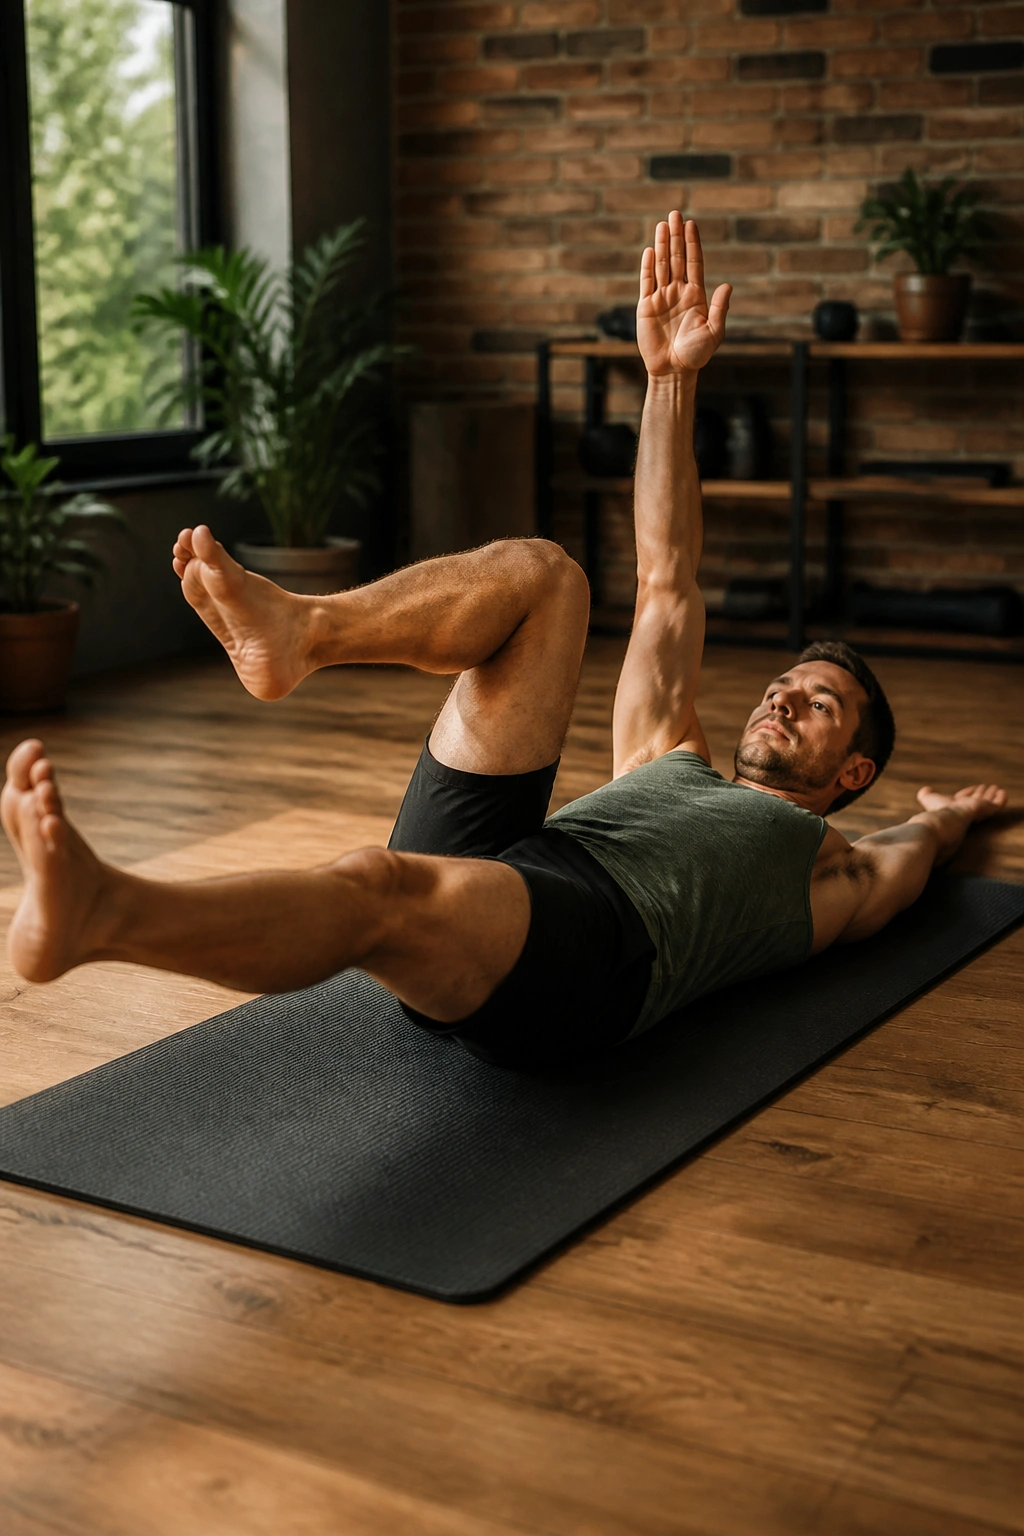
Dead bug looks tame. It isn’t.
What makes it so useful is the way it forces your ribs, pelvis, and limbs to cooperate while everything is moving. One leg reaches out, the opposite arm extends, and your trunk has to stay quiet. That’s the whole point. If your lower back pops up or your ribs flare, the movement stops being a core drill and turns into a sloppy limb swing.
What Makes It Worth Your Time
The dead bug is one of the cleanest ways to teach anti-extension, which is just a plain-English way of saying your core learns not to arch when your arms and legs move. That skill carries over to planks, lifting, running, and even standing without looking like you’re leaning back against a wall.
How to Feel It in the Right Place
Lie on your back with your arms pointed up and your hips and knees bent at 90 degrees. Press your lower back gently into the floor, then slowly lower one heel and the opposite arm. Keep the movement slow enough that you can breathe through it. If you have to hold your breath, you’re rushing.
- Start with 6 to 8 reps per side.
- Keep your lower back heavy on the floor.
- Exhale as the arm and leg extend.
- Stop the range the second your back starts to arch.
Best cue: imagine you’re balancing a full glass of water on your stomach. If the glass tips, you moved too far.
2. Forearm Plank That Teaches Full-Body Bracing
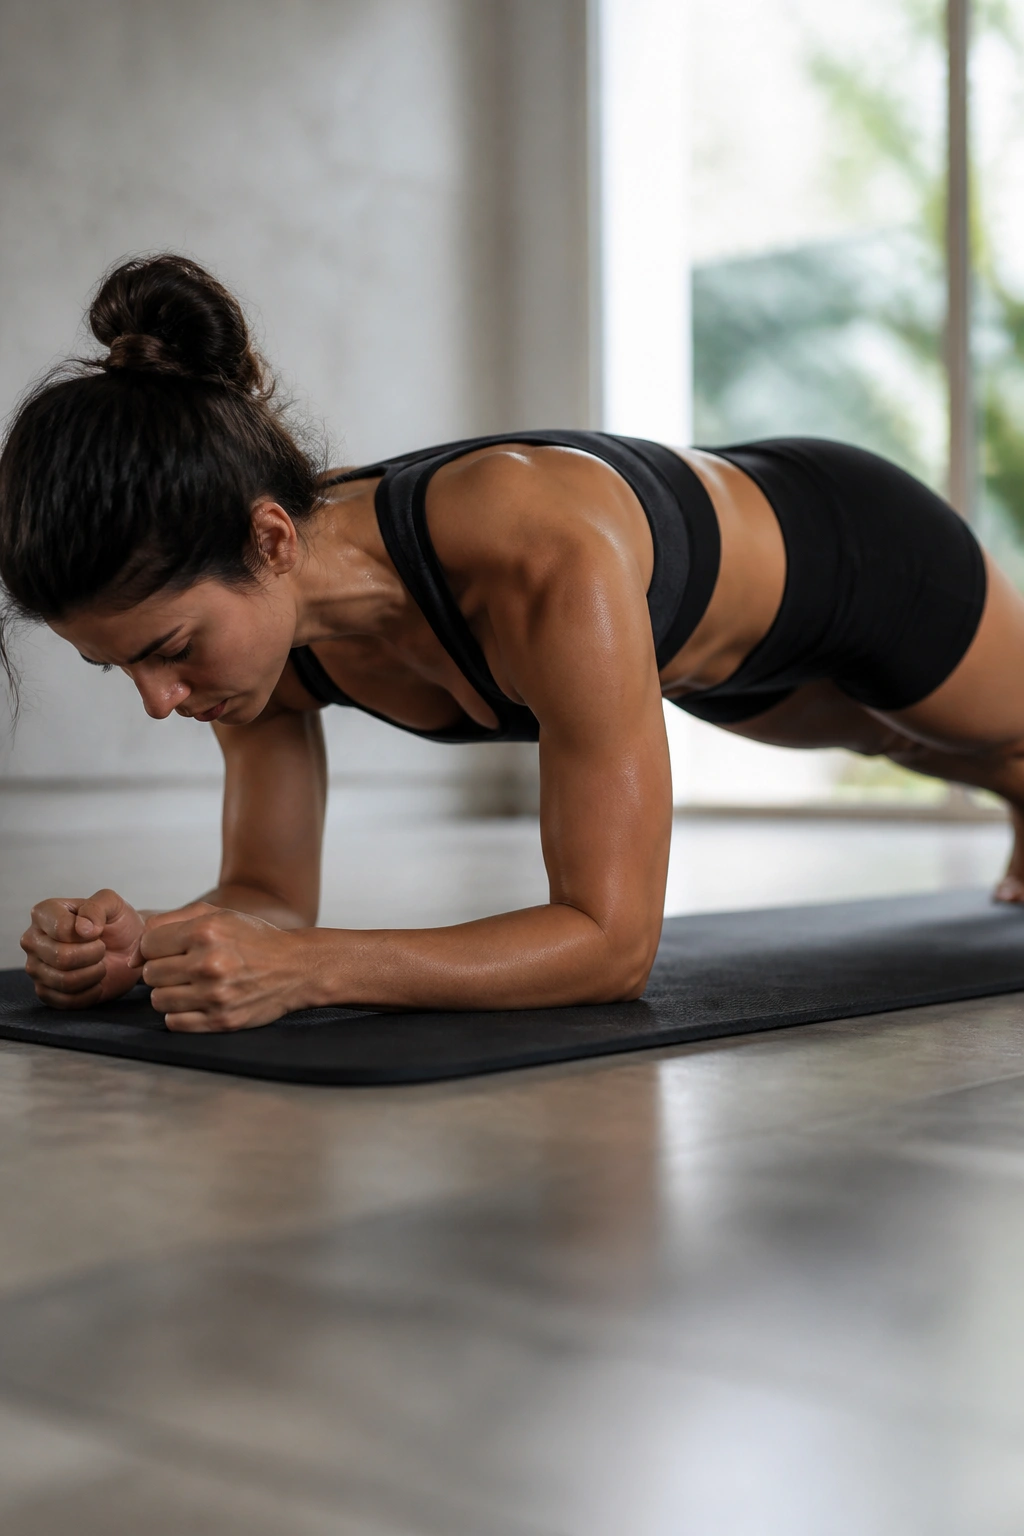
A good forearm plank is not an endurance contest. It’s a tension drill.
Most people go too long and too loose. Their hips sag, their shoulders creep toward their ears, and the whole thing becomes a patience test. I’d rather see a tight 25-second plank than a sloppy two-minute one every single time. Quality wins here. Easily.
The reason it works is simple: your abs have to stop your spine from dipping while your glutes keep your pelvis level and your upper back keeps the shape from collapsing. That’s a lot of jobs for one quiet position on the floor. Which is exactly why it matters.
Set your elbows under your shoulders, squeeze your glutes, and tuck your pelvis just enough that your ribs knit down. Breathe in short, controlled breaths through your nose if you can. If your neck gets tense, you’re probably looking forward or shrugging instead of bracing. Think long line, not long suffering.
Three rounds of 20 to 40 seconds is plenty for most people. Rest 30 to 45 seconds between rounds, reset, and make every second count.
3. Hollow Body Hold for a Stronger Front Line
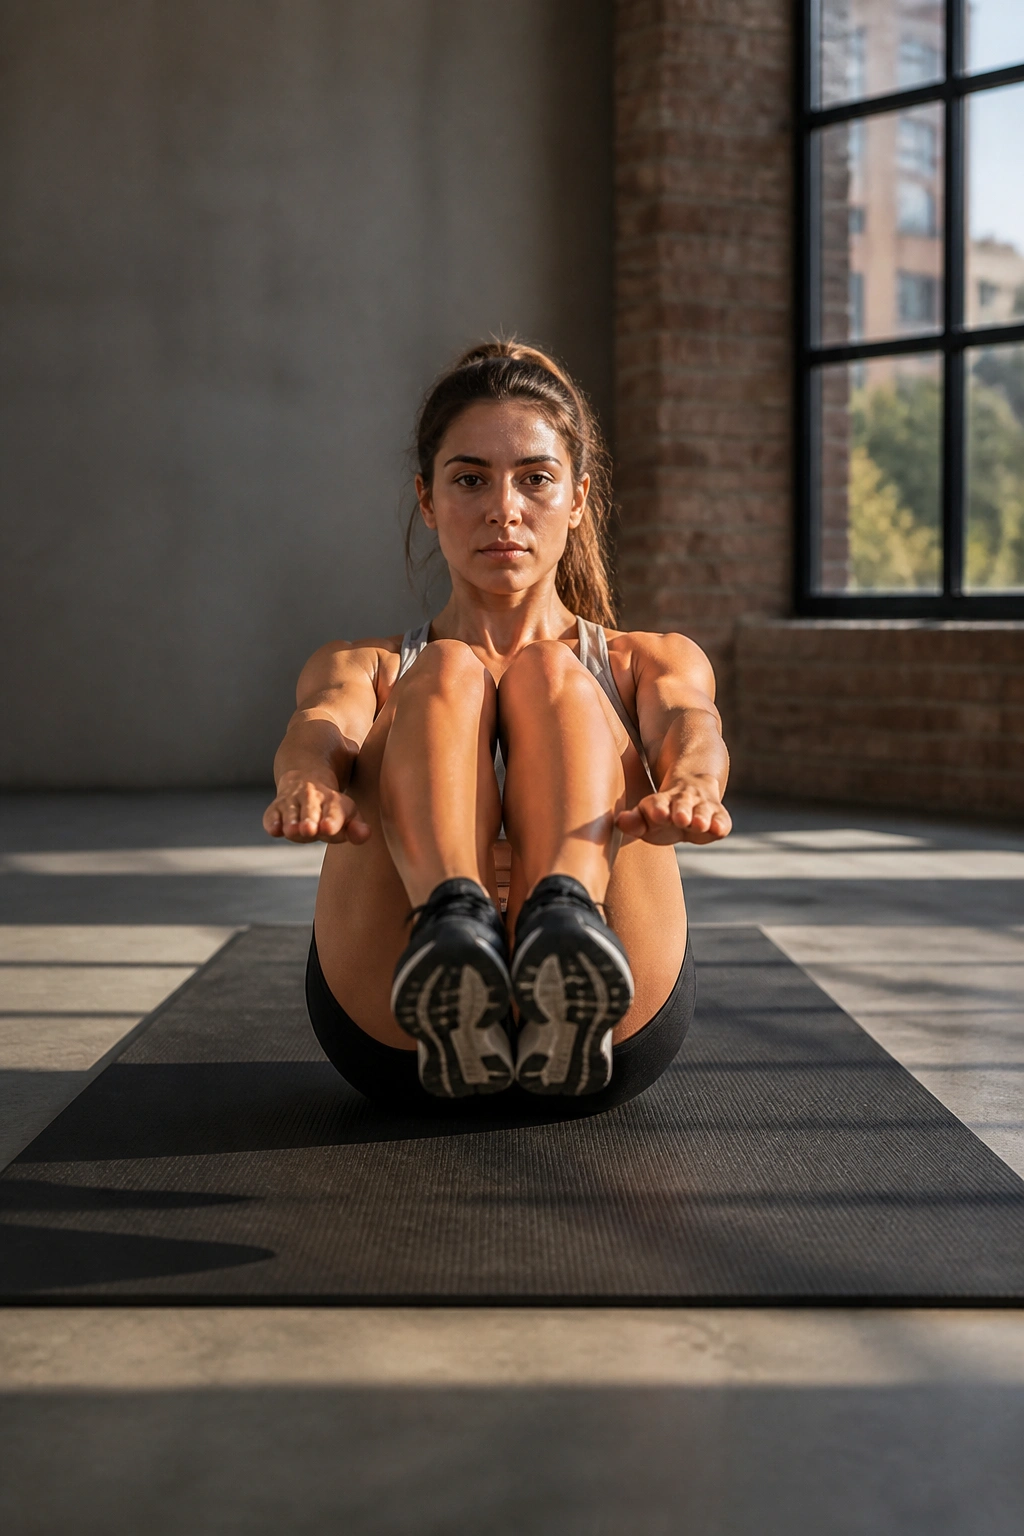
Why do gymnasts love this move so much?
Because the hollow hold teaches the front of your body to stay tight when your limbs are extended. Your abs, hip flexors, and deep trunk muscles all have to work together, and the floor gives you instant feedback. If your lower back peels away, the hold is too aggressive. No drama. Just shorten it.
How to Use It
Start with a tucked version. Pull your knees in, lift your shoulders a few inches, and keep your lower back glued to the mat. Once that feels controlled, extend one leg at a time. Full hollow holds are demanding, and there’s no prize for rushing into the hardest version too soon.
- Hold the tucked position for 10 to 20 seconds.
- Move to one-leg extension for another week or two.
- Only go to full leg extension when your back stays flat the entire time.
A hollow hold looks small. That’s part of the trap. It can light up your midsection in a way that feels more intense than big, flashy exercises because there’s nowhere to hide. If your abs shake a little, fine. If your back arches, stop and make it easier.
4. Bird Dog for Quiet, Controlled Stability
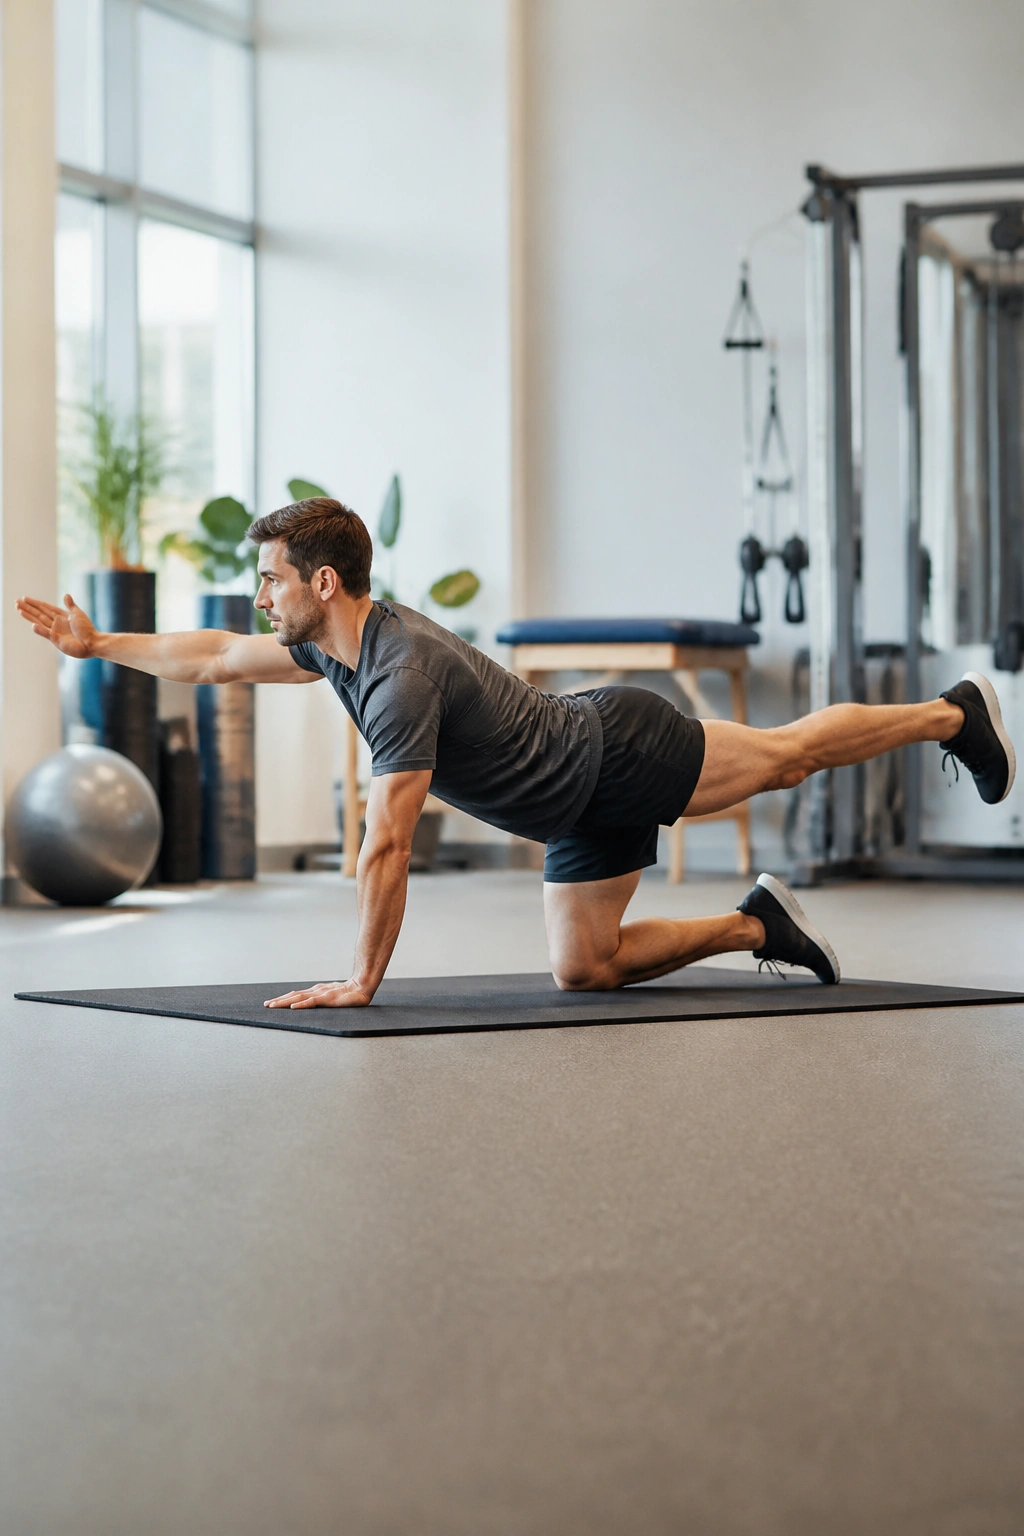
Bird dog is the move I’d hand to someone who says planks bother their back or that their abs never seem to “turn on.” It looks almost too simple, which is probably why people skip it and then miss out on one of the best floor-based stability drills around.
The magic is in the cross-body reach. When your right arm and left leg extend together, your trunk has to stay level while your hips resist twisting. That small demand is the whole exercise. It teaches coordination and control without crushing you with load.
The Cues That Matter
Get on hands and knees. Stack shoulders over wrists, hips over knees. Reach one leg straight back without arching your lower back, then extend the opposite arm. Pause for a full second. Not half a second. A real pause.
- Do 6 to 10 reps per side.
- Keep your hips square to the floor.
- Imagine balancing a bowl on your low back.
- Move slowly enough that you can correct wobble.
Bird dog is one of those exercises that pays you back later. Running form tends to feel cleaner. Planks feel steadier. Even simple things like carrying groceries get a little less sloppy. It’s not flashy, and that’s exactly why it earns a place here.
5. Reverse Crunch for Lower-Ab Focus
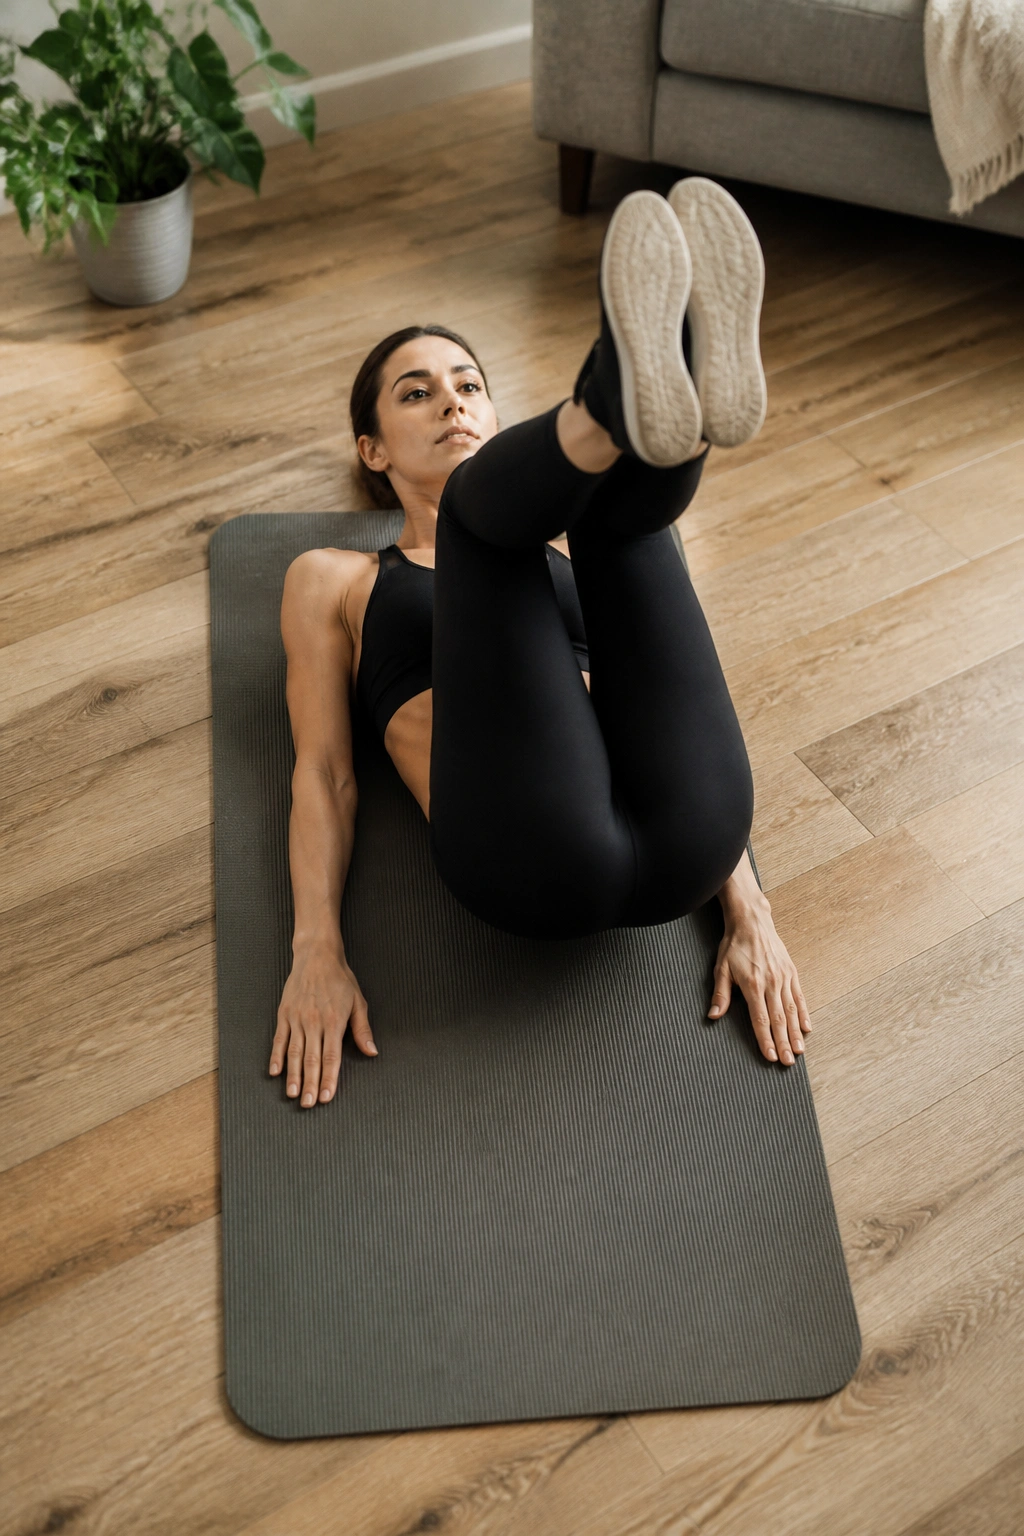
The reverse crunch gets dismissed by people who only trust exercises that look hard. That’s a mistake.
What makes this move so effective is the way it curls the pelvis upward instead of yanking the neck or pumping the legs. You’re training the lower abs to tilt the pelvis, which is different from just swinging your knees toward your chest. Done well, it feels compact and sharp. Done badly, it turns into a momentum party.
Keep your hands lightly on the floor or by your sides. Bend your knees, lift them toward your chest, then use your abs to curl your tailbone off the floor. The actual lift is tiny. Small range, big effort. That surprises people the first time, and honestly, it should.
The biggest mistake is tossing the legs and calling it a rep. Another bad habit is letting the low back arch on the way down because the lowering phase is where the control lives. Slow down. Exhale as you curl up, then lower with a five-count if you can manage it. Ten clean reps will do more than twenty rushed ones.
A reverse crunch also pairs well with plank work because it gives your body a different job: flex the trunk instead of just holding it still.
6. Side Plank for Obliques and Waist Stability
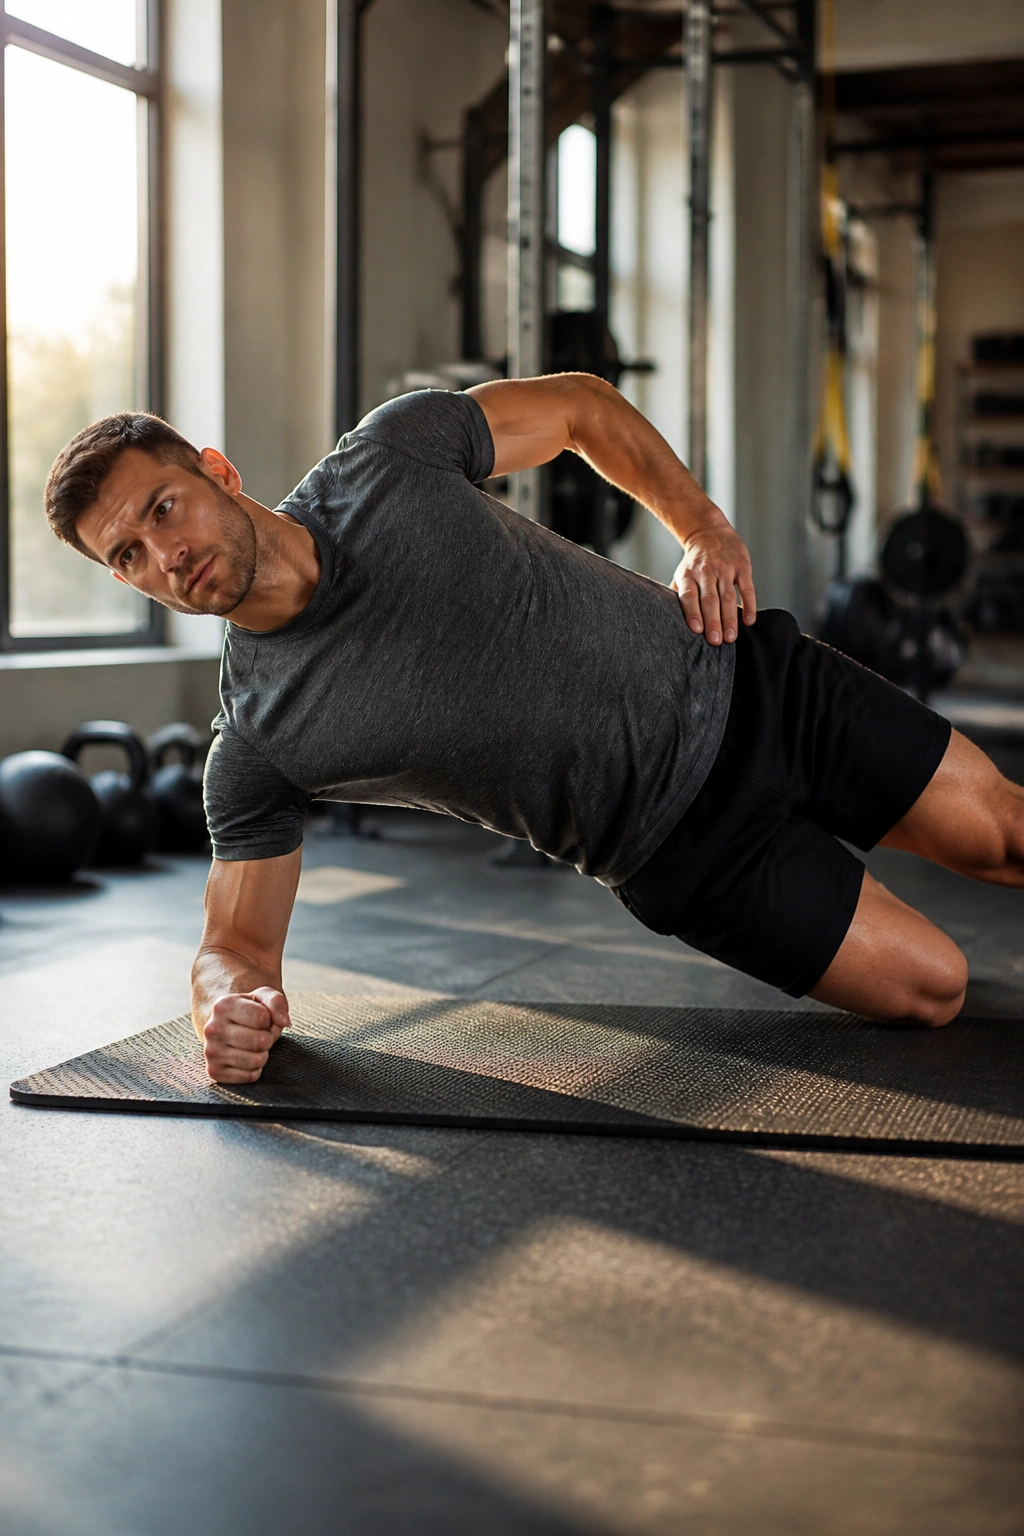
A side plank is not just a side version of a regular plank.
It asks something different from your body. Instead of resisting front-to-back collapse, you’re resisting side-bending and rotation at the same time. That makes your obliques work hard, but it also puts your shoulder and glute on duty. A lot of people feel this more in the underside of the waist than they expect.
If you want cleaner posture and a trunk that doesn’t fold when you carry a bag on one side, this is a smart pick. If you want a visible burn, you’ll get that too. The floor gives you a simple test: can you keep one straight line from head to heels without dumping into the lower hip?
Start with your bottom knee down if full side planks feel shaky. Keep your top shoulder stacked over the bottom elbow, and press the floor away. Don’t let your ribs drift forward. Fifteen to 25 seconds per side is enough for most beginners.
For a little extra challenge, raise the top leg. That changes the demand fast. But only do it after the base version feels honest.
7. Bicycle Crunch Done Slowly and Without the Neck Tug
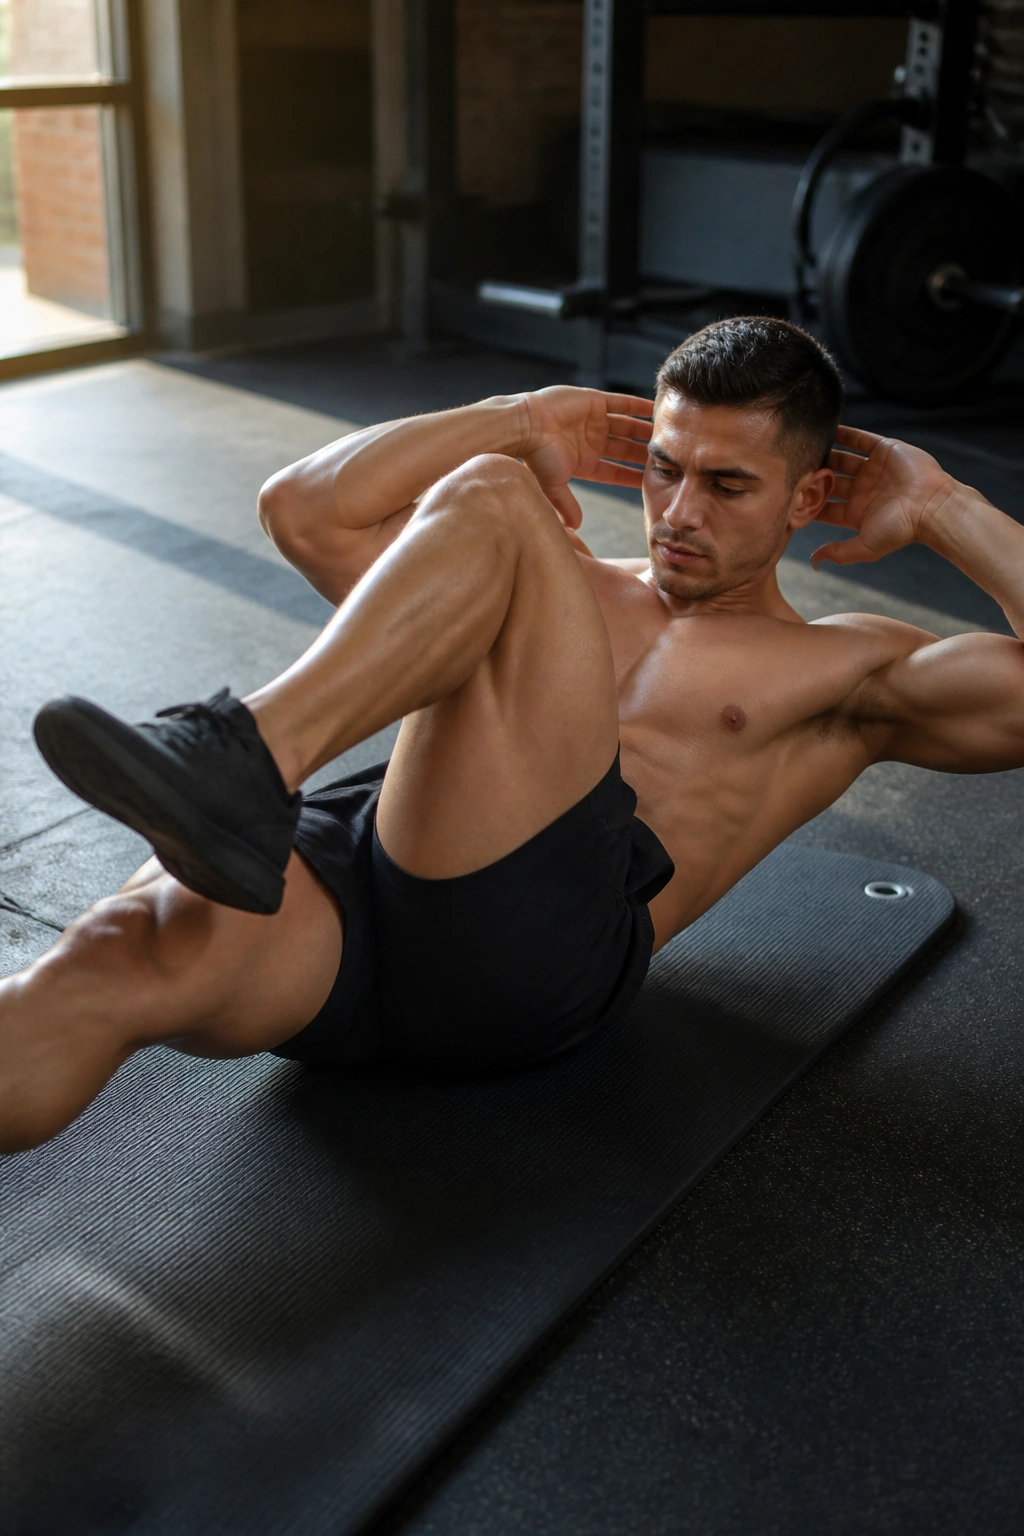
Speed ruins this exercise for a lot of people.
The bicycle crunch can be brutal in a good way, but only when it’s controlled. If you fling your elbows and knees around like you’re trying to beat a clock, your hip flexors take over and your neck starts complaining. Slow it down and the whole move changes. Suddenly the twist comes from your rib cage, not your shoulders.
What to Watch For
Lie on your back, hands lightly behind your head, and lift your shoulders just off the floor. Bring one knee in while the opposite elbow rotates across your body. The knee and elbow do not need to smash together. They need to meet the right distance with a twist, not a jerk.
- Keep your lower back pressed down.
- Rotate from the rib cage.
- Keep the chin slightly tucked.
- Aim for 8 to 12 controlled reps per side.
A lot of people overthink the elbow-to-knee part. Don’t. The useful work happens in the twist and the brace, not in the collision. If your head is doing most of the pulling, your abs are getting cheated. And yes, that happens all the time.
8. Mountain Climbers for Core and Cardio Together
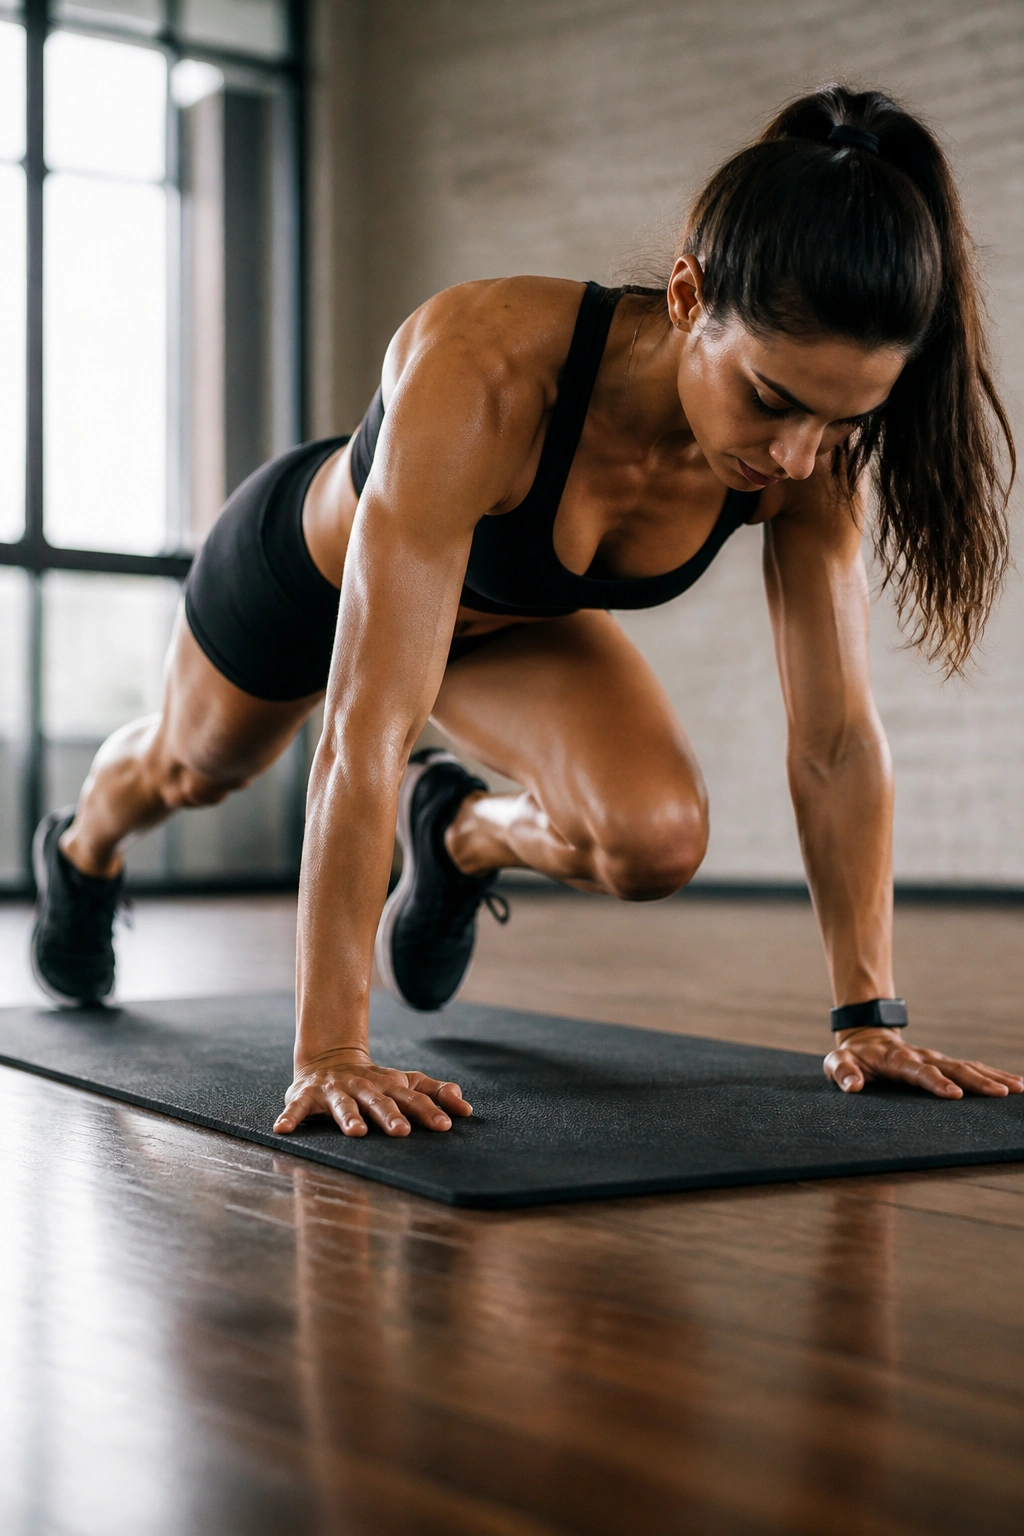
Mountain climbers are often sold as a cardio move. That misses half the story.
Yes, your heart rate climbs. So does your core demand. Each knee drive asks your trunk to stay steady while one leg moves quickly under your body. If your hips bounce all over the place, the exercise turns messy fast. The cleaner version is better, even if it feels a bit less dramatic.
Set your hands under your shoulders and lock into a strong plank. Drive one knee toward your chest, then switch legs with control. The best climbers look almost quiet from the waist up. That’s not a coincidence. It means the core is doing its job instead of just surviving chaos.
A useful trick is to slow the first ten seconds on purpose. That sets the pattern. After that, you can build speed without losing shape. If your lower back starts to sag, shorten the range or slow down. Thirty seconds of clean climbers beats a minute of bouncing.
If your wrists are cranky, put the exercise on a slightly higher surface. The movement pattern stays the same, and your joints get a break.
9. Leg Raises Without the Lower-Back Arch
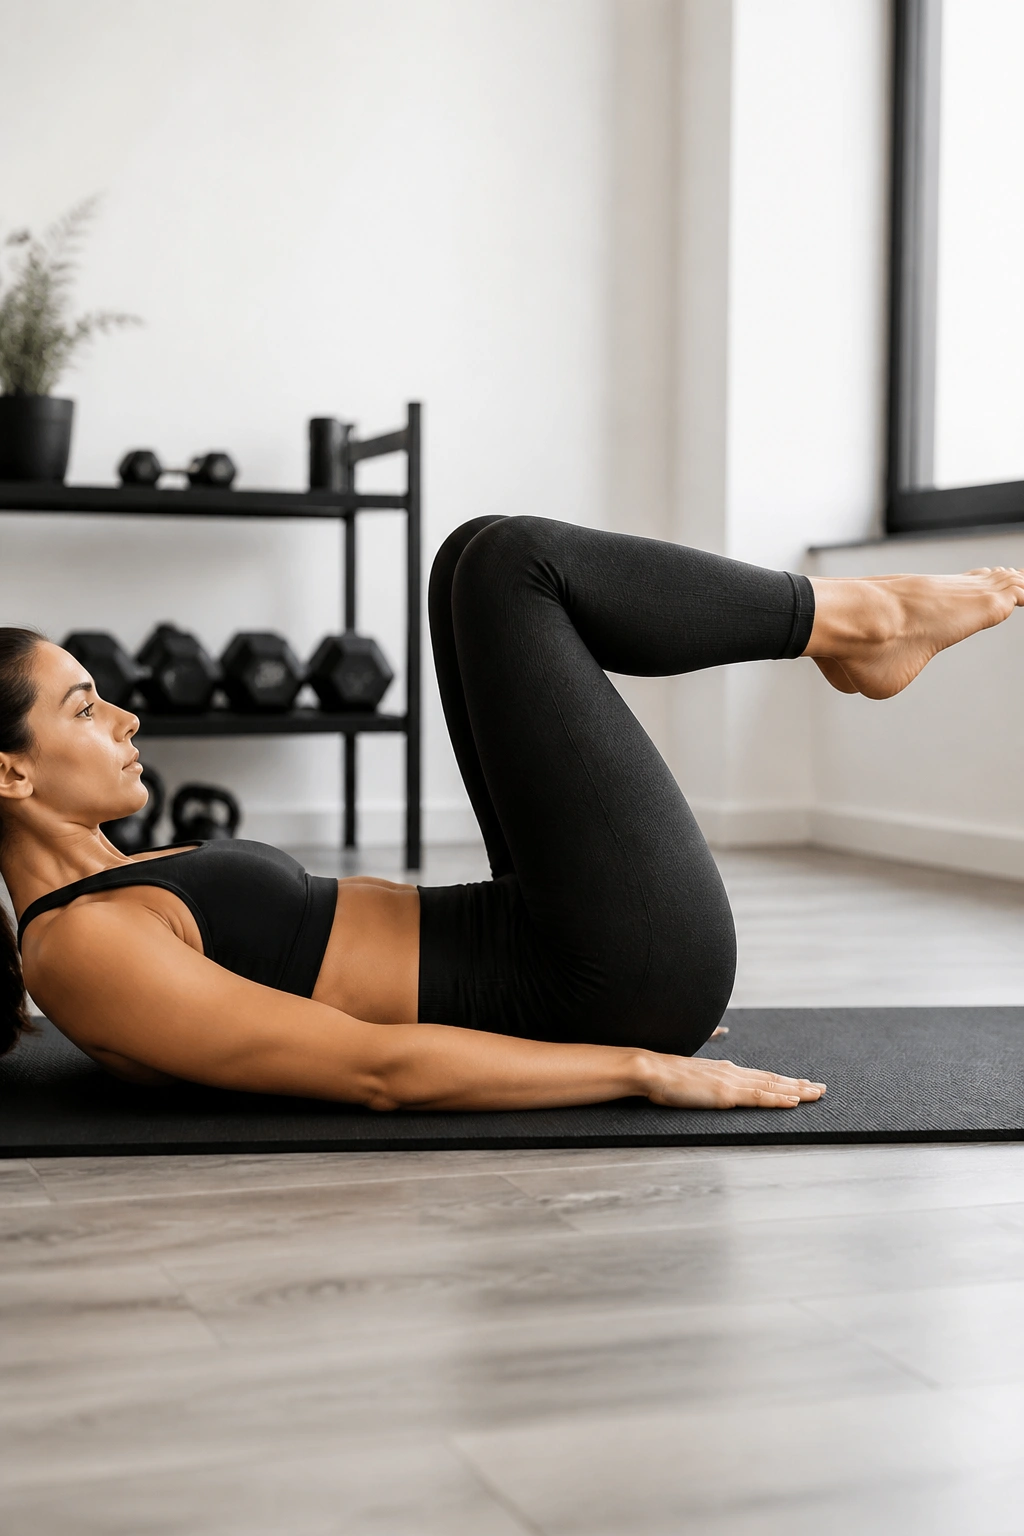
Can you lower both legs without your back popping off the floor?
That’s the real test here. Leg raises look simple, but they expose control issues fast. If your hip flexors are doing all the work, your low back will arch and the movement gets ugly in a hurry. When done well, leg raises are one of the cleanest ways to train the front of the core against extension.
How to Scale It
Start with bent knees if straight legs are too hard. Keep your hands under your hips only if you need a bit of support, and don’t turn that into a crutch. Lower the legs slowly until you feel the point just before your back wants to lift, then stop there.
- Use 6 to 10 reps.
- Lower for 3 full seconds.
- Keep the ribs down.
- Stop the set the second form slips.
Straight-leg raises are harder, but harder is not the same as better. Better is the version you can control from start to finish. If your legs shake a little on the way down, that’s fine. If your spine arches, cut the range. No heroics needed.
10. Toe Touch Crunch for a Sharp Upper-Abs Burn
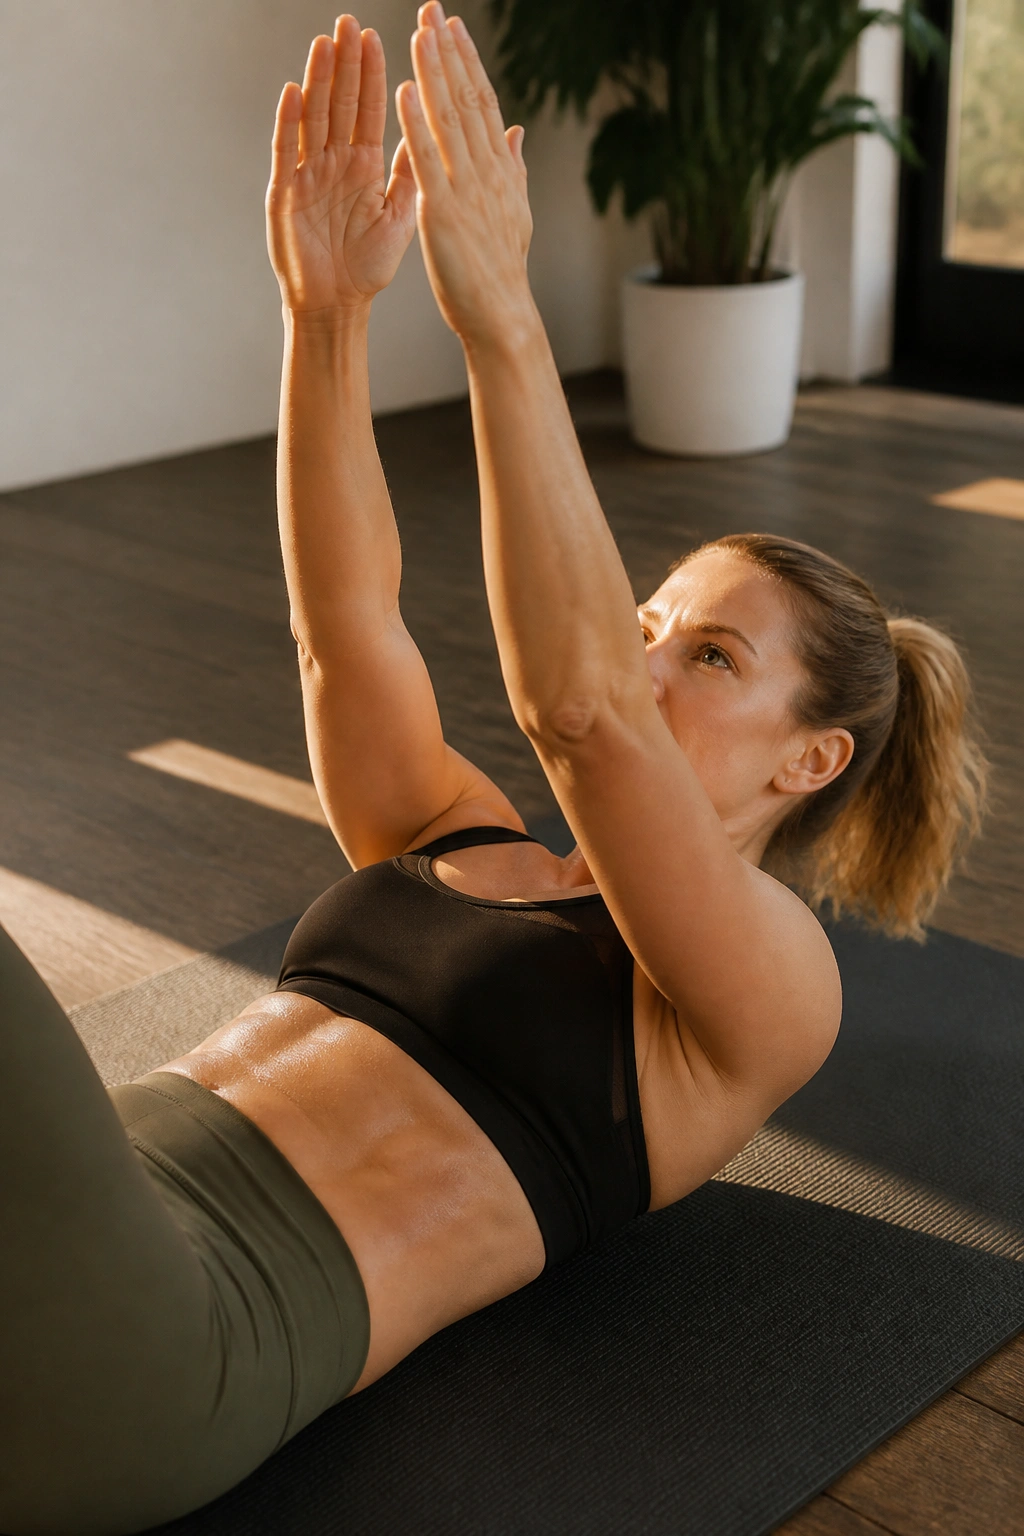
Toe touch crunches get overlooked because people assume crunches are old news. They’re old, sure. They’re also useful when you want a direct upper-ab contraction without a lot of setup.
The movement is small and honest. Your arms reach toward the ceiling, your legs extend upward, and your shoulders curl off the floor to meet your toes. If you try to whip through the reps, you lose the point. If you slow it down, you’ll feel the upper abs light up in a very specific way.
This is one of those floor workouts that works best when you stop trying to make it huge. Keep the lift compact. Curl up through the rib cage, not the neck. Your fingertips do not need to touch your toes every single rep. They need to reach with control while your abs drive the motion.
Ten to fifteen reps is a good start. If your neck gets sore first, your head is doing too much work. Keep your gaze up and your chin slightly tucked, or use a light pause at the top to make the contraction cleaner. It’s a small move. That’s the point.
11. Glute Bridge March for Pelvis Control
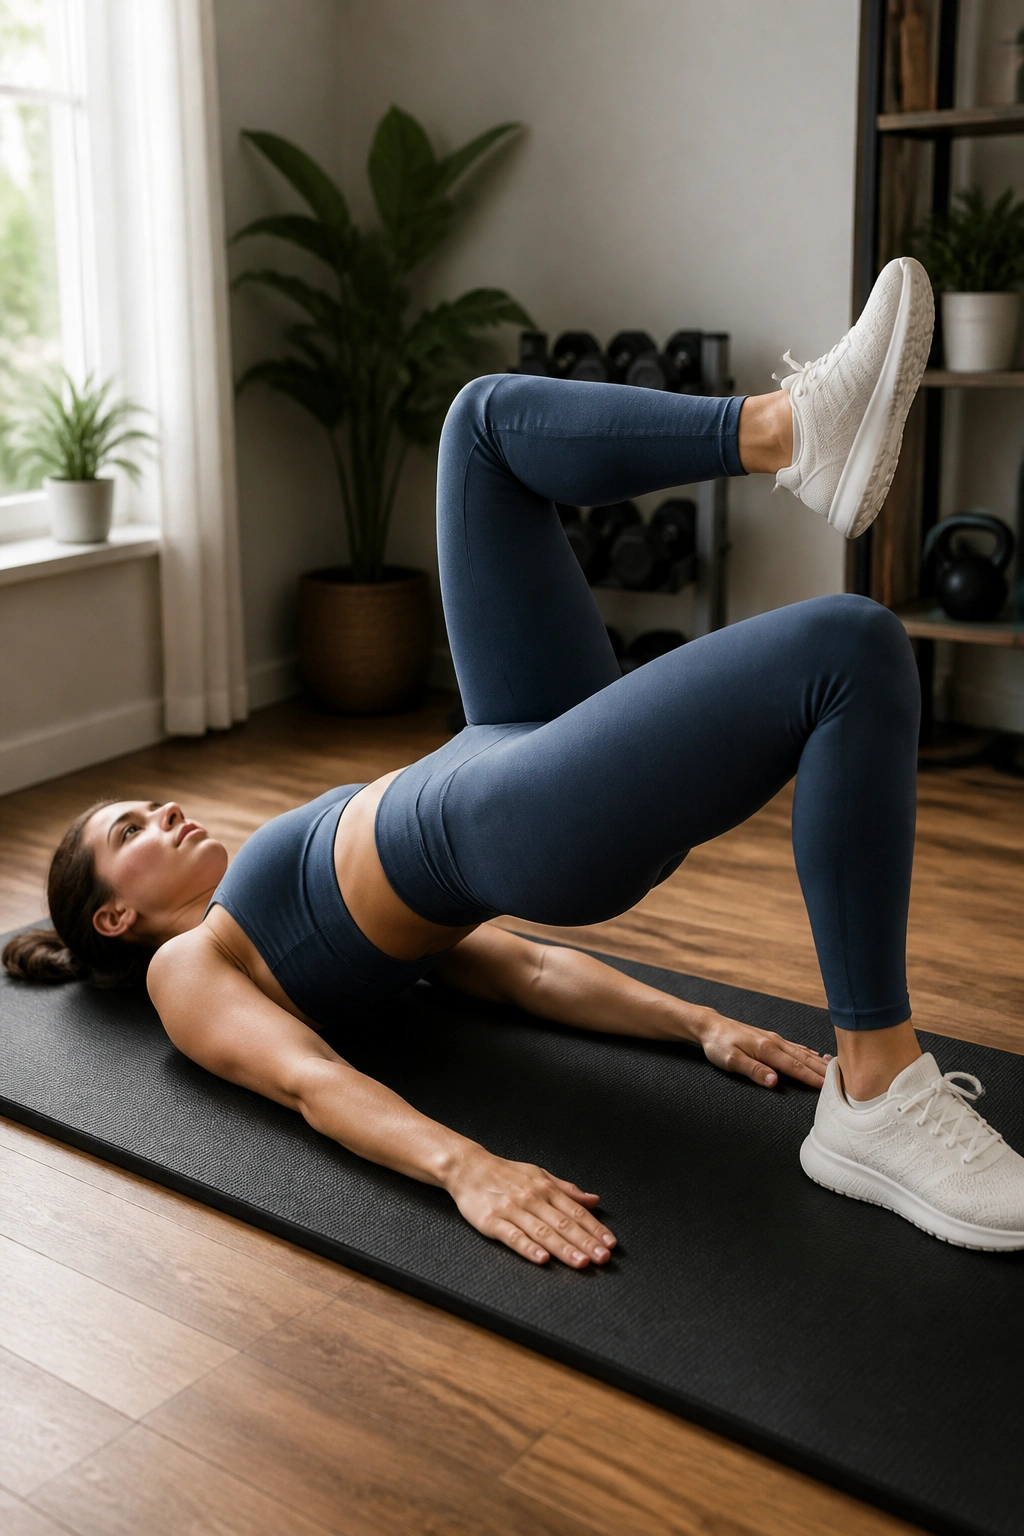
A glute bridge march looks like a lower-body move at first glance, but it sneaks into core training fast.
Why? Because lifting one foot at a time forces your pelvis to stay level while your glutes and deep core keep everything from tilting. If you’ve got a history of low-back tightness, this one often feels better than endless crunches. It teaches support, not just bend-and-burn.
Lift into a standard bridge first. Feet flat, knees bent, ribs tucked down. Then slowly raise one knee toward your chest without letting your hips drop. Set it back down and switch sides. The motion should look almost boring from the outside. That’s a good sign.
If you feel your hamstrings cramping, move your heels a little closer or lower your hips slightly. If your back arches, reduce the march range. Eight to twelve marches per side is enough to start. Two-second pauses at the top make the whole thing much harder in a good way.
This move is especially useful if you sit a lot. It gives your glutes a job and stops your core from freeloading.
12. Plank Shoulder Tap for Anti-Rotation Strength
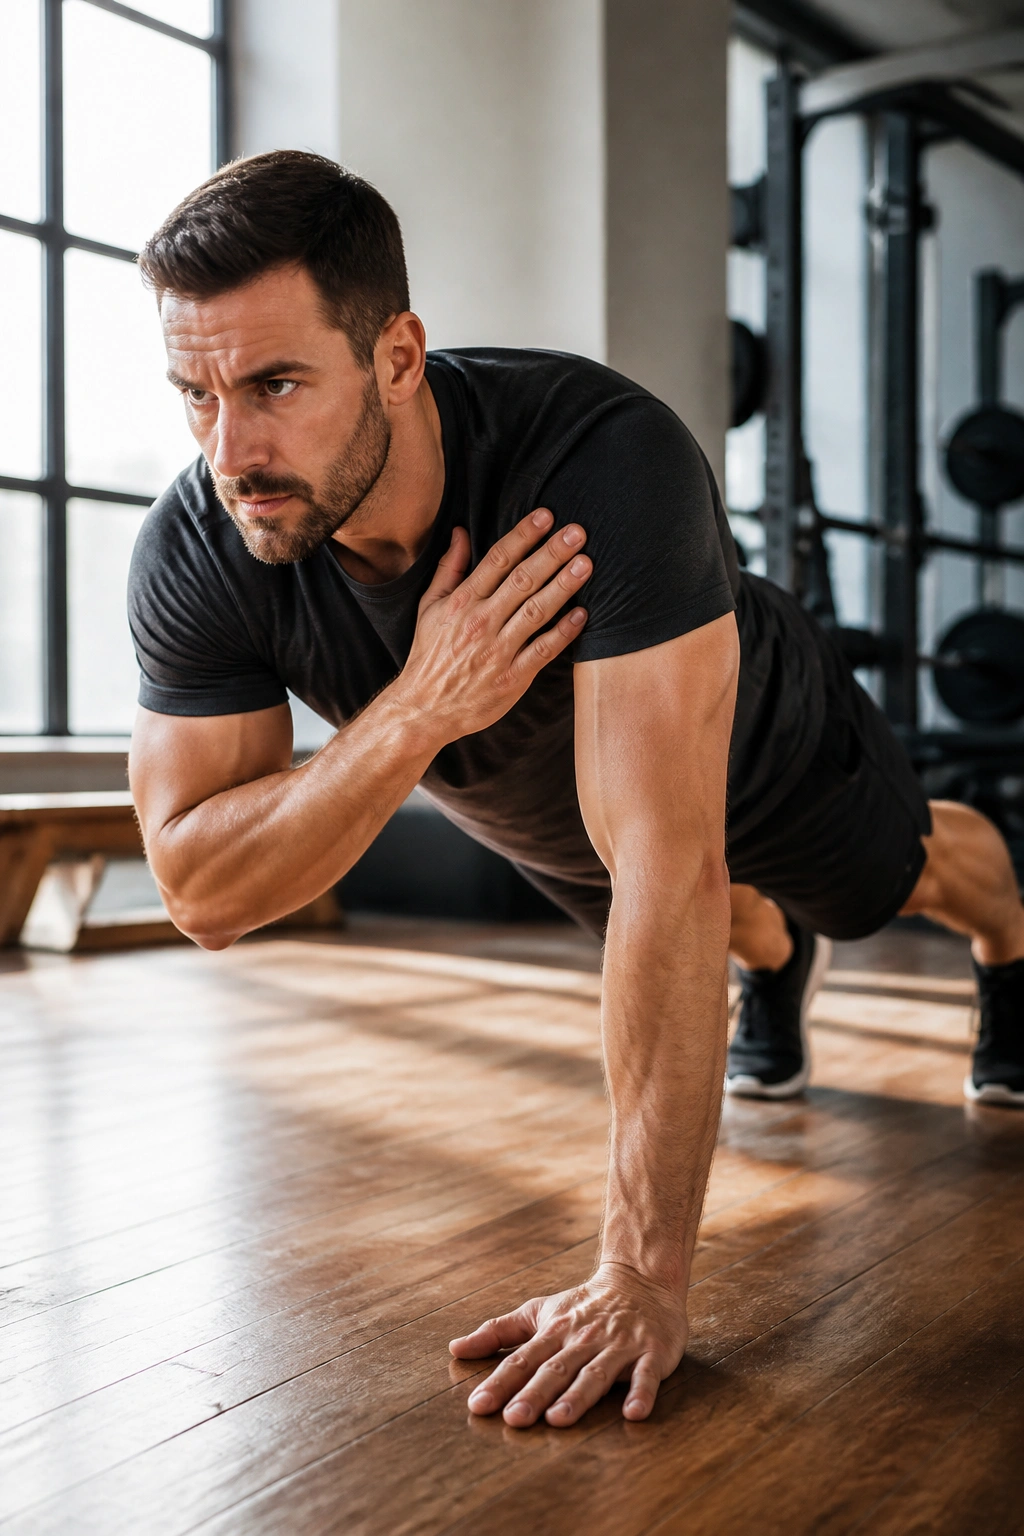
Plank shoulder taps are one of the best tests of whether your core can stay still while your arms move.
That’s a fancy way of saying they train anti-rotation. Your body wants to twist every time one hand leaves the floor. Your abs, glutes, and shoulder stabilizers have to stop that from happening. If your feet are set too narrow, the drill gets sloppy. If they’re too wide, it gets easier, but there’s a sweet spot.
What to Watch For
Set up in a high plank with your hands under your shoulders and your feet about hip-width apart. Tap one shoulder with the opposite hand, then switch sides. Keep the hips as level as you can. If they sway a little, that’s normal. If they swing like a pendulum, slow down and widen your stance.
- Do 10 taps per side.
- Keep the taps light, not aggressive.
- Breathe on every rep.
- Stop if your lower back starts sagging.
The reason I like this drill is that it blends strength with control. You’re not just holding a position. You’re resisting a shift every second. That’s more honest, and frankly more useful, than a lot of core work that looks busy but doesn’t teach much.
13. Russian Twist Done With Control, Not Chaos
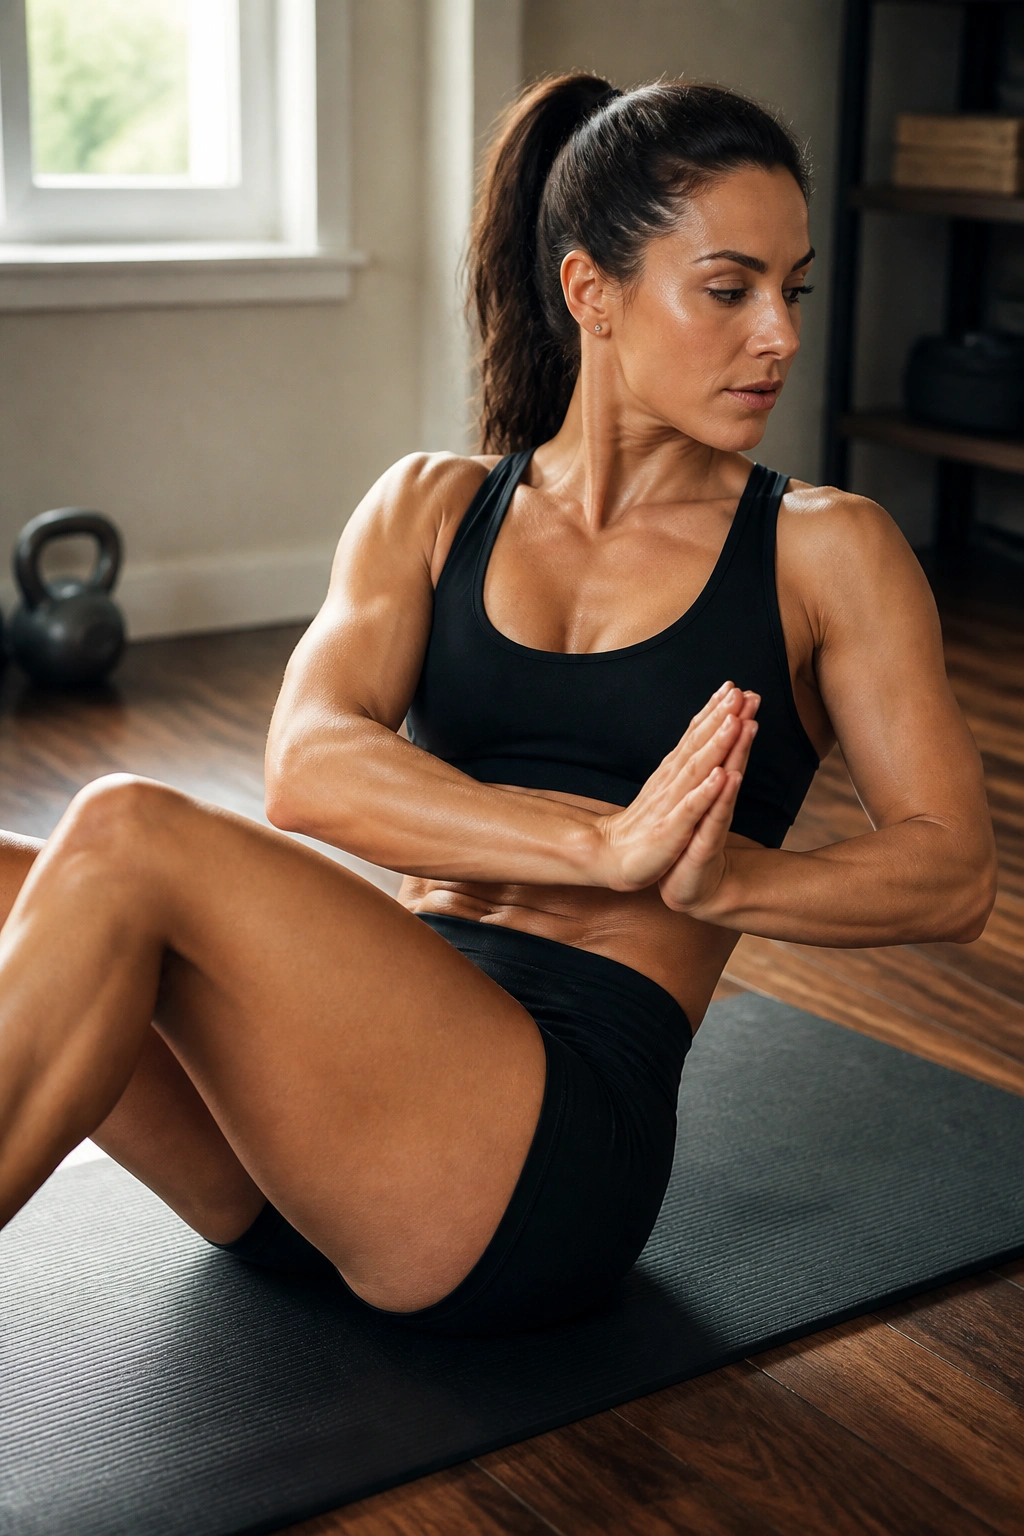
Russian twists have a bad reputation for a reason.
People rush them. They yank their torso side to side. They fling a dumbbell around and call it core work. That version can bother the low back and doesn’t teach much. The clean version, though, is a solid seated rotation drill that asks your obliques to move and control the twist at the same time.
Sit on the floor with your knees bent and your chest tall. Lean back only a little, not enough to collapse. Rotate from your rib cage toward one side, then the other. Your arms can stay together, and you do not need heavy weight to make this count. In fact, a lighter load often makes the movement better because you’re less tempted to cheat.
If you want a harder version, lift your feet a few inches. That changes the balance demand fast. If your lower back starts to feel pinchy, keep your feet on the floor and shorten the lean. Twelve slow turns per side is plenty when the form is honest.
This is a good exercise for control, but only if the torso leads and the arms stay out of the driver’s seat.
14. Scissor Kicks for Lower-Ab Endurance
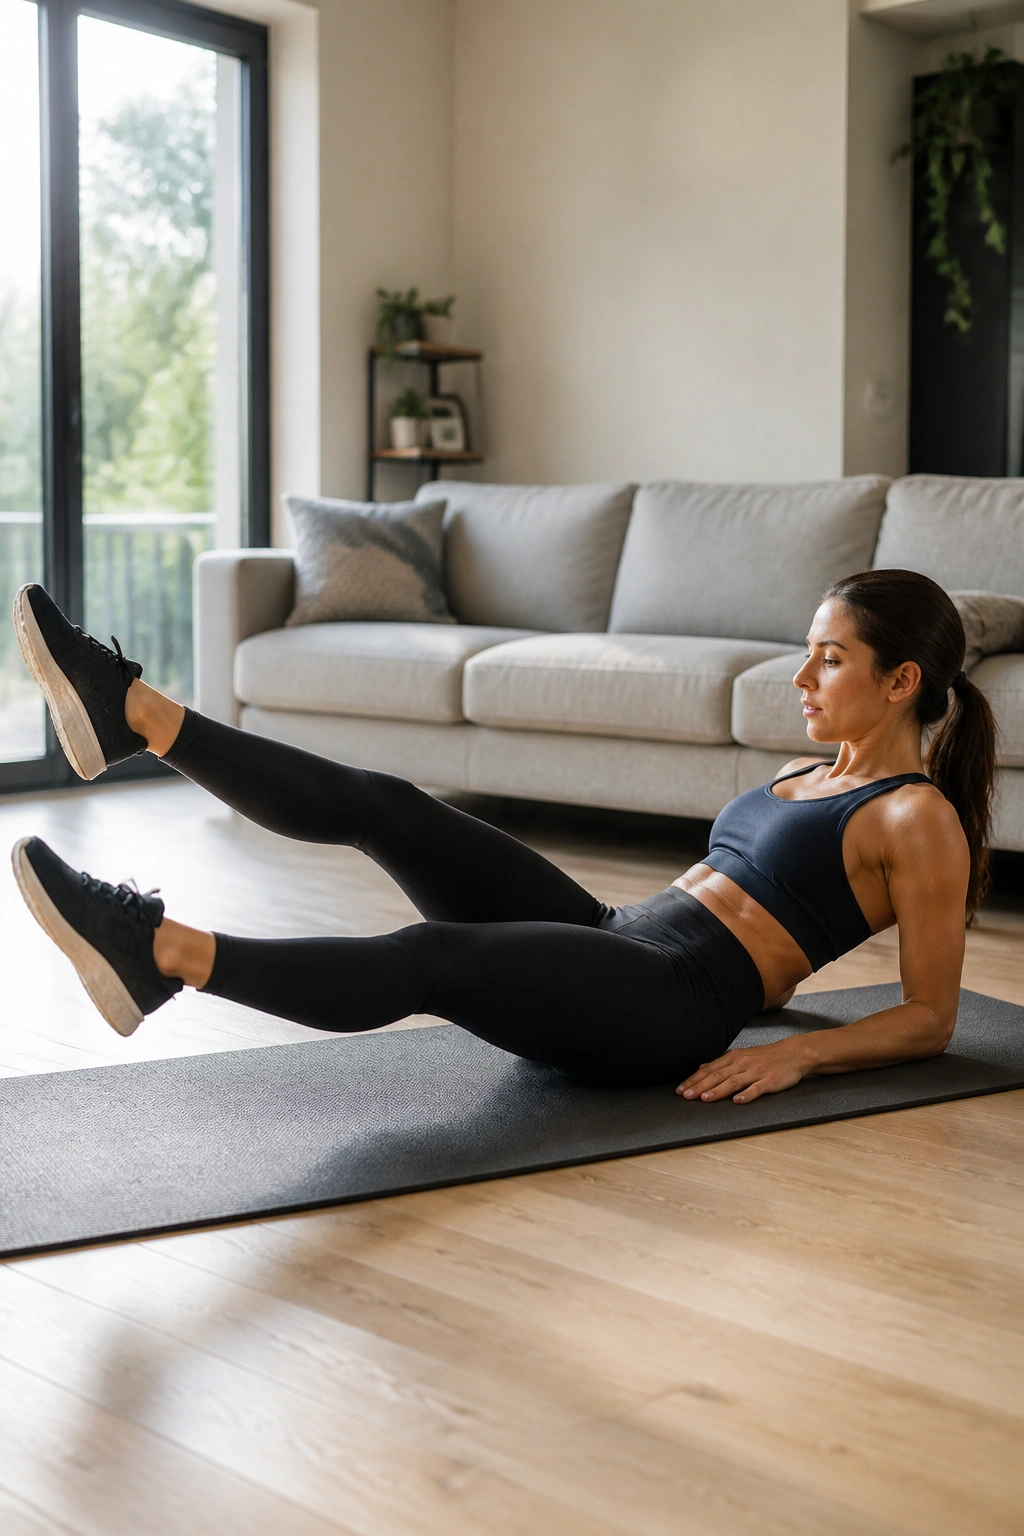
Why does such a simple movement light up the lower abs?
Because scissor kicks force the front of your core to fight the pull of your legs while one leg lowers and the other rises. The lower back has to stay anchored, and that turns a tiny movement into a real test. If you drop the legs too low, the back arches. If you keep them too high, it gets easy. There’s a middle lane, and that’s where the work lives.
How to Get the Most From It
Lie on your back and press your low back into the floor. Lift both legs a few inches off the ground, then alternate them in a controlled scissor pattern. Move slowly enough that you can feel the abs stay on. The motion should look smooth, not frantic.
A lot of people make the mistake of treating this like a speed drill. It isn’t. If your neck tightens, support your head lightly and look up instead of forward. If your hip flexors burn before your abs do, raise the legs a little higher.
- Try 20 to 30 seconds per set.
- Keep the legs long but not locked.
- Stop before the back arches.
- Rest and repeat for 3 rounds.
This one is sneaky. It doesn’t look dramatic, but it can leave your midsection tired in a way that lasts.
15. Bear Hover Hold for Serious Floor Tension
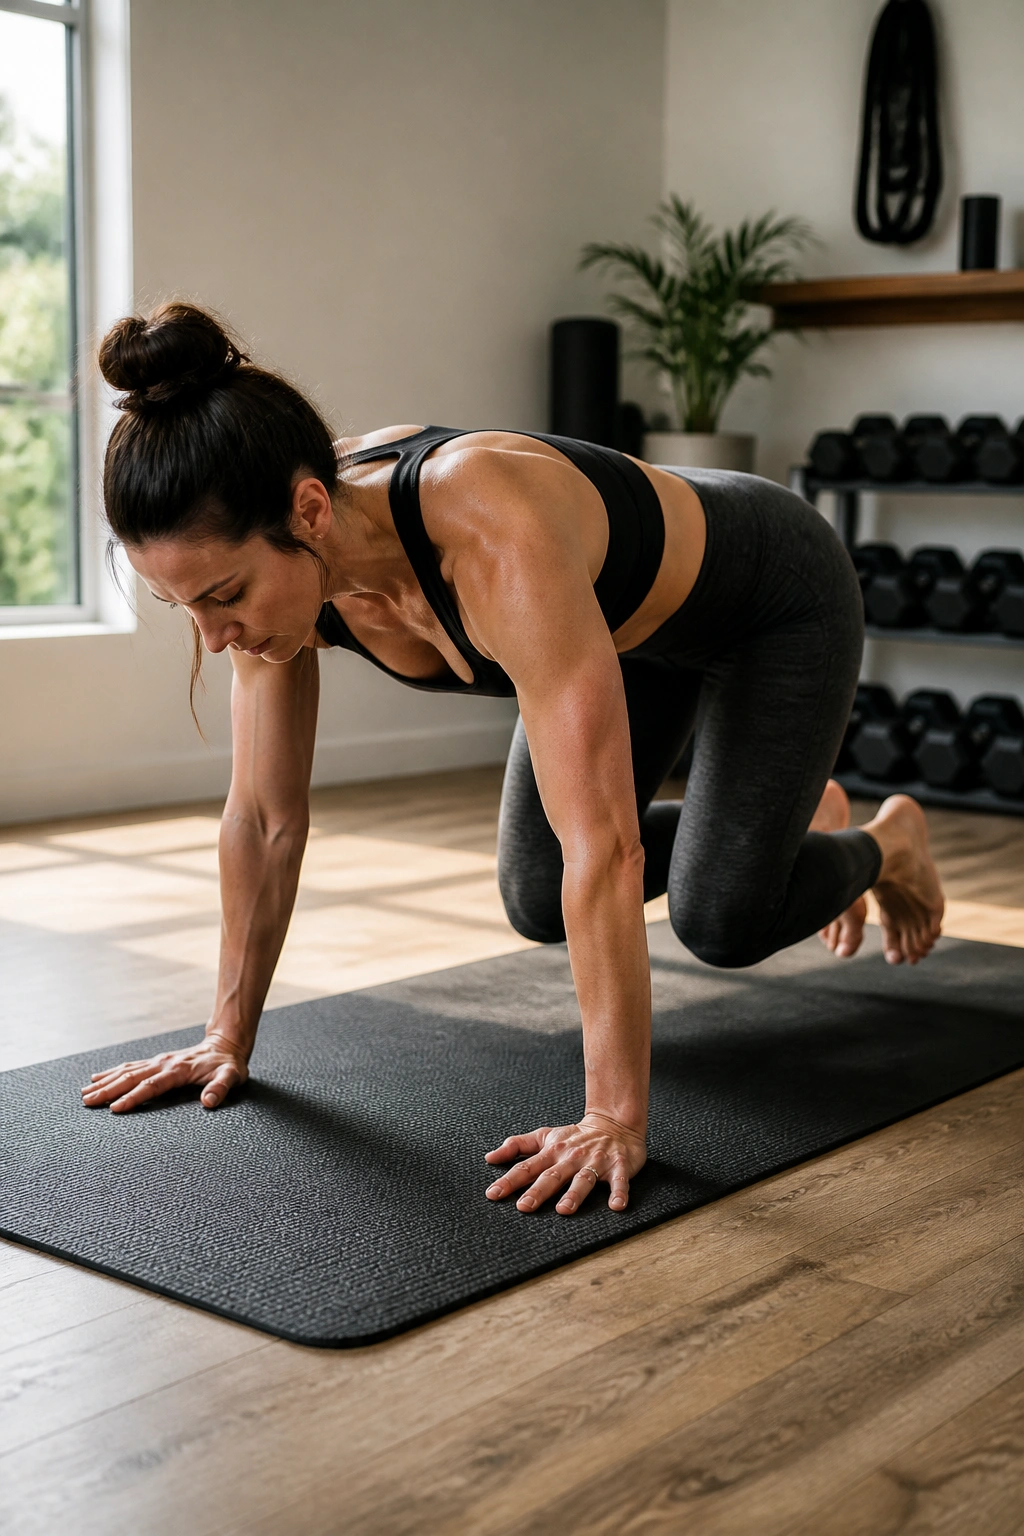
Bear hover is the move I reach for when someone wants something tougher than a plank but still totally floor-based.
You start on hands and knees, then lift your knees just an inch or two off the floor. That tiny hover changes everything. Your abs tighten, your shoulders wake up, your quads light up, and your breathing gets choppy if you lose focus. It’s a full-body brace disguised as a crawl position.
Unlike a straight plank, bear hover asks you to keep the knees floating while the hips stay level and the spine stays neutral. That means you can’t lean on momentum. You can’t hide. If your knees sit too high, the move gets easier. Too low, and your back may arch or your knees may slam. The sweet spot is small and exact.
This is best for people who already have some floor-core basics and want more tension without adding equipment. Start with 10 to 20-second holds, five rounds, and rest about 30 seconds between sets. Keep your breath steady. Hold your breath and the whole thing turns into a strain contest, which is not the point.
If you want one floor drill that feels like a reset button for sloppy bracing, this is a strong pick.
Finish Strong
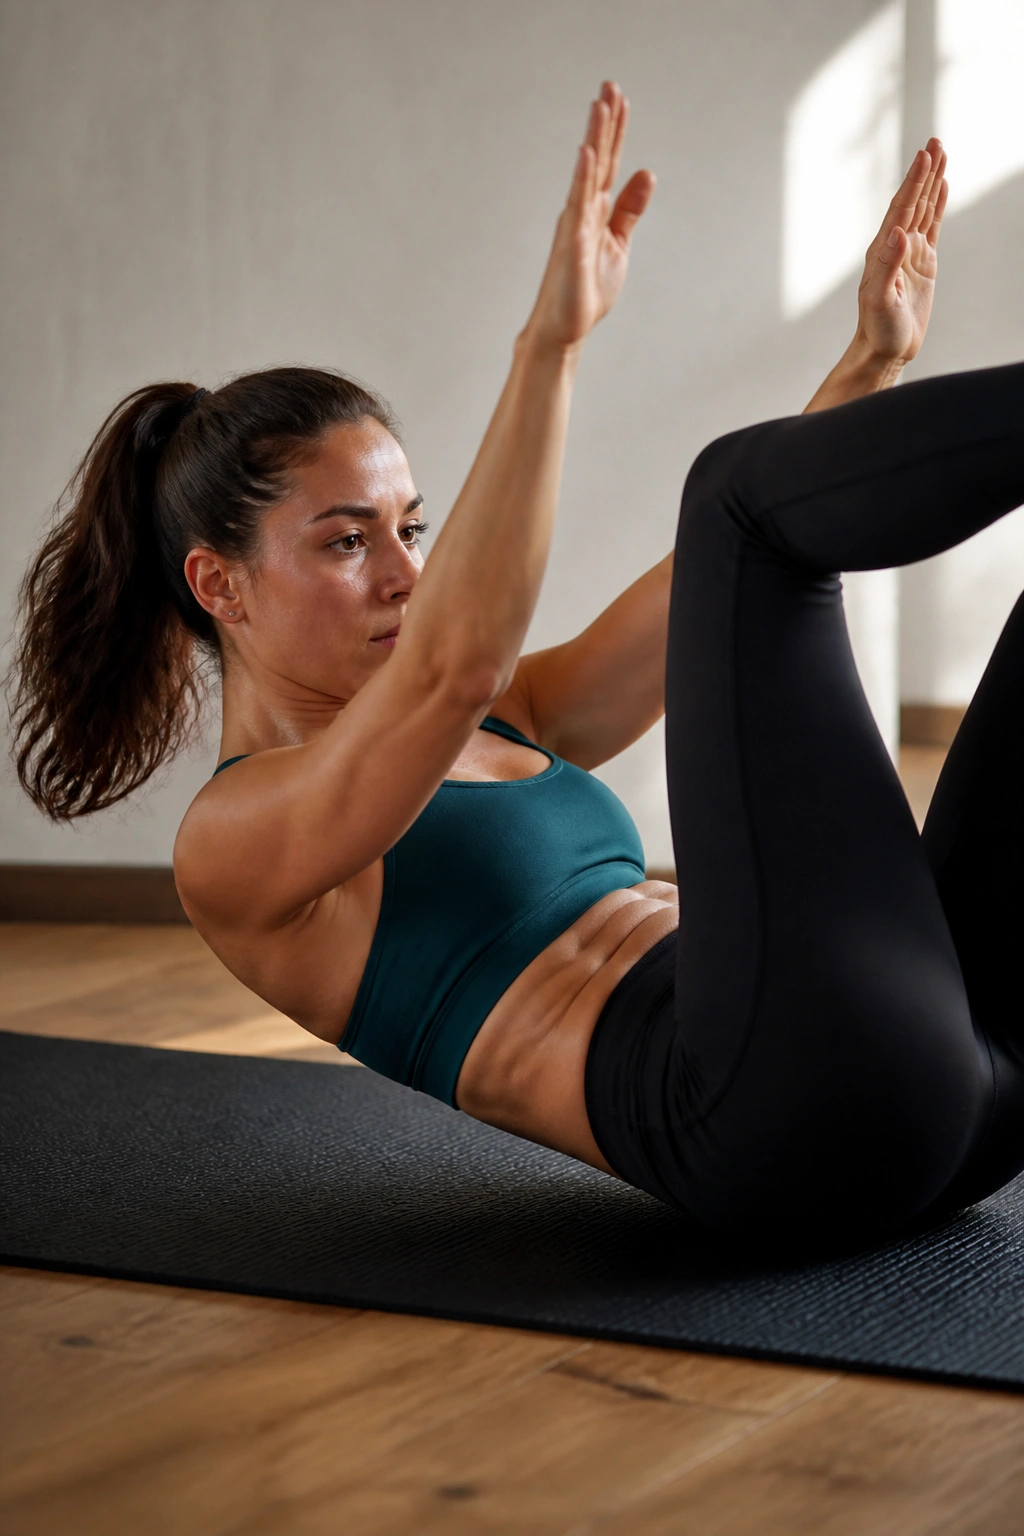
The best core floor workouts do more than burn. They teach your body how to stay organized when your limbs are moving, your breathing gets challenged, or your pelvis wants to wobble. That matters more than chasing a tired burn for its own sake.
Mix the patterns. Pick a move that resists extension, one that resists rotation, and one that flexes the trunk cleanly. Dead bugs, side planks, reverse crunches, and bear hovers cover a lot of ground without needing a single piece of equipment.
Pick three. Do them well. Then come back to the floor another day and do the same thing with cleaner form. That’s where the payoff shows up.
