



Waking up feeling like a board of stiff wood is a sensation most of us know intimately. You roll out of bed, your lower back complains, your hamstrings feel like they’ve been pulled taut against their will, and your shoulders are hunched up toward your ears, carrying the weight of the previous day. It isn’t just a sign of age or inactivity; it is a signal that your body is holding onto tension, physically “locking” itself into a pattern of restriction. Flexibility isn’t about becoming a contortionist or performing circus-worthy tricks. It is about reclaiming the natural range of motion that your joints were designed for. When you increase your flexibility, you aren’t just stretching muscles—you are improving circulation, reducing the risk of injury during daily activities, and teaching your nervous system that it is safe to let go of defensive tension.
Many people make the mistake of approaching stretching as a race. They bounce, they force, and they try to measure their progress by how close their fingers get to their toes. This is the surest way to trigger the stretch reflex, where the muscle fibers actually contract to protect themselves from overextension. Instead, true flexibility comes from a blend of patience, active engagement, and rhythmic breathing. Yoga offers a distinct advantage here because it rarely asks for passive hanging. It asks for active, supported movement. You are teaching your muscles to lengthen while they are still working, which creates a more stable, functional type of flexibility that carries over into every other physical pursuit you might have.
1. Child’s Pose for Spinal Decompression
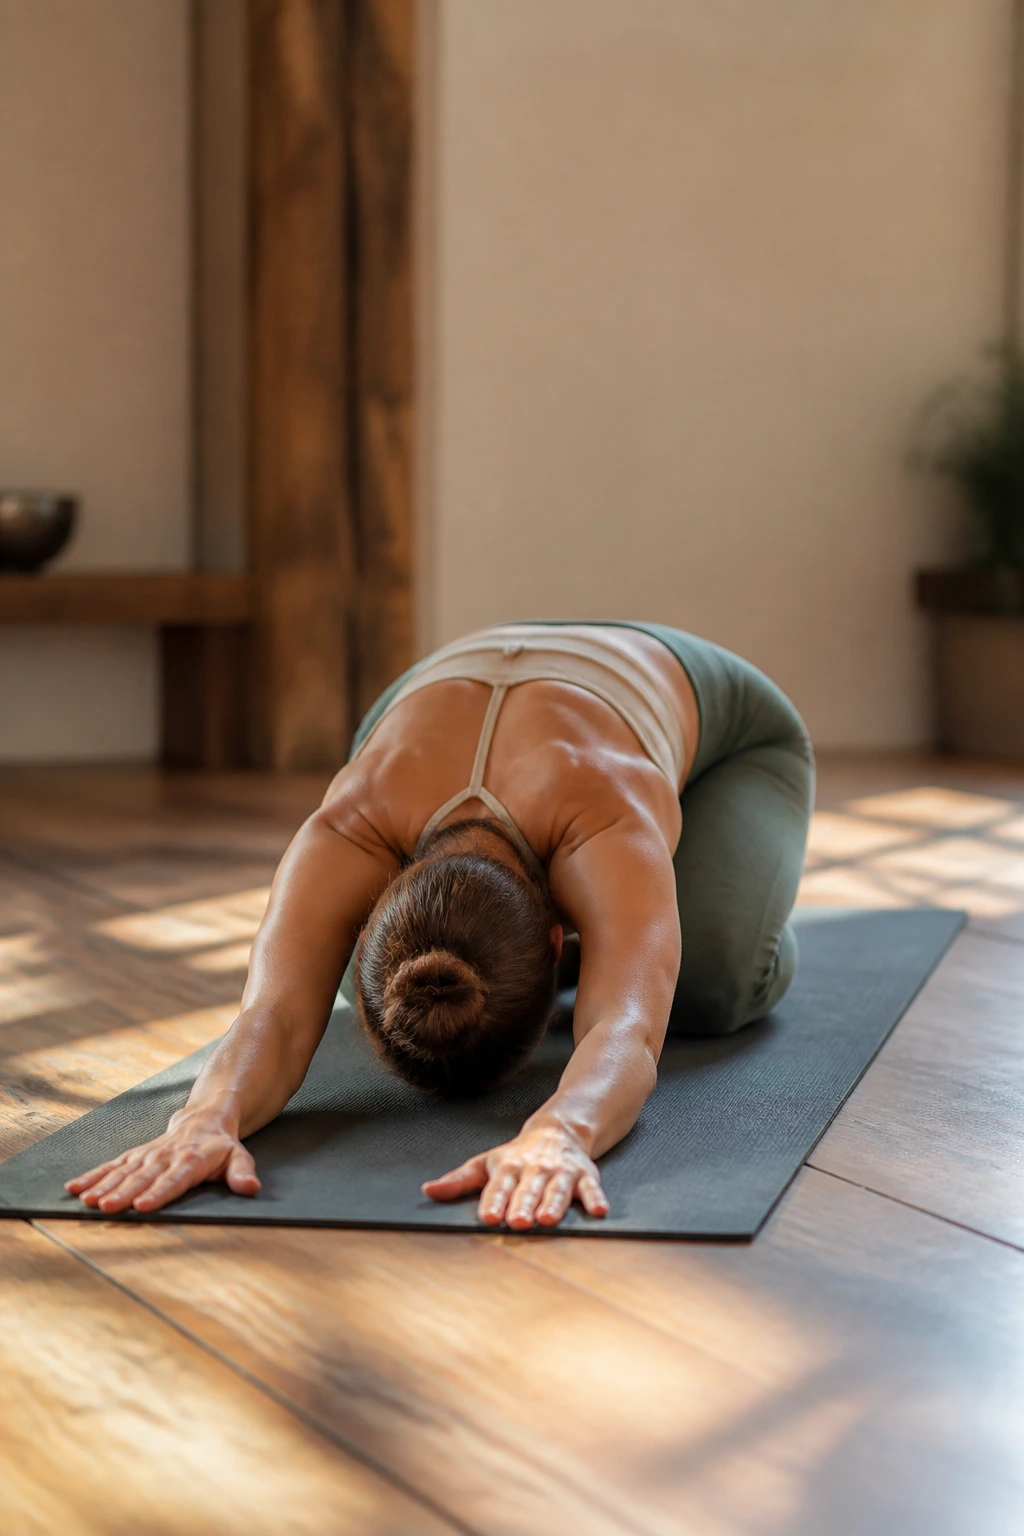
This is the ultimate resting point, but it does significantly more than give you a break. When you kneel and fold forward, you are creating a gentle, traction-based stretch for the entire length of your spine. Most people carry their stress in their mid-back, between the shoulder blades, where the thoracic spine often gets locked up from hours of sitting.
Why It Works for Flexibility
The forward fold creates a rounding action that stretches the muscles surrounding the vertebrae. By reaching your hands forward as far as you can while keeping your hips heavy toward your heels, you are effectively lengthening the latissimus dorsi—the large muscles of your back—which often contribute to shoulder tightness.
Pro tip: If your forehead doesn’t comfortably reach the floor, do not strain your neck to make it happen. Place a yoga block, a thick book, or a folded blanket under your forehead. The goal is to relax the neck completely. If the neck is tense, the rest of the spine will refuse to release.
2. Cat-Cow Stretch for Vertebral Articulation
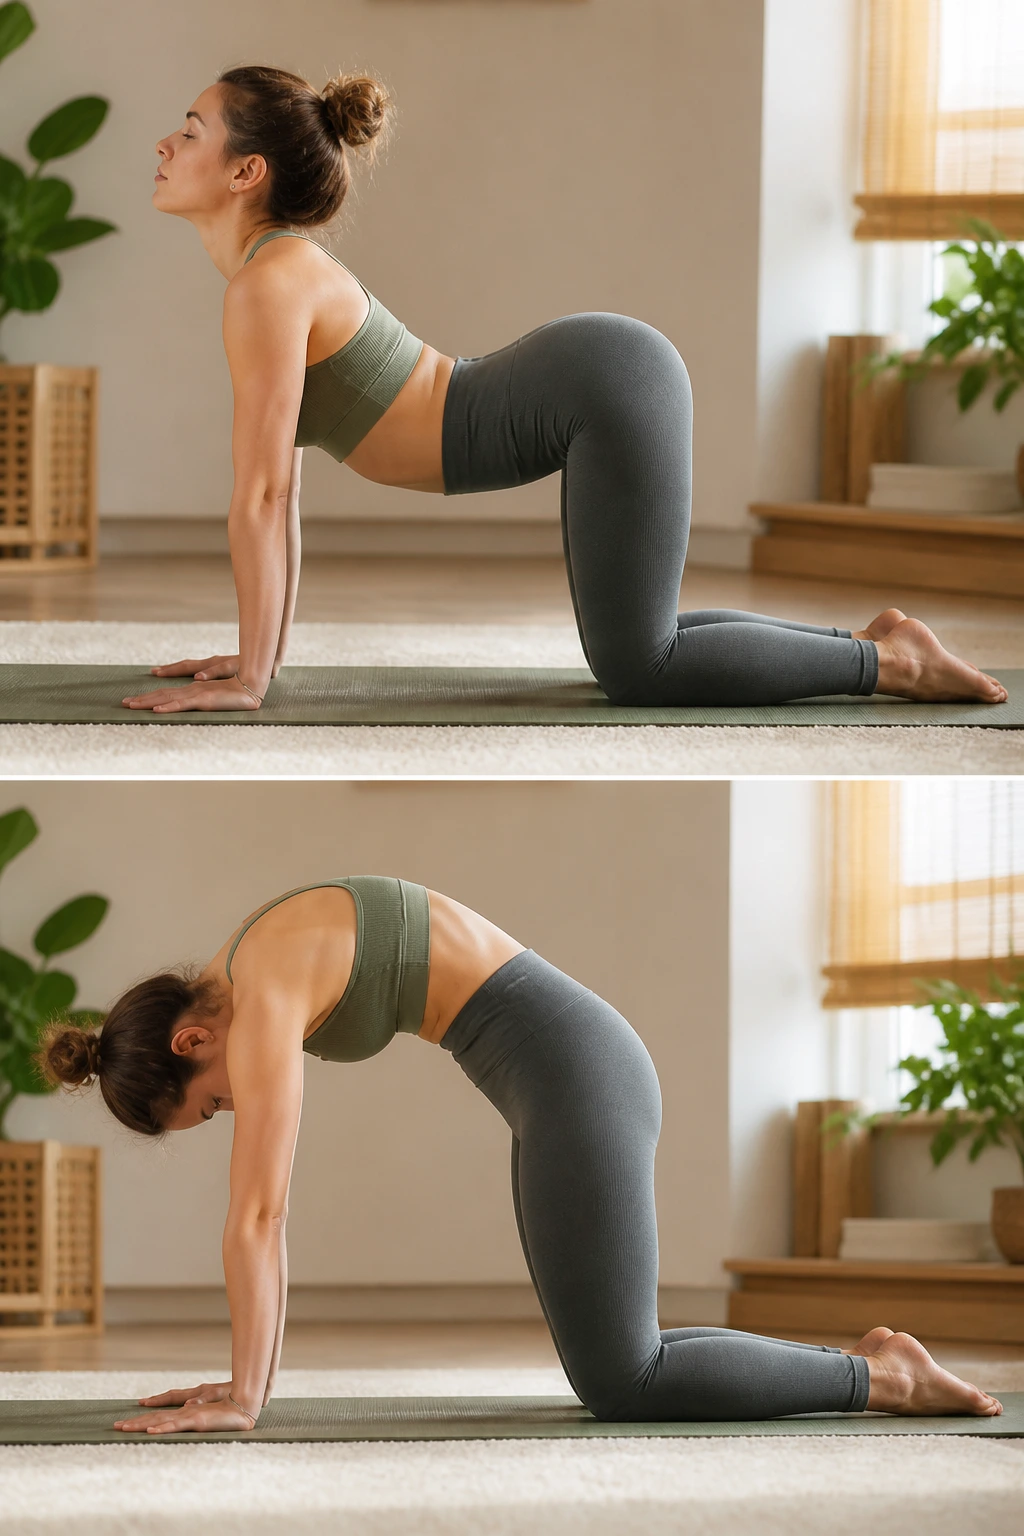
This isn’t really a single pose; it is a fluid movement that acts as a reset button for your entire torso. You start on all fours, hands under shoulders and knees under hips. As you inhale, drop your belly and lift your chin. As you exhale, push the floor away and round your spine like an angry cat.
Breaking Down the Movement
The secret here is to initiate the movement from the pelvis, not just the head. Often, we get lazy and move only the neck and the lower back, leaving the stiff thoracic spine (the upper-middle back) completely stationary. To get the benefit, visualize moving one vertebra at a time, like a string of pearls being lifted or laid down.
- Inhale: Tailbone tilts up, chest opens forward, collarbones broaden.
- Exhale: Tailbone tucks, pubic bone pulls toward the navel, space opens between the shoulder blades.
Do this for ten full cycles. Don’t rush. The goal is lubrication of the spinal joints, not speed.
3. Downward-Facing Dog for Posterior Chain Release
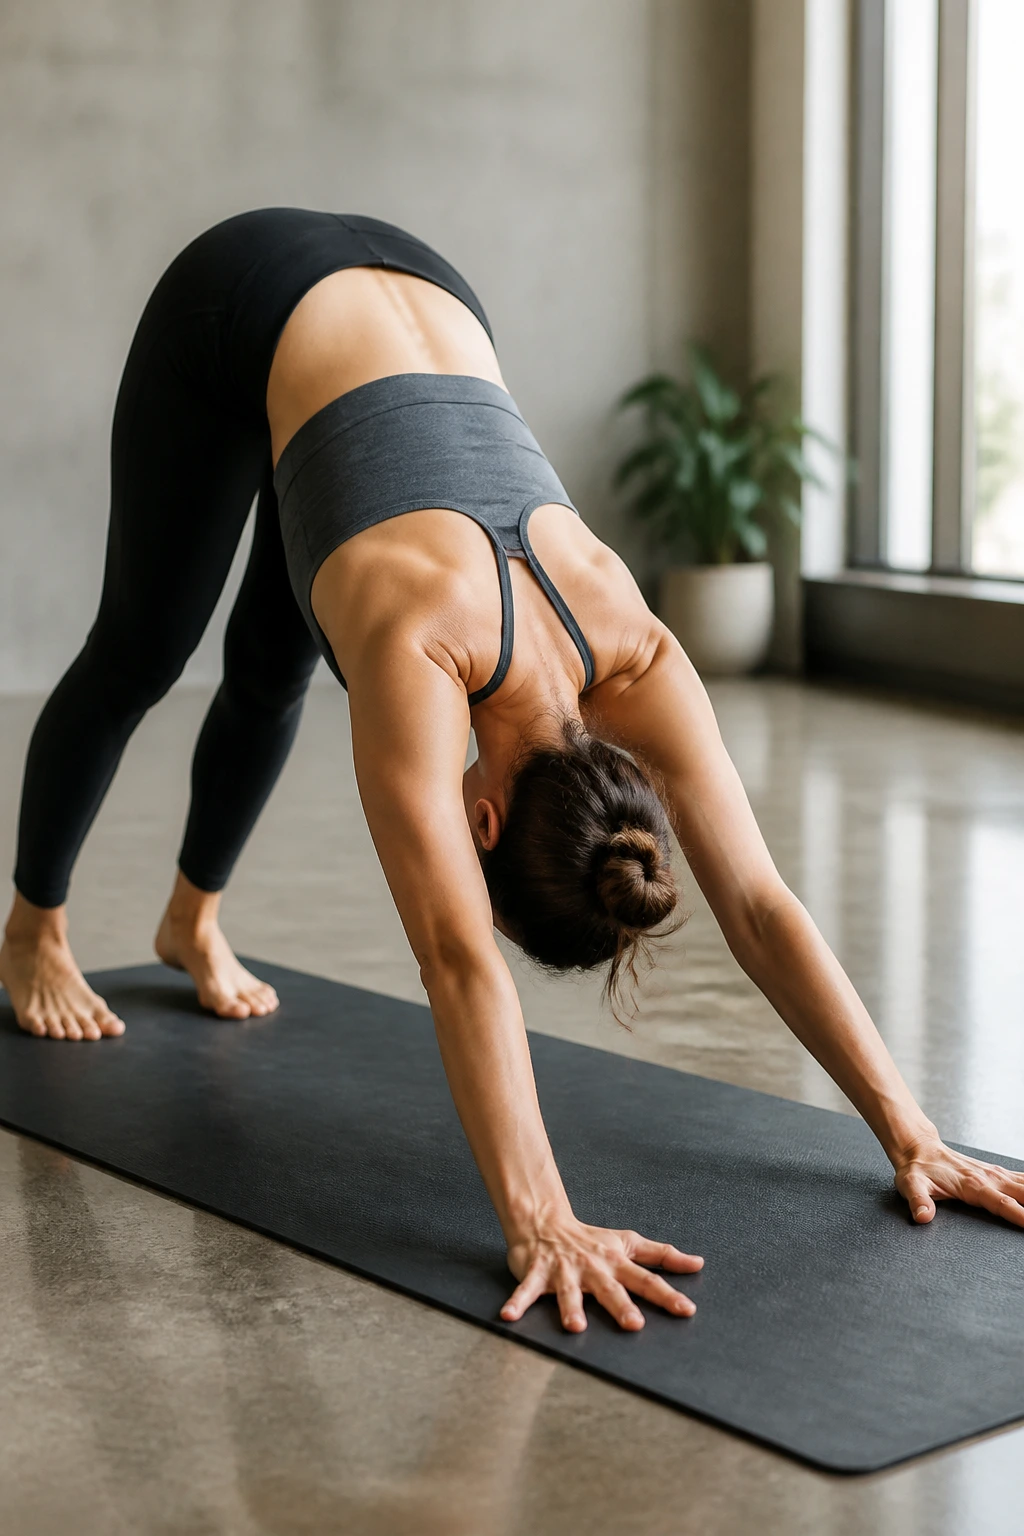
This is the quintessential yoga pose, yet it is frequently misunderstood. People often think the goal is to get the heels to touch the ground. While that is a nice milestone, it is secondary to the real goal: lengthening the entire posterior chain—the calves, the hamstrings, the glutes, and the back.
The Fix for Tight Hamstrings: If your legs feel like steel cables, do not force the heels down. Bend your knees—bend them deeply, if necessary—so that you can prioritize a flat back. Imagine your sitting bones lifting toward the ceiling. Once you have a long, straight spine, then begin to pedal your feet, lowering one heel at a time. The sensation should be a gradual, rhythmic release behind the knees. If you feel like you are sliding forward or your wrists are screaming, check your hand placement. Spread your fingers wide and press into the “L” shape between your thumb and index finger to take the pressure out of the heel of your hand.
4. Standing Forward Fold for Hamstring Mobility
Stand with your feet hip-width apart and fold forward at the hips. The key is in the “hinge.” People with tight hamstrings often try to fold by rounding the lower back, which is a recipe for back strain, not hamstring lengthening.
How to Get the Most From It
Put a micro-bend in your knees. Seriously, keep them bent. When you fold, reach for the floor, or grab opposite elbows (the “ragdoll” variation). Let the weight of your head hang heavy, which helps decompress the cervical spine. As you hold, you might feel a deep sensation in the belly of the hamstrings. If the stretch feels too intense or sharp, widen your stance. A wider base makes the fold accessible to almost everyone, regardless of their current level of flexibility. Breathe into the resistance; your hamstrings will only surrender if they feel you are not forcing the issue.
5. Butterfly Pose for Hip and Adductor Openness
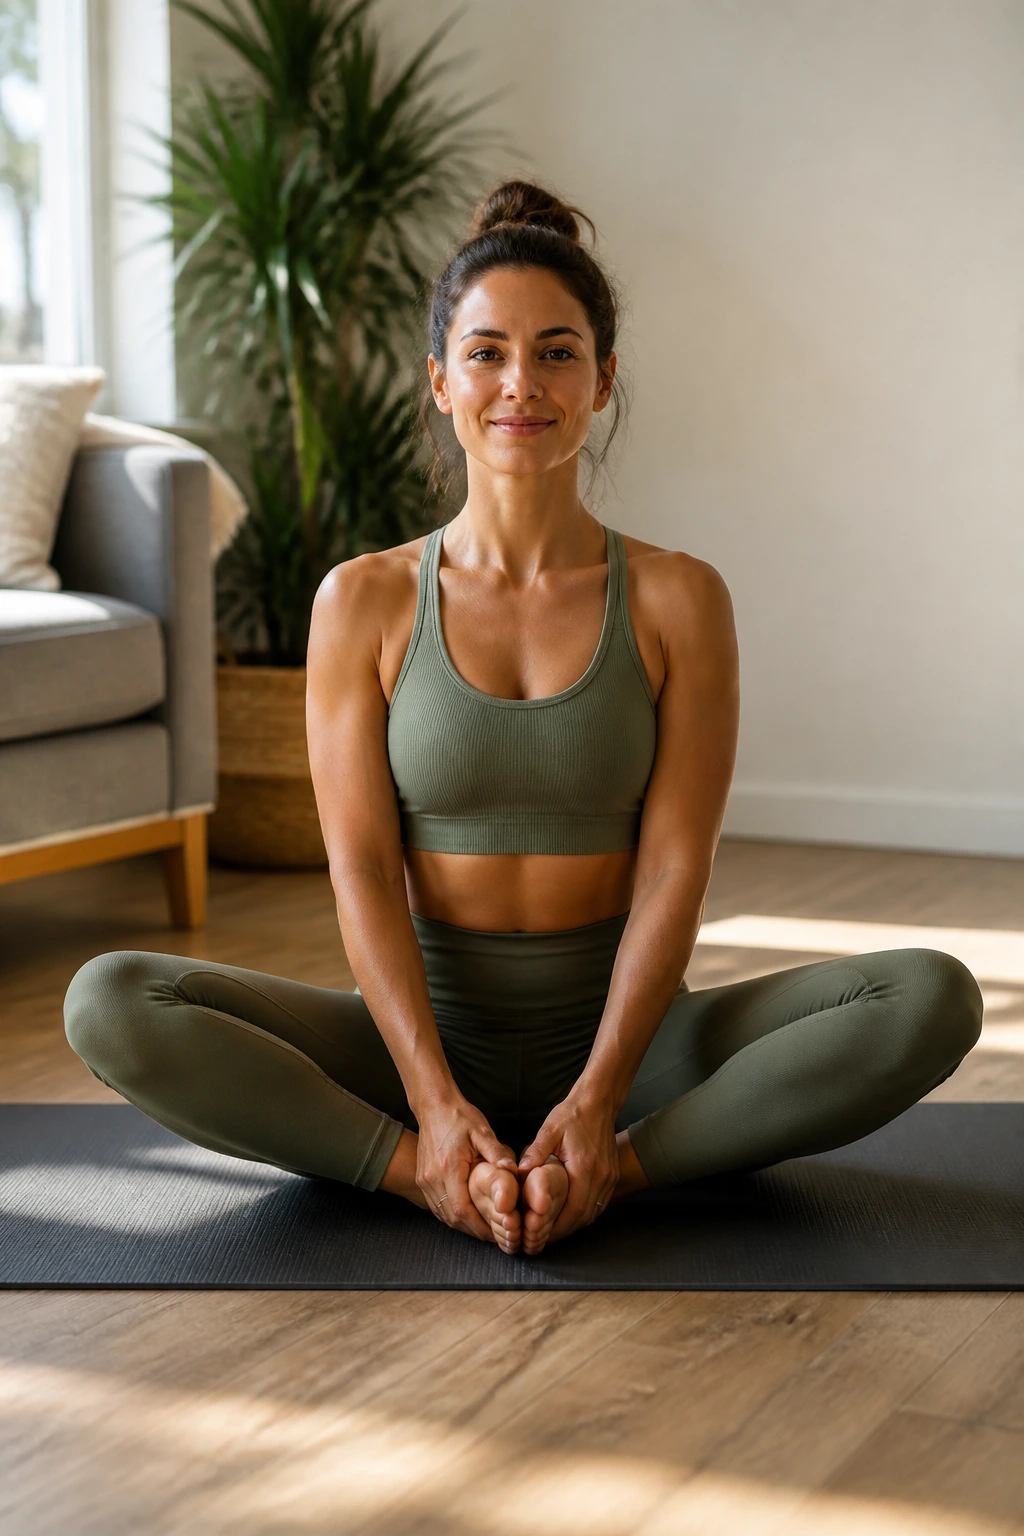
Sit on the floor, bring the soles of your feet together, and let your knees fall open to the sides. This pose targets the adductors (inner thighs) and helps open the hips. It is simple, but its effectiveness depends entirely on your setup.
Common Alignment Issues: If your knees are floating near your ears, your hips are likely too tight for this position. Don’t struggle to push them down. Sit up on a folded blanket or a bolster. Elevating your hips allows your pelvis to tilt forward naturally, which makes it significantly easier to maintain a tall spine. Avoid the urge to grab your feet and pull them aggressively toward your groin. Instead, hold your ankles and gently encourage the knees toward the floor using only the strength of your outer hip muscles. If you want a deeper stretch, lean forward from the hips while keeping your back straight, rather than rounding the spine to get your forehead to your toes.
6. Pigeon Pose for Deep Gluteal Release
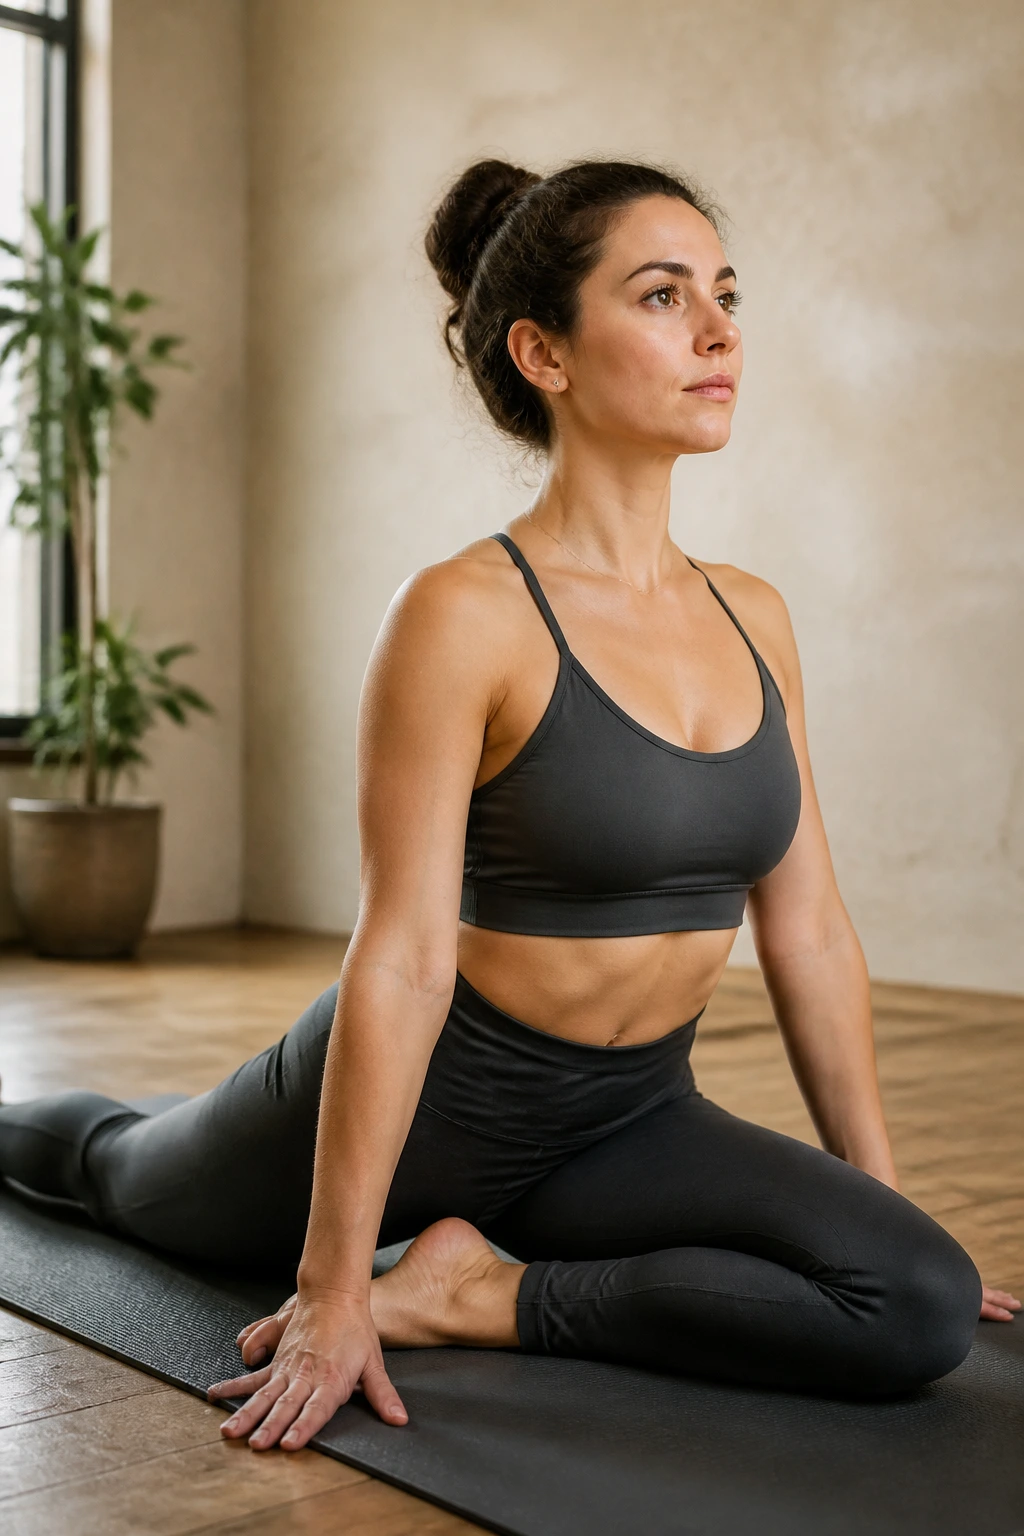
Pigeon pose is famous for being both loved and hated. It is perhaps the most effective pose for targeting the piriformis and the outer gluteal muscles. You start in a lunge, then bring your front knee to the mat, angling it toward your right wrist, while the back leg extends long behind you.
Why Proper Alignment Is Non-Negotiable
You must keep your hips square to the front of the room. A common mistake is to “dump” all your weight onto the hip of the bent leg, which twists the spine and puts undue stress on the knee. Use a block or a thick blanket under the hip of the bent leg to bridge the gap if you are hovering in mid-air. This support allows the hip to relax, and relaxation is the mechanism that actually allows for lengthening. If your knee feels “twingy” or sharp, back out immediately. This pose is a deep stretch for the muscles, not a stretch for the joint.
7. Warrior I for Psoas and Hip Flexor Length
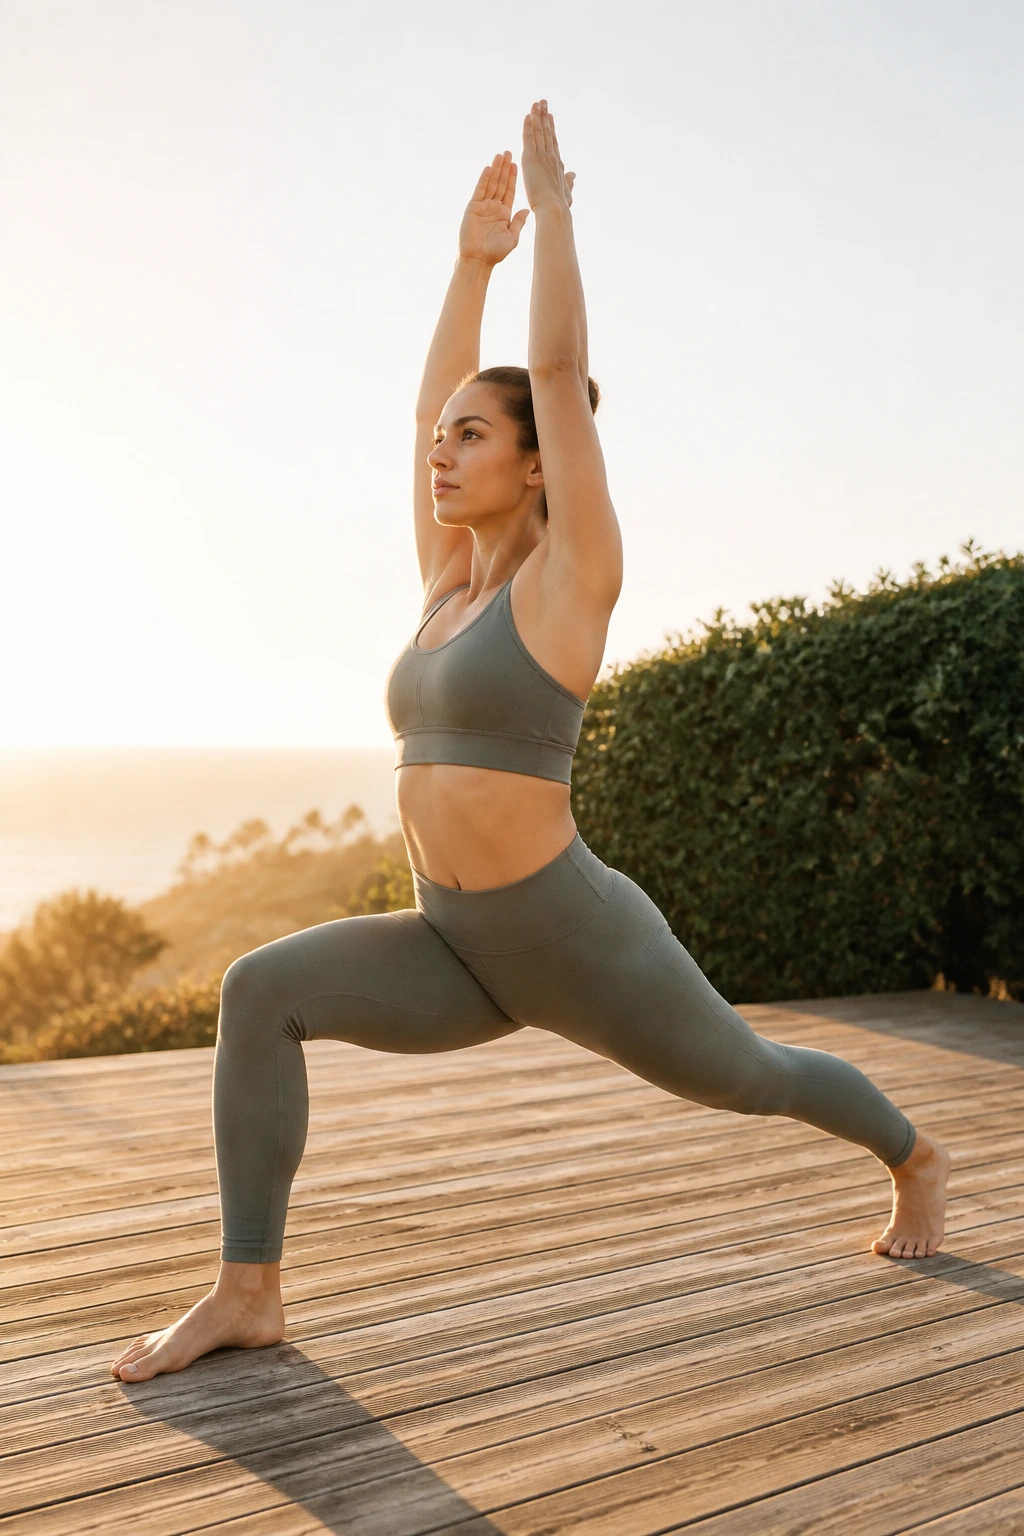
Warrior I is a standing pose that requires strength, but it is also a fantastic way to open the front of the body. With your front knee bent and your back foot planted firmly at a 45-degree angle, your hips are squared forward.
The Hidden Benefit: The back leg in Warrior I provides the primary stretch. By grounding the outer edge of your back heel and energetically pulling your back hip forward, you lengthen the psoas muscle, a deep hip flexor that often gets chronically tight from sitting. Most of us are locked in a shortened position in our psoas all day; this pose gives it the space to elongate. Ensure your front knee is tracking directly over your ankle, not collapsing inward. A stable knee allows the surrounding muscles to disengage the “guarding” reflex, letting the stretch penetrate deeper.
8. Warrior II for Inner Thigh Stability
Unlike Warrior I, Warrior II opens your hips to the side. It is a powerful pose that builds endurance in the legs while inviting the adductors of the inner thigh to open.
How to Hold It Properly
The temptation here is to lean the torso toward the front leg. Resist this. Keep your torso stacked directly over your hips. Reach your arms out wide, as if someone is pulling your fingertips in opposite directions. The real magic happens in the front leg: track your knee toward your pinky toe. When the knee caves inward, the stretch in the inner thigh disappears. Keep that knee open, and you will feel an immediate difference in the adductor engagement. It is an active, burning type of flexibility that builds heat in the body.
9. Triangle Pose for Side Body Extension
Triangle pose is a masterclass in lateral stretching. With feet wide, front foot turned forward, and back foot turned in slightly, reach forward and bring your hand down to your shin, a block, or the floor.
Why It Matters: We rarely stretch our side body—the intercostal muscles between our ribs and the obliques—in our daily lives. This pose demands that you keep both sides of your torso long. A common error is collapsing the bottom side of the waist to get lower to the ground. If you cannot reach the floor without “scrunching” your side ribs, you are going too low. Place your hand on your shin or a block instead. The visual cue to look for is a straight line from your head to your tailbone. Think about stacking your top shoulder directly over your bottom one.
10. Cobra Pose for Anterior Chain Opening
Lying on your stomach, place your hands under your shoulders and gently peel your chest off the floor. This is a gentle backbend, but it is also one of the most reliable ways to stretch the abdominals and the chest.
Addressing the Lower Back
Do not obsess over height. You do not need to straighten your arms. In fact, if you straighten your arms, you likely have to “crunch” into your lower back to get the arch. Instead, keep a bend in your elbows and focus on pulling your heart forward and up. Your shoulders should be rolled back and down, away from your ears. Think of this as lengthening the front of your torso rather than compressing the back of it. The sensation should be one of “opening” rather than “pinching.”
11. Wide-Legged Forward Fold for Inner Hamstring Focus
This pose is often the “ah-ha!” moment for people who struggle with standard forward folds. Standing with your legs wide apart and toes turned slightly inward, fold forward.
The Mechanical Advantage: Because your legs are spread, you have more room for your pelvis to tilt forward. This creates a more accessible stretch for the inner hamstrings and the adductors. Let your head hang. Use your hands to pull gently on the floor or your ankles to invite a bit more depth. Because you have a wider base, your lower back often feels more protected here than in a standard standing forward fold. It is a perfect pose to hold for extended periods—up to two or three minutes—to allow the connective tissue to actually soften.
12. Seated Forward Fold for Deep Posterior Lengthening
Sit with your legs extended straight in front of you, flex your feet, and fold forward. This is the classic “hamstring test,” and it can be incredibly frustrating if you are starting from a place of significant tightness.
Modifying for Success
Do not view the bend in your knees as a failure. If your hamstrings are tight, your lower back is likely pulling on your pelvis, tilting it backward. By bending your knees, you give your pelvis the slack it needs to tilt forward, which is the necessary precursor to folding. You can even place a rolled-up towel under your knees. As you hold the pose, focus on the sensation of your chest reaching toward your thighs, rather than your nose reaching toward your knees. A straight spine is always the priority.
13. Cow Face Pose for Shoulder and Hip Depth
This is an advanced pose that stacks the knees and arms. You are sitting with one knee on top of the other, and one arm reaching over the shoulder while the other reaches behind the back, trying to clasp hands.
Dealing with Difficulty: If your hands don’t touch, don’t worry. Use a strap or a towel to bridge the gap. The goal is to open the rotator cuff and the chest. If your hips are too tight to stack the knees, sit on a blanket. The hips and the shoulders are often connected through fascial lines, and this pose targets both simultaneously. It is intense, and you shouldn’t stay for long, but it is unparalleled for releasing the chronic “computer posture” rounded shoulders.
14. Eagle Pose for Upper Back Release
Eagle pose requires balancing on one leg while wrapping your arms around each other. It looks like a knot, but it is one of the best ways to stretch the space between the shoulder blades—an area that is usually neglected by standard stretching routines.
Focusing on the Upper Back
When you are in the arm bind, push your elbows away from your face and lift your hands slightly. You will feel an immediate, sharp sensation of separation in the upper back muscles. This is the goal. Do not worry about the balance—if you fall out, just reset. The arms are the real focus here for flexibility. If the bind is too much, just hug your shoulders with your opposite hands and pull them apart. The effect is similar and just as beneficial.
15. Sphinx Pose for Lumbar Softening
Similar to Cobra, but you are resting on your forearms. This is a passive backbend that is excellent for those who find Cobra too intense or who struggle with lower back stiffness.
Why It Works By keeping the forearms parallel and pressing down into the floor, you engage the upper back muscles to lift the chest. This provides a gentle, sustained stretch for the abdominals. It is an excellent “entry-level” backbend that allows you to control the depth of the stretch. If you feel any pinching in your lower back, walk your elbows slightly further forward. This creates more length in the lumbar spine, which usually resolves the discomfort. Breathe deeply into your belly; the expansion of the breath against the floor creates a sort of internal massage for the core.
16. Camel Pose for Front-Body Opening
Camel is a deep kneeling backbend where you reach back to touch your heels. This is an advanced pose that opens the entire front line of the body—from the throat, through the chest, down to the quads.
Proceed with Caution
This pose requires preparation. Do not dive into it cold. You can tuck your toes to make your heels higher, which makes them easier to reach without collapsing your lower back. Keep your hips pressing forward over your knees. If your hips sit back, you aren’t stretching the front of your body; you are just compressing your lumbar spine. If touching the heels feels impossible, keep your hands on your lower back for support and focus purely on lifting your heart to the ceiling.
17. Boat Pose for Core Support
Wait, isn’t this for strength? Yes, but core strength is a secret weapon for flexibility. When your deep abdominals are weak, your back muscles “lock down” to stabilize you. By strengthening the core with Boat Pose, you actually allow your back to relax and become more flexible.
The Balancing Act Sit on your sit bones, lift your legs, and extend your arms. If your back rounds, drop your heels to the floor and just keep your chest lifted. The goal is a flat, straight spine. By teaching your body to hold itself upright without tension in the lower back, you improve your overall posture, which is the foundation of all movement. Think of this as the “reset” that allows your other stretches to be more effective.
18. Bridge Pose for Front Body Elongation
Lie on your back, knees bent, feet flat, and lift your hips. This is a gentle inversion and a fantastic chest and quad opener.
Technique Matters
Interlace your hands underneath your back and shimmy your shoulders underneath you. This tucking action is what creates the lift in the chest. Press firmly into your heels to engage the glutes. The goal isn’t just to “poof” the belly up; it is to lengthen the hip flexors. If you feel the stretch only in your lower back, you are likely over-arching. Engage your glutes and pelvic floor to neutralize the pelvis—this creates the “tuck” that protects the lower back while maximizing the stretch in the quads and the front of the hips.
19. Garland Pose (Malasana) for Ankle and Hip Mobility
This is the classic “squat.” Drop your hips low between your heels, keeping your feet flat. If your heels lift, place a rolled towel under them.
Why Modern Bodies Need This Most of us have lost the ability to squat comfortably because we sit in chairs all day. This pose restores the necessary range of motion in the ankles and hips. Use your elbows to gently press your knees outward. Keep your spine long—don’t let the chest cave in. It might feel awkward or uncomfortable at first, but this is a natural resting position for humans. Staying here for just one minute a day can dramatically change how your hips feel during normal walking or standing.
20. Head-to-Knee Pose (Janu Sirsasana)
Sit with one leg extended and the other bent, the sole of the foot resting against the inner thigh. Fold forward over the extended leg.
Isolated Stretching
This pose is excellent because it isolates one hamstring at a time. It removes the stress of trying to fold over both legs, which can be overwhelming. Keep your extended foot flexed; this engages the calf and keeps the entire leg active. If you feel a “pulling” sensation behind the knee, it is likely your nerve—the sciatic nerve—that is being stretched. This isn’t a muscle stretch, so back off slightly. The sensation should be in the muscle belly, not behind the joint.
21. Thread the Needle for Upper Back Tension
Start on all fours, then thread one arm underneath the opposite arm, bringing your shoulder to the mat.
The Targeted Release This is arguably the best pose for releasing the tension held in the rhomboids and the trapezius—the muscles that get tight from looking at screens. It is a gentle, passive rotation. You don’t need to push; gravity does the work. If you want more intensity, walk your top hand further forward or reach it up toward the ceiling to add a bit of spinal rotation. Hold it for at least 45 seconds per side to let the muscles fully release their grip.
22. Happy Baby for Deep Hip Opening
Lie on your back, bring your knees toward your chest, grab the outer edges of your feet, and pull your knees toward the floor.
Understanding the Mechanics
This is one of the most effective ways to open the hips without the pressure of gravity. Because you are lying on your back, your spine is fully supported, which means you can relax the muscles that usually “guard” against a deep stretch. Keep your tailbone grounded. A common mistake is curling the tailbone up off the floor to grab the feet. If you can’t reach your feet, hold your shins or use a strap around your feet. The goal is to keep the spine long and the hips heavy.
23. Supine Twist for Spinal Mobility
Lying on your back, bring your knees to your chest, then drop them both to one side while keeping your shoulders pinned to the floor.
The Beauty of Passive Twists Twisting is essential for spinal health. Our spines are designed to rotate, yet we rarely do it in daily life. This pose is passive—you don’t need to force the knees to the floor. Let them hover if they need to. The rotation should come from the thoracic spine (the upper-middle back), not the lumbar (the lower back). To ensure this, look in the opposite direction of your knees. This simple neck movement helps guide the twist up into the ribcage, where we really need the release.
24. Puppy Pose for Thoracic and Shoulder Opening
Start on all fours, then walk your hands forward, keeping your hips high above your knees. Drop your chest toward the mat.
Why This Beats Down Dog for Shoulders
This pose specifically targets the lats and the shoulders without the heavy demand on the hamstrings. If you have “tight” shoulders from overhead lifting or desk work, this is your best friend. Keep your forehead on the floor and focus on melting your heart space toward the ground. If you want more, come onto your fingertips. This slight change in hand position engages the shoulders differently and intensifies the stretch along the sides of your torso.
25. Dancer’s Pose for Quad and Shoulder Flexibility
Dancer’s pose is a standing balance that requires you to grab one foot behind you, kick into your hand, and lean forward.
Managing the Complexity Don’t worry about the “dance” part—focus on the mechanics. Use a wall for balance if you need to. The kick is more important than the lean. By kicking your foot into your hand, you stretch the quadriceps and the front of the shoulder simultaneously. This active engagement prevents the lower back from taking the brunt of the pressure. It’s an exercise in coordinated flexibility; you are using the strength of your quad to stretch the opposing side, which is a very efficient way to gain range of motion.
26. Half Moon Pose for Side Body and Hip Stability
Standing on one leg, hinge at the waist, reaching your hand to the floor while extending your other leg and arm to the sky.
Beyond Balance
This is a side-body stretch masquerading as a balance pose. It opens the hip of the lifted leg and the obliques of the standing side. If the floor feels miles away, use a block. Do not sacrifice the length of your side body just to touch the ground. If you are rounded over, you lose the stretch. Keep your heart open to the side of the room, as if your back were pressed against a wall. It forces your hips to stack and maximizes the expansion in the torso.
27. Tree Pose for Stability and Adductor Opening
Stand on one leg, place the sole of the other foot on your inner thigh (or calf—never on the knee joint), and bring your hands to prayer.
The Role of Stability Flexibility is not just about lengthening; it is about having a stable base to lengthen from. Tree pose teaches you to engage the standing leg, which stabilizes the hip. When your hip is stable, the surrounding musculature can actually release. If you are wobbling and panicking, your muscles are contracting to catch you. Find the stability, and the openness will follow. The external rotation of the bent knee helps gently release the inner thigh, making this a double-duty pose.
28. Lizard Pose for Deep Hip Flexor Release
Start in a deep lunge and bring both hands to the inside of your front foot. If possible, lower onto your forearms.
When to Use Blocks
Lizard pose is arguably the most effective way to open the psoas and the front of the hip. However, most people can’t reach the floor without rounding their spine. This is where yoga blocks are essential. Place your forearms on two blocks. This allows you to keep your spine straight while you “melt” your hips forward and down. It is a slow, deep, and often uncomfortable stretch. Stay here for a while. The hip flexors are protective muscles; they don’t let go quickly. They need time to realize they are in a safe, supported environment.
29. Legs-Up-the-Wall for Nervous System Reset
This is the easiest pose on the list, yet it is often the most skipped. Lie on your back and rest your legs vertically up a wall.
The Physiological Impact This is a restorative pose. It uses gravity to help drain fluid from the legs and gently stretches the hamstrings, but the real benefit is to the nervous system. By inverting the legs, you signal to your body that it can shift out of “fight or flight” mode. When your nervous system calms down, the chronic muscle tension you carry—the kind that makes you feel “tight” even when you aren’t working out—begins to evaporate. It is the perfect pose to finish any stretching routine.
30. Revolved Head-to-Knee Pose for Side Body Length
Sit with one leg extended and the other bent. Instead of folding forward, rotate your torso and reach your arm overhead, leaning toward the extended foot.
The Finishing Touch
This targets the latissimus dorsi and the intercostals on the side of the extended leg. It is a fantastic way to finish a session because it combines a hamstring stretch with a side-body opener. Focus on rolling your top shoulder back; don’t let your chest point toward the floor. You want to feel the stretch originating from your hip and traveling all the way up to your fingertips. It creates space in the ribcage, which literally makes it easier to take a deep, full breath.
Final Thoughts
Flexibility is not a destination. You do not “arrive” at a point where you are finally flexible and then stop. It is a maintenance project, a way of interacting with your own body that requires daily attention. Some days your hamstrings will feel like steel; other days they will feel like warm butter. Both are normal. The key is to stop fighting the days where you feel stiff and instead change your approach. Use blocks, bend your knees, and shorten your stance.
The most effective way to gain range of motion is to cultivate a consistent, low-intensity practice rather than one brutal session once a week. Your nervous system craves repetition and safety. If you push too hard, you trigger the stretch reflex and end up tighter than when you started. If you move gently, breathe fully, and allow your body the time it needs to understand that these positions are safe, the tension will eventually subside. Trust the process, respect your current limitations, and enjoy the feeling of finally being able to move through your day with a little more freedom.
