



The dull, throbbing ache in your lower back usually doesn’t start in your back at all. It is a classic case of mistaken identity. Most of the time, that tension is a direct result of what is happening (or failing to happen) in your hips. When we spend the majority of our waking hours in a seated position—whether at a desk, in a car, or on a couch—our hip flexors remain in a shortened, contracted state. Over time, these muscles lose their elasticity and start to pull on the pelvis. The pelvis, in turn, tilts forward, creating a chain reaction that forces the lower back muscles to compensate by staying constantly braced and tight.
Trying to fix lower back pain by only massaging or stretching the back muscles is like trying to put out a fire by swatting at the smoke. You have to address the heat source. The hips are the hub of your body’s movement, and they are almost always the culprit when your lumbar spine starts complaining. The good news is that the body is remarkably adaptable. You do not need expensive equipment or a gym membership to reverse this tension. You need a dedicated, consistent approach to mobility.
The goal here is not to force your body into extreme positions. It is to remind your muscles how to lengthen, relax, and support your frame again. This requires patience. If you rush through these movements, you will just be white-knuckling your way through them, which defeats the purpose. Focus on the sensation of release. Listen to your body when it says to stop, and respect the natural tension you feel.
1. Child’s Pose
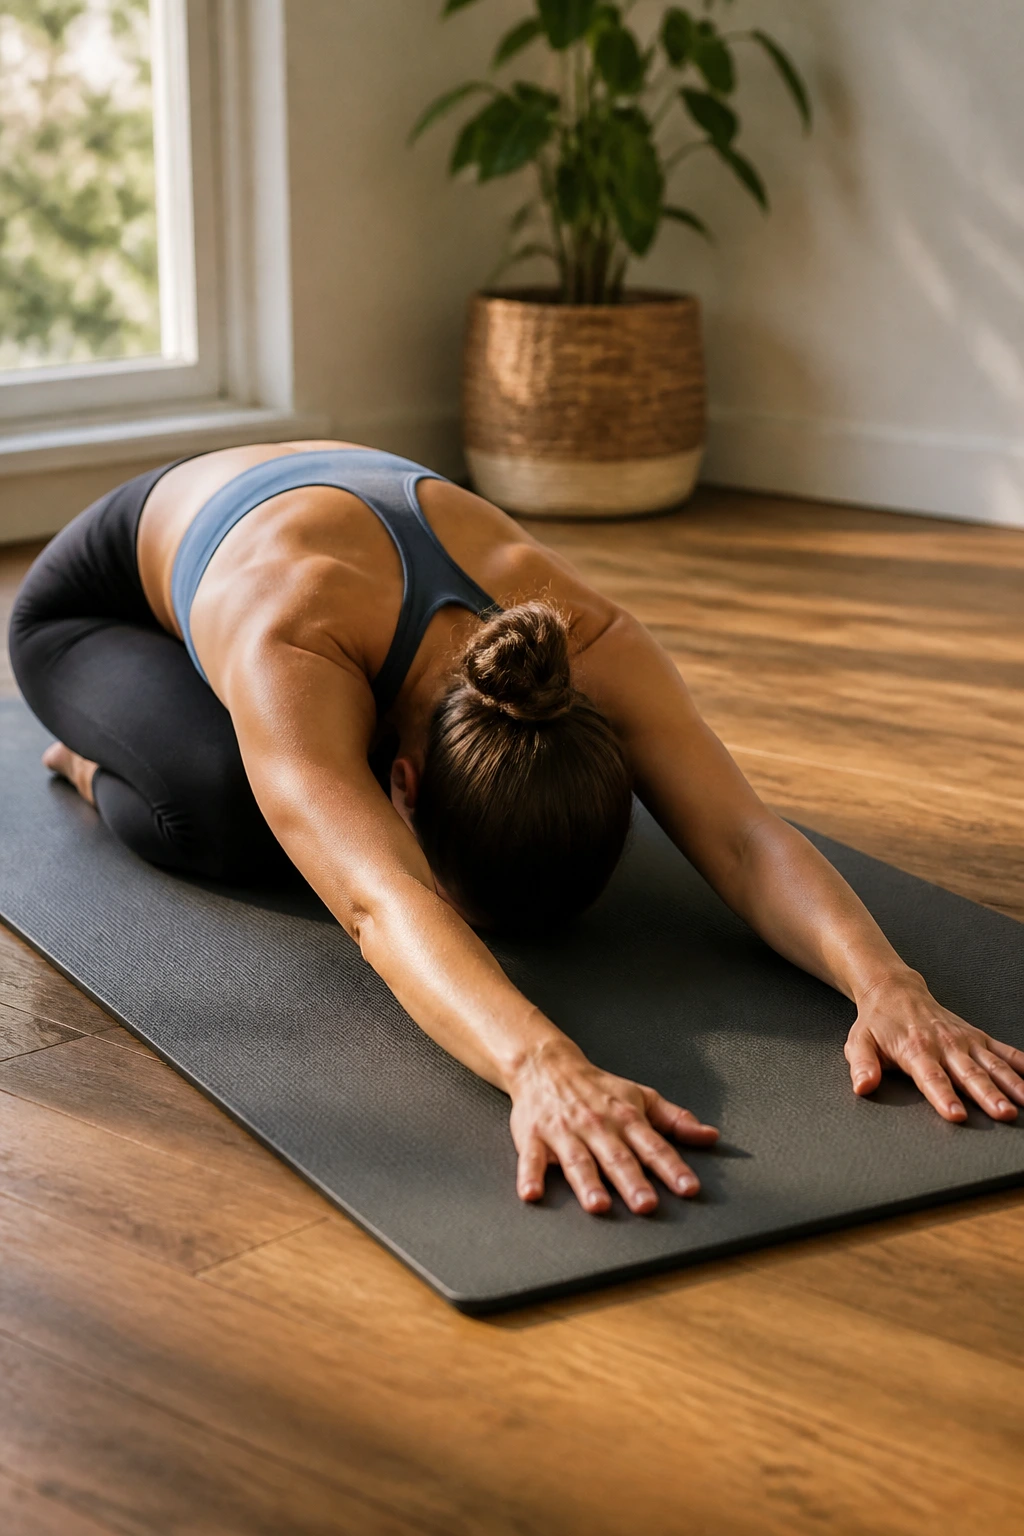
This is the gold standard for a reason. It is the first thing I do when my back feels like a tightly wound spring. It creates a gentle, passive traction for your entire spine while simultaneously releasing tension in the glutes and lower back muscles.
How to Get the Most Out of It
Start on your hands and knees. Bring your big toes together to touch and widen your knees as far as they comfortably go—this opening allows the belly to drop between the thighs, which is critical for that deep lumbar release. Slowly push your hips back toward your heels. Walk your hands forward on the floor as far as you can reach, actively stretching through your lats and shoulders.
The sensory cue to look for: You should feel a distinct lengthening sensation starting from your tailbone and traveling all the way up to the base of your neck. If you feel pressure in your knees, use a blanket or a towel underneath them. Do not force your forehead to touch the floor if it does not reach; let your head hang heavy, or place a yoga block or a thick book under your forehead to bridge the gap. Hold this for at least sixty seconds. Breathe into the back of your ribcage. You will feel the muscles there expand and soften as you exhale.
2. Cat-Cow Stretch
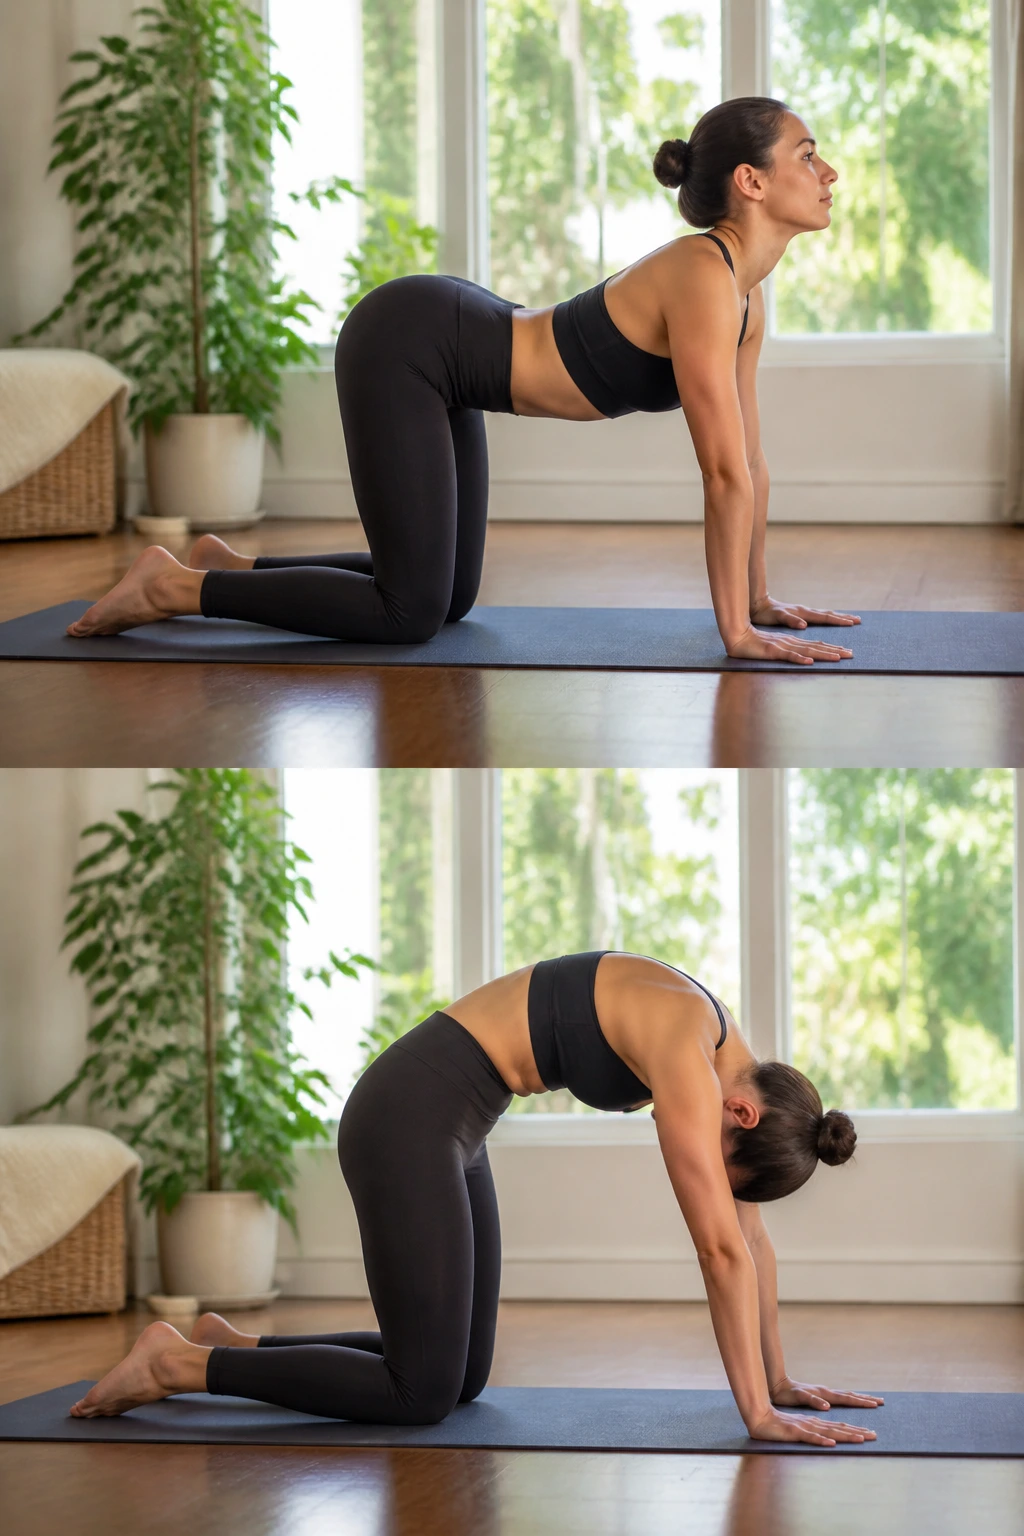
This movement is less about “stretching” and more about “articulating.” If your spine feels like a rigid pole, this sequence is your best friend. It forces your vertebrae to move through their full range of flexion and extension, which helps lubricate the spinal discs and wakes up the muscles surrounding your lower back.
The Flow of Movement
Come to an all-fours position, hands stacked under shoulders, knees under hips. As you inhale, drop your belly toward the floor, lift your chin and chest, and gaze upward—this is the Cow phase. It opens the front of your body. As you exhale, push the floor away, round your spine toward the ceiling, and tuck your chin to your chest—the Cat phase.
Do not rush this. Most people treat this as a frantic exercise. Don’t. Treat it like a wave moving through water. Visualize each individual vertebra—start at the tailbone, let the movement ripple up to your neck, and then reverse it from the top down. If you have a specific spot in your mid-back that feels stuck, pause there. Move in and out of that stuck spot with micro-movements. Repeat this cycle for ten to fifteen slow, controlled rounds. It should feel like a deep, internal massage for your spinal column.
3. Bird-Dog
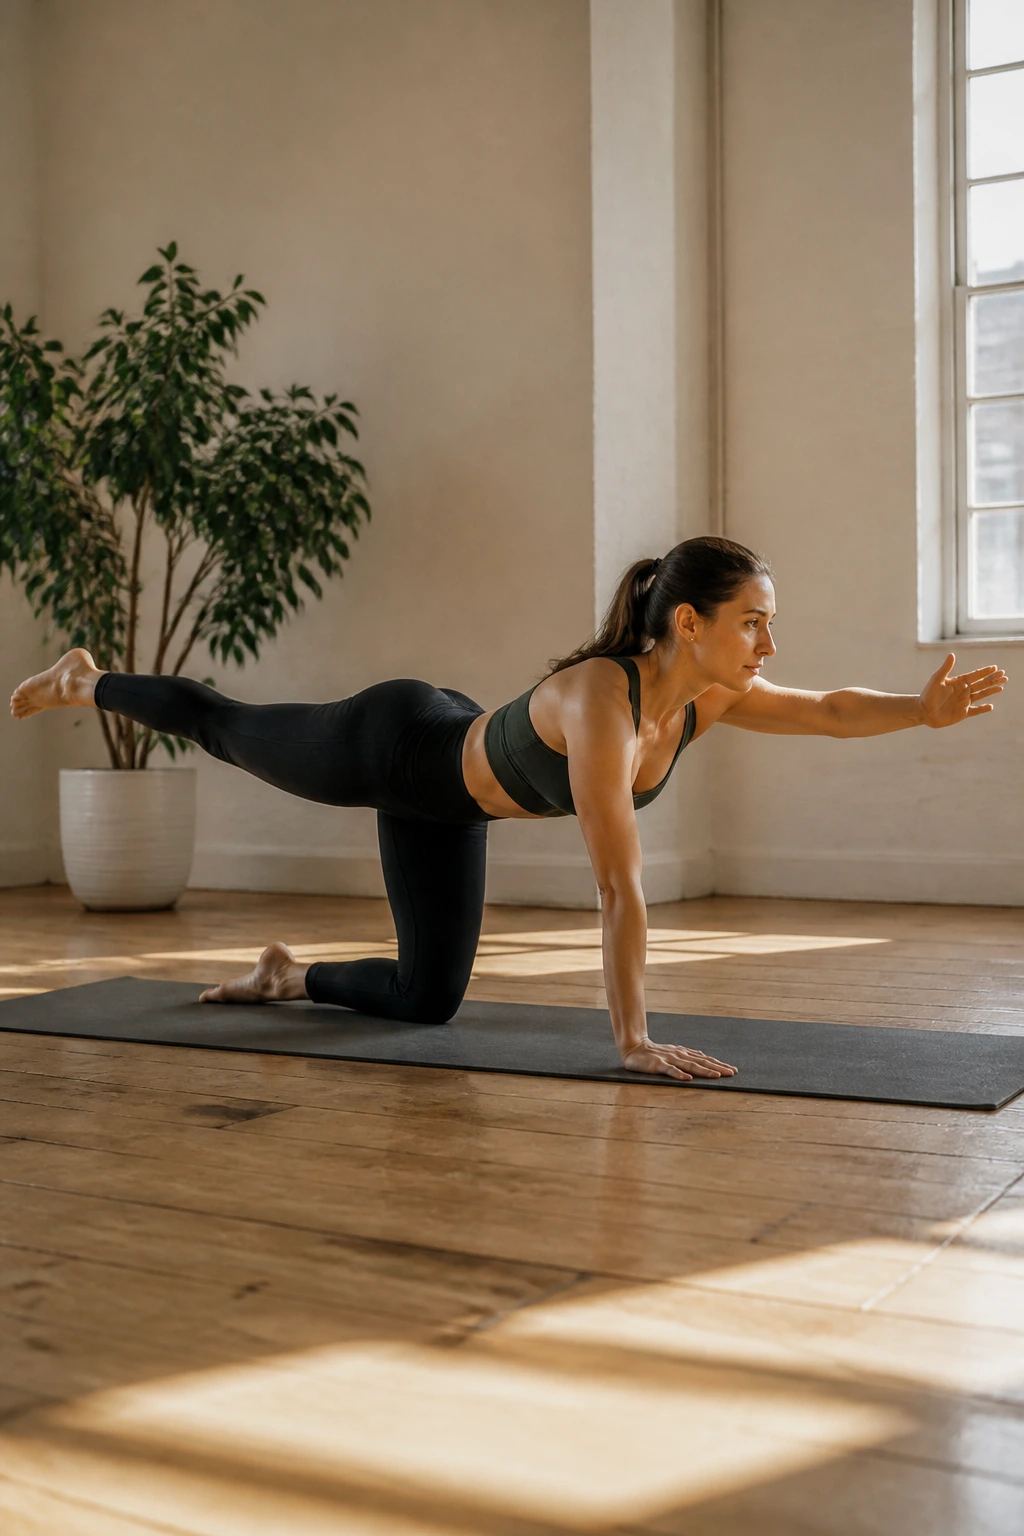
We often focus so much on stretching that we forget about stability. Bird-dog is the antidote to the “slouching” posture that ruins our lower backs. It is a deceptively simple movement that forces your core muscles to engage, which takes the burden off your lower back while simultaneously stretching the hip flexors as you extend the leg.
Technique for Stability
Assume the tabletop position again. Keep your spine in a neutral, flat position—imagine a glass of water resting on your lower back. You do not want that water to spill. Slowly extend your right arm forward and your left leg backward at the same time. Reach through your heel and your fingertips. Hold for three seconds.
Do not lift the leg so high that your back arches. This is the most common mistake. If you lift too high, you bypass the glute and dump all the stress into the lumbar spine. Instead, focus on lengthening the limb away from the center of your body. Keep the hips square to the floor—imagine you have a headlight on each hip bone, and both are shining directly down at the mat. Switch sides and repeat for ten repetitions per side. If your balance feels shaky, just start by sliding the arm and leg along the floor without lifting.
4. Pigeon Pose
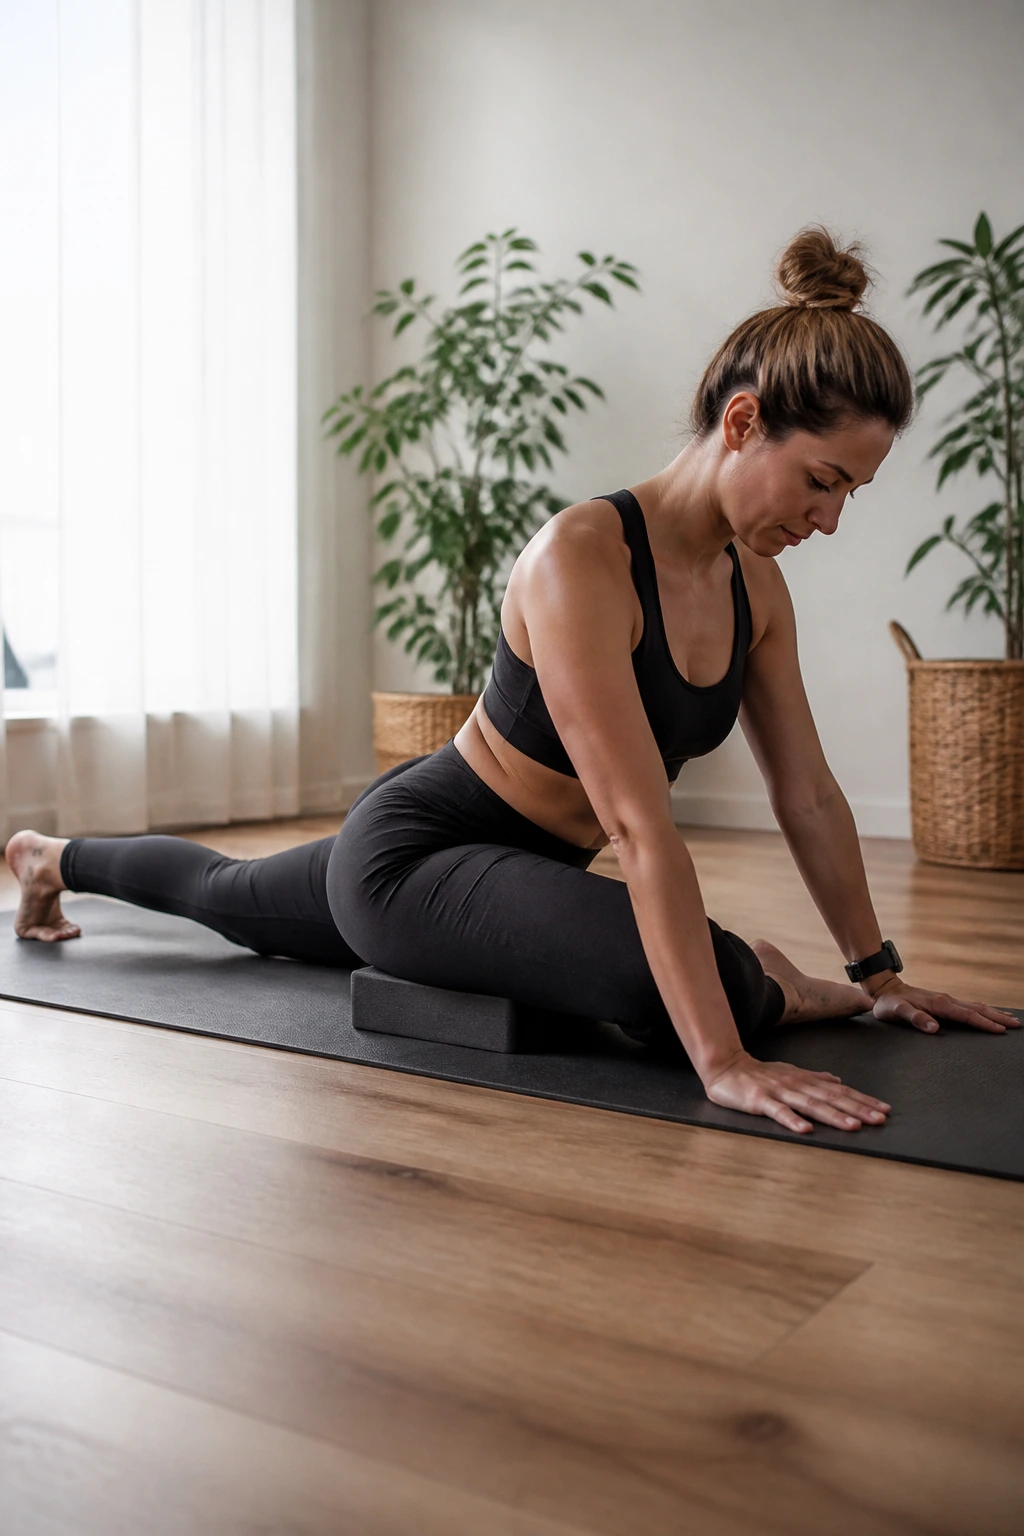
This is the ultimate hip opener. If you have done any amount of running, cycling, or sitting, this move will likely feel intense. It targets the piriformis, a small but troublesome muscle deep in the glute that, when tight, can compress the sciatic nerve and cause radiating pain down the leg.
The Nuance of Positioning
From a downward-facing dog or all-fours, bring your right knee forward and place it behind your right wrist. Angle your right shin so that your foot is somewhere near your left hip. Extend your left leg straight back behind you. Your hips should be square to the front of the mat.
Warning: Do not collapse onto the right hip. If your right hip is hovering far off the ground, put a pillow or a yoga block underneath that hip. You want stability, not a twisting sensation in the knee. Once you are set, walk your hands forward and lower your chest toward the floor. The sensation should be a deep, dull ache in the outer right glute. If you feel sharp, stabbing pain in your knee, back out immediately. That means you are twisting the joint instead of stretching the muscle. Spend two full minutes on each side. It takes time for the hip tissue to release; do not rush it.
5. Butterfly Stretch
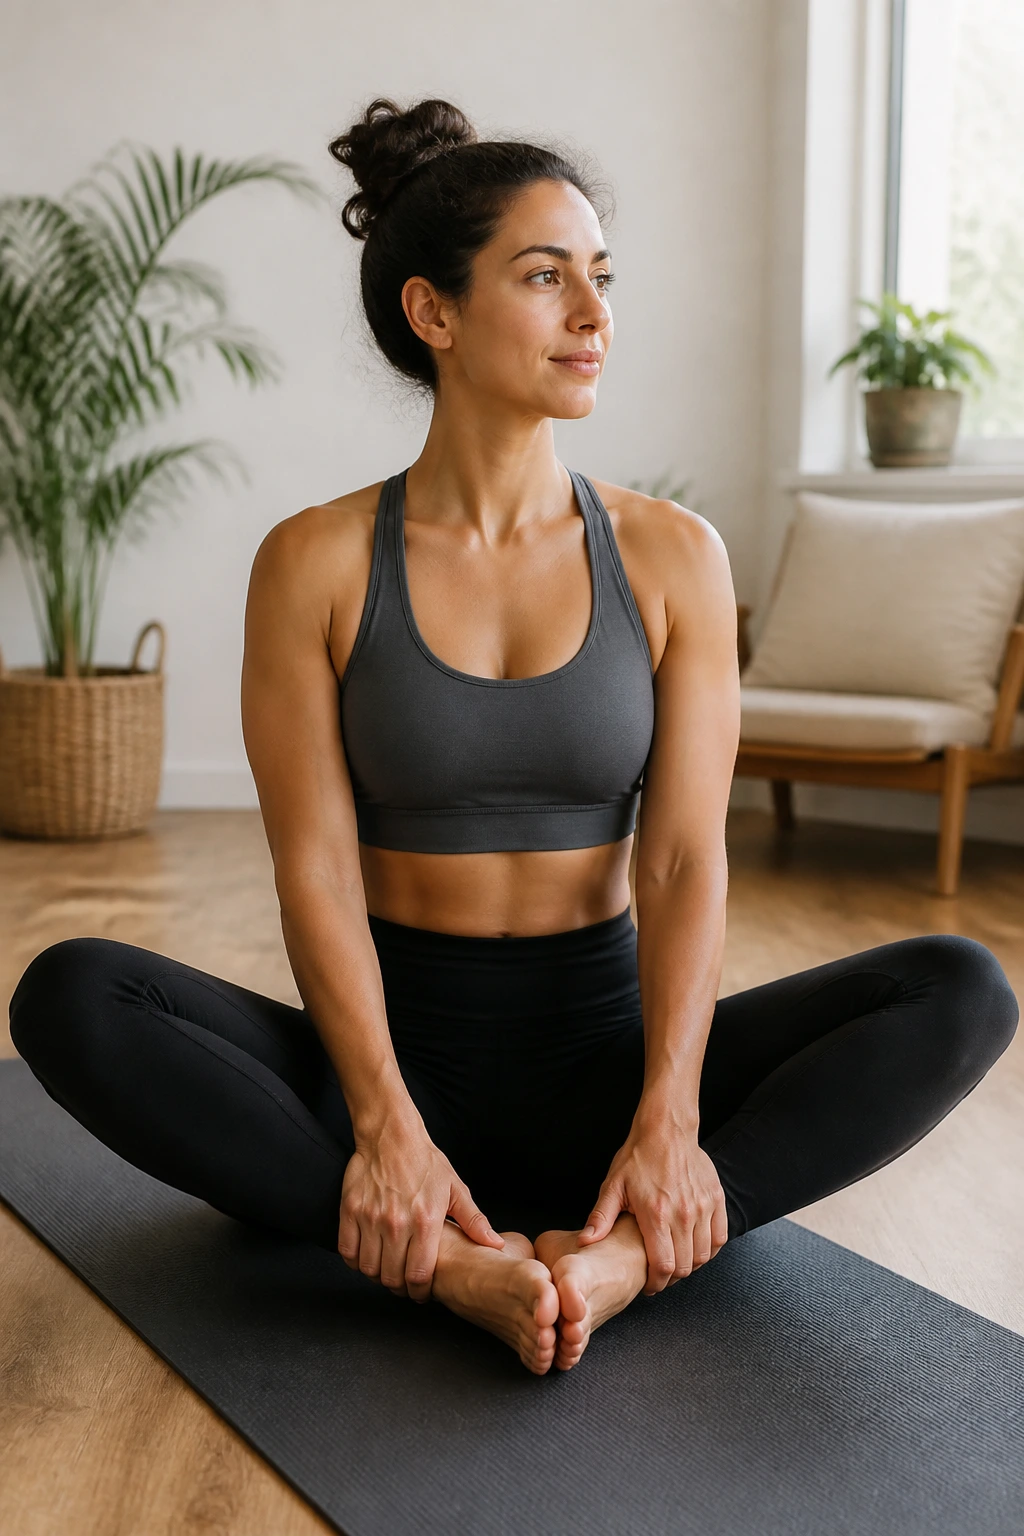
This classic seated stretch is fantastic for the adductors—the inner thigh muscles. When these are tight, they pull the pelvis forward, which creates a downward tug on the lower back. Relaxing the inner thighs helps create space for the pelvis to return to a more neutral position.
Adjusting for Your Anatomy
Sit on the floor with your feet together, knees dropping out to the sides. Use your hands to hold your ankles. Here is the trick: do not hunch your shoulders forward to touch your nose to your toes. That just rounds your spine and adds tension where you don’t need it.
Instead, sit tall. Imagine a string pulling the crown of your head toward the ceiling. Lengthen your spine first. Then, hinge forward from the hips, keeping your back flat. Use your elbows to gently—very gently—nudge your knees closer to the floor. If you find your back rounding, stop. You have gone too far. Sit back up, reset, and hinge only as far as you can while maintaining that straight-back posture. This stretch is a slow burn. The longer you hold it, the more the adductors will eventually surrender.
6. Figure-Four Stretch
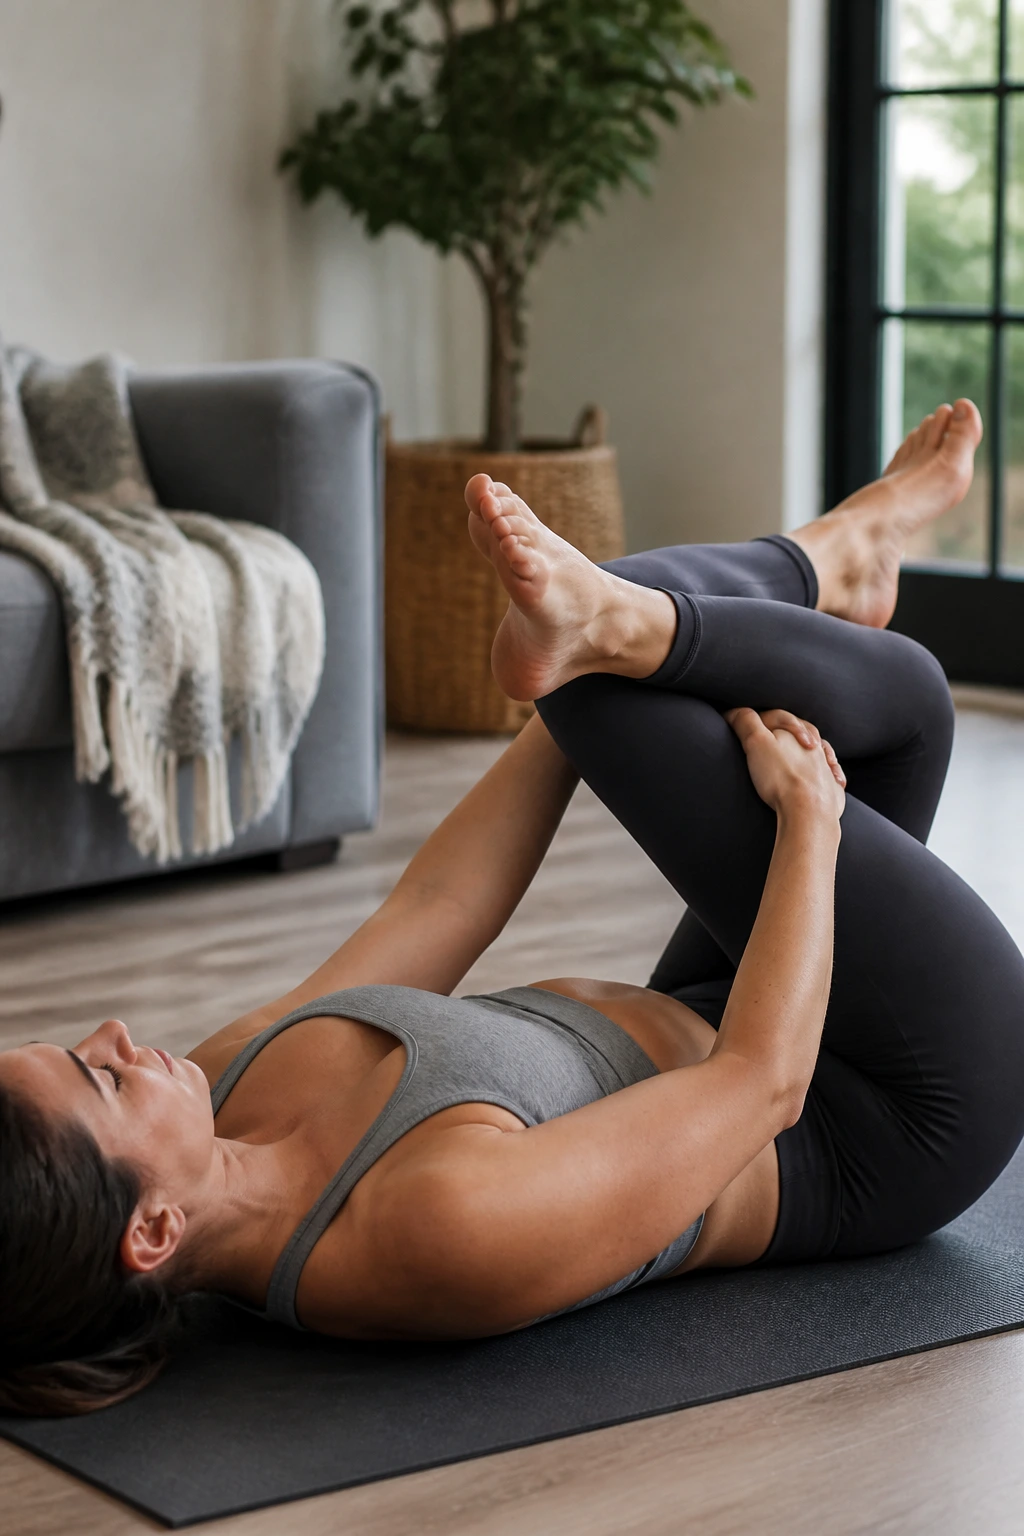
If the Pigeon Pose feels too aggressive for your knees or hips, the Figure-Four is your best alternative. It targets the same glute and piriformis muscles but keeps your spine supported on the floor, making it much safer for anyone dealing with acute lower back sensitivity.
The Execution
Lie flat on your back with your knees bent and feet flat on the floor. Cross your right ankle over your left knee, creating a shape like the number four. Reach through the opening you’ve created and grab the back of your left thigh with both hands. Pull your left thigh toward your chest.
Keep your head and shoulders relaxed on the ground. Do not strain your neck to get the leg closer. If you can’t reach your thigh, use a towel or a strap wrapped around your left hamstring to give you some leverage. As you pull, keep your right foot flexed—this protects the knee joint. You will feel a deep, satisfying stretch in the right glute. It is a very direct, honest stretch. Stay here for a solid two minutes on each side, breathing deeply.
7. Knee-to-Chest
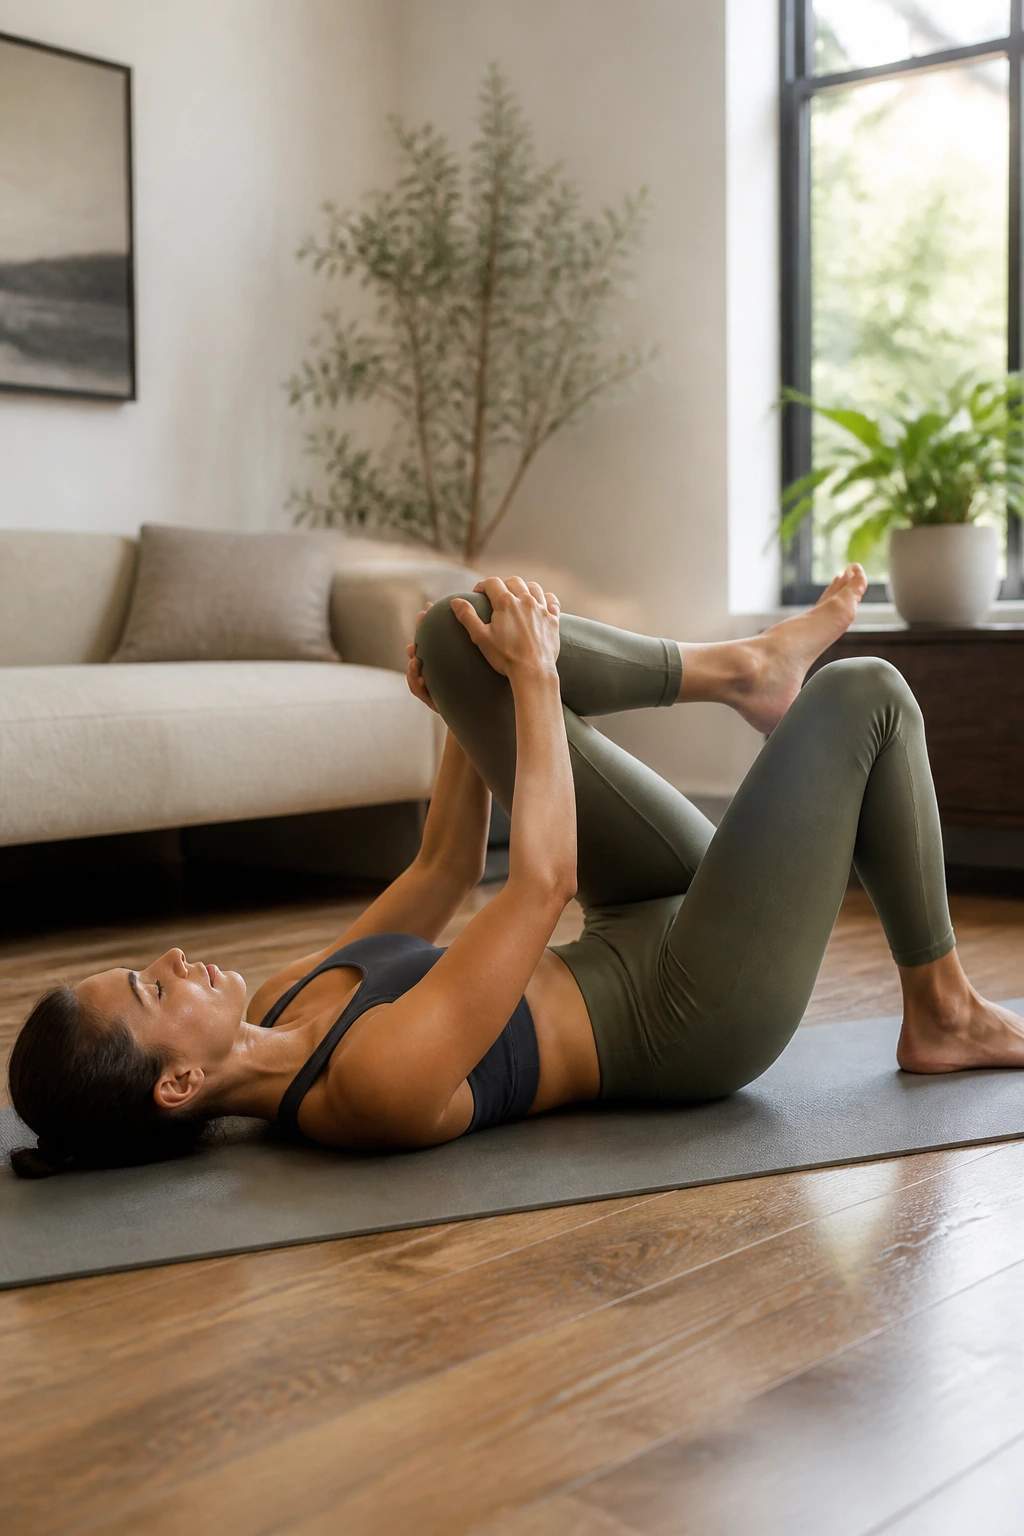
This is one of the simplest, most effective ways to release the lower back muscles after a long day. It’s essentially a reset button for the lumbar spine, flattening the natural curve and giving those over-worked muscles a chance to disengage.
The Correct Way to Hold
Lie on your back, legs extended. Bring your right knee into your chest and clasp your hands around your shin, just below the knee. Gently pull it toward your chest. The key here is to keep the other leg—the one on the floor—active. Press the back of that extended leg into the mat. This prevents your pelvis from tucking too much and ensures the stretch is localized to the hip and lower back.
If you have knee issues, grab behind the thigh instead of the shin. Hold for thirty seconds, then switch sides. After doing both legs individually, pull both knees into your chest at the same time and gently rock from side to side. That rocking motion acts like a self-administered massage for the muscles flanking your spine.
8. Cobra Stretch
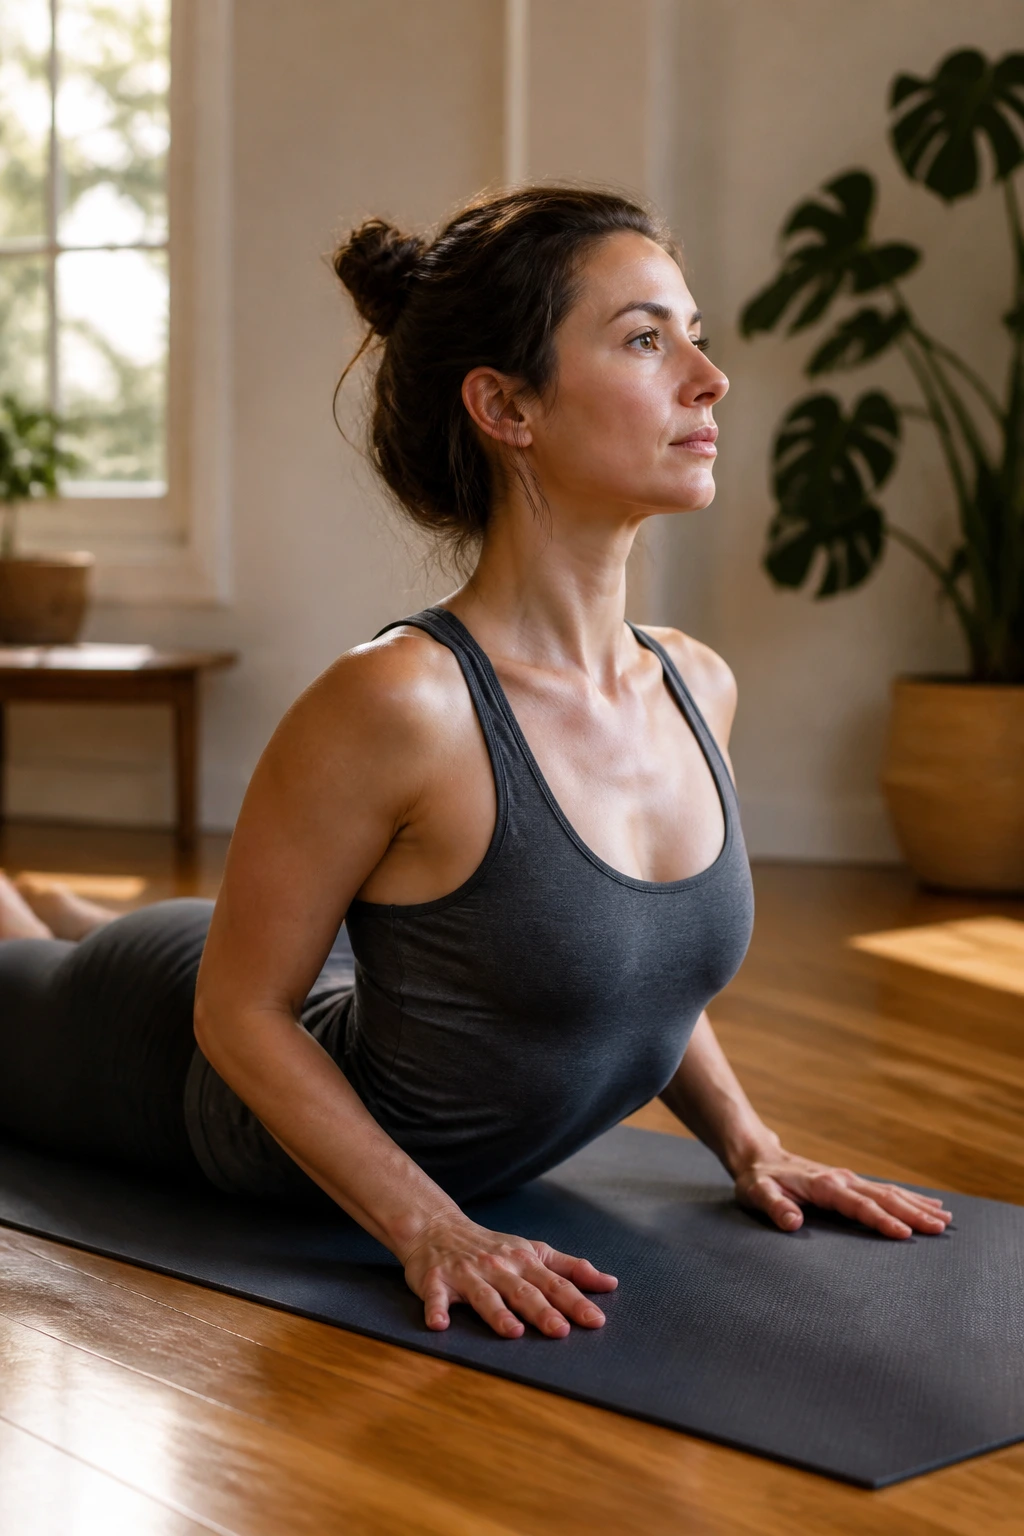
While most of these stretches focus on the hips and glutes, the Cobra is essential for the front side of the body. If your abs and hip flexors are tight, they pull your torso forward, putting your back into a constant state of flexion. Cobra gently lengthens the entire anterior chain, opening the chest and abdomen.
Mindful Extension
Lie face down on the floor with your hands under your shoulders. Keep your elbows tucked in close to your ribs—do not let them wing out. Slowly press into your palms to lift your chest and head off the floor.
Critical warning: Only lift as high as you can while keeping your lower ribs on the floor. If you push up until your arms are straight, you are doing an “Upward Dog,” which is a much more intense backbend and can irritate a sensitive lower back. For the Cobra, think length, not height. Keep your shoulders down away from your ears. Look slightly forward, not up at the ceiling, to protect your neck. This should feel like a gentle opening, not a crunching in the spine.
9. Spinal Twist
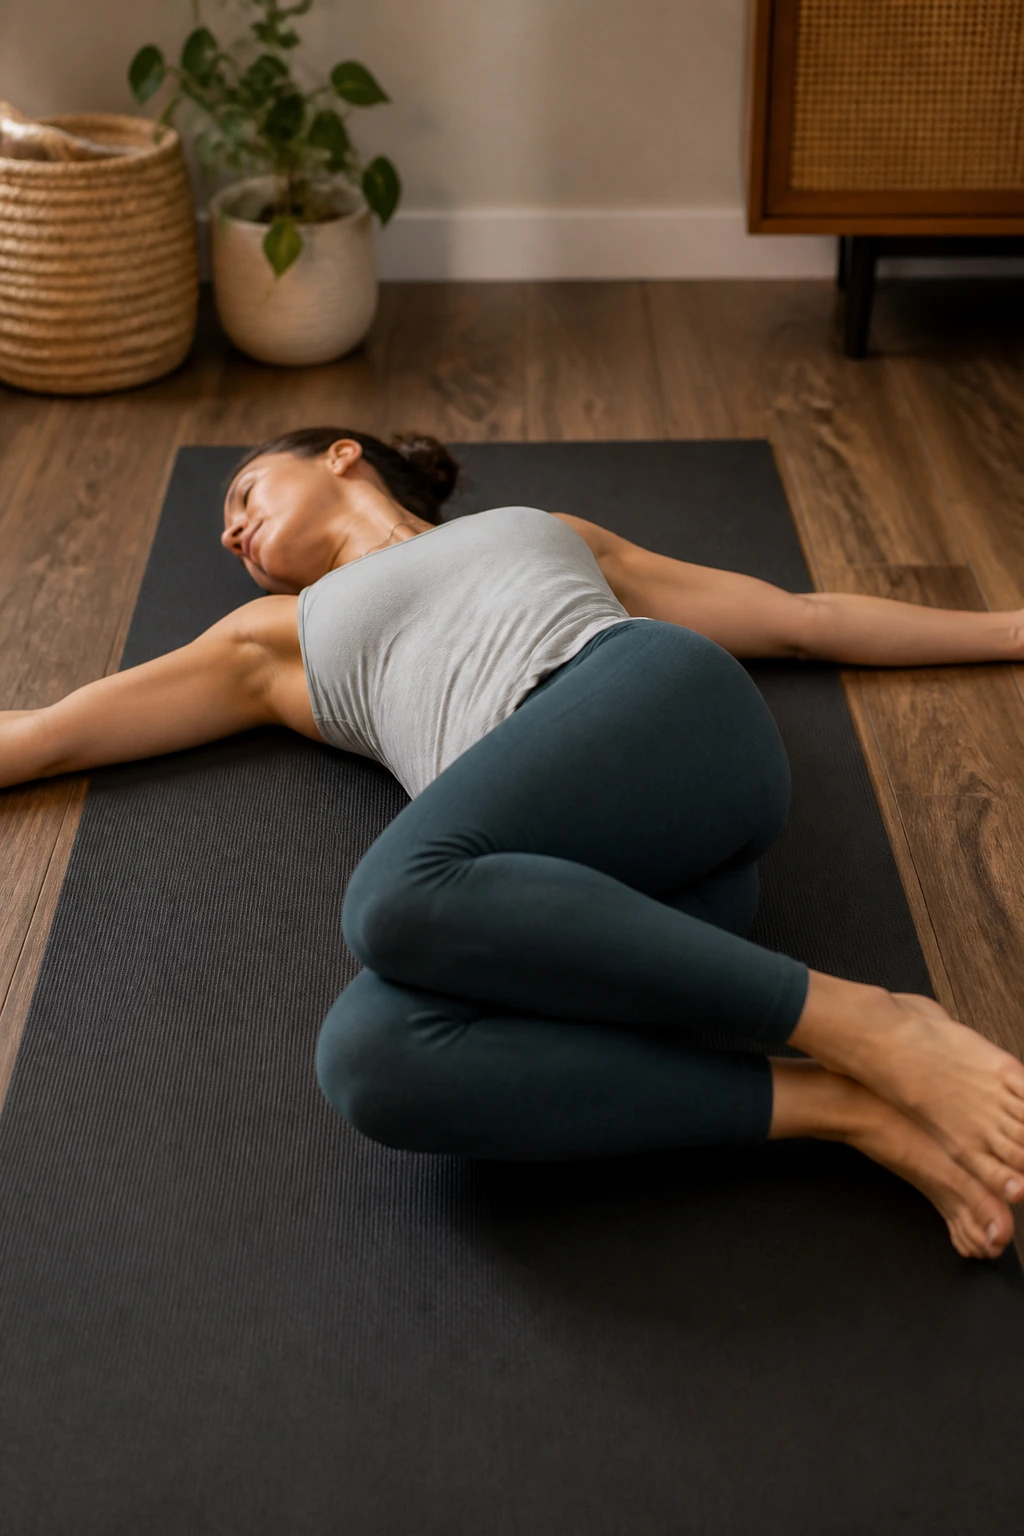
Twists are great for mobilizing the thoracic spine (the mid-back), which often gets stiff from hours of slouching. By increasing mobility in the mid-back, you reduce the compensatory load on your lower back.
The Supine Twist
Lie on your back with your arms extended out to the sides like a ‘T’. Bring your knees into your chest. Slowly drop both knees over to the right side, trying to keep both shoulders pressed firmly into the floor. If your left shoulder starts to lift, you have gone too far—place a pillow under your knees so they can rest on something without forcing your shoulder up.
Look toward your left hand to increase the twist through the neck and upper spine. Breathe deep into the ribs. You will feel the tension start to dissipate across your side body and lower back. Hold for one minute on each side. It’s a passive stretch, so let gravity do the work.
10. Sphinx Pose
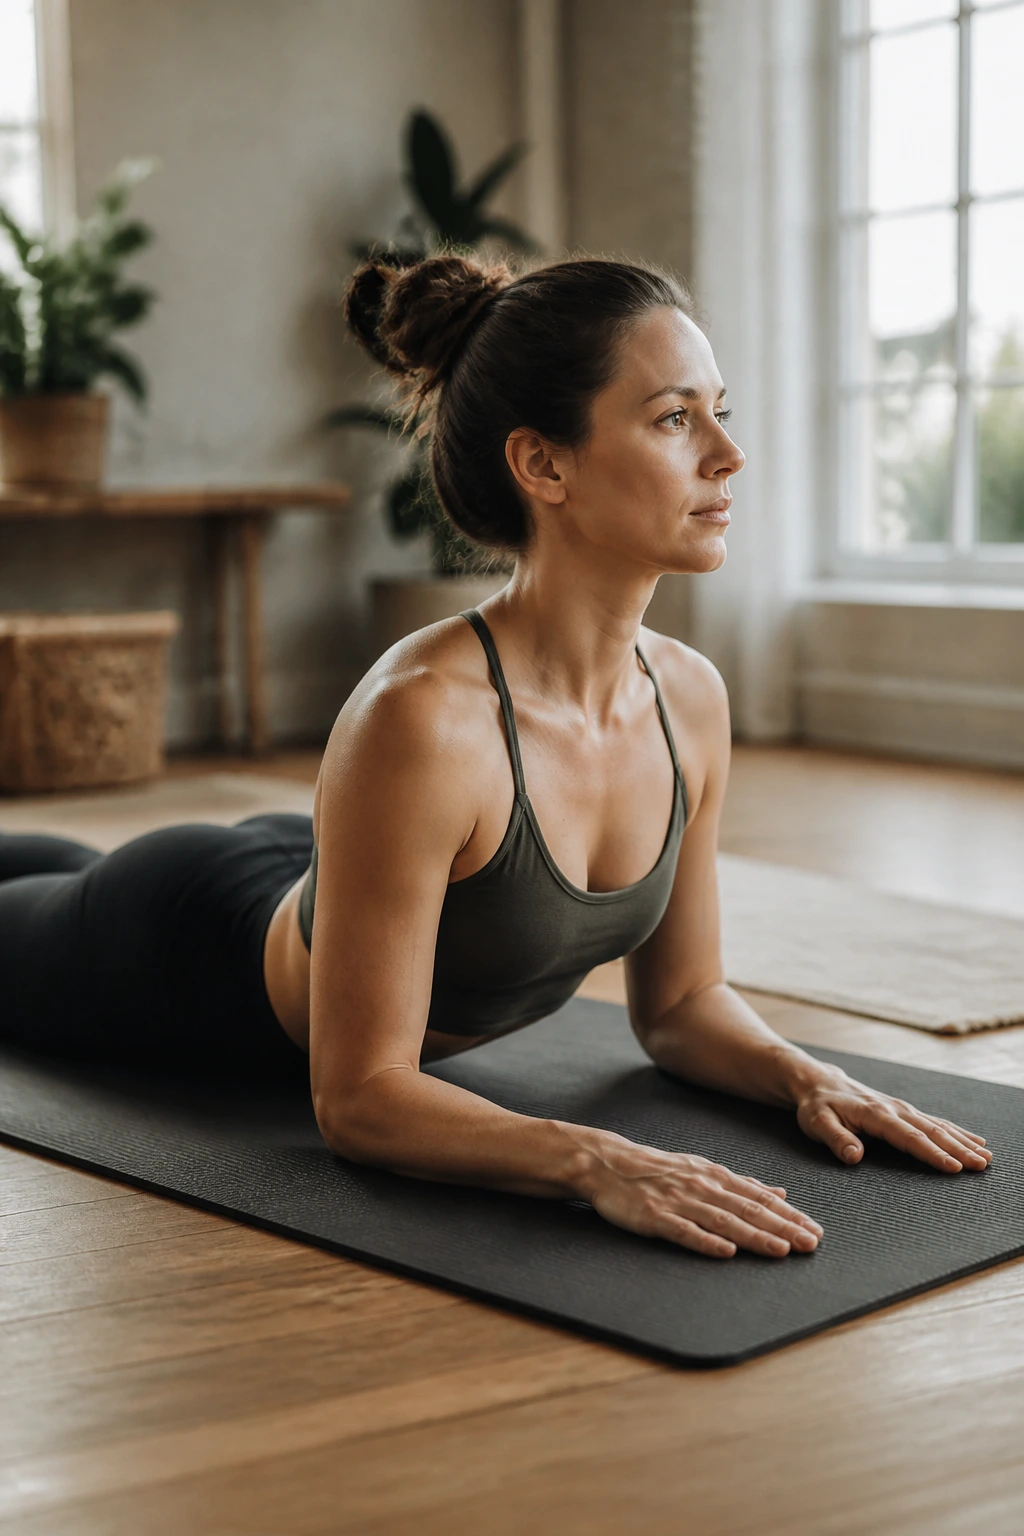
Think of this as the “easier” cousin of the Cobra. It is incredibly gentle and perfect if you are new to back-extension movements. It provides a sustained, mild stretch to the abdominal wall and hip flexors without requiring the strength of your arms to hold the position.
Relaxed Positioning
Lie on your stomach with your legs extended behind you. Prop yourself up on your forearms, placing your elbows directly under your shoulders. Your forearms should be parallel to each other. Press down into your forearms to lengthen your spine, but keep your shoulders relaxed—don’t let them shrug up toward your ears.
Gaze softly forward. The goal is to allow your belly to relax and hang toward the floor, which creates a gentle arch in the lower back. If you feel any pinching, move your elbows slightly further away from your body to decrease the intensity of the arch. Stay here for two to three minutes. It is a great position to hold while reading or listening to a podcast, as it doesn’t require active holding.
11. Hip Flexor Lunge
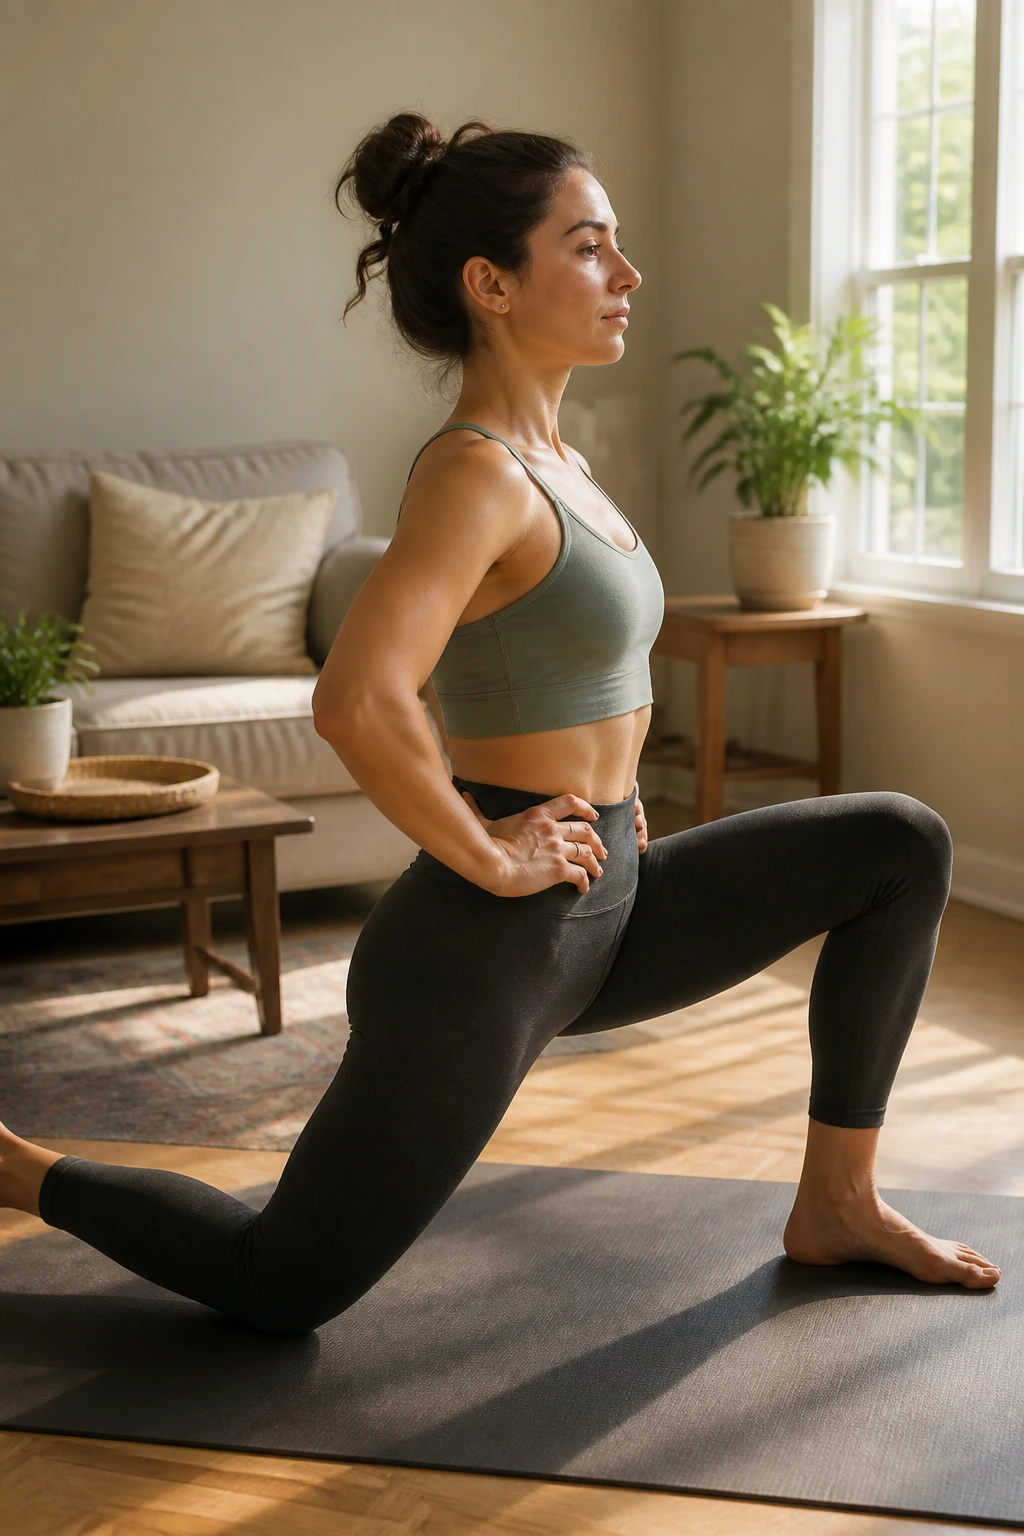
This is the most direct way to hit the psoas—the major muscle that connects your spine to your legs. If you sit for a living, your psoas is likely tight, and this is the specific remedy for it.
The Importance of the Posterior Tilt
Step into a lunge with your right foot forward and your left knee on the ground. This is your setup. Now, do not just sink into the stretch. Instead, tuck your tailbone—imagine you are trying to lengthen your tailbone toward the back of your left knee. You should feel an immediate, intense stretch in the front of your left hip.
If you don’t feel it, you aren’t tucking your pelvis enough. Keep your torso upright; don’t lean forward. If you lean forward, you lose the stretch on the psoas and just stretch the hamstring. Squeeze the glute of your back leg—this is an active technique that forces the front of the hip to relax. Hold for sixty seconds per side.
12. Gate Pose
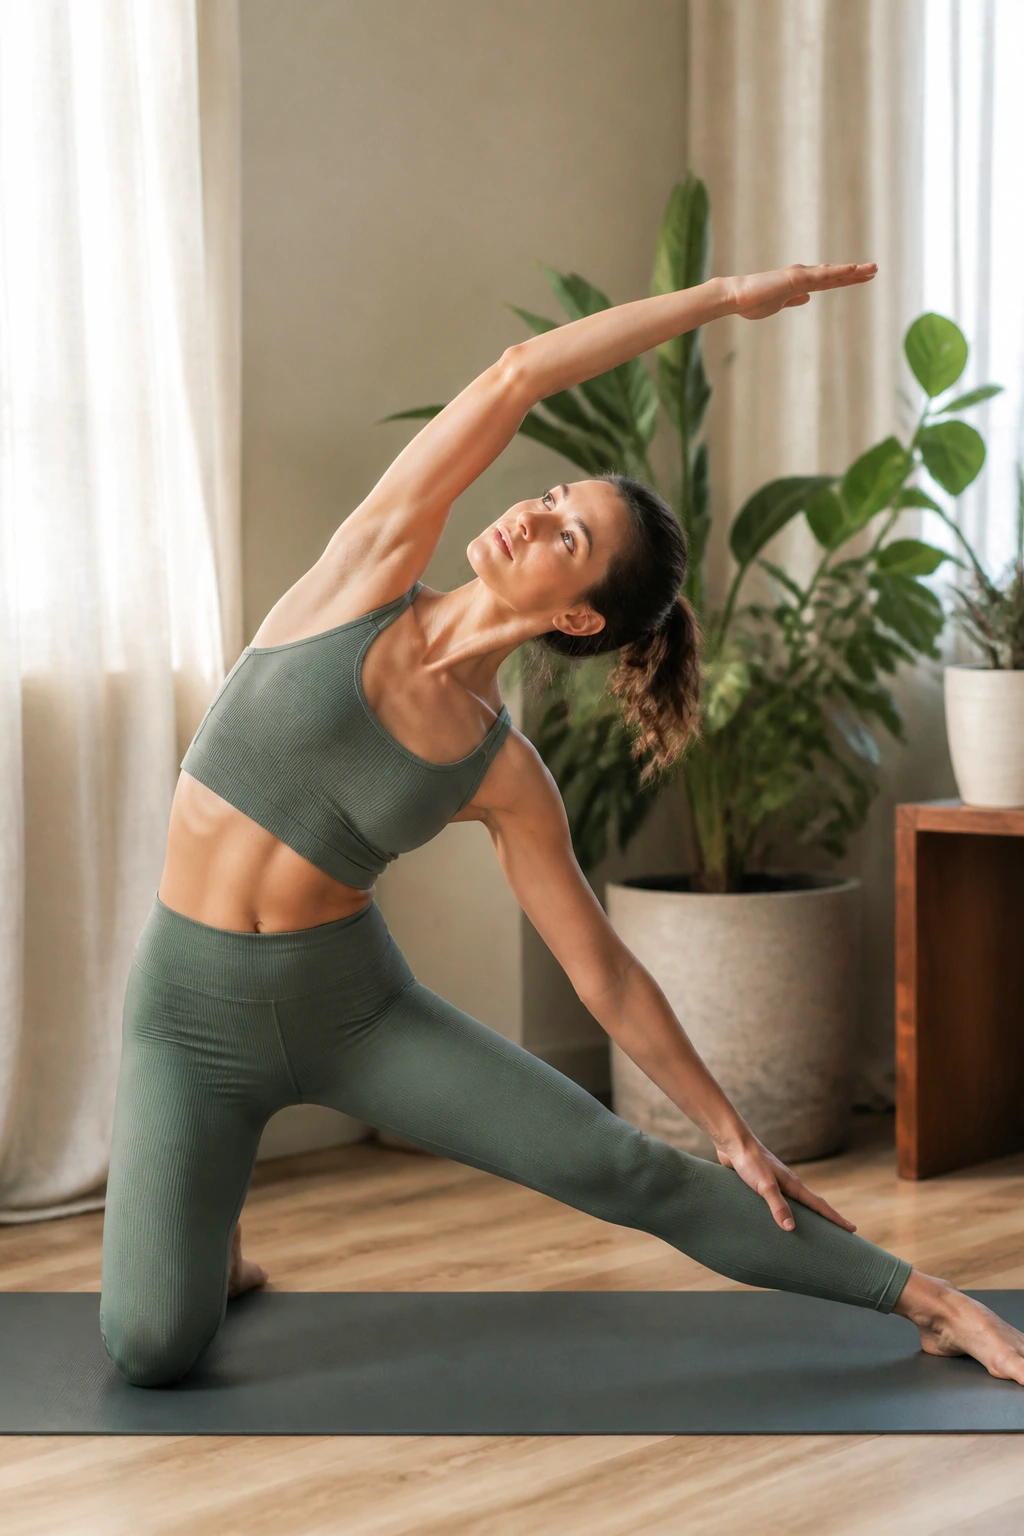
This move addresses the obliques and the quadratus lumborum—a deep muscle in the back that connects your ribs to your pelvis. When this muscle is tight, it can cause severe, localized low back pain on one side.
Stretching the Side Body
Kneel on the floor, then extend your right leg out to the side, keeping the foot flat on the ground. Inhale and reach your left arm up to the ceiling. As you exhale, reach that left arm up and over toward your right leg. Do not collapse; keep your chest open.
Imagine you are trying to touch the wall on the opposite side of the room, not just reaching toward the floor. You should feel a deep, beautiful stretch running from your left knee, up through the side of your torso, to your ribs. Keep your extended leg active by engaging the quadriceps. Switch sides after forty-five seconds.
13. Glute Bridge
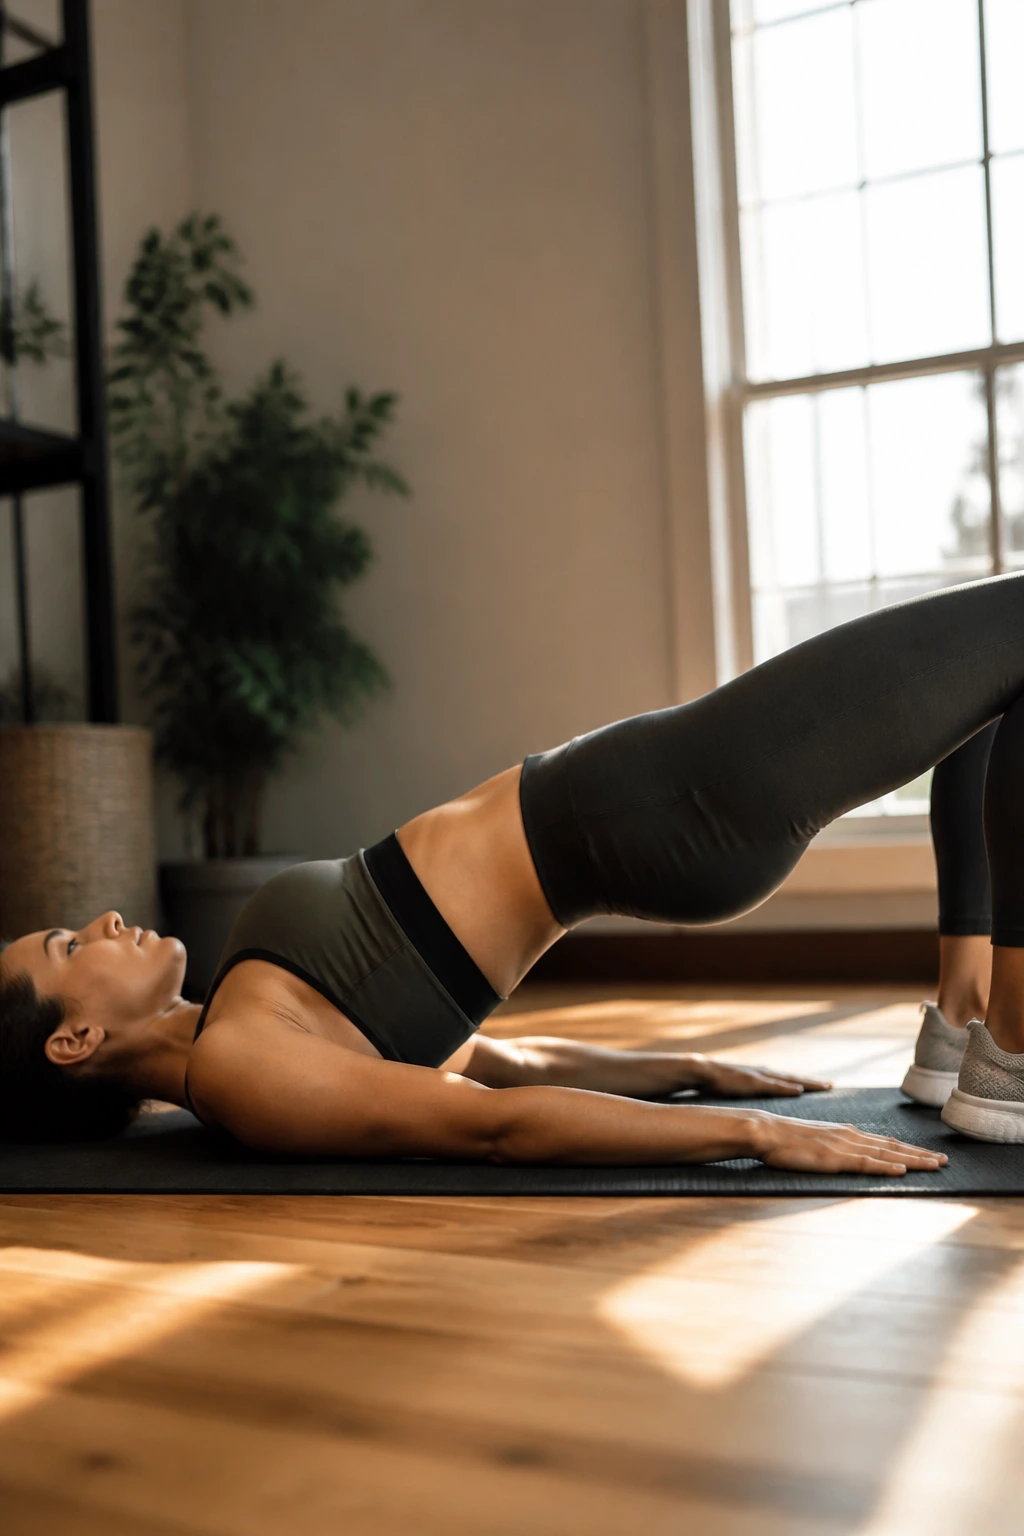
Weak glutes are a primary driver of lower back pain. When the glutes don’t fire, the lower back has to do all the work of lifting your body. The bridge strengthens the posterior chain and forces the hips into extension.
Proper Activation
Lie on your back, knees bent, feet hip-width apart and close to your glutes. Drive through your heels to lift your hips toward the ceiling. At the top, squeeze your glutes hard. Do not push your hips so high that your back arches excessively—keep the ribcage knit down.
Pause at the top for three seconds. This isometric hold is where the work happens. Lower back down slowly, letting your spine articulate back onto the floor one vertebra at a time. Do three sets of twelve. This is less of a “stretch” and more of a “reset” for the muscles that support your spine.
14. Thread the Needle
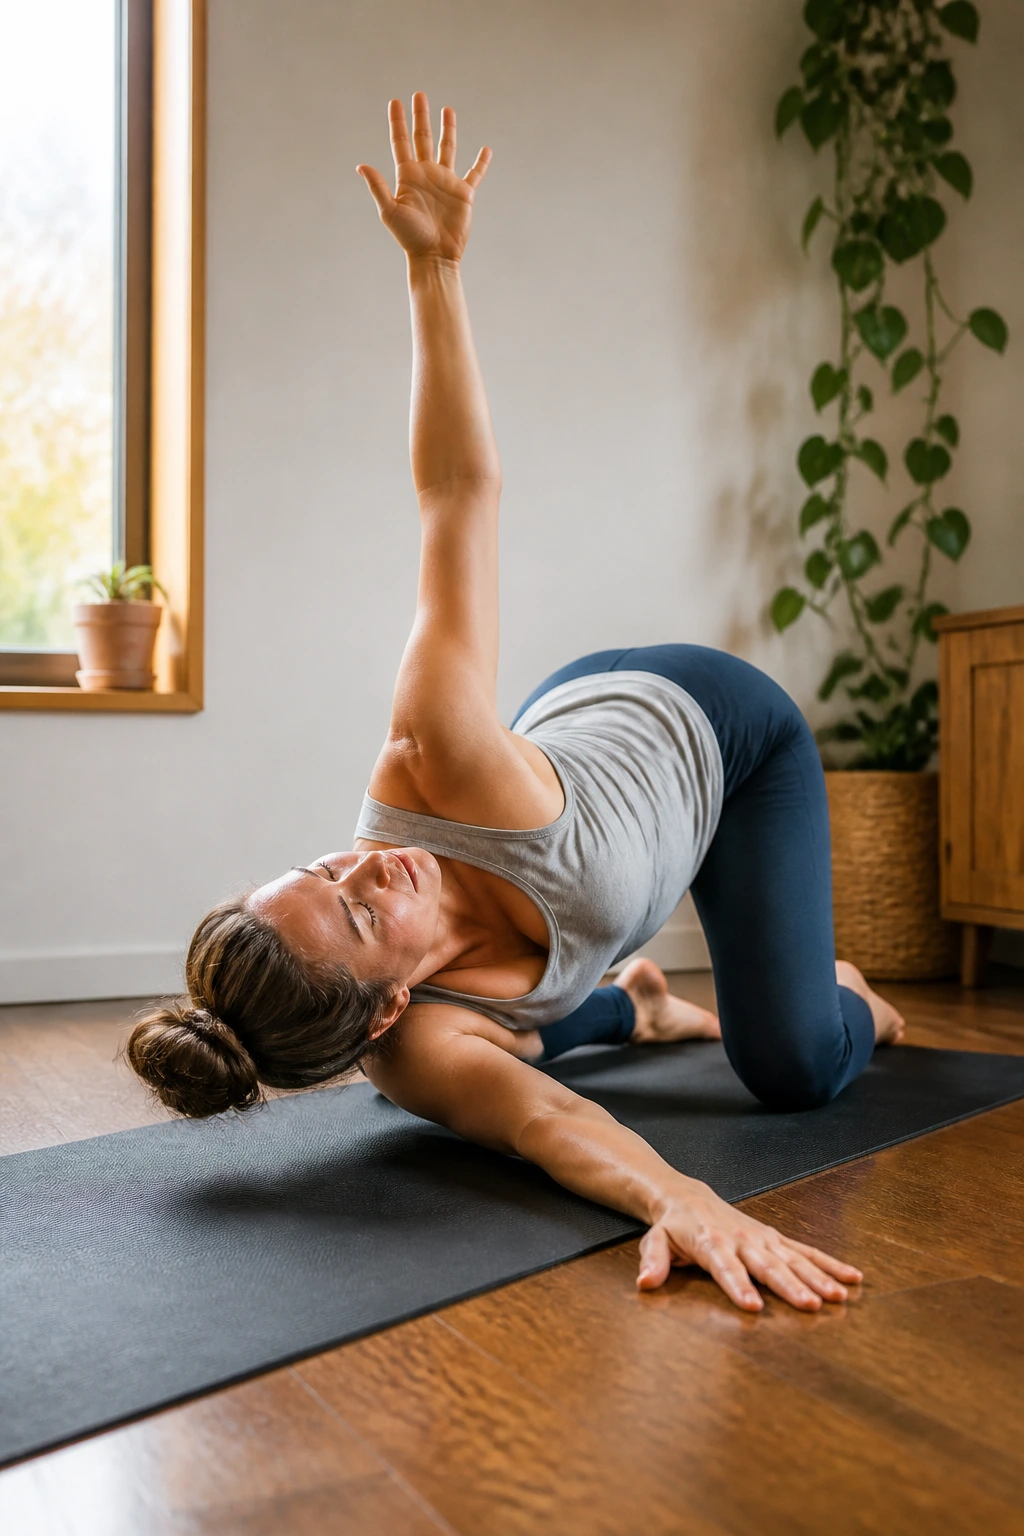
This is a fantastic shoulder and thoracic opener that helps reduce the tension that travels down from your upper back into your lower back. It helps integrate the movement of the entire spine.
The Twist
From an all-fours position, reach your right arm under your left arm, sliding it across the floor until your right shoulder and cheek rest on the ground. Keep your left hand on the floor for support, or reach it up toward the ceiling for an added twist.
You should feel a stretch across your upper back, between the shoulder blades. This area is often connected to lower back tightness because when the upper back is locked, the lower back tries to overcompensate. Hold for one minute on each side, focusing on keeping your hips high and level.
15. Lizard Pose
Lizard pose is similar to the runner’s lunge, but it goes much deeper into the hip joint. It is excellent for people who feel like their hips are “stuck” or heavy after sitting all day.
Finding Depth
Step your right foot forward into a wide lunge. Bring both hands to the inside of your right foot. If your hips allow, lower down onto your forearms—but do not force it. You can stay up on your palms if your range of motion isn’t there yet.
The key here is to keep the back knee either lifted (for an active stretch) or grounded (for a restorative one). If you keep the knee grounded, focus on pressing the hip gently toward the floor. You will feel this deep in the front of the hip and the inner thigh. Hold for one minute on each side.
16. Happy Baby
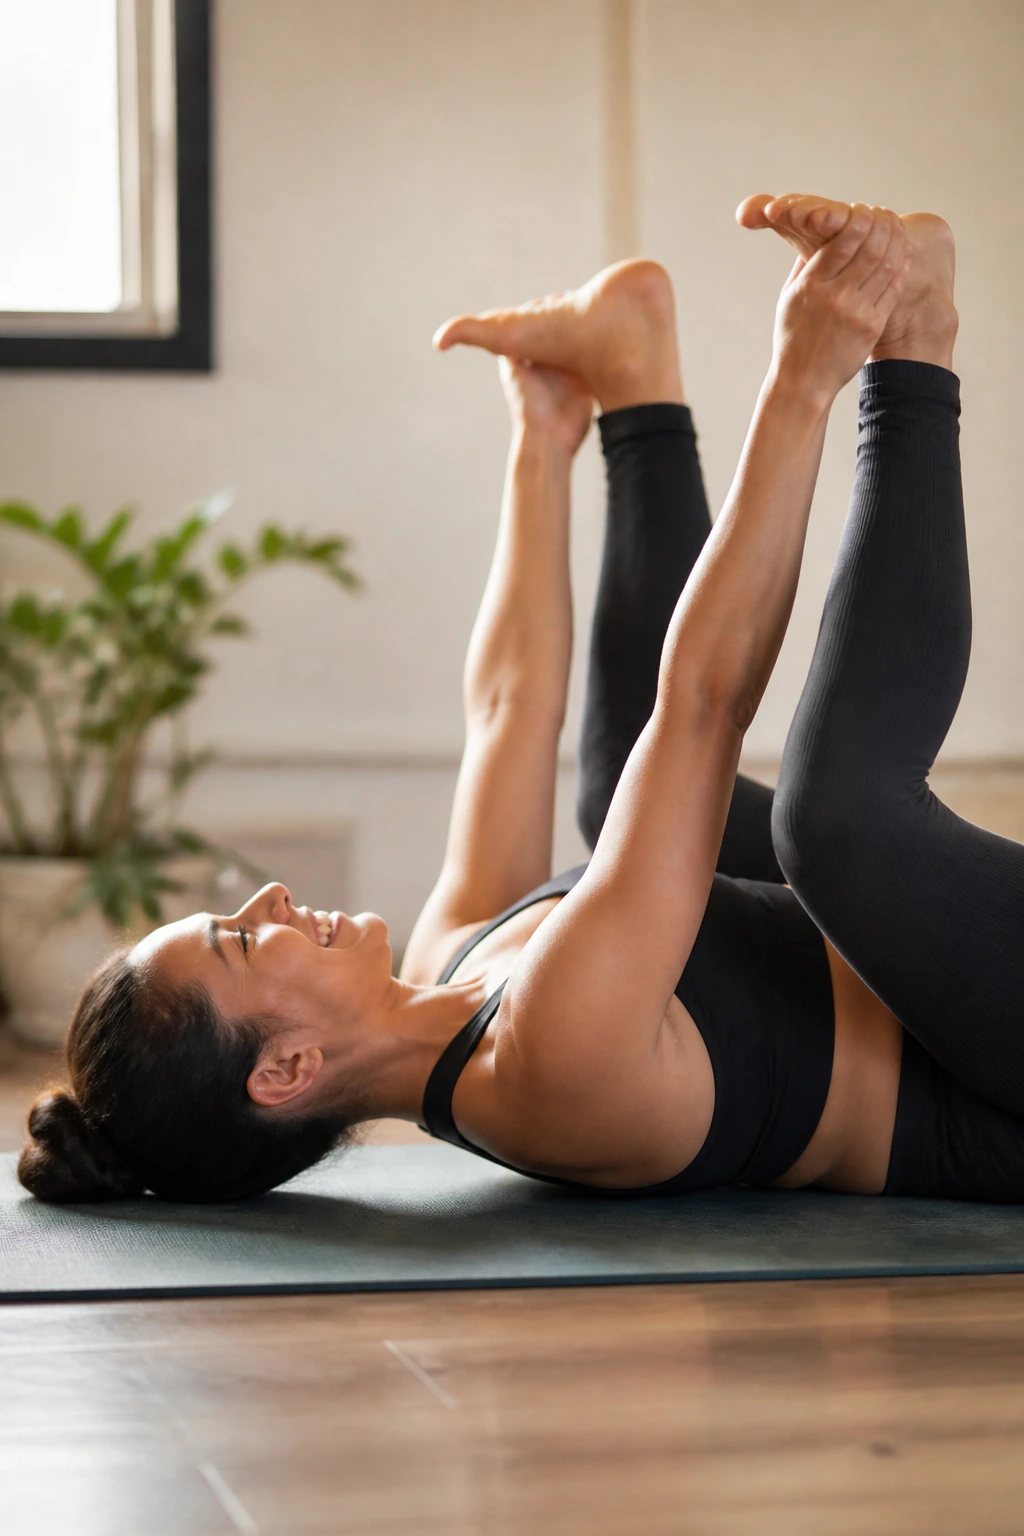
This is a quintessential restorative pose. It mimics the natural position of an infant and is incredible for releasing tension in the lower lumbar area and the inner hips.
The Rocking Release
Lie on your back and pull both knees into your chest. Reach for the outside edges of your feet with your hands. Open your knees wider than your torso and bring them up toward your armpits. Ensure your ankles are directly over your knees, creating a 90-degree angle.
Press your feet into your hands, and at the same time, pull down with your hands to create resistance. This engagement creates a powerful release in the hips. Keep your tailbone pressed down toward the floor—do not let it curl up. Gently rock side to side, feeling the floor massage your lower back. Hold for one to two minutes.
17. Standing Forward Fold
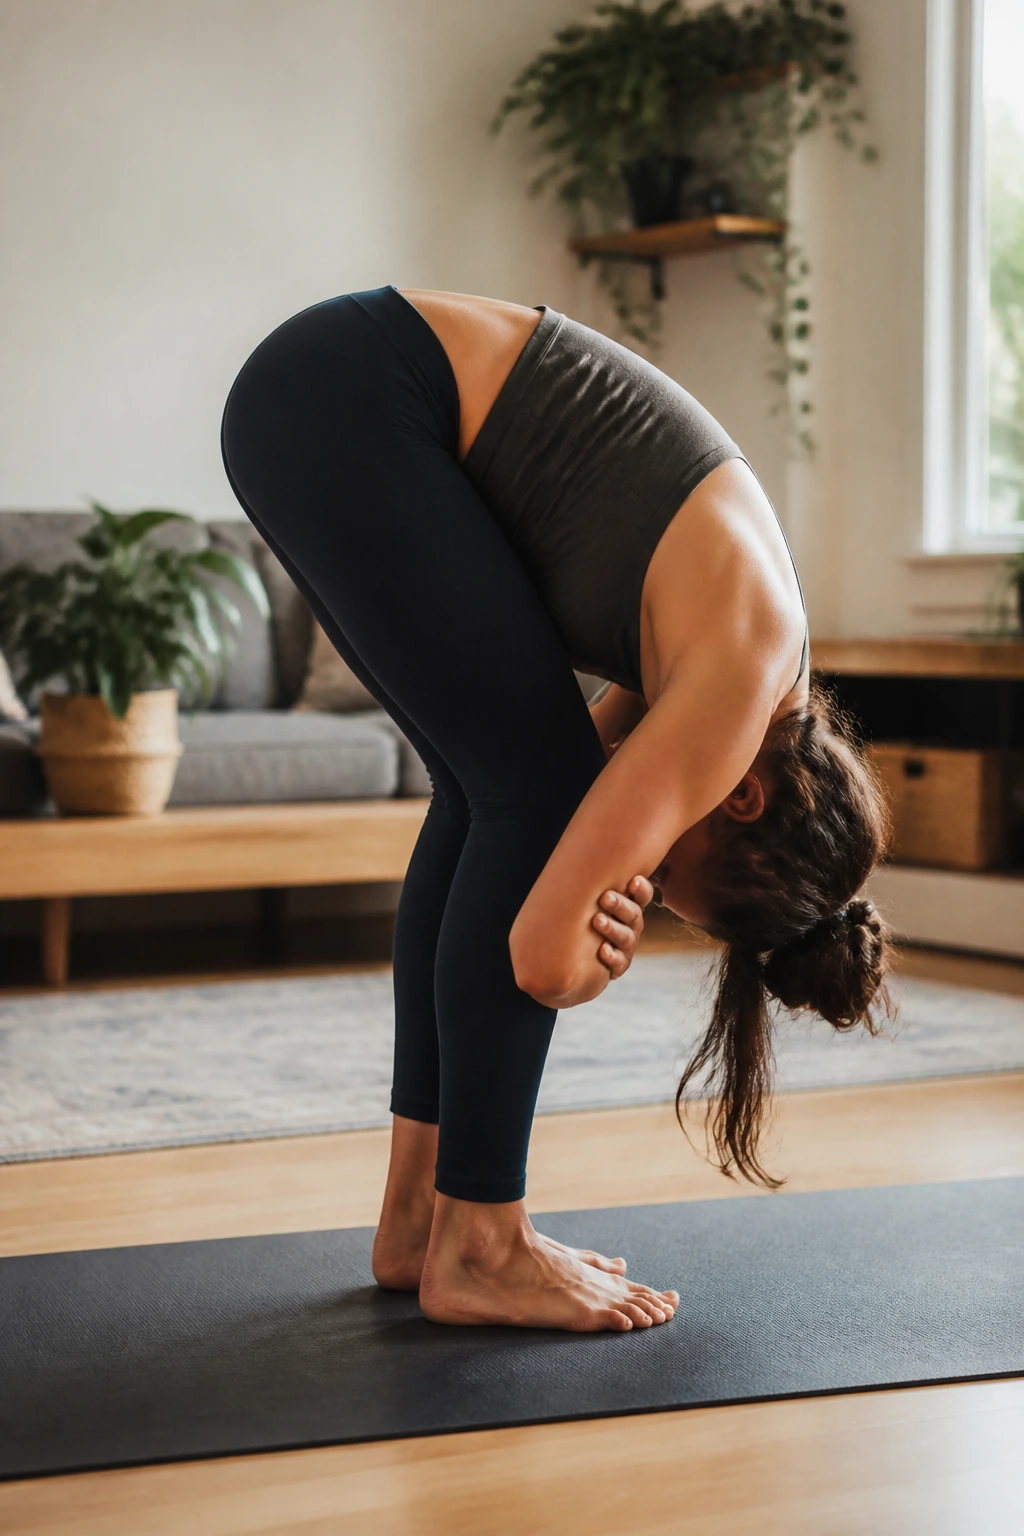
Sometimes the simplest movements are the most effective. A standing forward fold uses gravity to decompress the spine while stretching the entire posterior chain—calves, hamstrings, glutes, and lower back.
Gravity and Lengthening
Stand with feet hip-width apart. Hinge at your hips and fold forward. Keep a generous bend in your knees—this is crucial. You want the stretch to be in your lower back and hamstrings, not in the back of your knees. Let your head hang completely heavy.
Hold opposite elbows with your hands to add a little weight, encouraging the spine to lengthen. If you feel any pulling in your lower back, bend your knees more. This is a passive release. Sway slightly if it feels good. Hold for at least one minute, then roll up very slowly, one vertebra at a time, to avoid dizziness.
18. Pelvic Tilts
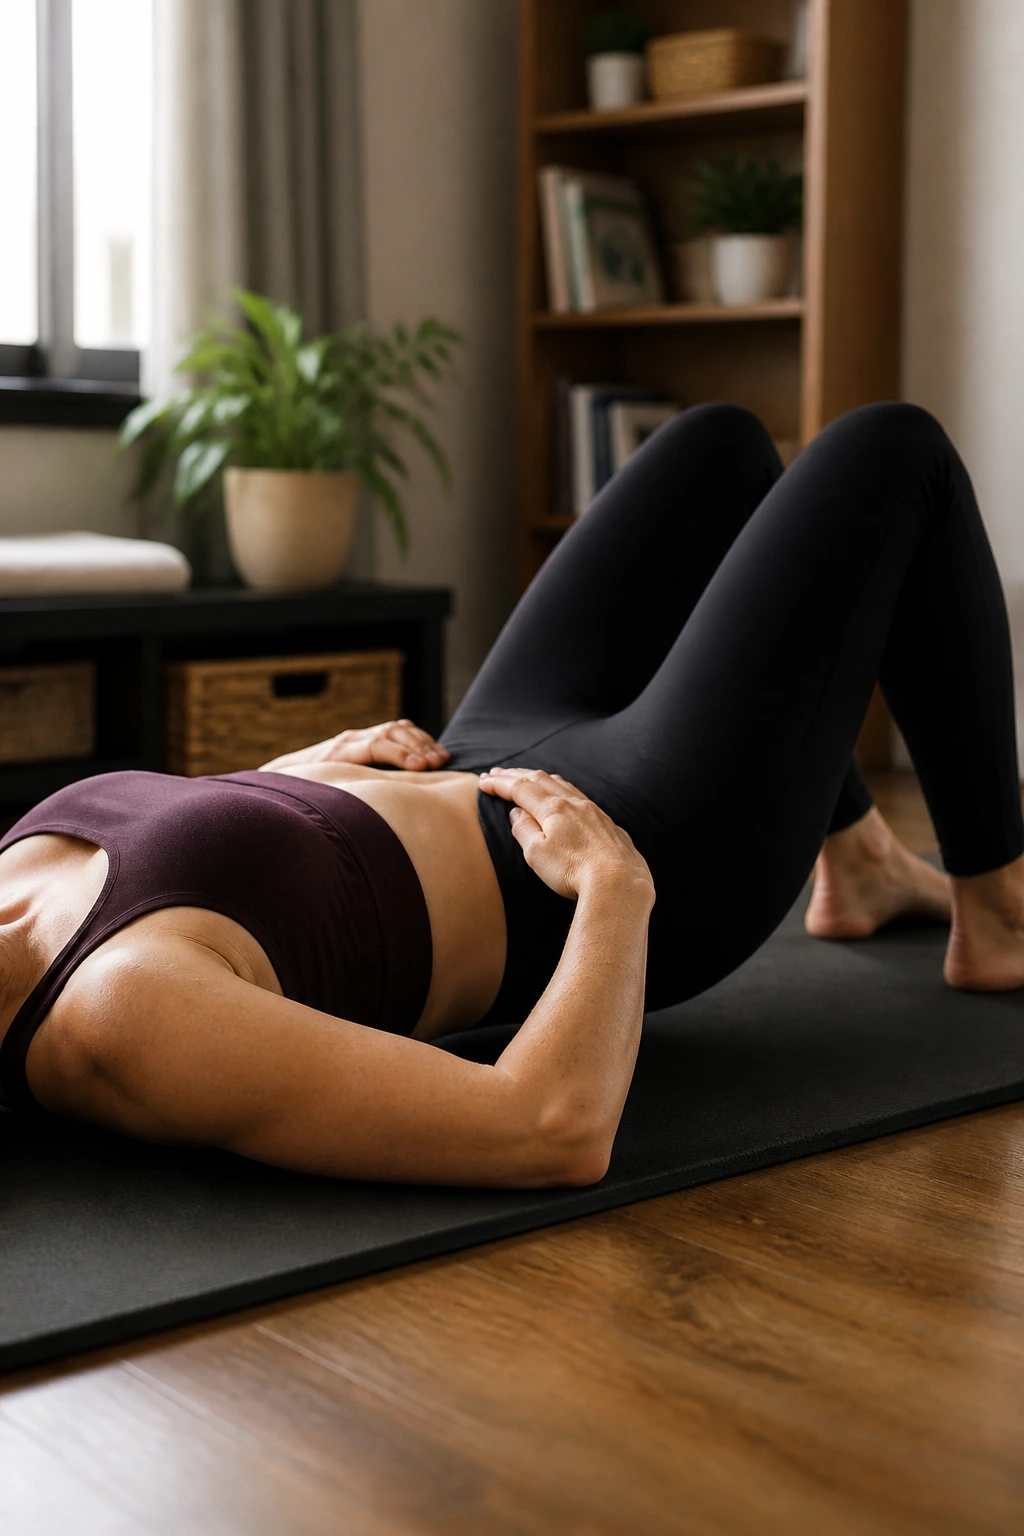
This is the most subtle movement on this list, but it is arguably the most important for anyone suffering from chronic, debilitating lower back pain. It teaches you how to control the position of your pelvis, which is the root of the issue for most back problems.
Controlling the Movement
Lie on your back with knees bent and feet flat. Place your hands on your hip bones. Inhale, and arch your lower back slightly, creating a small space between your spine and the floor. This is an anterior tilt. Now, exhale and push your lower back into the floor by tilting your pelvis upward—think about pulling your belly button toward your spine.
This is the posterior tilt. Repeat this subtle rocking motion, moving between the arch and the flat back. It is a tiny range of motion. Do not use your legs to push; use your core muscles. Do twenty slow repetitions. It is the best way to develop the mind-body connection to your pelvis.
19. Supine Twist (Variation)
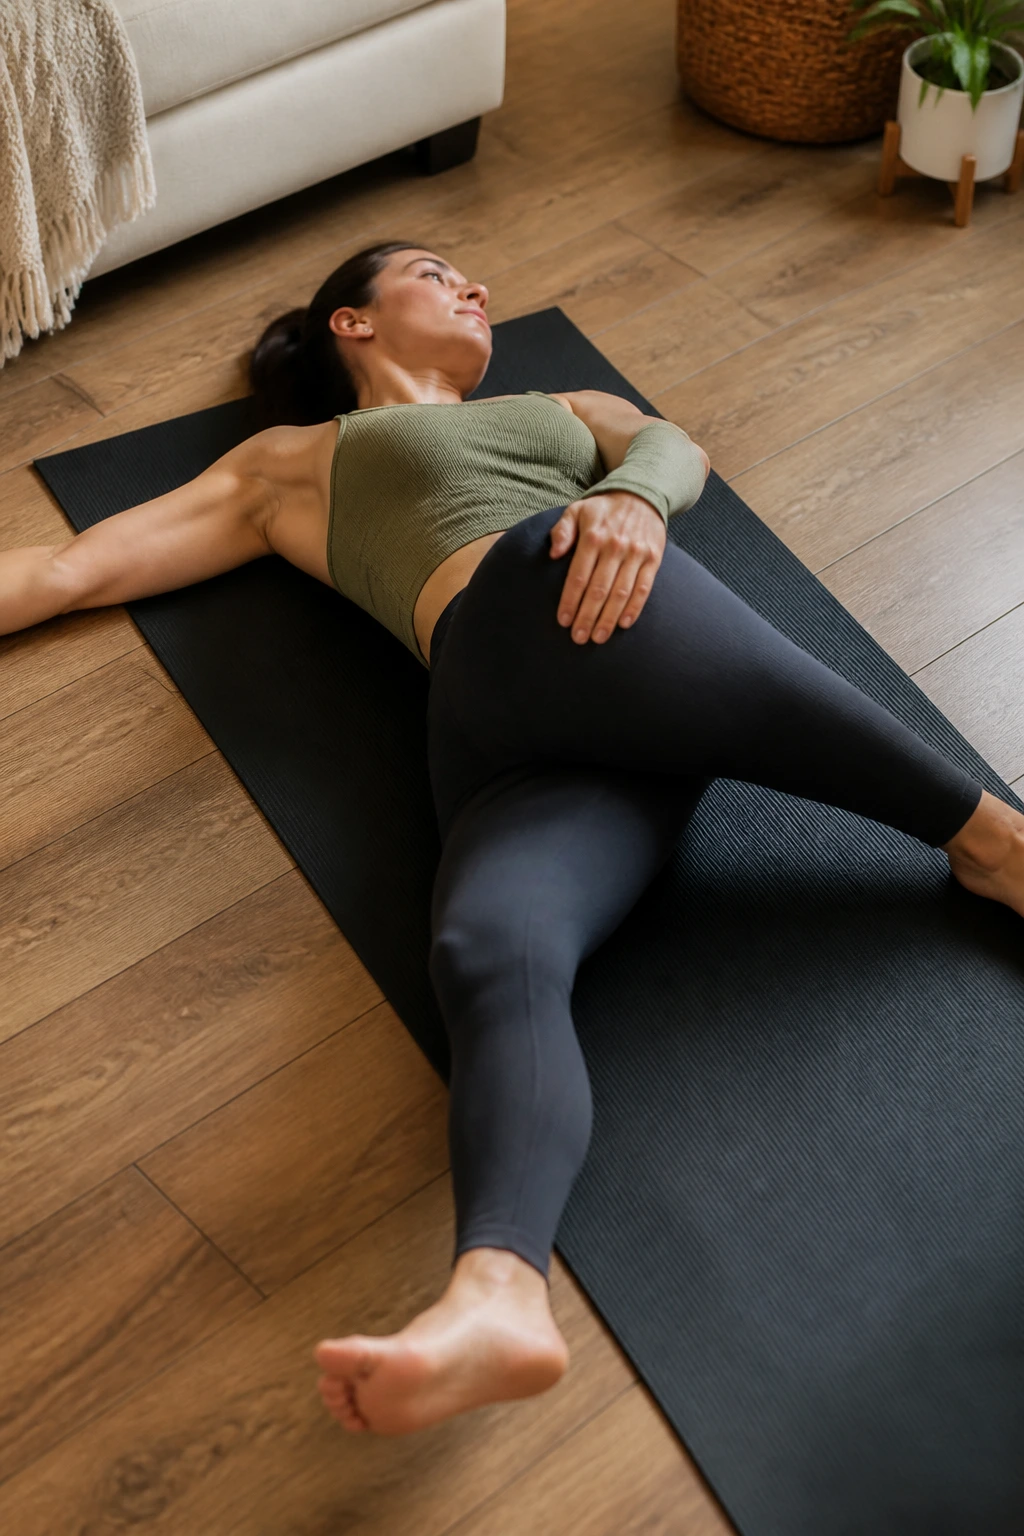
While we covered a standard twist earlier, this variation focuses on isolating the lower lumbar segment more precisely. It’s effective if you feel a “knot” deep in the lower back muscle groups.
The Crossed Leg
Lie on your back. Extend your left leg and cross your right leg over your body. Unlike the previous twist where both knees were bent, keep the right leg relatively straight as you cross it over. You can use your left hand to gently hold the right knee down.
Extend your right arm to the side. The goal is to keep the right shoulder on the ground. This creates a longer lever, which intensifies the stretch along the outer hip, the IT band, and the lower back. Breathe into the space where you feel the most tightness. Hold for one minute on each side.
20. Deep Squat Hold
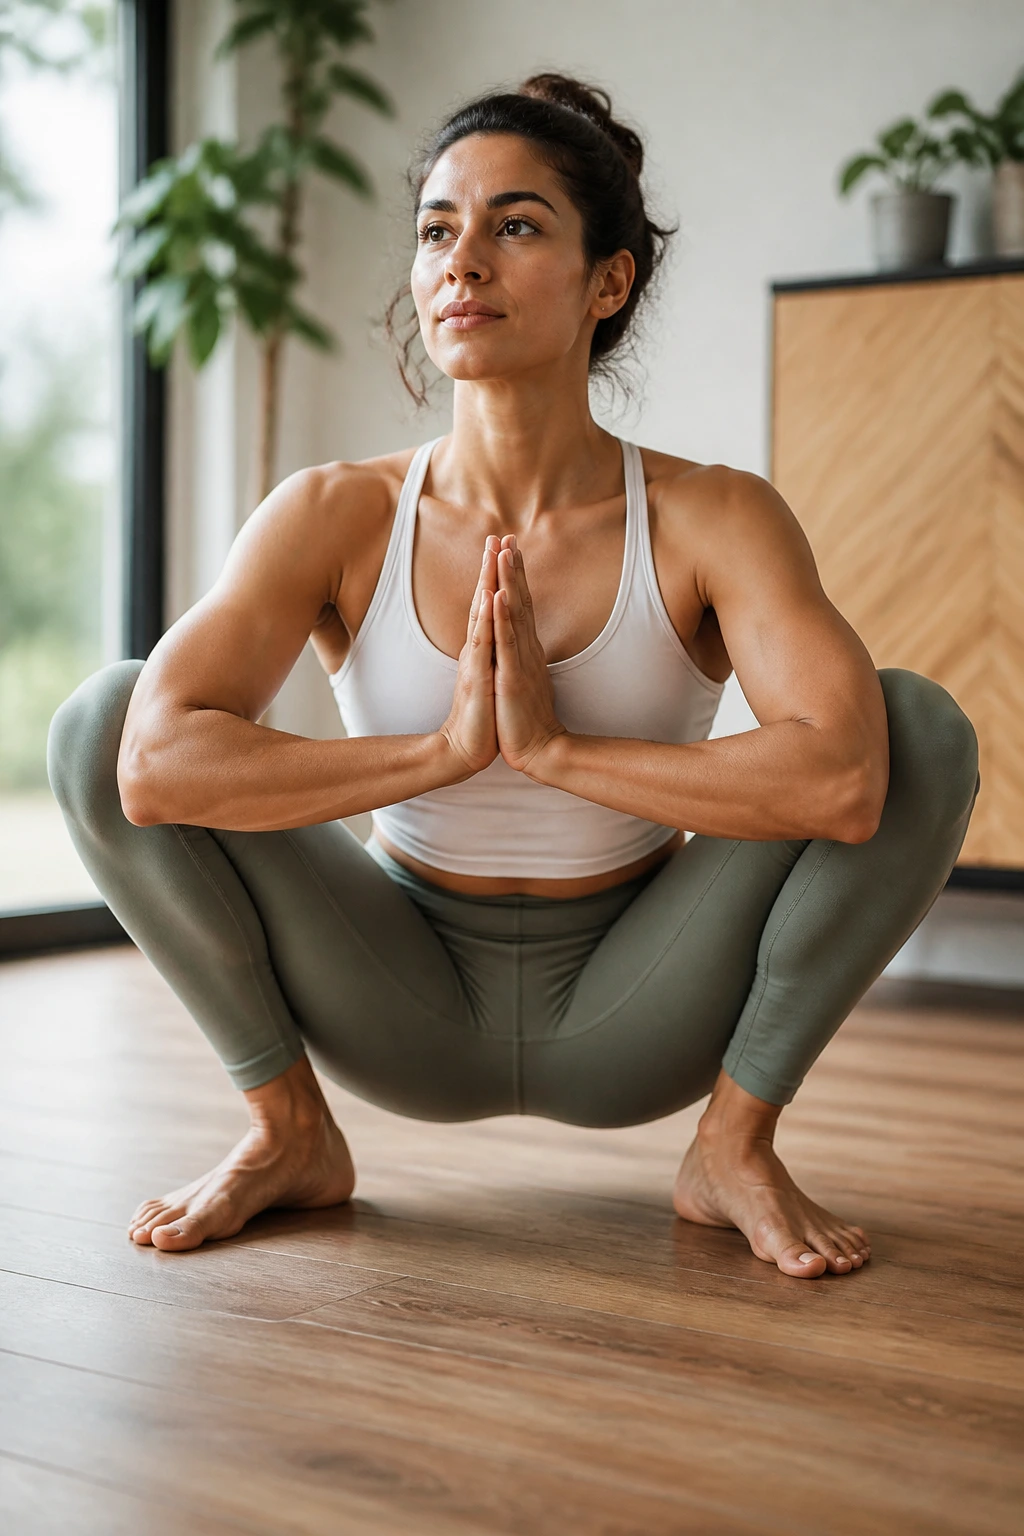
The deep squat, often called the “Malasana” in yoga, is a natural resting position for humans. It opens the hips, lengthens the lower back, and stretches the ankles. If you cannot get into a deep squat, use support.
The Full Release
Stand with feet slightly wider than shoulder-width, toes turned slightly out. Lower your hips down as far as you can, aiming for a position where your glutes are near your heels. If your heels lift off the ground, place a folded blanket or a rolled-up towel under them for support.
Bring your hands together at your heart and use your elbows to gently nudge your knees open. Keep your chest lifted; do not hunch over. This position forces the lower back to flatten and the hips to externally rotate. Hold for sixty seconds. If it feels impossible, hold onto a doorframe or a sturdy piece of furniture to balance yourself while you drop into the position. Consistency here will change how your hips feel within weeks.
The Bottom Line
You do not need to do all twenty of these every single day. That is a recipe for burnout and will likely lead to you skipping the routine entirely. Instead, treat this like a menu. If you have been sitting at a desk all day, prioritize the Hip Flexor Lunge and the Child’s Pose. If your back feels generally stiff and achy, focus on the Cat-Cow and the Pelvic Tilts.
The key to long-term relief is not intensity; it is frequency. Doing five minutes of focused stretching daily is infinitely better than doing an hour-long session once a week. Your hips took months or years to get tight, so give them the grace of time to loosen back up. Listen to the feedback your body provides. If a stretch feels like “good” tension, lean into it. If it feels like sharp, jagged pain, stop immediately and find a different movement. Your back will thank you for the diligence.
