



Your hip flexors aren’t just tight; they’re stuck. You spend half the day sitting at a desk, commuting, or slumped on a sofa, and your body adapts to that shape. The psoas and iliacus muscles shorten, lock in place, and eventually start pulling on your lower back or causing sharp, nagging pain in the front of your pelvis. It is a classic cycle. You sit more, your hips get tighter, you move less because of the pain, and the loop continues until you consciously break it.
Loosening these muscles requires more than just a quick pull on your leg. It takes consistent, targeted, and varied movement. If you only rely on one or two go-to stretches, your body eventually stops responding. Variety isn’t just about avoiding boredom; it’s about hitting the hip complex from different angles—rotation, extension, abduction—to ensure every fiber of that stiff tissue gets a signal to let go.
If you are dealing with chronic stiffness, do not rush. Stretching is not a contest to see how close you can get your face to your floor. It is about finding the point of tension and staying there until the muscle decides it is safe to relax. Start slowly, breathe through the discomfort, and pay attention to where your body resists. Here are twenty ways to unlock those hips and get back to moving freely.
1. Kneeling Hip Flexor Stretch
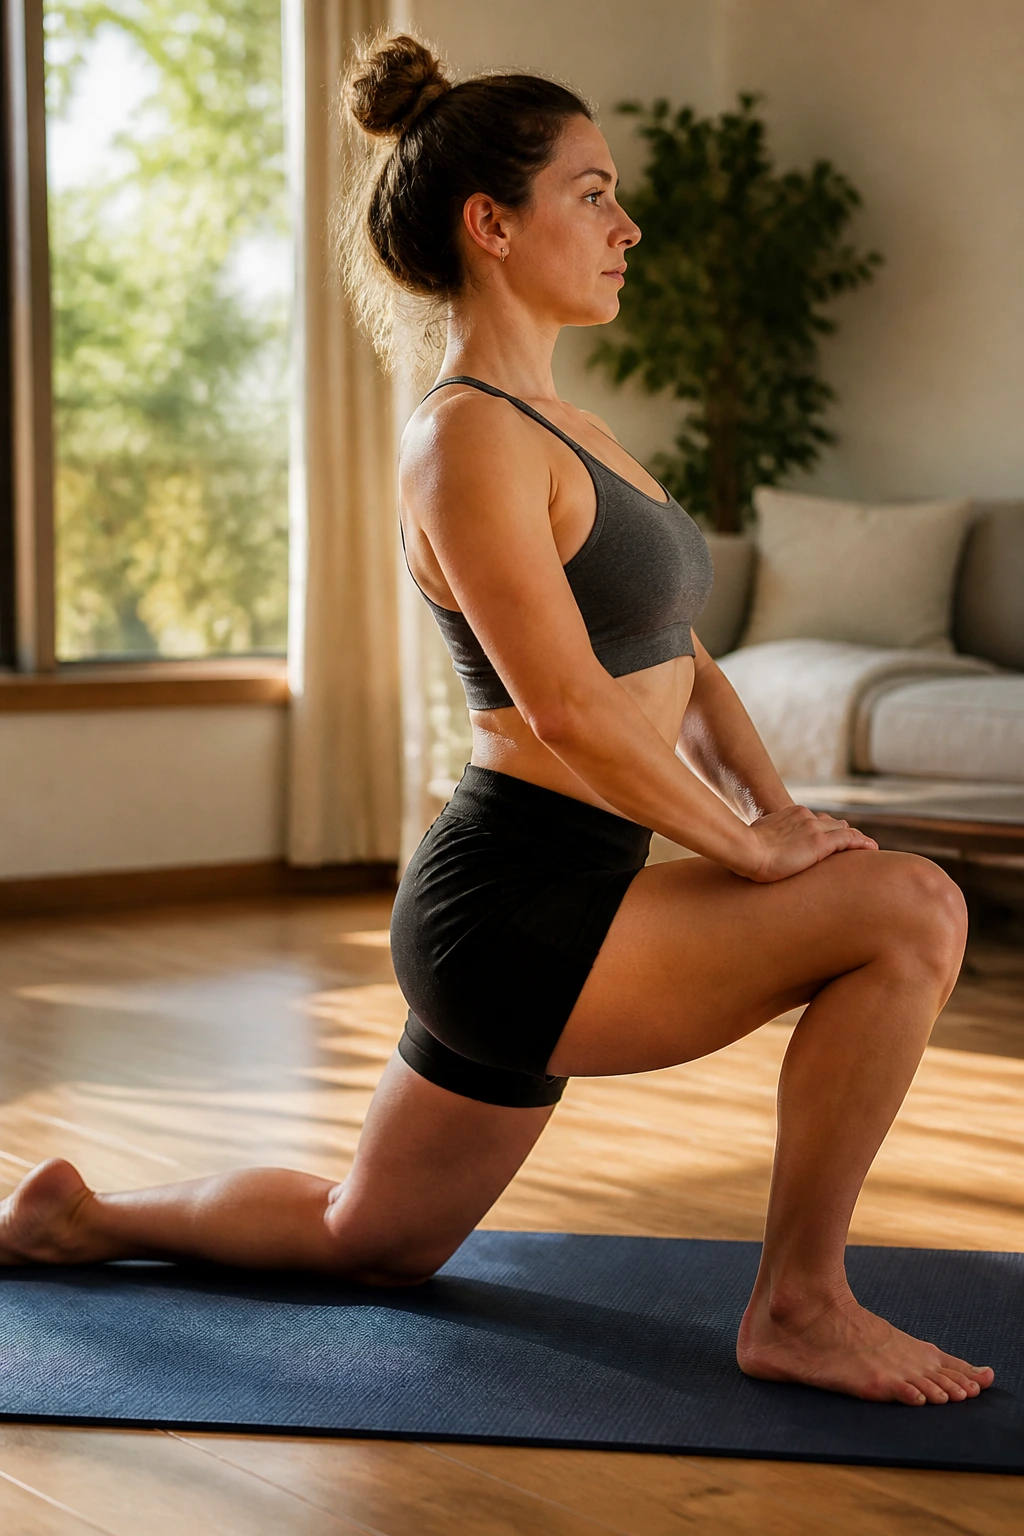
This is the gold standard for a reason. It targets the psoas directly by placing the hip in full extension. Kneel on one knee, placing your other foot flat on the floor in front of you, creating a ninety-degree angle with both legs. Keep your torso upright—do not lean forward yet—and tuck your tailbone underneath you.
Why It Works
Tucking your pelvis is the secret sauce here. If you arch your lower back, you bypass the hip flexor and strain the spine instead. The tuck forces the front of the hip to open. If you feel it deep in the groin, you are doing it right.
How to Get the Most From It
- Keep your glutes engaged on the kneeling leg.
- Squeeze that glute hard to inhibit the psoas, which helps it relax.
- Hold for at least sixty seconds per side for a genuine change in tissue length.
Pro tip: Imagine you are trying to push your back knee into the floor and forward at the same time without actually moving it.
2. Lunge with Overhead Reach
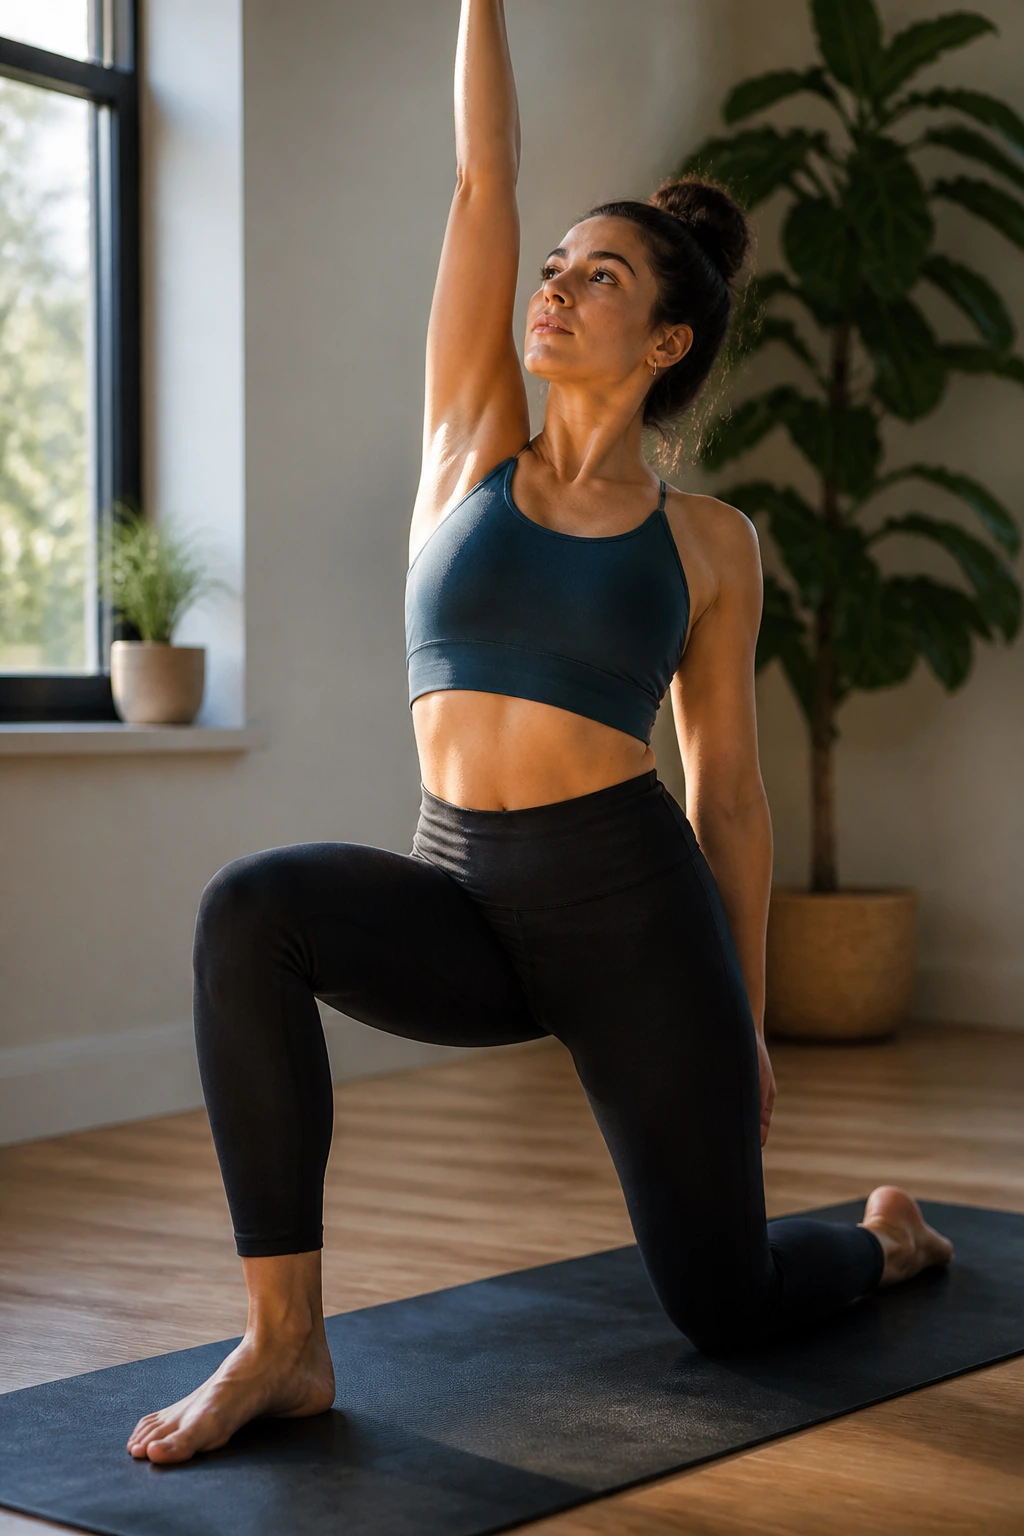
Once you master the basic kneeling lunge, you need to address the upper attachment point of your hip flexors. By adding an overhead reach, you pull the fascia from your ribcage down to your thigh. Start in the same kneeling position as the previous stretch. Reach the arm on the same side as your kneeling leg straight up toward the ceiling.
The Mechanism of Release
Your hip flexors connect to your lumbar spine. By stretching the side body, you take the tension off those spinal attachments. Lean slightly away from the side you are stretching to deepen the sensation. It should feel like a long, clean line of tension running from your ribcage down to your knee.
Important Cues
- Keep your shoulders down; do not shrug them toward your ears.
- Maintain that pelvic tuck mentioned earlier.
- If you feel pinching in the lower back, pull back. You should feel this in the soft tissues of the abs and the front of the hip, not the bones of the spine.
3. Pigeon Pose
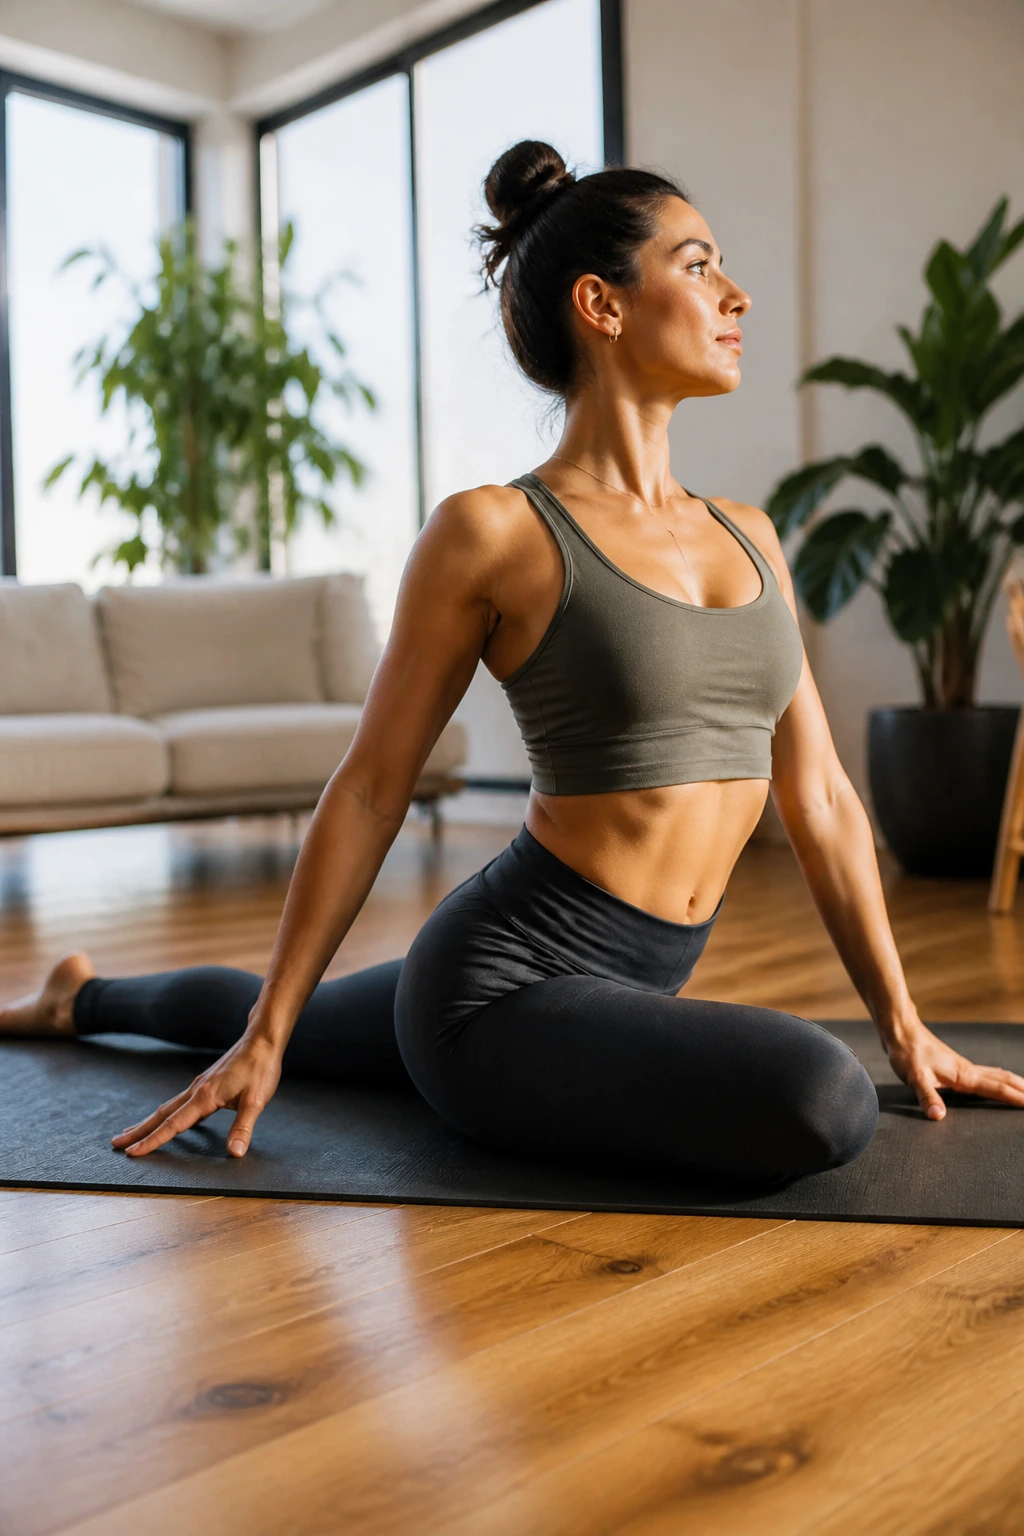
Pigeon is often marketed as a glute stretch, but it plays a crucial role in external hip rotation, which is vital for freeing up the surrounding flexor tissue. From a tabletop position, slide your right knee forward toward your right wrist. Extend your left leg straight back behind you. Lower your hips toward the floor.
Understanding the Geometry
Most people force their shin to be parallel to the front of their mat, which can be devastating for the knee. Let your foot come back toward your opposite hip if that feels better. The goal is hip release, not knee trauma. Use a folded blanket or a block under the glute of the bent leg if your hip is hovering far off the floor.
What to Watch For
- Ensure your hips stay squared to the front.
- Do not let yourself roll onto the side of your bent hip.
- Breathe into the tightness; the outer hip can be incredibly stubborn.
4. Lizard Pose
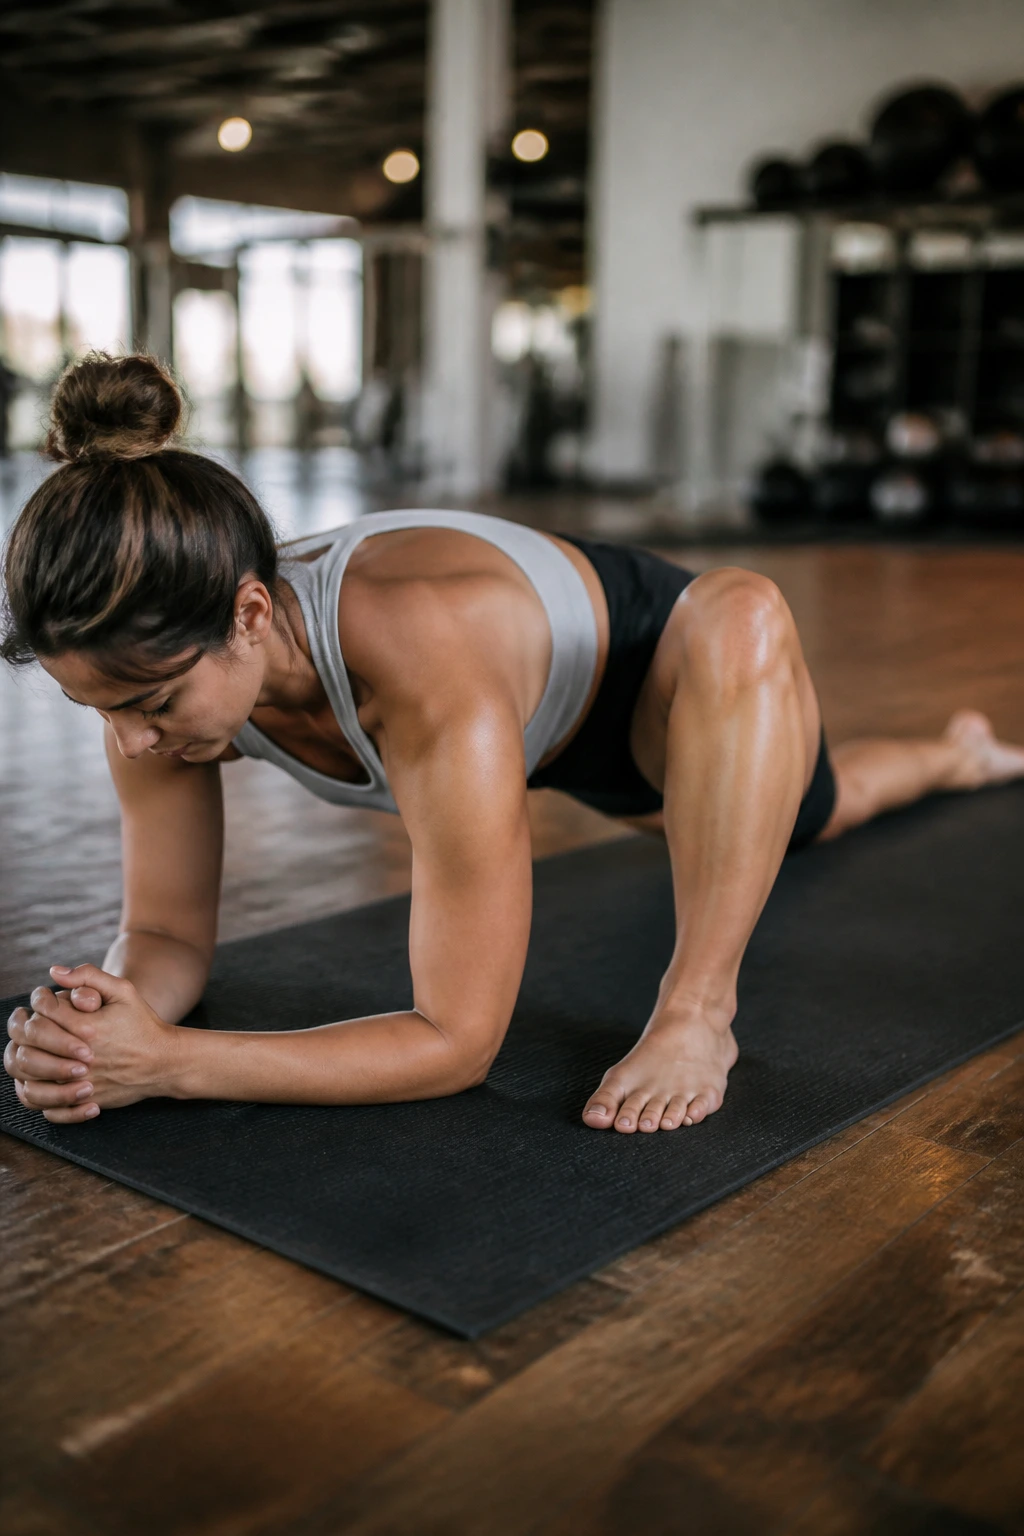
This is a deep, functional lunge that opens the hip joint while challenging your balance. Step your right foot to the outside of your right hand in a low lunge. Keep your back knee on the ground. If you have the mobility, lower down onto your forearms, keeping your back straight.
Why This Matters
It opens the groin and the deep hip capsule in a way that static stretches often miss. It is essentially an active, loaded stretch. You are not just hanging out; you are actively engaging the hip to sink deeper into the floor.
How to Get the Best Results
- Do not let the front knee collapse inward; keep it tracking over your second toe.
- If your back hurts, stay up on your palms instead of dropping to your forearms.
- Use this as a dynamic stretch, gently rocking forward and backward, rather than holding it completely still for the first thirty seconds.
5. Butterfly Stretch
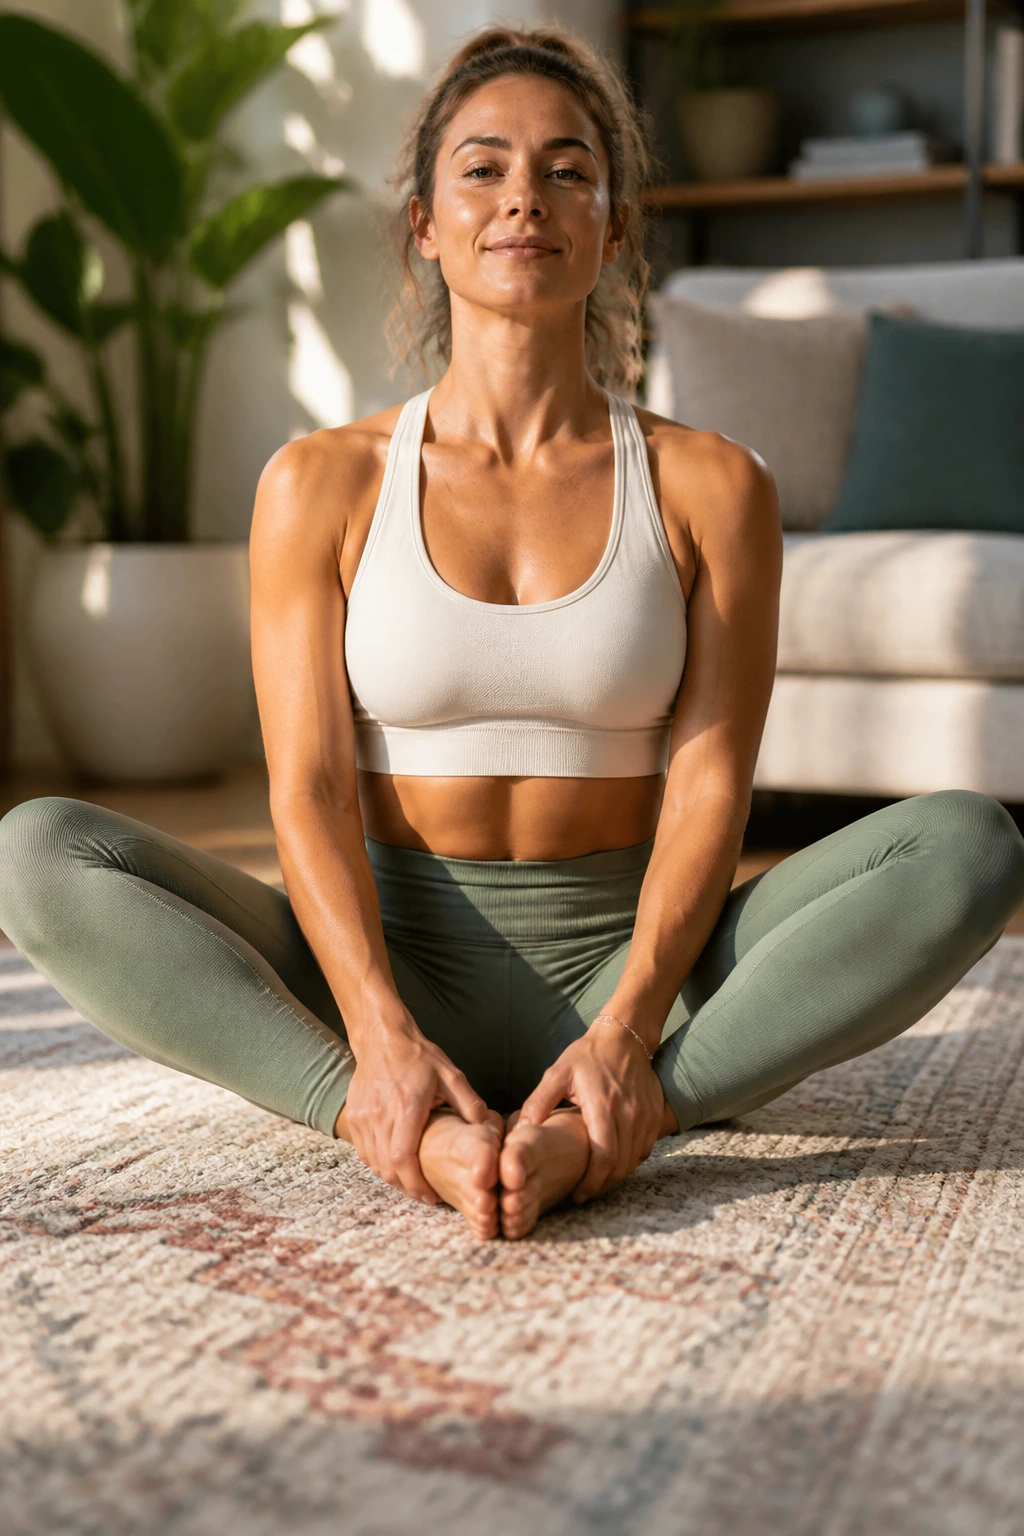
The classic butterfly is the go-to for opening the adductors, which often get tight alongside the hip flexors. Sit on the floor, bring the soles of your feet together, and let your knees fall open. Pull your heels toward your pelvis, but keep your back flat.
Finding the Edge
Avoid the urge to round your shoulders and hunt for your toes. The goal isn’t to touch your head to the floor; it is to lengthen the spine while opening the hips. If you hunch, you lose the leverage to open the adductors effectively.
Pro-Level Technique
- Hold your ankles and use your elbows to gently press the knees toward the floor.
- Keep your chest lifted.
- If your knees are high, sit on a yoga block or a thick book to elevate your pelvis; this simple adjustment makes the entire posture much more accessible.
6. Frog Pose
Warning: This one is intense. Start on your hands and knees. Slowly slide your knees apart as wide as possible. Keep your ankles in line with your knees, and turn your feet out. Lower yourself onto your forearms and press your hips back toward your heels.
The Sensation
You will feel this deeply in the inner thighs and the pelvic floor. It is one of the most effective ways to open the hips in the frontal plane. Because it hits the adductor magnus and gracilis muscles, it creates a lot of space for the hip joint to move more freely.
Managing Discomfort
- Do not force the width.
- If you feel sharp pain in the knees, come out immediately.
- Use a mat or a carpet to cushion the knees; this is not a pose for hard surfaces.
7. Glute Bridge
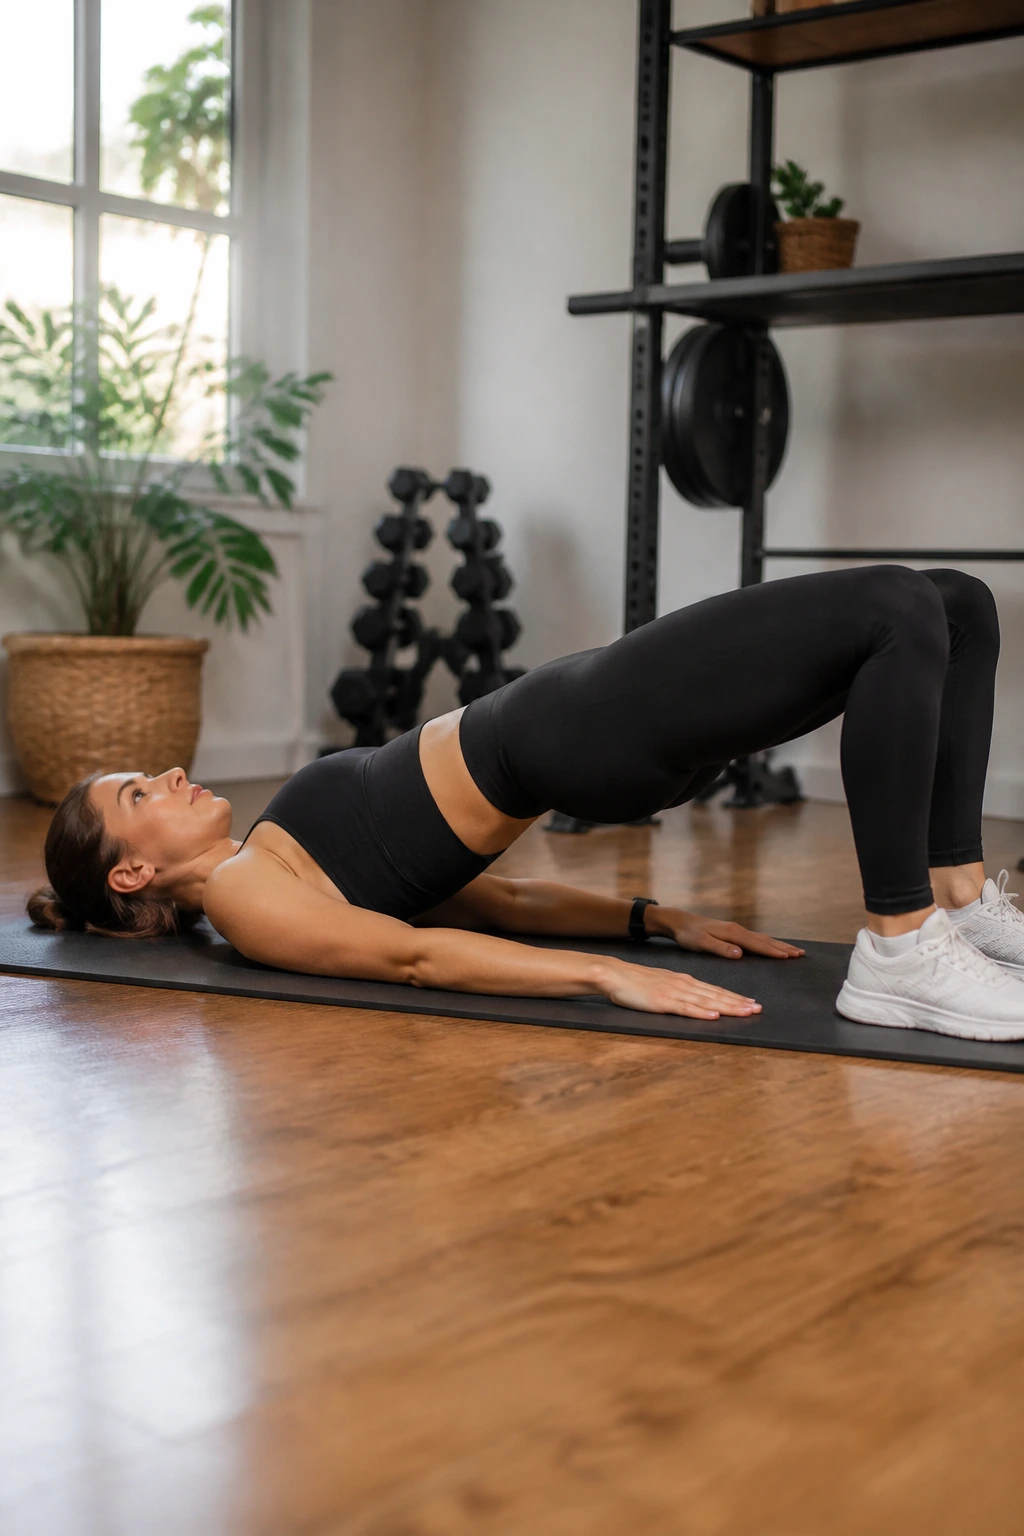
Wait, isn’t this a strength exercise? Yes, but it is also one of the best “release” mechanisms for tight hip flexors. Tightness is often caused by muscle imbalances where the glutes are “turned off” or weak. The hip flexors then have to work overtime to stabilize the pelvis.
The Logic of Activation
By firing the glutes, you send a neurological signal to the hip flexors to relax. This is called reciprocal inhibition. When the agonist (glute) contracts, the antagonist (hip flexor) is forced to let go. It is a biological override switch.
Execution Details
- Lie on your back, feet hip-width apart.
- Drive through your heels to lift your hips.
- Squeeze your glutes at the top as hard as you possibly can.
- Do not push your hips too high, or you will hyperextend your spine. A straight line from knees to shoulders is the target.
8. Standing Quad Stretch
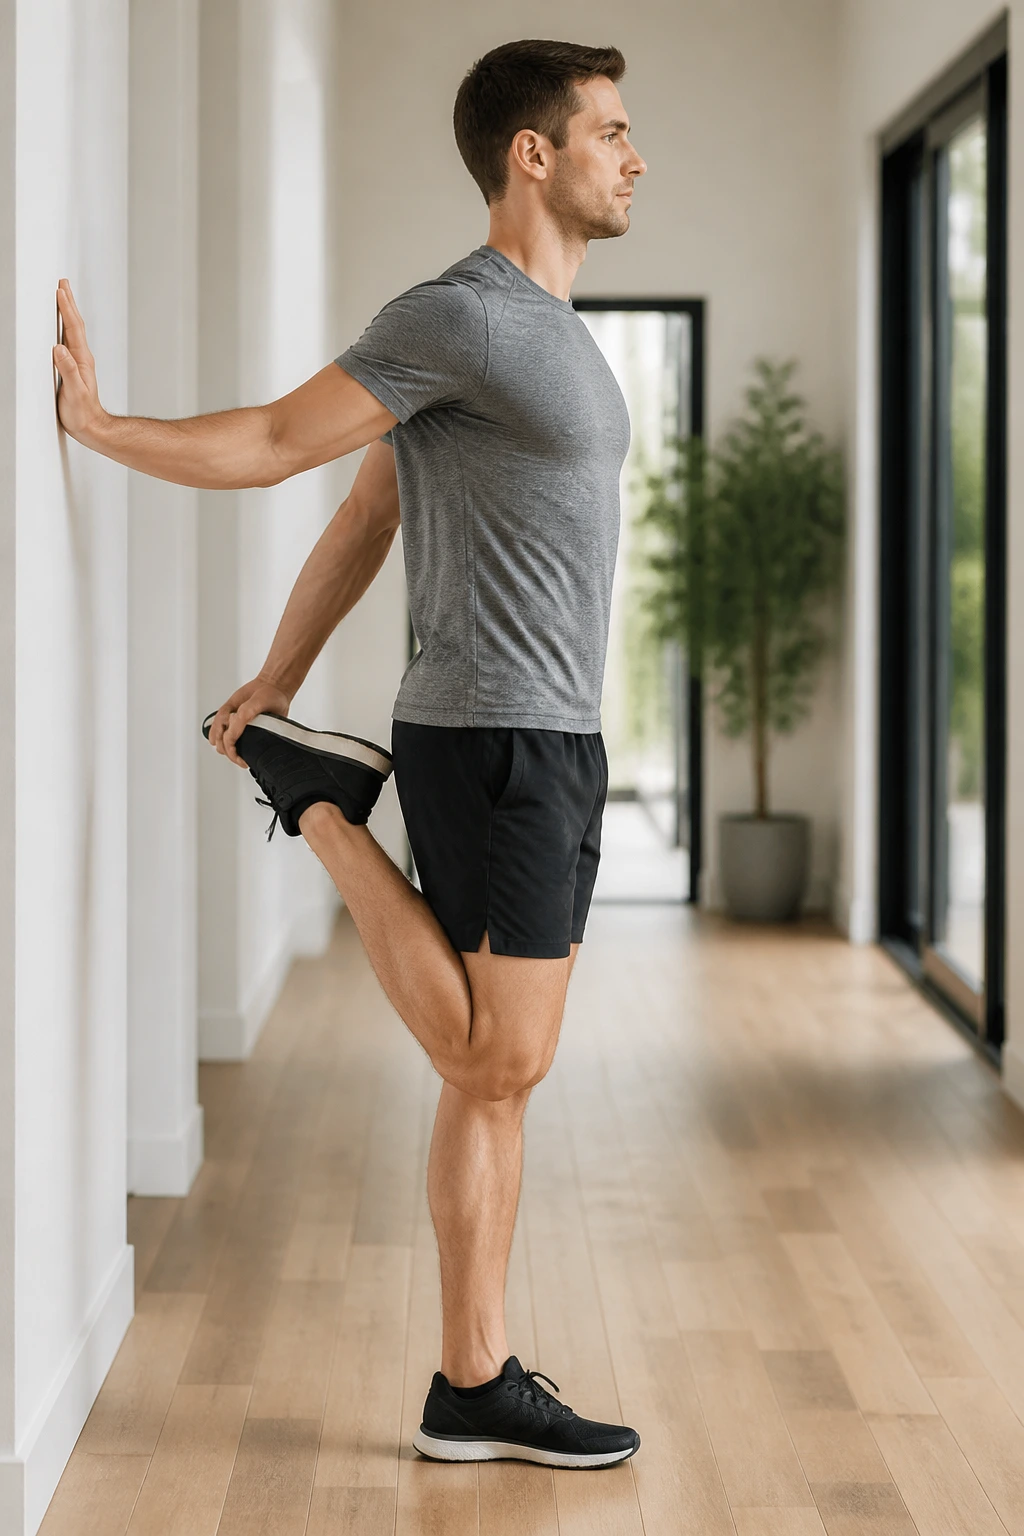
The rectus femoris, one of the four quadriceps muscles, crosses the hip joint. When it is tight, it acts like a giant rubber band pulling your pelvis into a tilt, contributing to the hip tightness you feel. Stand on one leg—hold onto a wall for balance if you need it—and grab your other ankle.
The Form Check
Most people make the mistake of letting the knee drift out to the side or forward. Keep your knees touching or very close together. Pull your heel toward your glute, but simultaneously drive your knee toward the floor.
Why This is Effective
It is a simple, no-equipment stretch you can do anywhere, even while waiting for your coffee to brew. Consistency is better than intensity here. A minute of consistent pulling every day will do more than five minutes of aggressive, shaky stretching once a week.
9. Wide-Stance Forward Fold
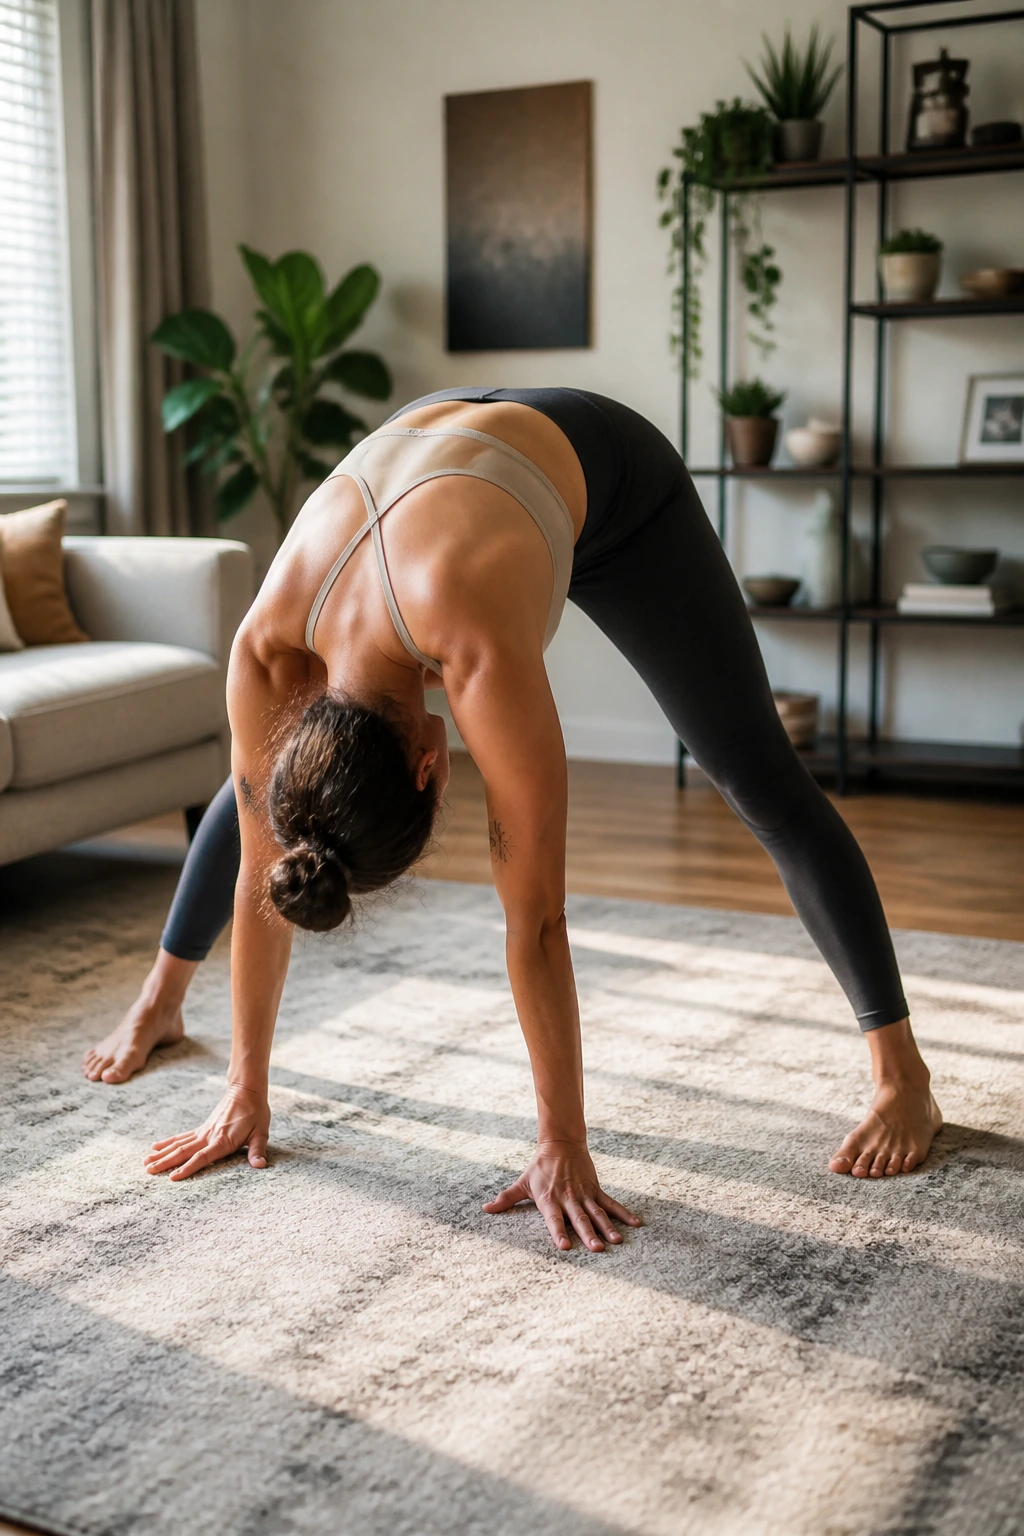
Standing with your feet significantly wider than hip-width, hinge at your hips and fold forward. Let your head hang heavy. This stretch targets the hamstrings and the connection point where the hamstrings meet the sit bones, which helps balance the forces pulling on your pelvis.
The Structural Benefit
When the back of your leg is tight, it pulls on the pelvis from the bottom, causing the hip flexors to compensate from the top. By loosening the back of the leg, you give the pelvis permission to return to a neutral position.
How to Do It Right
- Keep a micro-bend in your knees; locking them out just puts stress on the joint.
- Let your spine decompress.
- If you cannot reach the floor, grab opposite elbows and let your upper body weight pull you down.
10. Cossack Squats
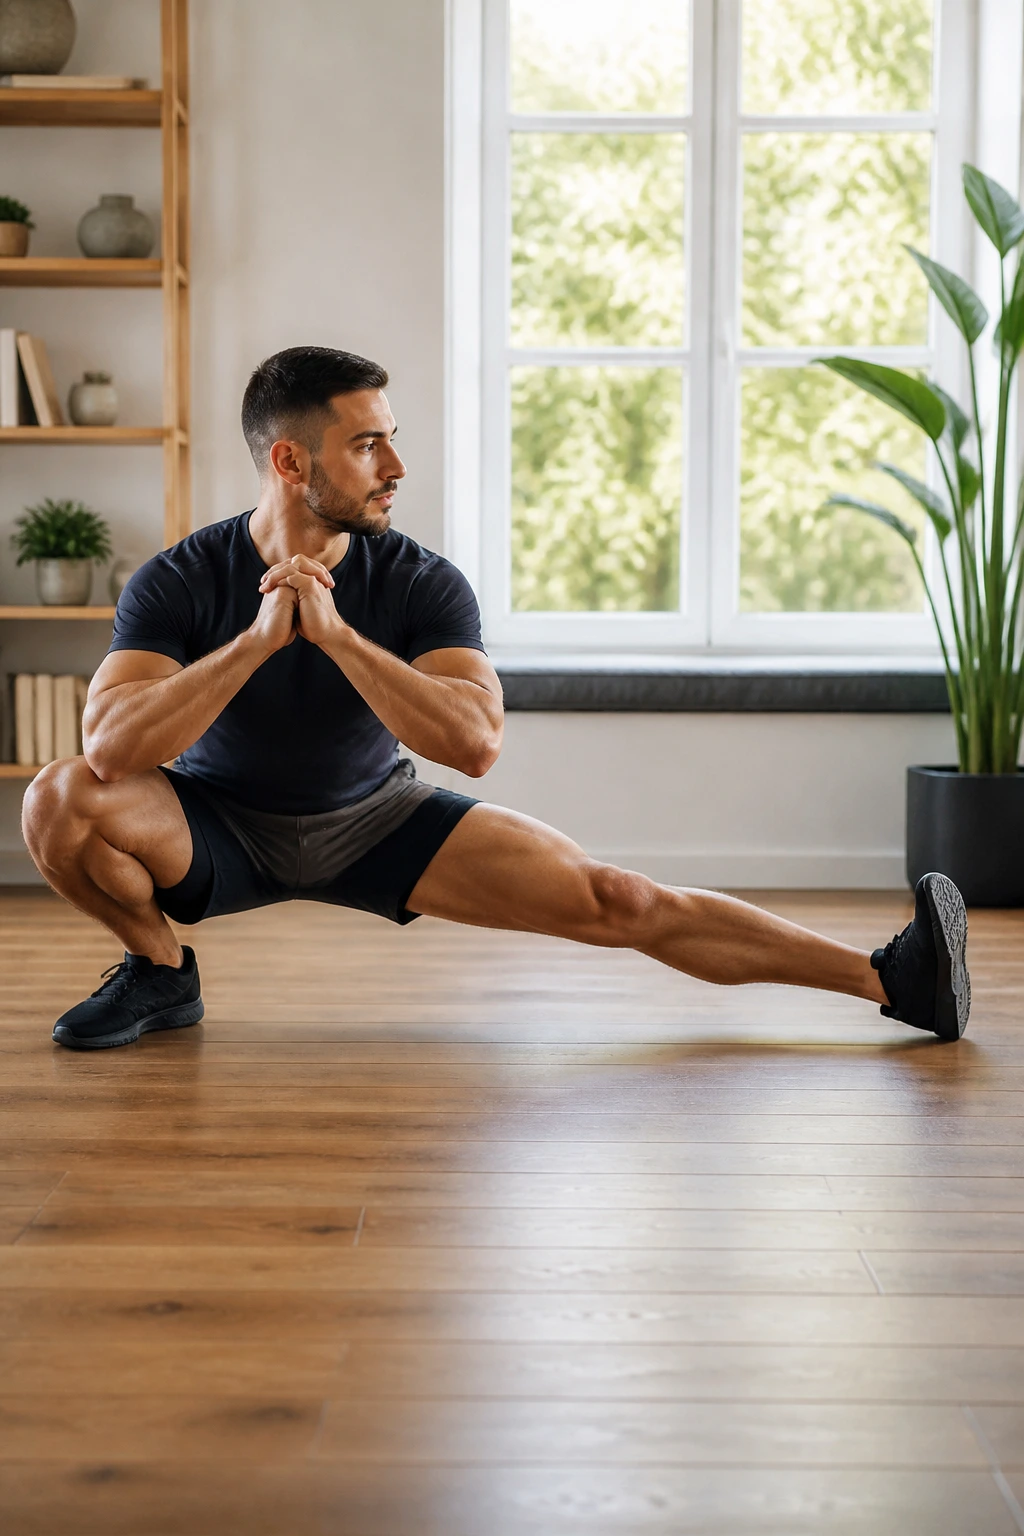
This is a dynamic mobility movement that tests and improves hip range of motion in the lateral plane. Start in a very wide stance. Shift your weight to your right side, bending your right knee and keeping your left leg straight. Try to keep your right heel on the floor.
Why Dynamic Beats Static
Movement allows you to explore the tension throughout the entire range of the joint. You aren’t just sitting in one spot; you are navigating the tightness. This helps the brain trust the range of motion, allowing the muscles to relax further.
Important Considerations
- If your heel comes off the ground, that is okay for now, but aim to keep it planted as you get stronger.
- Keep your chest tall.
- Move slowly. This is not a race; it is a search for where your hips catch.
11. Camel Pose
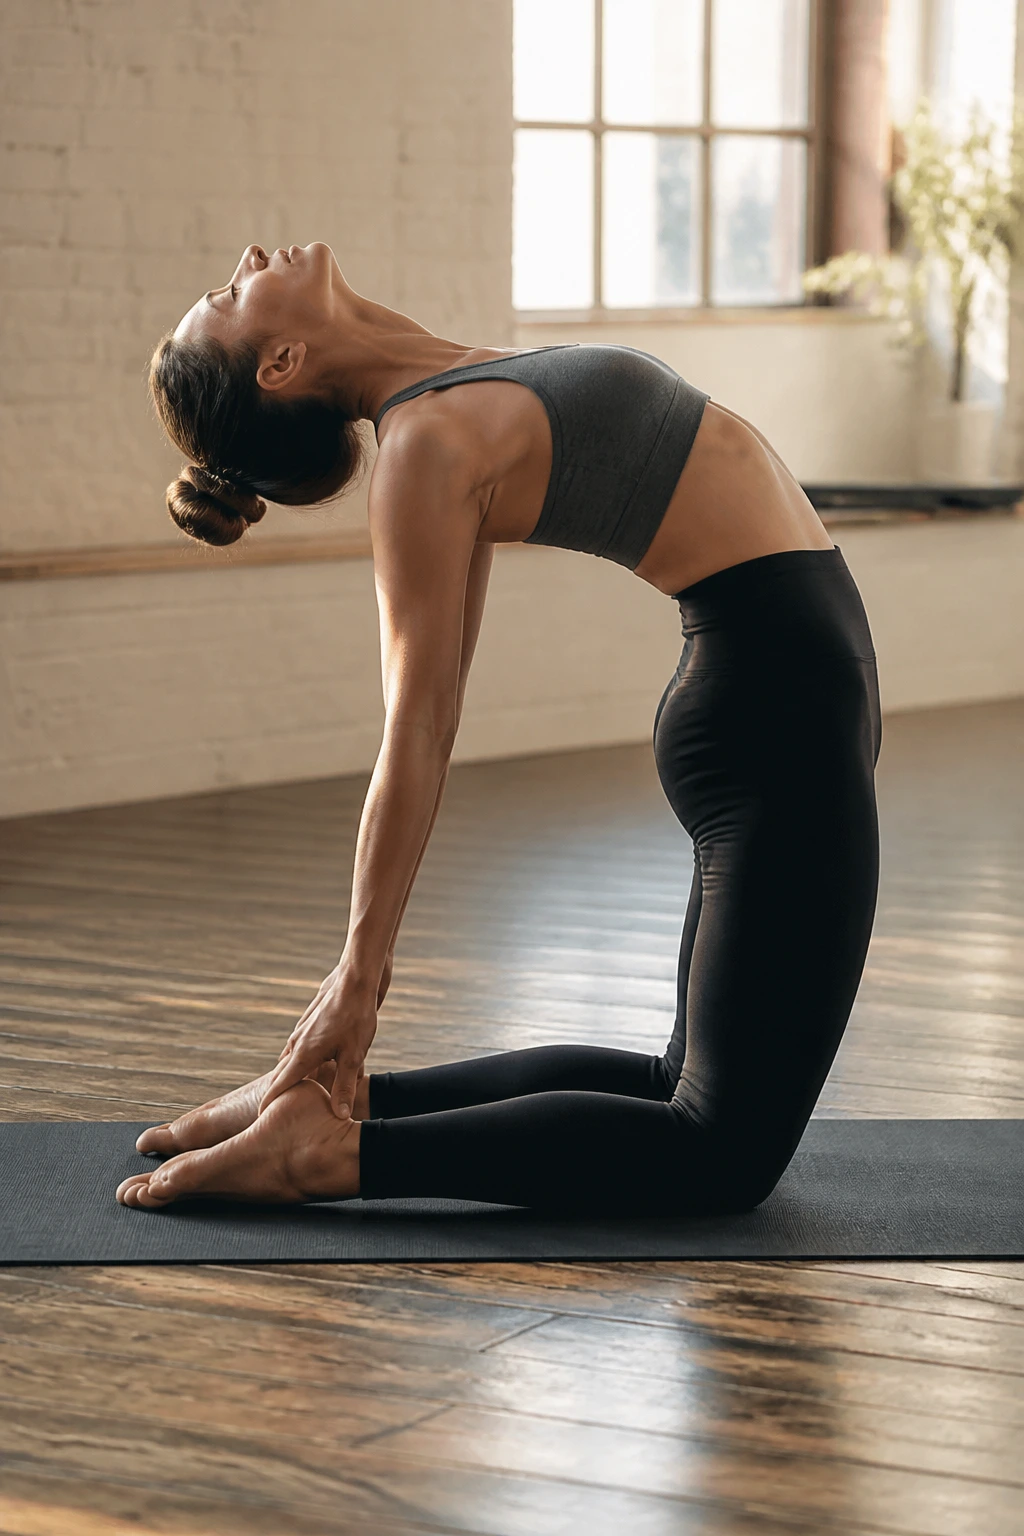
Camel is a deep backbend that forces the front of the hips into total extension. Kneel with your shins on the floor. Reach back and grab your heels. Push your hips forward and drop your head back, opening your chest and your hip flexors simultaneously.
The Difficulty Factor
This is an advanced stretch. Do not attempt this if you have a history of spinal injury without clearance from a professional. For most, start by tucking your toes under to bring your heels closer to your hands.
Safety Cues
- Engage your glutes and core to protect your lumbar spine.
- Imagine lengthening your spine before you bend backward.
- If reaching for your heels feels like a bridge too far, place your hands on your lower back and lean back gently, focusing on pushing the hips forward.
12. Gate Pose
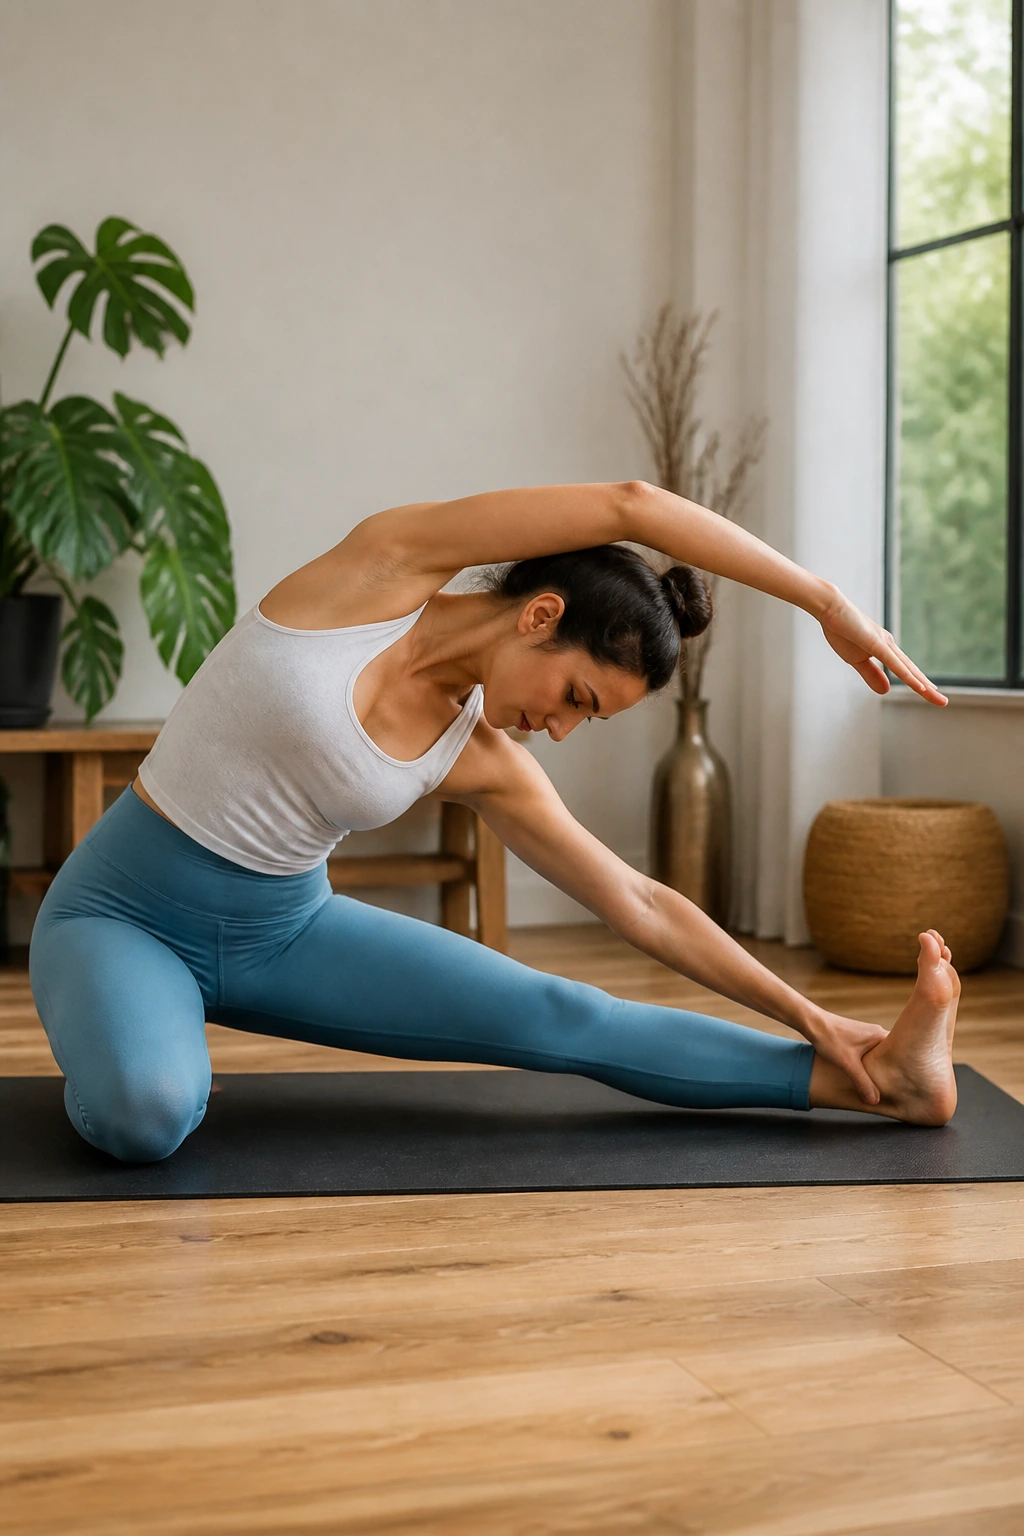
Gate pose is a lateral opening stretch that hits the hips from an angle we rarely explore. Kneel on one knee and extend the other leg out to the side, foot flat. Reach your arm over your head toward the extended foot.
The Result
You get a massive stretch through the side of the torso and the inner thigh of the extended leg. This is particularly effective for people who feel tight “all over” and don’t know exactly which muscle to target. It clears out the tension in the oblique and hip complex simultaneously.
Practical Application
- Keep your hips pushed forward; do not let your butt stick out behind you.
- Imagine you are stuck between two panes of glass; stay in one plane.
- If you cannot reach your foot, just reach toward your shin. The goal is the stretch, not the touch.
13. Reclining Hand-to-Big-Toe Stretch
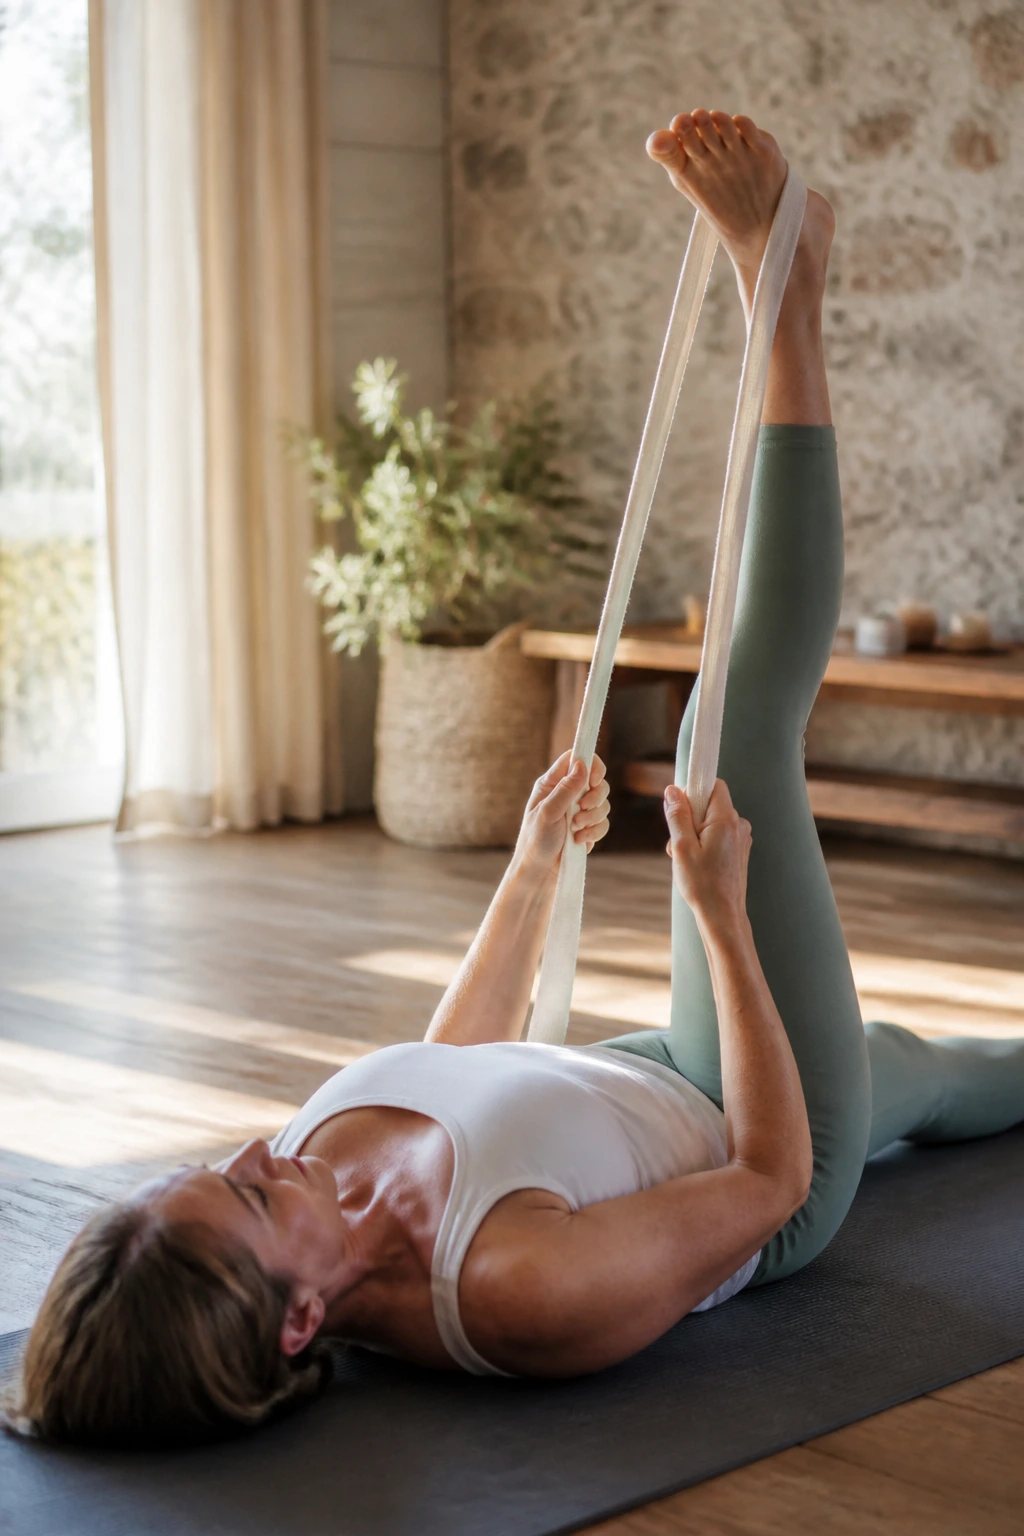
This is the ultimate low-back-friendly hip opener. Lie on your back, take a strap, belt, or towel, and loop it around the ball of your foot. Extend that leg toward the ceiling, keeping it as straight as possible.
Why It’s Superior
Because you are lying on the floor, your spine is fully supported, allowing your nervous system to fully relax. If your nervous system is in “fight or flight” because you are fighting for balance, the muscles will never let go.
Fine-Tuning the Stretch
- Keep your other leg flat on the floor, toes pointed toward the ceiling.
- You can bring the strapped leg out to the side for an inner-thigh stretch or across your body for an outer-hip stretch.
- Do not yank. Use the strap to provide gentle, sustained tension.
14. Half-Split (Hanumanasana Prep)
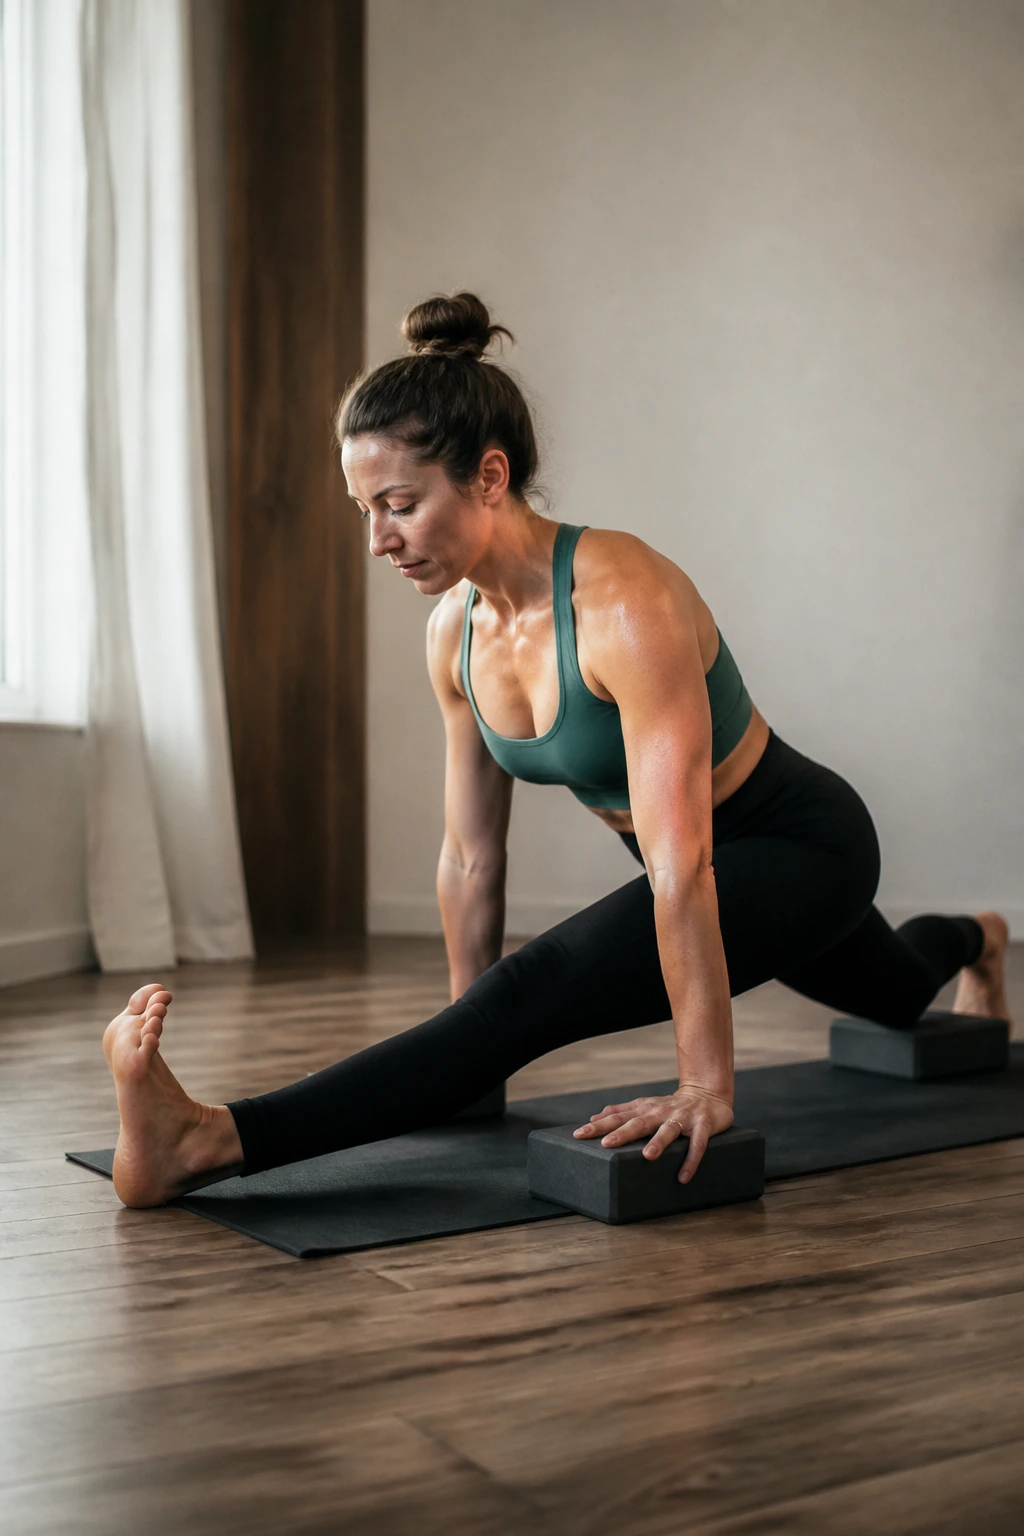
From a low lunge, shift your hips backward, straightening your front leg and flexing your toes toward your face. This is the Half-Split. It lengthens the hamstring and the hip, creating a powerful release for the pelvic area.
Balancing the Tension
Most people focus on the front of the hip and ignore the back. But the pelvis is a two-way street. If the front is tight, the back is likely compensating. This pose attacks both, providing a balanced, comprehensive release.
Tips for Success
- Keep your hips squared; do not let your front hip pull forward.
- Keep your back flat. Hunching over will just strain your neck.
- Use yoga blocks under your hands if the floor feels miles away.
15. Cow Face Pose
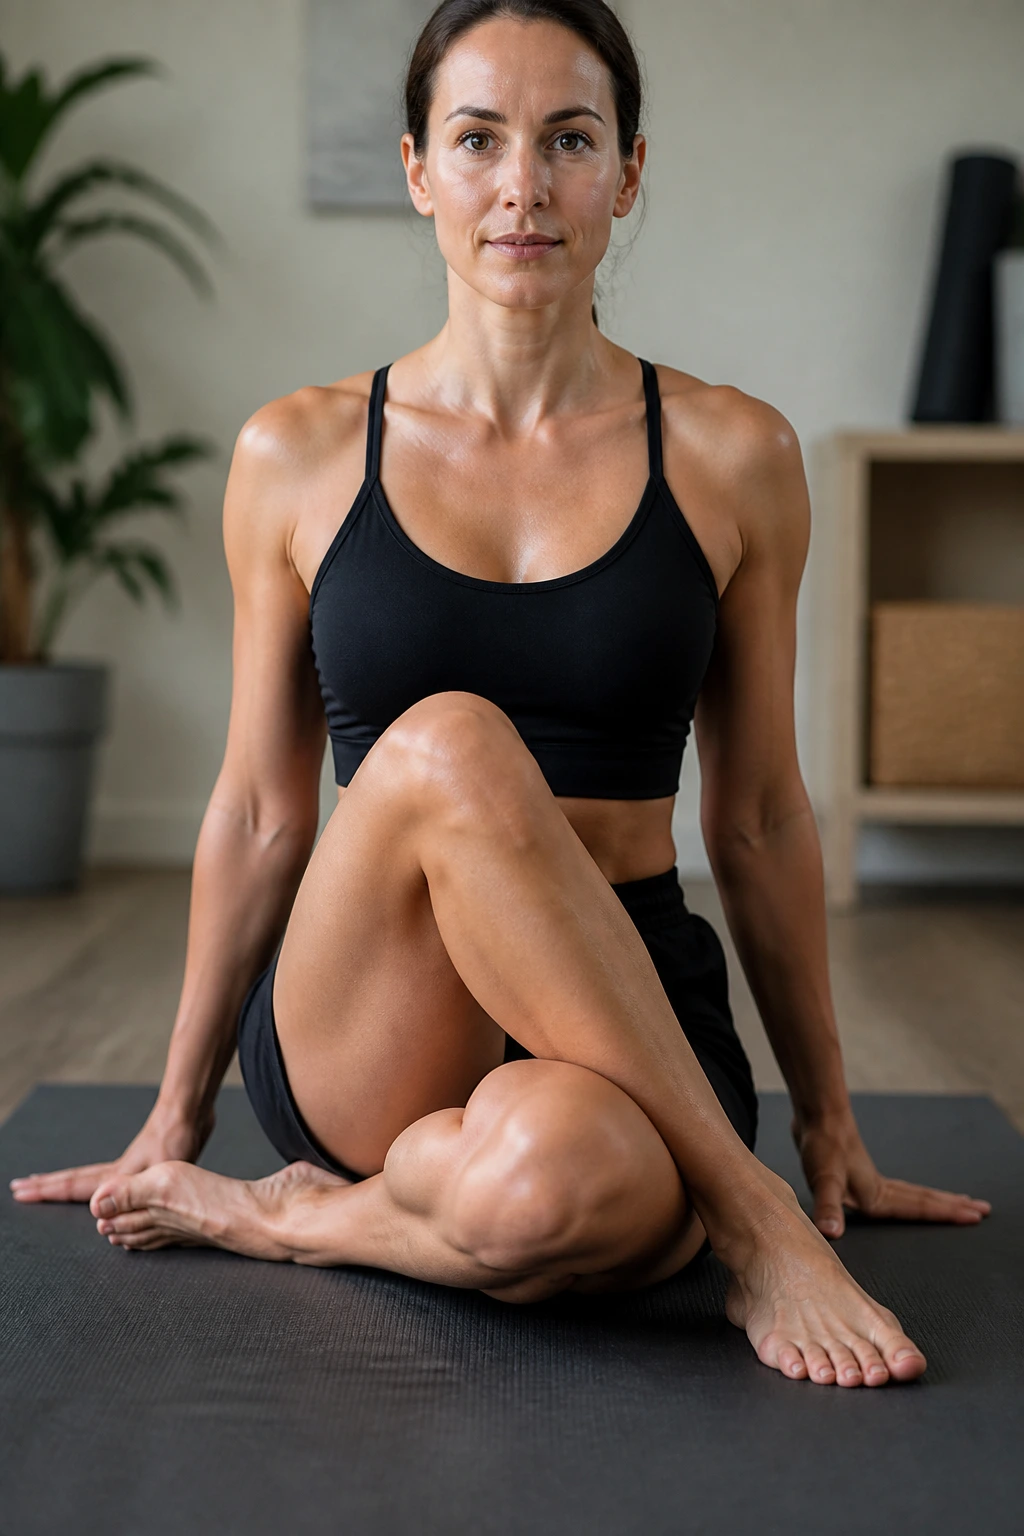
This pose is often associated with the shoulders, but the legs are the real workhorse here. Sit on the floor and cross your right knee over your left, stacking your knees on top of each other. Pull your feet toward your hips.
The Hip Connection
This pose creates intense external rotation and stretches the glutes and the outer hips. It is the perfect antidote for the stiffness caused by hours of chair-sitting.
Navigating the Position
- If this is impossible, sit on a blanket or block.
- Keep both sit-bones on the floor.
- If you feel sharp pain in the knee, untwist slightly. This should be a hip stretch, not a joint-torque exercise.
16. Supported Bridge
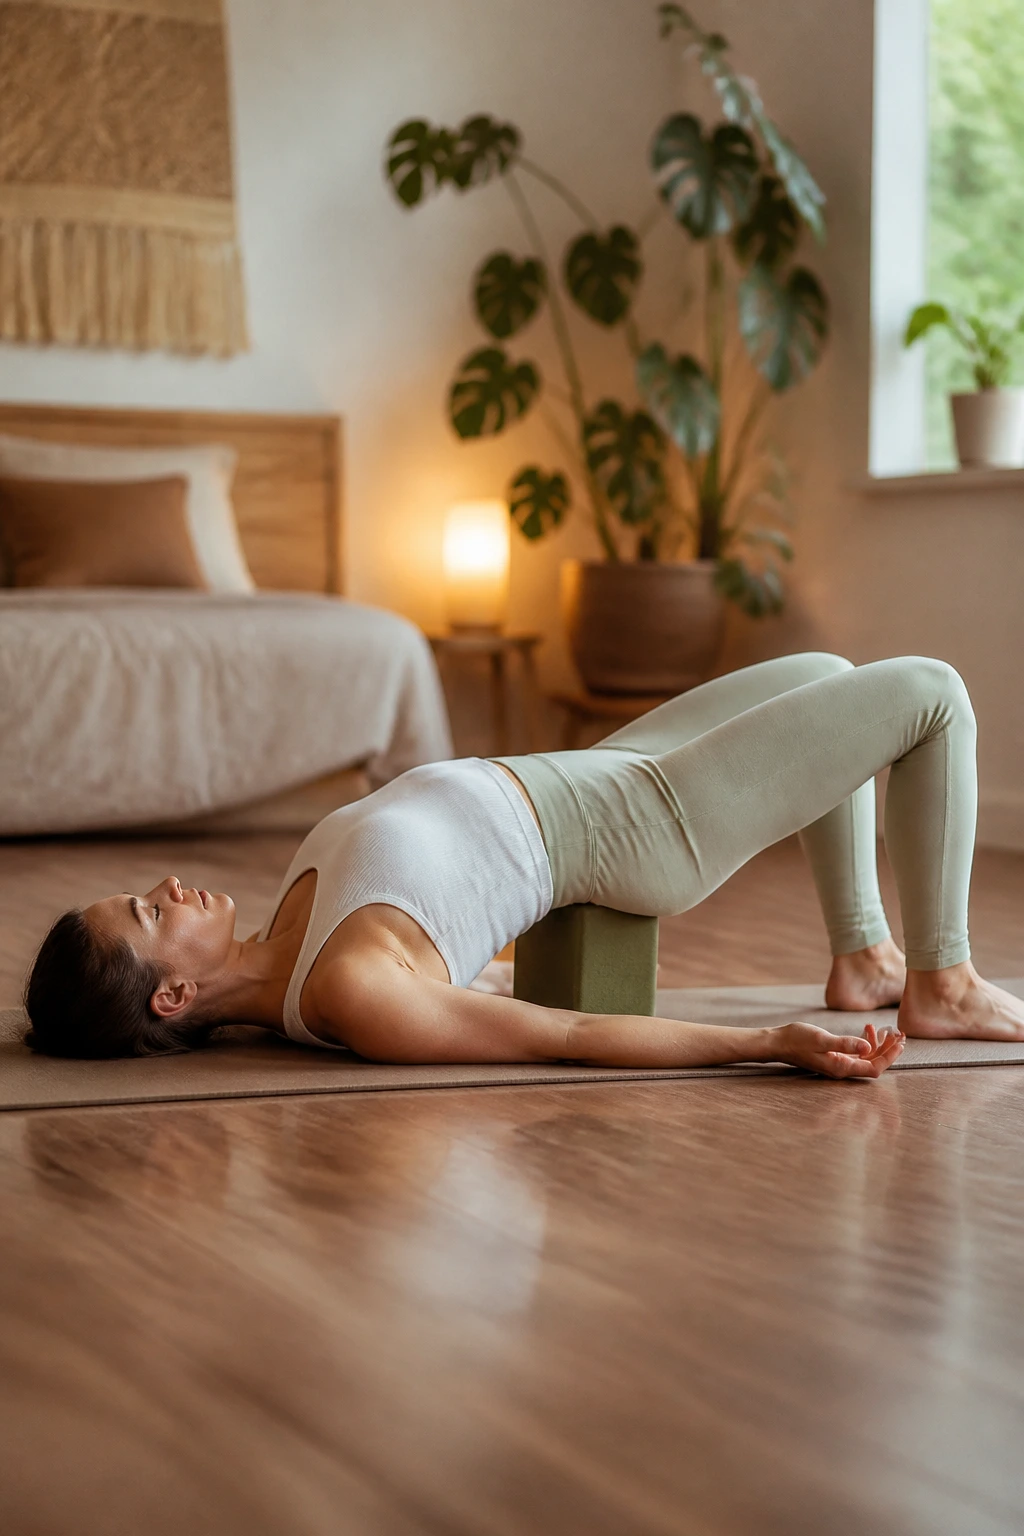
This is a passive release technique. Lie on your back, knees bent, feet flat. Lift your hips and slide a yoga block or a thick book under your sacrum (the flat bone at the base of your spine). Let your hips rest on the block.
The Passive Benefit
You do not have to hold the position. Gravity does the work. When you don’t have to engage muscles to hold a pose, your body can sink much deeper into the release.
Usage Guidance
- Stay here for three to five minutes.
- Let your lower back sink into the support.
- If you feel comfortable, you can even extend one leg straight out at a time, which will increase the stretch on the hip flexor of the extended leg.
17. Sumo Squat Hold
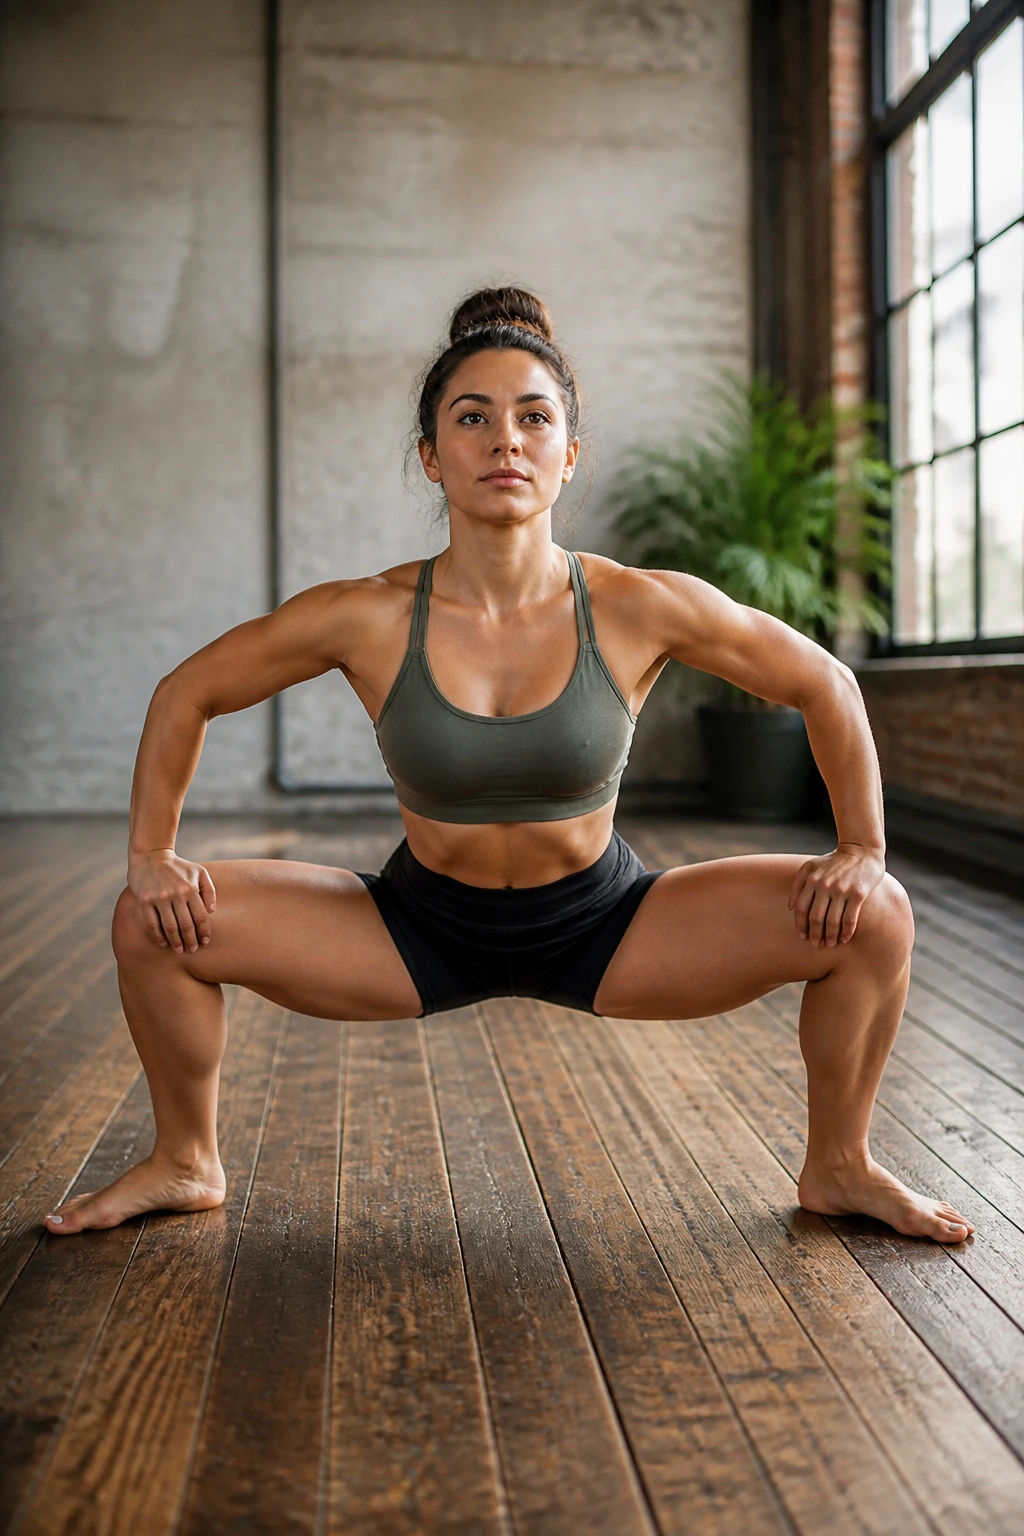
Stand with your feet wider than your shoulders, toes pointed out. Drop into a squat, keeping your chest tall and your knees tracking over your toes. Use your elbows to push your knees outward.
Active Mobility
This builds strength while simultaneously stretching the hips. The more you “work” the stretch by driving your knees out with your elbows, the faster the muscles seem to yield. It is about creating space through active resistance.
How to Master It
- Keep your weight in your heels.
- If you fall backward, put a small weight under your heels or hold onto a sturdy object in front of you.
- Hold this for 30 seconds at a time; it’s deceptively exhausting.
18. Twisted Lunge
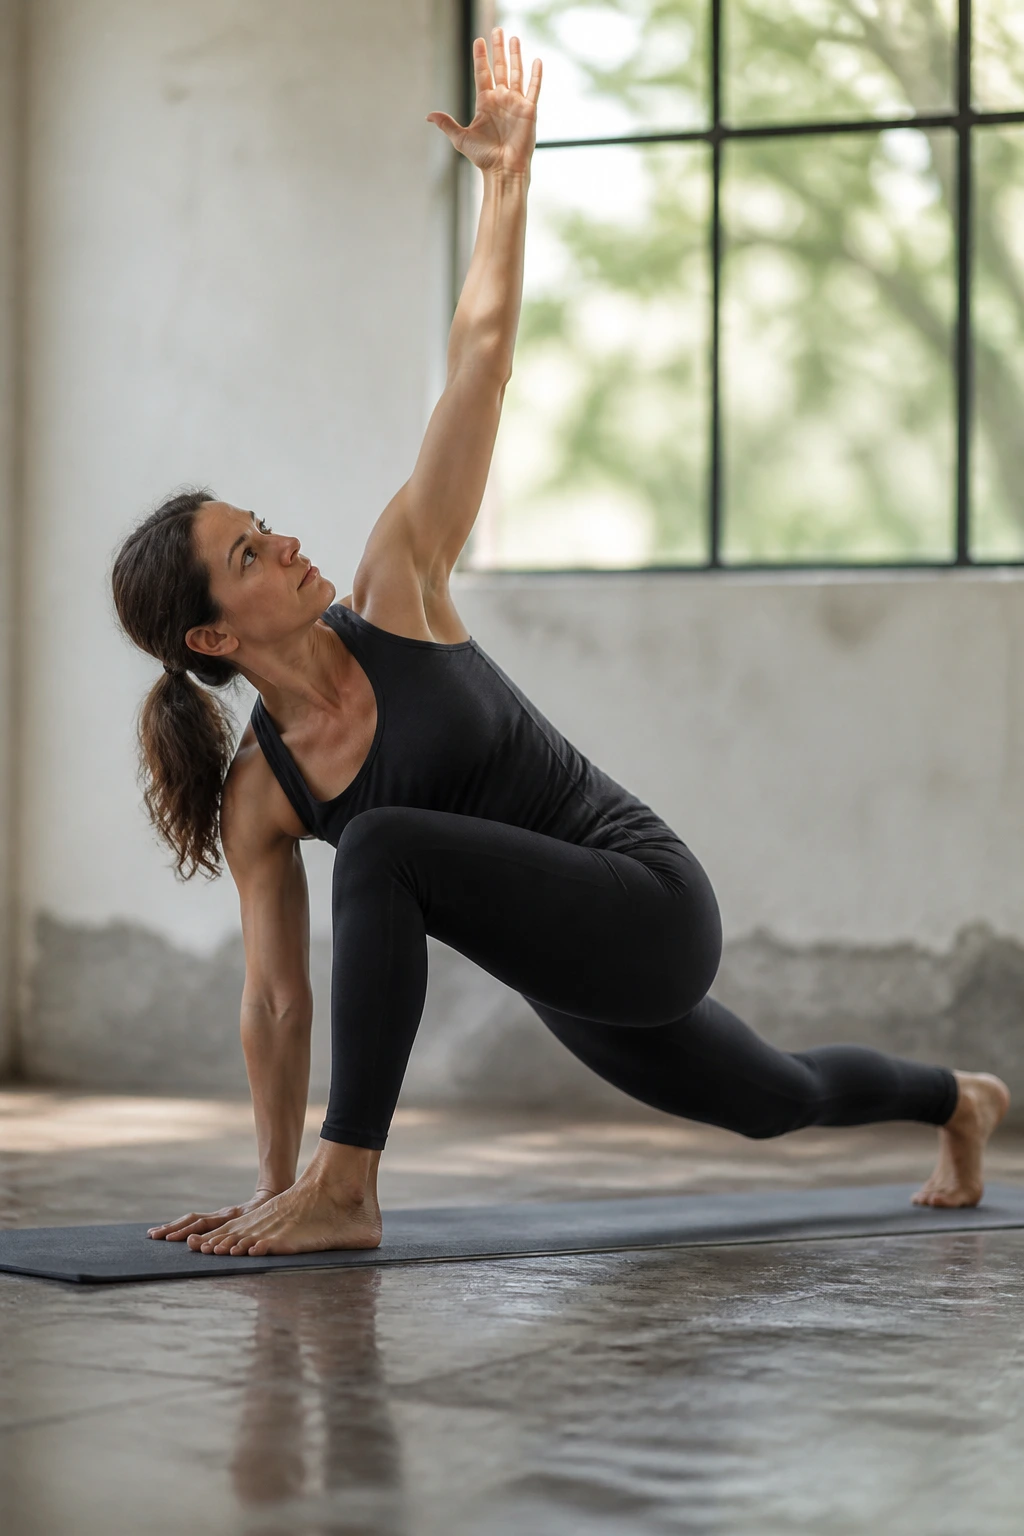
From a standard low lunge, place your hand on the floor and rotate your torso toward your front bent knee. Reach your other arm to the sky. This adds a rotational component to the hip stretch.
Why Rotation Helps
Hip flexors are complex, multi-joint muscles. Sometimes they get stuck not because they are short, but because they have lost the ability to move in three dimensions. Adding a twist ensures you hit the fibers that run diagonally, not just the ones that run straight up and down.
Key Details
- Look up toward your top hand to deepen the rotation.
- Keep your back leg strong.
- If you can’t reach the floor, place your hand on a block.
19. Child’s Pose with Wide Knees
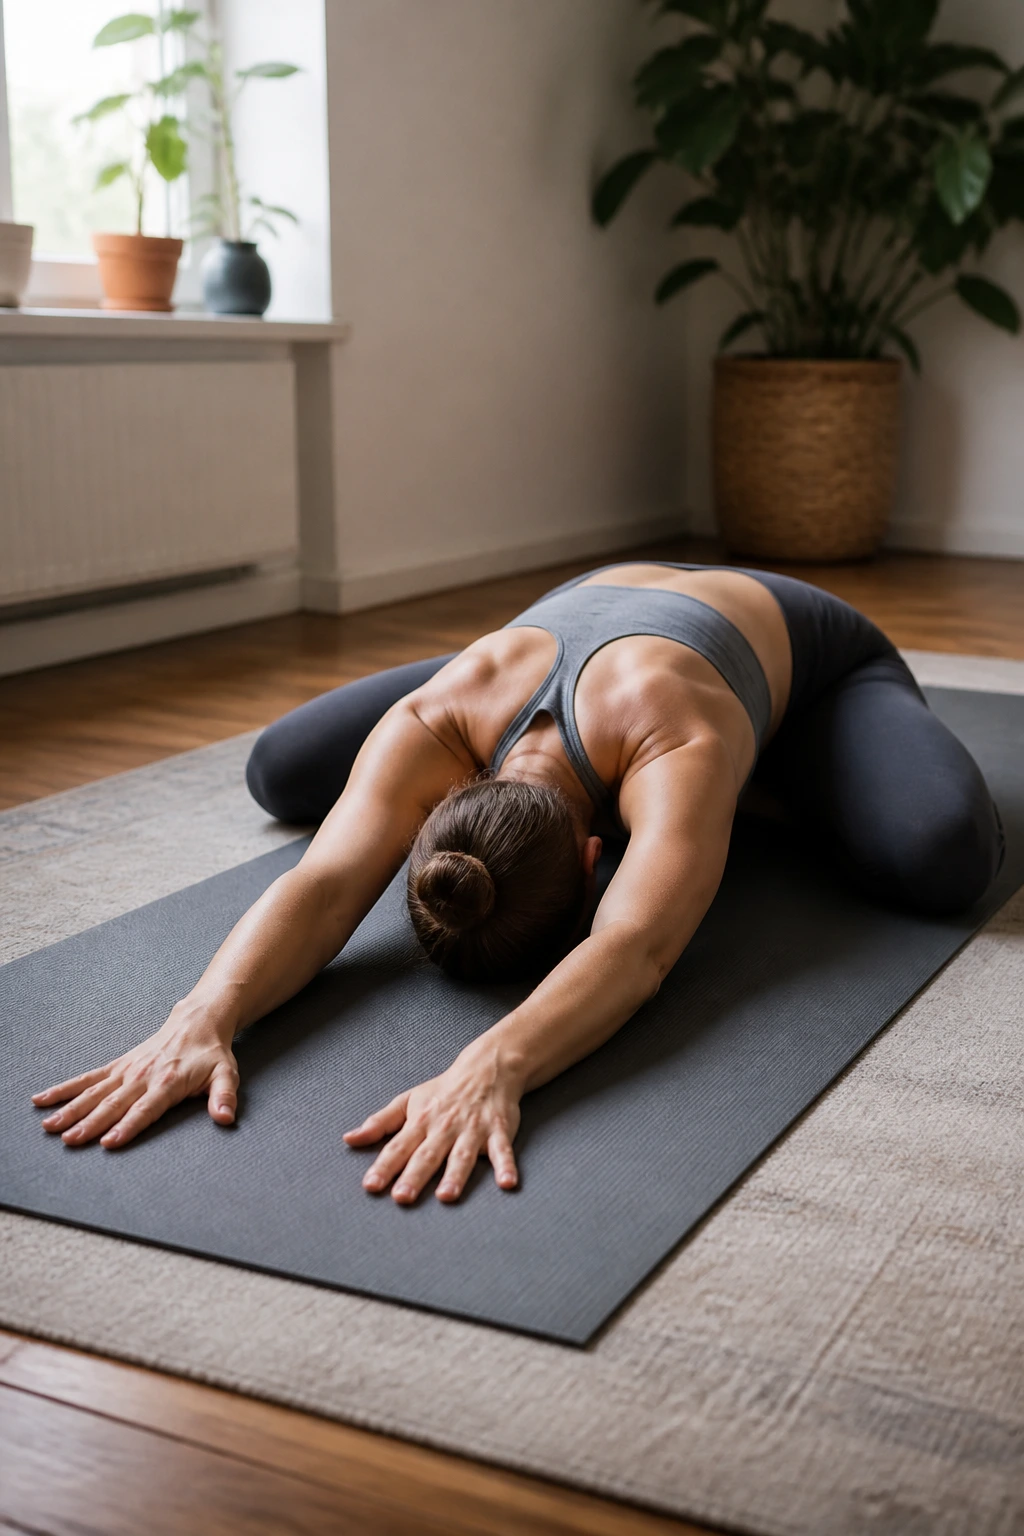
Sometimes, the best way to release a muscle is to stop bothering it. Child’s pose is the ultimate restorative position. Kneel on the floor, bring your big toes to touch, and spread your knees wide. Sink your hips back toward your heels and reach your arms forward.
The Mental Release
Physical tension is often a mirror for mental tension. If you are aggressive and angry while stretching, your muscles will lock up in defense. Child’s pose forces you to let go, breathe, and surrender.
Variations
- If your shoulders are tired, bring your arms back alongside your body.
- If you want a deeper hip opening, focus on pressing your pelvis down toward your heels with every exhale.
20. Sleeping Swan
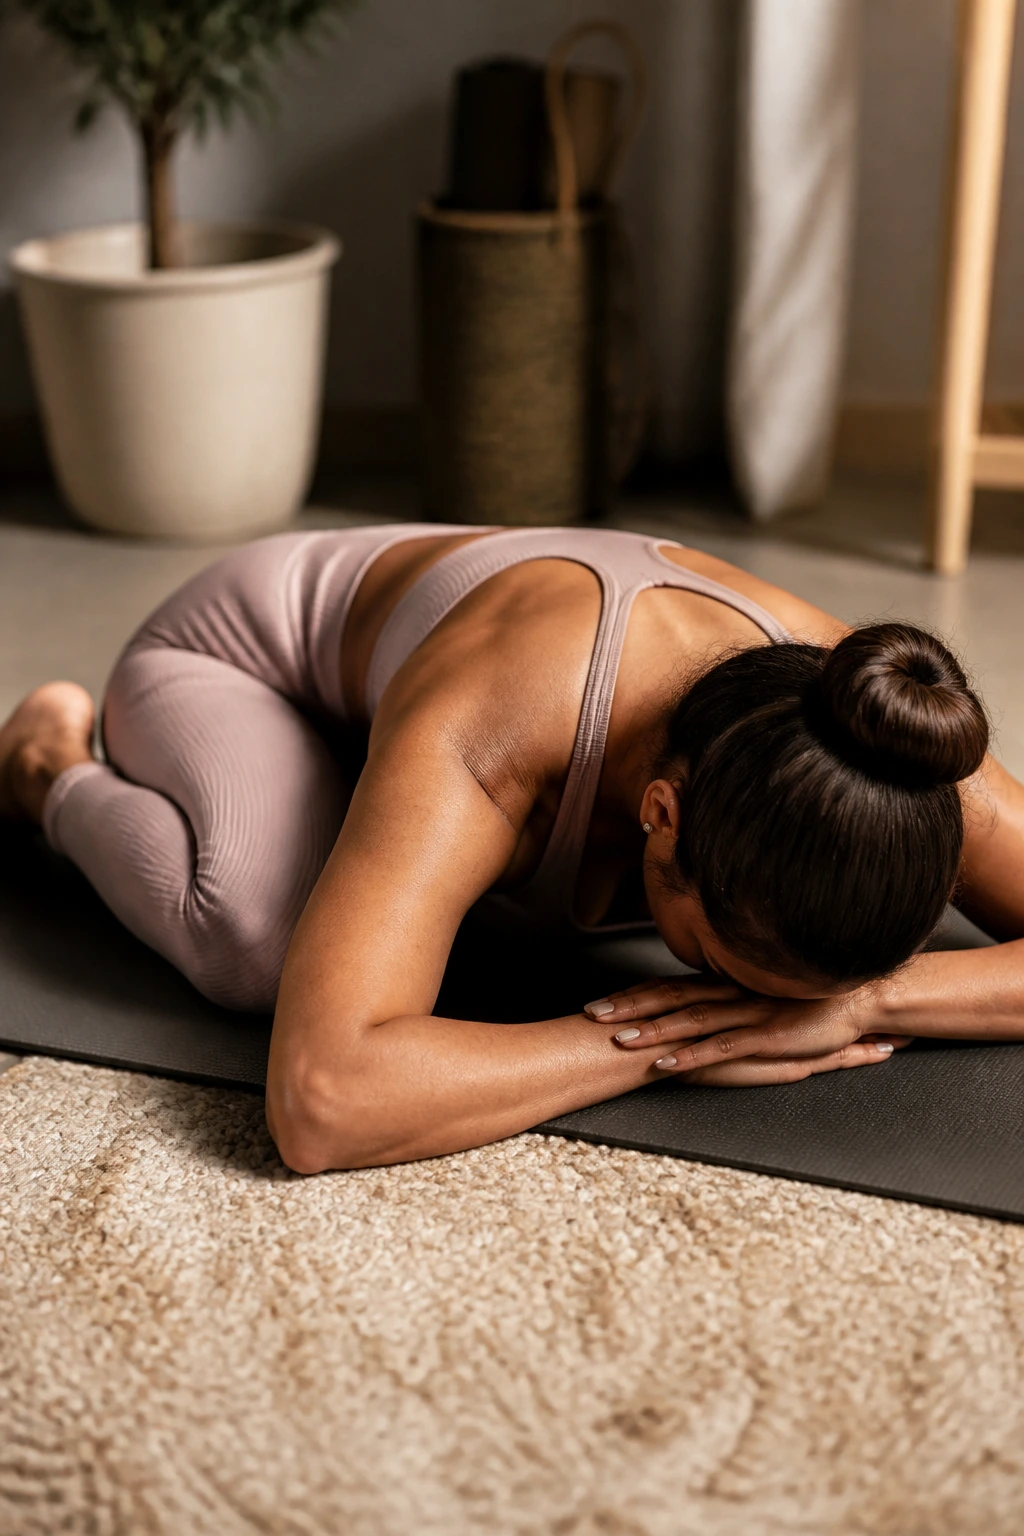
This is a variation of the Pigeon pose that allows for a more relaxed, sustained hold. From the Pigeon position, instead of staying upright, fold your upper body over your front leg. Rest your forehead on your hands or the floor.
Finding the Deep Release
By folding forward, you change the angle of the stretch on the glute and the hip rotators. It feels less like a performance and more like an invitation for the hip to open.
Important Reminders
- You do not need to be on the floor. Use a pillow if you cannot get low.
- Focus on relaxing the jaw and the face; tension in the face often correlates to tension in the pelvis.
- Breathe deep into the belly.
Final Thoughts
Consistency beats intensity every single time when it comes to hip mobility. You could spend one hour on a Sunday grinding through every stretch on this list and see very little progress. However, if you pick three or four of these and perform them for ten minutes every evening while watching television or listening to a podcast, you will see real changes within a few weeks.
Your hips did not get tight overnight, and they won’t get loose overnight either. Think of this as a long-term maintenance project for your body. The goal is to reach a point where your pelvis feels like a stable, mobile base rather than a rusted hinge. Start today, keep your movements slow and deliberate, and give your body the time it needs to finally unwind.
