



If your core only wakes up when you lie flat and do crunches, yoga will expose that fast. Yoga workouts for a stronger core rely on slow transitions, steady breathing, and the awkward little moments where you want to dump into your lower back or let your ribs flare wide.
That is the whole point. Real core strength is not a neat six-pack performance. It is the ability to hold your trunk steady while your arms, legs, and breath keep moving. The deep abdominal wall, obliques, pelvic floor, and spinal stabilizers all have to do their jobs at once, and yoga is one of the few training styles that asks for that kind of control without turning the whole thing into a gym-floor punishment session.
The best part is that you do not need fancy gear. A mat, some floor space, and enough patience to move slowly are enough. If a pose feels “easy,” the answer is usually not to make it prettier. It is to make it stricter: lower the knee, lengthen the exhale, pause for two breaths, or stop letting one hip drift out of line.
Start on your forearms. That’s where the real work begins.
1. Forearm Plank Knee Drives
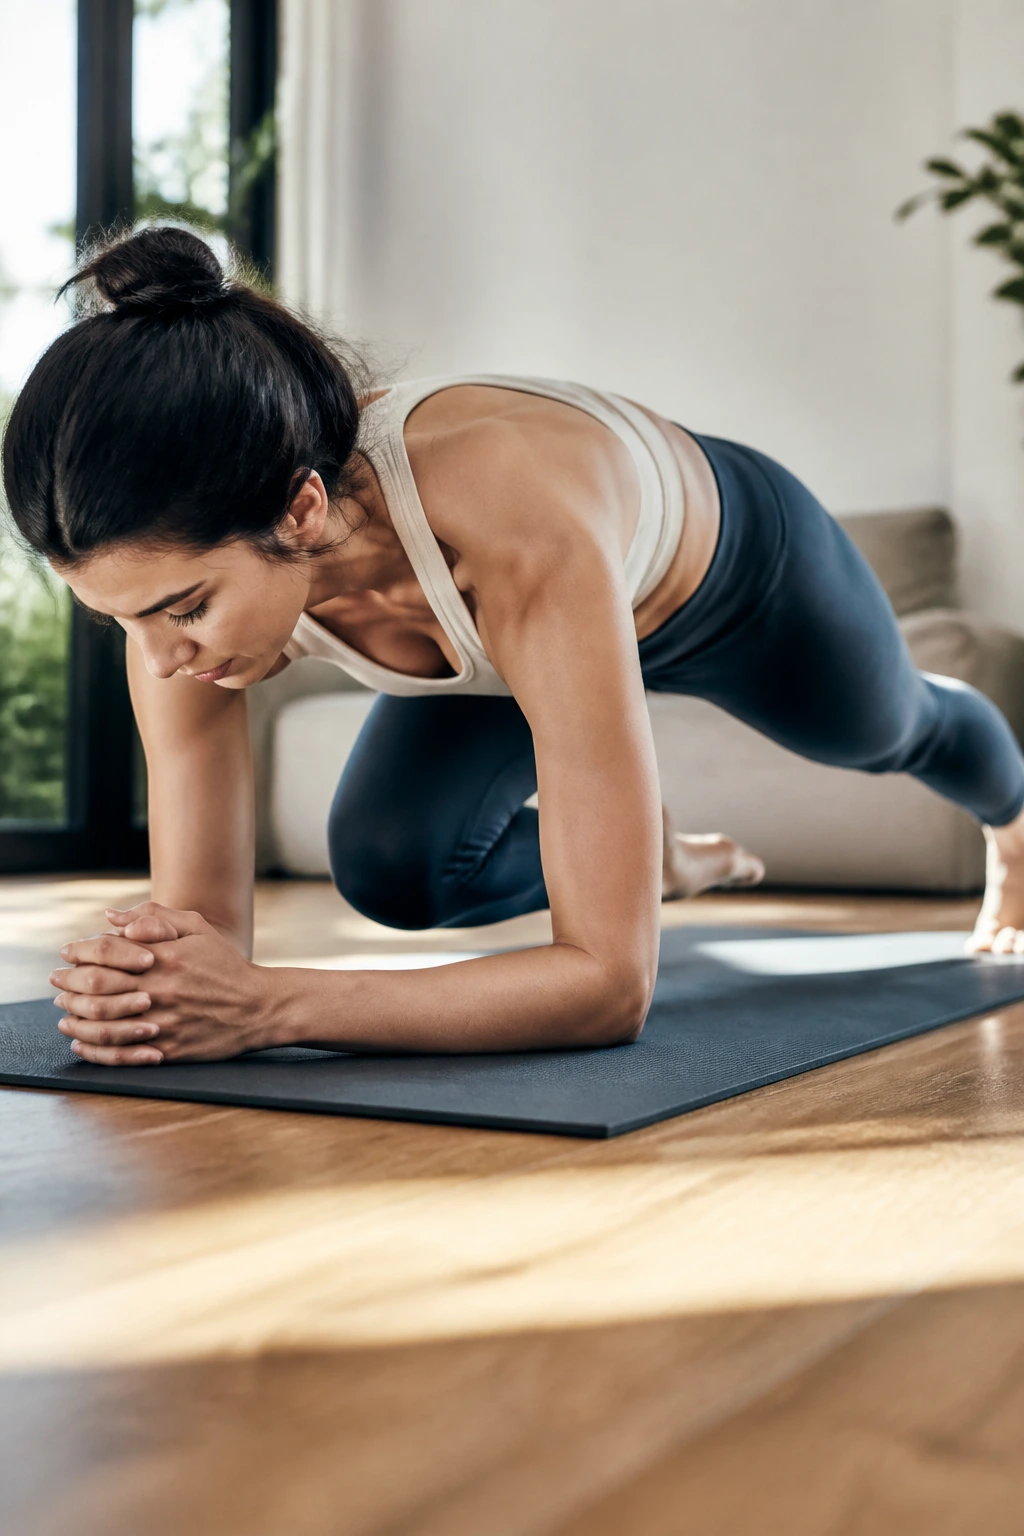
This is one of those moves that looks simple until you actually have to keep your pelvis still. In a forearm plank, the core has to stop your body from sagging, and the knee drive adds a second job: resisting rotation while one leg moves. That combination lights up the deep abs fast.
How to make it matter
Set your elbows under your shoulders, press your forearms into the mat, and step both legs back into a straight line from head to heels. Then, without letting your hips wobble, draw one knee toward the same-side elbow or toward your chest. Return it with control. Alternate sides for 8 to 10 reps per side or hold the plank and perform 20-second intervals.
A lot of people rush this. Don’t. The slower the knee moves, the harder your core has to work. Exhale as the knee comes in. Inhale as you stretch it back. That little breath pattern keeps the ribs from flaring and keeps the movement honest.
- Keep your glutes lightly squeezed.
- Spread your shoulder blades wide.
- If your lower back pinches, drop to both knees and keep the same slow tempo.
Best cue: think “quiet hips, moving legs.” That one phrase fixes more planks than fancy coaching ever does.
2. Down Dog to Plank Waves
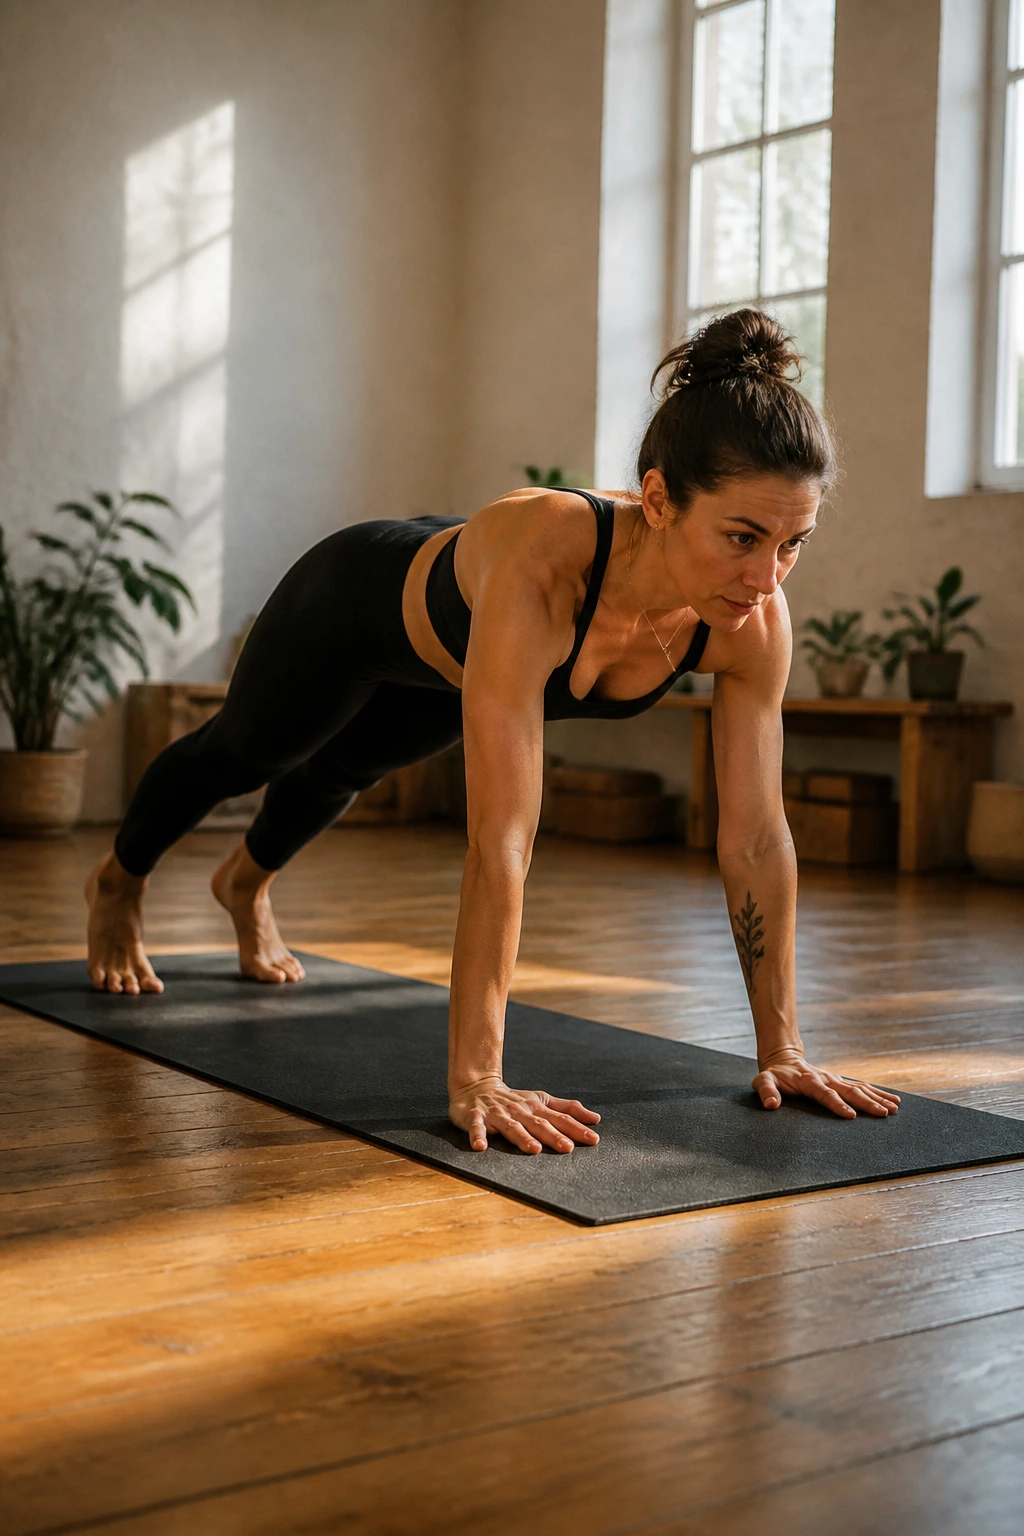
Why does such a basic transition feel so intense? Because the body hates instability when it’s forced to control it on purpose. Moving from Downward-Facing Dog into a plank and back again asks your abs to brace while your shoulders, hamstrings, and upper back all shift positions.
Start in Down Dog with your hands grounded and your heels reaching back. Roll forward until your shoulders stack over your wrists and your body comes into plank. Pause for one breath. Then press the floor away and send your hips back to Down Dog. Do 5 to 8 slow waves.
The trick is not speed. If you bounce through it like a cardio drill, the core work drops off and the shoulders take over. I like to keep the movement small enough that I can still feel the ribs knit in as I glide forward. That makes the abs do the hard part.
Keep your gaze slightly ahead of your hands as you move into plank. If your neck cranes, you’ll start losing tension through the midsection. It’s a tiny detail, but it matters.
3. Boat Pose Reach-and-Hold
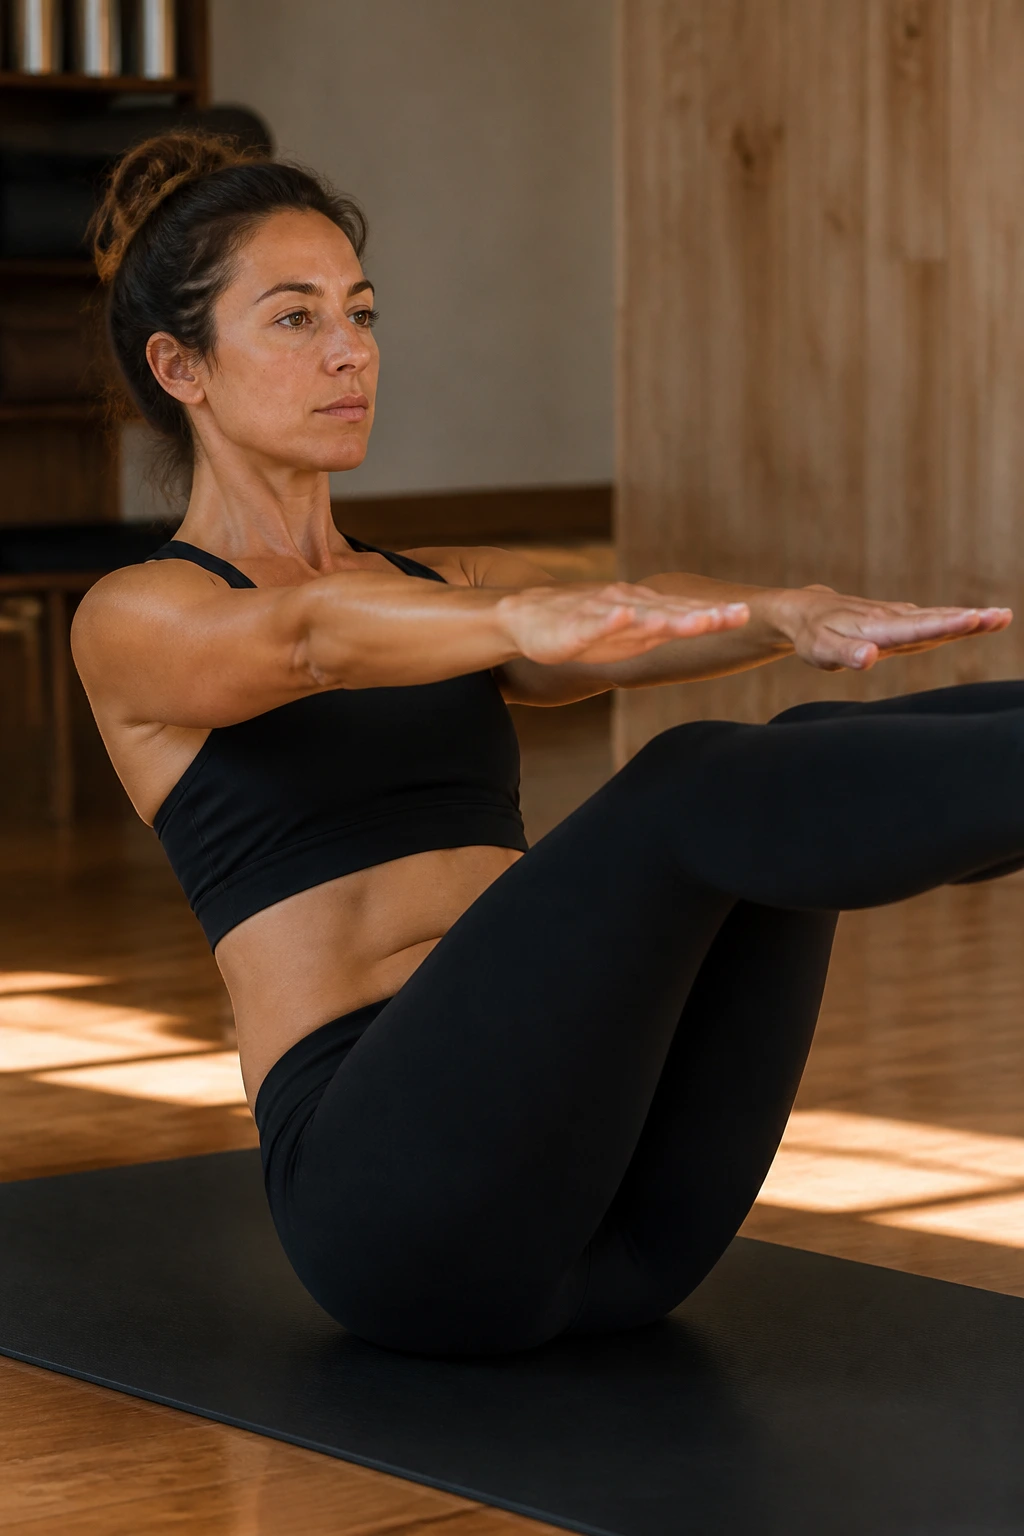
Boat pose gets a bad reputation because people turn it into a hip-flexor fight. Done well, though, it’s one of the cleanest yoga workouts for a stronger core because it forces the front body to stay lifted without leaning on momentum.
What makes it harder than it looks
Sit tall, bend your knees, and lean back just enough to feel your abs switch on. Lift your shins so they’re roughly parallel to the floor. Reach your arms forward at shoulder height and hold for 20 to 30 seconds. If you want more work, straighten one leg at a time or keep both legs bent and pulse the arms forward by an inch or two.
How to keep it honest
If your lower back rounds hard or you feel your chest collapsing, back out of the shape. Bend the knees more. Lift the sternum a little higher. You should feel the work across the deep abs, not a pinch in the lumbar spine.
- Keep your chest proud, not puffed.
- Exhale fully through the hard part of the hold.
- If the neck gets cranky, look at a spot on the floor instead of your toes.
My favorite version: hold a folded towel between the thighs. It sounds small. It isn’t.
4. Side Plank Hip Dips
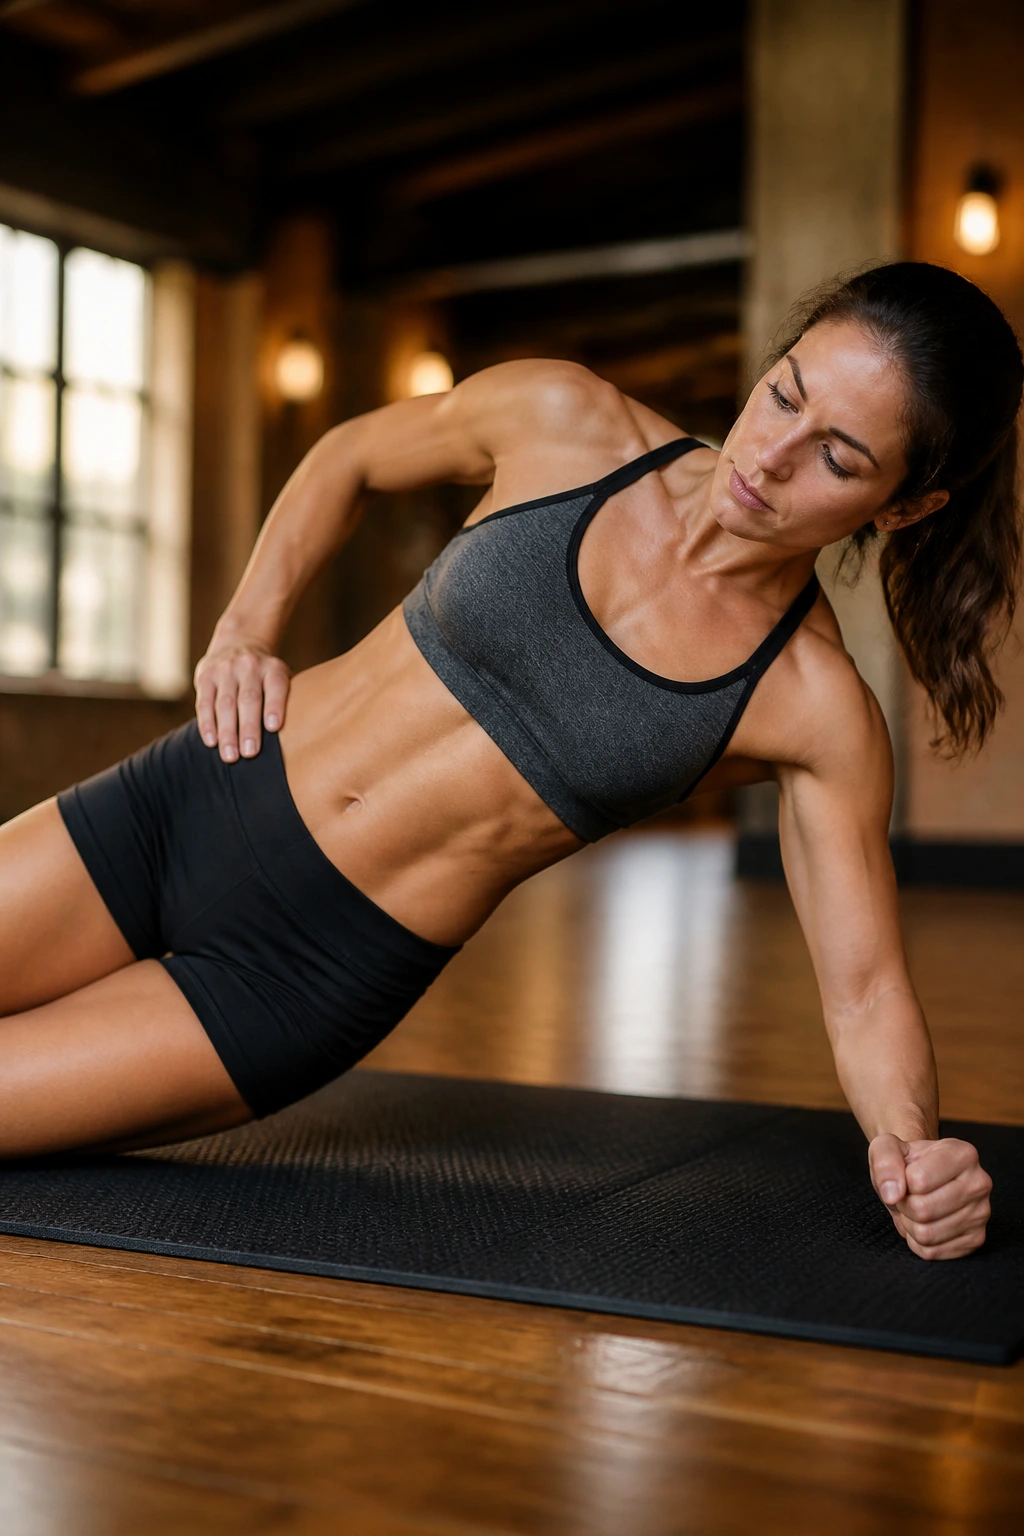
Side plank is the move people love to skip because it is less dramatic than crunches and more honest than almost everything else. The obliques have to keep your body from folding, and the hip dips add just enough movement to expose weak spots fast.
Set up on one forearm with your bottom knee down if needed, or stack both feet if you’re ready. Lift your hips until your body forms a long line. Then lower the hips by a few inches and lift them back to the top. Do 6 to 10 controlled dips per side.
A lot of fitness advice treats the obliques like decoration. That is nonsense. They are stabilizers, rotators, and brakes. Side plank hip dips train all three, and they do it without requiring a single sit-up.
If your shoulder sinks, shorten the lever. Bring the bottom knee down, or place the top foot in front of the bottom foot for more balance. The goal is not to suffer in a prettier shape. The goal is to keep the rib cage stacked over the pelvis while the body moves.
5. Bird Dog Knee-to-Elbow
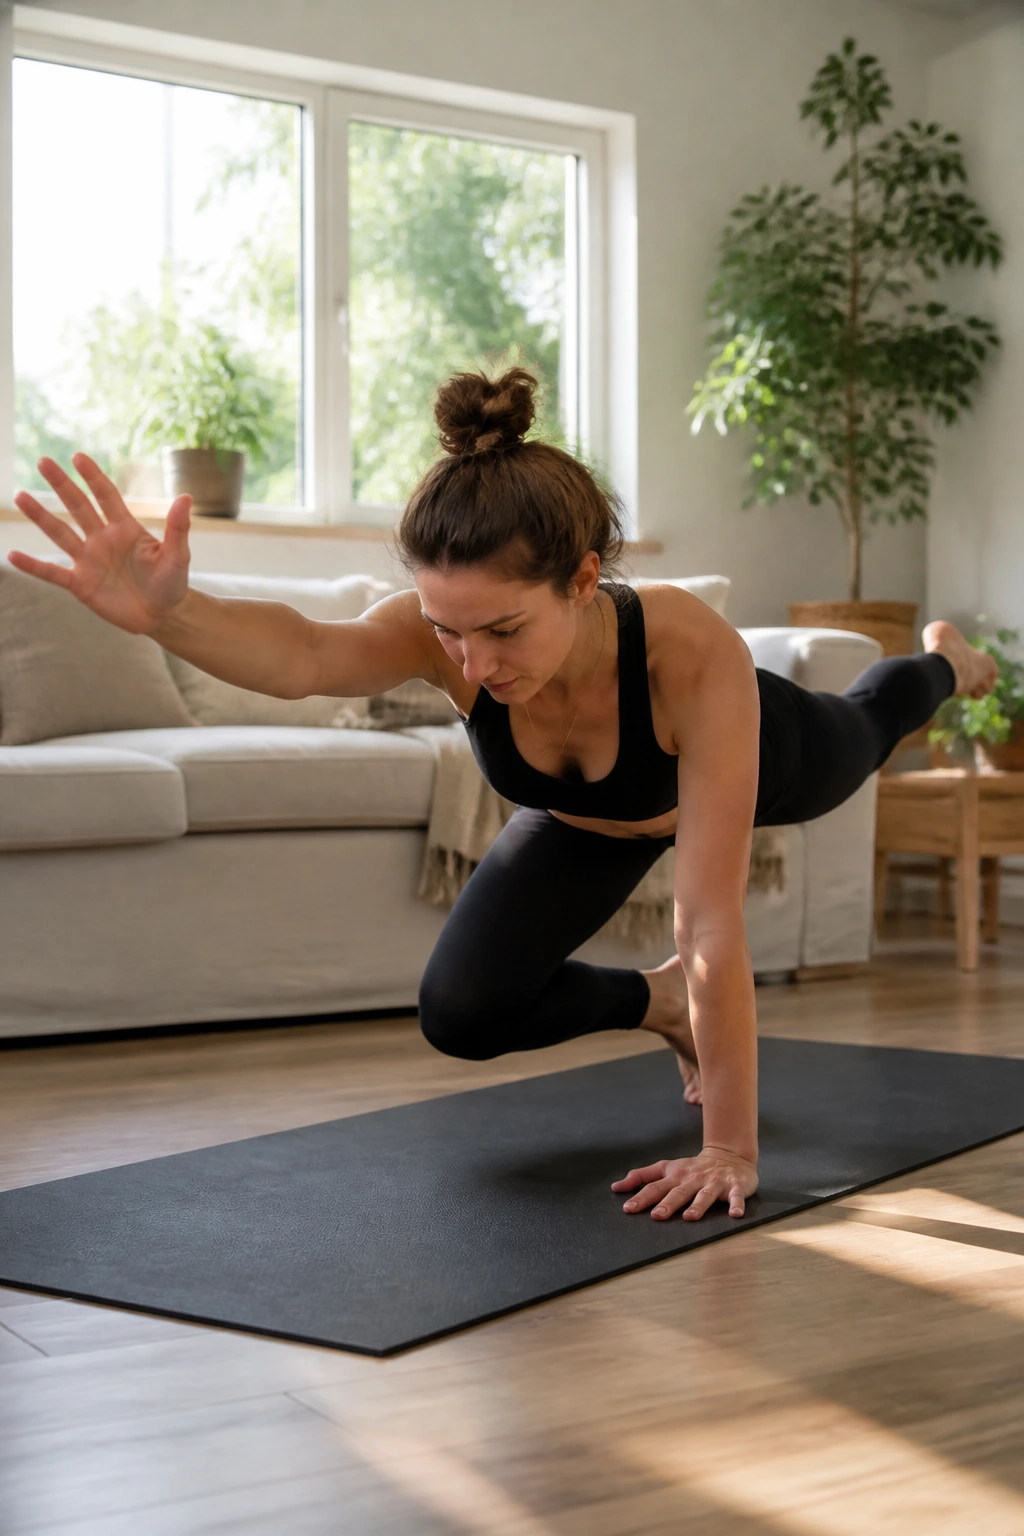
This one looks tame. It isn’t. Bird dog is already a solid core drill, but the knee-to-elbow version adds a compression element that makes the abdominal wall work much harder.
Start on hands and knees with wrists under shoulders and knees under hips. Reach your right arm forward and your left leg back. Hold for one breath, then draw the knee in toward the elbow under your chest without twisting your hips. Extend again. Repeat 6 to 8 times per side.
The cleanest reps are tiny. If you swing the knee wildly or let the shoulder shrug to the ear, the movement turns sloppy fast. Keep the spine long, the belly lightly drawn in, and the neck relaxed. You should feel a steady pull through the front of the torso, not a jolt.
This is a good one for people who want core training without a lot of floor crunching. It also sneaks in a balance challenge, which matters more than most people think. One-sided work reveals imbalances that two-legged exercises hide.
A small pause at full extension changes everything. Try it.
6. Dead Bug in Tabletop
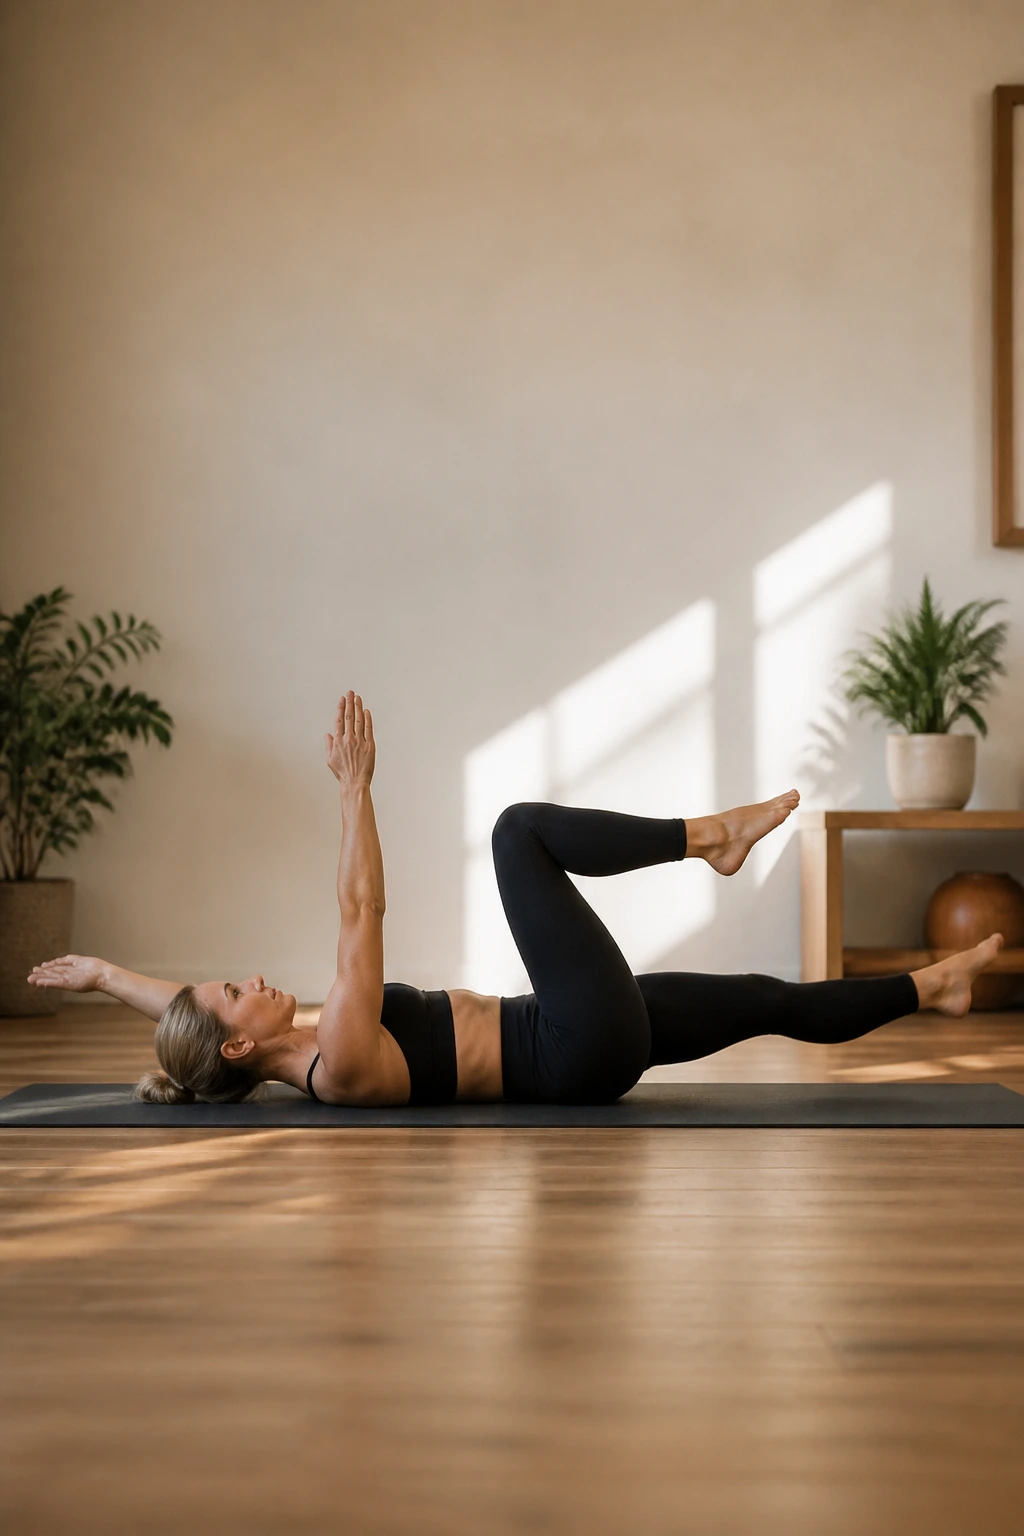
Why does a floor move with no standing, no jumping, and no weight feel so demanding? Because the torso has to stay still while the limbs go wandering off in opposite directions. That is the whole game.
Lie on your back and lift both legs into tabletop, knees over hips. Reach your arms toward the ceiling. Lower your right arm and left leg away from center, only as far as you can without arching your lower back, then return and switch sides. Work for 6 to 10 reps per side.
How to use it
Keep your lower back heavy against the mat. If it lifts, shorten the range. A lot. You do not earn extra points for lowering the leg closer to the floor. You earn the benefit by controlling the movement while your spine stays quiet.
I like this one early in a practice or on days when the body feels tired and tight. It wakes up the deep core without frying the hips.
What to watch for
- Do not let the ribs flare as the limbs lengthen.
- Do not yank the neck forward.
- Breathe out as the arm and leg move away.
That exhale matters more than people think. It teaches the trunk to brace without gripping.
7. Bear Hover Shoulder Taps
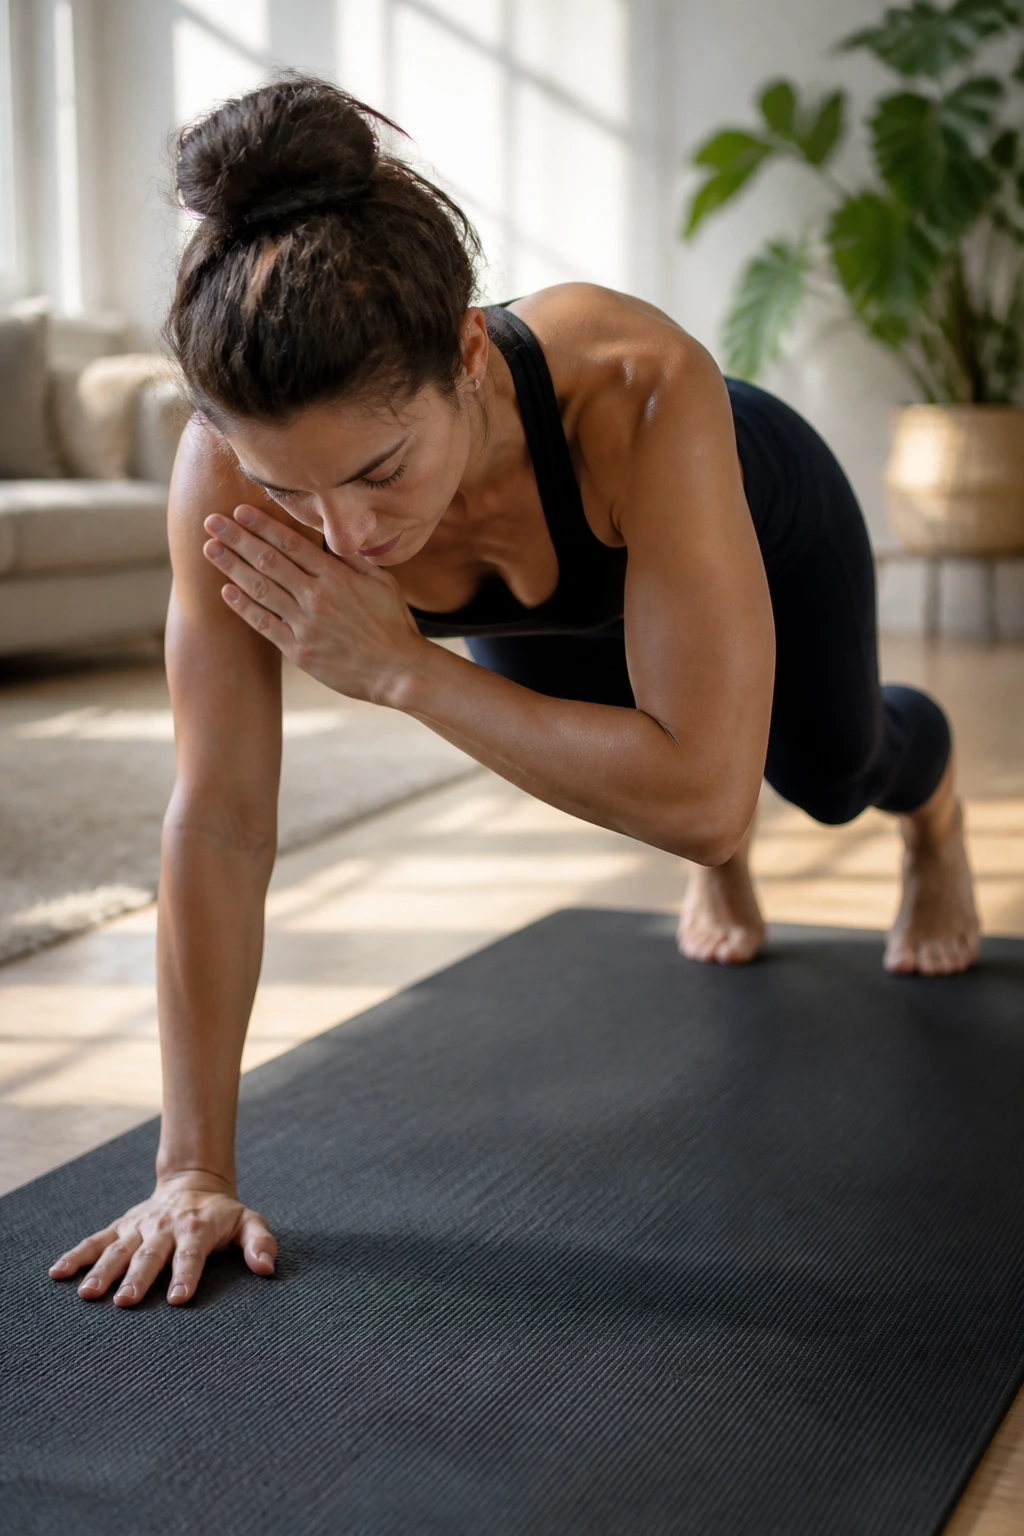
A bear hover is a strange little beast. You’re on hands and knees, but your knees stay lifted an inch or two off the mat, which means the abs have to work hard just to keep the torso from swaying. Add shoulder taps, and the challenge gets real fast.
Hover your knees under your hips, hands under shoulders, spine neutral. Tap your right hand to your left shoulder, then return it to the floor. Switch sides. Do 10 to 16 taps total. Keep the motion slow enough that your hips don’t rock side to side like a boat in bad weather.
The best version is almost boring to watch. That’s a good sign. The movement should be small, controlled, and neat. If you rush it, the shoulders start to shrug and the lower back steals the job from the abs.
This is one of my favorite yoga-adjacent core drills for people who want something more athletic without ditching mat work. It also teaches a useful skill: staying stable while one hand leaves the floor. That carries over into plank, arm balances, and plenty of daily movement.
8. Dolphin Plank Rocks
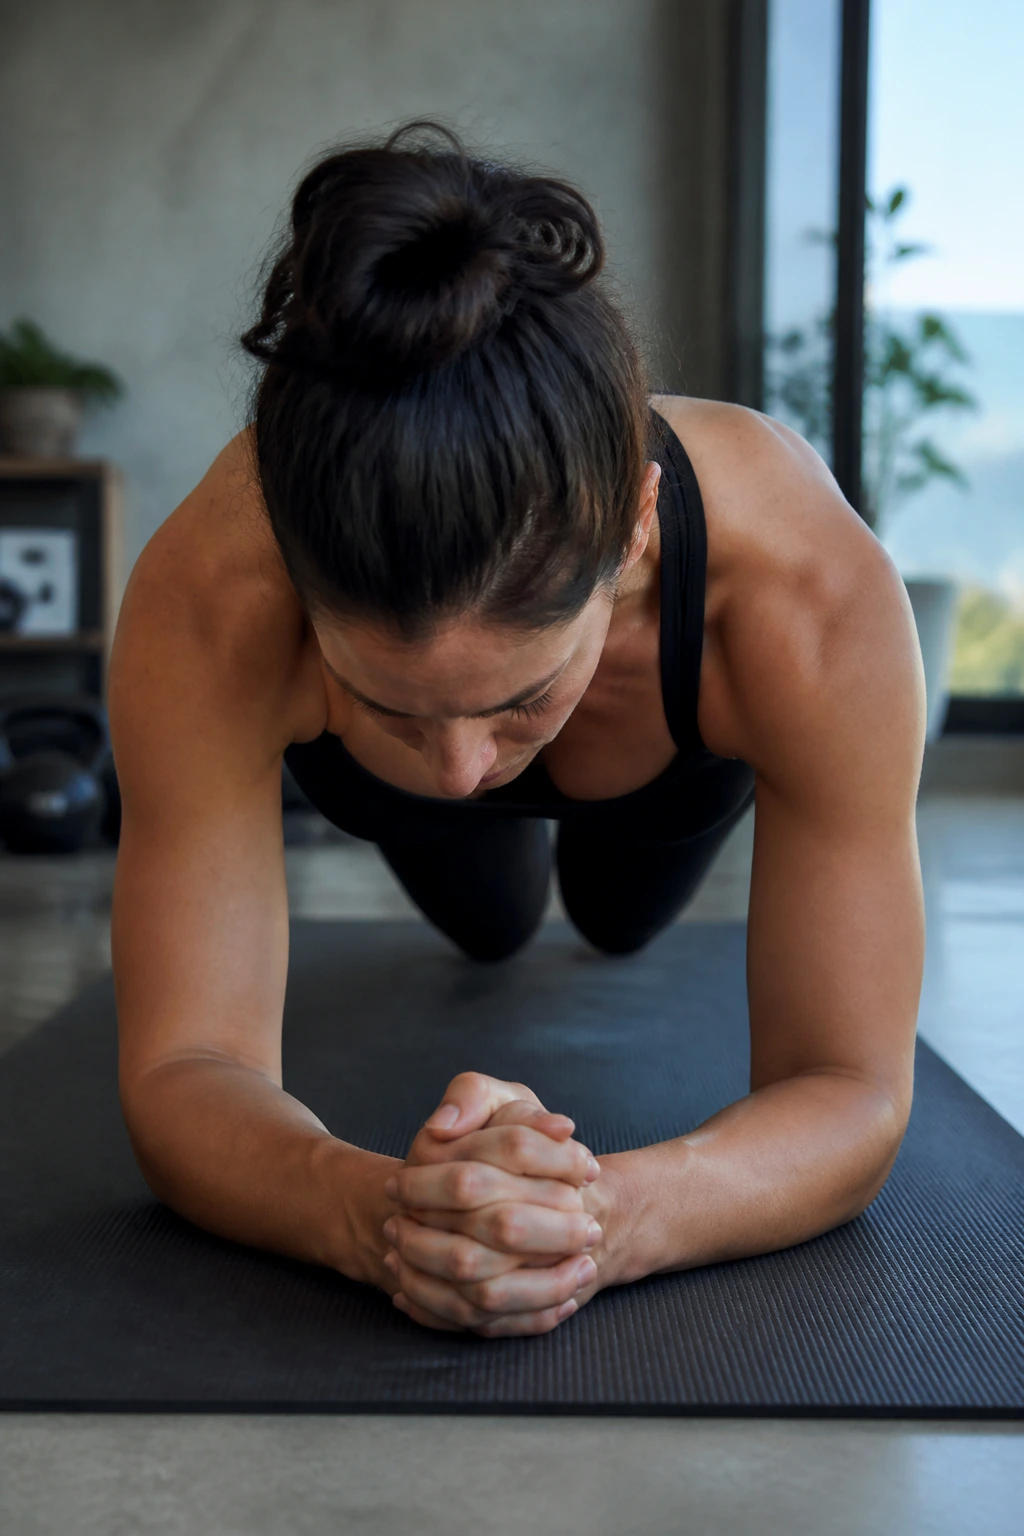
Dolphin plank gives you the front-body challenge of plank without asking the wrists to bear all the load. The forearms stay grounded, the shoulders work hard, and the core has to manage a tiny forward-and-back rock that exposes cheating immediately.
Set your forearms down, then step your feet back into a long line. From there, rock the whole body forward by 2 to 3 inches, then back to the starting point. Keep the motion measured. Try 8 to 12 rocks.
The first thing most people do is let the belly sink. Nope. Pull the low ribs in, press the forearms down, and keep the tailbone reaching toward the heels. You should feel pressure through the shoulders, abs, and even the inner thighs if you’re doing it cleanly.
This one has a nice side benefit: it teaches you how to shift weight without dumping into the lower spine. That skill shows up in chaturanga, arm balances, and even standing balances when you lean forward slightly. Tiny rocks. Big payoff.
9. Warrior III Arm Reaches
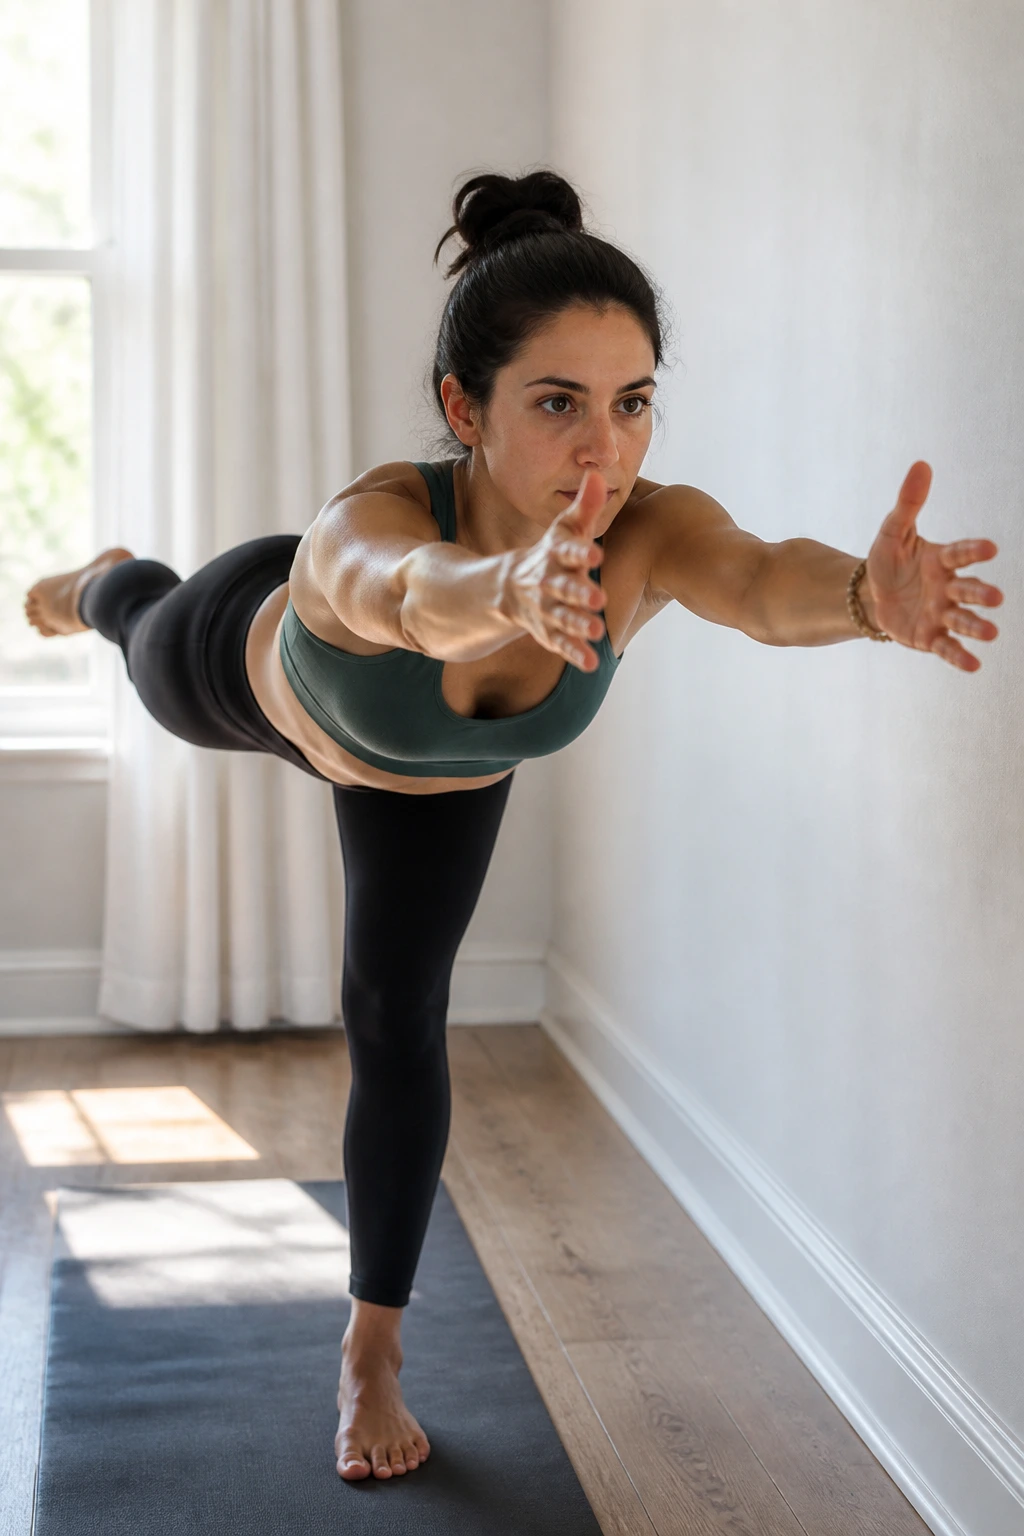
Warrior III is not just a balance pose. It is a core test disguised as a standing shape. When one leg leaves the floor and the torso tips forward, the midsection has to stop everything from spinning out.
Stand tall, shift your weight onto your left foot, and hinge forward as the right leg extends behind you. Reach both arms forward or out to a T. Then make small arm reaches—an inch or two forward, back to center—while holding the line. Stay there for 3 to 5 breaths per side.
Unlike floor planks, this pose asks the core to work while the standing leg and glute keep you upright. That combination is why it feels so different from ab exercises on a mat. It’s also why people wobble. A lot.
Best for: anyone who gets bored lying on the floor and wants core work that feels more alive. Start near a wall if balance is shaky. Put fingertips on a wall at first, then back off as the shape steadies. There’s no prize for tipping over early.
10. Chair Pose Heel Lifts
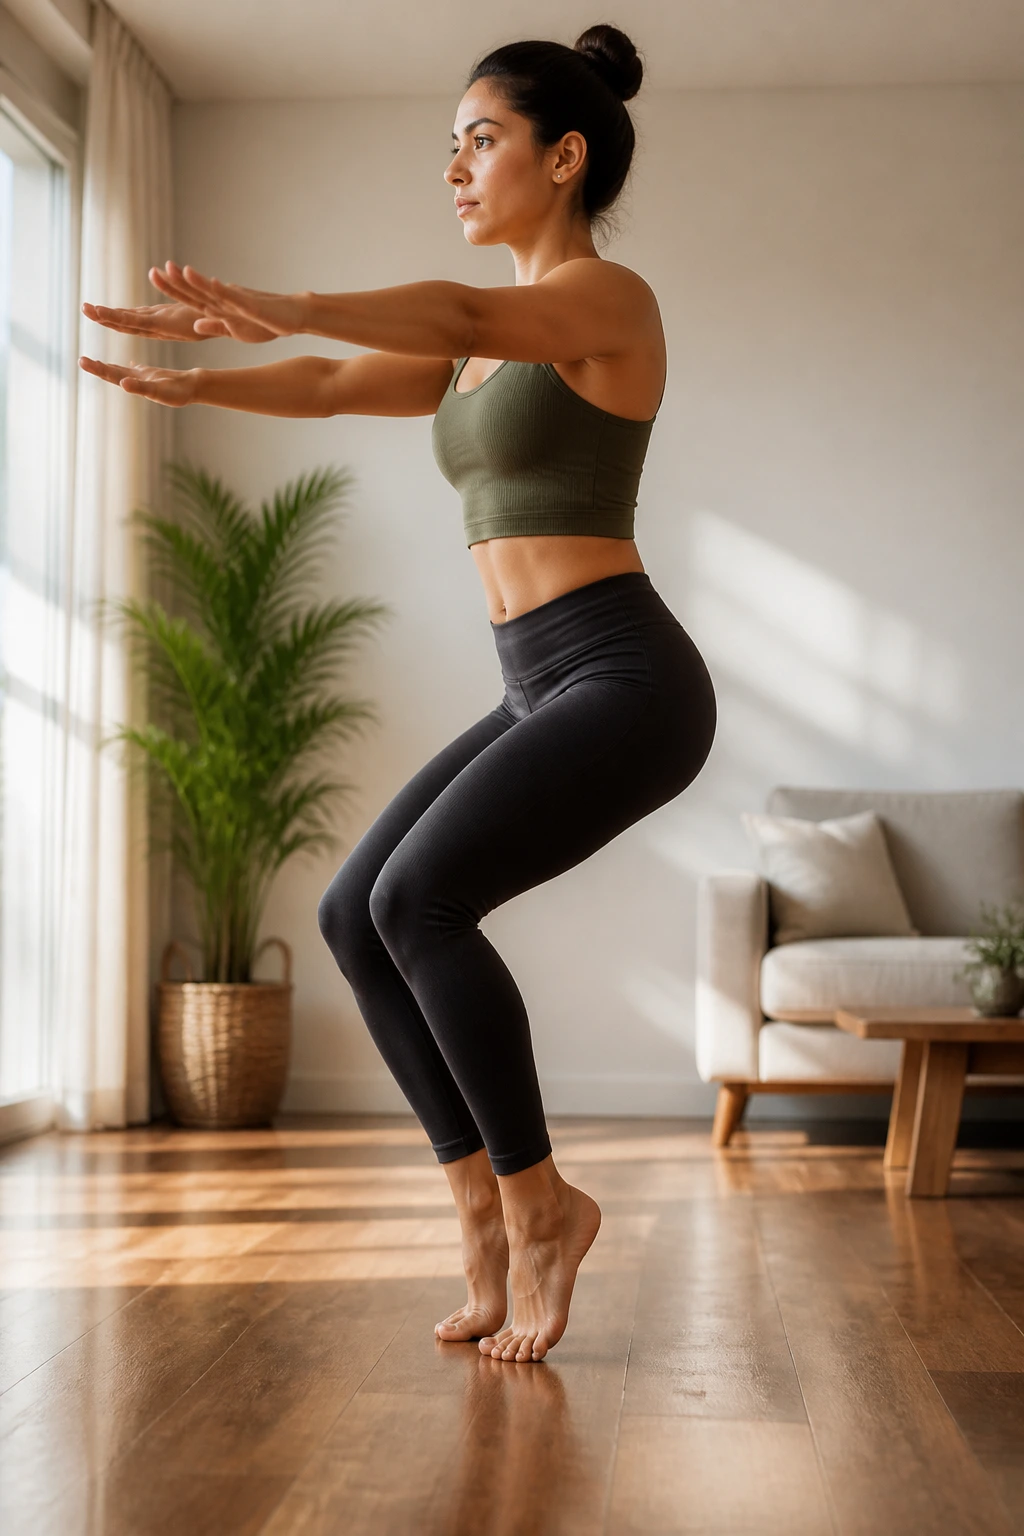
Chair pose already burns. Add heel lifts, and the lower belly has to stay braced while the feet and calves do extra work. It’s a sneaky one, and I mean that as praise.
Drop into chair with your feet about hip-width apart, knees bent, and hips back as if you’re sitting into a high stool. Keep your chest lifted and lift your heels an inch off the floor, then lower them slowly. Aim for 8 to 12 heel lifts or hold for 5 steady breaths with a few slow pulses.
Why the burn shows up fast
The body wants to dump forward in chair pose. When you lift the heels, that tendency gets worse, which means the abs must step in and keep the torso from folding. It’s not glamorous. It works.
What to watch for
- Keep the knees tracking over the second and third toes.
- Don’t let the ribs flare out.
- If your low back feels pinchy, sit a little higher.
Best use: tack this onto the end of a standing sequence when the legs are warm and the core is a little tired. That’s when the form gets honest.
11. Crescent Lunge Knee Drives
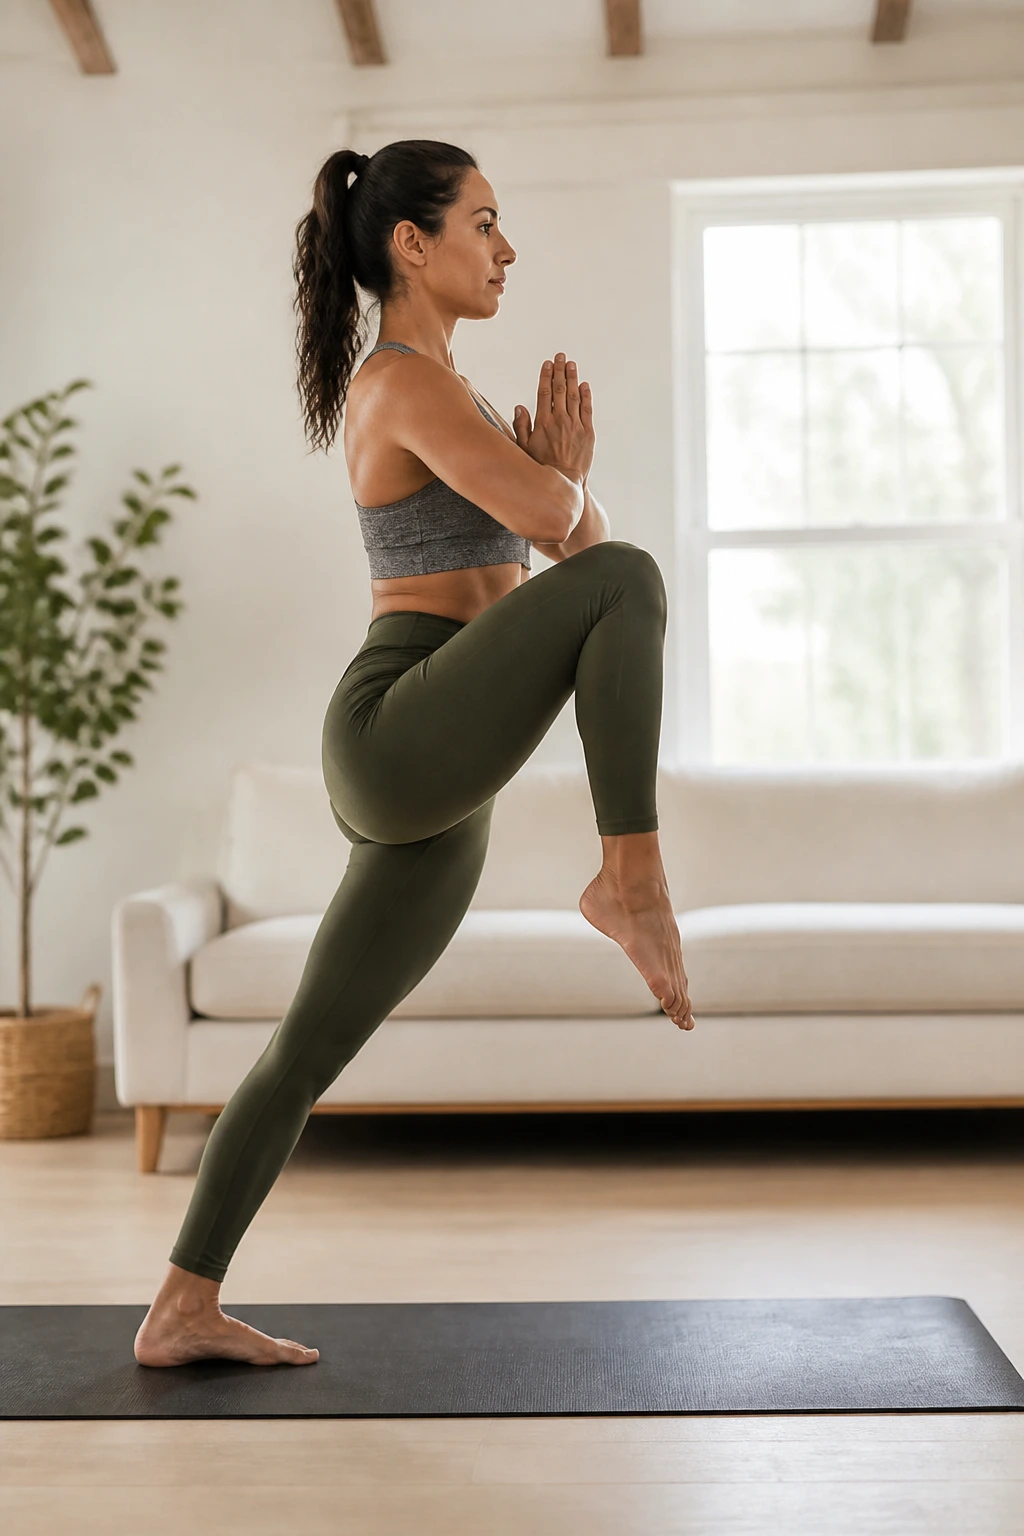
This move has the clean feel of a yoga lunge and the core demand of a sports drill. You hold a crescent lunge, then drive the back knee forward with control before stepping it back again. The torso has to stay tall the whole time.
Set up with your front knee stacked over the ankle and your back heel lifted. Bring your hands to prayer at the chest or keep them overhead if balance is solid. Draw the back knee toward the floor, then lift it back to the starting lunge. Work 8 reps per side.
The important part is the chest. If the torso collapses forward, the abs stop working and the hip flexors take over. Keep the sternum lifted and the pelvis facing forward. You should feel the midsection bracing against the pull of the moving leg.
This one is useful because it trains the core in a standing, weight-bearing position. That matters more than people admit. Real life does not happen only on a mat.
12. Standing Figure-Four Knee Lift
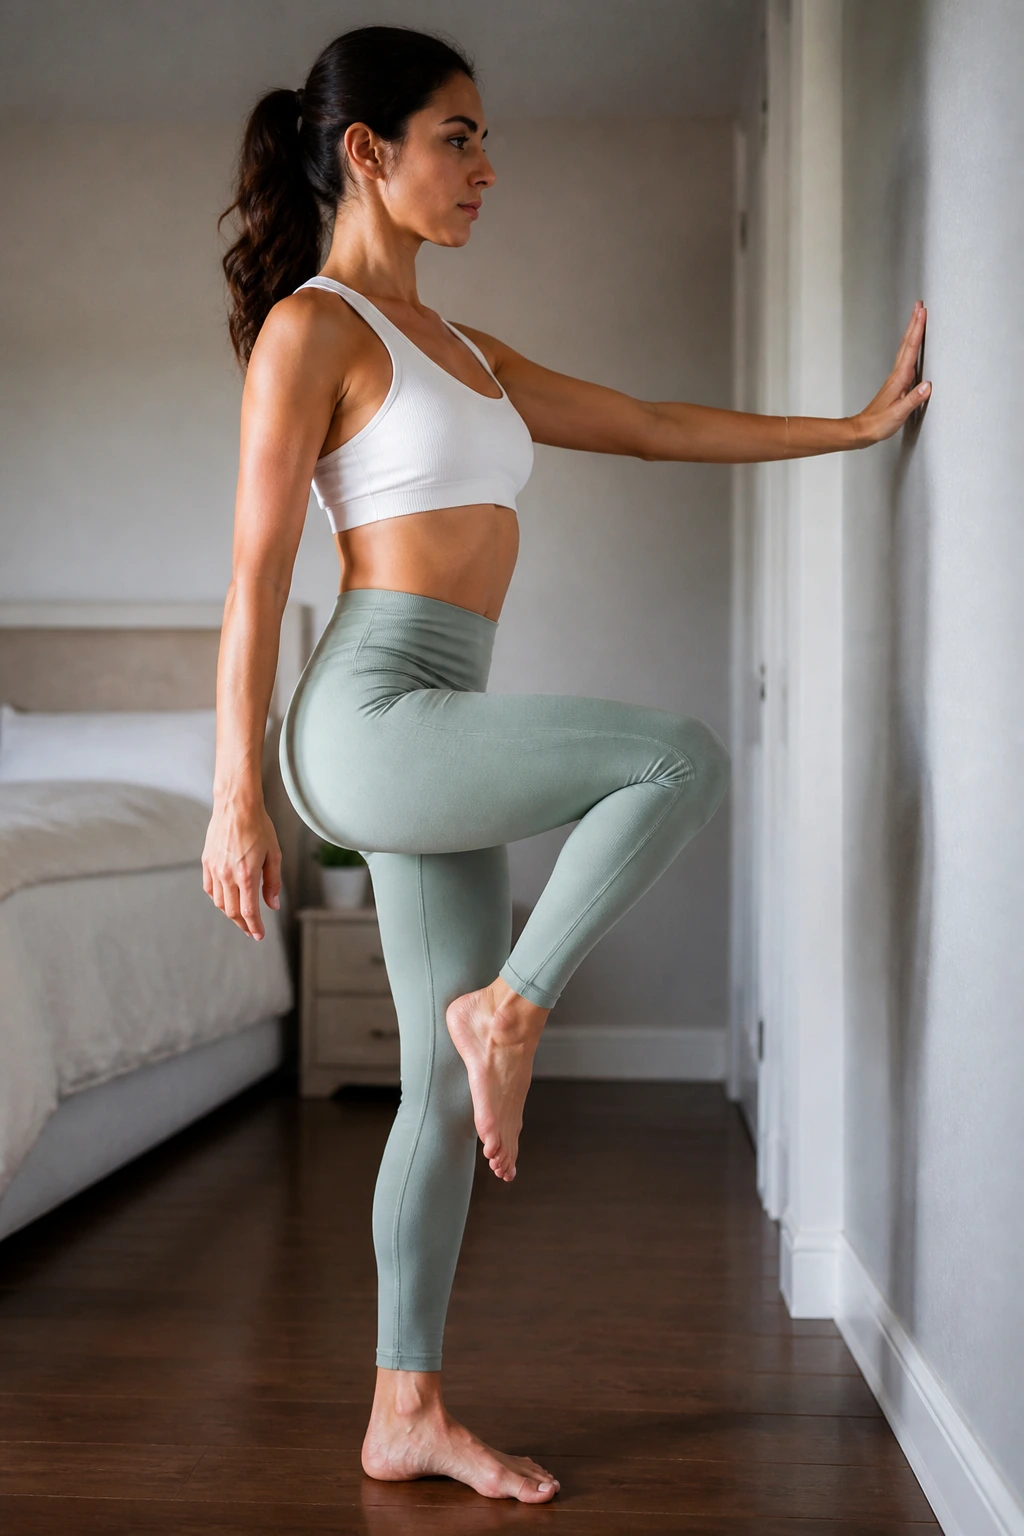
Can a balance pose train the core without looking like a core drill? Absolutely. Standing figure-four does exactly that, especially when you add a controlled knee lift from the folded shape.
Stand on one leg and cross the opposite ankle over the standing thigh, like a seated figure-four but upright. Sit the hips back a few inches, then stand taller and lift the crossed shin slightly as the standing leg stabilizes. Move slowly for 5 to 8 reps per side.
This is a great one for people who feel their core most when balance gets messy. The standing leg has to hold steady, the outer hip has to stay engaged, and the abs have to keep the rib cage from drifting. If you wobble, good. That means the nervous system is paying attention.
Use a wall if needed. Really. Balance work gets better when you stop treating the wall like cheating. It lets you train the shape instead of fighting fear.
13. Revolved Chair Hold
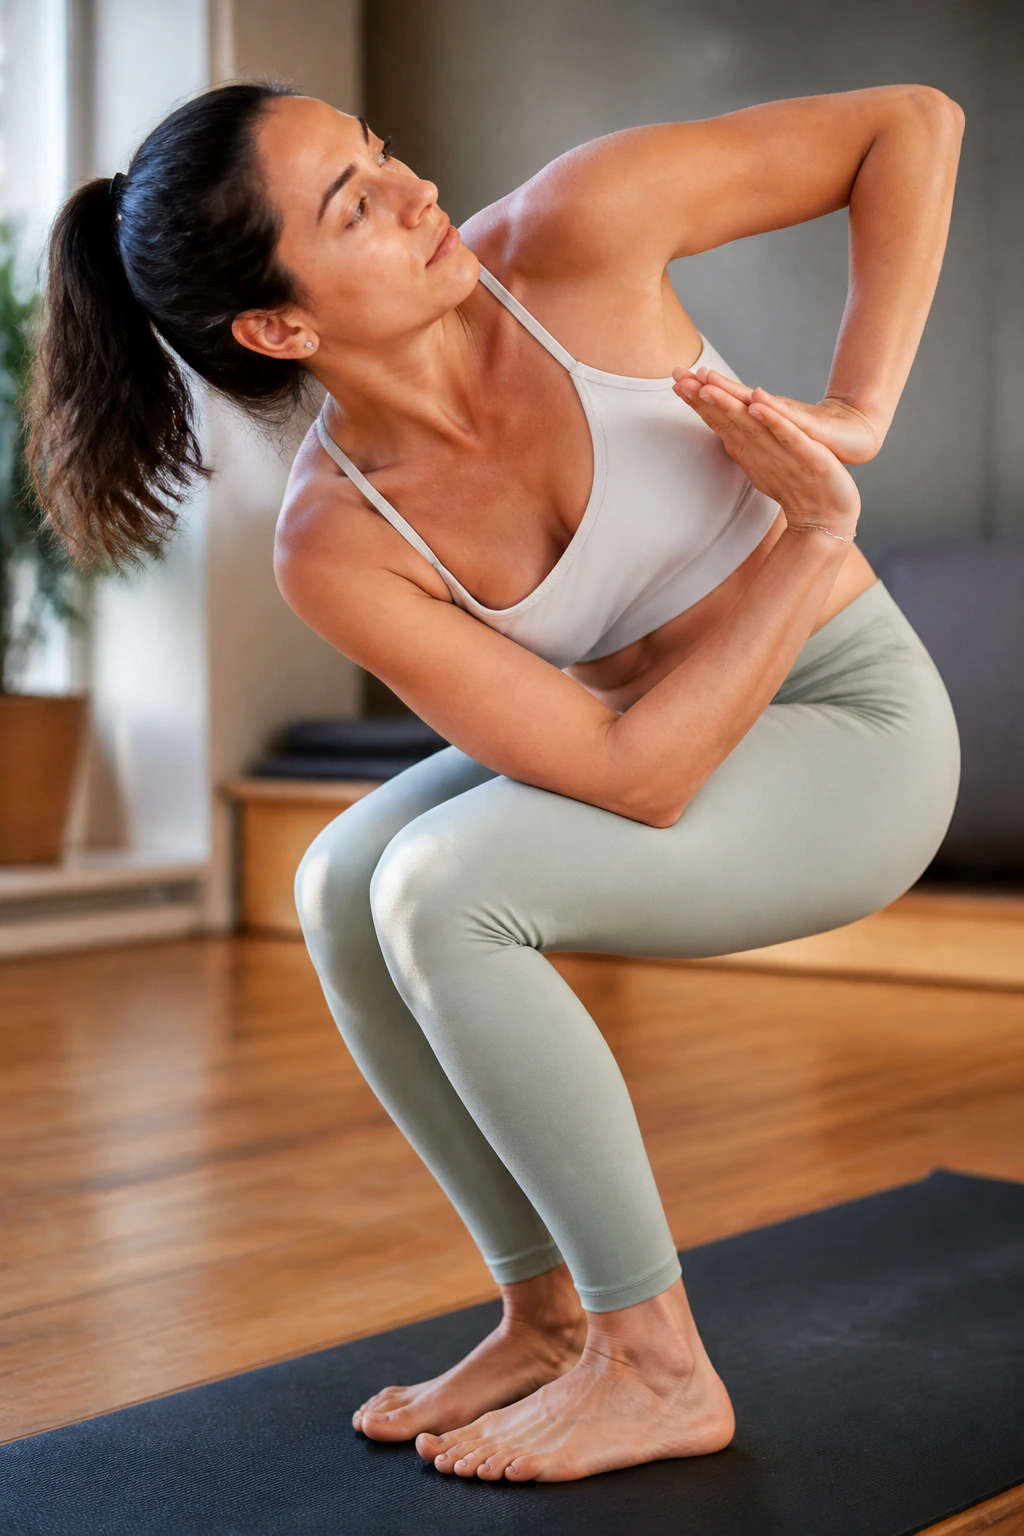
Revolved chair is where the obliques show up to work. The pose asks you to squat, twist, and stay low at the same time, which is a lot of work for one shape. That’s why it feels so satisfying when it’s done well.
Sink into chair, bring your palms together, and twist your torso so one elbow crosses toward the outside of the opposite thigh. Hold for 3 to 5 breaths per side, keeping the knees level and the hips from sliding away.
The real challenge is not the twist itself. It is resisting the urge to let the knees collapse or the chest dump forward. Stay broad across the collarbones. Keep the belly firm enough that the twist comes from the upper spine instead of the lower back.
A lot of people rush revolved chair as if the goal were to touch elbow to knee. It isn’t. The goal is to create torque through the trunk while the lower body stays strong and steady. That’s what makes it useful.
14. Low Lunge Twist
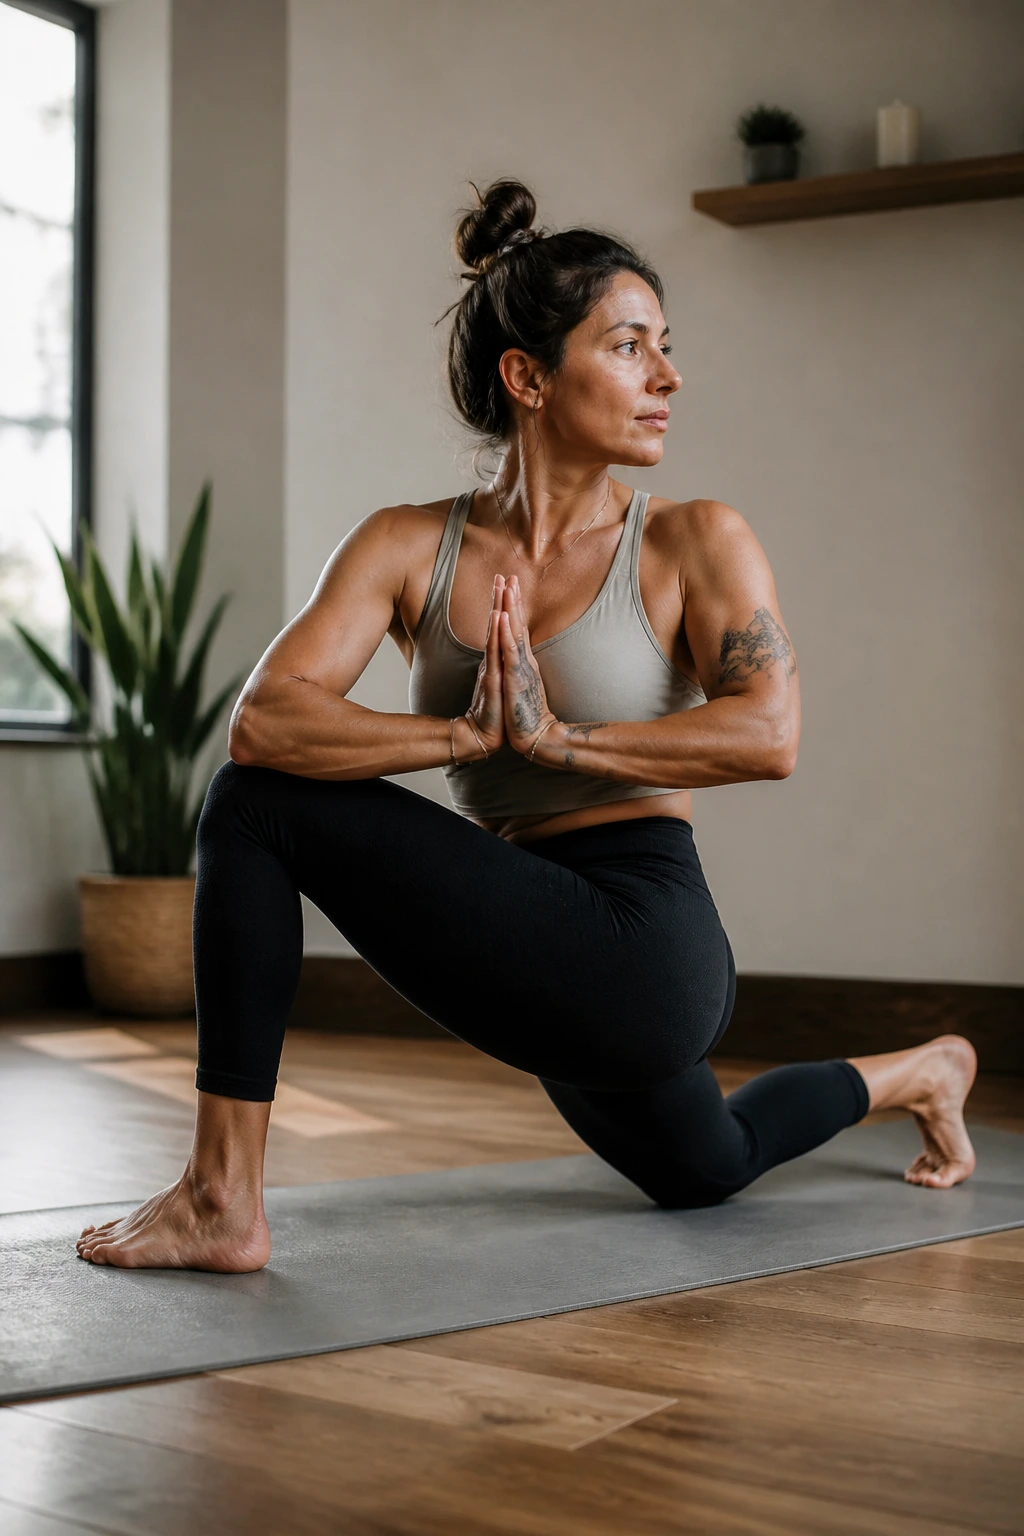
A low lunge twist looks gentle from the outside. Inside, it is a full-body coordination drill. The hips open a little, the torso rotates, and the core has to keep the shape from collapsing into the lower back.
Start in a lunge with the back knee down. Bring your hands to prayer, then rotate the chest toward the front leg while keeping the hips mostly square. Hold for 4 to 6 breaths each side.
If your back knee complains, fold a blanket under it. If your front knee drifts inward, widen your stance by a few inches. Small adjustments make this pose feel a lot cleaner.
- Keep the front foot grounded through the big toe mound.
- Lift through the crown of the head.
- Don’t yank the twist with the arms.
This is one of those shapes that rewards patience. The better you stack the joints, the more the obliques and deep trunk muscles can do their job without strain.
15. Bridge Marches
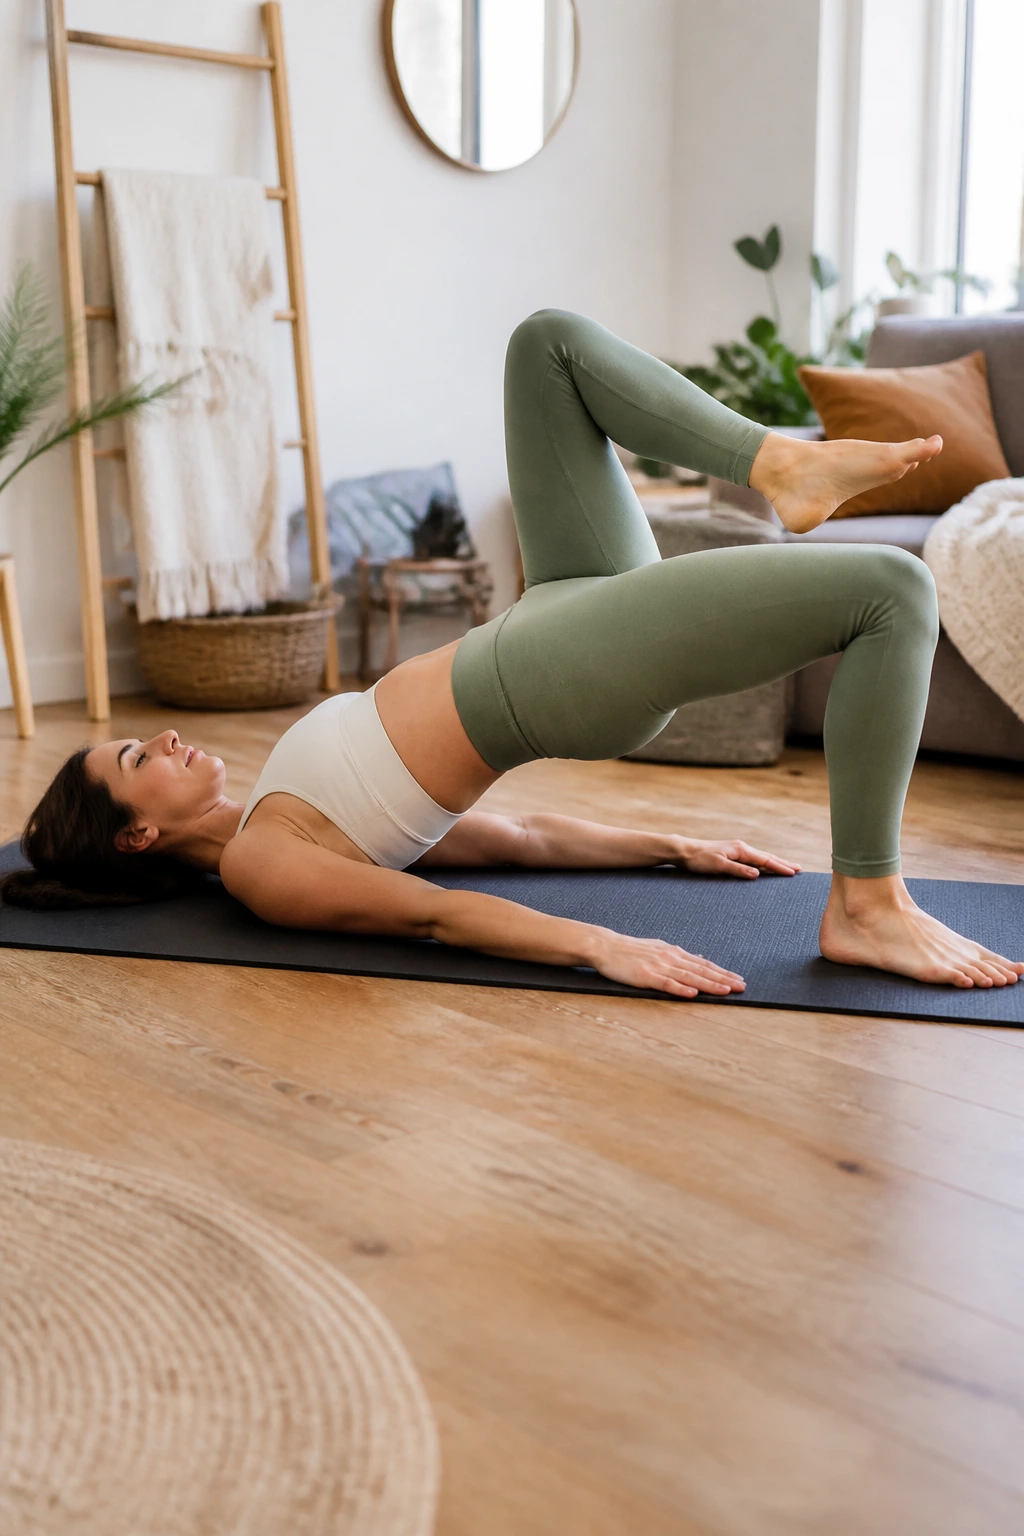
People often think bridge pose is mostly about glutes. Not quite. Once you start marching one knee up at a time, the core has to keep the pelvis level, which is where the real work happens.
Lie on your back, bend your knees, and lift the hips into bridge. Hold the shape steady, then lift one foot a few inches off the mat, bring the knee toward your chest, set it down, and switch sides. Do 8 marches per side.
The trick is to keep the hips from swaying. If one side drops every time a foot leaves the floor, the core is giving away the game. Lower the hips a little and try again. Sometimes a smaller bridge is the stronger bridge.
I like this move because it trains the back body and front body together. Glutes support the pelvis, abs resist the sway, and the whole trunk learns to stay organized under pressure. Boring-looking. Extremely useful.
16. Locust Lift and Release
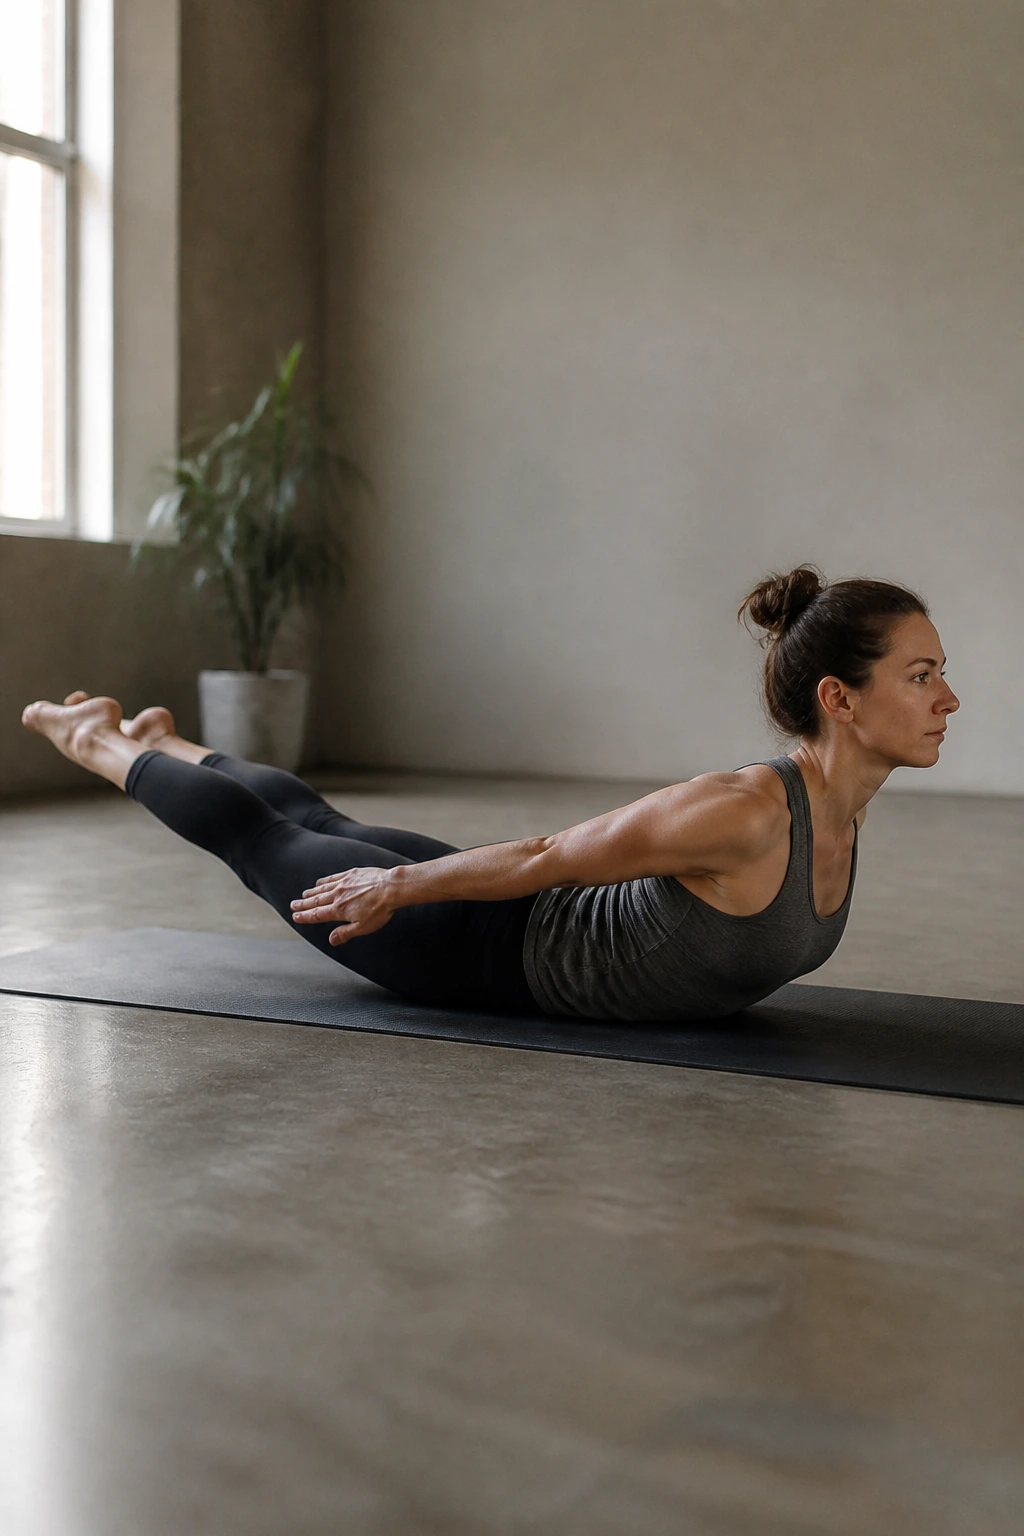
This is a back-body move with a core job baked in. Locust pose asks you to lift the chest and legs off the mat without over-arching the lower back, which means the deep abdominal wall has to stay engaged to protect the spine.
Lie face down with your arms by your sides or reaching back. On an inhale, lift the chest, arms, and legs a few inches off the floor. Hold for 3 to 5 breaths, then lower slowly. Repeat 3 rounds.
The first mistake is throwing the head up. Don’t. Keep the neck long and the back of the skull reaching away from the shoulders. The second mistake is trying to lift too high. A modest lift with clean support does more for the core than a bigger backbend that collapses into the low back.
This pose feels especially good after a lot of plank or boat work. It restores balance. Not everything should be flexion and front-body strain. The spine likes a little extension, and the abs still have to stay awake while it happens.
17. Cobra to Child’s Pose Flow
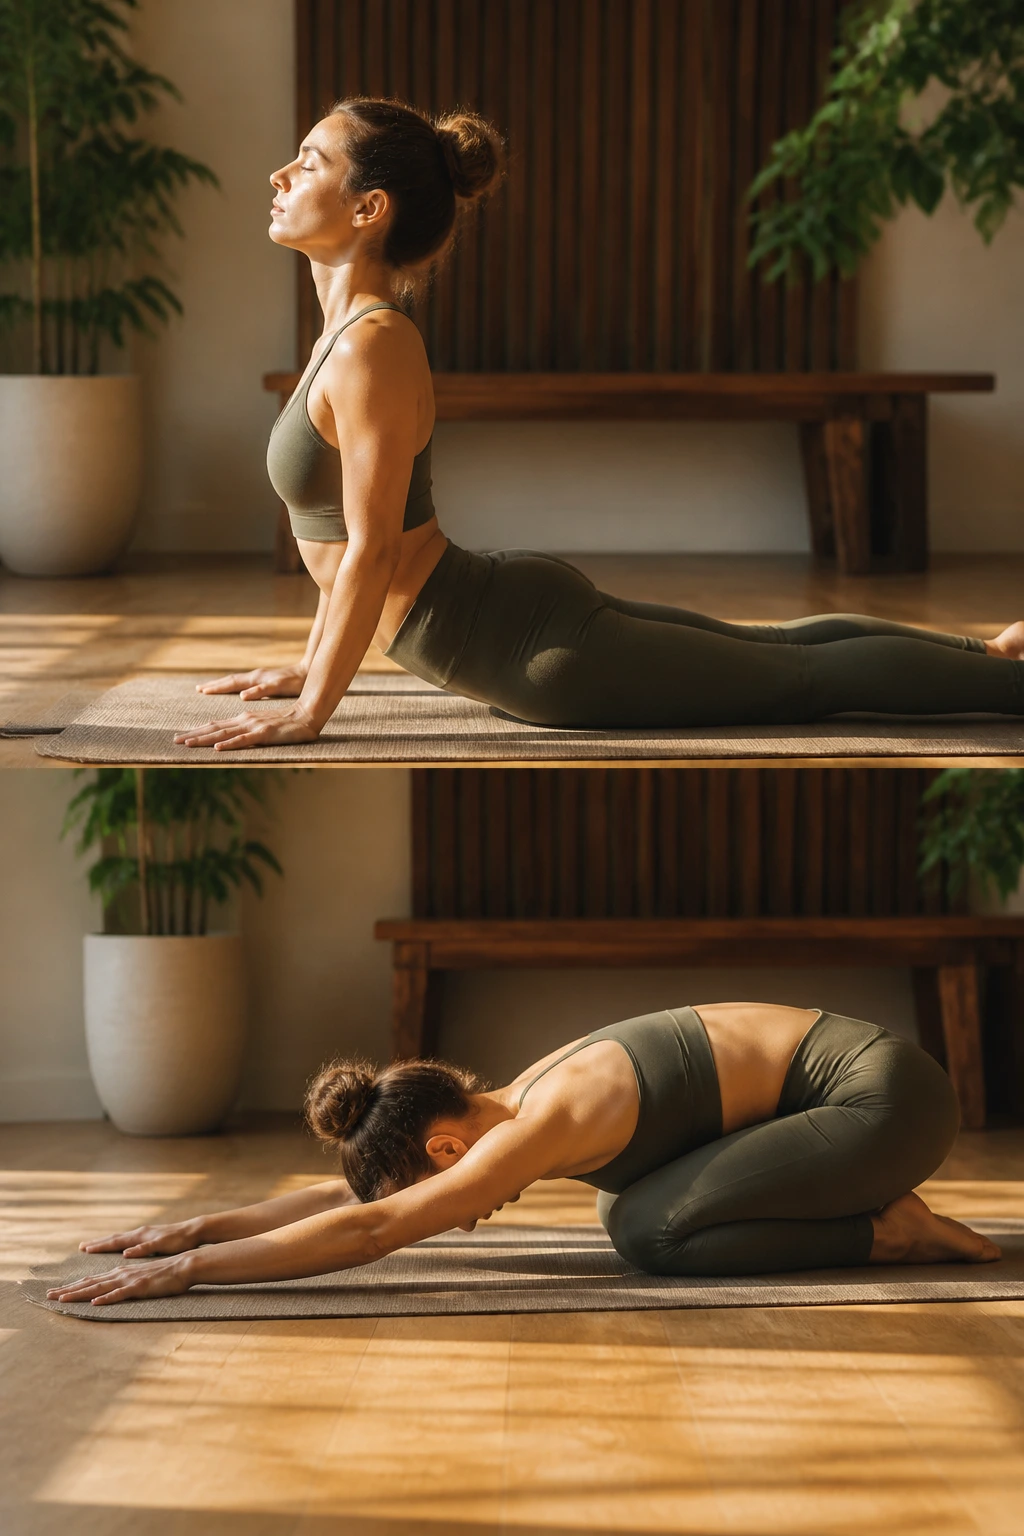
Why does a gentle backbend followed by a rest position count as core training? Because the transition is where the work lives. Moving from cobra into child’s pose and back again forces the abs to control the spine instead of letting gravity do all the talking.
Lie on your stomach, hands under shoulders. Lift into a low cobra, keeping the elbows soft and the pelvis grounded. Then lower with control and press back into child’s pose. Repeat 5 to 8 slow rounds.
The temptation is to fling the chest up and collapse down. That turns the flow into a shrug-and-drop pattern. Instead, keep the movement smooth. Think about drawing the lower belly away from the floor as you rise, then maintaining that support while you settle back.
This is a good choice for people who want core work without getting trapped in a “burn at all costs” mindset. It also gives the low back a break while still asking the middle of the body to stay present. Sneaky, calm, useful.
18. Crow Prep Weight Shifts
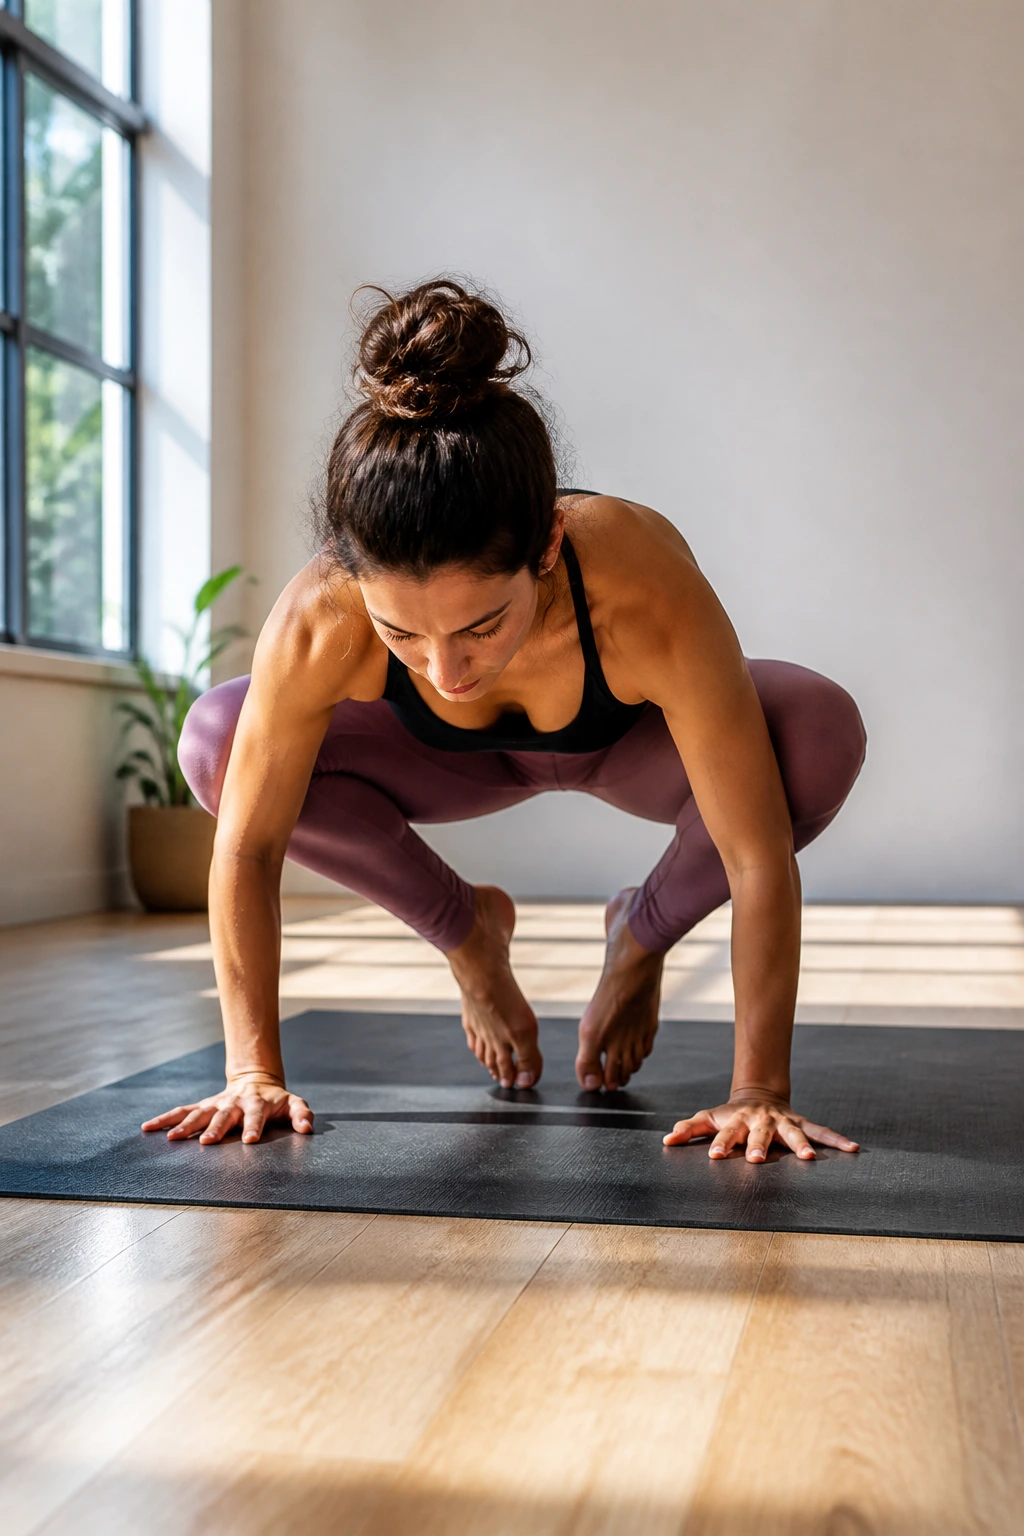
Crow prep scares people because it looks advanced. Fair enough. It is advanced. But the early version—just the weight shift—teaches a huge amount of core control without requiring you to lift both feet right away.
Squat down, place your hands shoulder-width apart, and bend your elbows slightly. Rock your weight forward until the toes get light. Then rock back. Repeat 6 to 10 times, keeping the knees high on the upper arms or simply hovering one foot at a time if that feels safer.
How to use it
Start with a blanket under your head if the floor feels intimidating. That takes away some of the fear and lets you focus on the body mechanics. The abs need to pull in to keep you from tipping too far, and the shoulders need to stay strong so the whole thing doesn’t dump forward.
What to watch for
- Keep the fingers spread wide.
- Push the floor away.
- Stop if the wrists feel sharp pain.
This is not a pose to rush. A clean weight shift teaches more than a wobbly airborne moment.
19. Side Plank Star
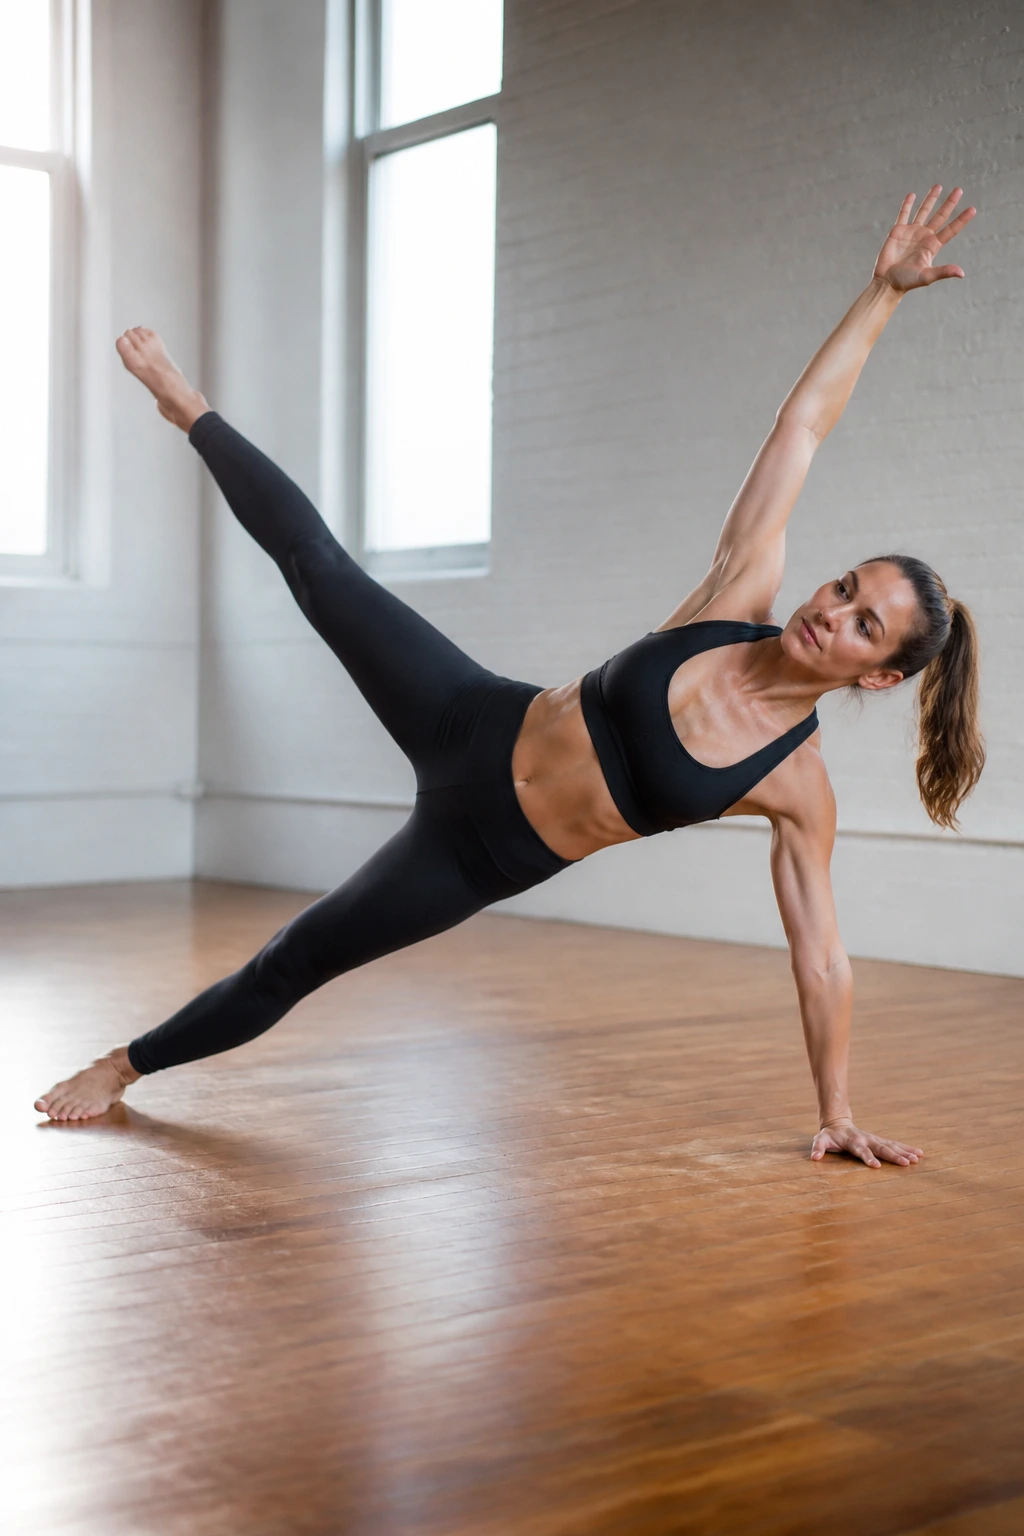
A side plank star is the kind of shape that makes a room go quiet. One leg lifts, one arm reaches, and suddenly the obliques, glutes, and shoulder stabilizers are all on duty at once.
Set up in side plank, then open the top leg into the air and reach the top arm overhead or upward. Hold for 3 to 5 breaths per side, or shorten it to 2 to 3 small pulses if full holds are too much.
The challenge is not just strength. It’s organization. The body wants to rotate open or sag through the waist. Keep the lower ribs drawing in and the lifted leg active from the heel all the way through the toes.
This pose is best for someone who already has a decent base of plank and side plank strength. If regular side plank feels shaky, build there first. Star is a lovely shape, but it punishes sloppy foundations. No need to pretend otherwise.
20. Half Boat Ladder
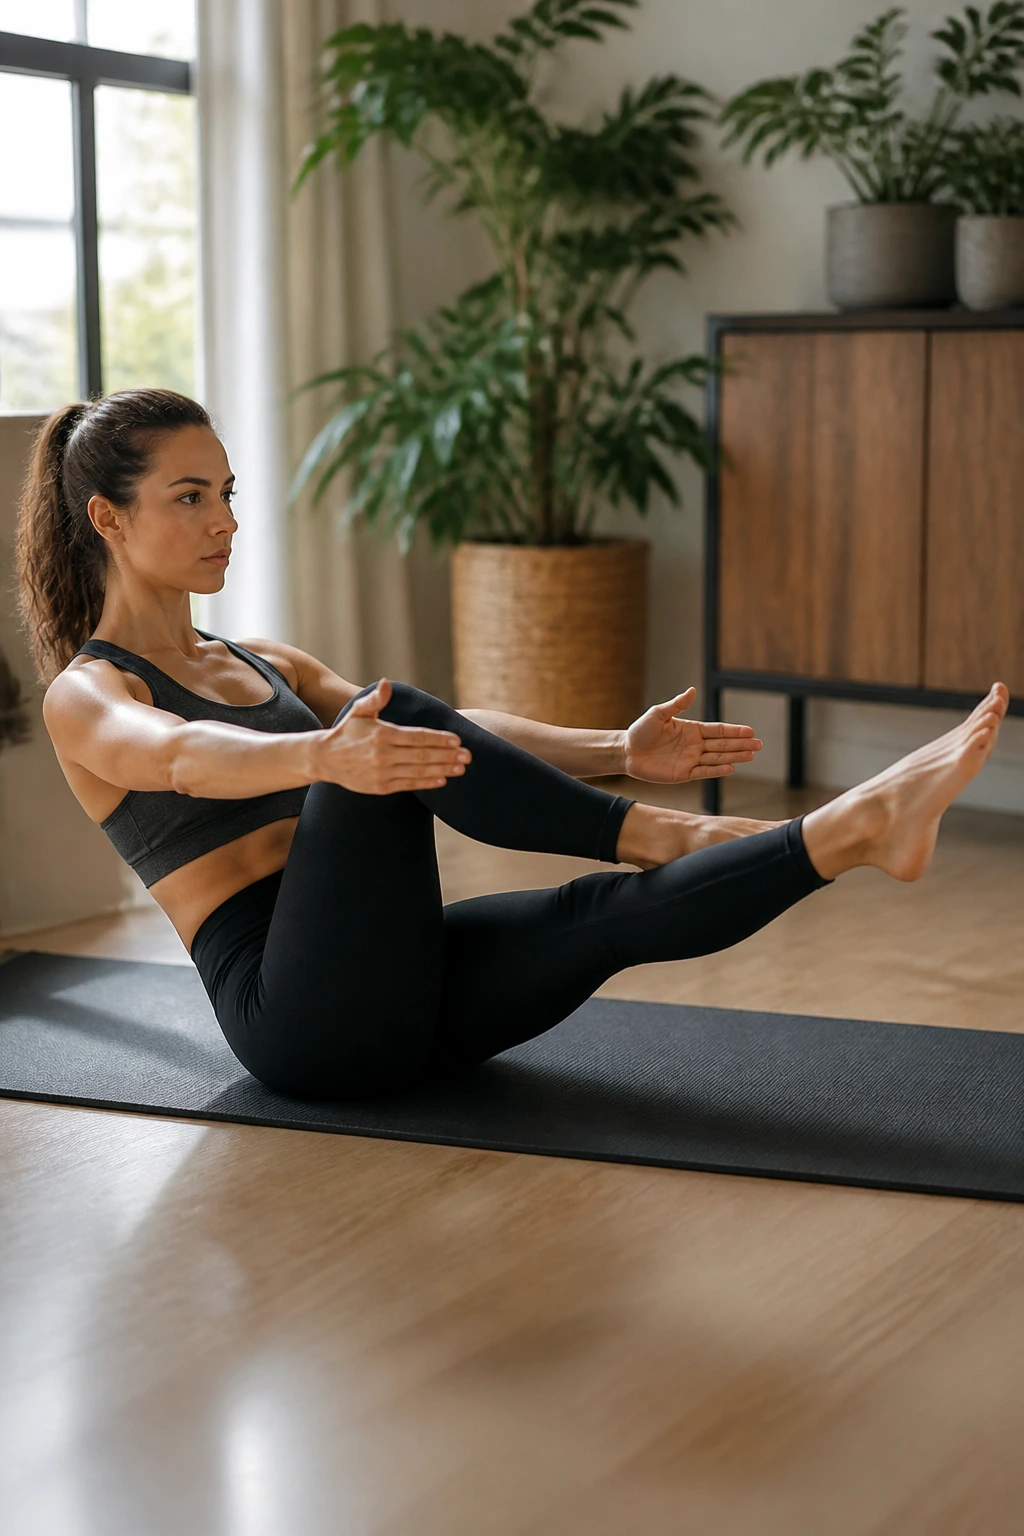
Half boat is one of my favorite core drills because it lets you scale the intensity in clear steps. You start with the knees bent, then one leg extends, then both, and the body has to keep choosing control over speed.
Sit with your knees bent and lift your shins into a low boat. Hold for one breath. Extend your right leg, bring it back. Extend your left leg, bring it back. Then, if the spine still feels supported, extend both legs for a short hold. Do 3 rounds.
How to scale it
If the low back rounds, keep both knees bent and skip the straight-leg step. If the neck starts to tense, lower the chest slightly and keep your gaze soft. The important part is that the torso stays lifted without turning the pose into a cramped sit-up.
This ladder style is useful because it gives you checkpoints. You can feel exactly where the shape gets messy. That kind of feedback is gold. It tells you whether you need more control, more breath, or just a smaller range.
21. Lizard Lunge Core Pulses
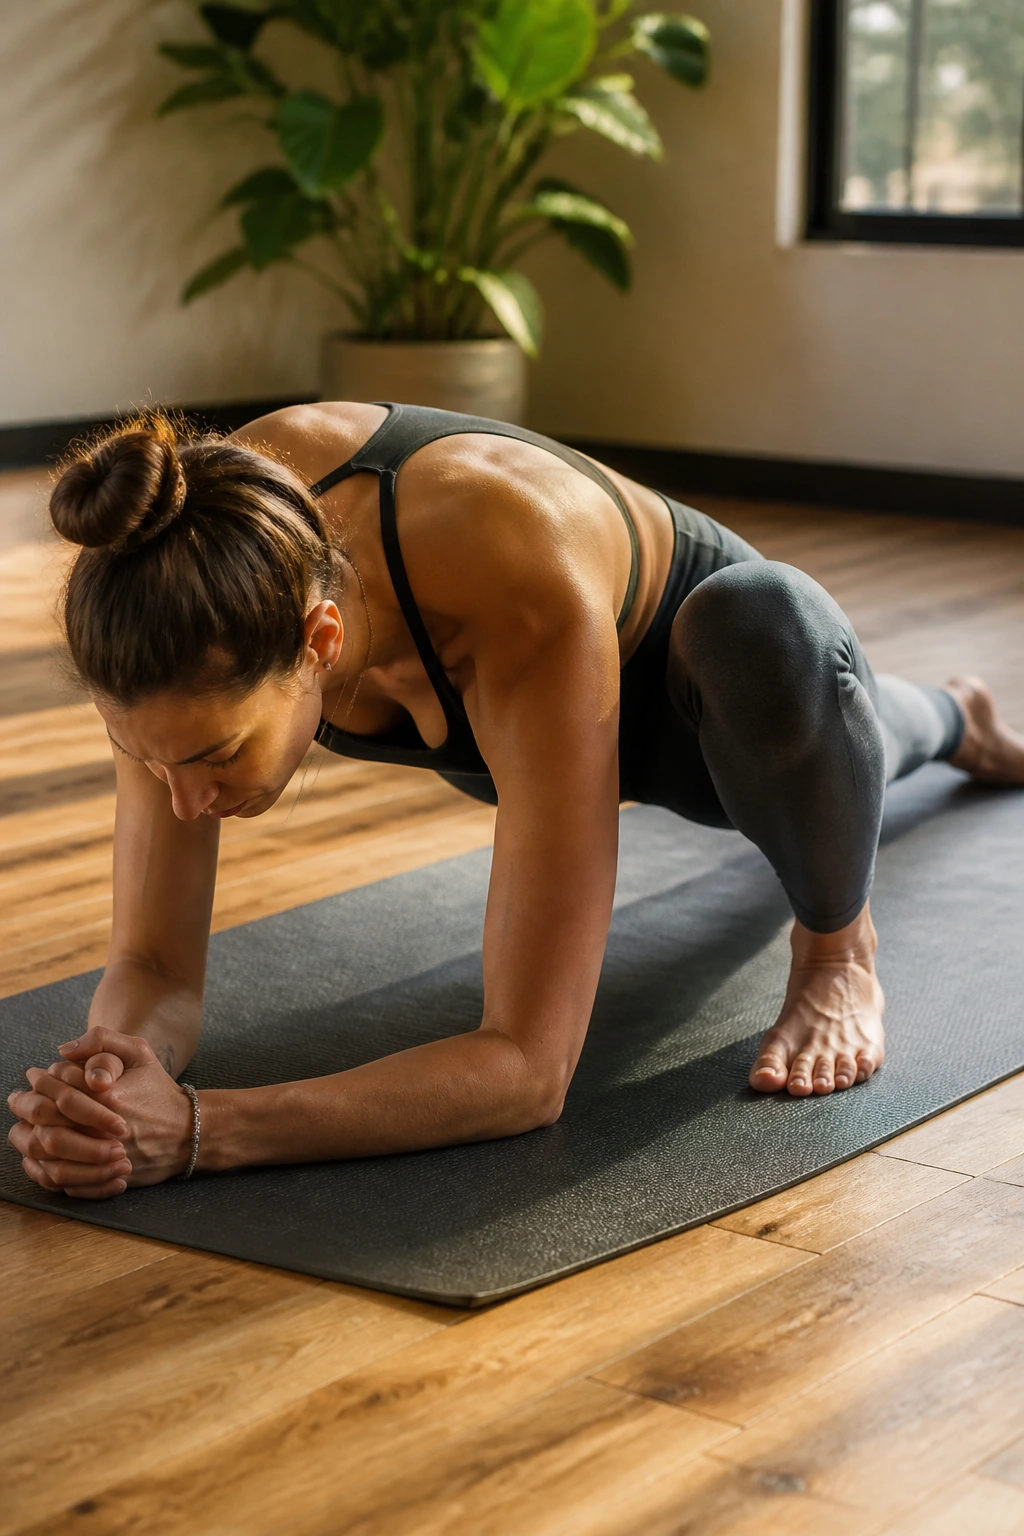
Lizard lunge is often treated like a hip opener and nothing else. That sells it short. Once you add small pulses and a steady trunk, it becomes a grounded core challenge that asks the torso to resist shifting while the hips move.
Step one foot outside the hand and lower the back knee if needed. Come onto forearms or stay on your hands. Pulse the hips back and forward by a couple of inches for 8 to 12 reps, keeping the rib cage tucked and the belly active.
Unlike a static stretch, this version makes you stabilize under motion. That matters because the body rarely needs perfect stillness in real life. It needs control while changing positions. Lizard lunge trains exactly that.
Best for: people who want core work but also need hip flexor and groin opening. Start small. If you force the depth, the lower back will usually pay for it later. A shorter pulse done well beats a dramatic sink every time.
22. Skater Lunge Flow
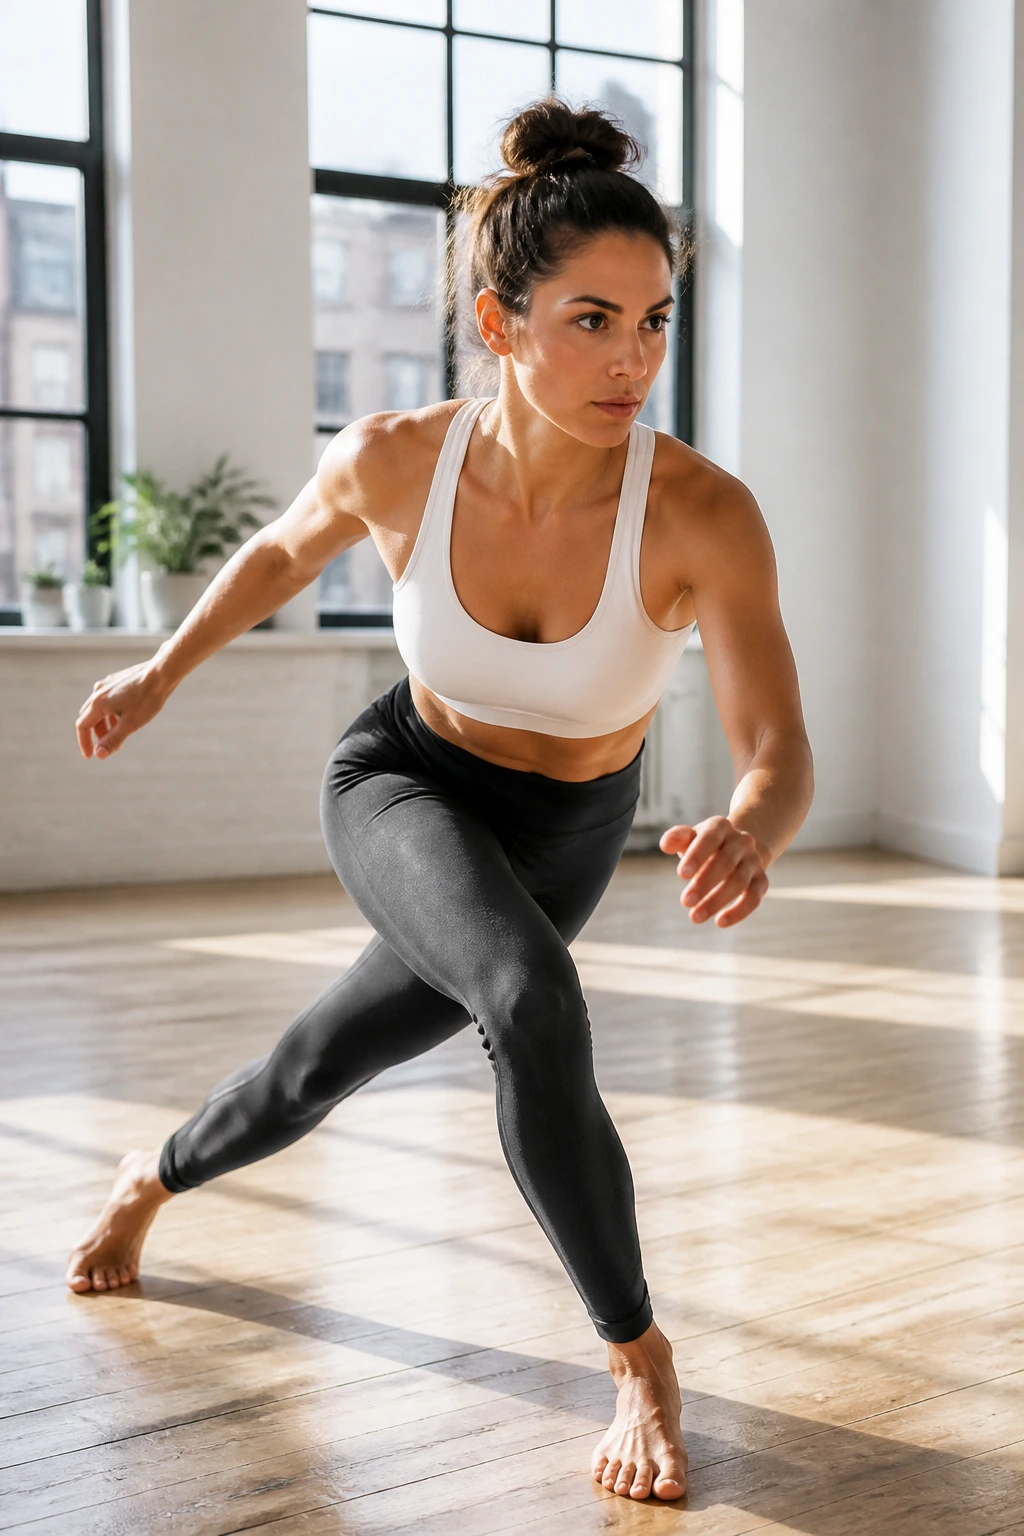
This is the most athletic move in the bunch. Skater lunge flow moves side to side with a low center of gravity, and the core has to keep you from tipping as the body crosses the midline repeatedly.
Step or hop one leg behind and across the body into a side-loaded lunge. Touch the floor or reach the hands to the inside of the front foot, then push back to center and switch sides. Do 6 to 10 total reps at a pace that lets you keep good form.
The cross-body pattern wakes up the obliques in a different way than static planks do. It also asks the hips and inner thighs to help stabilize the pelvis, which is useful if you like movement-based workouts more than holds.
A small warning: if your knees don’t love quick lateral shifts, keep it slow and grounded. Step instead of hop. The workout still counts. What matters is keeping the trunk stacked while the legs travel from side to side.
23. Sphinx Rocking Hold
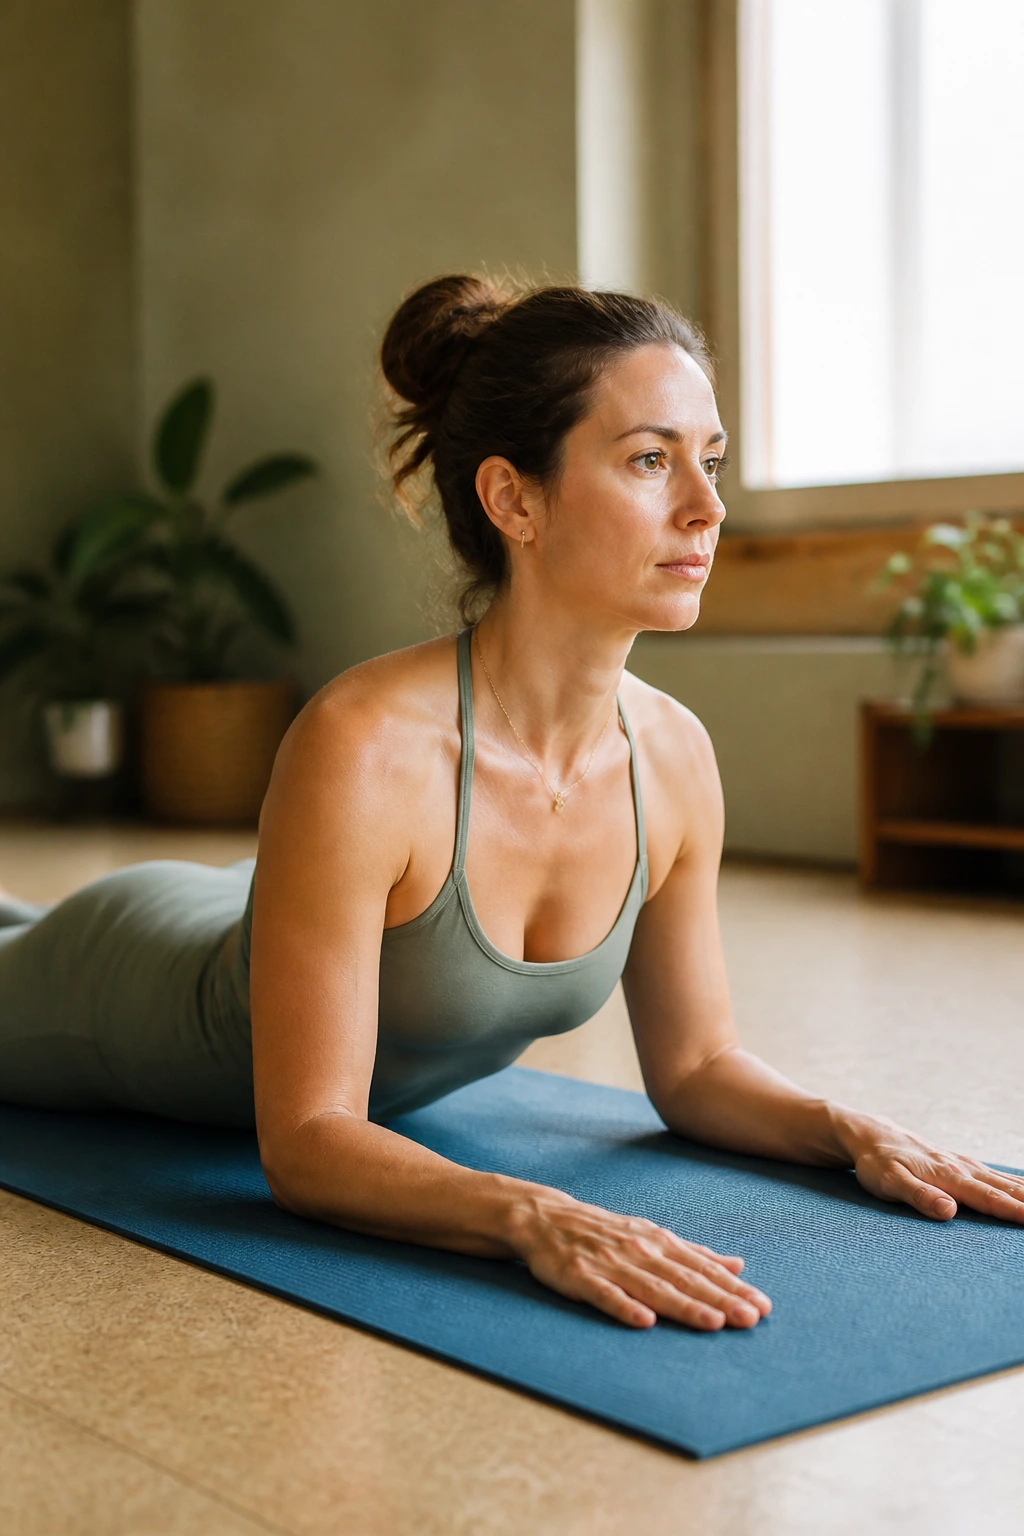
Lie on your stomach and prop onto your forearms for sphinx pose. From there, rock the body a tiny amount forward and back, keeping the pelvis heavy and the belly gently engaged. It feels calm. It isn’t passive.
What it trains
Sphinx rocking teaches the front body to stay long while the spine extends. That matters because many core workouts only ask for flexion or anti-extension. This one asks for awareness around the lower ribs and low belly while the back body wakes up.
How to do it
Lift into sphinx, take a breath, then shift your chest forward an inch or two and back again. Try 6 to 8 small rocks. Keep the forearms grounded and the shoulders away from the ears.
A lot of people let the low back dump here. Don’t. Think about reaching the pubic bone into the mat and gently drawing the lower belly away from the floor. It should feel steady, not crushed.
This is a good recovery-style core exercise for days when you want to work but not grind.
24. Supine Leg Lowering
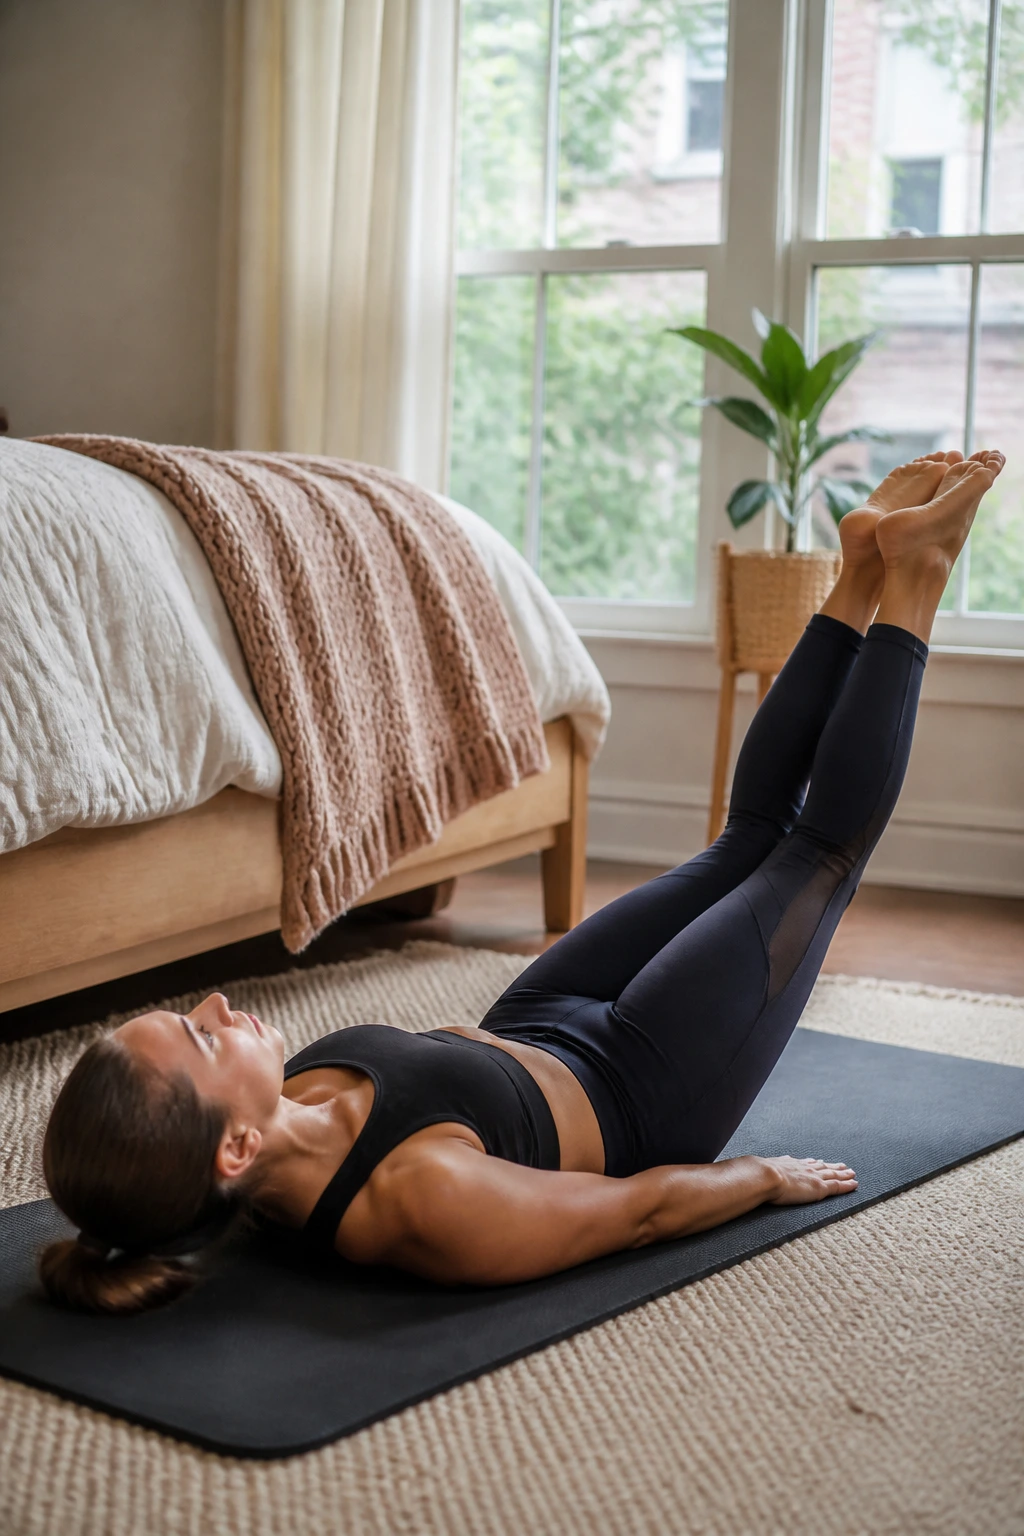
How do you train the lower abs without doing a thousand frantic reps? Supine leg lowering, if you do it with control. The movement is tiny, slow, and brutally honest about what your trunk can actually hold.
Lie on your back and raise both legs toward the ceiling. Keep one or both knees slightly bent if needed. Lower the legs a few inches toward the floor, then return before the back arches. Do 6 to 10 reps.
How to feel it in the right place
The lower spine should stay heavy on the mat. If it lifts, the legs are going too low. Raise them higher and slow the descent. You want tension through the front of the abdomen, not a tug of war in the hip flexors.
This move pairs well with boat pose because it teaches the same idea from a different angle: the torso stays quiet while the legs move. That skill is useful everywhere, and it is one of the real markers of usable core strength.
Quick cue
Breathe out on the lower. Every time.
25. Whole-Body Core Flow
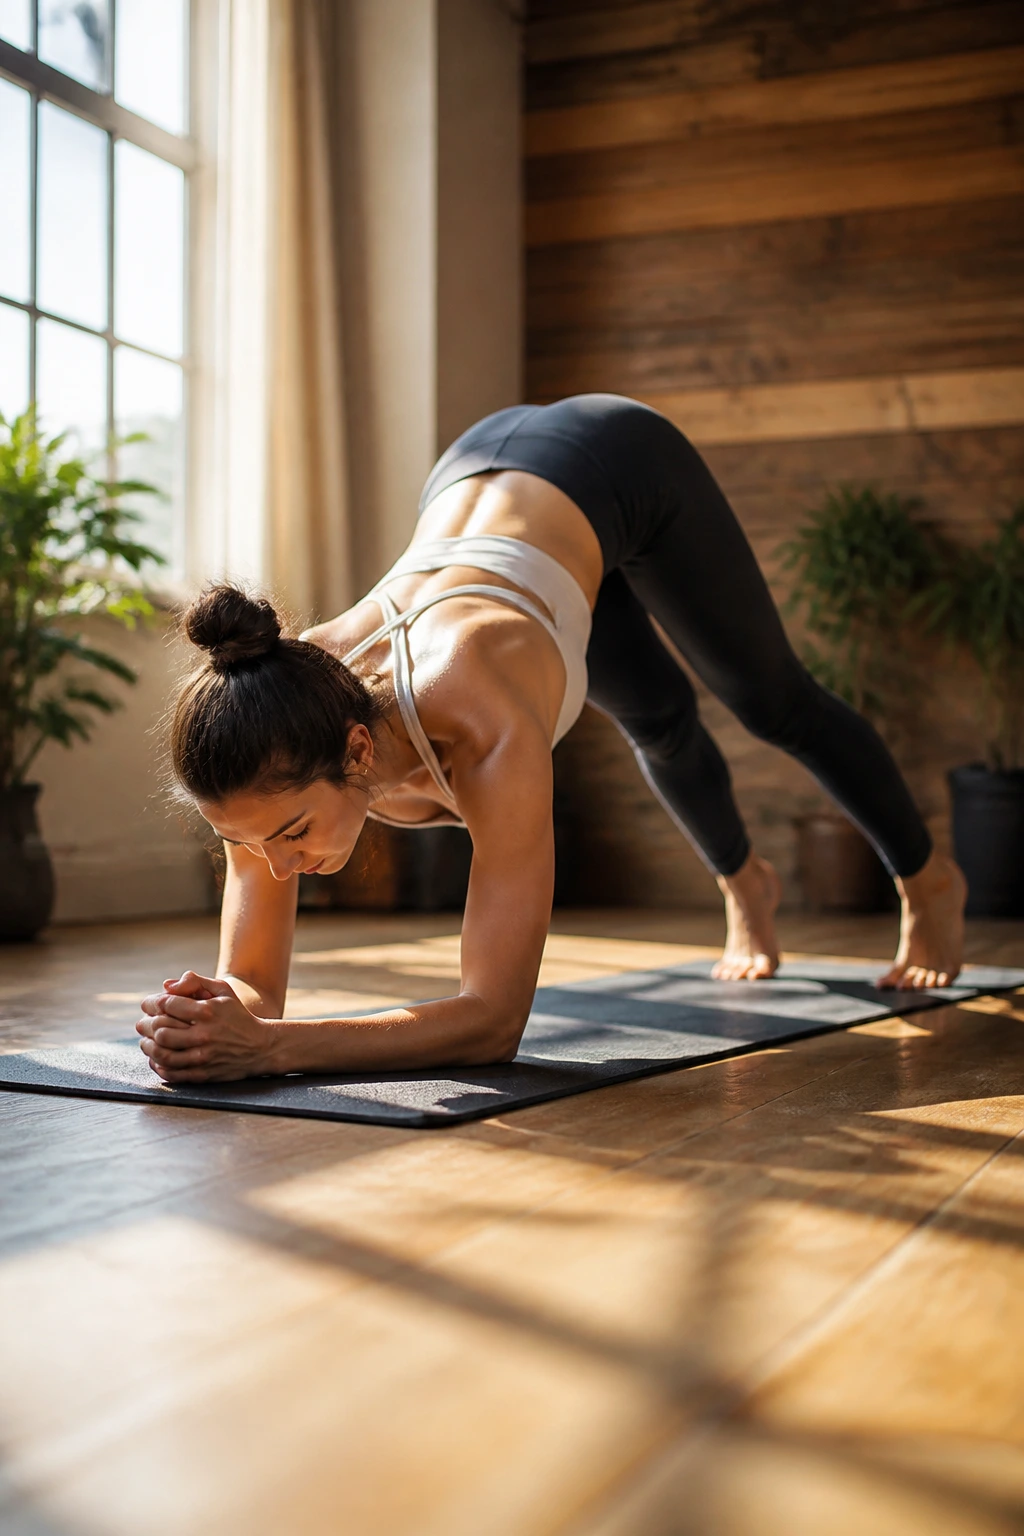
A good yoga core workout should feel like a conversation between floor work, standing balance, and controlled transitions. This final flow strings that idea together without needing a lot of equipment or a lot of space.
Start with 30 seconds of forearm plank, move into 5 Down Dog to Plank waves, then sit for 20 seconds of Boat Pose Reach-and-Hold. Stand up and hold 3 breaths of Warrior III, then finish with 8 Bridge Marches and one round of Revolved Chair on each side. Rest for a minute and repeat the circuit 2 times.
How to run it
Keep the pace steady, not frantic. You want enough breathing room to keep the form clean. If one move falls apart, shorten that piece instead of rushing through everything. That one adjustment makes the flow feel like training instead of a messy circuit.
Use this as a standalone session on days when you want a full core hit, or cut it in half when you only have a short window. The point is not to empty the tank. The point is to teach the body how to stay organized while the shapes change.
Finish by lying on your back for three slow breaths. Good work still needs a stop signal.
