



If you spend any significant amount of time sitting—whether at a desk, in a car, or on a couch—you are likely living with chronically tight hip flexors. It is the silent epidemic of modern life. When the psoas and the iliacus, the primary muscles responsible for lifting your legs, remain in a shortened state for hours on end, they lose their elasticity. They start to pull on your lower back, leading to a dull, persistent ache that most people misattribute to a “bad mattress” or “sleeping wrong.”
The hip flexors are deep, stubborn muscles. They do not respond well to quick, aggressive stretching. If you try to force them open with intensity, your nervous system will naturally clamp down to protect the hip joint, effectively canceling out the effort. The secret is not power; it is persistence and alignment. You have to convince the brain that it is safe to let go of the tension.
Yoga provides a specific, systematic way to re-educate these muscles. It is not about reaching the deepest expression of a pose on day one. It is about finding the point of resistance, breathing into it, and allowing the nervous system to signal a release. You do not need a gym membership or fancy gear to undo the damage of a sedentary day. You just need a bit of floor space and the willingness to slow down.
1. Low Lunge (Anjaneyasana)
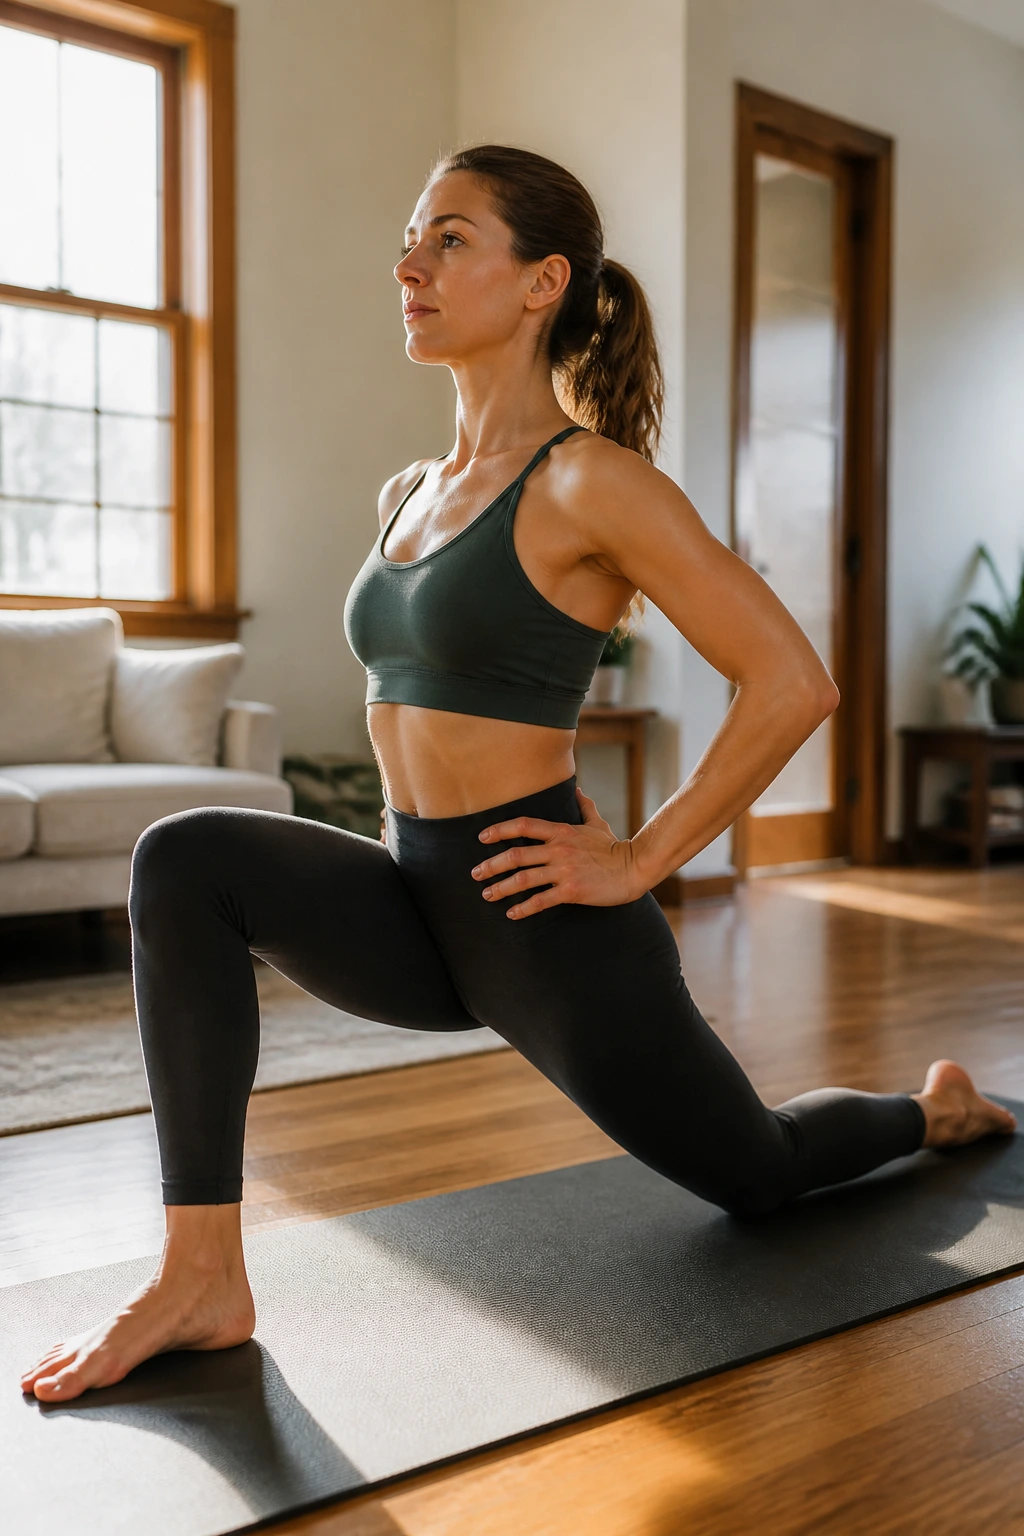
This is the bread and butter of hip flexor release. Many people treat this as a pose to simply “sink into,” but that is a mistake. If you dump your weight into the front leg, you are mostly stretching the connective tissue of the knee, not the hip flexor.
How to Find the True Stretch
To get the benefit, keep the back toes tucked or untucked—whichever feels stable—but prioritize the engagement of the glute. When you squeeze the glute of the back leg, you send a neurological signal to the hip flexor to release. It is a concept called reciprocal inhibition.
- Keep your torso upright; do not lean forward.
- Tuck your tailbone slightly under to engage the core.
- If you feel pinching in your lower back, back off. You have gone too far.
Pro tip: Imagine dragging your front heel and your back knee toward each other. This isometric contraction creates a magnetic, stabilizing energy that makes the stretch significantly more effective.
2. Lizard Pose (Utthan Pristhasana)
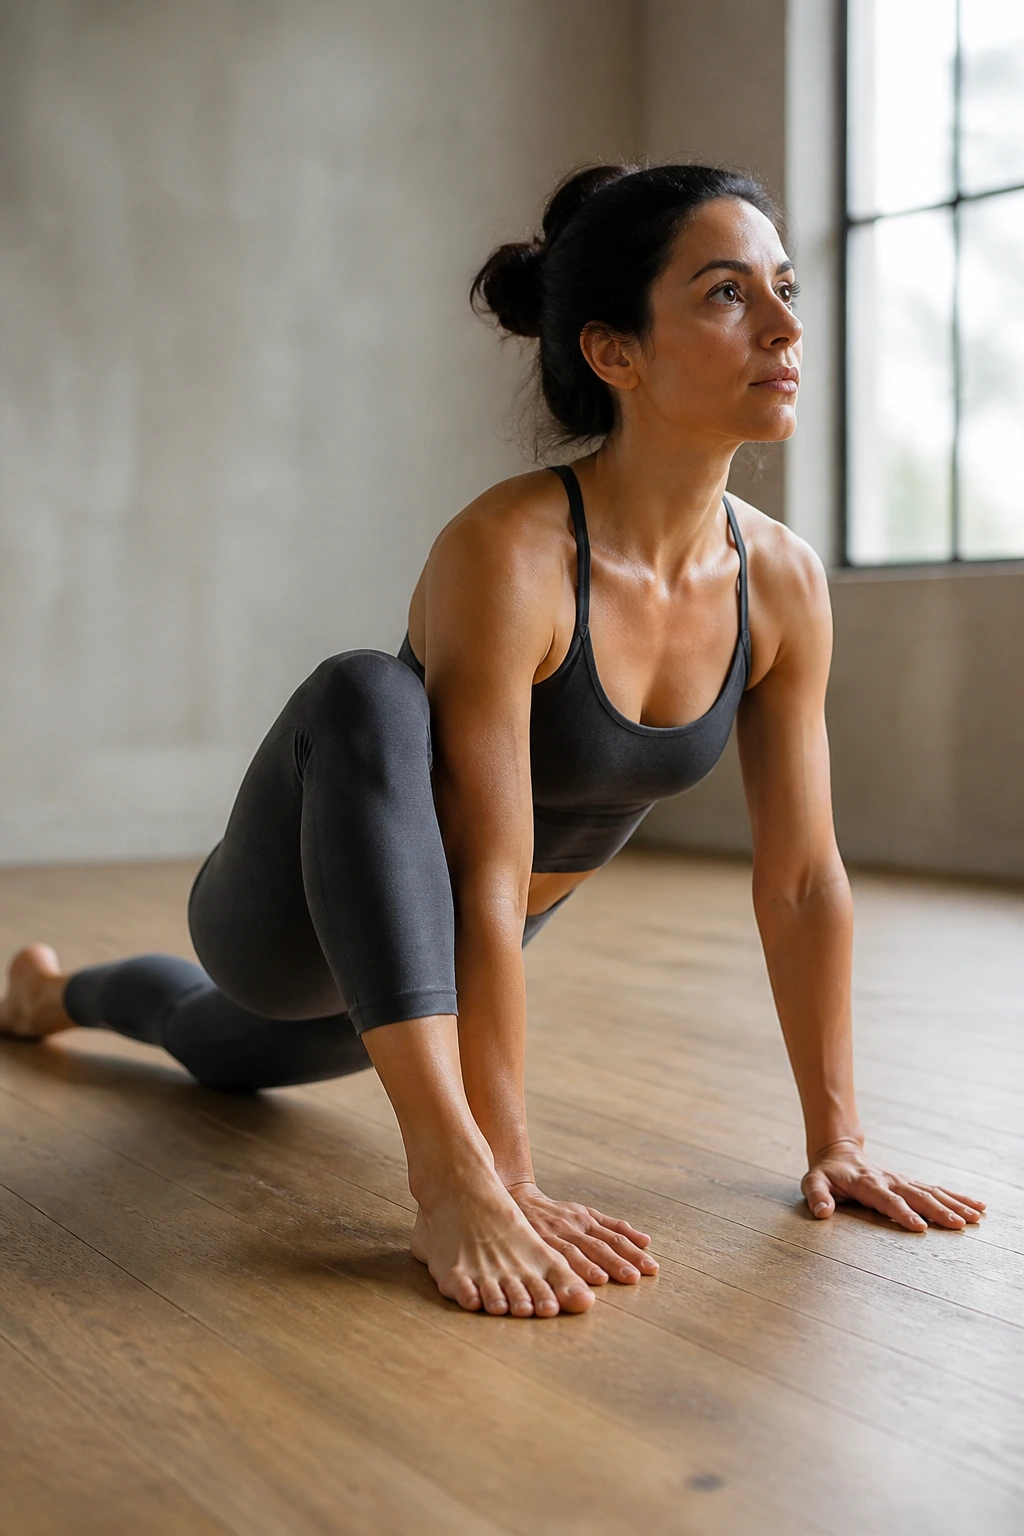
Lizard pose takes the low lunge and demands more space. It gets into the deep hip tissues, specifically the iliopsoas, which connects the lumbar spine to the femur. It is uncomfortable for almost everyone at first. That feeling of “I cannot go any lower” is exactly where the work happens.
Moving Into the Stretch
You can start on your hands, but dropping to your forearms or onto a block changes the geometry completely. If your hip flexor is truly tight, your knee will want to splay outward. Keep the front knee hugging toward your shoulder.
- Maintain a flat back; do not round your shoulders.
- Breathe into the tightness—do not hold your breath.
- If your knee starts to hurt, put a blanket under it.
This pose is not just about the front hip; it is about the structural integrity of the entire pelvic floor. Keep your gaze forward to maintain a neutral cervical spine.
3. Pigeon Pose (Eka Pada Rajakapotasana)
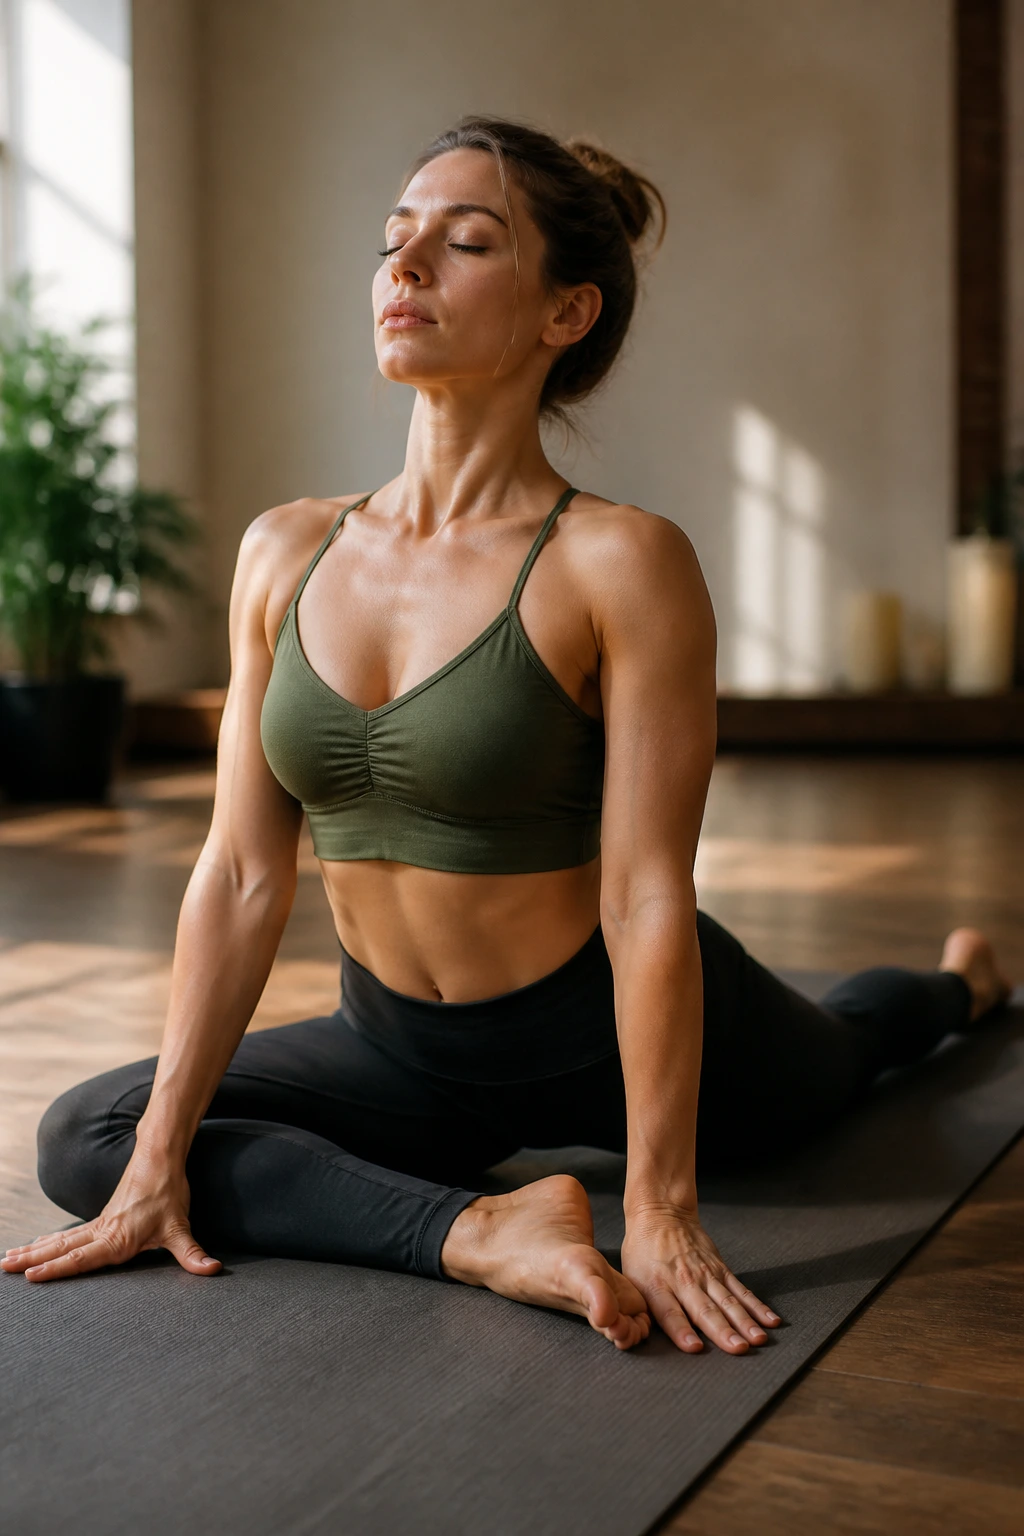
Pigeon is often misunderstood as a glute stretch. While it certainly hits the piriformis and the outer hip, it does double duty on the back leg’s hip flexor. The key is in the setup. If you just flop into it, you are likely putting strain on the knee of the front leg.
The Setup That Saves Your Knees
Position your front shin at an angle that works for your hips, not necessarily parallel to the front of the mat. The back leg needs to be straight behind you. It is easy for the back leg to “turn out” or drift to the side. Keep it centered, as if you are trying to touch your big toe to the mat behind you.
- Use a prop under your front hip if it is hovering far off the ground.
- Square your hips toward the front of the room.
- Walk your hands forward to fold, but do not sacrifice the hip alignment.
When the hips are squared, the back leg’s hip flexor gets a deep, targeted elongation. It is a subtle adjustment that makes a massive difference in the sensation.
4. Bridge Pose (Setu Bandhasana)
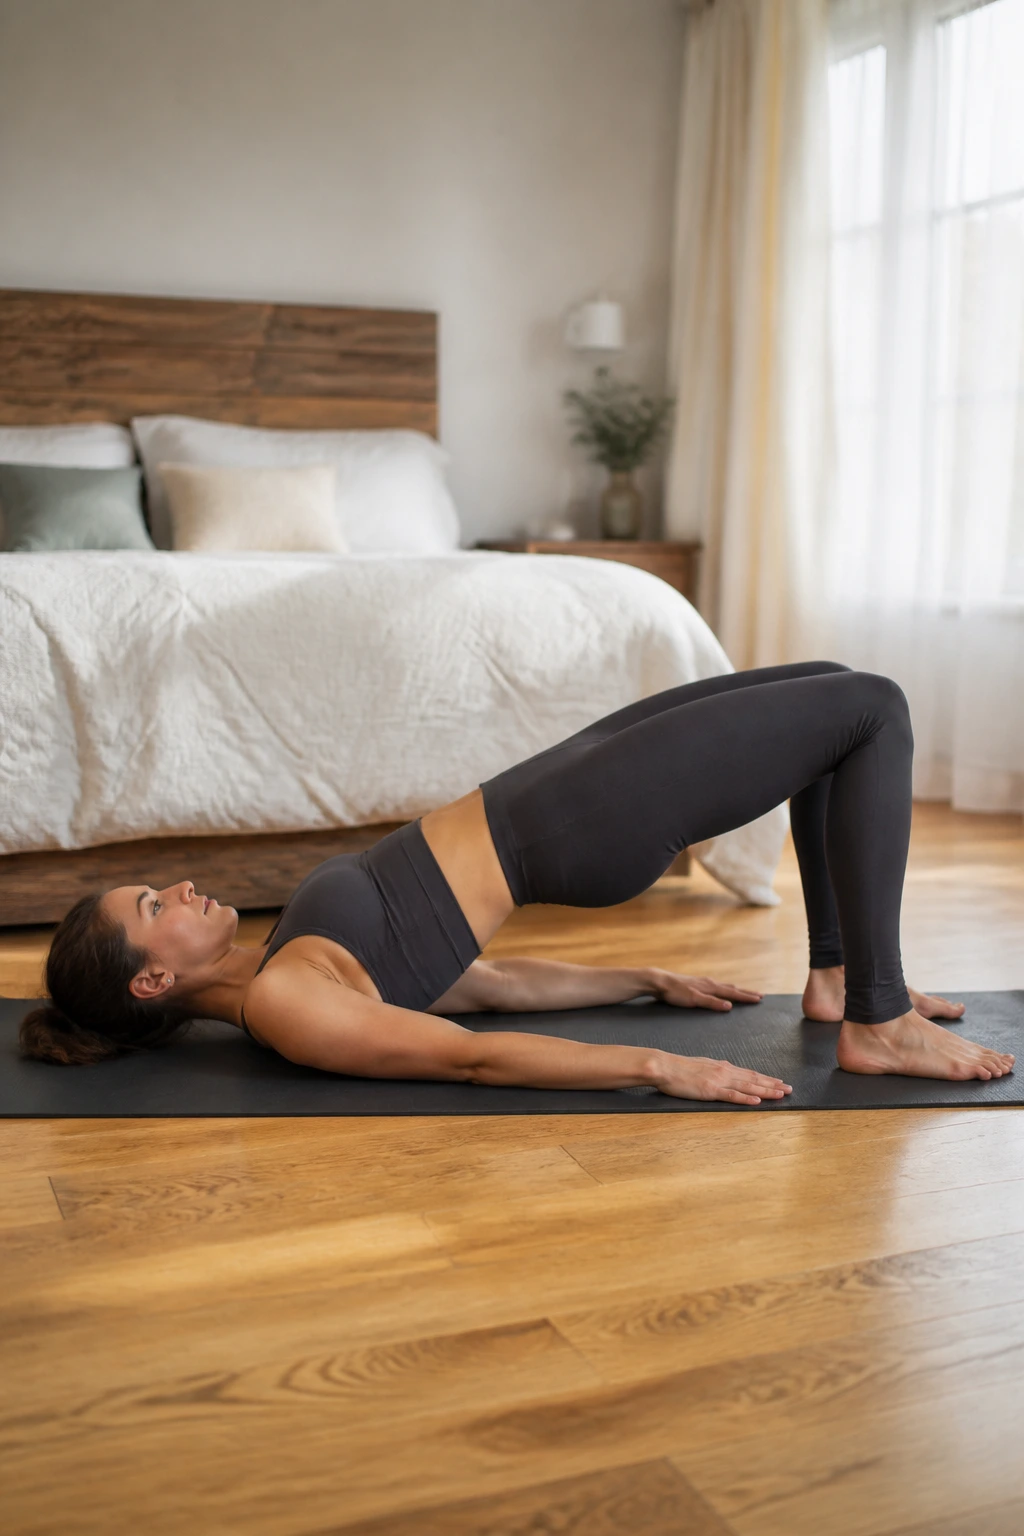
We often think of backbends as spinal exercises, but they are secretly the most potent hip flexor stretches available. In Bridge, your hip flexors are physically forced into extension. It is a passive, gravity-assisted way to lengthen the front of the pelvis.
Maximizing the Extension
The common error here is to splay the knees outward, which relieves the pressure on the hips. Resist that urge. Keep your feet and knees hip-width apart. Visualize your knees reaching toward the front wall, which lengthens the femur away from the hip socket.
- Interlace your hands under your back to open the chest further.
- Ensure your weight is on your shoulders, not your neck.
- Lift the hips, but keep the glutes engaged—not clenched to the point of cramping.
This pose resets the pelvis after a day of sitting in a chair, helping to counteract the anterior pelvic tilt that leads to chronic hip tightness.
5. Butterfly Pose (Baddha Konasana)
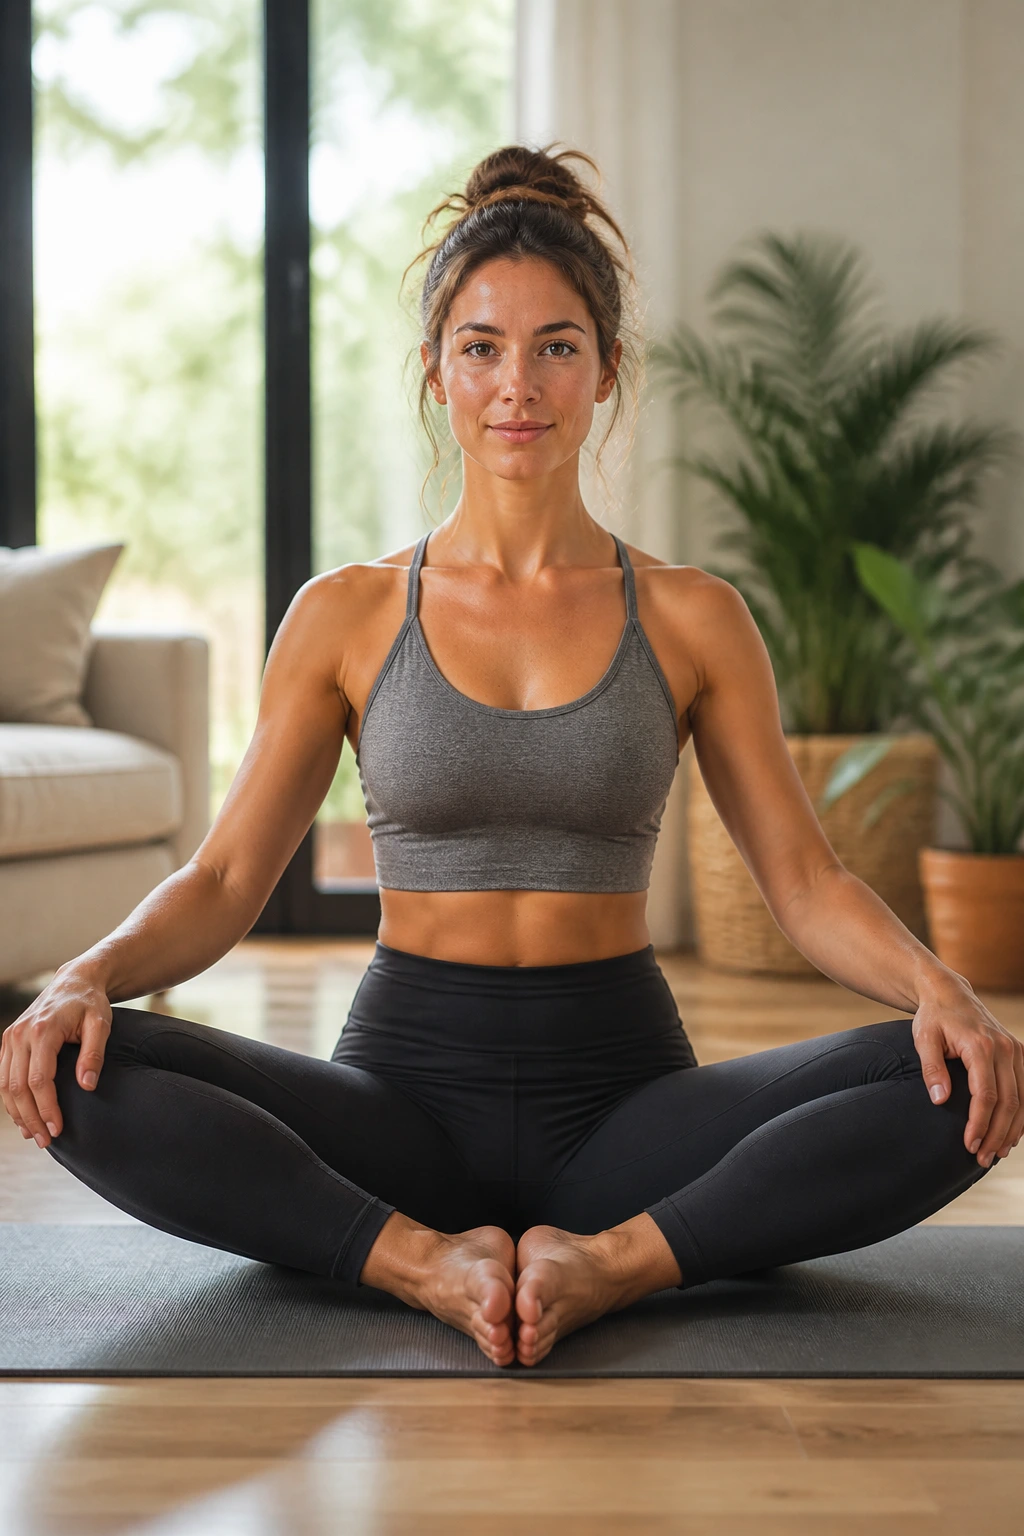
This is the classic, accessible hip opener. While it primarily targets the inner thighs and adductors, the way you sit in this pose affects the hip flexors. If you hunch, you lose the benefits. The goal is to create a long, tall spine.
Why It Matters
When you sit upright, you tilt the pelvis forward, which puts the hip flexors in a neutral, relaxed position. From there, you can safely explore the outer hip opening.
- Hold your ankles or your feet.
- Press the soles of your feet together, but do not force your knees to the floor.
- Lengthen through the crown of your head.
Use your elbows to gently nudge your knees down, but only if your back stays flat. If you start to curve, stop. It is better to have your knees higher and your spine straight than to be folded over with a rounded back.
6. Happy Baby (Ananda Balasana)
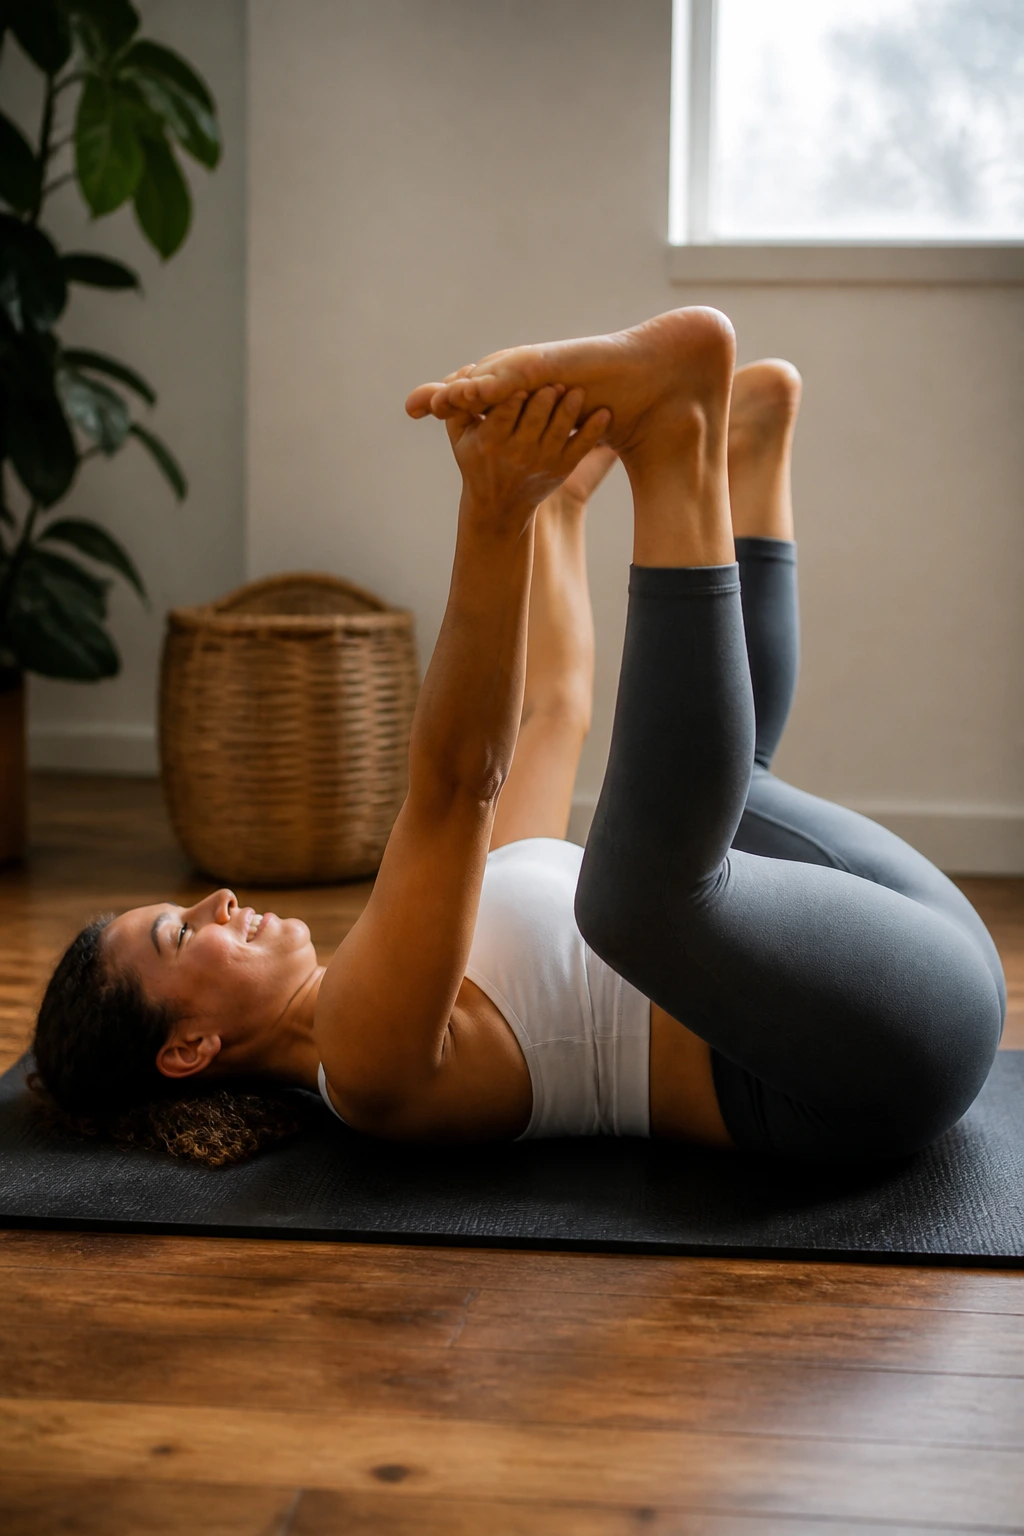
Happy Baby is not just for kids; it is one of the most effective ways to release the lower back and hips simultaneously. By pulling your knees toward your armpits, you are putting the hips into a deep flexion.
Making the Most of It
The magic here is in the resistance. Pull your knees down with your hands, but push your feet up into your hands. This creates an antagonistic muscle engagement that helps the hips release tension without feeling like you are forcing a stretch.
- Keep your lower back flat on the mat.
- Rock gently from side to side to massage the lumbar region.
- Keep your shoulders relaxed away from your ears.
If you cannot reach your feet comfortably, hold your shins. The benefits remain the same. The pressure of the thighs against the torso helps “decompress” the hip joints, providing a sense of relief after a day of being upright.
7. Crescent Lunge (Alanasana)
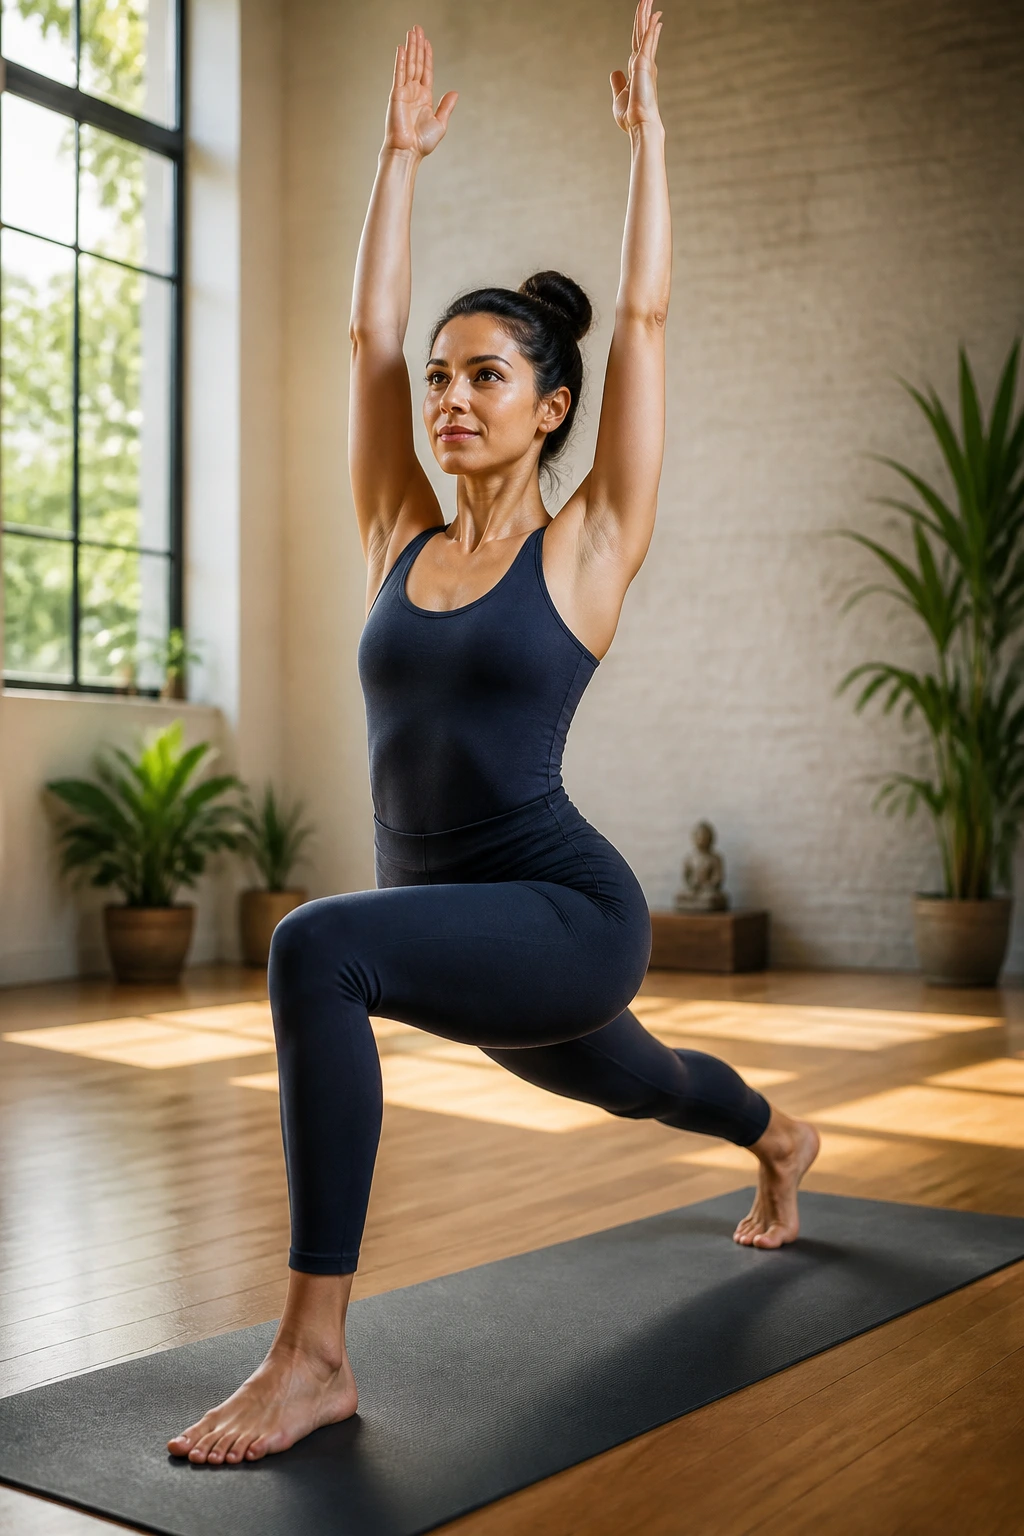
Unlike the low lunge, Crescent Lunge requires balance and active engagement. Because you are standing, you have to stabilize your core to keep from falling. This stabilization prevents you from dumping into the low back.
The Mechanics of Stability
In Crescent Lunge, the back leg is straight, which creates a more intense line of energy than the low lunge. The back heel stays lifted. This lifted heel forces the hip flexor of the back leg to work harder and stretch further.
- Draw your front hip back and your back hip forward to square the pelvis.
- Reach your arms high, but drop your shoulders down.
- Keep your front knee stacked over your ankle.
If you wobble, it is just your nervous system struggling to find the new range of motion. It will stabilize with time and practice.
8. Gate Pose (Parighasana)
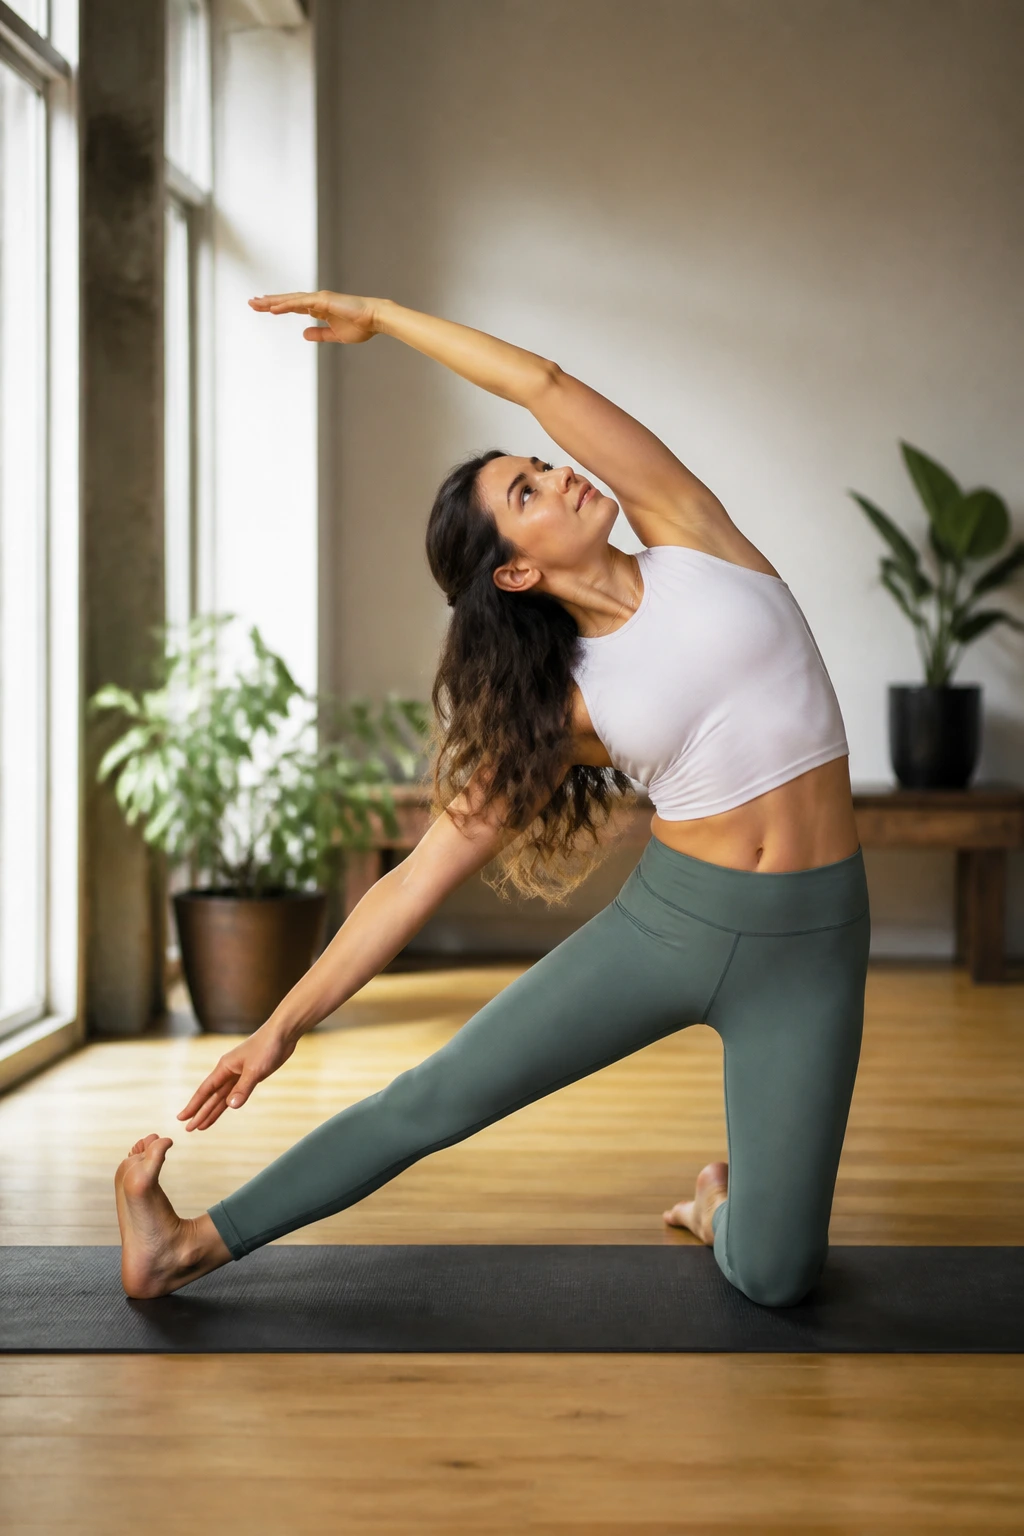
Gate pose is a lateral stretch that targets the side body, but it also creates a unique opening for the hips. By extending one leg out to the side while kneeling, you isolate the hip flexors in a way that standard forward-facing poses cannot.
Where to Feel the Stretch
You should feel this along the entire side of your body, from the hip up to the ribs. It forces the pelvis to open in a plane of motion—the frontal plane—that we almost never move in during daily life.
- Keep the extended leg firmly rooted.
- Reach the arm over your head, aiming for the toes of the extended leg.
- Avoid collapsing the chest; keep it open toward the ceiling.
This is a fantastic pose for people who feel “stuck” in their hips, as it works on the muscles that stabilize the hips laterally, specifically the tensor fasciae latae (TFL).
9. Warrior I (Virabhadrasana I)
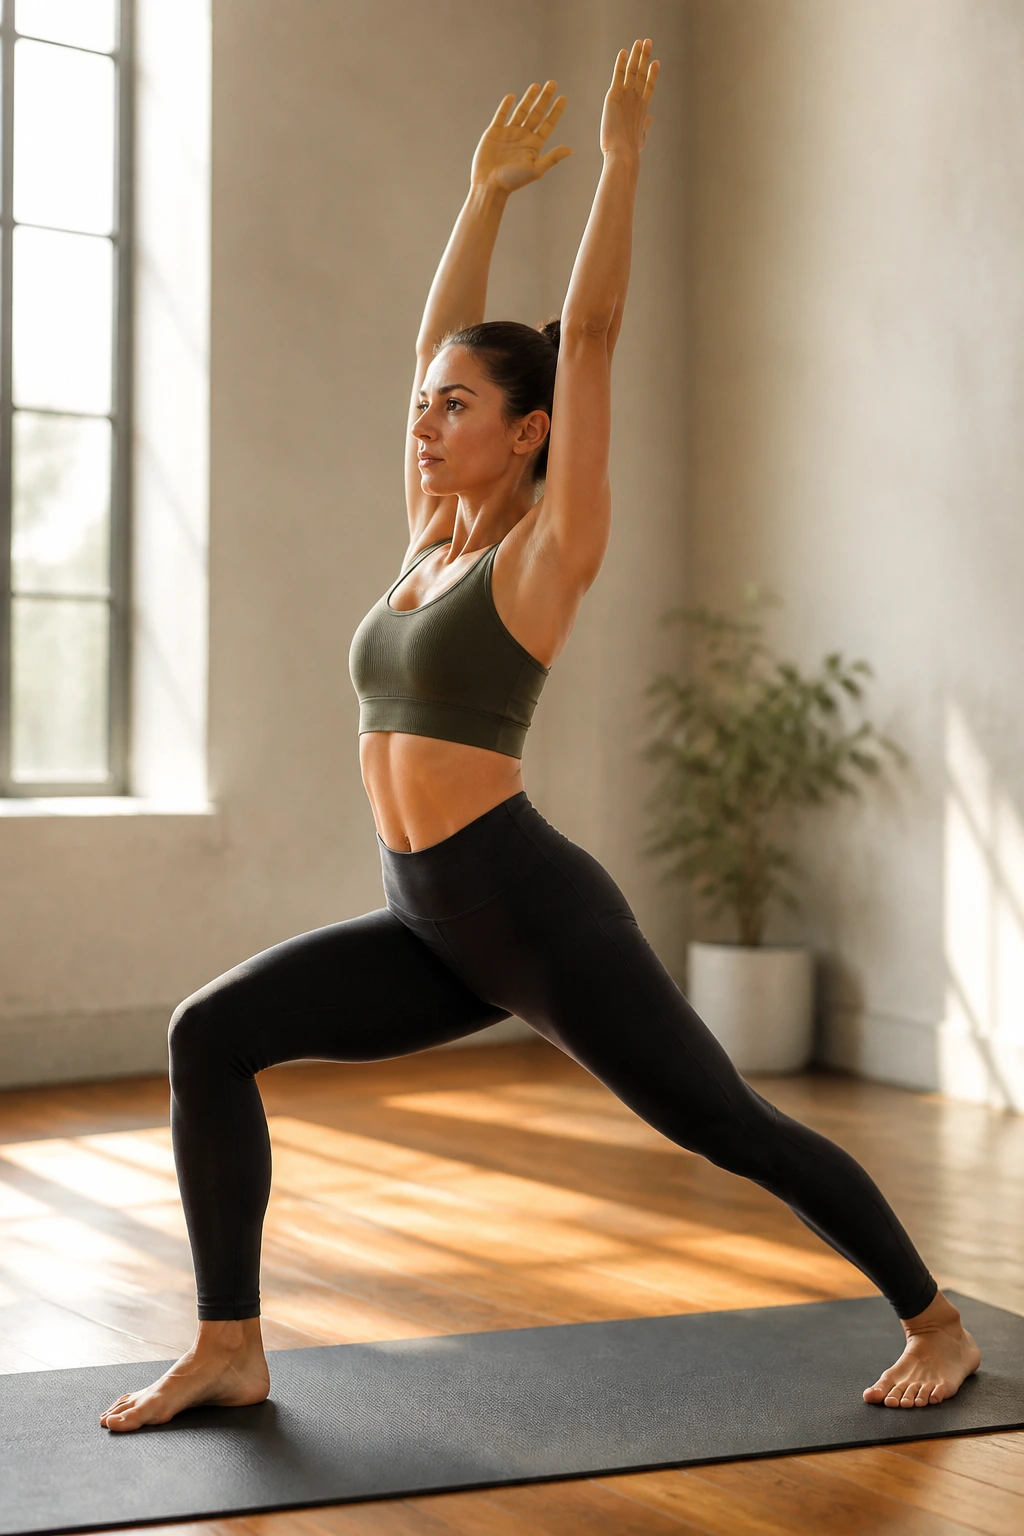
Warrior I is the foundation of standing poses. It looks simple, but it is notoriously difficult to get right. You are asking your hips to square forward while your back foot is turned out at an angle. This creates a specific, manageable tension in the back leg’s hip flexor.
Avoiding the Low Back Trap
The most common mistake is to try to square the hips by twisting the lower back. Don’t do that. You can have a slight diagonal in your hips; it is safer for your SI joint. Focus on pushing the back heel into the mat.
- Deeply bend the front knee.
- Keep the torso tall, stacked directly over the hips.
- Engage your core as if you are bracing for a gentle poke in the stomach.
By keeping the torso vertical, you are preventing the hip flexor from shortening and forcing it to stay long and engaged.
10. Pyramid Pose (Parsvottanasana)
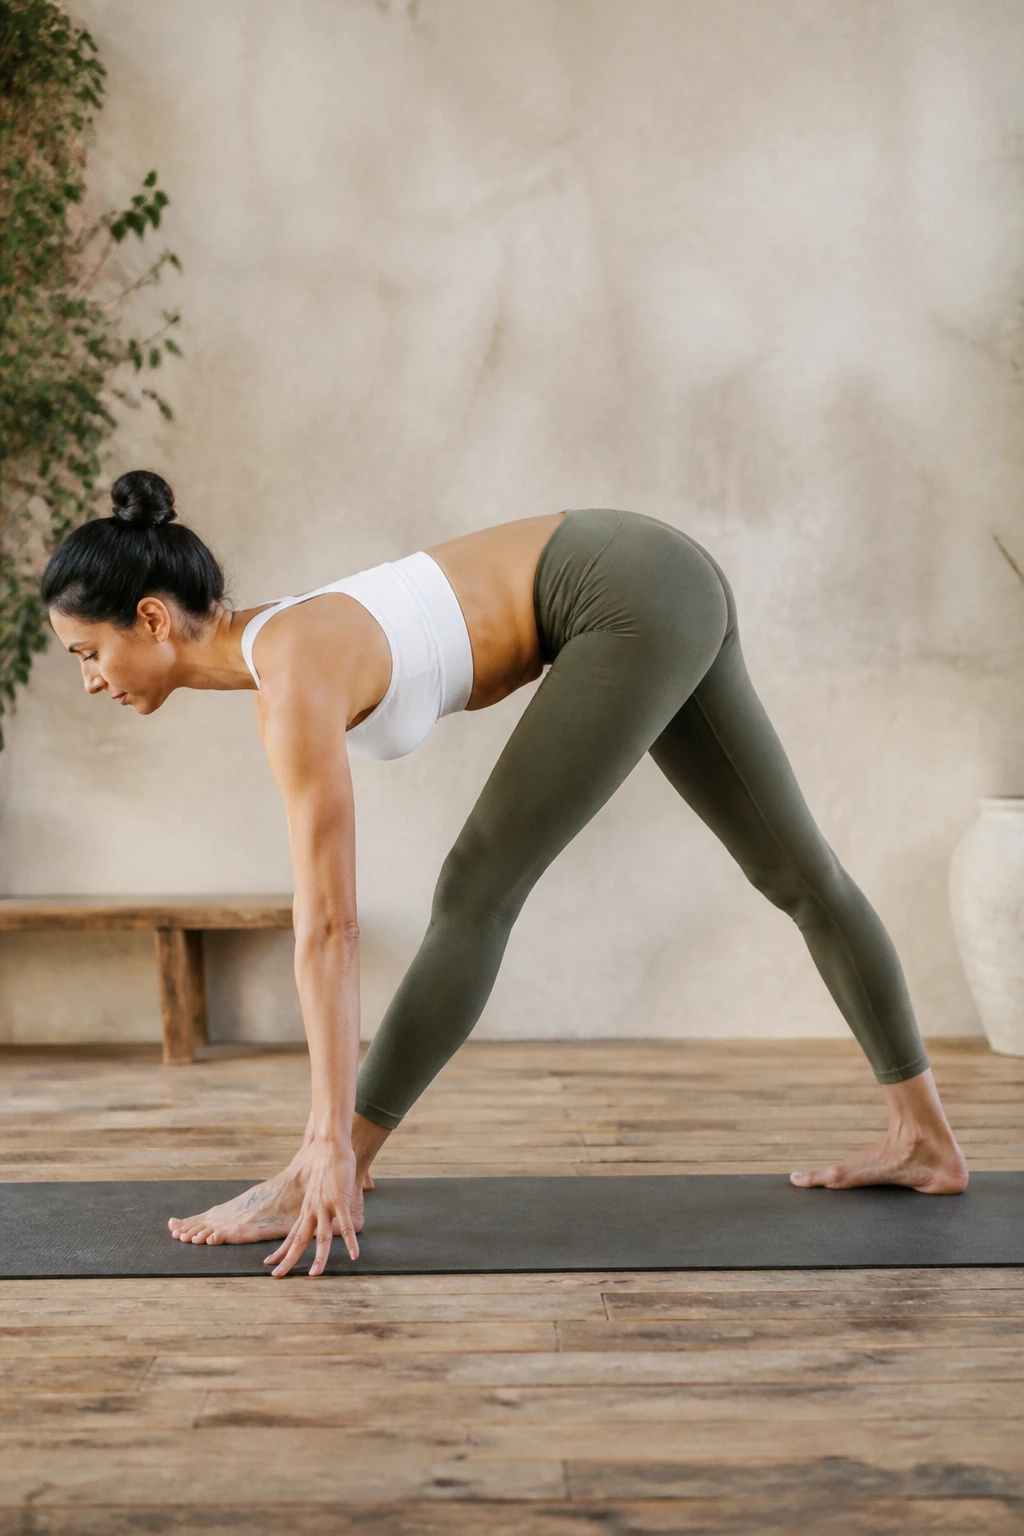
Pyramid pose is an intense hamstring stretch, but it also acts as a stabilizer for the hips. By straightening both legs, you create a symmetrical stretch that allows the hip flexors to let go of their “protective” tension.
Handling the Tightness
If your hamstrings are tight, your hip flexors will often tighten in response to prevent you from falling forward. Use blocks under your hands. Do not try to touch the floor with your palms if it means rounding your spine.
- Keep your hips square to the front.
- Fold from the hip creases, not the waist.
- Relax your head and neck entirely.
When the hamstrings release, the hips follow. It is all connected; treat the body as one singular unit rather than a collection of separate parts.
11. Cow Face Pose (Gomukhasana)
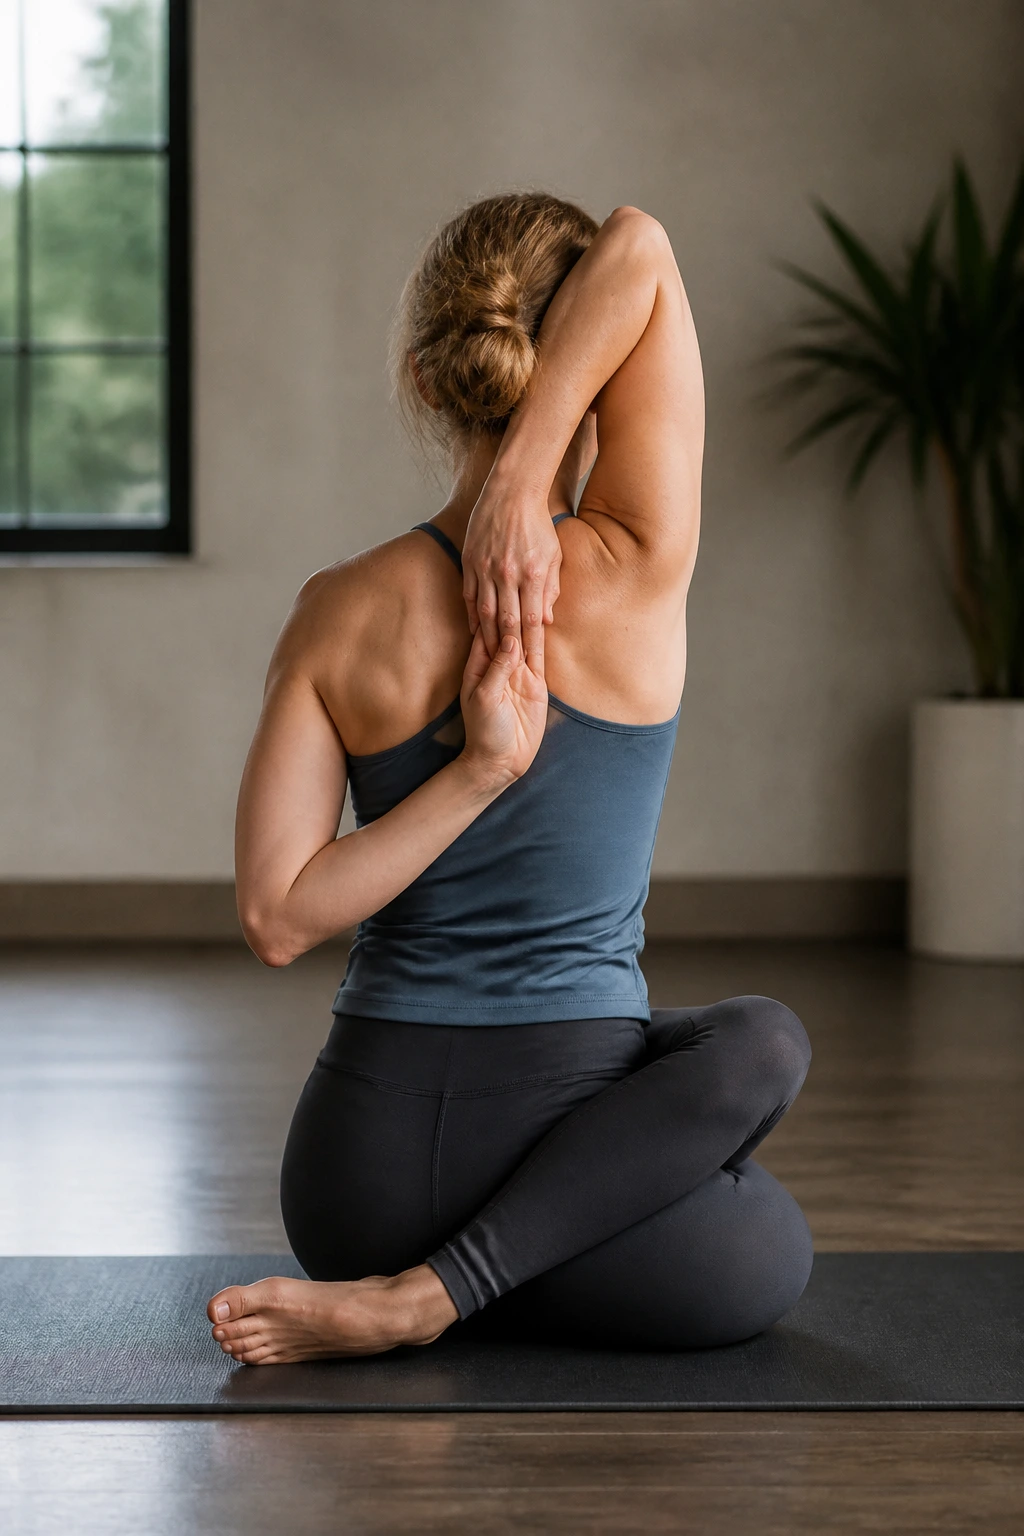
This pose is intense. It stacks the knees and creates a deep internal rotation for one hip and external for the other. It is a powerful way to access the deep, stuck tissues of the hip joint.
Managing the Intensity
If your knees do not stack easily, do not force it. You can sit on a block or a folded blanket to elevate your hips. This simple change allows the pelvis to tilt forward, which is essential for safely stretching the hips.
- Stack the knees as best as you can.
- Keep both sitting bones grounded on the floor.
- Lengthen the spine before folding forward.
This pose hits the hips from an angle that most other stretches miss. It is not always comfortable, but it is deeply effective for those who spend their days in a seated position.
12. Reclined Hand-to-Big-Toe Pose (Supta Padangusthasana)
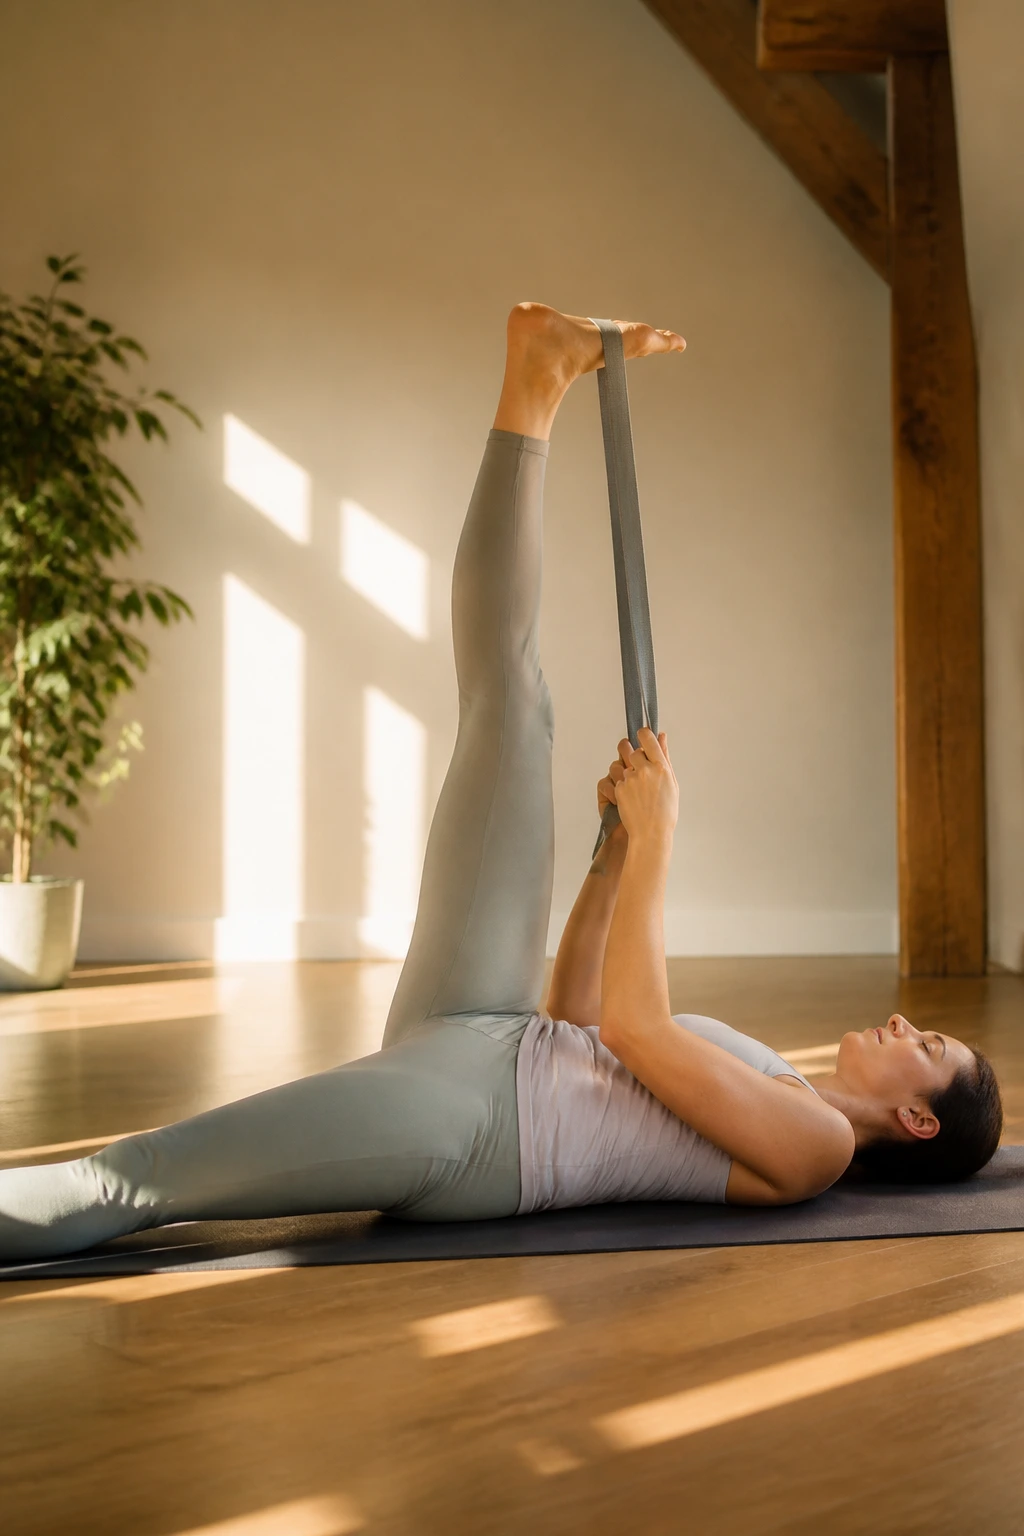
This is the “cheat code” of yoga poses. You get the benefit of a deep hamstring and hip stretch without the challenge of balance or gravity fighting against you. Because your back is on the floor, you can isolate the hips without engaging the core to stabilize the torso.
Using the Strap
Most people should use a strap, towel, or belt around the foot of the extended leg. This allows you to keep your shoulders relaxed on the mat.
- Keep the bottom leg pressing firmly into the floor.
- Draw the lifted leg toward your chest, but keep the knee straight.
- Flex both feet.
By keeping the bottom leg active and grounded, you create a “scissor” effect in the hips that releases deep, stubborn tension.
13. Goddess Pose (Utkata Konasana)
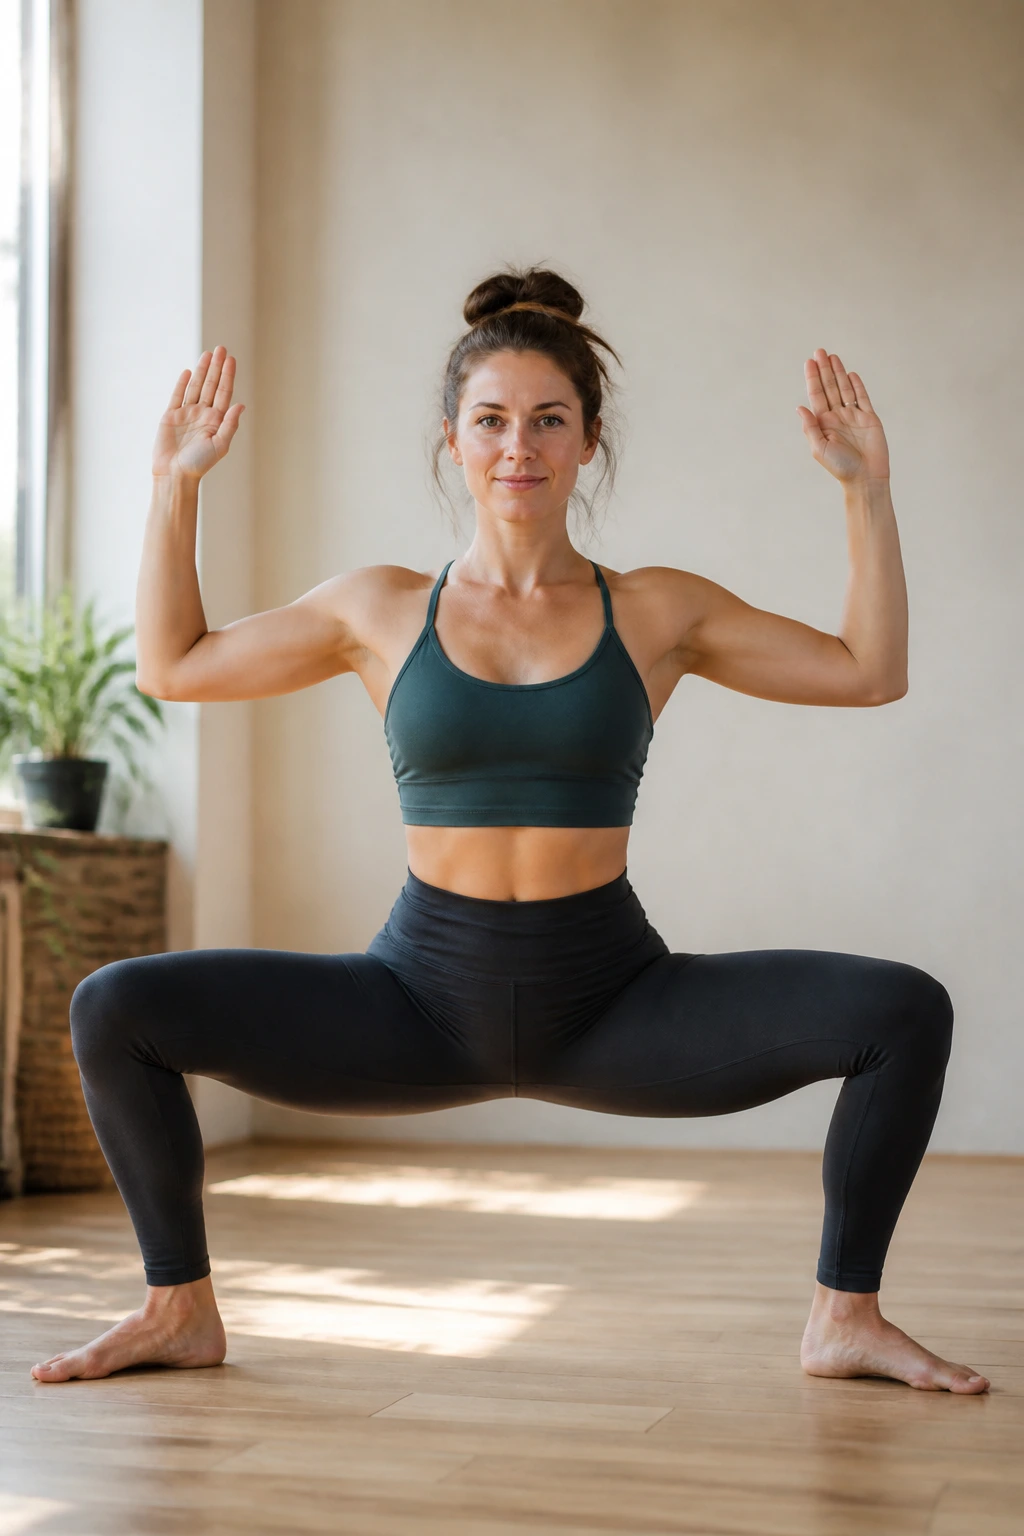
Goddess pose is about strength as much as flexibility. By opening the hips into a deep squat, you are challenging the inner thighs and the hip flexors to work in their end-range of motion.
Holding the Squat
When you are in the pose, the urge is to tuck the pelvis or lean forward. Resist both. Try to keep the tailbone pointing straight down toward the earth, as if a string were attached to it.
- Keep knees tracking over the toes—do not let them cave in.
- Keep the arms in a cactus shape to open the chest.
- Breathe into the intensity of the legs.
It builds heat, which makes the muscles more pliable and ready to release. It is the perfect pose for those who feel “tight” in the hip sockets.
14. Garland Pose (Malasana)
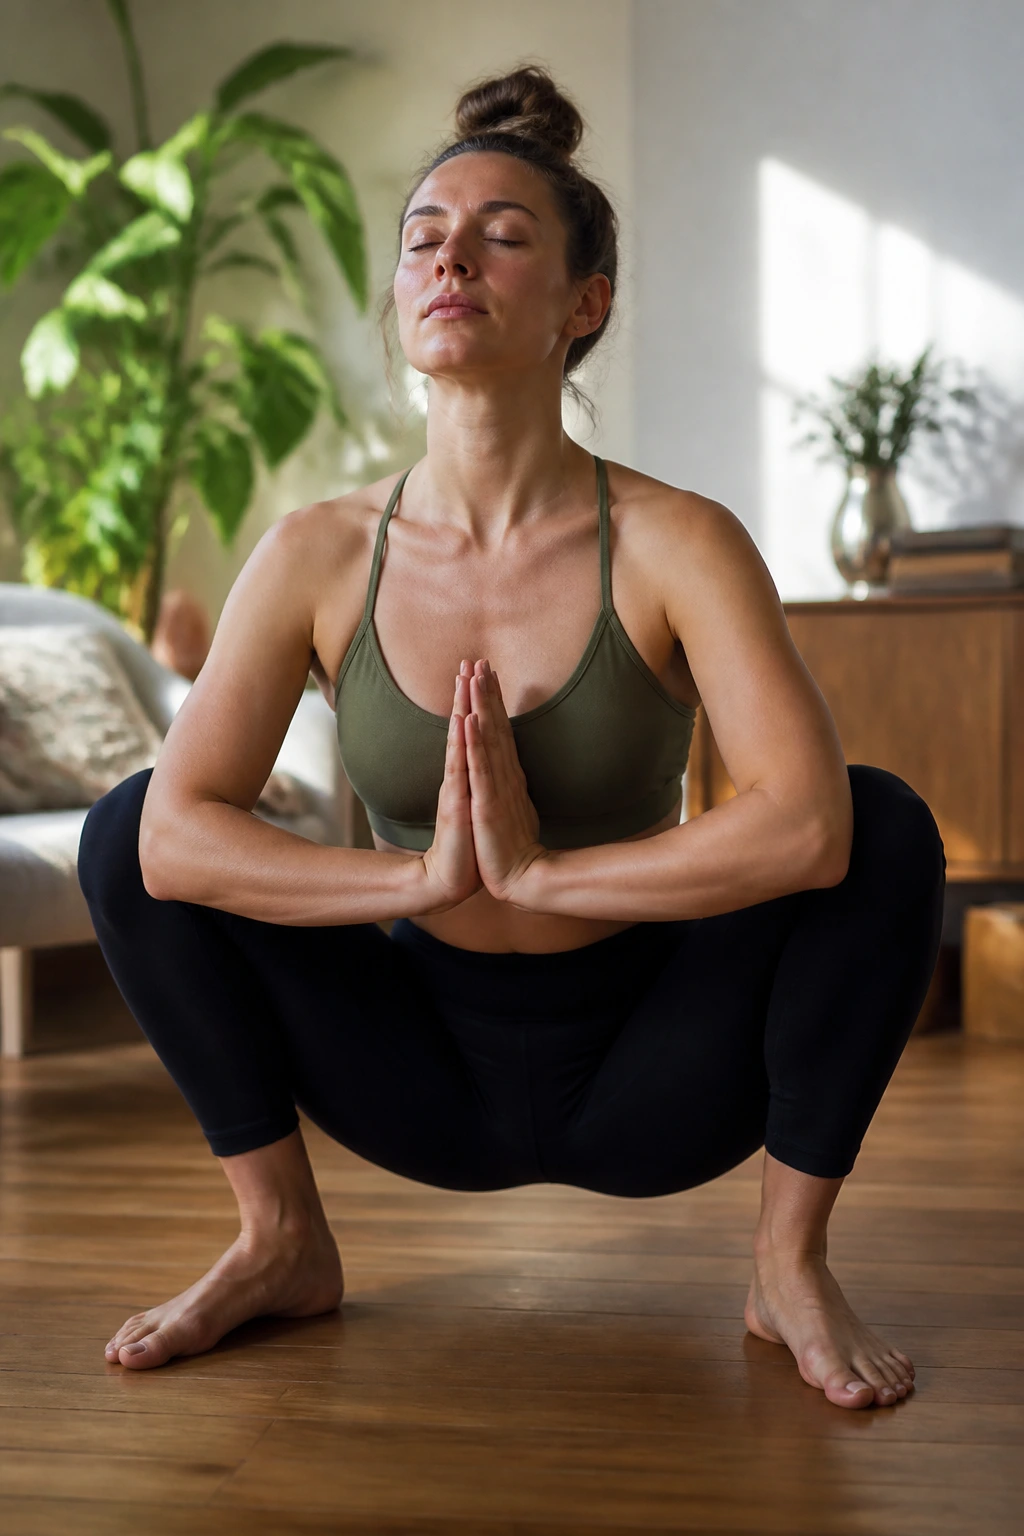
Malasana is a deep squat. It is a natural human resting position that we have largely abandoned in modern society. This pose is the antidote to the chair.
The Grounding Effect
When you sit deep in this squat, the weight of your torso helps to open the hips passively. If your heels lift, place a rolled-up mat or a blanket under them. There is no shame in using support; it helps you hold the pose longer, which is where the real benefit lies.
- Keep your chest lifted; don’t collapse.
- Use your elbows to gently nudge your knees outward.
- Drop your tailbone toward the floor.
This pose is incredibly soothing for the nervous system, helping to signal to the body that it is safe to open the hips.
15. Staff Pose with Variation (Dandasana)
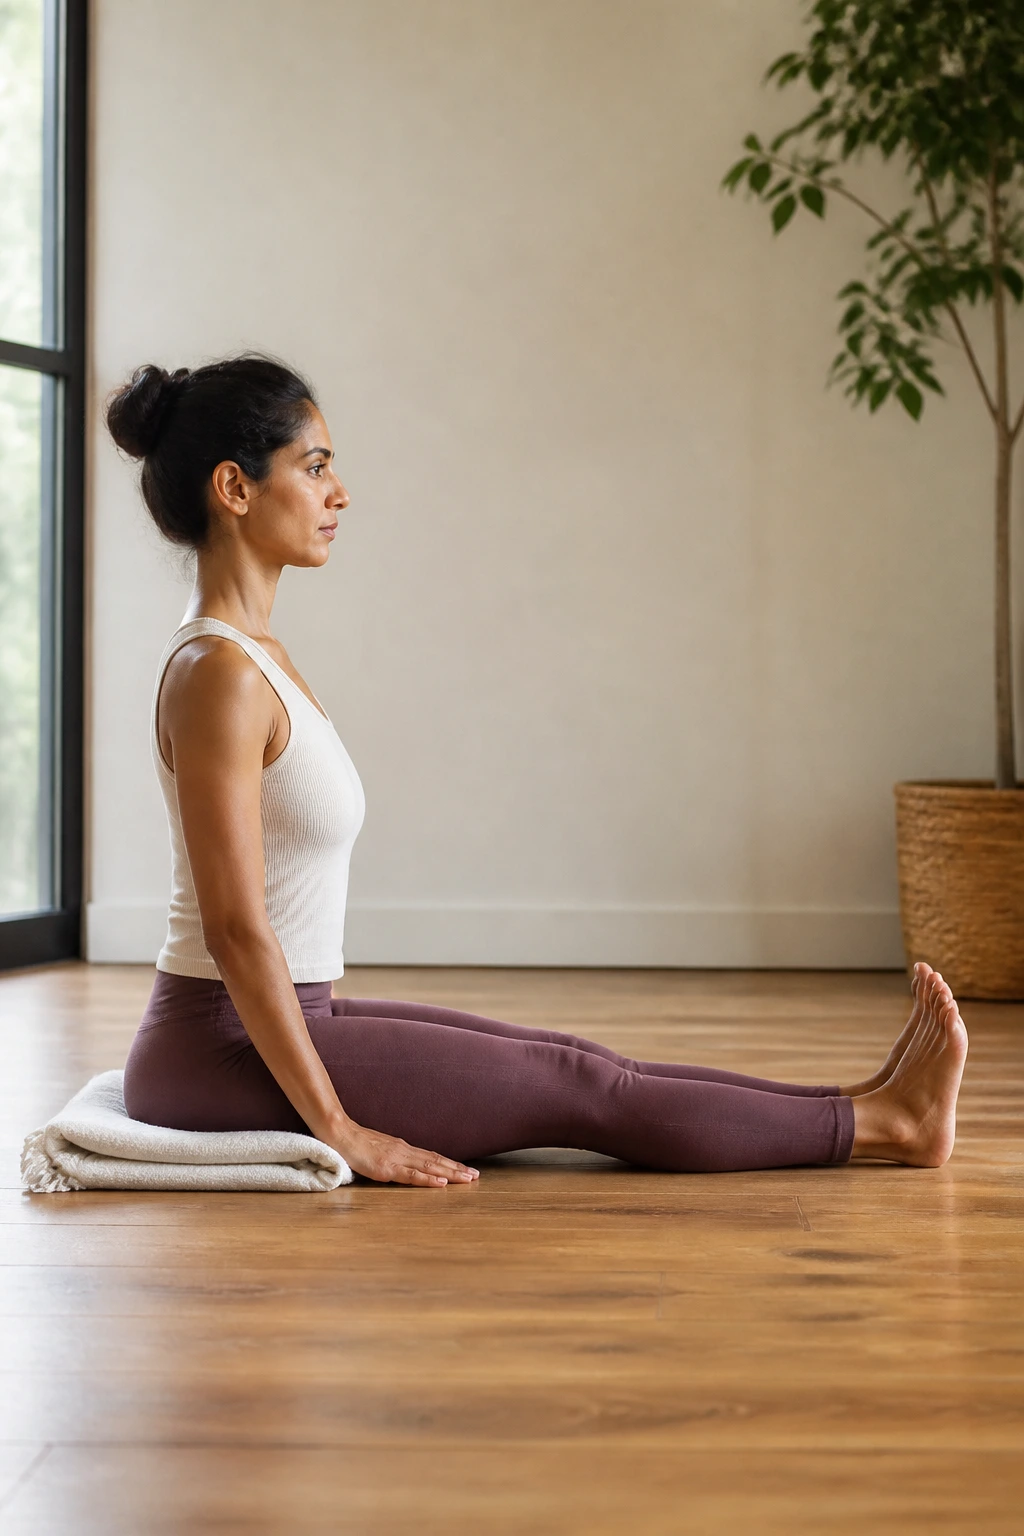
While it looks like you are just sitting, Staff Pose is active. It requires you to engage the muscles of the legs and the core. Adding a variation—like sitting on a folded blanket—tilts the pelvis forward, which is vital.
Why This Variation Matters
Many people have tight hamstrings, which pull the pelvis into a posterior tilt when they sit on the floor. This effectively locks the hip flexors. By sitting on a blanket, you change the angle, freeing up the pelvis to move correctly.
- Sit tall, as if a string is pulling the crown of your head upward.
- Flex your feet strongly.
- Keep the shoulders back and down.
It is a subtle, grounded posture that prepares the rest of the body for deeper work. It teaches you how to maintain pelvic alignment while in a seated position.
16. Wide-Legged Forward Fold (Prasarita Padottanasana)
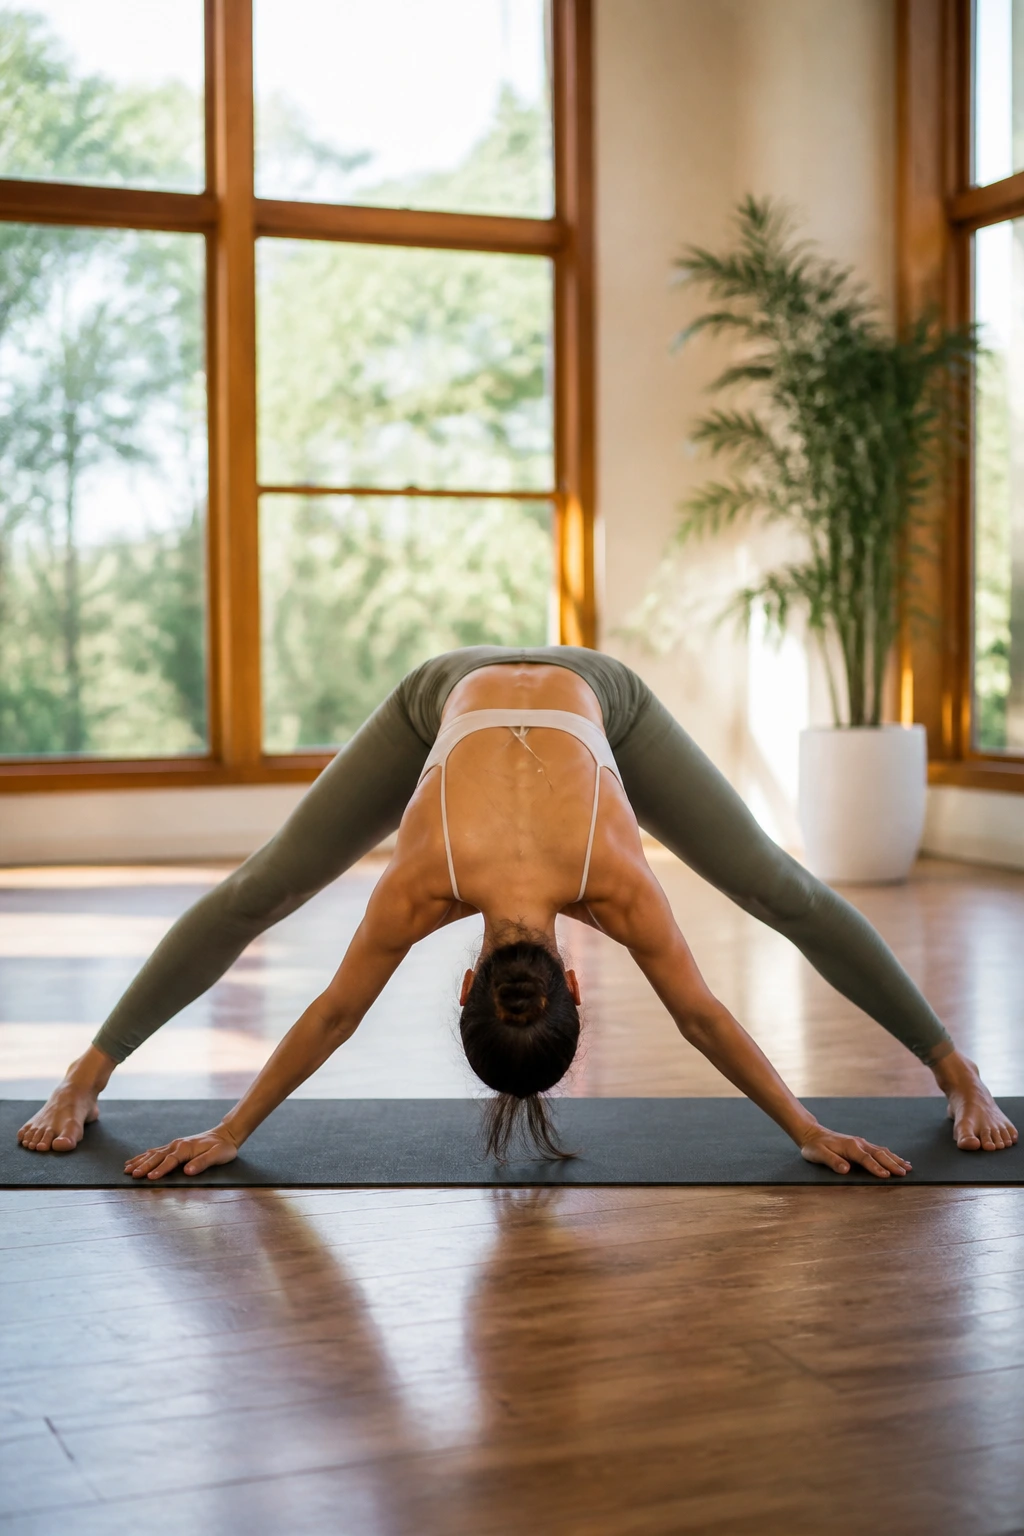
This is a fantastic way to stretch the adductors and the inner hips. By straddling the legs wide, you change the way the femur sits in the hip socket, creating a different opening than standard forward folds.
Finding the Edge
The secret to this pose is the engagement of the legs. If your legs are soft, you are just hanging on your ligaments. Engage your quads, lift your kneecaps, and notice how the stretch moves deeper into the tissue.
- Keep your feet parallel or slightly turned in.
- Fold from the hips, not the waist.
- Place your hands on blocks if they don’t reach the floor easily.
Focus on extending the spine forward before you fold down. The length in the torso provides the room for the hips to fold.
17. Camel Pose (Ustrasana)
Camel is a deep backbend that is physically demanding. It is the most direct way to stretch the front of the body, including the hip flexors, the quads, and the abdomen. It is not for the faint of heart, but it is life-changing for desk workers.
A Gentle Approach
You do not have to touch your heels to get the benefit. Keep your hands on your lower back, fingers pointing down, and focus on lifting your chest toward the ceiling. The goal is to lengthen the front of the body, not to crunch the back of it.
- Keep your hips pushed forward, stacked over your knees.
- Protect your neck—only drop your head back if it feels stable and comfortable.
- Keep the glutes engaged the entire time.
This pose requires caution. If you feel sharp pain in the lower back, back out immediately. It should feel like a deep stretch, not a compression.
18. Extended Side Angle (Utthita Parsvakonasana)
This is a powerful side-body opener. By lunging into one leg, you create a long line of energy from the back heel all the way up through the fingers. This diagonal pull is excellent for opening the lateral hip flexors.
Anchoring the Pose
The back foot should be firmly planted, like you are trying to anchor it into the floor. This creates a stable base from which to lengthen. Do not let the front knee cave in; keep it aligned with the pinky toe.
- Reach the top arm over your ear, not just straight up.
- Keep the bottom shoulder away from your ear.
- Look up toward the ceiling to open the chest.
It takes practice to find the length without collapsing, but once you do, it feels like a full-body reset.
19. Half-Split (Ardha Hanumanasana)
If full splits feel impossible, this is your solution. It provides the same deep hamstring and hip benefit without the risk of overstretching. By keeping one knee down, you maintain stability.
Proper Alignment
Ensure your hips are directly over the back knee. If you sit back onto your heel, you are essentially in a child’s pose, not a split. Keeping the hips high is what makes this pose effective for the hip flexors and hamstrings.
- Use blocks under your hands so you can keep a flat back.
- Flex the front foot to protect the knee.
- Square the hips toward the front.
This is a precision pose. The more you square your hips, the more you will feel the targeted release in the hip flexor and hamstring.
20. Thread the Needle (Sucirandhrasana)
This is a reclined version of pigeon pose. It is safer for the knees and easier on the lower back. It is arguably the best “no-stress” hip opener you can do after a long day.
Finding the Release
You control the intensity entirely by how close you pull your legs toward your chest. If you are sore, keep it gentle. If you need more, interlace your hands behind your thigh.
- Keep your head and shoulders on the floor.
- Flex the foot of the top leg to protect the knee.
- Breathe slowly, allowing the hip to sink deeper into the stretch with every exhale.
It is a passive, restorative pose. There is no need to push or pull; let gravity do the work for you.
21. Hero Pose (Virasana)
Hero pose is a deep quad and hip flexor stretch. Sitting on your heels might feel impossible, but it gets easier with time. The key is to keep the knees together—or at least parallel.
Modifying for Success
Do not force your hips to the floor if your knees protest. Use a block between your feet to sit on. Elevating your hips significantly reduces the strain on the knees and allows you to focus on the stretch in the quads and hip flexors.
- Keep the shins flat on the floor.
- Draw your navel in to support the lower back.
- Stay upright; do not lean forward.
This pose is intense. If it feels too much, take a break. It is a slow-burn stretch that requires patience.
22. Legs Up the Wall (Viparita Karani)
This is technically an inversion, but it is also a gentle hip opener. By lying with your legs up the wall, you let the weight of your legs passively stretch the hips and the lower back. It is the ultimate recovery pose.
The Benefits of Inversion
When you are upside down, the fluid in your legs drains back toward your heart. This reduces swelling and helps the hips feel lighter. It is the perfect way to finish a session.
- Get your hips as close to the wall as possible.
- Let your feet relax completely.
- Rest your arms wherever they are comfortable.
Stay here for at least five minutes. The nervous system release that happens here is just as important as the physical stretch.
23. Cobra Pose (Bhujangasana)
Cobra is a gentle backbend that stretches the abdominal wall and the front of the hips. Unlike Camel, you are lying on your belly, which makes it much easier to control.
Building Strength and Length
The goal is not to see how high you can go. It is to see how long you can make your spine. Use your back muscles to lift you, not just your arms.
- Keep your legs engaged and pressing into the floor.
- Draw your shoulders back and down.
- Keep the elbows close to the ribs.
This pose counteracts the “slump” of sitting by opening the front body and strengthening the back. It is a fundamental movement that pays dividends over time.
24. Bow Pose (Dhanurasana)
Bow pose is an active backbend. By holding your ankles, you are physically pulling your legs into extension. This is a powerful stretch for the hip flexors, though it requires significant core engagement to be safe.
Focus on the Breath
In backbends, your breath can become shallow. Try to breathe into your belly, even though it is compressed against the floor. This forces you to engage the diaphragm, which further stabilizes the core.
- Kick your feet into your hands to lift your chest.
- Keep your knees hip-width apart.
- Do not jerk into the pose; move slowly and steadily.
This pose builds strength in the posterior chain while opening the front. It is efficient and highly effective.
25. Child’s Pose (Balasana)
We end where we began. Child’s pose is the ultimate resting posture. It gently rounds the back and releases the hips after all the intense work of the previous poses.
Final Integration
Take your knees wide to allow the torso to sink between them. This modification turns it into a hip opener rather than just a back stretch.
- Rest your forehead on the mat or a block.
- Let your shoulders melt.
- Notice how your hips feel different now compared to when you started.
There is no rush to get up. Let the work settle into your body. Consistency is what changes the architecture of your tissues over time, not one single, intense session.
Final Thoughts
You do not need to do all twenty-five of these poses every single day to see results. In fact, if you tried to do that, you would likely burn out within a week. The goal here is to build a “toolbox.” When your hips feel tight, you now have twenty-five specific ways to address that sensation.
Pick three or four that feel accessible and effective for your body. The best routine is the one that you actually do. If you only have five minutes, do the Low Lunge, Happy Baby, and Child’s Pose. That small investment, practiced consistently, will do more for your mobility than an hour-long, once-a-month deep stretch session ever could.
Remember that hip tightness is often a symptom of something else. It is a sign that your body is compensating for a lack of movement elsewhere. Stay curious about your own tension. Some days, your hips will feel open and fluid. Other days, they will feel like they are made of concrete. Both states are temporary. Just keep showing up on the mat, breathe, and let the process happen at its own pace. Your body will thank you for it in the long run.
