



Most of us spend the better part of our waking hours in a shape that looks like a question mark. You sit at a desk, shoulders rounded forward, head jutting toward a screen, and chest collapsed. Over time, your body stops seeing this as an “option” and starts seeing it as the “default.” Your muscles tighten in the front, weaken in the back, and suddenly, you have chronic back pain, stiff shoulders, and that persistent ache in your neck.
Fixing this isn’t about just “pulling your shoulders back.” If you simply force your posture into an upright position without addressing the underlying tightness and muscular imbalances, you’ll just create new points of tension. You need to release what’s too tight and strengthen what’s too weak. Yoga is arguably the most effective tool for this because it requires both. It demands engagement from your back muscles while simultaneously lengthening the tight tissues across your chest and hips.
The following routines are designed to address the specific “tech-neck” and “desk-slouch” mechanics that plague modern bodies. Pick a few to integrate into your daily life, or build a longer sequence by stringing them together. Your goal isn’t to look like a gymnast; it’s to teach your body how to hang from your skeleton in a way that doesn’t hurt.
1. Mountain Pose (Tadasana)
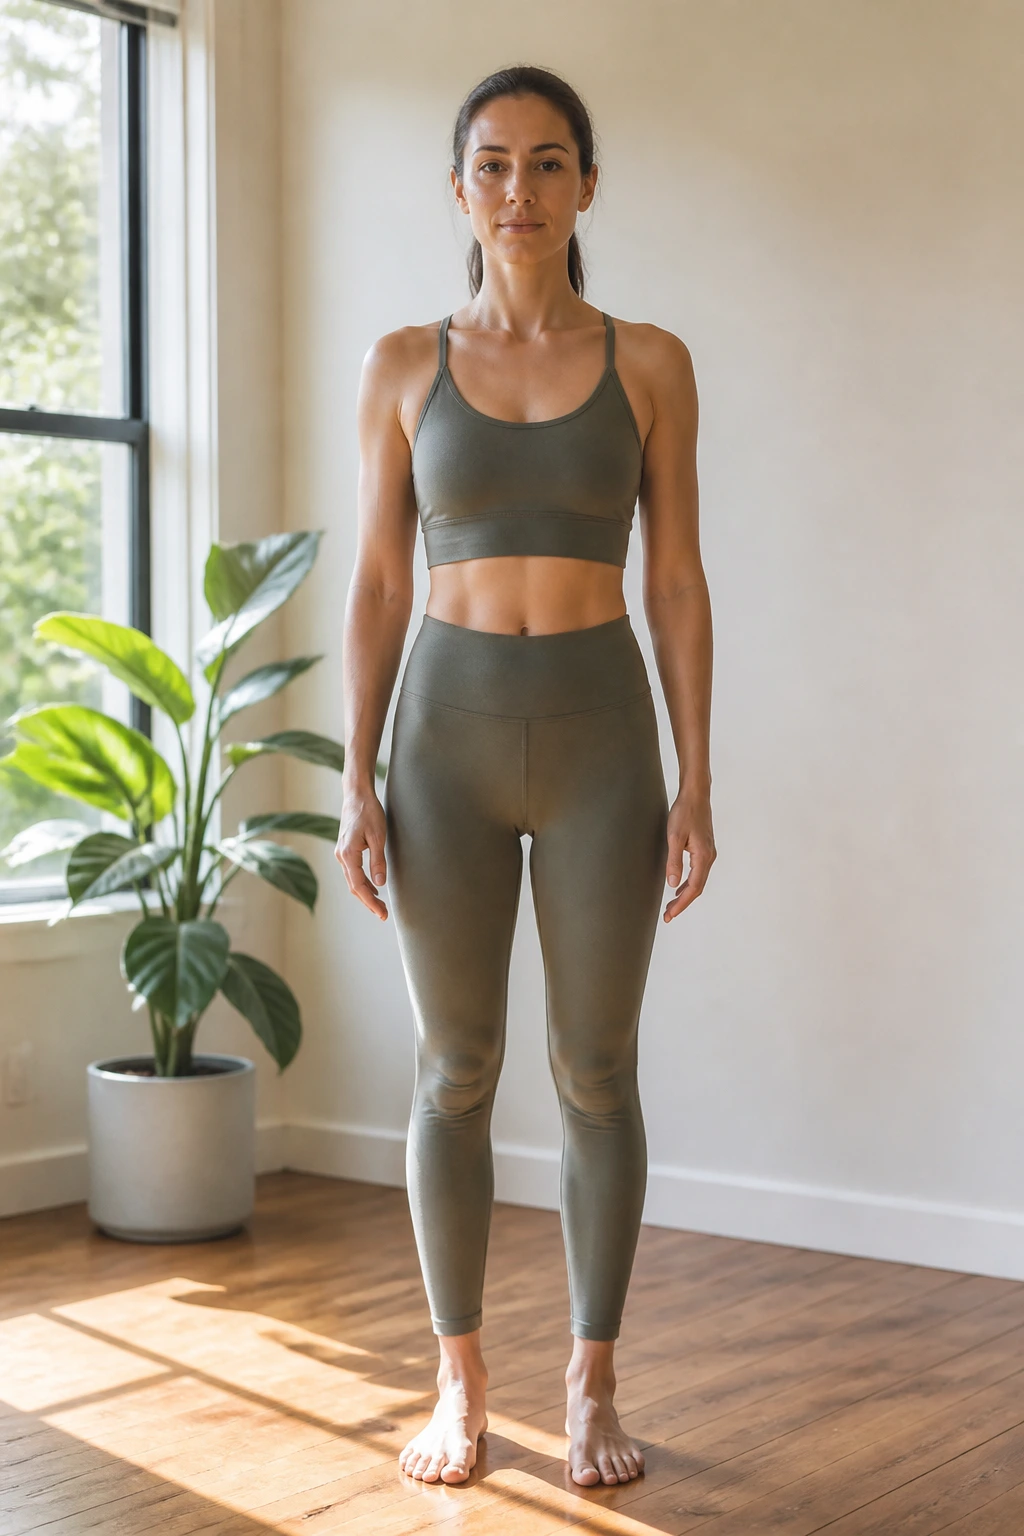
This is not “just standing.” It is the foundation for every other pose in yoga and the most critical skill for fixing your standing posture. Most people stand with their weight dumped into their lower back or locked into their knees. To fix this, stand with your feet hip-width apart. Lift your toes, spread them wide, and place them back down.
Setting the Proper Foundation
Engage your quadriceps by lifting your kneecaps—not by locking the joints back, but by contracting the muscle. Tuck your tailbone slightly to neutralize your pelvis. Imagine a string pulling the crown of your head toward the ceiling, creating length in your spine.
Why It Matters
When you master Tadasana, you train your brain to recognize a neutral spine. It acts as a reset button. Spend three minutes here, breathing deeply, and you will notice how much effort it actually takes to align your ears over your shoulders, your shoulders over your hips, and your hips over your ankles.
2. Cat-Cow Stretch
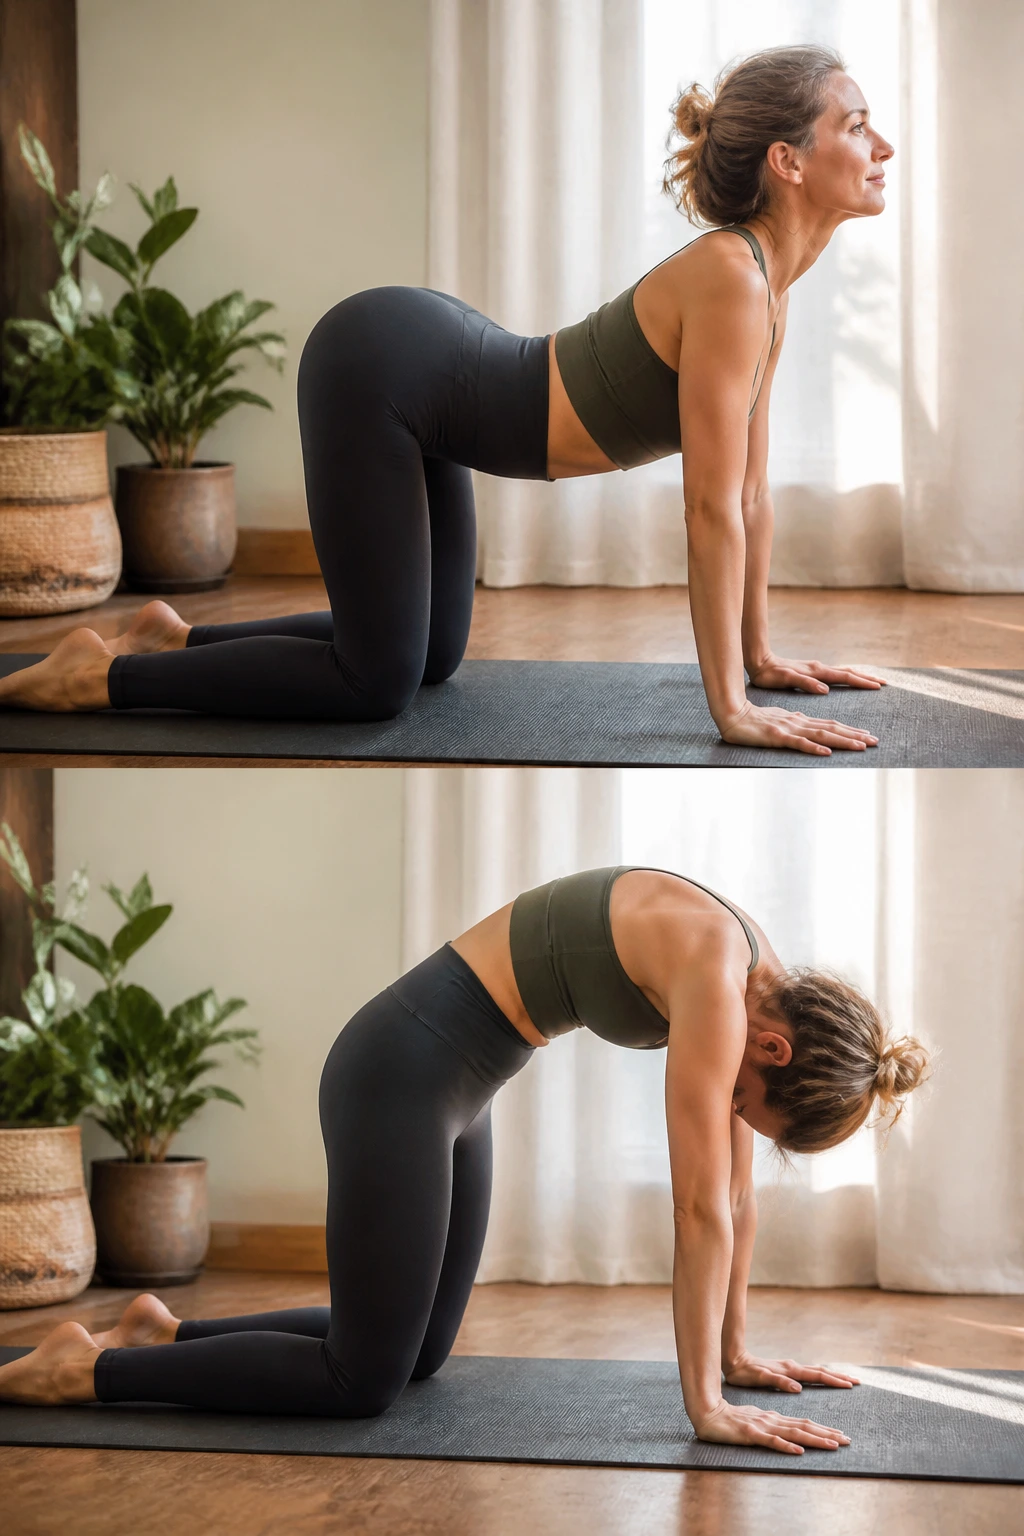
This is the classic spinal warm-up for a reason. It articulates every single vertebrae, waking up your back and forcing the core to stabilize. Start on your hands and knees in a tabletop position. Ensure your wrists are directly under your shoulders and your knees under your hips.
The Movement Pattern
As you inhale, drop your belly toward the mat, lift your chin and chest, and gaze upward, drawing your shoulders away from your ears for the Cow pose. As you exhale, tuck your tailbone, round your spine toward the ceiling like an angry cat, and drop your head.
Focus Areas
Do not just move your neck. The goal is to get movement into the thoracic spine—the mid-back area that usually gets stiff from hours of typing. Try to move one vertebra at a time, like a wave.
3. Child’s Pose (Balasana)
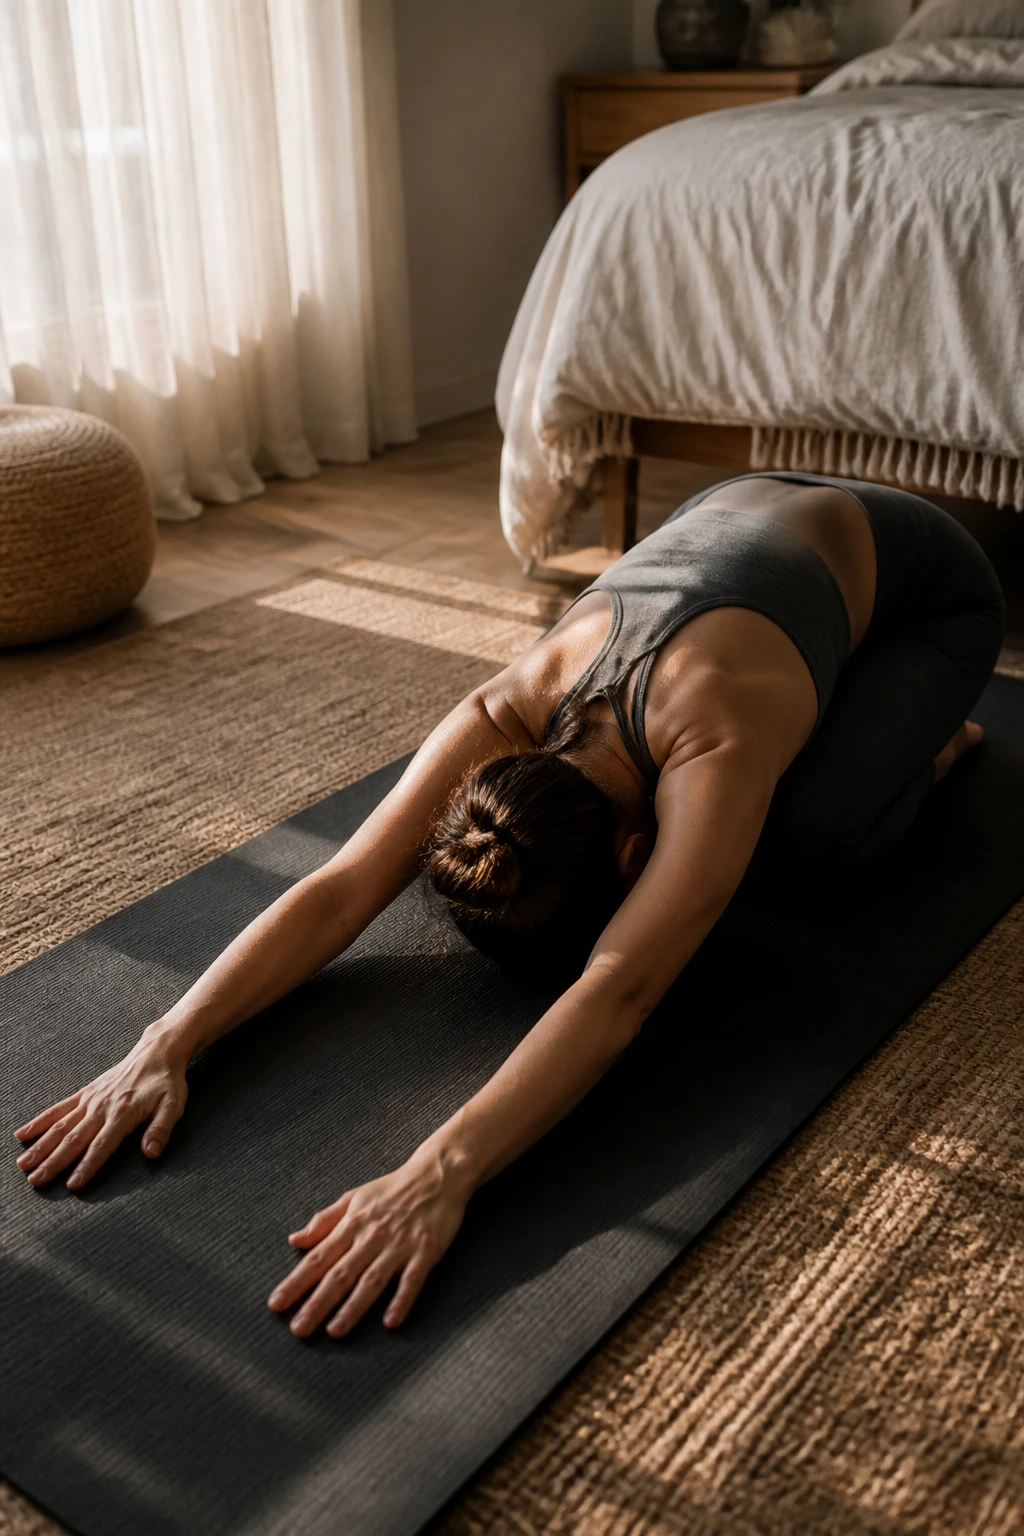
When your lower back feels like a tight rubber band, this is your release. It gently stretches the entire spine and opens the hips. Start on your hands and knees, then push your hips back toward your heels. Extend your arms forward on the mat, resting your forehead on the ground.
Refining the Alignment
If your shoulders are tight, keep your arms slightly wider than your shoulders. If you want a deeper stretch, keep your arms narrow and reach your fingers as far forward as possible, feeling the stretch through your lats and sides.
Pro Tip: If your hips don’t touch your heels, put a folded blanket between your calves and hamstrings. This takes the pressure off your knees and allows your spine to fully relax.
4. Puppy Pose (Uttana Shishosana)
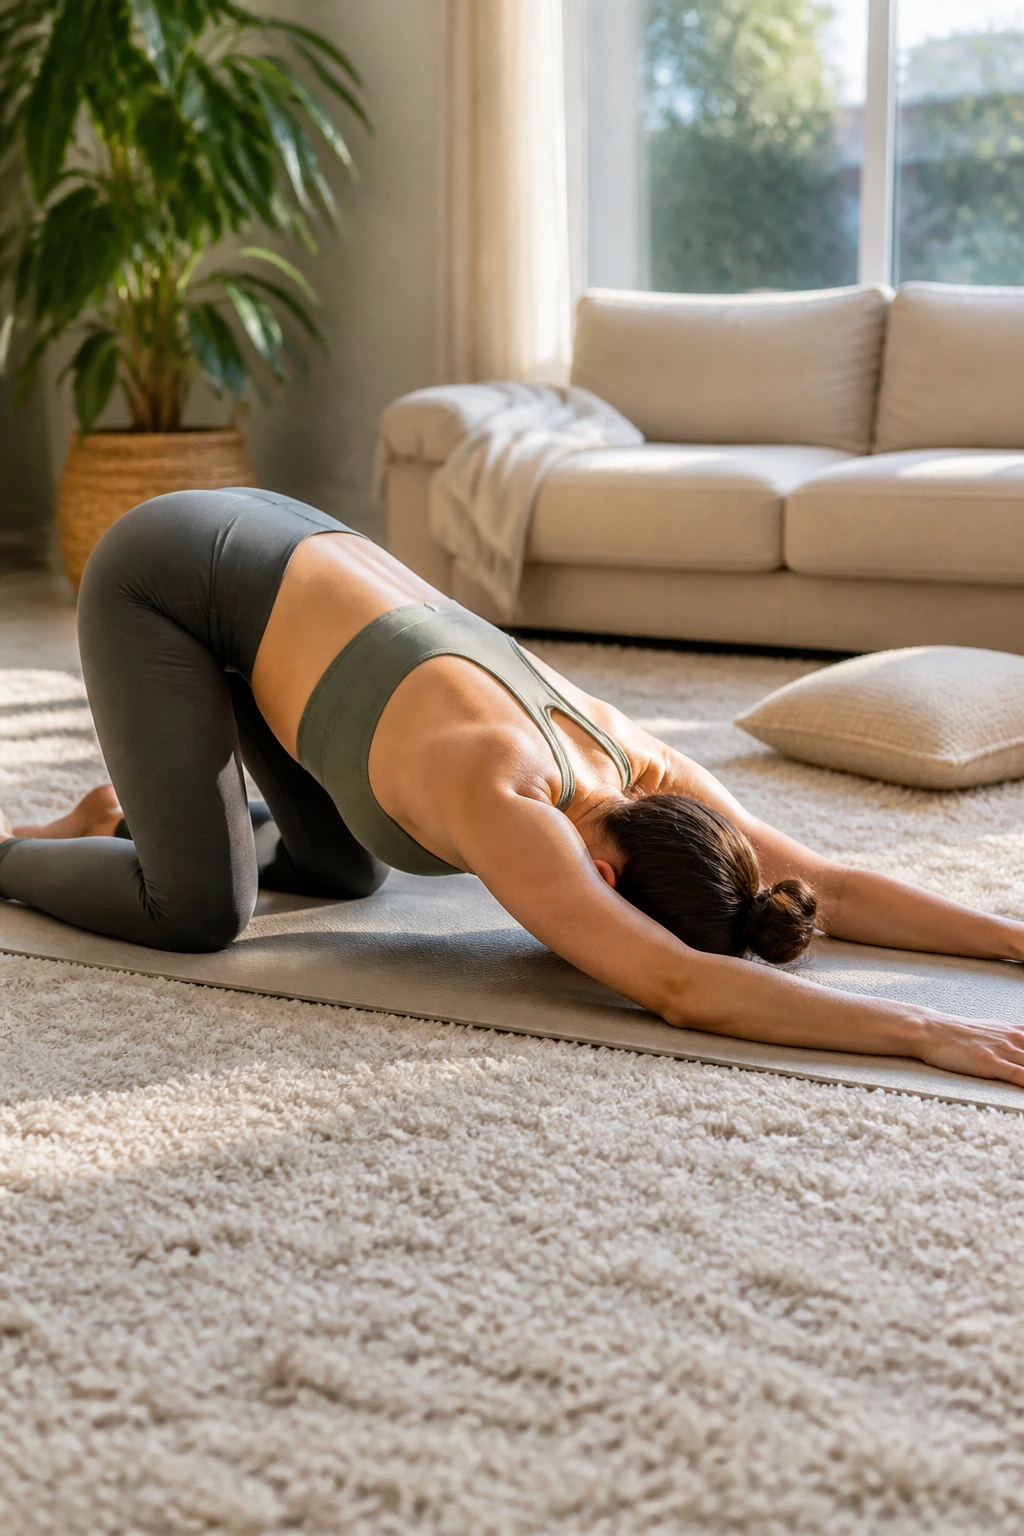
Puppy pose is the secret weapon for anyone with rounded shoulders. It bridges the gap between Child’s Pose and Downward Dog, focusing heavily on opening the chest and shoulders without putting too much weight on your wrists.
How to Execute
Start in tabletop. Walk your hands forward while keeping your hips stacked directly over your knees. Drop your chest toward the mat and rest your forehead or chin on the floor.
Why This Works
Because your hips stay high, you get a much deeper thoracic extension than in Child’s Pose. You are effectively counteracting the “hunch” by stretching the pectoral muscles—which are almost always short and tight from computer use—while encouraging the shoulder blades to slide down your back.
5. Thread the Needle (Parsva Balasana)
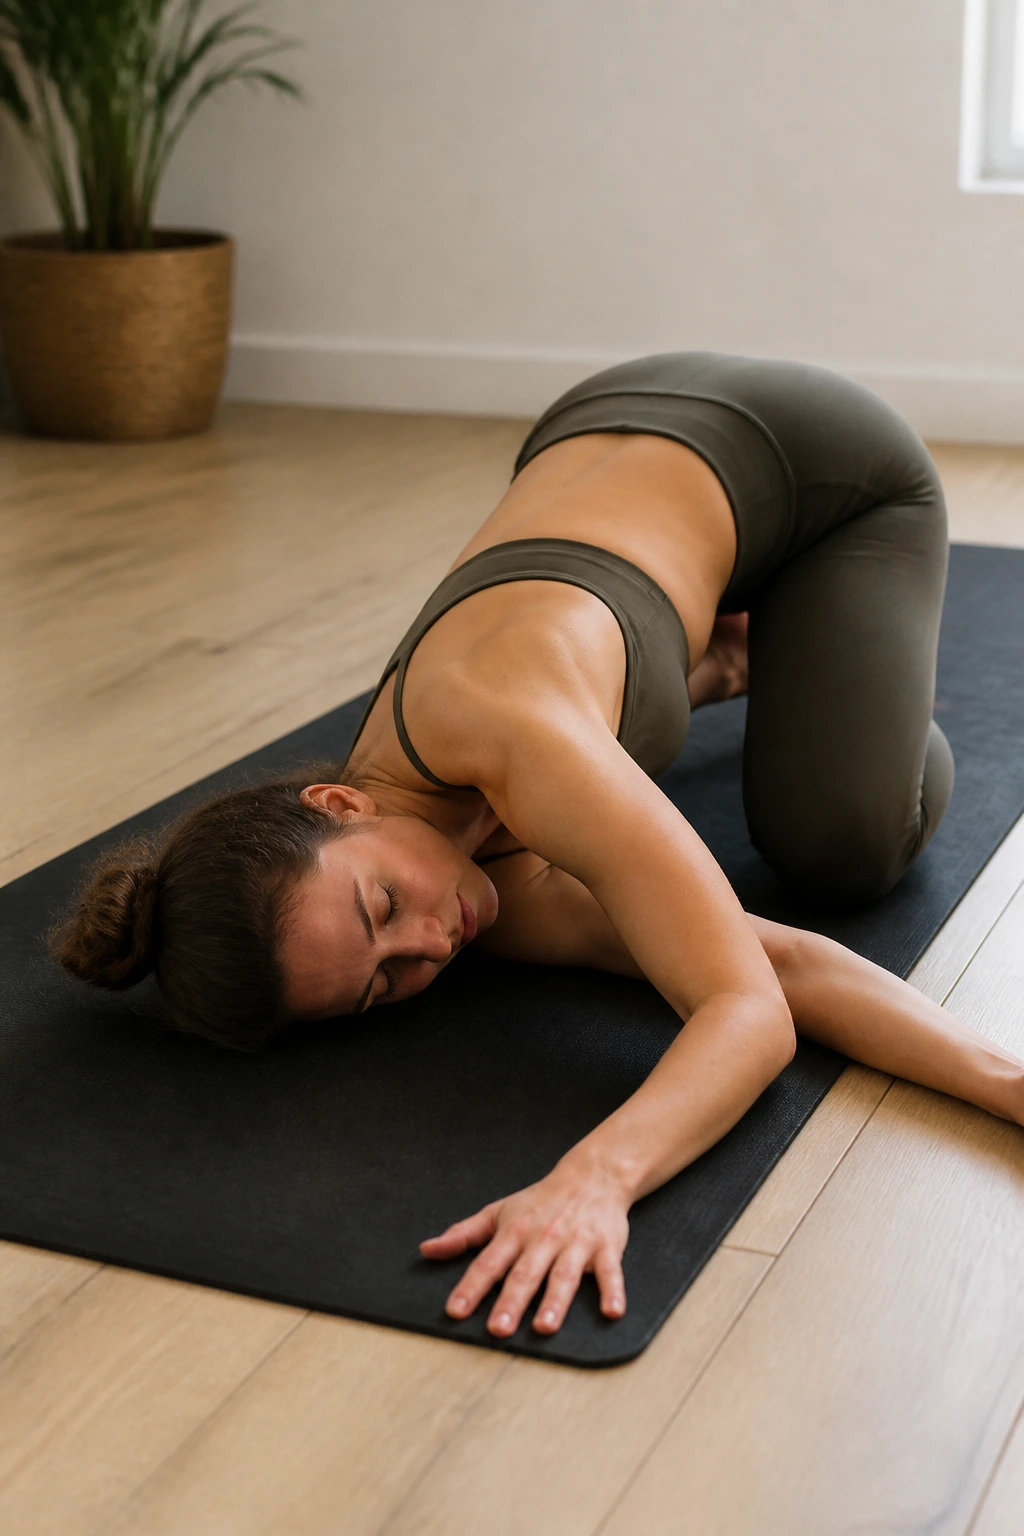
This pose introduces rotation, which is often missing from our daily movement patterns. We move forward and backward all day but rarely twist, leading to a stiff mid-back. Start in tabletop. Reach your right arm up to the sky, then “thread” it under your left arm, resting your right shoulder and cheek on the mat.
Adding Intensity
Walk your left fingers toward the front of your mat to deepen the twist. Keep your hips level—it is easy to shift them to the side, but if you keep them square, the twist stays in your spine where it belongs. Hold for at least five full, deep breaths on each side.
6. Cobra Pose (Bhujangasana)
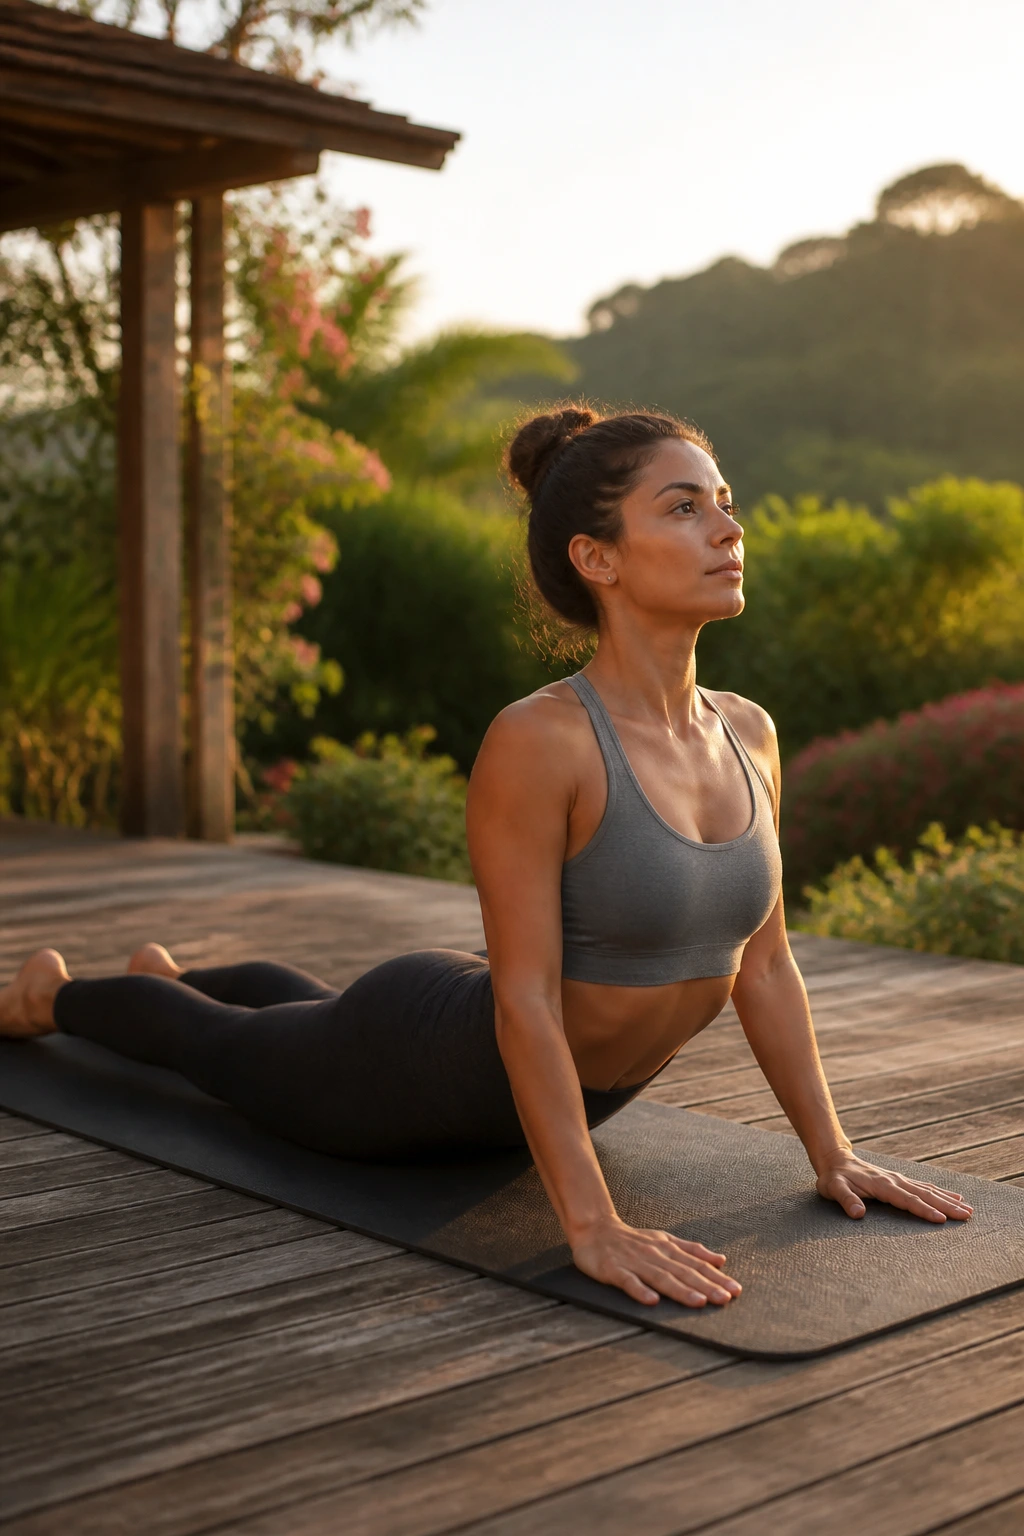
We spend all day collapsing our chests, so we need a pose that opens them. Lie on your stomach, legs extended behind you. Place your hands under your shoulders. Press into your hands to lift your chest off the mat.
The Critical Cues
Keep your elbows tucked into your ribcage. Do not shrug your shoulders up toward your ears. Focus on drawing the shoulder blades together and down your back. This isn’t about how high you can lift; it is about how much space you can create across your collarbones.
Warning: If you feel pinching in your lower back, lower your chest. This pose should feel like an expansion of the front body, not a crunch in the low back.
7. Locust Pose (Salabhasana)
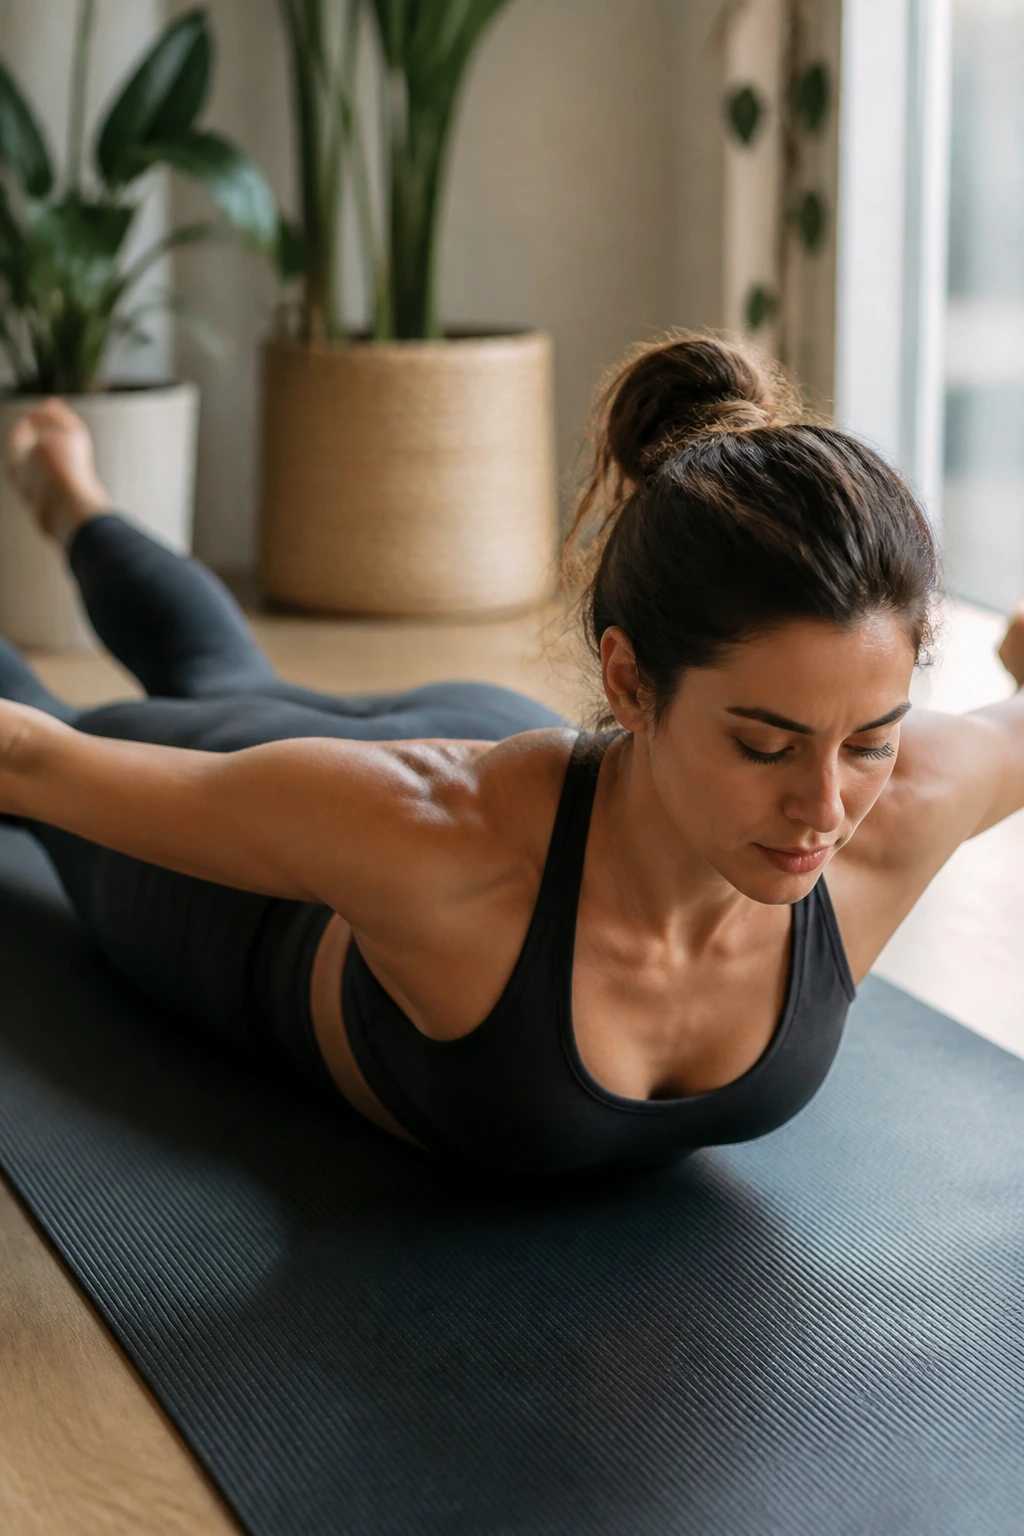
This is an active strengthener. While Cobra uses the floor for leverage, Locust forces your back muscles to do the heavy lifting. Lie on your stomach with your arms alongside your body, palms facing down. On an inhale, lift your chest, arms, and legs off the mat.
Why It’s Essential
The muscles that run along your spine (the erector spinae) and your rhomboids are likely weak from constant slouching. Locust targets these specific areas. Imagine you are trying to squeeze a pencil between your shoulder blades. Keep your gaze down at the mat to keep your neck neutral rather than straining to look up.
8. Sphinx Pose
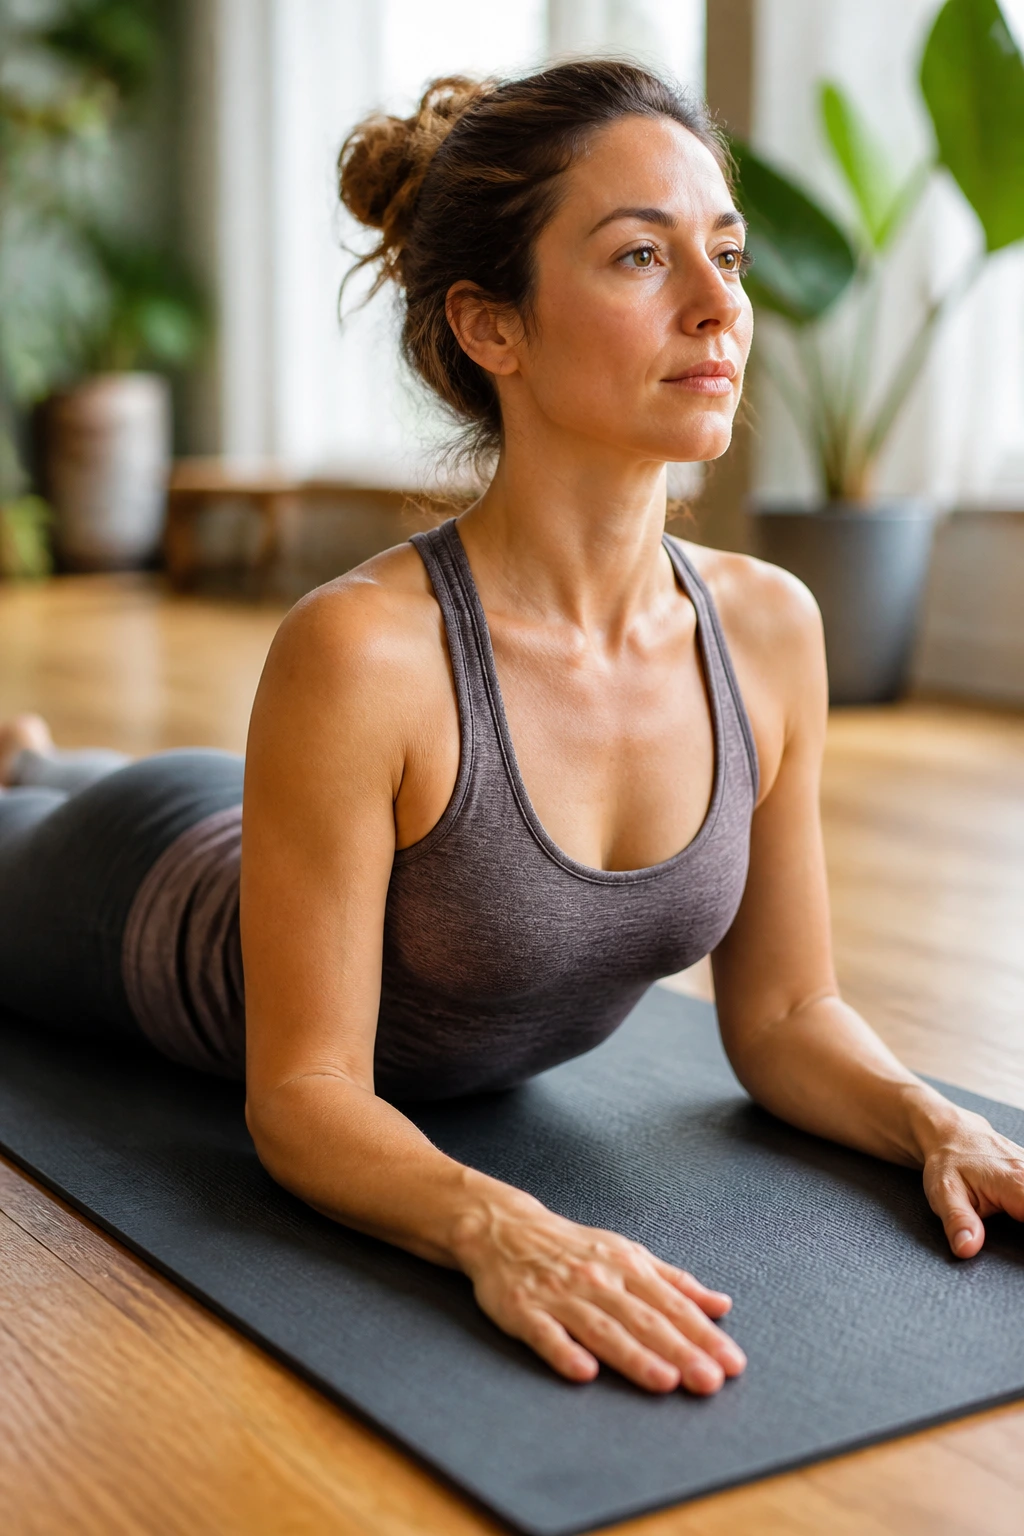
If Cobra is too intense for your lower back, Sphinx is your best friend. Lie on your stomach and place your forearms on the mat, elbows directly under your shoulders. Press through your forearms to lift your chest.
Achieving Depth
The key here is engagement. Do not just hang out in your joints. Actively drag your elbows back toward your hips without actually moving them. This action pulls your chest forward through your arms, lengthening the abdomen and extending the spine gently. It is a fantastic pose to hold while listening to a podcast or reading—two minutes here is often enough to undo the damage of an hour of slouching.
9. Downward Facing Dog (Adho Mukha Svanasana)
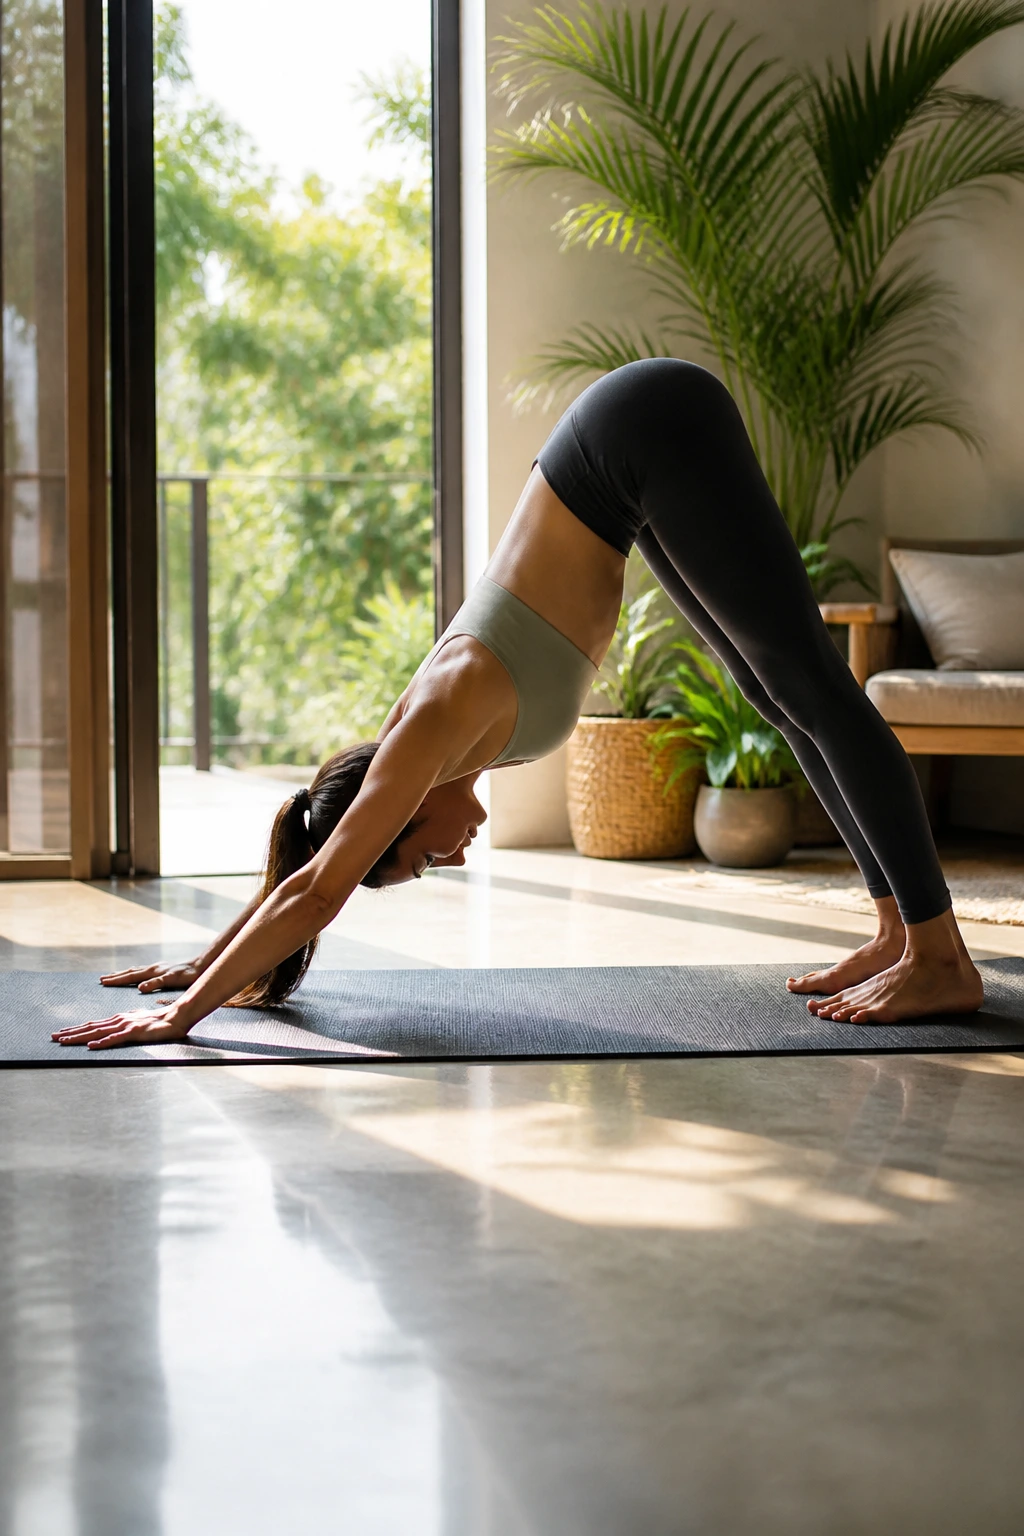
Everyone knows this pose, but few do it correctly for posture. Start on hands and knees, tuck your toes, and lift your hips high. Focus on creating an inverted “V” shape.
Correcting the Shoulder Hunch
Most people struggle with tight hamstrings here, which ruins the spine shape. If your back is rounded because your hamstrings are tight, bend your knees. It is better to have bent knees and a straight spine than straight legs and a rounded back. Roll your upper arms outward to create space in the neck and shoulders.
10. Plank Pose
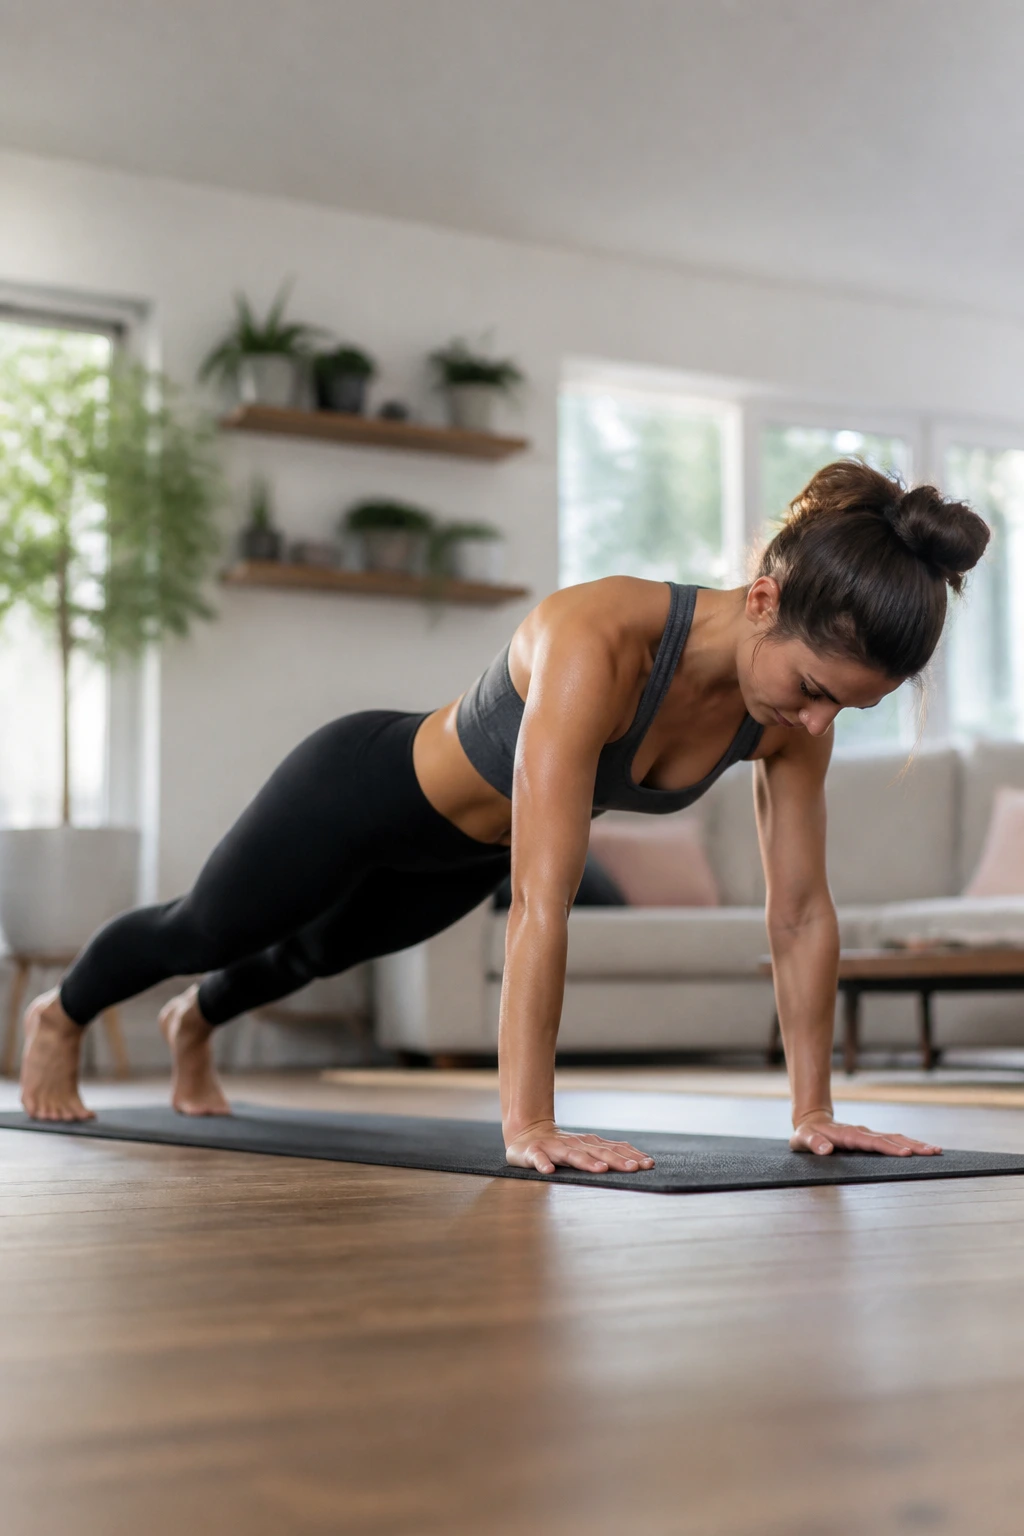
Posture is not just about flexibility; it is about having the core strength to hold yourself upright. Plank is the simplest way to check your alignment. Hold the top of a push-up position.
The Mechanics of Stability
Press the floor away from you. This is crucial—rounding the upper back slightly (protraction) is actually good here. It engages the serratus anterior, a muscle essential for scapular stability. If your hips sag, you are straining your lower back. If your hips are too high, you are taking the load off your core. Keep a straight line from your heels to the top of your head.
11. Bird-Dog
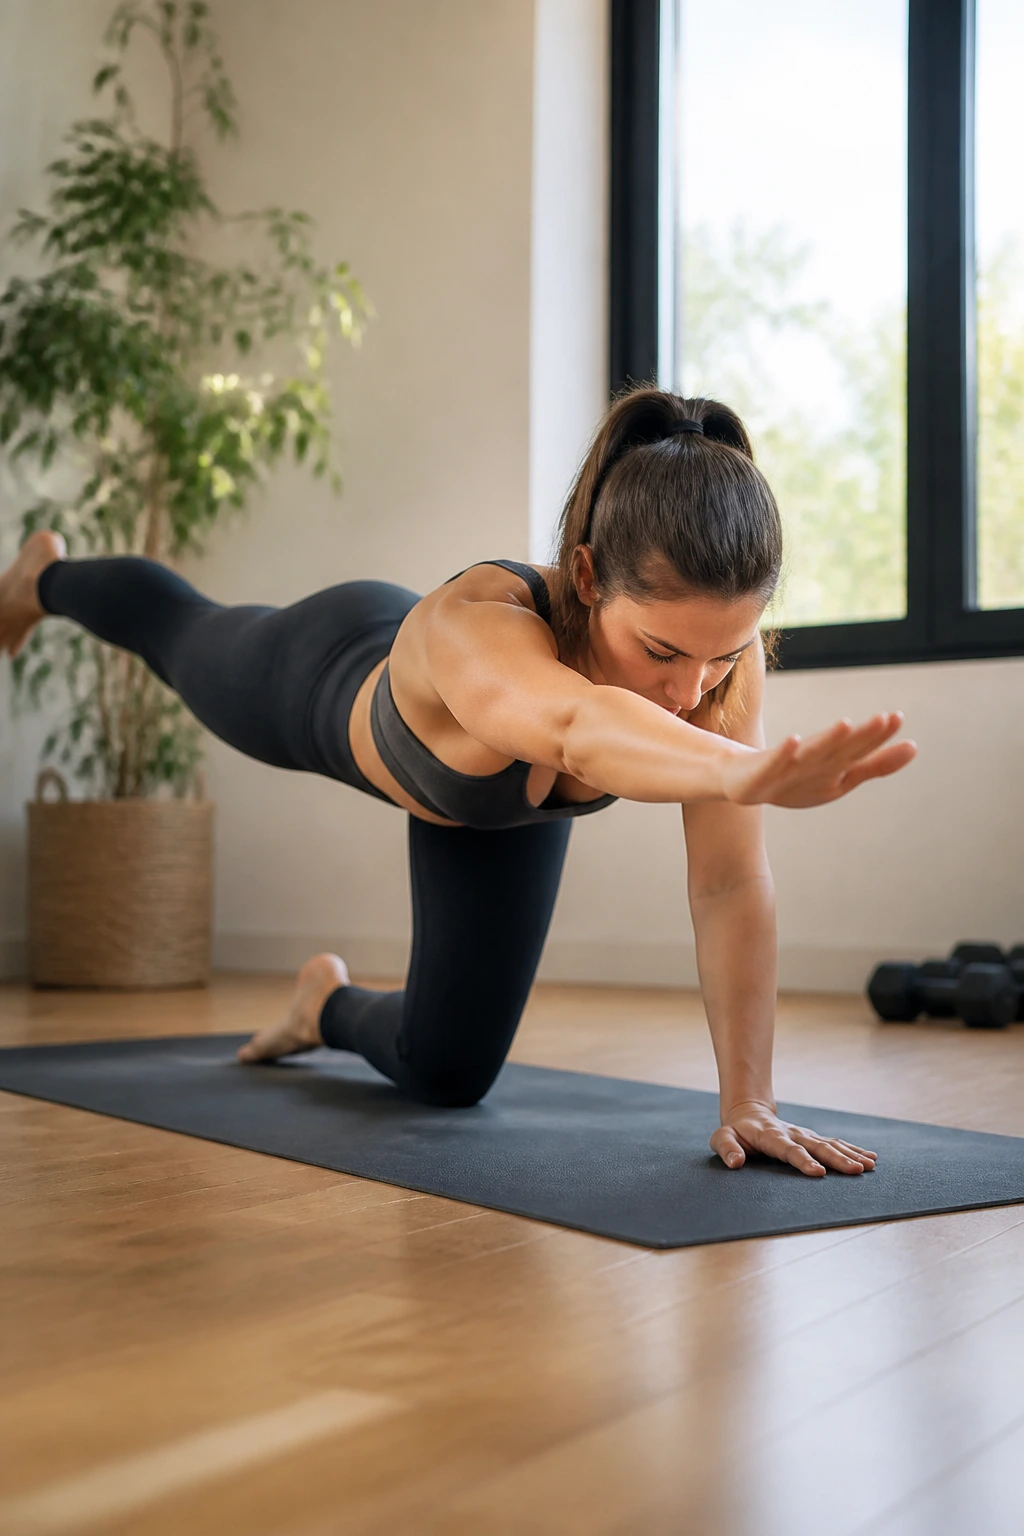
This is an underrated movement for spinal alignment and coordination. Start in tabletop. Simultaneously extend your right arm forward and your left leg backward. Keep your hips and shoulders square to the mat.
The Focus
Do not let your back sway or your hip hike up. Imagine you are balancing a glass of water on your lower back. Hold for three seconds, feeling the core stabilize your spine, then switch sides. This pose teaches your body to maintain a neutral spine while your limbs are moving—exactly what you need for daily tasks like reaching, lifting, or walking.
12. Bridge Pose (Setu Bandhasana)
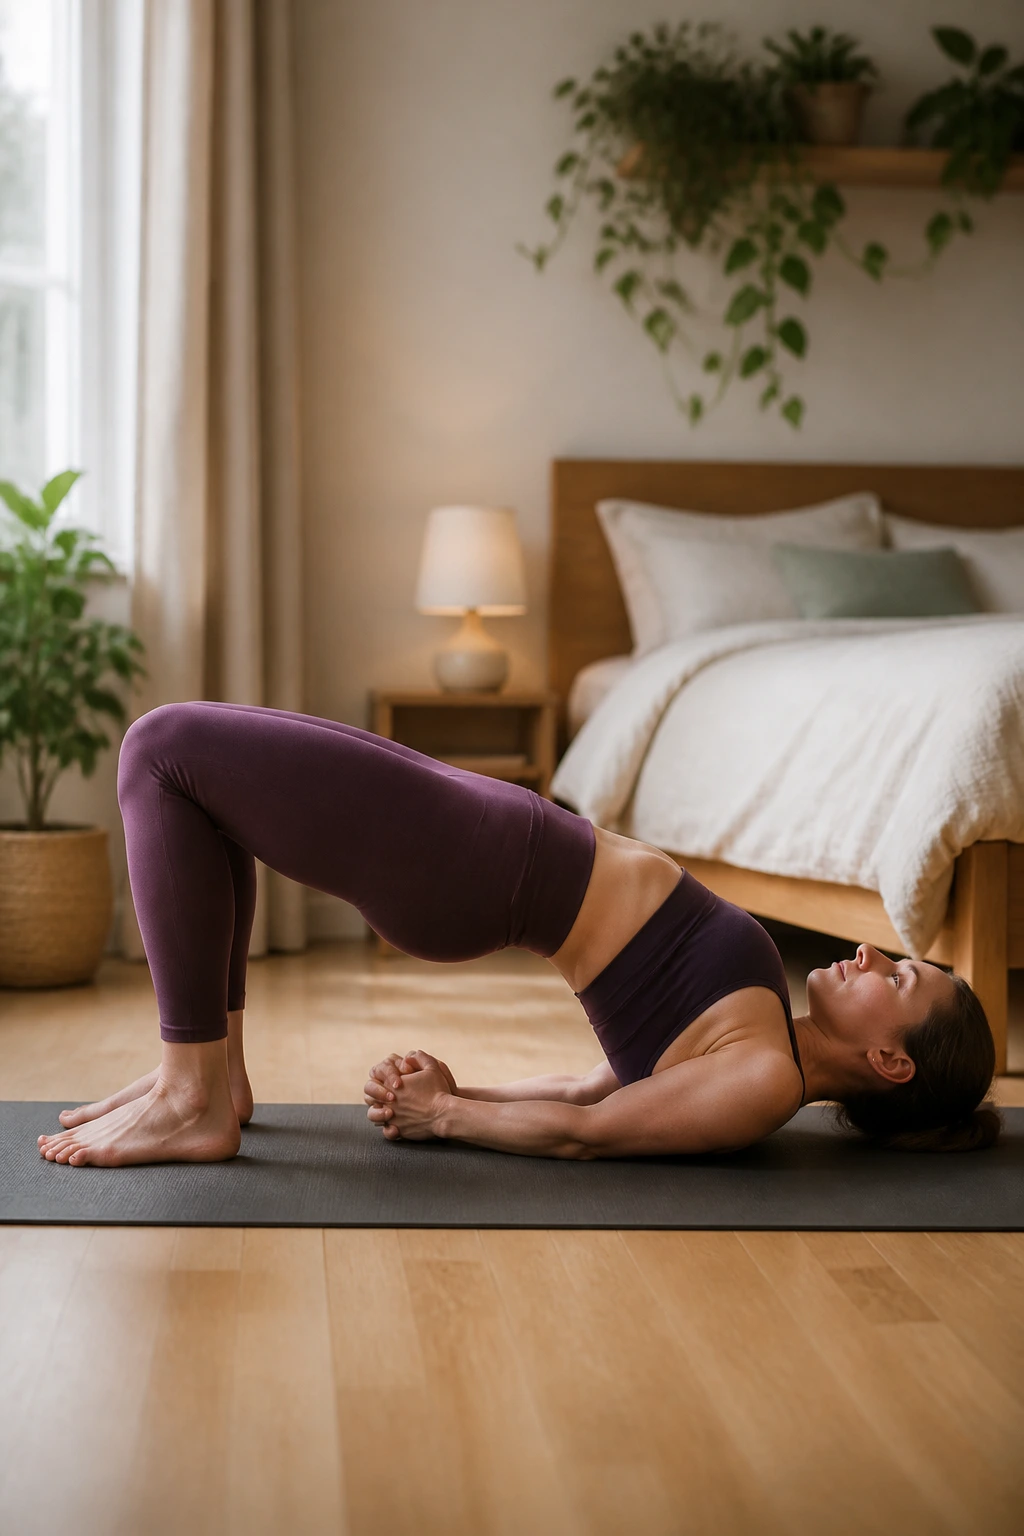
This pose opens the chest while strengthening the glutes—a winning combination for posture. Lie on your back, knees bent, feet flat on the floor hip-width apart. Lift your hips toward the ceiling.
Refining the Shape
Clasp your hands underneath you and roll your shoulders under. Press your upper arms into the mat to elevate your chest even higher. By lifting the hips, you are stretching the hip flexors, which get tight from sitting. By opening the chest, you counteract the slouch. Keep your knees from splaying outward; imagine squeezing a block between them.
13. Cow Face Pose (Gomukhasana)
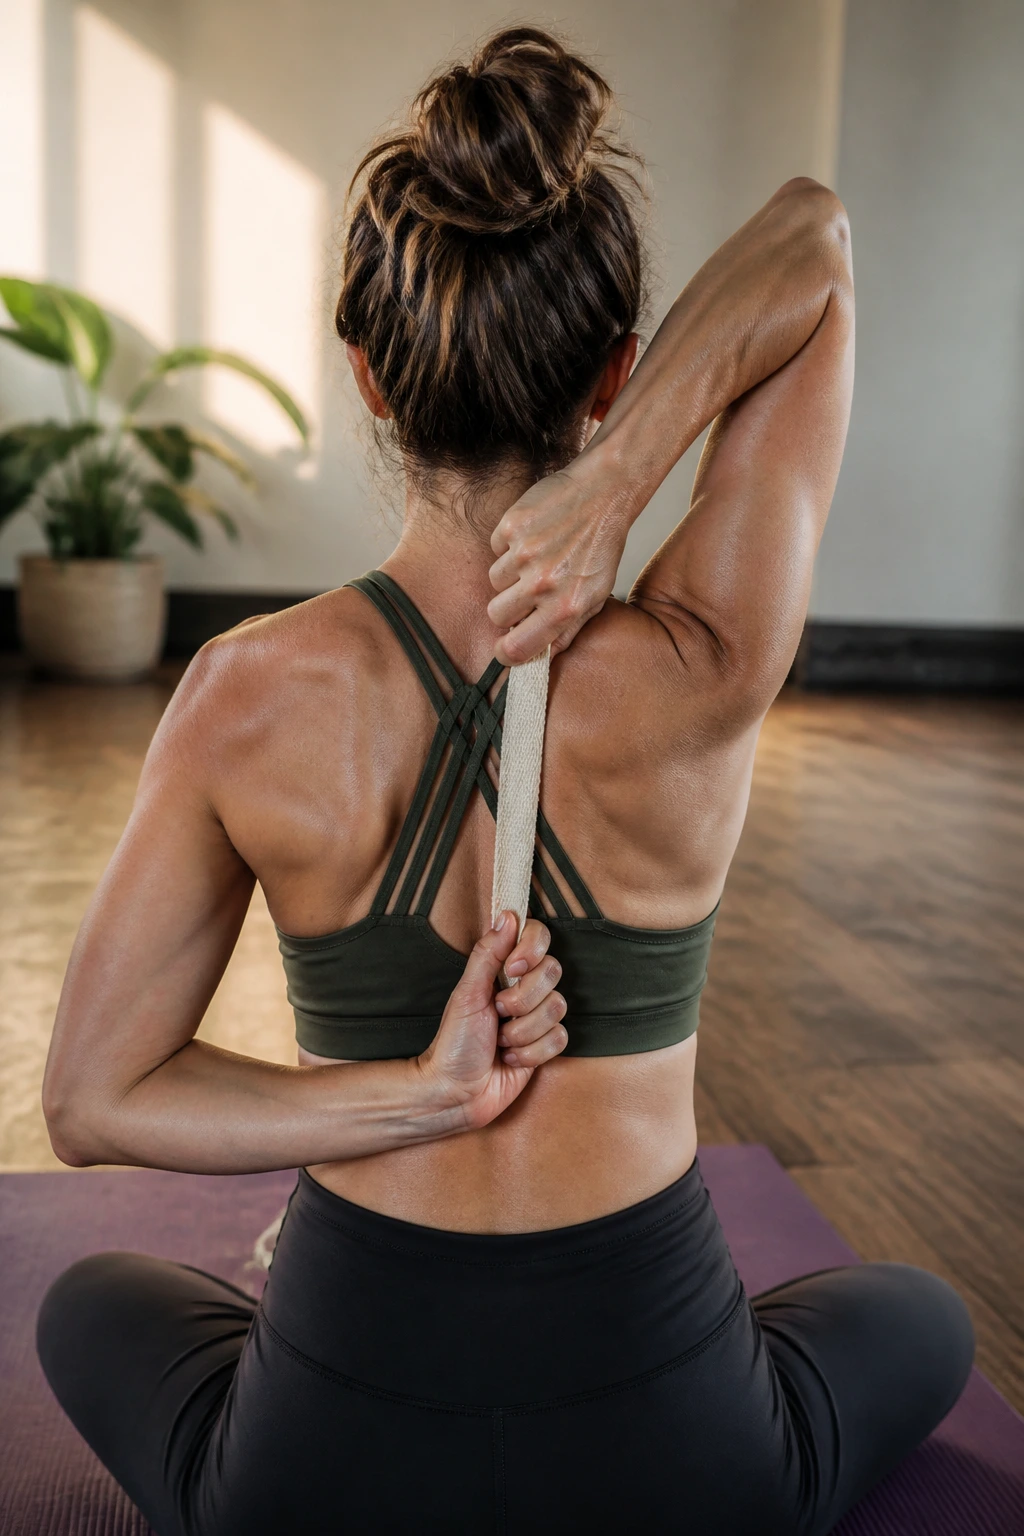
This is a challenging shoulder opener. Sit on the floor. Take your right arm and reach it up, then bend your elbow to bring your hand behind your back. Take your left arm, reach it behind your back, and try to clasp your hands.
What to Do If You Can’t Reach
If your hands don’t touch, hold a towel or a strap between them. The goal is to get the top elbow pointing toward the ceiling and the bottom elbow pointing toward the floor. This provides an intense stretch through the triceps and shoulders, helping to combat rounded shoulders.
14. Eagle Arms (Garudasana Arms)
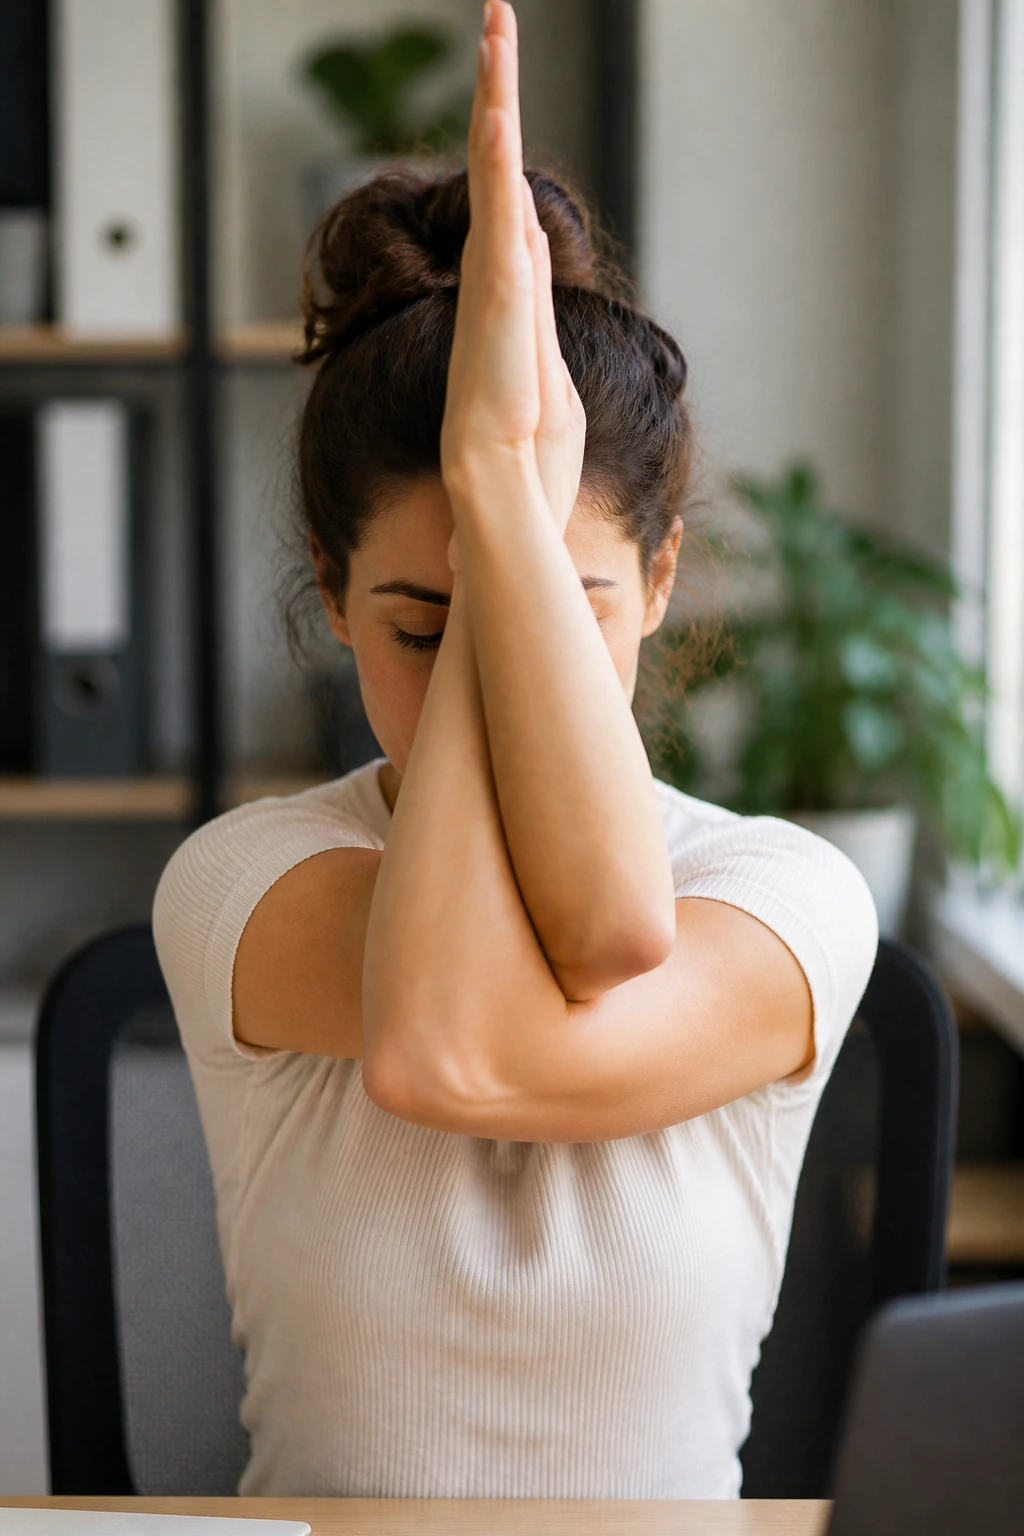
You can do this while sitting in a chair, making it perfect for a quick workday break. Wrap your right arm under your left. Bend your elbows and try to press your palms together. If that’s not possible, grab your shoulders.
Targeting the Upper Back
Lift your elbows to shoulder height and press your hands away from your face. You will feel a massive stretch across the space between your shoulder blades—the very area that gets “stuck” when you hunch over a keyboard all day. Do 30 seconds on each side.
15. Wall Angels
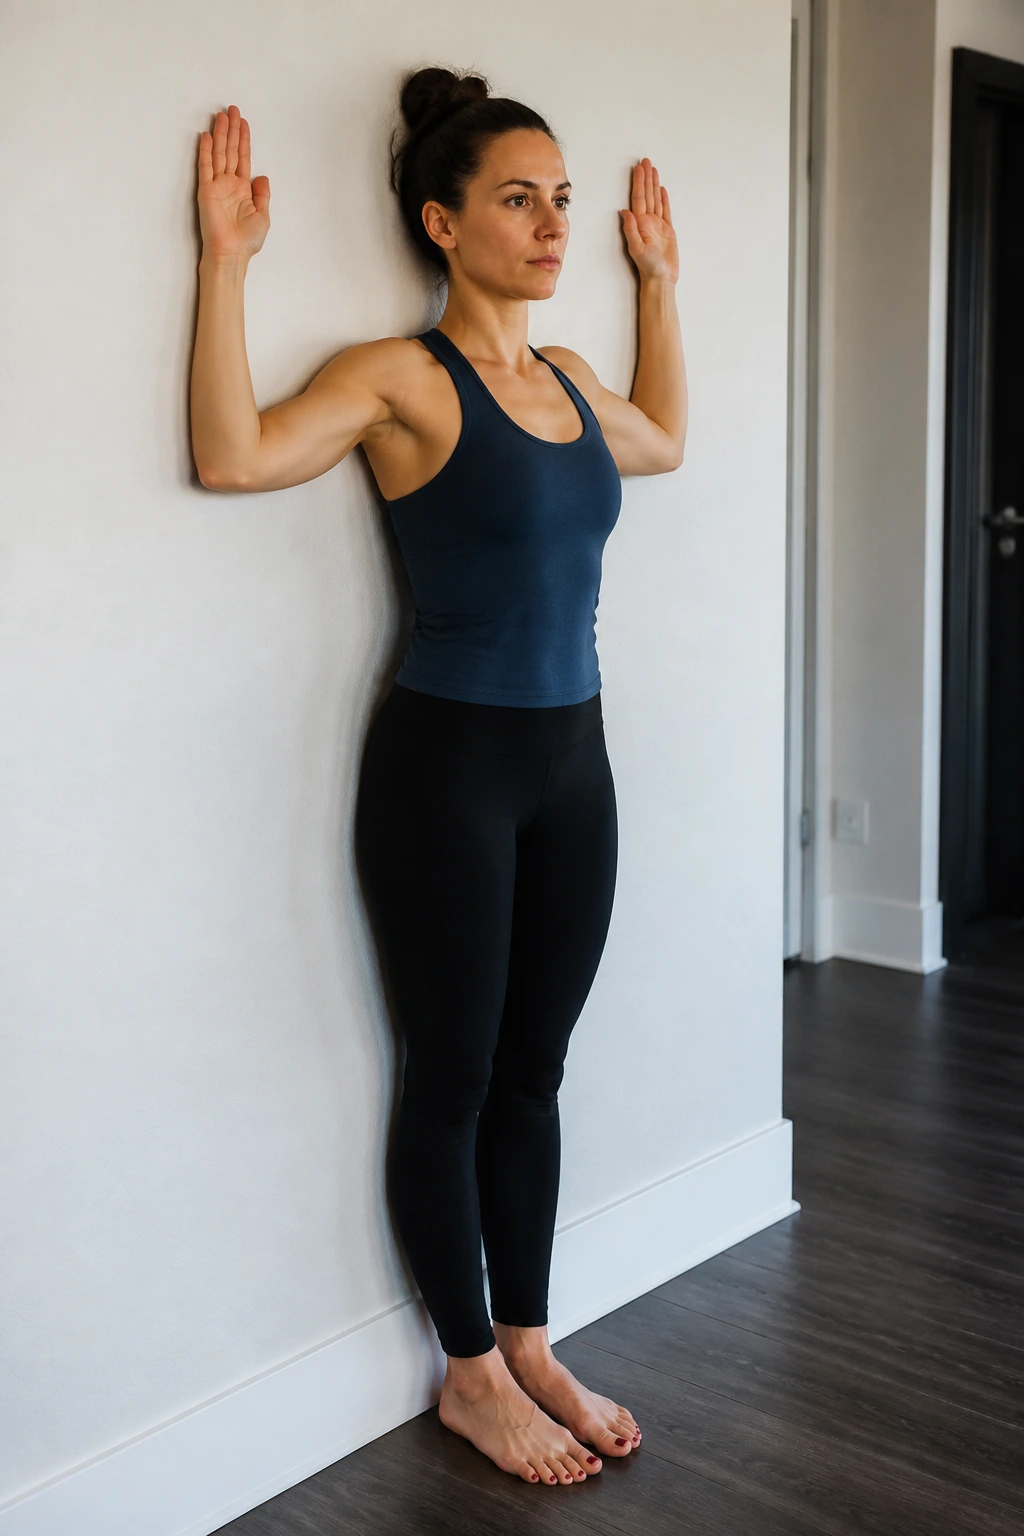
While not a traditional yoga pose, this is often used in yoga therapy to correct scapular positioning. Stand with your back, head, and heels against a wall. Raise your arms into a “goalpost” position (elbows bent at 90 degrees).
The Movement
Slide your arms up and down the wall without letting your elbows or wrists leave the surface. If they pop off, move your feet a few inches away from the wall. This forces the muscles around the shoulder blades to fire, teaching you what proper retraction feels like.
16. Forward Fold (Uttanasana)
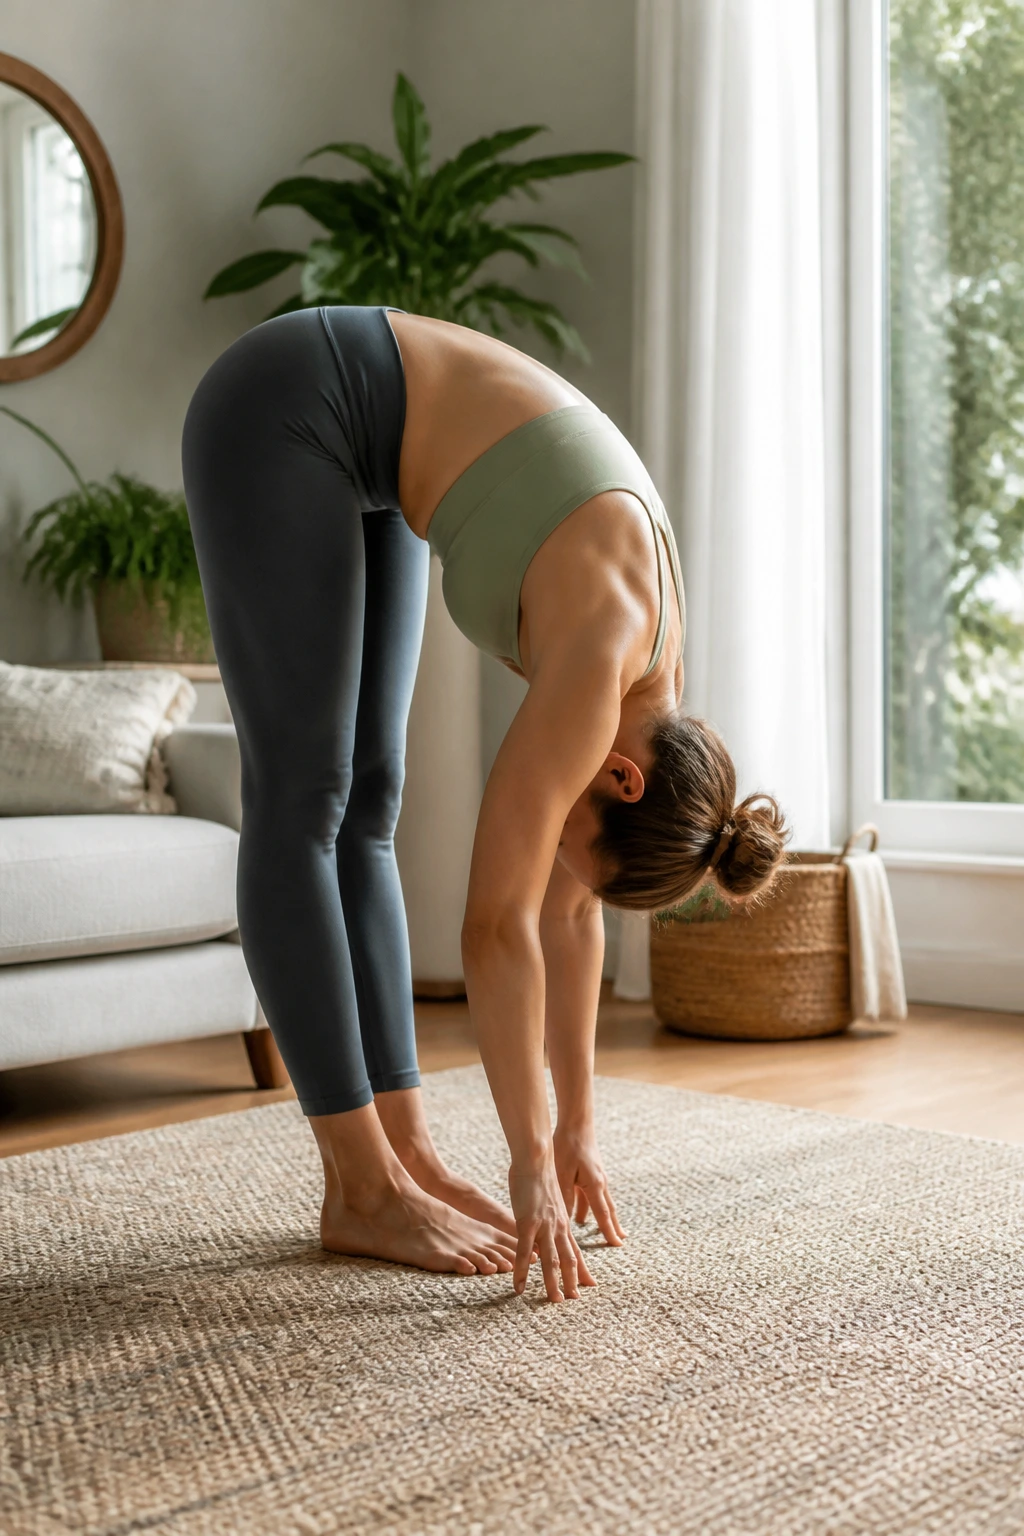
Sometimes, the best thing you can do for your spine is to let gravity do the work. Stand with feet hip-width apart and fold forward from your hips. Keep a slight bend in your knees.
The Decompression
Let your head hang heavy. Really—let it go. Many people hold tension in their neck by looking forward; shaking your head “yes” and “no” helps release that. Gravity gently pulls the spine into traction, providing a break from the vertical compression of standing or sitting all day.
17. Wide-Legged Forward Fold (Prasarita Padottanasana)
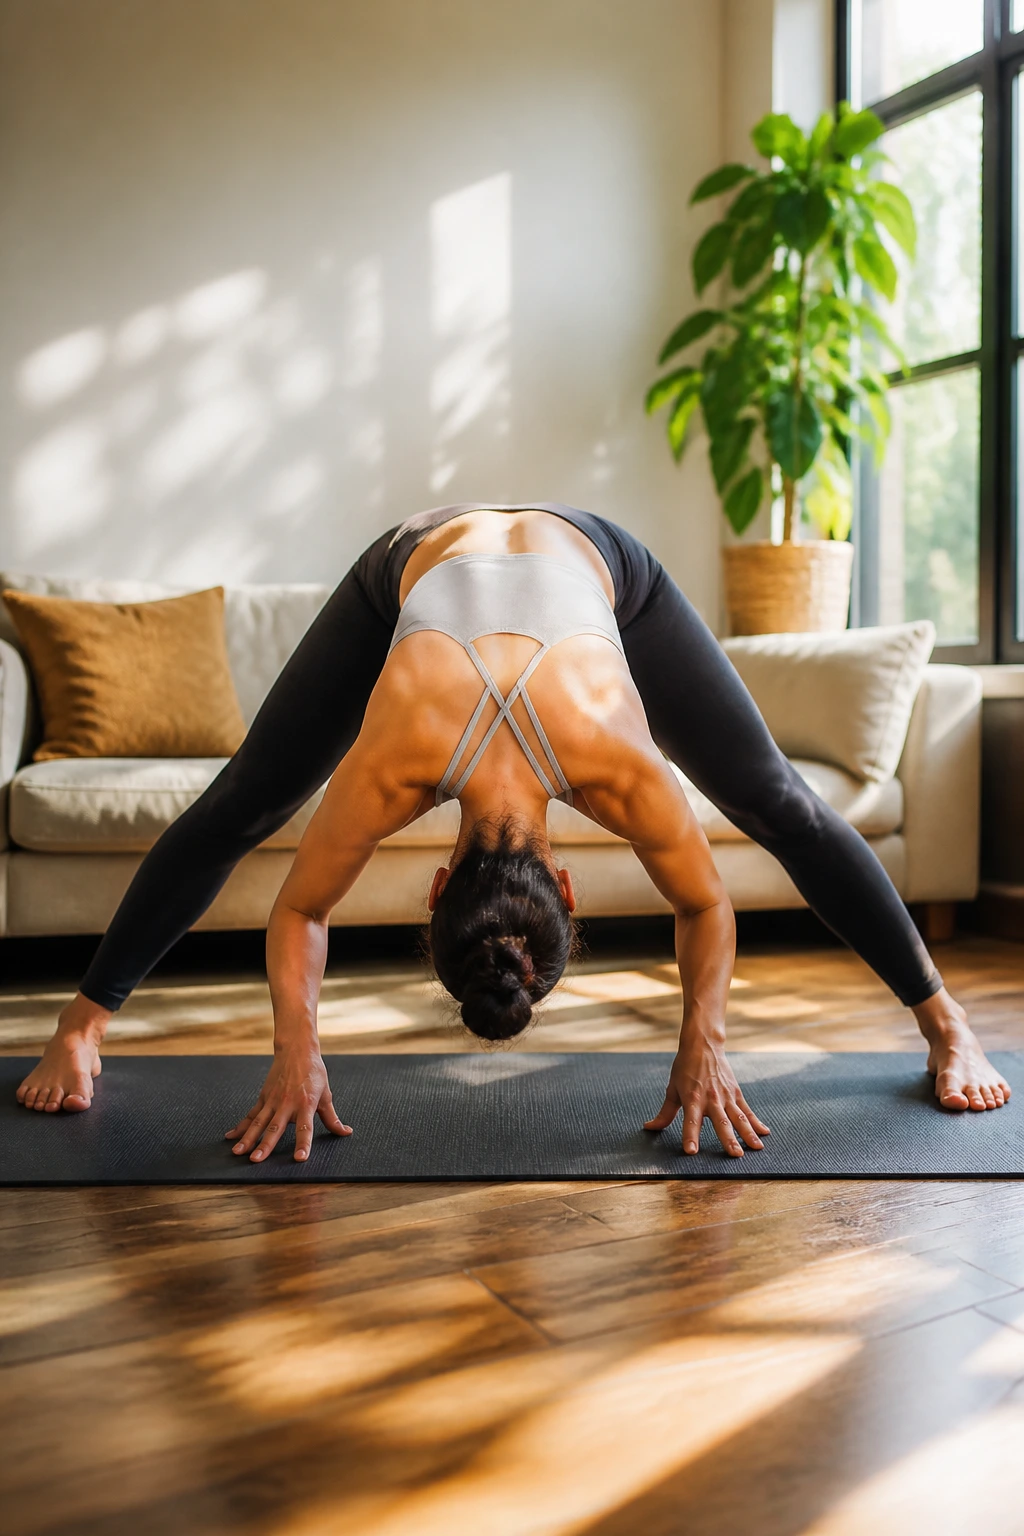
This takes the Forward Fold to the next level by changing the geometry of your hips. Step your feet wide apart, toes slightly turned in. Fold forward, placing your hands on the mat or blocks.
Adjusting for Impact
By going wide, you open the adductors (inner thighs) and create more room for the pelvis to tilt forward properly. This helps lengthen the hamstrings and lower back effectively. Let the crown of your head reach toward the floor, lengthening the neck.
18. Supine Twist
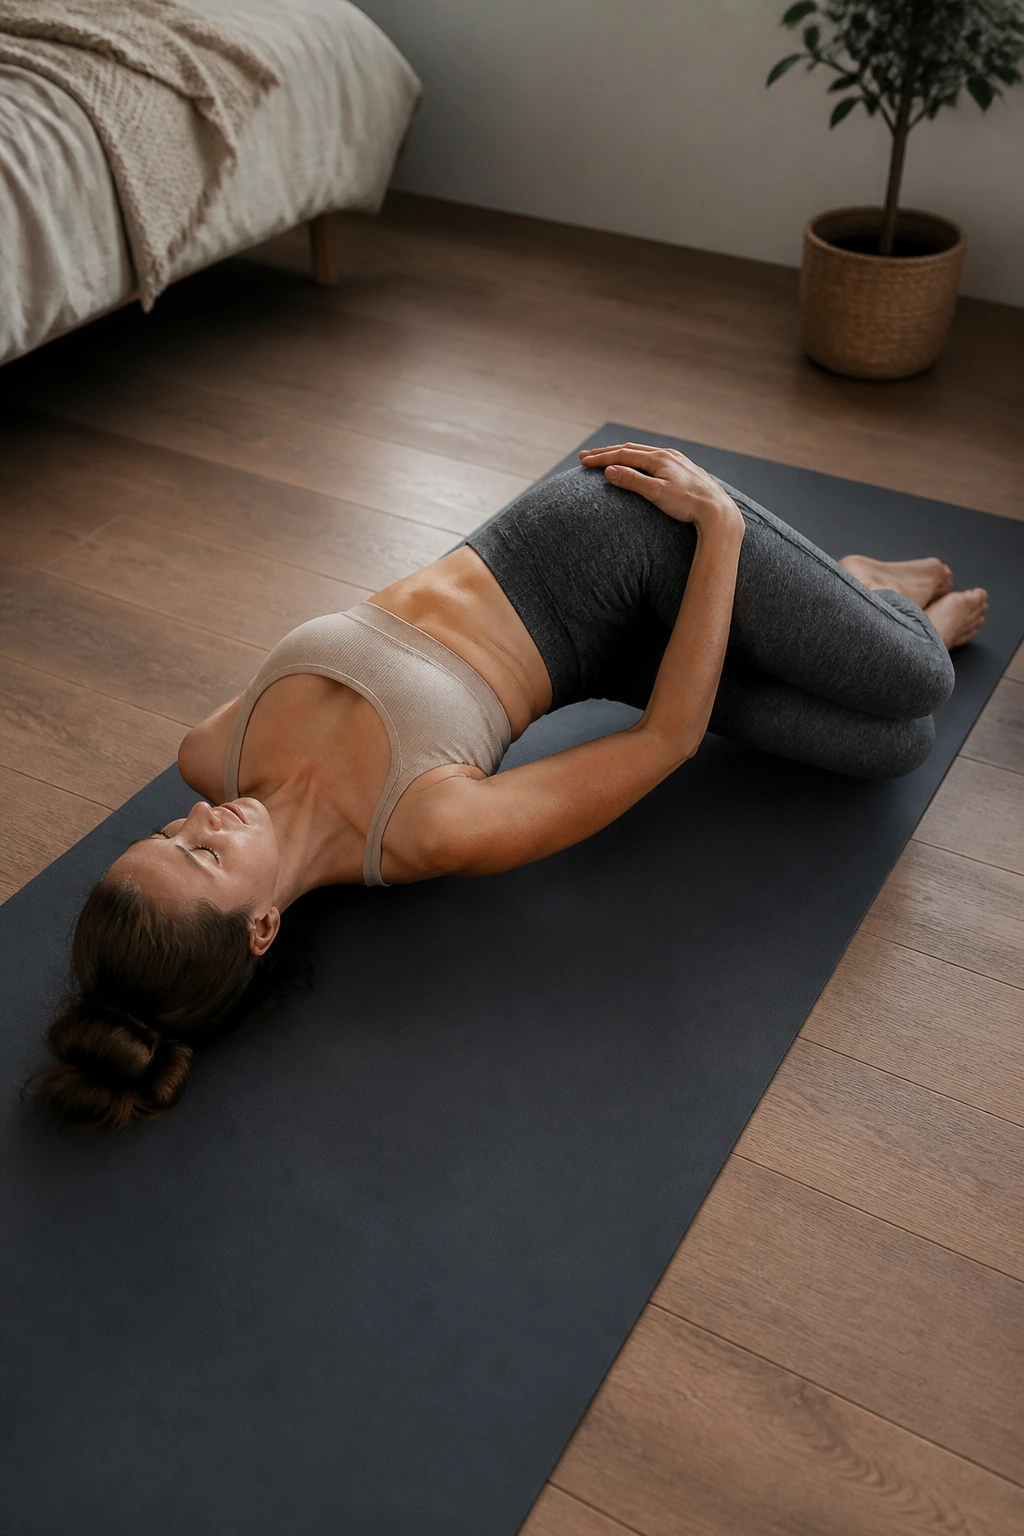
Spinal rotation is vital for mobility, and doing it on your back removes the element of balance, allowing you to focus purely on the stretch. Lie on your back, hug your knees to your chest, then drop both knees to the right while extending your left arm out.
The Key Detail
Keep both shoulders flat on the floor. If your left shoulder lifts, bring your knees higher up toward your chest. This ensures the twist happens in the thoracic spine—the mid-back—rather than forcing it into the lower back where you might be prone to injury.
19. Gate Pose (Parighasana)
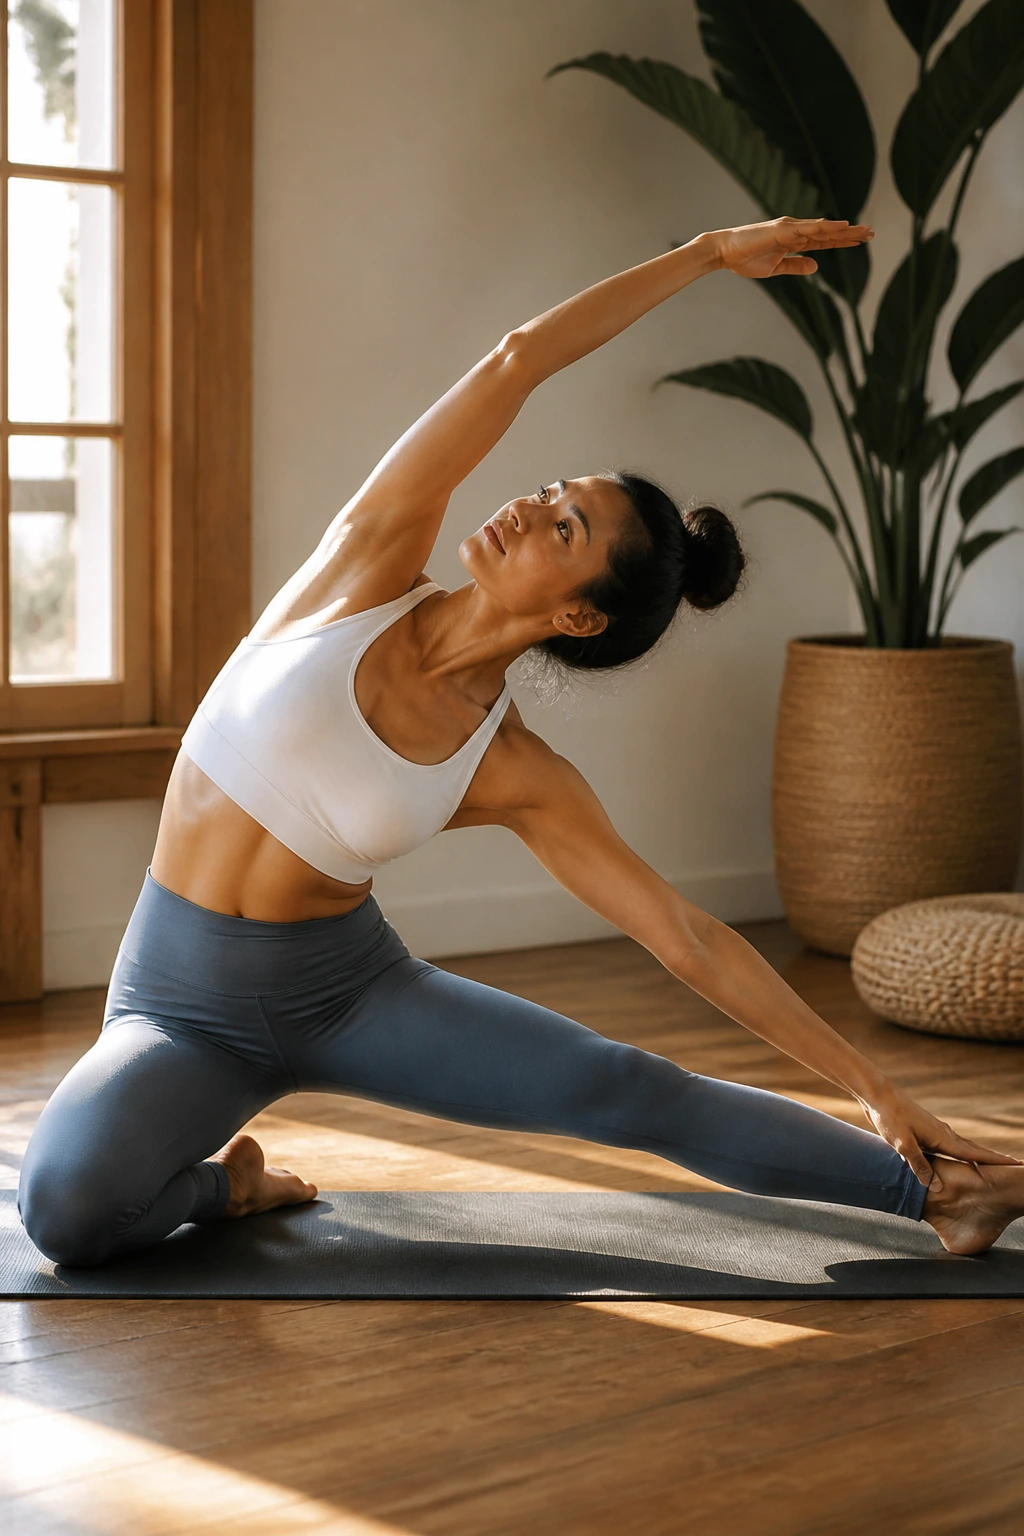
This is a lateral stretch, which is crucial because we rarely move our spines side-to-side. Kneel on your mat. Extend your right leg out to the side. Reach your left arm over your head, bending toward the extended leg.
Creating Space
The stretch should travel all the way from your left knee, up your side, to your fingertips. This opens the rib cage and the intercostal muscles. When the muscles between your ribs are tight, your breathing becomes shallow and your posture suffers. This pose literally makes room to breathe.
20. Camel Pose (Ustrasana)
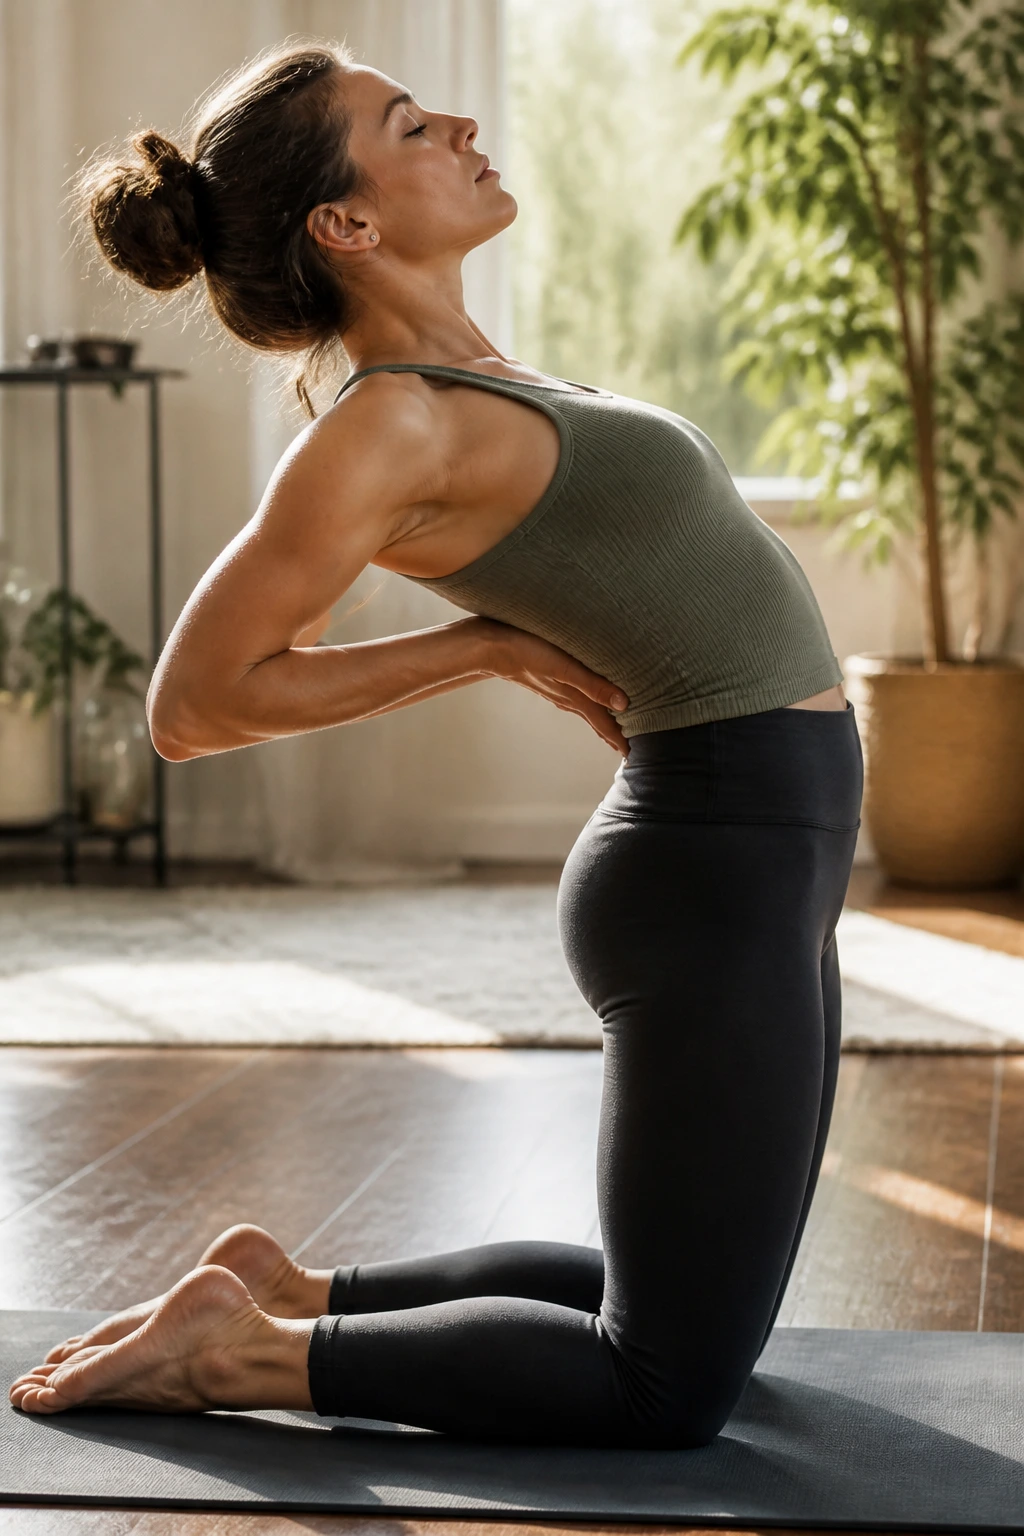
This is an advanced chest opener. Kneel with knees hip-width apart. Place your hands on your lower back, fingers pointing down. Press your hips forward while lifting your chest to the ceiling.
A Gentle Approach
If you can reach back and grab your heels, do so, but don’t force it. The focus is on opening the heart center and the front of the throat. This is the ultimate antidote to the “head forward” posture. If your neck feels compressed, keep your chin tucked slightly rather than dropping your head all the way back.
21. Bow Pose (Dhanurasana)
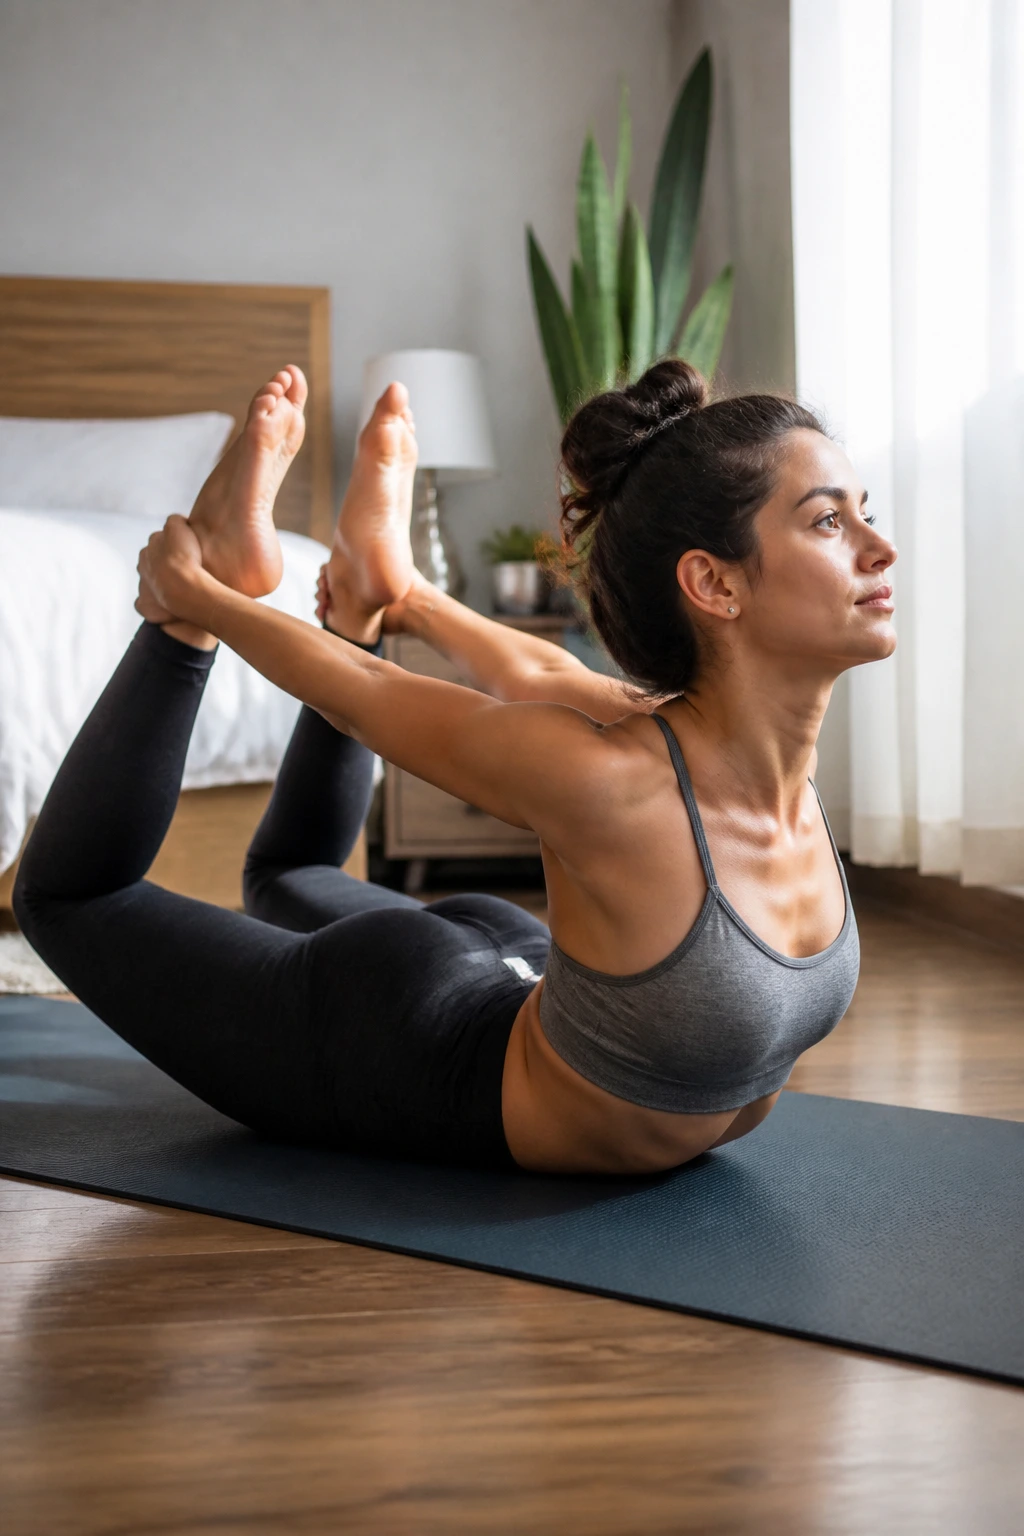
Bow pose builds significant strength in the posterior chain—the backside of your body—which is the structural support for your posture. Lie on your stomach, bend your knees, and reach back to grab your ankles.
The Action
On an inhale, kick your feet into your hands. This kick is what lifts your chest and thighs off the floor. Keep your knees only hip-width apart. This pose actively fights the slouch by strengthening the entire back body while stretching the front. It is intense, so approach it with patience.
22. Warrior II (Virabhadrasana II)
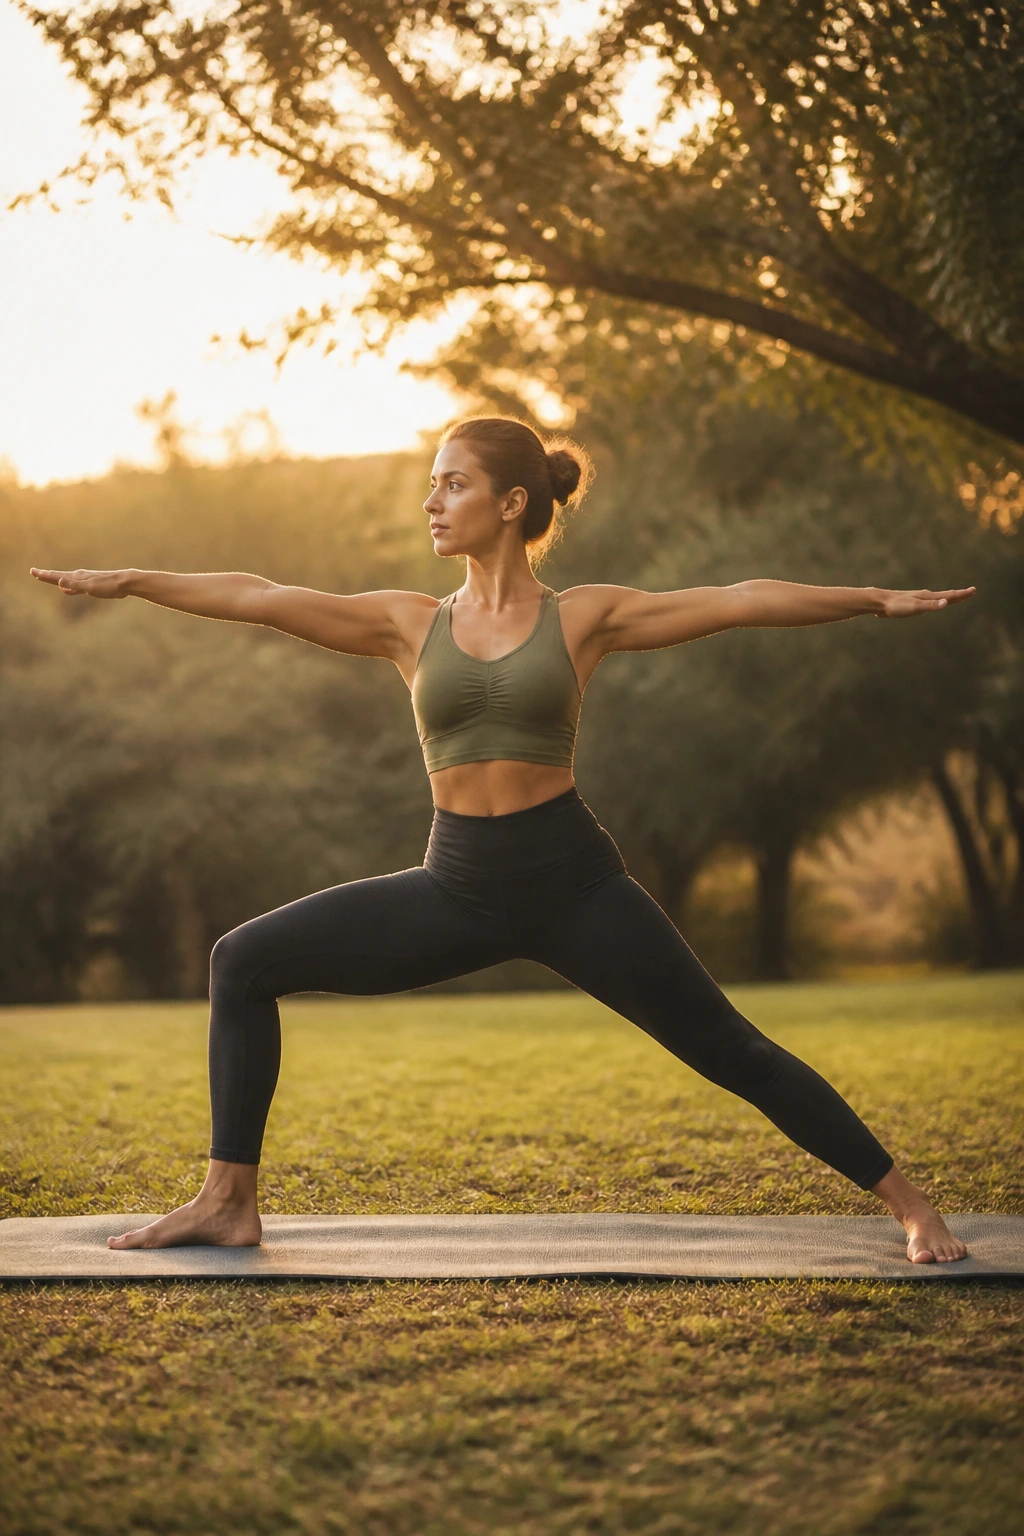
This pose requires you to hold your torso upright, which sounds easy but is surprisingly difficult for people who are used to leaning. Step your feet wide, turn your right foot out, and bend your right knee. Keep your torso stacked directly over your hips.
The Posture Check
Many people lean forward toward the bent knee. Don’t. Imagine you are pressed between two panes of glass. This forces your core to work and keeps your spine neutral. Reach your arms out actively—this engages the muscles around the shoulders and collarbone.
23. Triangle Pose (Trikonasana)
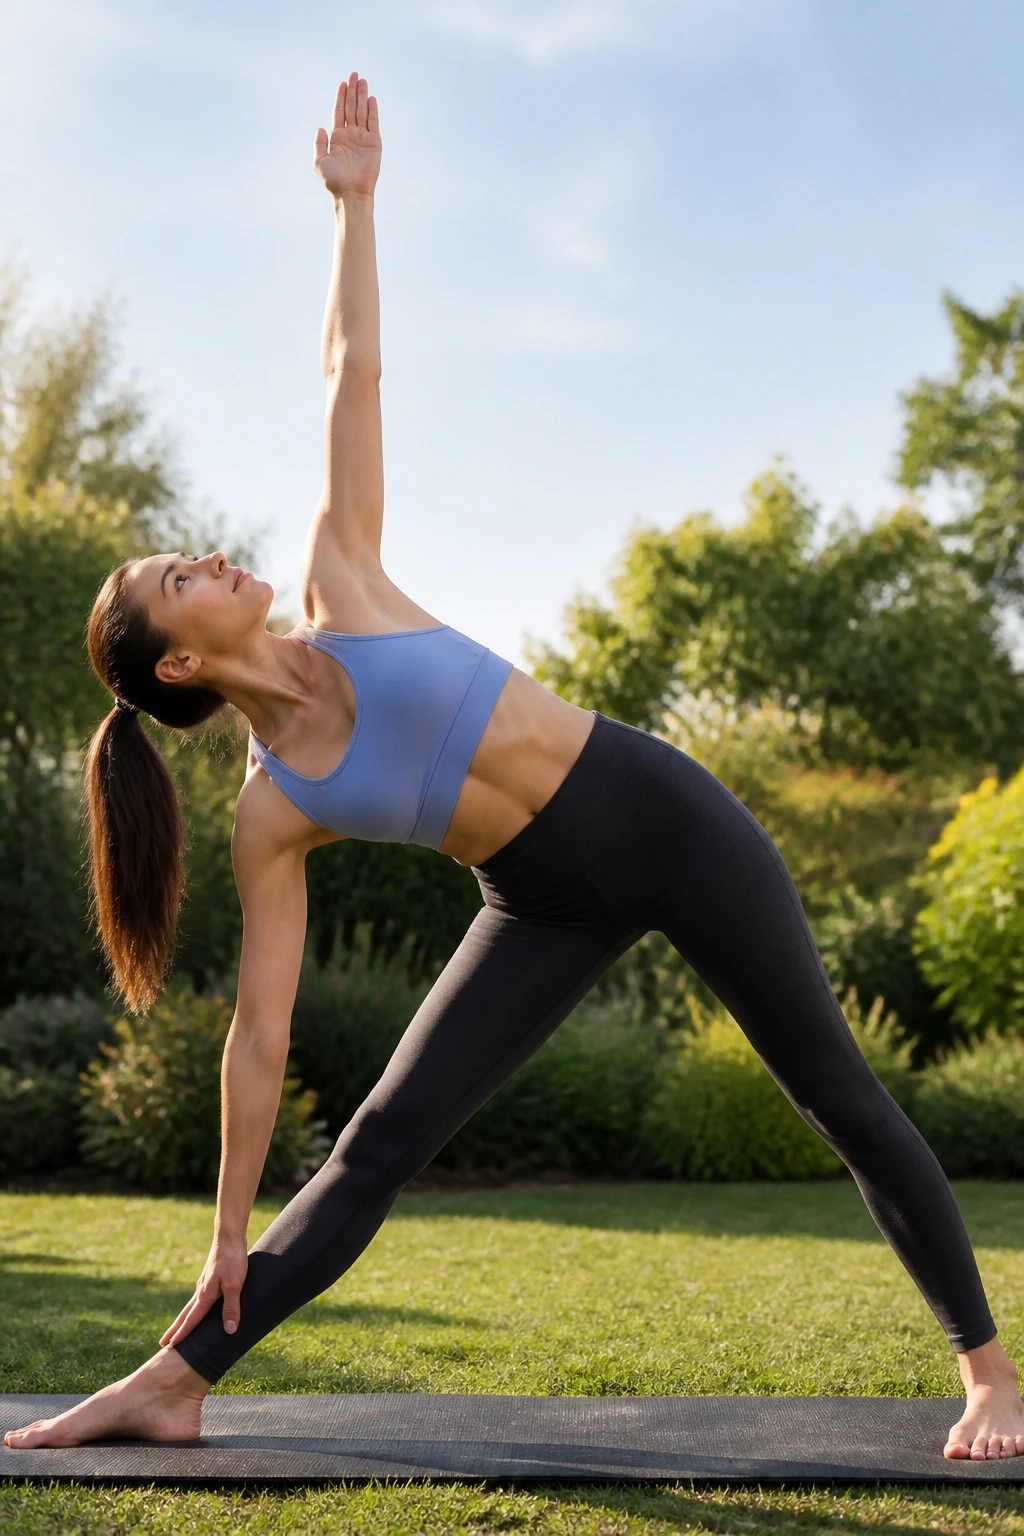
This pose builds lateral core strength. Stand with feet wide, turn your right foot out, and extend your arms. Reach your right arm forward as far as you can, then tip down, placing your hand on your shin, a block, or the floor.
The Alignment
The goal is to keep your torso long on both sides. Don’t crunch the bottom side to get lower. Imagine you are leaning against a wall behind you. This builds the stability needed to stand tall without effort.
24. Half Lord of the Fishes (Ardha Matsyendrasana)
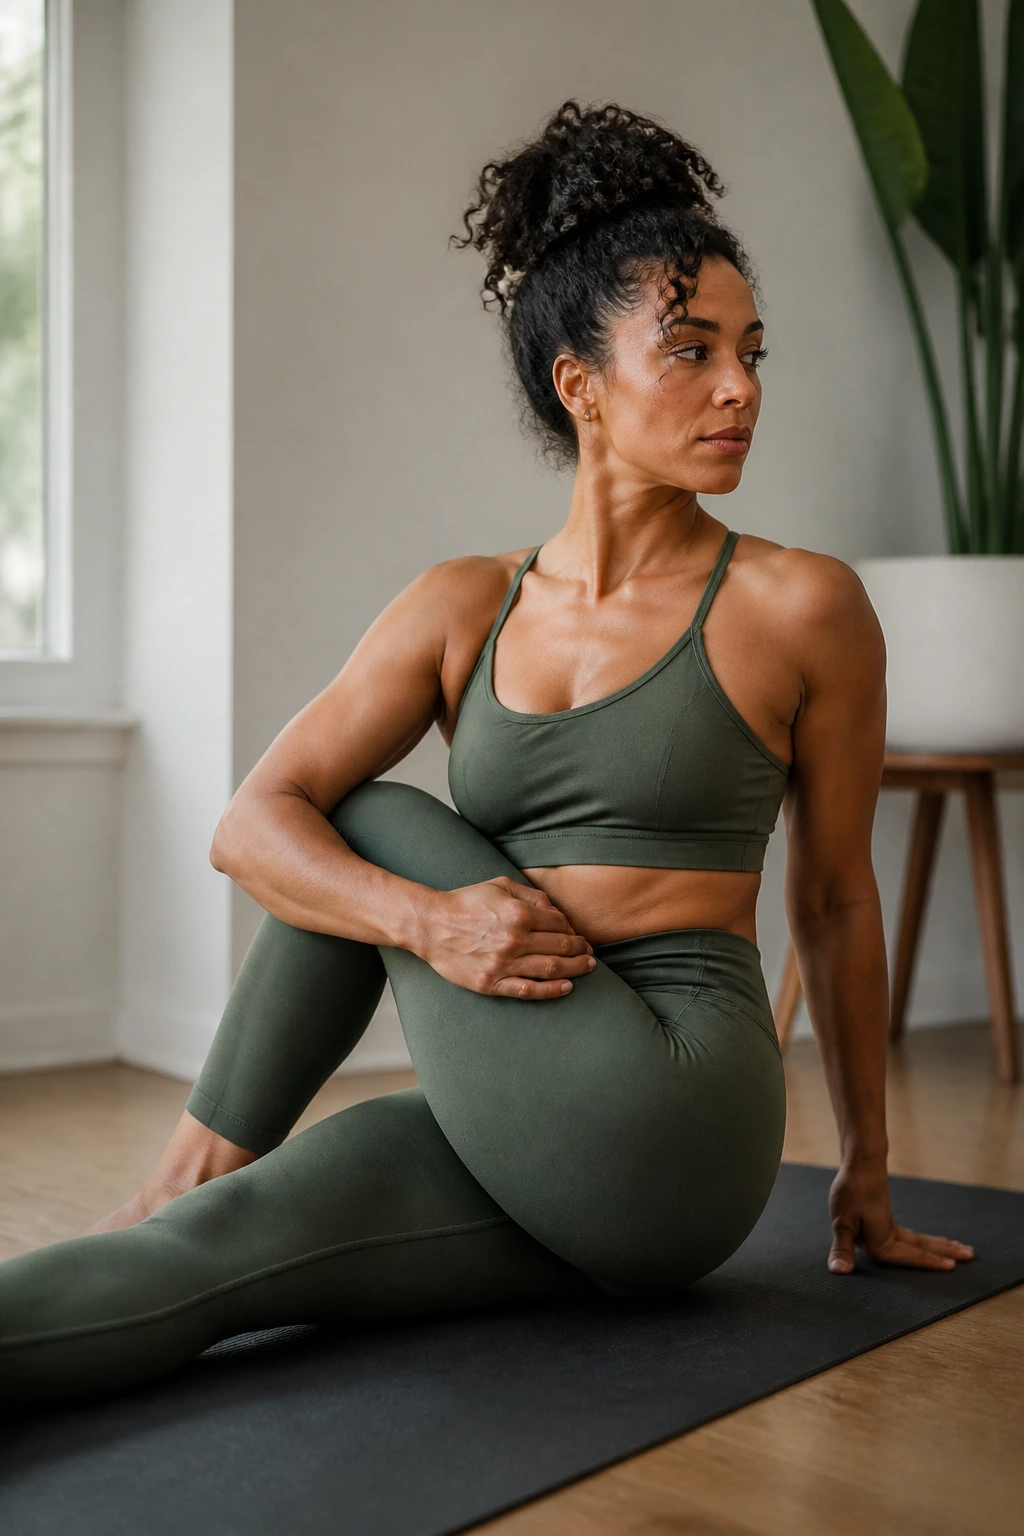
This seated twist is excellent for realigning the spine. Sit with your legs extended. Cross your right foot over your left knee. Hug your right knee with your left arm and twist to the right, placing your right hand behind you for support.
The Subtle Correction
Most people slump in this pose. Use your back hand to push into the floor, lengthening your spine upward before you twist. Imagine you are a corkscrew—the length comes first, the twist comes second. This de-rotates the vertebrae and helps improve spinal mobility.
25. Savasana (with support)
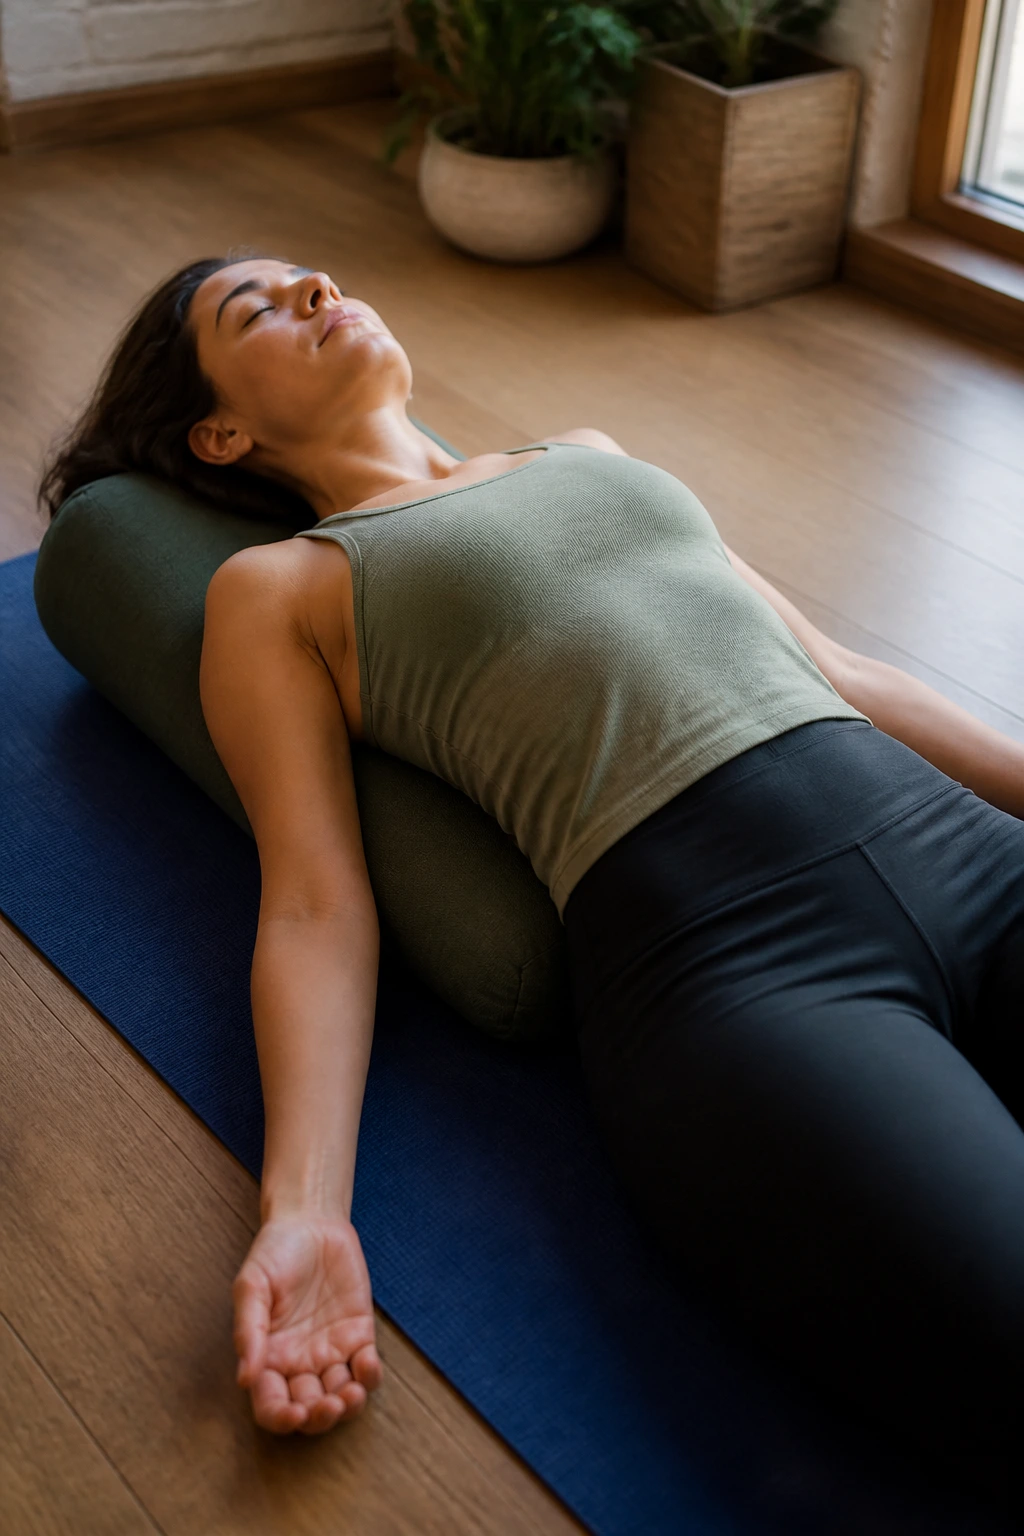
The most important part of any posture routine is learning how to let go. Lie on your back. If you struggle with rounded shoulders, place a bolster, a rolled-up blanket, or a firm pillow along the length of your spine.
The Goal
Let your shoulders drape over the sides of the support. This provides a passive, gentle stretch to the chest and creates space for the spine to settle. Stay here for at least five minutes. After all the work of strengthening and stretching, this is when your nervous system learns to accept a more open, upright shape as your new “normal.”
Final Thoughts
Improving your posture is a marathon, not a sprint. You are undoing years of habit, and the body resists change. You don’t need to do all 25 of these every single day. In fact, if you tried, you would likely be sore for a week.
Pick three or four of these poses that address your specific “pain points.” If your shoulders are your biggest issue, stick with Puppy Pose, Eagle Arms, and Thread the Needle. If you feel weak and slumped, focus on Locust, Plank, and Bridge. The key is consistency. Five minutes of deliberate movement every day will produce far better results than a single hour-long session once a month. Pay attention to how you feel when you aren’t on the mat—that awareness is the real work of yoga.
