



Most back pain tied to tight posture is a habit with a memory. If you sit with your head forward, your ribs flared, and your hips folded for hours, your body starts treating that shape as normal, and getting out of it can feel weirdly hard.
That’s why the best workouts for back pain and tight posture usually look calmer than people expect. They’re not a punishment session. They’re a mix of gentle mobility, deep core control, glute work, and a little bit of loaded standing practice so your spine stops doing all the work by itself.
No, you do not need to smash your spine with sit-ups.
Boring often wins.
If pain shoots down a leg, your arm goes numb, you lose strength, or the pain started after a fall or accident, that’s not a “tight posture” problem to train through. Get it checked. For the usual desk-body stiffness, though, the right sequence can change how your back feels in a way that’s obvious by the third or fourth session.
1. 90/90 Breathing Reset for Back Pain and Tight Posture
Your ribs matter more than your abs here. That’s the part most people skip. When the ribcage is stuck up and open, the low back tends to arch, the neck tightens, and the whole posture chain starts acting like it’s bracing for impact.
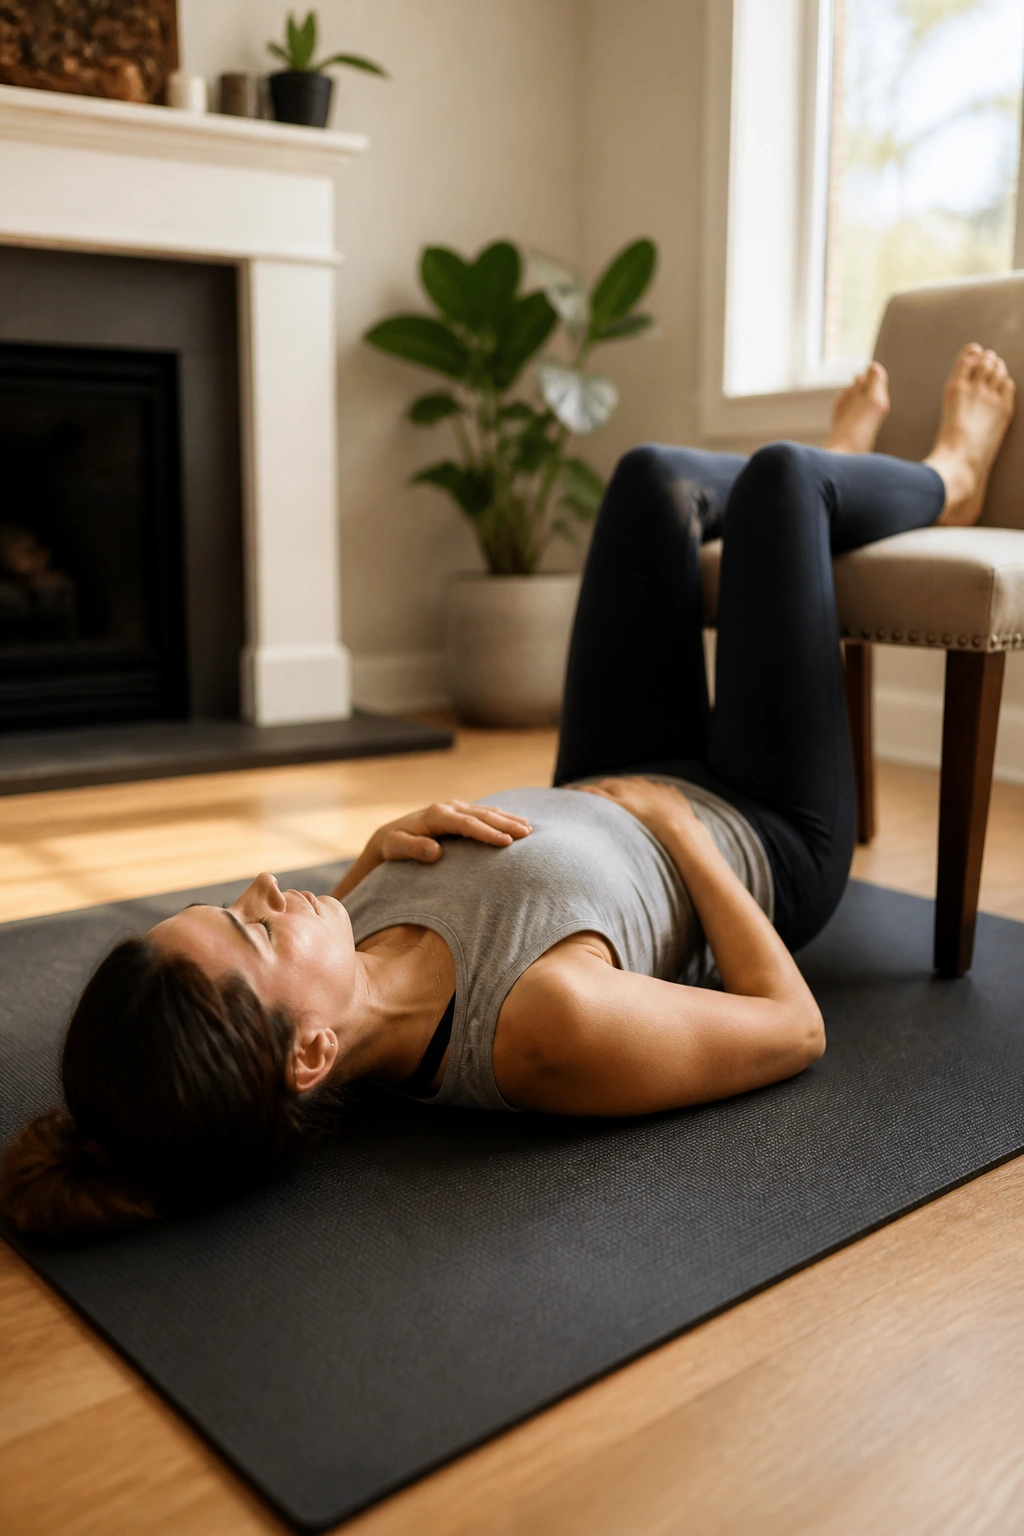
The 90/90 breathing reset is a quiet drill, but it’s not fluff. Lie on your back with your feet on a wall or a chair, hips and knees bent to about 90 degrees, and exhale long enough that your lower ribs soften down. A full exhale helps your diaphragm and deep core do their job without your back taking over.
How to do it
- Lie on your back with your calves resting on a chair or wall.
- Exhale through your mouth for 5 to 7 seconds.
- Pause at the end of the exhale for 2 seconds.
- Inhale quietly through your nose into the sides of your ribs.
- Do 5 breaths per round, 2 to 3 rounds.
The cue that matters most: your lower back should feel heavy, not arched. If your neck is doing the work, start over and breathe smaller.
This is a smart first move before almost any other workout on this list. It changes the position you’re starting from. That sounds small. It isn’t.
2. Cat-Cow Spine Waves
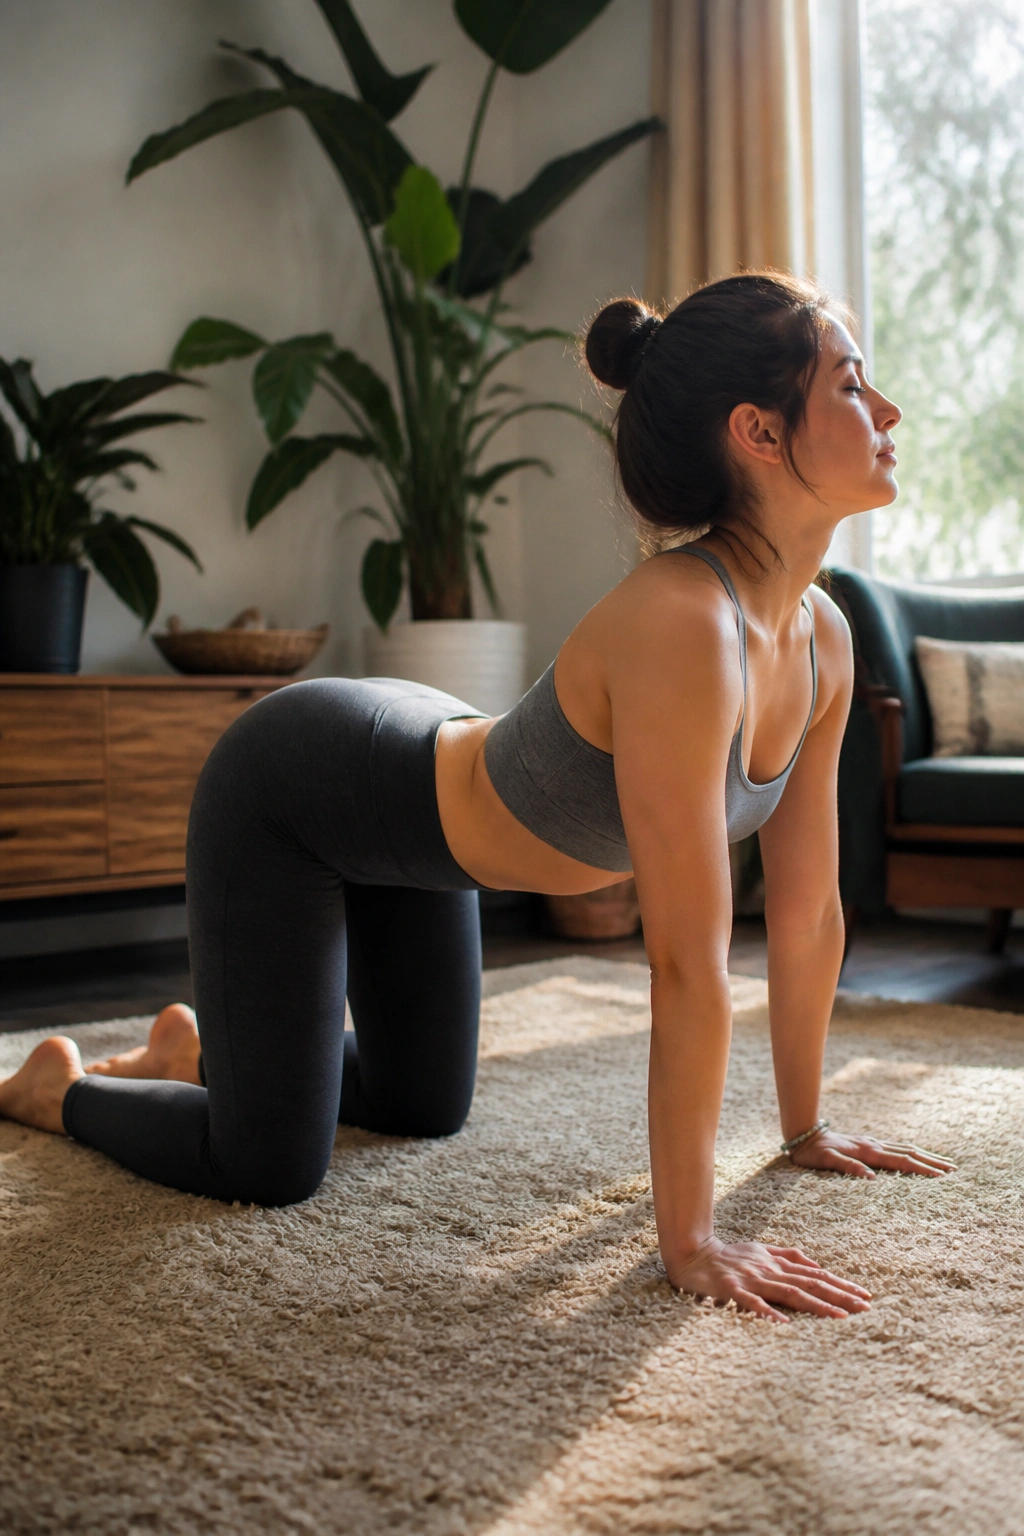
Cat-cow gets mocked because it shows up in every warm-up on earth, but the old move sticks around for a reason: it gives the spine a chance to move segment by segment instead of locking in one shape. That matters when your back has been parked in one position for half the day.
Go slow. Really slow. A fast cat-cow is basically a shrug with bent elbows. A good one feels like each breath is rolling through the spine, one vertebra at a time, with the low back, mid-back, and neck all getting a turn.
Try 8 to 10 controlled reps. On the “cow” phase, let the chest open only as far as it can without jamming the low back. On the “cat” phase, think about pushing the floor away and rounding through the upper back more than the neck.
One rep should never feel like a back bend contest.
If you feel pinching in the lower spine, make the motion smaller and keep the ribs quieter. This drill is about lubrication, not range for range’s sake. A smoother back is usually a happier back.
3. Thread-the-Needle Rotations
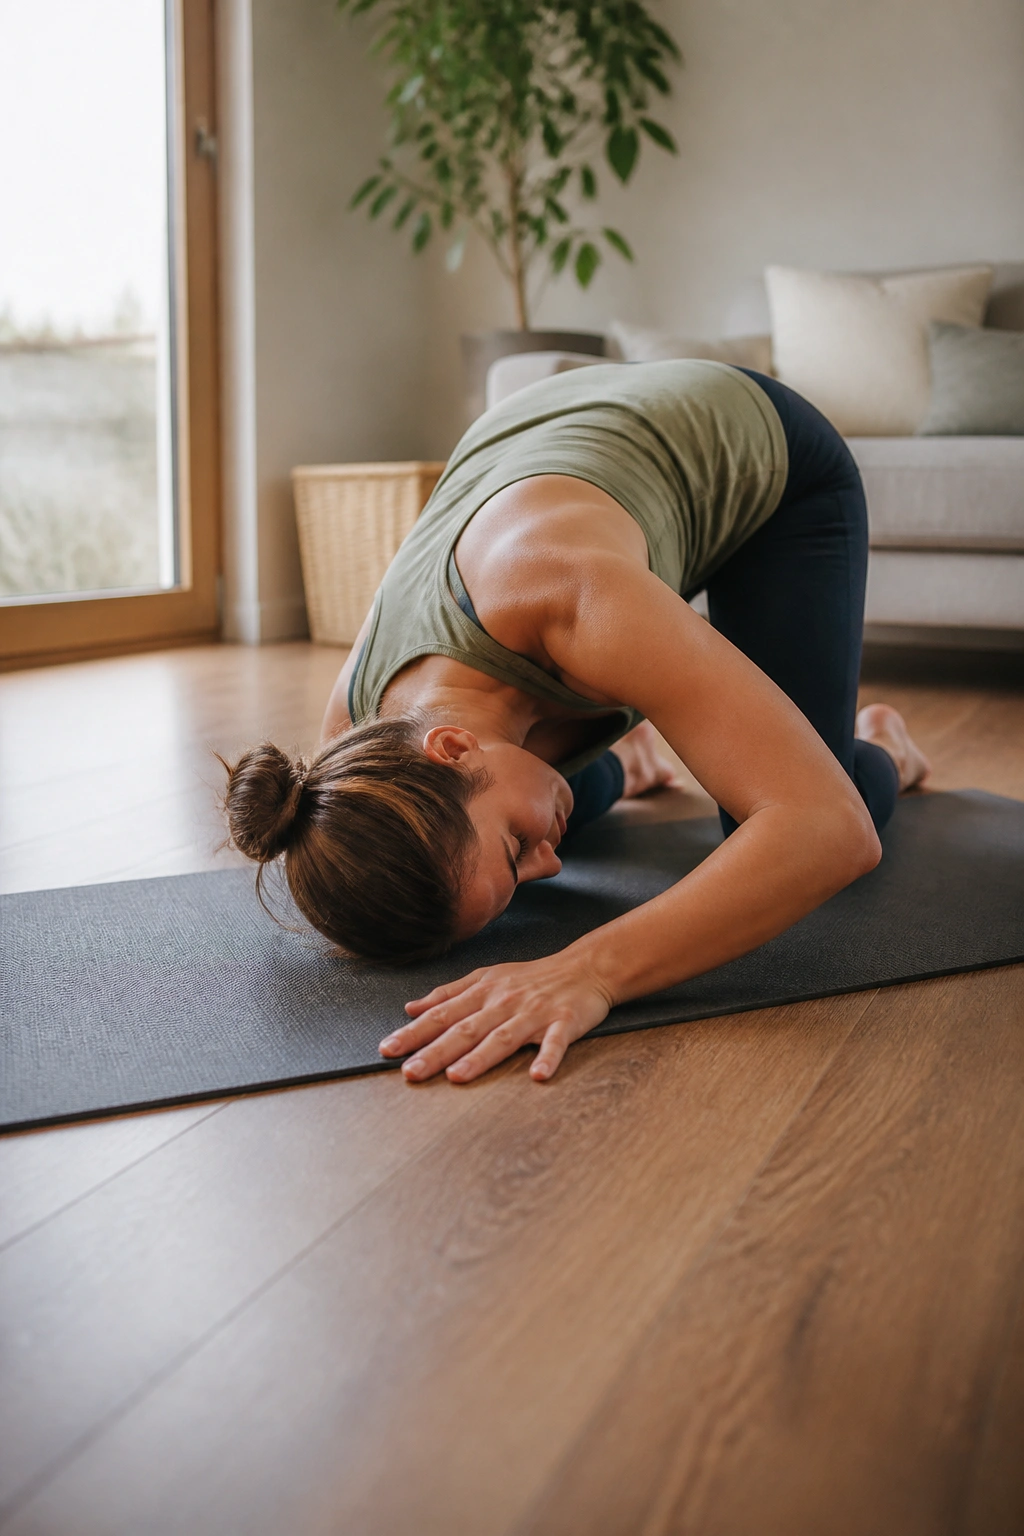
Twisting isn’t the enemy. Stiff, sloppy twisting is. Thread-the-needle gives your upper back a chance to rotate without forcing the low back to wring itself into a knot, which is exactly what tight posture tends to encourage.
Start on hands and knees. Slide one arm under the other and let the shoulder and upper back turn toward the floor. Breathe there for a second, then return and open the same arm toward the ceiling. Six slow reps per side is enough to start.
Why it helps
- It wakes up thoracic rotation, which desk posture tends to shut down.
- It asks the shoulder blade to glide instead of freeze.
- It usually feels better than aggressive twisting because the hips stay steadier.
If your lower back tries to rotate hard, narrow your stance a little and slow down. The goal is to turn from the ribcage, not to crank the pelvis around. That distinction matters more than people think.
Thread-the-needle is a good one when your upper back feels glued together after sitting. It’s also a nice bridge between breathing work and stronger drills later in the session.
4. Open-Book Rotations on the Floor
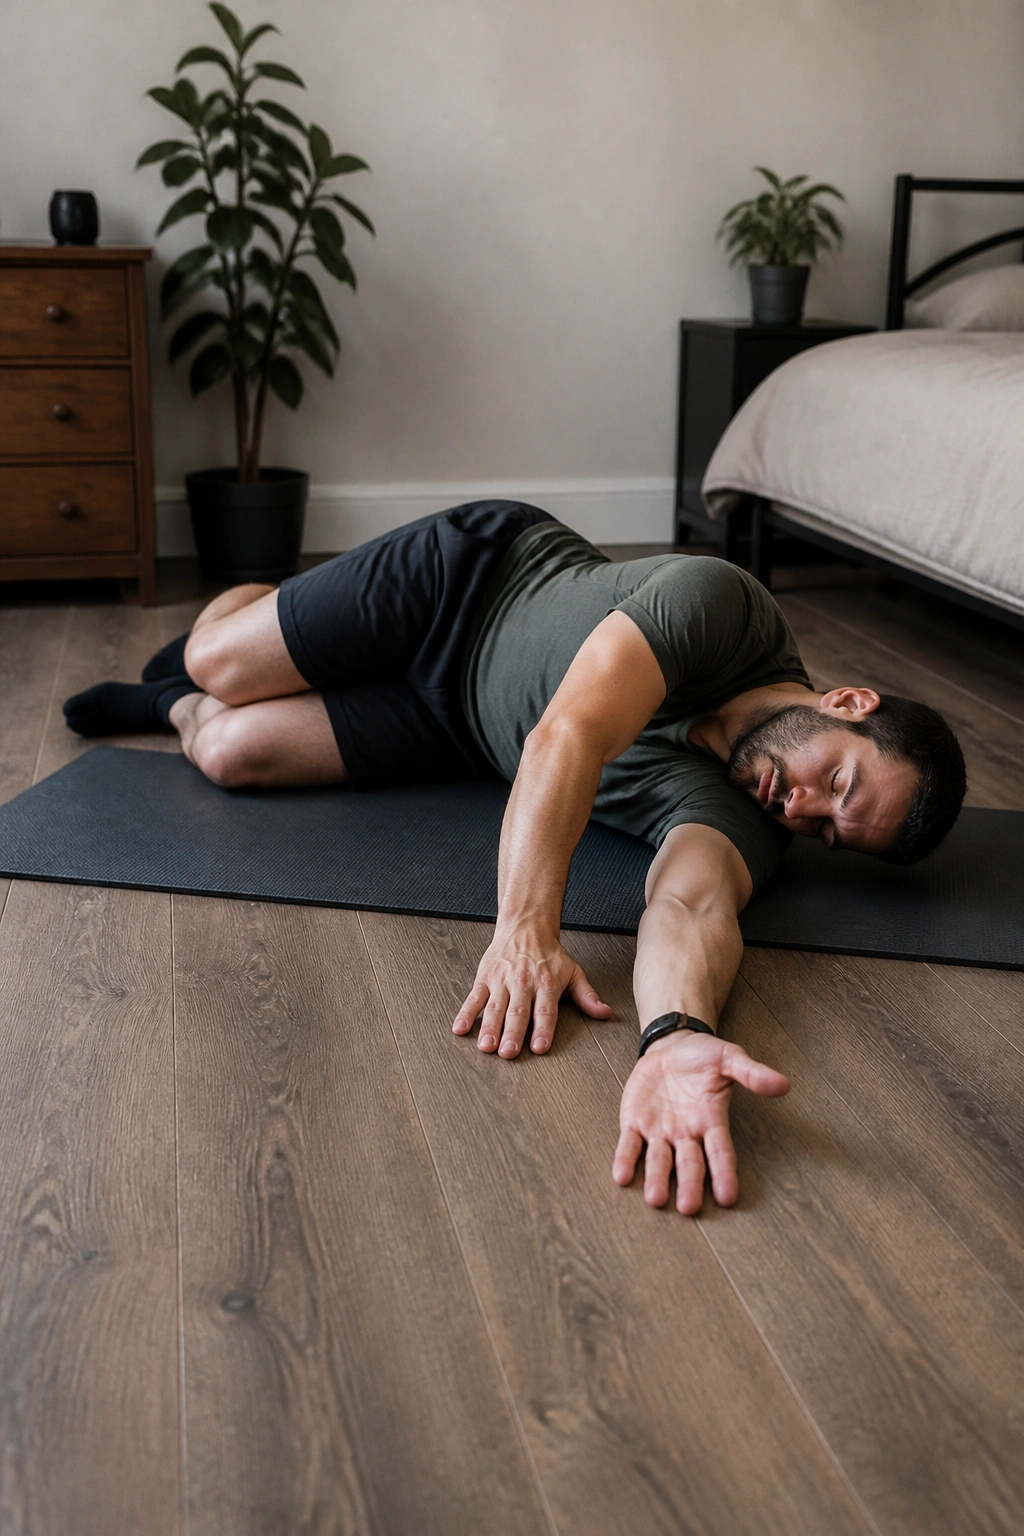
If thread-the-needle is a kneeling rotation, the open-book is its more relaxed cousin. You lie on your side, knees bent, arms stacked, and open the top arm like you’re turning a heavy page. It’s one of the cleanest ways to get motion into the mid-back without asking the hips to help too much.
The interesting part is the breath. Exhale as the top arm opens, then inhale as the chest settles into the stretch. That breathing pattern keeps the movement smooth and stops people from forcing the last inch with brute strength. Six reps per side is plenty.
The stretch should land between the shoulder blade and the spine, not in the front of the shoulder joint. If the shoulder feels jammed, bend the top elbow a little and shorten the arc. Smaller range, better quality. Every time.
I like this drill for people whose posture has turned into one long forward curve from neck to low back. It gives the upper body room to move again, and once the thoracic spine starts cooperating, the low back usually stops compensating so hard.
5. Child’s Pose With Side Reach
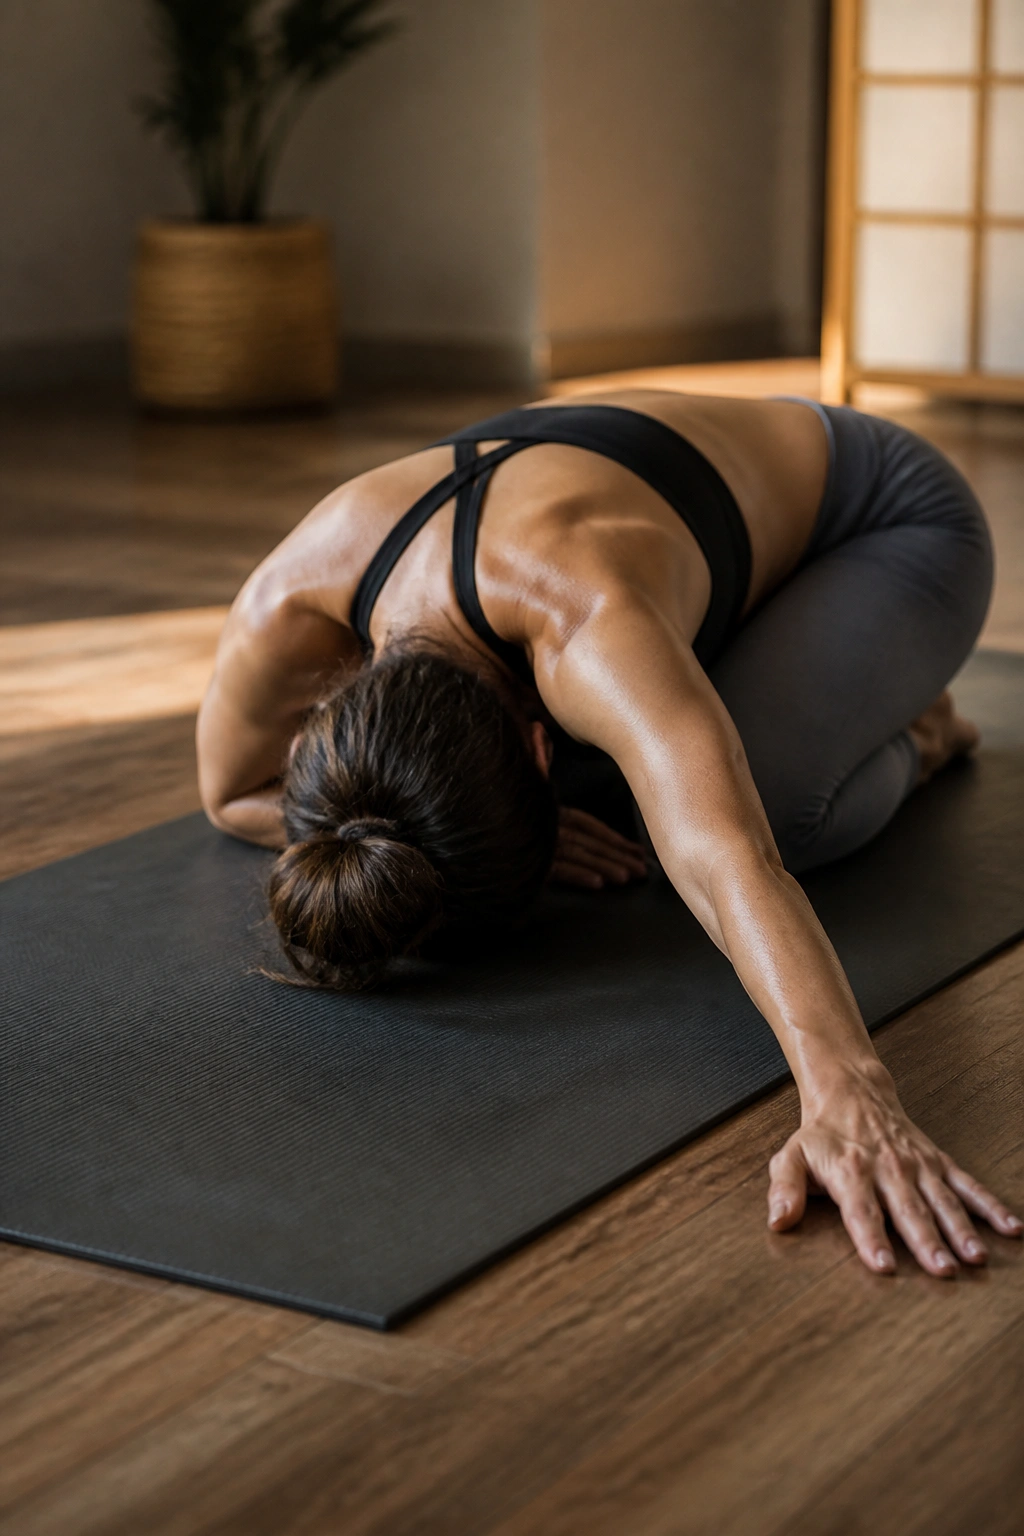
Child’s pose should feel like a long exhale through the back of the body. If it feels like your hips are being punished, back off. The best version is soothing, especially when the low back feels grippy and the lats are tight from hunching over a keyboard or steering wheel.
From kneeling, sit the hips toward the heels, reach both hands forward, then walk the hands slightly to one side. You’ll feel the stretch run along the side body, under the armpit, and down into the ribs. Hold for 20 to 30 seconds, then switch sides.
A lot of people rush this stretch because it looks easy. It isn’t hard, but it does ask for patience. The side reach is the part that matters most for tight posture, since the lats and side ribs often get so stiff they pull the shoulders forward and keep the chest from opening.
If your knees dislike the position, put a folded towel under them. If your back feels pinchy, come out of the stretch a bit. Gentle tension is fine. Sharpness is not.
6. Wall Angels
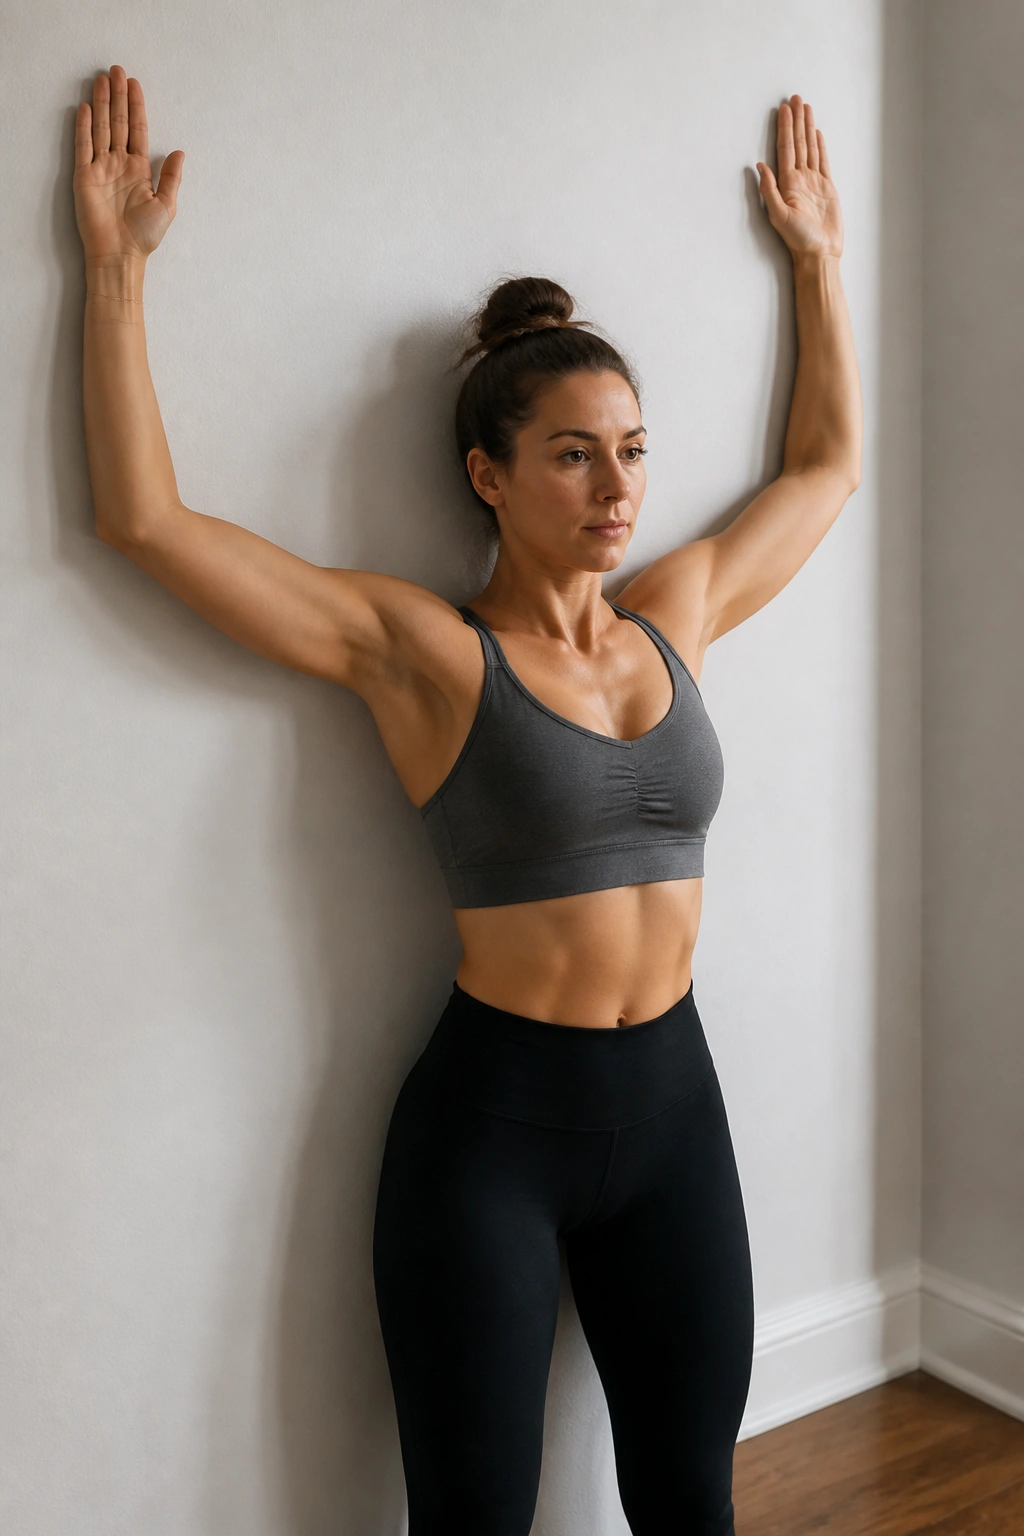
Wall angels are a humbling little test. They reveal quickly whether your upper back, shoulders, and neck are actually ready to stand tall or just pretending. The movement looks simple: back against a wall, ribs down, arms sliding up and down like a snow angel.
Most people find out fast that the wall is harder than it looks. That’s the point. Tight posture often means the shoulders live forward, the chin pokes out, and the ribcage flares. Wall angels ask all three to calm down at once.
Common mistakes
- Letting the low back arch off the wall
- Shrugging the shoulders toward the ears
- Forcing the arms too high and losing the rib position
- Moving faster than the body can control
Do 6 to 8 slow reps. If your hands can’t stay on the wall, keep the elbows bent and work a smaller range. A half-sized wall angel that stays clean is better than a giant one that turns into a shrug festival.
This is one of the best posture drills if your upper back aches by the end of the day. It teaches control, not just stretch.
7. Chin Tucks Against the Wall
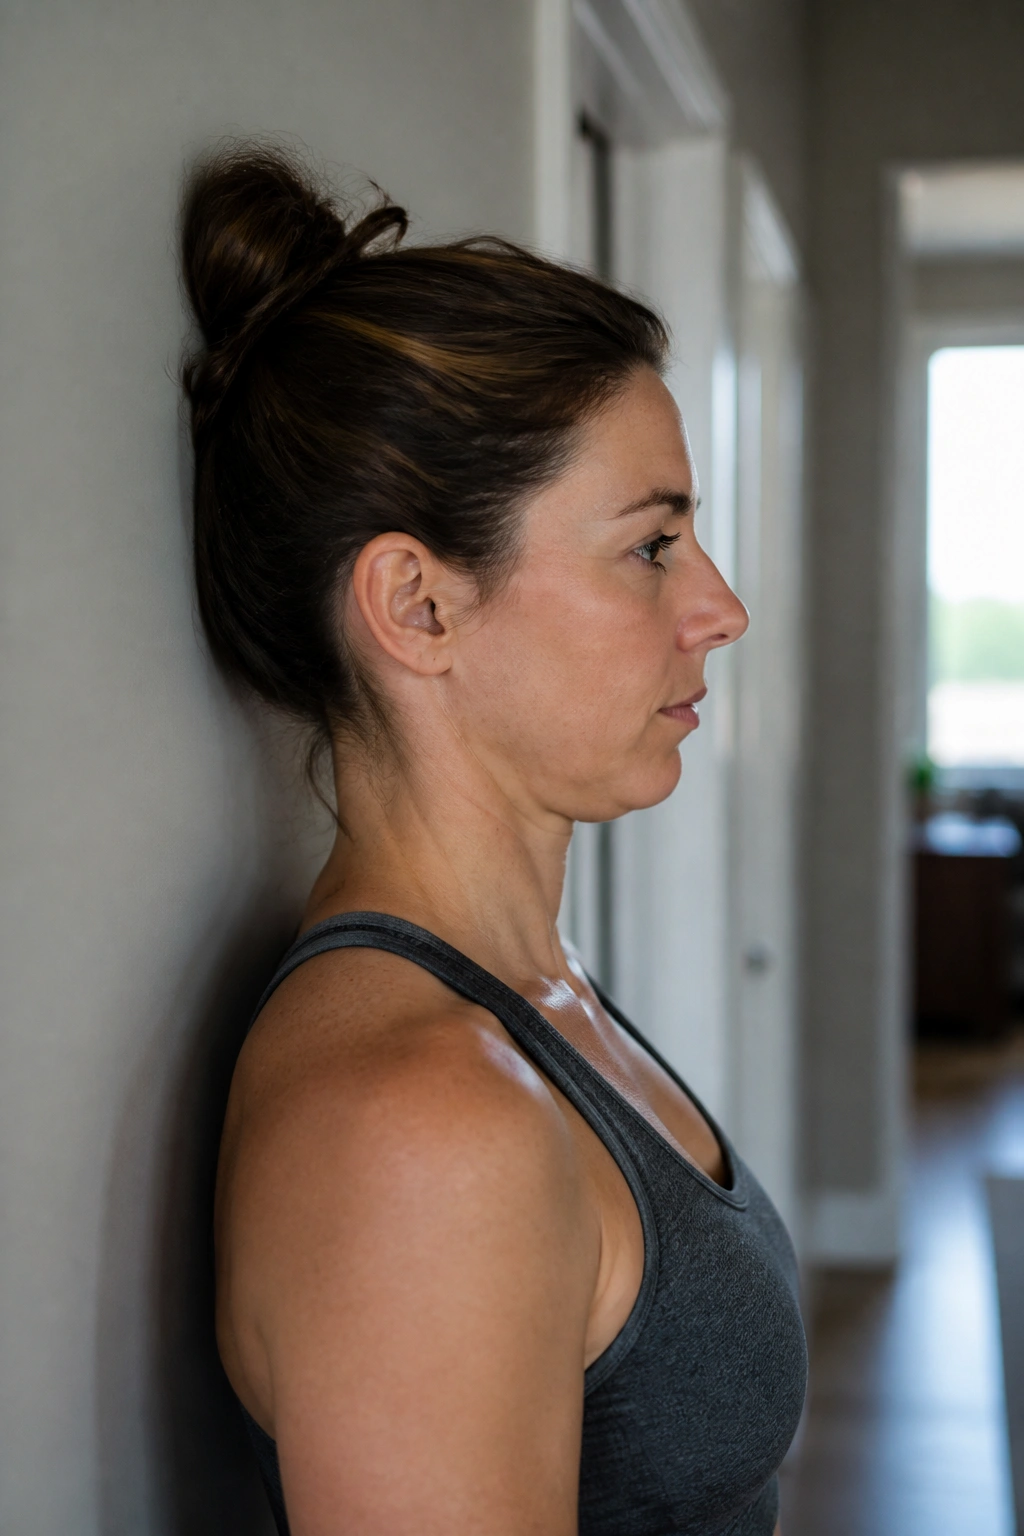
A forward head position can make your upper back and neck feel like they’ve been carrying a bowling ball all day. Chin tucks are tiny, but they can take a real bite out of that feeling when they’re done well. Ten seconds is often enough to remind the neck where “stacked” actually is.
Stand with the back of your head near a wall. Glide the chin straight back, like making a double chin without tipping the head up or down. Hold for 5 seconds, relax, and repeat 5 to 10 times.
The trick is not to jam the neck. You’re trying to lengthen the back of the neck, not smash the chin into the throat. A clean rep feels like the back of the skull drifting up and back while the jaw stays relaxed.
How to tell it’s working
- The front of the neck stays soft.
- The throat doesn’t tense.
- You feel a mild effort deep under the skull, not a cramp.
- The head ends up stacked over the ribs a little better.
If you spend a lot of time at a desk, this drill is worth keeping around. It won’t fix every posture problem by itself, but it helps undo the forward-head habit that often rides along with back pain.
8. Bird Dog
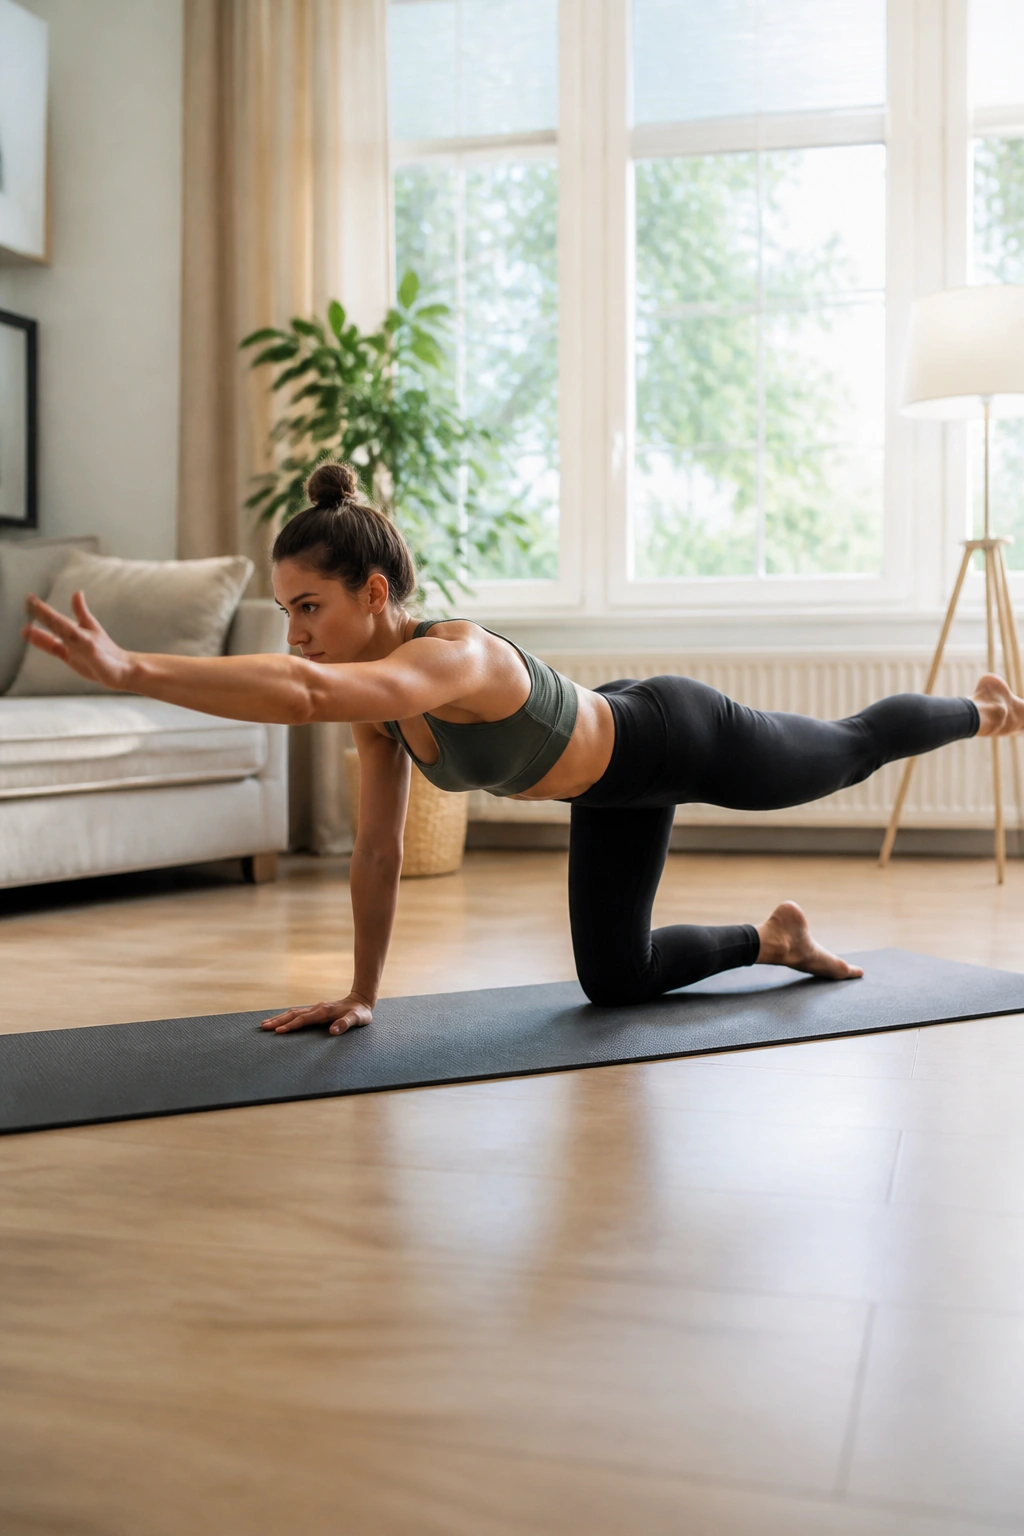
You know the feeling: one arm and the opposite leg have to move, and suddenly your trunk wants to wobble like it’s on a loose floorboard. Bird dog shows you exactly how much stability you’ve got left.
On hands and knees, reach one leg straight back while extending the opposite arm forward. The back should stay level, the hips should stay square, and the neck should stay long. Hold for 5 seconds, lower with control, and repeat for 6 reps per side.
What to watch for
- Don’t fling the leg high. That usually arches the low back.
- Don’t twist open toward the raised arm.
- Keep the belly lightly braced, like you’re about to be poked in the stomach.
This is one of the better back-friendly strength drills because it teaches the trunk to resist movement. That matters when posture is tired and the spine starts making extra effort just to stay upright.
Bird dog is also a sneaky mirror. If one side shakes more than the other, you’ll see it immediately. Good. That’s useful information, not a problem.
9. Dead Bug
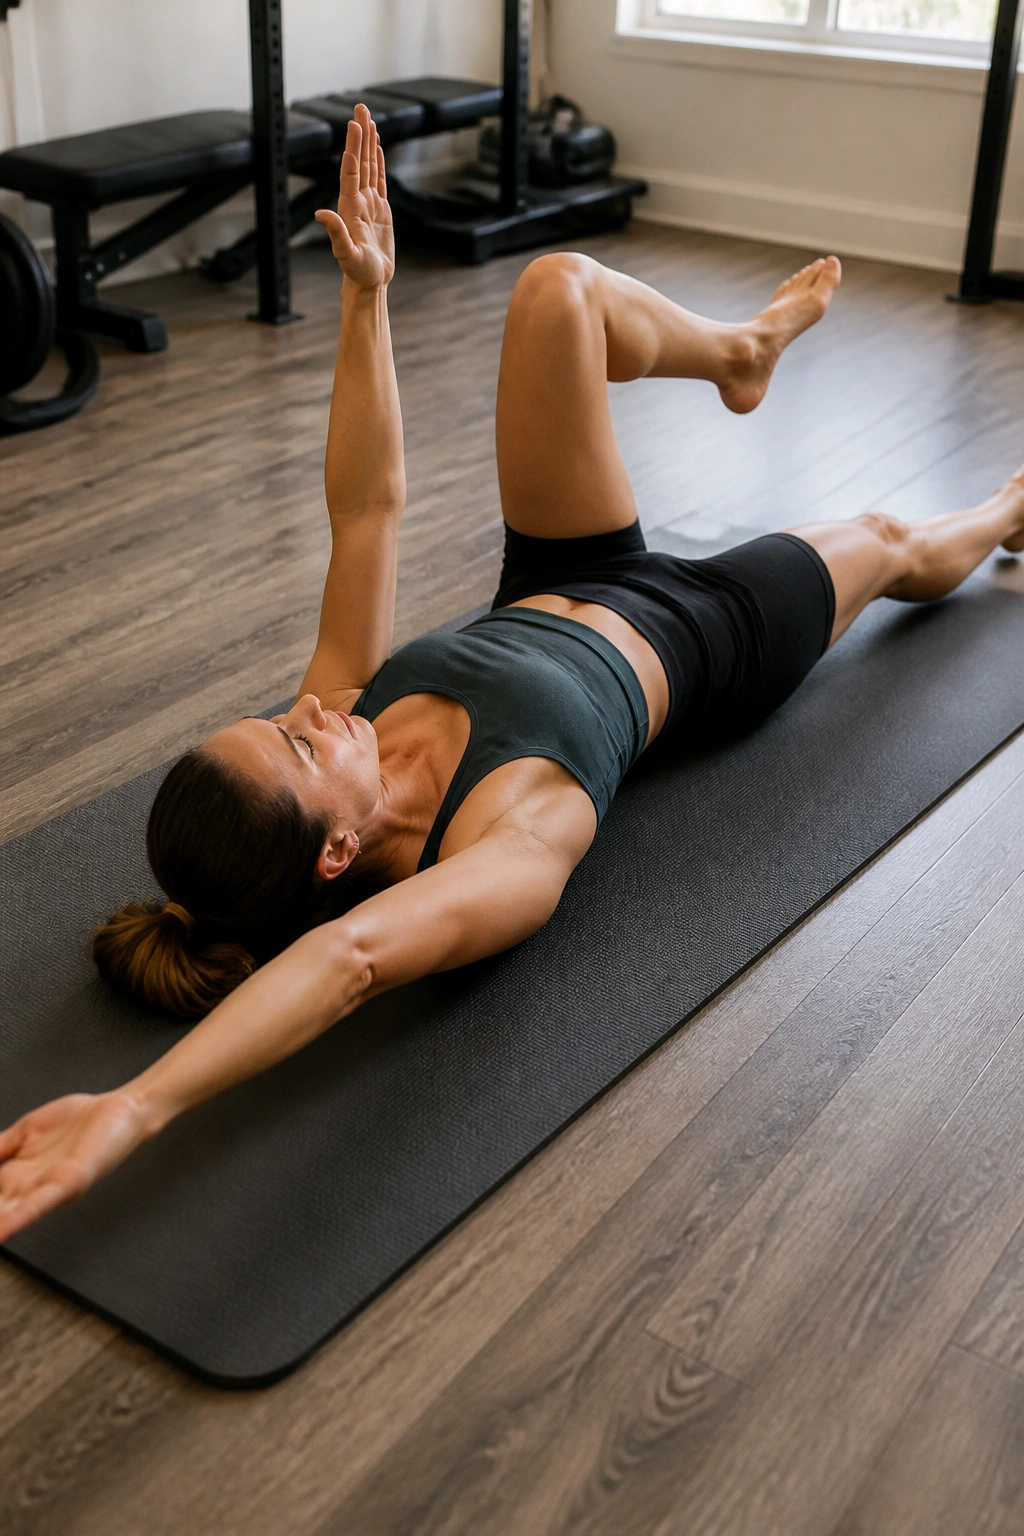
The dead bug looks almost too easy until you do it with honest control. Then it gets spicy fast. This move is one of my favorites for back pain because it teaches the ribs, pelvis, and deep core to stay organized while the arms and legs move away from the center.
Lie on your back, knees up, arms pointed toward the ceiling. Exhale, flatten the low back gently toward the floor, then lower the opposite arm and leg until they hover just above the ground. Return and switch sides. Start with 6 reps per side.
Keep these three things in mind
- The low back should stay quiet.
- The ribs should not flare.
- The movement should look smooth, not jerky.
If your back arches hard the second your leg moves, shorten the range. Tap the heel to the floor instead of lowering it far, or keep the knees more bent. Control matters more than reaching low.
Dead bug is especially useful if tight posture makes your back feel unstable when you get up from a chair or bend to pick something up. It builds the kind of control that shows up later in standing, walking, and lifting.
10. Glute Bridge
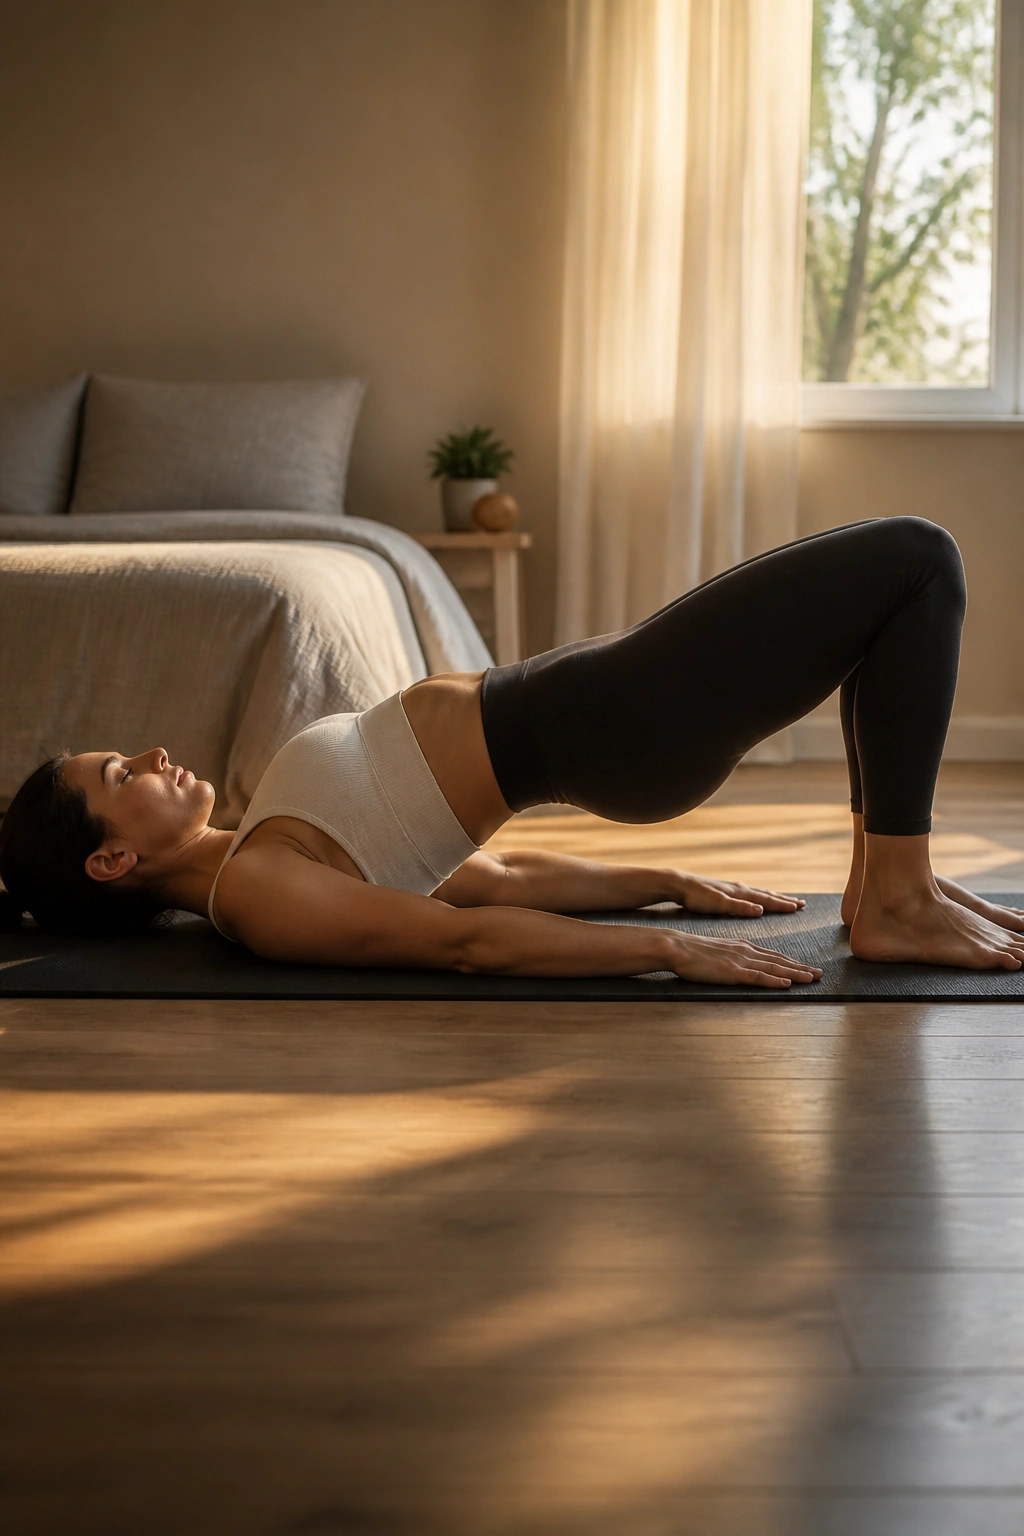
A weak or sleepy set of glutes can leave the low back doing extra labor all day. That’s a bad trade. Glute bridges help shift some of that load back where it belongs, and they do it without much stress on the spine.
Lie on your back with knees bent and feet flat, about hip-width apart. Exhale, brace lightly, then press through the heels and lift the hips until the body makes a straight line from shoulders to knees. Pause for 2 seconds at the top. Lower slowly. Eight to 12 reps usually works well.
The top position should feel like the back of the legs and the seat working together. If you feel it mostly in the low back, your ribs are probably flaring or your feet are too far away. Bring the feet a little closer and keep the exhale honest.
A good bridge is not a giant arch. It’s a clean hip extension. That difference matters when the goal is back pain relief and better posture, not a gym selfie with a dramatic curve.
11. McGill Curl-Up
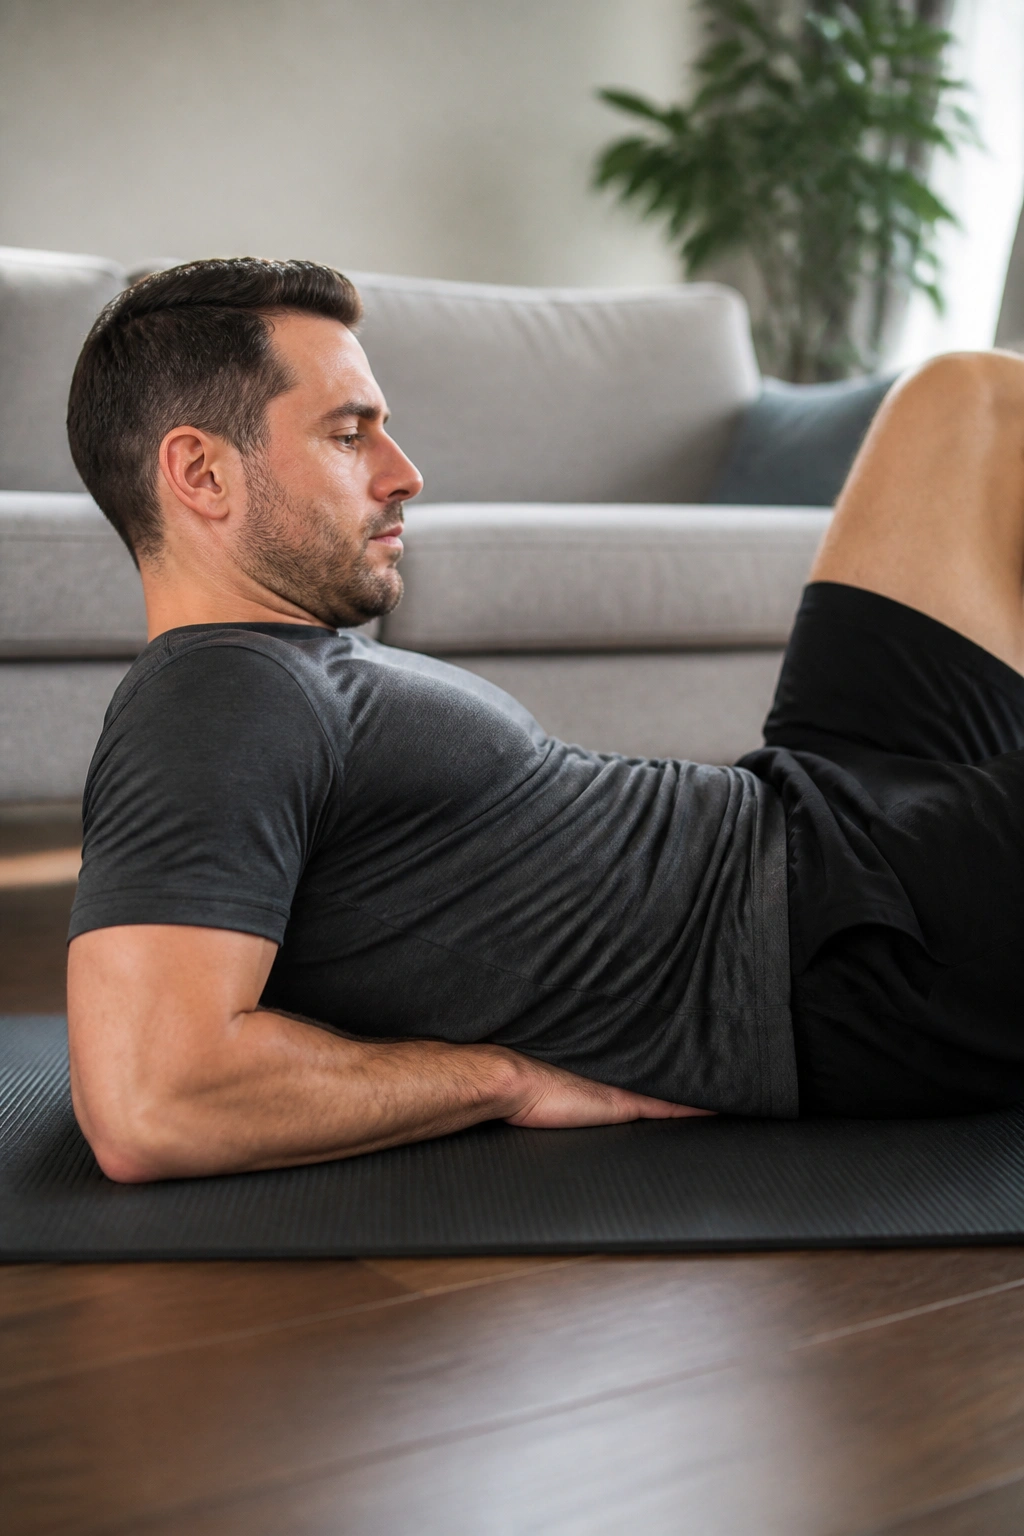
Crunches are not the only way to train your front side, and they’re not the best choice when the back is cranky. The McGill curl-up is a much calmer option. It trains the abs to brace without dragging the spine through repeated flexion.
Set one knee bent, the other leg straight. Slide both hands under the low back to keep a natural arch. Lift the head and shoulders just a few inches, hold for 8 to 10 seconds, then lower. Five to 8 reps is enough.
The point here is stiffness, not movement. You’re teaching the torso to stay solid, which can help when posture feels loose and the low back keeps grabbing for support. That’s why this drill shows up in so many back-friendly routines.
If your neck strains, keep the chin slightly tucked and lift less. If your low back loses its natural shape, you’re going too hard. A small, clean lift beats a big sloppy one every time.
12. Hip Hinge Drill
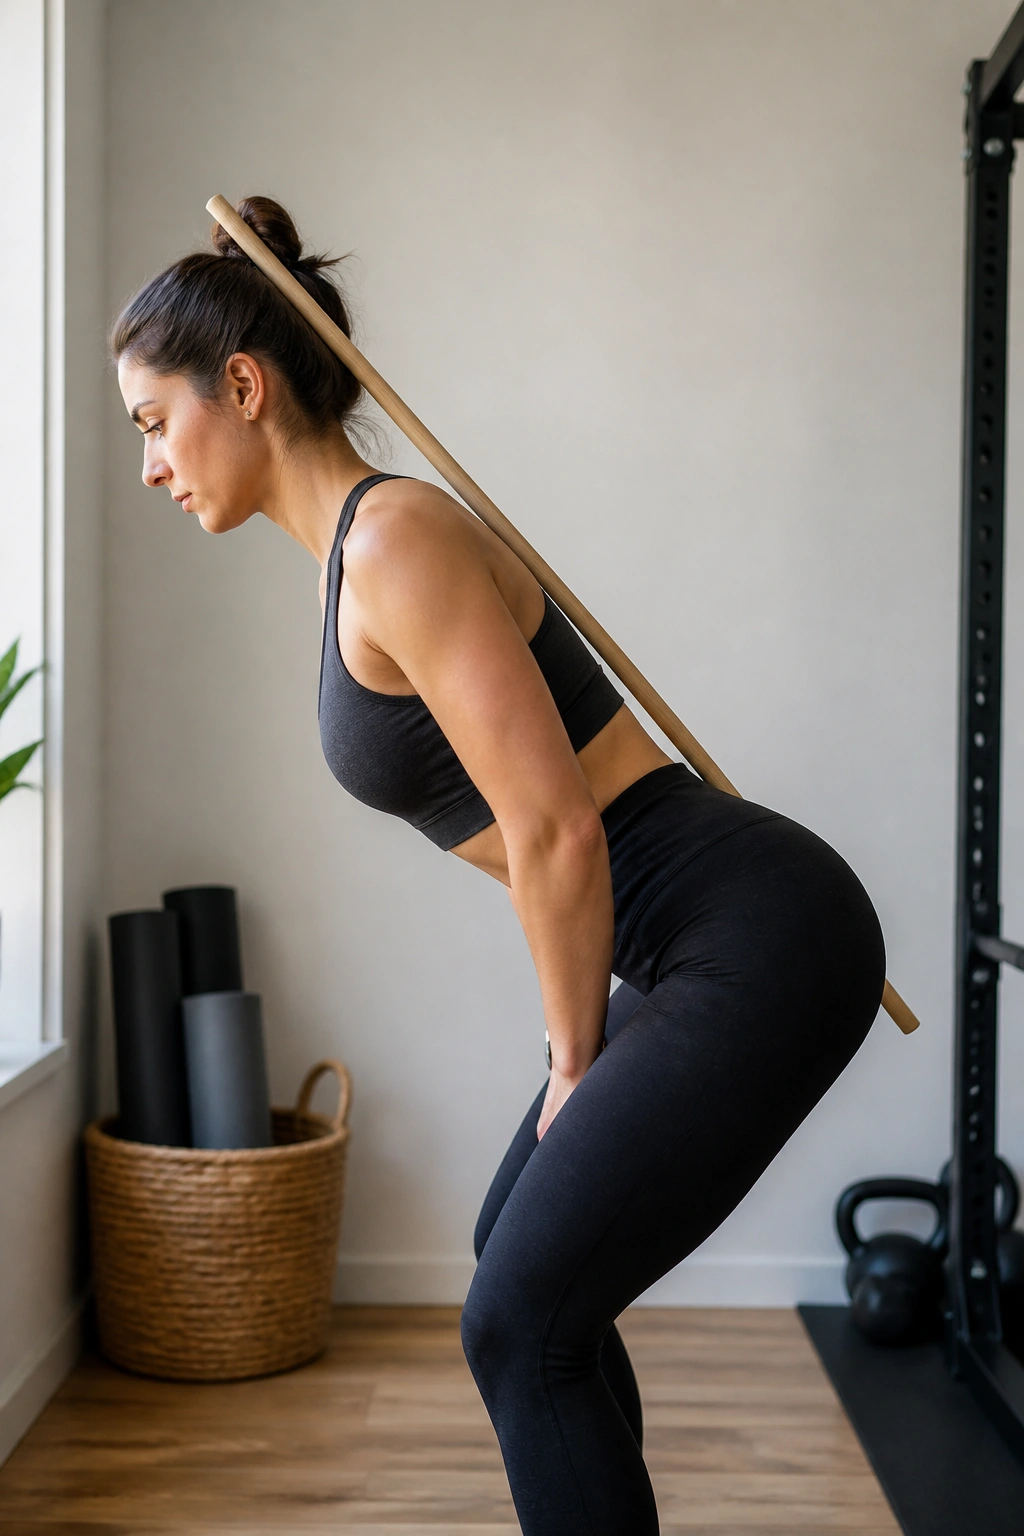
Most people with tight posture bend from the back when they should be bending from the hips. That habit shows up everywhere: picking up a laundry basket, tying shoes, reaching into the car, lifting a dumbbell. The hip hinge drill fixes the pattern.
Stand with feet about hip-width apart and soften the knees. Push the hips back like you’re closing a car door with your butt while keeping the chest long and the spine neutral. A broomstick along the head, mid-back, and tailbone is a useful trick if you want feedback. Ten reps is plenty.
The big thing is this: the spine stays fairly still while the hips move. That’s what people mean when they talk about “training the hinge,” but the plain version is easier to use. Bend where the hips bend. Don’t fold from the waist like a lawn chair.
Once this clicks, daily movement gets friendlier fast. The low back stops being the first place you reach for motion, and that alone can take pressure off a stiff posture.
13. Half-Kneeling Hip Flexor Stretch
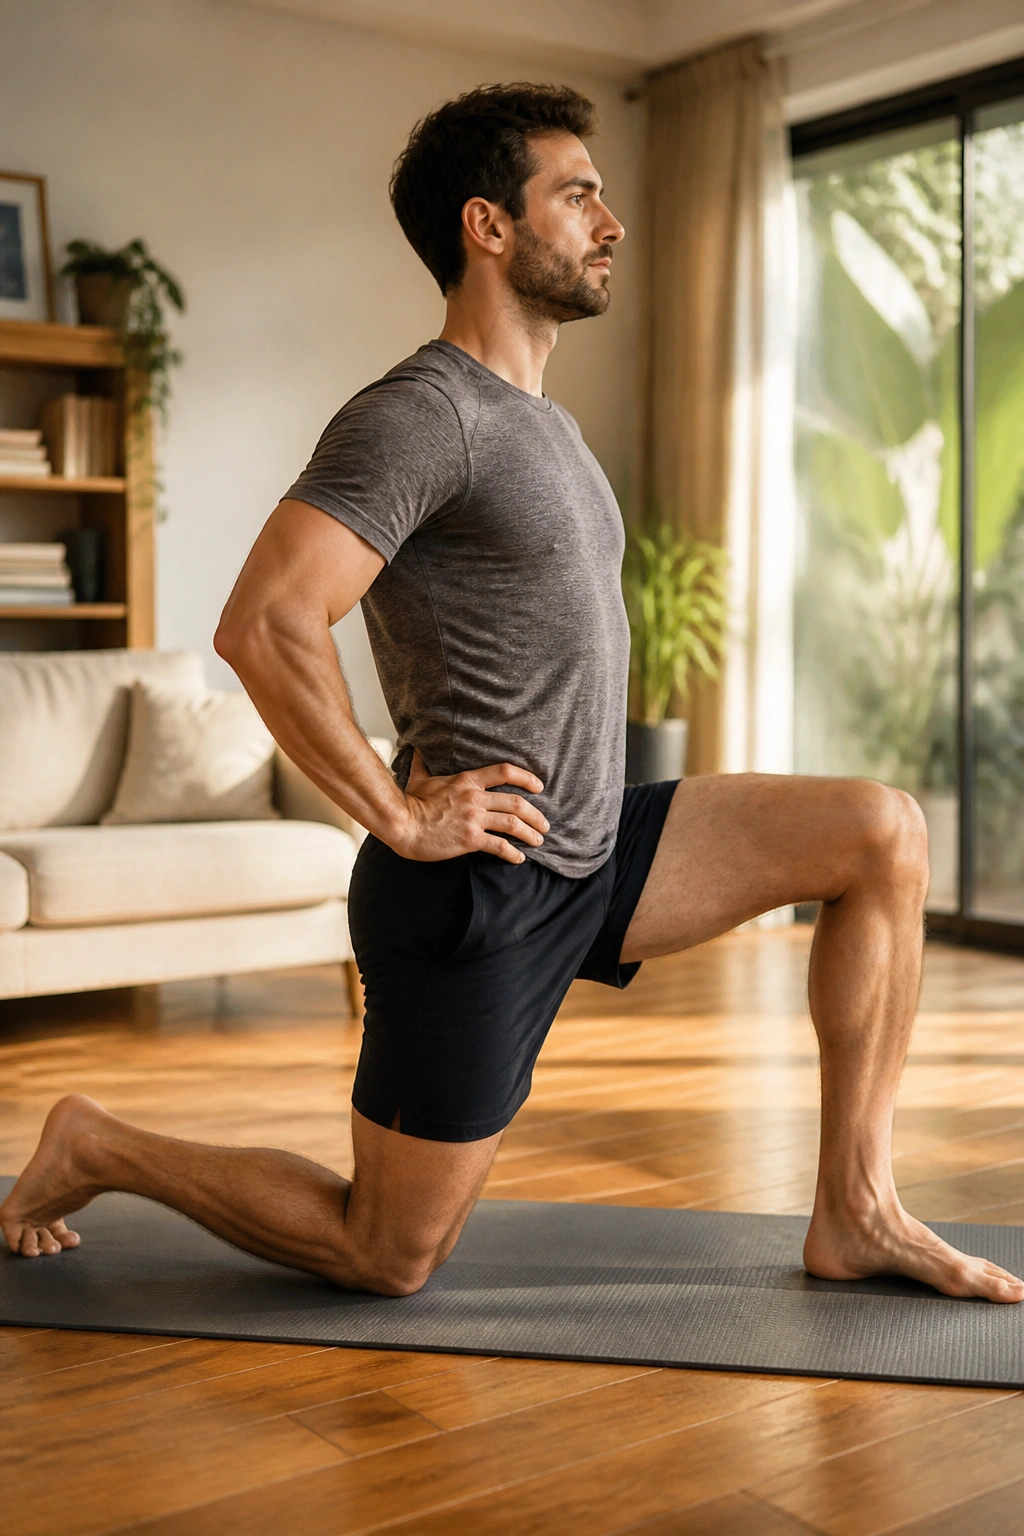
A tight front hip can pull the pelvis forward and make the low back arch just enough to feel irritated all day. The half-kneeling hip flexor stretch helps if that’s part of your pattern, and a lot of posture-related back pain has this in the background.
Kneel on one knee, the other foot planted in front. Tuck the pelvis slightly under, squeeze the glute of the kneeling side, and shift forward a few inches until the stretch lands in the front of the hip. Hold for 30 to 45 seconds per side.
The sensation should be deep and warm, not sharp in the lower spine. If you feel the stretch mostly in the low back, you’ve probably overarched. Pull the ribs down a little and squeeze the back-side glute more firmly.
A small reach overhead on the side of the kneeling leg can make the stretch stronger. Only do that if the basic version feels clean. No need to get fancy before the foundation behaves.
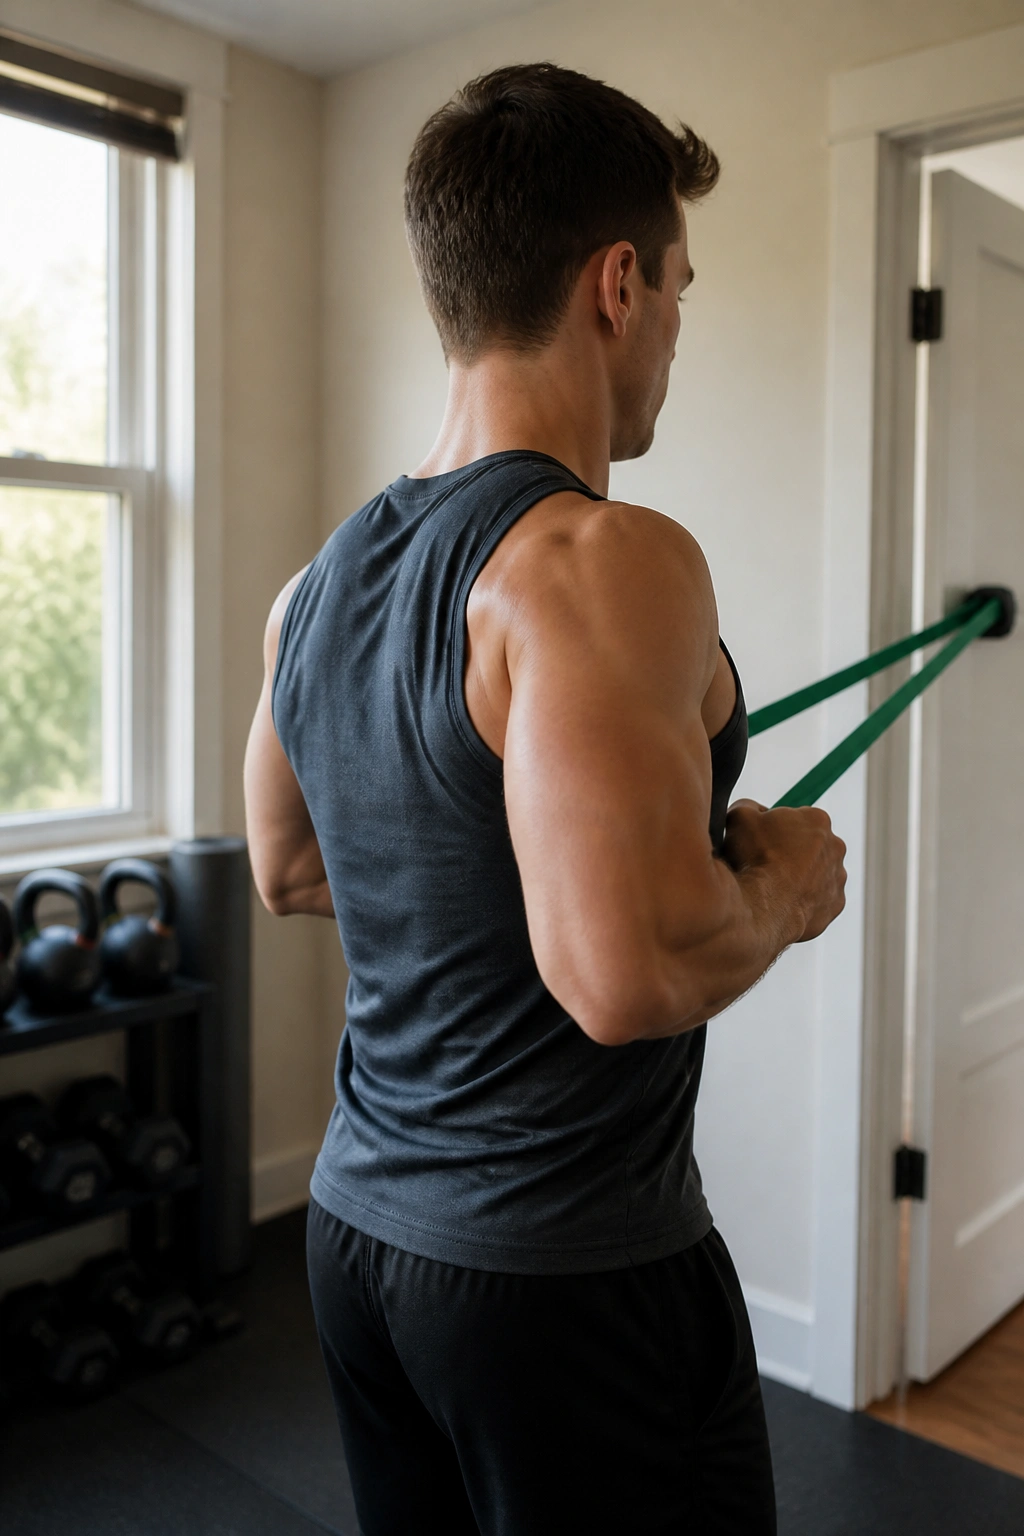
14. Band Row With Scapular Set
Short fragment. This one matters.
A rounded upper back often isn’t just a flexibility issue. It’s also an endurance issue. The muscles between the shoulder blades get tired, the shoulders creep forward, and posture starts to collapse even when you’re trying to sit or stand tall. Band rows help fight that.
Anchor a light band at chest height. Start with the shoulders down, then pull the elbows back until the hands are near the ribs. Pause for one second and squeeze the shoulder blades gently together. Ten to 15 reps is a good place to start.
What to feel
- The back of the shoulders, not the neck
- The middle of the back, not the low back
- A smooth pull, not a yank
If you shrug, the band is too heavy. If your chest pokes forward and your ribs flare, you’re cheating the position. The goal is clean scapular motion, not a dramatic heave.
This is one of the best posture-strength exercises in the list because it gives your upper back some staying power. A stretch can open a shape. A row helps you keep it.
15. Suitcase Carry

A loaded carry is one of the most honest tests in training. Hold a weight in one hand, stand tall, and walk without leaning, twisting, or letting the shoulder ride up. That sounds simple. It isn’t. And that’s exactly why it helps.
Use a dumbbell or kettlebell that feels moderate, not brutal. Walk 20 to 40 meters on one side, switch hands, and repeat for 2 to 4 rounds. The torso should resist the pull of the weight while the ribs stay stacked over the pelvis.
How to walk it
- Keep the neck long and the chin level.
- Let the arm hang naturally.
- Don’t lean toward the weight.
- Take slow, steady steps.
The suitcase carry builds side-core strength, grip, and upright posture at the same time. That combination shows up in real life fast, especially if your back gets cranky from standing, walking, or carrying bags unevenly. It also tends to expose weak spots you can’t fake through.
If one side feels much harder, start there. Always. The asymmetry will tell you something, and you may as well listen.
Final Thoughts
If I had to keep only three of these on a busy day, I’d pick one mobility drill, one core drill, and one carry. Something like cat-cow, dead bug, and suitcase carry covers a lot of ground without turning the session into homework.
The best workouts for back pain and tight posture are the ones you can repeat without dread. That usually means the reps are slower than your ego wants, the range is smaller than social media suggests, and the payoff shows up in how you stand up from a chair or reach for a bag.
Start with the drills that feel easiest to clean up, not the ones that look hardest on video. Your back will tell you pretty quickly which moves calm things down and which ones make it grumpy. Listen to the first version.
