



A shaky single-leg stand is not a character flaw. It is a clue.
These balance exercises for stability and strength show you where the weak link lives: the foot that collapses, the ankle that never quite steadies, the hip that drifts, the trunk that leaks tension the second one leg leaves the floor. Strong people wobble all the time. So do runners, lifters, dancers, and weekend hikers with very respectable quads.
Use a wall, a chair back, or a countertop for the first round. Bare feet help on the foot and ankle drills; shoes are fine for loaded work. Start with holds of 20 to 30 seconds or 5 to 8 slow reps, and do not get stubborn about form when the knee dives inward or the arch folds like wet cardboard. That is the whole point of the drill. You are teaching your body to keep shape when the base gets smaller.
I like to think about balance work in layers. First comes stillness. Then comes reaching, hinging, stepping, carrying, and a little bit of controlled chaos. The good stuff is usually simple-looking and mildly annoying, which is another way of saying it works.
1. Single-Leg Stand for Balance and Stability
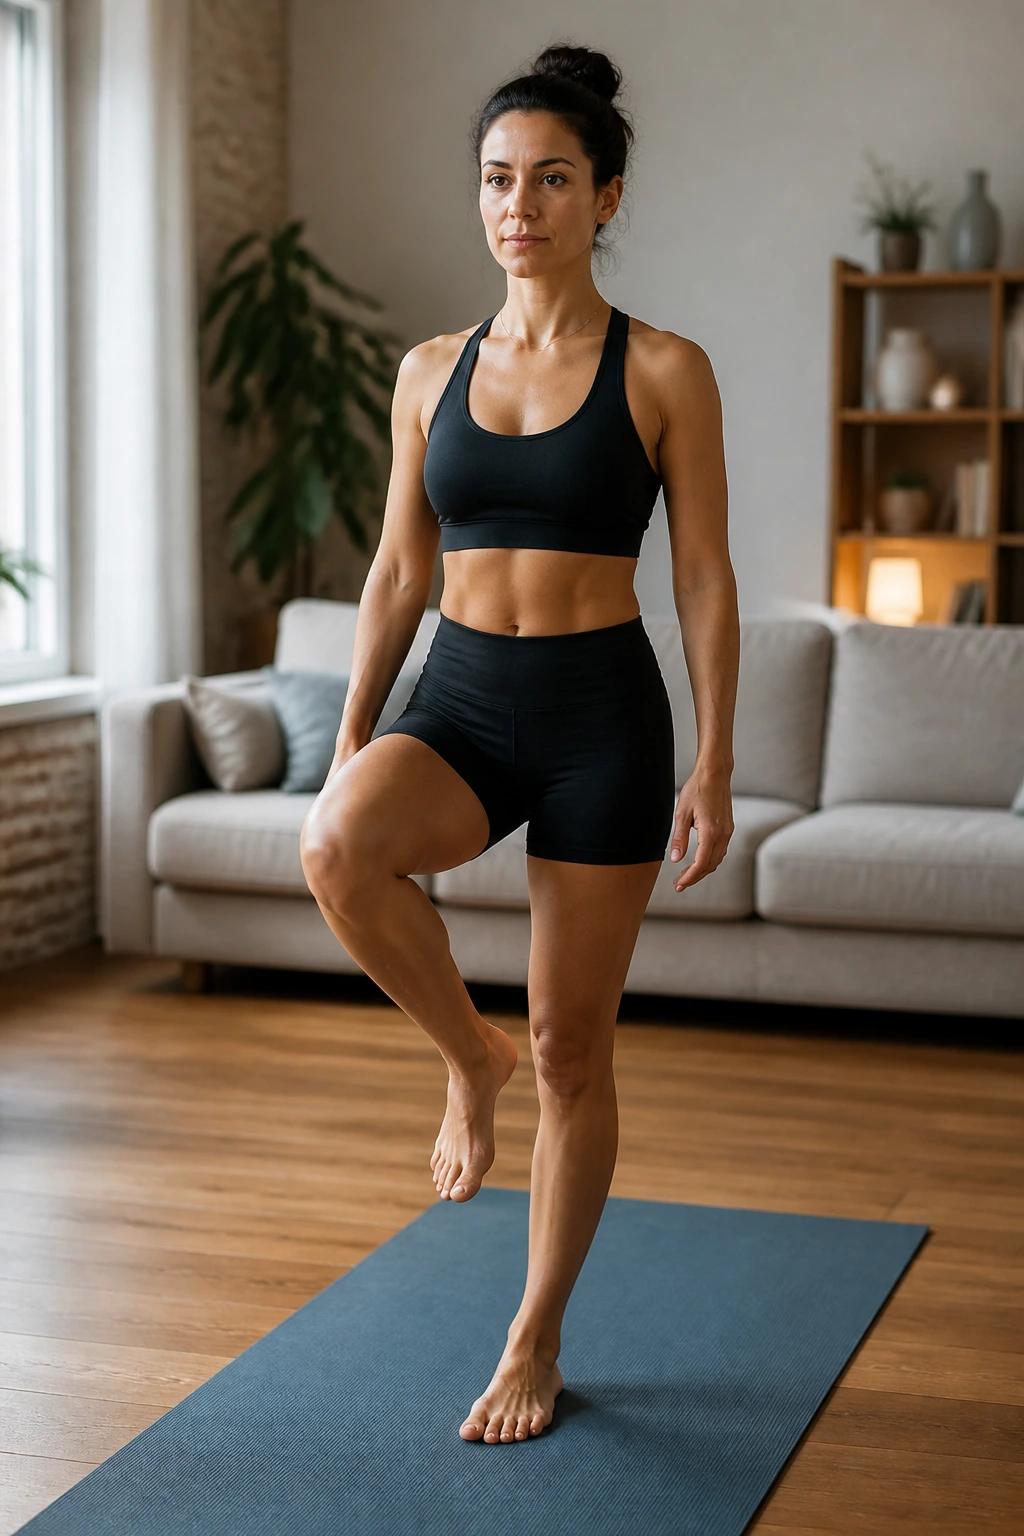
Start here. If a person can stand on one leg for 30 seconds without grabbing the floor with their toes, they usually have a decent base for the harder drills that come later. If they cannot, that is fine. The exercise is already doing its job.
Stand tall, soften the standing knee, and lift the other foot an inch or two off the ground. Press the big toe, little toe, and heel into the floor like a tripod. Don’t lock the knee and don’t twist the hips open to cheat the hold.
A good first target is 2 to 4 sets of 20 to 30 seconds per side. Breathe slowly through the nose if you can. If your foot starts clawing at the floor, reset. If the arch collapses, shorten the hold and try again.
2. Tandem Stance
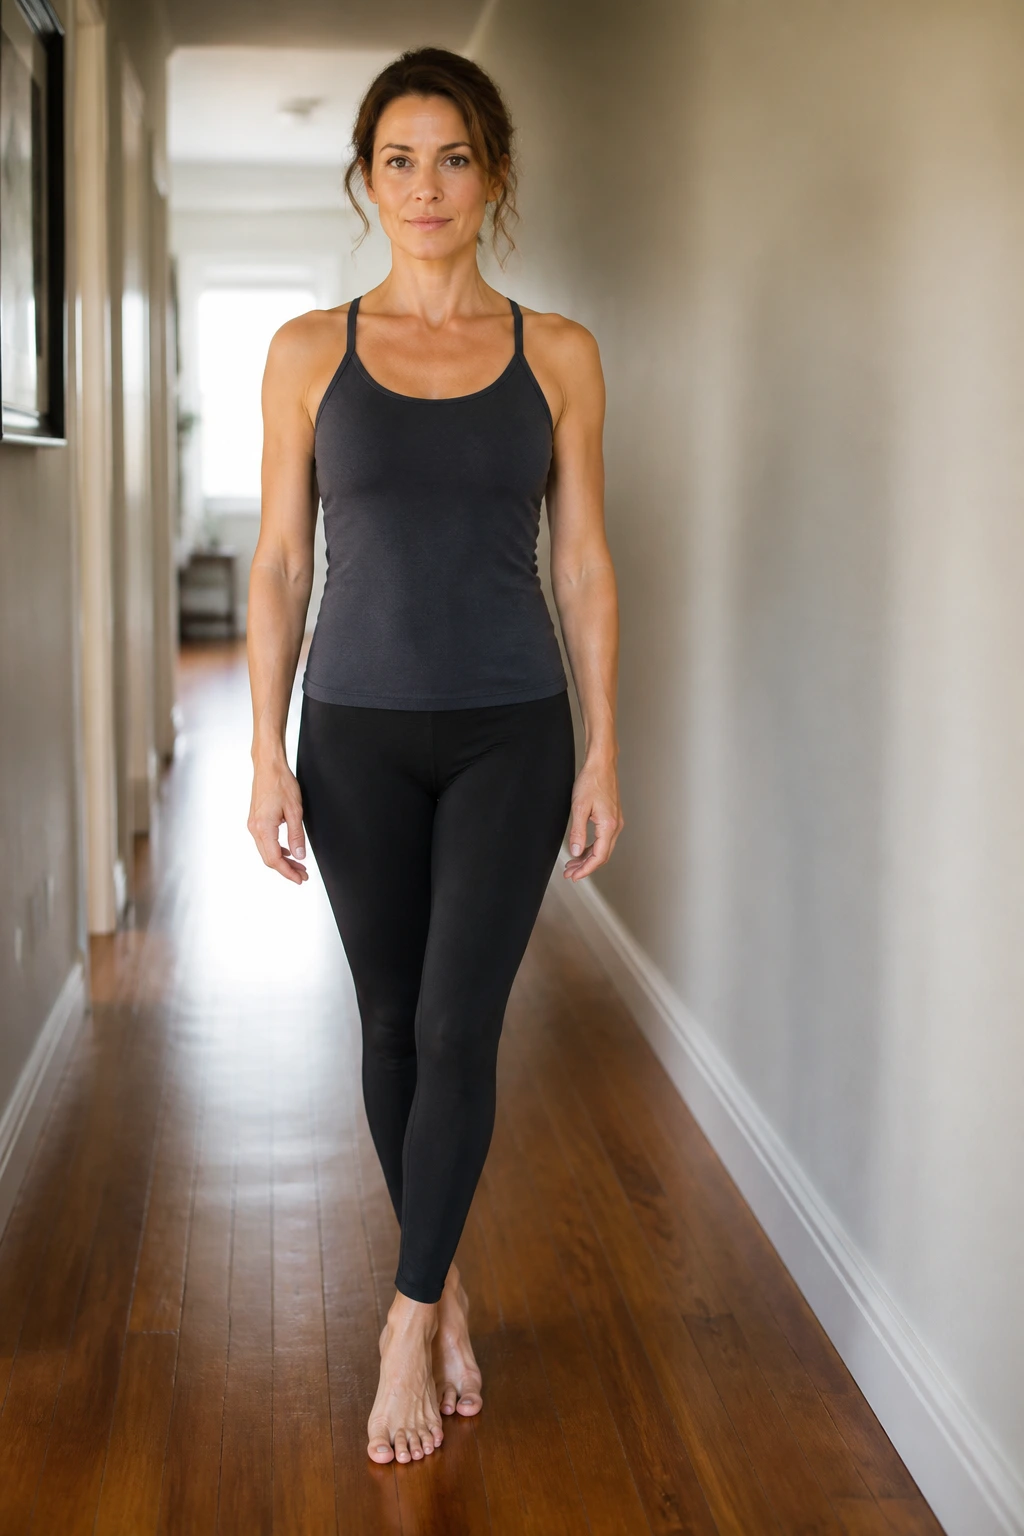
Why does a narrow stance suddenly feel so unfriendly? Because the body loves a wide base, and tandem stance steals that comfort without asking permission.
Place one foot directly in front of the other so the heel of the front foot almost touches the toes of the back foot. Stand there for 20 to 45 seconds, then switch sides. Keep the ribs stacked over the pelvis and look straight ahead instead of staring at your shoes. Staring usually makes people tenser, not steadier.
How to make it harder
- Turn your head slowly left and right.
- Close your eyes for 3 to 5 seconds at a time.
- Stand on a folded towel or foam pad.
- Lightly reach one arm forward, then the other.
The nice thing about tandem stance is that it looks harmless. It is not. It teaches ankle control, foot pressure, and a little calm under stress — useful qualities when you step off a curb or walk across an uneven trail.
3. Heel-to-Toe Walk
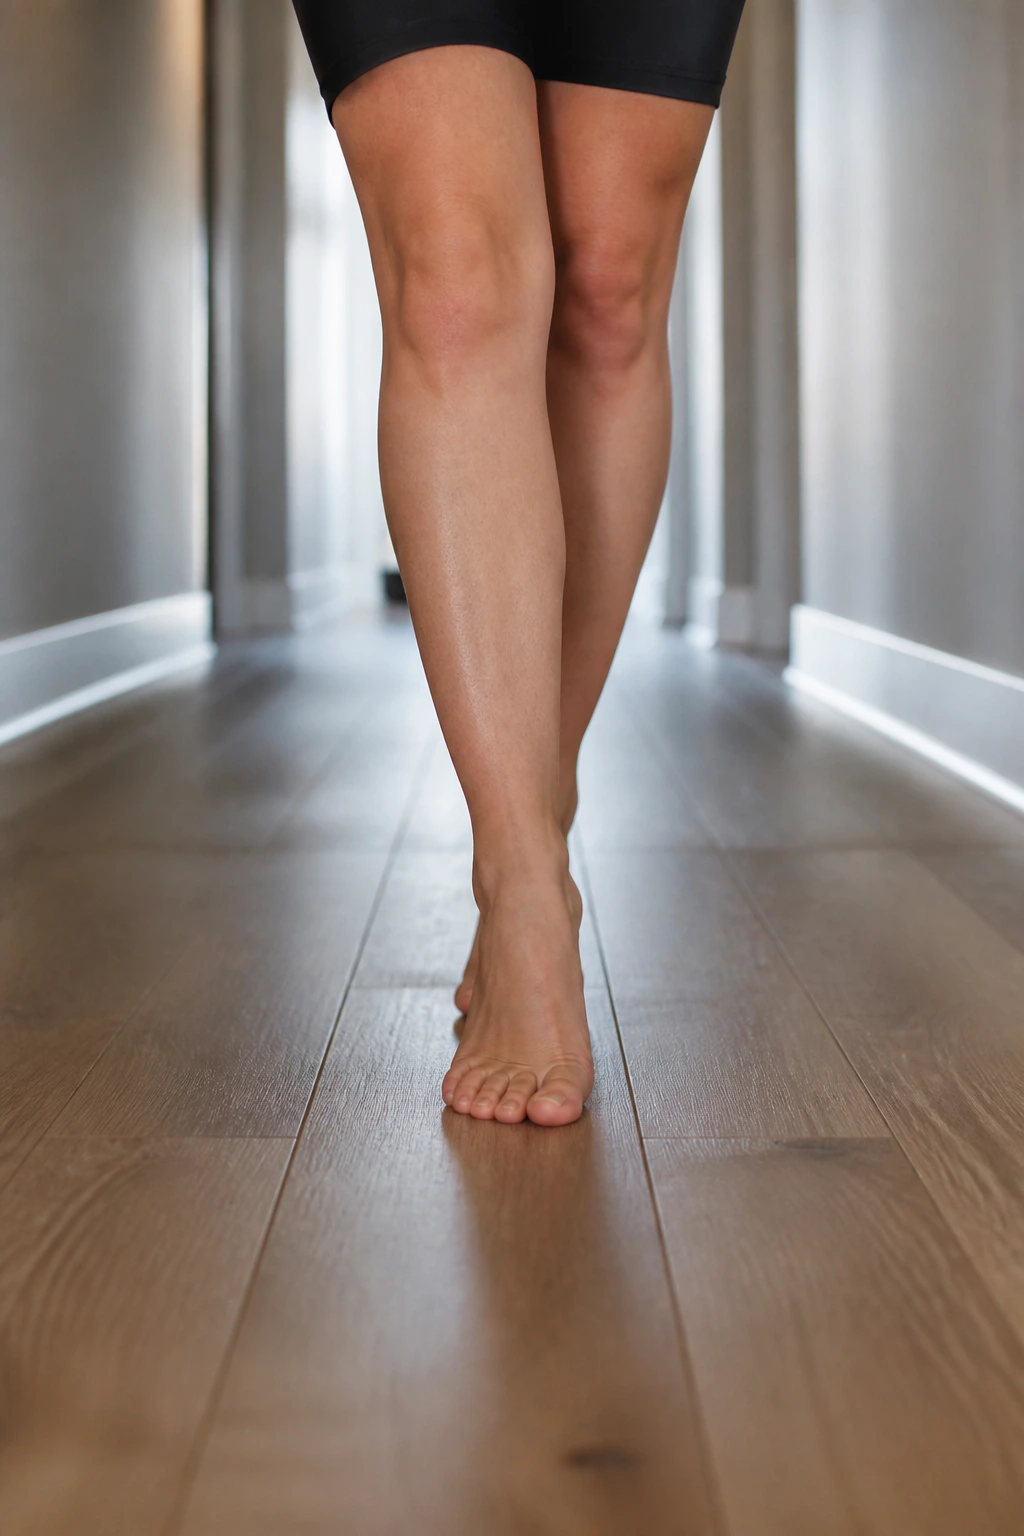
A hallway and a strip of floor are enough. Seriously.
Walk forward in a straight line, placing each heel directly in front of the other foot’s toes. Take 8 to 12 slow steps, turn around, and come back. Keep the shoulders quiet and the eyes level. The goal is a smooth, deliberate roll through the foot, not a nervous shuffle with dramatic arm swings.
What to watch for
- Don’t slam the heel down.
- Don’t look at the floor the whole time.
- Don’t rush the turn at the end.
- Stop if you start to wobble so much that the steps become sloppy.
This one does a sneaky amount of work. It challenges the ankles, the small muscles under the foot, and the timing between each step. If you are a runner, it may also tell you something unpleasant but useful about your stride. Good. That’s data.
4. Short-Foot Hold
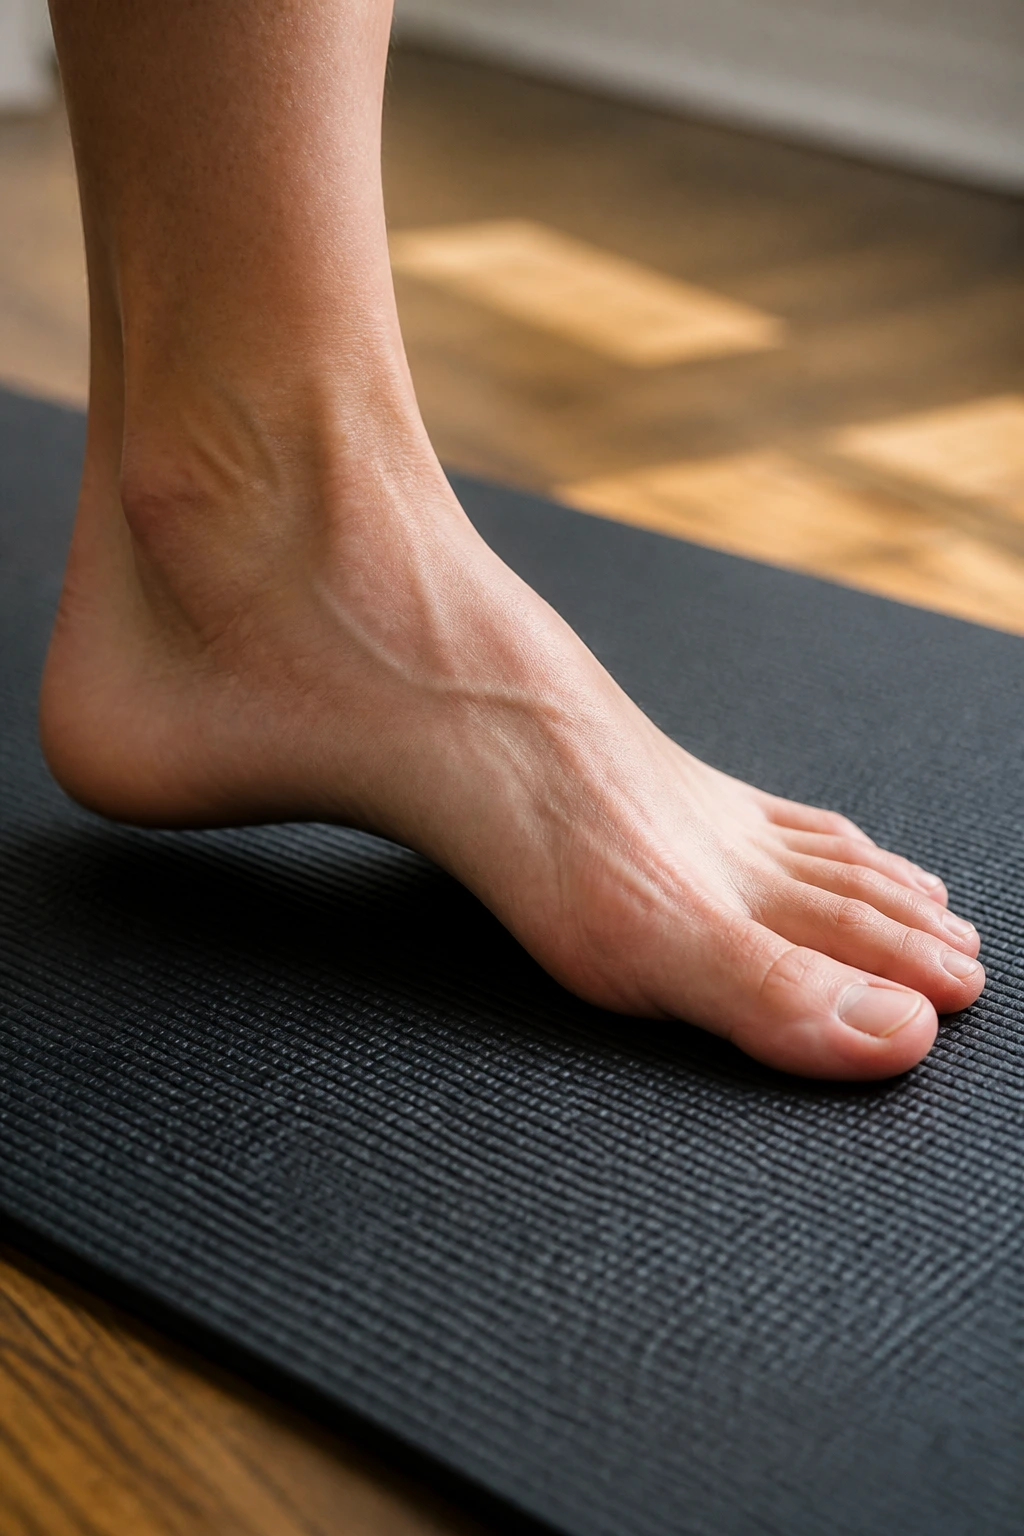
This drill is about the arch, and the arch matters more than most people admit. A flat, floppy foot gives balance away before the hips even get a say.
Keep the toes relaxed and gently draw the ball of the foot toward the heel without curling the toes. The arch should lift a little. That’s the cue. Not a full cram of the foot into a tiny ball — just a subtle shortening underneath the foot.
What it should feel like
- The arch lifts.
- The big toe stays long.
- The toes stay spread, not scrunched.
- The foot feels active but not cramped.
Hold the position for 5 to 10 seconds and repeat 6 to 10 times per foot. If the exercise turns into toe cramping, you are probably pressing too hard. Short-foot work looks small, which is exactly why people skip it. They shouldn’t.
5. Toe Yoga
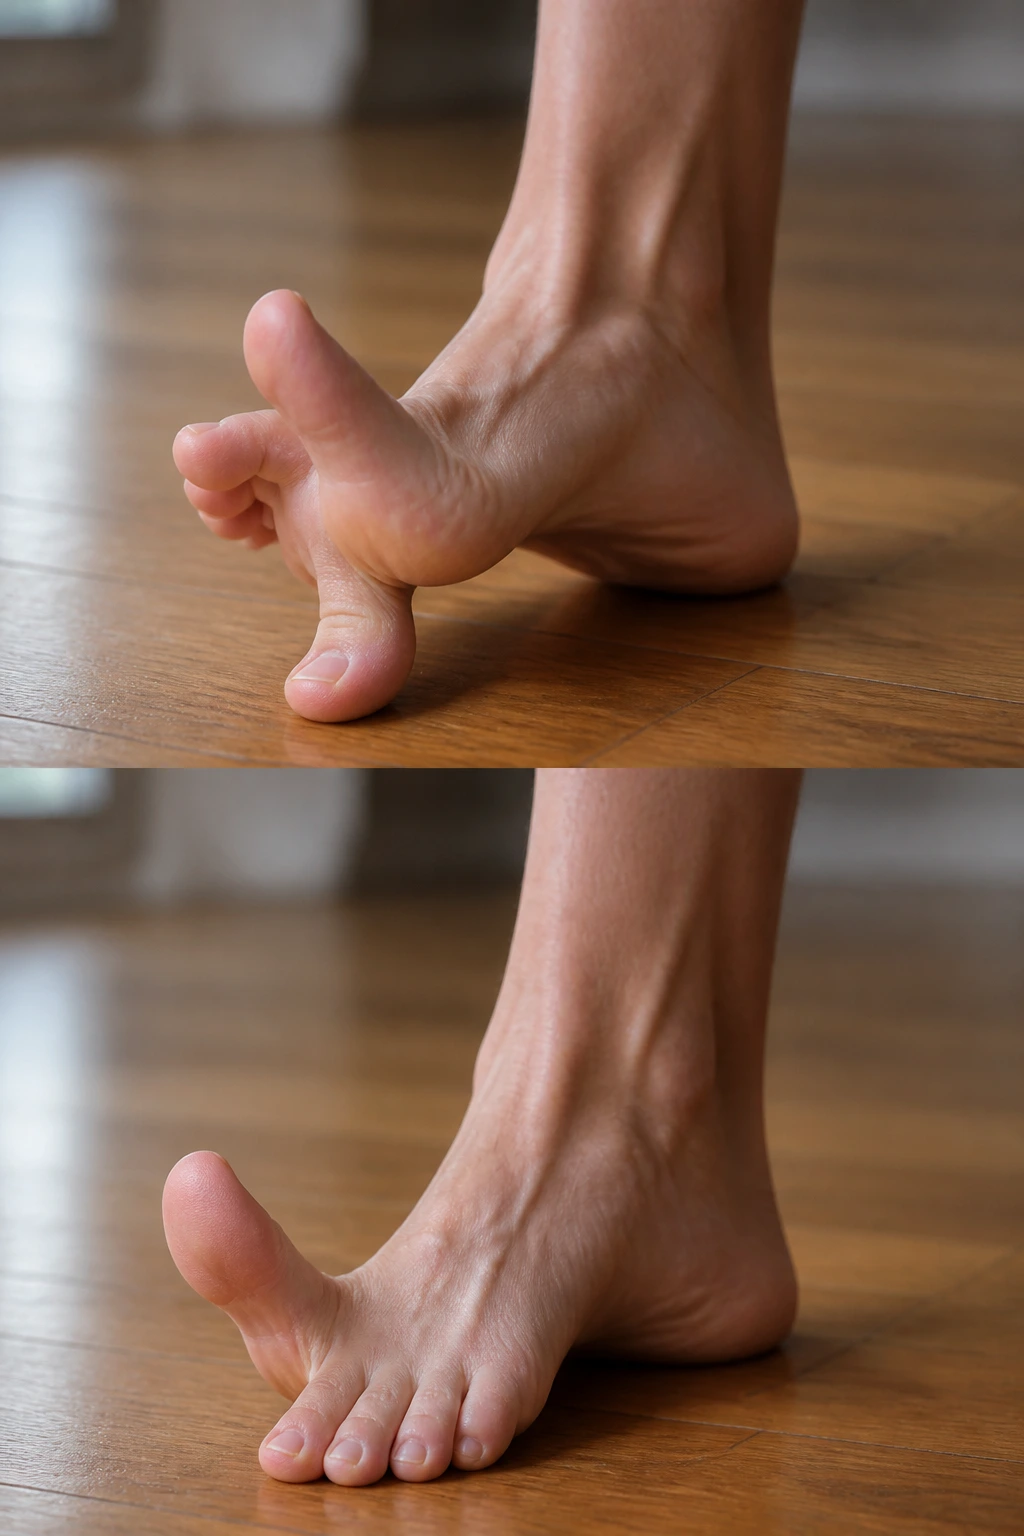
If your big toe won’t cooperate, your balance work starts behind schedule.
Sit or stand with both feet flat. Press the big toe down while lifting the other four toes, then switch: lift the big toe while the smaller toes stay grounded. That is toe yoga in its plain, slightly goofy glory. It improves foot control, and foot control matters when you are trying not to wobble on one leg.
A simple practice
- Big toe down, four toes up: 5 reps
- Four toes down, big toe up: 5 reps
- Spread all toes wide and hold for 10 seconds
- Repeat for 2 rounds
This sounds almost silly until you notice how hard one side of the foot fights the other. That struggle is useful. Small muscles get a real job, and the rest of the chain tends to behave better once the foot stops acting like a collapsed tent.
6. Clock Reach
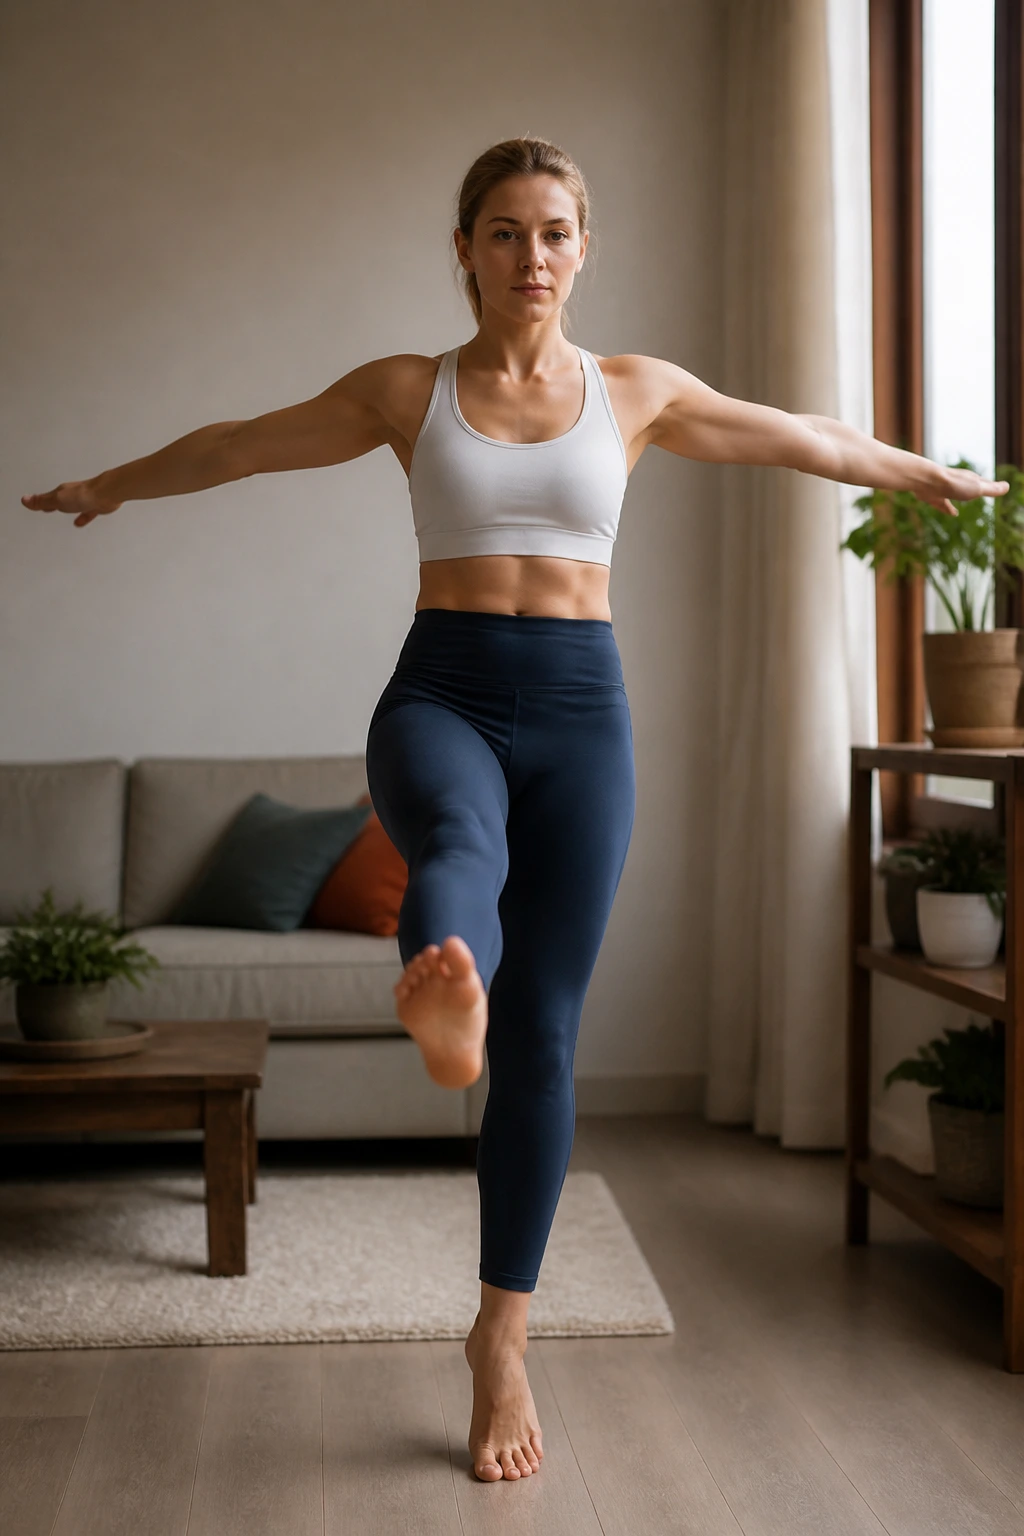
Stand on one leg and imagine the other foot is the hand of a clock. Reach it out to 12 o’clock, 3 o’clock, and 6 o’clock before returning to center, then repeat on the other side.
The magic here is not speed. It is control. Each reach should be slow enough that your standing hip has to work to keep the pelvis level. Use 2 to 3 rounds per side, and tap the floor lightly rather than stomping into it. If you need a fingertip on the wall, take it.
Why this one earns its keep
The clock reach teaches your body to stay organized while the free leg moves through different angles. That’s the kind of control that shows up when you change direction, step around a bag on the floor, or reach down to pick something up without twisting like a broken umbrella.
You can also make it harder by standing on a folded towel or by reaching farther forward without letting the chest collapse.
7. Single-Leg March
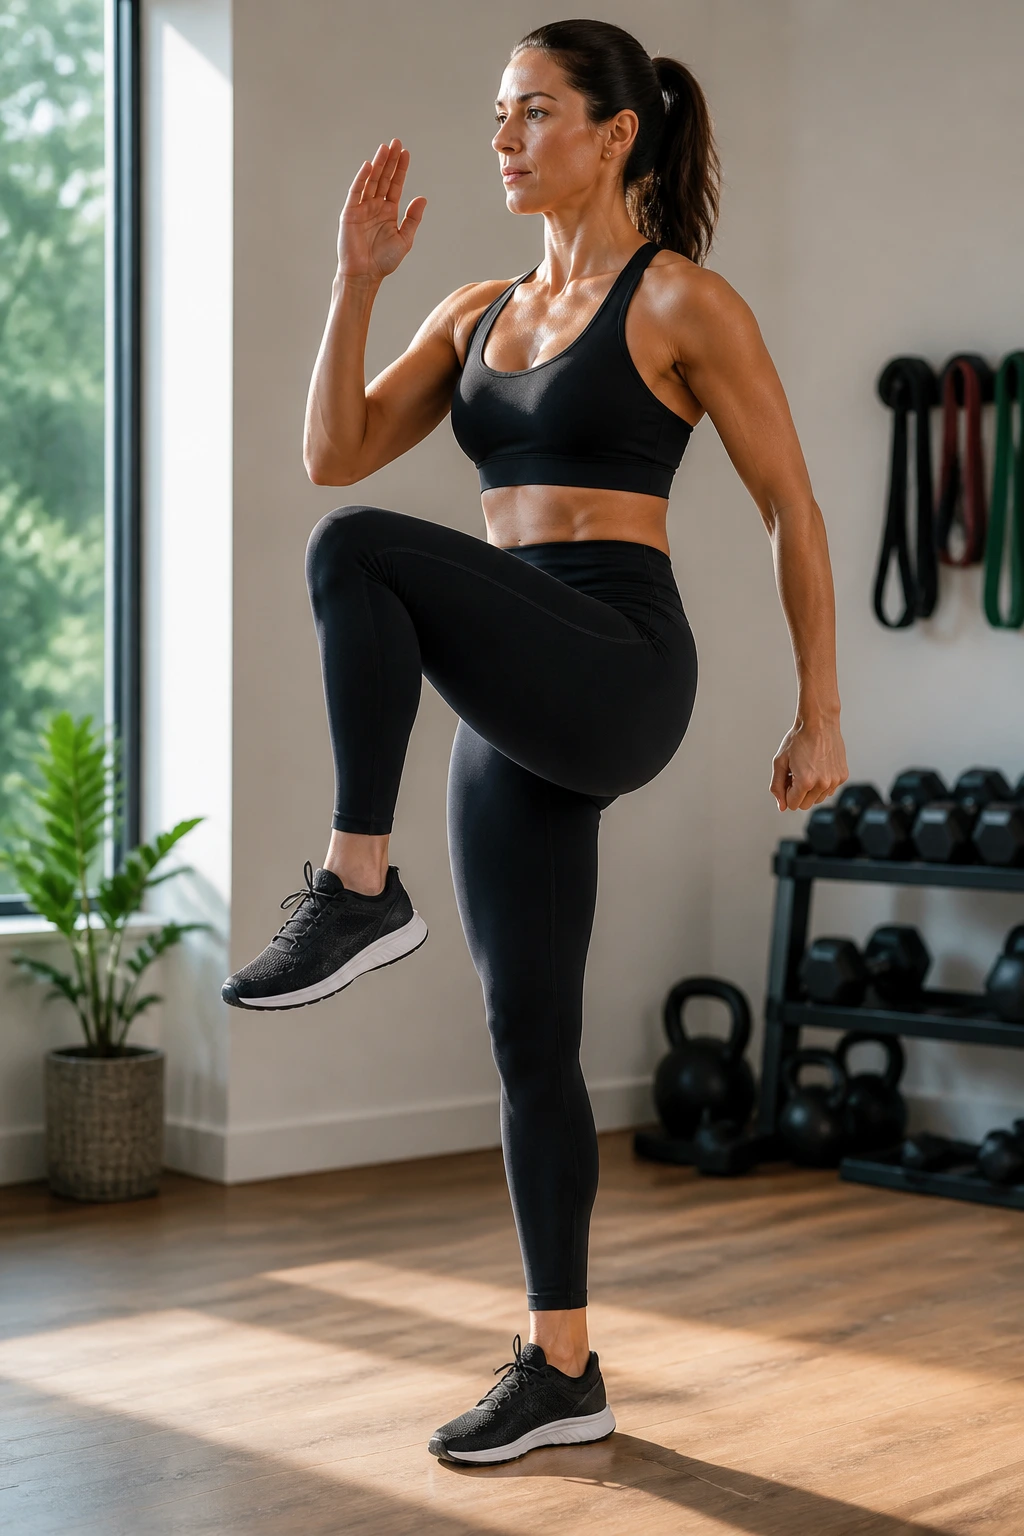
Can you lift one knee to hip height without rocking the standing leg? That’s the test.
Stand tall, shift your weight onto one foot, and drive the opposite knee up until the thigh is roughly parallel to the floor. Pause for 1 to 2 seconds, then lower with control. Do 5 to 8 reps per side. Keep the torso upright and the standing foot planted like it means something.
The mistake to avoid
A lot of people throw the knee up and let the hip dump to the side. That is not balance. That is a quick cheat with a dramatic finish. The standing glute should stay engaged, and the ribs should not flare out like you are trying to show off a belt buckle.
This drill is useful because it looks like walking, which is what makes it so honest. You are training the part of gait that people usually ignore until something starts feeling off.
8. Hip Airplane
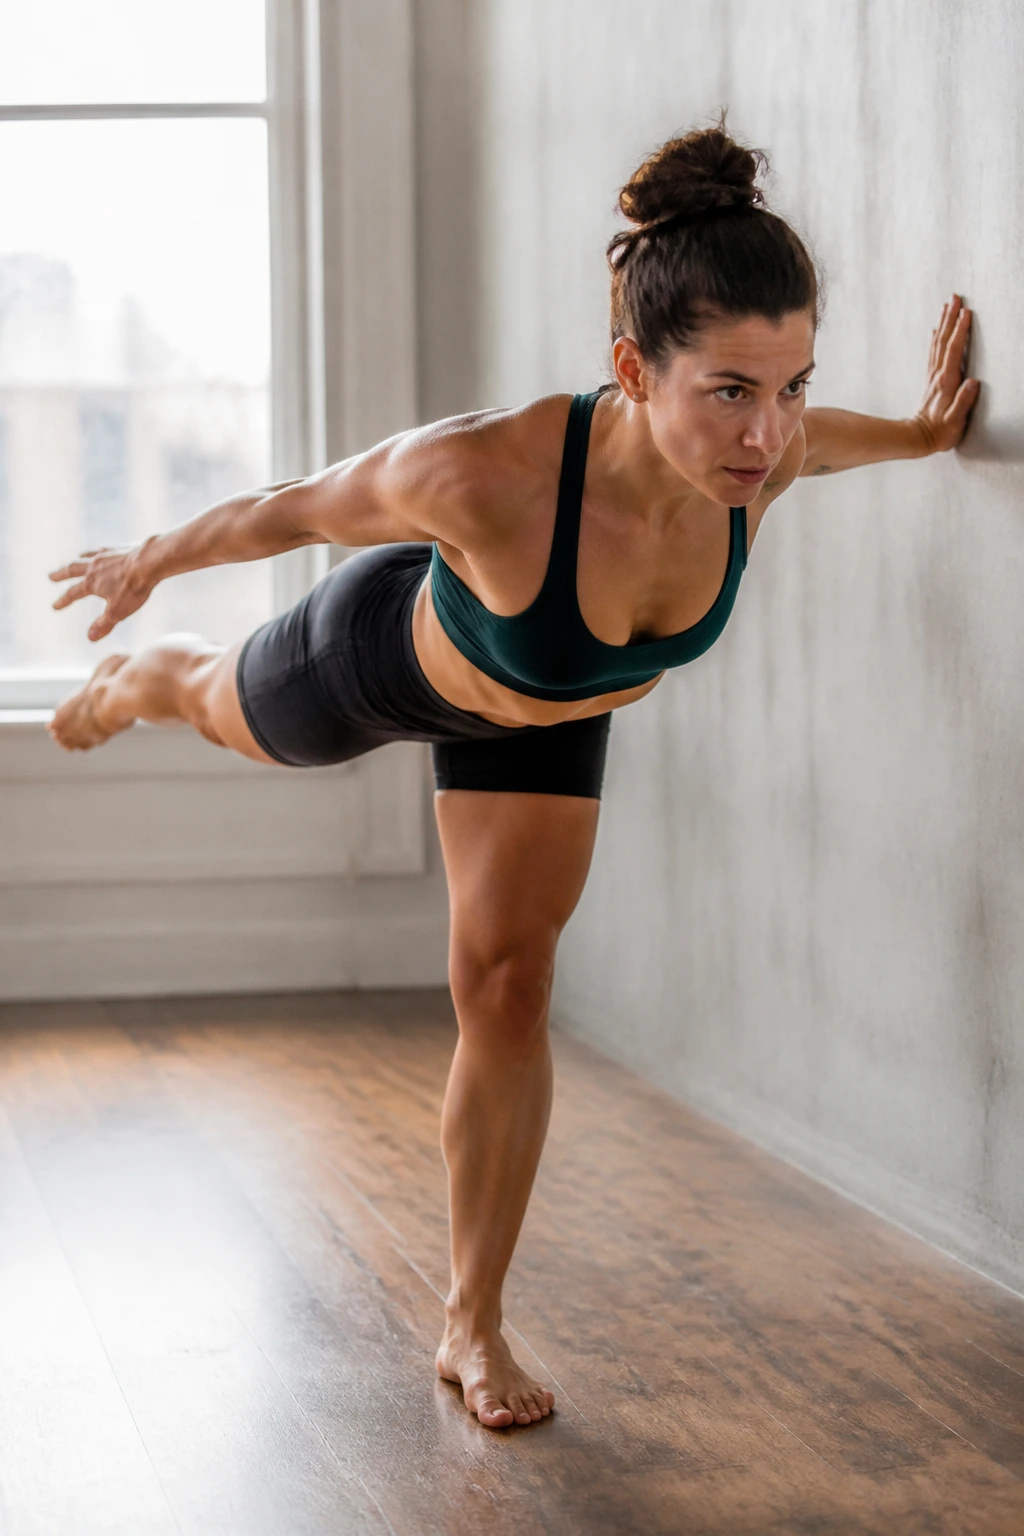
This is a strong move. It also exposes lazy hips fast.
Hinge on one leg with the torso tipped forward, then rotate the pelvis open and closed while the standing leg stays planted. Use a wall for support the first few times. Three to five controlled reps per side is enough to start, because the hip airplane asks for a lot.
Unlike a static hold, this drill makes the pelvis control rotation while the femur stays centered. That matters for athletes, yes, but it also matters for ordinary life. Turning to grab a seat belt, stepping around a chair, or changing direction on a sidewalk all ask the same basic thing: keep the hip steady while the body turns.
If the full version feels messy, do a supported hinge with one hand on a wall and skip the rotation at first. Ugly reps beat wild ones.
9. Single-Leg Romanian Deadlift for Balance and Strength
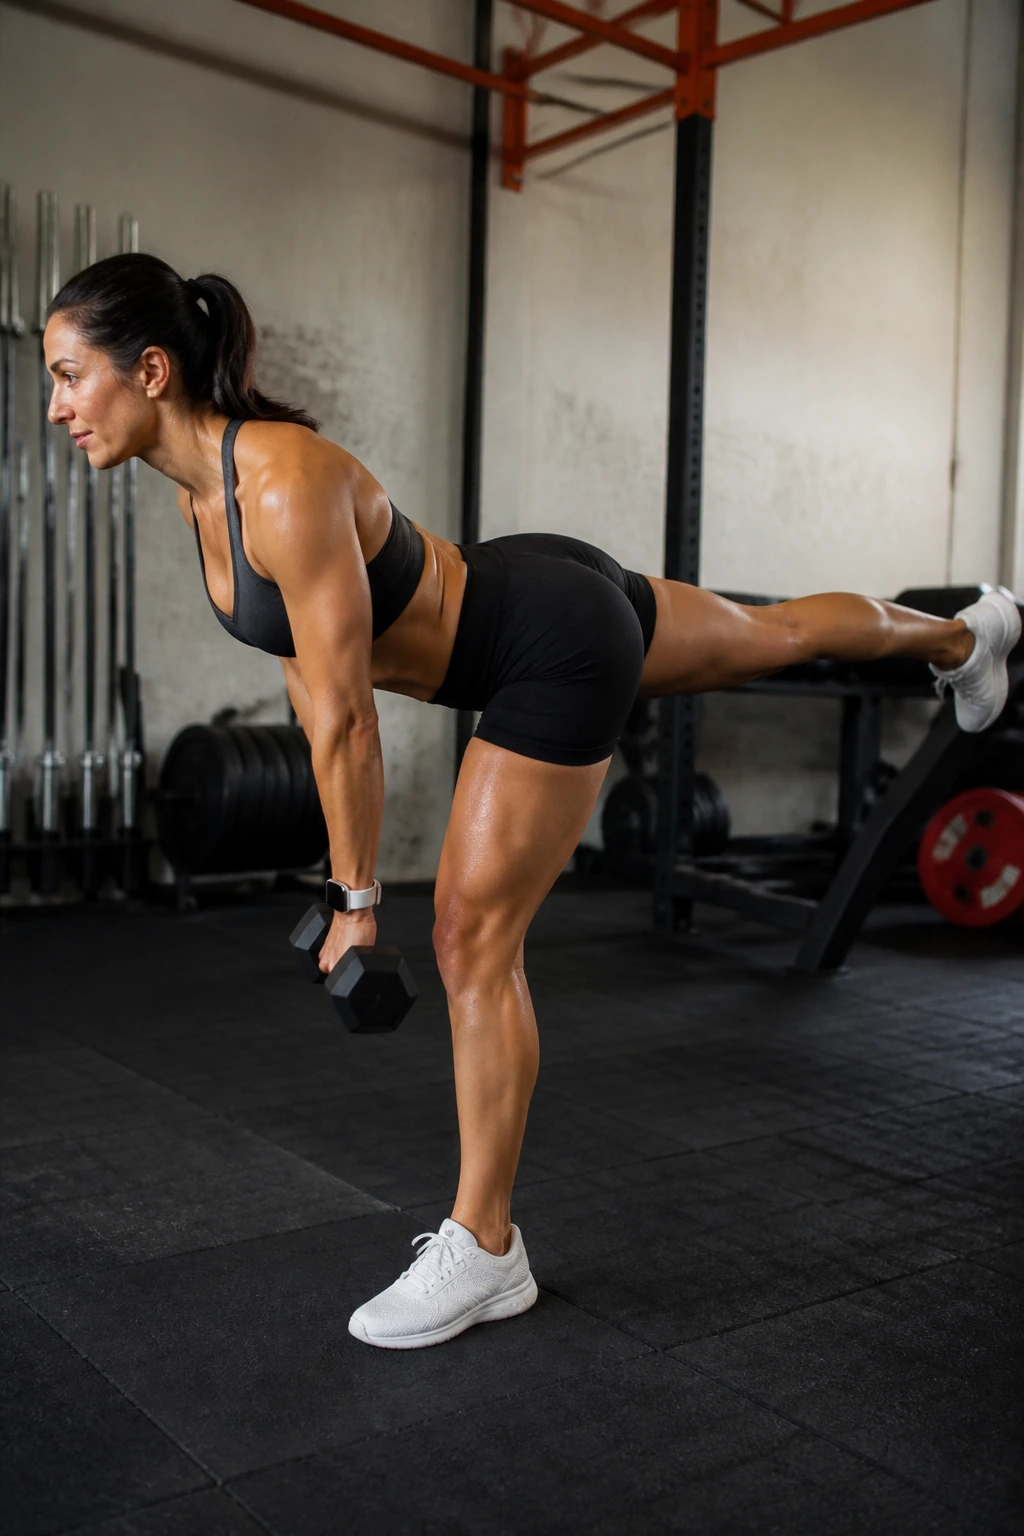
A clean single-leg Romanian deadlift tells the truth about hip control faster than a hundred machine reps.
Stand on one leg with a slight bend in the knee. Hinge at the hip, send the free leg back, and keep the spine long as the torso tips forward. You can hold a light dumbbell in the hand opposite the standing leg, or do it with bodyweight until the pattern settles in. Stop when your pelvis starts opening to the side.
Key cues
- Chest stays long, not rounded.
- Standing foot stays heavy through the whole tripod.
- Back leg reaches back instead of lifting high.
- The movement comes from the hip, not the lower back.
Use 5 to 8 reps per side with slow lowering, about 3 seconds down. If you rush it, the exercise turns into a sloppy reach. If you slow it down, your hamstrings and glute medius have to show up and do their share.
10. Split Squat Iso Hold for Balance and Leg Strength
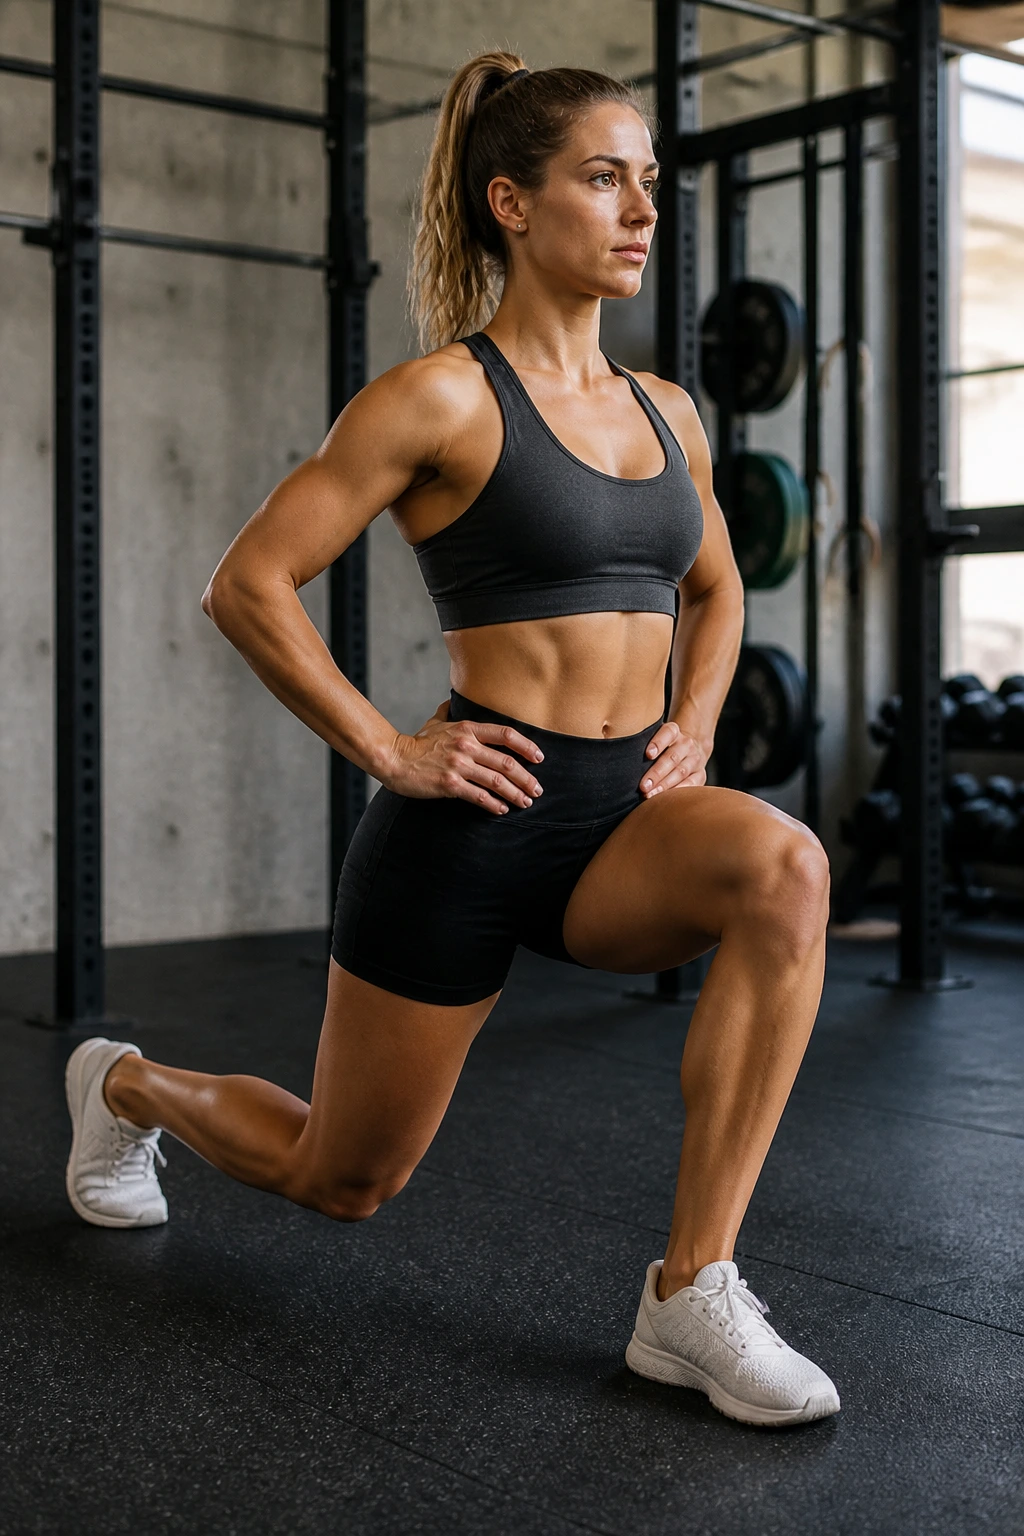
Hold the bottom of a split squat for 20 to 40 seconds, and the wobble shows up quickly. That is the point.
Set one foot forward and the other behind you, then lower until both knees bend and the back knee hovers just above the floor. Stay there. Keep the front heel grounded and the front knee stacked roughly over the middle toes. The back heel can stay lifted.
A split squat hold builds leg strength and balance at the same time because it removes momentum from the equation. There is nowhere to bounce. There is nowhere to hide. If you need help, hold a rack or wall lightly with one hand and keep the torso tall.
I like this one for people who can do moving lunges but fall apart at the bottom. The static pause exposes the weak spot, which makes the fix obvious.
11. Reverse Lunge to Knee Drive
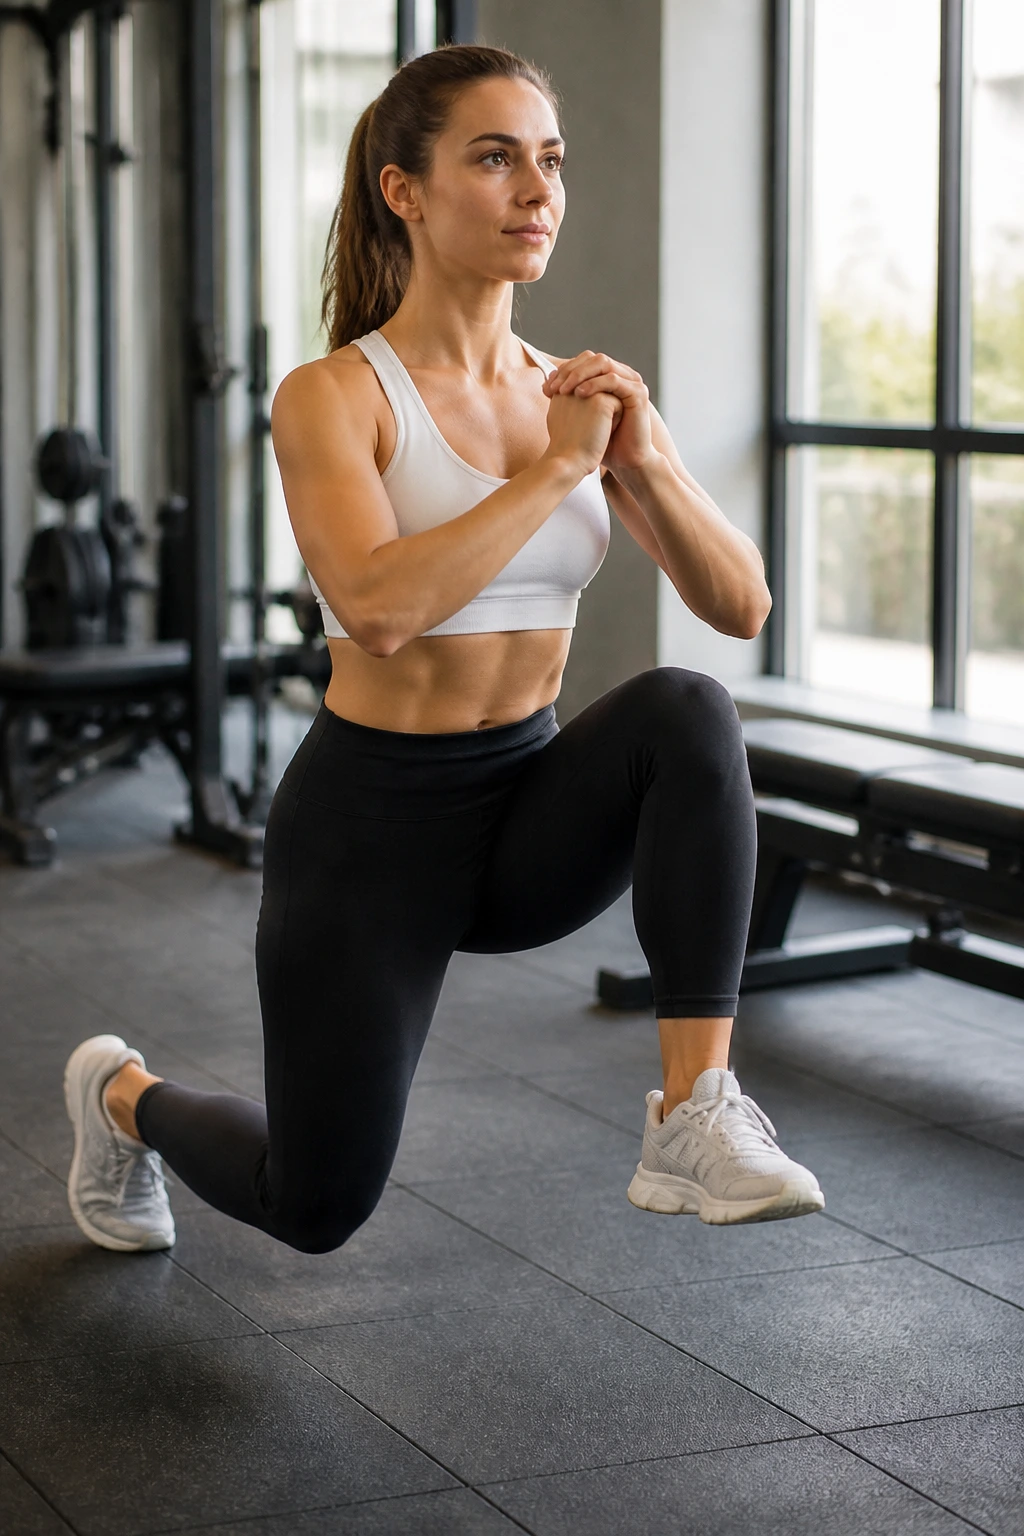
Why reverse lunge instead of forward lunge? Because stepping back is usually kinder on the knees and a little easier to control.
Step one foot back, lower until the front thigh is close to parallel, then drive through the front foot and bring the back knee up to hip height. Pause for a beat at the top. Do 5 to 8 reps per side and keep the movement smooth. The standing leg should feel like it is doing the actual work. If the push off the back leg is doing most of the job, shorten the step and try again.
How to use it well
- Keep the front knee from caving inward.
- Land softly on the back toe.
- Rise tall at the top instead of leaning back.
- Pause the knee drive for 1 second.
This one bridges strength and balance nicely. It has a real-world feel, too. People step back, stand back up, and then need to hold themselves steady all the time.
12. Step-Up With Knee Drive
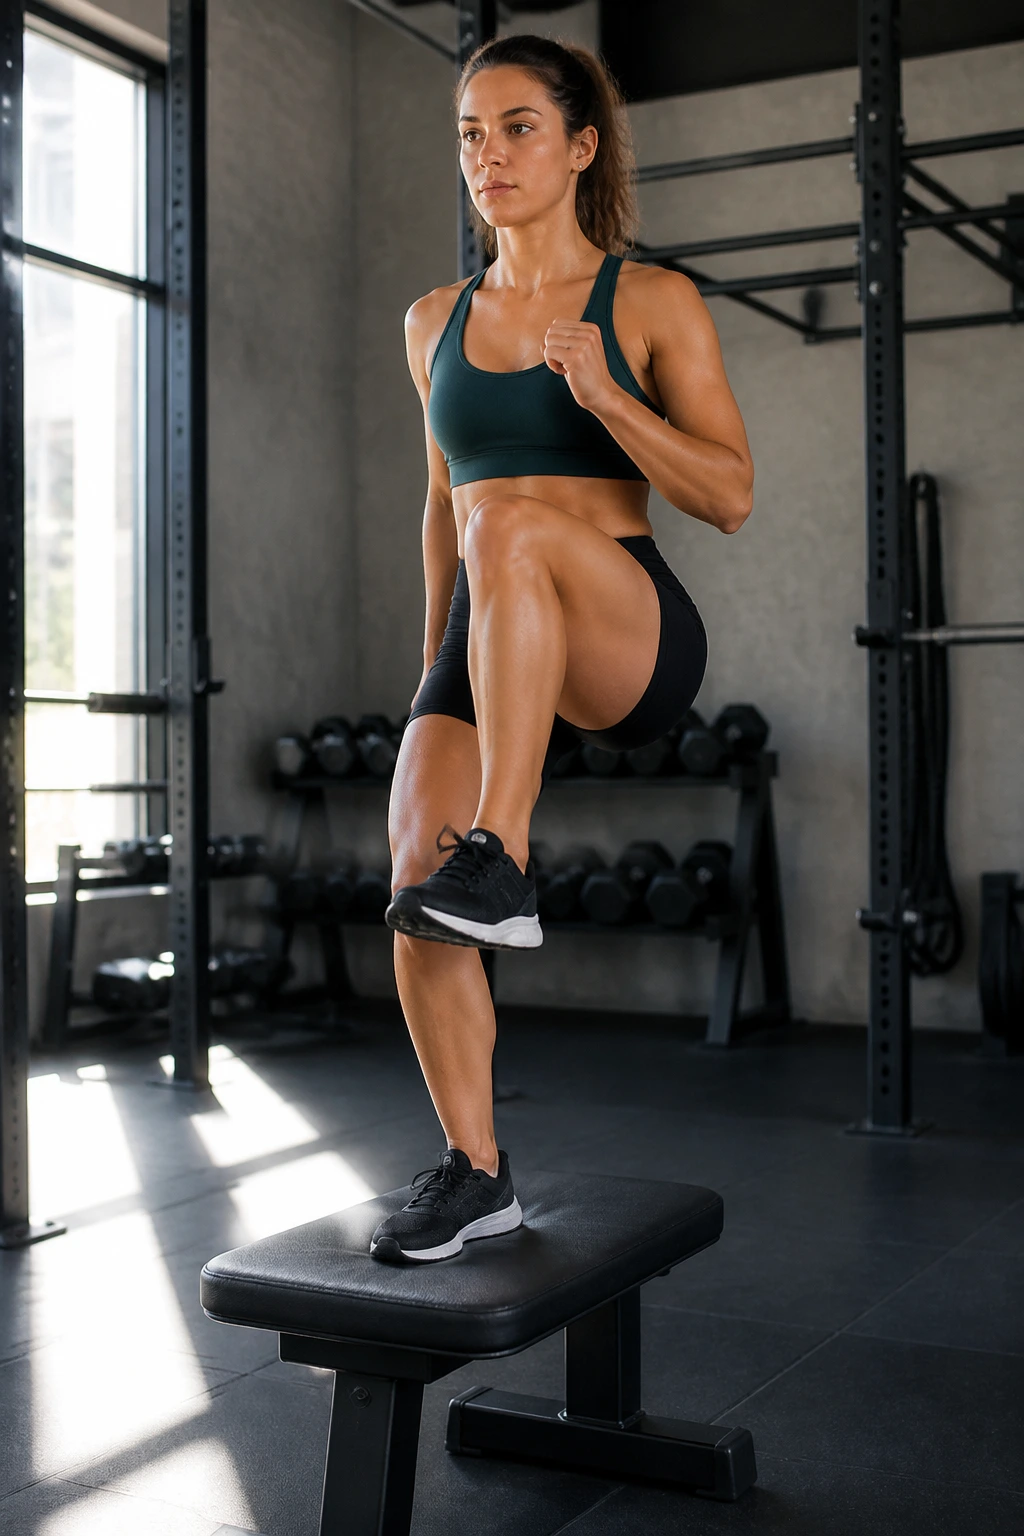
A box, step, or sturdy bench turns into a balance tool the second you add a knee drive at the top.
Place one whole foot on the step, press through the heel and midfoot, and stand up without jumping off the back leg. At the top, bring the free knee up and hold for 1 to 2 seconds. Lower slowly. Six to eight reps per side is a solid start.
The setup matters
- Choose a step height that keeps the hip below or near hip level.
- Use a full foot on the surface, not just the toes.
- Keep the standing knee tracking over the second toe.
- Avoid leaning so far forward that the lower back takes over.
This move looks simple until the standing leg has to own the whole ascent. Then it gets interesting. A step-up with knee drive is especially useful if stairs feel awkward or if one leg always seems to “find” the floor slower than the other.
13. Lateral Step-Down
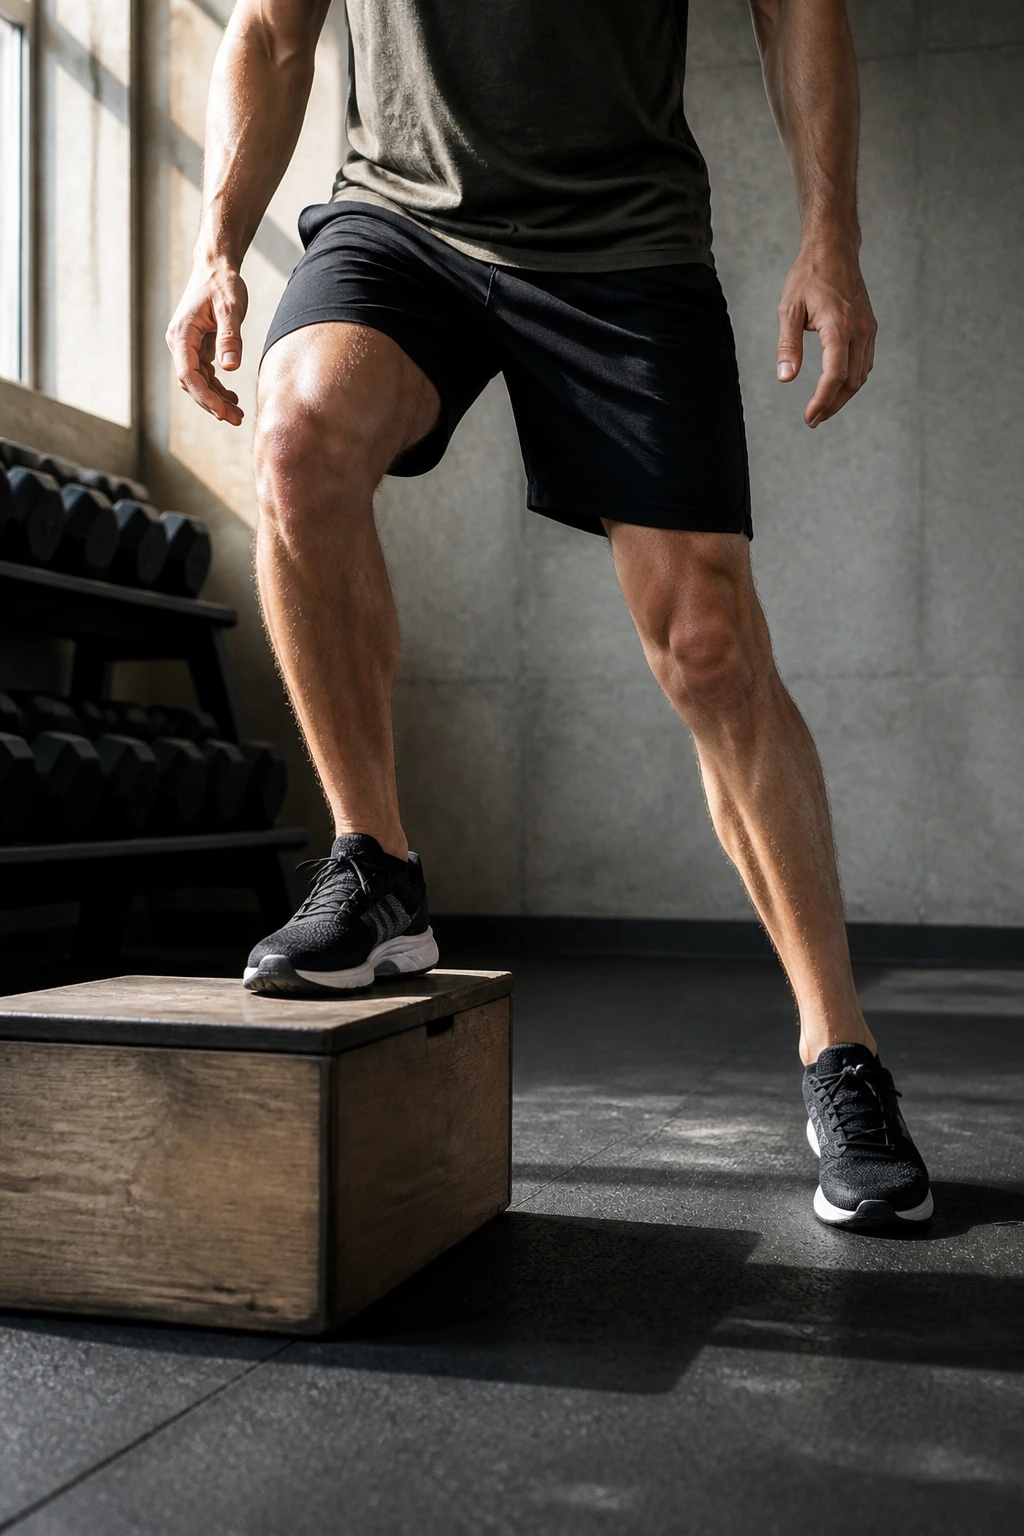
Side-to-side control is where a lot of knees get exposed.
Stand on a low step with one foot and slowly lower the opposite heel toward the floor without collapsing the standing hip. Touch lightly, then come back up. Use a step only 4 to 8 inches high at first. Do 6 to 10 reps per side.
This is not a racing drill. It is a slow test of control. The standing knee should track over the second toe, and the pelvis should stay level instead of dipping hard to one side. If the knee caves inward, lower the step or use a finger on the wall until the pattern cleans up.
I love this exercise for runners, hikers, and anyone whose knees feel a little wobbly on stairs. It teaches the leg to absorb load from the side, not just straight up and down.
14. Skater Hop and Stick
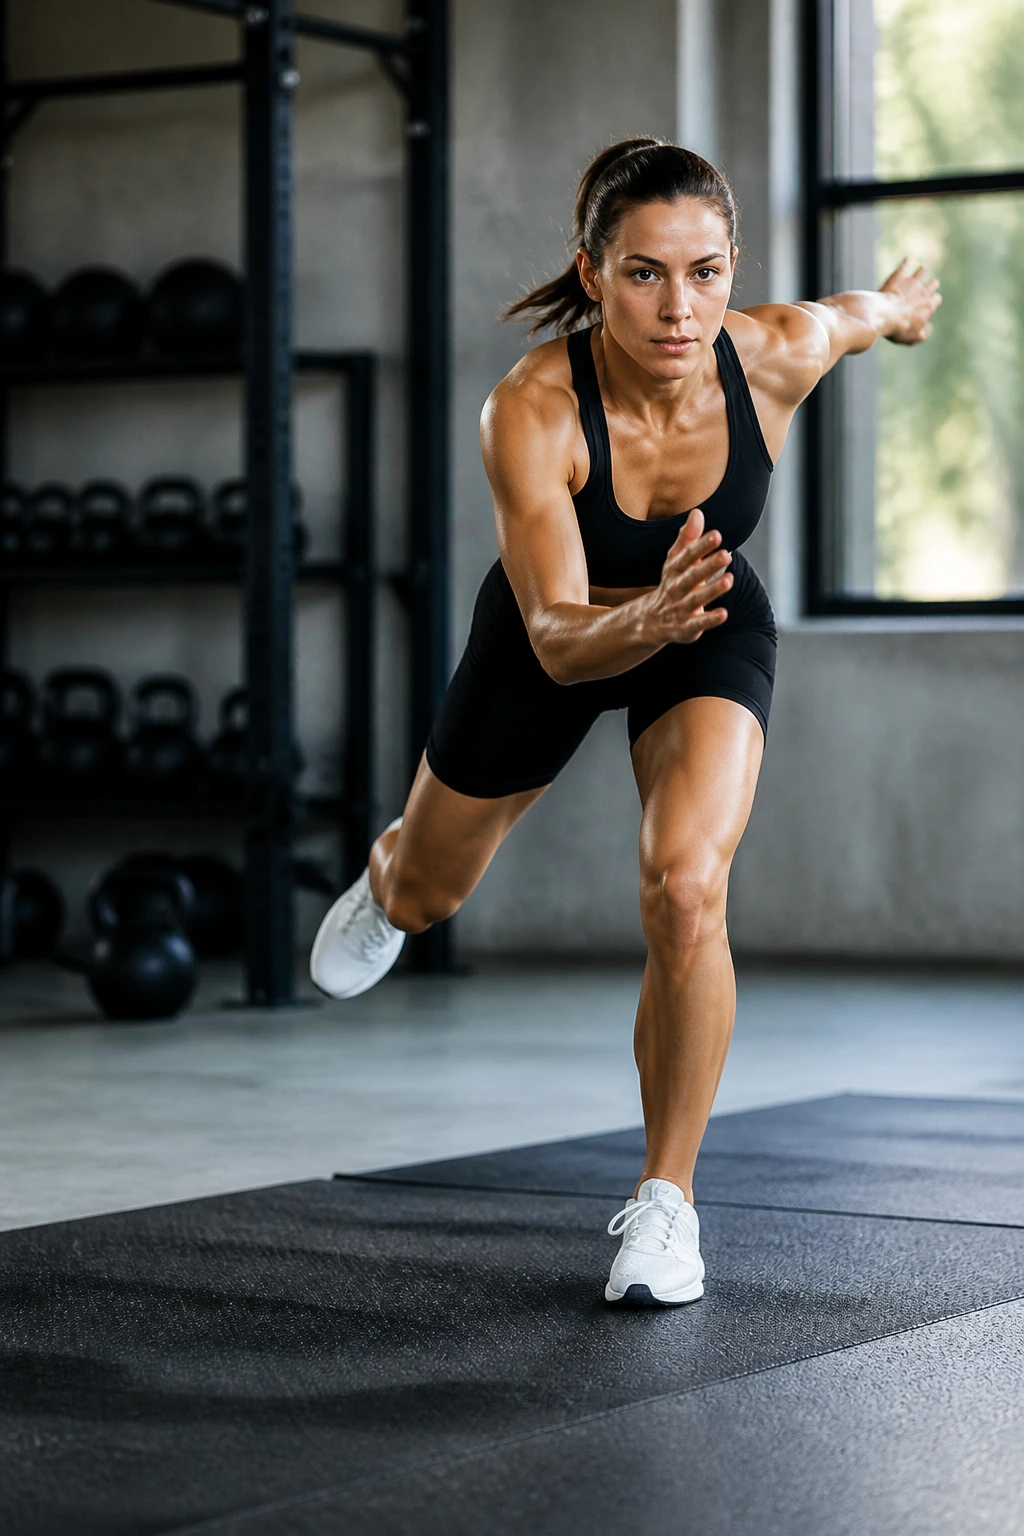
Fast moves are where balance gets honest.
Hop sideways off one leg, land on the other, and freeze for 2 full seconds before the next rep. That pause is what turns a jump into a stability drill. Start with a small hop, then build the distance only if the landing stays quiet. Six to ten total hops is plenty.
Landing cues
- Land softly through the midfoot.
- Keep the chest slightly forward, not folded.
- Don’t let the knee buckle inward.
- Freeze before the next hop.
This drill is useful because it teaches the body to accept force and settle it fast. That matters for sports, sure, but it also matters for anyone who has ever slipped on a wet floor and needed to recover without drama. Small hops first. Big hops later.
15. Single-Leg Glute Bridge
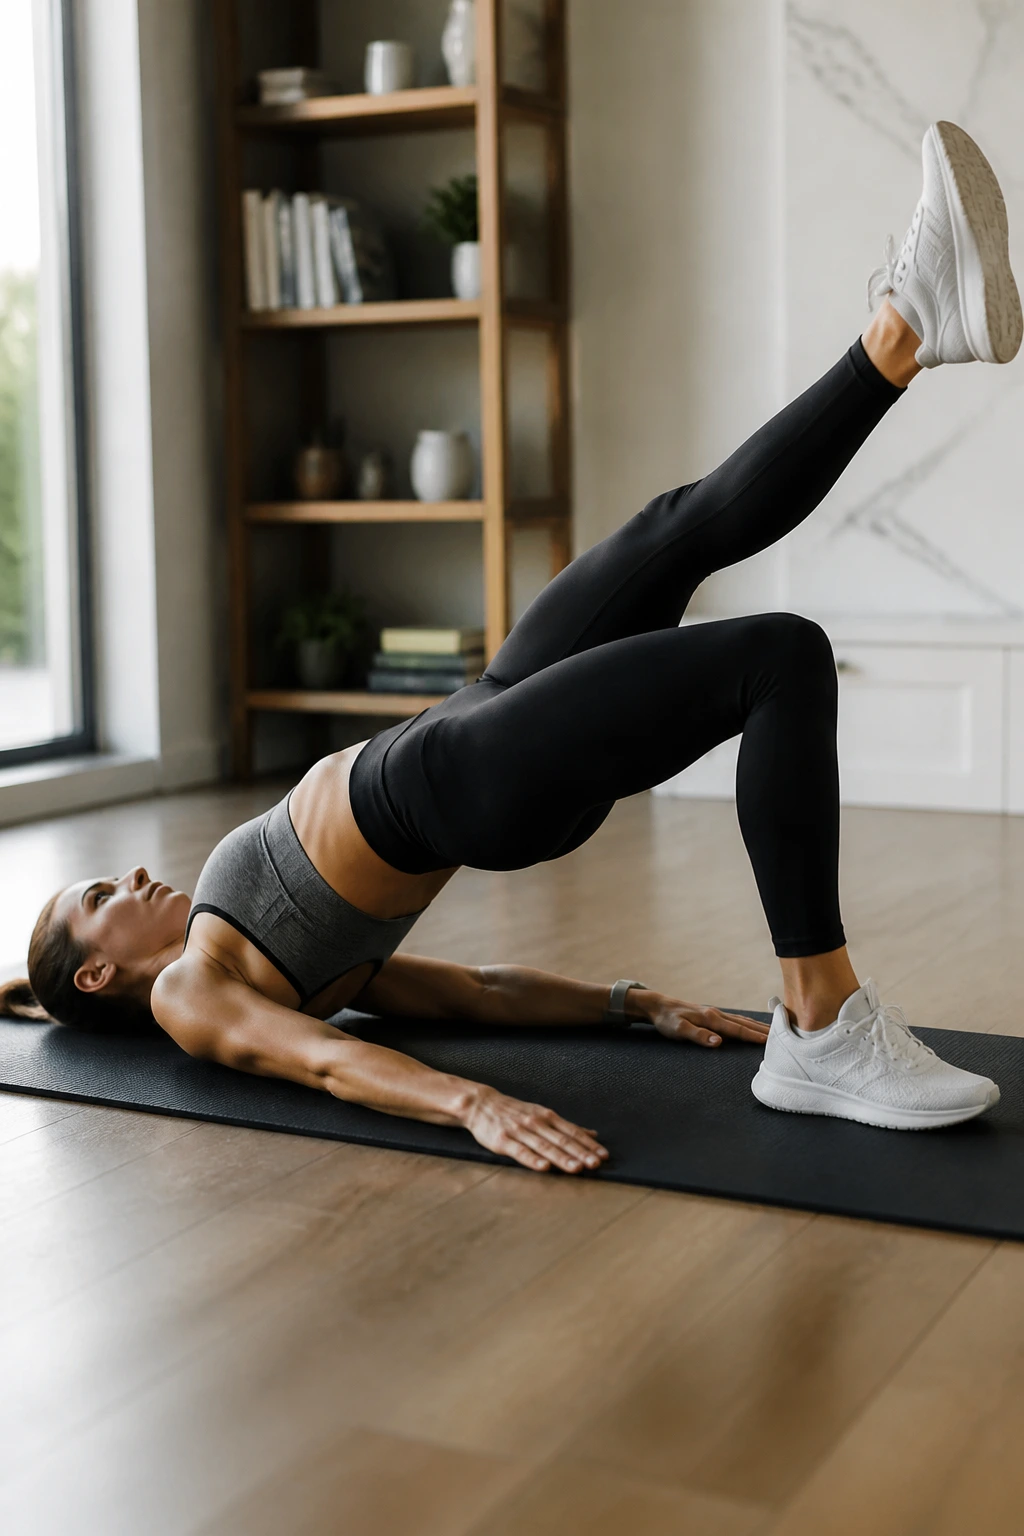
On the floor, balance gets less flashy and more honest.
Lie on your back with one knee bent and the other leg lifted or extended. Press through the grounded heel, lift the hips until the body makes a straight line from shoulder to knee, then lower with control. Try 8 to 12 reps per side or a 15 to 20 second hold at the top.
Hamstring cramps show up here all the time. If that happens, bring the heel a little closer to the glutes and think about lifting from the hip instead of yanking from the knee. The glute should be doing the heavy lifting, not the back of the thigh.
This exercise is good for people who need more pelvic control but do not want another standing drill on a tired day. It builds strength without asking the ankles to work overtime.
16. Bird Dog
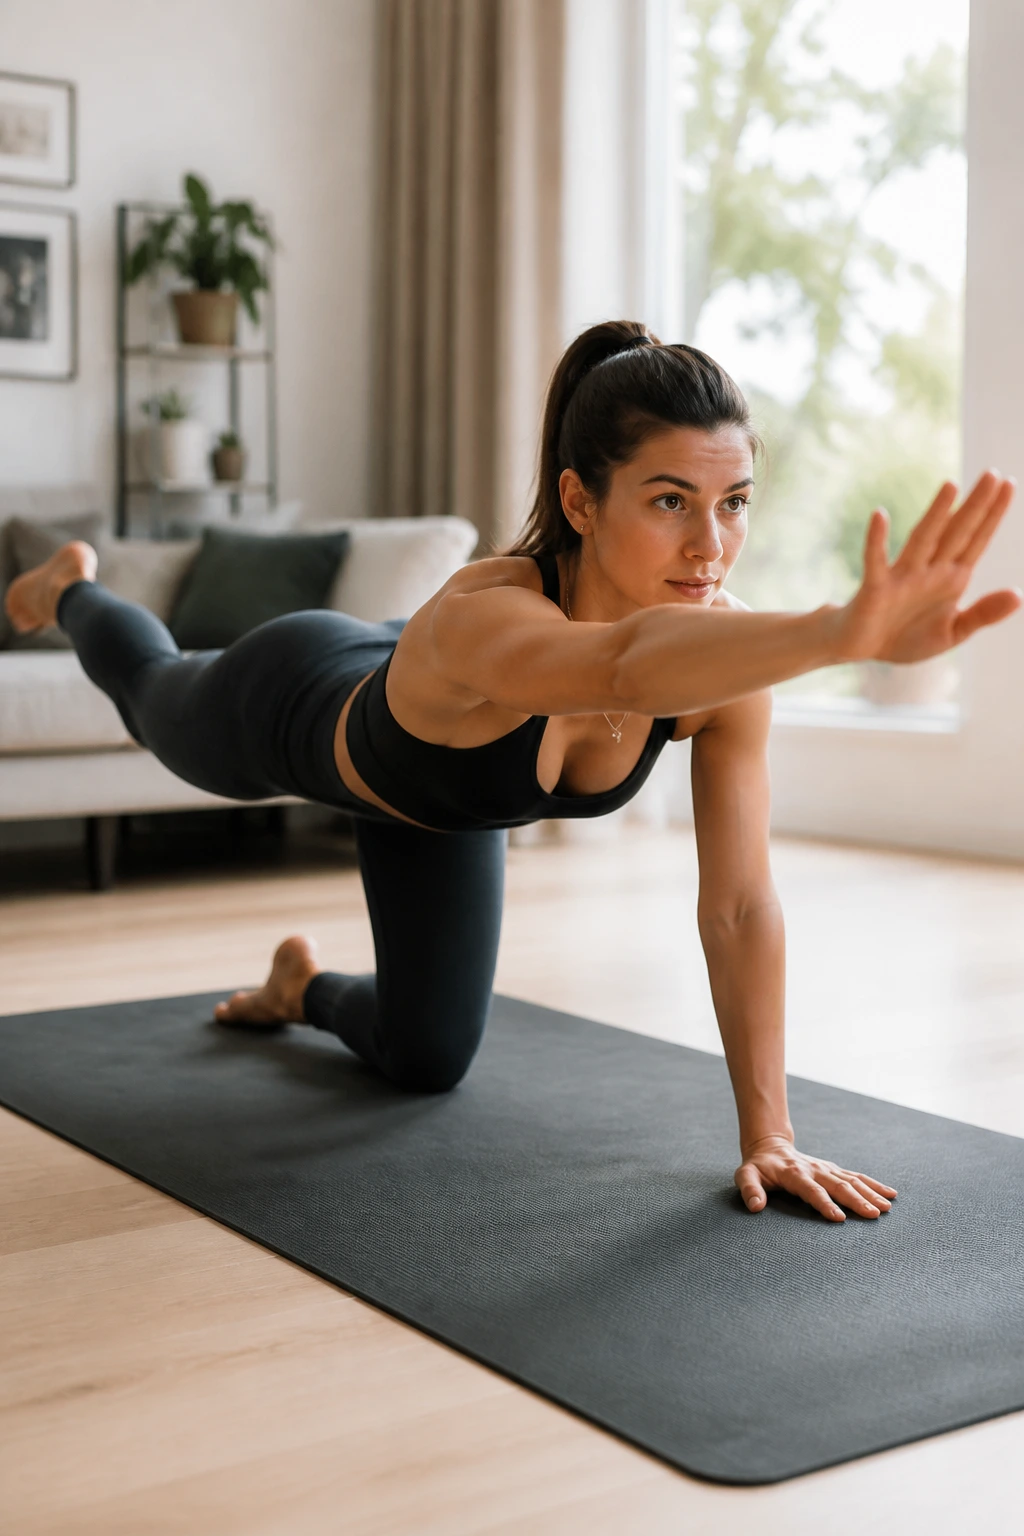
Bird dog looks like a beginner move. Done well, it is anything but.
Start on hands and knees. Extend one arm forward and the opposite leg back without shifting the hips. Pause for 2 to 3 seconds, then return with control. Five to eight reps per side is enough if the trunk stays quiet.
What to watch for
- Keep the low back from arching.
- Reach long, not high.
- Put weight into the supporting hand and knee.
- Breathe out as the limbs extend.
The trick is not the reach itself. The trick is keeping the spine from spinning or sagging while the limbs move. That cross-body control carries over to walking, lifting, and pretty much any time you need the upper and lower body to talk to each other without shouting.
17. Dead Bug Heel Tap
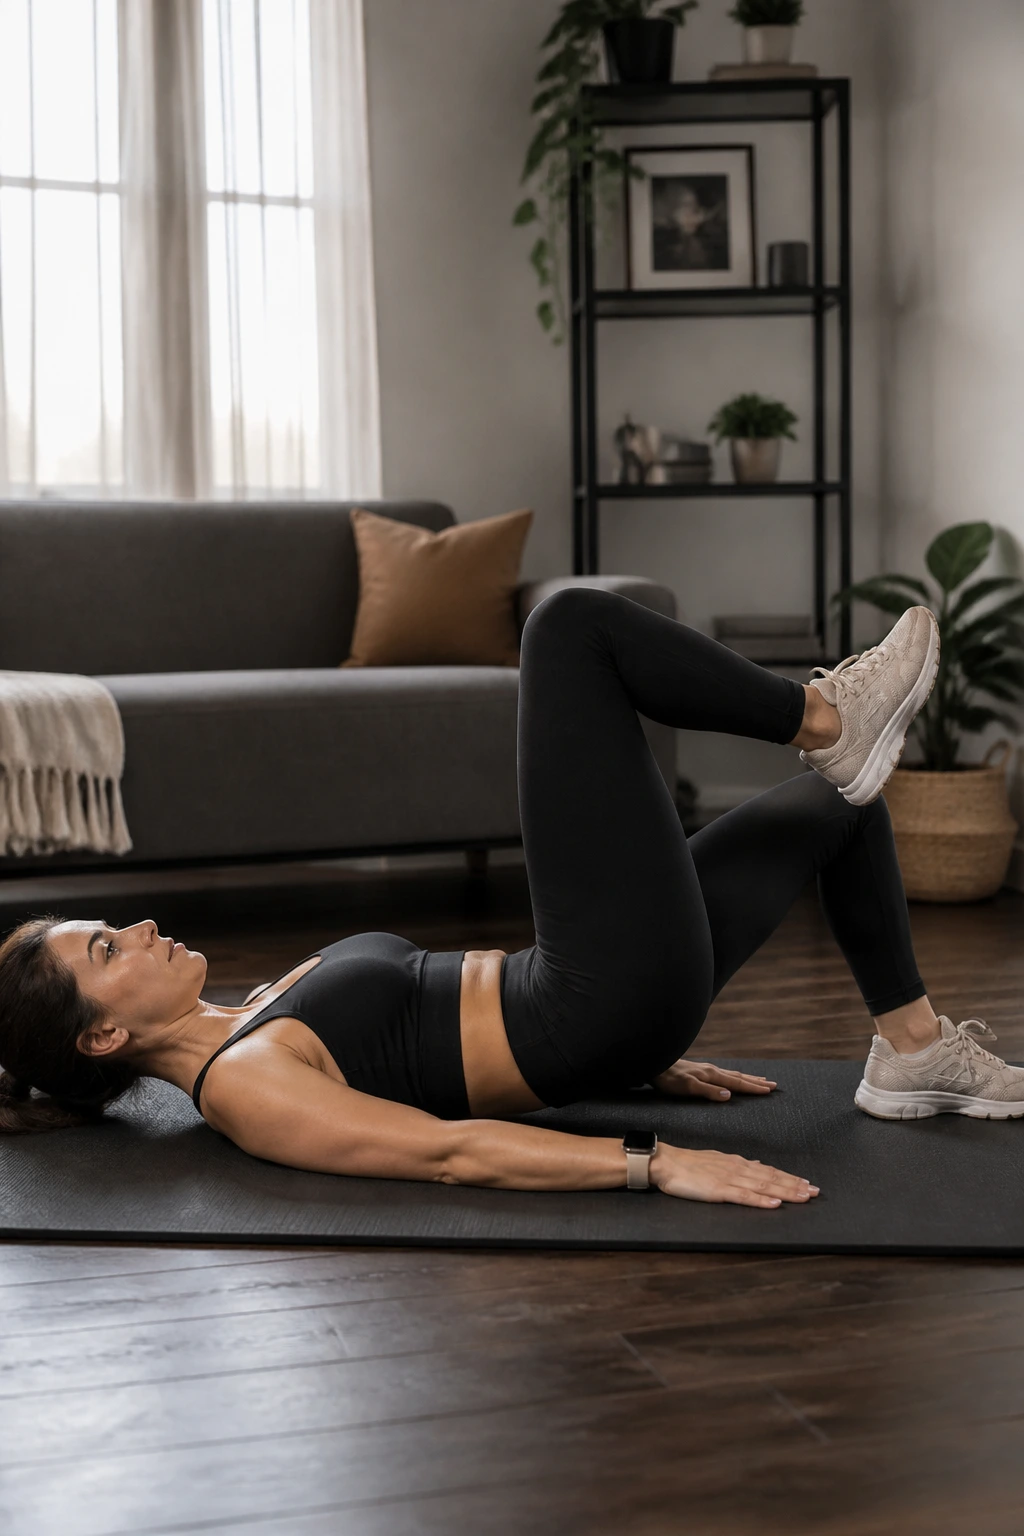
This one is on the floor, but it has a real balance payoff.
Lie on your back with hips and knees bent at 90 degrees. Brace the ribs down, lower one heel toward the floor, tap lightly, and bring it back before switching sides. Keep the lower back heavy on the mat. Aim for 6 to 10 taps per side.
It is easy to rush this drill and turn it into a sloppy leg drop. Don’t. The point is to keep the torso steady while the legs move, which is the same skill that keeps the body from flopping around when you walk, lift, or change direction.
If your back pops up, shorten the range. A smaller tap with better control is worth more than a big reach that turns into a backbend.
18. Side Plank With Top-Leg Lift
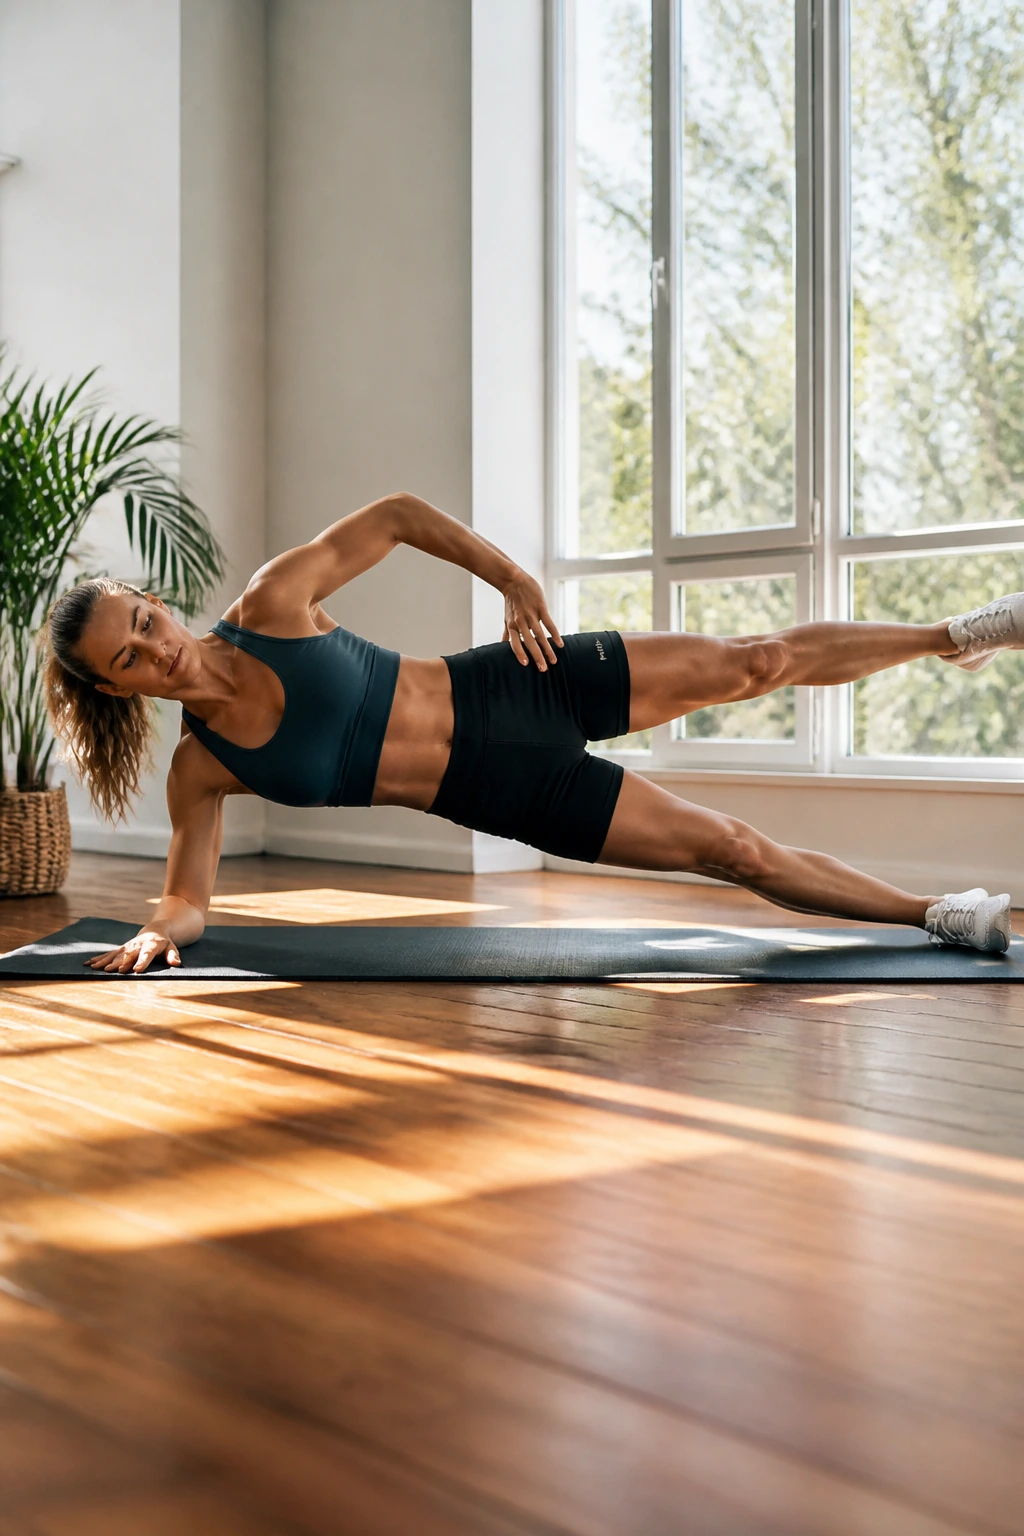
Side planks already work the side body. Add a top-leg lift, and the outer hip has to earn its keep.
Set up in a side plank, then lift the top leg a few inches and lower it slowly. Hold for 15 to 25 seconds or do 6 to 8 controlled lifts. If the full version is too much, drop the bottom knee and keep the rest of the shape.
Unlike a regular side plank, this version asks the glute medius to stabilize the pelvis while the leg moves. That matters because hip drop is one of the fastest ways balance gets sloppy. The move is small, but it bites.
I would rather see a clean, short side plank with a tiny leg lift than a heroic-looking version where the hips are twisting all over the place. Clean lines beat big numbers here.
19. Suitcase Carry for Core Balance and Stability
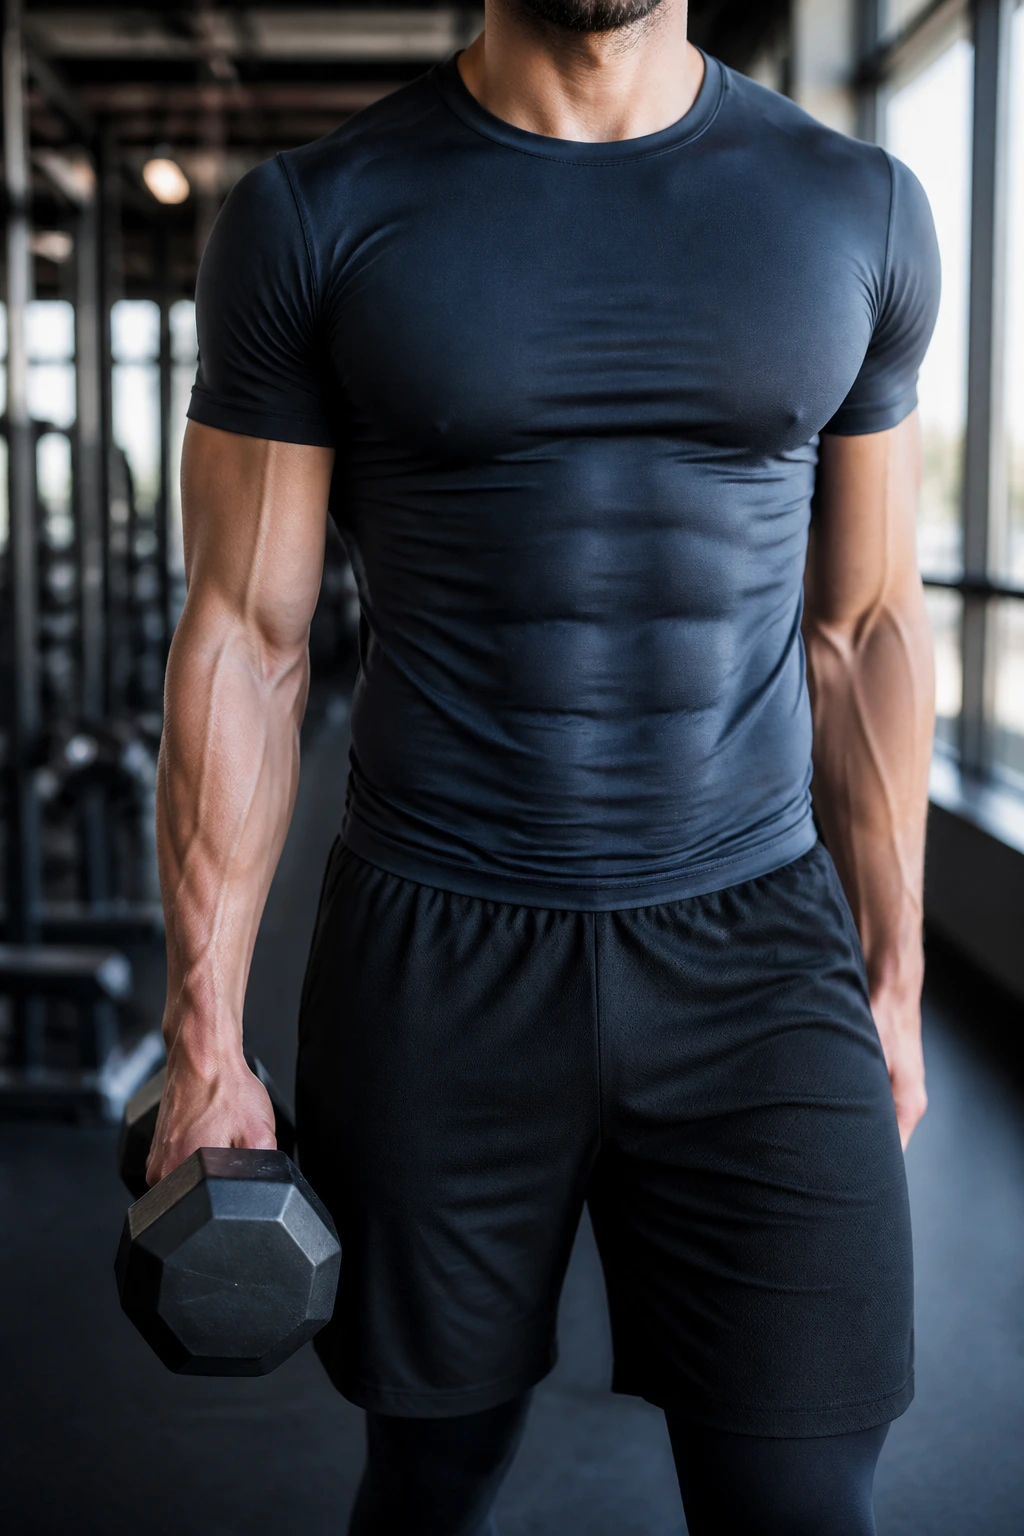
One dumbbell can expose a weak trunk fast.
Hold a weight in one hand and walk 20 to 40 yards or 30 to 45 seconds without leaning toward the load. The ribs should stay stacked over the pelvis, and the shoulders should stay level. Switch sides and repeat. Go heavier than a shoulder raise, lighter than a shrug-fest.
How it shows up in real life
- Carrying groceries in one hand.
- Walking upstairs with a bag.
- Holding a child on one side.
- Standing on one leg while the body shifts around you.
The suitcase carry is simple and brutally useful. It teaches anti-lateral flexion, which is a fancy way of saying the trunk resists bending sideways. That skill pays off every time life asks you to carry something awkward and keep walking like a normal person.
20. Farmer’s Carry
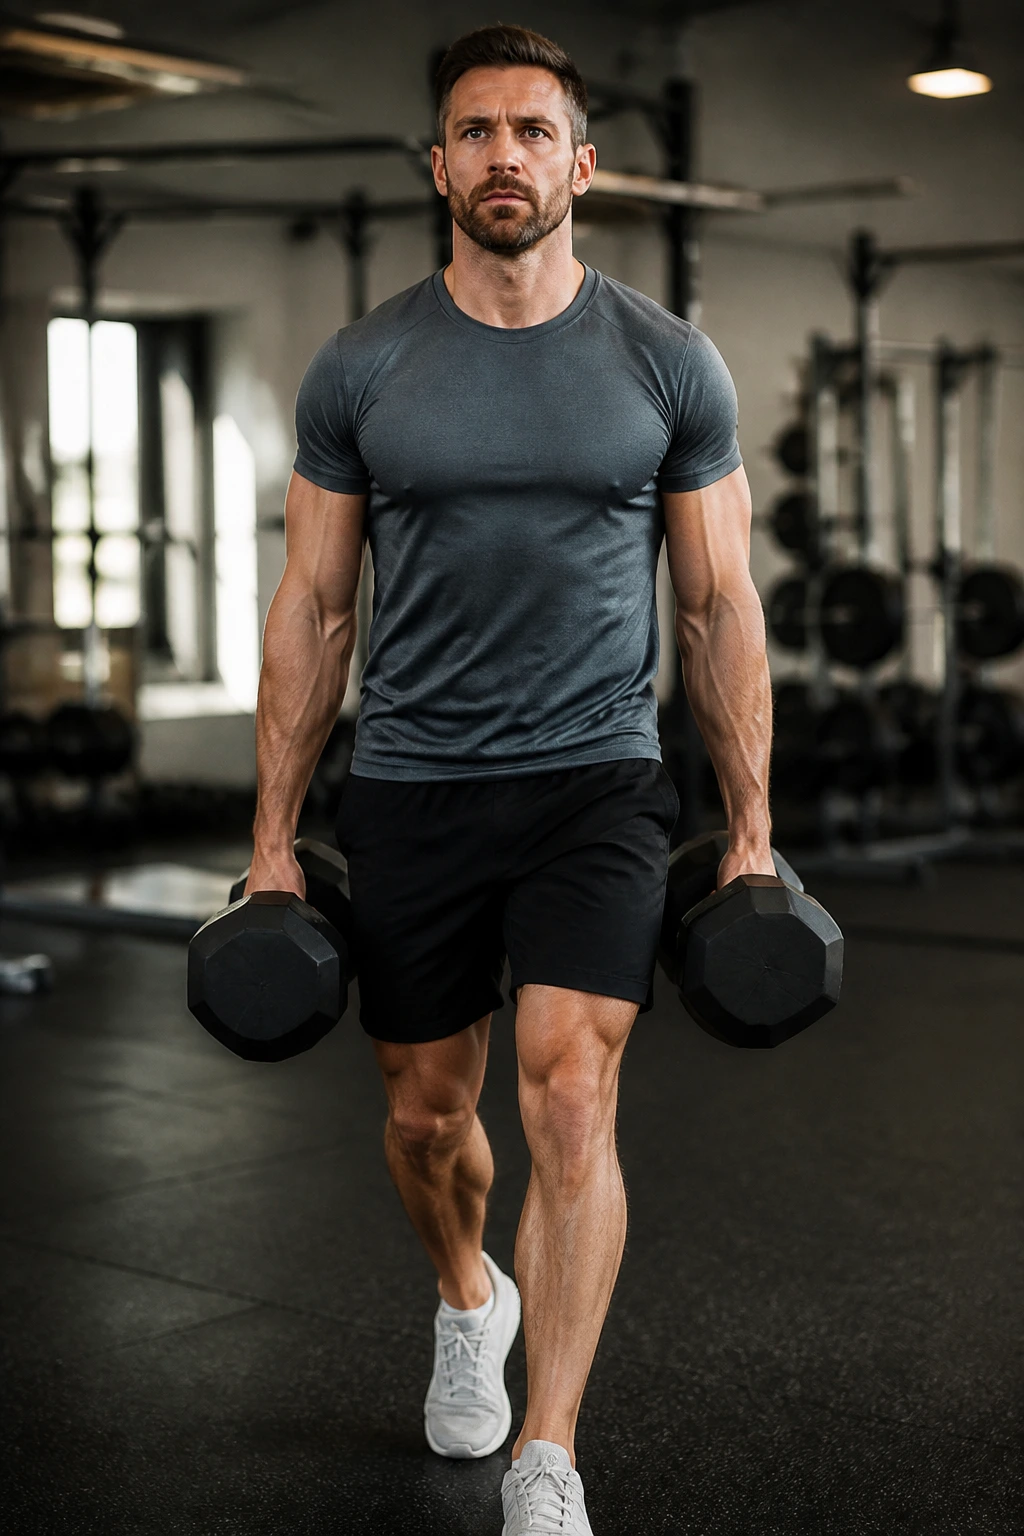
If the suitcase carry is one-sided honesty, the farmer’s carry is two-sided order.
Grab a pair of dumbbells or kettlebells and walk for 30 to 60 seconds with tall posture, quiet feet, and a steady gaze. Keep the shoulders down and the ribs from flaring. The stride should stay smooth, not choppy. If the weight changes your gait, it’s too heavy.
One good thing about farmer’s carries is that they connect a lot of small jobs at once: grip, posture, breathing, gait, and ankle control. Another good thing is that they look boring enough for people to underestimate them. Fine by me. Boring exercises are often the ones that fix the messiest problems.
If you only have room for one loaded carry in a workout, make it this one.
21. Half-Kneeling Press
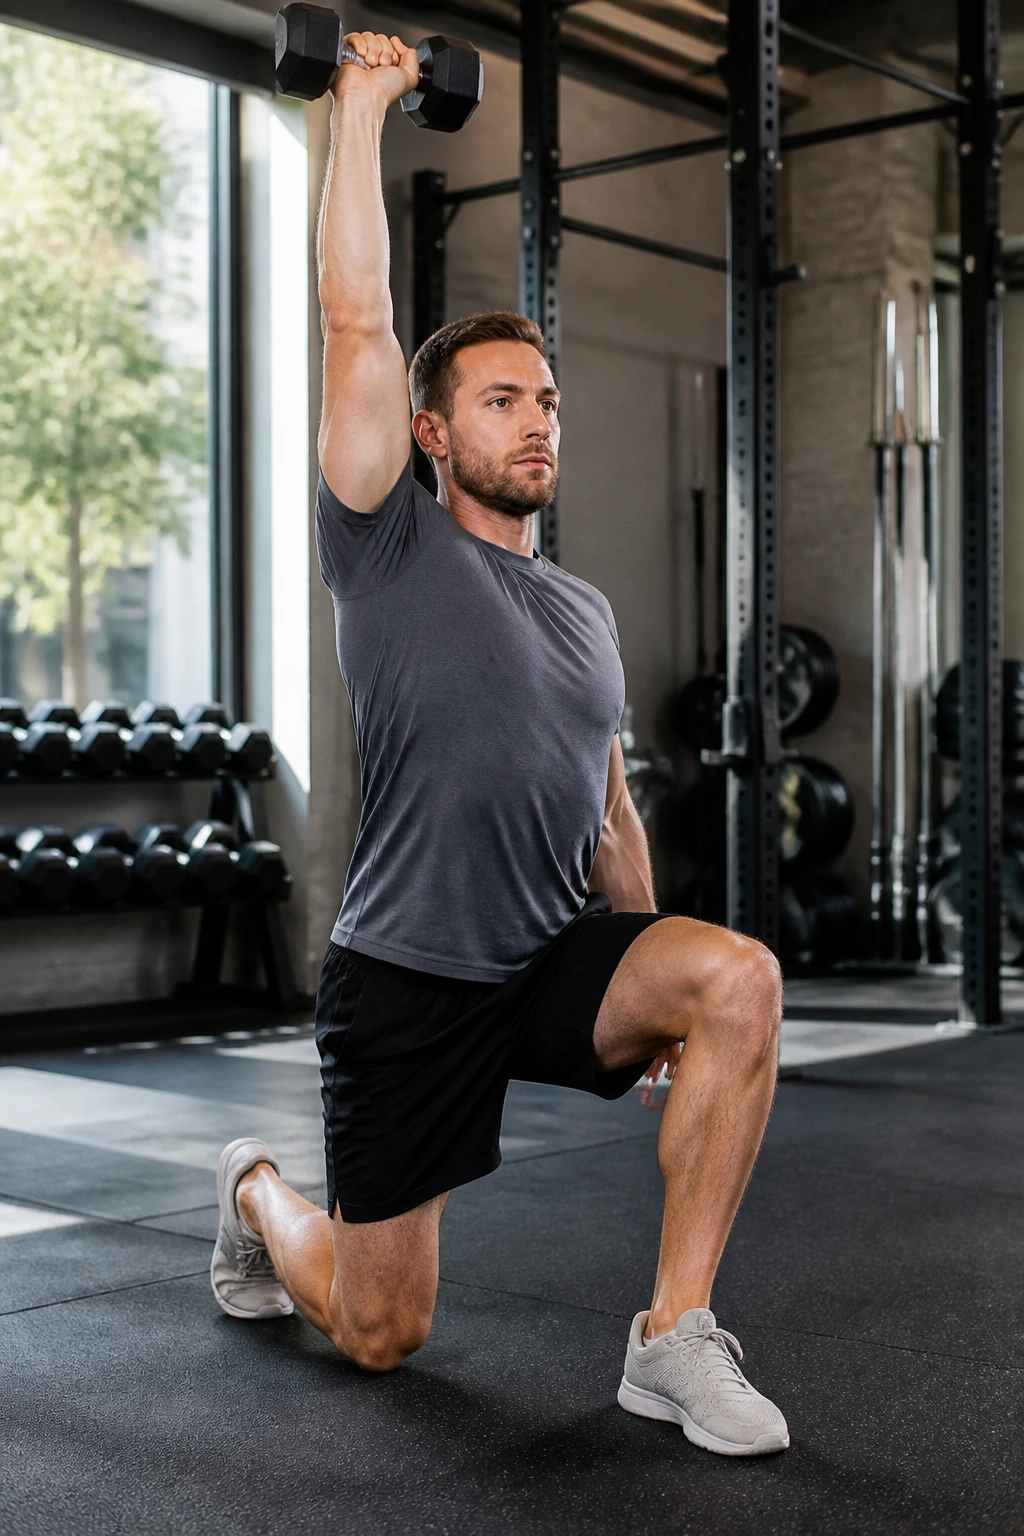
Why half-kneeling? Because it shuts down the easy cheats and makes the trunk work.
Set one knee on the floor with the other foot planted in front. Squeeze the glute on the kneeling side, keep the ribs stacked, and press a dumbbell or kettlebell overhead. Do 5 to 8 reps per side with a brief pause at the top. The pelvis should stay level instead of tipping forward.
How to set it up
- Front foot flat, heel under the knee.
- Back glute lightly tight.
- Weight starts at shoulder or chest height.
- Press straight up, not forward.
This position teaches balance in a way standing presses sometimes miss. One side of the body gets a stable base, the other side has to resist wobble, and the torso has nowhere to hide. It is a neat little lesson in control, and it tends to show up later in overhead work and single-leg movements.
22. Single-Leg Calf Raise Hold
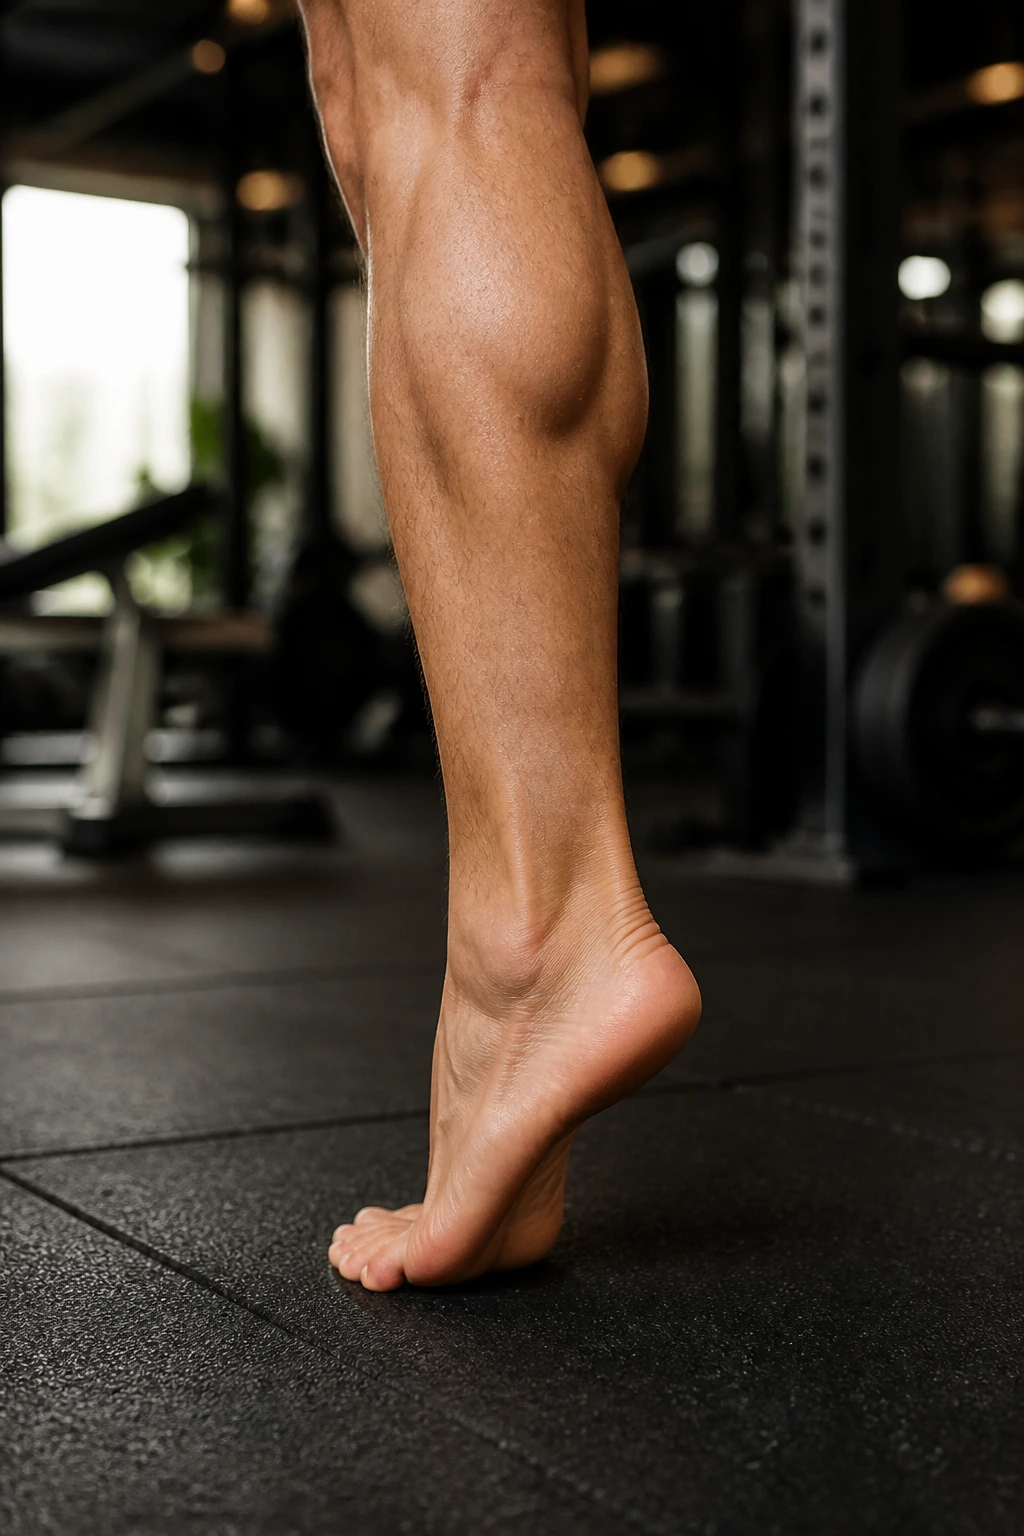
People skip the ankles and then act surprised when balance feels shaky. Funny how that works.
Stand on one foot, rise onto the ball of the foot, and hold the top position for 2 seconds before lowering slowly for 3 seconds. Try 8 to 12 reps per side. The calf should feel loaded, but the toes should not cramp like they are trying to hold onto the floor.
Form cues
- Stay tall through the whole body.
- Keep pressure through the big toe.
- Don’t roll out to the pinky toe.
- Use a wall lightly if needed.
The calf raise hold improves ankle stiffness and foot control, which are both useful when you need to balance on a small base. It sounds tiny. It is not tiny. The lower leg has a bad habit of getting ignored until it starts barking on stairs or uneven ground.
23. Single-Leg Sit-to-Stand
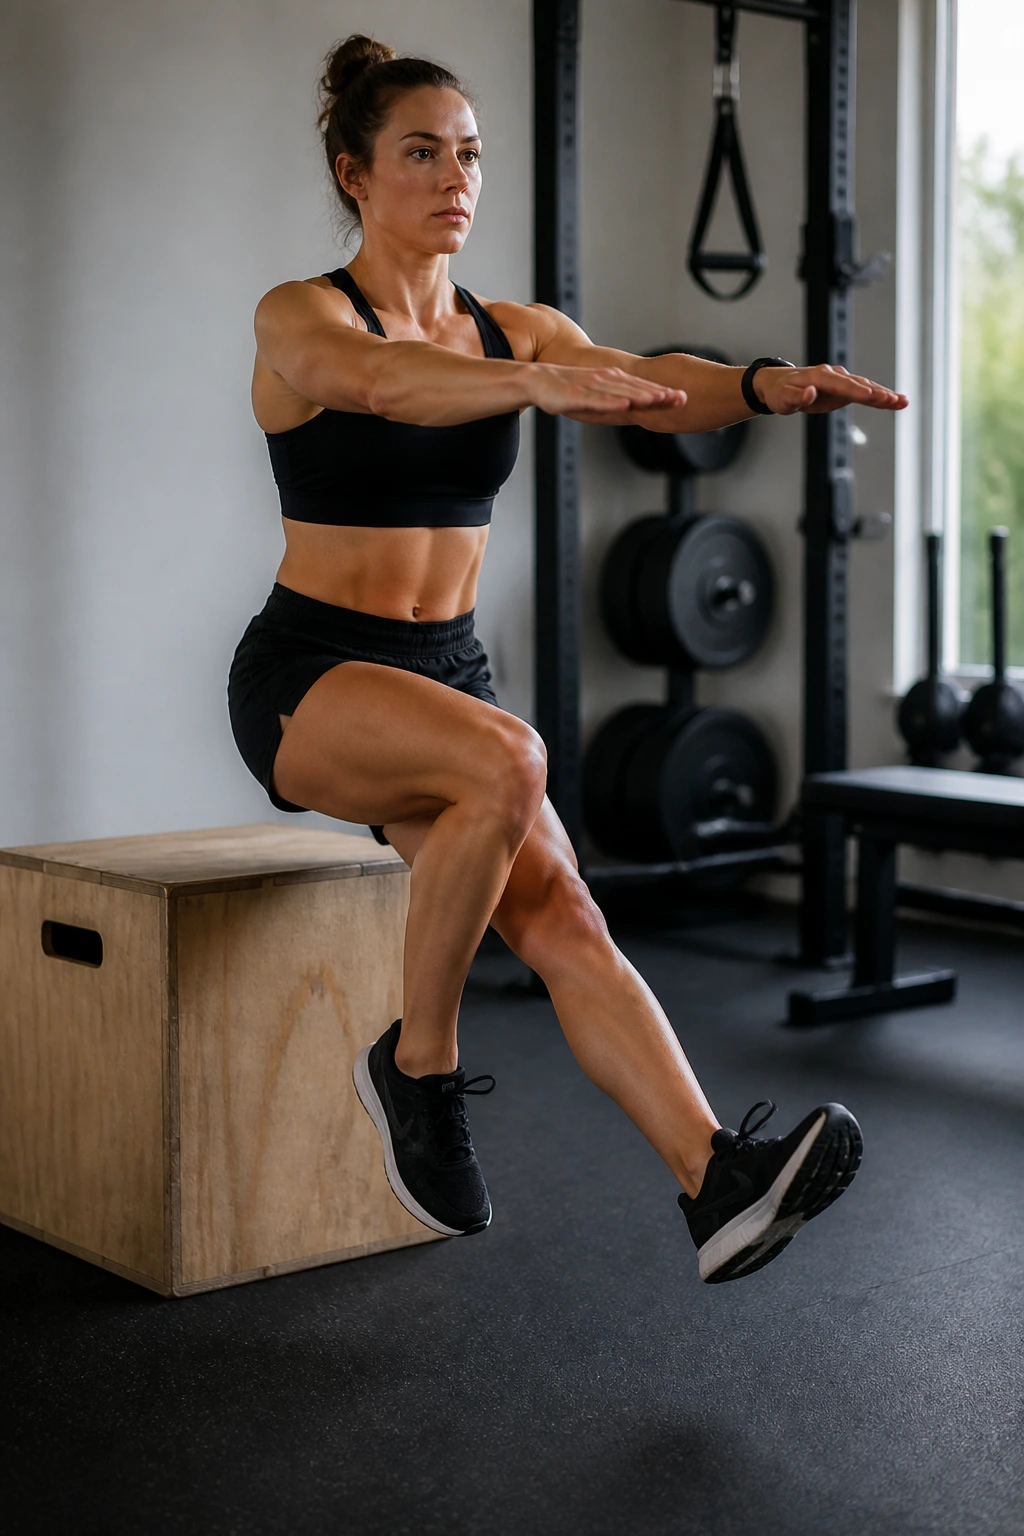
This one has a reputation for being humbling, and honestly, that reputation is deserved.
Sit on a box or bench, lift one foot, and stand up using the other leg alone. Tap the bench lightly on the way down, then stand without dropping into the seat. Use a higher seat first — around 16 to 18 inches is a decent starting point for many adults — and lower it later if the pattern stays clean.
How to scale it
- Reach both arms forward to help balance.
- Use a fingertip on a rack or wall.
- Keep the working knee aligned with the second toe.
- Stop the descent before you collapse.
This exercise blends strength, eccentric control, and balance in one shot. It also tells you a lot about how one leg handles bodyweight when there is no momentum to save it. If the move feels impossible, that is not a sign to quit. It is a sign to start with a box that is higher and cleaner.
24. Cossack Squat Hold
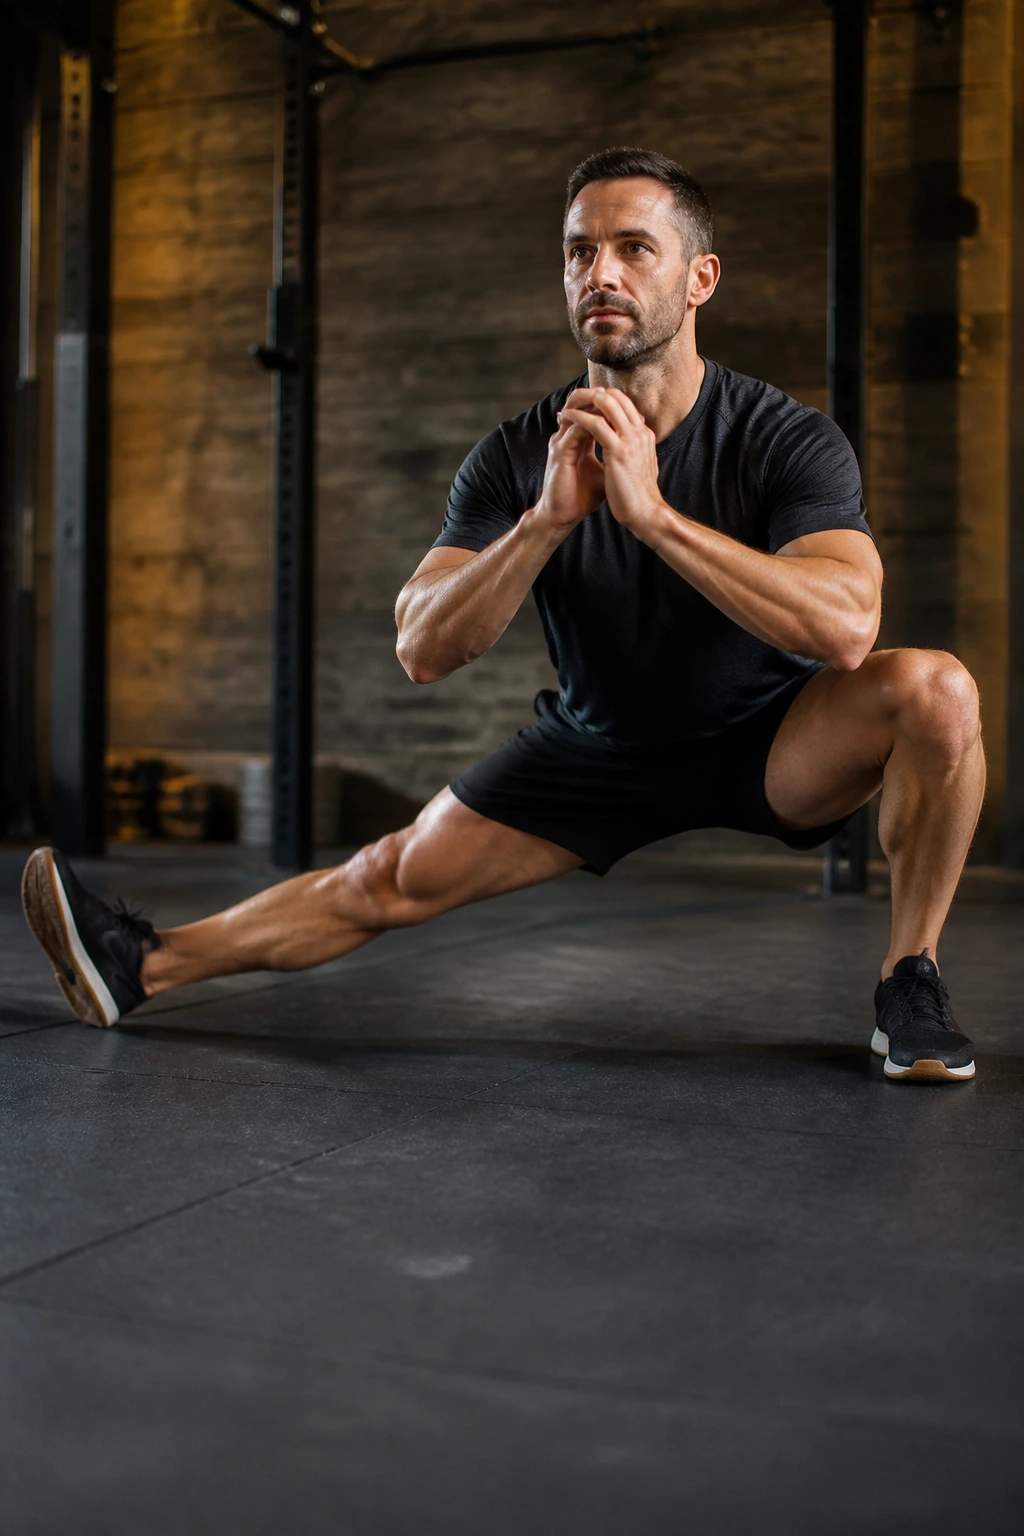
Wide stance, side shift, and a lot of honesty in the hips.
Step out into a wide squat stance, sink into one side, and keep the other leg long. Hold the bottom for 10 to 20 seconds or do 3 to 5 slow reps per side. The working heel stays grounded if your mobility allows it, and the chest stays proud instead of folding into the floor.
The Cossack squat asks for balance, hip mobility, and strength all at once. It also tells you which side is tighter before you have to guess. If one ankle refuses to bend, shorten the depth and work there. Better a controlled half-depth hold than a messy full drop with a heel pop and a grumpy knee.
This one is excellent for people who sit a lot and then try to move like their hips are made of rubber bands. They are not.
25. Star Excursion Reach for Balance and Control
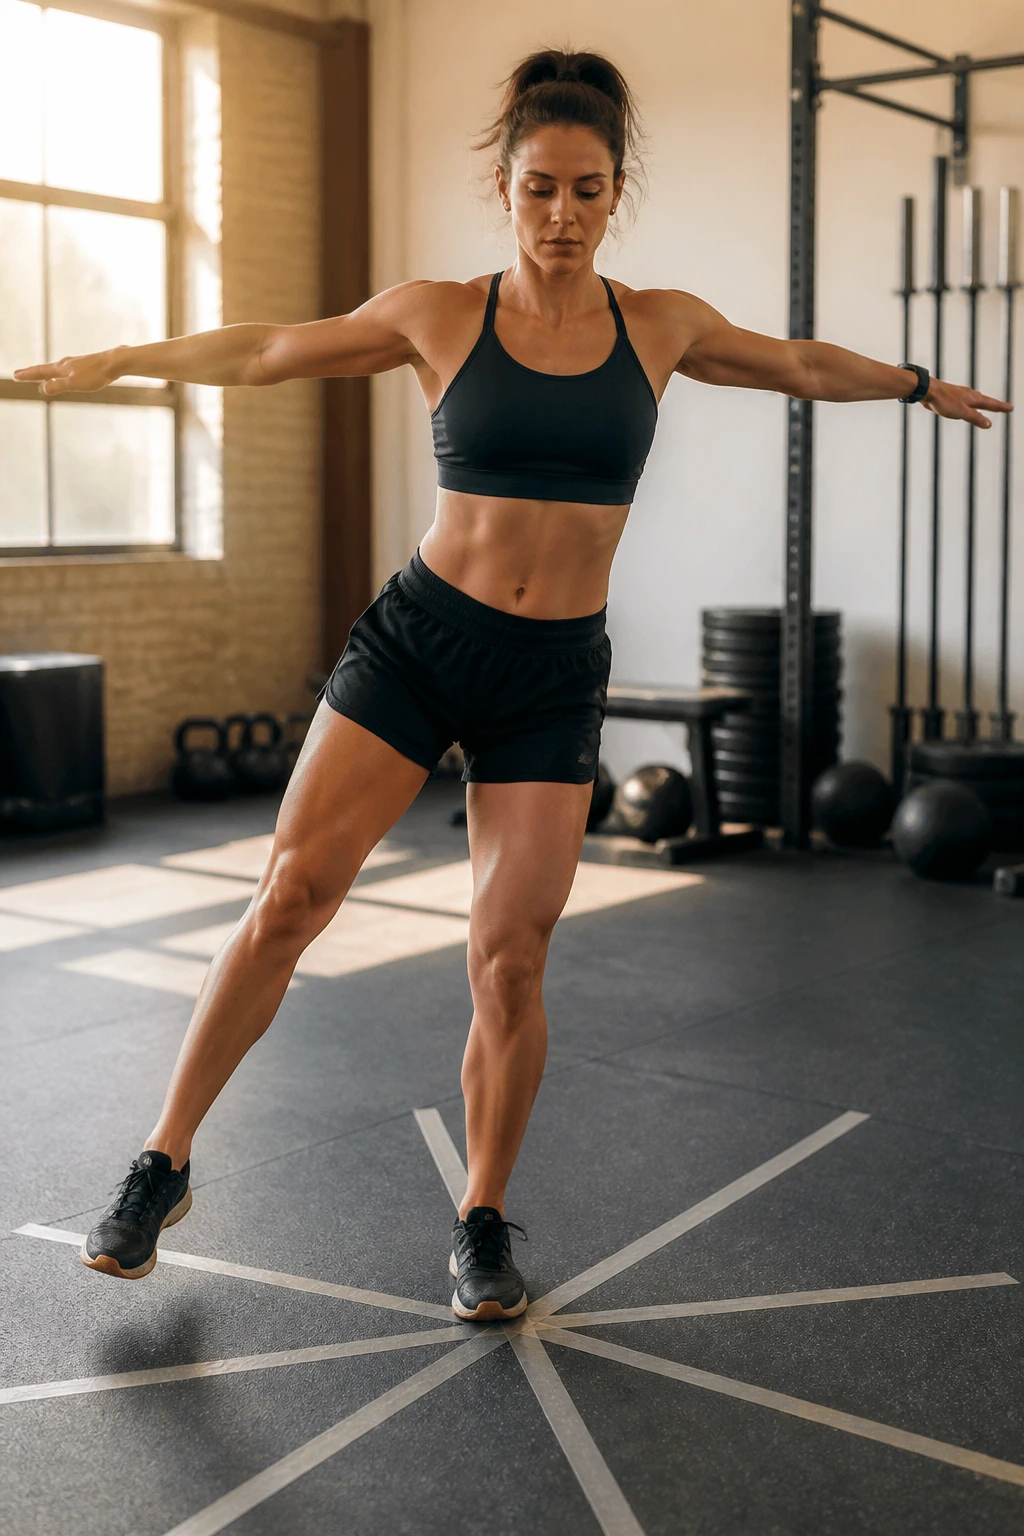
A piece of tape on the floor turns into a useful little map here.
Stand on one leg at the center and reach the other foot out in several directions — forward, forward-diagonal, side, and back-diagonal. Touch lightly, return to center, and repeat. Three rounds per side is enough at first. Keep the standing knee soft and the pelvis level.
What makes it different
- It exposes side-to-side differences fast.
- It asks for control in multiple directions, not just one.
- It pairs well with a timer and a marked floor.
- It can be made easier by shortening the reach.
The star excursion reach is a nice end point because it pulls a lot of earlier skills into one drill: foot control, hip stability, trunk steadiness, and the patience to move slowly. If one side reaches farther than the other, that is useful information. If the standing foot starts drifting, that is useful too.
Pick a few drills from the list and come back to them often. The body likes repetition, but it likes clean repetition better.
If you only have a short session, start with one foot drill, one single-leg strength move, and one carry. That combination covers a lot of ground without turning the workout into a circus. And if the last rep looks a little messy, lower the difficulty before you chase more reps. Balance gets better when the standard gets cleaner, not when the ego gets louder.
