



If you’re brand new to yoga, start with the smallest possible win: stand on your mat and take five slow breaths. A beginner yoga flow does not need to look graceful, and it definitely does not need to feel complicated. It just needs to help your body understand what comes next.
That matters more than people think. Most first-timers don’t quit because yoga is too hard; they quit because they try to start with something that belongs in the middle of a much longer practice. Tight hamstrings, stiff shoulders, shaky balance, weird wrist pressure — all of that is normal at the start. The trick is picking flows that teach you the shape of the movement before they ask you to hold it for long.
A mat, a wall, and a folded blanket are enough for almost everything here. A pair of blocks helps, but you can also use sturdy books in a pinch. And if your breath gets ragged, that’s your cue to slow down, not push harder. The best place to begin is with movements that feel plain at first and quietly useful a few days later.
1. Breath, Mountain, and Shoulder Rolls
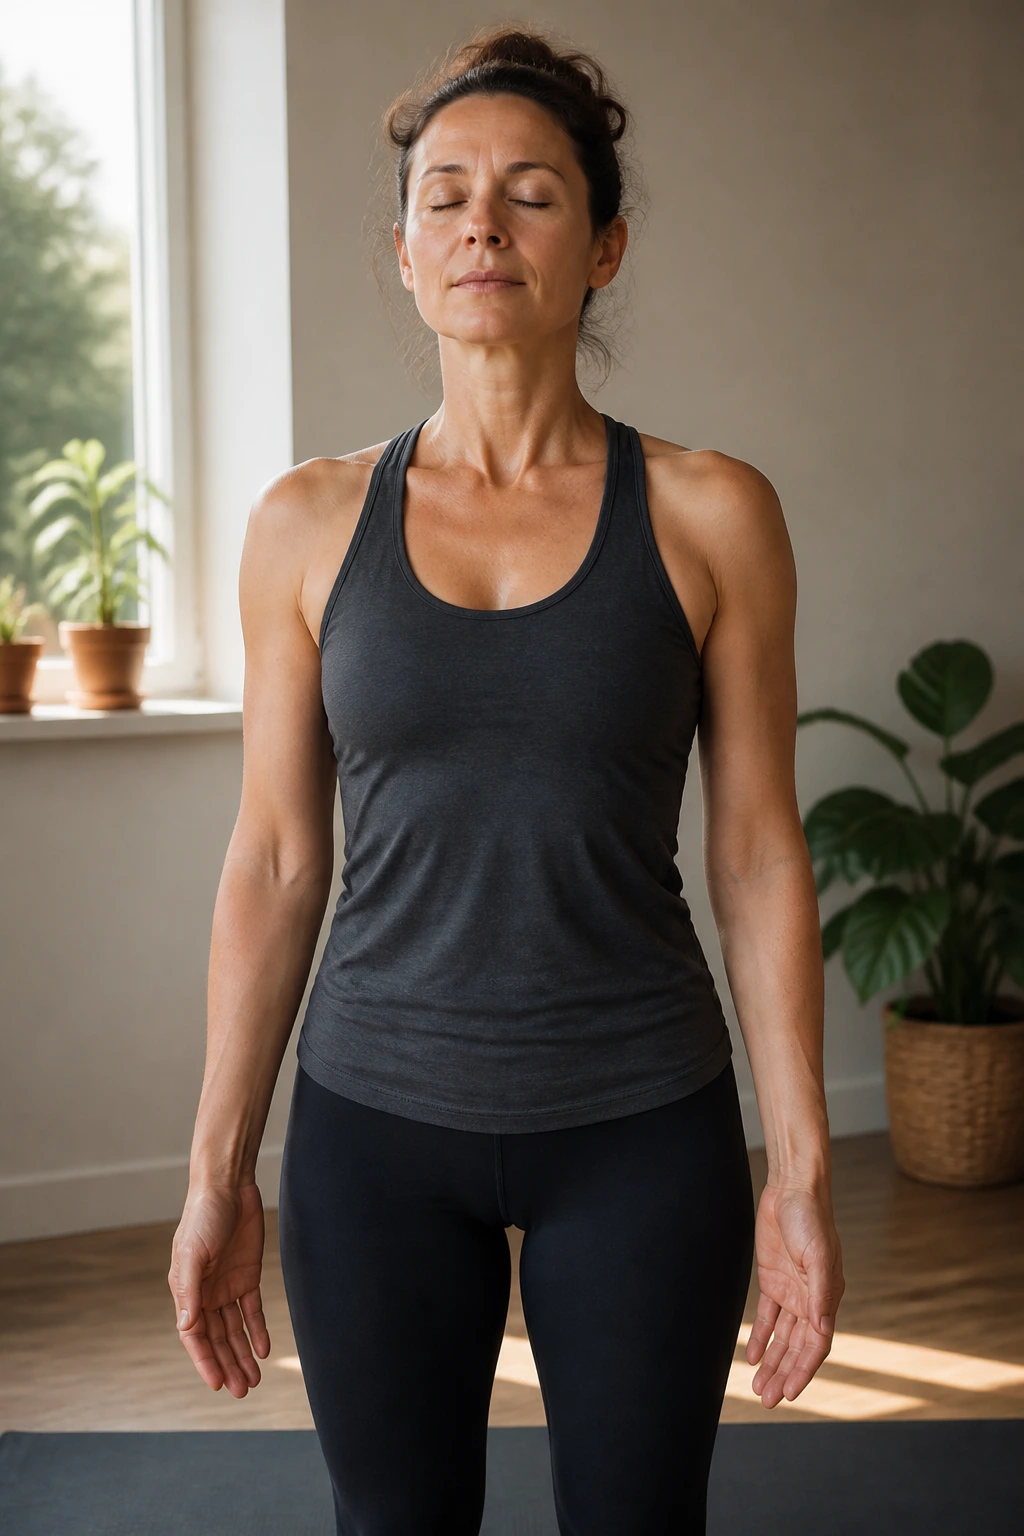
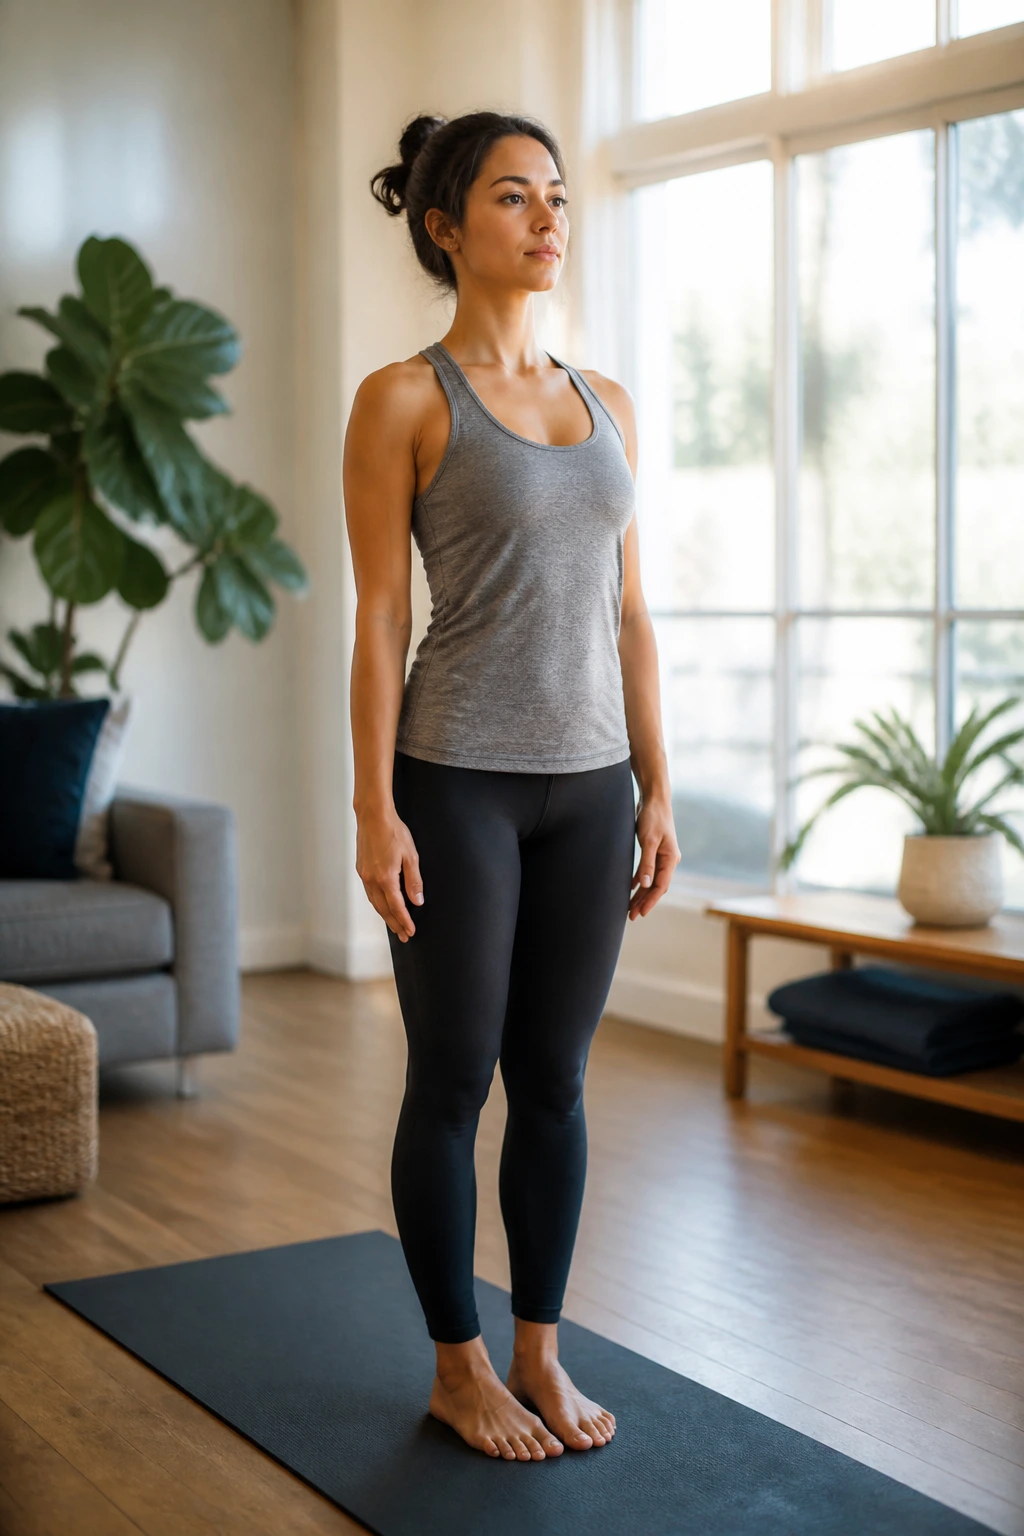
Start here if you want the least intimidating yoga flow possible. Mountain pose looks like standing still, which is exactly why it works so well for brand new yoga students. It gives you a place to notice your feet, your ribs, and the way your shoulders creep toward your ears when you’re nervous.
What to Notice
- Stand with your feet about hip-width apart.
- Let your knees stay soft, not locked.
- Roll your shoulders up, back, and down 5 times.
- Take 5 slow breaths through your nose.
The point is not to “do” much. The point is to feel the difference between stiff standing and grounded standing. That small shift changes everything that comes next, because you’re not walking into the rest of the practice already tense. Keep your gaze soft and level, and let your hands rest wherever they feel natural — at your sides, on your ribs, or lightly over your belly.
Use this flow before almost anything else. It’s short, it lowers the noise in your head, and it helps you check whether you’re breathing shallowly or holding your breath without noticing.
2. Cat-Cow Into Child’s Pose
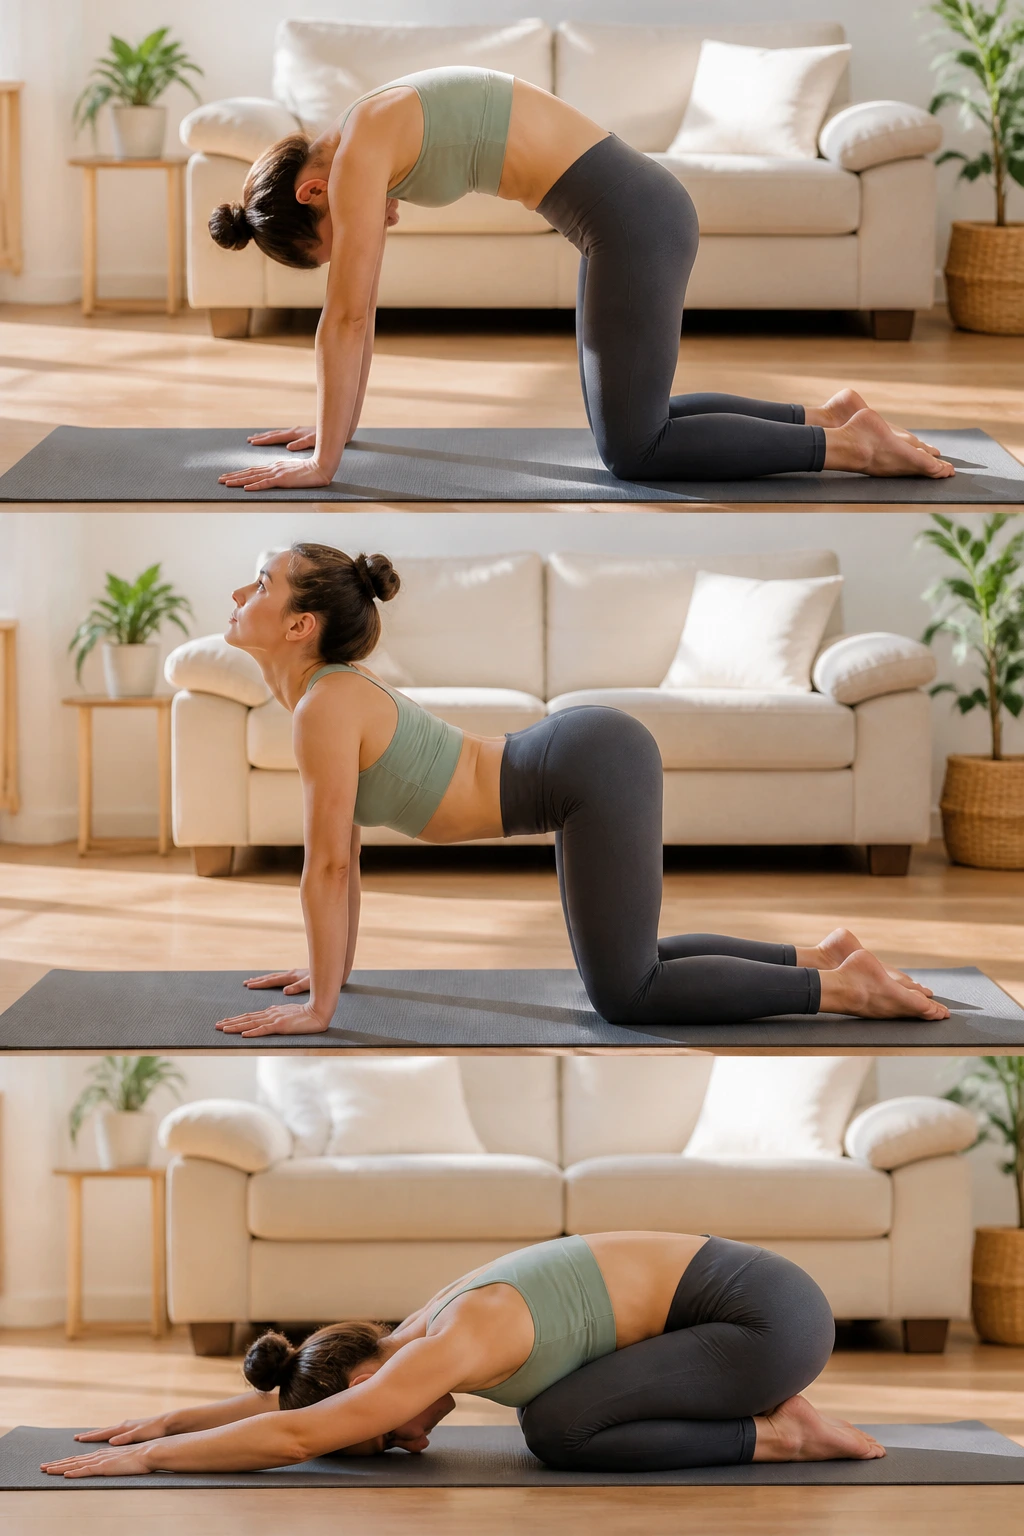
If your back feels creaky, this is the flow I’d hand you first. Cat-cow is one of those yoga movements that looks almost too simple to matter, then turns out to be incredibly useful for waking up the spine. It also gives beginners a clear rhythm: inhale to open, exhale to round.
Move from hands and knees into a few slow rounds of cat-cow, then sit back into child’s pose with your arms stretched forward or tucked beside you. The transition matters. Cat-cow warms the middle of the body, and child’s pose gives you a place to rest before you get tired.
No need to chase a huge arch in the back. Keep the movement small if that feels better, and let the breath drive the motion. If your wrists are unhappy, come down to forearms on a blanket or use fists instead of flat palms. Gentle is not lazy. Gentle is smart.
3. Tabletop Thread-the-Needle Flow
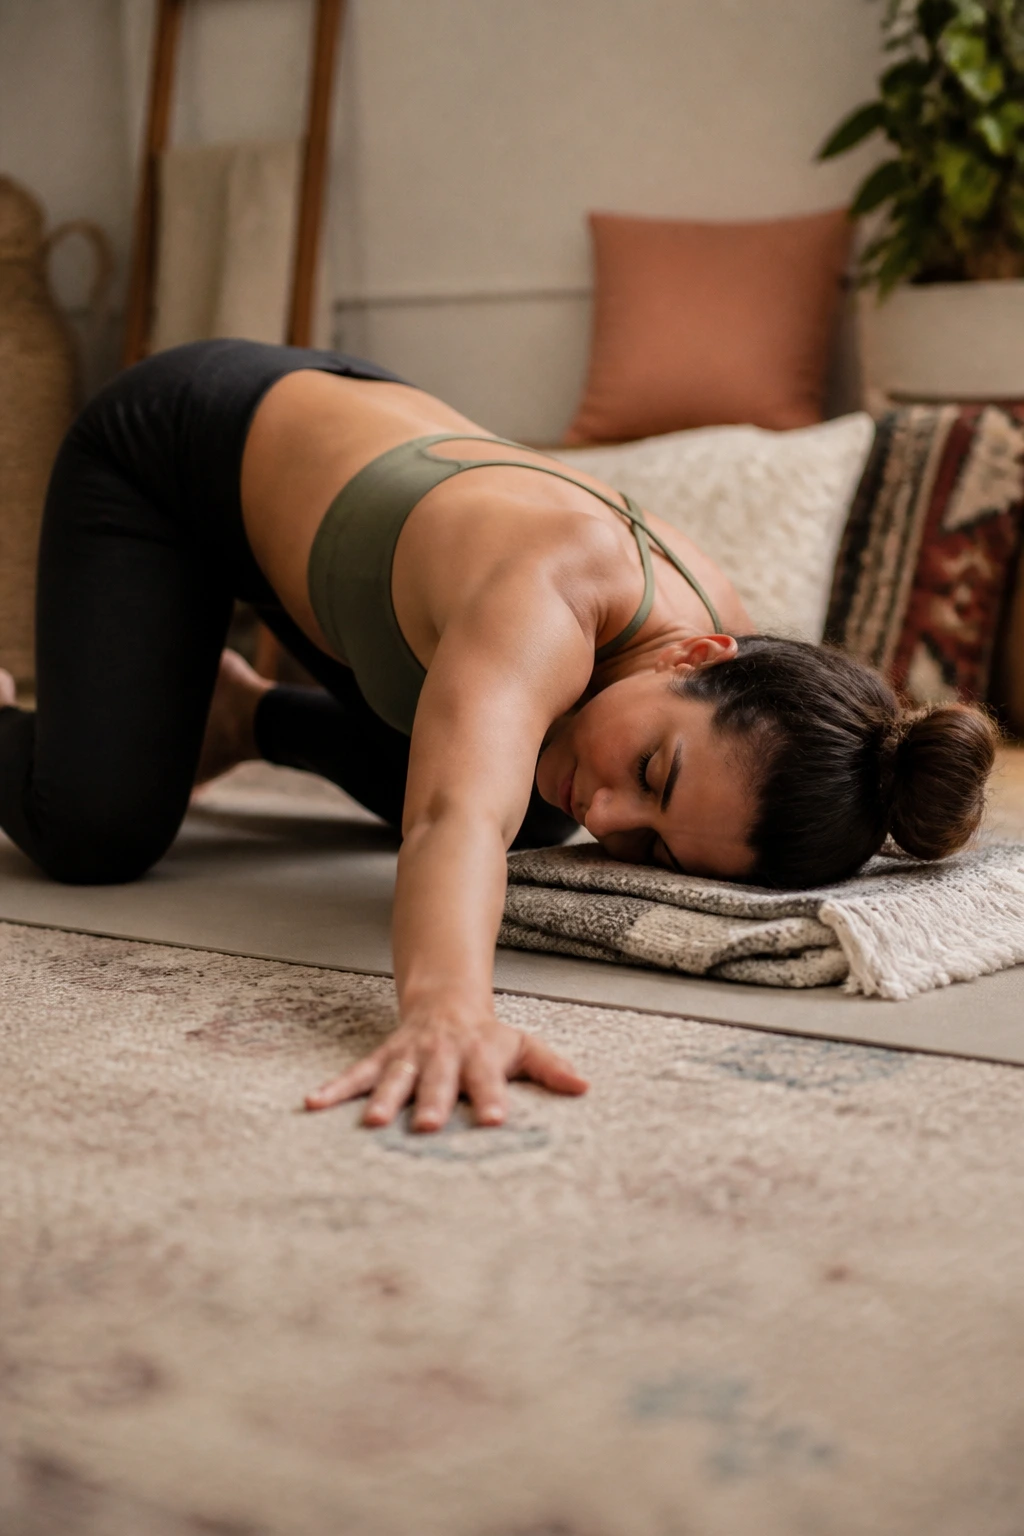
This one is for tight upper backs and shoulders that live near your ears. From tabletop, slide one arm underneath the other and rest your shoulder and cheek on the floor for thread-the-needle. Then come back to center and switch sides. It sounds tiny. It isn’t.
Why It Feels So Good
The twist opens the upper back without demanding flexibility from the lower spine, which is a nice trade for beginners. You also get a little stretch through the side body and the back of the shoulder — places most people ignore until they start feeling stiff at a desk.
A good beginner version stays low and slow. Keep your hips stacked over your knees if possible, and don’t force the reaching arm to twist farther than it wants to go. If the floor feels far away, place a folded blanket under your shoulder or head.
Try 3 slow rounds per side. You should feel roomy, not jammed. That’s the line.
4. Down Dog Walk-Out and Forward Fold
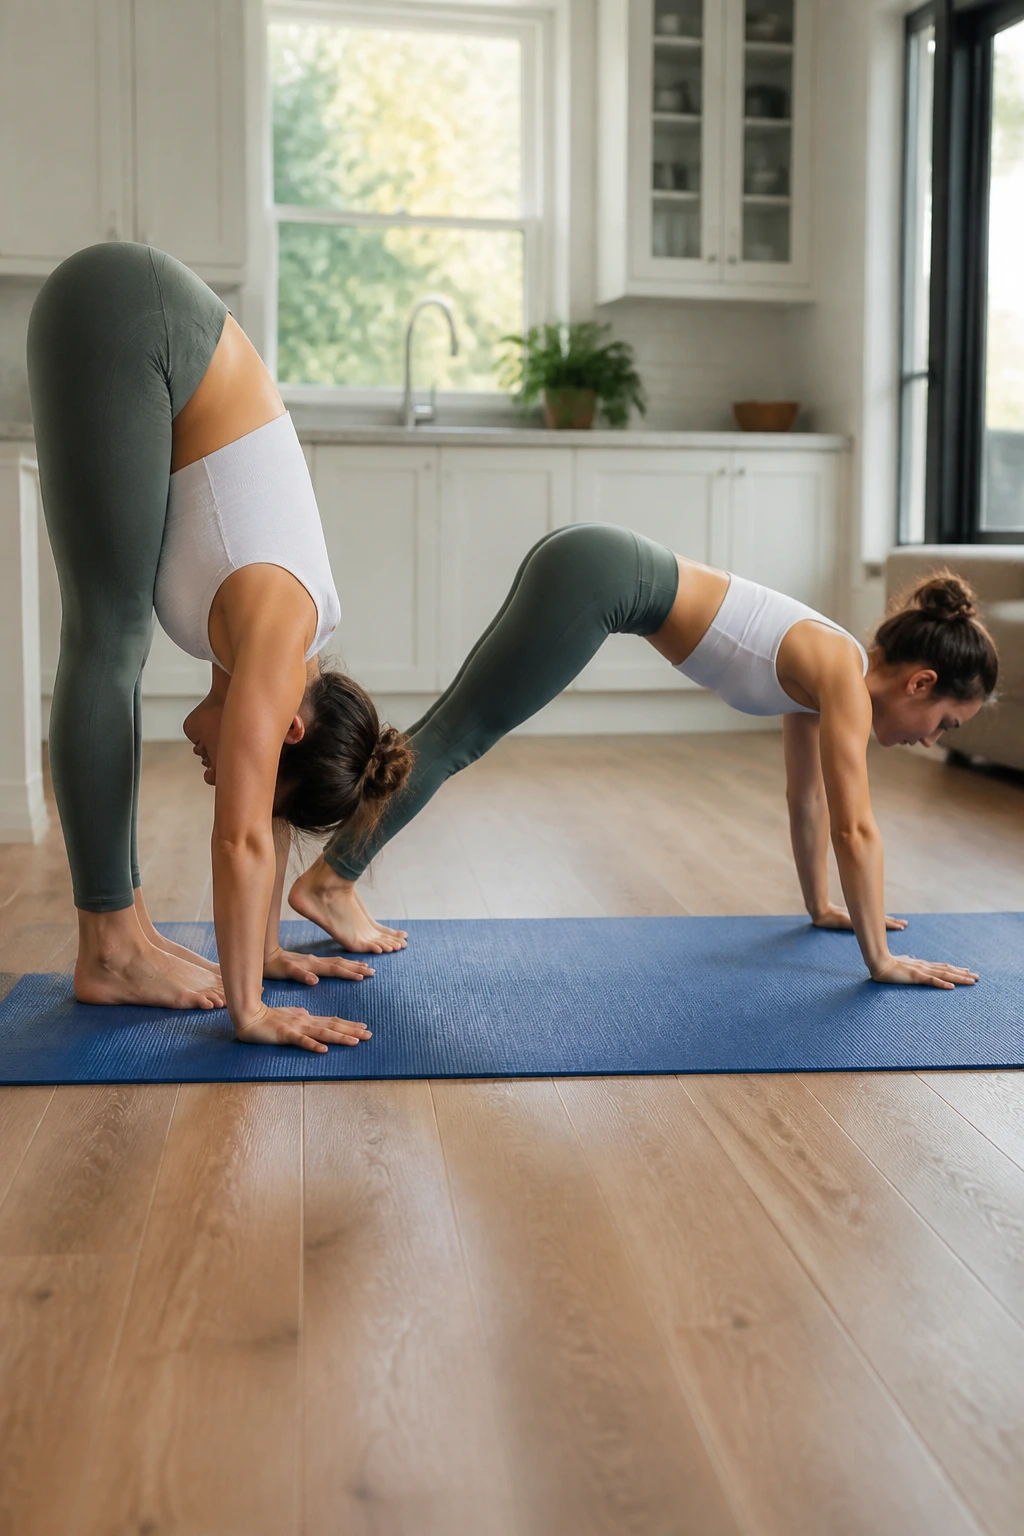
A full downward-facing dog can feel like a lot on day one, which is why I like the walk-out version. Start in a forward fold, walk your hands out until you’re in a short plank-like shape, then lift your hips a little and press back only partway. Walk the feet in and out if the hamstrings need help.
This flow teaches the shape without trapping you in it. You learn how to lengthen the spine, how to bend the knees without guilt, and how to use the hands to support the body instead of hanging off the shoulders. That last part matters. A lot.
Keep your heels lifted if that’s easier. Bend both knees as much as you need. And if your wrists feel grumpy, spend more time in the forward fold and less time in the inverted part. The goal is a smooth transition, not a perfect pose.
5. Half Sun Salutation at the Wall
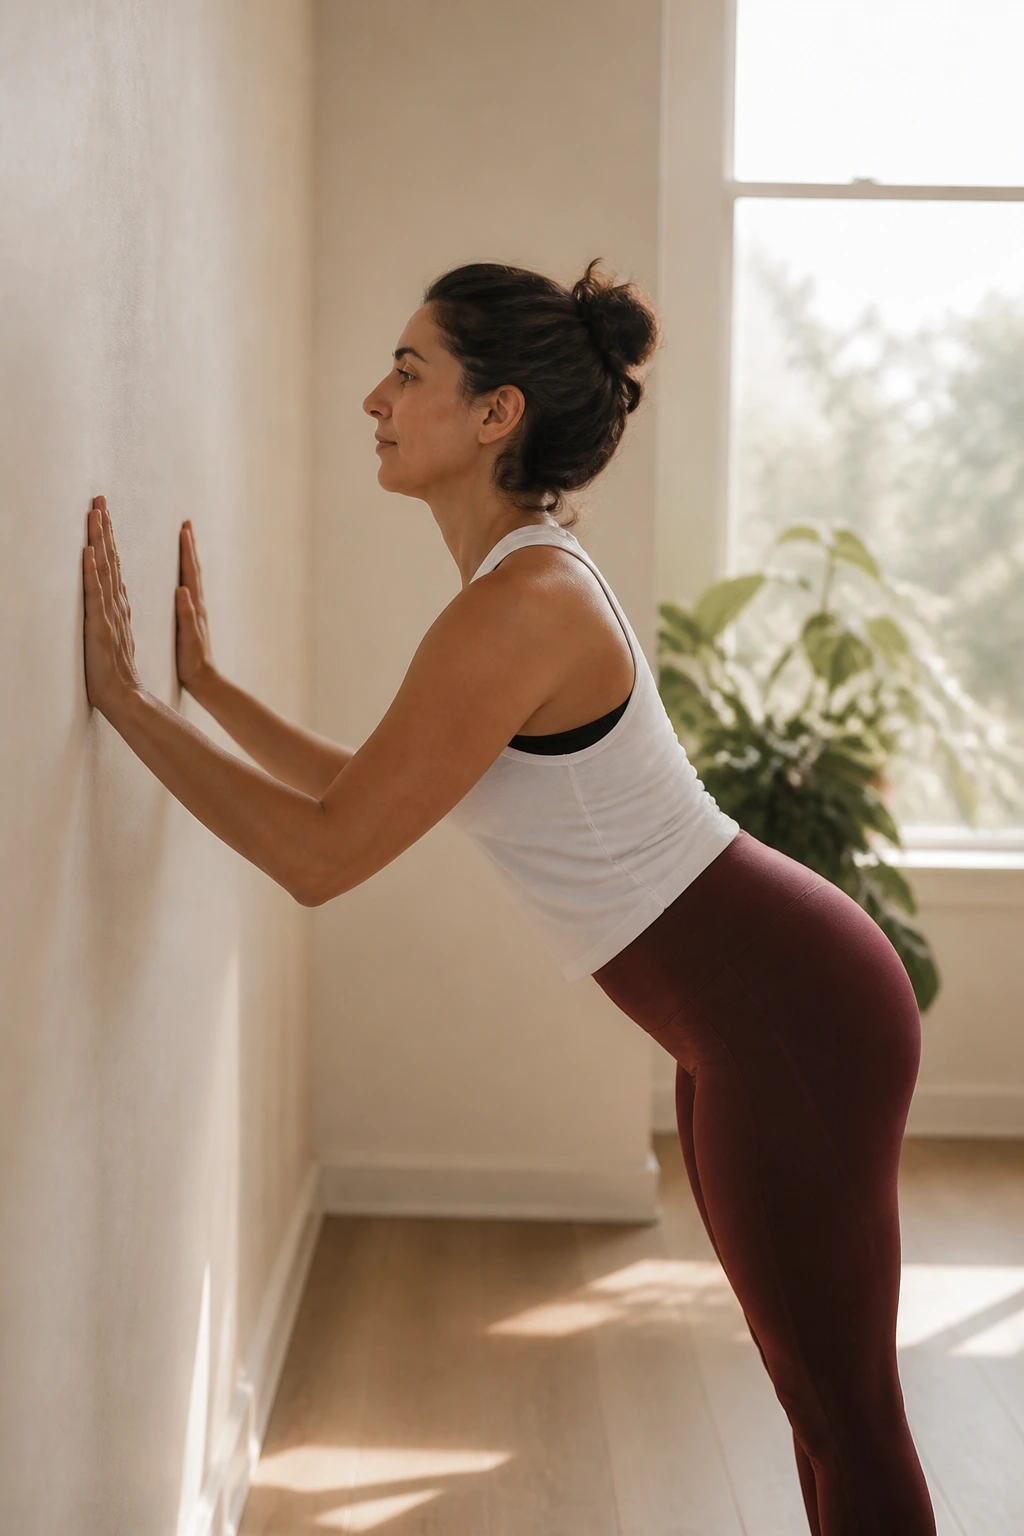
Here’s a safer way to meet the classic yoga rhythm without getting lost in the full thing. A half sun salutation at the wall gives you a clean pattern: stand, fold, half lift, rise, repeat. The wall adds support, which is a gift for anyone who feels wobbly in new spaces.
Stand an arm’s length from the wall, fold forward, and place your hands on the wall or on your thighs as you lengthen into a half lift. Come back up slowly, stacking the spine one piece at a time. After a few rounds, your body starts to learn how to move with the breath instead of against it.
Good Beginner Cues
- Keep the knees bent in the fold.
- Press the wall gently, not hard.
- Lift the chest on the inhale, not the neck.
- Stand up through the legs, not the low back.
It’s simple. That’s why it works.
6. Low Lunge and Crescent Reach
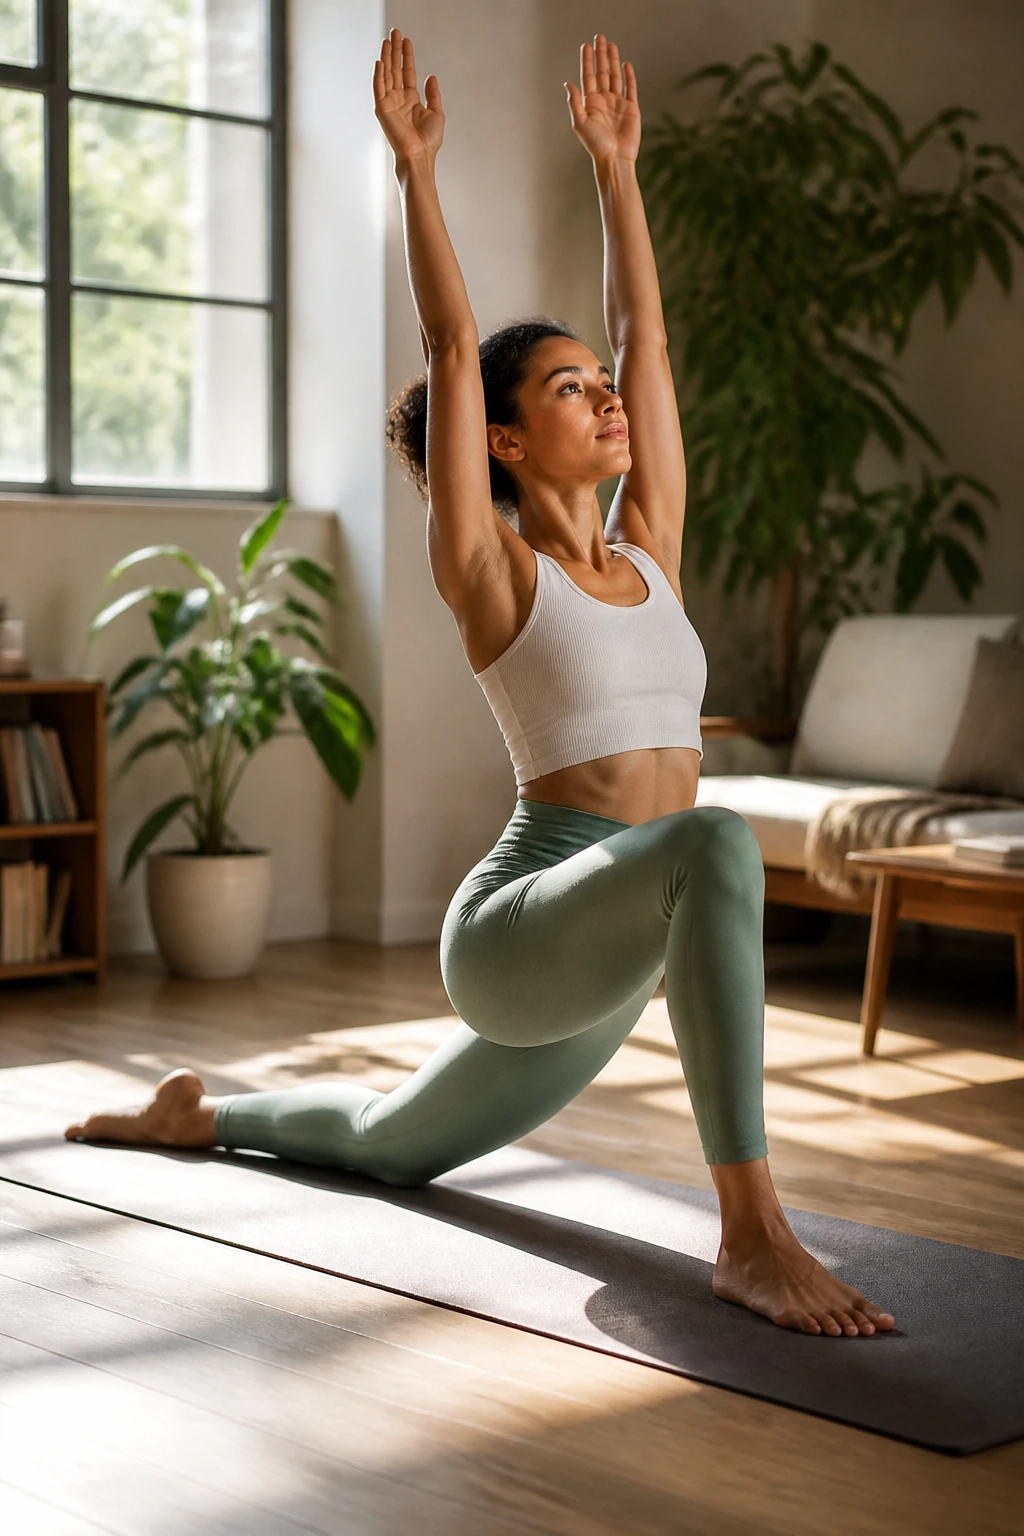
Low lunge is the kind of pose that looks dramatic and feels very modest when you first try it. One knee is down, the other foot is forward, and the whole thing is basically a hip opener with manners. If your hips are tight — and most beginners’ hips are — this is where the good stuff starts.
Step one foot forward between your hands, lower the back knee, and stay upright with your hands on blocks or on the front thigh. Reach the arms overhead only if your ribs can stay quiet. If they flare, keep the hands low and work with breath first.
I like this flow because it doesn’t demand much balance. You can just breathe, sink a little, then come out. That alone is enough. Use a folded blanket under the back knee if the floor feels hard, and keep the front knee roughly over the ankle rather than jammed far forward.
7. Warrior I Without the Wobble
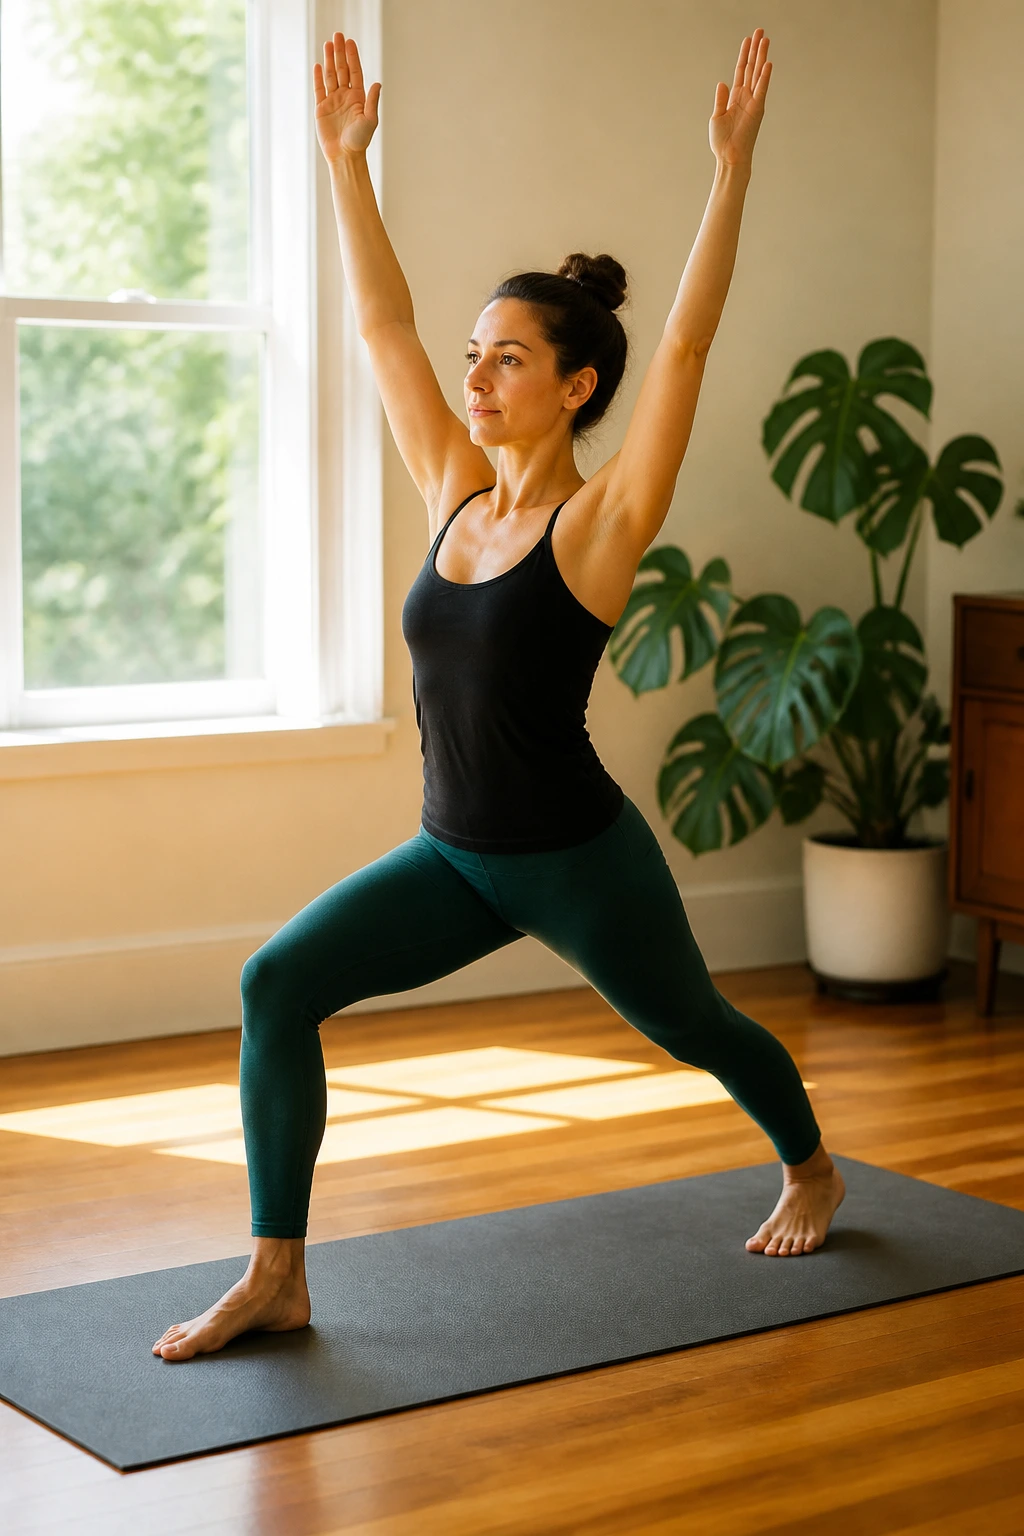
Warrior I scares beginners less when you strip it down. Shorten the stance. Keep the back heel lifted if that helps. And do not try to “square” your hips so aggressively that the pose turns into a wrestling match with your pelvis.
From a lunge, root through the front foot and rise into Warrior I, bringing the arms up if that feels stable. The back foot angles out a little, and the back leg stays active. That’s the big lesson here: this pose is as much about the feet as it is about the torso.
A beginner-friendly version should feel strong but not strained. If your shoulders are tight, keep the hands in a cactus shape or bring them to prayer. If your balance is shaky, look straight ahead instead of up. Steady beats fancy every time.
8. Warrior II With Side Stretch
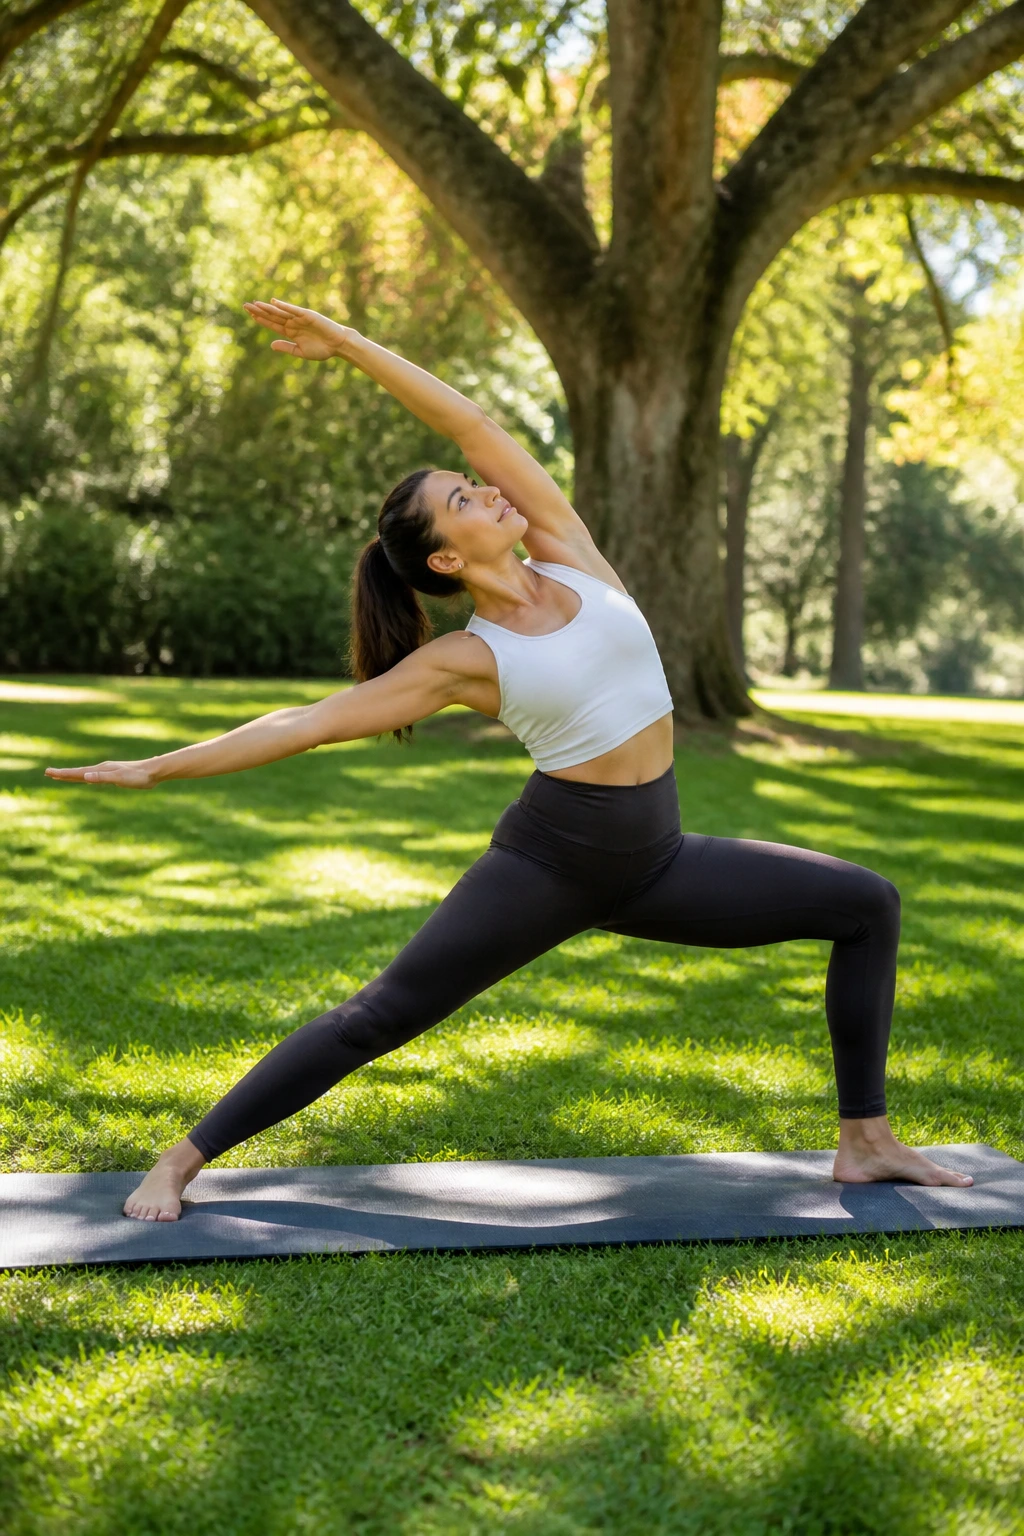
Warrior II gives you a different lesson: how to open the body without collapsing the front knee or spilling the chest forward. It’s broader, calmer, and a little kinder than Warrior I for many first-timers. The stance is open, the arms stretch in opposite directions, and the gaze moves over the front hand.
What I like here is the clear shape. You can see whether you’re sinking too deep, leaning too far, or letting the front knee drift inward. Those mistakes are easy to spot and easy to fix. Stand shorter than you think you need to. A narrow stance is often better for beginners.
Add a side stretch if you want a little more length through the ribs. Keep the back hand on the back leg or reach it overhead. Don’t chase depth in the front thigh. You want a clean line, not a quivering hero pose.
9. Triangle Pose and Short Side Bends
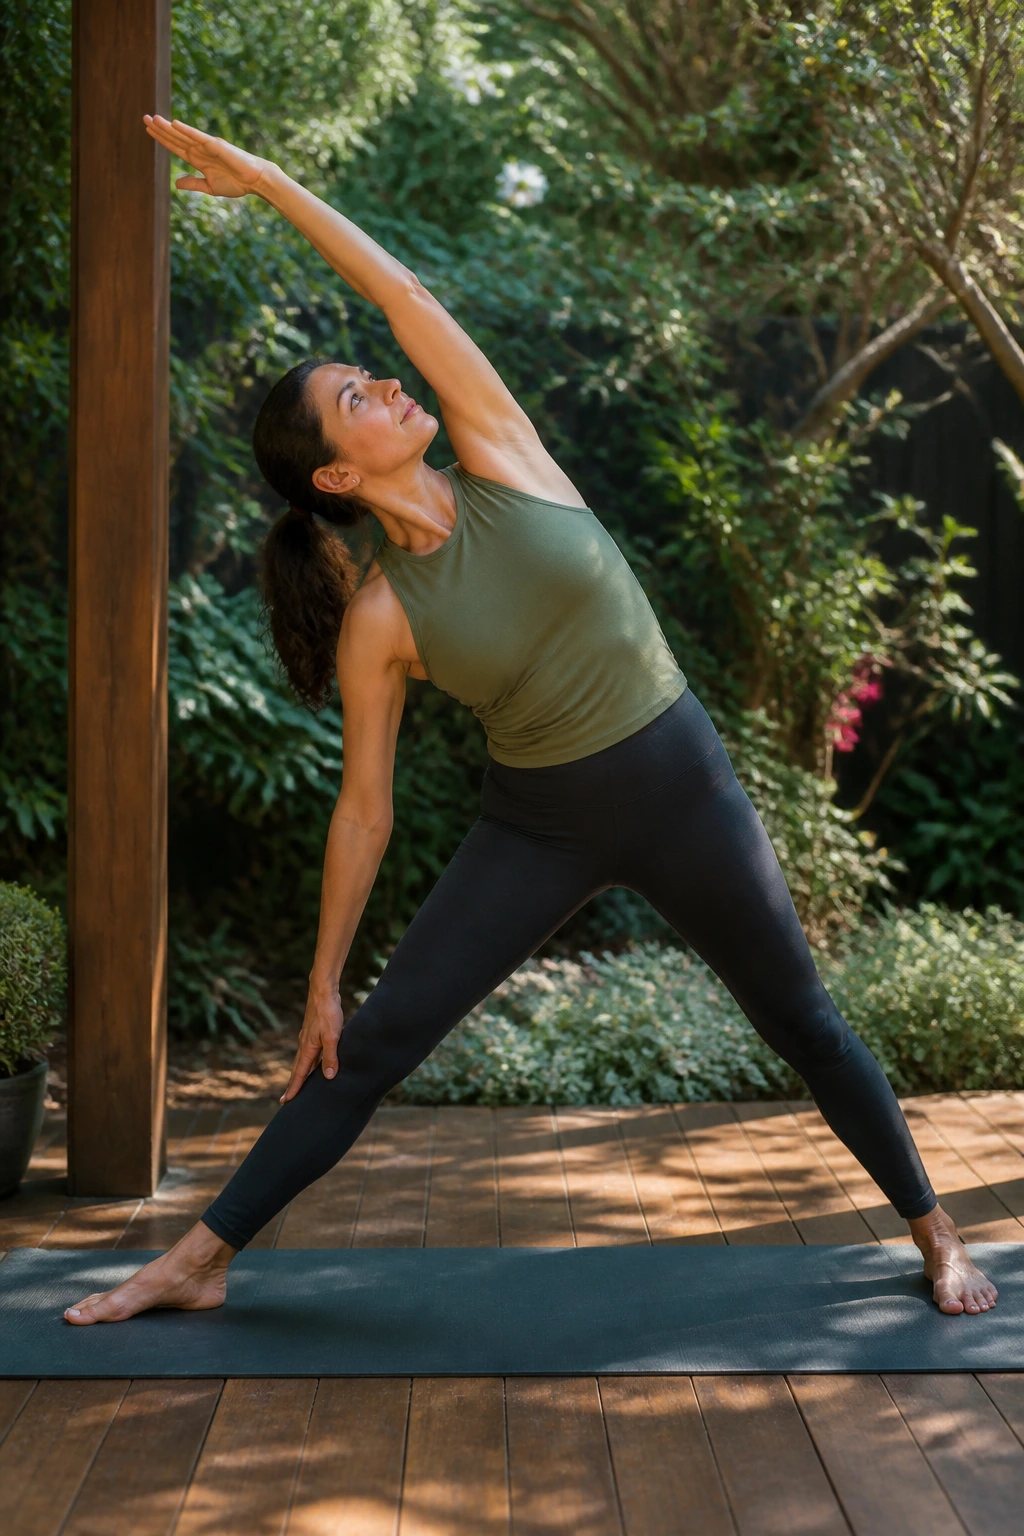
Triangle pose looks elegant in photos, but for beginners it’s mostly a lesson in patience. The real work happens in the setup: long stance, front leg straight or almost straight, hips open enough to breathe, and one hand sliding down the shin or to a block. That block is not cheating. It’s sanity.
Why This One Helps
Triangle teaches side-body length, which most people miss because they keep folding forward instead of outward. It also makes you pay attention to where your pelvis is going. If you twist too much, the pose turns messy fast. If you stay a little higher and use a block, it gets clearer.
A short side bend can come after the triangle, with the top arm reaching overhead for a few breaths. Keep your chest open and your gaze soft. This should feel like space across the waist, not a tug-of-war at the hamstring.
10. Chair Pose to Forward Fold Reset
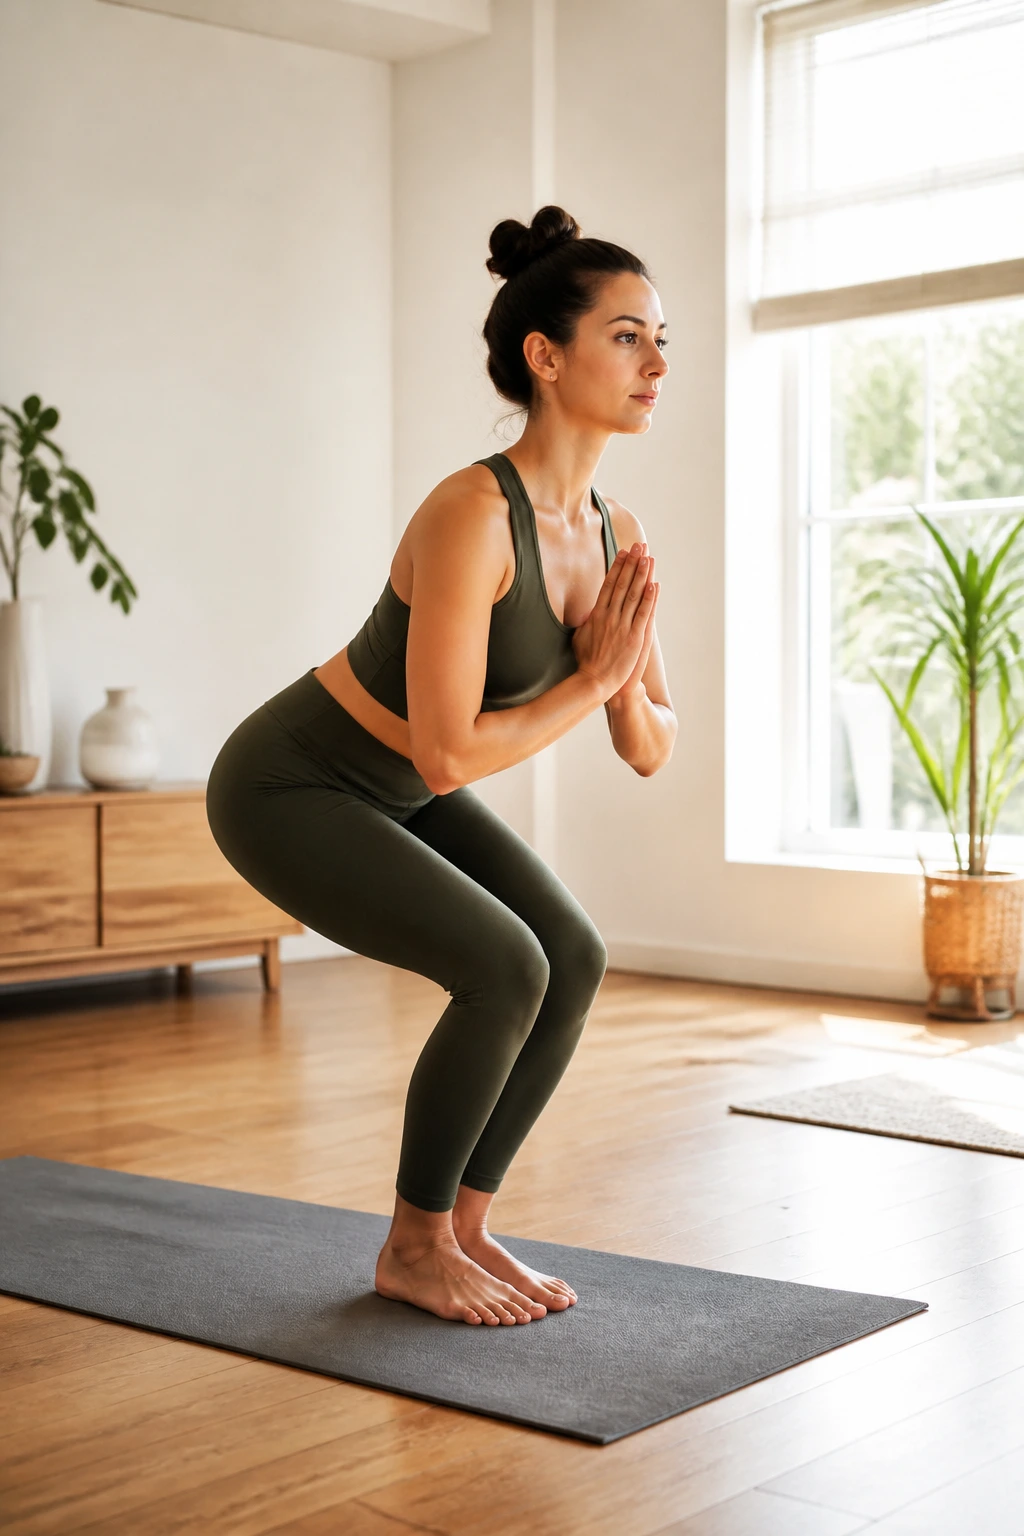
Chair pose is humble strength training wearing yoga clothes. It asks you to sit back as if touching a chair that isn’t there, then stand up again and fold. That’s it. But within that little loop, you get legs, breath, and a reminder not to lock your knees when life gets hard.
Bend the knees, send the hips back, and keep the chest lifted in Chair Pose for just 3 to 5 breaths. Then fold forward and let the head hang. If your lower back complains, don’t go deep. Sit back less and keep the spine long. If your arms fatigue, place them at heart center instead of overhead.
The reset matters as much as the pose. A forward fold after chair lets your breath settle and gives the legs a chance to stop shouting. Tiny effort, big payoff. That’s often how beginner yoga works.
11. Bridge Pose and Knees-to-Chest
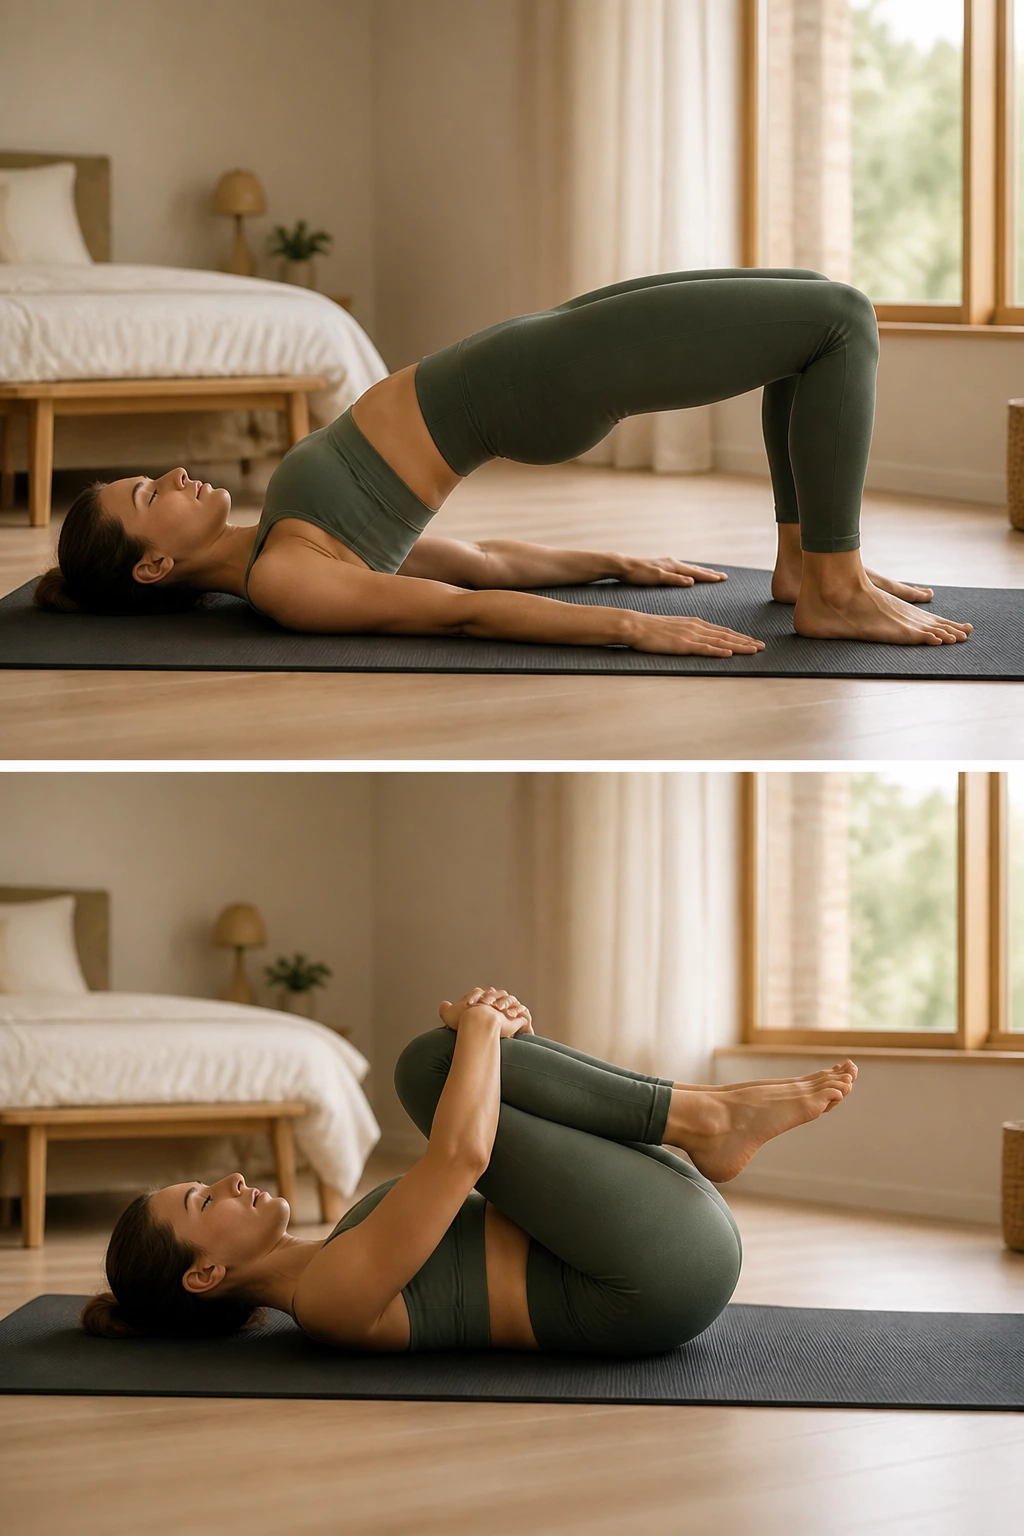
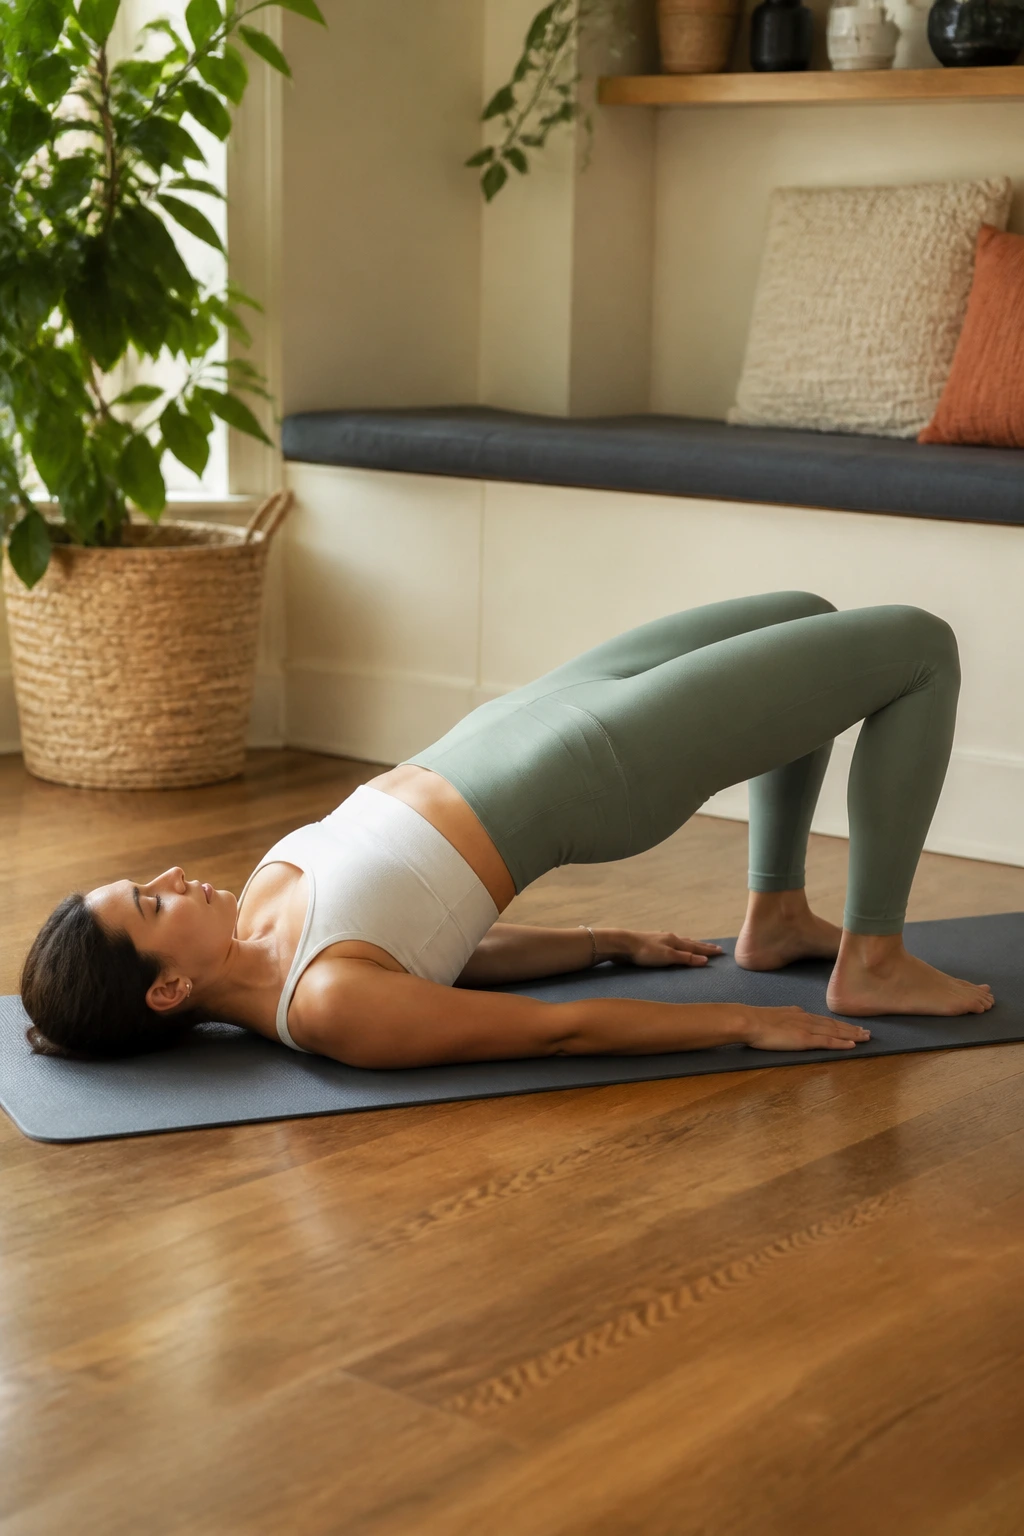
Bridge is one of the nicest backbends for new practitioners because the floor does half the work. Lie down, bend your knees, and press your feet into the mat as you lift the hips. The neck stays long, the knees track forward, and the chest opens without any wild drama.
Use a bridge that feels smooth and controlled. Hold for 3 breaths, lower with care, and then hug the knees into the chest. That little rest at the end keeps the lower back from feeling overworked. If your shoulders feel pinched, don’t lift quite as high. If your hamstrings cramp, walk the feet a little closer to your seat.
This is a good flow for people who sit a lot. It wakes up the backside, and it feels better than it has any right to.
12. Reclined Figure Four for Tight Hips
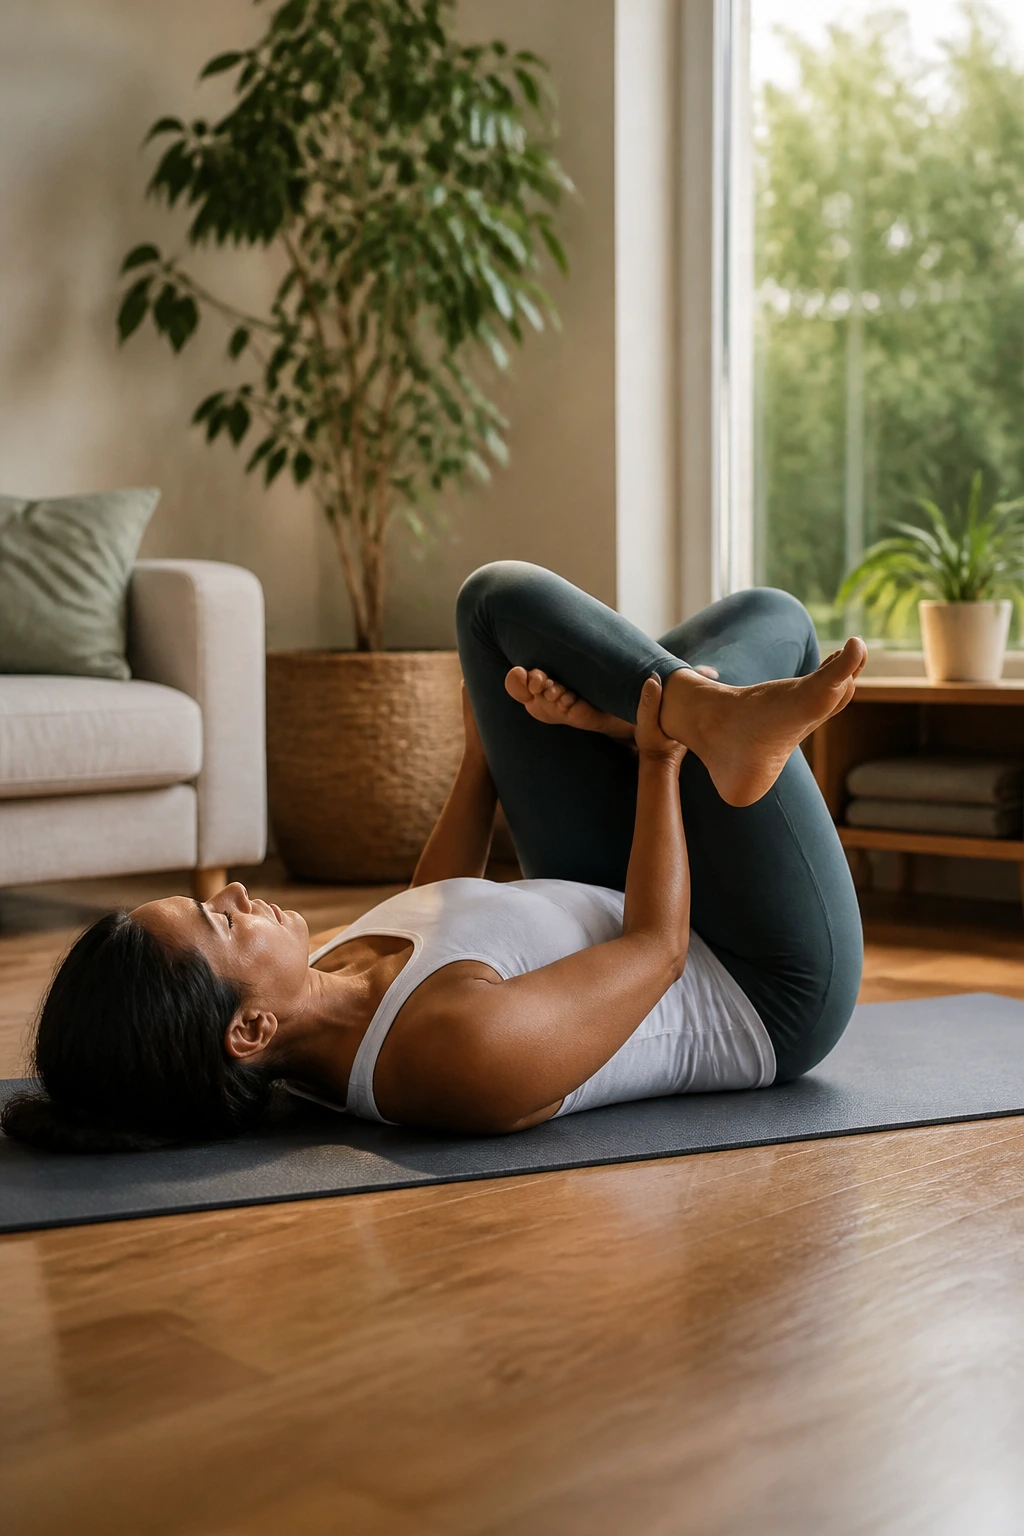
Tight hips can make beginners feel like every seated pose is a punishment. Reclined figure four fixes that by putting the stretch on the floor, where gravity can help instead of fight you. Lie on your back, cross one ankle over the opposite thigh, and draw the legs toward you if it feels comfortable.
How to Keep It Comfortable
- Flex the crossed foot to protect the knee.
- Keep the head down.
- Hold behind the uncrossed thigh, not on the shin.
- Stop before you feel knee pain.
The stretch should sit in the outer hip and glute, not in the knee joint. That’s the tell. If the knee feels crunchy or strained, back off and make the shape smaller. A lot smaller if needed.
You can stay here for 5 to 8 breaths per side, which is usually more than enough for a beginner session.
13. Seated Forward Fold With Bent Knees
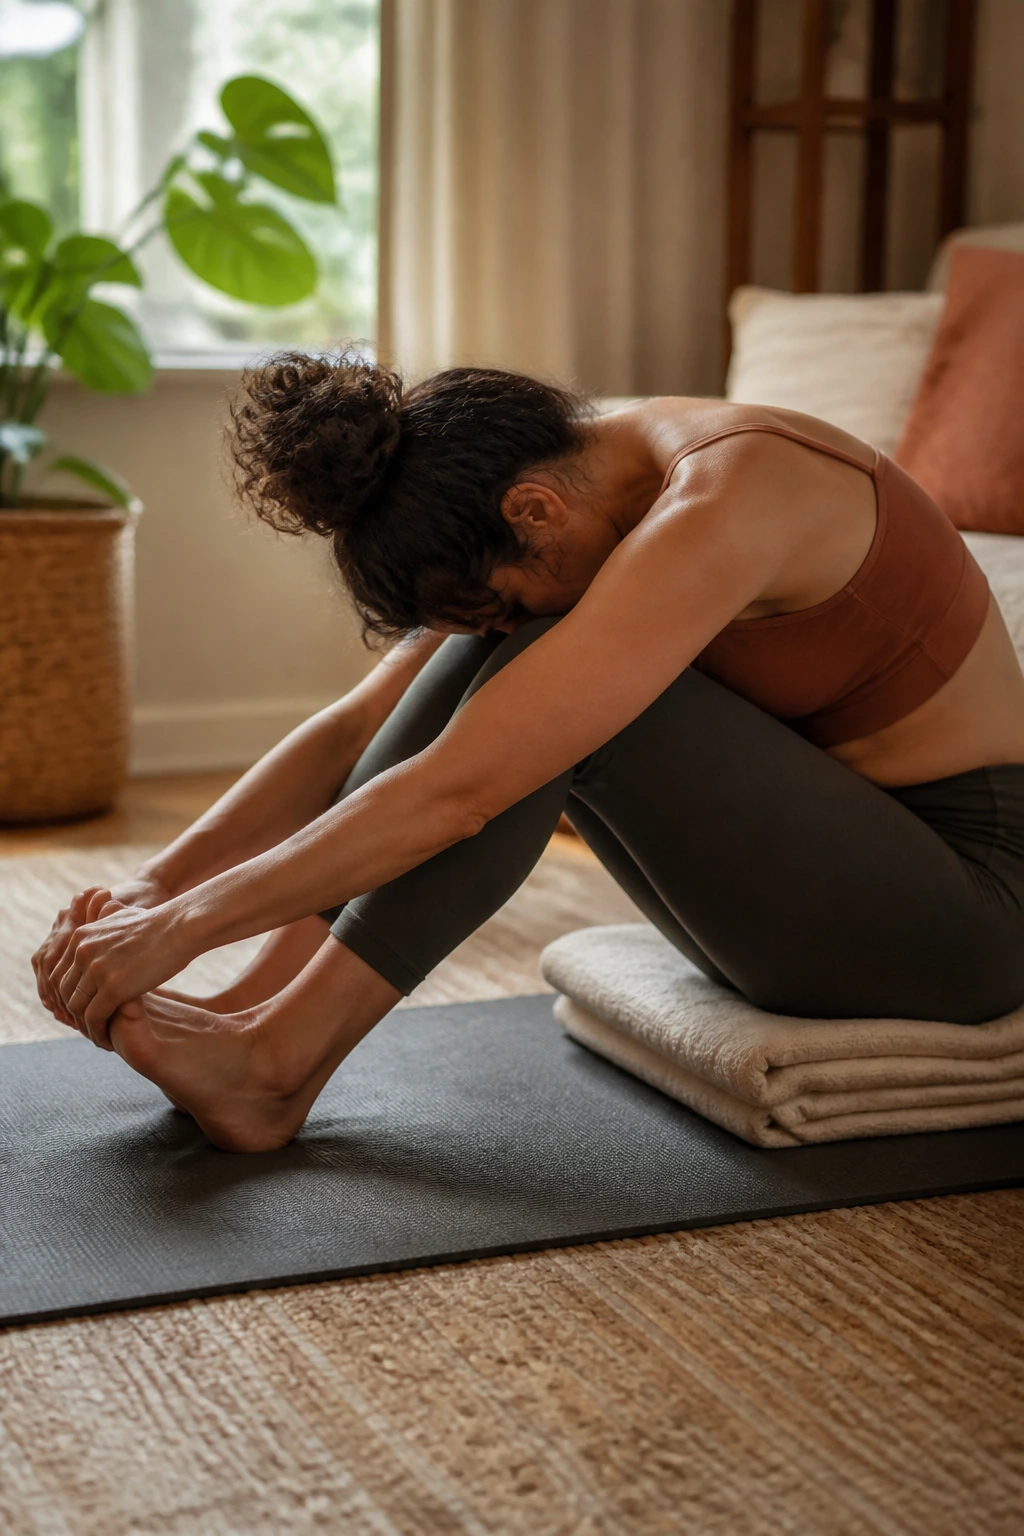
People love to yank themselves into a straight-legged seated fold and then wonder why yoga feels miserable. Don’t do that. Bend the knees. Sit on a folded blanket if your pelvis tips backward. Reach for the shins, ankles, or feet — whichever keeps the spine lengthened.
A beginner seated forward fold should feel like a slow exhale. The thighs release a little, the back body stretches a little, and the head can stay lifted if dropping it feels too much. I prefer this version to the overdone, locked-knee version because it teaches honesty. If the body says “not that far,” listen.
Stay for 5 slow breaths and resist the urge to force depth. A smaller fold with a long spine beats a deeper fold with a strained back. Every time.
14. Supine Twist and Wind-Down Breathing
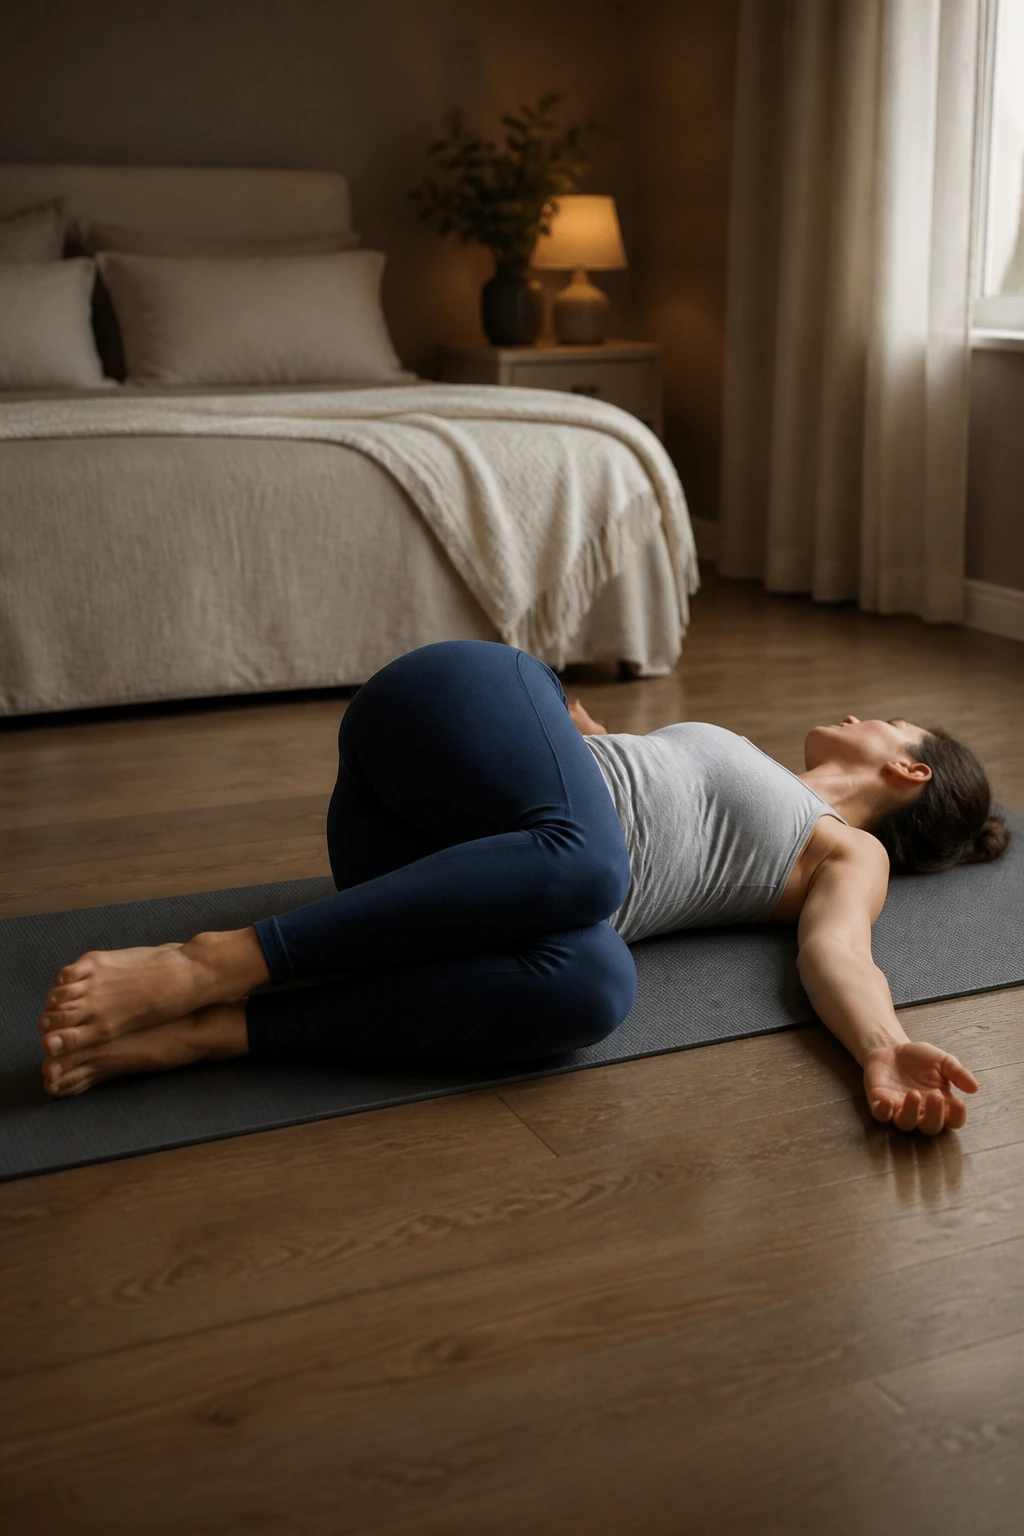
A twist on the floor is a clean way to finish a beginner practice because it asks so little from the body. Lie on your back, bring both knees in, and let them fall to one side while your shoulders stay grounded. Turn your head the opposite way if your neck likes that.
The shape is simple. The effect is bigger than it looks. Your low back gets a gentle release, your belly gets a little space, and your breath slows down because the body finally has permission to stop working. If both knees together feel too intense, stack a pillow between them or keep the top knee lifted slightly.
Hold each side for several breaths. No rush. If the twist feels cranky, make it smaller and breathe there. Restorative does not mean passive; it means supported.
15. Sphinx Pose for a Gentle Backbend
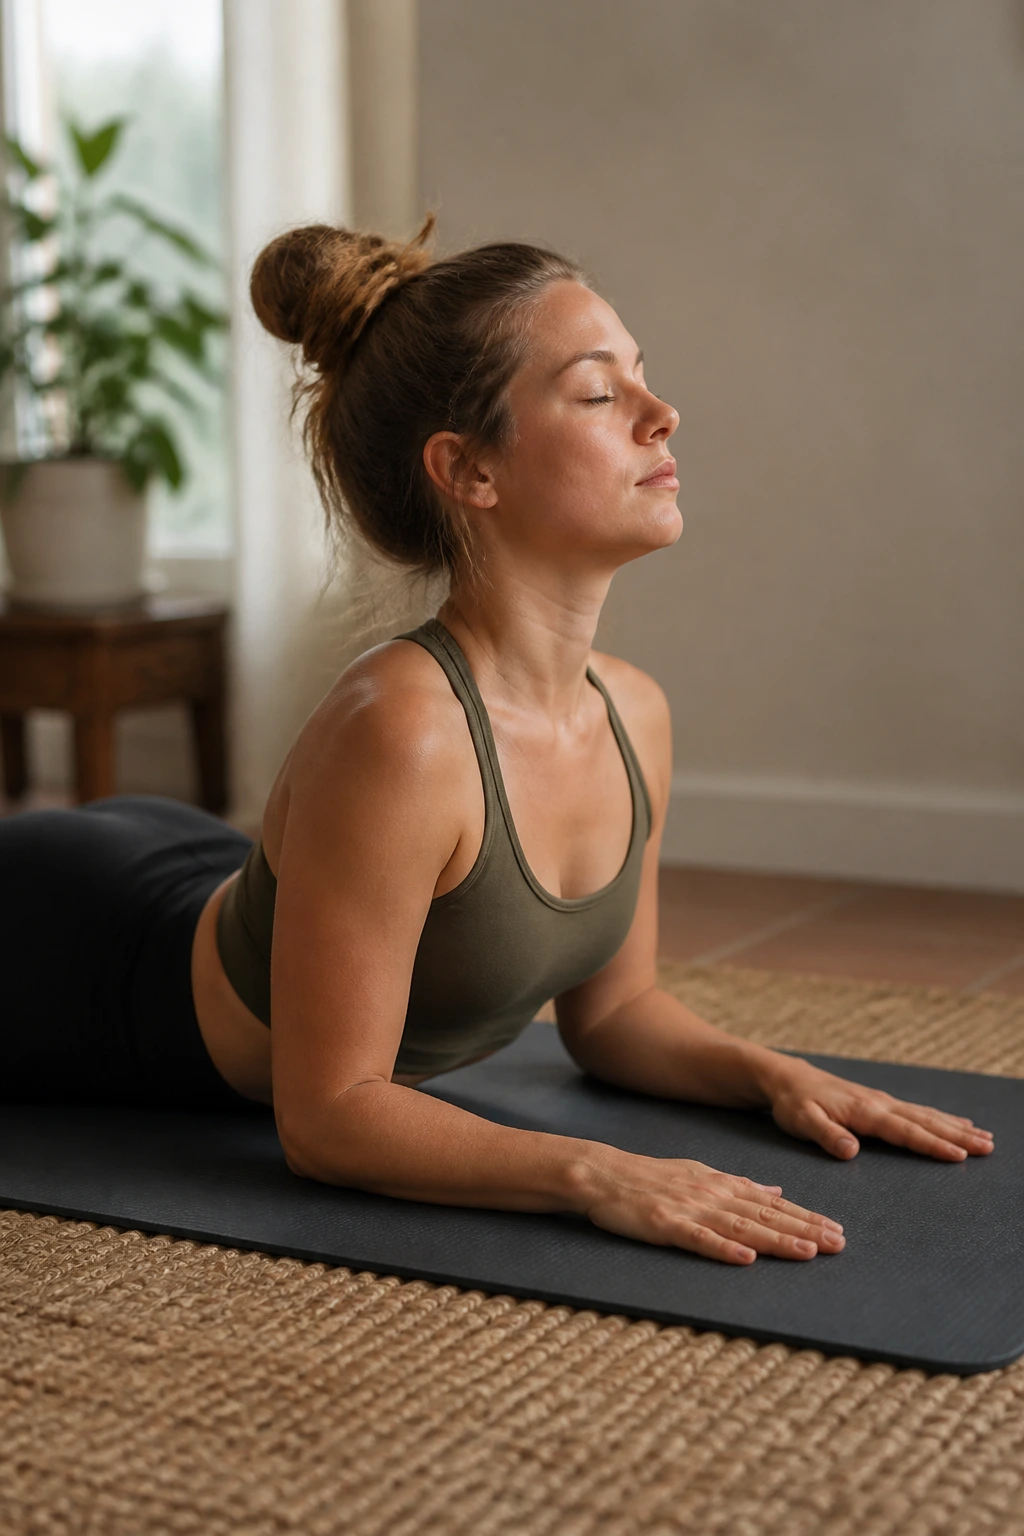
Sphinx is the backbend I trust most with brand new yogis. You lie on your belly, prop onto your forearms, and let the chest open without forcing a huge arch in the lower back. It’s calm. It’s sturdy. It doesn’t ask you to be flexible before you are ready.
Keep the elbows under the shoulders and the forearms parallel. Press the pubic bone lightly into the floor and lengthen the tailbone away. If you feel a pinch in the low back, lower down a bit or widen the forearms. If the shoulders creep up, slide them away from the ears.
This pose pairs well with slow belly breathing. A few breaths here can undo the slumped feeling that builds up from screens, commuting, or plain old stress. It’s a quiet pose, and I mean that in the best way.
16. Sun Salutation A, Simplified
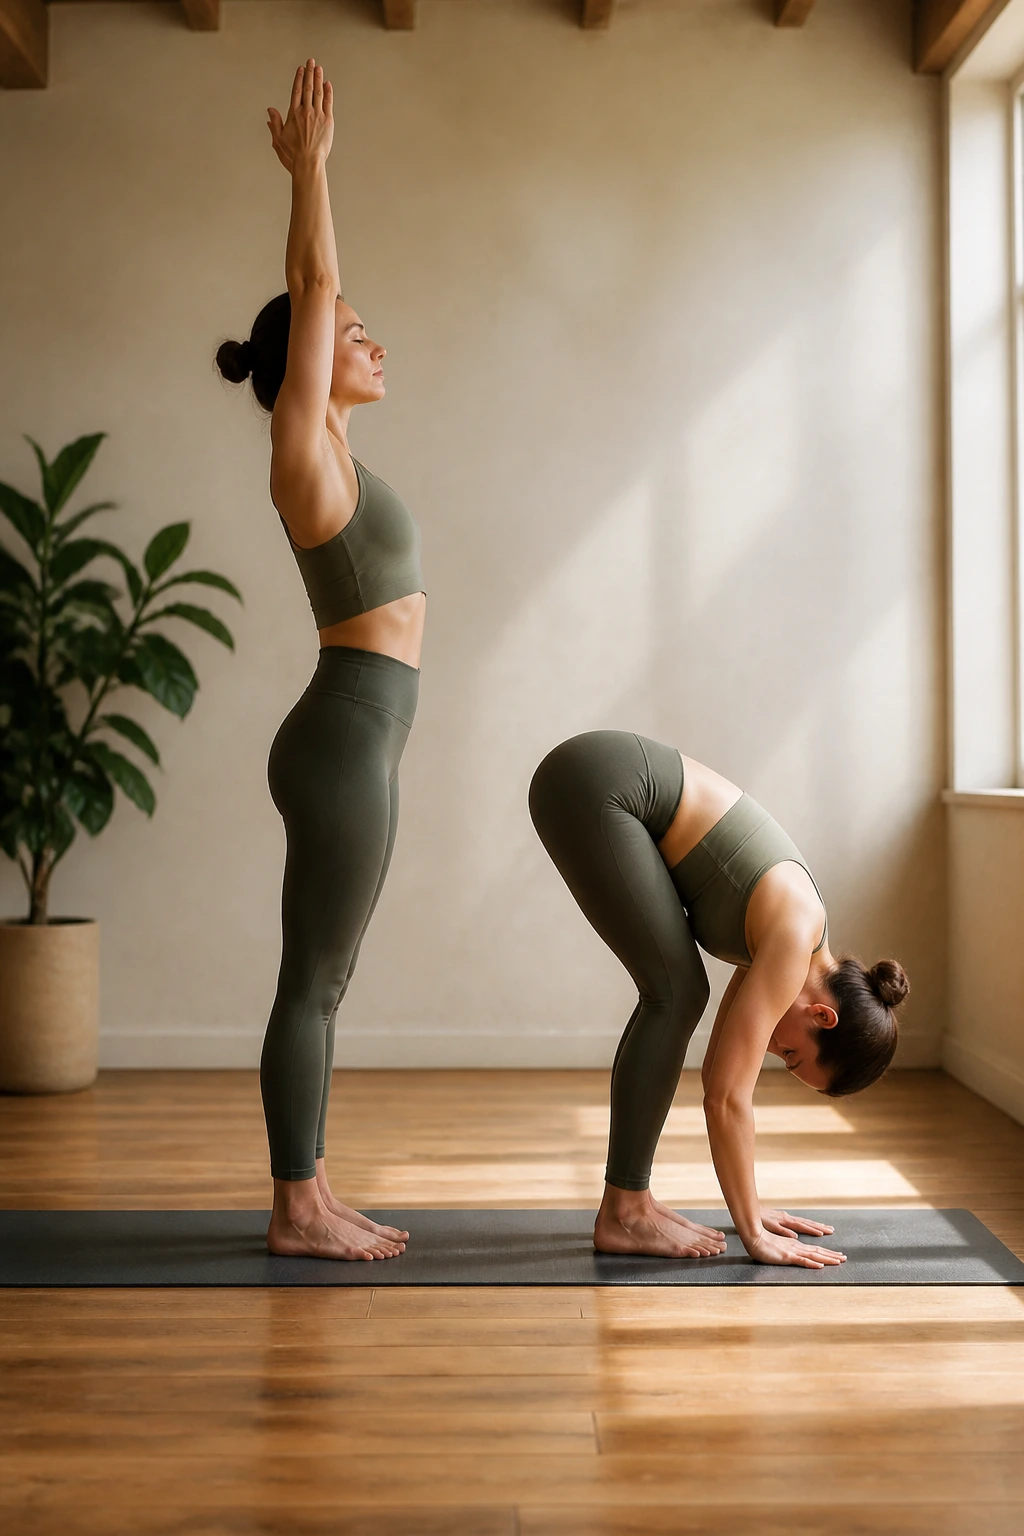
A lot of beginners hear “sun salutation” and picture something fast, airy, and impossible. Skip that version. The simplified Sun Salutation A is slower, smaller, and far more useful. Think standing, fold, half lift, step back, lower to the floor, gentle backbend, then walk back up.
A Beginner Pace That Actually Works
- Stand in Mountain and lift the arms.
- Fold forward with bent knees.
- Half lift with hands on shins or blocks.
- Step one foot back, then the other.
- Lower knees first if needed.
- Lie down to Sphinx or a small cobra.
- Press back and return to standing.
Move with the breath, but keep the pace slow enough that you can always tell what your body is doing. If stepping back feels clumsy, step one foot back at a time and keep the knees down. The flow is still valid. Smooth matters more than speed.
17. Tree Pose and Standing Balance
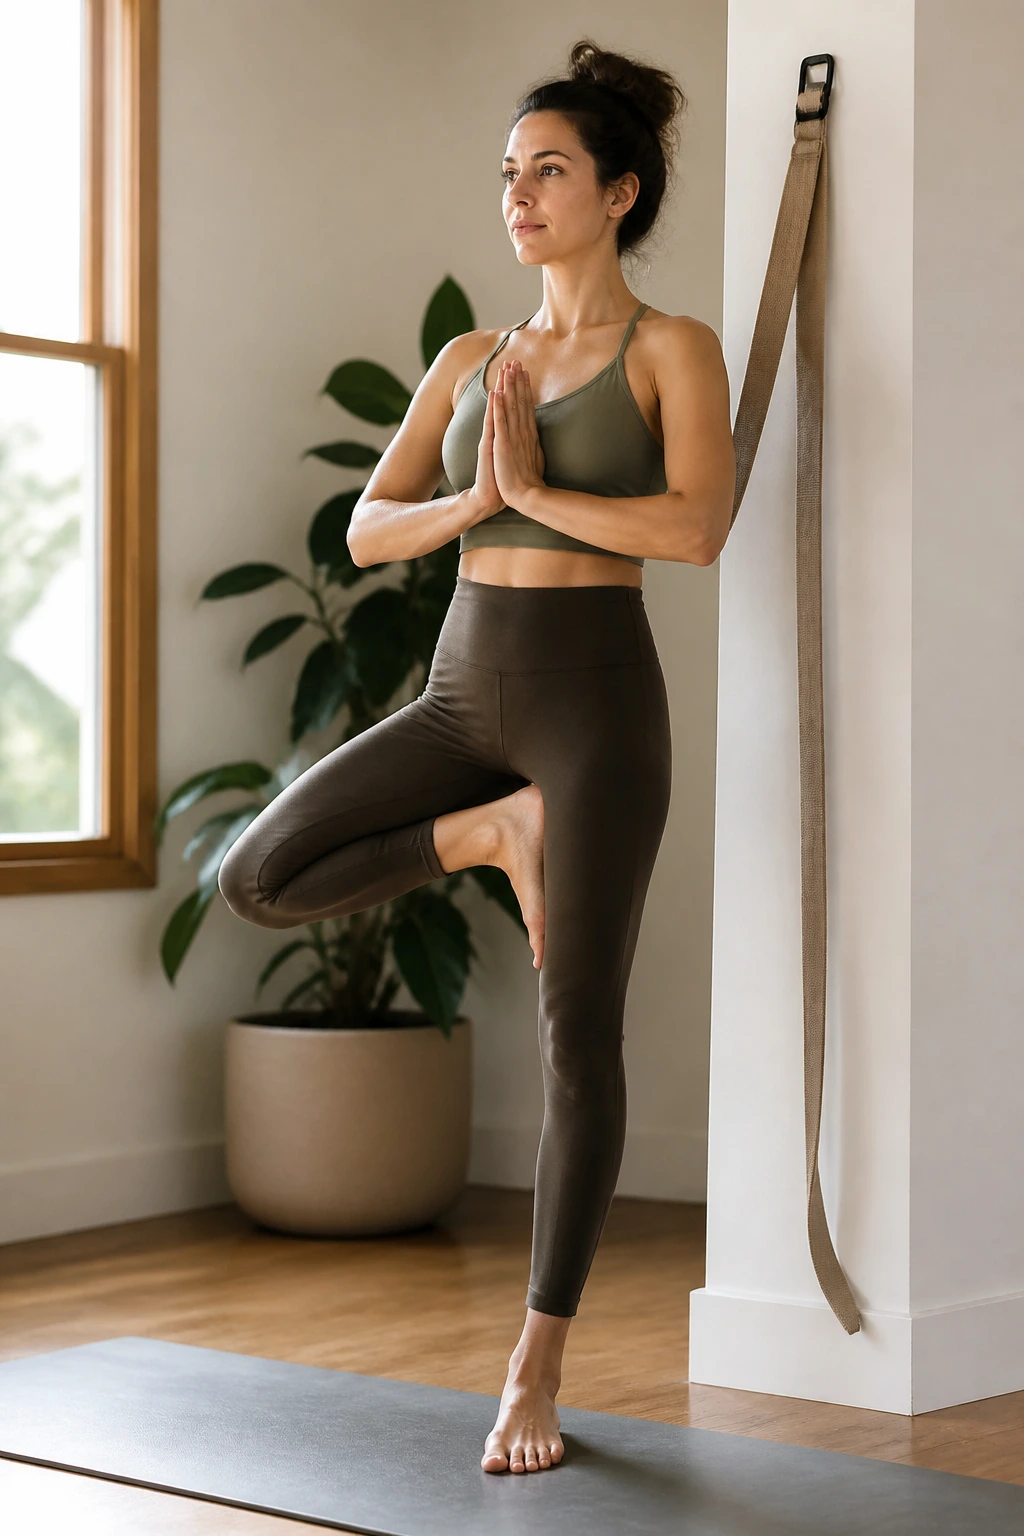
Tree pose can feel silly the first time, and that’s fine. You’re standing on one leg, one foot is resting on the ankle or calf, and your hands can stay at heart center or reach up. The point is not to look serene. The point is to notice how much the standing foot has to do.
Pick a spot on the wall and keep your eyes there. That alone helps more than people expect. If balance slips, touch a finger to the wall. If the lifted foot keeps sliding off the standing leg, place it lower — ankle is easier than calf. No one gets bonus points for wobbling harder.
This is a good flow for building quiet confidence. Not the loud kind. The kind that says, “I can stay here for 5 breaths without chasing perfection.”
18. Wide-Knee Hip Opener on the Floor
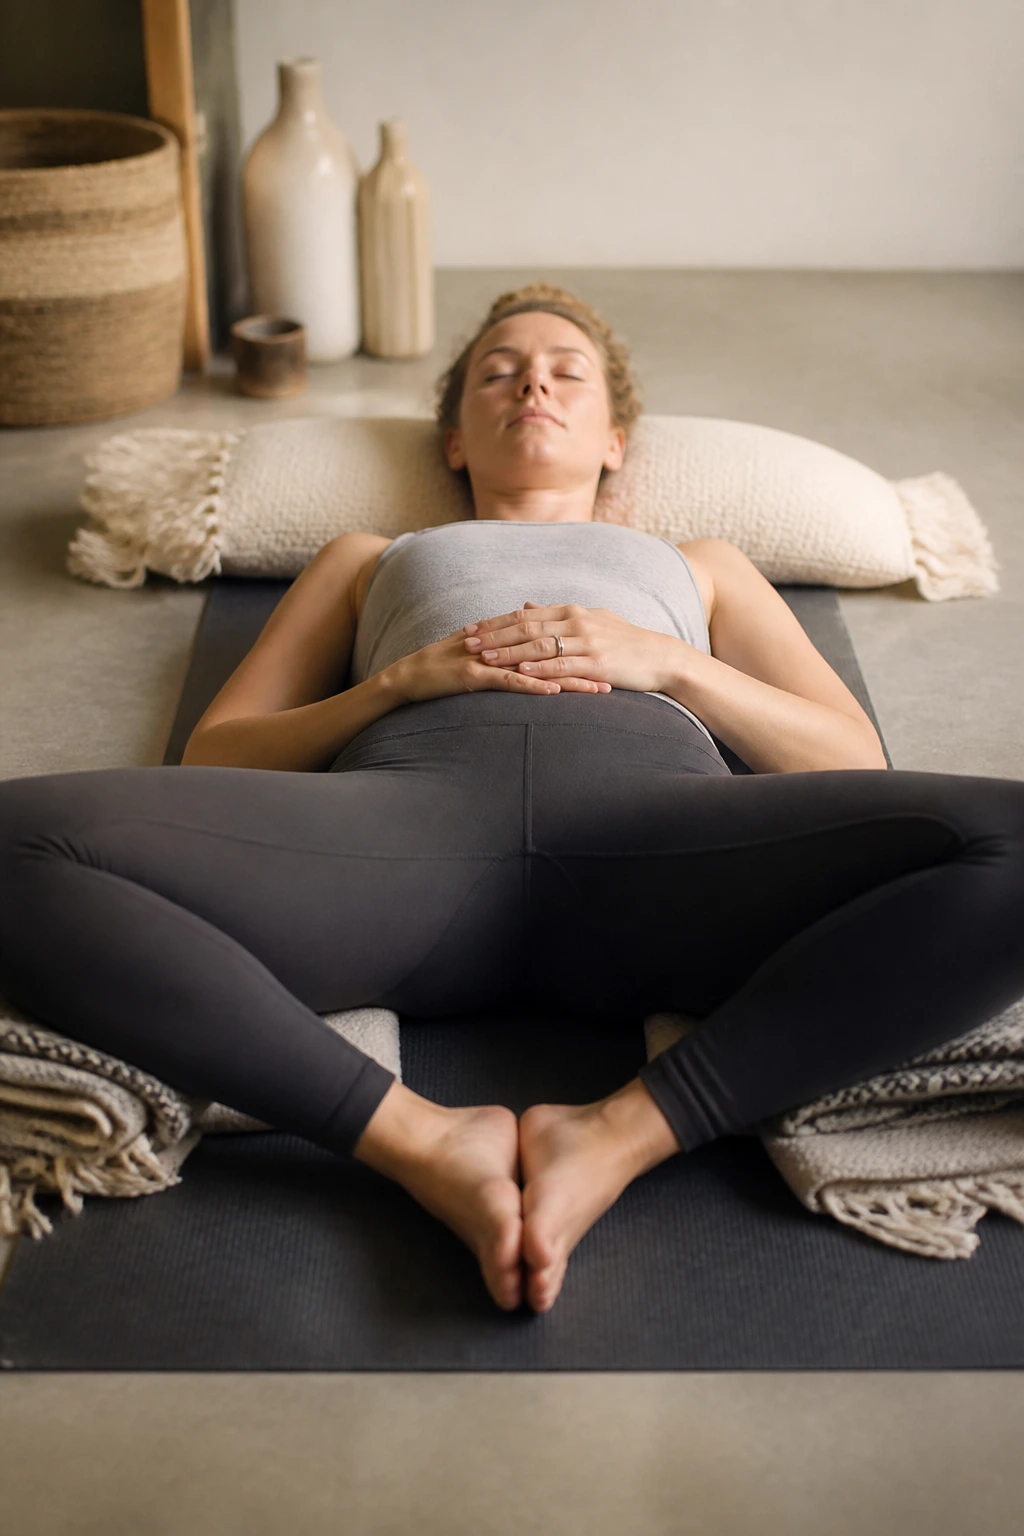
This floor-based hip opener is a relief after all the standing work. Come onto your back, bring the soles of the feet together, and let the knees drift open into a supported butterfly shape. If the groin feels tight, place blocks or pillows under the thighs.
The nice thing about floor hip openers is that they do not rely on balance or coordination. You can breathe, soften, and let gravity do its part. Beginners often try to force the knees down. Don’t. That just irritates the hips and makes the stretch feel like a dare.
Best Way to Use It
- Hold for 8 to 10 breaths.
- Keep the shoulders relaxed.
- Rest a hand on the belly.
- Come out slowly, with the knees supported.
It’s a gentle one, but it works.
19. Desk-Reset Flow for Neck and Shoulders
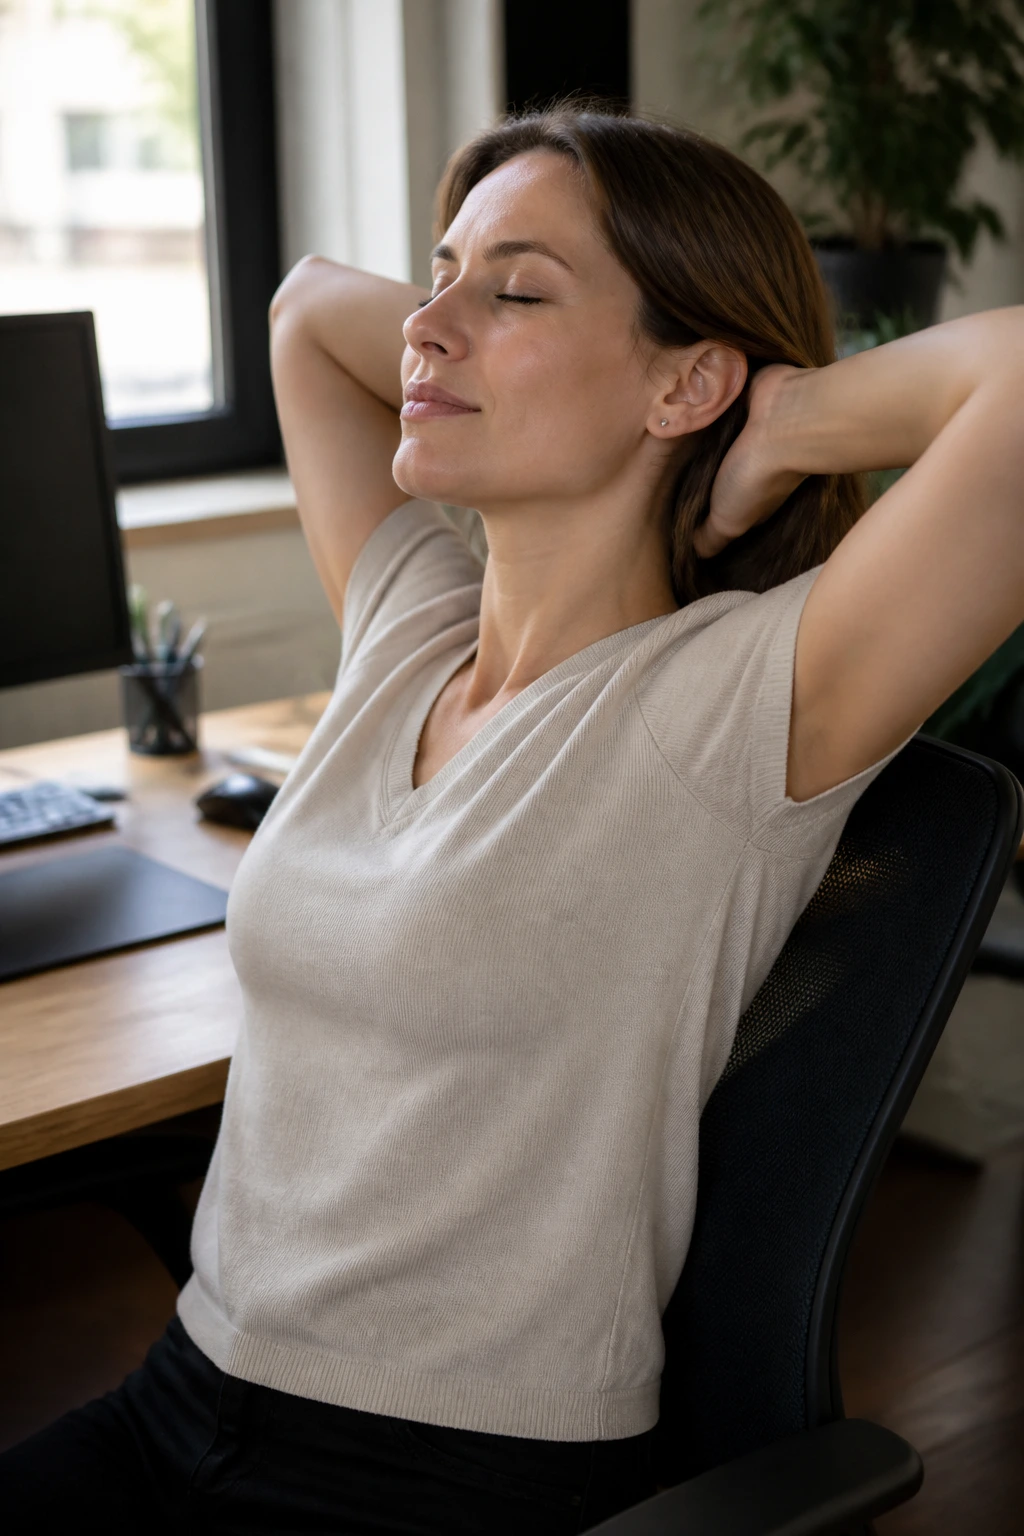
If you spend a lot of time hunched over a keyboard, this one earns its keep. Start seated or standing, roll the shoulders back, interlace the fingers behind the head if that feels okay, and open the elbows wide. Then tip the head slightly side to side, never forcing it.
After that, move into a small seated twist and a chest opener with the hands clasped behind the back. Nothing dramatic. Just enough to remind the upper body that it’s allowed to widen again. I like this flow because it’s practical. You can do it in a few minutes without changing clothes or even leaving your chair.
The biggest mistake here is muscling through the neck. Keep the movements tiny. Neck work should feel relieving within the first breath or two. If it doesn’t, make the shape smaller.
20. Bedtime Flow for Sleepy Muscles
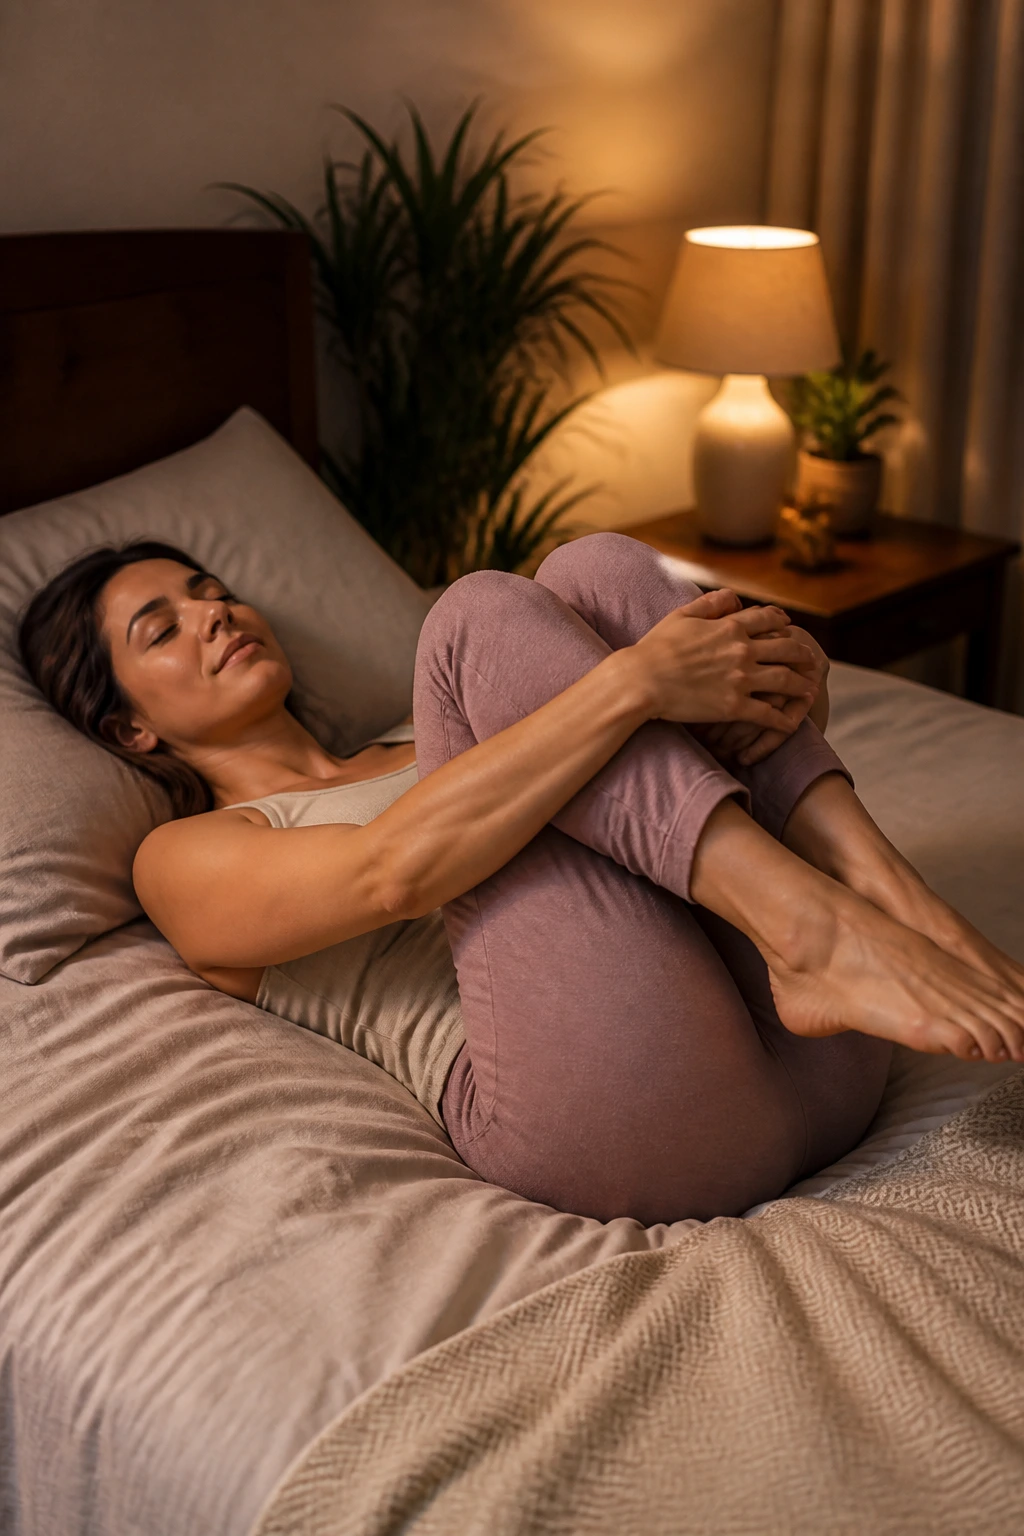
This is the one I’d choose when a beginner says, “I want yoga, but I don’t want to get worked up.” Good. That’s the right instinct. A bedtime yoga flow should feel like dimming a lamp, not turning on a stage light.
Start with knees-to-chest, then move into a reclined twist, figure four, and a short child’s pose if you’re on the floor. Keep every shape low and supported. A blanket under the knees or neck can make the whole thing feel much calmer. You can even keep the eyes closed for parts of it.
No strong backbends here. No deep lunges. No ambitious balance. Just slow exhalations and the kind of stretching that tells the nervous system it is safe to shut the door for the night.
21. Ten-Minute All-in-One Starter Flow
When you want one easy sequence that touches most of the body, build it around a simple arc: stand, fold, open, lunge, balance, rest. That’s enough for a beginner practice without making the session drag.
Here’s a clean version: Mountain, half lift, forward fold, cat-cow, low lunge, Warrior II, Tree, bridge, twist, and then a short rest on your back. Keep each piece to 3 to 5 breaths. If that sounds short, good. Short is often the right size for a first practice because it leaves you wanting another round tomorrow.
I like this flow because it teaches transitions, not just poses. The transitions are where most new yogis feel lost, and they’re also where the body learns the rhythm of yoga. A decent flow is not a pile of poses. It’s a smooth path between them.
22. Fifteen-Minute Full-Body Beginner Flow
This is the most complete beginner sequence in the bunch, and it still stays friendly. Start standing in Mountain, move into a fold and half lift, step to Tabletop for cat-cow, then press back to a short Down Dog or stay on hands and knees if that feels better. From there, step forward into Low Lunge, rise into Warrior II, return to a fold, and lower to the floor for Bridge, Figure Four, and a Supine Twist.
A Simple Order to Follow
- 3 breaths in Mountain
- 3 rounds of Cat-Cow
- 2 breaths in Down Dog or Tabletop
- 3 breaths in Low Lunge each side
- 3 breaths in Warrior II each side
- 5 breaths in Bridge
- 5 breaths in Figure Four each side
- 5 breaths in a floor twist
End with Savasana or a quiet knees-bent rest. That final pause matters more than people realize. It gives the body time to register the work you just did, even if that work was gentle. If you only remember one thing from this practice, remember this: beginner yoga works best when the whole session feels linked, slow, and unforced.
The Bottom Line
The best yoga flows for people brand new to yoga are the ones that teach shape, breath, and pace without asking you to perform. Standing still, folding with bent knees, using the wall, resting on the floor — none of that is second-rate. It is how people learn to trust their bodies again.
Start with three or four of these flows and repeat them until they feel familiar. Familiar is underrated. Familiar lets you notice what changed from one week to the next, and that’s where progress starts to show itself.
Keep a folded blanket near your mat. It solves more problems than most people expect, and honestly, it makes beginner yoga feel kinder right away.
