



A stability ball can make a simple workout feel rude. The first time you put your hands, shins, or back on one, every lazy rib flare and every lopsided hip gets exposed fast. That is exactly why stability ball exercises stay useful long after the novelty wears off.
What makes the ball so handy is the way it scales. Put it against a wall and it becomes friendly; move your body farther from the floor and it gets demanding fast. You can use the same piece of equipment for a seated march, a hamstring curl, or a hard rollout, and the change in difficulty comes from body position more than brute force.
Ball size matters more than most people think. When you sit on it, your knees should sit close to a right angle, with your feet flat and your hips level or slightly above your knees. A ball that feels too soft will wander; one pumped rock-hard can feel slippery and awkward.
Start with control, not speed. Slow reps. Clean lines. If the ball rolls, that is the ball telling on you.
1. Seated March on the Stability Ball
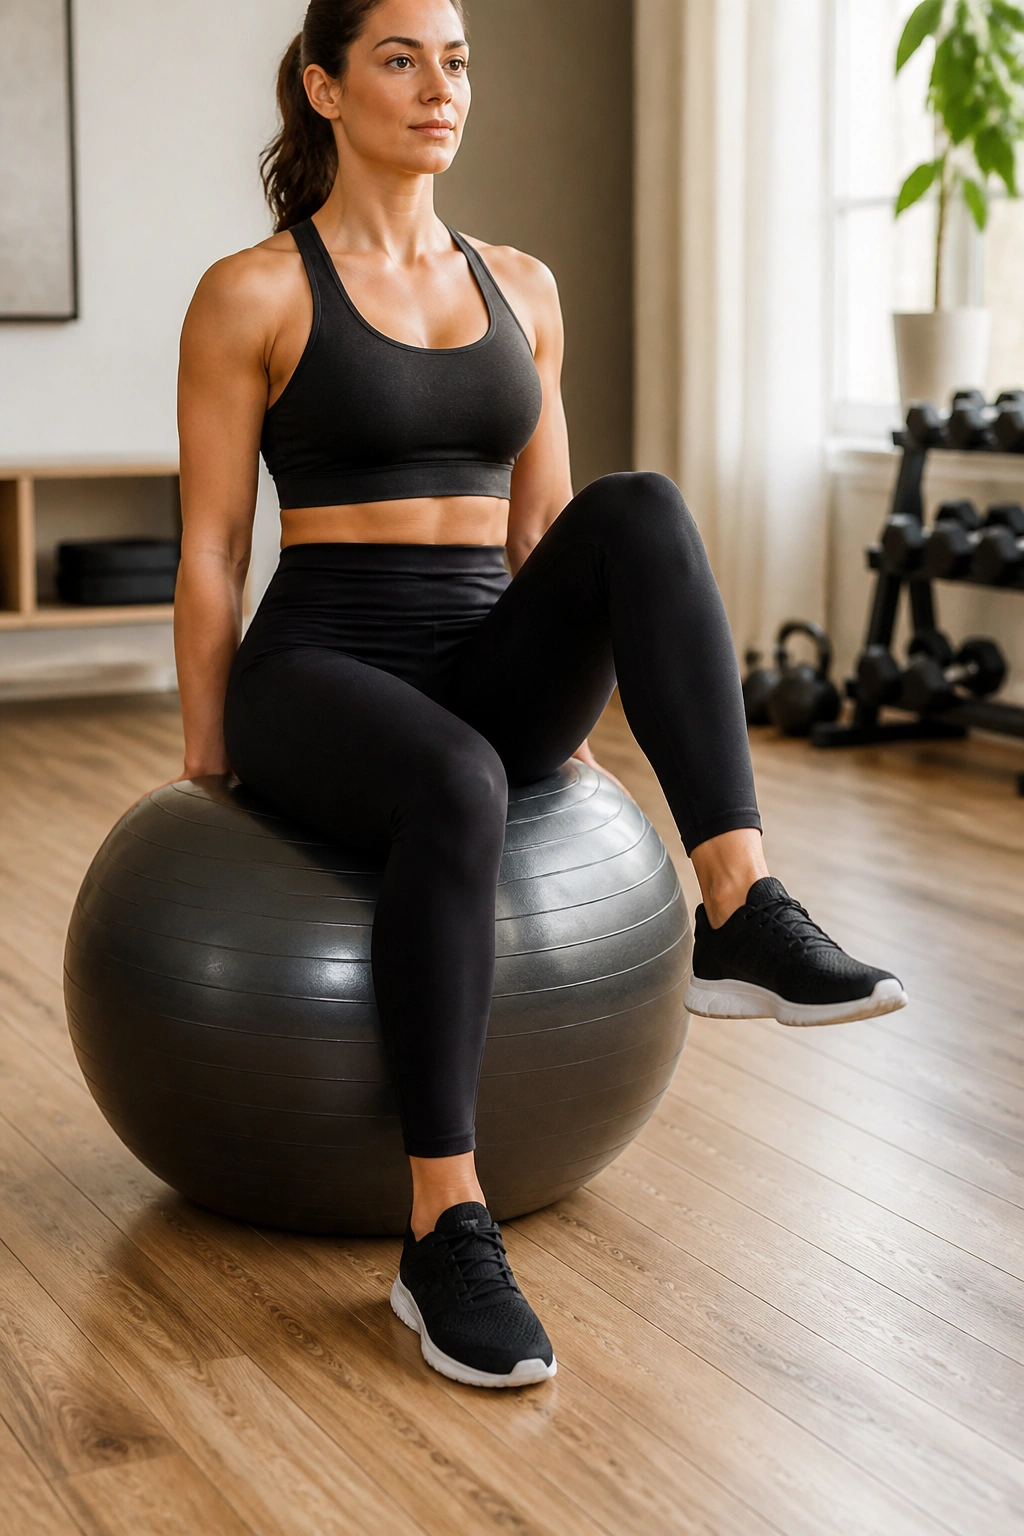
Looks easy. Isn’t.
The seated march is a smart place to begin because it teaches balance without asking your shoulders, hips, and abs to do everything at once. Sit on the center of the ball, plant both feet, and lift one foot 2 to 4 inches off the floor. Alternate sides for 20 to 30 total marches, or run a 30 to 45 second set if you like working by time.
How to Make It Count
- Sit tall, not slumped into the ball.
- Keep your ribs stacked over your pelvis.
- Lift the foot slowly; a 1-second lift and 1-second lower is enough.
- Add an opposite arm reach when the basic version feels too tame.
No drama. The whole point is to make the trunk work while the legs do something very small. If the ball wobbles a lot, widen your feet a bit and slow down. That tiny adjustment often turns a messy rep into a clean one.
This is also a nice warm-up before lower-body work. A few rounds wake up the hips, remind the core to brace, and get your balance tuned before you move on to something harder.
2. Wall Squat with the Ball Behind Your Back
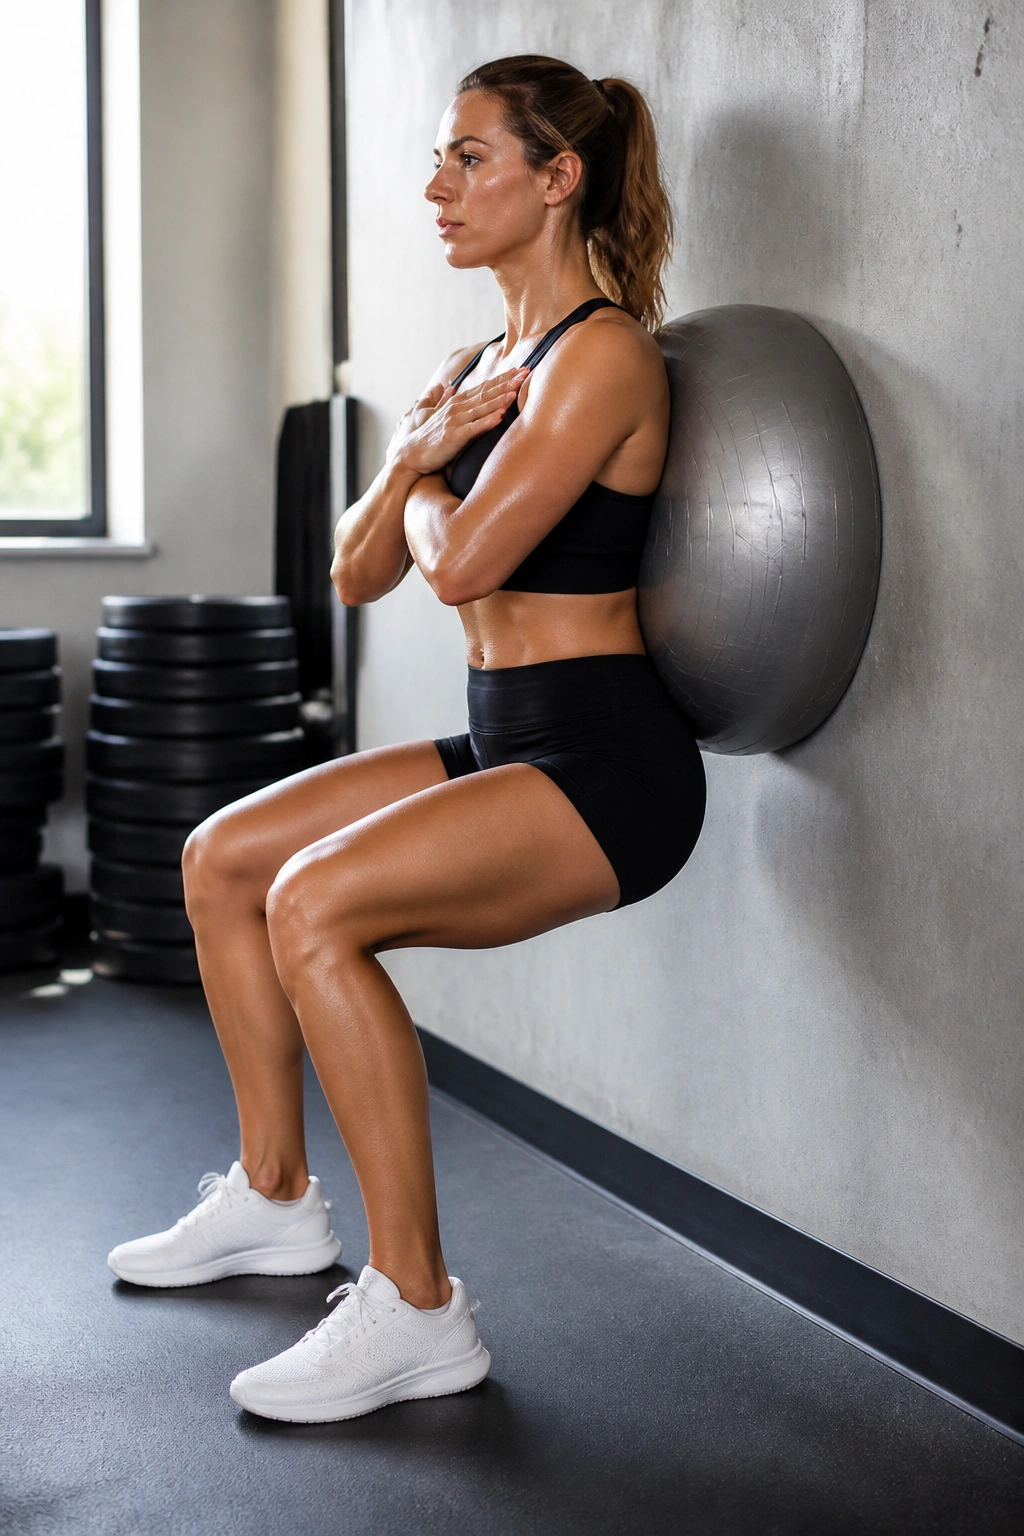
This is the cleanest beginner leg exercise on the list.
A wall squat with a stability ball behind your back gives you support where a free squat can feel twitchy. Stand with your feet about 12 to 18 inches away from the wall, place the ball between your low to mid-back and the wall, and lower until your thighs are about parallel or until your knees start to complain. Most people do well with 8 to 12 reps for 2 to 4 sets.
Where the Ball Should Sit
- Keep the ball under the shoulder blades or low back, not up by the neck.
- Let your feet stay slightly ahead of your knees.
- Stop the descent before your hips tuck under.
- Pause for 1 second at the bottom if you want more work without adding load.
The ball makes this movement kinder on coordination, but it still asks for good tracking. Your knees should travel in line with your toes, not cave inward. That matters more than depth.
If your knees grumble, shorten the range and move your feet a little farther forward. If your heels lift, step closer to the wall. Simple fixes. Good squat mechanics usually look boring from the outside.
3. Stability Ball Dead Bug
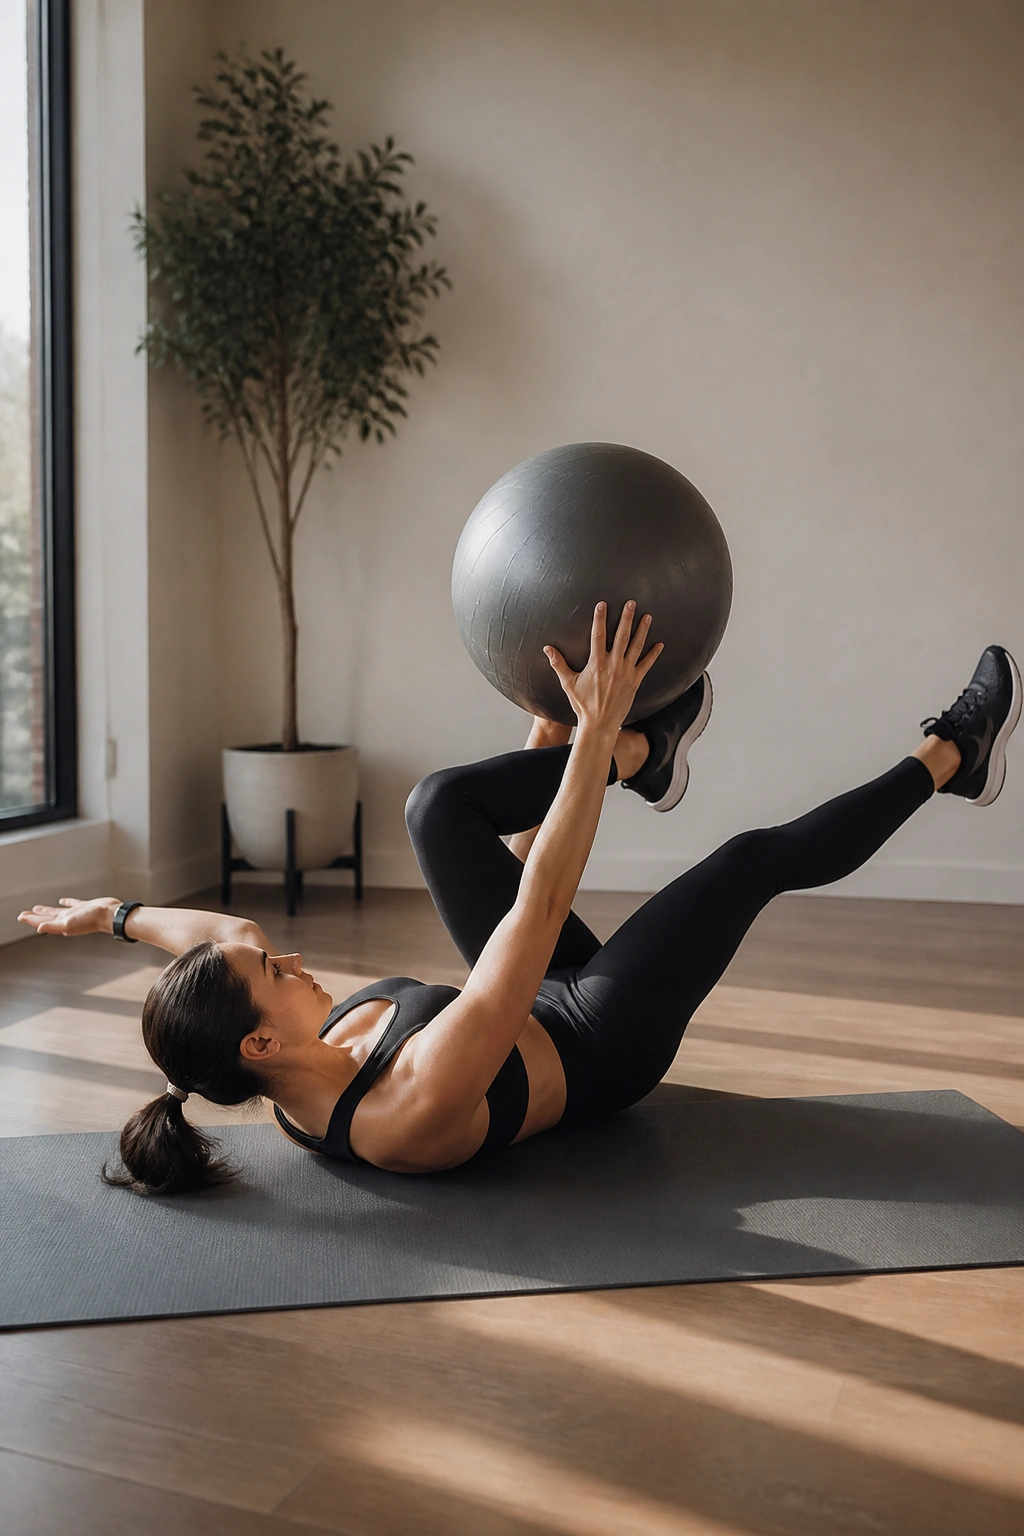
Why does a dead bug with a ball feel harder than the floor version?
Because the ball makes the brace honest. Lie on your back with your knees bent to roughly 90 degrees, then hold the ball between your hands and knees with gentle pressure. As you extend the opposite arm and leg, keep the lower back heavy and quiet on the floor. Aim for 6 to 10 reps per side.
Press and Breathe
Exhale as the arm and leg move away from center. That breath is doing more than people think; it helps you keep the ribs from popping up and the pelvis from tipping. If you rush through this, the ball will slide and your low back will start helping in ways it should not.
A clean dead bug should feel controlled, almost calm. The movement is small. The work is not. If full extension is too much, tap the heel to the floor before bringing it back in. That version still teaches the pattern without turning it into a fight.
Keep the squeeze on the ball light, not white-knuckle tight. You want tension, not a hand cramp. The best reps feel steady all the way through.
4. Glute Bridge with Shoulders on the Ball
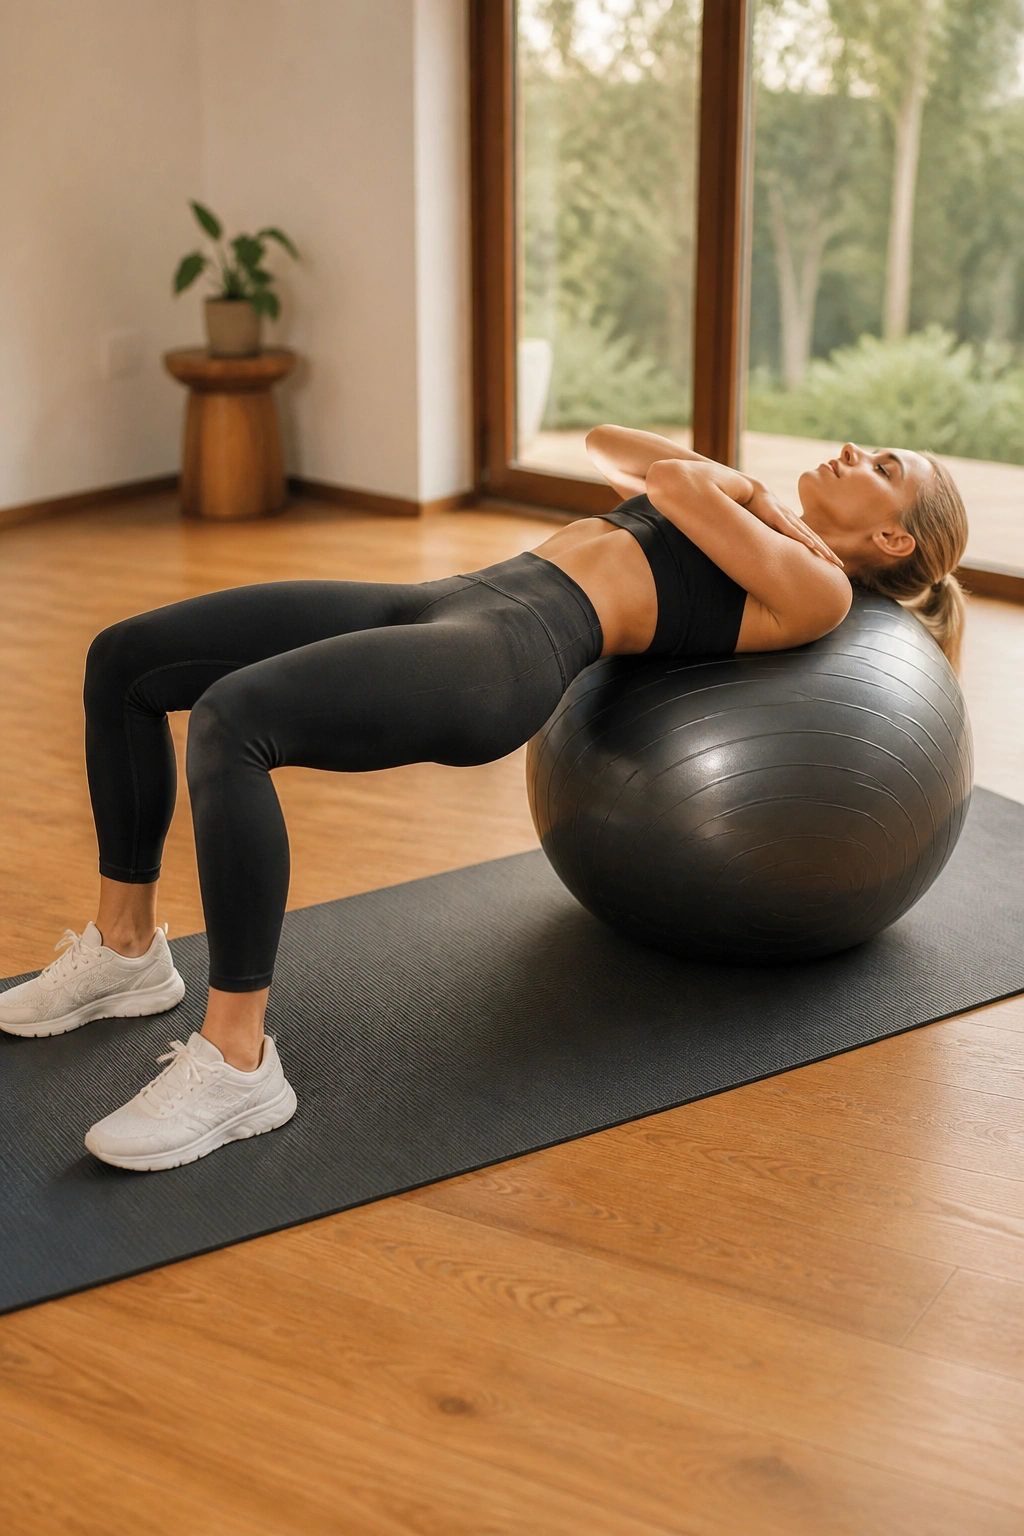
A glute bridge on a ball gives you two jobs at once: hip drive and balance.
Set your upper back and shoulders on the ball, plant your feet about hip-width apart, and walk them out until your knees are bent and your body can lift into a bridge without your neck taking over. Drive through your heels, squeeze the glutes, and raise the hips until your torso and thighs make a straight line. 8 to 15 reps is a clean working range.
Hamstring cramps are a clue.
If they show up fast, your feet are probably too far away or your hips are lifting without enough glute squeeze. Slide the feet a little closer and keep the ribs down as you rise. That usually cleans it up right away.
What You Should Feel
- Glutes at the top.
- Feet grounded.
- Ball stable under the shoulders.
- A mild stretch through the front of the hips.
Once the standard bridge feels easy, try holding the top for 10 to 20 seconds or lifting one foot for a single-leg version. Don’t rush that part. The bridge gets much harder the moment one side has to do more work.
5. Bird Dog with Hands on the Ball
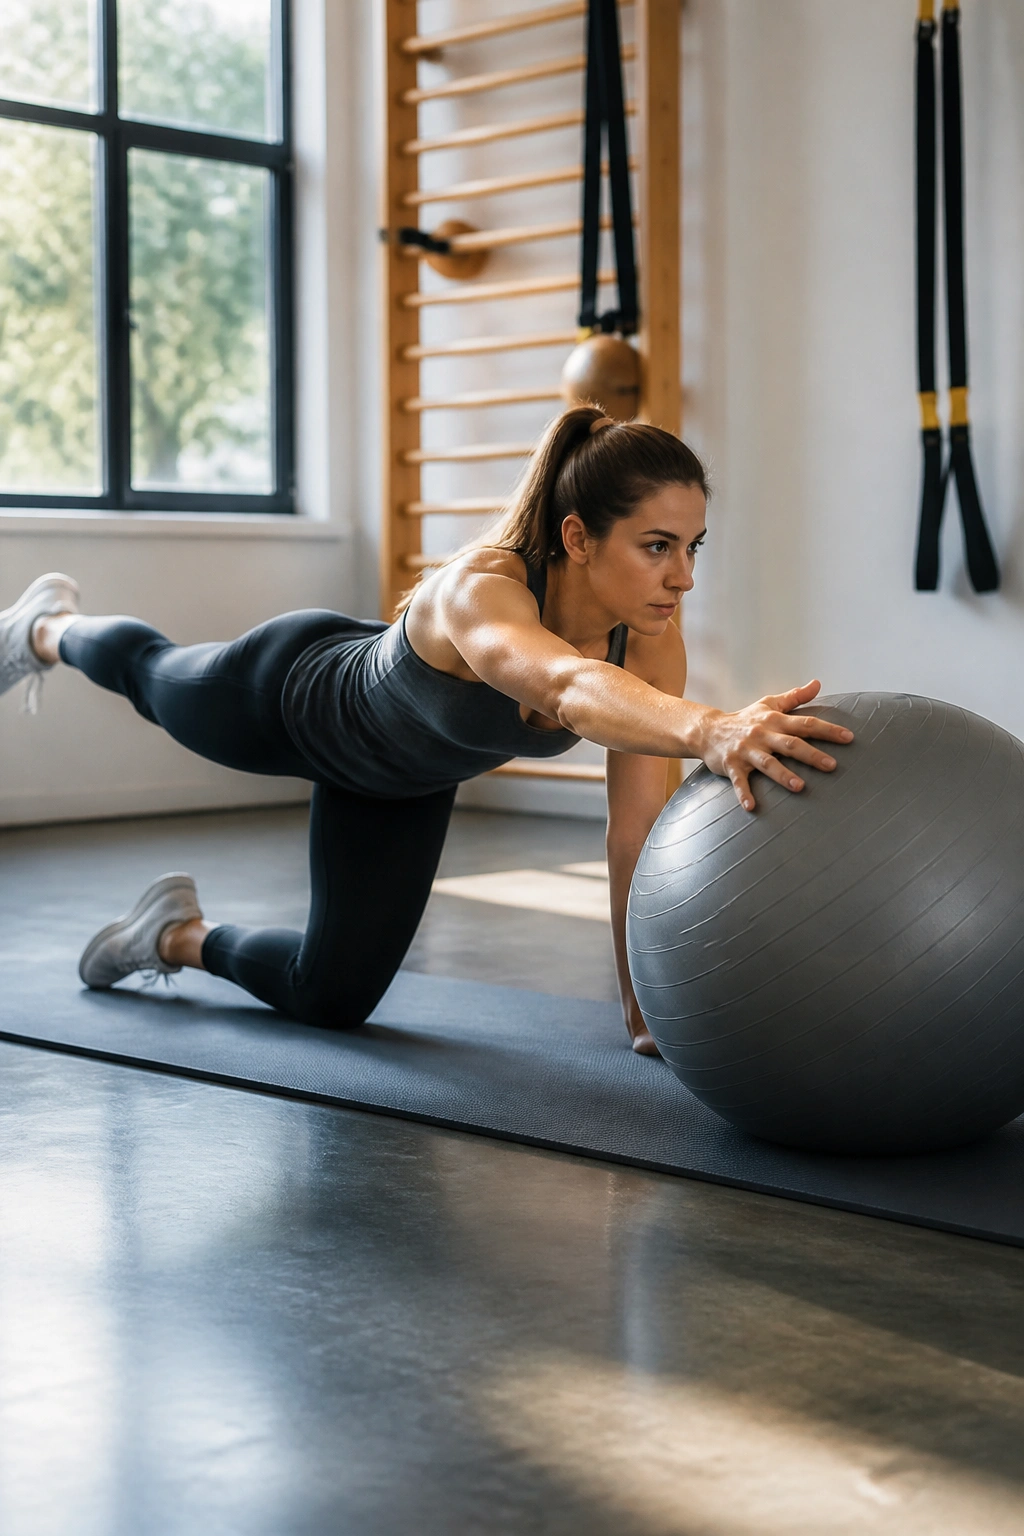
Unlike the floor version, this one punishes a lazy brace.
Get into a tabletop position with your hands resting on the ball and your knees on the floor. Press the ball lightly, extend the opposite arm and leg, and keep the hips as square as you can manage. Hold the reach for 2 seconds, then switch. 6 to 8 reps per side is enough to make the point.
Keep the Hips Square
- Reach long, not high.
- Keep the ball from drifting sideways.
- Reach the leg straight back, not out to the side.
- Move slowly enough that you can stop the wobble before it starts.
The ball adds a little chaos, which is the whole reason to use it. If your back arches when you extend, shorten the reach and think about pushing the floor away with the supporting hand and knee. That cue usually steadies the whole body.
This is a good drill for people who want more core control without doing endless crunches. It also teaches shoulder stability in a way that carries over to pressing, planks, and carrying groceries up stairs. Real life stuff. The unglamorous kind.
6. Forearm Plank with Forearms on the Ball
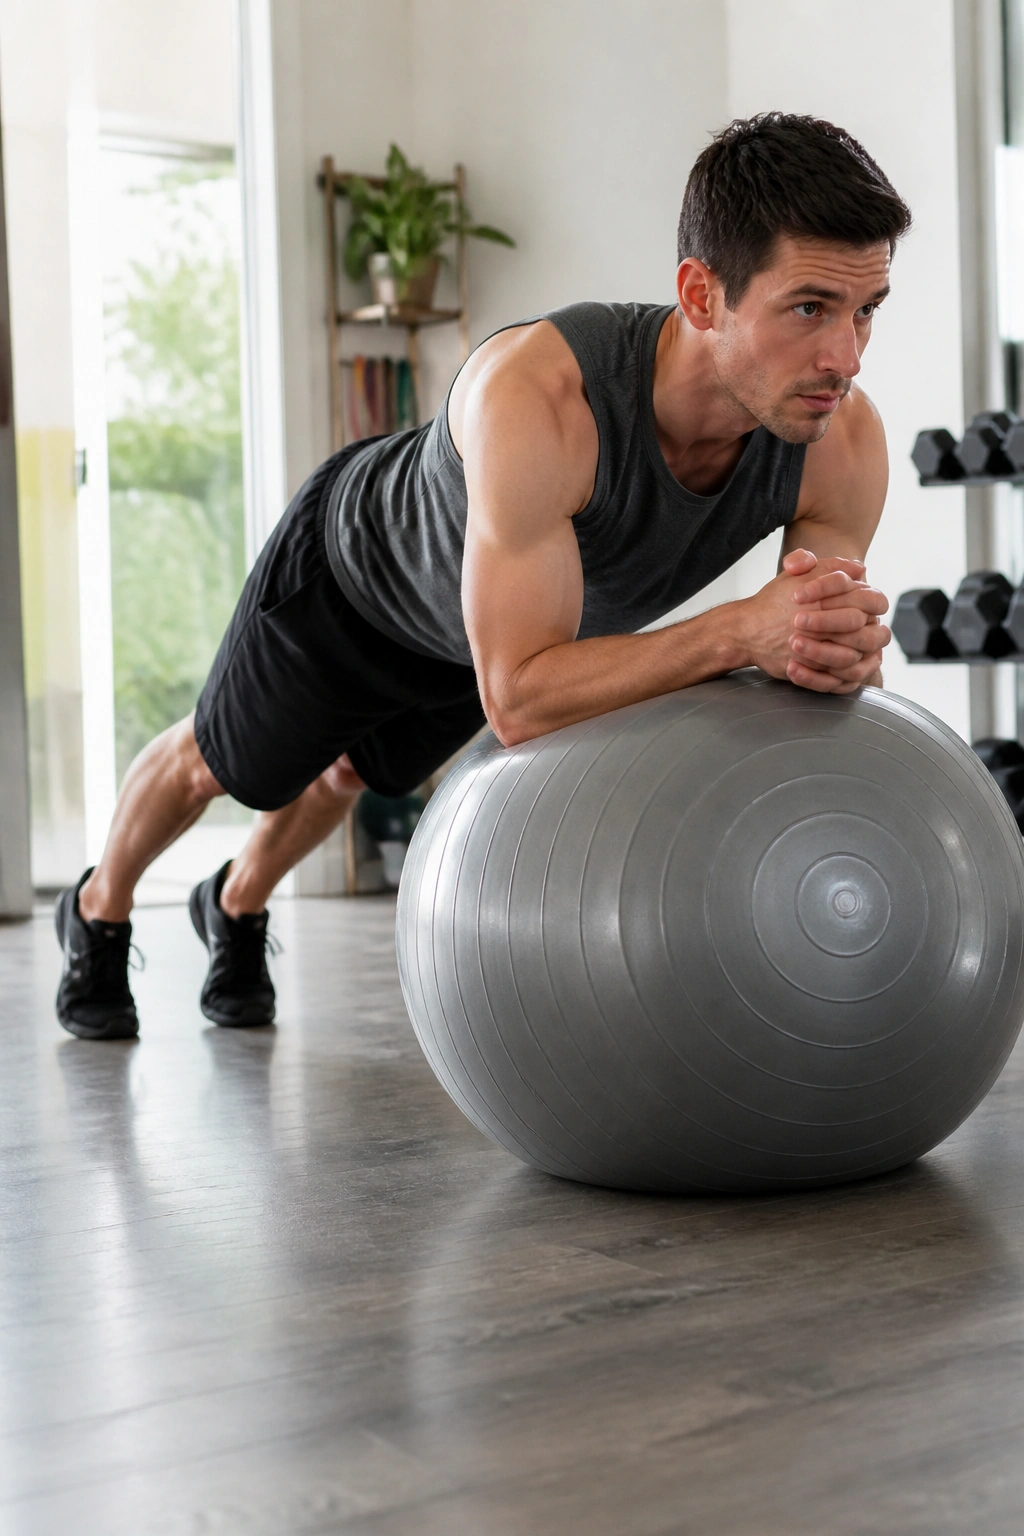
A plank on a ball is honest.
Place your forearms on top of the ball, step your feet back, and make a straight line from ears to heels. Hold for 15 to 30 seconds to start, then build toward 45 seconds if the shape stays clean. If your hips sag or rise, cut the hold short and reset.
The unstable surface means your obliques and glutes have to work harder to keep the body from drifting. That is the part people feel fastest. Not the abs alone. The whole front line from shoulders to hips.
Easy Fixes That Help Fast
- Widen your feet a little if the ball feels skittish.
- Keep your elbows under your shoulders.
- Squeeze your glutes before you start the hold.
- Breathe through the nose if you can.
A lot of people try to survive this move by locking up everywhere. That usually makes the hold uglier, not stronger. A tighter brace with a calmer breath beats panic tension every time.
If the ball slides too much, put it near a wall for the first few sessions. That small boundary can save your patience while you learn the position.
7. Stability Ball Hamstring Curl
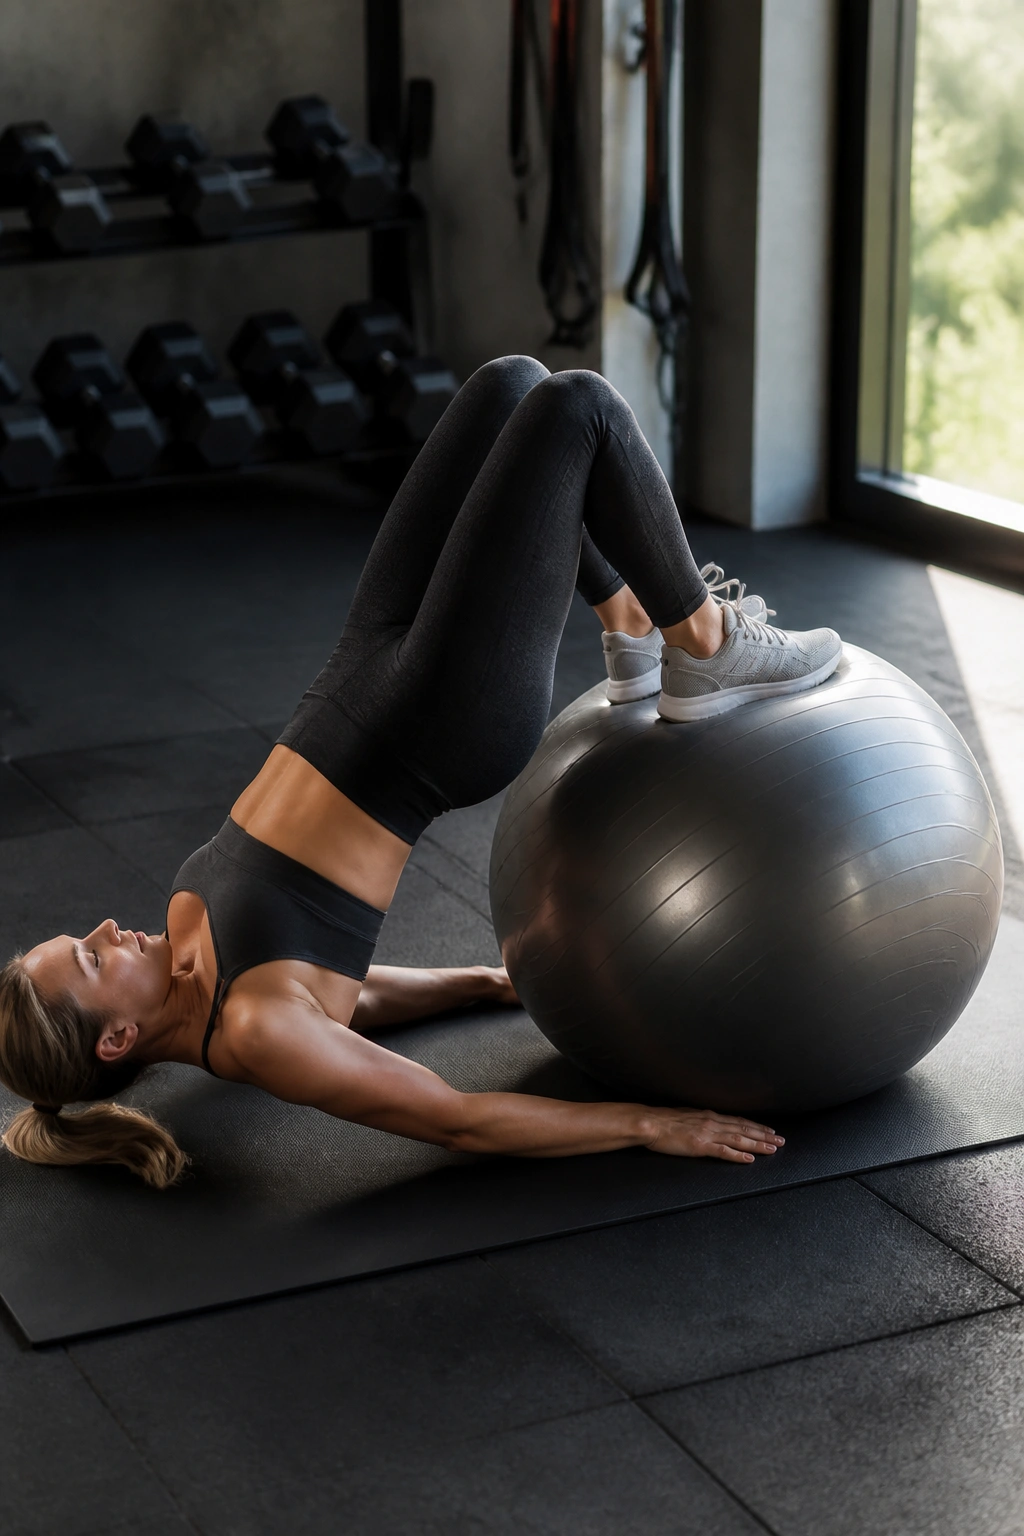
The first curl feels fine. The second one is where most people start negotiating with gravity.
Lie on your back, place your heels on the ball, and lift your hips into a bridge. From there, curl the ball toward your glutes by bending your knees, then extend the legs back out with control. A solid working set is 8 to 12 reps for 2 to 4 rounds.
The hard part is not the curl. It’s keeping the hips from sagging while the legs move. If the pelvis drops every time you pull the ball in, the hamstrings lose tension and the movement turns sloppy fast.
A clean rep should feel smooth under the heels. No kicking. No jerking. The ball should roll, not bounce.
If you want a friendlier version, shorten the range and stop halfway in. If you want more work, hold the bridge at the top for 2 seconds before each curl. That tiny pause changes the exercise a lot more than people expect.
8. Stability Ball Push-Up
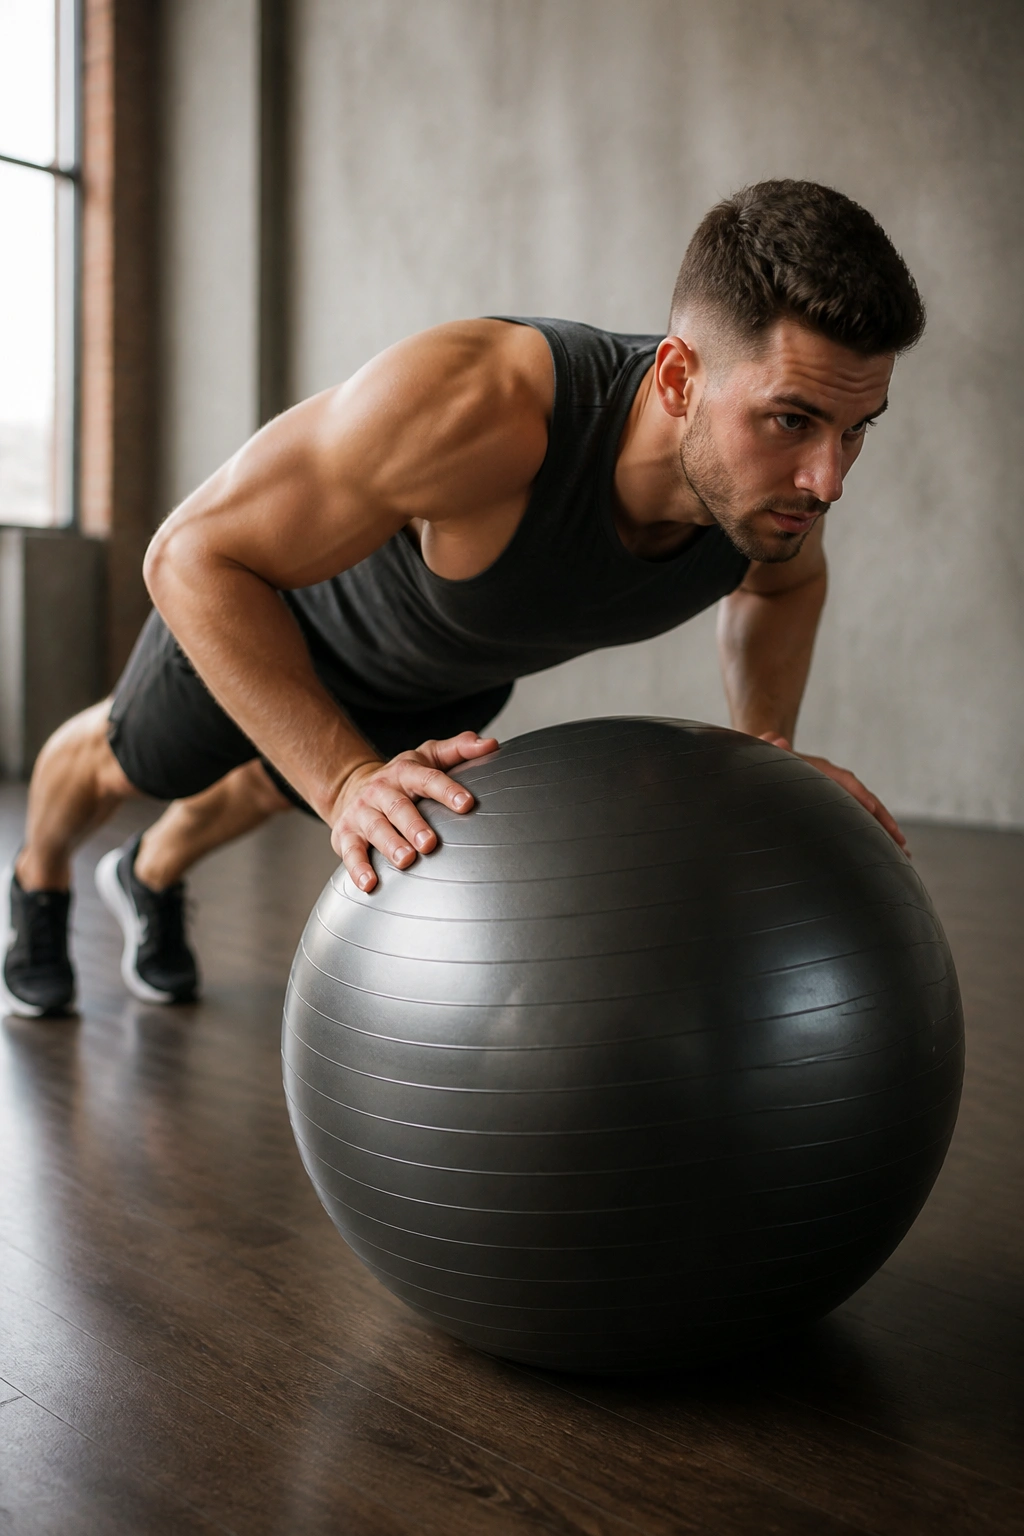
The ball does not care how many floor push-ups you can do.
Place both hands on the ball, step your feet back, and lower your chest with control. Keep the elbows angled roughly 30 to 45 degrees away from the body, not flared straight out. Start with 5 to 8 reps if you are new to unstable pressing, or 8 to 12 if you already own the pattern.
Slow reps win here. Fast reps turn the exercise into a shoulder shrug with motion.
If the full version feels rough, drop to your knees and keep the hands on the ball. If your wrists complain, turn the hands out a touch and keep the pressure even through the whole palm. That small adjustment often makes the position feel less awkward.
You’ll know it’s working when the torso stays quiet and the shoulders have to stabilize before they even start pressing. That is the good part. The ball makes the upper body earn each inch of the rep instead of tossing it away.
9. Side Plank with the Forearm on the Ball
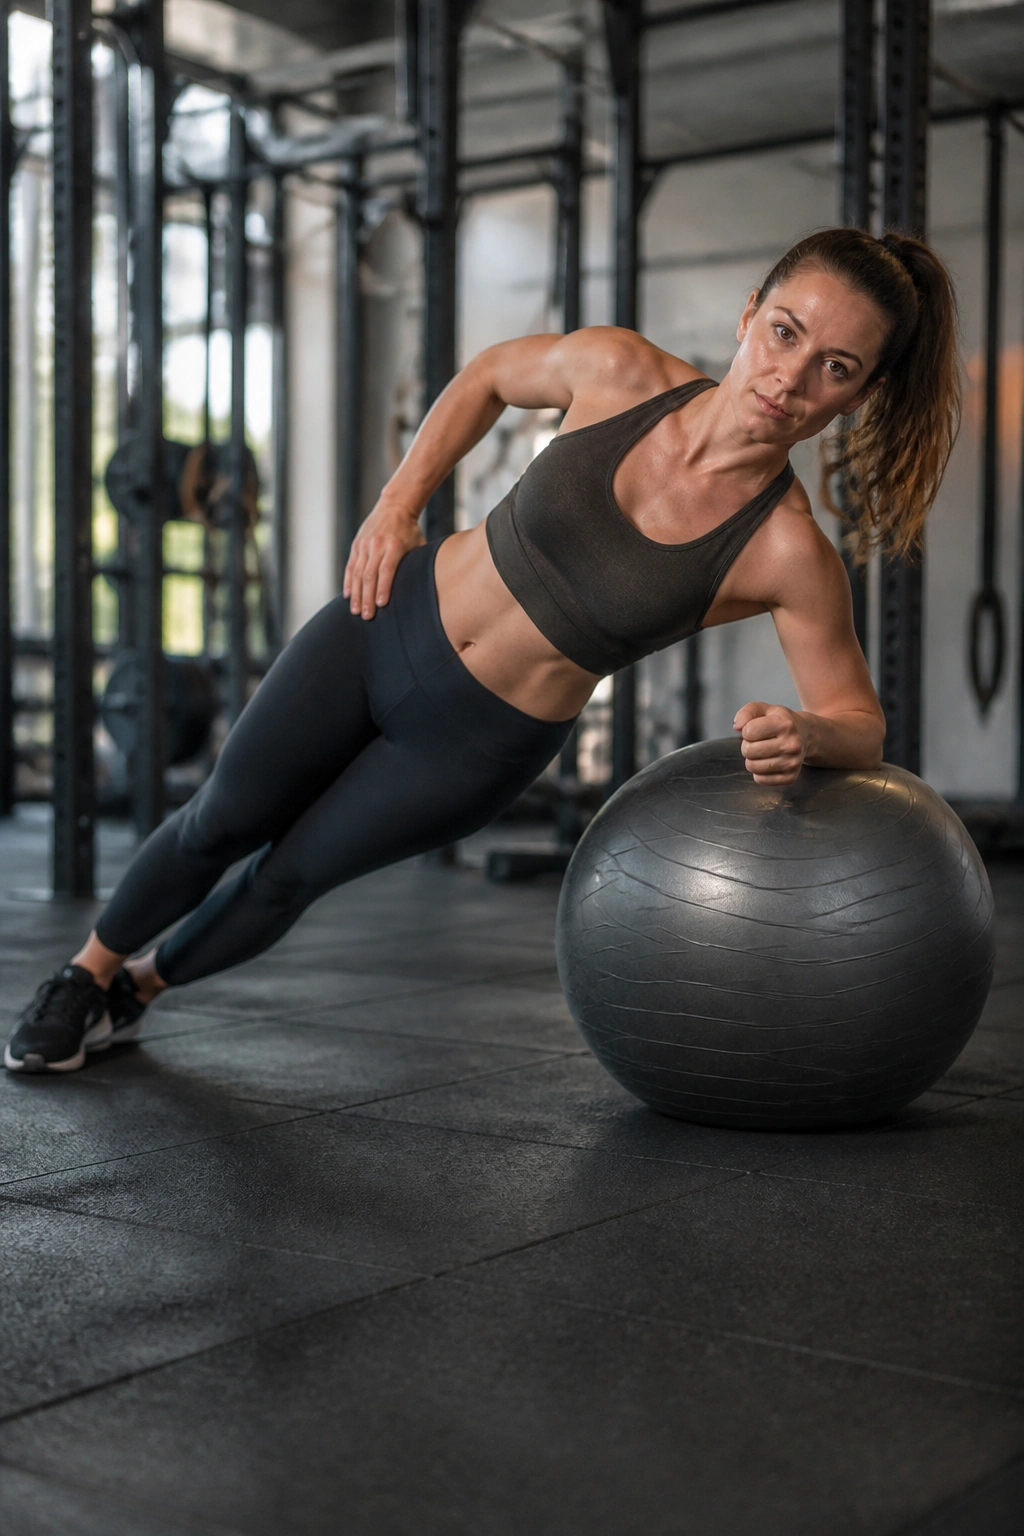
Side planks expose asymmetry fast.
Set one forearm on the ball, stack your feet or place the top foot slightly in front of the bottom one, and lift the hips until your body forms a straight side line. Hold for 15 to 25 seconds per side to start. If you can keep the shape steady, build from there.
Set Your Feet First
- Stagger the feet if balance is shaky.
- Keep the shoulder away from the ear.
- Press the forearm down into the ball.
- Lift the top hip slightly higher than you think you need.
A side plank on a ball tends to light up the obliques and the glute medius, which is the hip muscle that helps keep the pelvis from dropping. That matters in walking, running, and most single-leg work. It also matters if one side of your body keeps feeling like the weak link.
If the shoulder gets annoyed, drop the bottom knee to the floor and keep the top leg straight. You still get a strong side-body challenge without turning the hold into a wrestling match with your own joints.
10. Stability Ball Back Extension
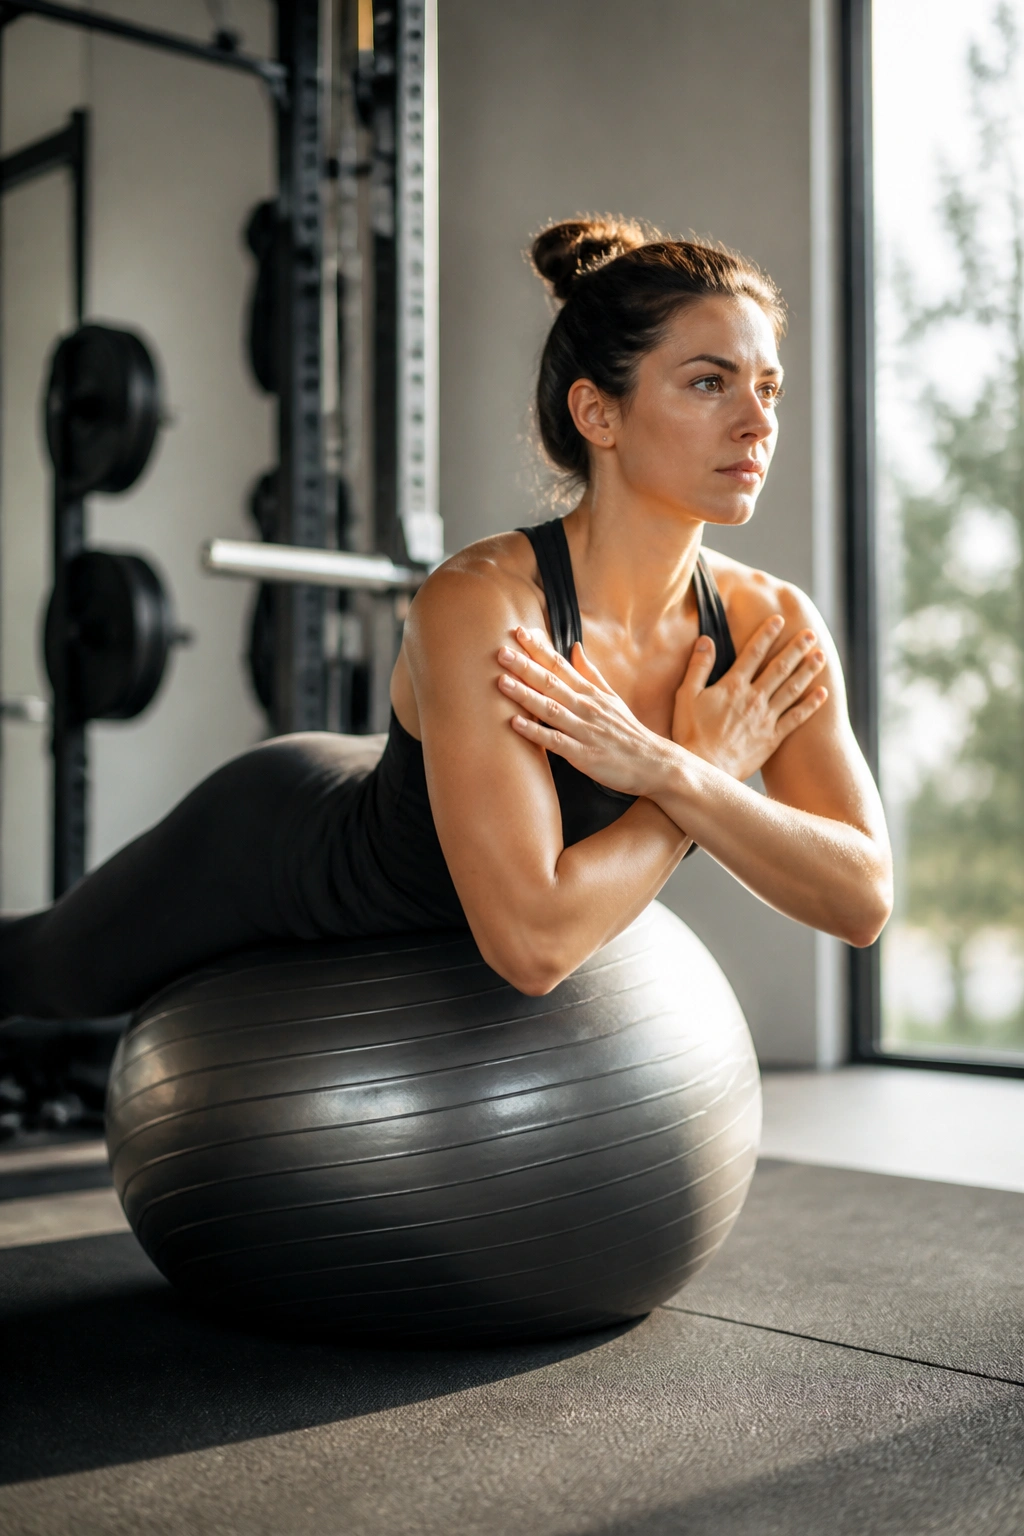
I keep coming back to this one because people skip it and then wonder why their lower back feels flat in hinges and carries.
Lie face down over the ball with your hips supported and your feet planted wide enough to stay anchored. Cross your arms over your chest or place your hands behind your head, then lift your chest until your torso is in line with your legs. 8 to 15 reps works well, and a 2-second hold at the top makes the exercise more useful without adding weight.
What to Feel, Not Just What to Do
- The lift should come from the upper back and glutes.
- Your neck stays long.
- The chest comes up to neutral, not way past it.
- The lower back finishes the rep, but it should not own the rep.
A lot of people overextend here and think higher means better. Nope. Once you pass neutral, you usually start yanking on the lumbar spine instead of training it. Clean extension looks calmer than flashy extension.
If you want to make it a little harder, reach your arms forward instead of crossing them. That lengthens the lever and makes the upper back work for its keep. Tiny shift. Big difference.
11. Stability Ball Oblique Crunch
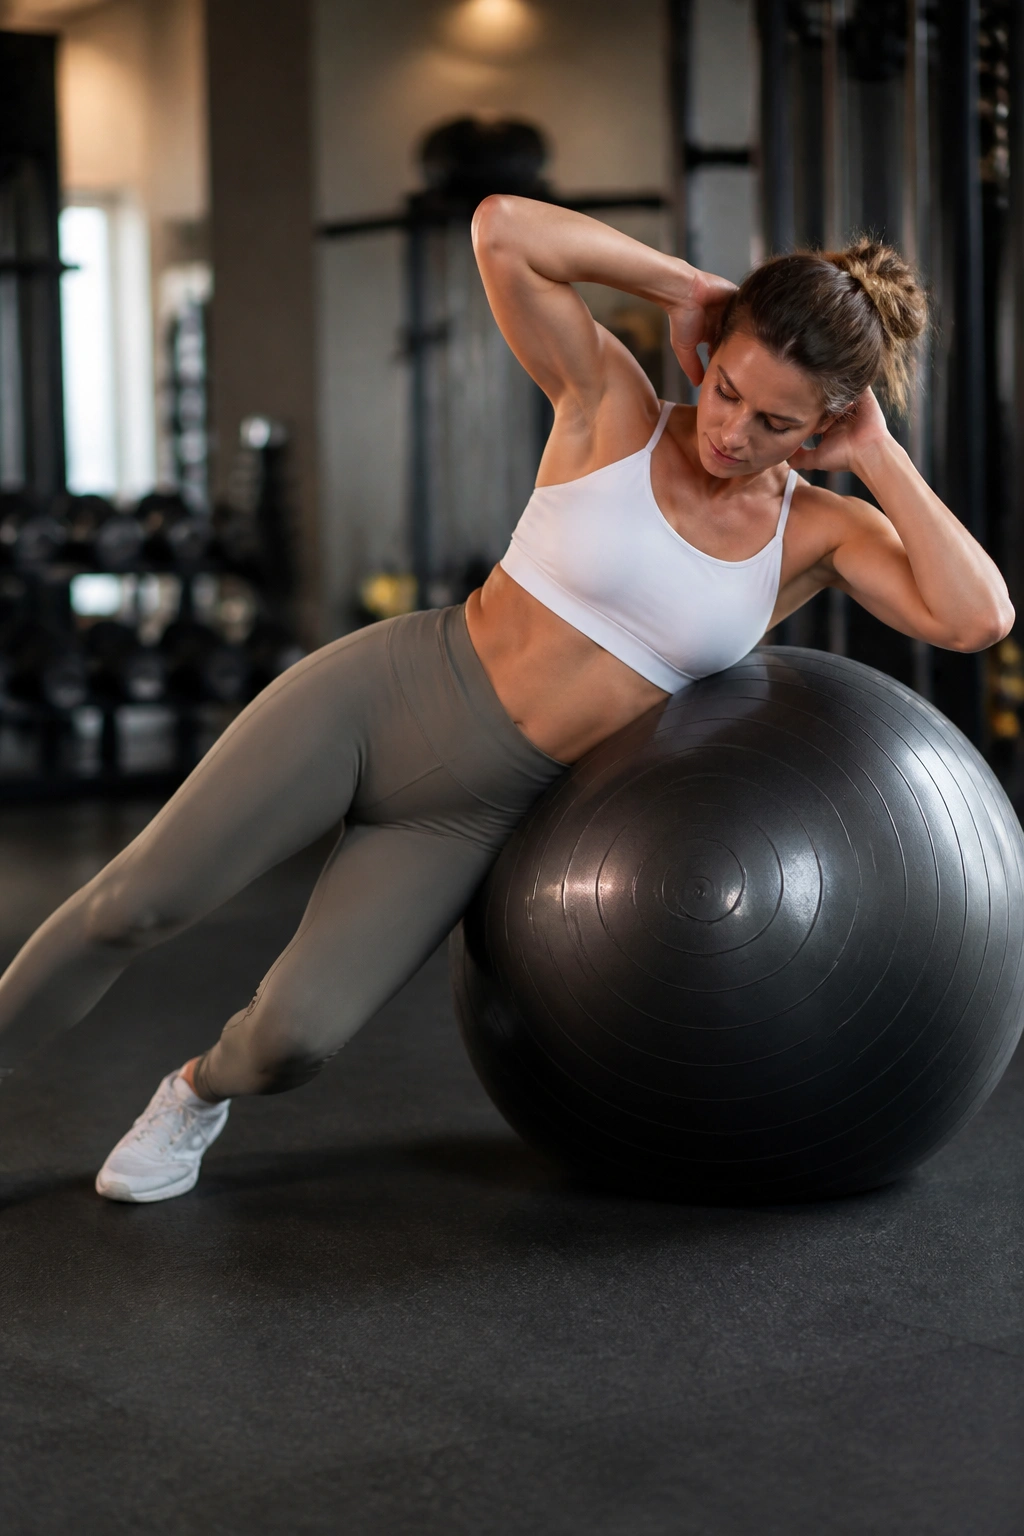
Straight-ahead crunches miss a lot of the story.
Lie sideways over the ball so the lower ribs and hip are supported, place your feet wide for balance, and crunch your upper ribcage toward the hip on the same side. Think small and controlled, not huge and dramatic. A good range is 10 to 15 reps per side.
The real trick is keeping the hips quiet while the ribs move. If the pelvis starts rolling around, the obliques are no longer doing the job cleanly. That is also where the neck tends to get involved, which nobody wants.
Smaller Range, Better Tension
- Exhale on the crunch.
- Keep the chin gently tucked.
- Move a few inches, not a foot.
- Lower under control for 2 to 3 seconds.
This exercise works well after dead bugs and planks because it asks for trunk control from a different angle. Front work is one thing. Side work is another. You want both.
If you need more stability, put your lower hand lightly against the wall or floor. That little bit of support can stop the body from over-rotating while you learn the pattern.
12. Stability Ball Rollout
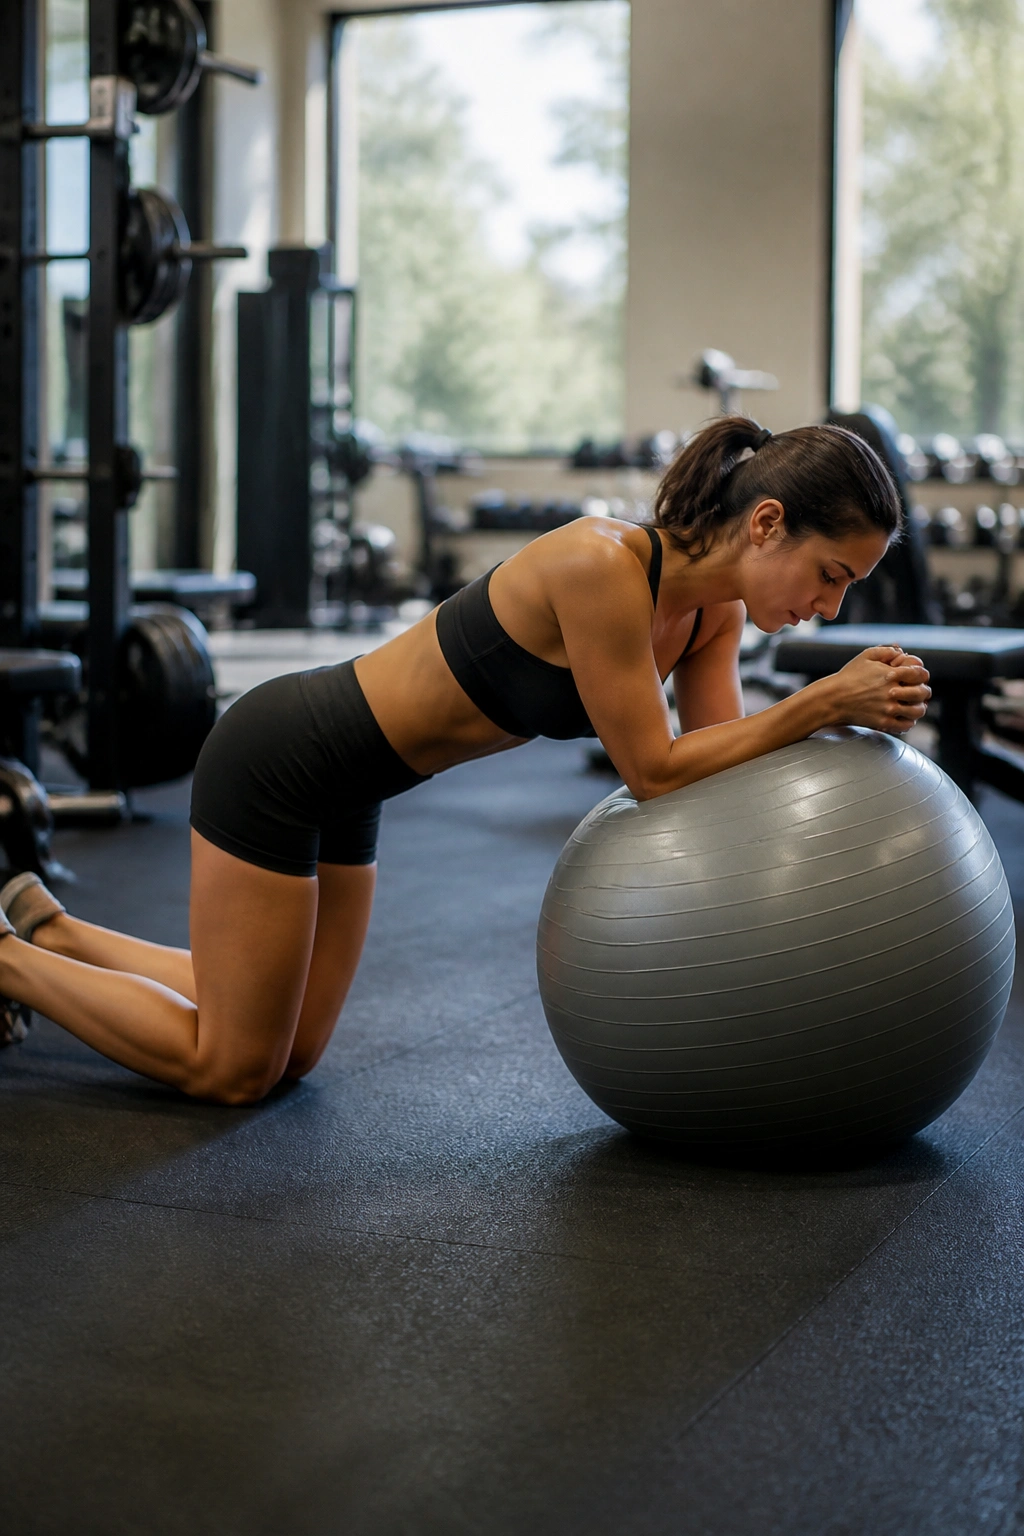
A stability ball rollout teaches you how much rib flare your core is hiding.
Kneel on the floor, place your forearms on the ball, and roll it forward only as far as you can keep the ribs down and the lower back from sagging. Then pull back using the abdominals and lats. Start with 5 to 8 reps, then build to 8 to 10 when the position feels cleaner.
The Stop Point Matters More Than the Distance
- Stop before the low back arches.
- Keep the glutes lightly squeezed.
- Breathe out as the ball rolls forward.
- Pull the ball back with control, not a yank.
The rollout looks simple because the motion is short. The challenge is that the lever gets longer every inch you move away from your knees. That is why a few controlled reps can feel harder than a much fancier exercise done badly.
If full range is too much, start by rolling only a few inches out and back. If that feels too easy, slow the return phase to 3 full seconds. The movement gets mean fast when you lengthen the lowering portion.
This is one of those exercises that should look neat from the side. If the back caves, shorten the move. Clean beats far.
13. Stir-the-Pot
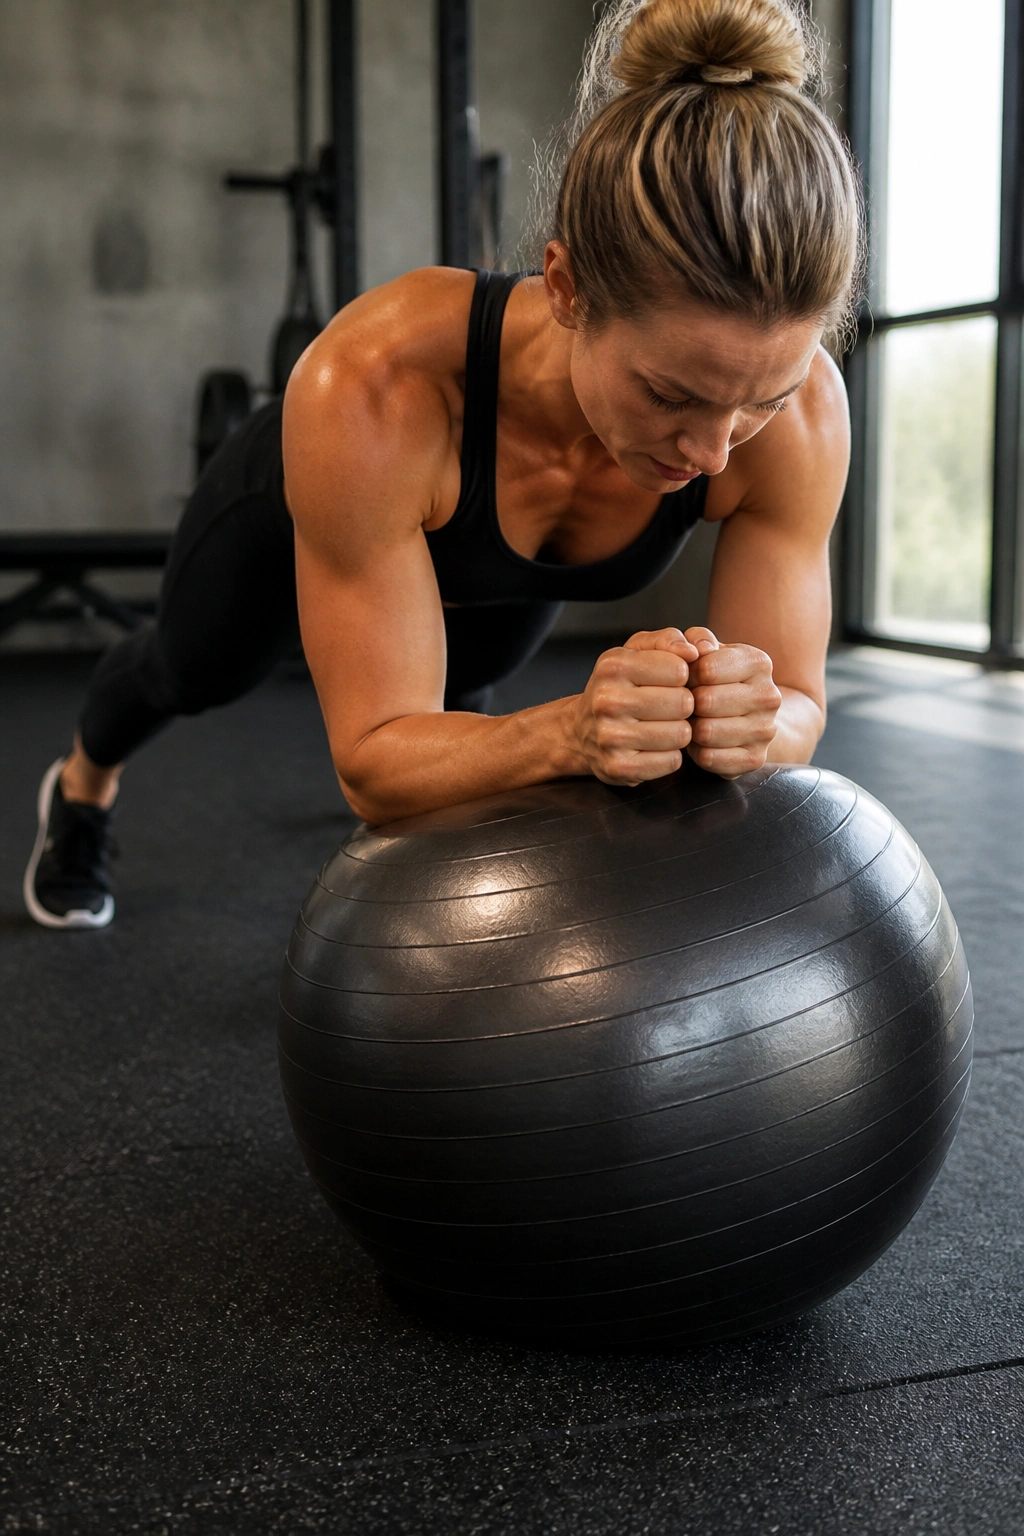
This one looks like a small circle and feels like a full-body argument.
Get into a forearm plank with your forearms on the ball, then draw tiny circles with your elbows. Start with circles around 3 to 5 inches across. If that feels stable, grow them slightly. Two sets of 5 circles each direction is enough to light things up.
Smaller circles are harder than big sloppy ones. That surprises people. A bigger circle gives you room to brace between shifts, while a small circle keeps the trunk under constant pressure.
Circle Size
- 3-inch circles for learning.
- 5-inch circles for a real challenge.
- Big circles only if you can keep the pelvis still.
- Stop if your shoulders start creeping toward your ears.
The name sounds playful, but the exercise is not. The abs have to stop the body from wandering while the shoulders and serratus do their own quiet work. It’s a good reminder that core training is not all crunches and sit-ups.
If your wrists or elbows hate the setup, put the ball close to a wall and keep the circle small. That gives you a boundary and removes some of the panic from the movement.
14. Stability Ball Body Saw
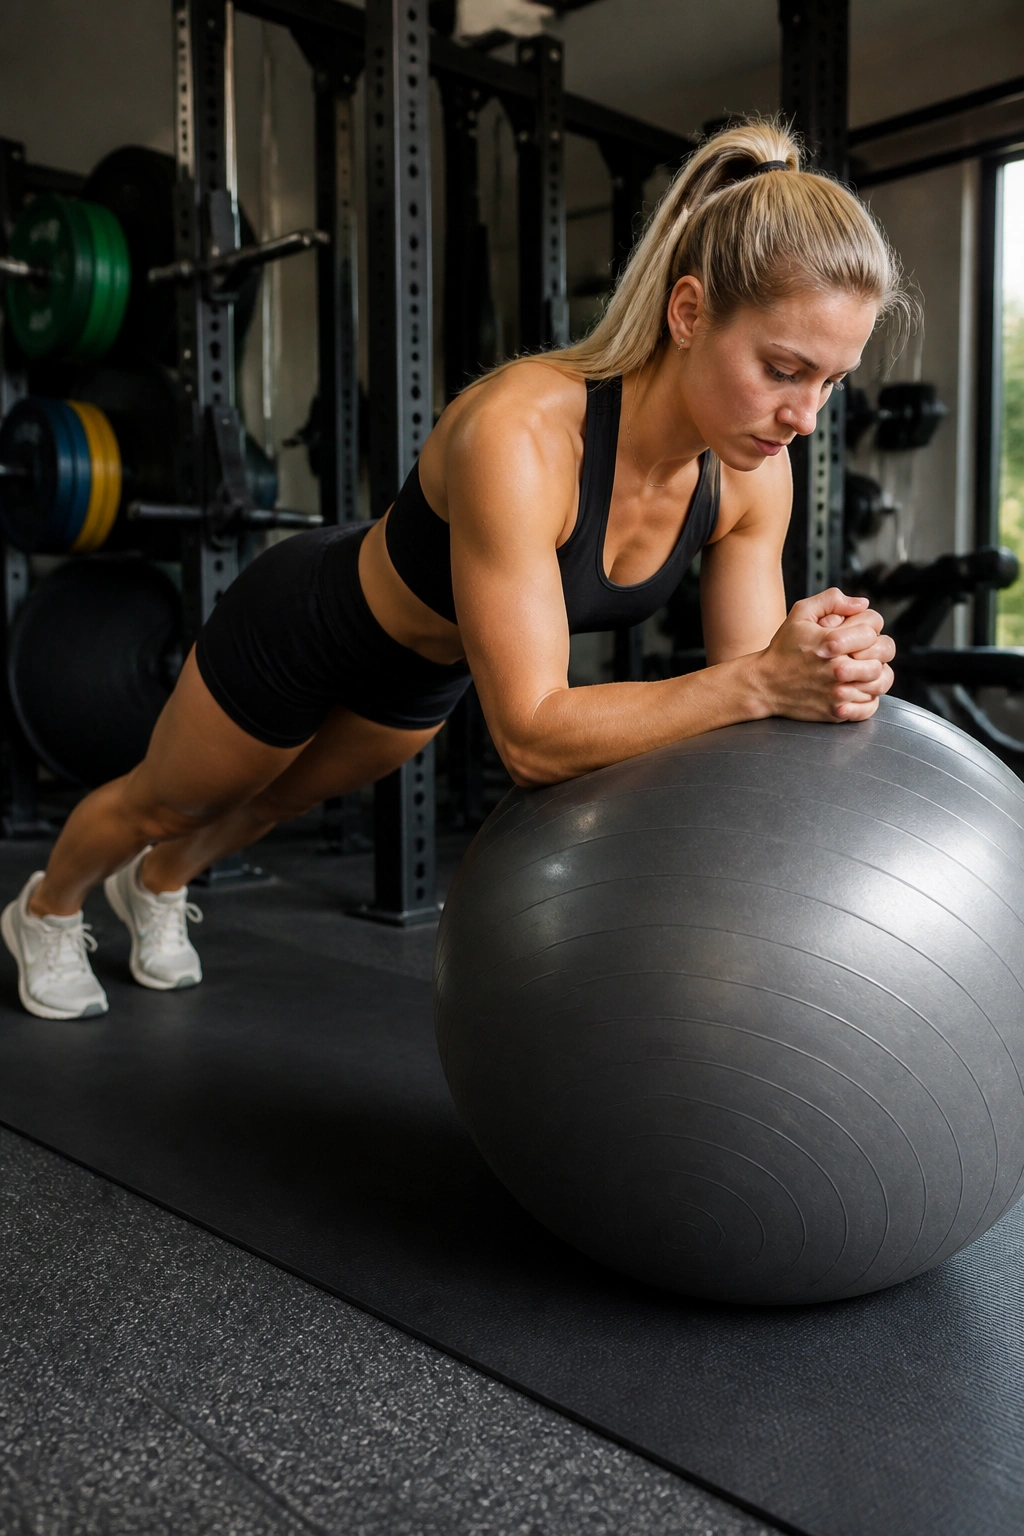
Nasty little exercise.
Set up in a forearm plank with the forearms on the ball, then shift your body a few inches forward and back by moving through the shoulders and toes. The motion should be small enough that your head barely travels, but big enough that the abs have to keep re-bracing. Aim for 8 to 12 rocks or a 20 to 30 second set.
The body saw is not a shrugging contest. If the shoulders climb up near the ears, reset. If the lower back sags, cut the range in half. Tiny movement, real tension.
What Not to Do
- Don’t let the ball run away from you.
- Don’t twist the hips.
- Don’t chase range for its own sake.
- Don’t hold your breath the whole time.
Compared with the rollout, this one is more about shifting the whole body as a unit. It is sneaky. A few controlled rocks can feel like a much longer set if you keep the line tight.
I like this move after planks and before harder ab work because it teaches the body to stay organized while the support point changes. That skill carries over fast.
15. Stability Ball Jackknife
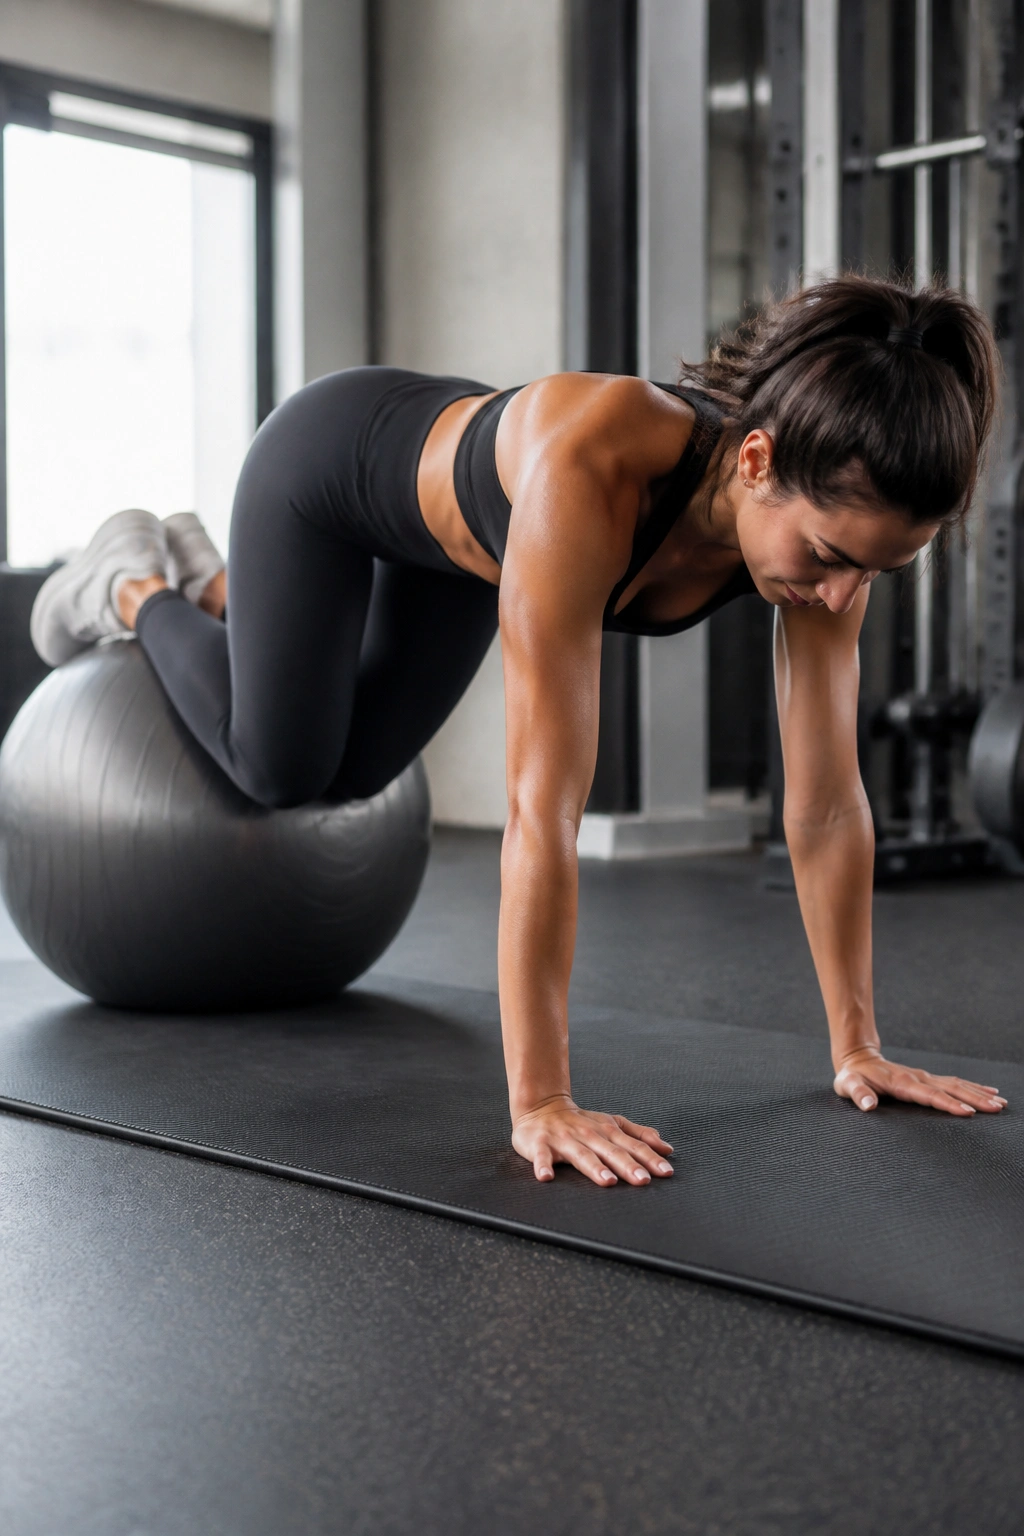
People call this an ab move, but your shoulders and hip flexors have opinions too.
Start in a strong plank with your shins on the ball, then pull the knees toward your chest while the ball rolls in under you. Extend back out with control and stop before the hips collapse. A good target is 6 to 10 reps for 2 to 3 sets.
The jackknife is usually easier than a full pike because the knees stay bent more. That bent-leg position shortens the lever and lets you focus on control instead of pure strength. It is still plenty hard.
A clean rep should look like one smooth fold and unfold. If you have to kick the ball or jerk the hips to finish the movement, the set is too ambitious right now. Shorten the range and keep the body tidy.
This is a useful stepping stone for harder moves because it teaches you how to pull the ball in without losing the plank line completely. That skill matters more than people think.
16. Stability Ball Pike
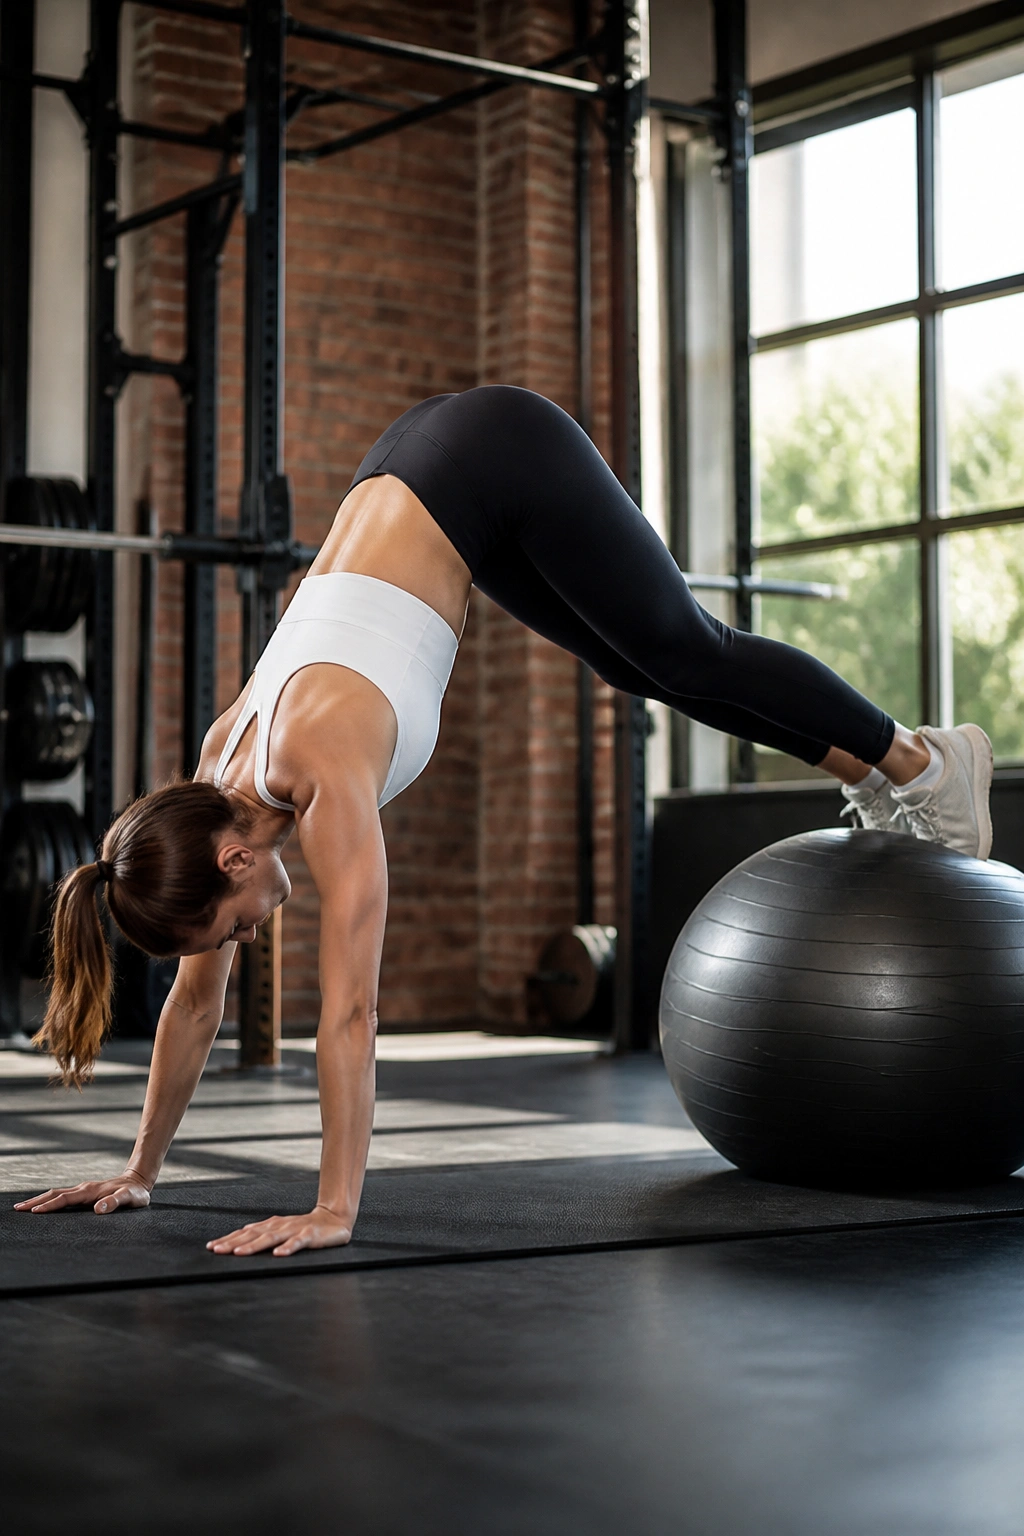
Why does a pike on a ball feel so weird?
Because the body is doing a very specific job: stay long, then fold at the hips without letting the shoulders collapse. From a plank with your shins or feet on the ball, lift the hips up and roll the ball toward your hands until your body makes an inverted V. Lower back into plank with control. 5 to 8 reps is plenty.
A Cleaner Cue
Think about pushing the floor away while you lift the hips. That keeps the shoulders active and stops the movement from becoming a floppy hip hinge with little control. If your hamstrings are tight, bend the knees slightly on the way up and keep the motion smooth.
The pike is a real step up from the jackknife. The straighter the legs stay, the more the abs have to manage the fold. That is why this exercise earns respect fast. It does not hide mistakes well.
If full range is too much, practice a half pike and hold the top for 1 second before lowering. That version still trains the position and keeps the quality high.
17. Single-Leg Hamstring Curl on the Stability Ball
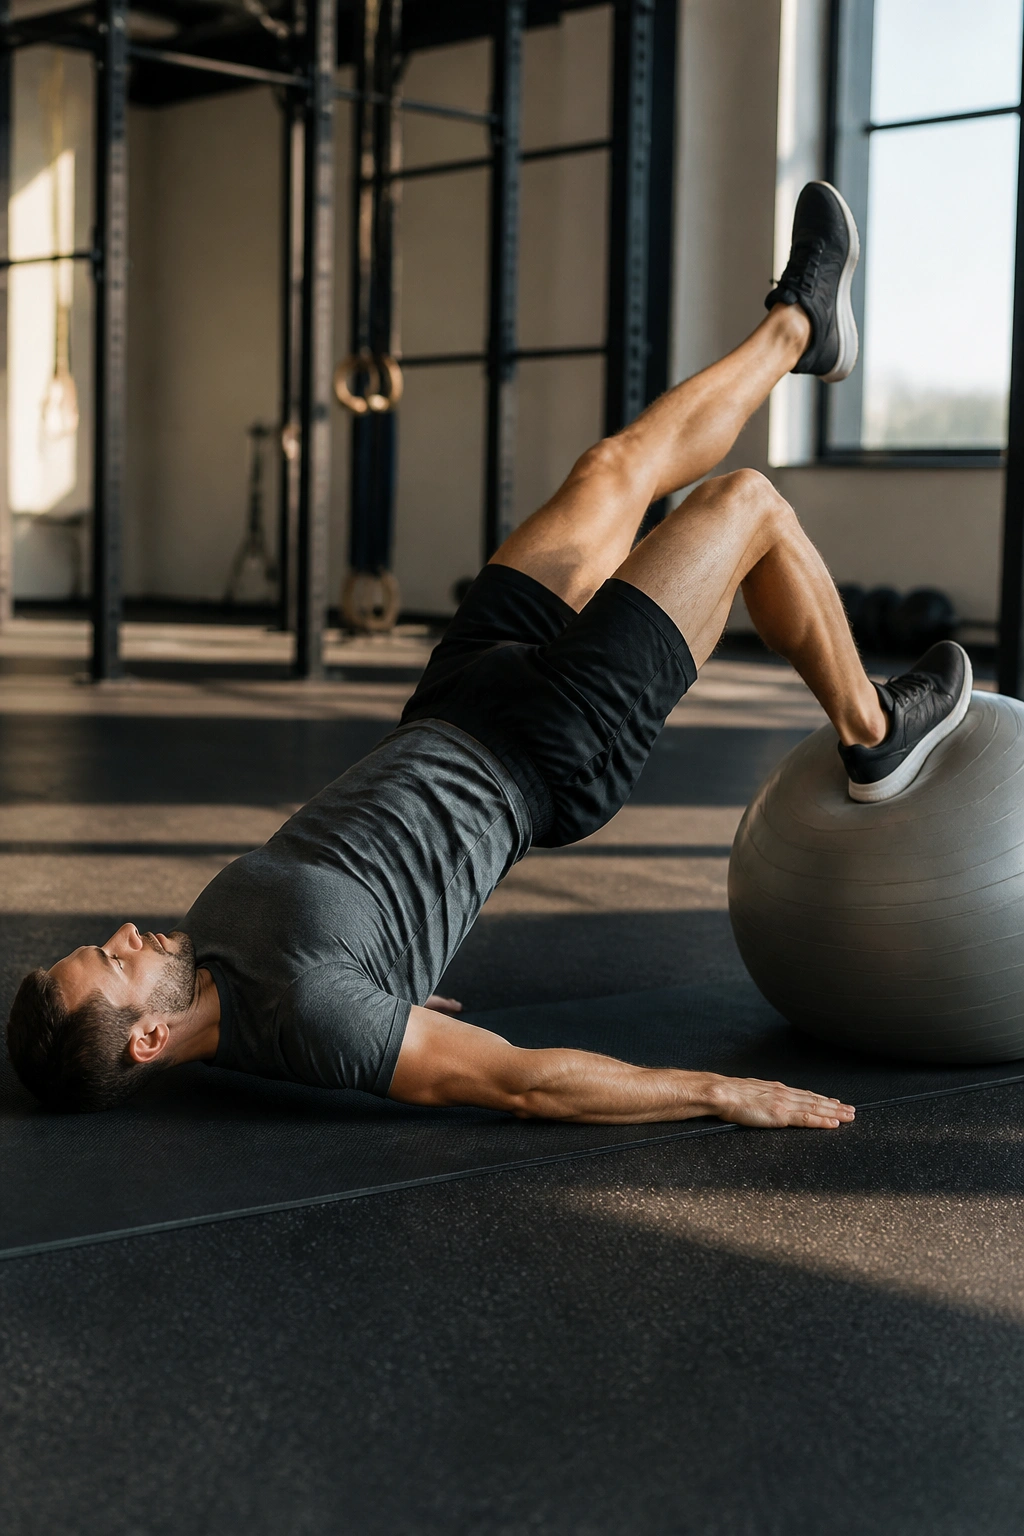
One heel stays on the ball. The other leg gets lifted. That tiny change is brutal.
Set up in the bridge position, place one heel on the ball, and extend the other leg straight or slightly bent off the floor. Curl the ball toward you using the working leg, then return it slowly. Keep the hips level the whole time. Start with 4 to 6 reps per side and treat every rep like it matters.
If the hips drop, reset.
That is the rule here. The movement can look fine while the pelvis quietly tips to one side, and that is usually where the work goes missing. A mirror helps, but so does a slower tempo.
Quick Setup Checks
- The working heel stays centered on the ball.
- The lifted leg stays quiet.
- Both hip points face the ceiling.
- The curl happens without twisting.
This is one of the tougher stability ball exercises because it layers balance on top of hamstring strength. It’s not a move to rush. If you can keep it smooth for a few clean reps, you’re doing it right. If not, go back to two legs and earn the upgrade.
18. Reverse Plank with Heels on the Ball
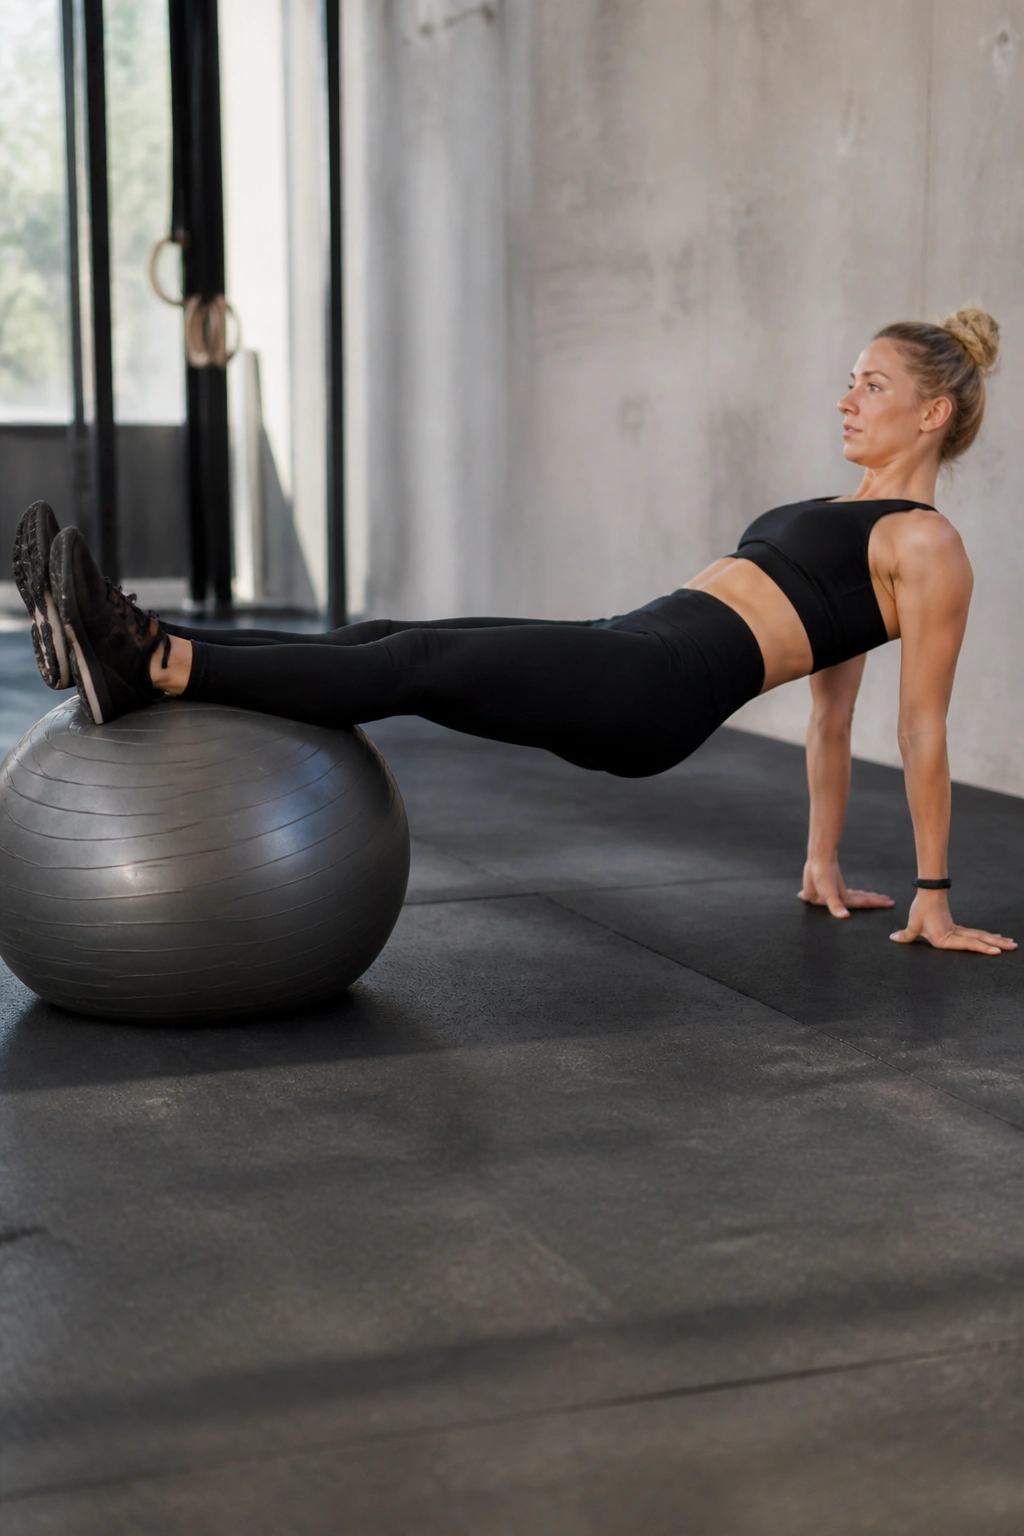
This one tells you a lot about your posterior chain in about ten seconds.
Sit on the floor with your hands behind you, place your heels on the ball, and lift the hips until your body makes a long line from shoulders to ankles. Hold for 15 to 25 seconds at first, or do 6 to 8 controlled reps if you prefer movement over static holds.
The reverse plank asks for glutes, hamstrings, shoulders, and upper back at the same time. It also shows you whether the shoulders are happy with extension, which is useful information even if it is not glamorous.
If the shoulders feel cranky, turn the hands slightly out and keep the chest open without forcing it. If the hamstrings cramp, slide the heels a little closer to the hips before you lift. Those little tweaks matter.
A small circuit of the wall squat, dead bug, rollout, and reverse plank covers more ground than a noisy machine session ever will. Pair one beginner move, one core move, one hamstring move, and one harder finisher, and the ball earns its place on the floor.
