



You know that feeling by mid-afternoon. Your chest starts to cave in, your head inches forward toward your screen, and your shoulders feel like they are permanently attached to your ears. This isn’t just a sign of fatigue; it is a structural default. Our modern lives demand that we lean inward. We hunch over desks, look down at phones, and cradle steering wheels for hours. Over time, these habits train your muscles to hold you in a slumped position. The muscles in your chest tighten, while the muscles in your mid-back weaken, creating a tug-of-war that your spine eventually loses.
Correcting this does not require a gym membership or expensive equipment. It requires rewiring the relationship between your muscles. You need to stretch the tissues that have become chronically tight and strengthen the ones that have gone dormant. Think of it as a maintenance program for your physical alignment. If you can dedicate a few minutes a day to these movements, you can effectively undo the compression of a sedentary day.
True improvement comes from frequency and awareness, not intensity. Do not try to force your body into an unnaturally rigid “military” posture. Instead, look for a neutral, comfortable alignment where your ears, shoulders, and hips stack vertically. This is not about forcing your shoulders back until they hurt; it is about providing enough tension in your back muscles to support your frame effortlessly. Let’s look at the movements that make this possible.
1. Wall Angels
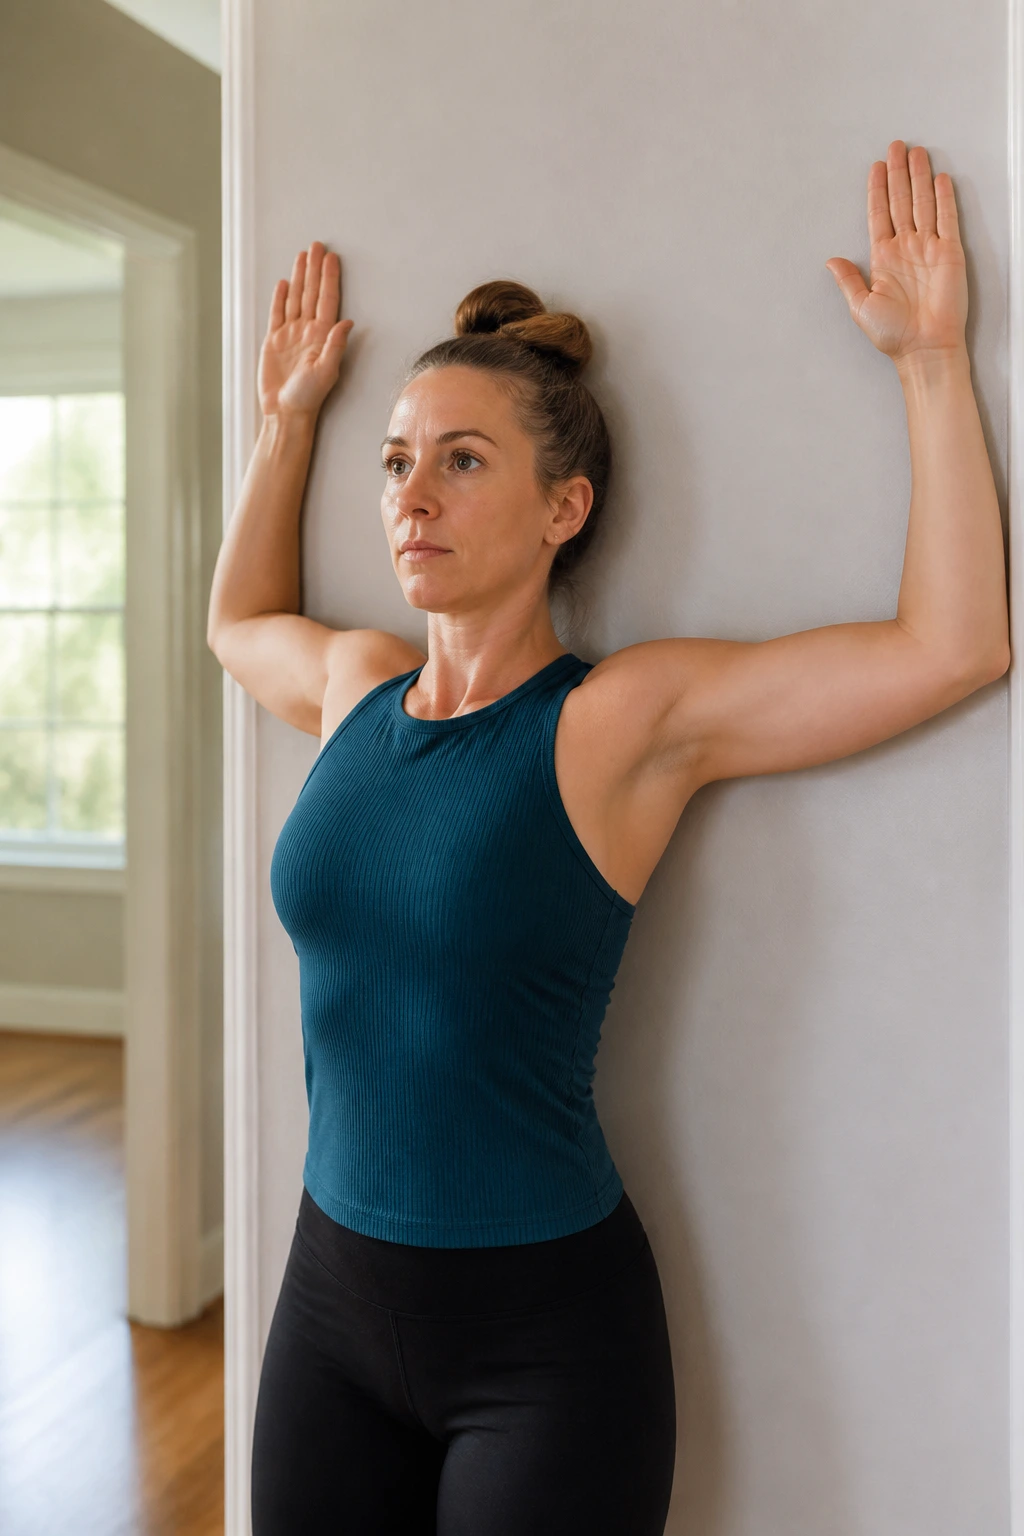
This is arguably the most effective drill for teaching your body where your shoulders should actually sit. It forces you to engage the muscles between your shoulder blades—the rhomboids—while simultaneously opening up the tight chest muscles that pull you into a slouch.
Why It Works
By keeping your entire spine and arms in contact with the wall, you eliminate the ability to compensate. If your chest is tight, your hands will likely want to lift off the wall as you raise them. That struggle is exactly the point.
How to Execute
- Stand with your feet a few inches from a wall, pressing your heels, glutes, upper back, and head against it.
- Bring your arms up into a “goalpost” position, with elbows and wrists touching the wall.
- Slowly slide your arms upward, keeping the back of your hands and elbows glued to the surface.
- If your lower back arches away from the wall, stop, reset, and focus on tucking your pelvis.
Pro Tip: Move slowly. This is not a cardio move. The effort should come from squeezing your shoulder blades down and together throughout the entire range of motion.
2. Chin Tucks
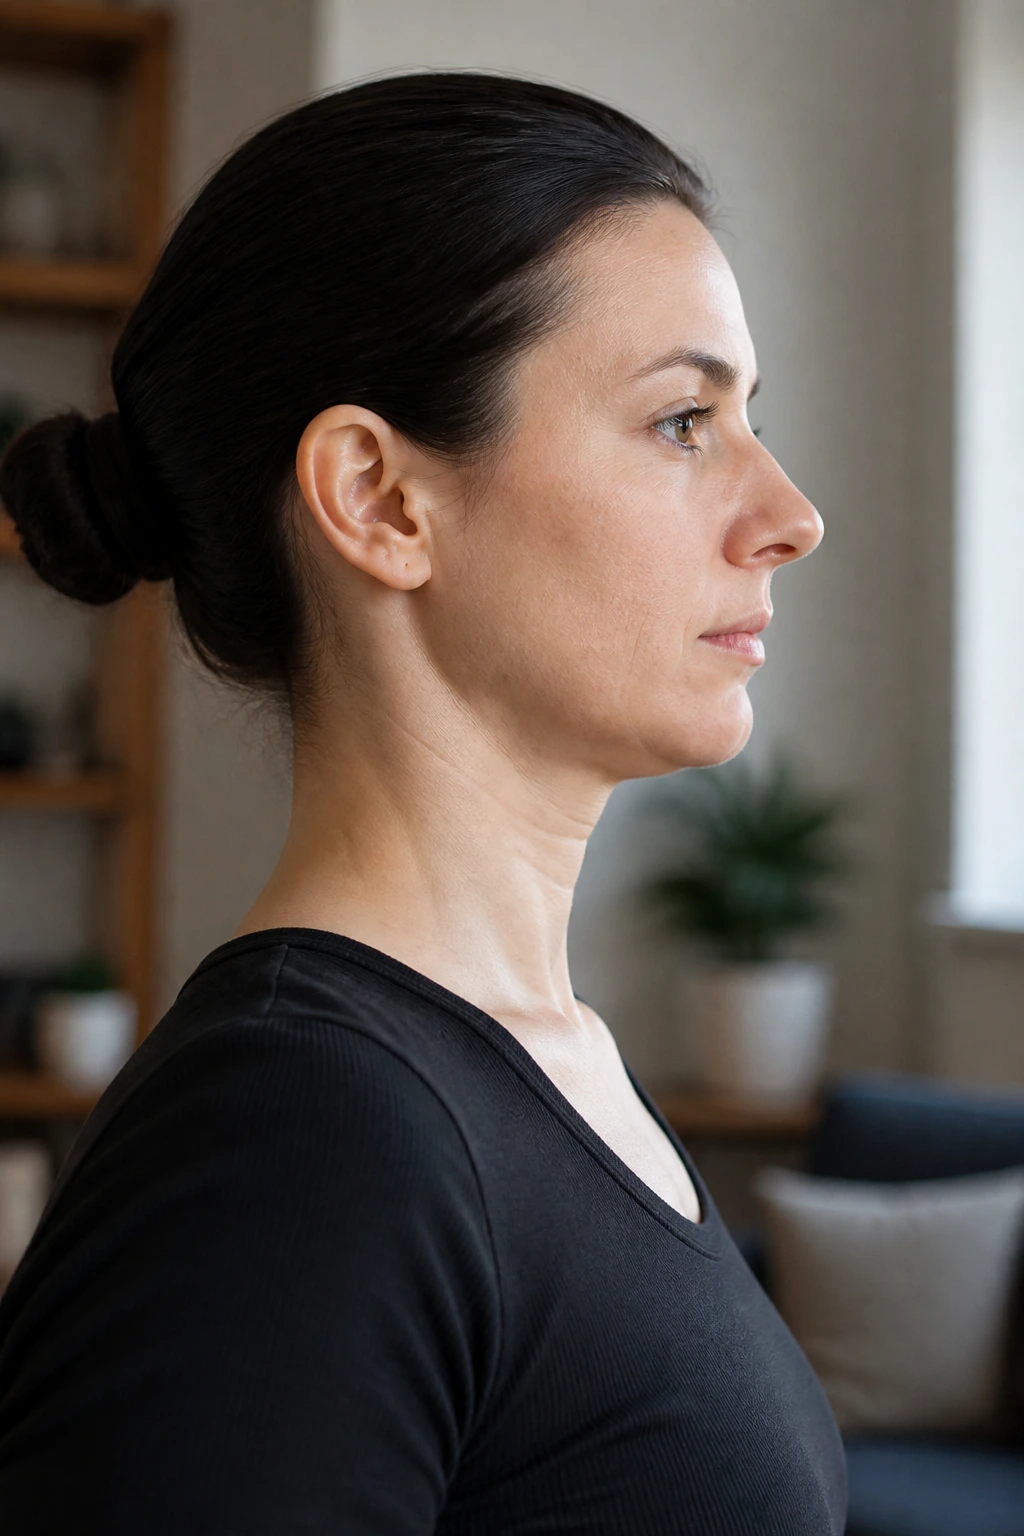
We spend hours in a “forward head posture,” often referred to as tech neck. Your head weighs roughly ten to twelve pounds; when it shifts forward, your neck muscles have to work significantly harder to keep it upright, which leads to chronic tension and headaches.
The Mechanism
Chin tucks aren’t about nodding; they are about sliding your skull straight backward. You are essentially trying to make a “double chin” to align the base of your skull with your spine. It feels awkward at first, but it is necessary to reset the cervical spine.
Implementation
- Sit or stand tall with your gaze straight ahead.
- Without tilting your head up or down, retract your chin horizontally backward.
- Imagine a string pulling the crown of your head toward the ceiling while your chin moves away from the mirror.
- Hold this retracted position for five seconds.
- Repeat this ten times.
Visual Cue: Think of your head as a block that needs to slide backward along a shelf, not a hinge that needs to tilt.
3. Cat-Cow Stretch
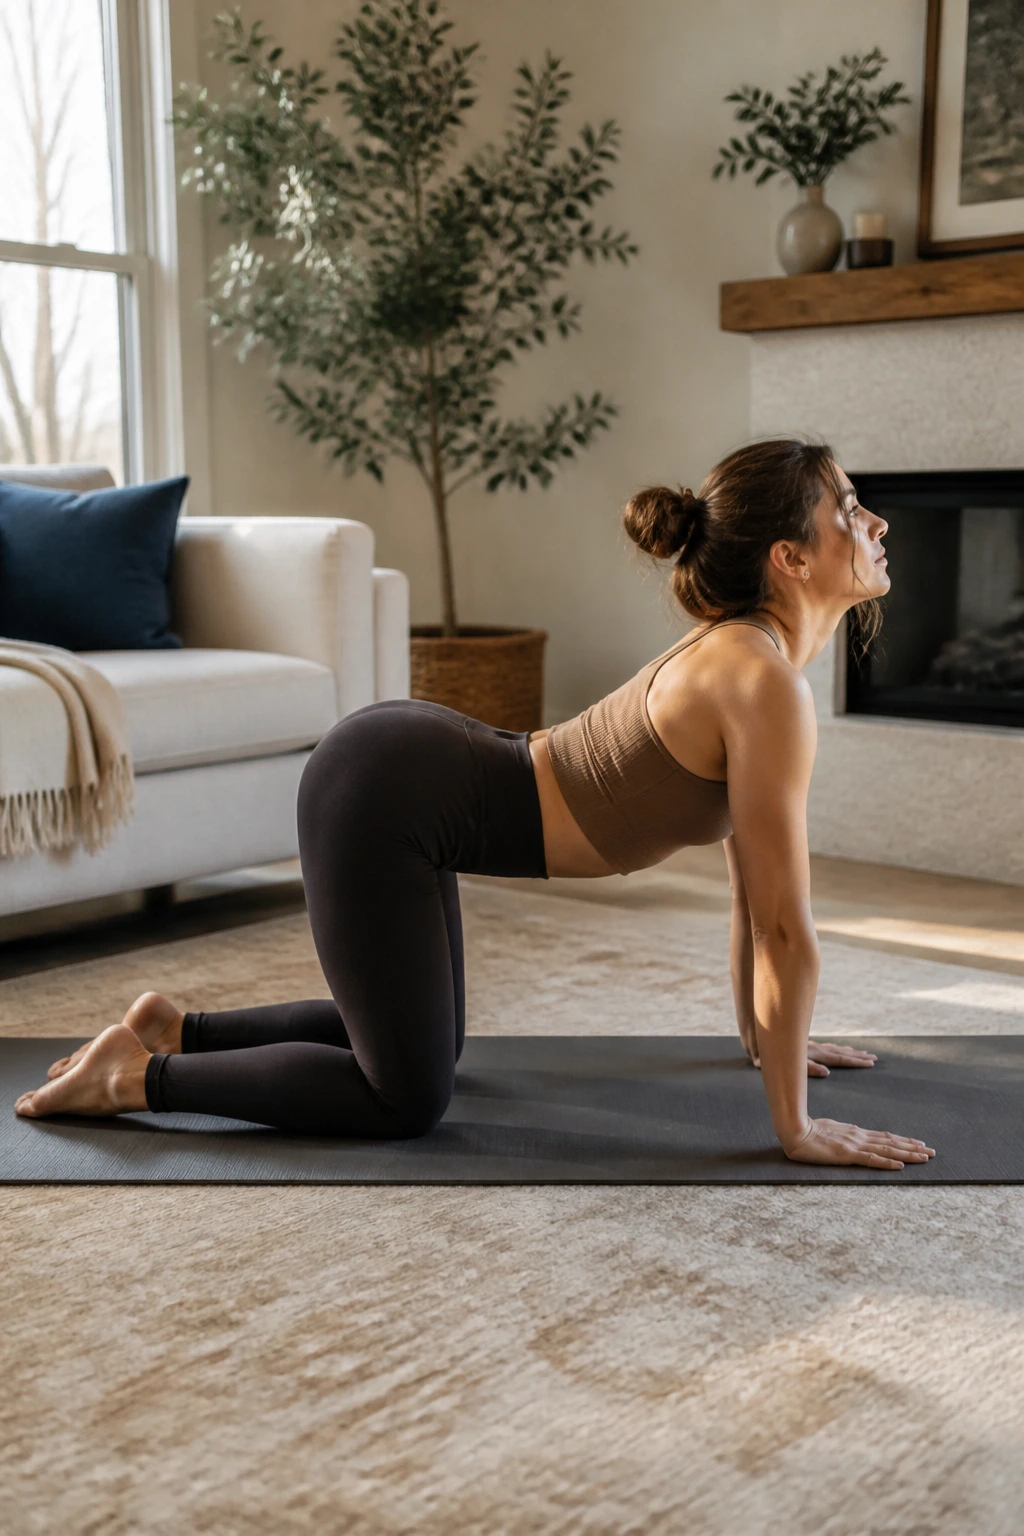
Your thoracic spine—the upper and middle part of your back—should be mobile. When you spend the day hunched over, this area becomes stiff and “locked” into a flexed position. This stretch forces the spine to articulate through its full range of motion.
Why It’s Essential
Moving your spine segment by segment helps hydrate the discs and releases tension in the long, vertical muscles that run parallel to your backbone. It is a fundamental movement for regaining spinal health.
How to Flow
- Get onto your hands and knees in a tabletop position.
- Inhale as you drop your belly toward the floor and look upward, arching your back (Cow).
- Exhale as you tuck your chin and round your spine toward the ceiling, pushing the floor away (Cat).
- Perform these slowly, focusing on moving one vertebra at a time rather than jerking your whole back at once.
Observation: You will notice one part of your spine feels stiffer than the rest. Spend a little extra time articulating through those stubborn areas.
4. Dead Bug
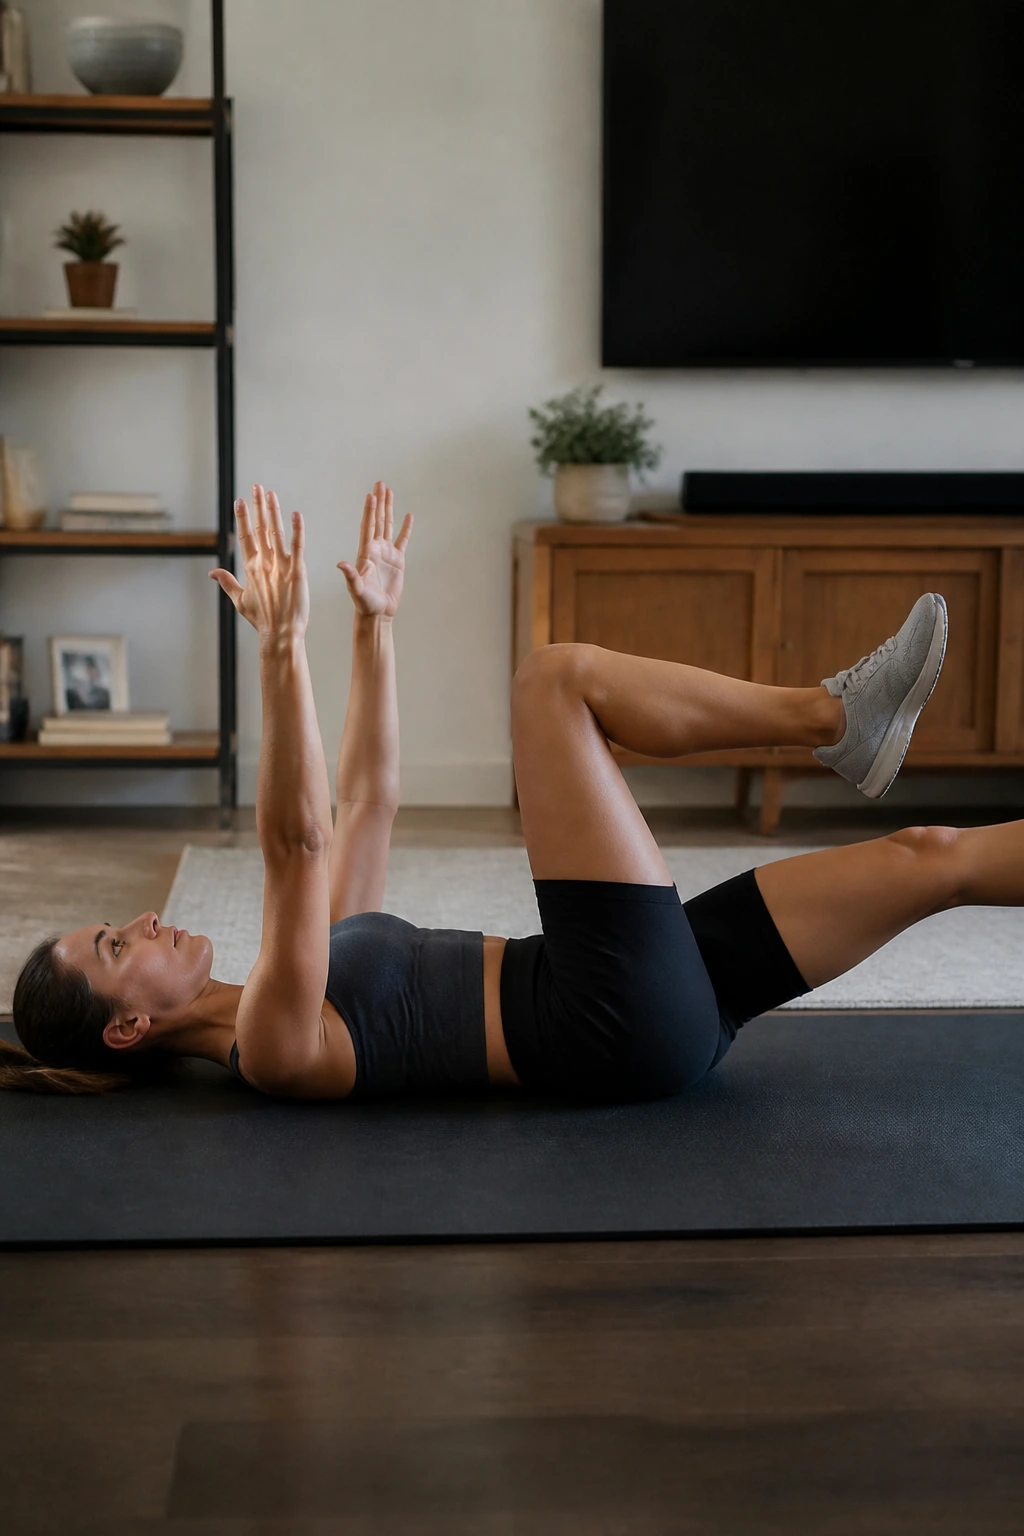
A weak core is the silent killer of good posture. If your abdominal wall isn’t strong enough to stabilize your torso, your lower back will compensate by arching excessively, which tilts your pelvis and disrupts your entire vertical line.
The Corrective Approach
The Dead Bug is deceptively simple. By keeping your lower back pressed firmly into the floor, you teach your core to maintain a neutral spine even while your limbs are moving. This translates directly to standing posture where you need to keep your ribs down.
Key Details
- Lie on your back with arms reaching toward the ceiling and legs in a tabletop position (knees bent at 90 degrees).
- Slowly lower your right arm behind your head and your left leg toward the floor simultaneously.
- Crucially, your lower back cannot lose contact with the ground.
- If your back starts to arch, do not lower your leg as far.
- Return to the center and switch sides.
5. Bird-Dog
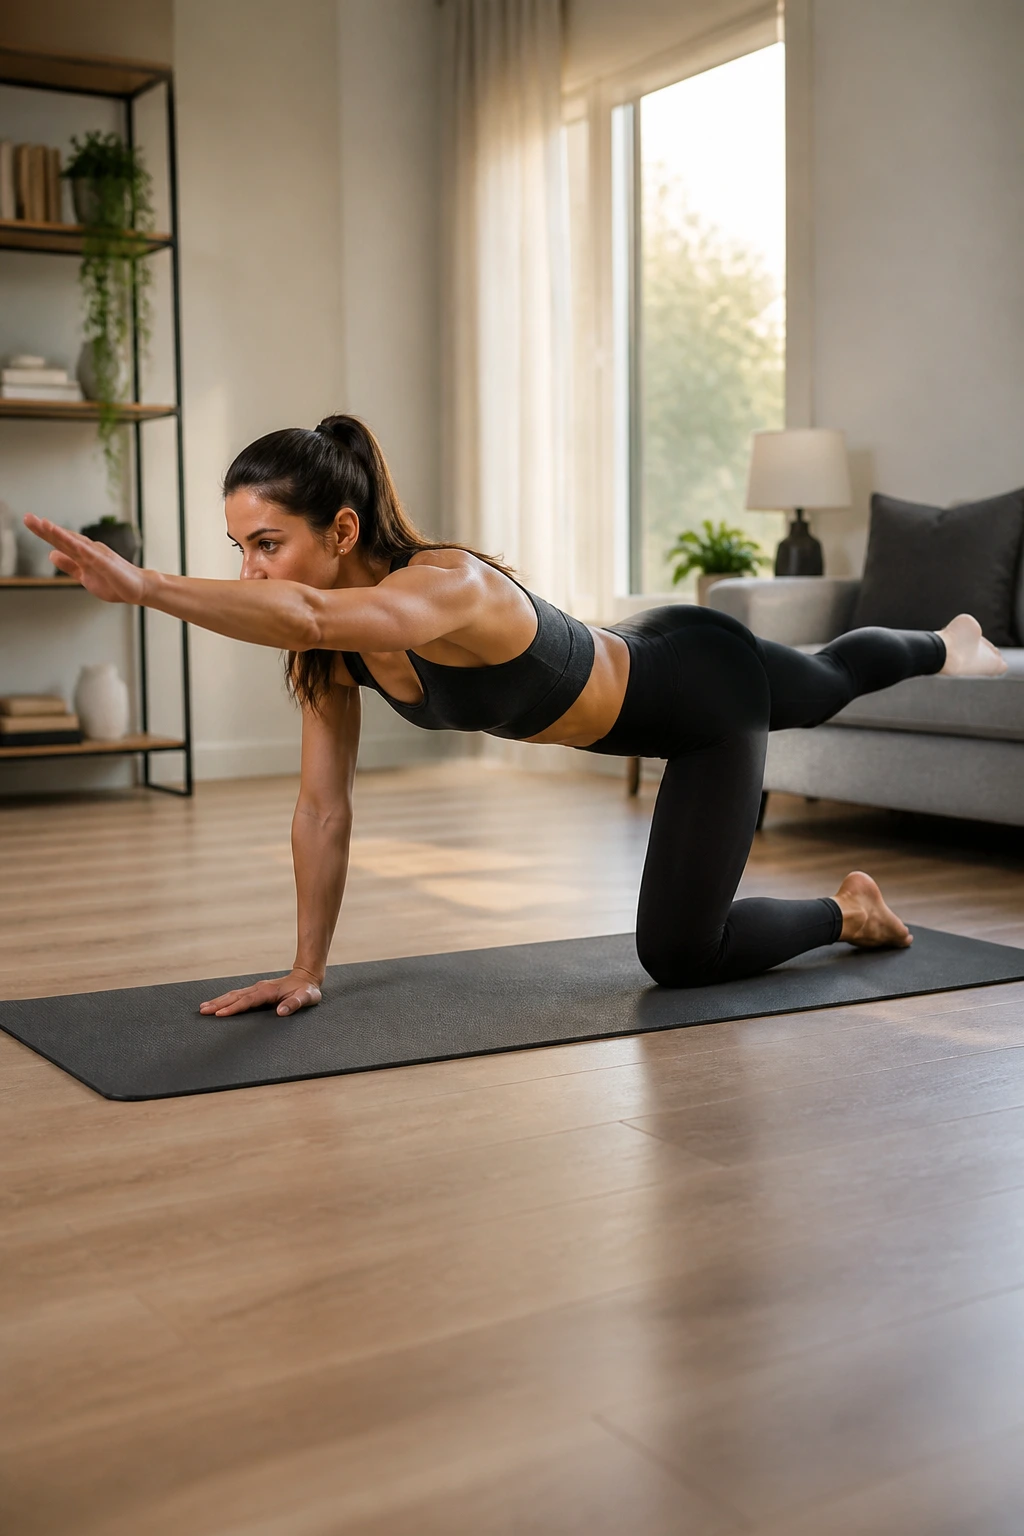
This movement targets the cross-body stability of the spine. It requires you to maintain a flat back while extending opposite limbs, which is an excellent way to train the erector spinae muscles without putting them under the high load of a traditional weightlifting movement.
Why This Matters
It creates stability without compression. By engaging your core to prevent your hips from rocking, you are training your body to hold a steady, aligned position against the resistance of your own limbs.
Execution Tips
- Start in a tabletop position with hands under shoulders and knees under hips.
- Extend your right arm forward and your left leg backward at the same time.
- Focus on maintaining a straight line from your fingertips to your heel.
- Do not let your hips rotate; imagine a glass of water balanced on your lower back.
- Switch to the left arm and right leg.
6. Glute Bridges
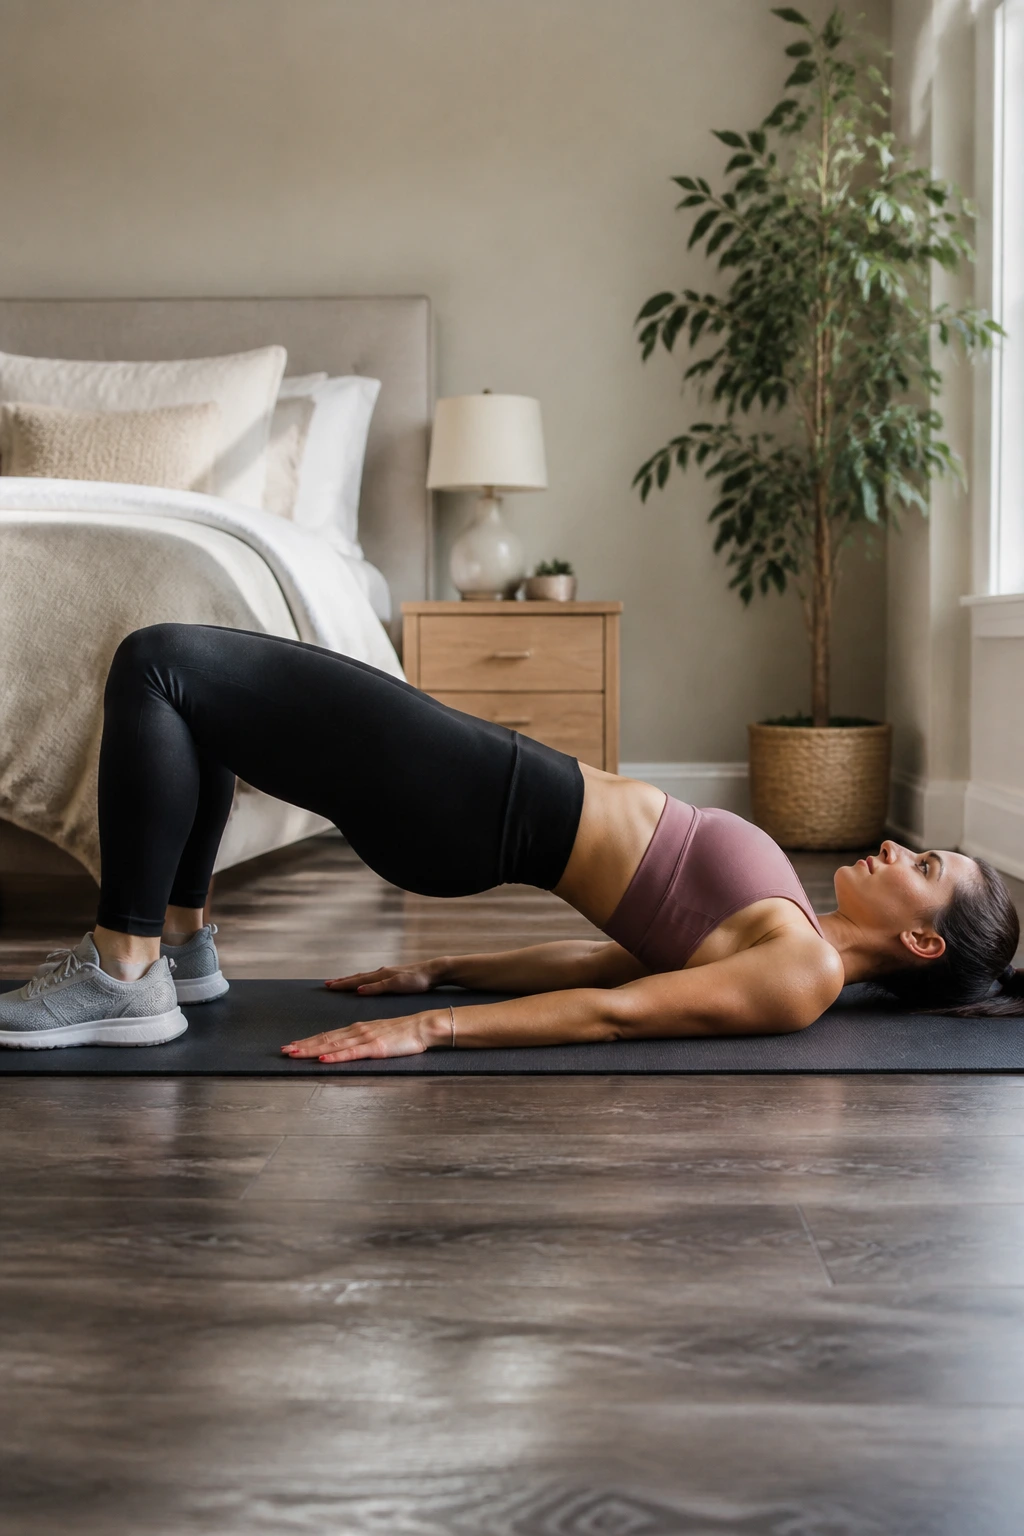
Your glutes are designed to support your pelvis. When we sit for hours, these muscles “turn off,” leading to a condition known as gluteal amnesia. When your glutes are weak, your lower back takes the brunt of the work to keep you standing, causing a swayback appearance.
Strengthening the Posterior Chain
Bridging activates the glutes and hamstrings, helping to pull the pelvis back into neutral alignment. It counters the shortening of the hip flexors that occurs when you sit.
How to Perform
- Lie on your back with knees bent and feet flat on the floor, hip-width apart.
- Drive through your heels to lift your hips toward the ceiling.
- Squeeze your glutes at the top of the movement—do not use your lower back to get the height.
- Hold for a second at the top, then lower with control.
Warning: If you feel this mostly in your lower back, your feet might be too far away from your body. Bring them closer to your glutes.
7. Doorway Chest Stretch

Tight pectoral muscles are the primary culprit for “rolled” shoulders. If your chest is tight, it acts like a bungee cord, constantly pulling your shoulders forward and inward. You cannot fix your posture without addressing this tension.
The Rationale
Stretching the pecs creates the room your shoulders need to sit back naturally. This isn’t a strength move; it’s a structural reset for your range of motion.
The Technique
- Stand in an open doorway and place your forearms against the frame, elbows at shoulder height.
- Step one foot forward, shifting your weight gently until you feel a deep stretch across your chest.
- Keep your head neutral; don’t let it drift forward during the stretch.
- Hold this for thirty to sixty seconds.
Insight: Vary your arm height to hit different fibers of the pectoral muscle. Placing your elbows higher will stretch the upper chest, while lower placement targets the mid-chest.
8. Thoracic Extension
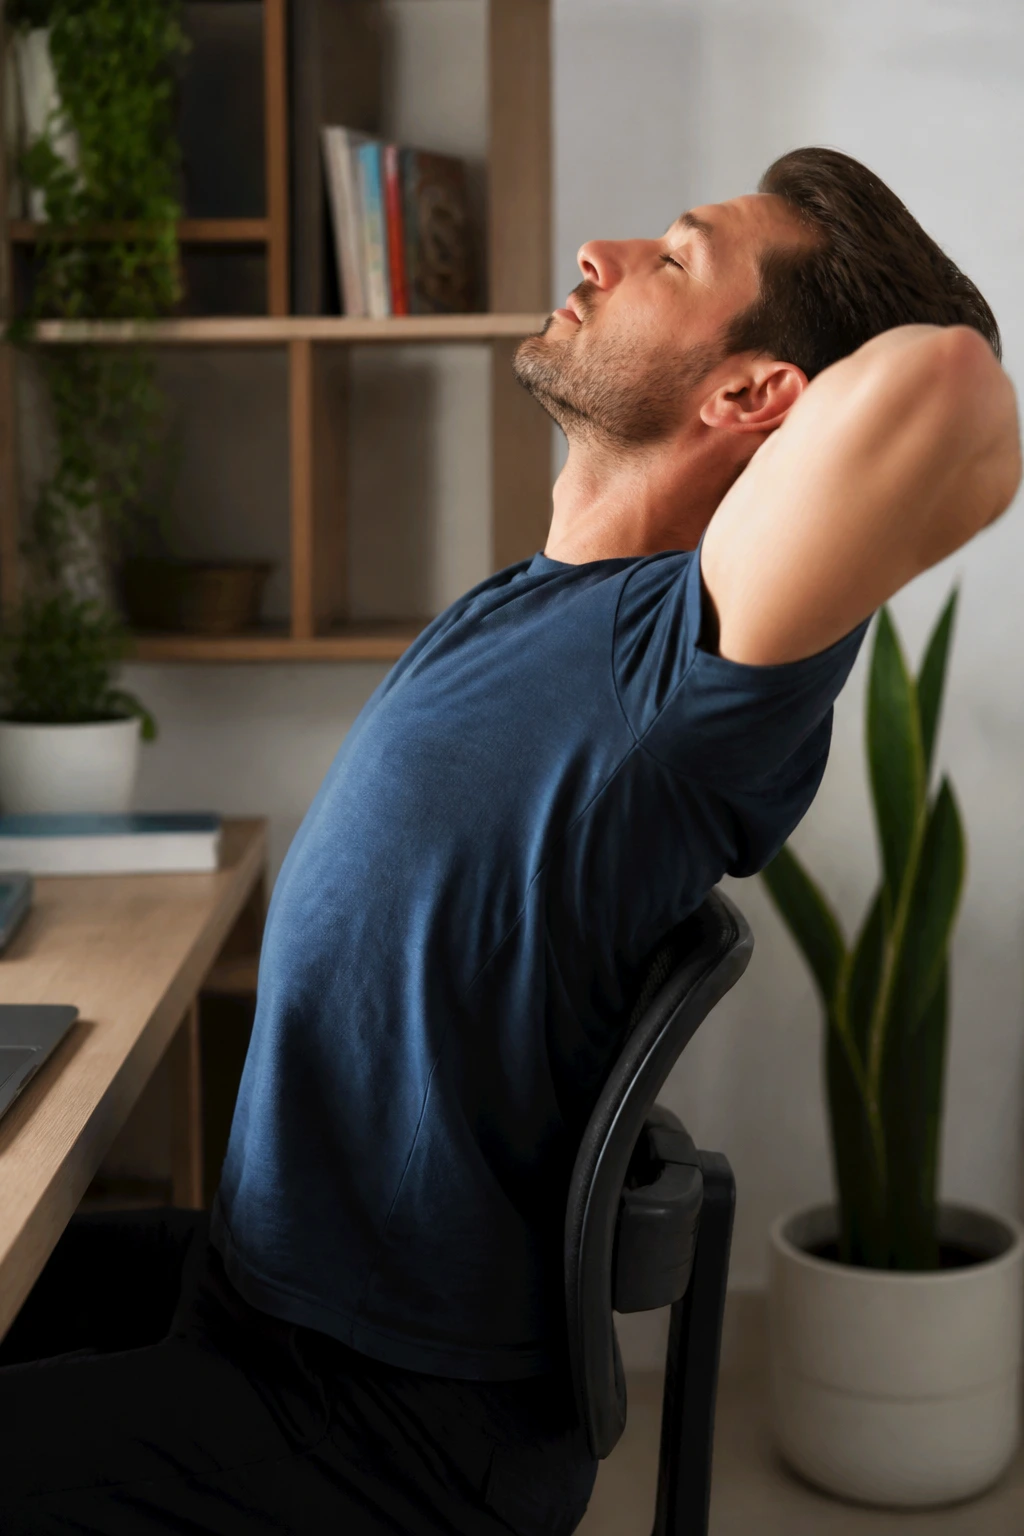
If you have a desk job, you are likely stuck in flexion. Thoracic extension is the direct antidote. You can use a foam roller for this, but if you don’t have one, a sturdy chair works just as well.
How It Changes Alignment
By physically pushing the middle of your spine into extension, you counteract the habitual slump. This helps “open” the ribcage, which improves both posture and breathing capacity.
The Setup
- Sit in a chair with a backrest that stops at the mid-back (the bra-line area).
- Interlace your fingers behind your head to support your neck.
- Lean back over the top of the chair, aiming to bend only at the mid-back.
- Do not dump the movement into your lower back; keep your ribs knit down.
- Breathe deeply in the extended position to allow the tissue to relax.
9. Scapular Retractions
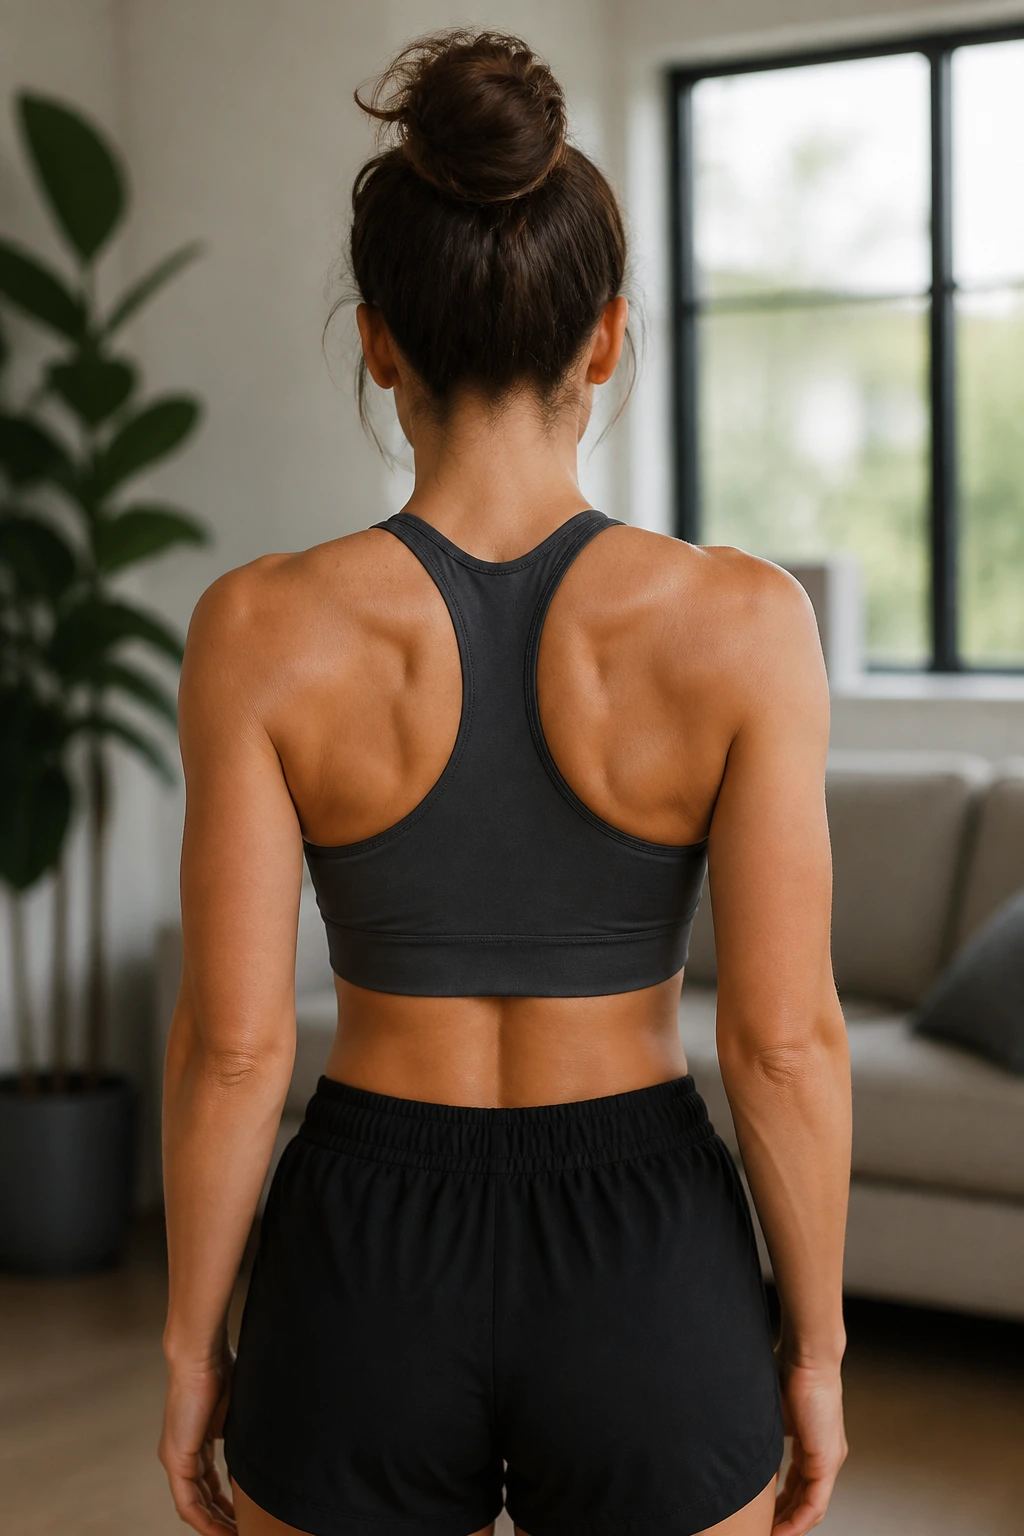
Most people confuse “shoulders back” with “shoulders up.” When we try to fix our posture, we often shrug our traps. Scapular retractions teach you to squeeze your shoulder blades together and down, which is the secret to a stable, relaxed posture.
The Mechanism
You are isolating the rhomboids and the middle-lower traps. These muscles are the foundation of your back. Strengthening them ensures that your shoulders stay anchored down rather than creeping up toward your ears during the day.
How to do It
- Stand with your arms hanging by your sides.
- Imagine trying to pinch a pencil between your shoulder blades.
- Pull your shoulder blades back and down toward your back pockets.
- Keep your neck long and your shoulders relaxed.
- Hold for a count of five and release.
10. Banded Face Pulls
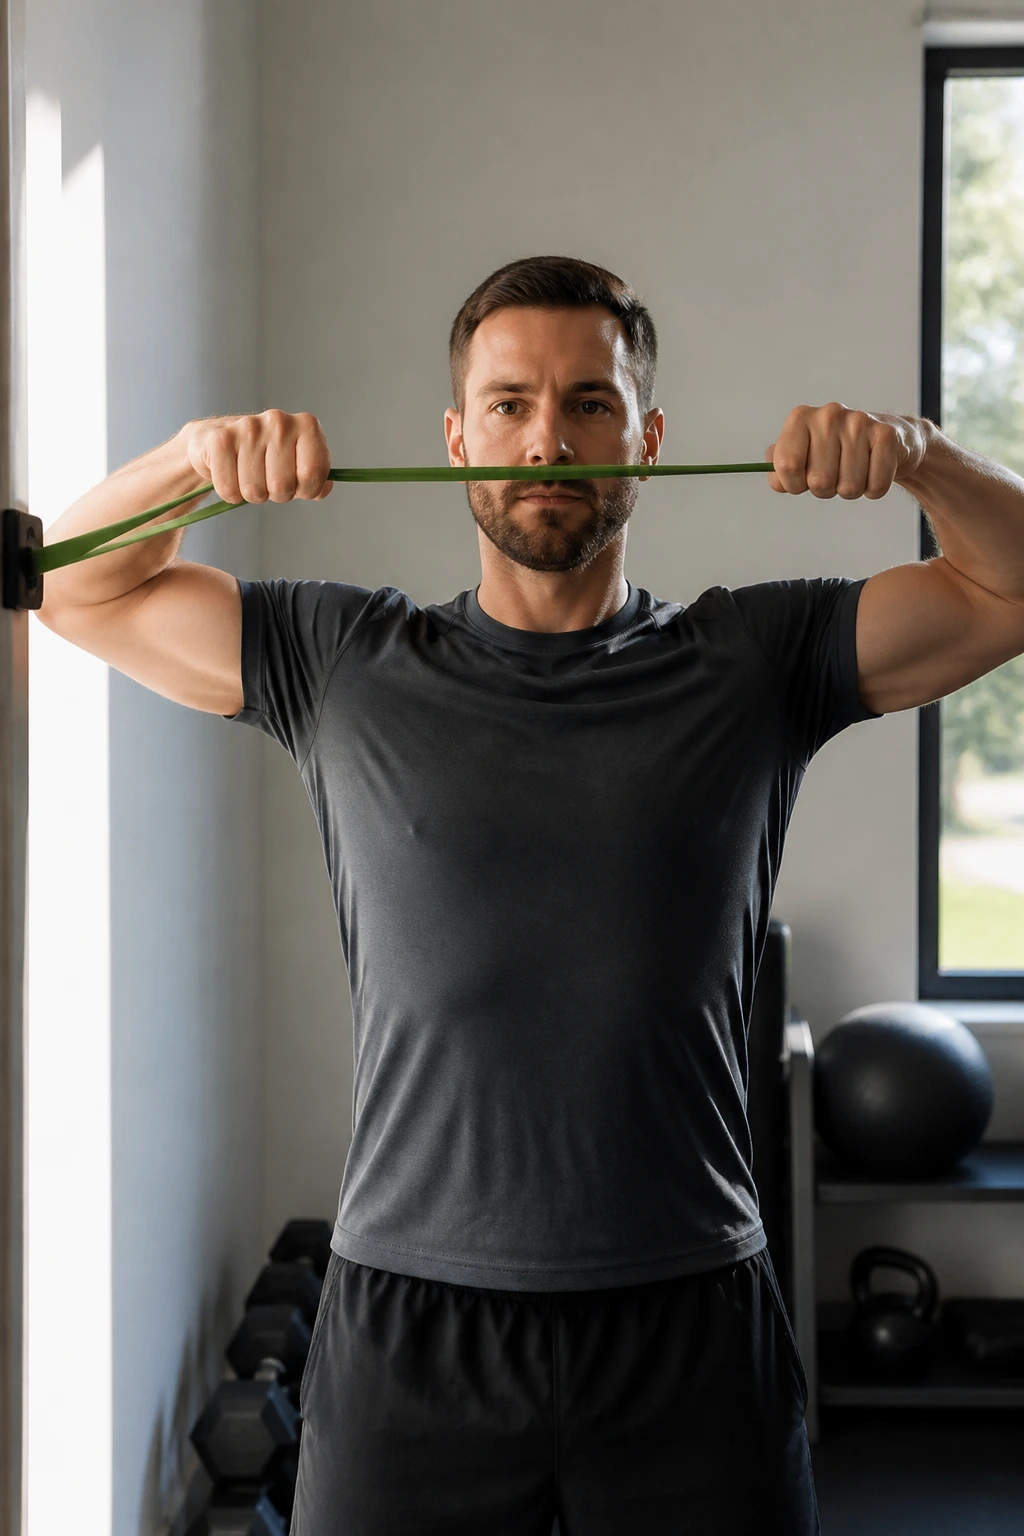
This is a staple for anyone concerned with shoulder health. Using a resistance band, you are actively pulling against tension to force your shoulders into external rotation—the exact opposite of the internal rotation you fall into while typing.
Why It’s Unique
It targets the rear deltoids, which are often underdeveloped. By pulling the band toward your forehead, you are forcing the shoulders to rotate backward and the scapulae to retract, correcting the rounded shoulder position.
Implementation
- Anchor a resistance band at chest height.
- Grab the ends of the band with both hands, palms facing each other.
- Pull the band toward your eyes, keeping your elbows high and wide.
- Squeeze your shoulder blades together at the end of the pull.
- Return slowly to the starting position.
11. Prone Cobra
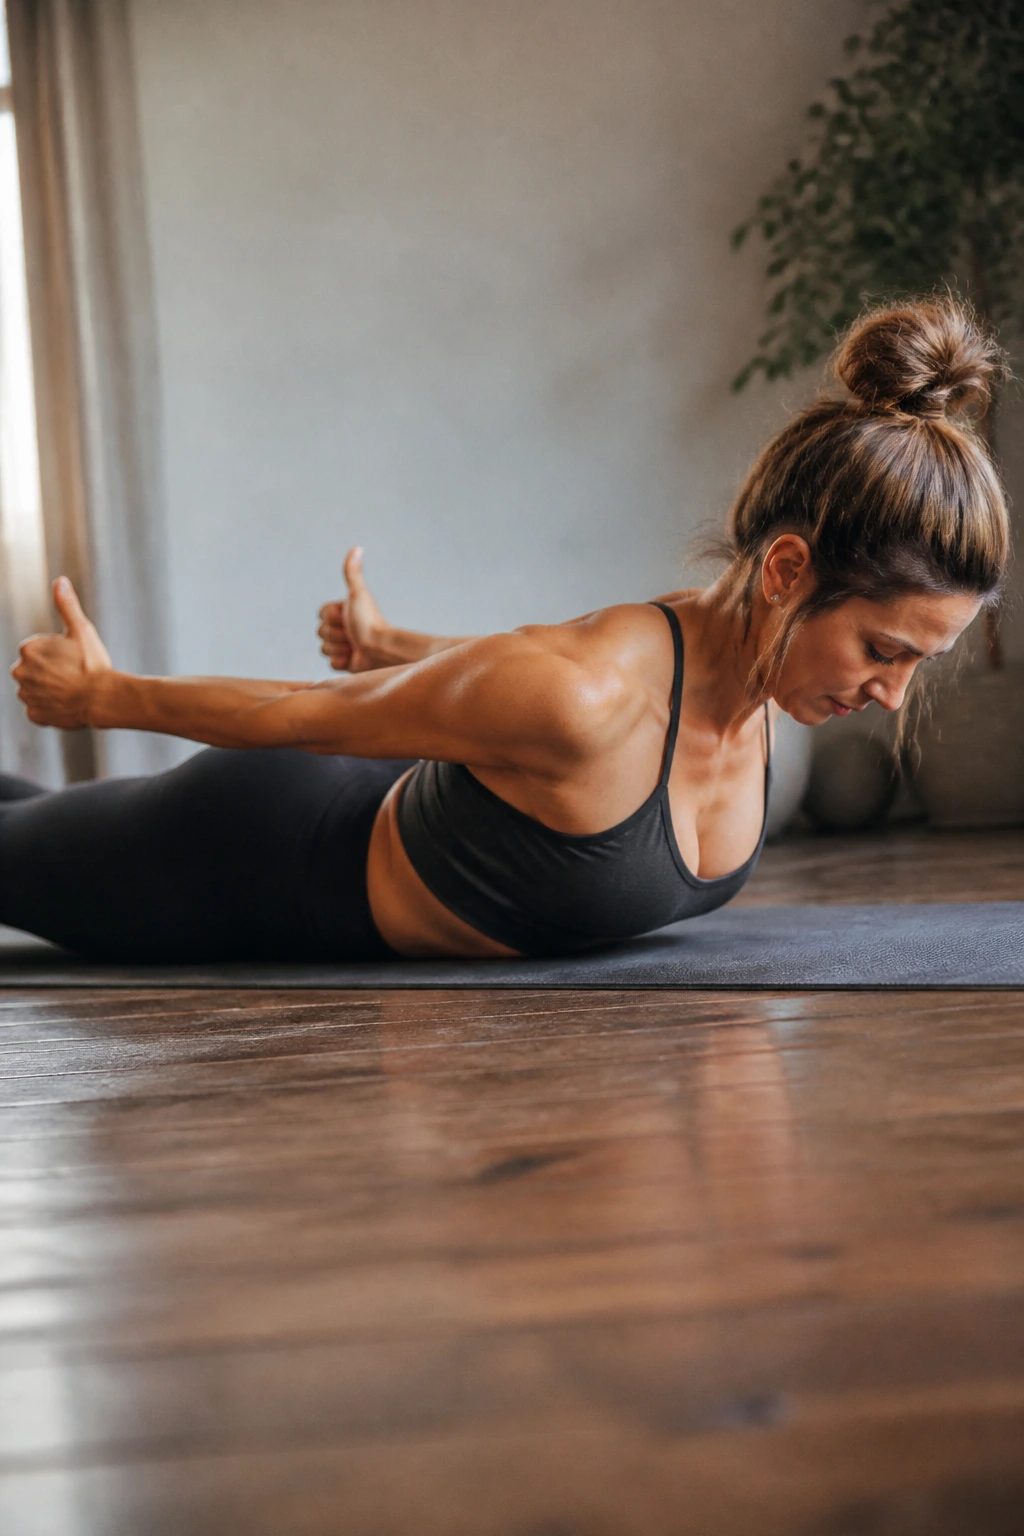
This is a challenging isometric exercise that targets the deep postural muscles of the spine. It is highly effective because it requires zero equipment but demands complete focus on the posterior chain.
The Impact
By lifting your chest and arms off the ground, you are forcing the muscles along your entire spine to contract simultaneously. It is like a plank for your back.
The Steps
- Lie facedown on a mat with your arms at your sides, palms facing the floor.
- Lift your chest, hands, and legs off the floor simultaneously, reaching toward the back wall.
- Rotate your thumbs toward the ceiling to open your chest.
- Keep your gaze on the floor to avoid straining your neck.
- Hold for twenty to thirty seconds.
12. Plank with Shoulder Taps

Standard planks are good, but adding shoulder taps introduces an anti-rotation element. This forces your core and your stabilizing shoulder muscles to work harder to prevent your torso from twisting as you shift your weight.
Why This Matters
Posture is dynamic. You need stability while you move, not just when you are standing still. Tapping your shoulders trains your core to lock your spine in place even when your center of gravity is challenged.
How to Execute
- Start in a high plank position (top of a push-up).
- Engage your glutes and core to keep your hips perfectly still.
- Slowly lift your right hand and tap your left shoulder.
- Return the hand to the floor and switch sides.
- If your hips are rocking side to side, widen your feet for more stability.
13. Side Planks
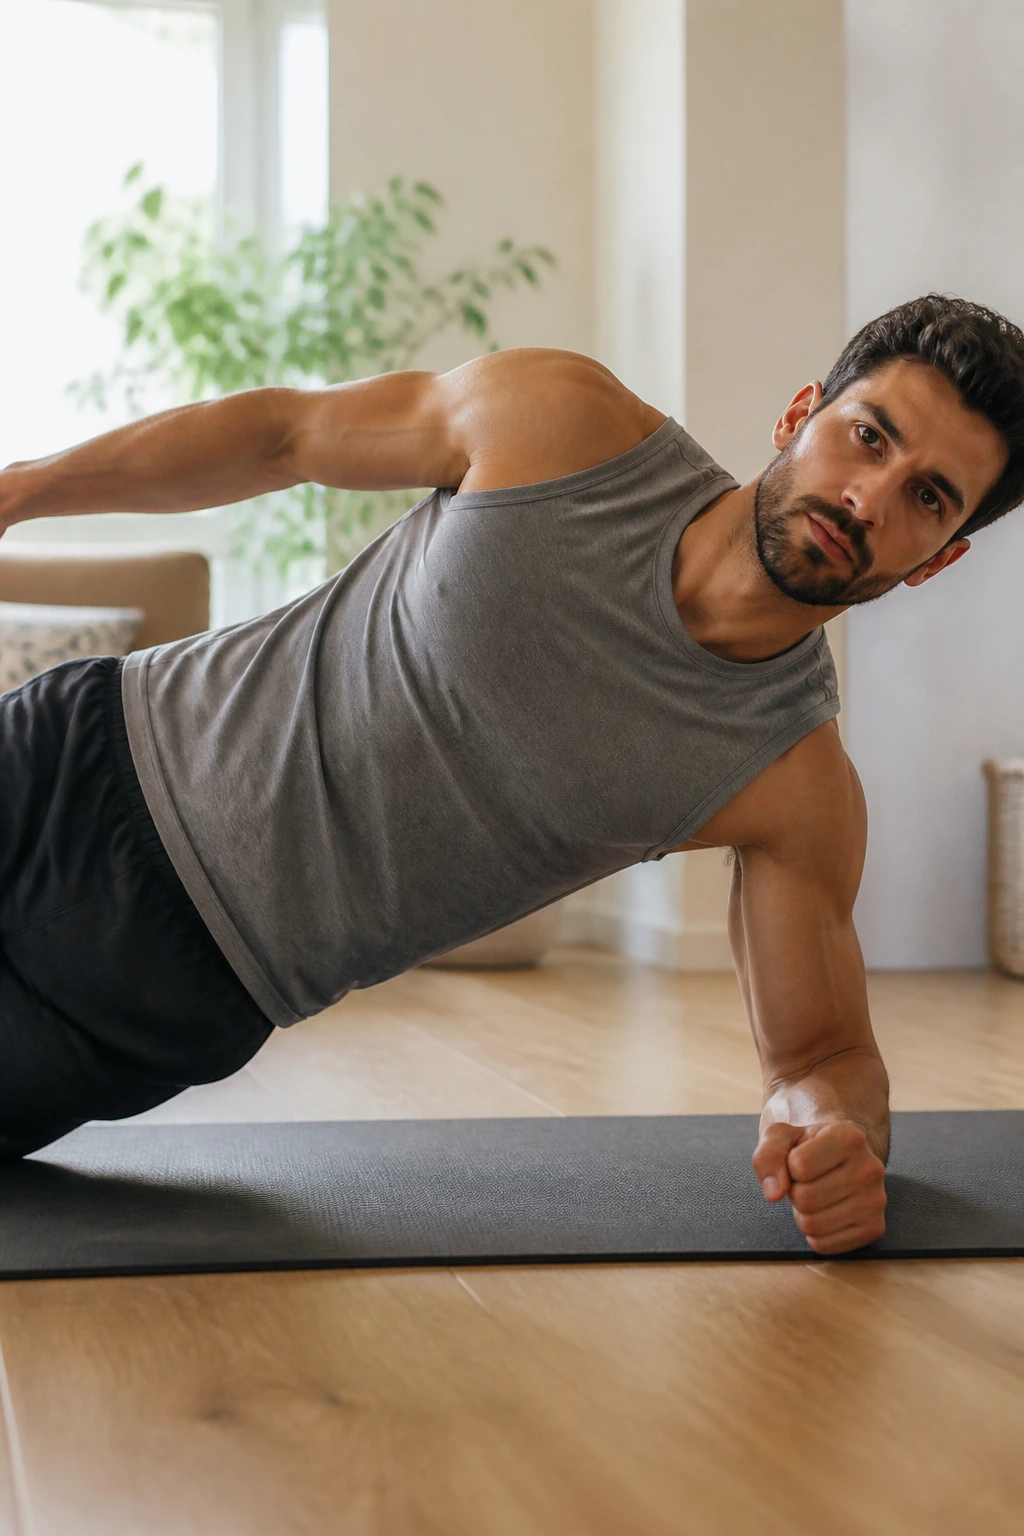
A slumped posture often involves a “dropping” of the hip or a side-leaning tendency that comes from weak obliques. Side planks build the lateral stability needed to keep your spine straight from a side profile.
The Focus
They work the quadratus lumborum—a deep muscle in your lower back—and the obliques. When these are strong, they act like a corset, keeping your torso upright and reducing the load on your spine.
Implementation
- Lie on your side with your elbow directly under your shoulder.
- Lift your hips until your body forms a straight line from head to heels.
- Keep your chest open; don’t let your top shoulder roll forward.
- If this is too hard, perform it from your knees.
- Hold for 30 seconds on each side.
14. Downward Facing Dog
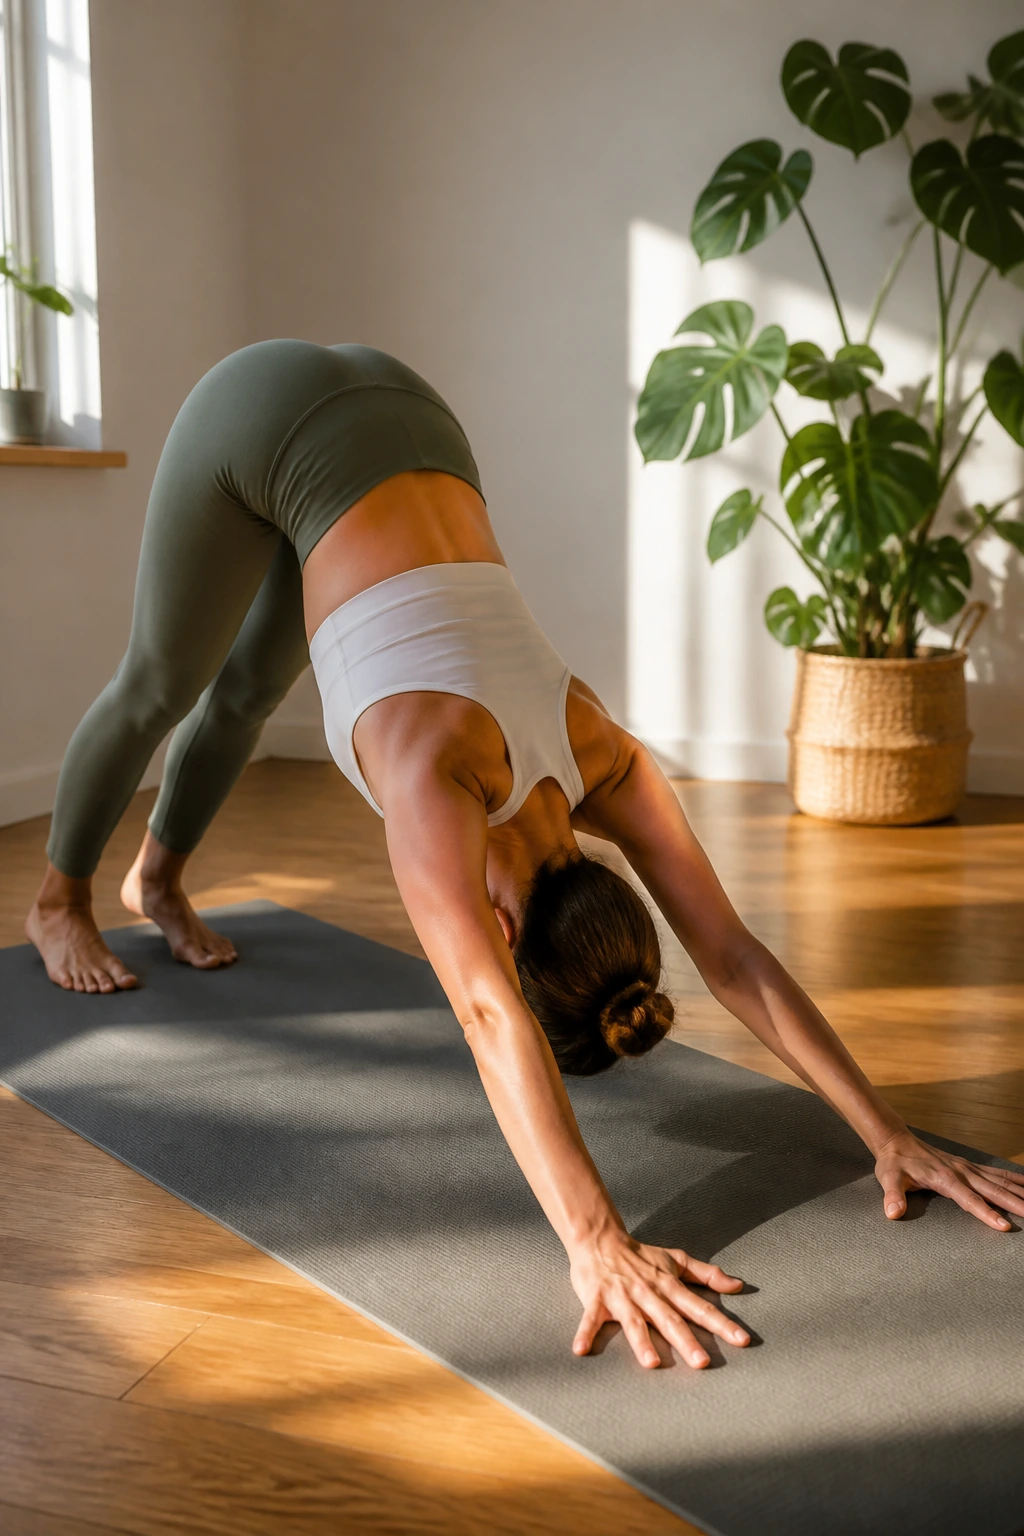
This classic yoga pose is a full-body decompressor. It helps stretch the entire posterior chain, from your calves and hamstrings up through your back and into your shoulders.
Why It’s Beneficial
The “down dog” creates length in the spine. By pushing the floor away and driving your heels down, you are actively creating space between your vertebrae. It also encourages overhead shoulder mobility, which is often severely limited in people with poor posture.
How to do It
- Start on all fours.
- Push your hips up and back, forming an inverted “V” shape.
- Keep your knees slightly bent if your hamstrings feel tight—your spine length matters more than straight legs.
- Push your shoulders away from your ears and spread your fingers wide.
- Breathe into the back of your ribcage.
15. Child’s Pose with Reach
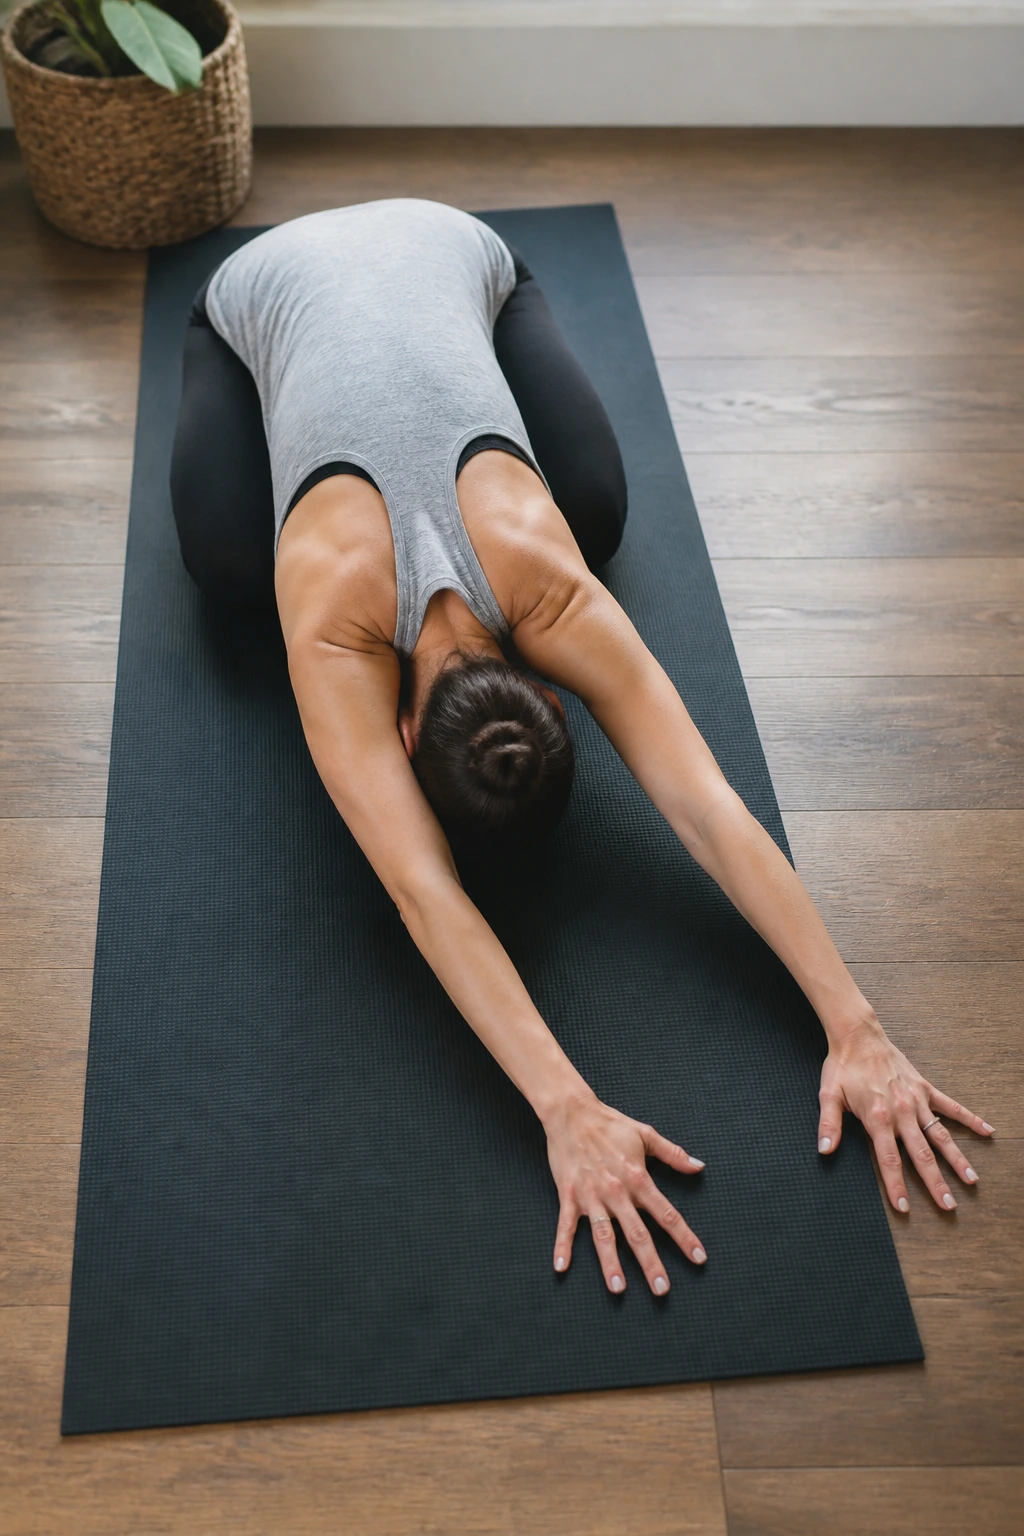
Sometimes you don’t need strength; you need to release. This position gently stretches the lats—the large muscles on your sides—which, when tight, can contribute to a rounded back and limited shoulder movement.
The Stretch
- Kneel on the floor and sit back on your heels.
- Fold forward, extending your arms as far as you can in front of you on the floor.
- Once you reach your limit, walk your hands to the right to stretch the left side, then to the left to stretch the right side.
- Let your forehead rest on the mat to allow your neck muscles to decompress.
16. Cobra Stretch
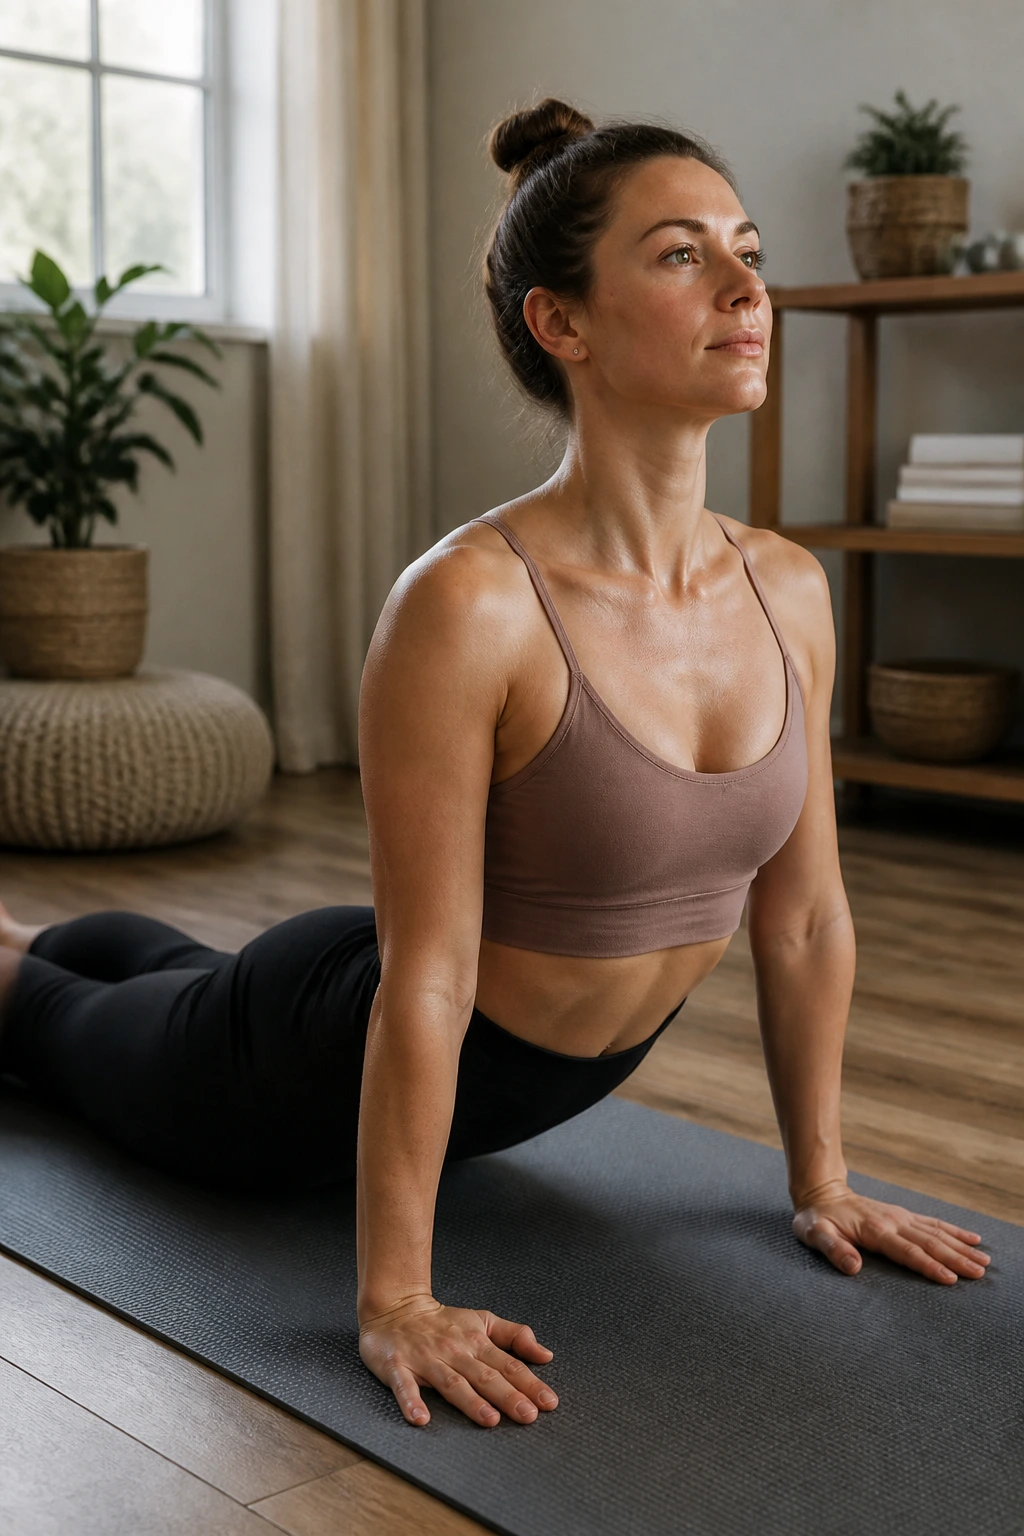
While the Prone Cobra is a strength move, this version is for mobility. It helps gently stretch the abdominals and hip flexors, which can pull your pelvis forward and cause an exaggerated curve in your lower back (anterior pelvic tilt).
The Purpose
By lengthening the front of the body, you allow the spine to stack more naturally. It is an excellent way to open up after a long day of sitting.
The Technique
- Lie facedown with hands under your shoulders.
- Gently press into your hands to lift your chest, keeping your hips and legs on the floor.
- Draw your shoulder blades down and back; do not let your shoulders hike up.
- Breathe into your chest.
- Only go as high as comfortable—the goal is extension, not back-breaking flexibility.
17. Resistance Band Pull-Aparts
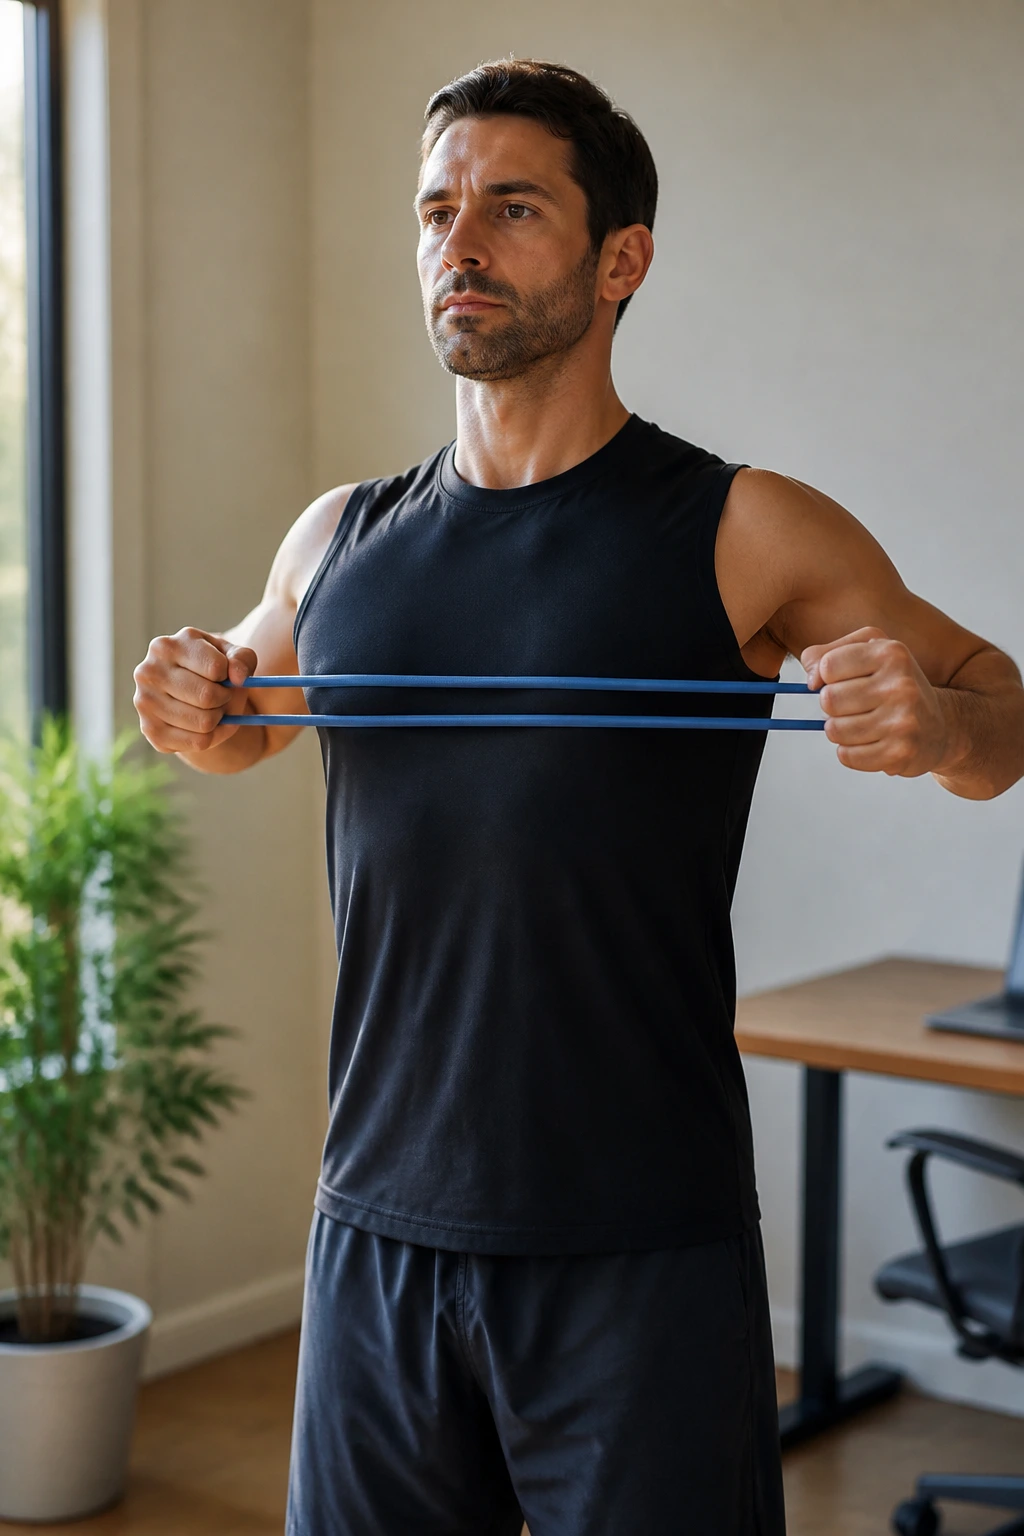
This is one of the easiest exercises to integrate into a desk routine. It requires nothing more than a light resistance band and a few seconds of your time. It targets the muscles between your shoulder blades directly.
The Rationale
Your chest muscles are constantly shortened by everyday tasks; your back muscles are constantly lengthened. Pull-aparts shorten your back muscles and lengthen your chest. It is a perfect restorative exercise.
How to Do It
- Hold the band with straight arms in front of you, hands shoulder-width apart.
- Keep your arms straight as you pull the band apart, bringing it toward your chest.
- Squeeze your shoulder blades together as hard as possible.
- Return to the start with control—don’t let the band snap back.
Frequency: You can do these several times a day. Consistency is the secret here.
18. Single-Leg Romanian Deadlift
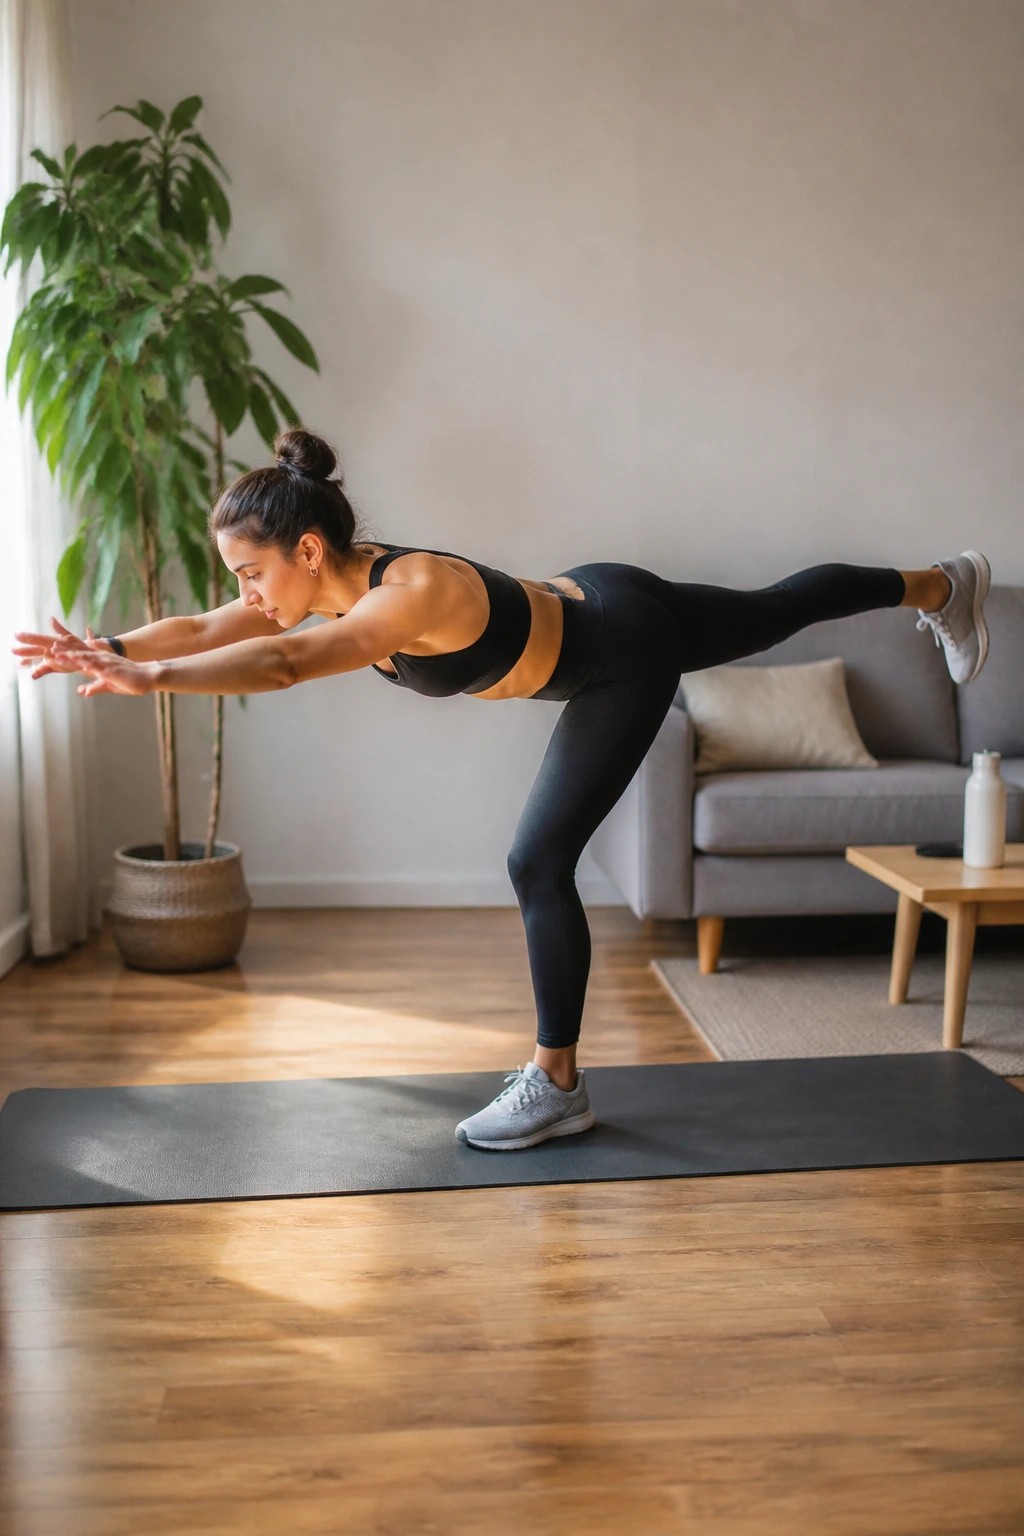
Posture isn’t just about the upper body; it is about balance. If you are weak on one side, your body will naturally tilt or rotate to compensate, leading to asymmetrical posture. This movement demands total body alignment.
Why It Works
It requires you to hinge at the hips while keeping your spine neutral. This teaches you to separate movement at the hip from movement in the spine, which is a critical skill for avoiding back pain.
Execution
- Stand on one leg.
- Hinge at your hips, sending your other leg straight back behind you.
- Lower your torso until it is parallel to the floor, maintaining a flat back.
- Use your glutes to pull your torso back to standing.
- If you fall over, use a wall for balance until you get the hang of it.
19. Farmer’s Carries
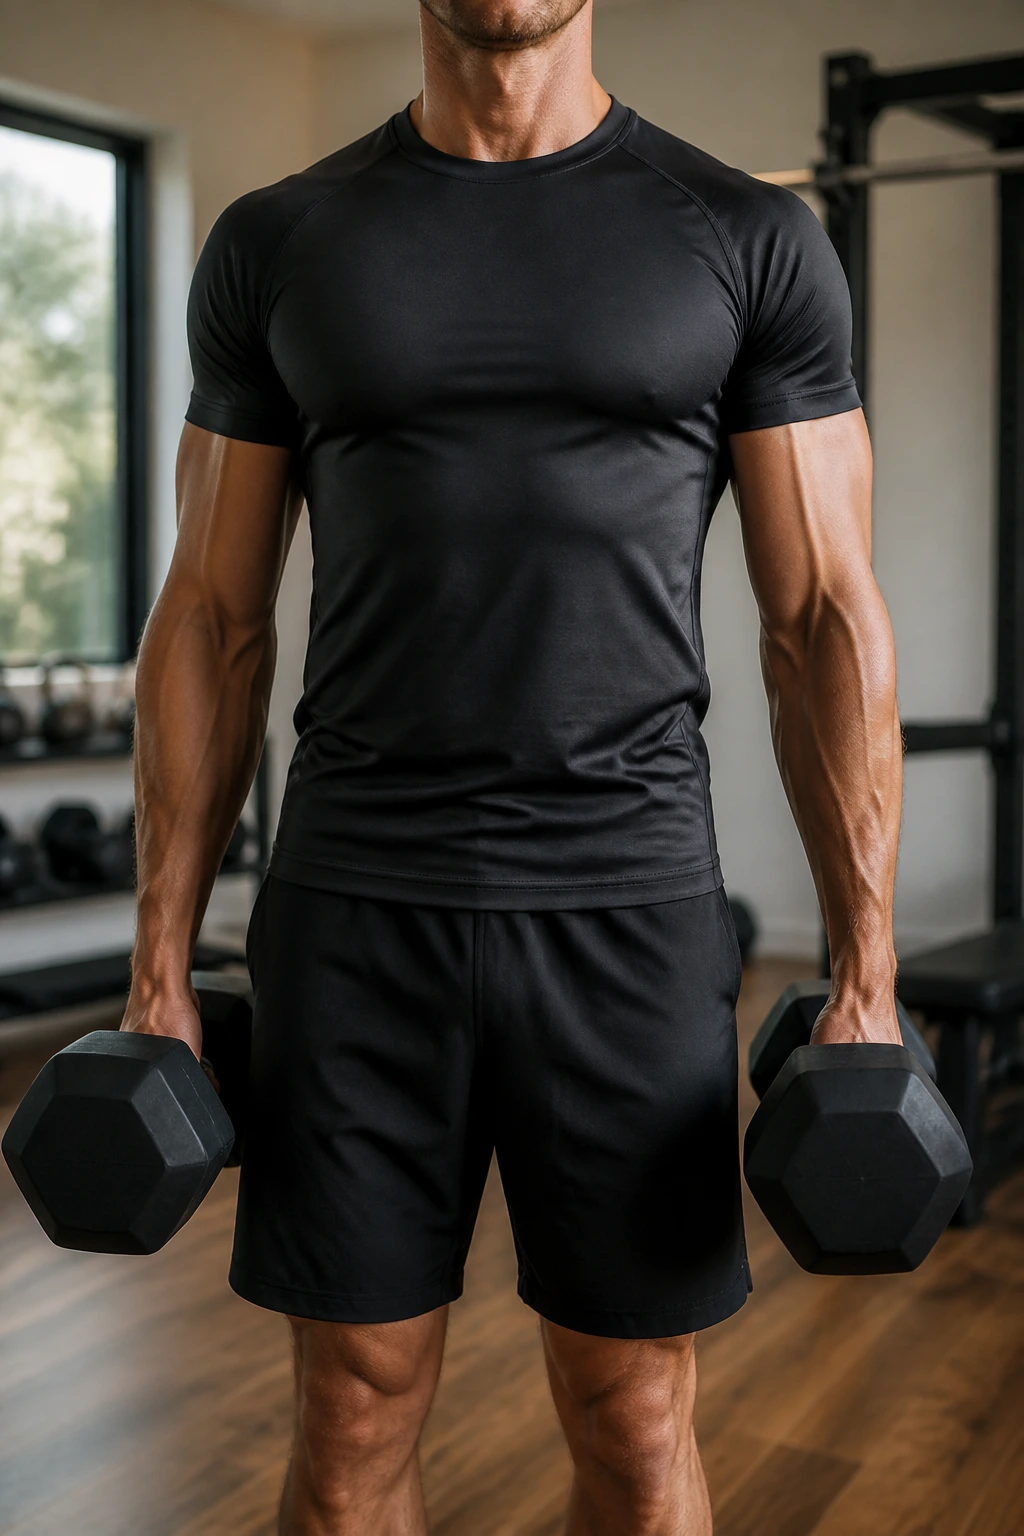
This is a functional strength move that is essentially “walking with good posture.” By holding heavy objects (like water jugs or dumbbells) by your sides, you are forced to engage your core, retract your shoulders, and stand tall to manage the load.
The Functional Benefit
It builds “postural endurance.” You aren’t just hitting a muscle; you are teaching your body to maintain an aligned position while under load. This helps when you have to carry groceries, luggage, or kids.
How to Execute
- Pick up two equal-weight items, one in each hand.
- Stand tall, puff your chest out slightly, and engage your core.
- Walk for thirty to sixty seconds, focusing on not letting the weight pull your shoulders forward.
- Keep your steps controlled and your spine straight.
20. Reverse Flys

This exercise specifically targets the rear deltoids and the upper back. It is a more advanced version of the pull-apart, providing more range of motion and requiring more stability.
The Focus
It rounds out your shoulder training. Many people focus on the front of the shoulder, leading to a hunched posture. Reverse flys ensure the back of the shoulder is just as strong, balancing the pull on your shoulder joint.
The Movement
- Hinge at your hips with a slight bend in your knees.
- Hold light weights or resistance bands in your hands.
- With a slight bend in your elbows, raise your arms out to the sides until they are in line with your shoulders.
- Squeeze your shoulder blades at the top.
- Lower slowly.
Note: If you have to swing your torso to get the weight up, the weight is too heavy. Drop the resistance; the tension should be in your upper back, not your momentum.
Final Thoughts
Building better posture is a marathon, not a sprint. You are undoing years of habit, so do not expect miracles overnight. The goal is to start paying attention. Notice when you are slumping at your desk, notice when your head is jutting forward, and use these movements to reset your alignment.
Remember that movement is the best medicine for a stiff body. If you can, sprinkle these exercises throughout your day rather than trying to do them all in one long, exhausting session. A few wall angels while the coffee brews or a quick doorway stretch after a meeting can make a world of difference. Your spine is designed to be mobile and resilient; give it the attention it deserves, and it will support you for years to come.
