



The first thing most of us do when a sharp, radiating ache grips the lower back is stop moving entirely, curling into a ball on the couch and hoping the inflammation will simply evaporate. It is a natural reaction. When your lumbar spine sends warning signals, your brain screams for protection. But here is the irony: resting for days on end is often the worst medicine you can prescribe for back pain.
Muscles that are not used become stiff, weak, and eventually painful. Your lower back, in particular, acts as a bridge between your upper body and your legs; when it stops moving, the entire structure suffers. The goal is not to punish yourself with aggressive weightlifting or high-impact cardio. Instead, the objective is to gently re-introduce range of motion, strengthen the supporting cast of muscles around your spine—the glutes, the deep abdominals, and the hip flexors—and create a stable environment where your back can actually recover.
Chronic lower back pain often stems from imbalances. Perhaps your hamstrings are tight, pulling on your pelvis. Maybe your core is weak, forcing your spine to carry a load it was never meant to bear. Or it could be that you spend eight hours a day in a seated position, essentially “gluing” your hip flexors into a shortened, tight state. This list of exercises is designed to address those common culprits. We are looking for stability, controlled mobility, and foundational strength.
If you are currently in the middle of a flare-up, treat these movements with extreme caution. This is not about pushing through the pain; it is about working around it. If a movement causes sharp, shooting, or electric sensations, stop immediately. Discomfort or a deep stretching sensation is fine; pain that radiates down your leg or sharp stabs in the spine are red lights. Let’s look at how to get you moving again, safely and effectively.
1. Pelvic Tilts
This is the foundational movement for spinal health. Most of us live with an anterior pelvic tilt—a swayback—from sitting too much, which puts constant pressure on the lumbar discs. The pelvic tilt teaches you how to engage the deep core muscles and reset the position of your pelvis without moving your legs.
To start, lie flat on your back with your knees bent and feet planted hip-width apart. In this neutral position, there is likely a small gap between your lower back and the floor. The movement is tiny. You are going to pull your belly button toward your spine and tuck your tailbone slightly. As you do this, you should feel your lower back press firmly into the floor.
Hold this for five seconds, breathing normally. Then, release it back to the neutral position. The key is to keep your glutes and legs relaxed. If you squeeze your butt, you are cheating the movement. This exercise targets the rectus abdominis—the front of your core—which acts as a corset for your spine. Aim for three sets of ten repetitions. It looks like you are doing almost nothing, but if you do it correctly, you will feel the deep tension in your stomach.
2. Cat-Cow
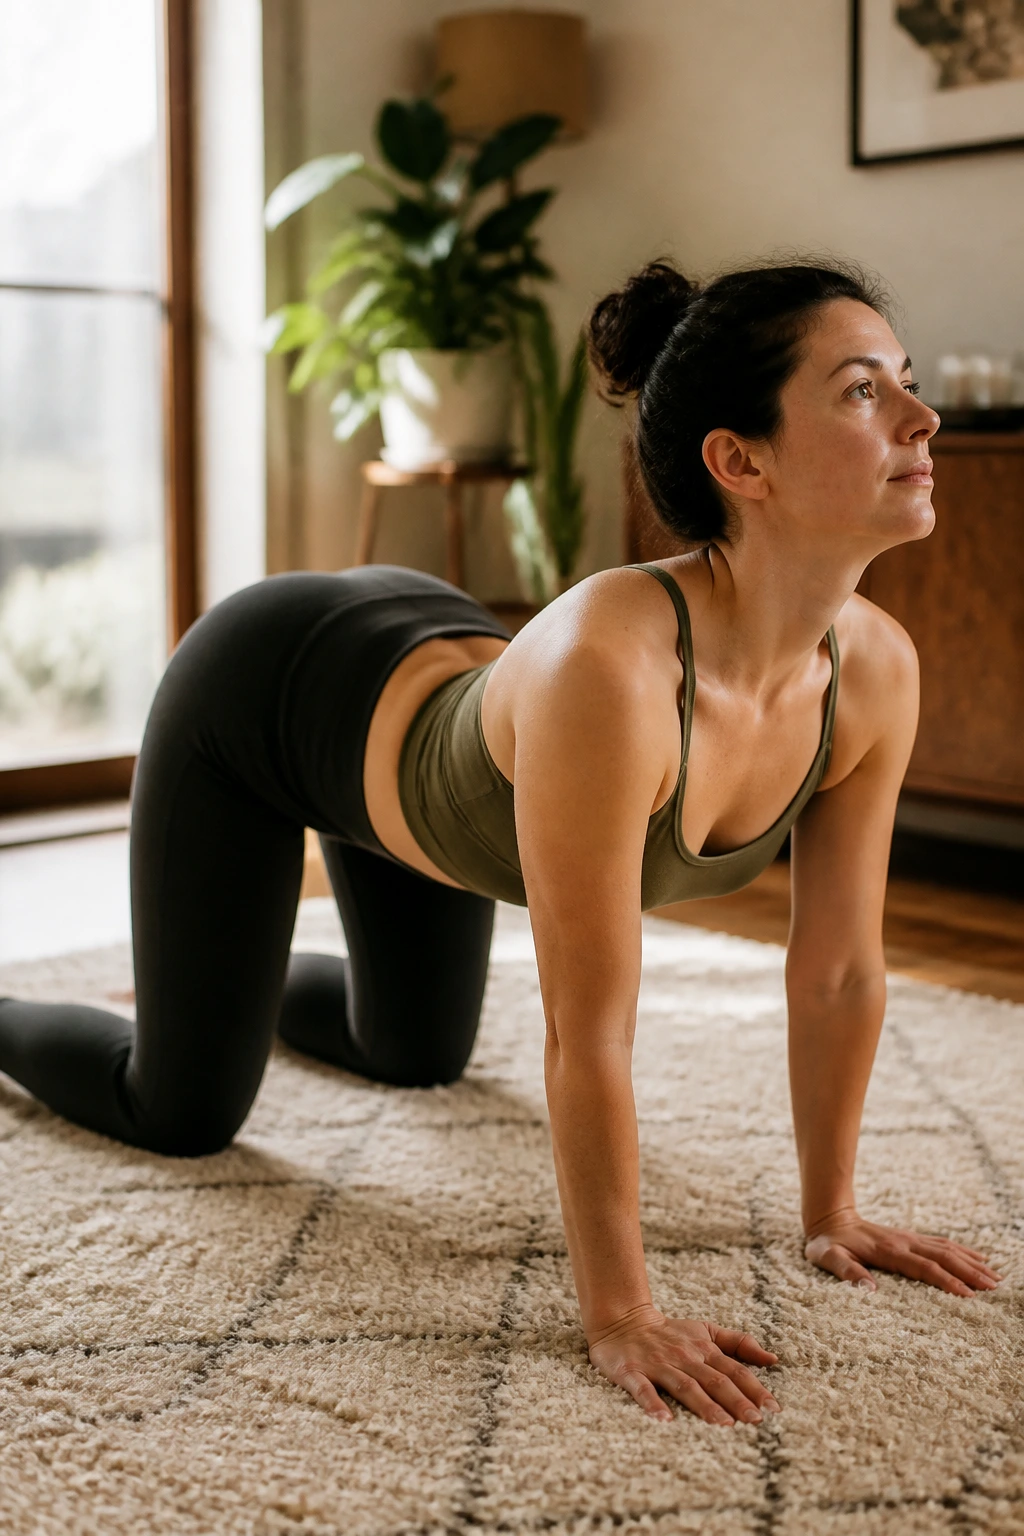
The Cat-Cow is a classic yoga posture, but it is also one of the most effective ways to lubricate the facet joints in the spine. When the back feels “seized up,” these joints are often the culprit, locked in place by tension. This movement gently forces the vertebrae to move through their full range of flexion and extension.
Start on your hands and knees in a tabletop position. Ensure your wrists are directly under your shoulders and your knees are under your hips. For the “Cow” phase, inhale as you drop your belly toward the floor, lift your chest, and look forward, gently arching the spine. Do not collapse into your shoulders; keep pushing the floor away.
For the “Cat” phase, exhale as you round your spine toward the ceiling. Think of pulling your belly button toward your back, tucking your chin to your chest, and pushing your shoulder blades apart. Imagine someone is pulling a string attached to the middle of your back. Move slowly between these two positions. Focus on the articulation of the spine, segment by segment. This should feel like a massage from the inside out.
3. The Bird-Dog
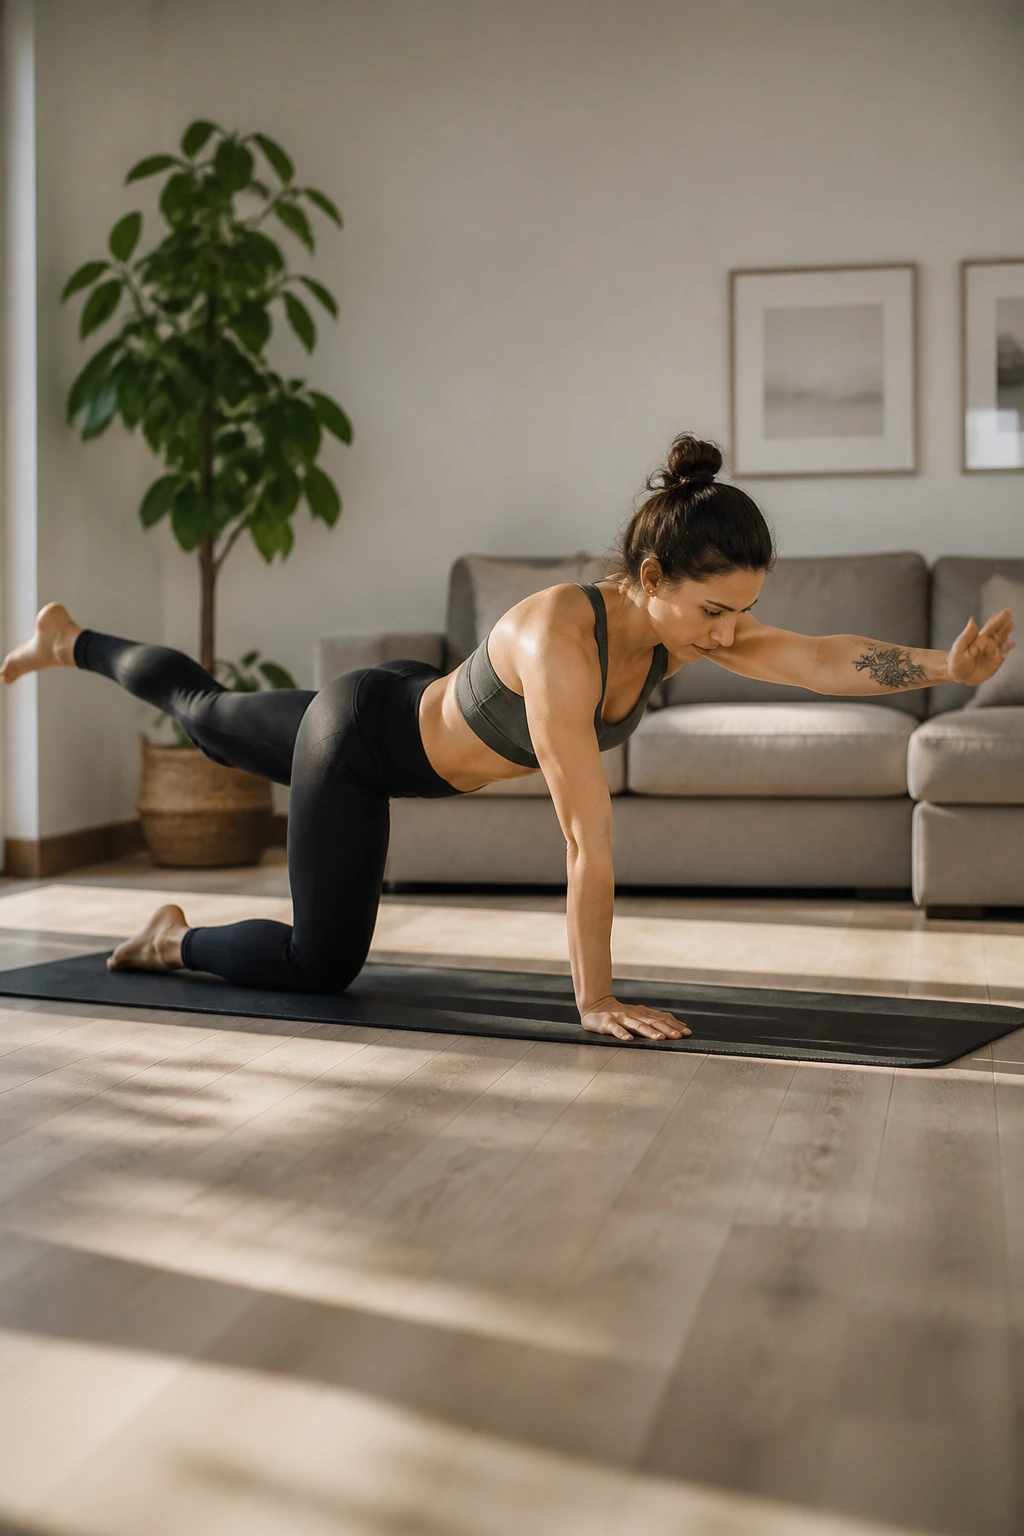
Stability is often more important than flexibility for a healthy back. The Bird-Dog is a brilliant exercise because it forces your body to remain stable while your limbs move—precisely the kind of coordination you need for everyday activities like reaching for a box or walking.
Start in that same tabletop position from the Cat-Cow. Keep your gaze focused on the floor to maintain a neutral neck. Extend your right arm forward and your left leg backward simultaneously. Do not try to lift them high; lift them until they are parallel to the floor. The goal is not height, but a perfectly straight line from your fingertips to your heel.
Your torso should remain rock solid. If your hips are rocking side to side, you are moving too fast. Keep your belly engaged as if you are bracing for a punch. Hold the extension for three seconds, return to the start, and switch sides. If you feel like a newborn giraffe at first, that is normal. The struggle to stay stable is where the neurological benefits for your back occur.
4. Glute Bridges
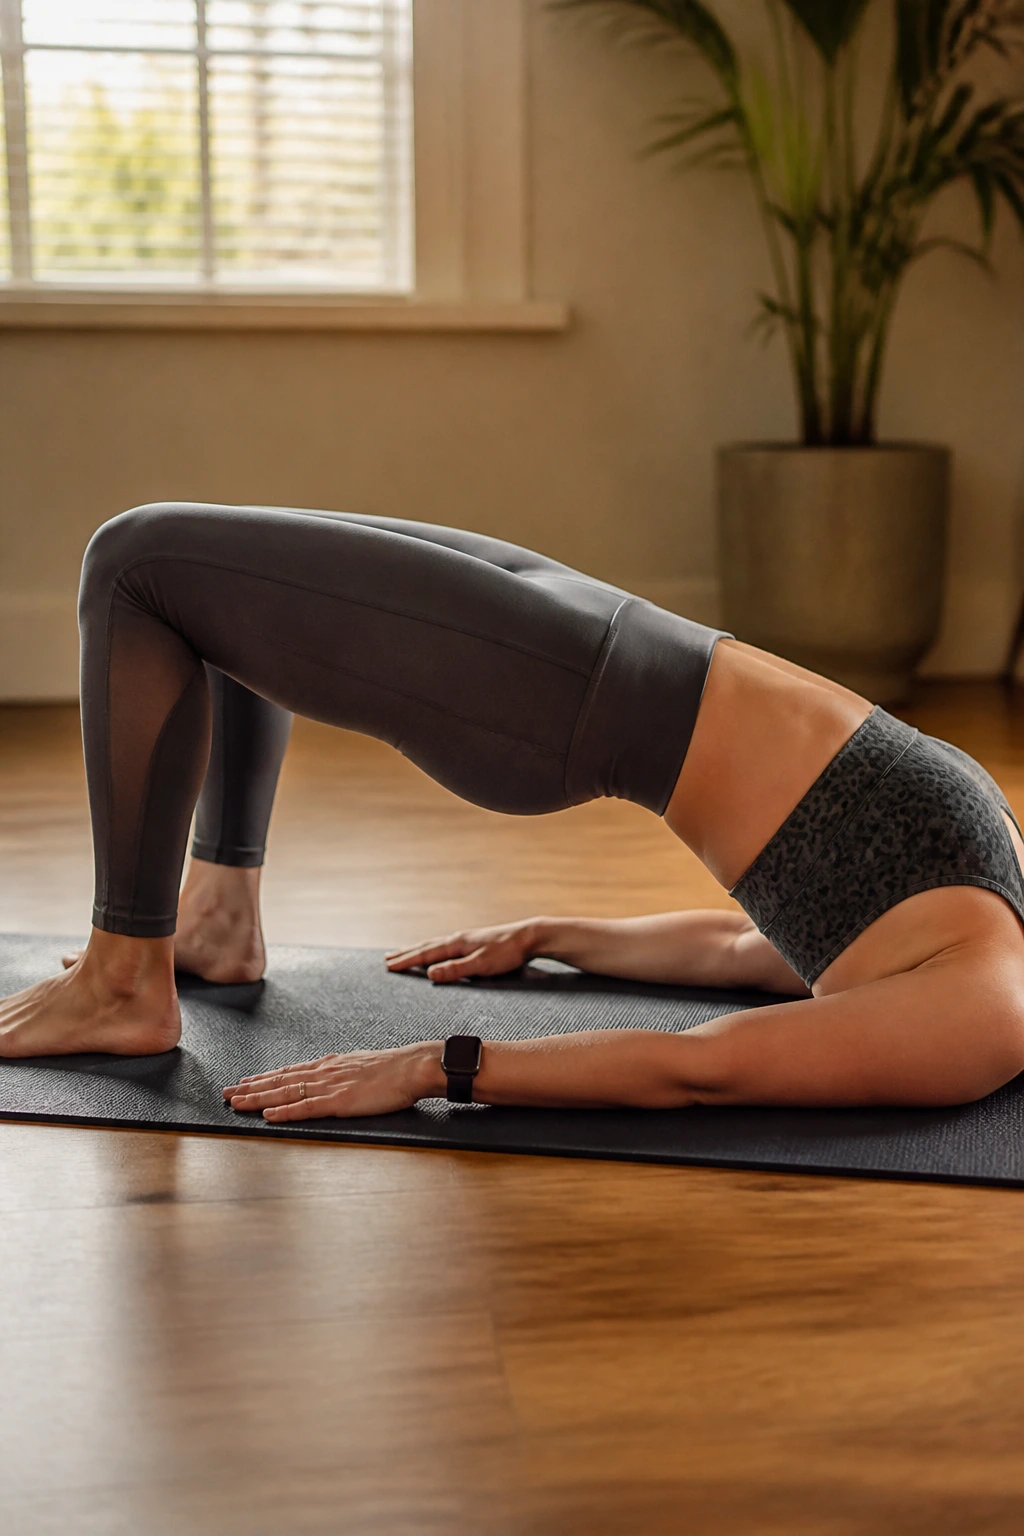
Many people with lower back pain have “gluteal amnesia.” Your glutes are the biggest muscles in your body, and they are designed to handle the heavy lifting. When they go dormant from sitting, the small muscles in the lower back have to pick up the slack. The glute bridge is the single best way to wake them up.
Lie on your back with knees bent, feet flat on the floor, about six inches from your butt. Keep your arms by your sides. Drive through your heels to lift your hips toward the ceiling. Squeeze your glutes at the top—really squeeze them. Your body should form a straight line from your knees to your shoulders.
Lower yourself back down with control. Do not drop. If you feel this mostly in your hamstrings, move your feet a little closer to your body. If you feel it in your lower back, you are likely over-arching your spine. Stop the lift before your back starts to strain. You want your glutes to be the engine here, not your lumbar spine.
5. Dead Bug
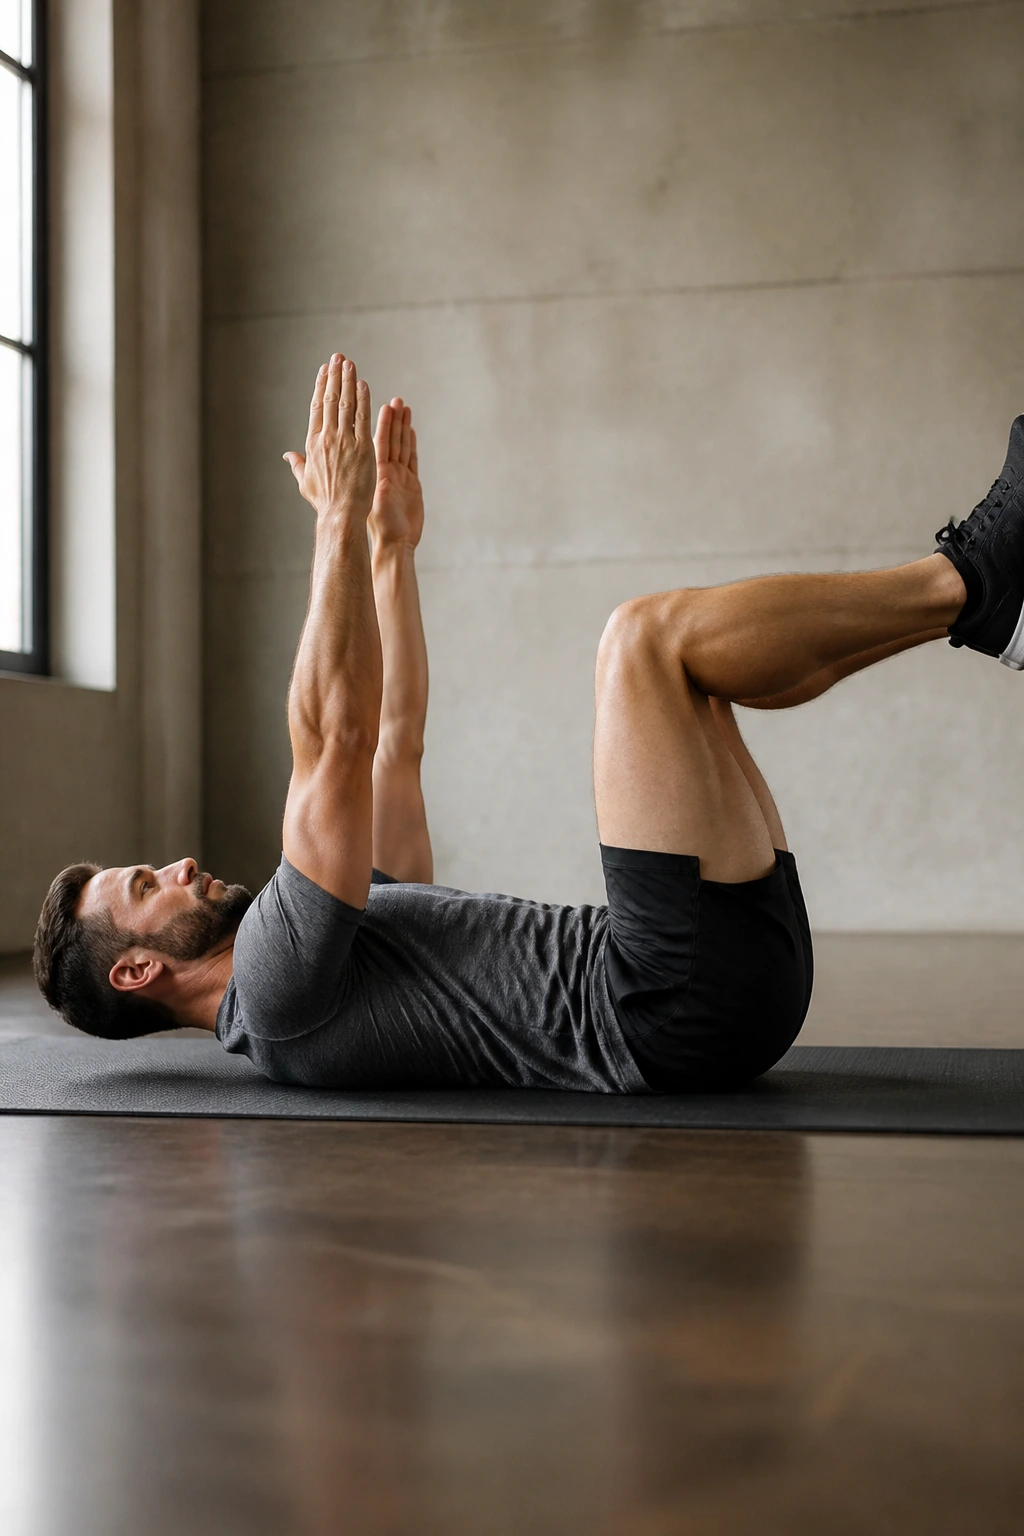
The Dead Bug is a masterpiece of core isolation. It looks easy, but it is notoriously difficult to perform with perfect form. It trains your core to support your spine while your extremities are moving, which is the definition of functional back health.
Lie on your back with your arms extended toward the ceiling and your legs in the air, knees bent at 90 degrees (the “tabletop” position). This is the starting point. Now, press your lower back into the floor. This “imprint” is non-negotiable. If your back arches off the floor, stop and reset.
Slowly lower your right arm behind your head and extend your left leg straight out. Keep your lower back glued to the floor the entire time. If you cannot get your leg all the way straight without your back arching, only extend it halfway. It is better to do the range of motion that you can control. Return to the center and switch sides. This is an exercise in patience and tension.
6. Child’s Pose
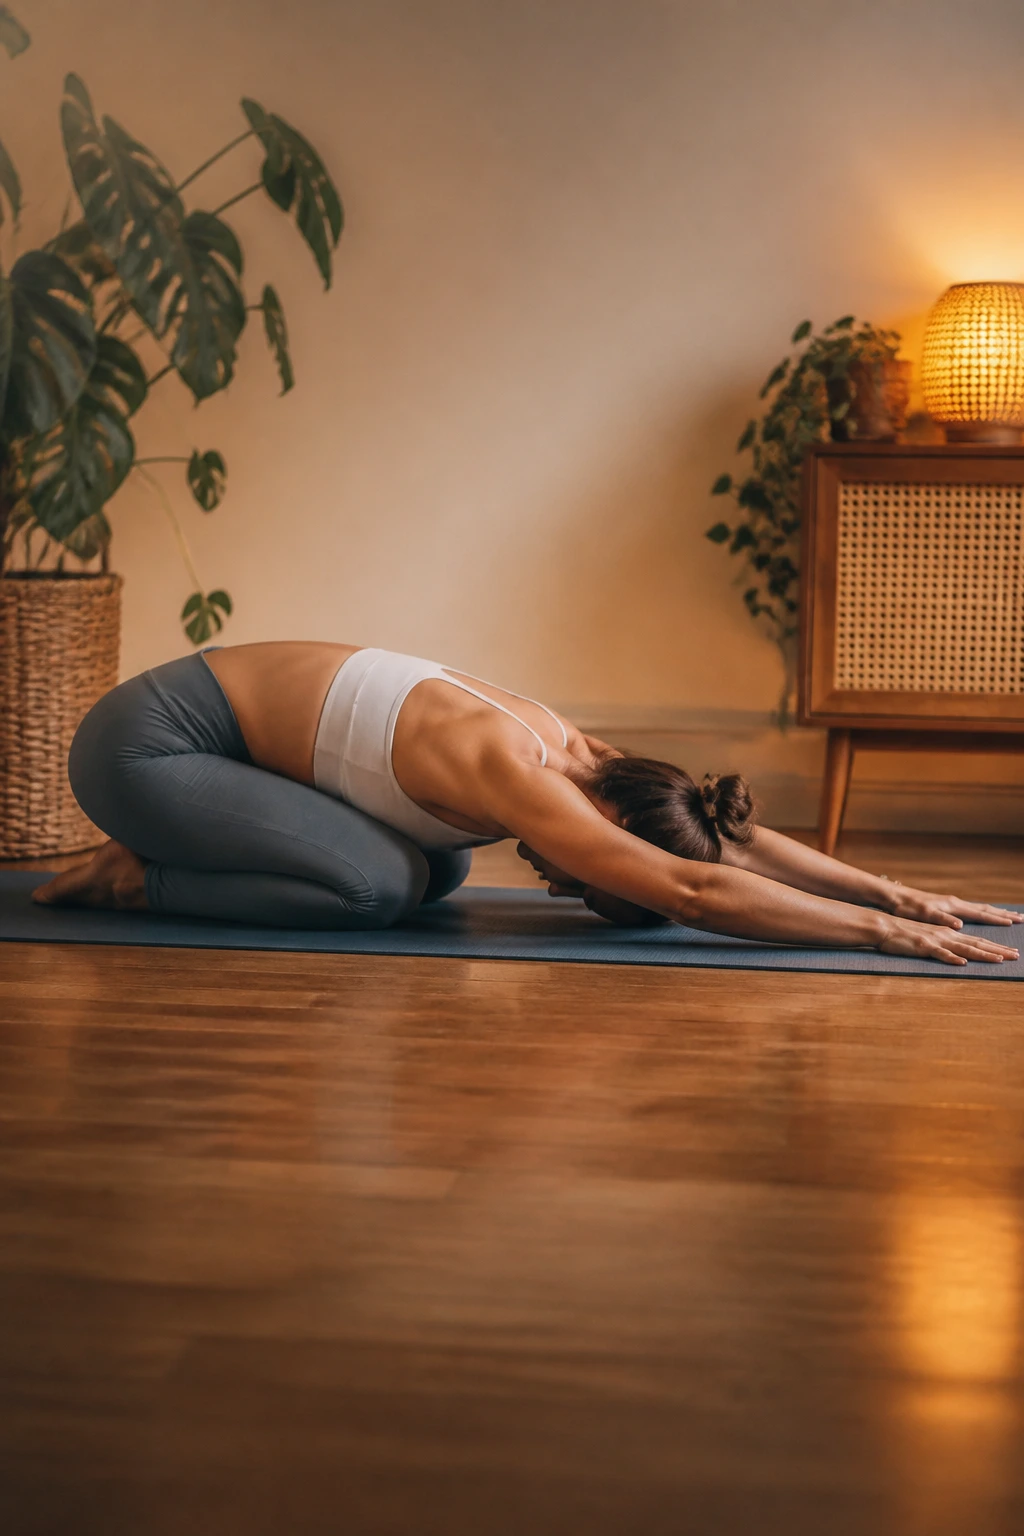
Sometimes the best thing you can do for your back is to give it space. The Child’s Pose provides a passive, gentle stretch to the muscles running along the spine, particularly the latissimus dorsi and the spinal erectors, which can get incredibly tight during stressful days.
Kneel on the floor with your big toes touching and knees wide apart. Sit back on your heels. Fold forward, walking your hands out in front of you until your forehead rests on the floor or a yoga block. Reach your fingertips forward to create length in the spine.
Close your eyes and breathe into your back. You should feel the muscles between your ribs and along your lumbar spine expand. If you feel tension in your knees or ankles, you can put a blanket between your calves and hamstrings. Stay here for a minute or two. This is as much a mental decompression as it is a physical one.
7. Sphinx Pose
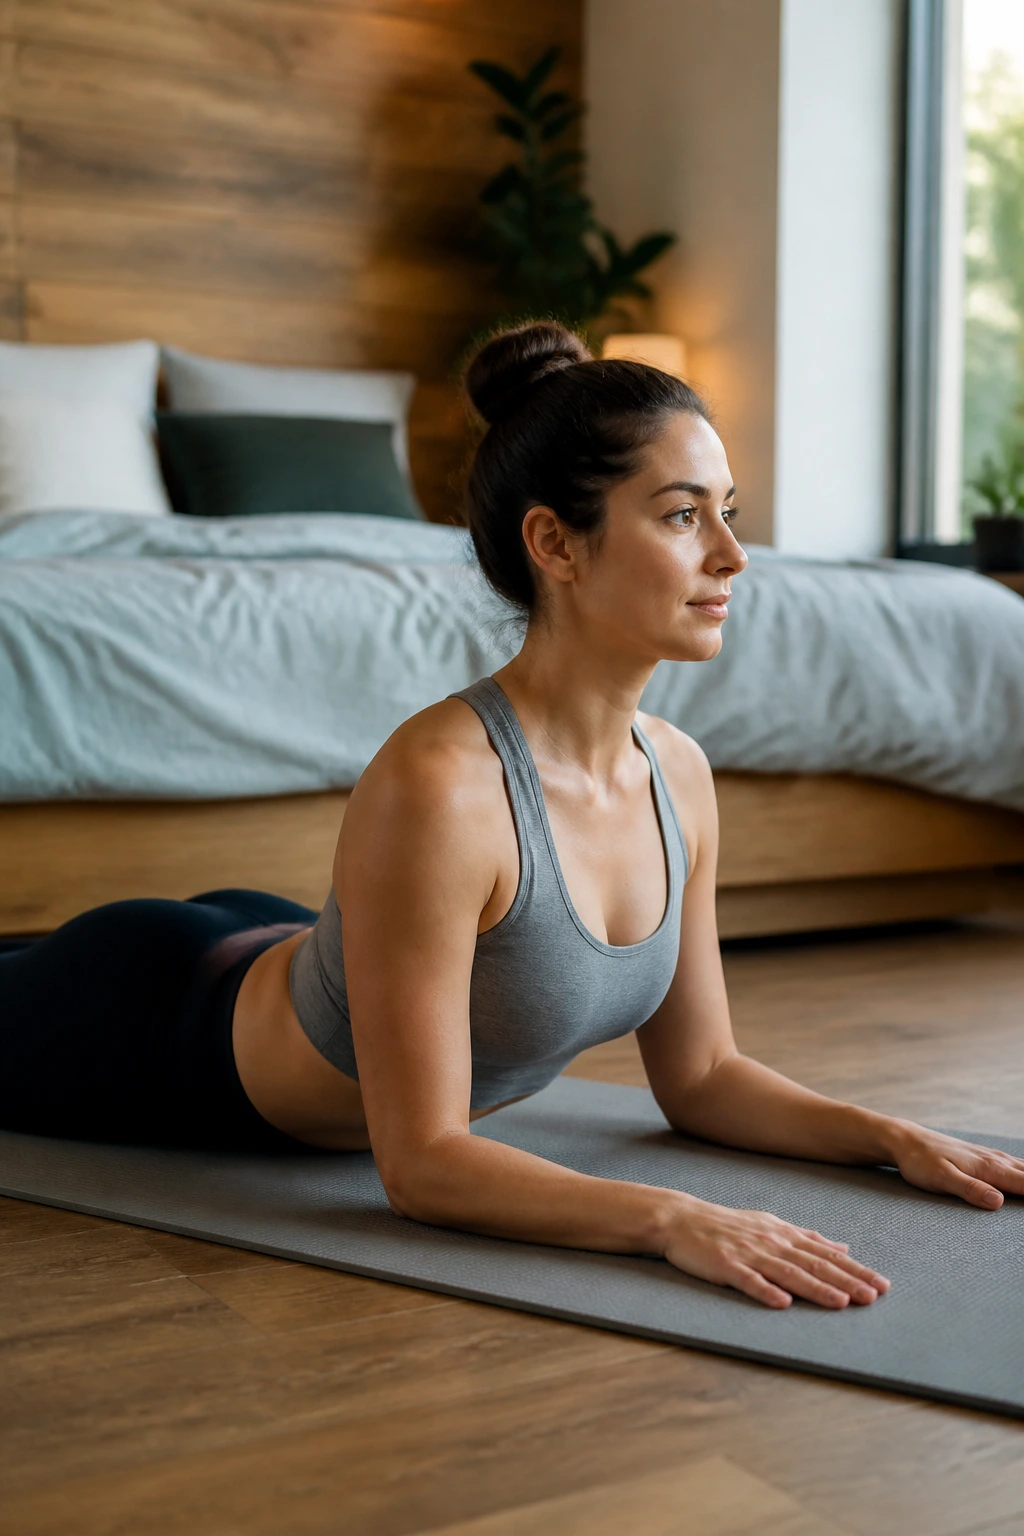
If the Cobra pose in yoga feels too aggressive for your spine, the Sphinx is your best friend. It offers a gentle, controlled extension of the lumbar spine, which can help “open up” the front of the body and encourage the vertebrae to settle into a more neutral, stacked position.
Lie on your stomach with your legs extended behind you. Place your elbows directly under your shoulders, forearms on the floor, palms facing down. Engage your glutes and press your hips into the mat. Gently lift your chest and head by pushing through your forearms.
You are not trying to push your chest to the sky; you are aiming for a gentle, comfortable arch. Keep your neck long—do not let your shoulders creep up toward your ears. Push your shoulders down and away from your ears. Hold this for thirty seconds. It helps counteract the “slump” position we spend all day in at our desks.
8. Single Knee-to-Chest
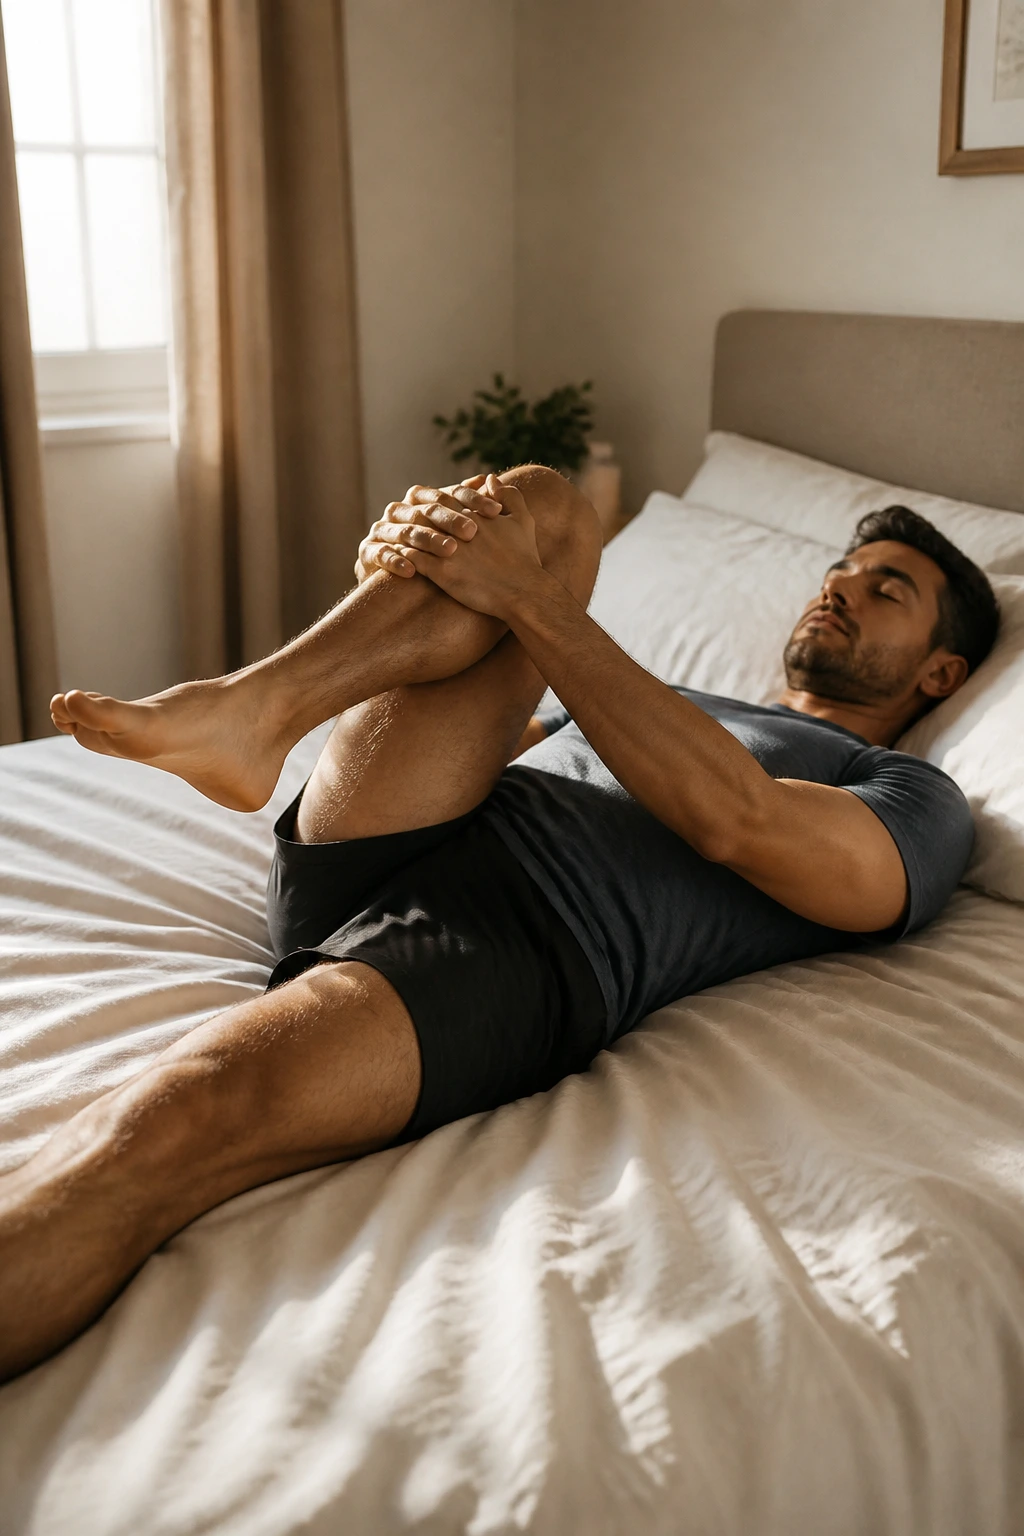
This is a classic recovery stretch. It targets the glute and the lower back area specifically. It is gentle, requires no equipment, and provides immediate feedback on how tight your hips and lower back really are.
Lie on your back with both legs straight. Slowly lift your right knee toward your chest. Clasp your hands around your shin or behind your thigh—whichever is more comfortable—and gently pull the knee closer to your chest. Keep your left leg flat on the floor. If the left leg starts to lift, you are pulling too hard or your hip flexors are very tight.
Hold the stretch for 20 to 30 seconds. Focus on relaxing your lower back into the floor. You should feel a deep, soothing stretch in the lower back and hip. Lower the leg and switch. This is a great move to do first thing in the morning when you are still in bed, before gravity forces your spine into a vertical, weight-bearing position.
9. Clamshells
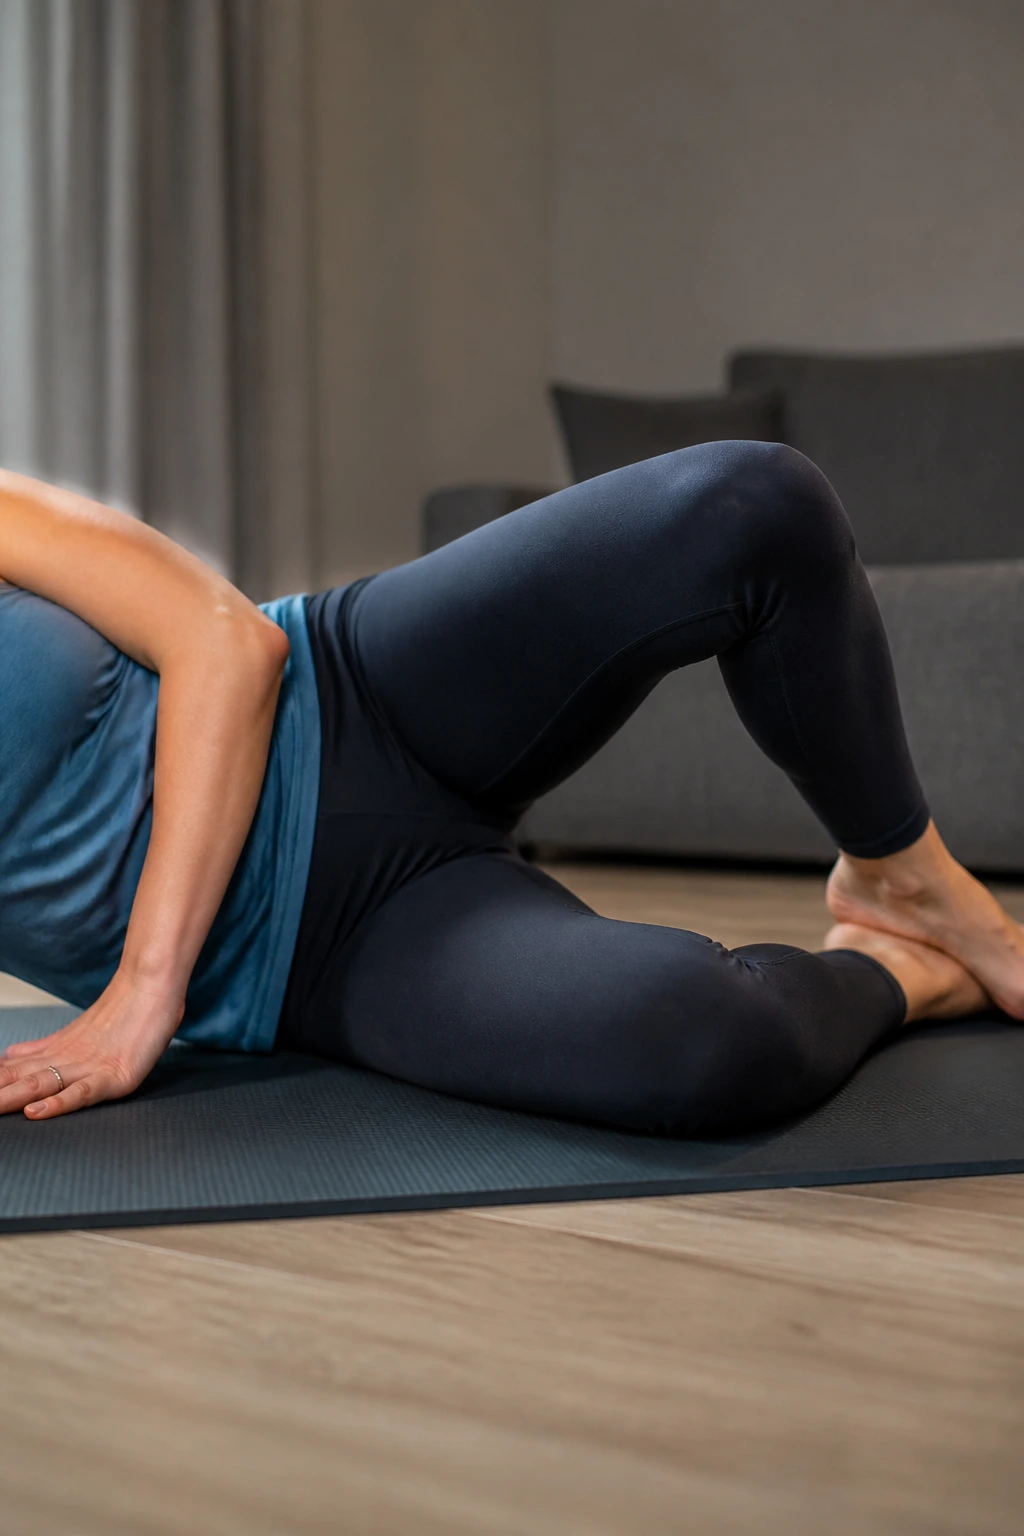
The glute medius is a stabilizer muscle on the side of your hip. If this muscle is weak, your pelvis will wobble every time you take a step, which sends shockwaves up into your lower back. The Clamshell is the gold standard for isolating and strengthening this often-ignored muscle.
Lie on your side with your legs stacked and knees bent at a 45-degree angle. Keep your feet touching. Keeping your feet together, open your top knee like a clamshell. The goal is to lift the knee without rolling your hips backward. If you roll your hips, you lose the engagement of the glute medius and your lower back will try to compensate.
Go slowly. The “burning” sensation should be high up on the side of your hip, near your butt. Do 15 reps on one side, then flip. If you want a challenge, you can add a resistance band around your knees, but do not start there. Master the movement without weight first.
10. Plank

The plank is famous for a reason, but it is often performed incorrectly. A “sagging” plank—where your hips dip toward the floor—is a recipe for back pain. A proper plank, however, creates a stiff, braced core that protects your lumbar spine like a suit of armor.
Get into a forearm plank position. Your elbows should be under your shoulders. Your body should be a straight line from your head to your heels. Now, do the work: squeeze your glutes, squeeze your quads, and brace your abs as if you are about to be punched.
The goal is to maintain that “hollow body” tension. If you feel your lower back start to ache or “dip,” stop. It is better to hold a perfect 15-second plank than a sloppy 60-second one. The back pain happens when the core fails, so keep the core tight.
11. Side Plank
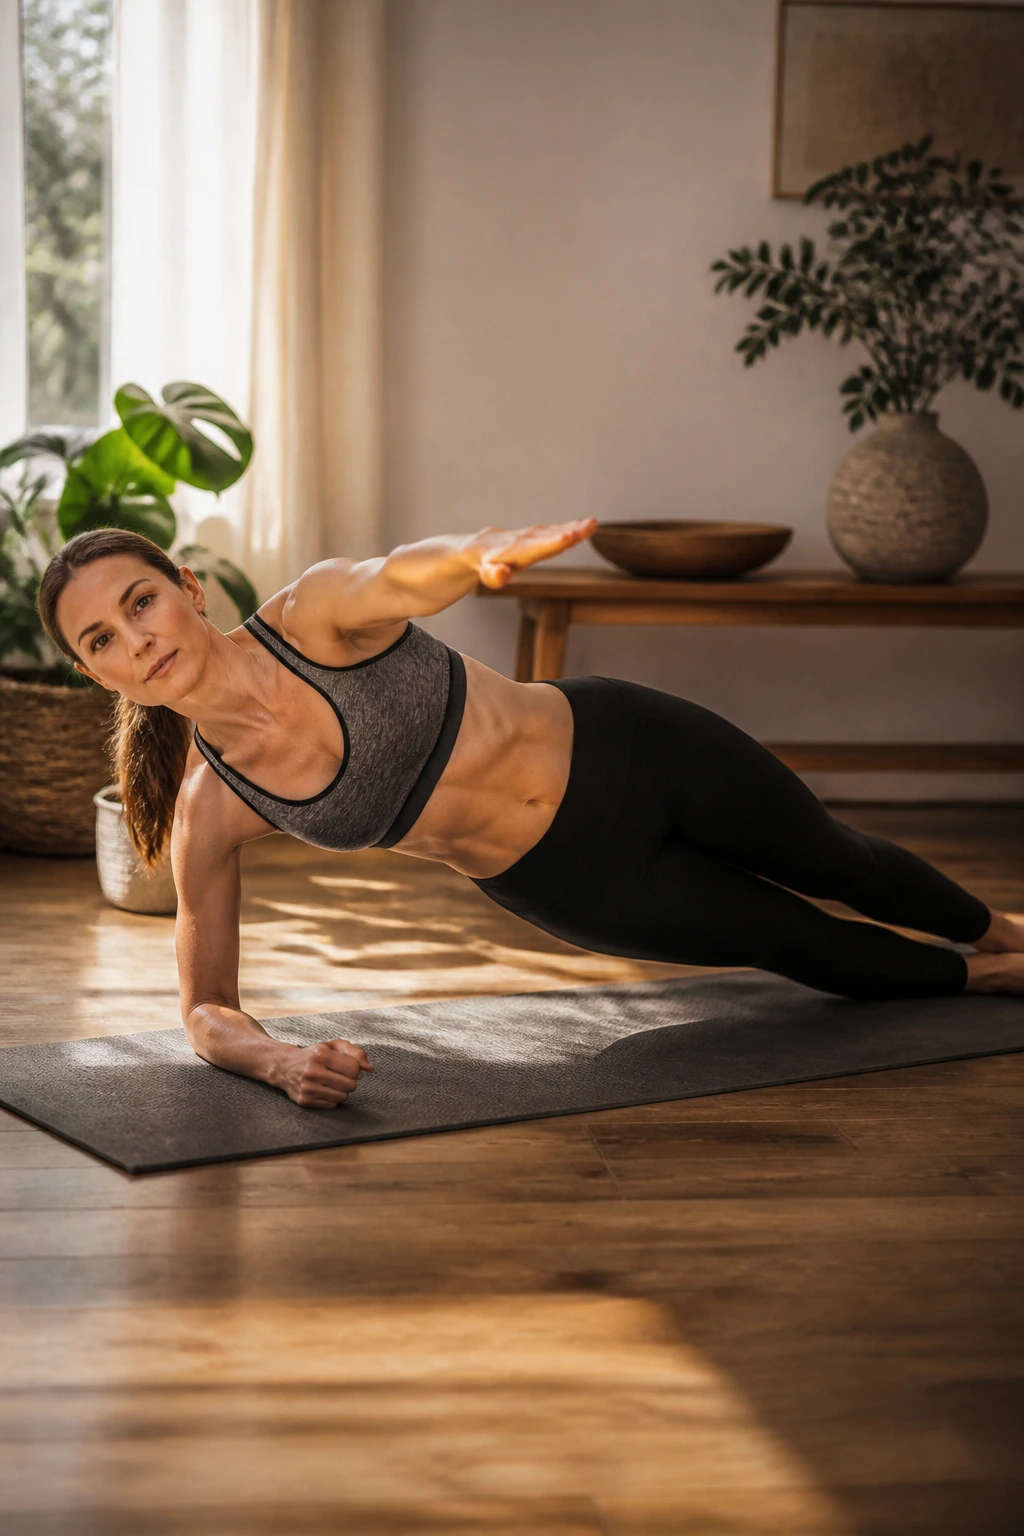
If a regular plank is the front-facing armor, the side plank is the support system for the side of your torso (the obliques and quadratus lumborum). These muscles are essential for lateral stability and rotation control.
Lie on your side with your legs straight. Prop yourself up on your forearm, elbow under your shoulder. Lift your hips off the floor until your body is a straight line. If this is too hard, you can modify it by keeping your bottom knee on the ground (a “knee side plank”).
Keep your chest open and your gaze forward. Do not let your top shoulder roll forward. Hold for 20 to 30 seconds. You will feel this shaking in your side—that is good. That shaking is your stabilizing muscles waking up. Switch sides and repeat.
12. Modified Superman
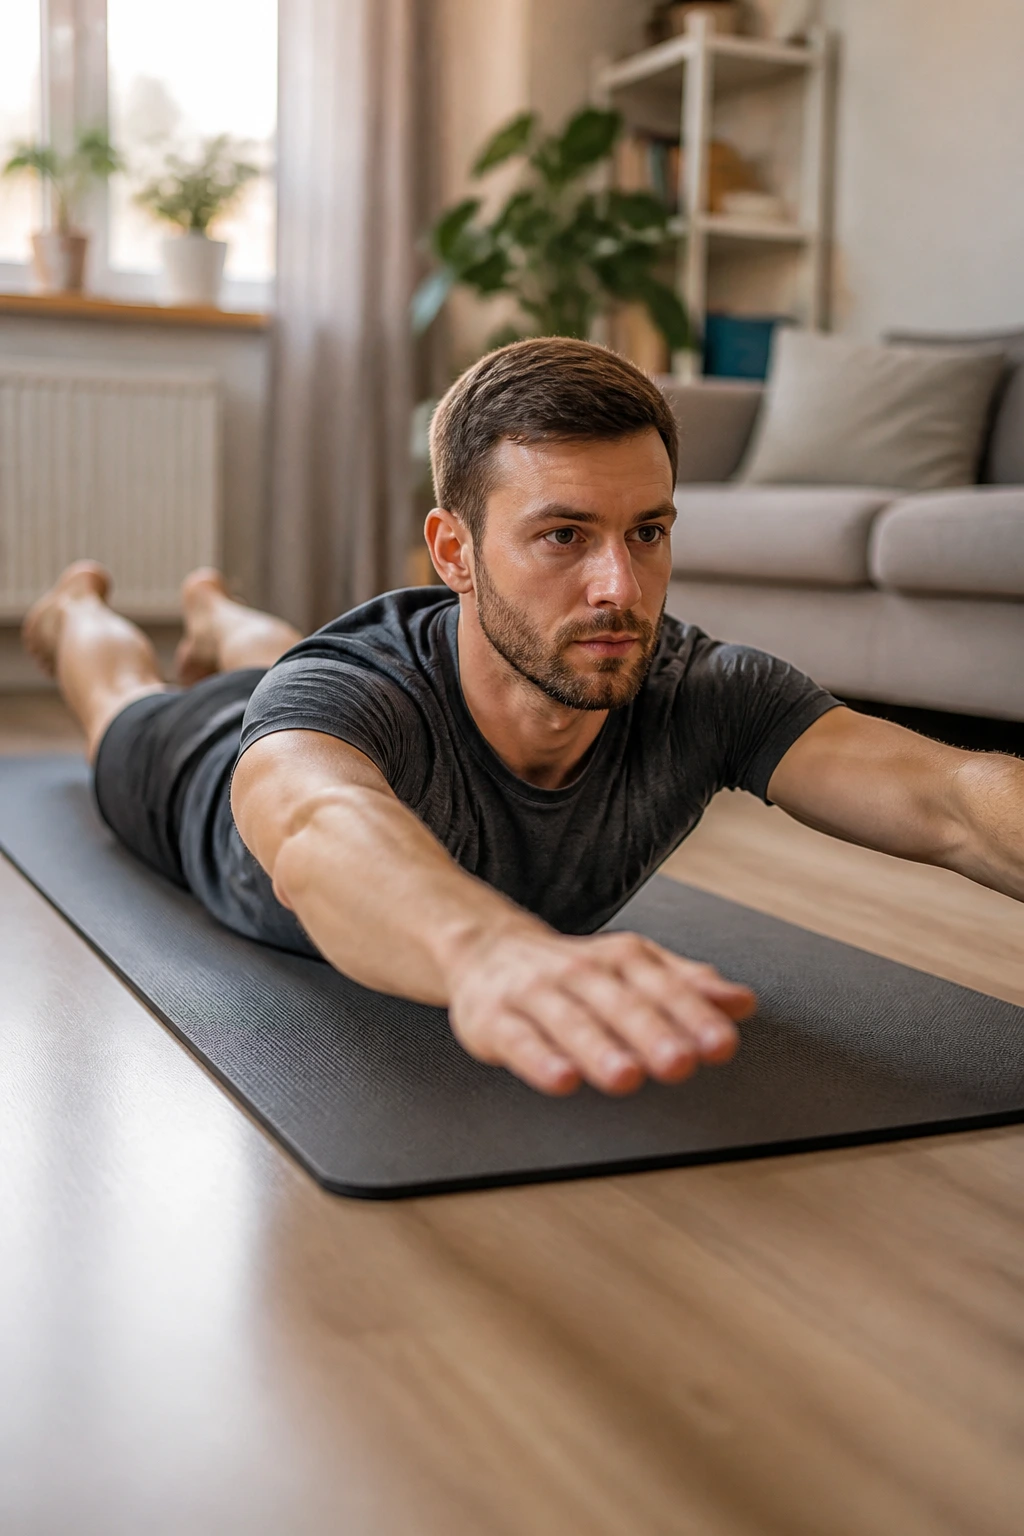
The Superman exercise is often debated because it can put a lot of pressure on the lower back if done with a massive range of motion. We are going to modify it to make it a “back-safe” exercise.
Lie on your stomach with your arms extended forward like Superman. Instead of lifting your chest and legs as high as possible, just hover your arms and legs an inch or two off the floor. Keep your gaze down at the floor to avoid straining your neck.
Focus on length, not height. Reach your fingers forward and your toes backward, as if someone is pulling you from both ends. Hold for 5 to 10 seconds, then release. This creates engagement in the spinal extensors without the hyper-extension that can cause irritation.
13. Wall Sits
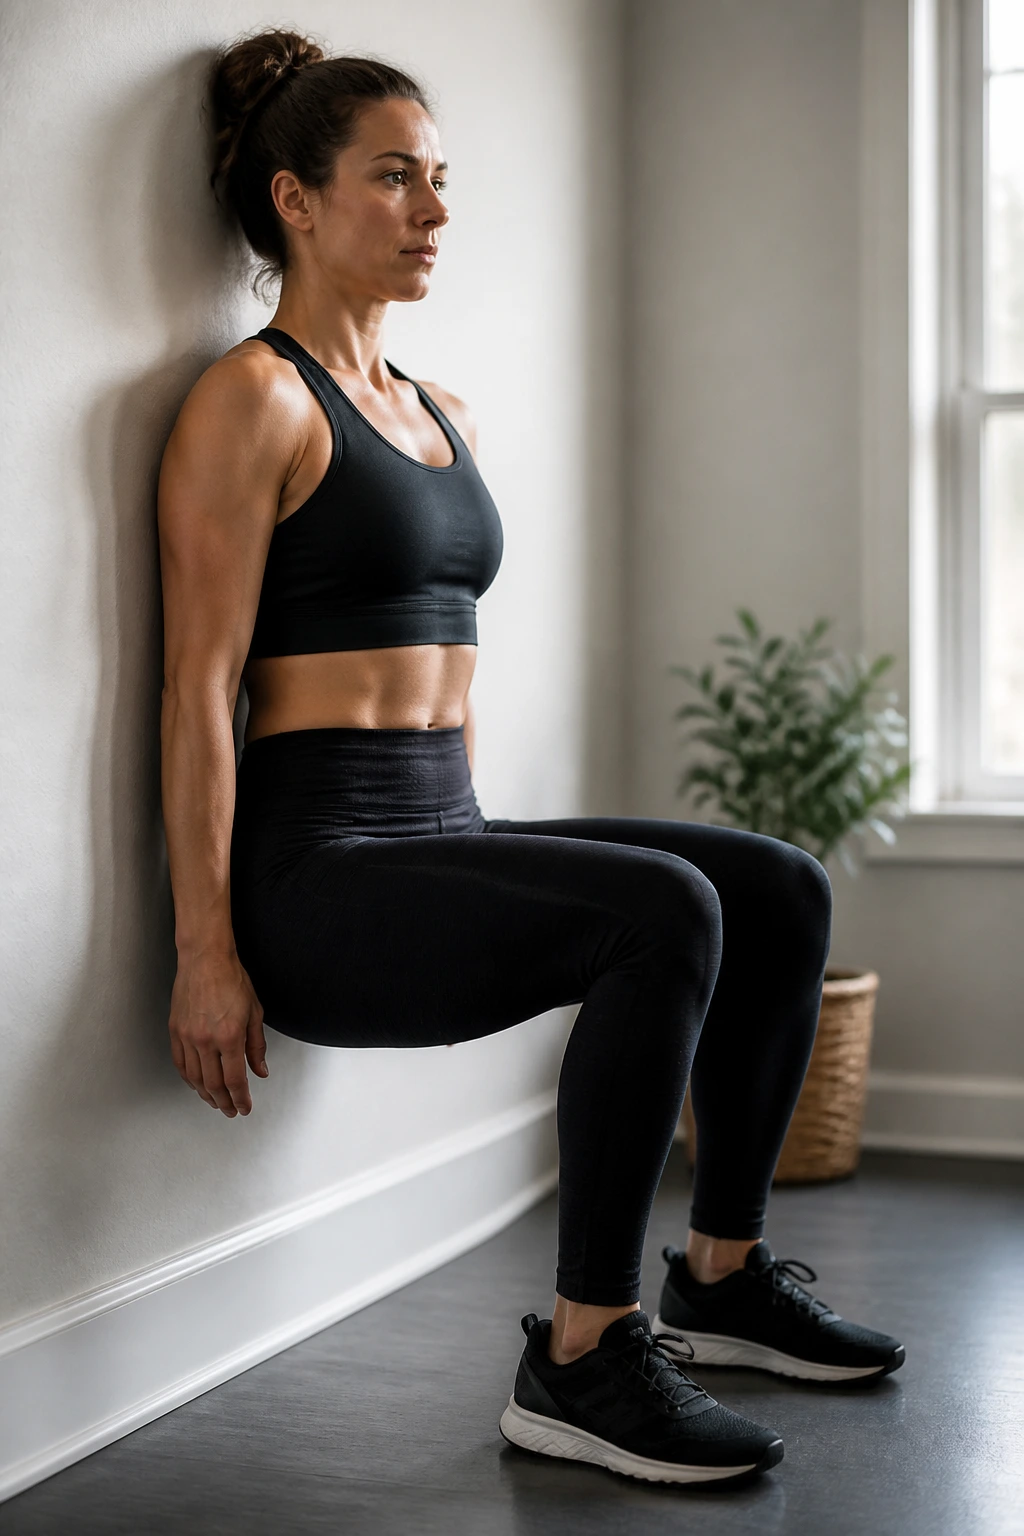
Wall sits are deceptive. They look like a leg exercise, and they are, but they also force your spine into a neutral position against a flat surface, which is fantastic for retraining posture.
Stand with your back flat against a wall. Slide down until your knees are bent at a 90-degree angle, or as close as you can get comfortably. Your entire spine—shoulders, mid-back, and lower back—should be in contact with the wall.
This is the hard part: keep your lower back pressed against the wall. Do not let it arch away. Hold the position for 30 seconds. You will feel your quads screaming, but you will also feel your core working to hold that spine flush against the wall. This builds the endurance necessary to maintain good posture when you are standing.
14. Heel Slides
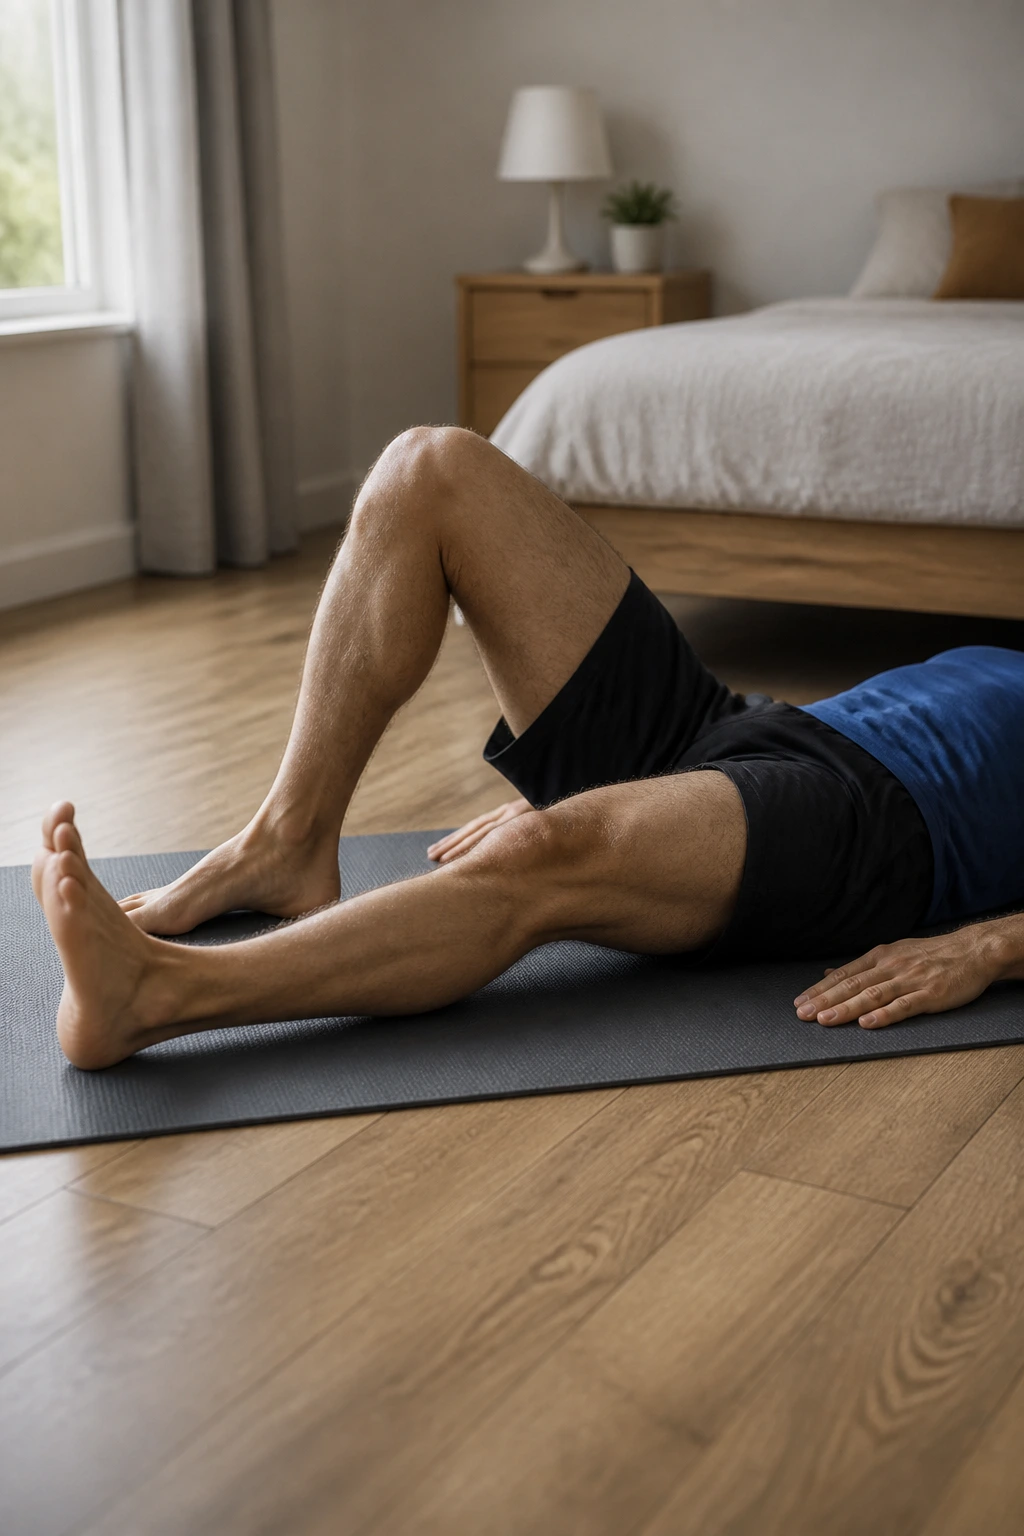
This is another variation of the Dead Bug, but it is more gentle and requires less coordination. It is an excellent way to train the core to stay stable while your legs move, without the risk of putting too much pressure on the lumbar vertebrae.
Lie on your back, knees bent, feet flat on the floor. Engage your core to imprint your lower back into the floor. This is your setup. Keeping your core engaged, slowly slide your right heel out along the floor until your leg is almost straight.
Do not let your lower back arch off the floor as you extend the leg. If it starts to arch, stop the leg extension right there. Slide the heel back to the starting position and repeat with the left leg. This is a very safe movement that reinforces the “imprint” technique.
15. Thoracic Rotations (Thread the Needle)
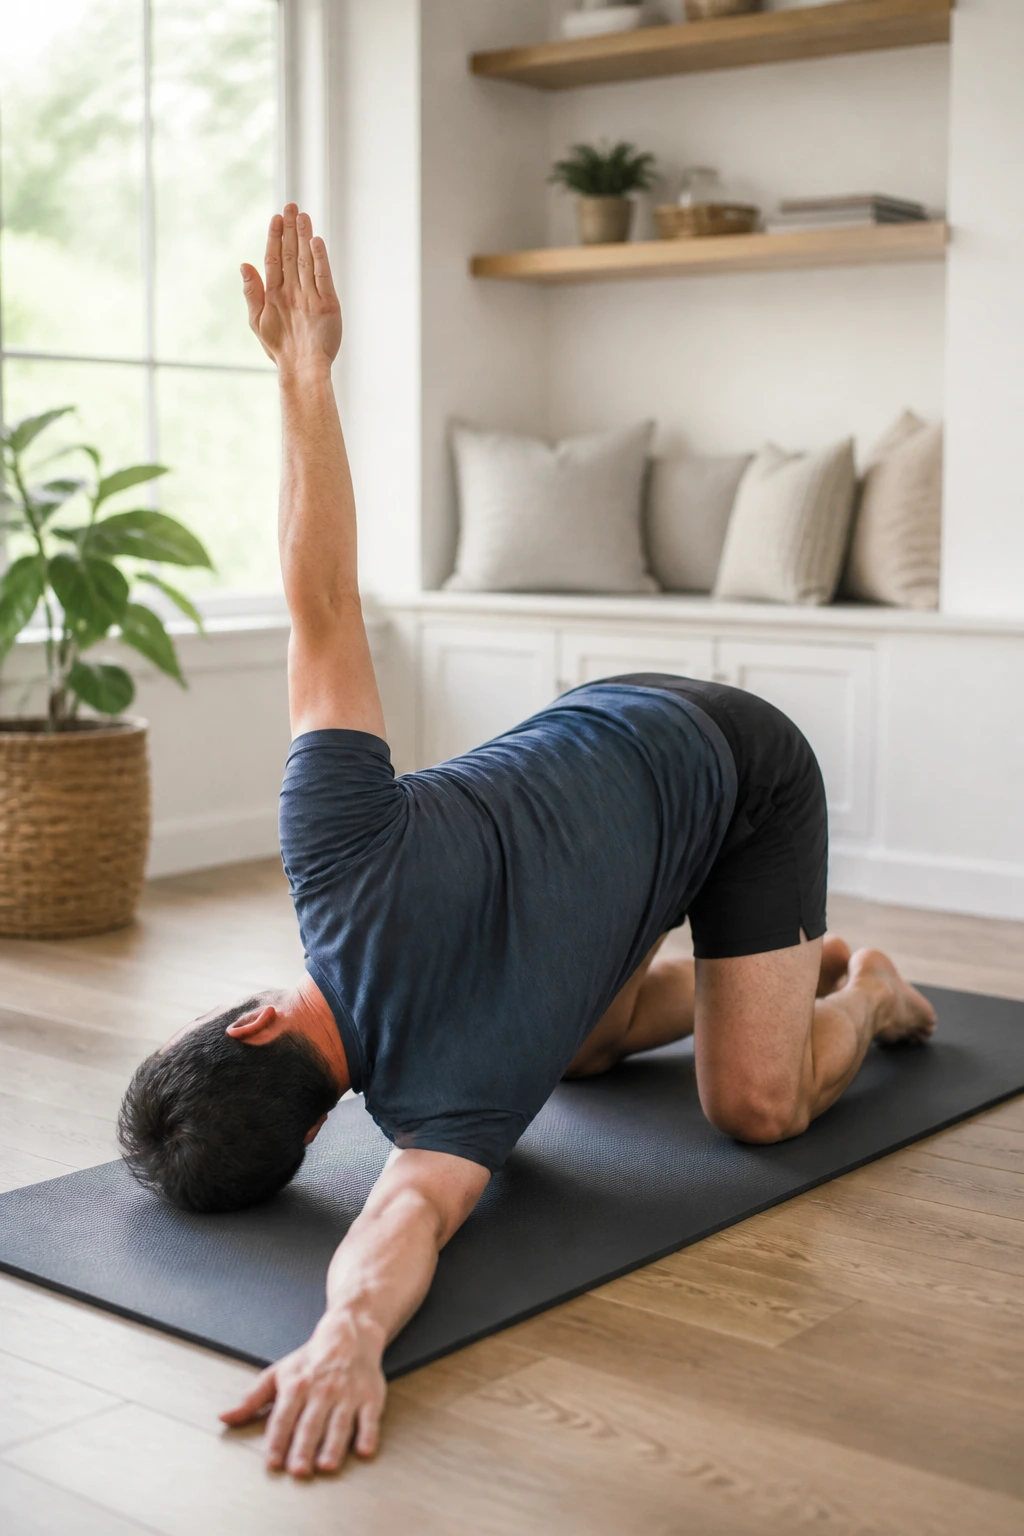
Lower back pain is often a symptom of a stiff upper back (thoracic spine). When your upper back doesn’t rotate, your lower back—which is designed for stability, not rotation—tries to make up for it. That leads to injury. We need to loosen the upper back to save the lower one.
Start in a tabletop position. Take your right arm and slide it underneath your left arm, reaching as far as you can while dropping your right shoulder toward the floor. Try to rest the side of your head on the floor. You should feel a stretch across your mid-back.
Hold for a few seconds, then return to the start and reach your right arm up toward the ceiling, rotating your chest open. Do this five times, then switch sides. This improves your rotational mobility, which takes the burden off your lumbar discs.
16. Piriformis Stretch
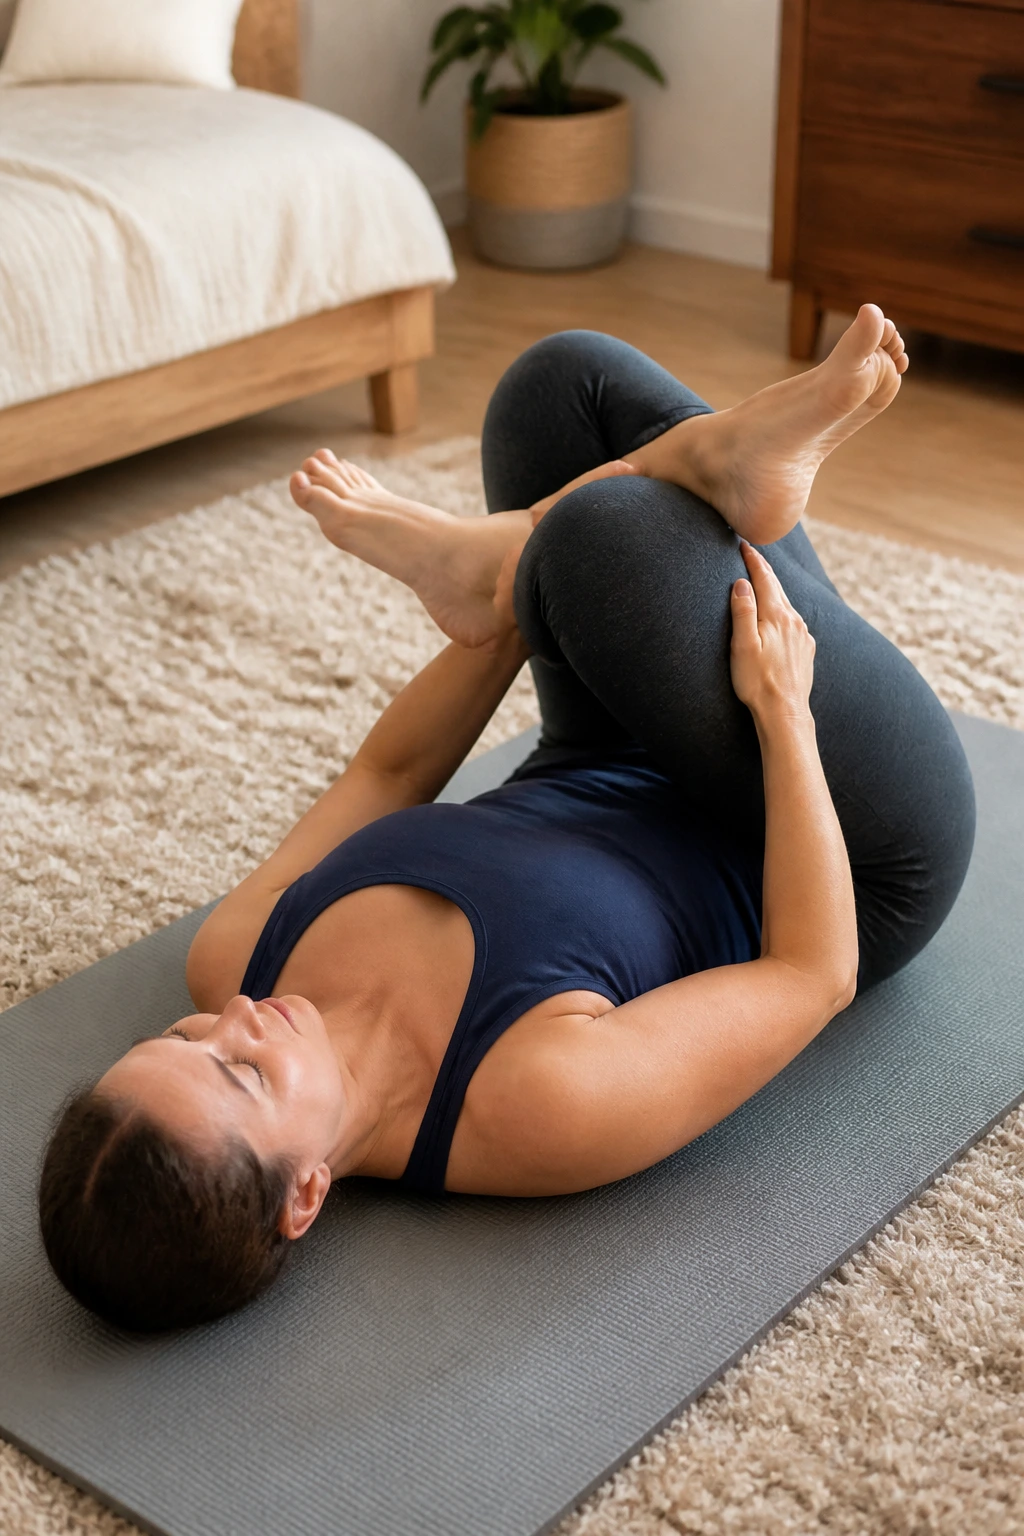
The piriformis is a small muscle deep in the glute. When it gets tight, it can compress the sciatic nerve, which sends pain shooting down the leg and creates a radiating ache in the lower back. Stretching this muscle can provide significant relief.
Lie on your back, knees bent, feet on the floor. Cross your right ankle over your left knee, making a “figure four” shape. If you already feel a stretch in your right hip, stay here. If not, reach through the gap and grab the back of your left thigh.
Gently pull the left leg toward your chest. Keep your lower back flat on the floor; don’t let it arch. You should feel a deep stretch in the right glute. Hold for 30 seconds, breathe deeply, and switch. This is a go-to move for anyone who sits for long periods.
17. Walking with Intention

Walking is the most underrated physical therapy tool on the planet. It is gentle, rhythmic, and forces the body to engage in reciprocal motion—the natural swing of the arms and legs that stabilizes the spine.
But here is the catch: how you walk matters. If you shuffle, look down, or carry your weight in your hips, walking won’t help. Walk with purpose. Stand tall, pull your shoulder blades back slightly, and engage your core. Look straight ahead, not at your feet.
Take shorter, quicker steps rather than long strides, which can jar the lower back. Focus on driving through your big toe and swinging your arms naturally. Start with 10 to 15 minutes. It is low impact, keeps the joints lubricated, and improves blood flow to the discs.
18. Supported Bridges
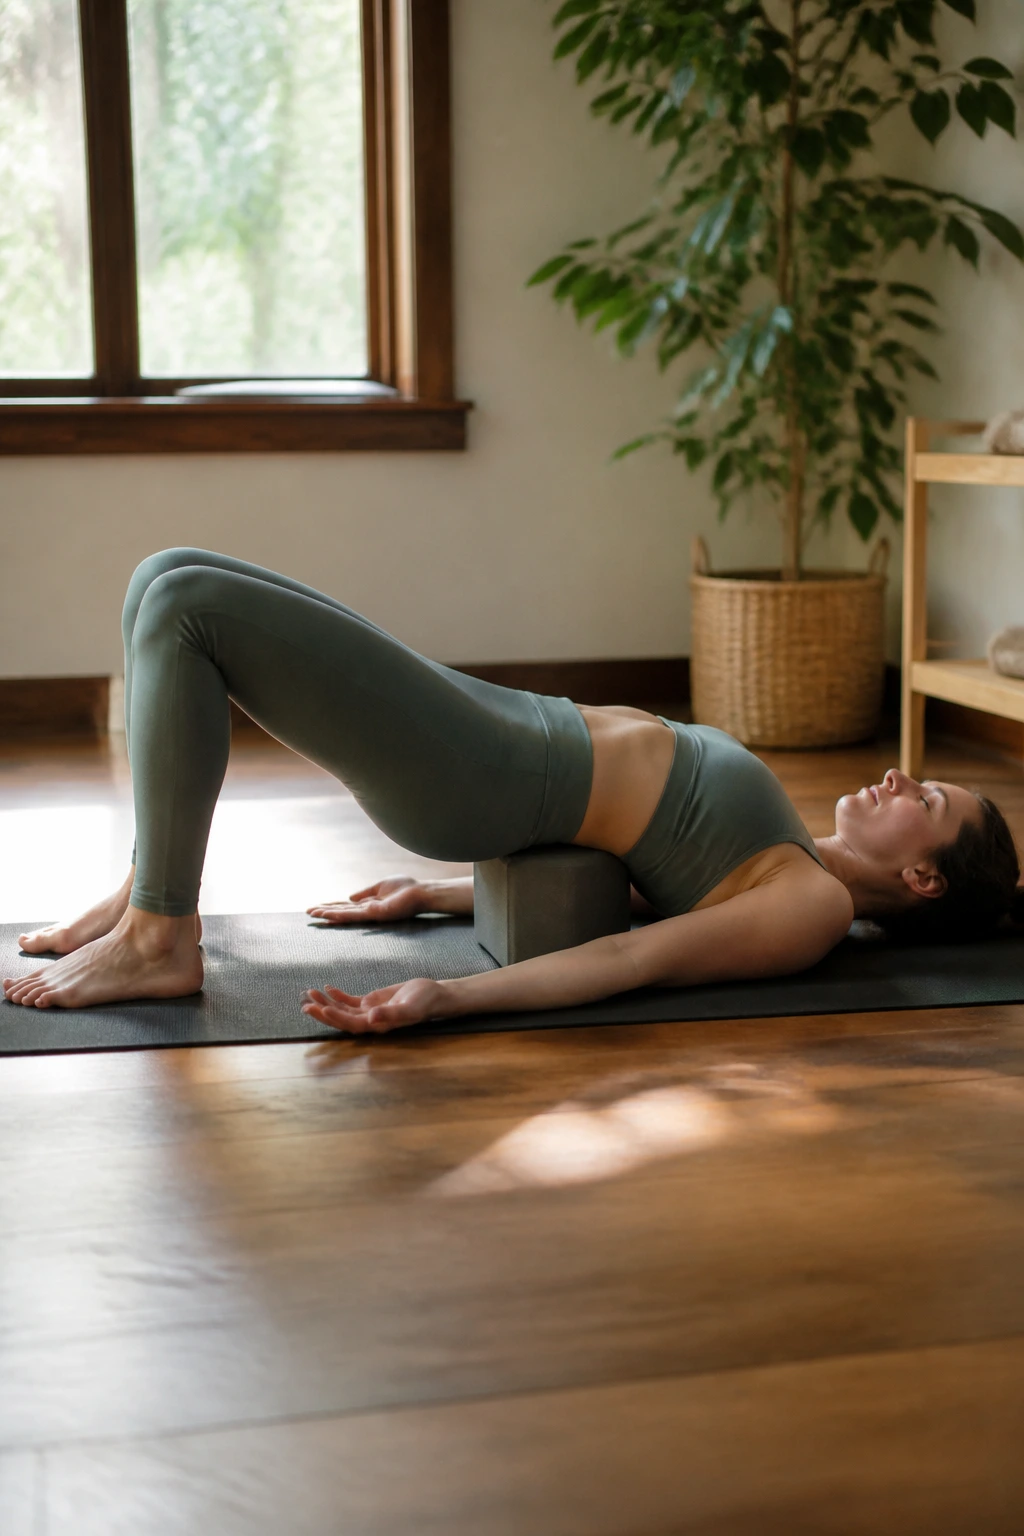
This is a progression from the standard glute bridge, but with a focus on stability. Sometimes, just holding the bridge is better than moving through it.
Perform a standard bridge, lifting your hips. Once you are at the top, place a yoga block or a thick book under your sacrum (the triangular bone at the base of your spine, not your lower back). Let your weight rest on the block.
This is a restorative version of the bridge. It allows your hips to open up and your lower back to decompress while you are supported. It is gentle, relaxing, and excellent for relieving tension after a long day. Stay here for a minute, breathe, and let gravity do the work.
19. Gentle Standing Hip Hinges
The hip hinge is the foundational movement for picking up anything—a bag of groceries, a laundry basket, a child. Most people bend at the waist, rounding their spine. The hip hinge teaches you to bend at the hips, keeping the spine neutral.
Stand with feet hip-width apart. Place your hands on your hips. Keep your knees slightly soft—not locked, not in a squat. Now, push your butt backward, as if you are trying to touch your glutes to a wall behind you. Your chest will naturally lower toward the floor as you hinge at the hips.
Keep your back perfectly flat. Keep your head in line with your spine. Go as low as you can while maintaining that flat back—usually until you feel a stretch in your hamstrings. Return to standing by squeezing your glutes. This move reinforces the motor pattern that prevents 90% of “lifting” injuries.
20. Diaphragmatic Breathing

It might seem strange to include breathing as a workout, but the diaphragm is a critical part of your core stability system. When you breathe shallowly into your chest, your core doesn’t engage, and your lower back has to stabilize your torso. Deep, diaphragmatic breathing creates intra-abdominal pressure, which acts as an internal brace for your spine.
Lie on your back, knees bent, one hand on your chest and one on your belly. Inhale slowly through your nose. You want the hand on your belly to rise, but the hand on your chest to remain still.
Focus on expanding your ribcage 360 degrees. Imagine your core is a cylinder, and you are filling it with air. This pressure is what protects your spine. Exhale slowly through pursed lips, feeling your belly deflate. Do this for five minutes. It is physically calming and neurologically training your core to protect your back during everyday movement.
The Bottom Line
Lower back pain is rarely solved by one magical movement. It is usually the result of a cumulative effect—weak glutes, tight hips, a soft core, and poor posture habits. The exercises listed here are not meant to be done all at once in a single, grueling session. That would likely do more harm than good.
Instead, treat this as a menu. Pick three or four that feel good to your body today and integrate them into your routine. Consistency is the magic ingredient. Doing five minutes of glute bridges and pelvic tilts every morning is infinitely more effective than doing an hour-long, intense routine once a week.
Listen to your body. If an exercise makes you feel “good pain”—like a muscle working or a stiff area lengthening—keep at it. If it makes you feel “bad pain”—sharp, stabbing, or electric—move on. Your spine is a resilient, adaptable structure, but it needs the right environment to thrive. Give it the stability it needs, the mobility it craves, and the consistency it requires, and you will find that the sharp aches you are dealing with today become nothing more than a memory. Your back is built to support you, not stop you; sometimes, it just needs a little bit of help to remember how.
