



Hip flexor workouts are one of the first things I reach for when the front of the hip feels stuck, cranky, or weirdly weak. A lot of people call that “tightness,” but the feeling is usually bigger than one muscle. Long sitting, hard running, shallow breathing, and too many crunches can leave the iliopsoas and rectus femoris doing extra work while the glutes and deep abs go quiet.
That matters because the hip flexors do more than lift the knee. They help organize the pelvis when you walk, climb stairs, sprint, or stand up after a long drive. When they’re overworked and under-controlled, the complaints show up in places that seem unrelated: a pinchy front hip, a tug in the low back, or that annoying sense that one leg doesn’t swing smoothly.
A quick stretch can feel nice. Sometimes that is enough. But lasting relief usually comes from a mix of length, control, and actual strength — not forcing the hip open and hoping for the best. The drills below lean on all three, with a few that work best before training and a few that make more sense after the session is done.
If the pain is sharp, catches in the groin, or shoots down the leg, stop playing home therapist and get it looked at. For the common desk-chair, runner, and weekend-lifter version of the problem, these are the movements that earn their keep.
1. Half-Kneeling Hip Flexor Stretch With Glute Squeeze
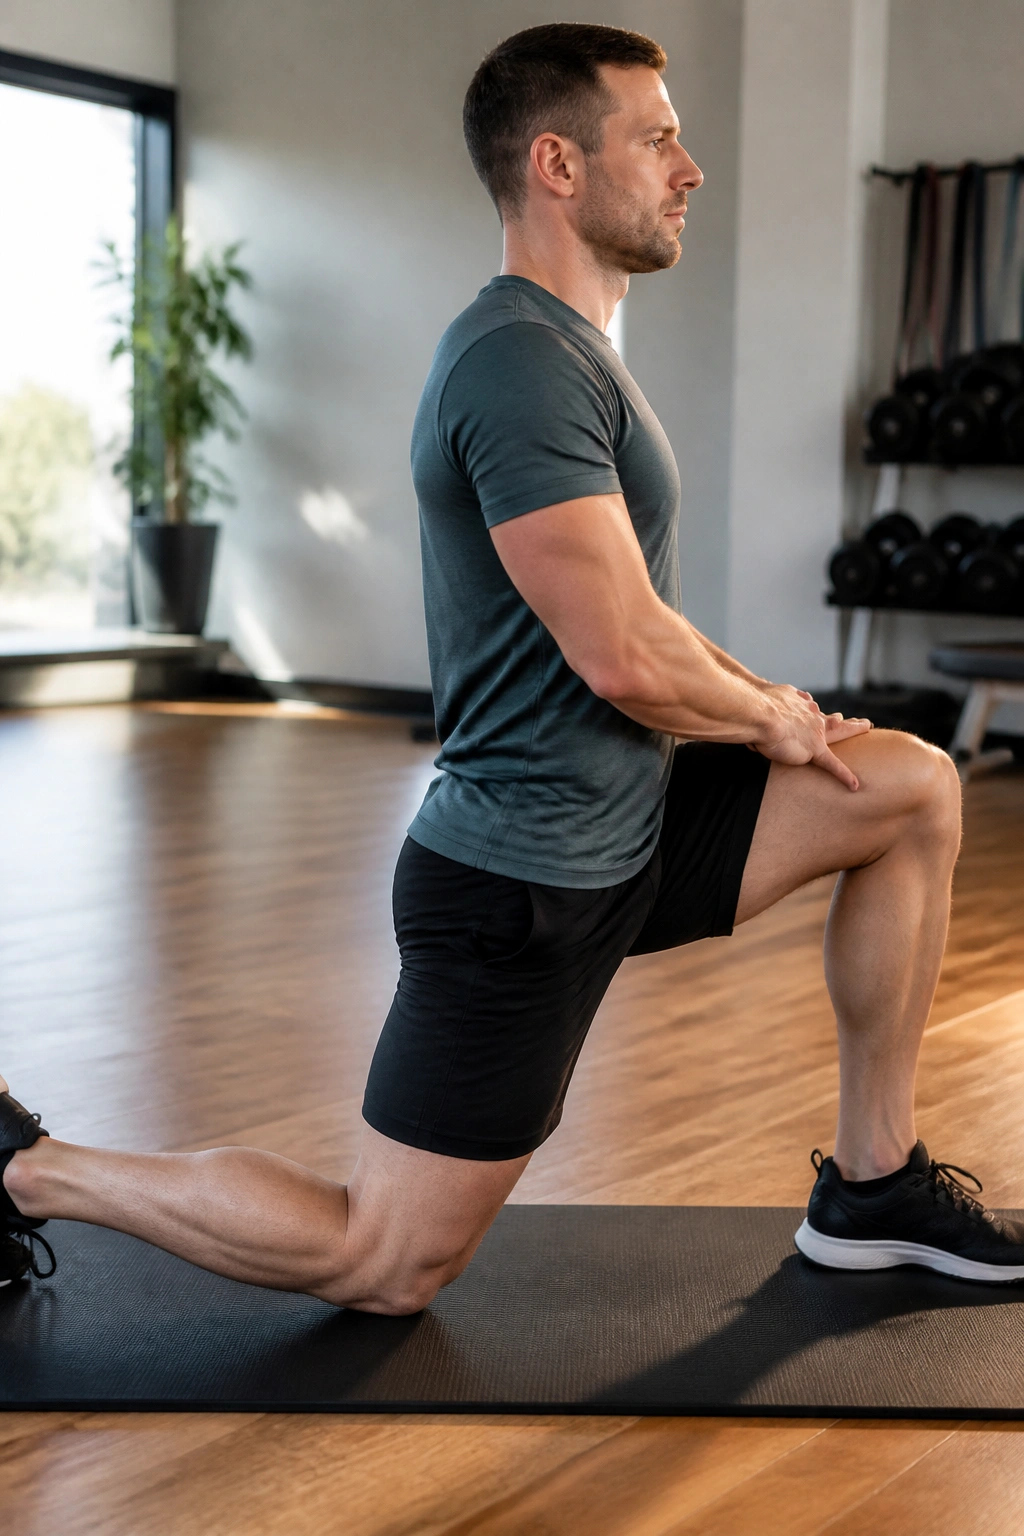
Start here if the front of your hip feels like it has been folded in half all day. The half-kneeling position gives you a clean line into the hip flexor on the back leg, and the glute squeeze keeps the stretch from leaking into your lower back.
Set your back knee on a pad, tuck the back toes, and bring the front foot far enough forward that the front shin stays close to vertical. Squeeze the back-side glute first. Then shift forward only 1 to 2 inches. You should feel a stretch in the front of the back hip, not a pinch in the spine.
Do not chase depth. That is the trap. Ten seconds of clean position beats 30 seconds of sloppy arching every time. Hold for 20 to 30 seconds, breathe out slowly, and repeat 2 to 3 times per side. I like this one after a workout or after sitting because it opens the hip without asking the joint to do anything fancy.
2. Couch Stretch Against the Wall
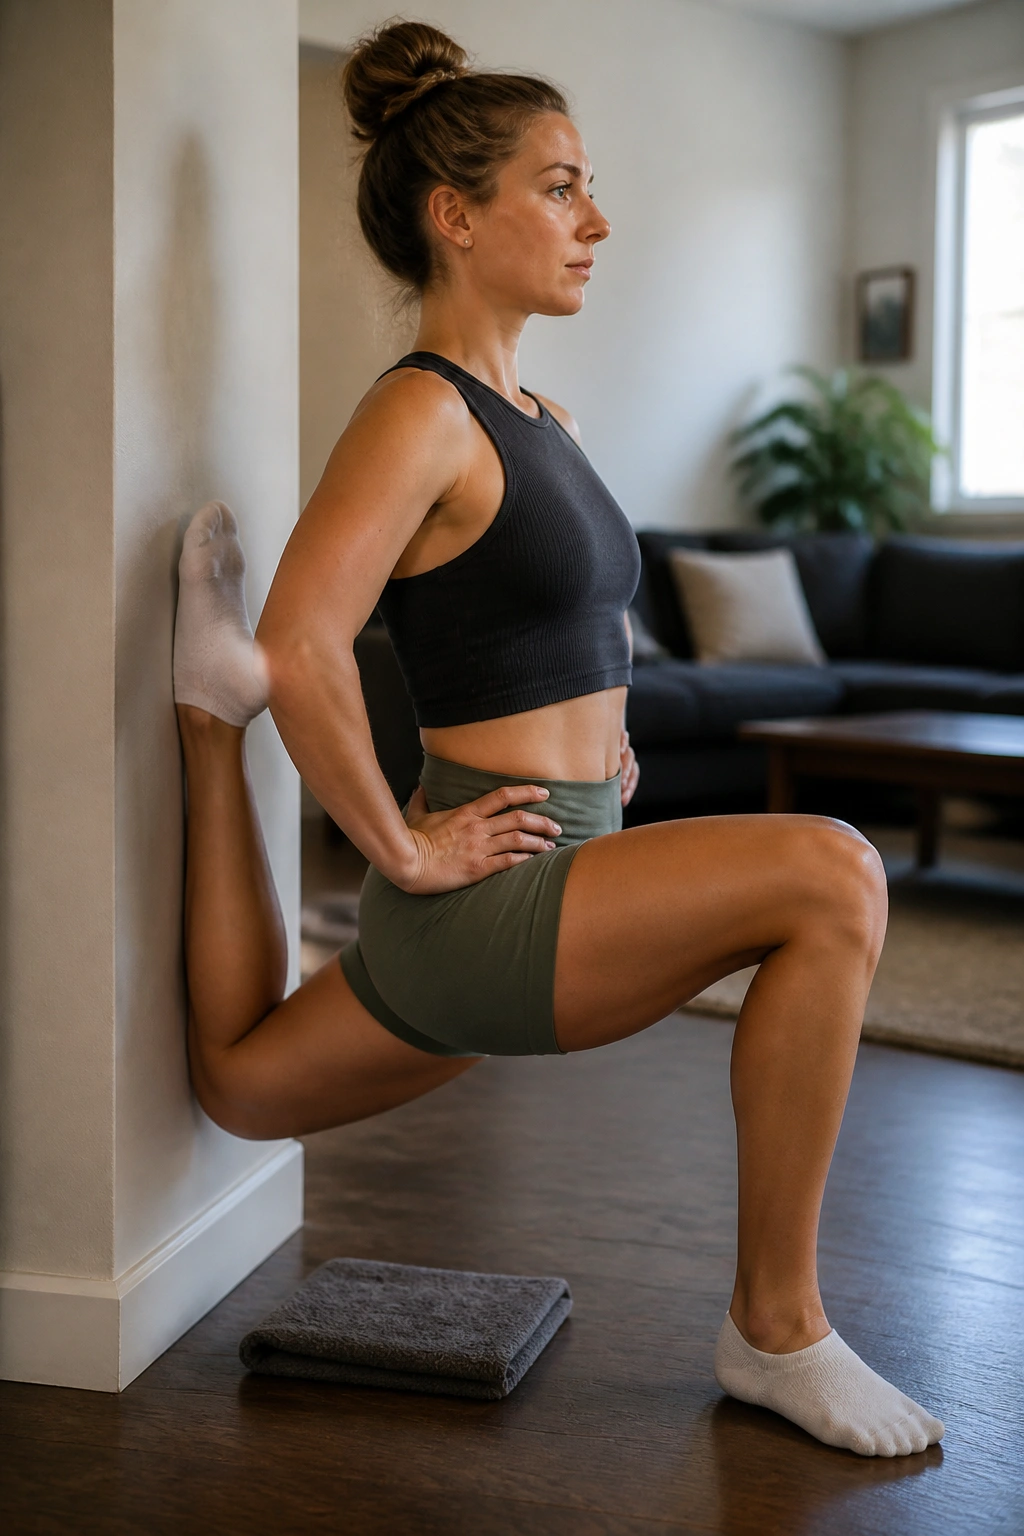
Why does this one feel so aggressive when it looks harmless? Because the couch stretch hits the rectus femoris — the quad muscle that also crosses the hip — and that muscle tends to get grumpy when you live in chairs or run a lot of hills.
What makes it different
Put one knee on a folded towel or mat with the shin up a wall, bench, or couch. The other foot stays in front like a kneeling lunge. Keep your torso tall, then tuck the pelvis slightly so your low back does not take over. A 30- to 45-second hold is enough for most people; if you go much longer, you may start fidgeting and lose the shape that makes the stretch useful.
What to watch for
- Use extra padding under the knee if the joint feels crushed.
- Keep the front foot far enough out that you can breathe without collapsing forward.
- Stop if you feel a sharp kneecap pinch or a hard pinch in the front of the hip.
- Keep the ribs stacked over the pelvis; no backbend circus act.
This is a better post-workout drill than a pre-run one. It can leave the front of the thigh feeling loose in a way that deep lunge stretches do not always manage.
3. Standing Hip Flexor Pulse and Reach

A short dynamic lunge beats a hard stretch before a run. The hip flexor likes motion when it is cold, not a long static hold that makes it feel guarded.
Step one foot back into a split stance and keep both feet pointing forward. Tuck the pelvis just a little, then pulse the hips forward 1 inch at a time. As you do that, reach the same-side arm overhead and slightly across the body. That overhead reach matters; it reminds the trunk to move while the hip opens.
Do 8 to 10 smooth reps per side. The movement should look calm, not forced. If your low back starts arching, shorten the range and slow down. This is a warm-up drill, not a stretch contest. I like it before sprint work, hill repeats, or any session where the hips need to feel awake fast.
4. Posterior Pelvic Tilt Wall Drill

If your low back keeps sneaking into the party, this drill teaches the pelvis to stop tipping forward. That’s usually the part people miss. They stretch the hip, but they never teach the pelvis where “neutral” feels like.
Why it matters
Stand with your upper back against a wall and place one foot about 6 to 8 inches away from the wall. Press the low back gently toward the wall without flattening every curve in your spine. That small posterior tilt is the key. From there, lift the opposite knee to hip height, pause for a second, then set it down and switch sides.
The feel you want
- Ribs stacked over hips.
- The standing glute doing some work.
- No rib flare.
- No wobbling through the low back.
Use 5 slow lifts per side for 2 rounds. It’s a small drill, but it pays off when your hip flexors are doing too much during walking or running. Also, it’s a good reminder that not every hip problem needs a harder stretch. Sometimes the fix is better control.
5. 90/90 Breathing Hip Reset
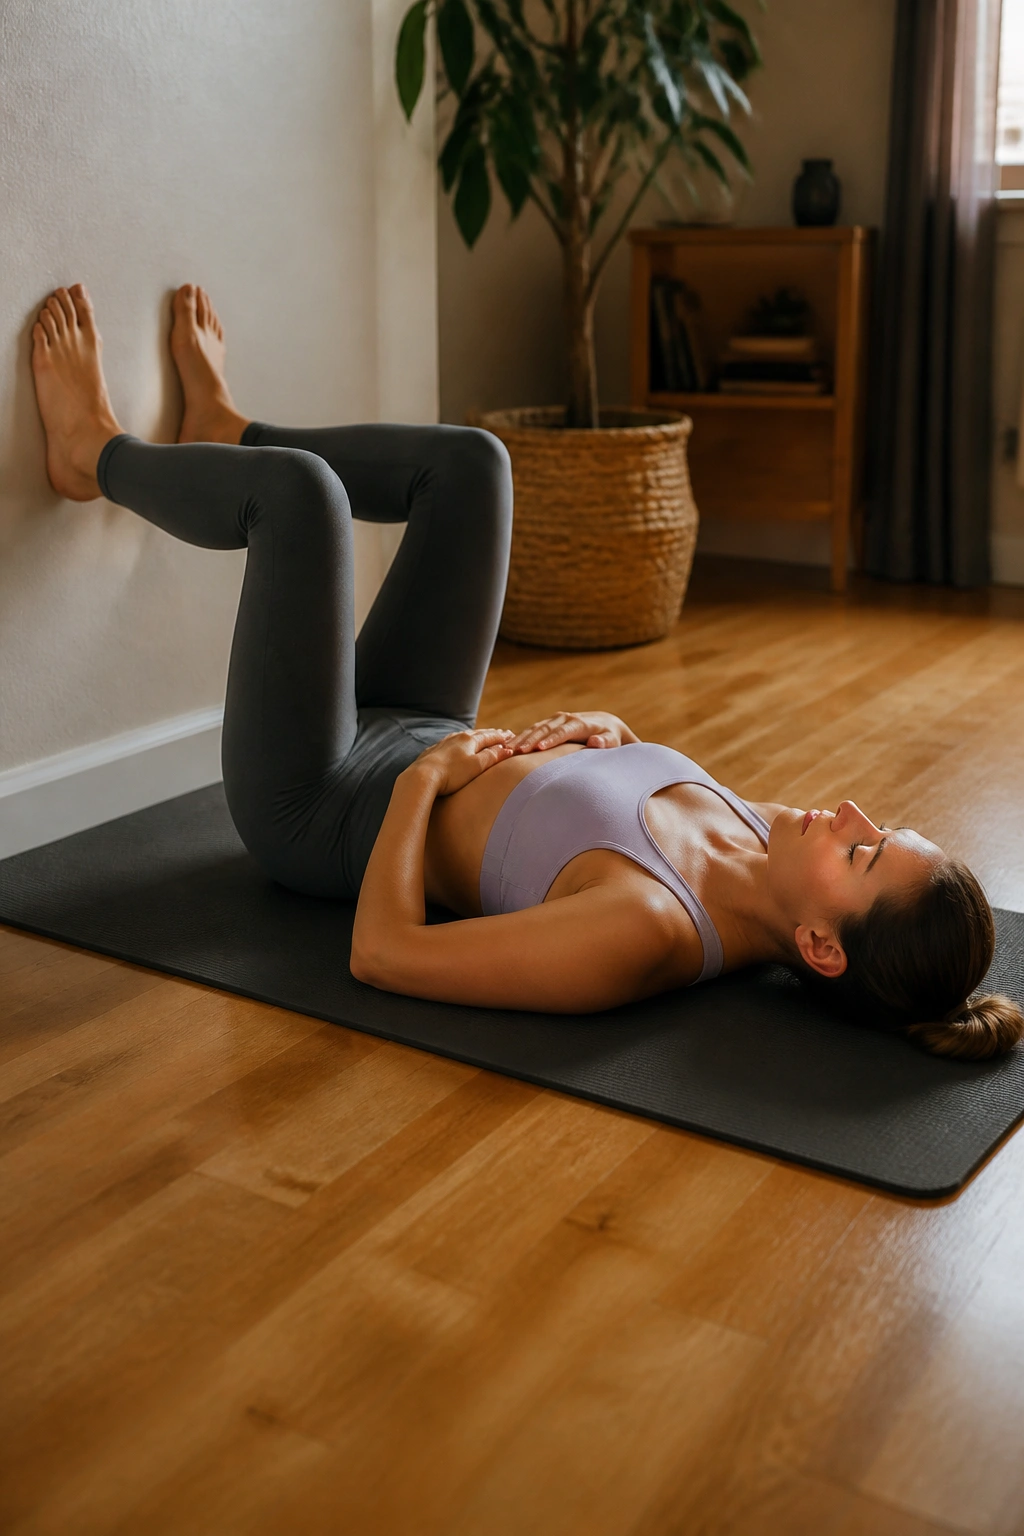
A quieter drill. Still useful. In fact, this is one of the better choices when your hips feel wound up after a long day of sitting or a heavy leg session.
Lie on your back with your calves on a bench or with your feet on a wall so your hips and knees sit around 90 degrees. Exhale through your mouth until your ribs soften down and your low back feels a little heavier on the floor. Then breathe in through your nose for about 4 seconds and out for 6. Do 4 to 6 rounds.
The point is not to “smash” the hip flexors with effort. It’s to let the pelvis stop bracing. If your breathing gets noisy or your neck starts helping, shorten the exhale a little and keep things smooth. I like this one after a workout, but it’s also a smart reset on the floor after travel or desk work. Your hips usually feel less like they’re hanging on for dear life.
6. Dead Bug Heel Tap
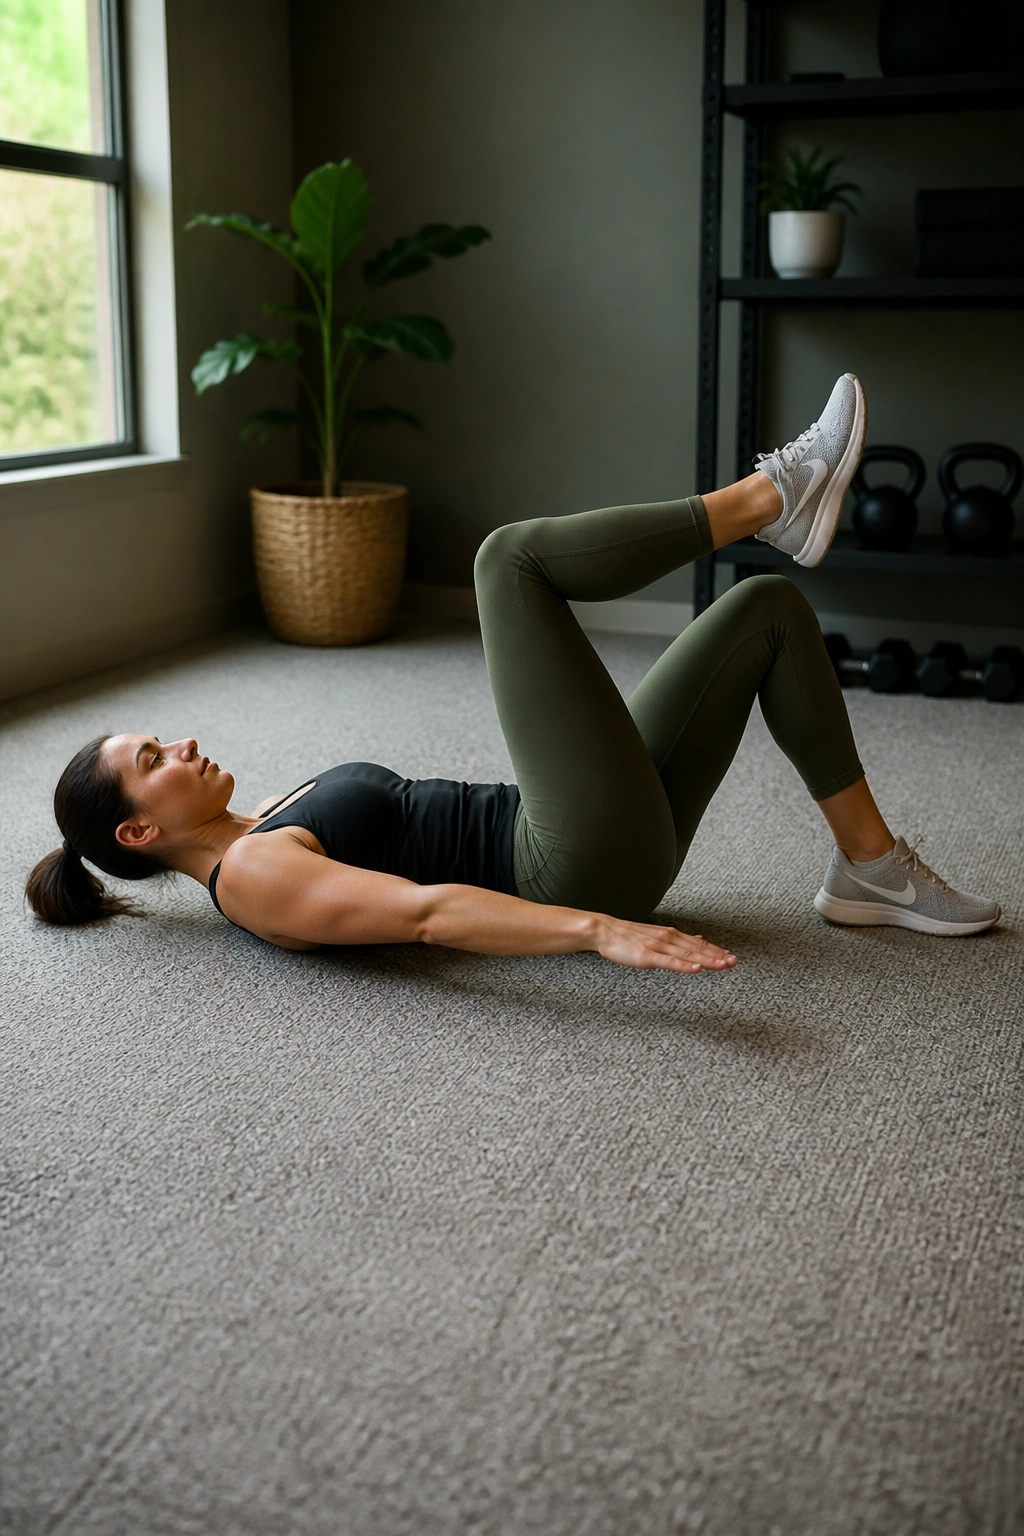
The dead bug looks boring until your lower back starts to arch. Then it becomes a lesson. A useful one.
Lie on your back with your hips and knees bent at 90 degrees. Press your lower back lightly into the floor, then lower one heel toward the ground until it just taps or hovers an inch above it. Bring it back up and switch sides. Keep the movement slow enough that the torso stays quiet.
How to keep the hip flexors honest
- Exhale before each rep.
- Keep the ribs down.
- Lower the heel only as far as you can control.
- Stop the set when the low back starts lifting.
Do 6 to 8 taps per side for 2 or 3 sets. This is one of my favorite hip flexor workouts because it teaches the body to flex the hip without turning the low back into a crank handle. Great before lifting, great after sitting, and great for anyone whose “tight hips” are really weak control.
7. Supine Marching Hold
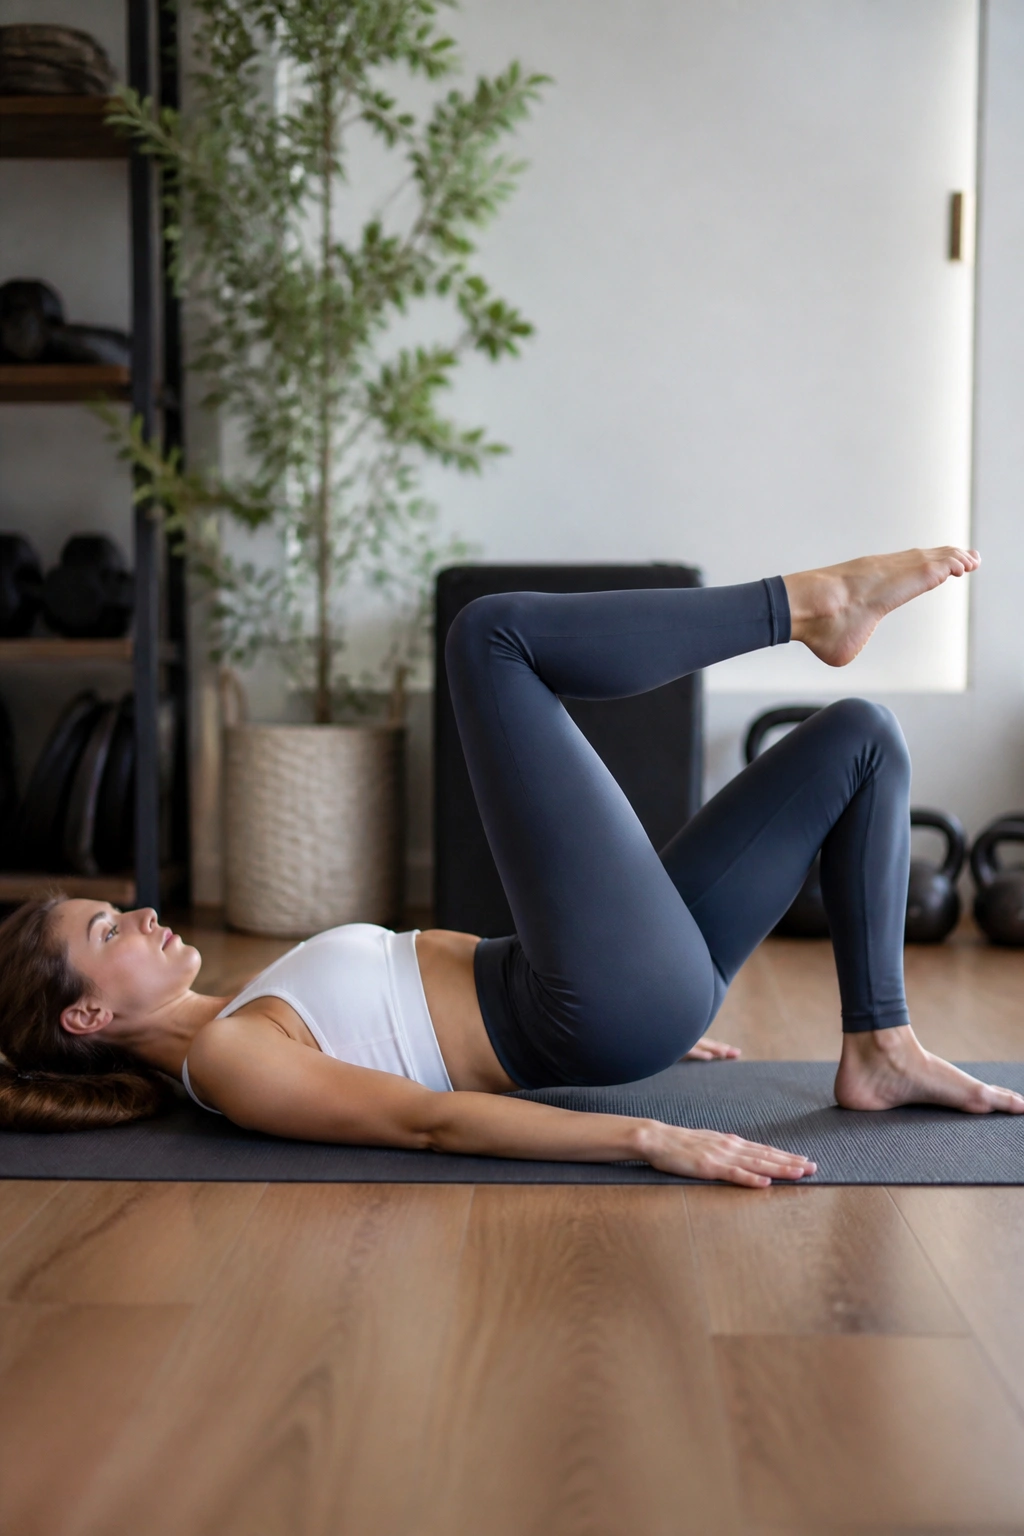
Can you lift one foot without your hips rocking? If the answer is no, this drill is useful. It looks tiny, but tiny is the point.
Lie on your back with both hips and knees bent, feet flat. Bring one knee toward your chest until the hip is at about 90 degrees, then hover the foot a few inches off the floor. Hold 3 to 5 seconds without letting the pelvis tip or the ribs flare. Set it down and alternate.
This version is easier than a straight-leg raise, which makes it a good bridge for people who feel the front of the hip grab too fast. Aim for 6 holds per side. If your neck, shoulders, or low back start doing extra work, you’re lifting too high or holding too long.
The best thing about marching holds is the honesty. You can’t fake control here. Either the pelvis stays quiet or it doesn’t.
8. Straight-Leg Raise
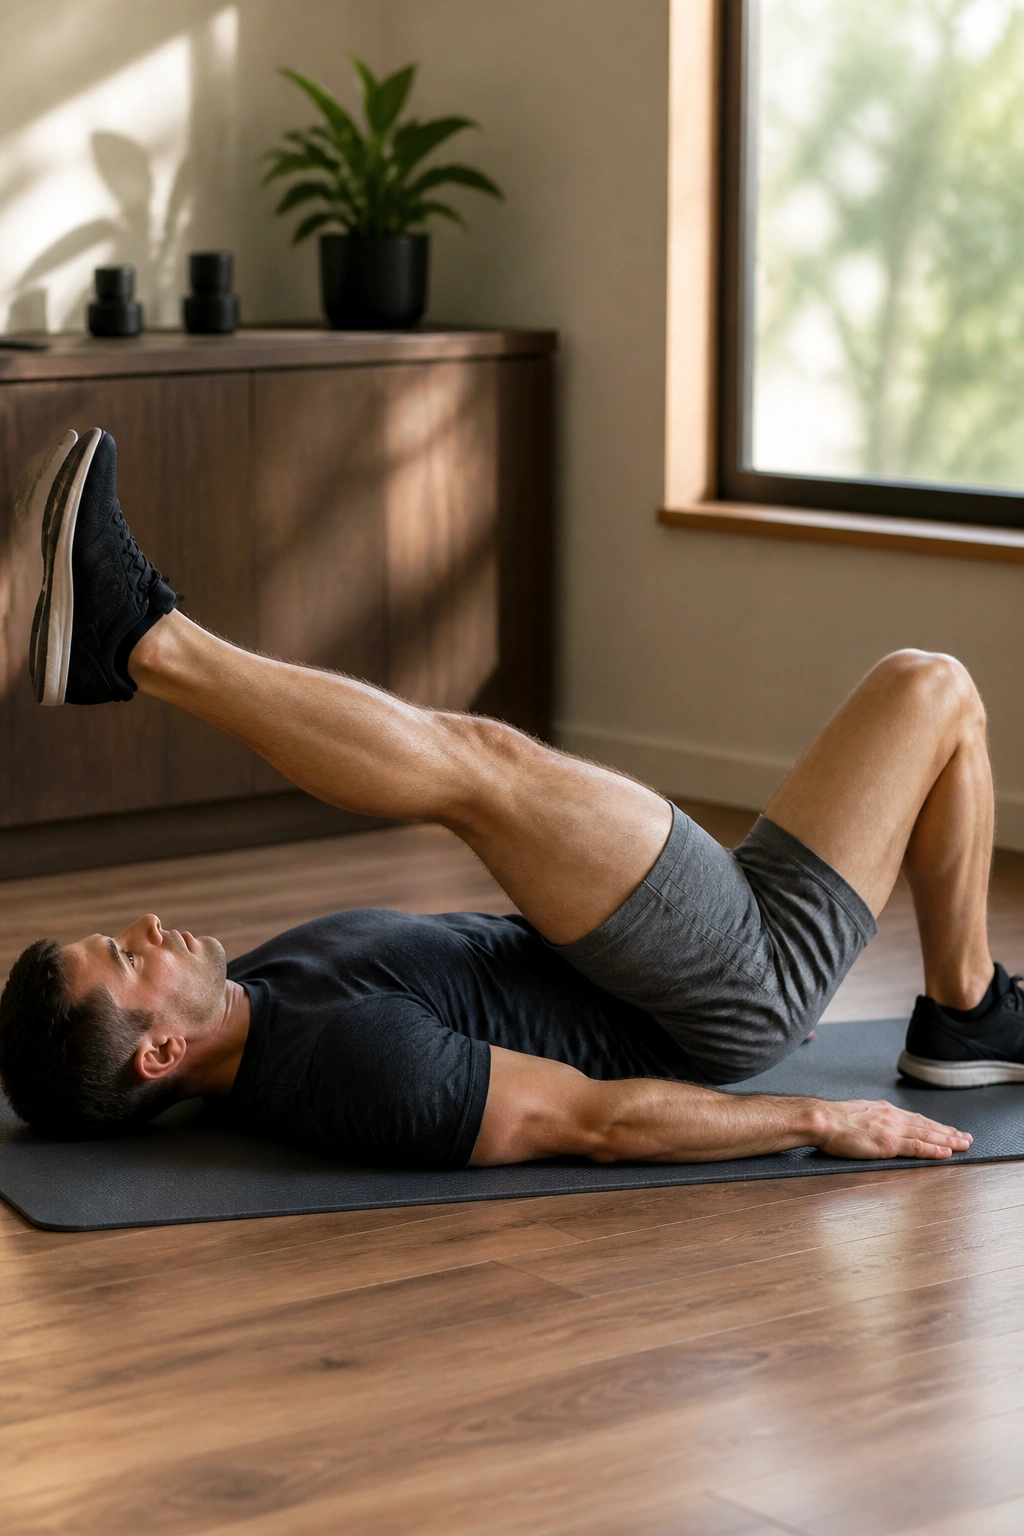
This one looks harmless and burns fast. That’s why I like it. The straight-leg raise asks the hip flexor to work while the knee stays extended, and that makes it a sharp test of control.
Lie on your back with one leg bent and the other straight on the floor. Pull the toes of the straight leg back toward you, then lift that leg 6 to 12 inches. Lower it slowly over 3 seconds. If you can, pause for a second at the top before lowering again. Do 6 to 8 reps per side.
If your low back arches, reduce the range. Don’t fight through it. A smaller, clean lift is better than a big sloppy one. This drill is useful when you want more than mobility and less than heavy strengthening. It works well on the days between workouts, especially if you sit a lot and your front hip feels asleep rather than tight.
9. Glute Bridge March
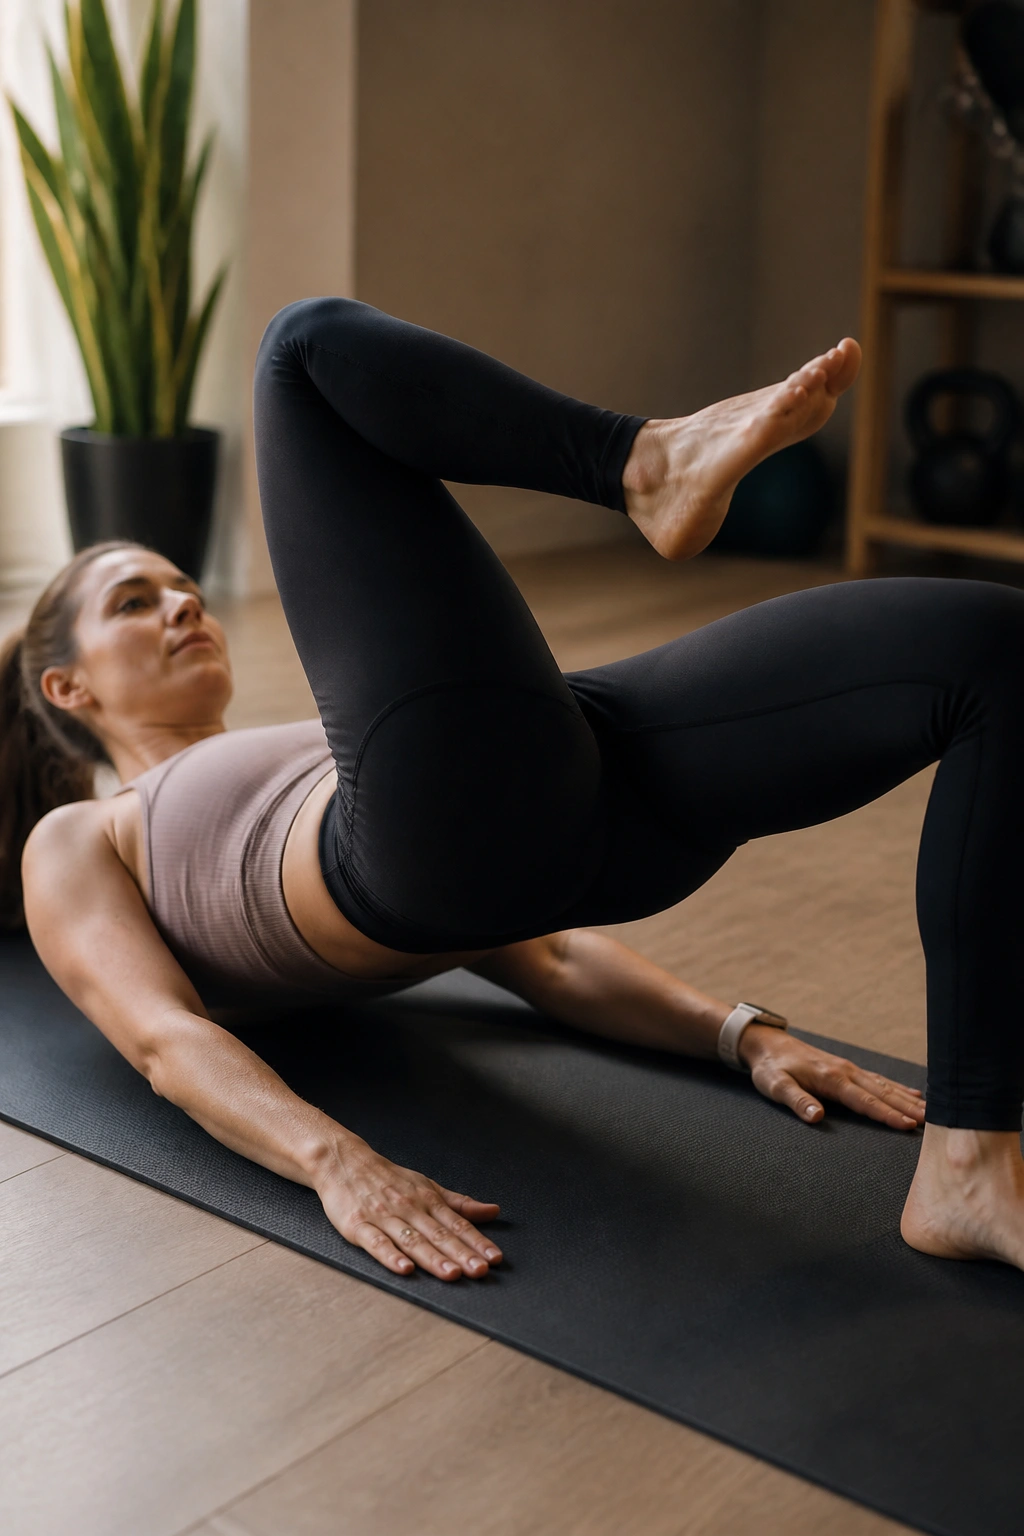
The front of the hip does better when the backside shows up. That’s the whole story here, and it’s a good one.
Set up in a glute bridge with your feet flat and hips lifted. From that bridge, lift one knee a few inches while keeping the pelvis level. Put it down, then switch sides. The bridge should stay high enough that you feel the glutes working, but not so high that your lower back cranks.
What makes this worth doing
- It trains hip extension while the opposite hip flexor has to stay organized.
- It gives the pelvis a stable base.
- It helps people who feel “tight” at the front because the back of the chain never contributes enough.
Do 6 to 10 marches per side. If your hamstrings cramp, move your feet a little farther away from your hips. If the low back takes over, lower the bridge an inch. Simple fix. Clean movement. That’s the whole game.
10. Split Squat Iso Hold
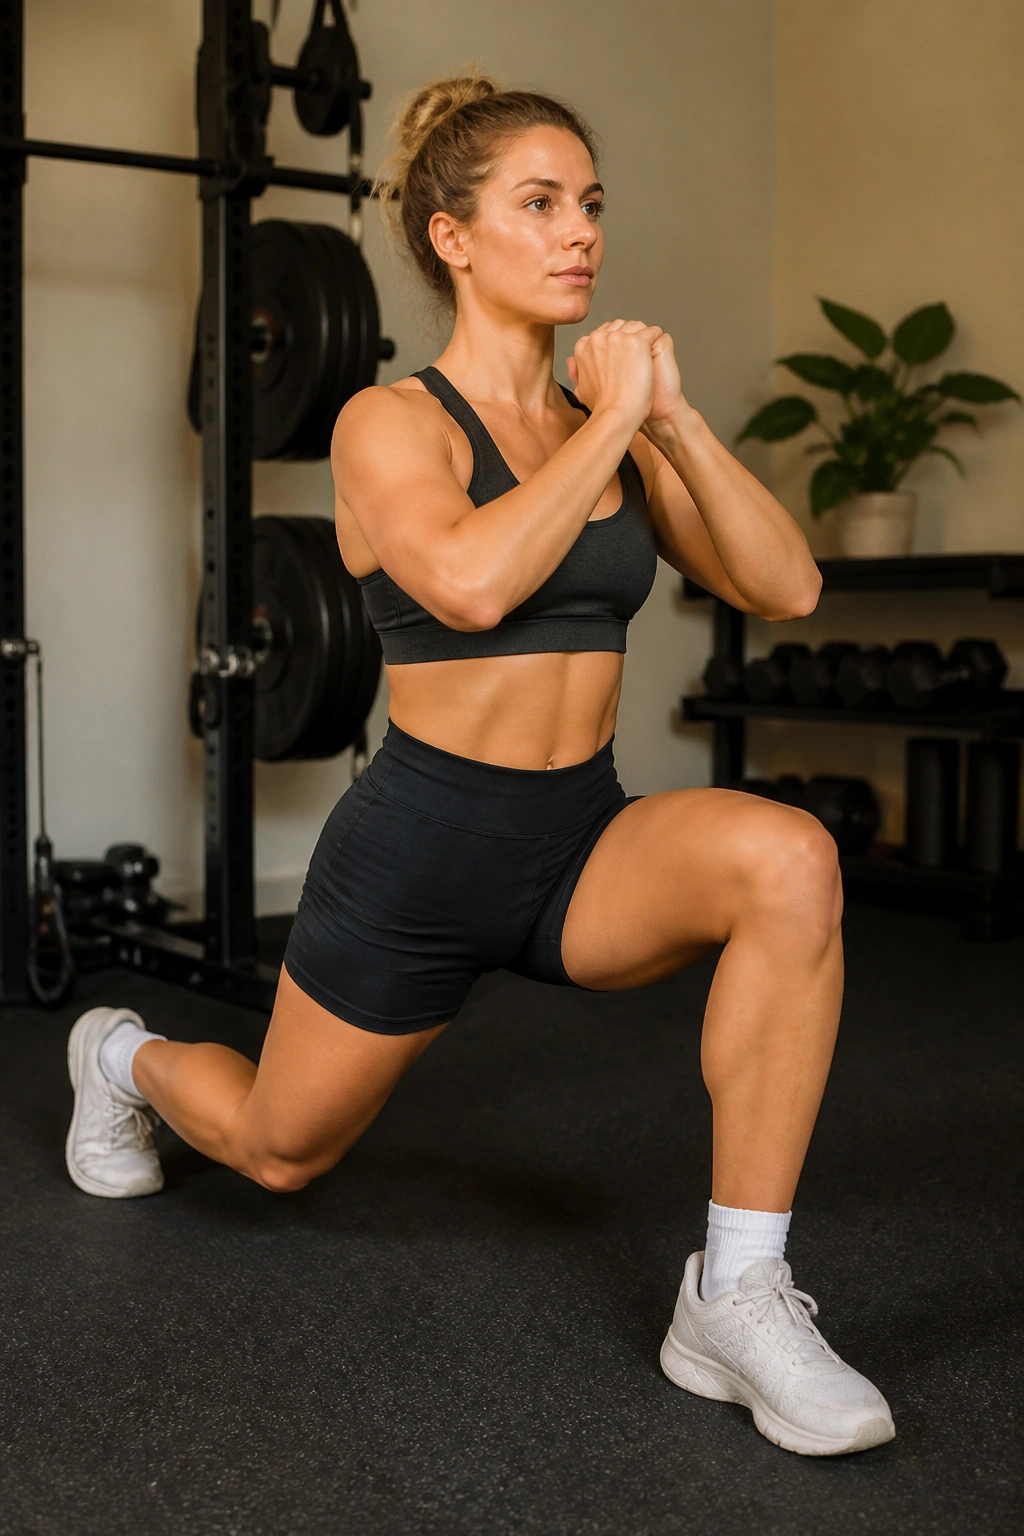
Unlike a quick lunge, an iso hold gives the hip flexors time under tension. That matters. A lot of front-of-hip stiffness shows up when the hip is asked to hold position, not just move through it.
Drop into a split squat with your back knee hovering 1 to 2 inches above the floor. Stay tall. Let the front shin stay fairly vertical, press the whole front foot into the ground, and hold for 20 to 30 seconds. You should feel the front leg working hard, with a long line through the back hip.
How to scale it
- Use a wall or rack for balance.
- Make the stance shorter if the back hip feels too stretched.
- Make it longer if you want more of a hip opener.
- Cut the hold in half if the knee starts complaining.
This one is excellent before lower-body training because it wakes up both hip flexion and hip extension without the slap of fast movement. It’s a workhorse.
11. Reverse Lunge With Overhead Reach

One step back, one arm up, and the front of the hip lengthens without a wrestling match. That’s the appeal of this move.
Step back into a reverse lunge, keeping the front foot planted and the torso tall. As the back knee lowers, reach the same-side arm overhead and a little away from the back leg. That gentle side bend opens the front line of the hip while keeping the ribs from flaring hard. Come back to standing and repeat on the other side.
Use 5 to 6 reps per side, moving slowly enough that you can feel where the stretch lands. If you feel it mostly in the low back, shorten the reach. If you feel nothing, lengthen your stance slightly.
This is one of those drills that plays nicely with both warm-ups and cool-downs. It has motion, but it still gives the hip flexors a useful stretch under control.
12. Step-Back Lunge to Knee Drive
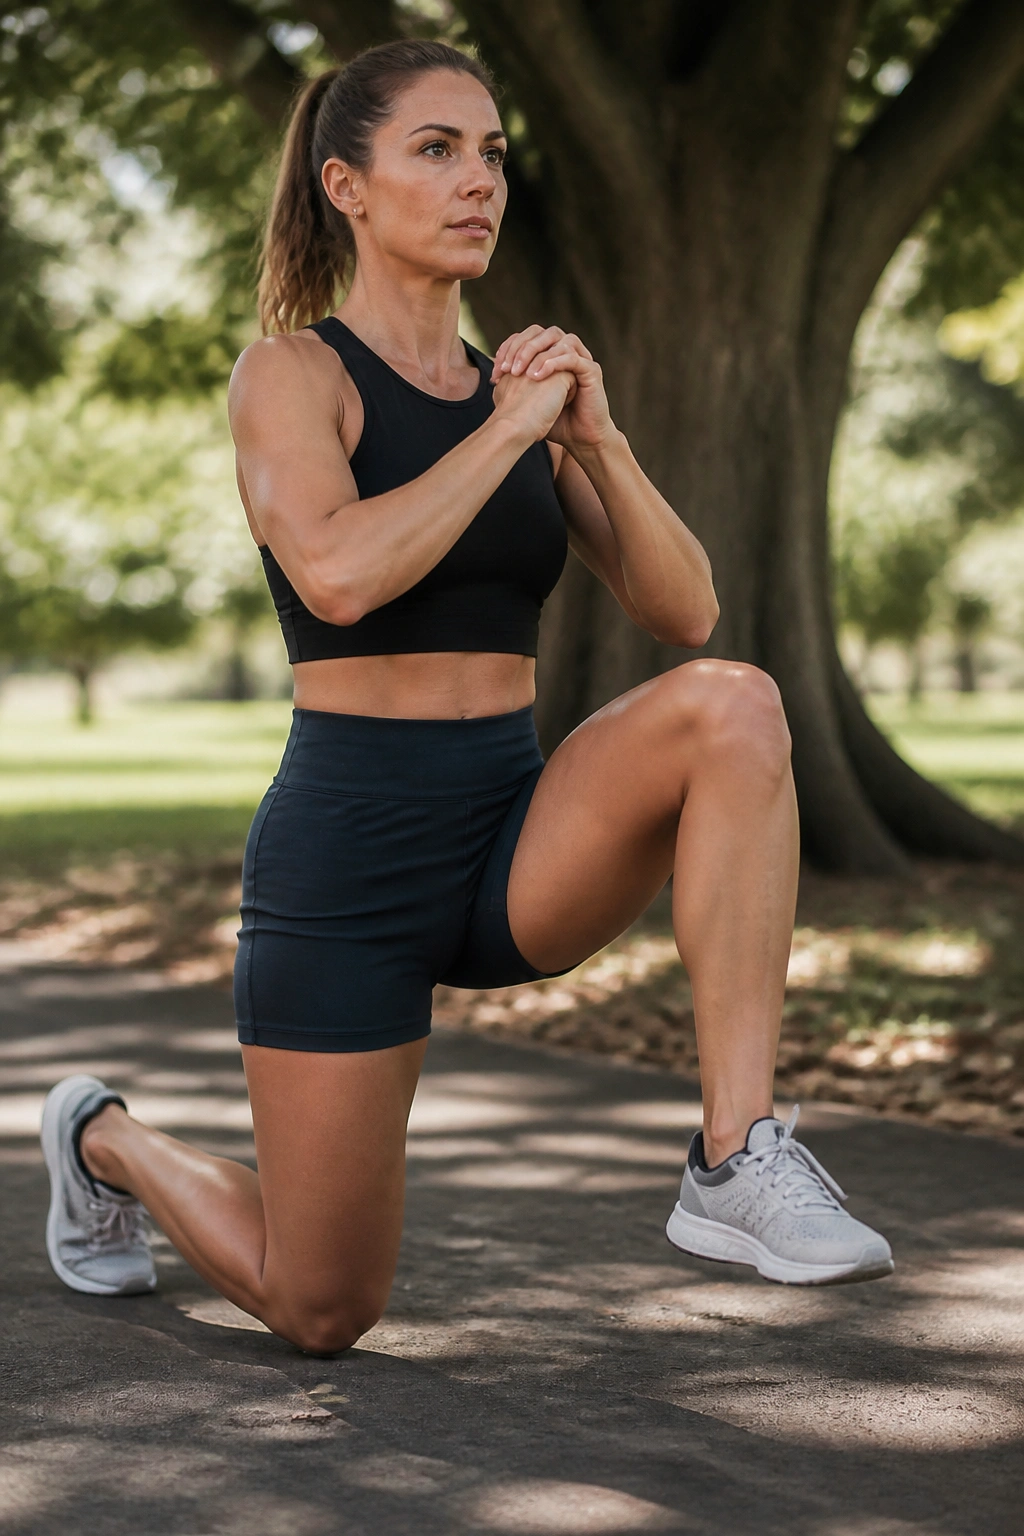
Mobility turns into movement here. That’s the real value of the drill.
Step one leg back into a reverse lunge. From the bottom, push through the front foot, come up tall, and drive the back knee forward to hip height. Pause for a beat at the top so the hip flexor has to finish the job instead of letting momentum do it. Then step right back into the lunge.
Do 5 to 8 reps per side. Keep the knee drive smooth and the torso stacked. If you lean backward on the drive, the hip flexor loses the point of the drill and your low back starts helping too much. A good rep feels coordinated, not explosive.
I like this one for runners and field-sport athletes because it connects the stretch position and the active position in the same pattern. That makes it more useful than doing either half by itself.
13. Banded Standing Knee Drive
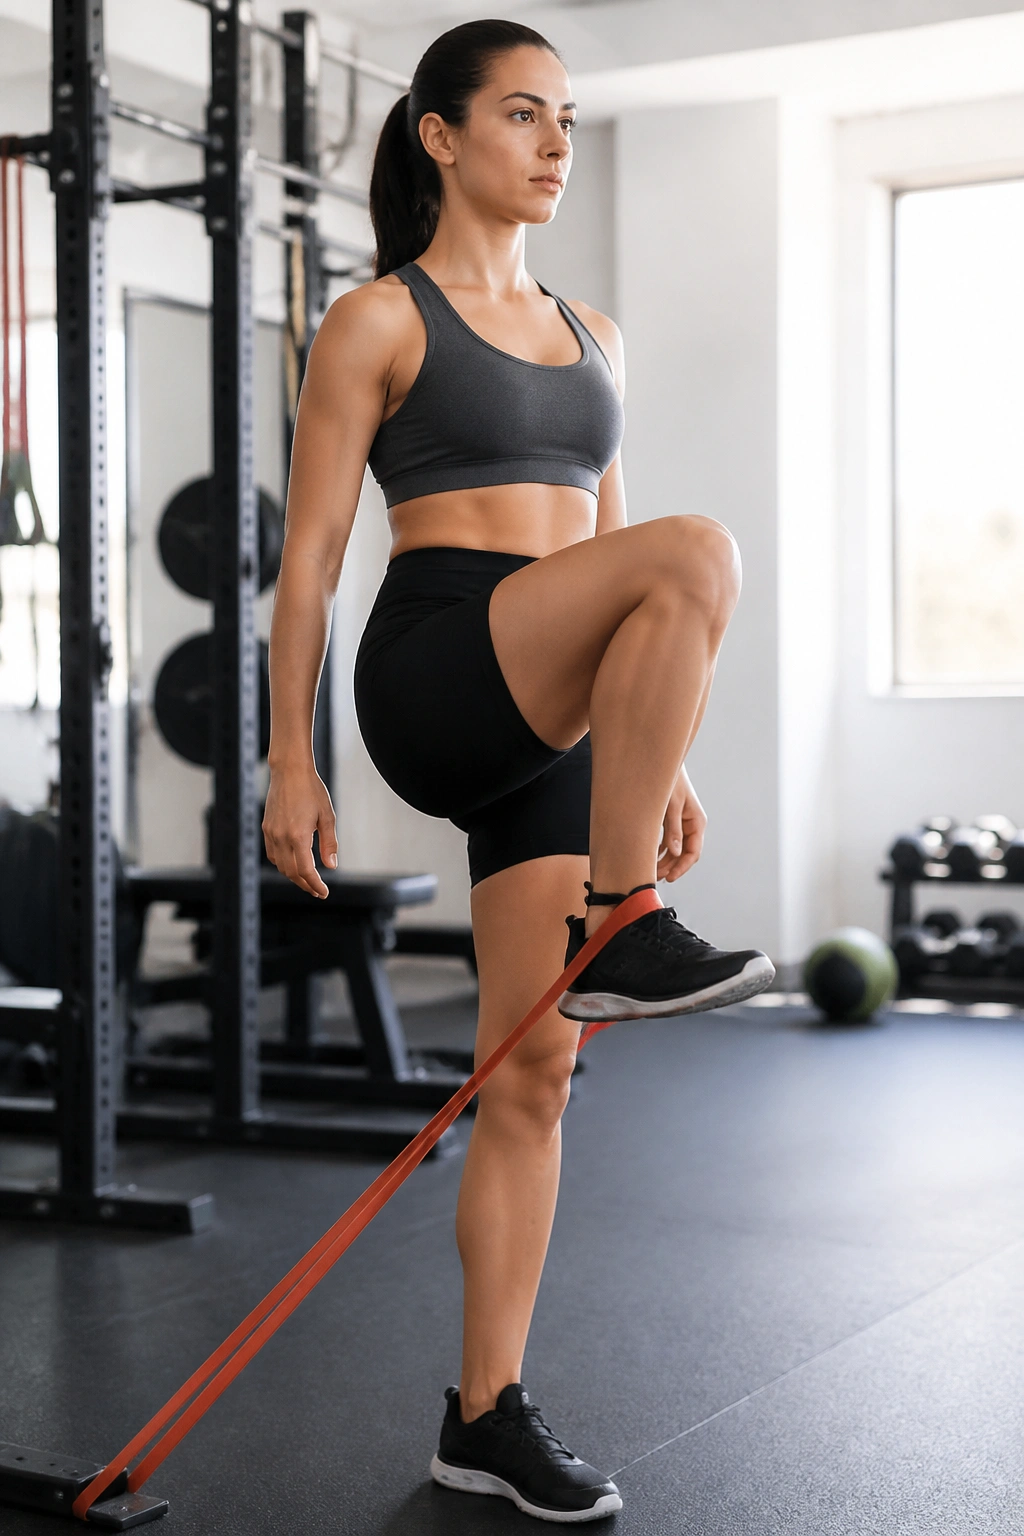
If you want the hip flexor to get stronger, load the motion. A light band makes that possible without turning the drill into a circus act.
Loop a resistance band around one foot and anchor it low, or use a cable machine if that’s what you have. Stand tall and drive the knee up to hip height against the band. Lower it slowly over 2 seconds. Keep the ribs down and the pelvis level so you don’t lean backward to cheat the rep.
What to watch for
- Use light resistance first.
- Stop the rep before the trunk starts tipping back.
- Keep the standing foot rooted through the big toe and heel.
- Move slow on the way down.
Do 2 or 3 sets of 8 to 12 reps per side. This is a strong choice for people who need actual hip flexor strength, not just more stretching. It’s also one of the better pre-run drills because it wakes up the motion you’re about to use.
14. High-Knee A-March
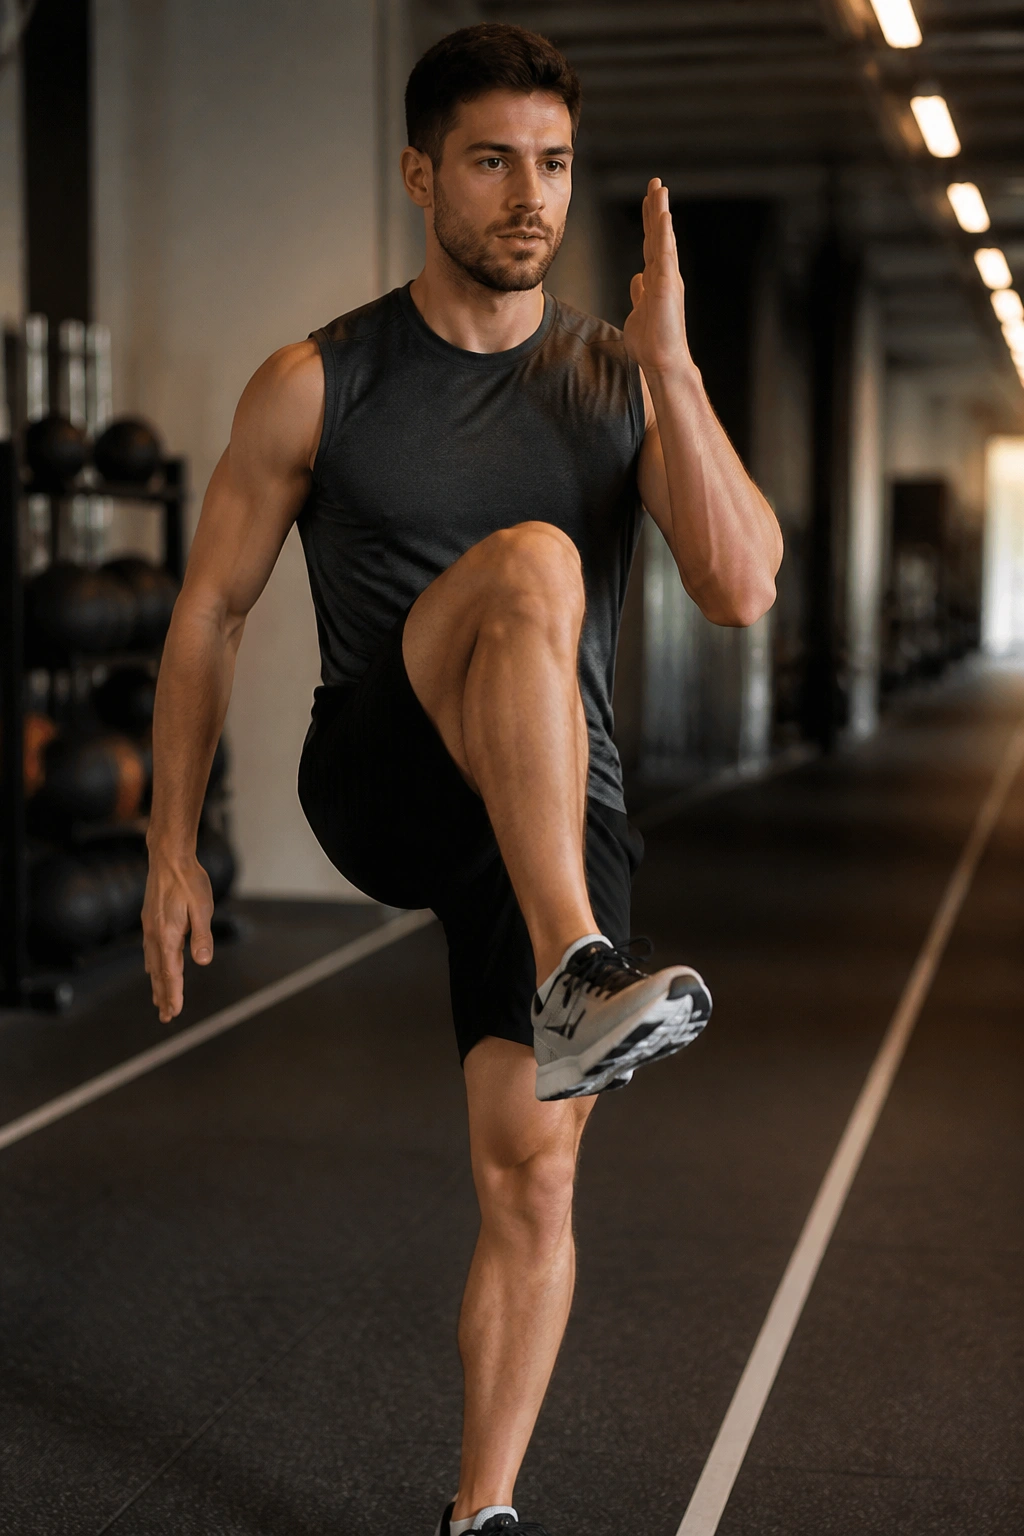
Want a walking drill that looks simple and sneaks in real work? This is it. The A-march is a classic for a reason.
March forward with one knee lifting to about hip height while the opposite arm swings naturally. Keep the foot dorsiflexed — toes pulled up — and place each foot under your body instead of reaching far out in front. The moment the torso starts leaning back, the drill gets sloppy.
Quick cues
- Tall posture.
- Knee up, not forward.
- Foot under the hip.
- Smooth arm drive.
Use 10 to 20 yards, or about 20 to 30 seconds of marching. It’s a smart warm-up before running, jumping, or court work because it teaches the hip flexors to fire in a clean, repeatable way. No burn chase. Just clean mechanics. If you want pain-free movement, this kind of drill matters more than the flashy stuff.
15. Seated Psoas Lift-Off
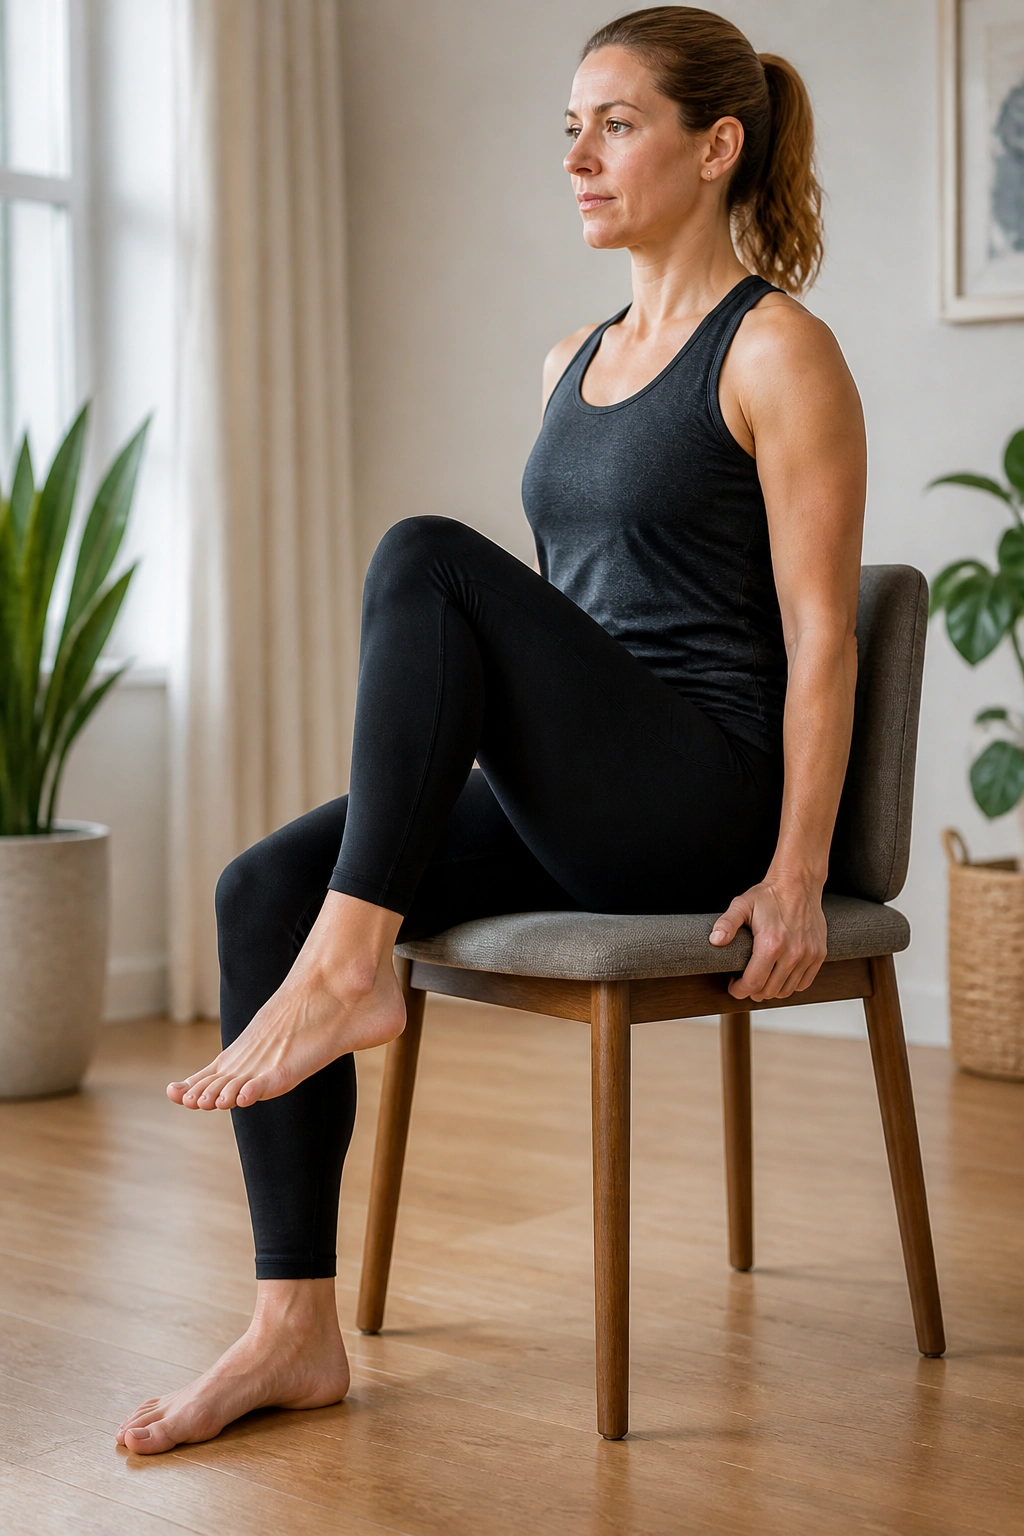
Sit tall and the psoas has less room to cheat. That’s why I like this one for people who feel their hips lock up after hours in a chair.
Sit on a box, bench, or sturdy chair with both feet flat. Keep your chest relaxed but tall. Lift one knee 1 to 2 inches without leaning backward or hiking the opposite hip. Hold for 3 seconds, lower, and switch sides. The movement is small, and that’s exactly right.
If the lift feels too easy, slow the lower to 4 seconds. If it feels pinchy in the front of the hip, reduce the lift height and check that you are not collapsing into the lower back. Do 6 to 8 lifts per side.
This drill is not glamorous. It is useful, though, especially for desk workers and anyone who wants to reclaim a clean hip flexor contraction without making the rest of the body compensate.
16. Prone Quad Stretch With Tuck
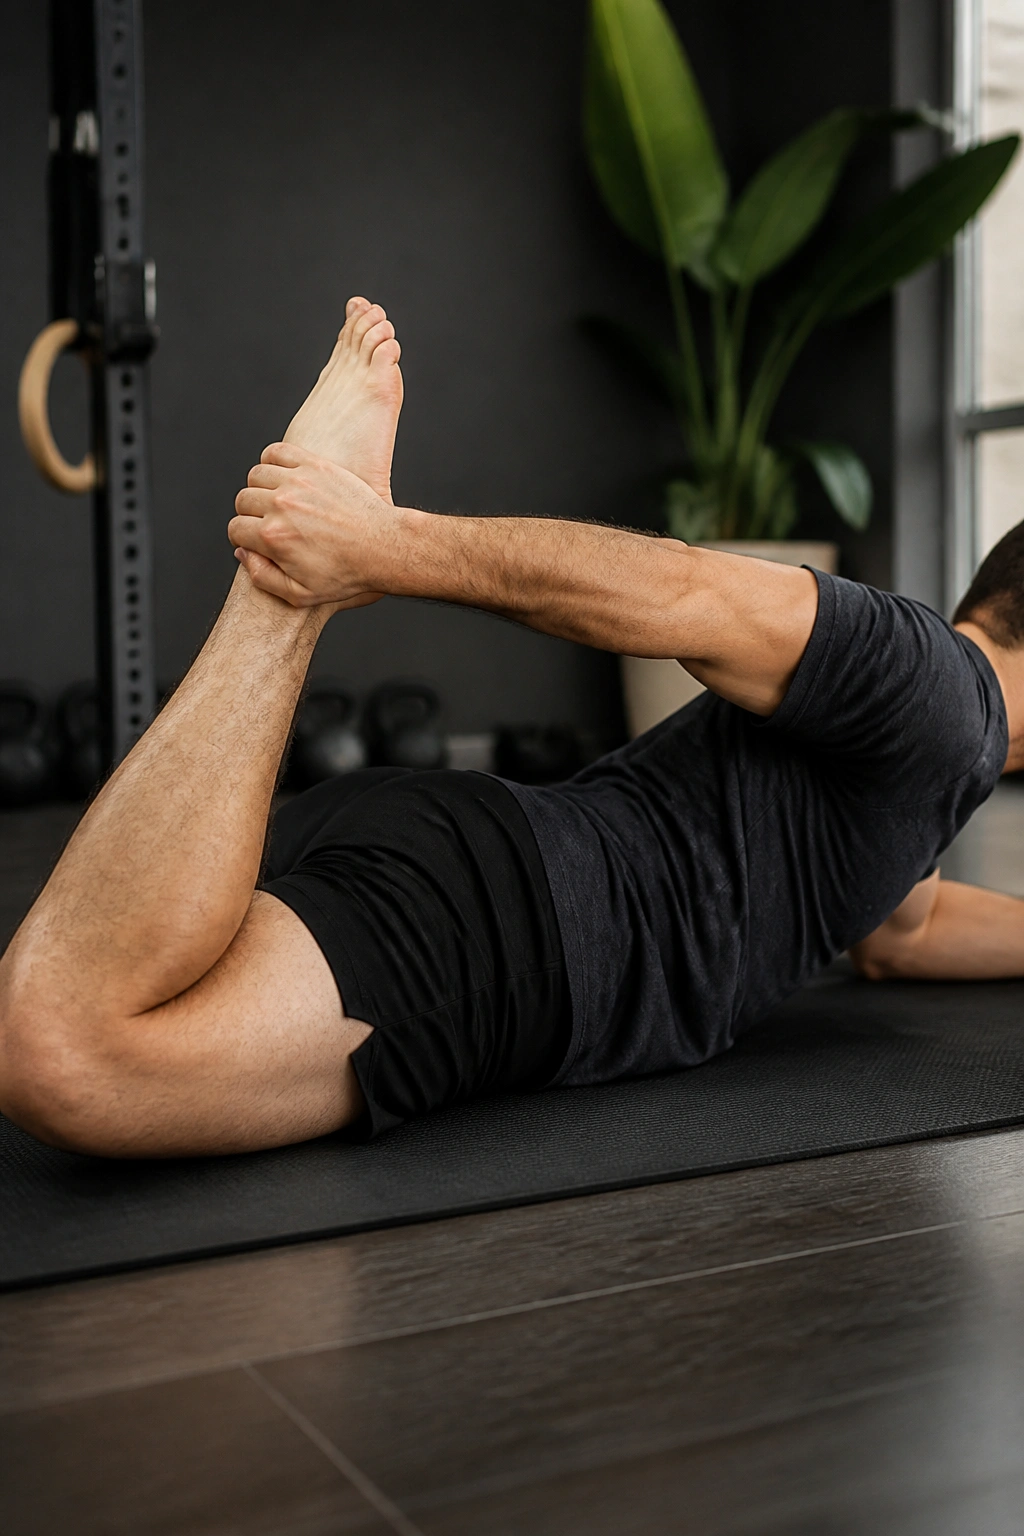
Lying face down is less glamorous than standing, but it blocks the low-back arch that ruins most quad stretches. That’s the main reason this version deserves a spot.
Lie on your stomach, bend one knee, and bring the heel toward the glute. Before you pull harder, gently tuck the pelvis so the tailbone feels a touch heavier on the floor. Then ease the heel closer until you feel the front of the thigh lengthen. Hold for 20 to 30 seconds per side.
When to choose it
- When the rectus femoris feels tight.
- When standing stretches make your back arch.
- When the knee can tolerate a bent-knee position.
- When you want a calmer stretch after leg day.
Use a strap if reaching the ankle feels awkward. Skip this one if the knee is already irritated by flexion. For the right person, it takes a lot of strain off the front of the hip and the top of the quad. Clean setup matters more than pulling harder.
17. Lateral Lunge to Reach and Reset
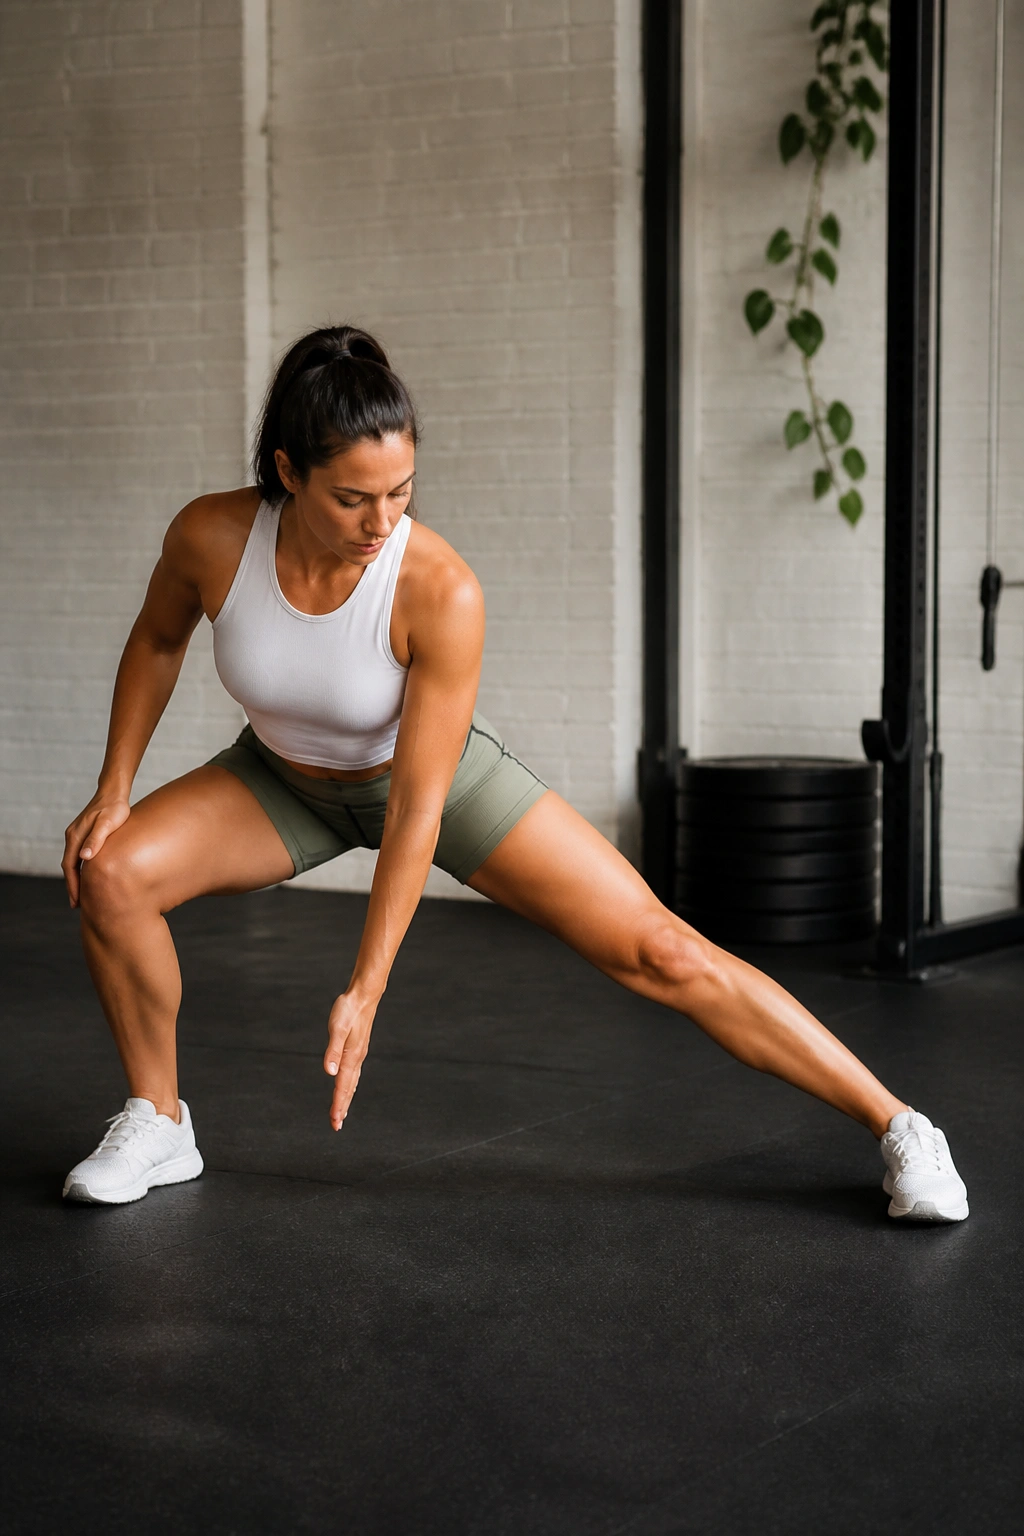
A side step opens the groin, then the reach reminds the hip flexor that the pelvis can move both ways. That balance matters more than people think.
Step out wide to one side, sit into that hip, and keep the other leg straight. From there, reach both hands toward the bent-leg side or lift one arm overhead if that feels better. Come back to center and switch sides. Move slowly enough that the standing foot stays planted and the pelvis doesn’t twist away.
Why it belongs in a hip flexor routine
- It opens the adductors, which often tug on pelvic position.
- It gives the hip flexors a different angle than forward lunges.
- It teaches side-to-side control, which walking and running both need.
Do 5 to 6 reps per side. I like this as a warm-up on days when the hips feel stiff in every direction, not just front to back. It gives you a reset that feels athletic instead of rehabby.
18. Mountain Climber With Slow Exhale

Fast mountain climbers are fine. Slow ones teach the hip flexors to work without hauling the spine around. That’s the version worth keeping.
Set your hands on the floor or on a bench if your wrists or shoulders prefer it. Drive one knee toward the chest as you exhale slowly, then switch sides with control. Keep the shoulders steady, the ribs from flaring, and the hips from bouncing. The rep should feel smooth, almost quiet.
Do 20 to 30 seconds for 2 or 3 rounds. If the lower back starts sagging, elevate the hands or shorten the range. If the movement turns into a sprint, slow down. Quality wins here. This is a nice finisher after the earlier drills, and it’s also a sharp pre-workout wake-up for people who need their hip flexors to cooperate under fatigue.
If you put the first three or four drills before training and save the slower strength and breathing work for after, the whole routine starts making sense fast. That mix usually feels better than hammering the same stretch ten times and wondering why nothing changes.
