



A chair, a wall, and ten quiet minutes are enough to start. That’s the part most people miss when they go looking for 20 workouts for plus size beginners at home: you do not need punishment, and you do not need a heroic sweat session to make progress.
You need movements that feel steady. Repeatable. Kind to your knees, wrists, and lower back.
Big bodies often do better with workouts that respect leverage, balance, and breathing instead of trying to fake athleticism on day one. A little support from a counter, a couch, or a sturdy chair can turn a move that feels scary into one that feels almost boring. Good. Boring is useful.
Start small, start slow, and stay honest about what your joints are telling you. The first few workouts below are the easy wins I’d hand to almost anyone who wants to build confidence at home without turning the living room into a punishment box.
1. Wall Push-Ups at the Kitchen Counter
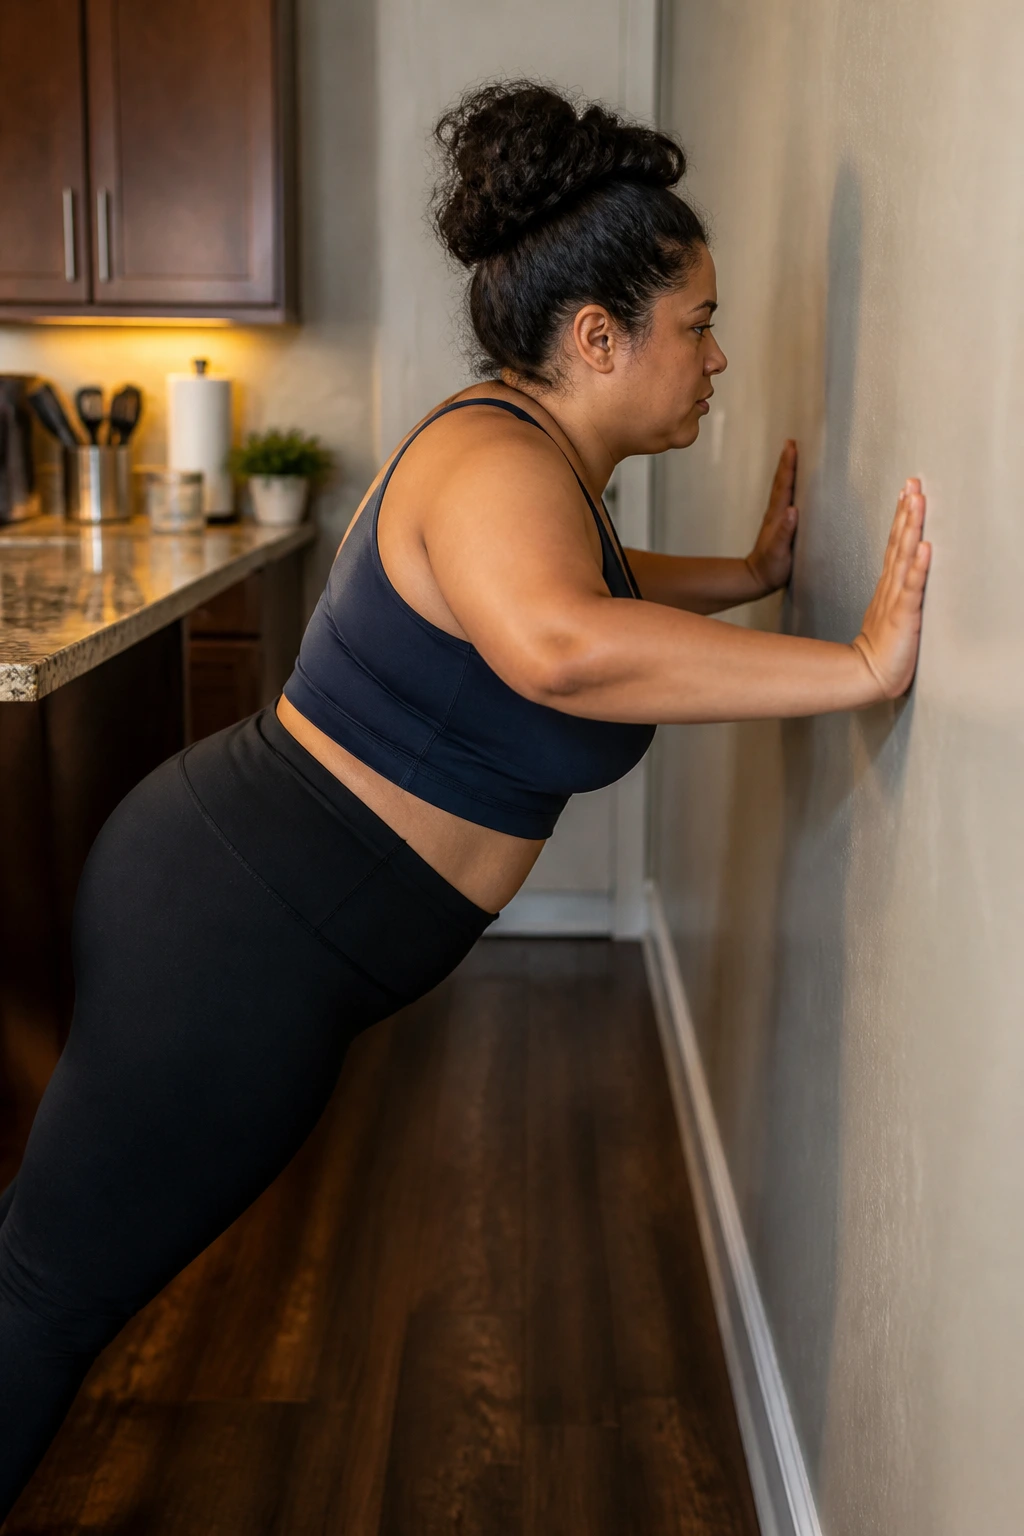
Wall push-ups are the easiest way to build upper-body strength without getting down on the floor. That alone makes them worth keeping around. They train the chest, shoulders, triceps, and a little bit of your core, but the real magic is how friendly they are on the wrists and the lower back.
How to set them up
Stand about an arm’s length from a wall or counter. Put your hands a little wider than shoulder width, then walk your feet back until your body makes one long line.
- Keep your heels down.
- Bend your elbows slowly.
- Lower your chest toward the wall until your nose or sternum is a few inches away.
- Push back to the start without locking your elbows hard.
Try 2 sets of 6 to 10 reps. If that feels easy, move your feet a little farther back. If it feels too hard, stand closer. That tiny distance change makes a huge difference.
The best part is how clean the movement feels when you do it right. No bouncing. No collapsing. Just steady, controlled reps that leave your arms warm and awake.
2. Seated March-and-Reach for Days When Standing Feels Like Too Much
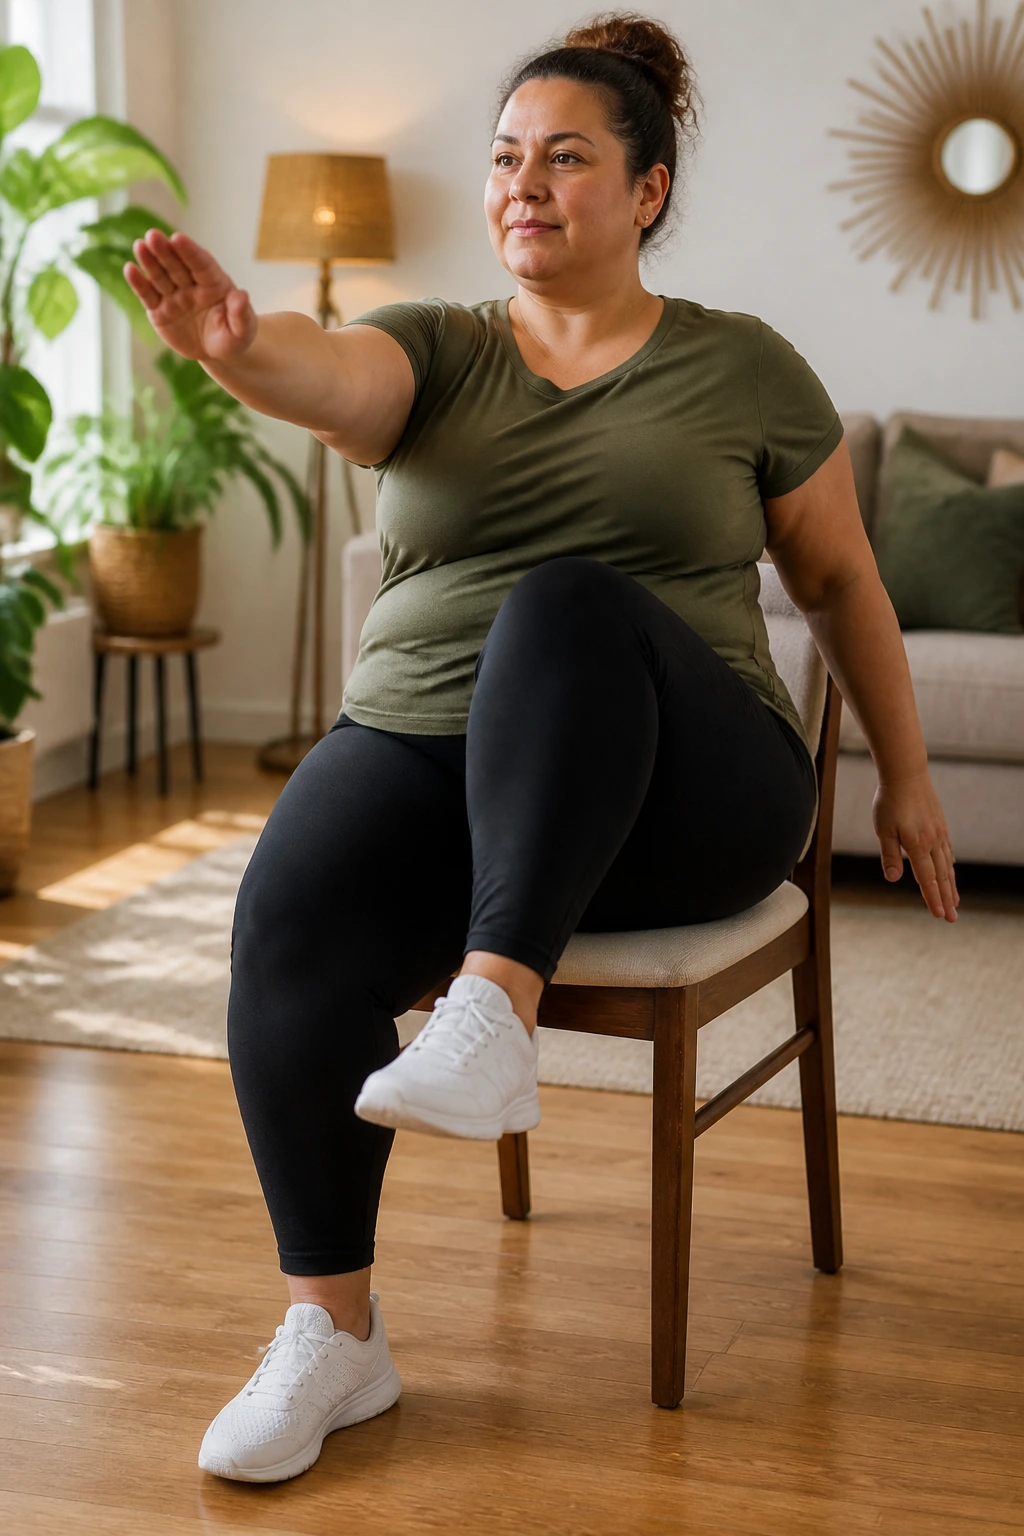
Why start seated? Because some days your body wants movement, not a lecture. This one gets your heart rate up a little, wakes up your hip flexors, and gives your shoulders something to do without demanding balance right away.
Sit tall on a sturdy chair with both feet flat. March one knee up, then the other, and add an opposite-arm reach if your shoulders like that motion. Keep the motion smooth, not frantic. You’re aiming for rhythm.
Do 30 seconds on, 30 seconds off for 6 rounds, or just keep marching for 3 full minutes if that feels better. The pace should let you breathe a little harder, not gasp.
Nice and simple. That matters.
If your lower back feels cranky, sit on a firmer chair and scoot closer to the front edge. If your arms get tired, leave them at your sides and focus on the leg lift. The workout still counts.
3. Chair Sit-to-Stand Practice
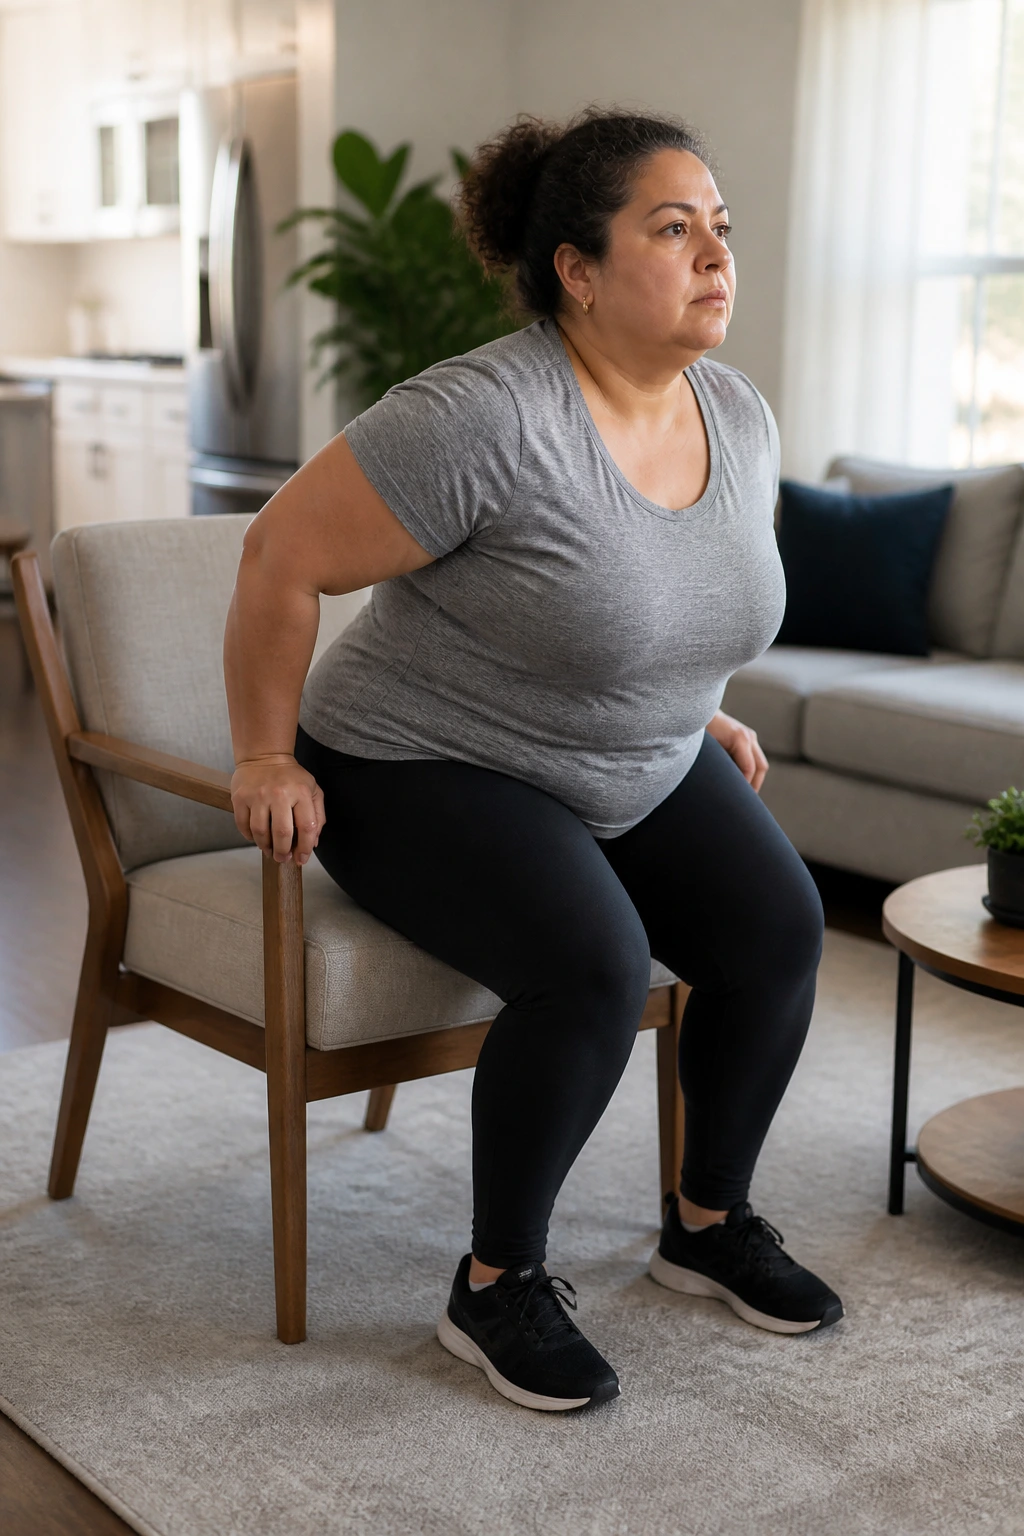
If standing up from a couch or dinner chair feels like the hardest part of the day, that is your workout. Chair sit-to-stands build leg strength, teach balance, and make everyday life easier in a way that a flashy exercise never will.
What makes it work
Use a chair that does not roll and does not sink backward when you sit. Place your feet about hip width apart, lean your chest slightly forward, and press through your heels to stand.
- Tap the chair lightly with your hips.
- Stand all the way up if you can.
- Use your hands on the chair arms if needed.
- Keep your knees tracking roughly over your toes.
Start with 2 sets of 5 reps. Build to 8 or 10 once the motion feels smooth. If a full stand feels too demanding, stop halfway up and sit back down. That still trains the same pattern.
People often rush this one. Don’t. The lower you go under control and the slower you rise, the more useful the move becomes. That slow return is where the work is hiding.
4. Standing Side Steps That Wake Up the Hips Without Beating Up the Knees
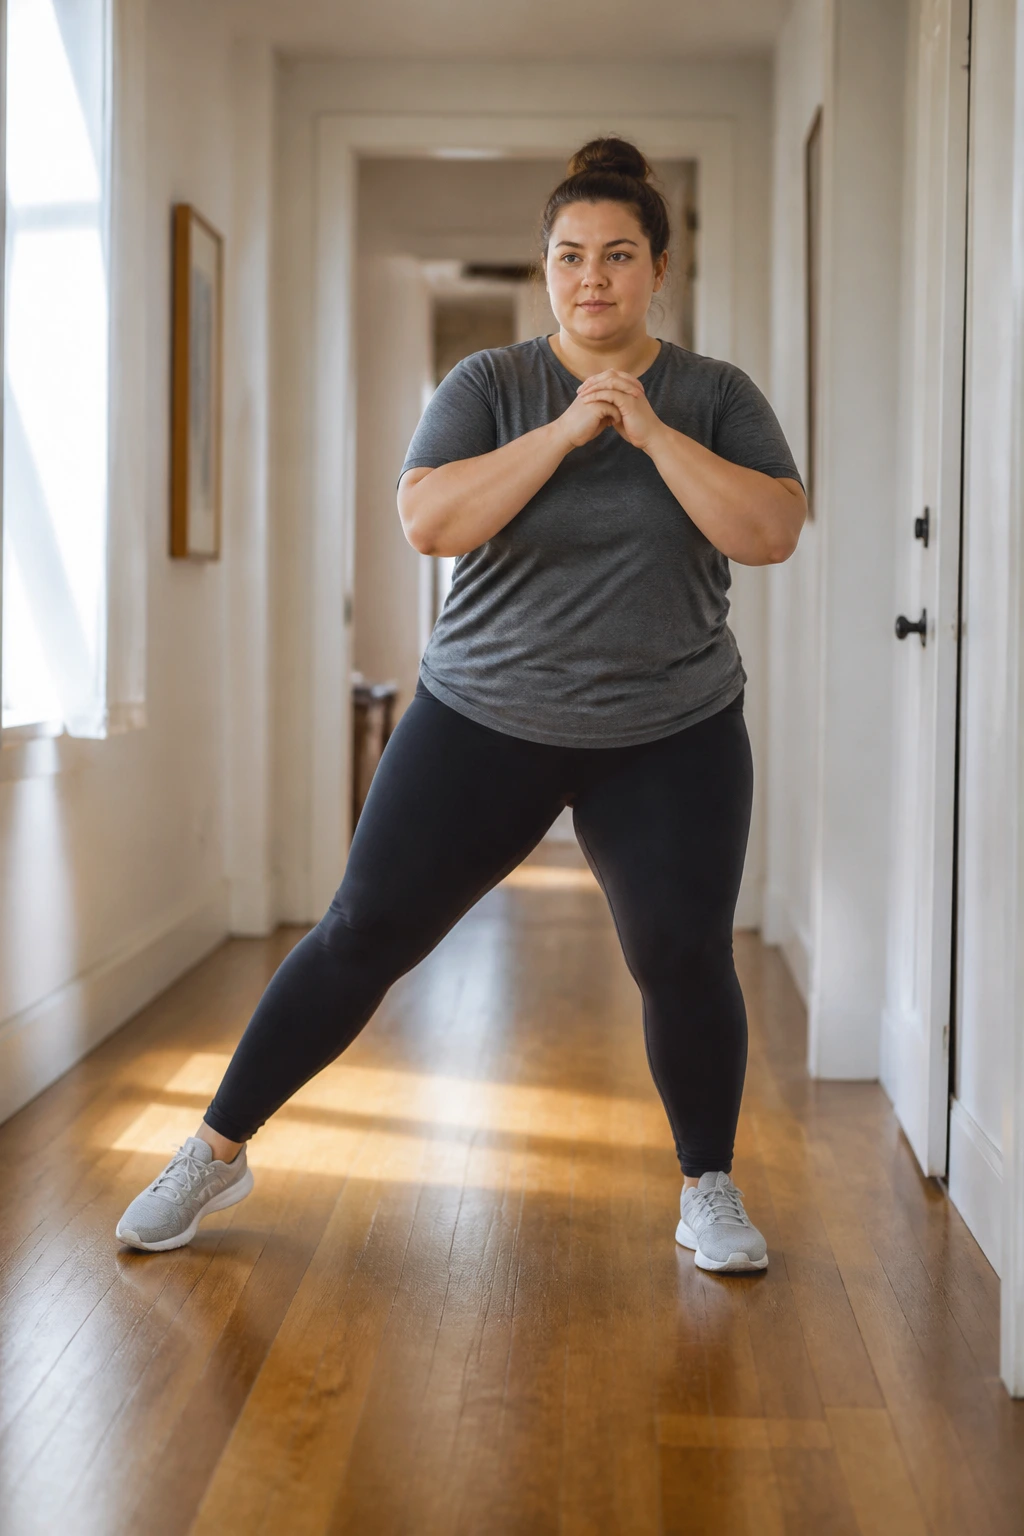
Side steps look almost too easy. They aren’t. They light up the outer hips, wake up the glute medius, and help your knees feel steadier when you walk, climb stairs, or carry groceries.
Stand with your feet under you, then step one foot out to the side and bring the other foot in without clicking your heels together. Keep your chest tall. No need to lunge or squat deep unless that feels natural.
You can do this along a hallway, beside a couch, or in a clear patch of floor. Try 10 steps each direction for 4 rounds. If you want more challenge, bend your knees slightly and add a light resistance band above the knees.
A tiny bend goes a long way here. Too much, and it turns into a half squat. Too little, and the hips barely wake up.
Best cue: keep your feet quiet and your hips level.
5. Glute Bridges on a Mat for a Quiet, Strong Posterior Chain
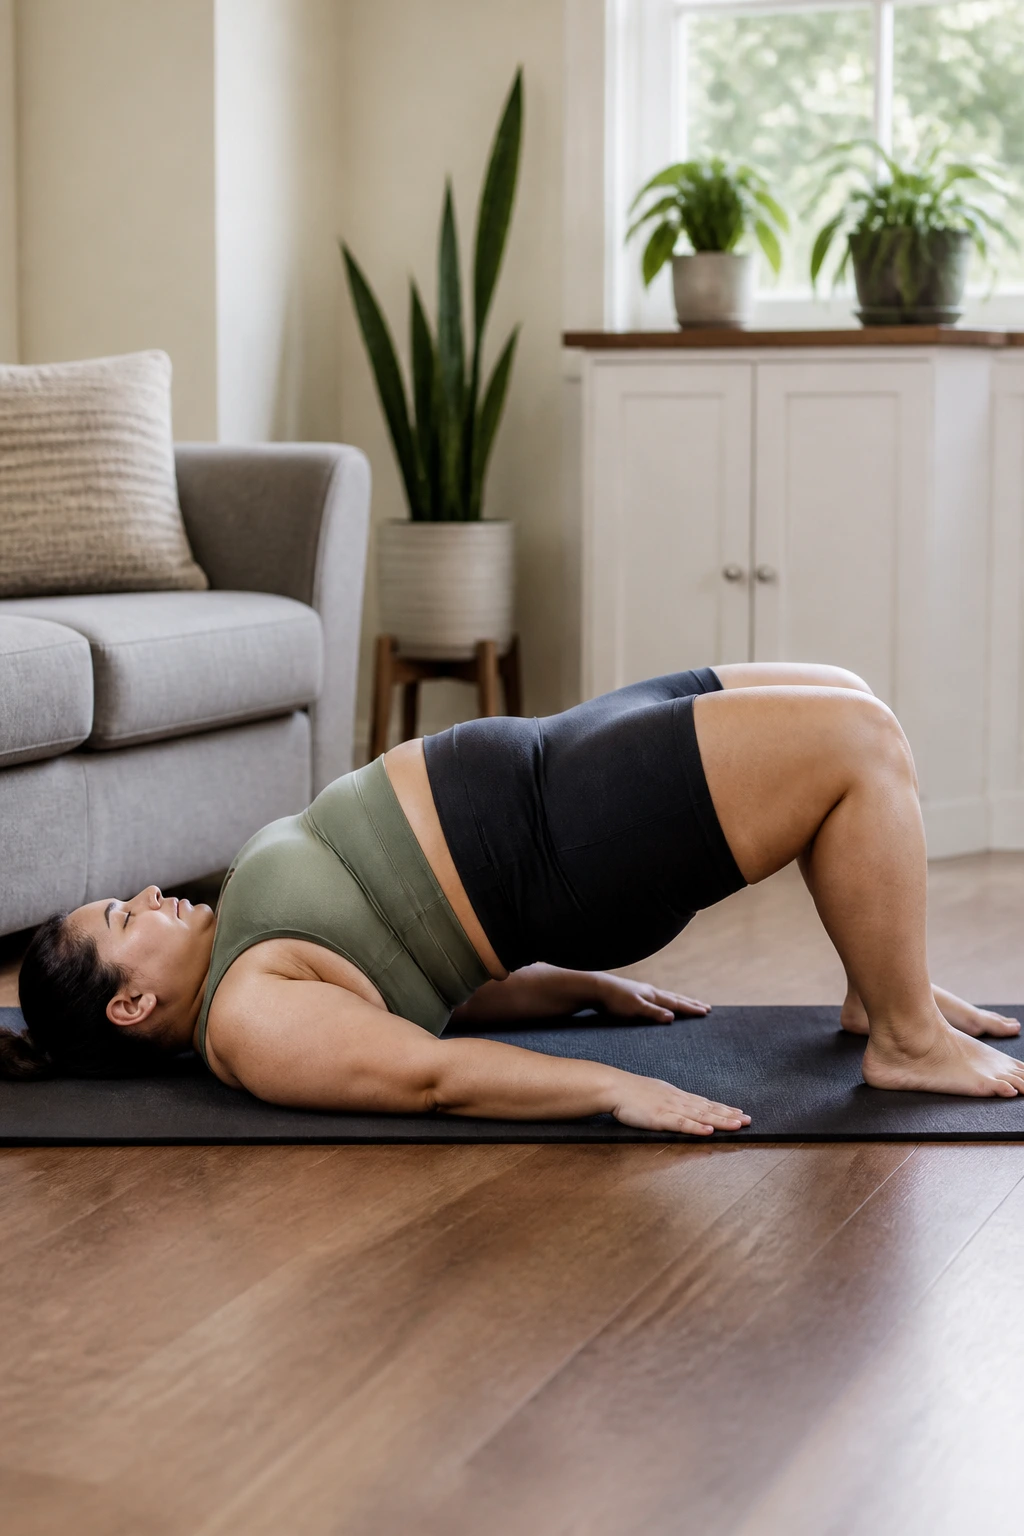
The floor should feel steady under you. A mat helps, but a folded blanket works too. Lie on your back, knees bent, feet flat, and press your hips upward until your body forms a gentle slope from shoulders to knees.
What to feel
You should feel your glutes doing the heavy lifting, not your lower back. If your back grabs first, bring your feet a little closer to your hips and lift less high.
Try 2 to 3 sets of 8 to 12 reps, with a one-second squeeze at the top. Lower slowly. The lowering phase matters more than people think, and that slow descent helps you own the movement instead of flopping through it.
A small form check
- Keep your ribs down.
- Press through the whole foot.
- Don’t let your knees cave inward.
- Stop if the motion pinches your back.
This one is quietly excellent for beginners. No noise. No impact. Just hips learning how to do their job again.
6. March-in-Place Intervals That Feel Like Real Cardio
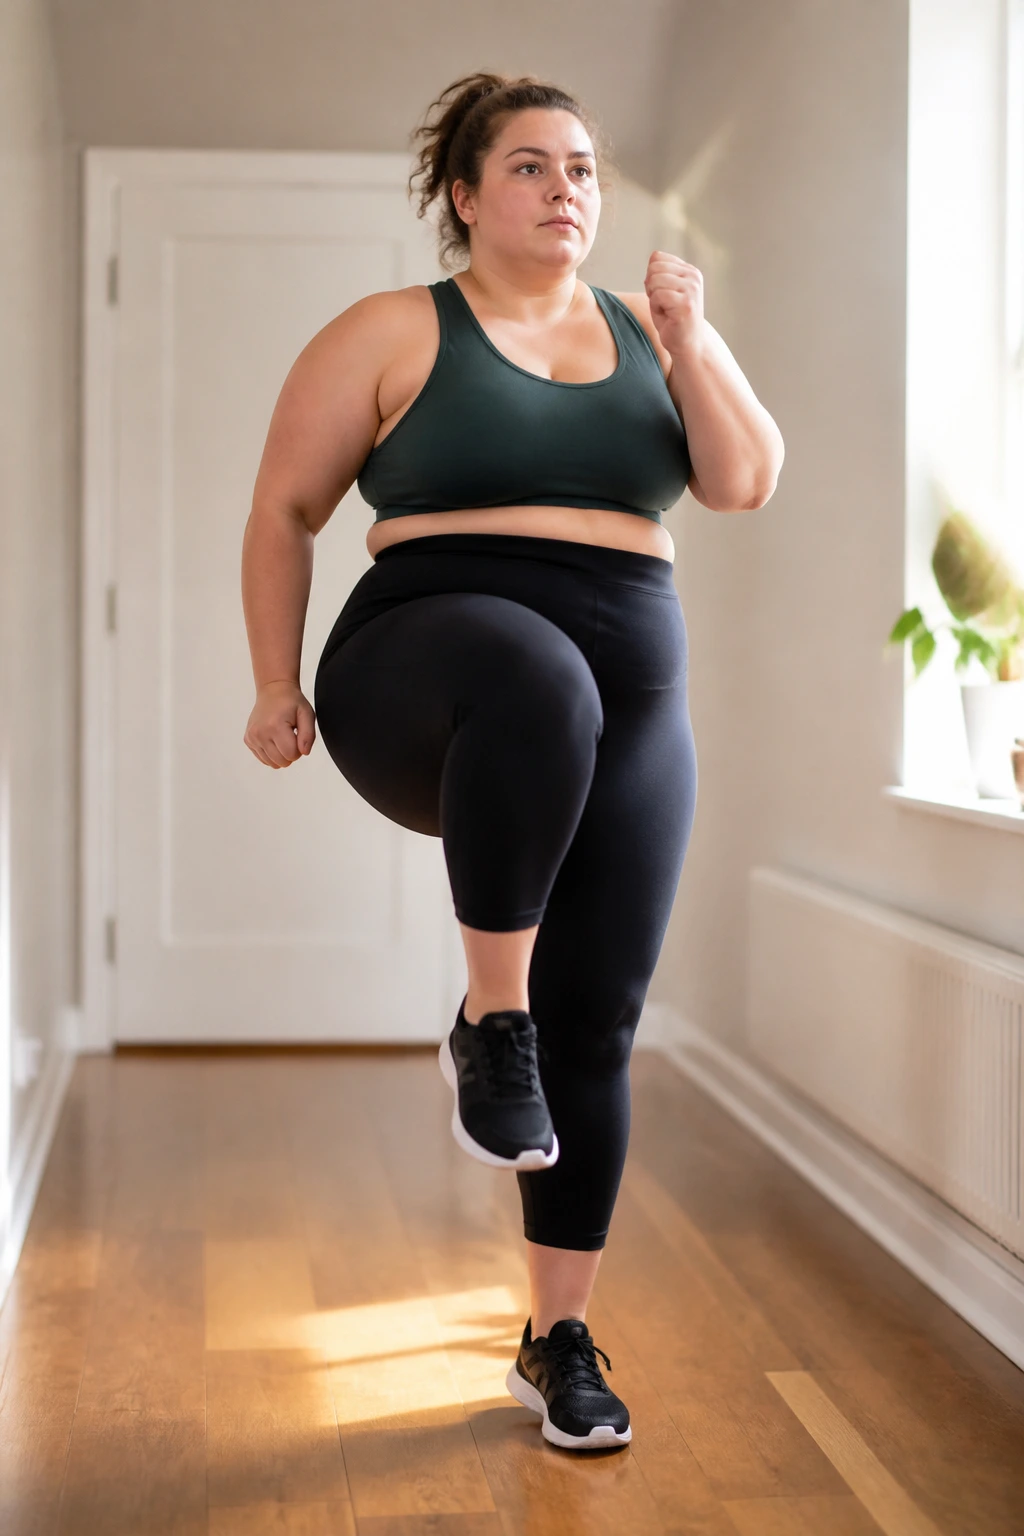
A march in place can look sleepy from the outside and still leave you breathing harder than you expected. That’s the charm. It gives you a cardio hit without jumping, without sprinting, and without needing much space.
Set a timer for 20 seconds of active marching and 40 seconds of easier stepping. Repeat that 8 times. Swing your arms naturally, or keep one hand on a counter if balance is shaky.
If the full march feels bouncy, shorten your steps. If your feet feel stiff, lift the knees only a few inches and keep the rhythm smooth. The goal is a steady pulse, not a parade.
One good trick: march during a song you already know well. When the chorus hits, pick up the tempo for a few beats. Then settle back down.
That tiny wave of effort is enough. Seriously.
7. Bird-Dog Holds for the Back That Gets Tired Fast
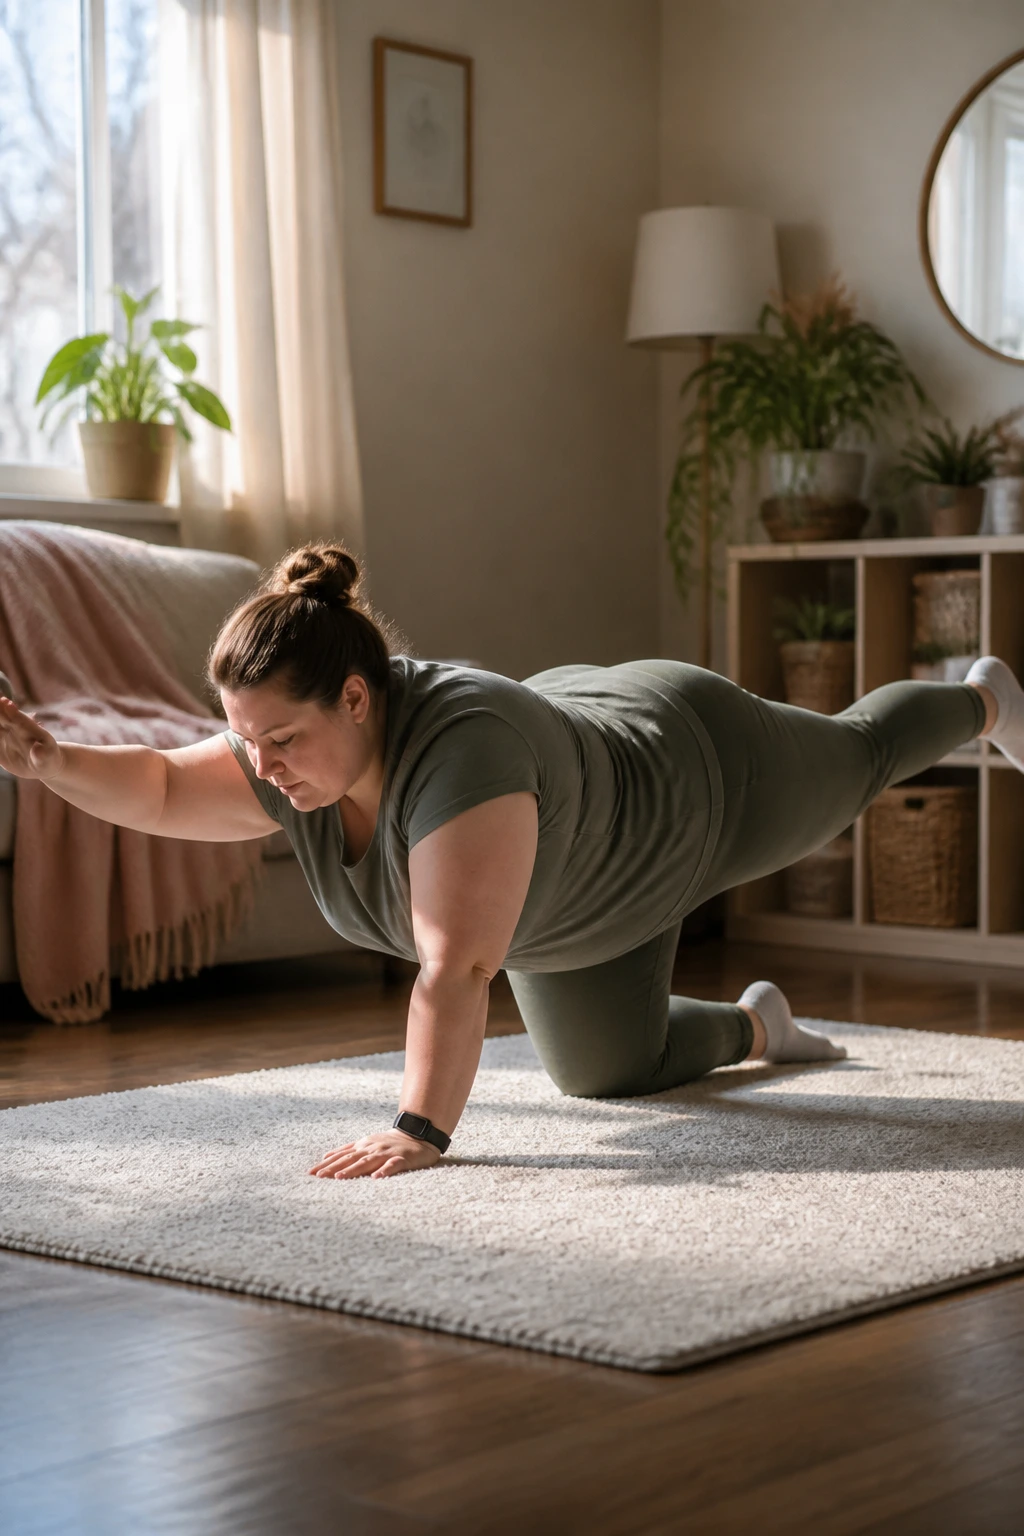
Can a move look almost too simple and still be useful? Absolutely. Bird-dog is one of those floor exercises that teaches your back, glutes, and core to work together without cranking on the spine.
Get on hands and knees, or place your hands on a couch cushion if the floor feels awkward. Reach one leg straight back and the opposite arm forward, then pause for 3 seconds before switching sides.
Keep your hips level. That is the hard part. A lot of people lift the leg too high and twist sideways, which turns the exercise into a balancing act instead of a stability drill.
What helps here
- Imagine balancing a glass of water on your low back.
- Keep your neck long.
- Reach, don’t yank.
- Use a smaller arm or leg range if your balance is wobbly.
Do 5 reps per side to start. Slow and clean beats fast and messy every single time.
8. Dead Bug Reps for a Core That Learns to Brace
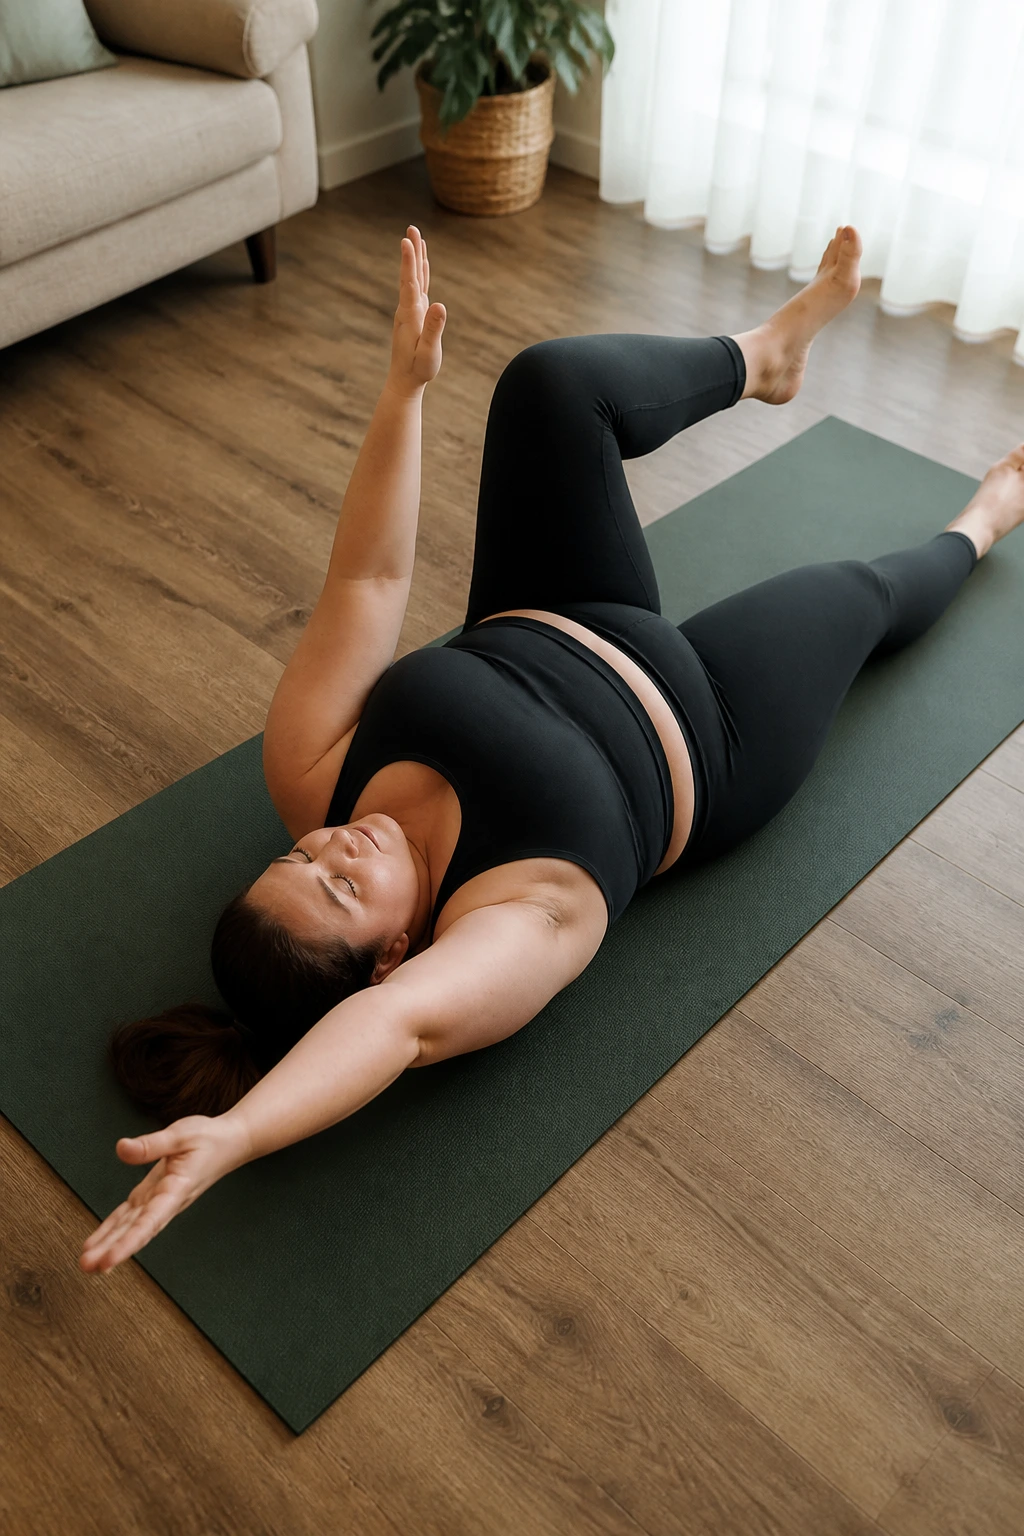
Picture a belly-up marching drill where your back stays calm and the floor does most of the stabilizing. That’s dead bug, and it’s one of the friendliest core moves for beginners who don’t love crunches.
Lie on your back with your knees bent at 90 degrees and your arms pointed toward the ceiling. Lower one heel toward the floor while the opposite arm reaches overhead, then bring them back and switch sides.
How to keep it gentle
If your lower back lifts, stop the range sooner. If your neck feels strained, keep your head down and your gaze fixed on the ceiling.
- Start with heel taps only.
- Exhale as the arm and leg move away.
- Keep the opposite ribs from flaring.
- Try 6 to 8 reps per side.
A lot of core work gets sold as sweat-first, form-later. This is the opposite. Quiet control is the point. You should feel your midsection working, but not straining.
9. Incline Push-Ups on a Couch Cushion or Bench
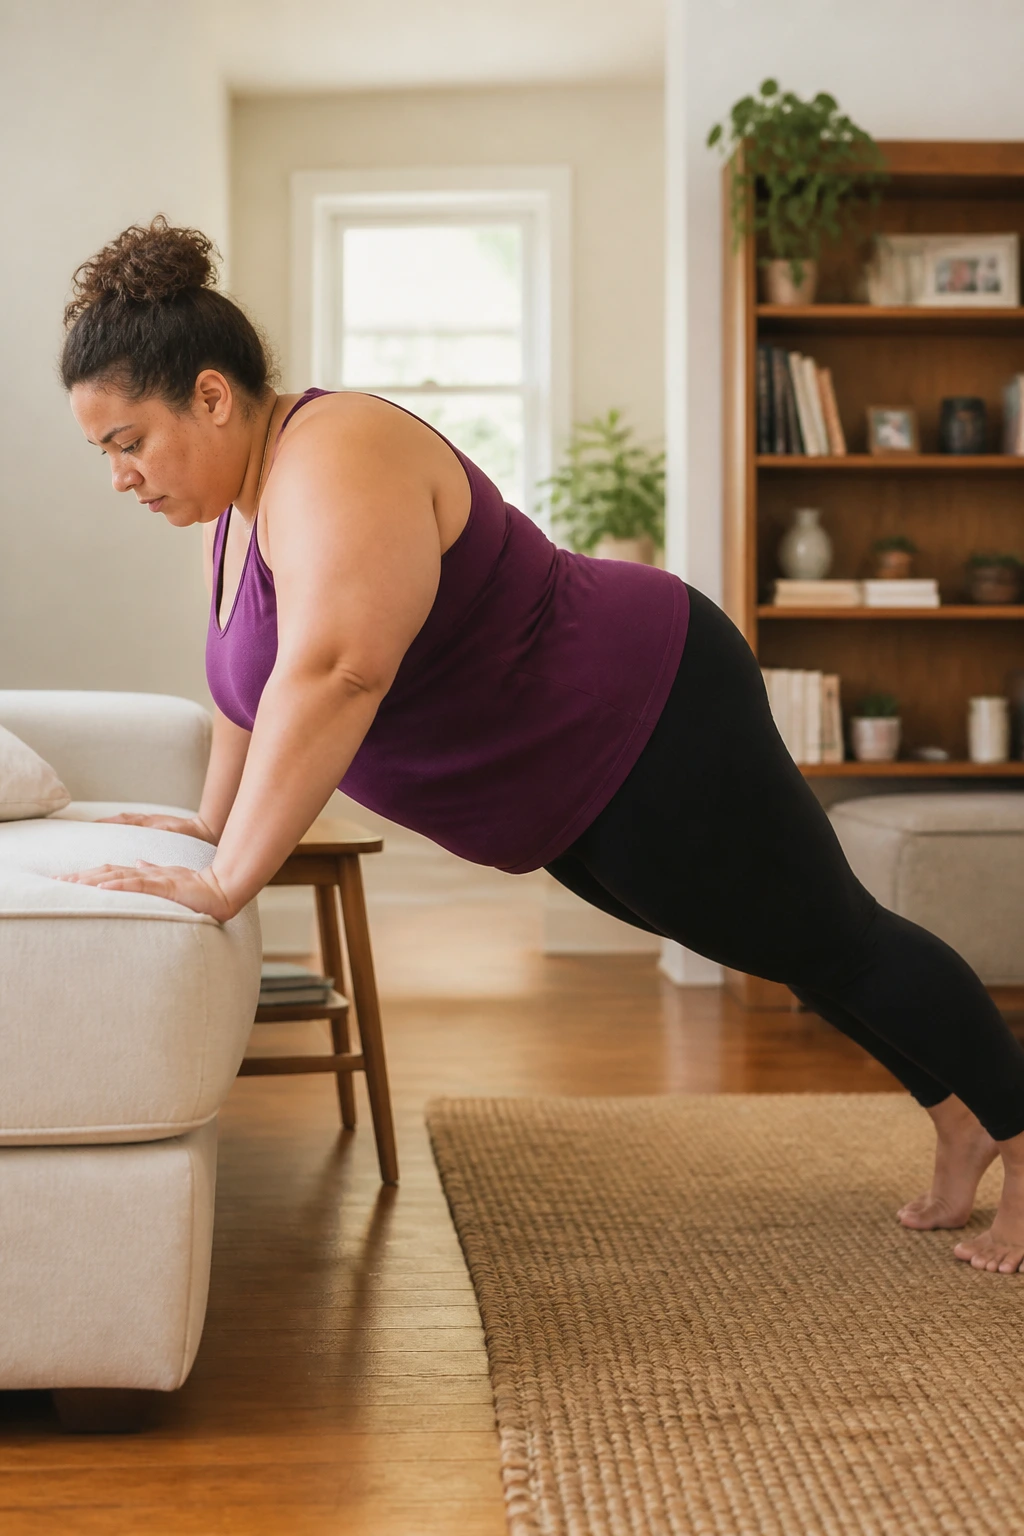
Counter push-ups can carry you only so far. Eventually, your body wants a little more load, and incline push-ups are the neat next step. They still protect the wrists and shoulders better than floor push-ups, but they ask for more from your chest and arms.
Place your hands on a sturdy couch edge, bench, or even a firm coffee table if it’s stable enough. Walk your feet back until your body stays long and your hips do not sag.
Lower until your chest is close to the surface, then push back up. Try 2 sets of 5 to 8 reps and rest longer than you think you need.
If your shoulders creep toward your ears, reset. If your elbows flare straight out, tuck them a little closer to your sides. Small adjustments matter.
This is a good place to slow down the lowering phase to 3 seconds. That one change makes the exercise feel stronger without needing more reps.
10. Step-Touch Cardio with Arms That Actually Gets Your Heart Rate Up
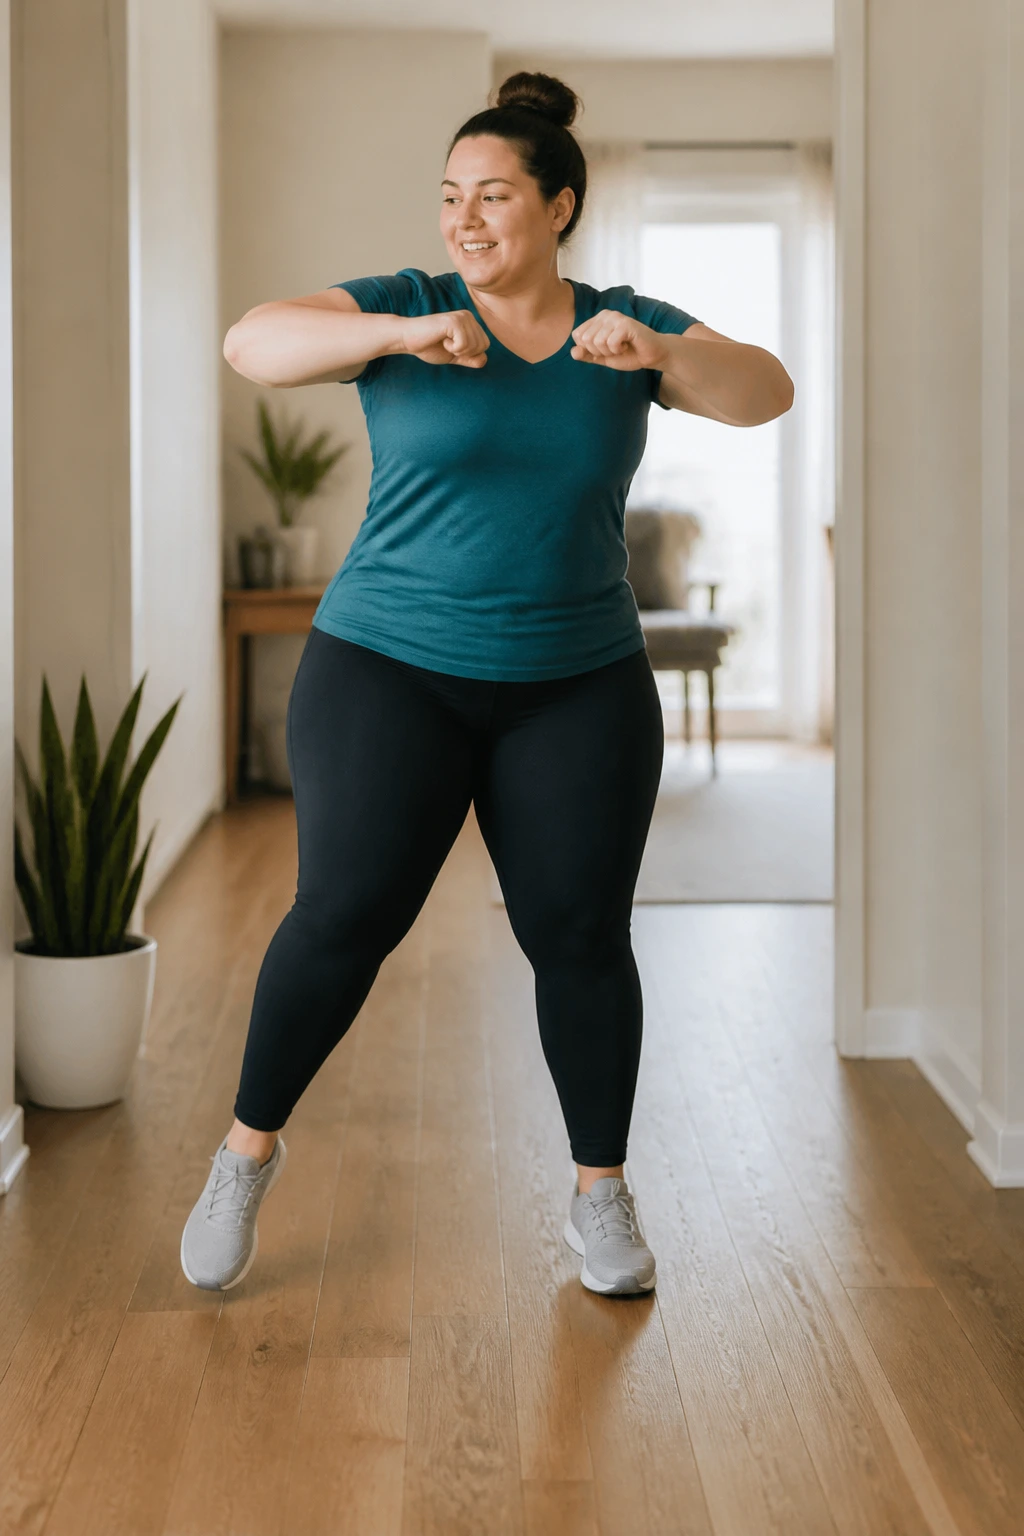
A step-touch is the dance-floor cousin of walking. It’s friendly, low impact, and easy to scale up or down depending on how your body feels that day.
Step to the right, bring the left foot in, then step left and bring the right foot in. Add arm reaches, shoulder-height pulls, or overhead sweeps if that feels good.
Keep it going for 45 seconds, rest for 15, and repeat for 6 to 10 rounds. If you want more challenge, widen the step and move your arms higher. If your balance is sketchy, keep one hand near a wall and make the steps smaller.
The rhythm matters more than speed. If you can talk in short sentences, you’re in a useful zone.
And yes, this counts. A lot of people dismiss it because it looks tame. Then they do eight rounds and start sweating through their shirt.
11. Calf Raises and Toe Lifts for Ankles, Feet, and Balance
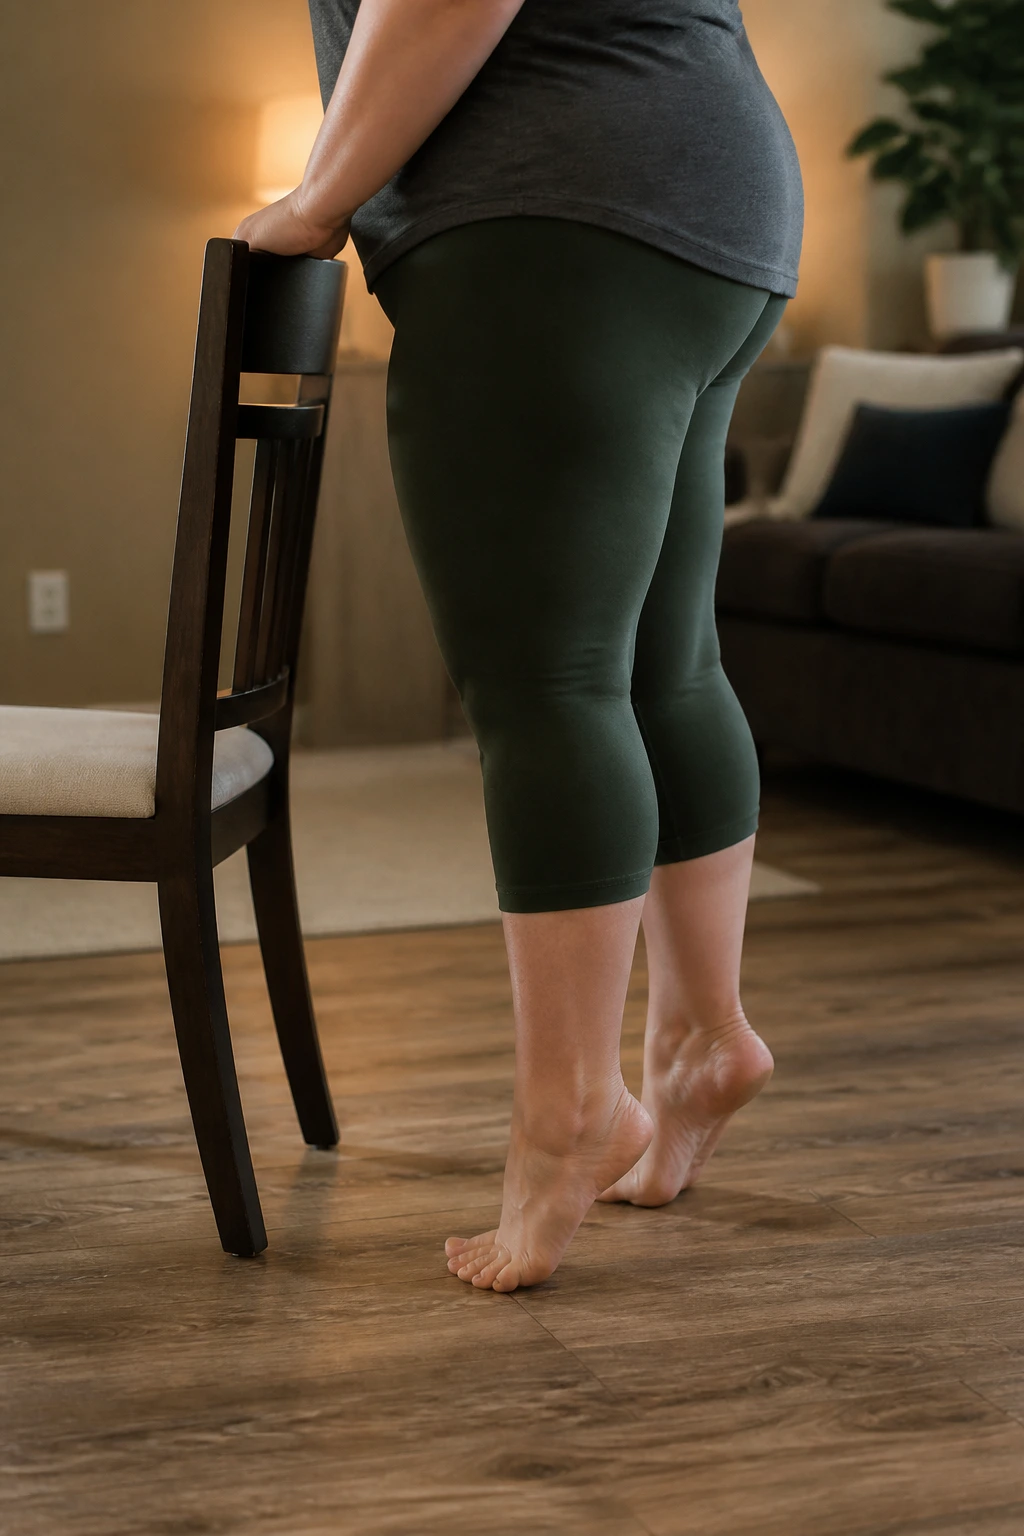
What do feet have to do with a beginner home workout? More than most people admit. Strong ankles and feet make standing moves feel steadier, and calf raises help train the lower leg in a clean, low-stress way.
Hold a chair or countertop with one hand. Rise onto the balls of your feet, pause for a beat, then lower slowly until your heels settle back down. After that, lift your toes while keeping your heels planted. That second move is the part most people skip.
Try 10 calf raises and 10 toe lifts for 2 rounds. If your calves cramp, shrink the range and take a longer pause between reps.
A useful cue
Think about growing taller through the top of your head. Don’t bounce. Don’t rush.
These tiny exercises do not look glamorous. They do help, though, especially if stairs, long walks, or standing in the kitchen leave your lower legs feeling like they’ve done too much.
12. Heel Digs and Hamstring Curls in a Small Living Room
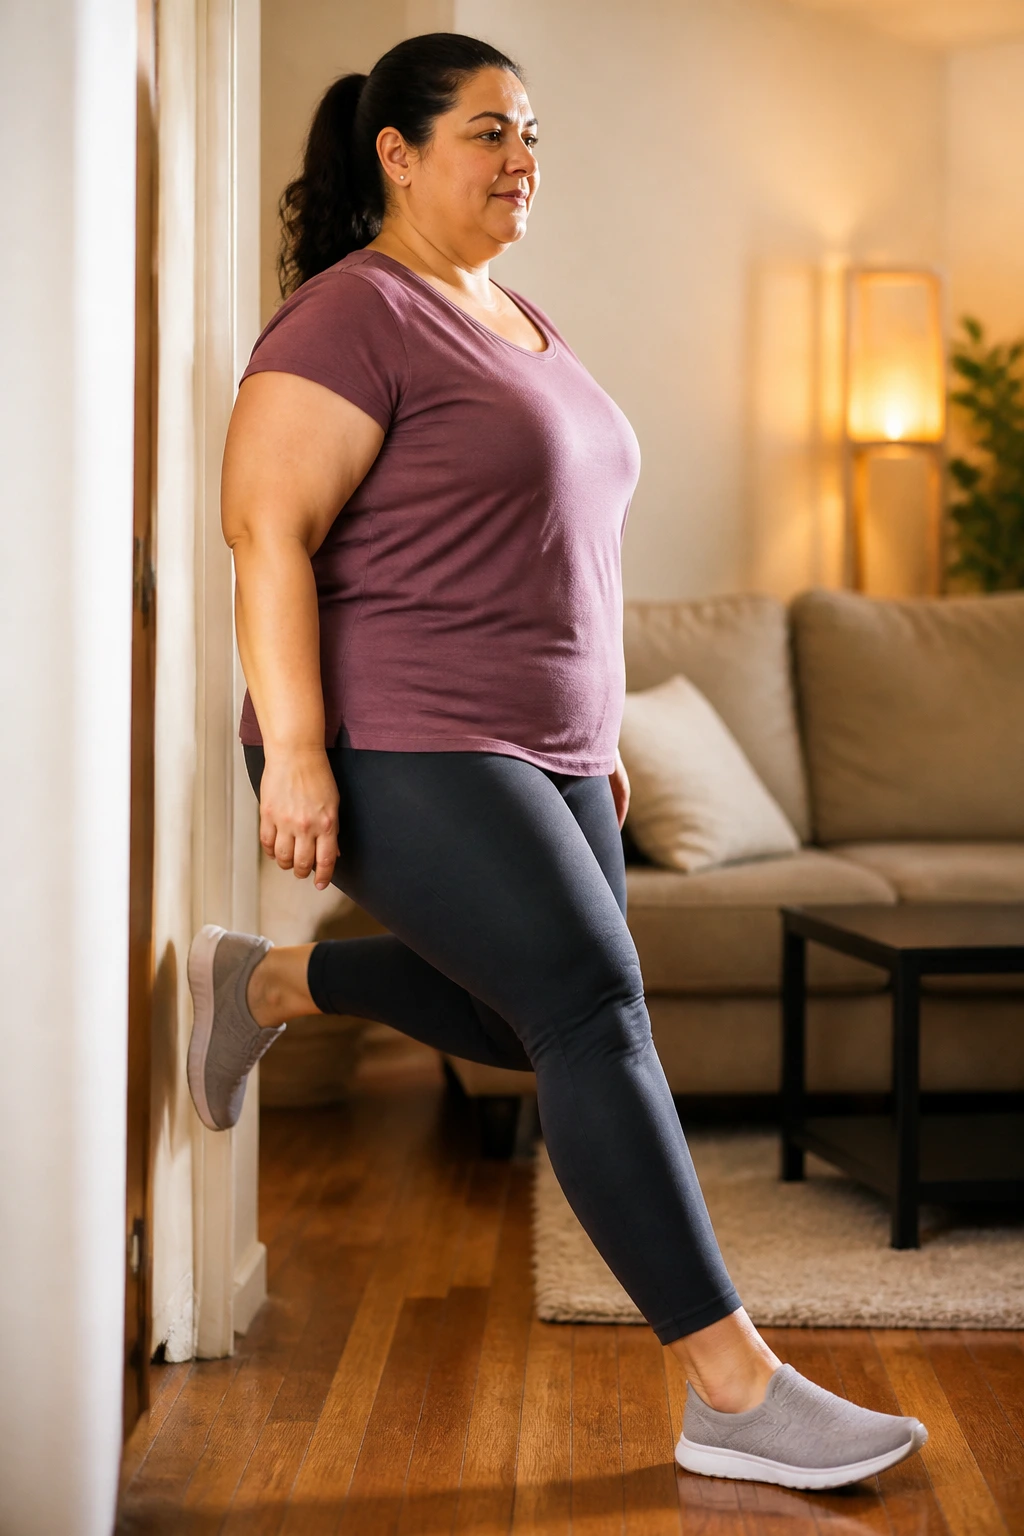
This one feels a bit like a low-energy line dance, and that’s part of why it works. You stay upright, keep the impact near zero, and give your legs a good dose of controlled movement.
Two moves, one easy rhythm
Heel digs are simple: extend one heel forward and tap the floor, then bring it back. Hamstring curls bend one knee so your heel lifts toward your glute while you stay tall. Alternate between them or do them back to back.
- 20 seconds heel digs
- 20 seconds hamstring curls
- 20 seconds of easy marching
- Repeat for 4 to 6 rounds
Keep the upper body relaxed. If your arms want a job, let them swing naturally or reach a little overhead on the heel digs.
This works best with music that has a steady beat. Nothing fancy. Just enough rhythm to keep you moving without thinking about every step.
13. Supported Mini-Squats to a Chair
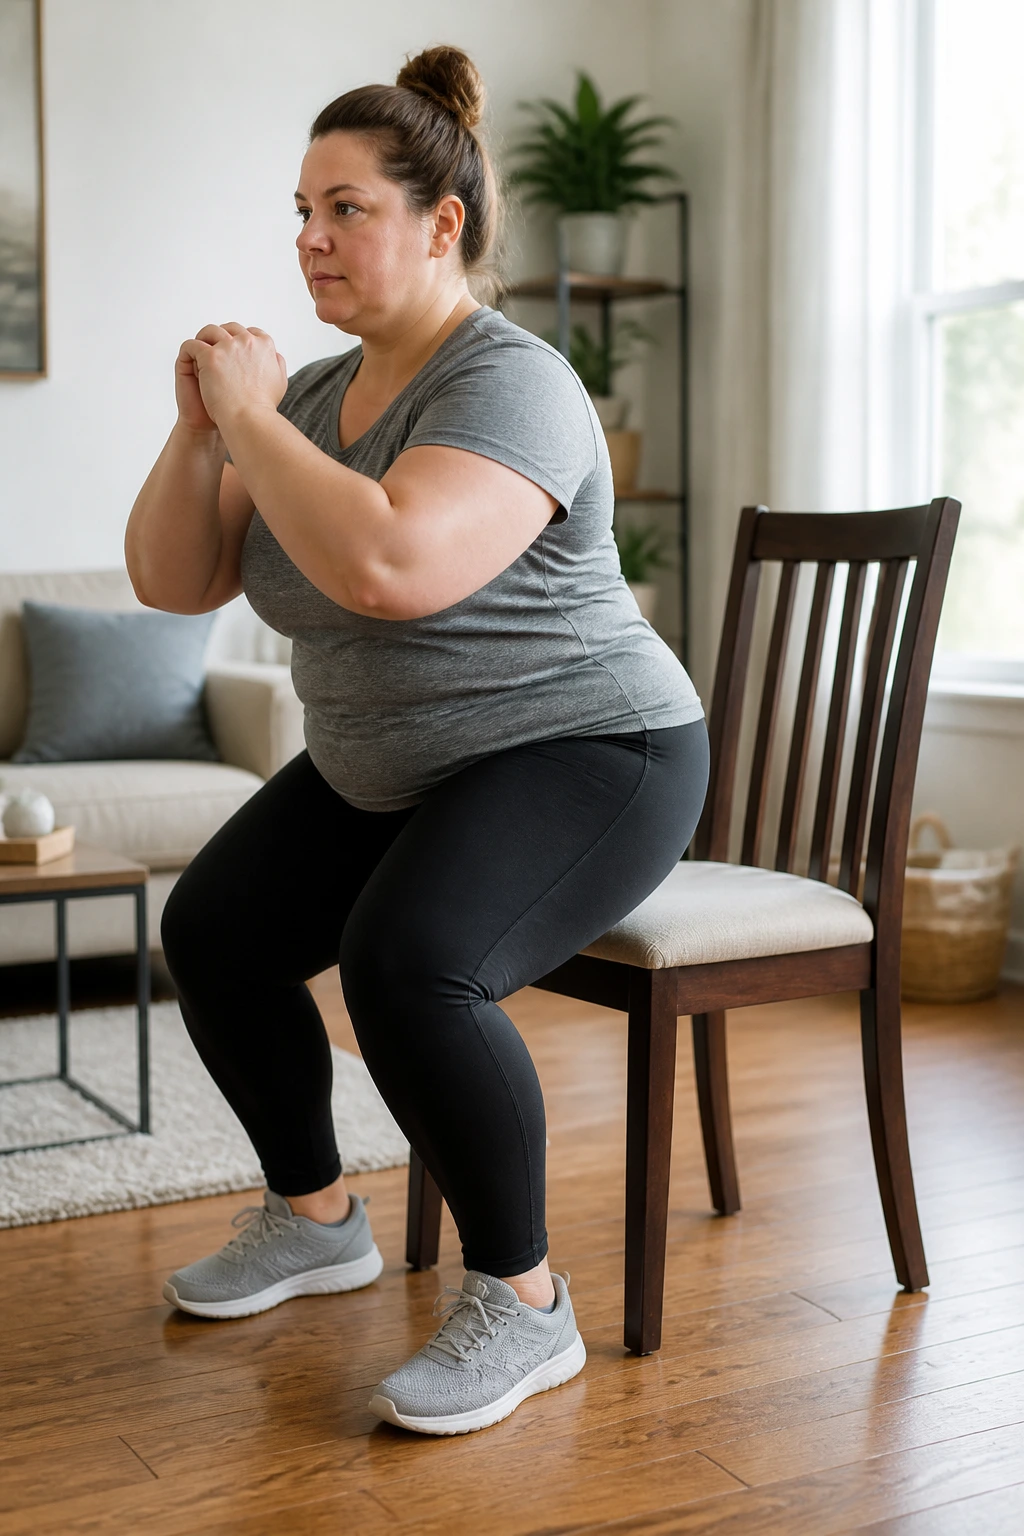
A squat does not need to be deep to count. That is the part people fight against, usually for no good reason. A mini-squat to a chair can build leg strength, improve sit-to-stand ability, and feel far safer than dropping low before your body is ready.
Stand in front of a chair with your feet a little wider than hip width. Push your hips back as if you’re about to sit, tap the chair lightly, and stand back up before fully collapsing onto it.
Keep your chest lifted enough that you can still breathe easily. Try 2 sets of 6 to 8 reps with a slow lower and a strong rise.
If your knees feel crowded, widen your stance a touch. If your heels lift, shift your weight back and shorten the squat depth.
Watch for this
Don’t rush the tap. The chair is a target, not a seat you dive into.
14. Hip Hinge Drills with a Wall Behind You
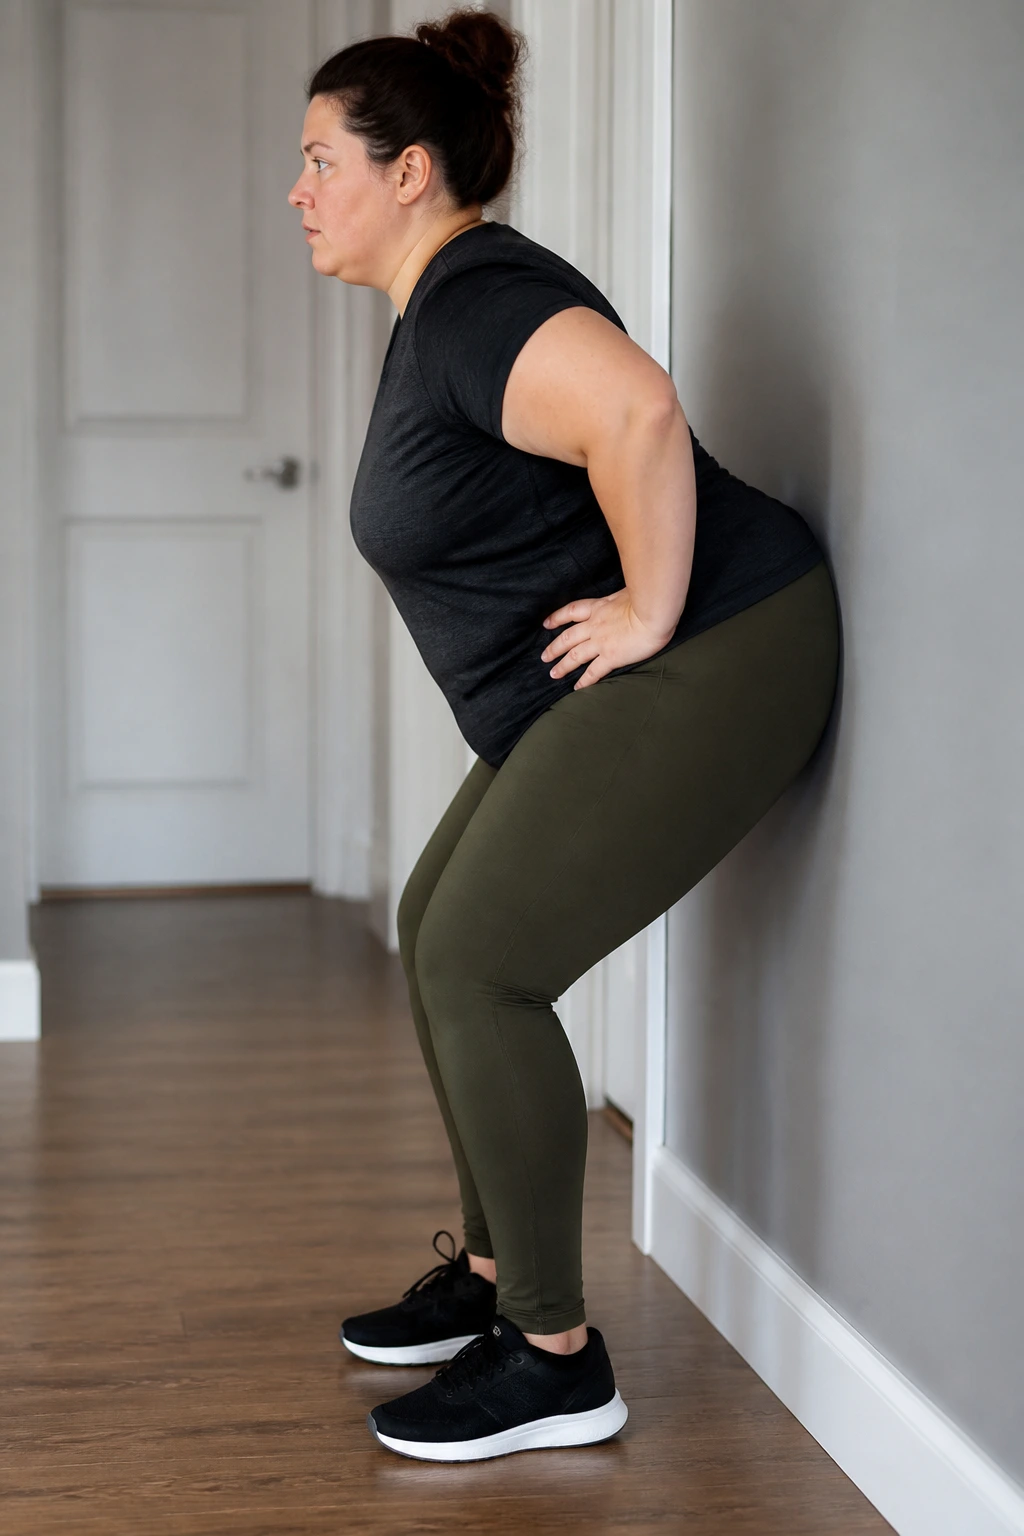
Stand a foot or so in front of a wall and push your hips back until your backside touches it. That’s the whole drill, and it teaches a movement pattern that shows up in deadlifts, picking up laundry baskets, and bending over without feeling like your spine is doing all the work.
Keep your knees softly bent and your hands on your hips or crossed over your chest. Hinge back, touch the wall, return to standing. The movement should feel like your hips are sliding behind you, not your chest dropping toward the floor.
Do 2 sets of 8 reps. Move slowly enough that you can feel the hamstrings load up.
This is one of those quiet strength moves that pays off later. It helps you bend with more control and less grabbing in the low back.
If you only do one thing right here, make it this: hips go back first.
15. Low-Impact Shadow Boxing for Days You Want Sweat Without Jumping
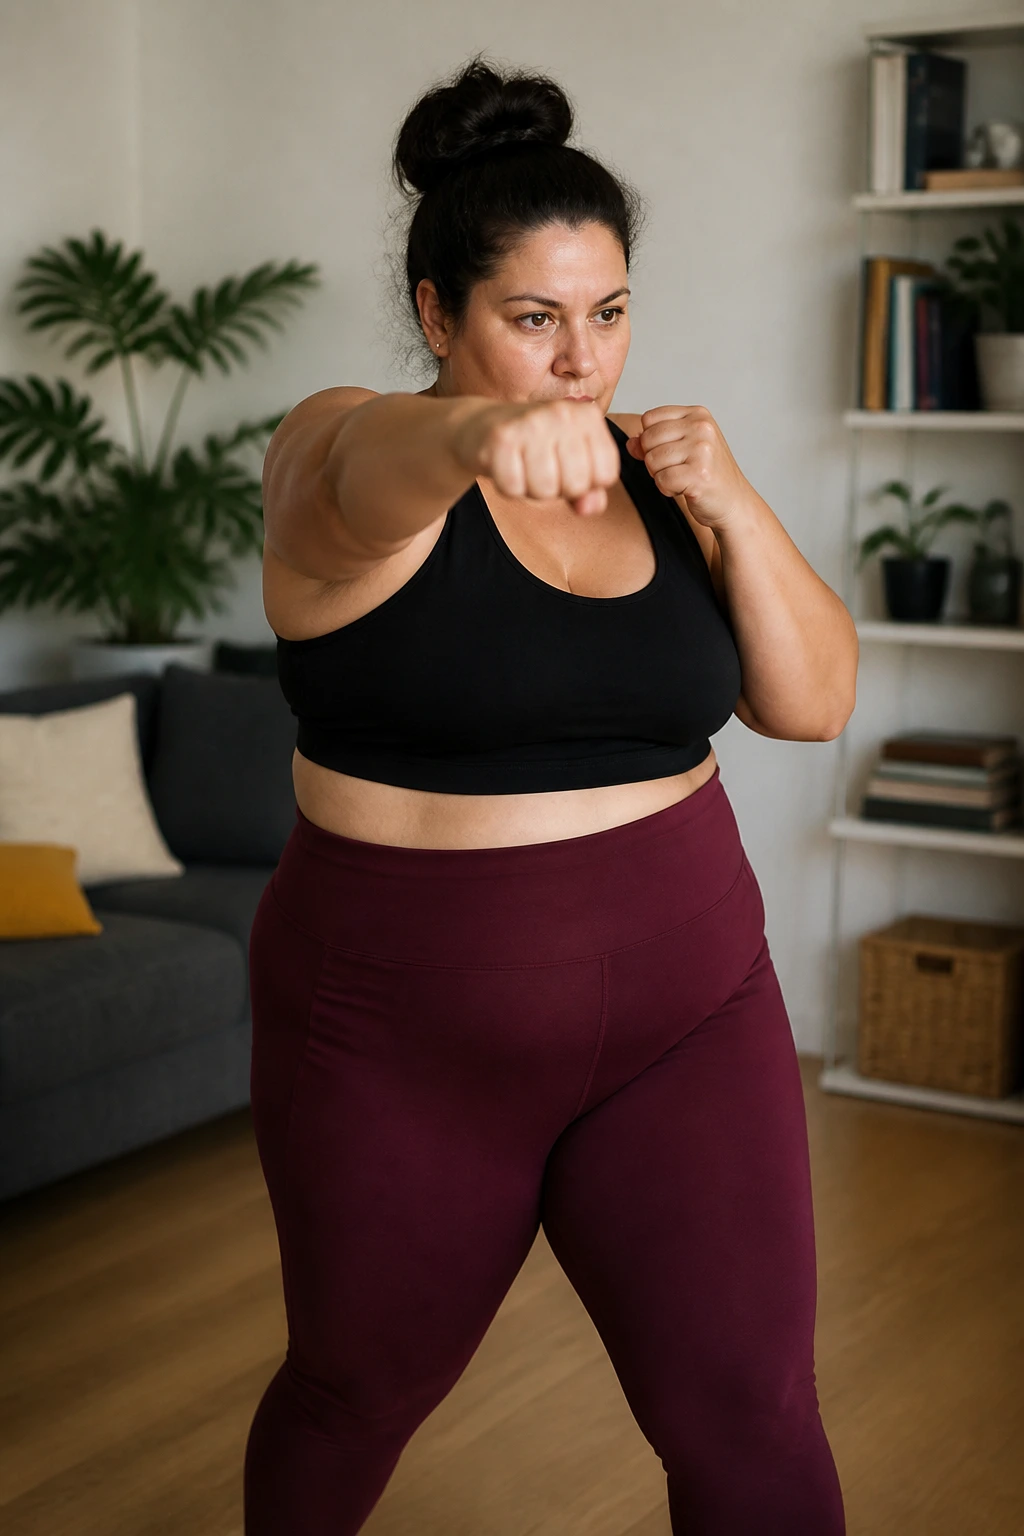
There’s something satisfying about throwing punches in your own living room. No impact. No equipment. Just arms, torso, and a little attitude.
A simple combo
Try a basic jab-cross pattern, then add a hook if your shoulders are happy with it. Keep your knees soft and your feet planted or in a tiny staggered stance.
- Jab with the front hand
- Cross with the back hand
- Rest for 10 seconds
- Repeat for 6 to 8 rounds
Keep your wrists straight. That matters more than speed or force. The punches should feel snappy, not wild. If you start hunching forward, reset your posture and lower the power.
Shadow boxing is useful because it asks for coordination, not just effort. You’ll feel your shoulders, core, and legs working together, which makes it feel more like a workout and less like arm waving.
16. Wall Sit Holds That Teach Your Legs to Stay Quiet Under Load
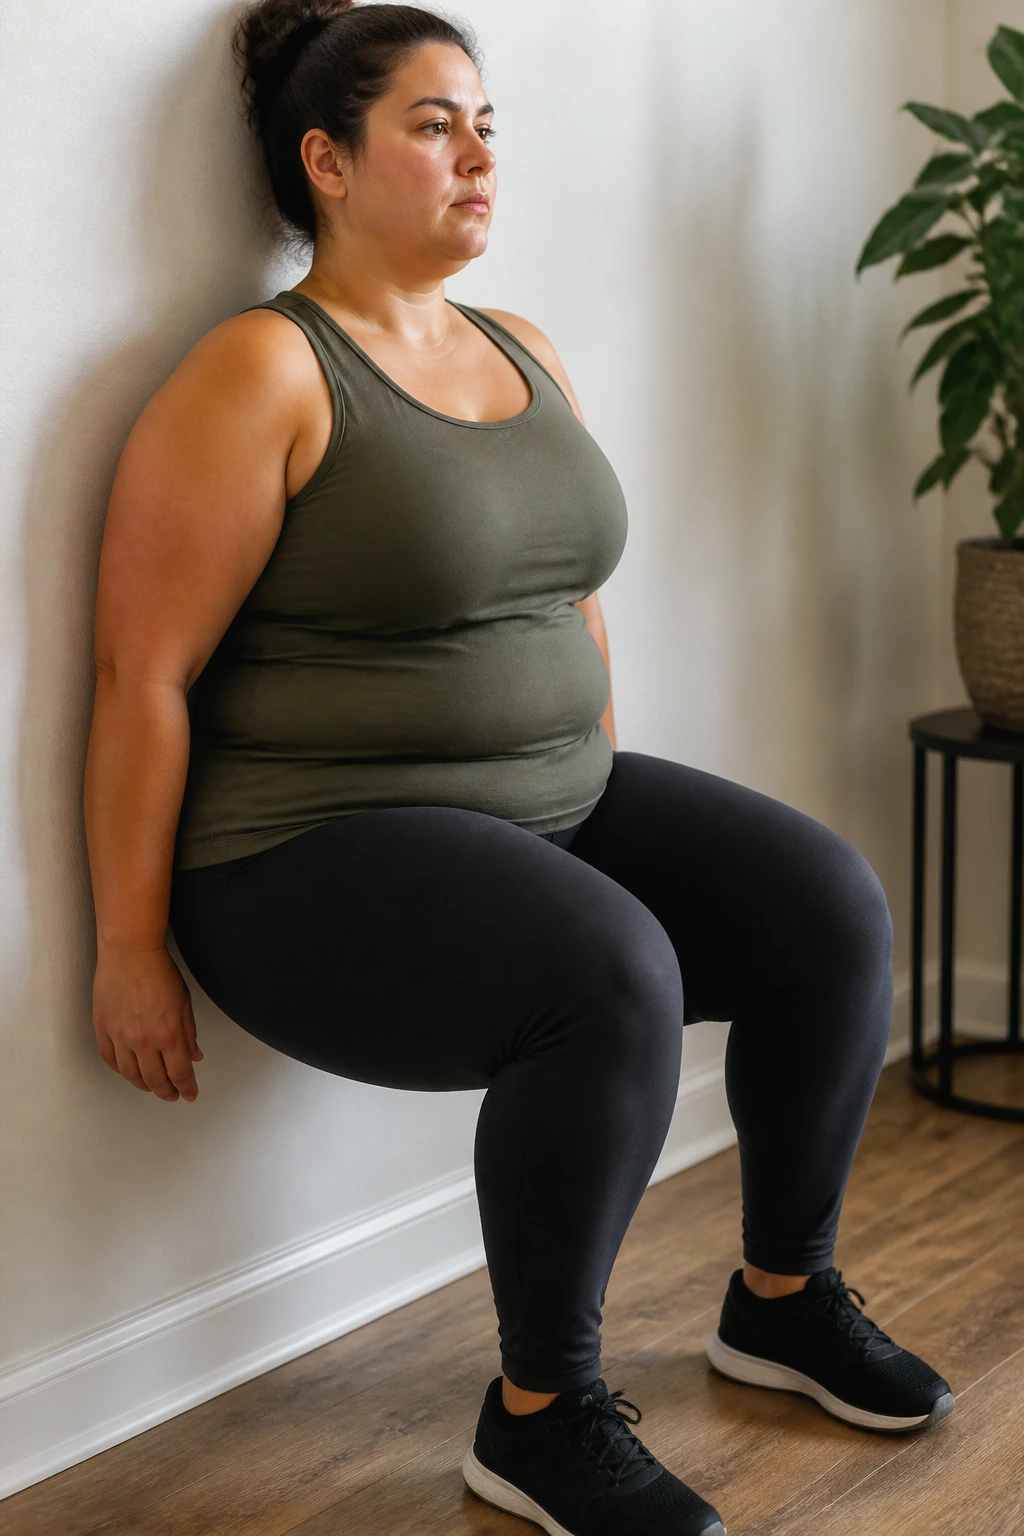
A wall sit is direct. No drama. No tricks. Your thighs work, your breathing gets louder, and the wall does the balancing for you.
Slide down the wall until your knees are bent to a comfortable angle. You do not need to hit a perfect right angle. In fact, starting higher is often smarter. Hold for 10 to 20 seconds, stand back up, and rest.
If your knees complain, move higher. If your quads barely notice the hold, inch lower next round. The sweet spot is the place where your legs feel busy but not shaky.
Keep your back flat against the wall and your feet far enough forward that your knees don’t shoot past your toes too much. A few inches can change the whole feel.
This one teaches patience. It also exposes weak spots fast, which is useful even if it isn’t flattering.
17. Floor-to-Stand Practice for Getting Down and Up Safely
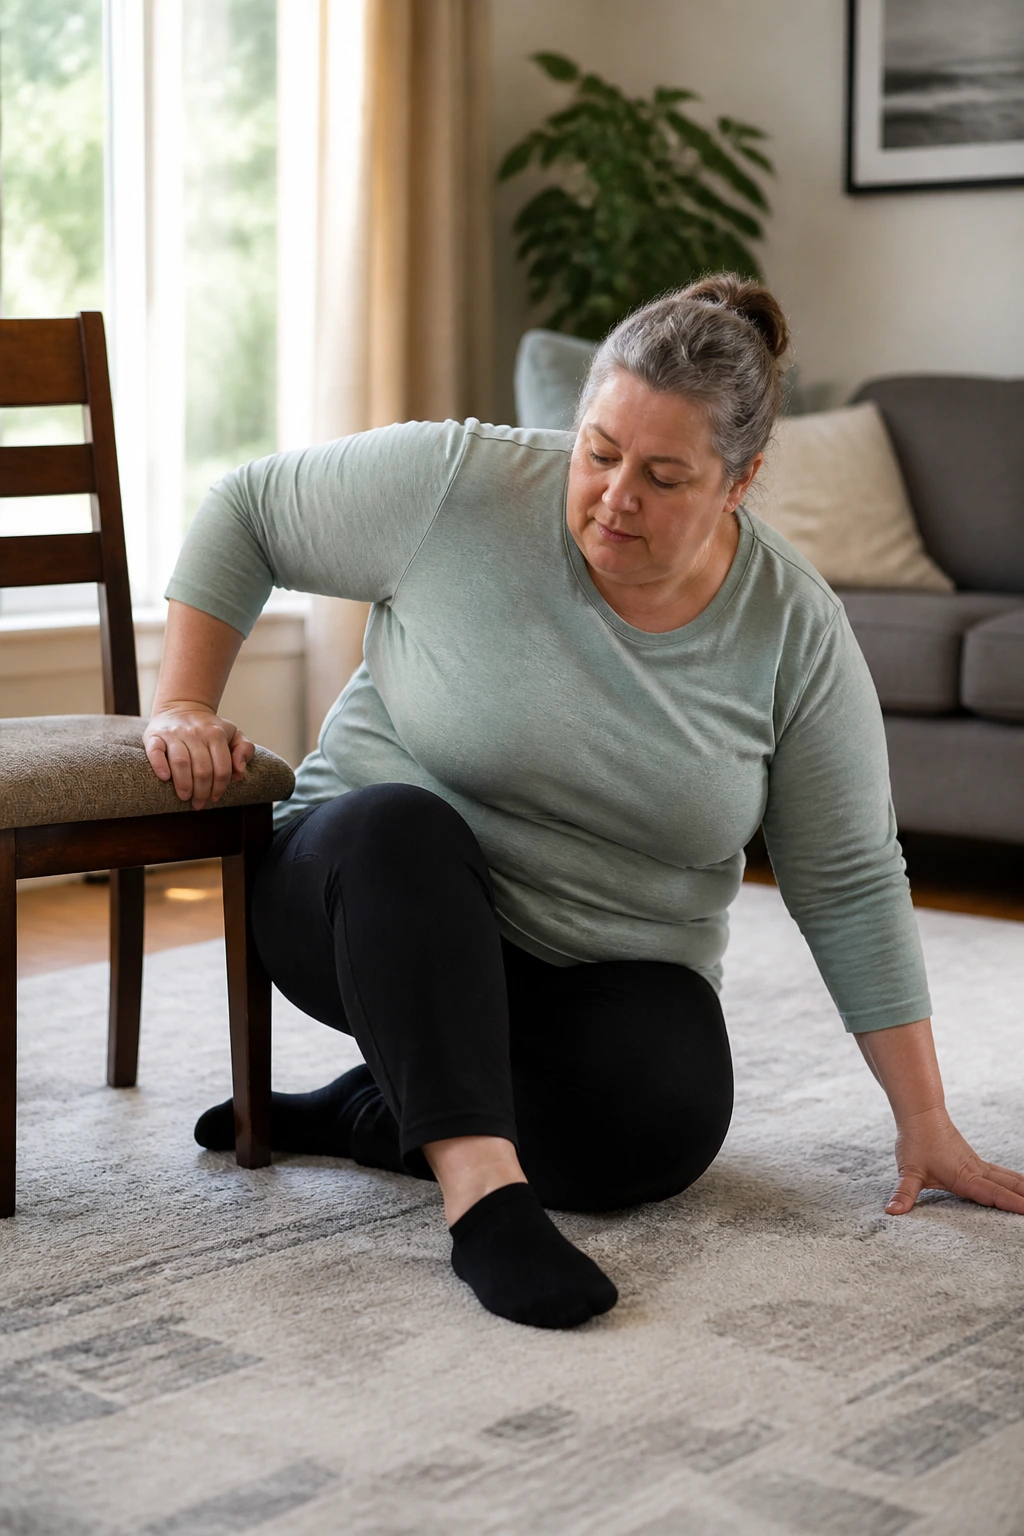
Getting on the floor is one thing. Getting back up is often the real test. Practicing that pattern at home builds confidence, balance, and the kind of leg strength that helps in daily life.
Use support on purpose
Place a sturdy chair beside you. Lower yourself to one knee, then both hands, then sit on one hip if needed. From there, plant one foot flat, use the chair for support, and press up slowly.
- Move one piece at a time.
- Keep the chair stable.
- Use a cushion under the knee if the floor is hard.
- Take a breath before standing.
Do 3 to 5 practice reps, not to exhaustion, but to learn the path. This is one of the most practical workouts in the whole list, especially if you’ve avoided the floor because getting up felt awkward.
No rush. The point is safe control, not speed.
18. Low Step-Ups on the Bottom Stair
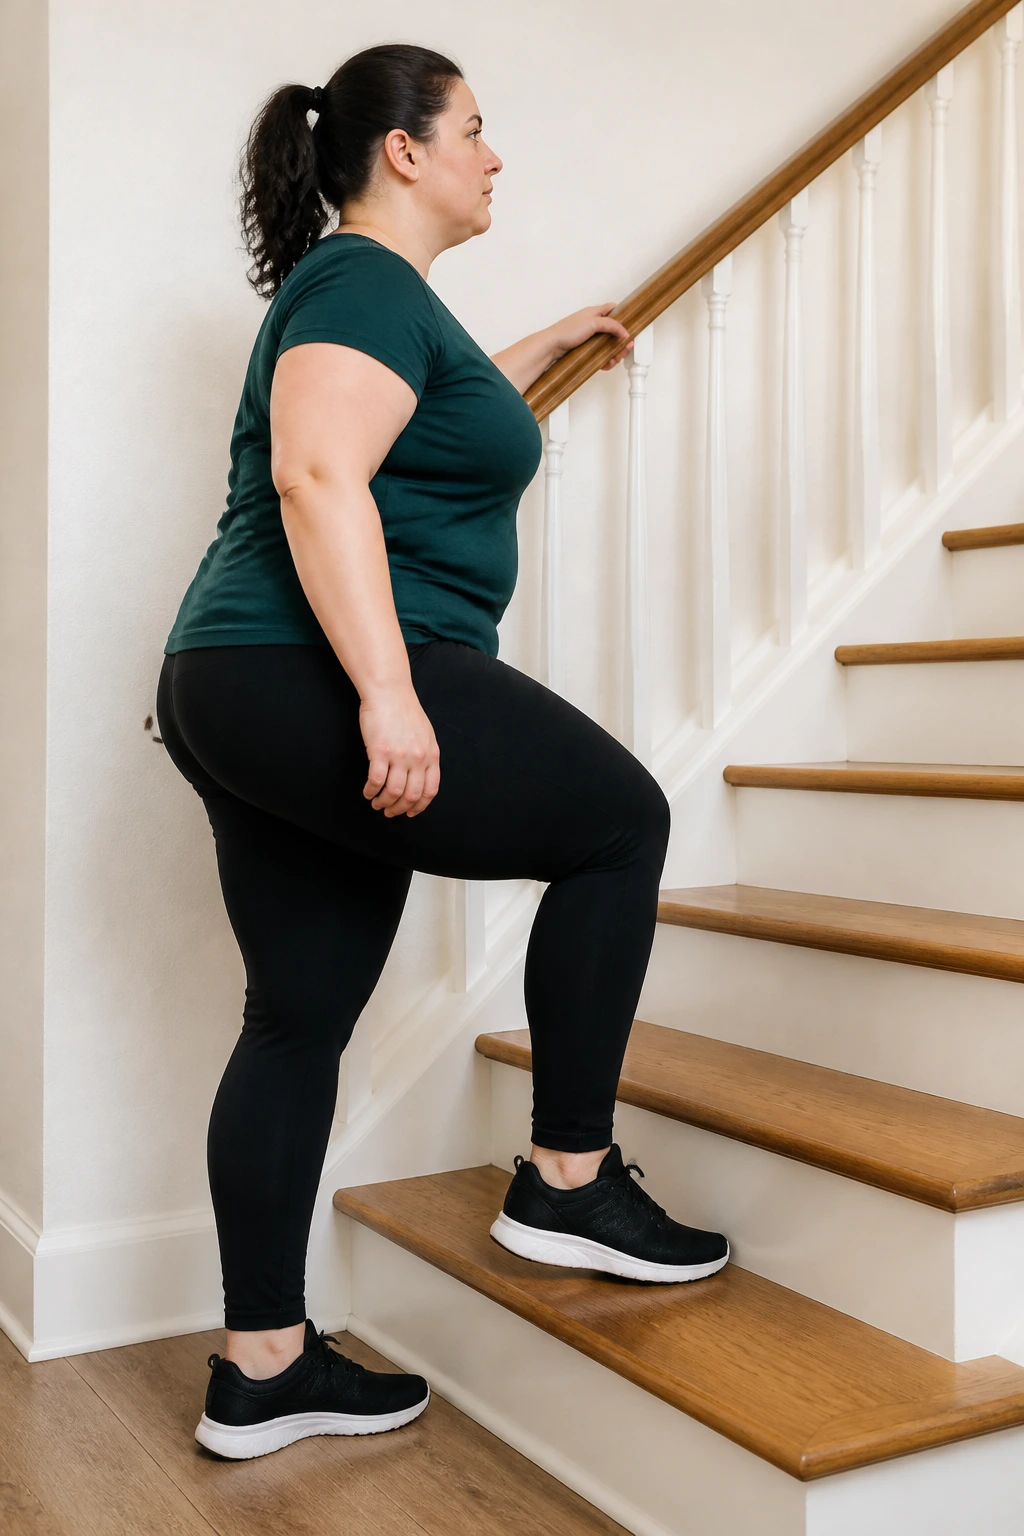
A bottom stair can be a surprisingly good training tool. It gives you a small height change, which is enough to challenge the legs and heart without turning the move into a climb that feels too steep.
Step one foot onto the stair, press through the whole foot, bring the other foot up, then step down with control. Use a railing if you have one. If not, keep a hand near a wall or banister.
Try 8 reps on each side. Start slower than you think you need. The lowering phase is where balance gets tested, and that’s often the part beginners skip.
If stairs make you nervous, use a sturdy step platform or even a thick aerobic step if it does not wobble. The surface has to feel solid. Wobbly equipment is not worth the risk.
One good sign: you should finish feeling worked, not rattled.
19. Standing Core Bracing and Breathing

Core work does not have to mean crunches on the floor. Sometimes it starts with learning how to stand, breathe, and tighten your midsection just enough to stay supported.
Try this pattern
Stand tall with your feet under your hips. Inhale through your nose, then exhale as if you’re gently fogging a mirror. As you breathe out, draw your ribs down a little and tighten your belly like you’re bracing for a light tap.
Hold that brace for 3 to 5 breaths, then relax and repeat. You can do this while waiting for water to boil or standing in line at your own kitchen counter.
- Keep your shoulders down.
- Don’t suck in hard.
- Let the breath stay smooth.
- Think “steady,” not “tense.”
This drill sounds almost too plain to matter. It does matter. A lot of beginner pain and wobble comes from not knowing how to stack the rib cage over the pelvis without gripping everything else.
20. Gentle Mobility Flow for Sore Mornings and Tight Afternoons
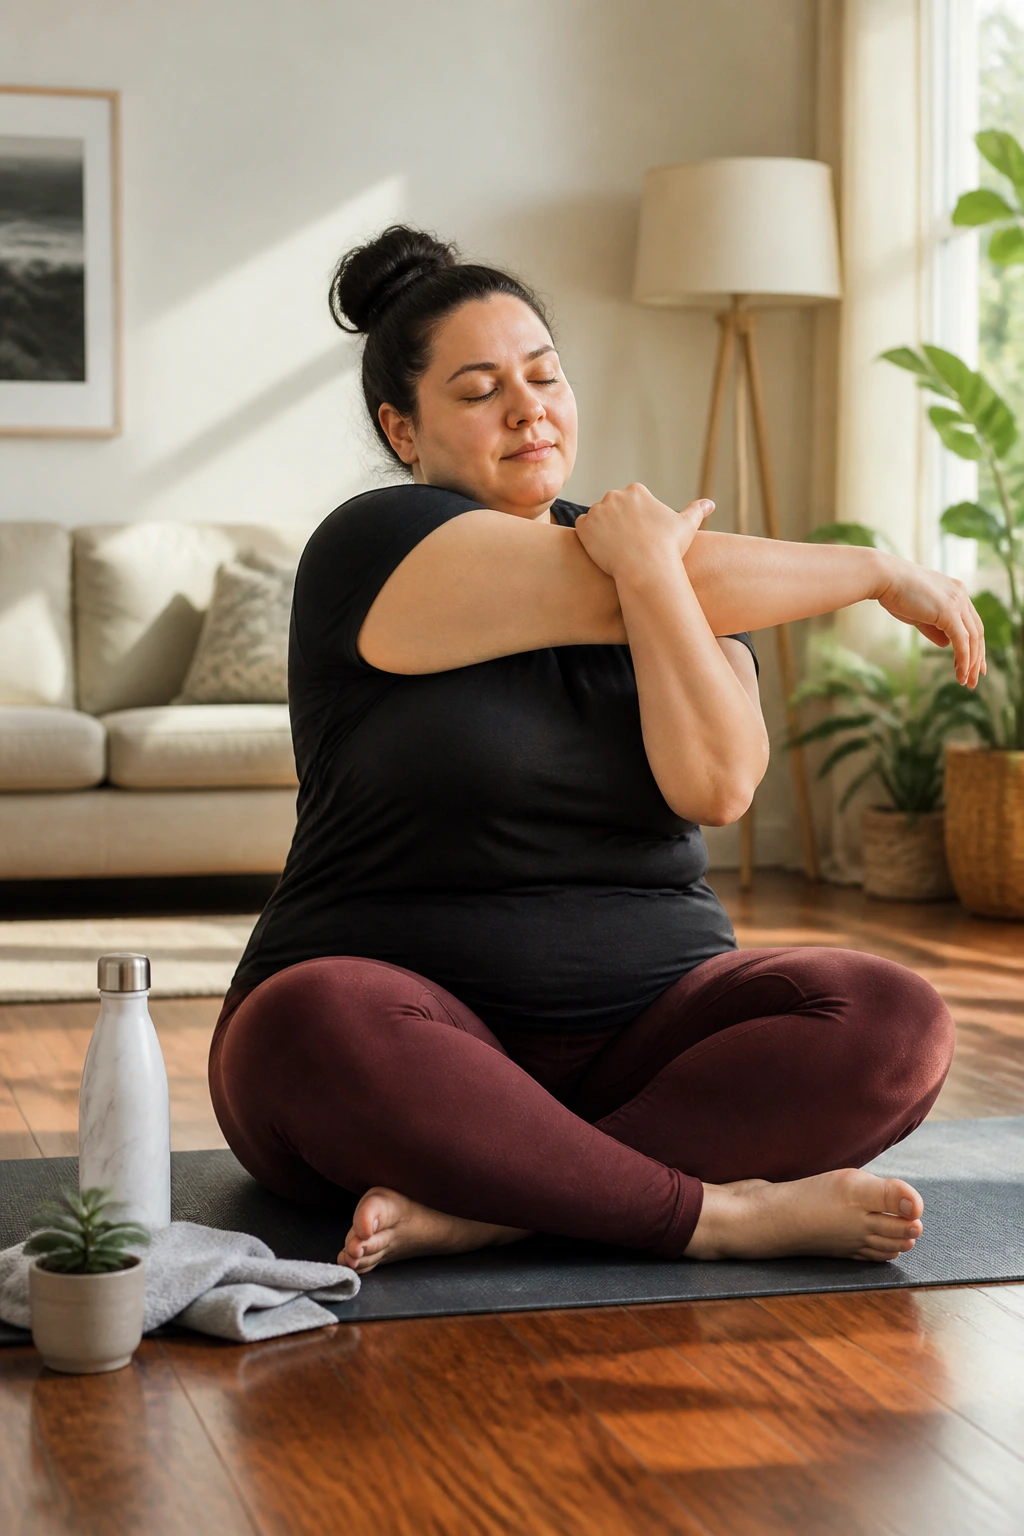
What do you do on the day your body feels stiff before you even start? You loosen up first. Mobility work is the easiest way to keep your home routine from turning into a grind.
Try a short flow: shoulder rolls, ankle circles, standing side bends, gentle hip circles, and a slow forward fold with bent knees. Spend about 5 to 8 minutes moving from one shape to the next.
A simple sequence
- 5 shoulder rolls each direction
- 5 ankle circles each foot
- 5 slow side bends per side
- 5 hip circles each direction
- 5 breathing reps with hands on your ribs
The point is not to stretch hard. The point is to feel your body get easier to move in. If your hamstrings are tight, bend your knees. If your shoulders feel pinchy, shrink the circles.
This is a good finish after any of the workouts above, or a stand-alone session on a day when your energy is low but you still want to keep the habit alive.
Keep Going
The smartest way to use these workouts is to pick 4 to 6 of them and repeat them across the week instead of trying to do all 20 at once. A short strength session, one cardio move, and one mobility drill can cover a lot of ground without leaving you wrecked.
Start with the moves that feel almost too easy. That’s not a weakness. It’s how you build consistency without your joints filing a complaint halfway through the week.
And if a workout feels awkward the first time, that does not mean it failed. It probably means your body is learning a new shape. Give it a few tries, slow the pace, and keep the chair close.
