



Senior beginner workouts at home don’t need dumbbells lined up like a gym commercial, and they definitely do not need a floor routine that leaves you muttering at your own knees. A sturdy chair, a wall, a bit of open space, and moves you can trust are enough to get started.
The best home workouts for older adults usually share the same bones: a little balance, a little strength, a little mobility, and some light heart-rate work. Public-health guidance from places like the CDC and the American College of Sports Medicine keeps coming back to that mix for a reason. It helps with everyday things that matter more than any fitness slogan — getting up from a chair, climbing stairs, carrying groceries, staying steadier when you turn too fast in the hallway.
Sharp pain is a stop sign. Muscle effort is fine; stabbing pain, chest pressure, or dizziness is not. If you take medication that affects balance or blood pressure, stand up slowly and give your body a second to catch up.
A quick warm-up helps, too. Walk around the room for a minute, roll your shoulders, and loosen your ankles before you do anything that asks your body to shift weight. Then pick a few moves from the list below. Five done well beats twenty done in a rush.
1. Seated Marching for Senior Beginner Workouts at Home
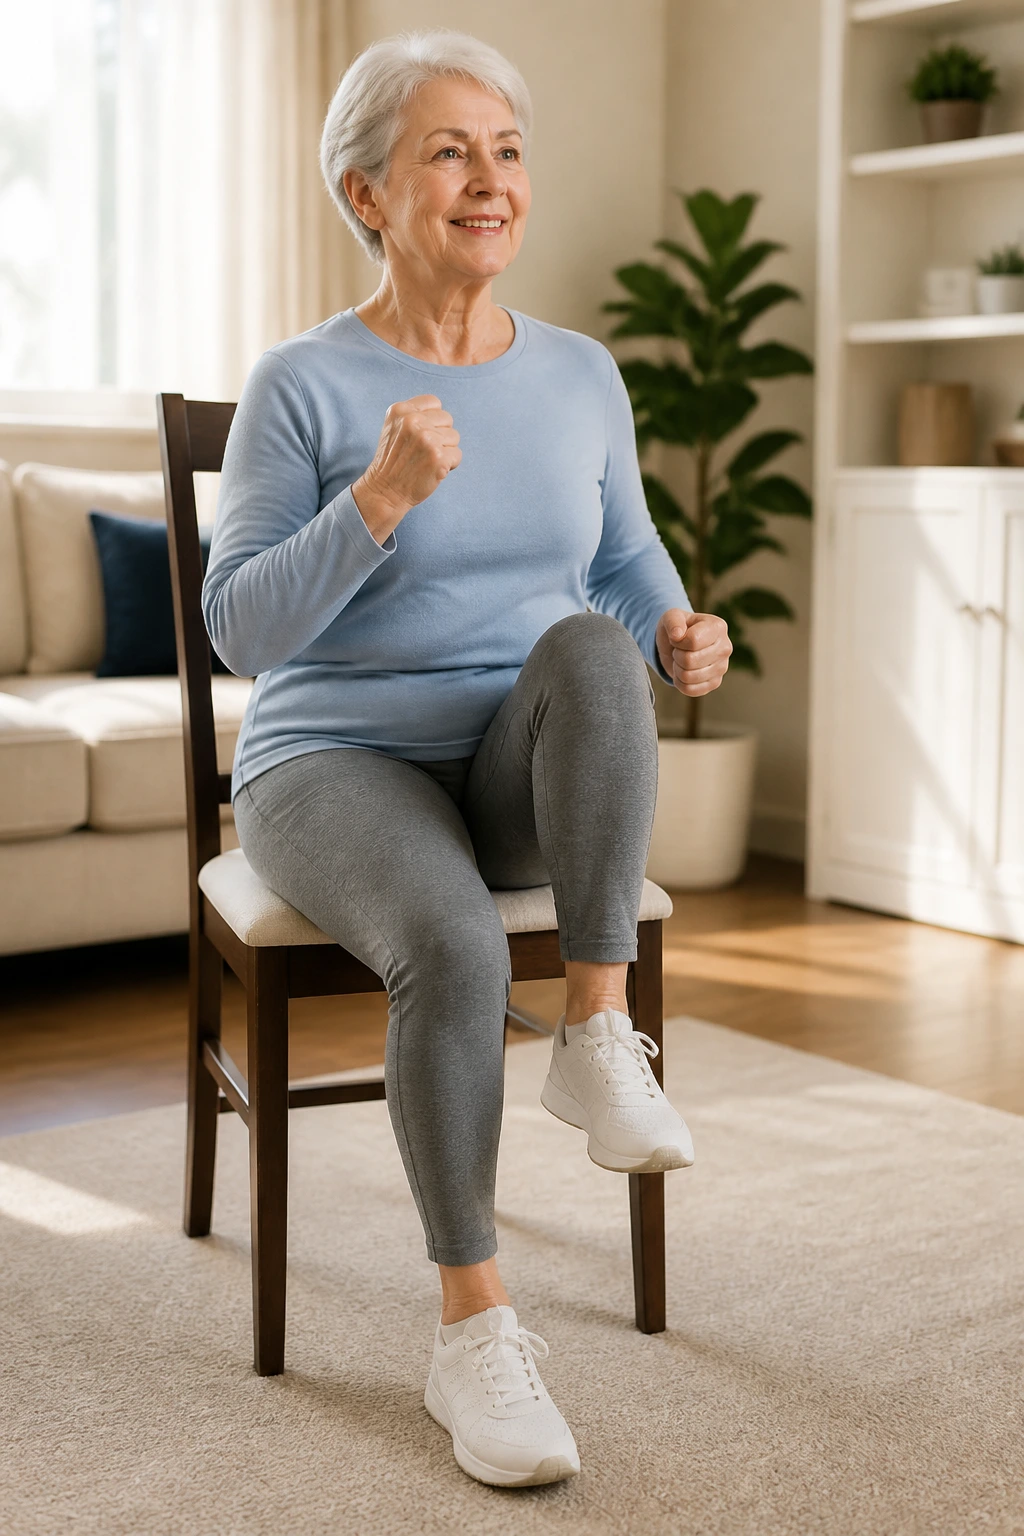
Seated marching looks almost too easy, and that’s exactly why it’s such a useful starting point. It gets the hips moving, nudges the heart rate up a little, and lets you practice rhythm without asking the knees and ankles to carry your full body weight.
Why It Helps
Do it for 30 to 60 seconds at a time, sitting near the front of a sturdy chair with both feet flat to start. Lift one knee, then the other, keeping the motion smooth and small at first. If you can keep your torso tall without leaning back, you’re doing it right.
- Keep your feet clear of the floor, but only by a few inches.
- Pump your arms if you want a little more effort.
- Breathe out as each knee rises.
- Stop before your shoulders creep up toward your ears.
Tip: If the chair sits low, place a folded towel on the seat so your hips stay a little higher and the marching feels easier to control.
2. Sit-to-Stand from a Sturdy Chair
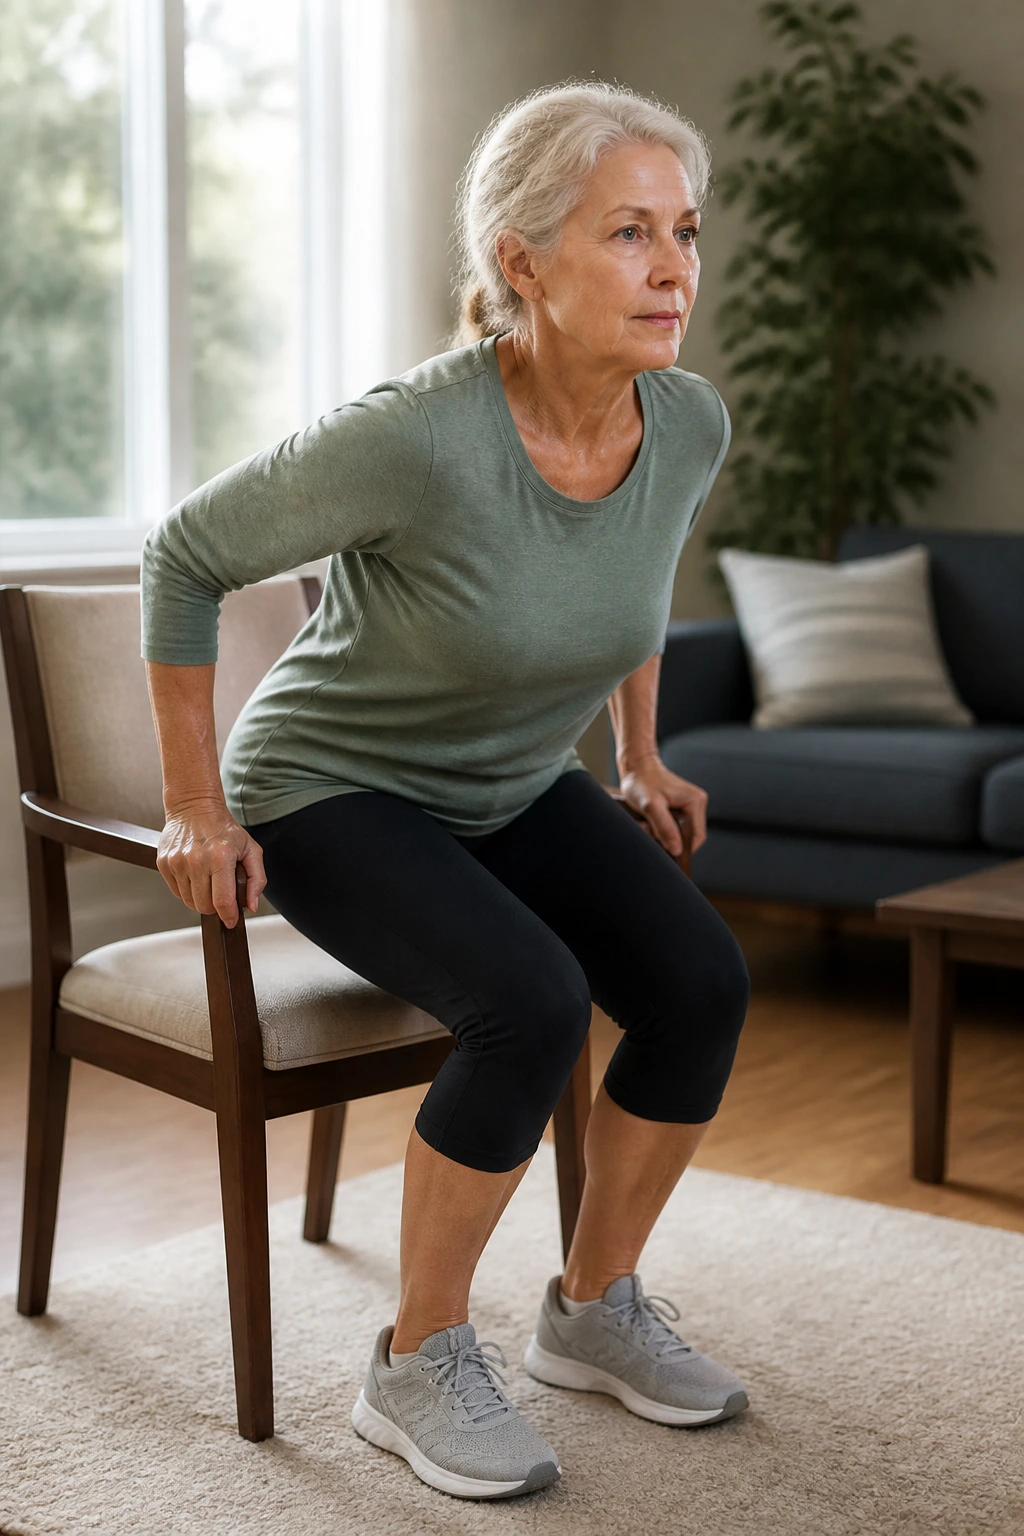
If I had to pick one move that gives the biggest return for daily life, this would be near the top. Sitting down and standing back up shows up everywhere — from breakfast to bathroom breaks to getting in and out of the car — so practicing it pays off fast.
The trick is not speed. It’s control. Scoot forward, place your feet under your knees, and lean your chest slightly over your toes before you stand. That small lean makes the move feel more natural and keeps the load in your legs instead of dumping it into your lower back.
Try 5 slow reps at first, then build to 8 to 10 if the first round feels steady. Use your hands on the chair arms if you need them, but don’t make that the default forever. Better to push through your heels, stand tall at the top, and lower yourself with a little care than to fling yourself up and down like you’re in a hurry.
One clean rep matters more than a fast set.
3. Wall Push-Ups for Upper-Body Strength
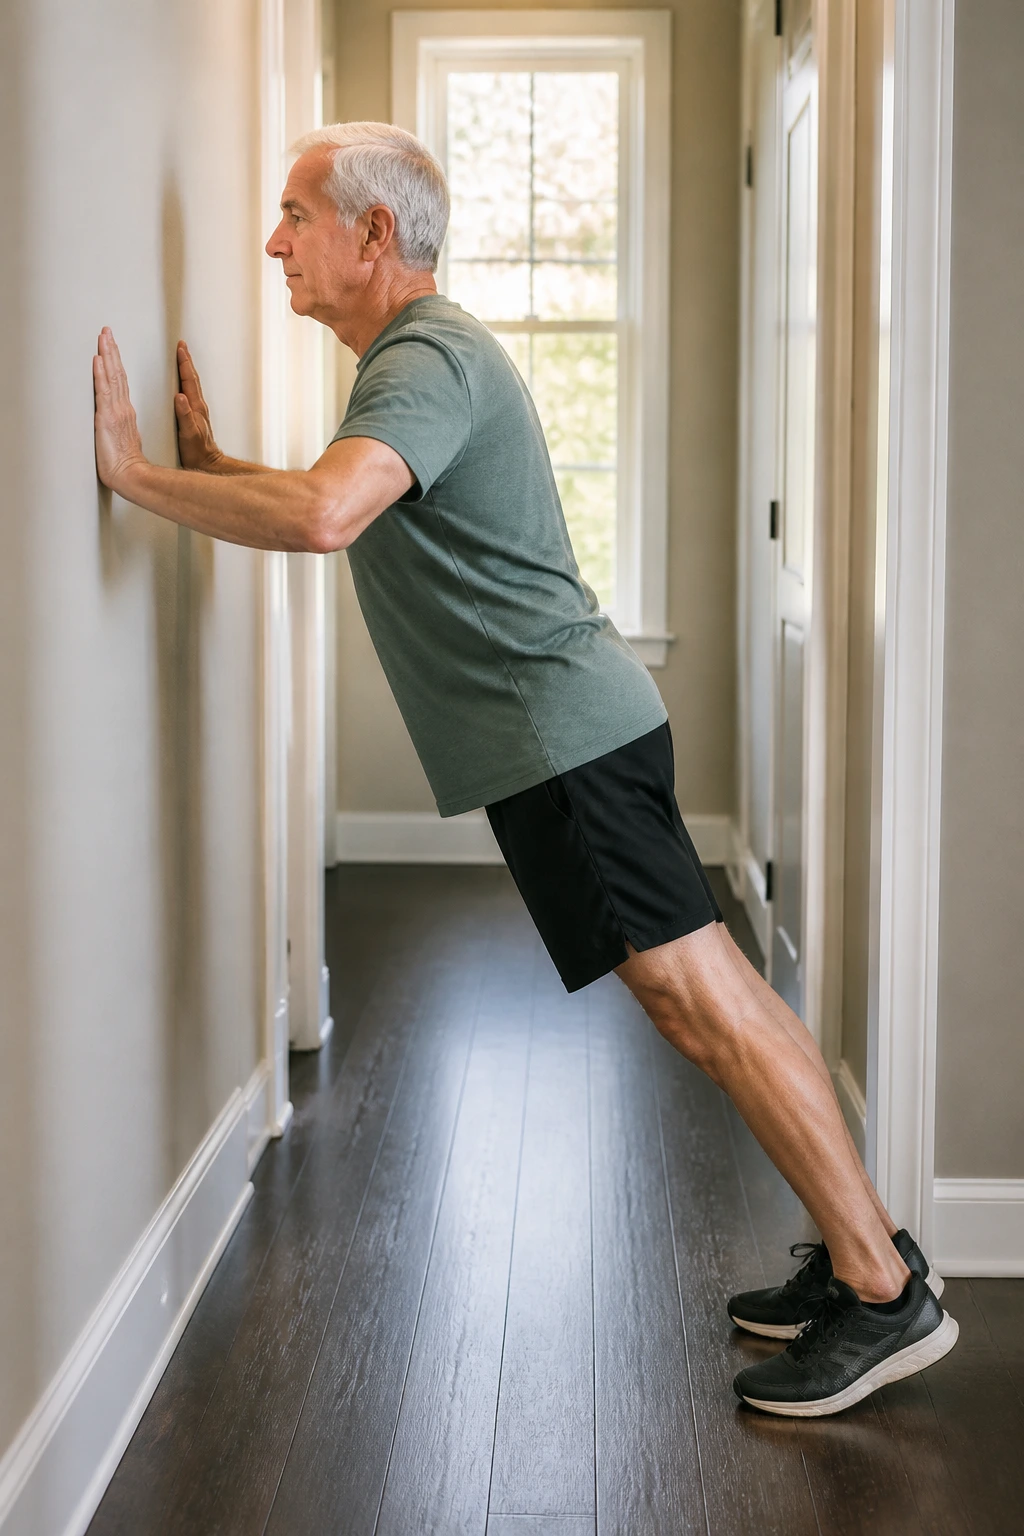
Can you build pushing strength without getting on the floor? Yes, and wall push-ups are the easiest place to start. They train the chest, shoulders, and triceps, but they also ask your core to stay braced so your body doesn’t sag toward the wall.
Start with your hands on the wall at chest height, a little wider than your shoulders, and step your feet back 6 to 12 inches. The farther your feet go back, the harder it gets. That’s a nice built-in dial for beginners.
How to Use It
- Keep your body in one straight line from head to heels.
- Lower until your face is a few inches from the wall.
- Press back to the start without locking your elbows hard.
- Move to a countertop if the wall feels too easy, or stay with the wall if your wrists complain.
Do 2 sets of 6 to 10 reps. If your lower back arches, bring your feet a little closer. And if the movement feels wobbly, slow it down. Slow usually wins here.
4. Heel Raises at the Kitchen Counter
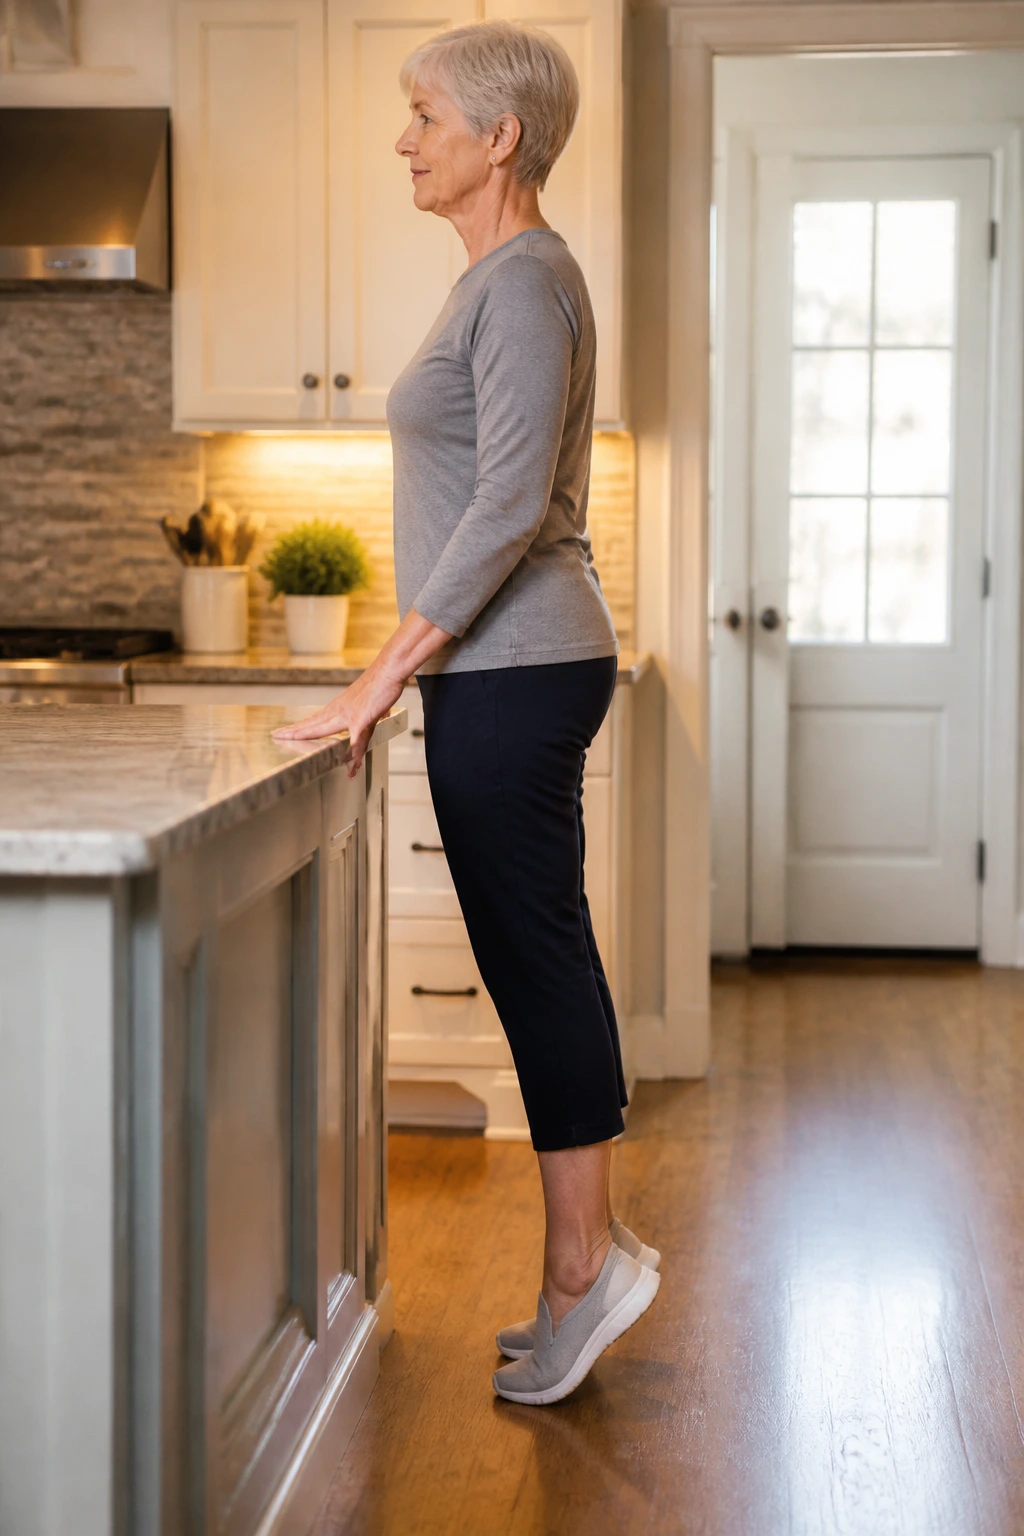
This is one of those plain little exercises that people skip because it doesn’t look dramatic. Big mistake. Strong calves help with walking, standing, and the tiny ankle adjustments that keep you upright when the floor is uneven or your shoe catches on a rug.
Stand near a counter or sink with your fingertips resting lightly on the edge. Lift both heels, pause for a beat at the top, then lower slowly until your feet are flat again. That slow lower matters more than the lift. It teaches control.
- Do 10 to 15 reps for one set.
- Hold the top for 1 second.
- Lower over 2 to 3 seconds.
- Keep your knees soft, not locked.
I like this move paired with a short walk around the house. The calves warm up, the ankles wake up, and suddenly stairs feel a little less grumpy.
5. Toe Taps for Ankle Control
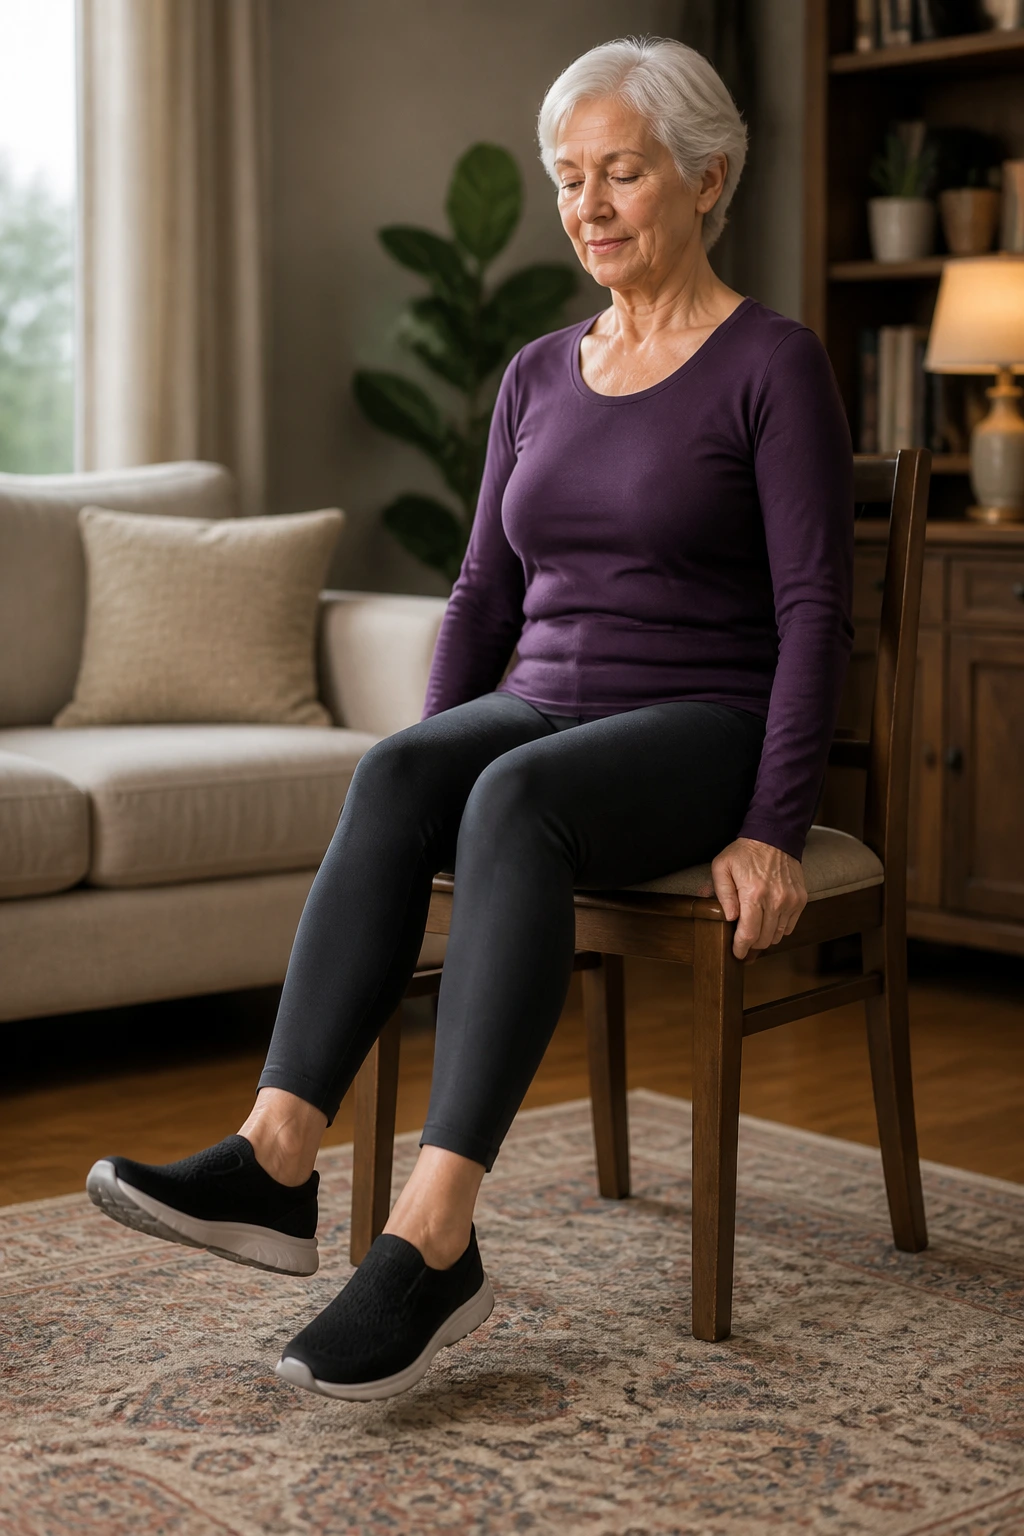
Toe taps are modest on the surface and sneaky underneath. They wake up the front of the lower leg, help the ankles move with more confidence, and make it easier to keep your feet light instead of dragging them through the day.
You can do them seated or standing. Seated taps are simpler: keep your heels down and lift the front of your feet up and down, almost like you’re testing whether the floor is still there. Standing taps ask a bit more balance, so hold the back of a chair if you need it and tap one foot forward, then the other.
The point is not a big range. Small is fine. Clean is better.
Try 20 alternating taps or 30 seconds at a time. If your shins feel a little tired after a set, that’s normal. If your hips start rocking from side to side, slow down and make the taps smaller. The move should feel crisp, not sloppy.
6. Side Leg Lifts for Hip Strength
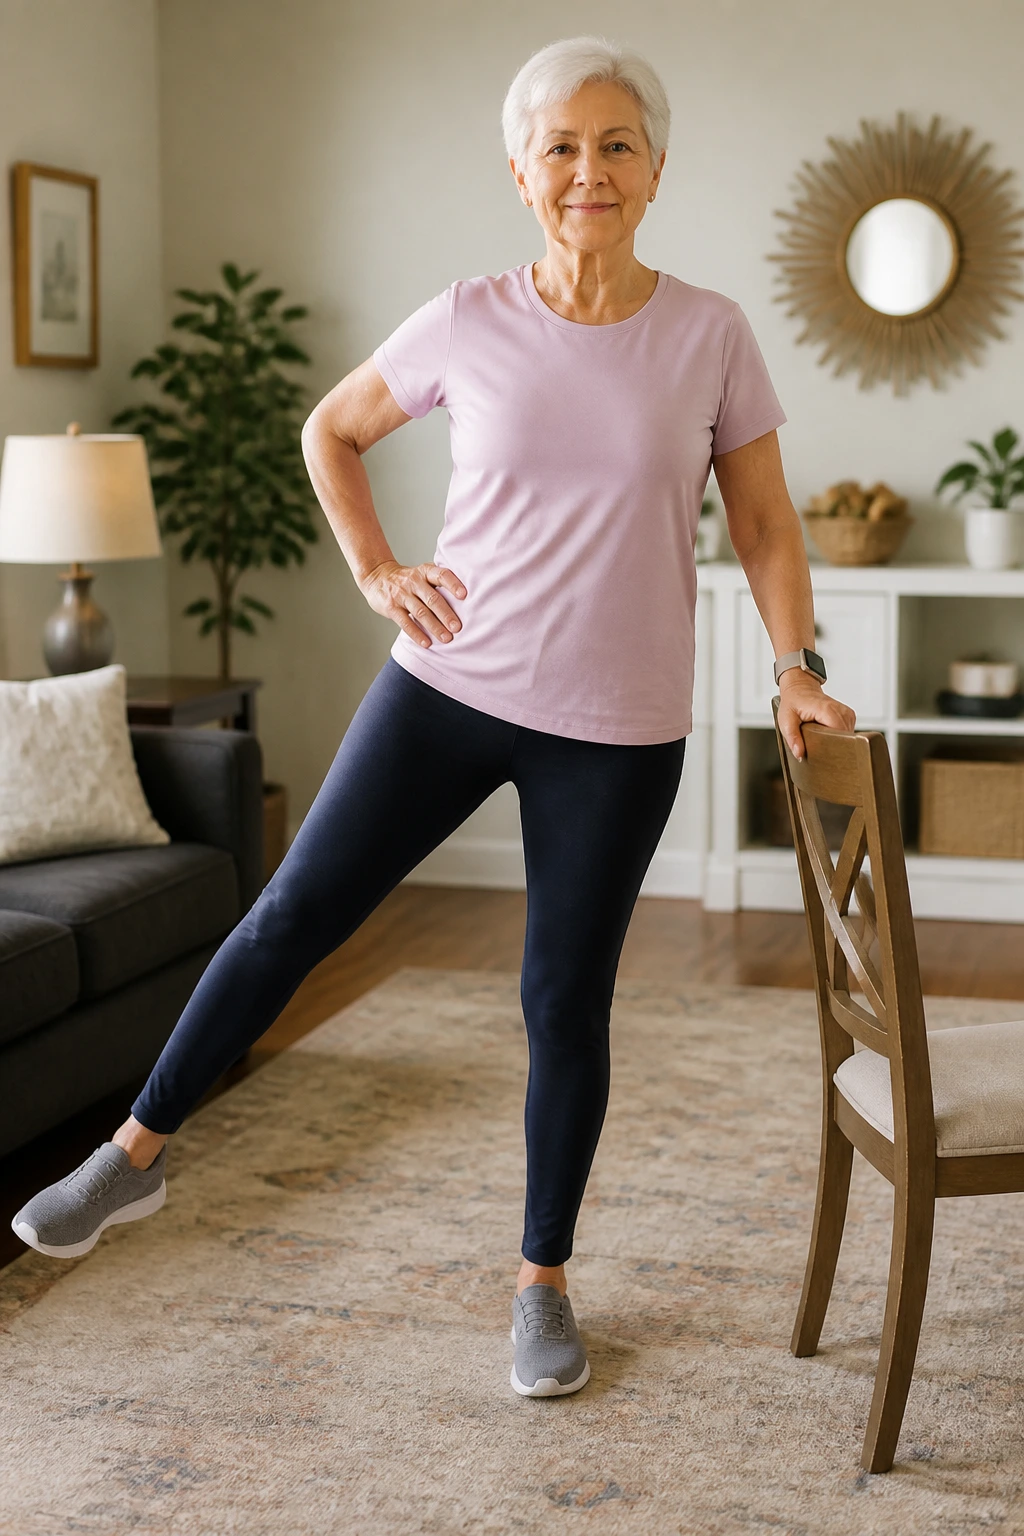
Unlike a side lunge, this move keeps the stance narrow and the knees happier. That makes it a nice choice when you want to wake up the hips without asking the joints to bend deeply or twist under load.
Stand behind a chair or next to a counter. Shift your weight onto one leg and lift the other leg out to the side just a few inches, toes pointed forward or slightly down. Don’t swing the leg. Lift it with control, then lower it with the same control.
What Makes It Different
Side leg lifts train the muscles that help keep your pelvis steady when you walk. If those muscles are weak, you can feel it in a wobbly stride or a little hip drop when you step.
- Keep your torso upright.
- Don’t lean away from the lifting leg.
- Lift only as high as you can without tipping.
- Aim for 8 to 12 reps per side.
If your standing leg feels shaky, that’s a sign to slow down, not quit. Light support from your fingertips is fine.
7. Standing Knee Lifts with Light Balance Work
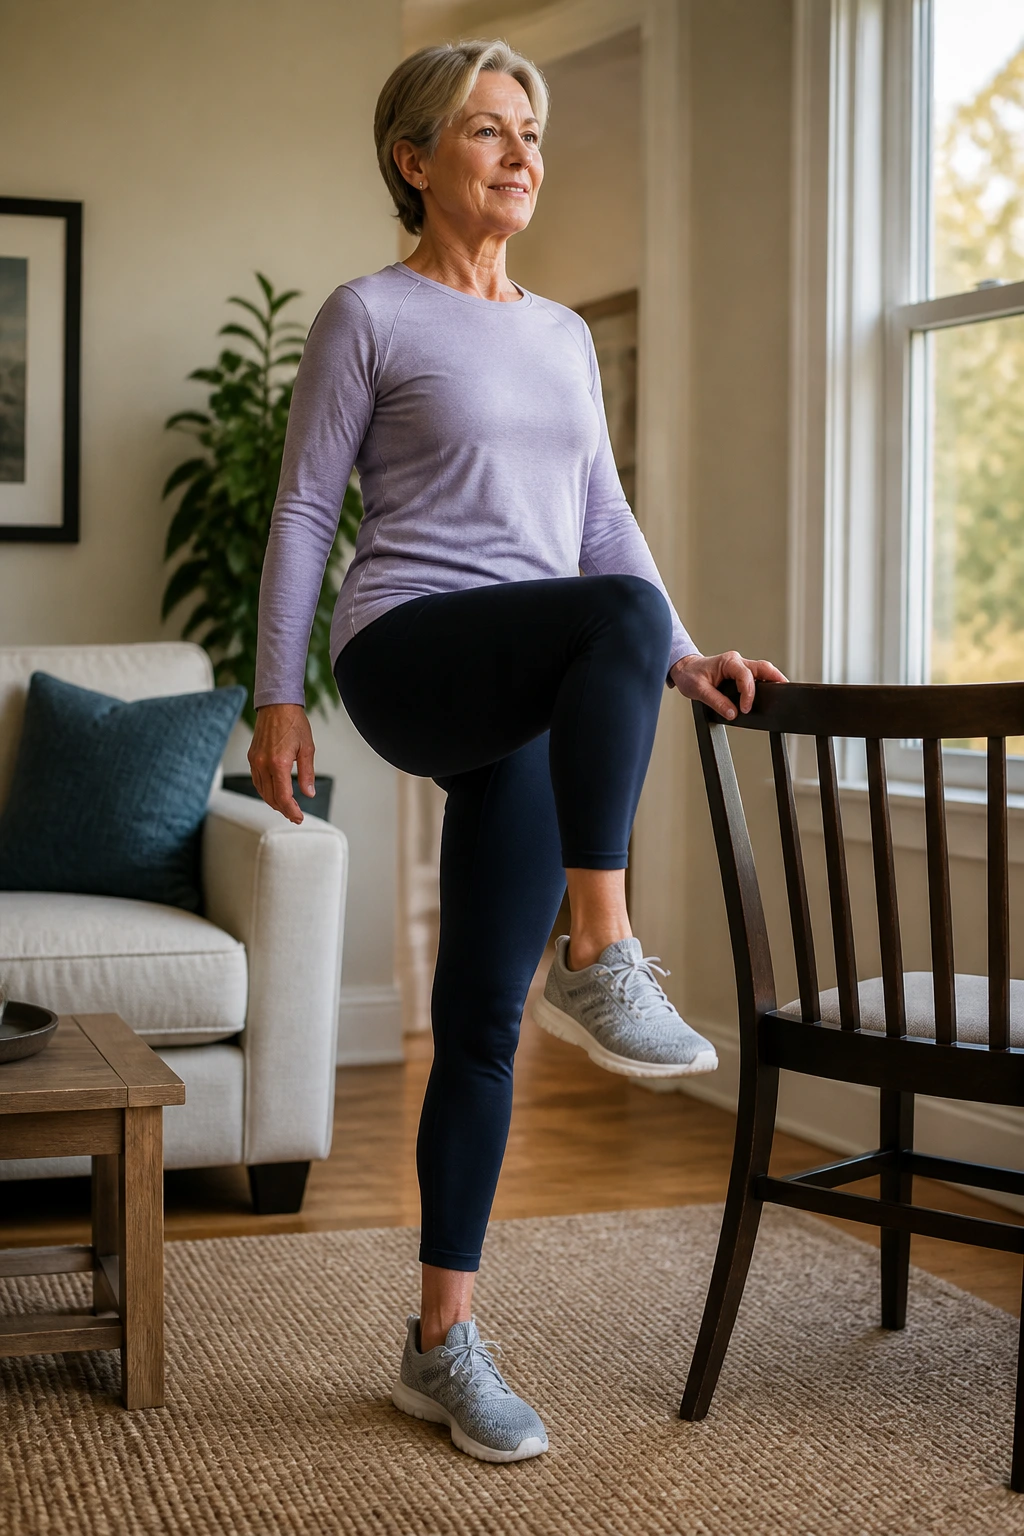
Standing knee lifts are part strength, part balance practice, and part confidence builder. The first few reps often feel awkward. That’s normal. Your body is learning to balance on one leg while the other one moves, and that takes a minute.
Why It Helps
This move works the hip flexors and the muscles around the standing leg, which matters for climbing steps, getting into a car, and turning without feeling like you might list to one side.
Do 10 knee lifts per side or work for 20 to 30 seconds. Use the back of a chair or the counter with one hand, then switch hands if needed. Lift the knee only as high as you can keep your chest tall. A tiny knee lift done well is better than a dramatic one that throws your balance off.
Quick Cues
- Press the standing foot into the floor.
- Exhale as the knee lifts.
- Keep the lifted foot relaxed.
- Lower slowly instead of dropping it.
If your hip feels pinched at the top, make the lift smaller. No prize is handed out for height.
8. Towel Rows for the Upper Back
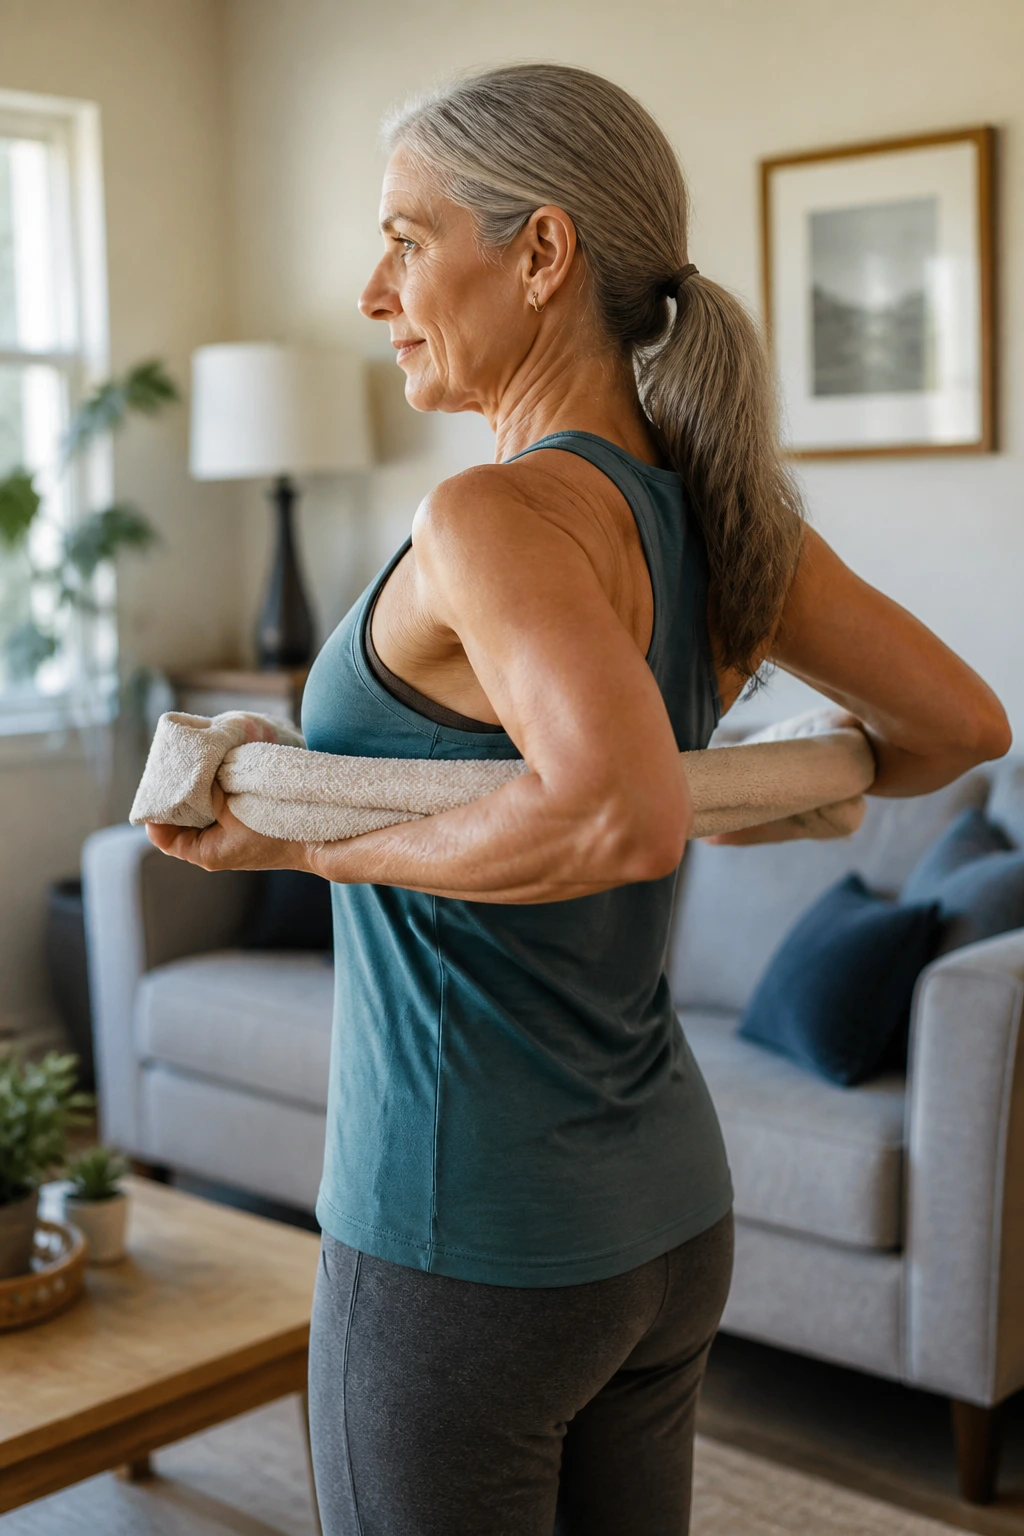
Upper-back work matters more than most people think. When the muscles between your shoulder blades get lazy, the shoulders drift forward, the neck tightens, and standing tall starts to feel like a chore. Towel rows help nudge things back into place.
Hold a bath towel in both hands at chest height and pull it apart as if you’re trying to stretch it wide. At the same time, draw your elbows back and pinch your shoulder blades gently together. This is a simple isometric row, which sounds fancy and isn’t. It’s just resistance without a machine.
You should feel the work across the upper back, not in your neck. If your shoulders climb up, ease off and soften your grip.
Do 8 to 12 pulls or hold the pull for 5 seconds at a time. Stand tall, breathe normally, and stop short of shrugging. A towel can do a surprising amount when you use it with intention.
9. Wall Angels for Shoulder Mobility
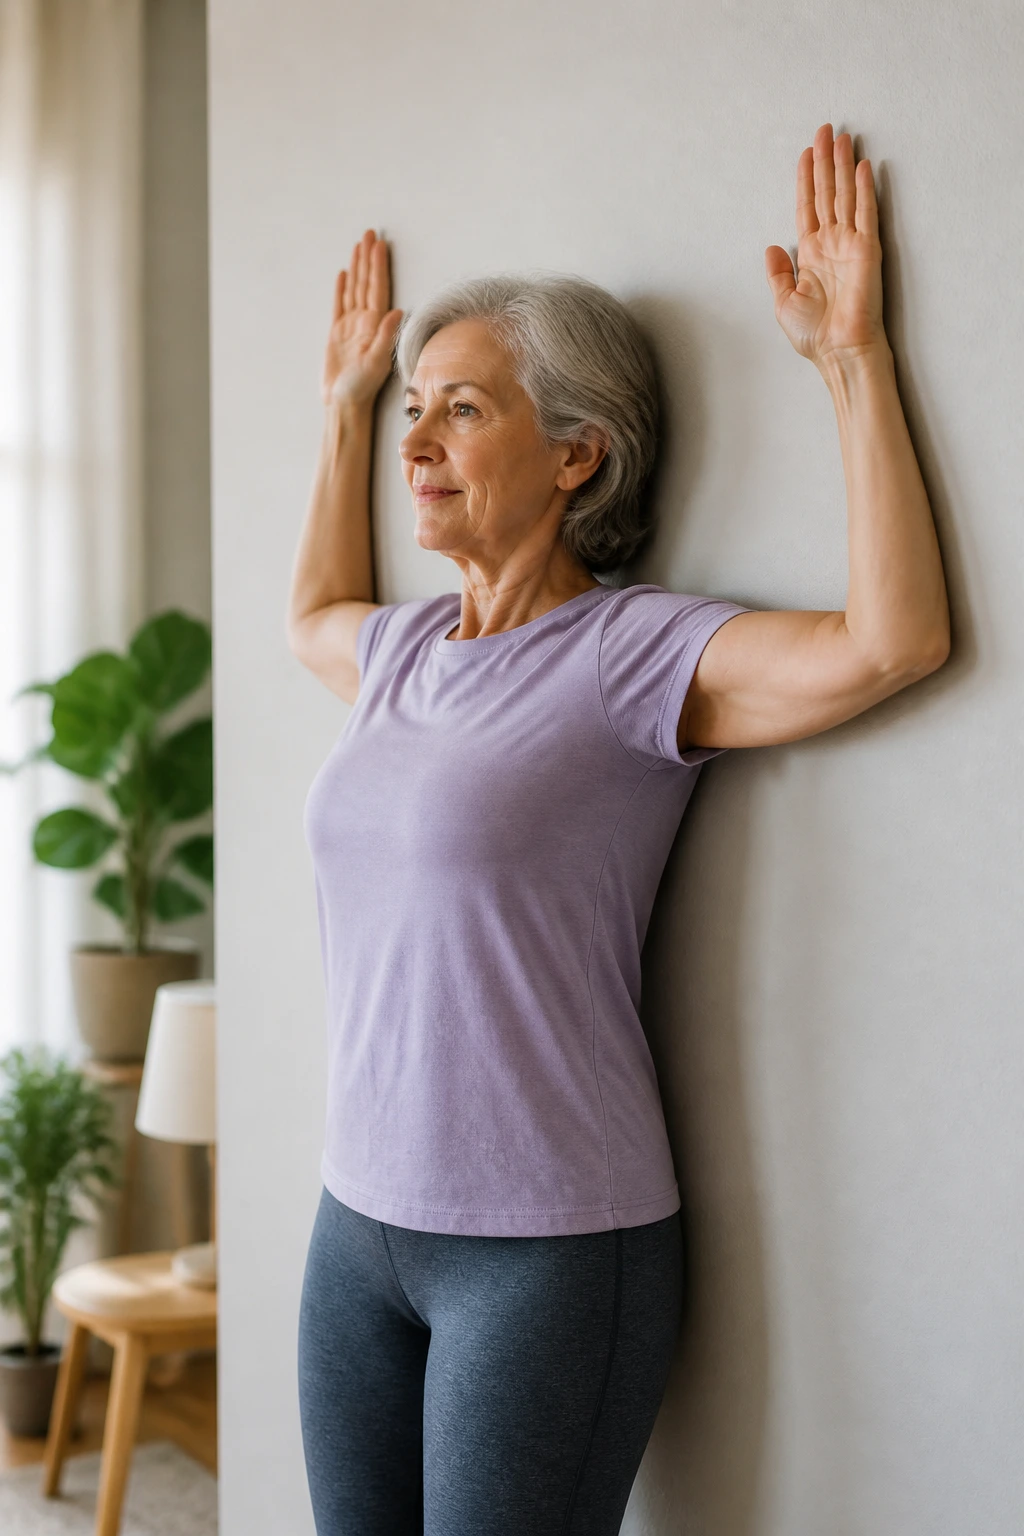
Why do wall angels feel awkward at first? Because they ask your shoulders to slide and open in a way that many of us stop doing after years of sitting, driving, and reaching forward for everything. Awkward is part of the deal here.
Stand with your back against a wall, feet a few inches out, and let your lower back rest in a natural curve instead of flattening it hard. Raise your arms like a field goal post, then slowly slide them up and down the wall if you can keep contact. If your wrists or elbows peel away a little, that’s not failure. It’s just where your mobility is right now.
How to Get the Most From It
- Keep your ribs from flaring up.
- Move slowly enough to notice the sticking points.
- Stop the motion before your shoulders shrug.
- Use 5 to 8 reps instead of racing through a longer set.
This one gets better with patience. On a good day, it feels smooth. On a stiff day, it feels like your body is negotiating.
10. Chair Leg Extensions for Senior Beginner Strength at Home
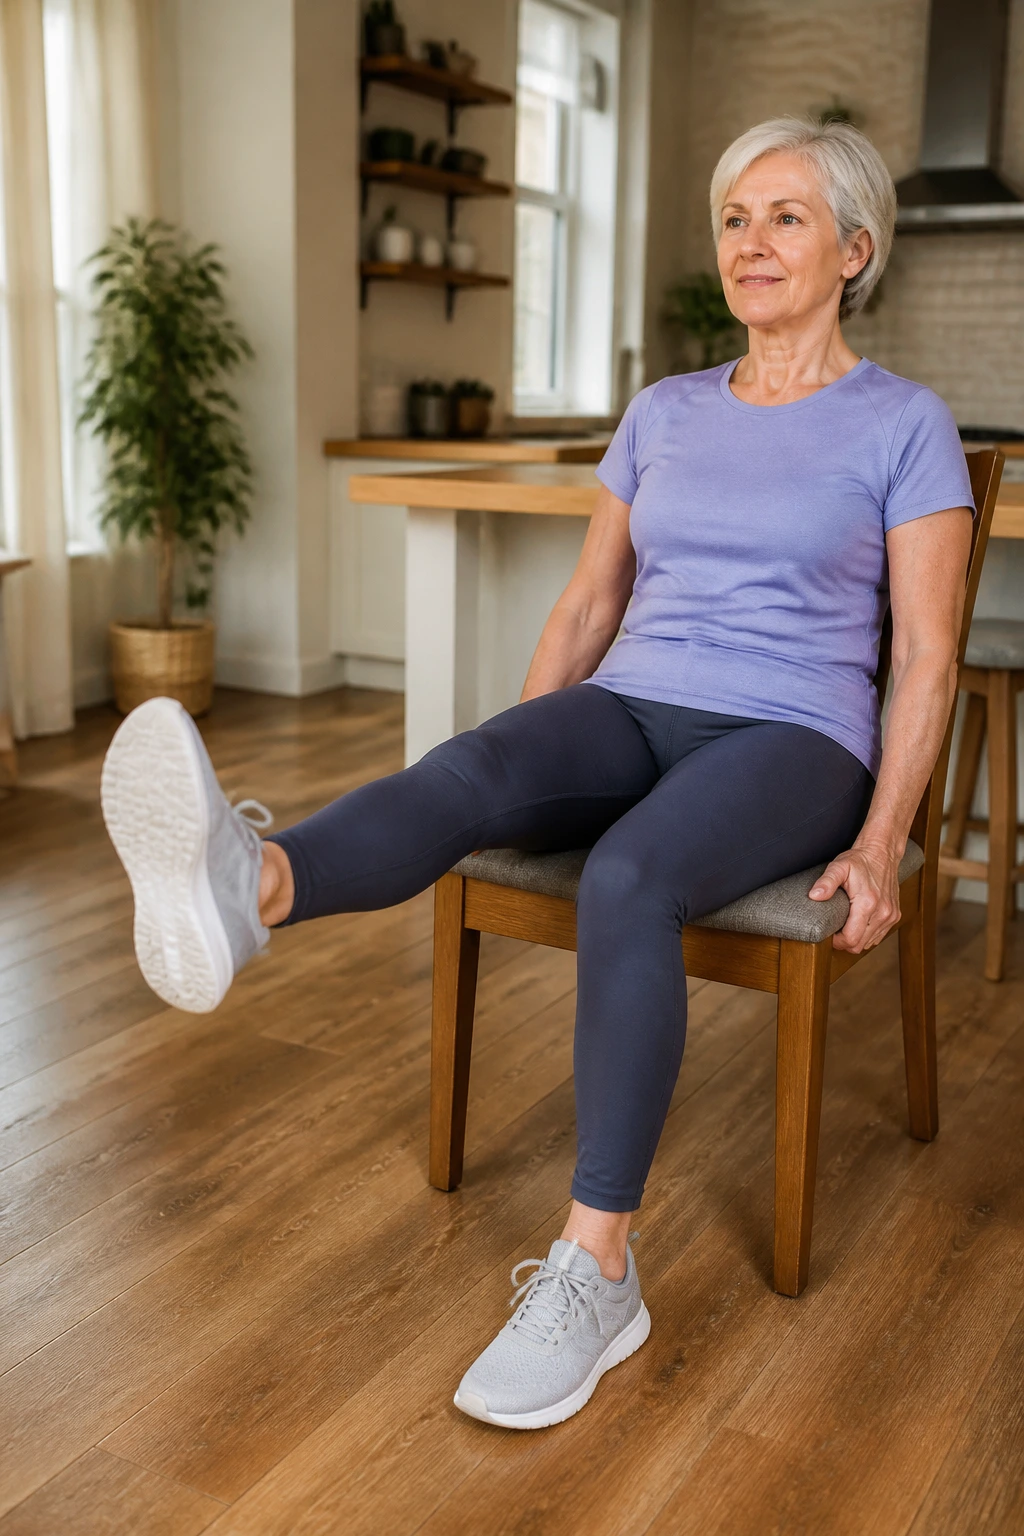
Chair leg extensions are a quiet way to work the front of the thighs without standing up or getting down on the floor. That makes them a handy option on days when your knees feel a little grumpy but you still want to do something useful.
Sit tall in a sturdy chair and extend one leg until the knee is nearly straight. Pause for a second, then lower it slowly until the foot returns to the floor. Switch sides and repeat. The slower the lowering phase, the more control you build.
The quads do the work here, but your core joins in if you keep your torso still. If you swing the leg up like a pendulum, the exercise turns sloppy fast.
- Do 8 to 12 reps per leg.
- Keep your toes pulled back toward you if that feels comfortable.
- Stop short of locking the knee hard.
- Use a towel roll under the thigh if the chair feels too low.
It’s a small move. It still matters.
11. Step-Touch Cardio in a Small Room
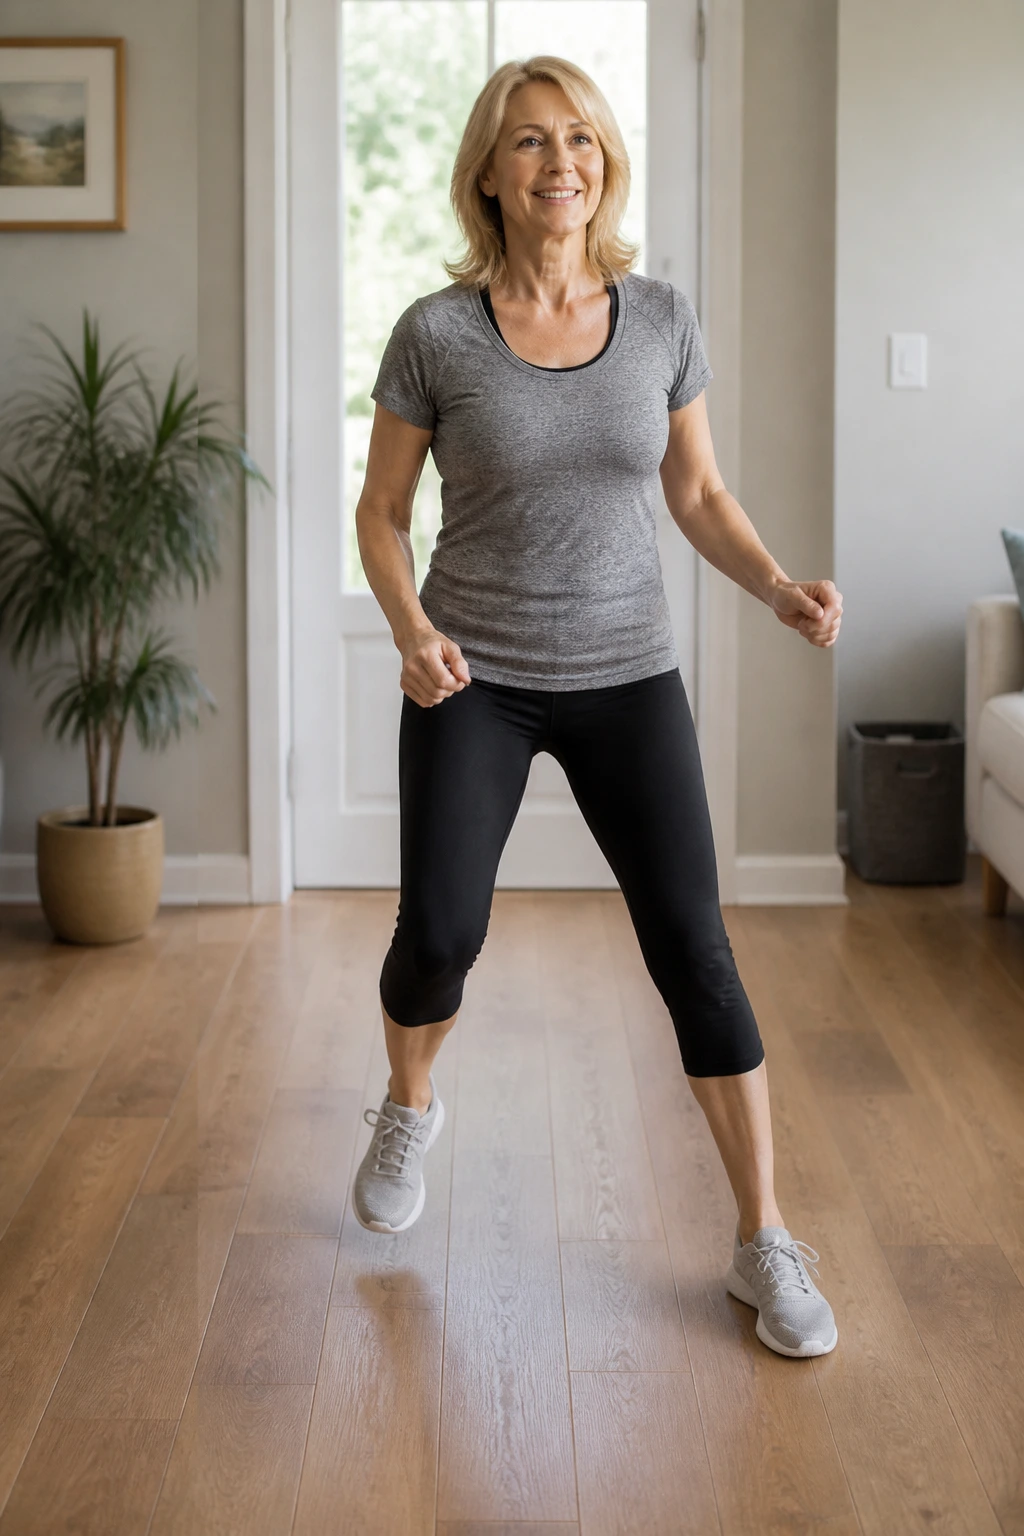
Step-touch is the kind of cardio move that looks harmless until you keep doing it for two minutes straight. Then the breathing changes, the legs start working, and the whole room turns into a little walking track.
Step to the right, bring the left foot in, then step to the left and bring the right foot in. Add arm swings if you want a bit more effort, or keep the arms low and relaxed if your shoulders are stiff. The rhythm should feel light, almost bouncy, but not sloppy.
A good starting point is 1 minute on, 1 minute easy, repeated 3 to 5 times. If your space is tiny, you can do this beside the couch or along the kitchen counter. Shoes help if your floor is slick.
The nice part is how easily this blends into real life. You can do it between chores, after lunch, or any time your body feels a little glued to the chair.
12. Heel-to-Toe Walk for Balance
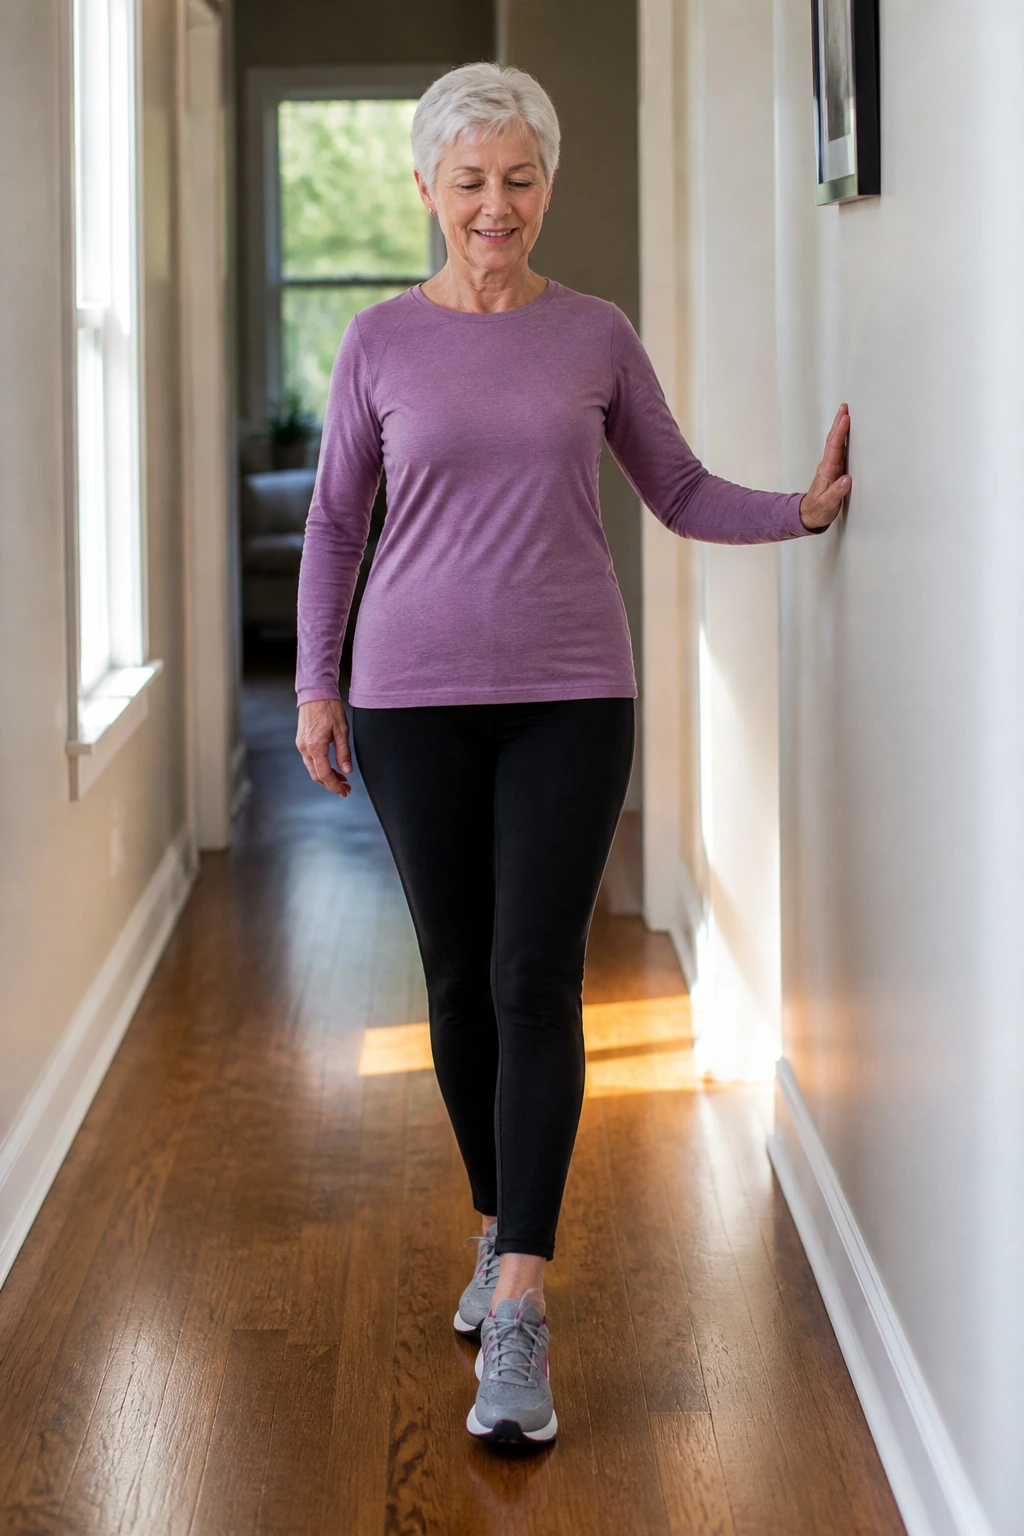
Heel-to-toe walking is one of the clearest balance checks you can do at home. One foot lands directly in front of the other, like you’re walking on a narrow line. There’s no hiding here. Your ankles, feet, and core all have to cooperate.
This is not speed work. It’s precision work.
Make It Safer
Walk next to a wall or countertop so you have a handhold within reach. Take 5 to 10 steps, pause, then turn around slowly and repeat. Keep your eyes forward, not down at your feet the entire time. A quick glance is fine, but staring at your toes can throw you off.
- Place the heel of one foot right in front of the toes of the other.
- Keep your steps smooth, not forced.
- Use a fingertip on the wall if you need it.
- Stop if you feel dizzy or overly shaky.
I like this one because it tells the truth fast. If you can do it steadily, great. If you can’t, you’ve learned something useful.
13. Standing Hip Hinge for the Back of the Legs
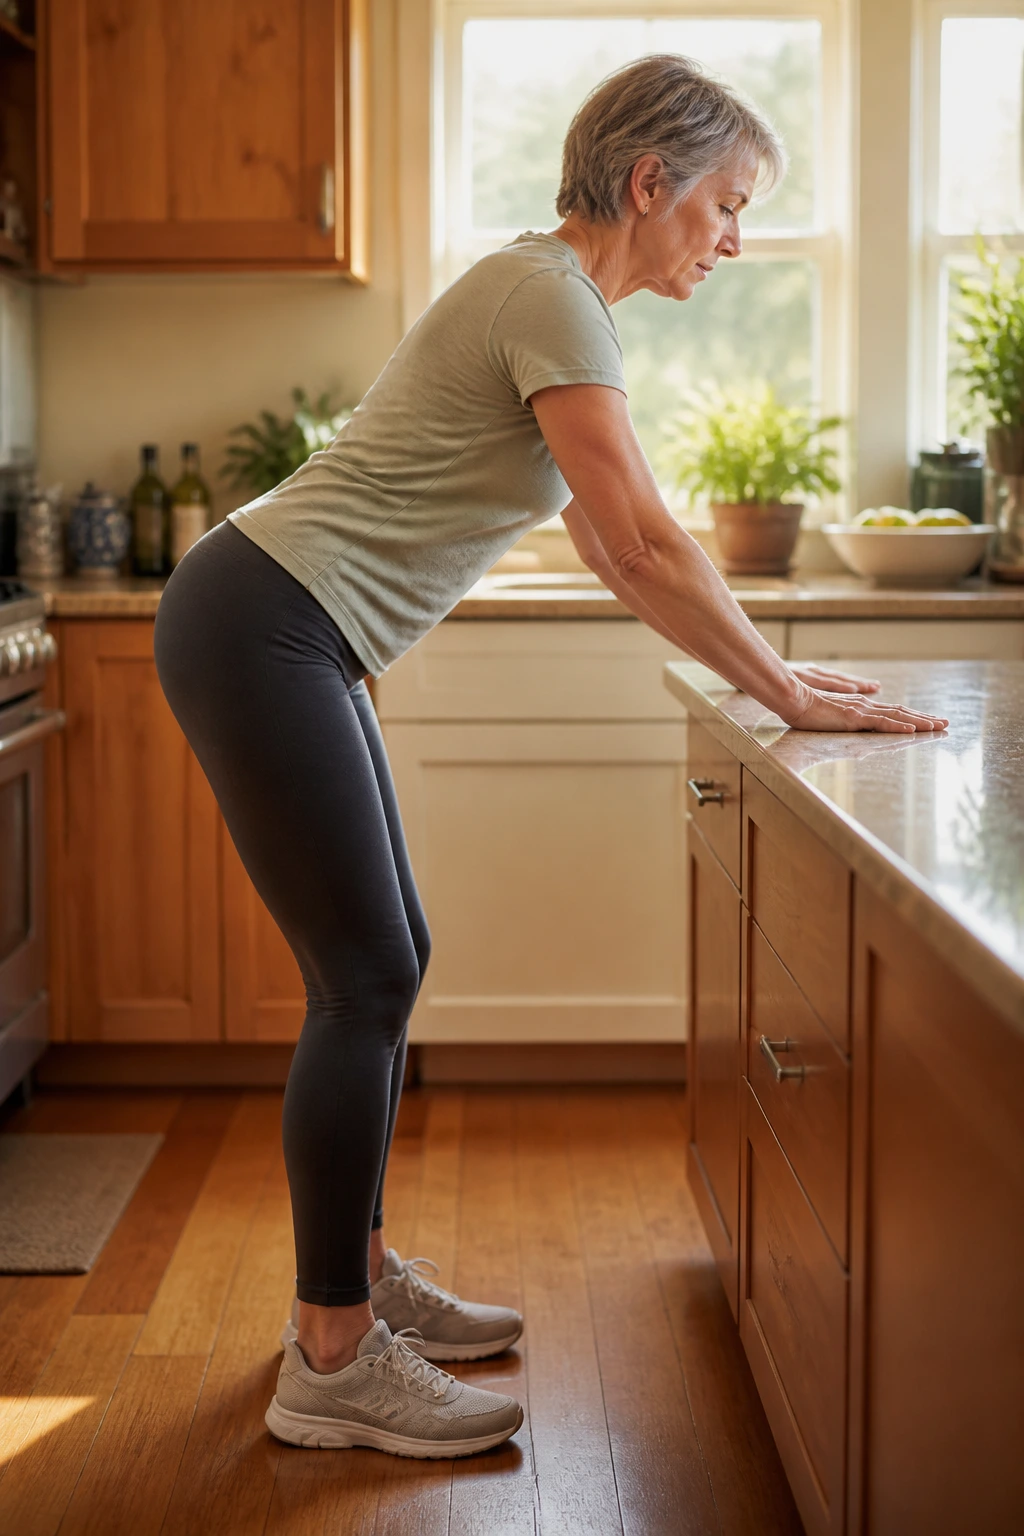
A hip hinge looks a little like bowing, but the point is different: you send your hips back while keeping your spine long. That loads the glutes and hamstrings without cranking the knees too hard. It’s one of the most useful movement patterns you can learn at home.
Why It Works
Stand with feet hip-width apart, soften your knees, and place one hand on a counter or chair if you want a little support. Push your hips back as though you’re trying to close a car door with your backside. Your chest tips forward slightly, but your back stays long. Then stand again by squeezing the glutes.
- Keep your weight in the middle of the feet.
- Don’t round the lower back.
- Go only as far as you can control.
- Aim for 6 to 10 slow reps.
If you feel this mostly in the hamstrings, good. If you feel it in the lower back, shorten the range and slow down. That usually fixes the problem.
14. Counter Bird Dog for Core Stability
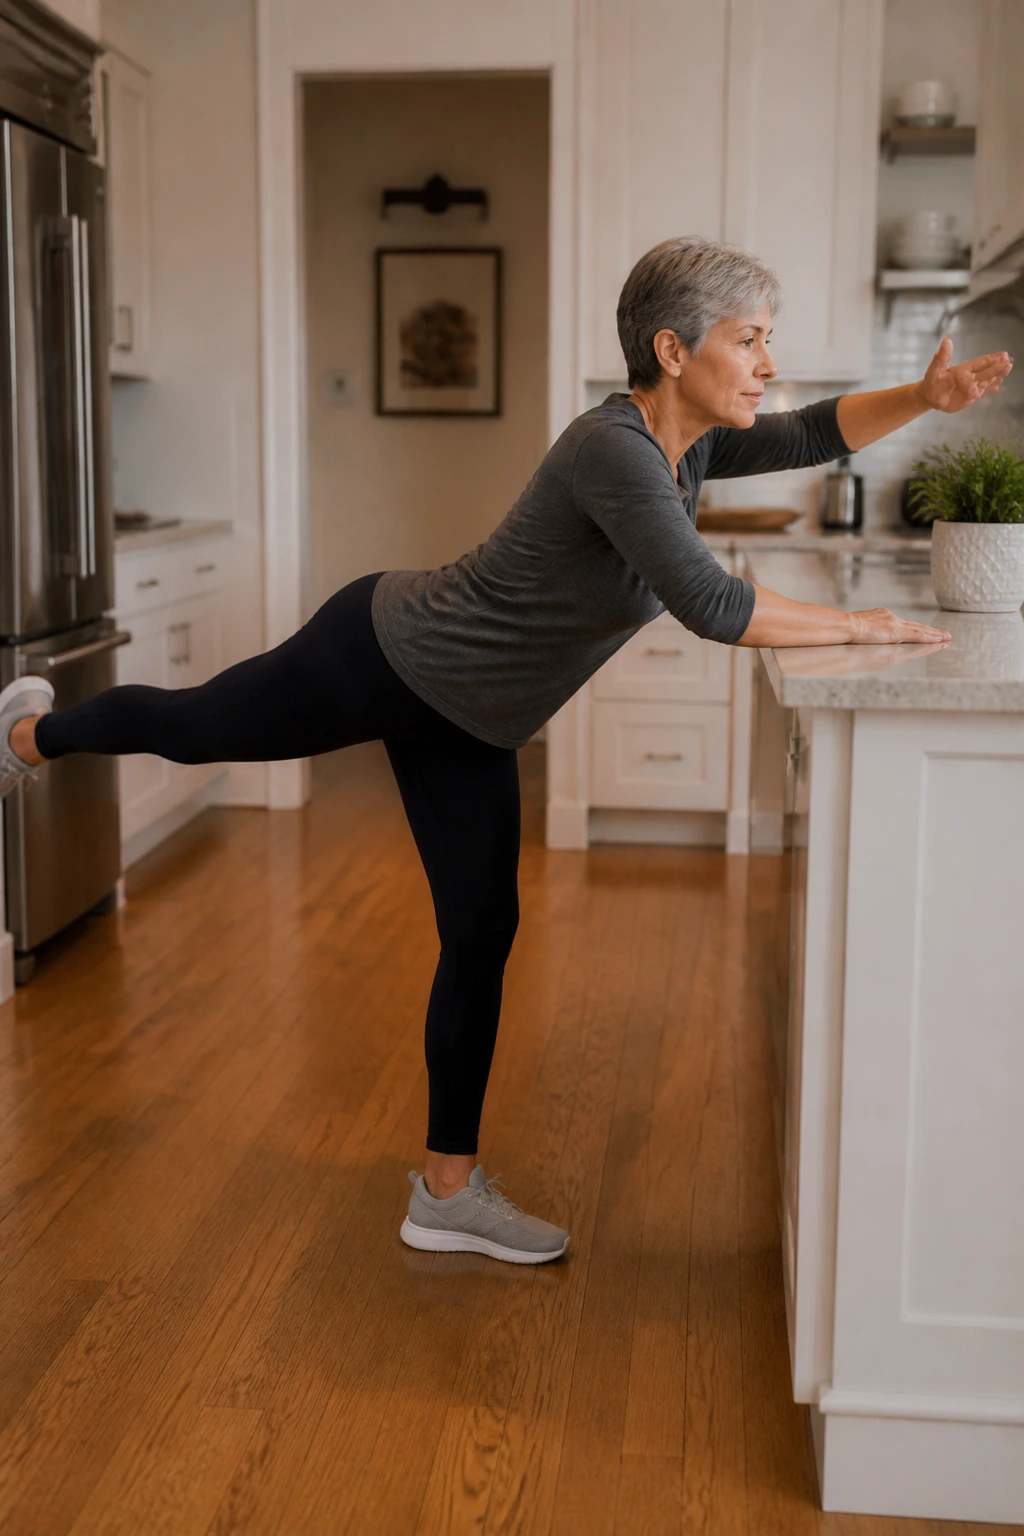
Bird dog gets a lot more approachable when you move it to the counter. On the floor, it can feel like a wrestling match with gravity. At the counter, it becomes a steadier drill for the core, hips, and balance.
Place both hands on a counter or table that does not wobble. Step one leg back, keeping the toes on the floor or lifting the leg a few inches behind you if that feels safe. If you want more challenge, reach the opposite arm forward too. The body should stay as still as possible. No wild swinging.
That stillness is the point.
Do 6 to 8 reps per side, holding each rep for 2 to 3 seconds. Keep your ribs tucked in and your neck long. If your low back arches when the leg goes back, shorten the lift and focus on the squeeze in the glute.
It feels simple. It works hard.
15. Glute Squeeze Holds While Standing or Seated
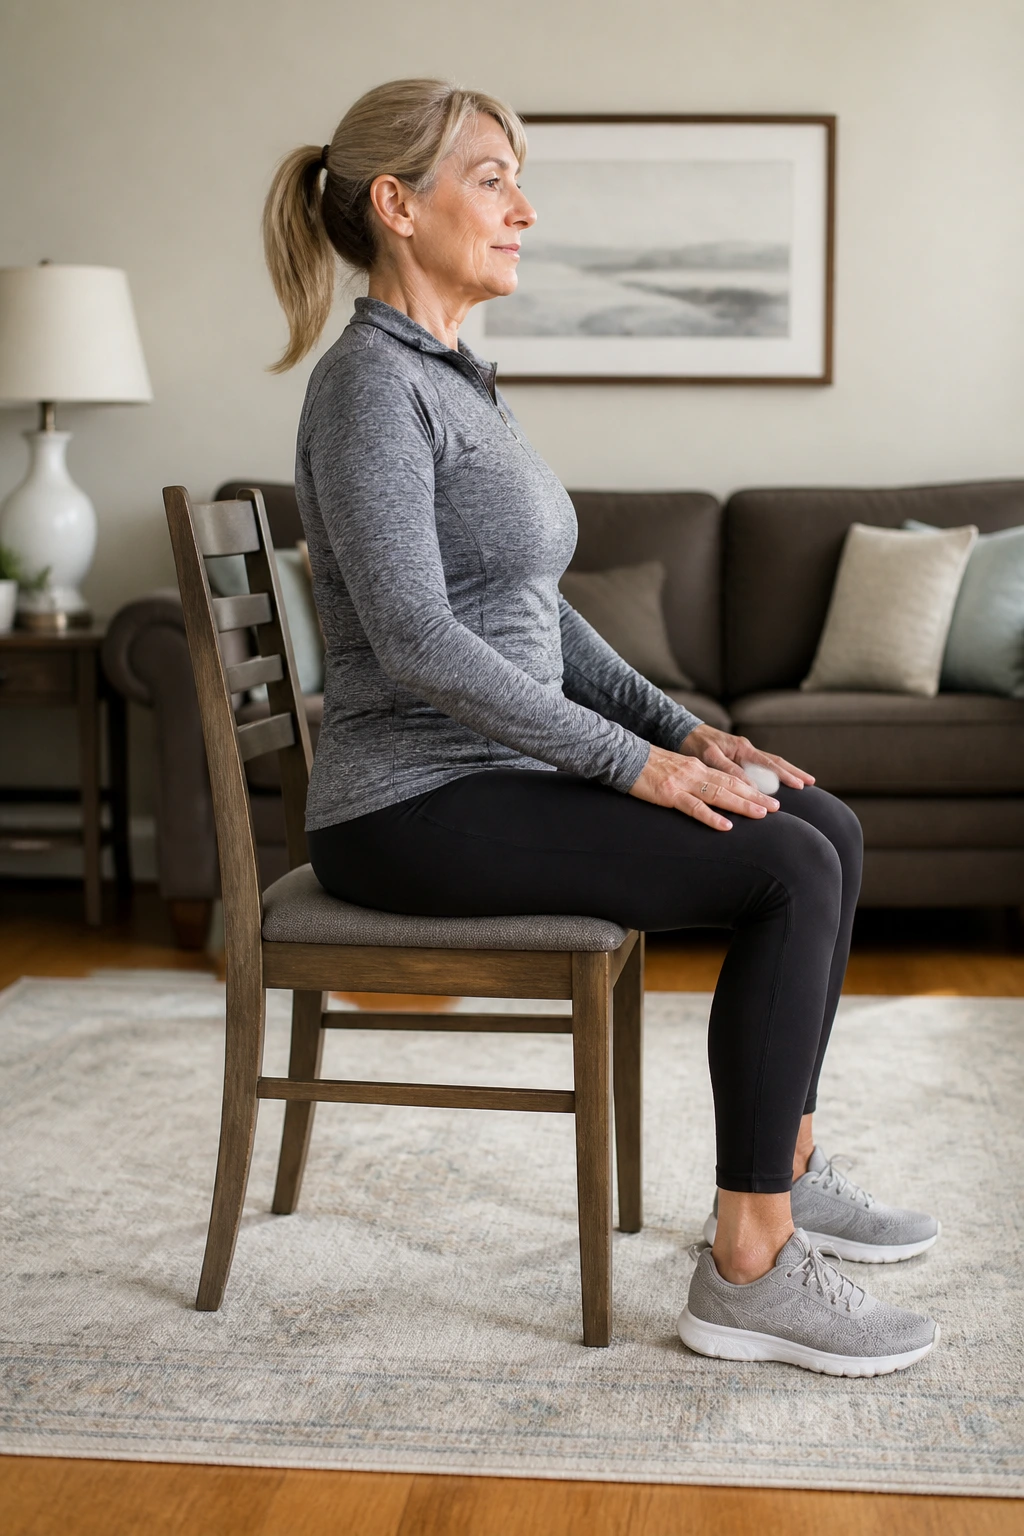
Do your glutes need a wake-up call after a long day of sitting? Usually, yes. And this one is almost embarrassingly easy, which is exactly why it gets used so often in warm-ups and rehab work.
Sit or stand tall, squeeze your butt muscles together, hold for 5 seconds, and relax for 5 seconds. That’s the whole move. No leaning back. No clenching your jaw. No over-arching your lower back like you’re trying to show off your posture to a camera.
How to Use It
You can stack 8 to 10 holds together while watching TV, waiting for coffee, or standing at the sink. If you’re seated, keep your feet flat and your chest relaxed. If you’re standing, imagine your zipper line lifting slightly without pushing your hips forward.
The goal is not a huge squeeze. It’s a clean squeeze.
This is one of those exercises that seems too plain to matter until you notice your hips feel a bit more switched on during the next walk.
16. March-and-Reach for Coordination
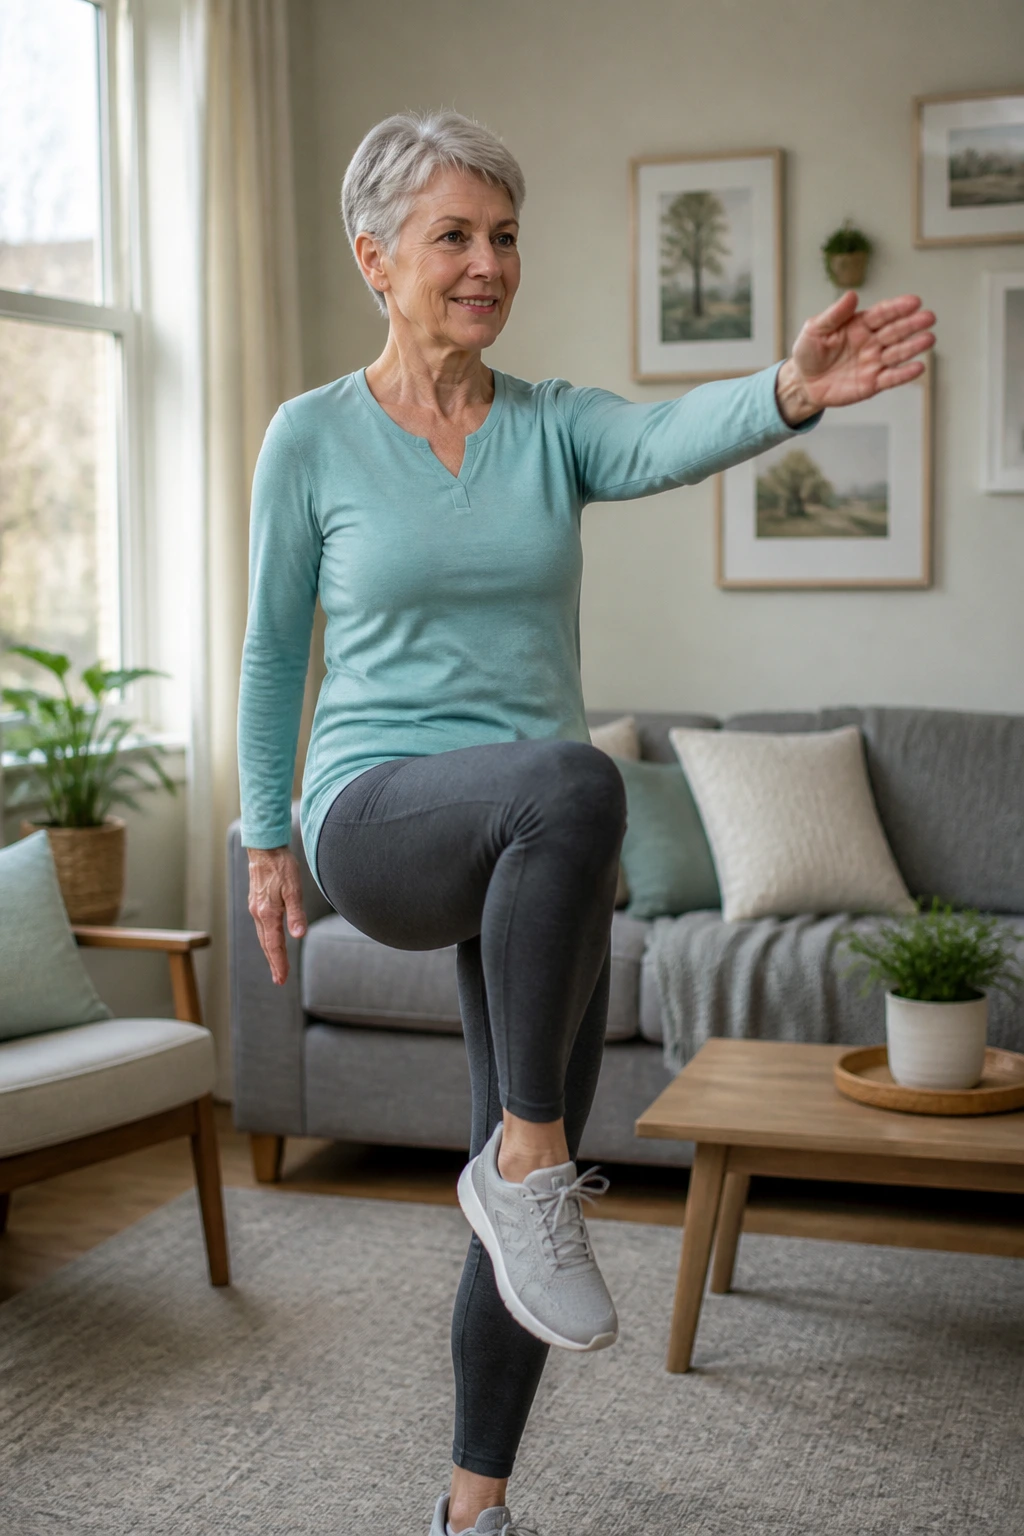
March-and-reach is what happens when regular marching gets a little more interesting. You lift one knee while reaching the opposite arm forward or overhead, and suddenly your brain has to organize more than one thing at once. That’s where the coordination work lives.
The movement can be small. It should be, at first. March in place, then reach one arm forward as the opposite knee lifts. Switch sides and keep the pace calm. If you want more challenge, reach the arm higher or hold the knee lift for a beat before stepping down.
Key Details
- Do 20 alternating reps or 30 seconds.
- Keep the reach smooth, not jerky.
- Hold onto a counter if your balance feels uncertain.
- Use a smaller reach if your shoulders are stiff.
A move like this is useful because it blends balance, rhythm, and a little cardio without asking you to bounce or jump. That makes it one of the nicer choices for days when you want to feel awake, not beat up.
17. Seated Arm Circles and Punches
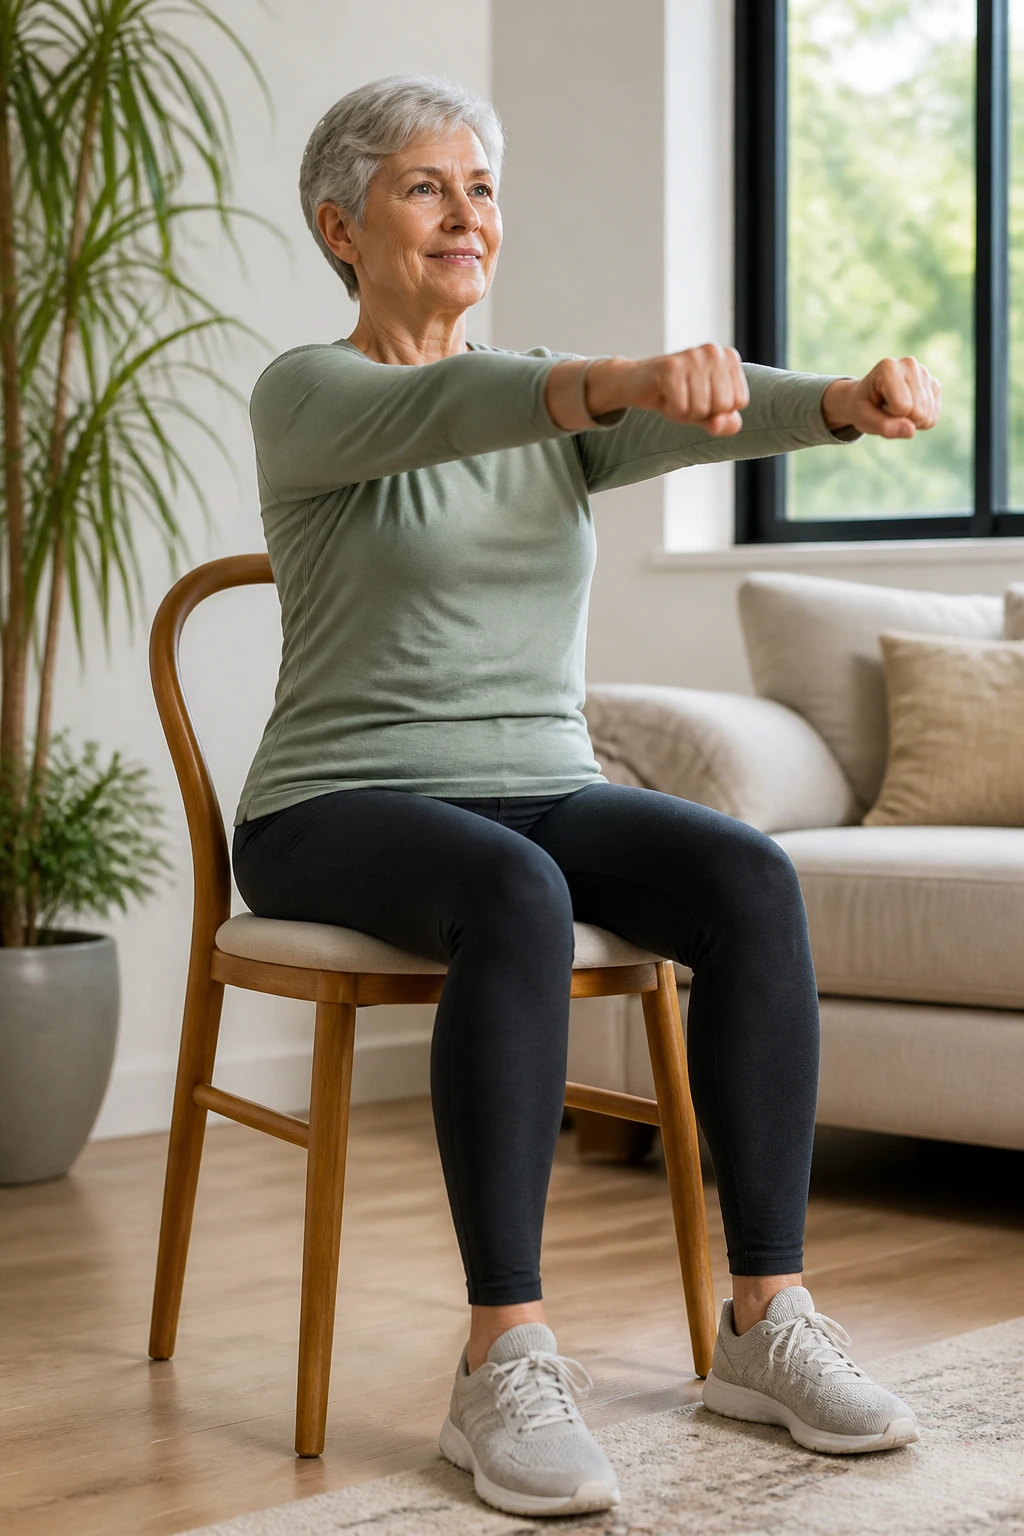
Seated arm circles and punches are a tidy way to give the upper body a wake-up without leaving the chair. They’re useful on stiff mornings, after long stretches of sitting, or anytime the shoulders feel like they’ve forgotten their range.
Start with small circles, palms facing down or in, and keep them no bigger than a dinner plate if your shoulders are cranky. Then switch to forward punches, one arm at a time, as though you’re reaching out to tap the air in front of you. The motion should be smooth and rhythmic.
A lot of people make the circles too big and then wonder why their neck tightens. Small is usually better here.
Try 20 seconds of circles, then 20 seconds of punches, then repeat if you still feel fresh. Breathe out as you punch. Sit tall enough that your ribs don’t flare up, but not so stiff that you turn into a plank with arms.
It’s light work. Still useful.
18. Mini Squats to the Chair
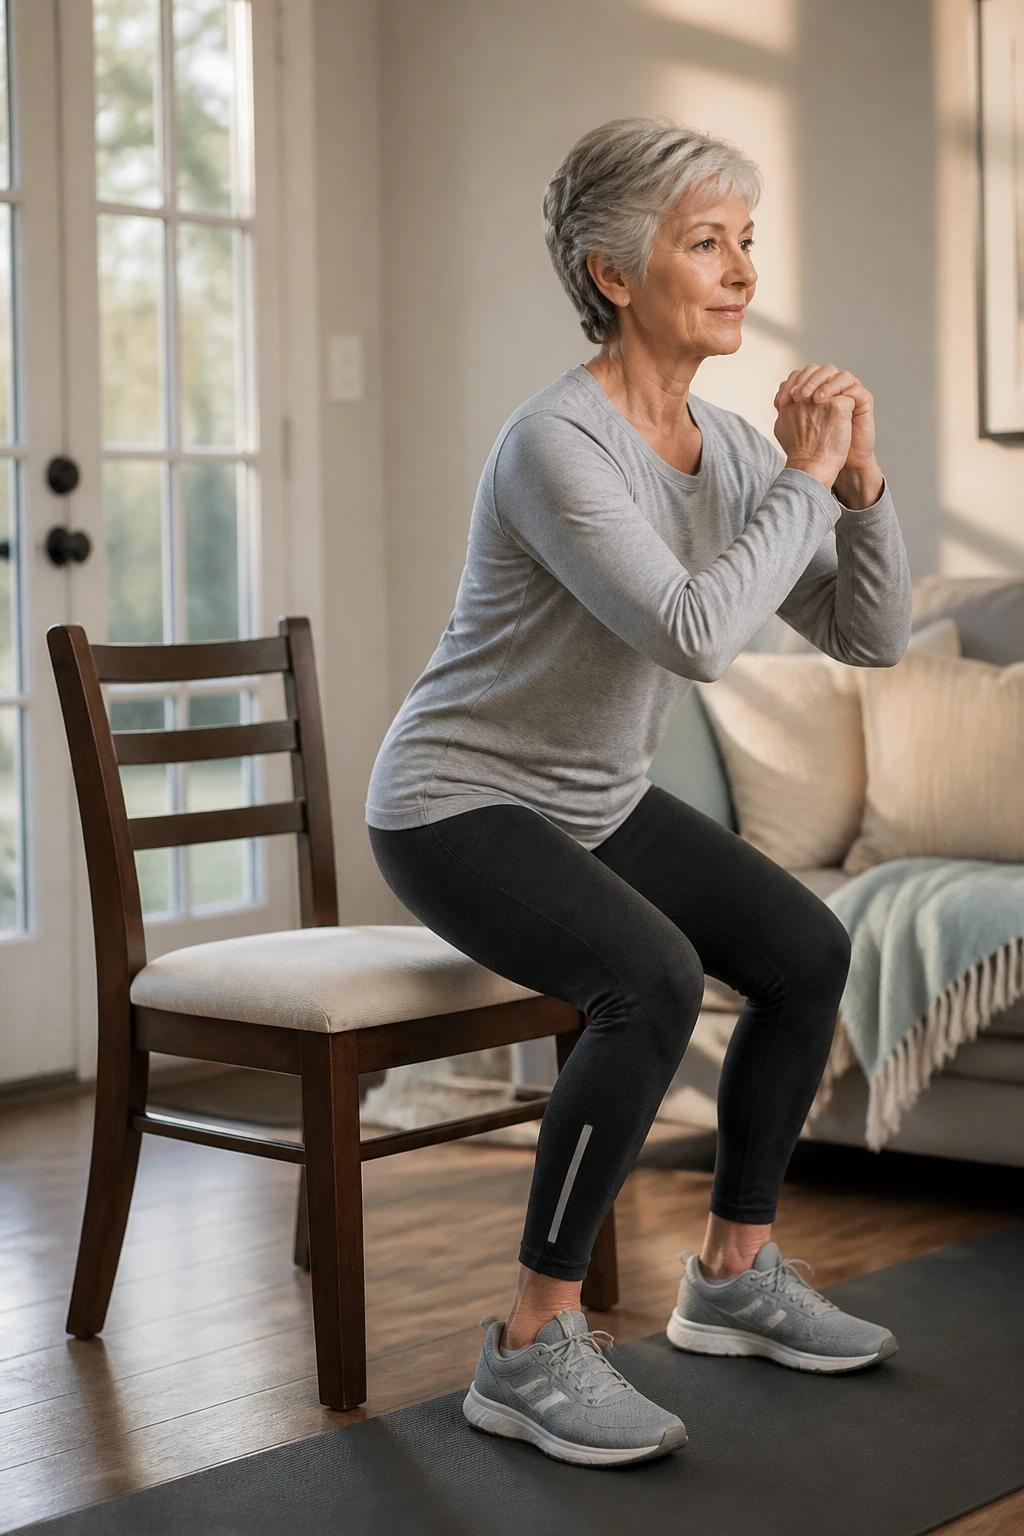
Mini squats to the chair are not the same thing as sit-to-stand, and that matters. The chair gives you a target, but you don’t fully sit. You hover just above the seat, then rise. That tiny difference turns the move into a controlled leg-strength drill instead of a pure standing-up practice.
This version is good when you want to practice knee and hip bend without going deep. It’s also a nice bridge toward fuller squats later, if those ever make sense for you.
What to Watch For
- Keep your feet about hip-width apart.
- Push your hips back a little before bending the knees.
- Stop as soon as you feel the chair touch or almost touch you.
- Stand by driving through the heels.
Do 6 to 10 reps and keep the tempo slow. If your knees cave inward, take a narrower range and think about pressing the floor apart with your feet. If the chair is soft, place a firmer cushion on it or use a harder chair. A mushy seat can make depth hard to judge.
19. Side Steps with or without a Light Band
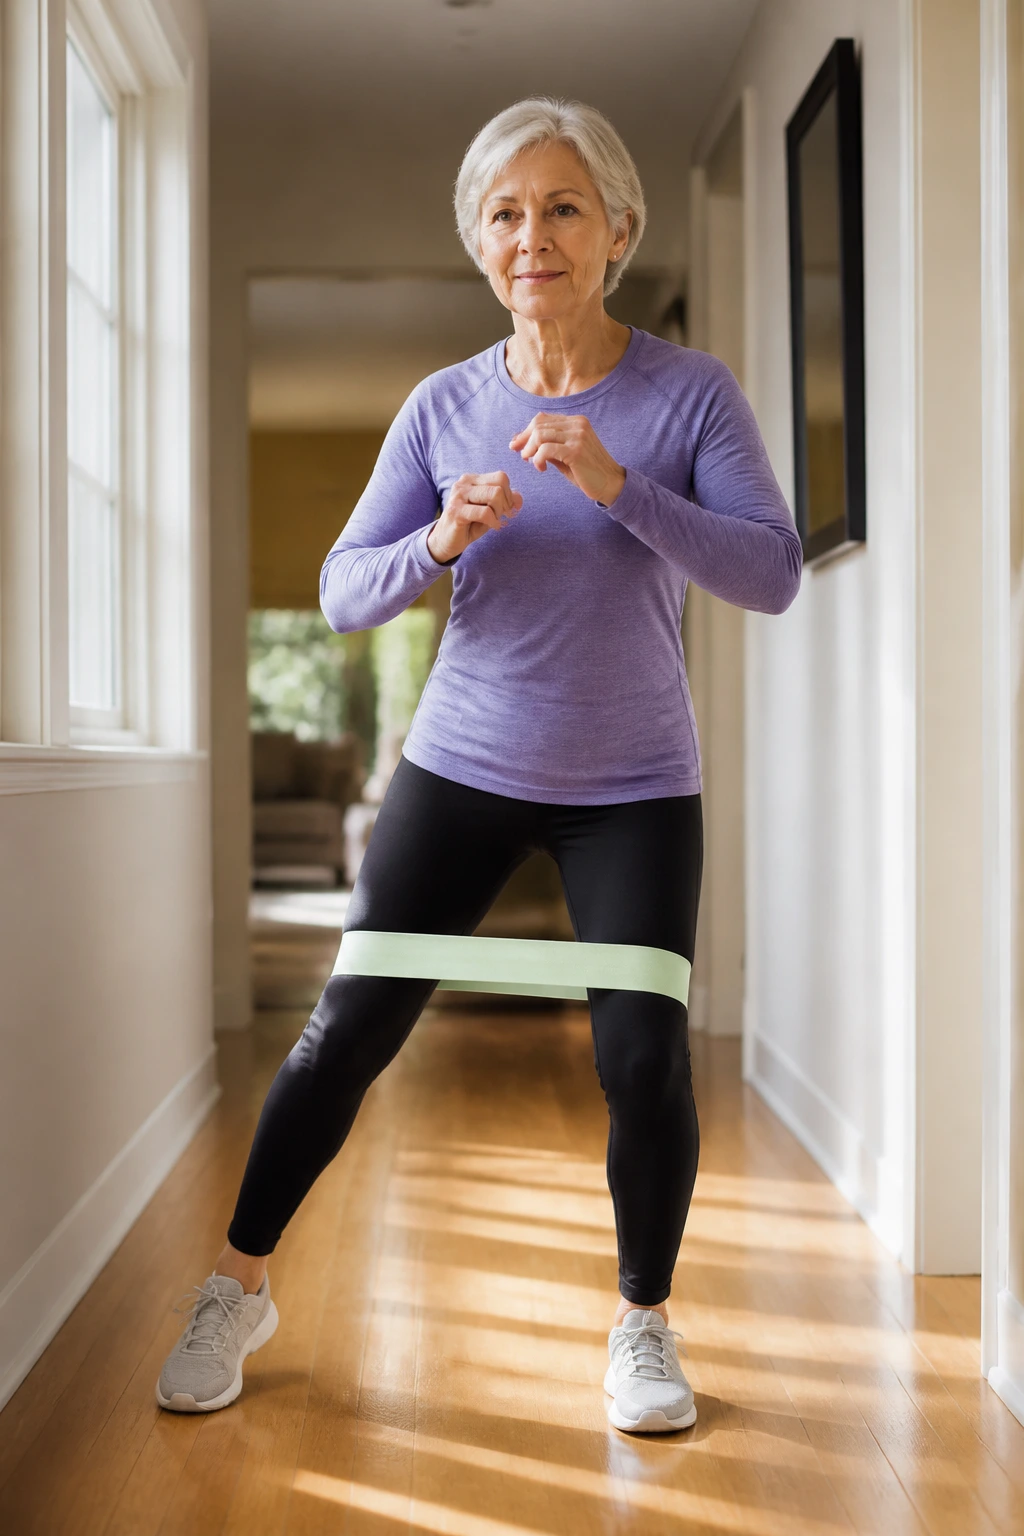
Side steps are one of the better home moves for the hips because they train the muscles that keep you steady when you shift sideways — which is something people do all day, even if they never think about it. Getting in and out of the car. Turning at the sink. Stepping around a cluttered room. Same pattern.
You can do this with no band at all or with a light loop band just above the knees if you want a little more work. Start with a soft bend in the knees, step to the side, then bring the other foot in without letting your feet slap together. Keep the steps measured.
Why It Helps
- Strengthens the muscles on the outside of the hips.
- Helps with side-to-side balance.
- Adds a little heat without pounding the joints.
- Works well for 5 to 8 steps each way.
Tip: Don’t drag your feet. Pick them up enough to move cleanly, then place them down with control. If the band forces your knees inward, it’s too tight.
20. Indoor Walking Intervals for Senior Beginner Workouts at Home
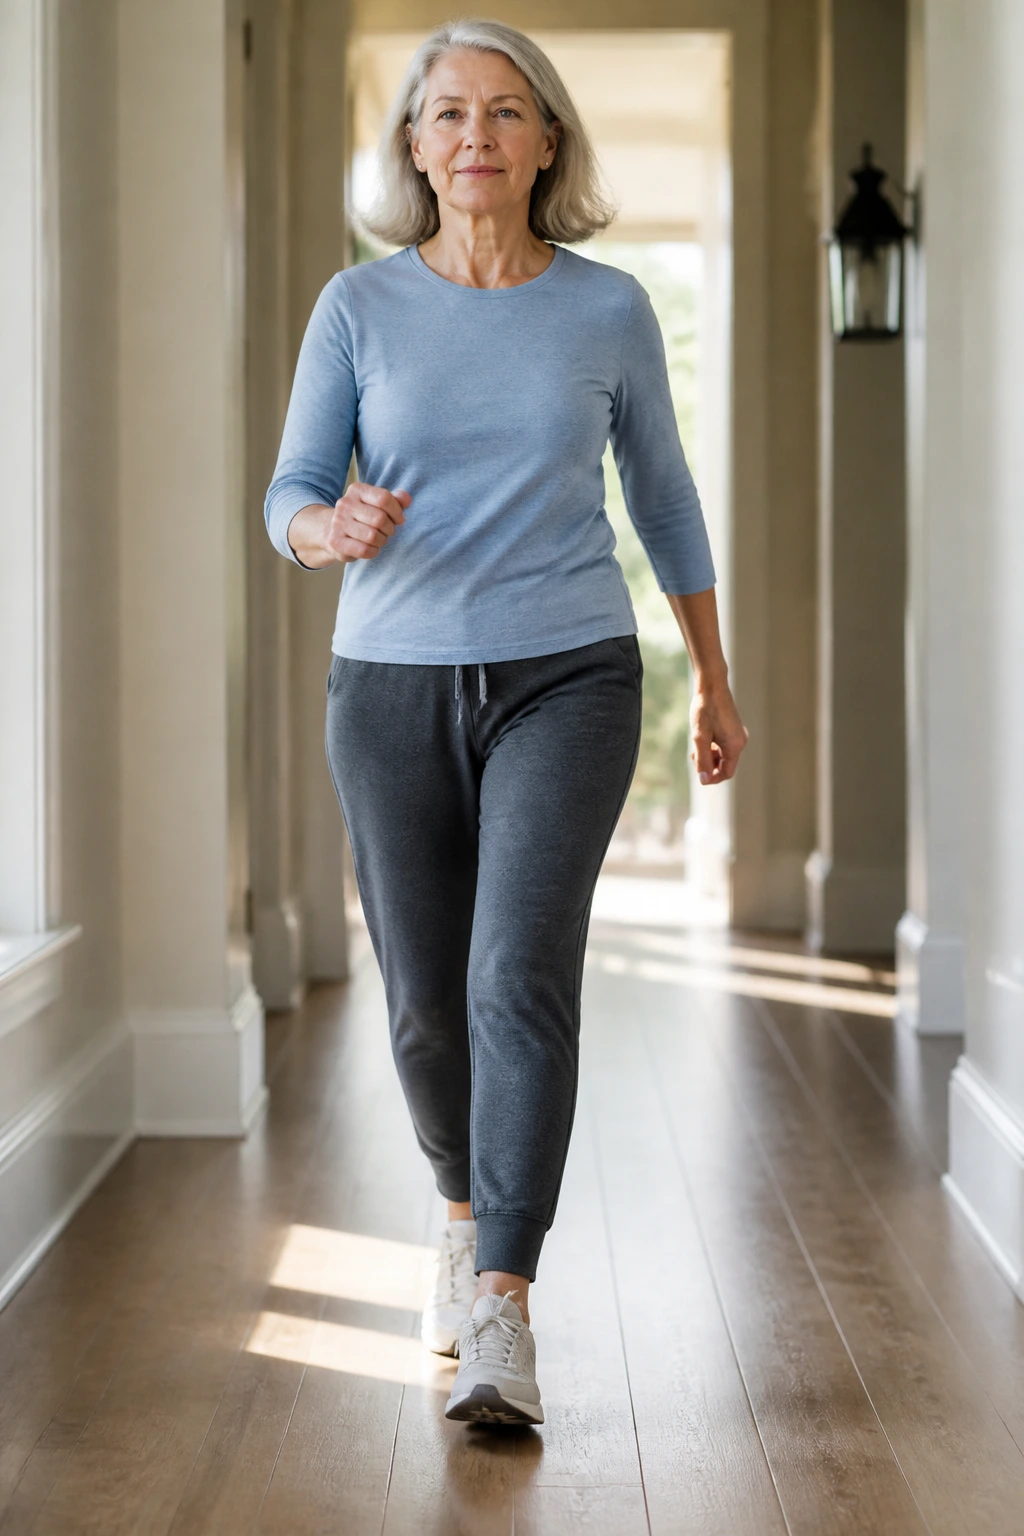
Walking still earns its place because it’s boring in the best possible way. No learning curve. No weird angle. No strange setup. Just a reliable way to get the legs moving and the lungs working while you loop around the kitchen, hallway, or living room.
Try a simple pattern: 1 minute brisk, 1 minute easy, repeated 5 times. Brisk means you’re breathing more heavily, not gasping. You should still be able to speak in short sentences. If your space is tiny, walk the perimeter of the room or use a back-and-forth route between two landmarks, like the couch and the doorway.
A few small tweaks make the walk count more. Swing your arms naturally. Stand a little taller than you think you need to. Turn slowly at the corners instead of twisting fast on one foot. If you want to make it more interesting, alternate one round with bigger arm swings and the next with shorter, quicker steps.
This is the move I’d use on the days when motivation is thin. Do it for ten minutes, and you’ve still done real work. Repeat a few of these workouts through the week, and the routine starts to look less like exercise and more like something you can keep living with.
