



The pelvic floor after birth doesn’t need punishment. It needs coordination.
Harder isn’t better.
Some postpartum women need strength. Others need relaxation first. A lot need both, and the difference shows up in tiny, annoying signs: a leak when you sneeze, a heavy feeling after standing a while, pressure down low when you try to do too much too soon, or a belly that tightens into a brace every time you move.
That’s why the most useful pelvic floor exercises postpartum are not all squeezes. Breathing matters. Hips matter. Glutes matter. Even the way you stand up from a chair matters, because your body after pregnancy is managing pressure in a way it didn’t have to before.
1. 360 Breathing for Postpartum Pelvic Floor Recovery
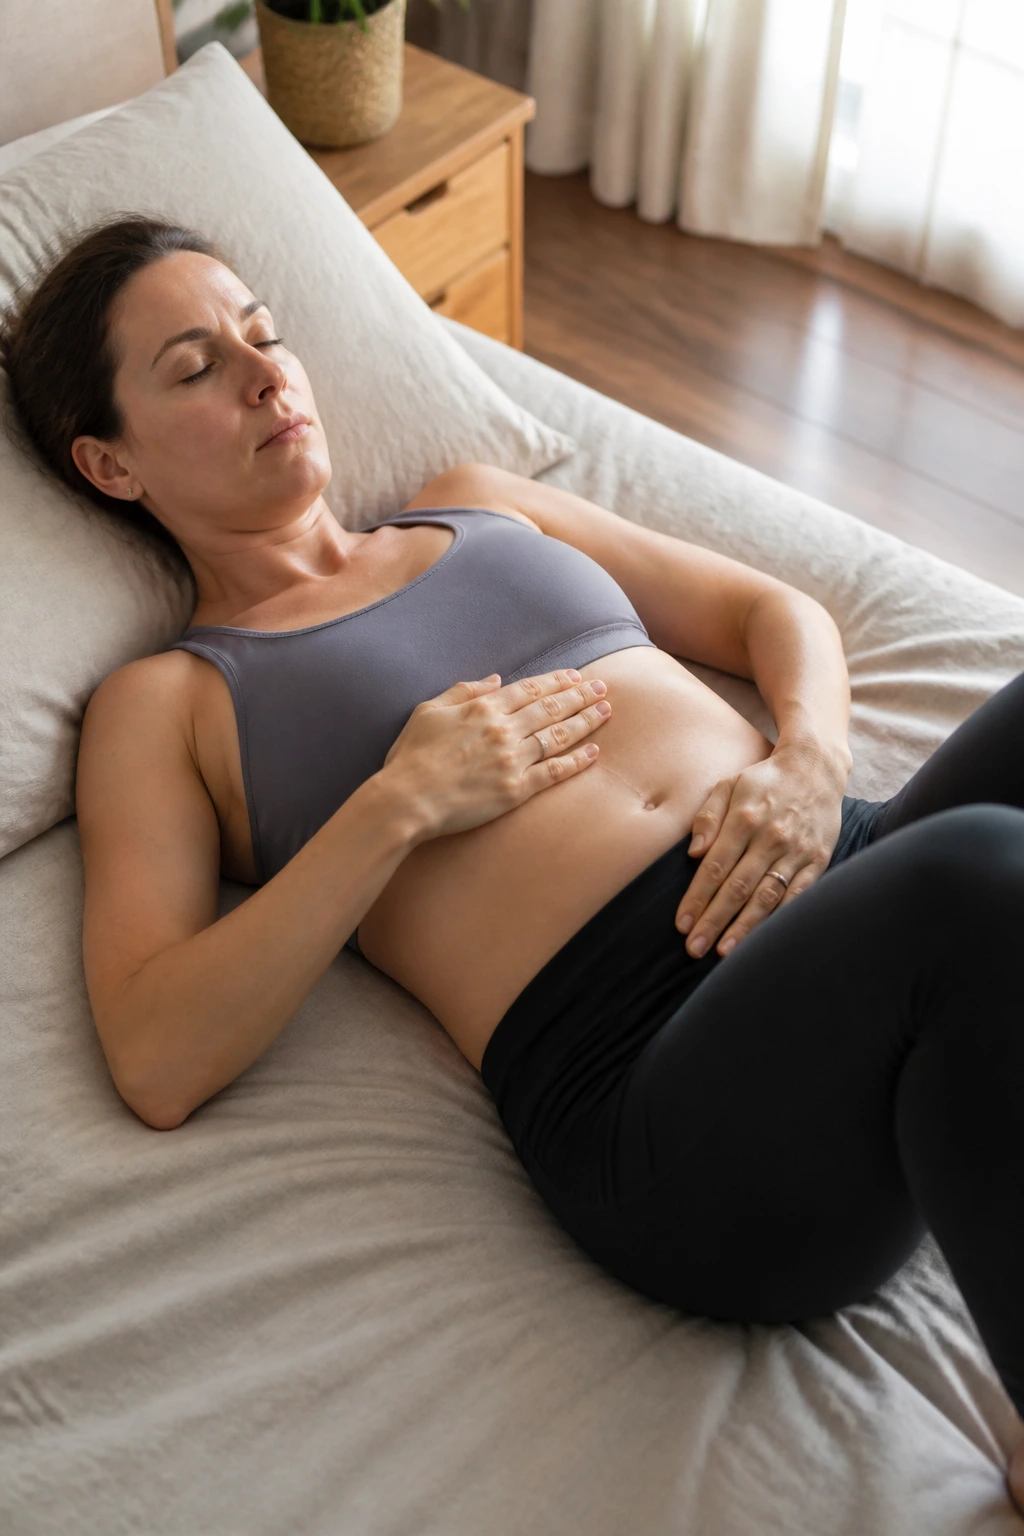
This is the reset button. Before you chase strength, you want the diaphragm, ribs, belly, and pelvic floor to start moving together again. If they stay stiff and disconnected, everything else gets messy fast.
Lie on your back with your knees bent, or lie on your side if your belly or incision feels cranky. Put one hand on your lower ribs and the other on your lower belly. Inhale through your nose for about 4 counts and let the ribs widen gently into your hands. Exhale through your mouth for 5 to 6 counts and let the lower belly soften as the pelvic floor lifts slightly—not a hard squeeze, just a small rebound.
A lot of people try to “engage the core” by sucking the stomach in. Nope. That usually turns into breath-holding and neck tension, which is the opposite of what you want right now.
What to look for
- The ribs move more than the shoulders.
- The belly stays soft on the inhale.
- The exhale feels long and quiet, not forced.
- The pelvic floor should feel like it rises a little, then fully lets go.
Do 5 breaths per round, 2 rounds a day. If your lower back arches or your chest does all the work, make the inhale smaller and slower.
2. Pelvic Floor Drops
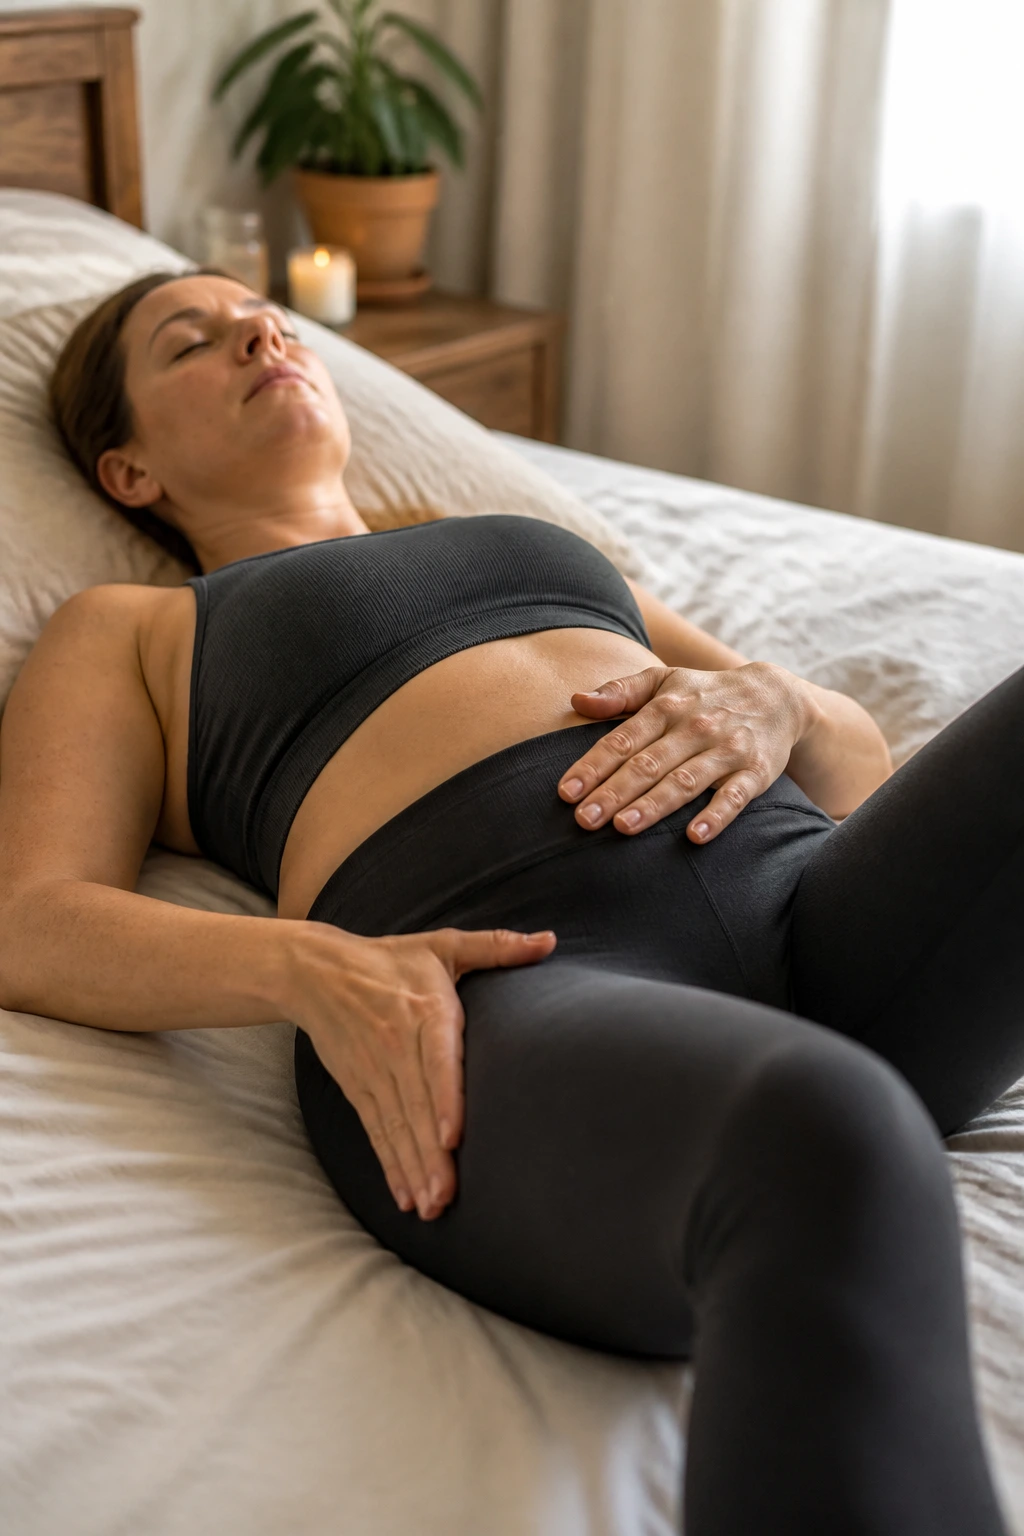
What if the first thing your pelvic floor needs is less effort, not more?
That’s the part many people miss. After birth, some pelvic floors are weak, but some are also too tight, guarded, or stuck in a clenched state. If you feel like you can’t fully relax, or everything down there feels braced, pelvic floor drops can be a better starting place than more squeezing.
What it should feel like
Picture the area between your sit bones widening on the inhale. On the exhale, don’t clamp down. Let the floor soften and lengthen. A good cue is to imagine the muscles melting away from the top of the thighs.
Do 6 to 8 slow breaths and keep the effort light. If you feel pain, pressure, or a strange bulging sensation, stop and shrink the range. That’s your body asking for a calmer version.
This one looks boring. It isn’t.
3. Slow Kegels
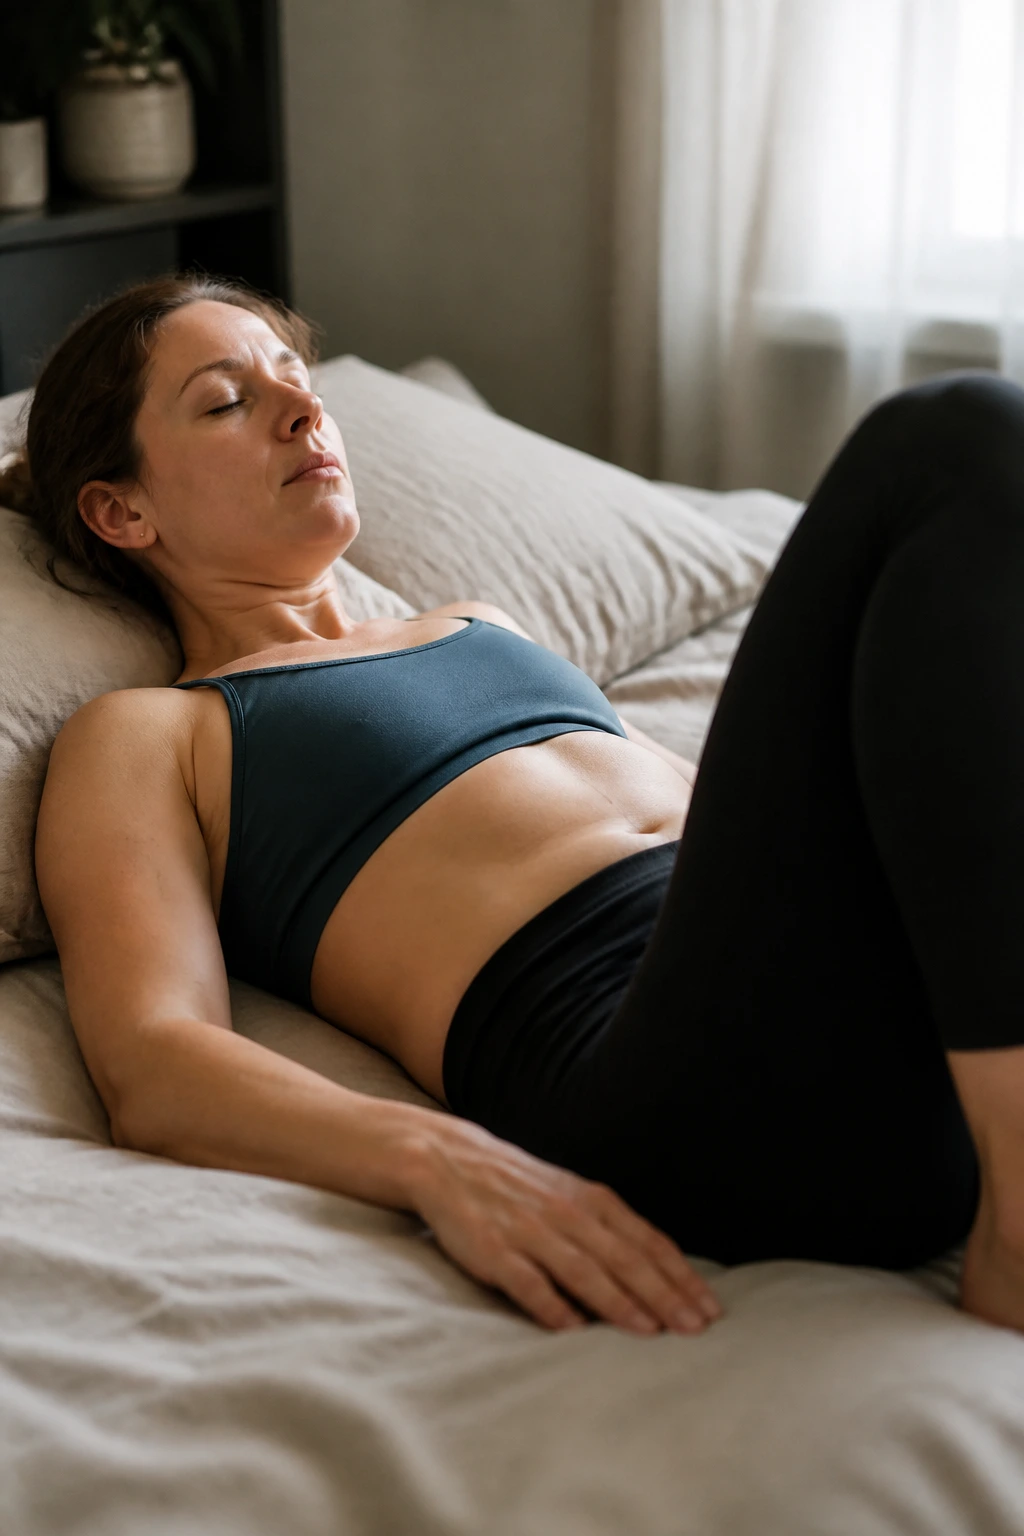
A Kegel should look small from the outside. If your face tightens, your glutes clench, or you hold your breath, the contraction is already too big.
Start by exhaling gently. Then lift the pelvic floor about 30 to 50 percent, as if you’re closing the opening at the base of the pelvis and drawing it upward a little. Hold for 3 seconds, then release for 6 full seconds. That long release matters as much as the squeeze.
A simple set
- 5 slow holds
- 3-second lift
- 6-second release
- 1 to 2 rounds
The release should feel complete. Not halfway. Not “I think so.” Fully let go.
Do not practice these while sitting on the toilet. That can mess with normal bladder habits and make the whole thing feel more confusing than it needs to be. If you cannot relax after a squeeze, back off and go to item 2 for a while.
4. Quick Flick Kegels
You know that moment when a cough sneaks up on you and your body leaks before your brain even reacts? Quick flicks are for that kind of speed.
These are tiny, fast contractions. Think of them as a reflex drill, not a strength test. Squeeze and release quickly, with the lift lasting about 1 second and the release about 1 second. Do 5 to 10 reps, then rest.
When to use them
- Before a cough or sneeze
- Before lifting a car seat or diaper bag
- Before getting out of a low couch
- Before laughing at the exact wrong moment
The trick is not to make them hard. If you clench like you’re trying to crush something, you lose the point. Fast does not mean forceful.
A lot of postpartum leakage responds better to a well-timed small lift than to endless maximal squeezing. That’s the bit nobody puts on a cute infographic.
5. Heel Slides
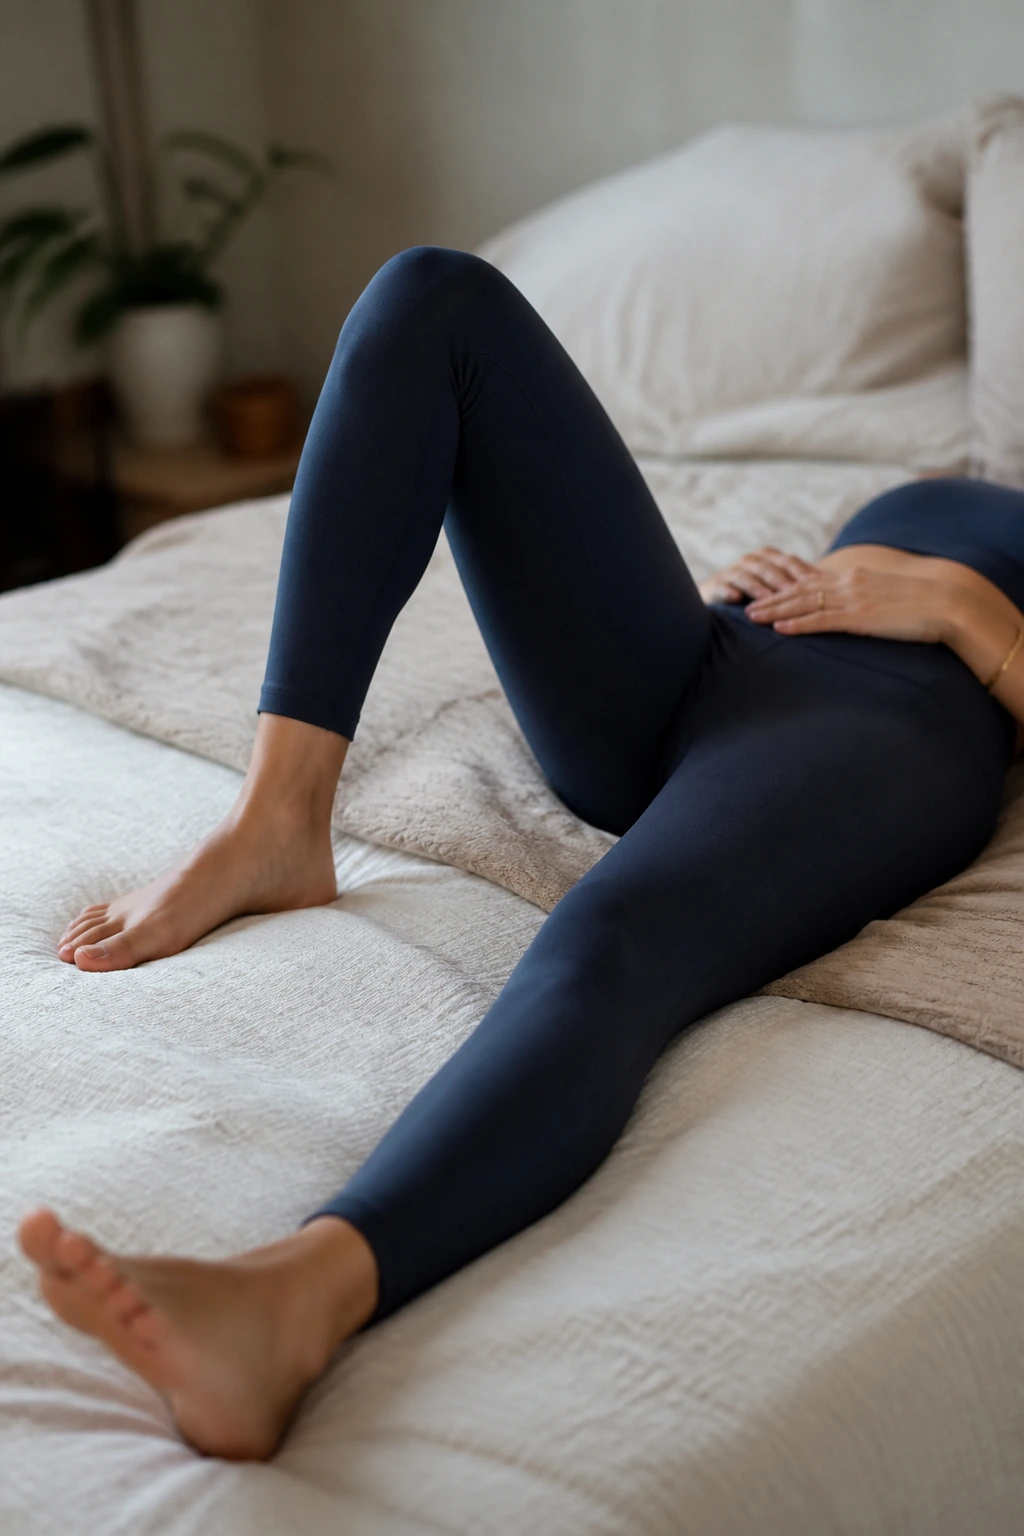
Heel slides look almost too easy, which is exactly why people skip them. Big mistake.
Lie on your back with your knees bent and feet flat. Keep your ribs heavy and your pelvis quiet. As you exhale, slowly slide one heel away from your body until the leg is nearly straight, then slide it back in on the inhale. The low back should stay calm, not arch and flop around.
Quick setup cues
- Move one leg at a time
- Keep the movement slow
- Exhale on the slide out
- Inhale on the return
If your belly domes, the slide is too long. Shorten it by half. If your low back presses hard into the floor, soften the effort. The goal is control, not range.
This one is sneaky-good for reconnecting the deep core with the pelvic floor without a lot of pressure. It also works well on a bed if getting to the floor feels like too much.
6. Pelvic Tilts
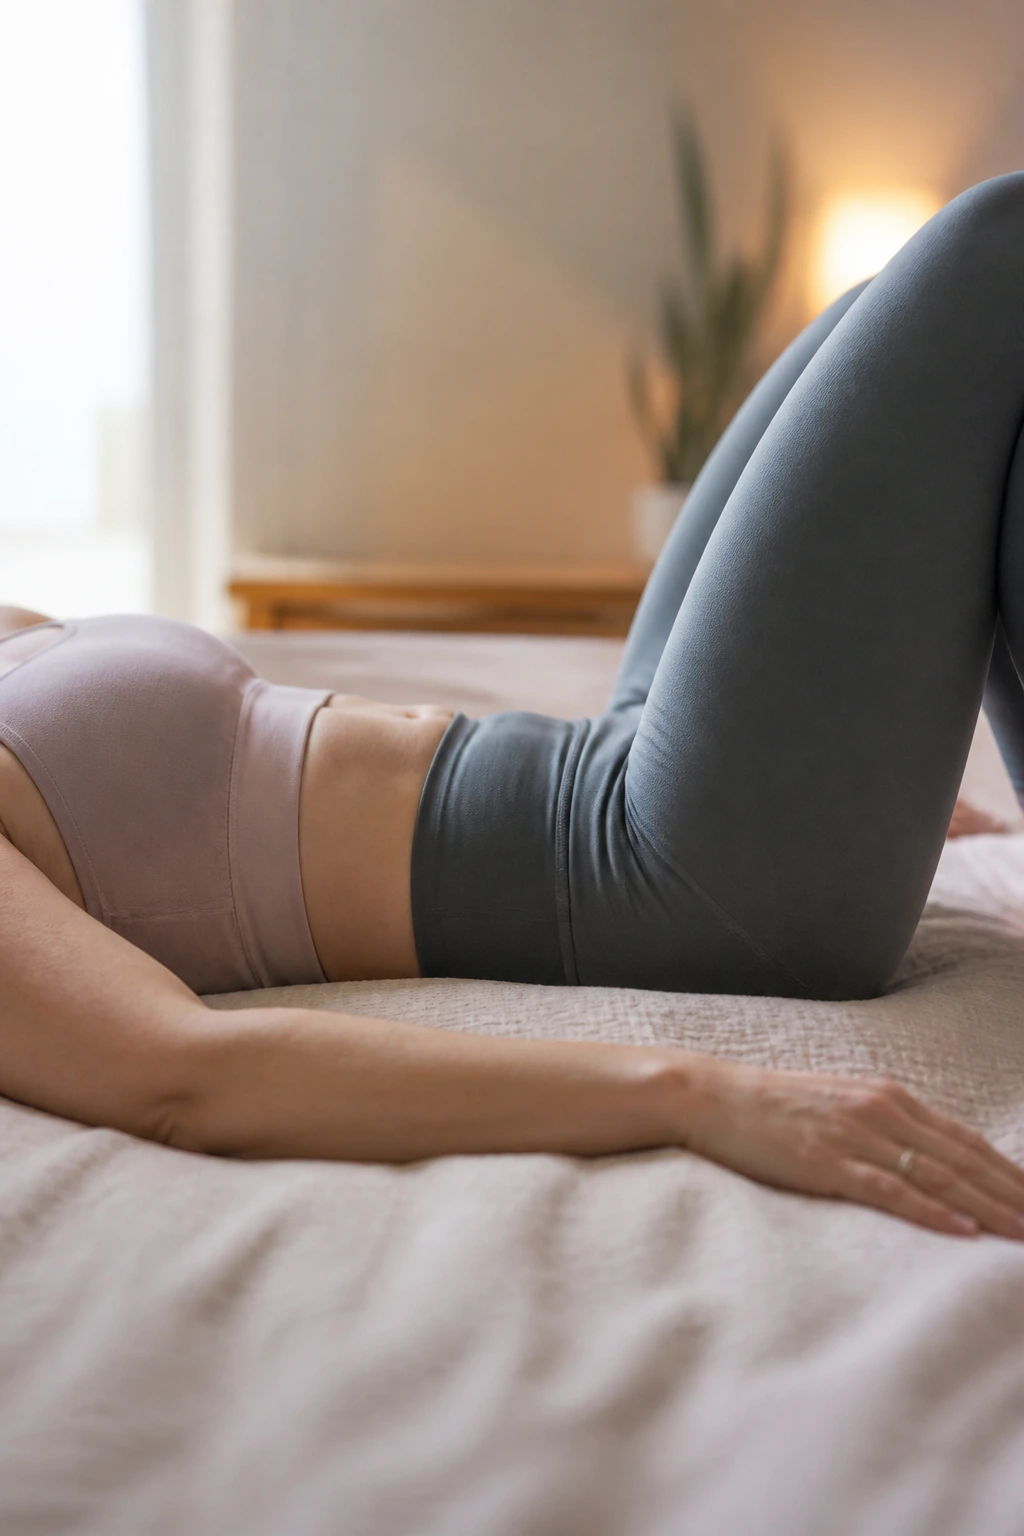
Tiny counts here.
Pelvic tilts bring back the ability to move the pelvis without gripping the whole midsection. Lie on your back with knees bent, then gently tip the pelvis so the low back flattens into the floor. On the release, let the curve come back just a little. No thrusting. No jamming.
The motion should be small enough that someone watching you barely notices. That’s fine. You are teaching your body to find neutral again, not doing crunches.
If you like structure, try 8 to 10 tilts, resting for a breath between each one. Some people do best with a slow exhale on the tilt and an easy inhale on the return. That pairing makes the pelvic floor and belly cooperate instead of fight.
Where this helps
- During the first months after birth
- On days when your back feels stiff
- When you need a low-effort floor reset
- As a warm-up before bridges or squats
7. Glute Bridges
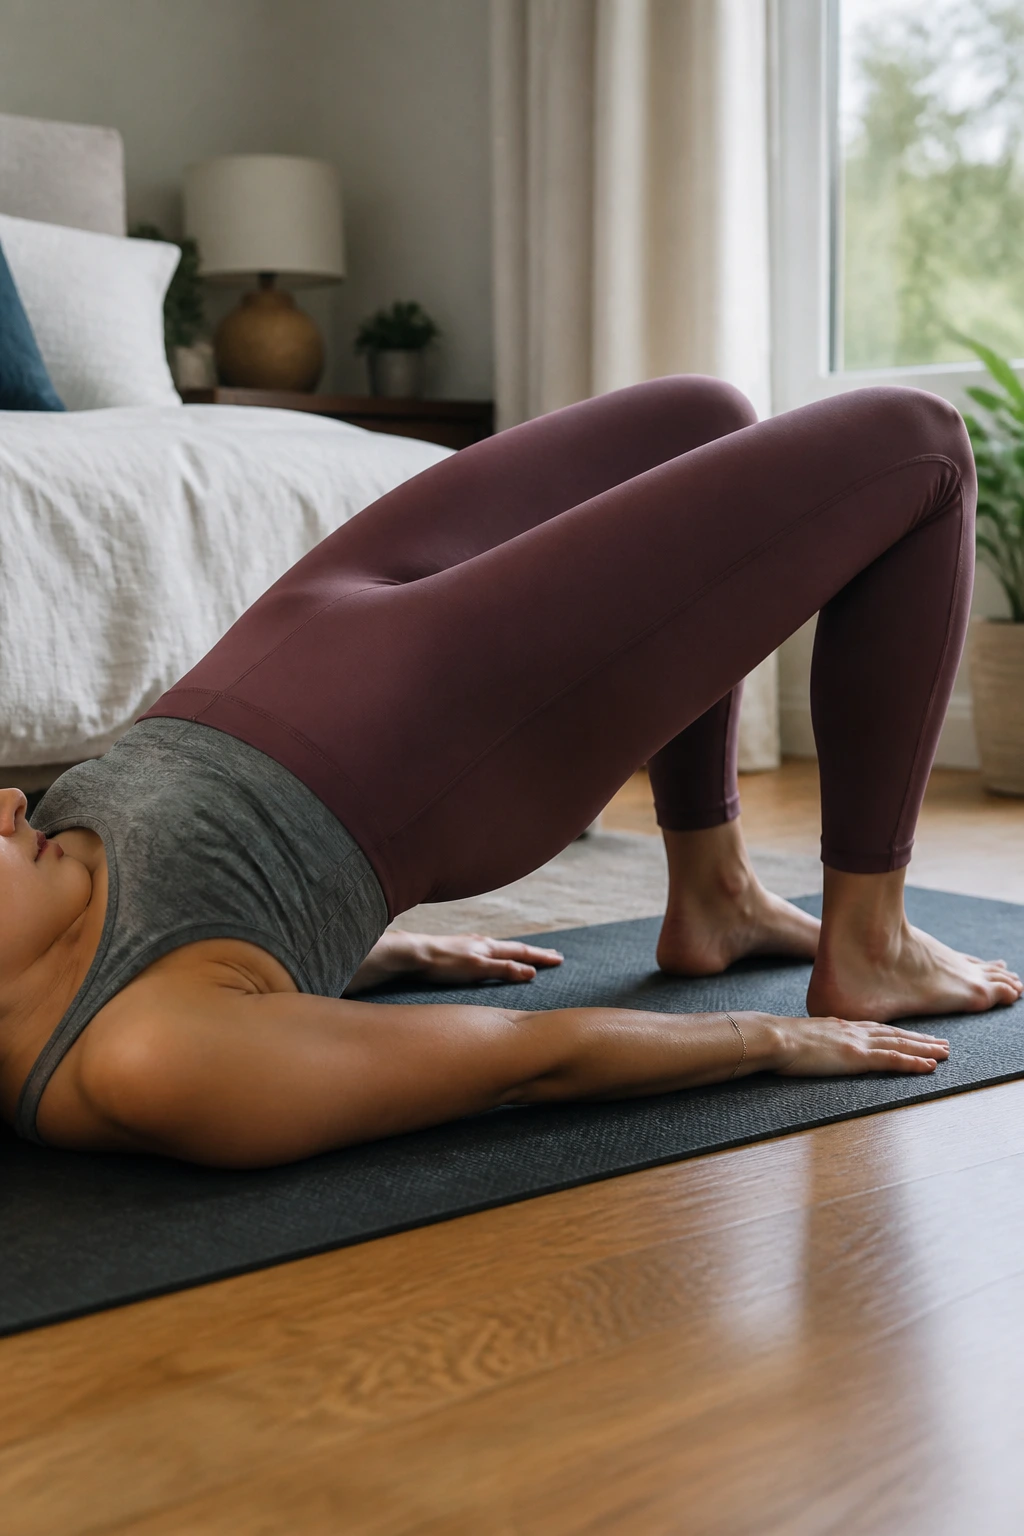
A bridge is not a backbend. If your ribs flare and your low back takes over, the glutes and pelvic floor get shoved out of the job.
Lie on your back with your feet about hip-width apart and close enough that you can press through the heels without cramping the hamstrings. Exhale as you lift your hips, keeping the ribs down and the pelvis level. Pause for 2 seconds at the top, then lower slowly on the inhale.
How to keep it honest
- Drive through both heels
- Keep the knees from flaring wide
- Stop the lift when the low back starts to arch
- Lower with control, not a drop
If your hamstrings cramp, bring your feet a little closer to your glutes. If your neck tenses, place a small folded towel under your head and keep your gaze to the ceiling.
A clean bridge should feel like the backside of your body waking up. Not your lower spine complaining.
8. Bridge Marches
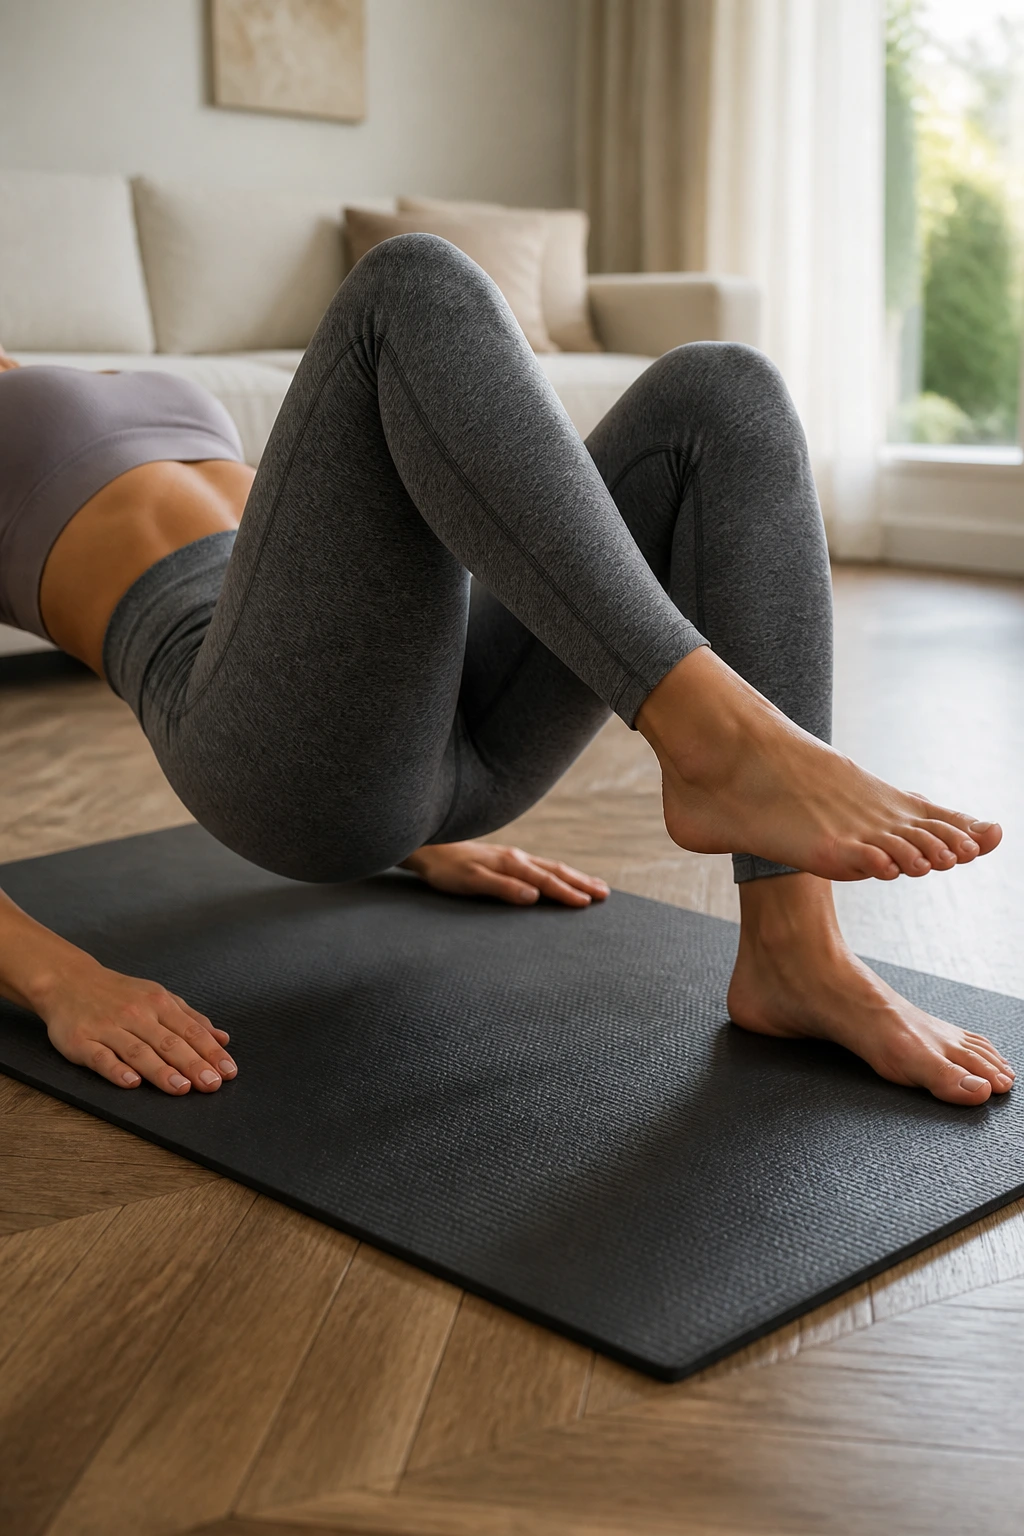
Once a normal bridge feels steady, the march tells the truth.
Hold the top of a glute bridge and lift one foot just an inch or two off the floor, then set it back down. The hips should stay level. If one side drops the second the foot leaves the ground, the march is too ambitious and you need to keep practicing regular bridges a little longer.
Keep the dose modest
- 4 to 6 marches per side
- Small foot lift
- Slow exhale on each lift
- Rest between sides if needed
This is one of those moves that looks simple and turns mean if you rush it. Don’t. The point is to make the pelvis stay quiet while one leg does a little work.
Bridge marches are especially useful if you notice asymmetry after birth—one hip always feels weaker, one side always feels heavier, or standing on one leg feels oddly wobbly. That’s the body telling you where to pay attention.
9. Bent-Knee Fallout
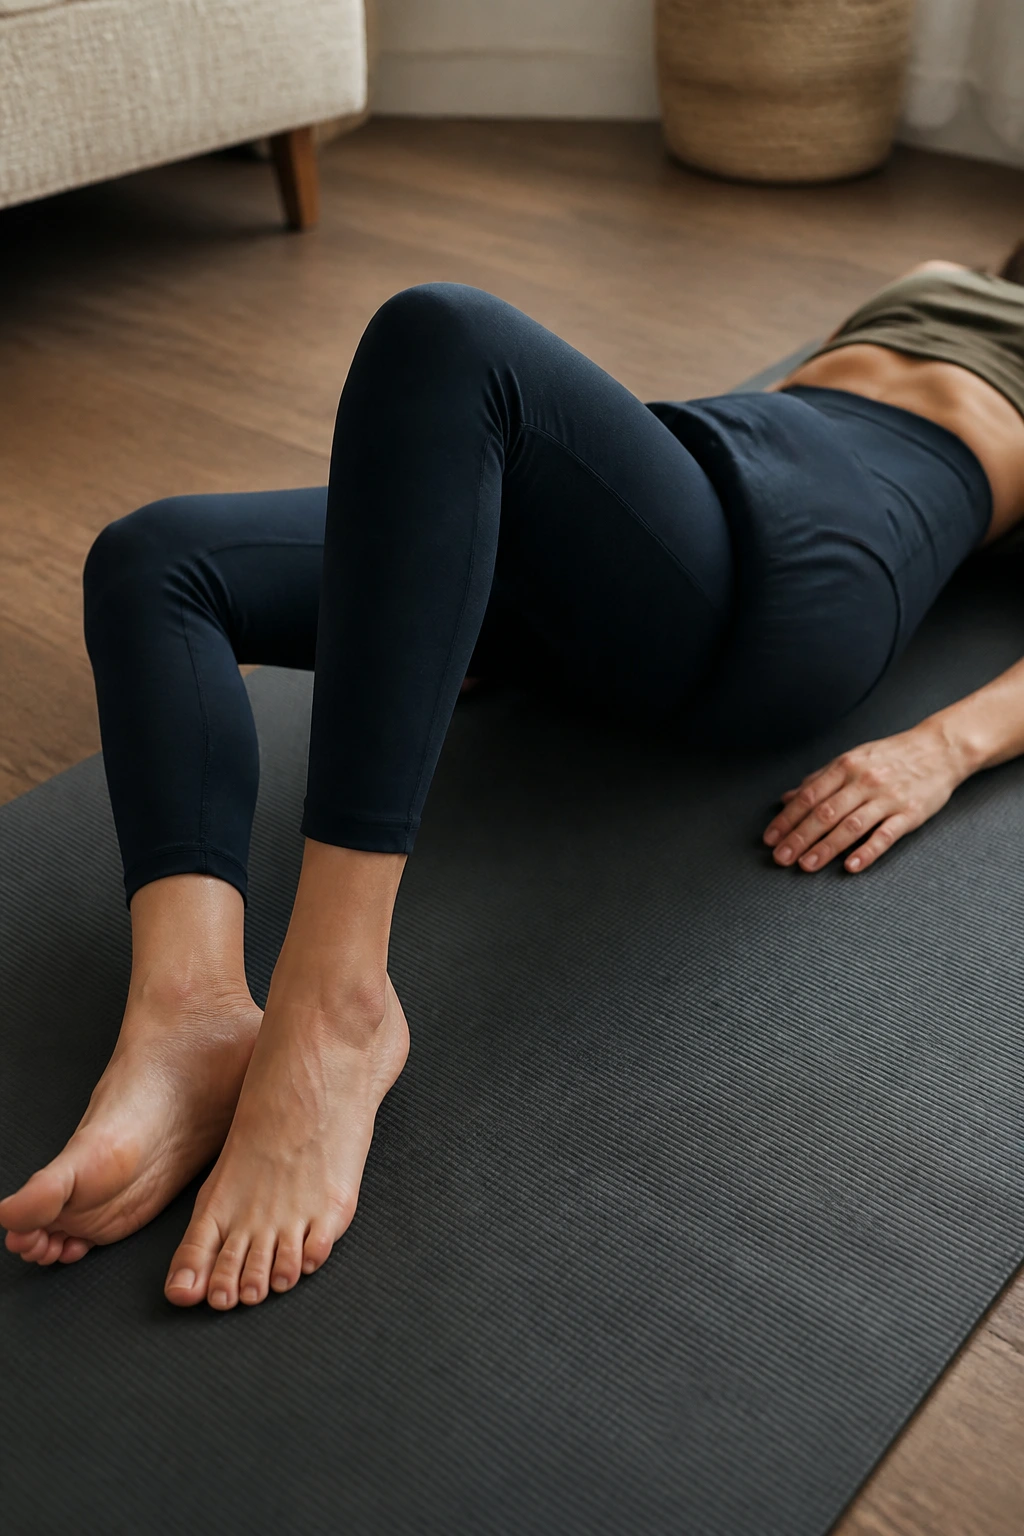
Most people have never heard of this one, and that’s a shame.
Lie on your back with your knees bent and feet flat. Keep your pelvis still while letting one knee open out to the side a few inches, then bring it back in. The motion comes from the hip, not the low back. It should feel controlled, almost quiet.
A lot of postpartum women use this to reconnect the deep hip muscles with the pelvic floor. When the pelvis stays steady during this tiny side-to-side motion, you’re training pressure control in a very real way.
What to watch for
- The ribs don’t pop up
- The belly doesn’t dome
- The low back doesn’t twist
- The knee doesn’t fly open too far
Start with 5 reps per side. If the inner thigh feels like it’s doing a panic dance, the range is too wide. Shrink it. If you had a C-section or a tender belly, this usually feels gentler than bigger floor work.
10. Bird Dog Reaches
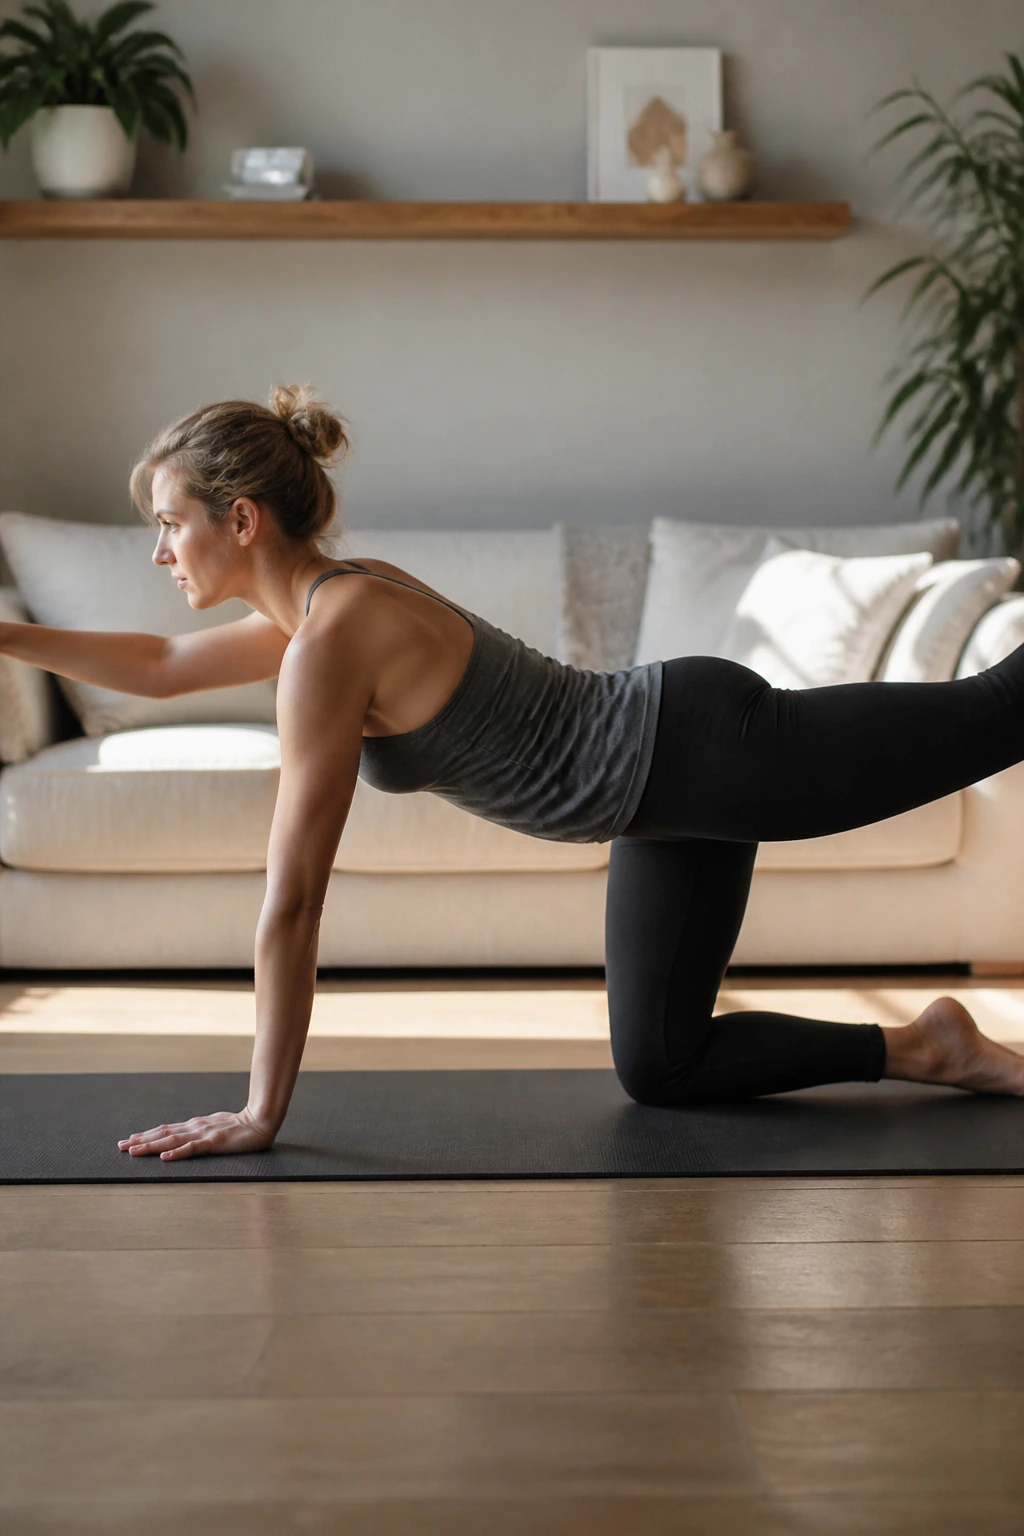
Bird dog is where control starts to get real. It asks your trunk to stay steady while your arms and legs move, and that’s a useful test after pregnancy.
Get on hands and knees with wrists under shoulders and knees under hips. Reach one leg straight back and the opposite arm forward, but only as far as you can keep the pelvis level. If your low back drops or your belly sags, the reach is too long. Start small.
How to do it well
- Exhale as you reach
- Keep the neck long
- Hold 2 to 3 breaths if you can stay stable
- Return slowly, without collapsing
If your wrists hate the floor, put your hands on a countertop and do the same pattern standing. Same idea. Less load.
I like this exercise because it exposes fake stability fast. If you’re cheating, you’ll know. If you stay honest, it builds that slow, steady kind of core strength that carries over into picking up babies, groceries, and everything else.
11. Dead Bug Heel Taps
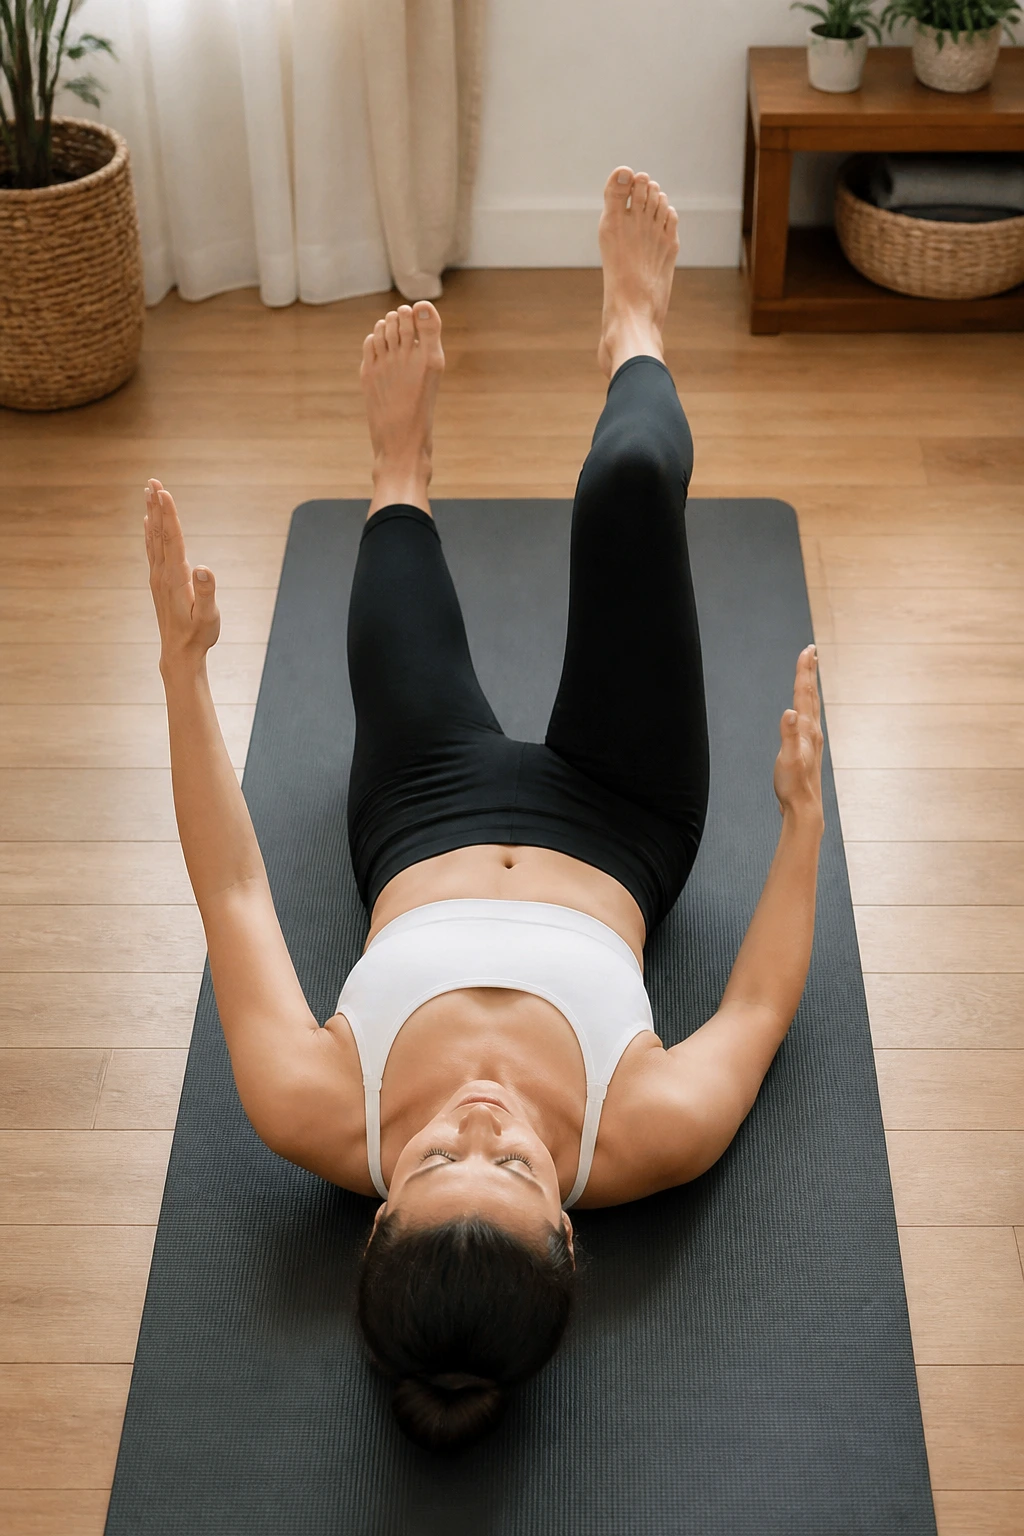
If your stomach domes, the range is too big.
Dead bug heel taps are a step up from heel slides. Lie on your back with your hips and knees bent at about 90 degrees, or keep the knees bent if that feels safer. Slowly lower one heel to the floor, exhale as it taps, then bring it back. Alternate sides and keep the movement tidy.
Why this one earns its keep
- It teaches pressure control
- It challenges the lower belly without crunching
- It links the breath to limb movement
- It’s easy to scale up or down
Start with 4 to 6 taps per side. If your back arches, put one hand on your lower belly and slow down. If you feel pressure downward, go back to heel slides for a few sessions and rebuild from there.
This move is a little more demanding than it looks. Good. That means it can grow with you instead of being useful for exactly one week and then forgotten.
12. Cat-Cow Flow
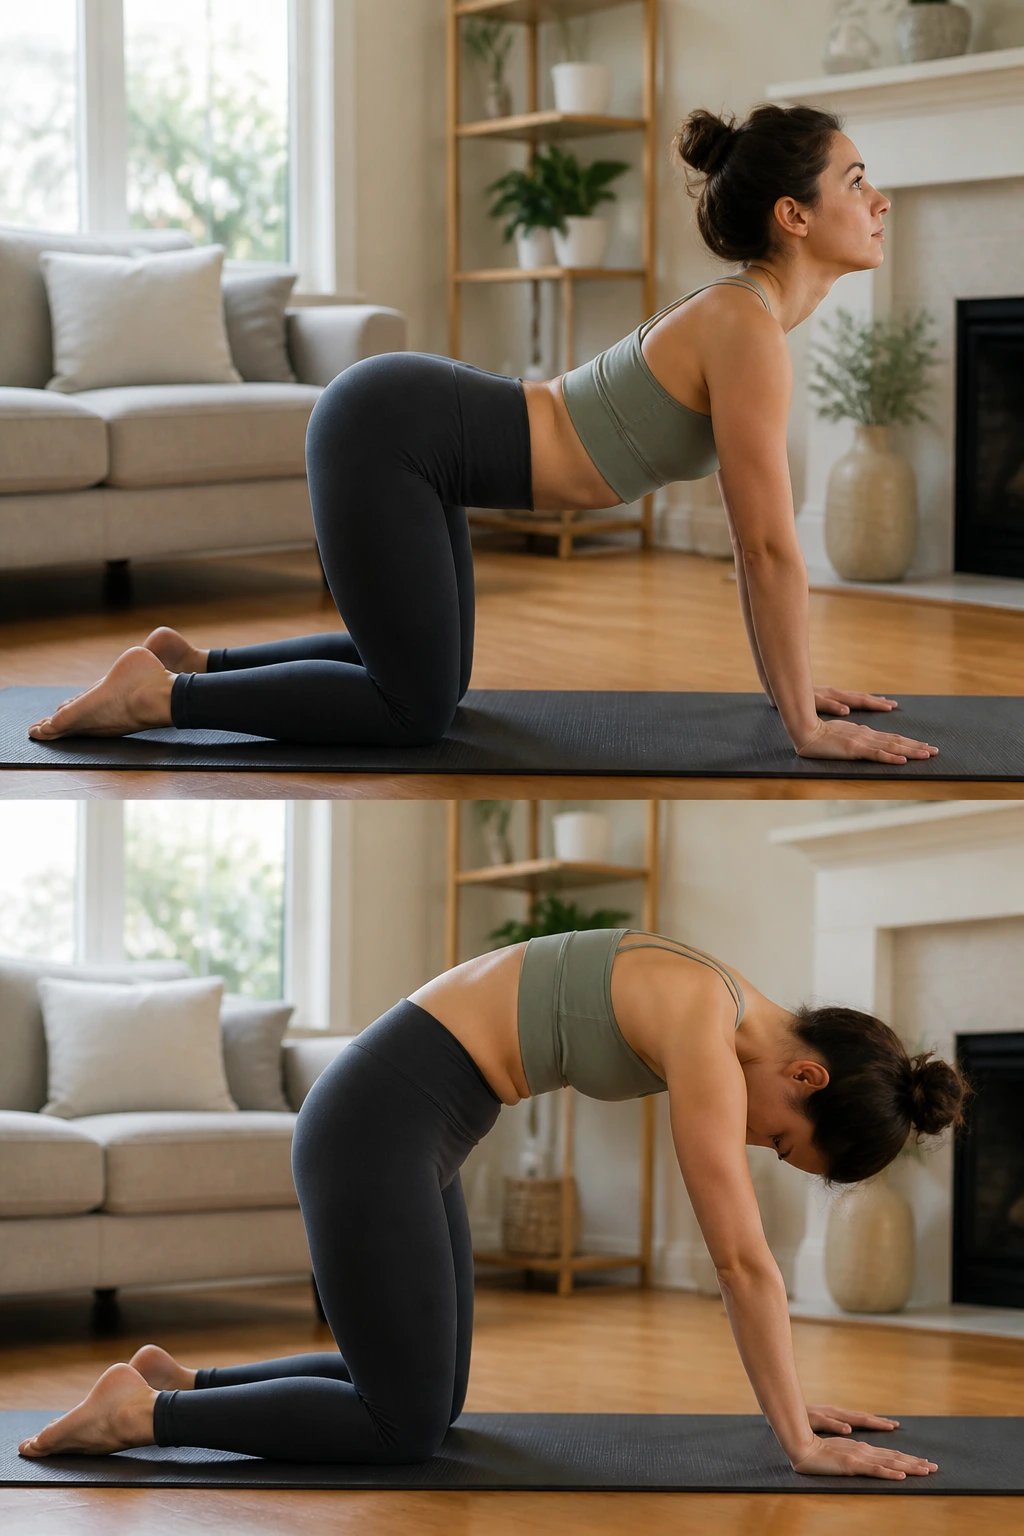
Why bring spine motion into a pelvic floor plan? Because the ribs and pelvis are supposed to move.
On hands and knees, inhale as you let the belly soften and the spine arch gently. Exhale as you round the back and let the pelvic floor recoil upward with the breath. Keep the movement smooth and modest. You’re not trying to jam the range.
Breath pairing
- Inhale to open the chest and belly
- Exhale to round and organize the core
- Move for 6 to 8 slow cycles
- Stop short of any sharp pulling or pinching
Cat-cow is one of my favorite early postpartum drills because it feels like a reset for the whole trunk. It is also kind on a tired back, especially after feeding, carrying, and not sitting in any one position for long enough.
If the wrists are annoyed, drop to forearms or place your hands on the edge of a couch and do a standing version.
13. Clamshells
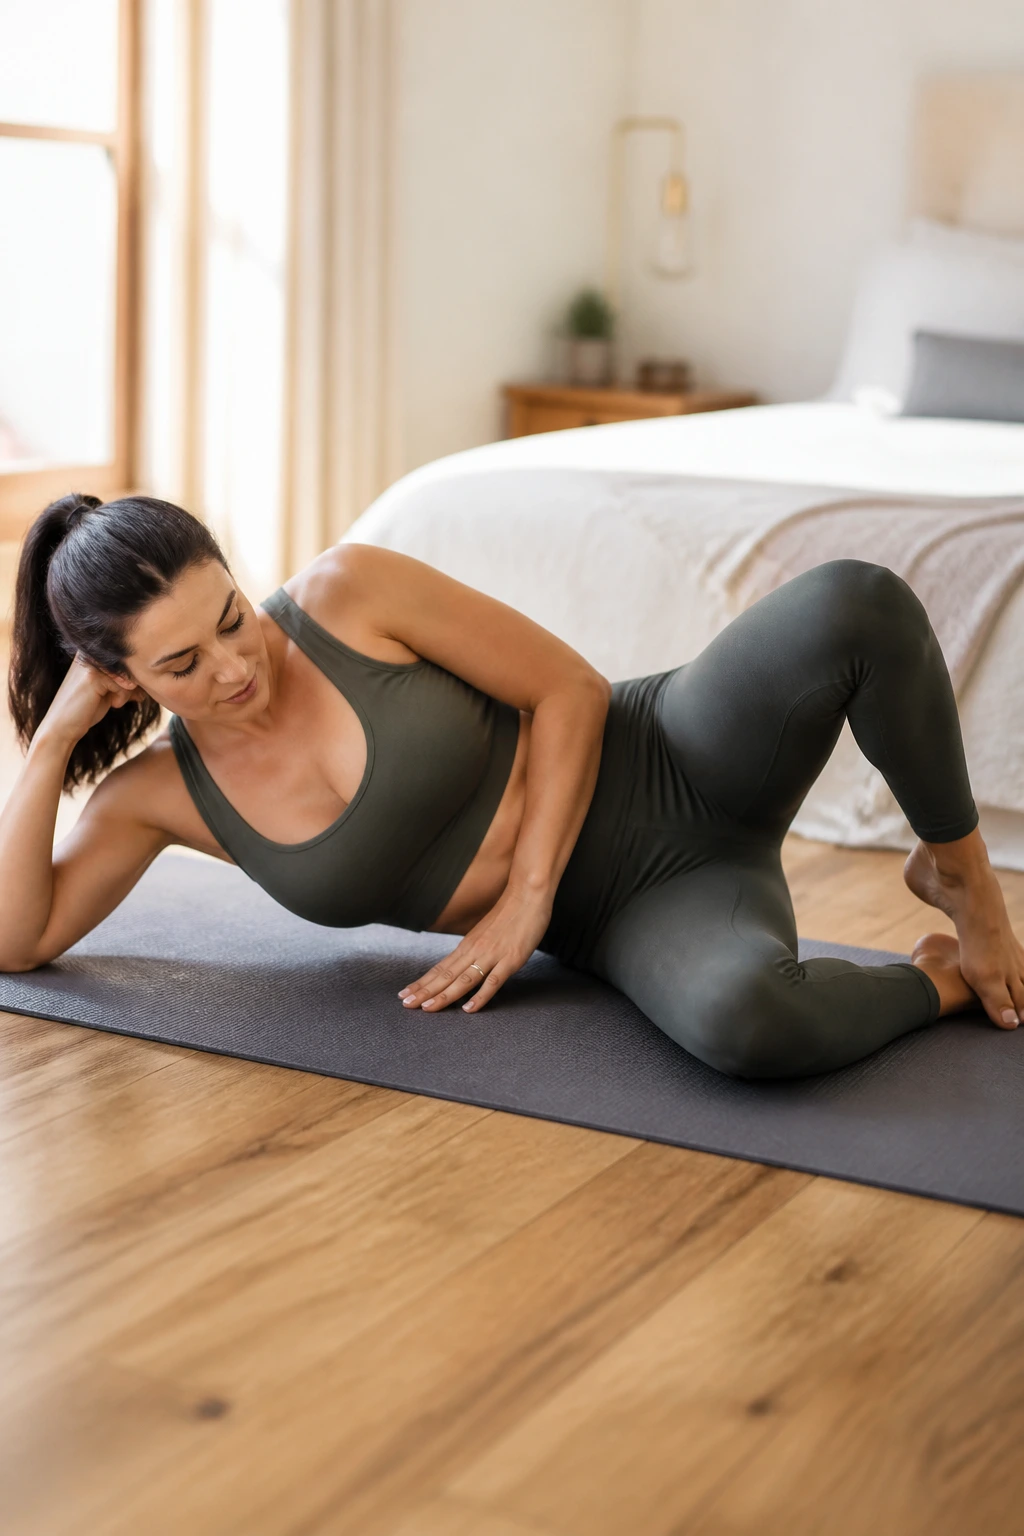
Your hips do more than shape your stride.
Lie on your side with knees bent and feet together. Keeping the pelvis stacked, lift the top knee a few inches, then lower it slowly. The movement should come from the side of the hip, not from rolling backward or swinging the pelvis open. If you need a tiny band above the knees, fine. If not, bodyweight is enough.
A few clean cues
- Feet stay touching
- Hips stay stacked
- Lift only 6 to 8 inches
- Stop before you twist backward
This exercise helps the glute med, which matters more than people think. A stable hip gives the pelvic floor less drama to deal with when you stand, walk, climb stairs, or carry something awkward.
If you feel it mostly in the front of the hip, your setup is off. Slide the knees a little farther forward and reduce the lift. Small fixes work better than bigger effort here.
14. Sit-to-Stand Practice
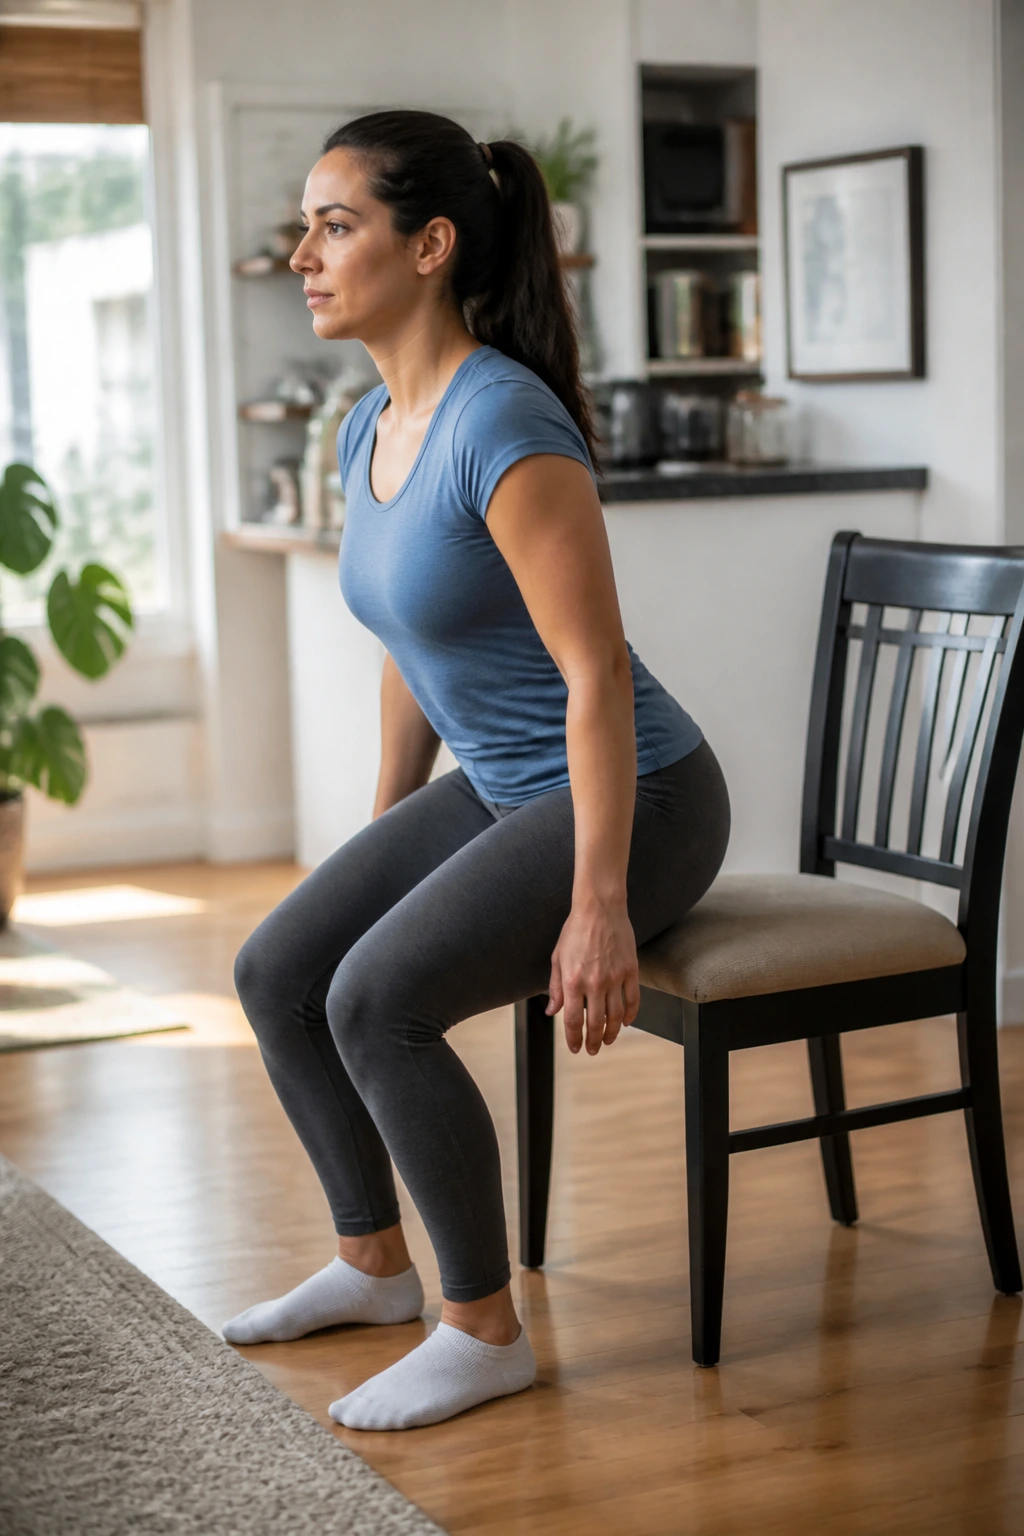
Every chair is a training tool.
Sit near the front edge of a sturdy chair with feet planted under your knees. Inhale to prepare, then exhale as you stand up, pressing through the whole foot. Sit back down with control instead of dropping heavily. That little moment of control on the descent matters more than it gets credit for.
The move sounds ordinary because it is ordinary. That’s the point. You need the body to relearn how to rise without bearing down through the pelvic floor like it’s lifting a truck.
Make it cleaner
- Keep the knees from collapsing inward
- Lean the chest slightly forward as you stand
- Avoid pushing off the thighs with your hands unless you need to
- Aim for 5 to 8 reps
This is a good one to practice before you tackle lower couches, stroller transfers, or the endless up-and-down of baby life. Practical work beats fancy work every time.
15. Wall Squats
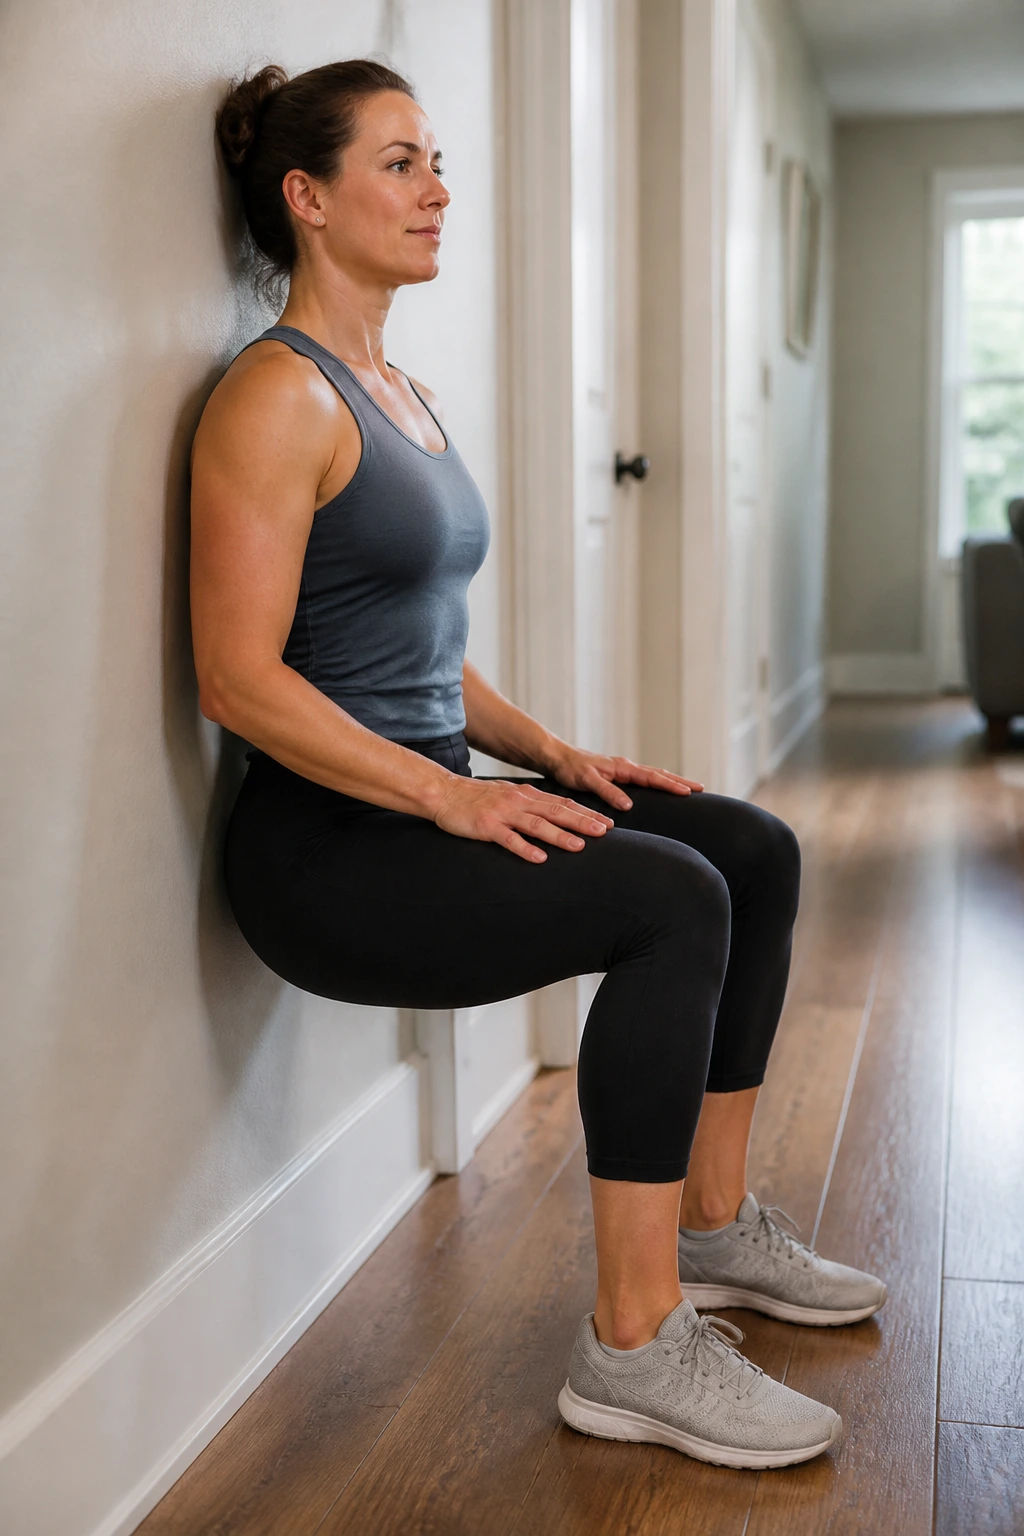
The wall turns a shaky squat into a breathing drill. That’s why wall squats belong in pelvic floor rehab.
Stand with your back against a wall and your feet about 12 to 18 inches forward. Slide down only as far as you can breathe comfortably—usually a shallow squat is enough. Hold for 10 to 20 seconds, then come back up with control. Keep the pressure even through both feet.
What to keep in mind
- Knees track over the second and third toes
- Ribs stay down
- Breath stays smooth
- Pelvic heaviness means the depth is too much
This is not a test of how low you can go. It’s a test of whether you can stay organized while the legs do a little holding work. If your quads shake, that’s normal. If your breath stops, that’s not.
A few short holds are plenty. I’d rather see 3 clean rounds than one ugly wall sit that leaves you bracing for the next hour.
16. Supported Deep Squat Breathing
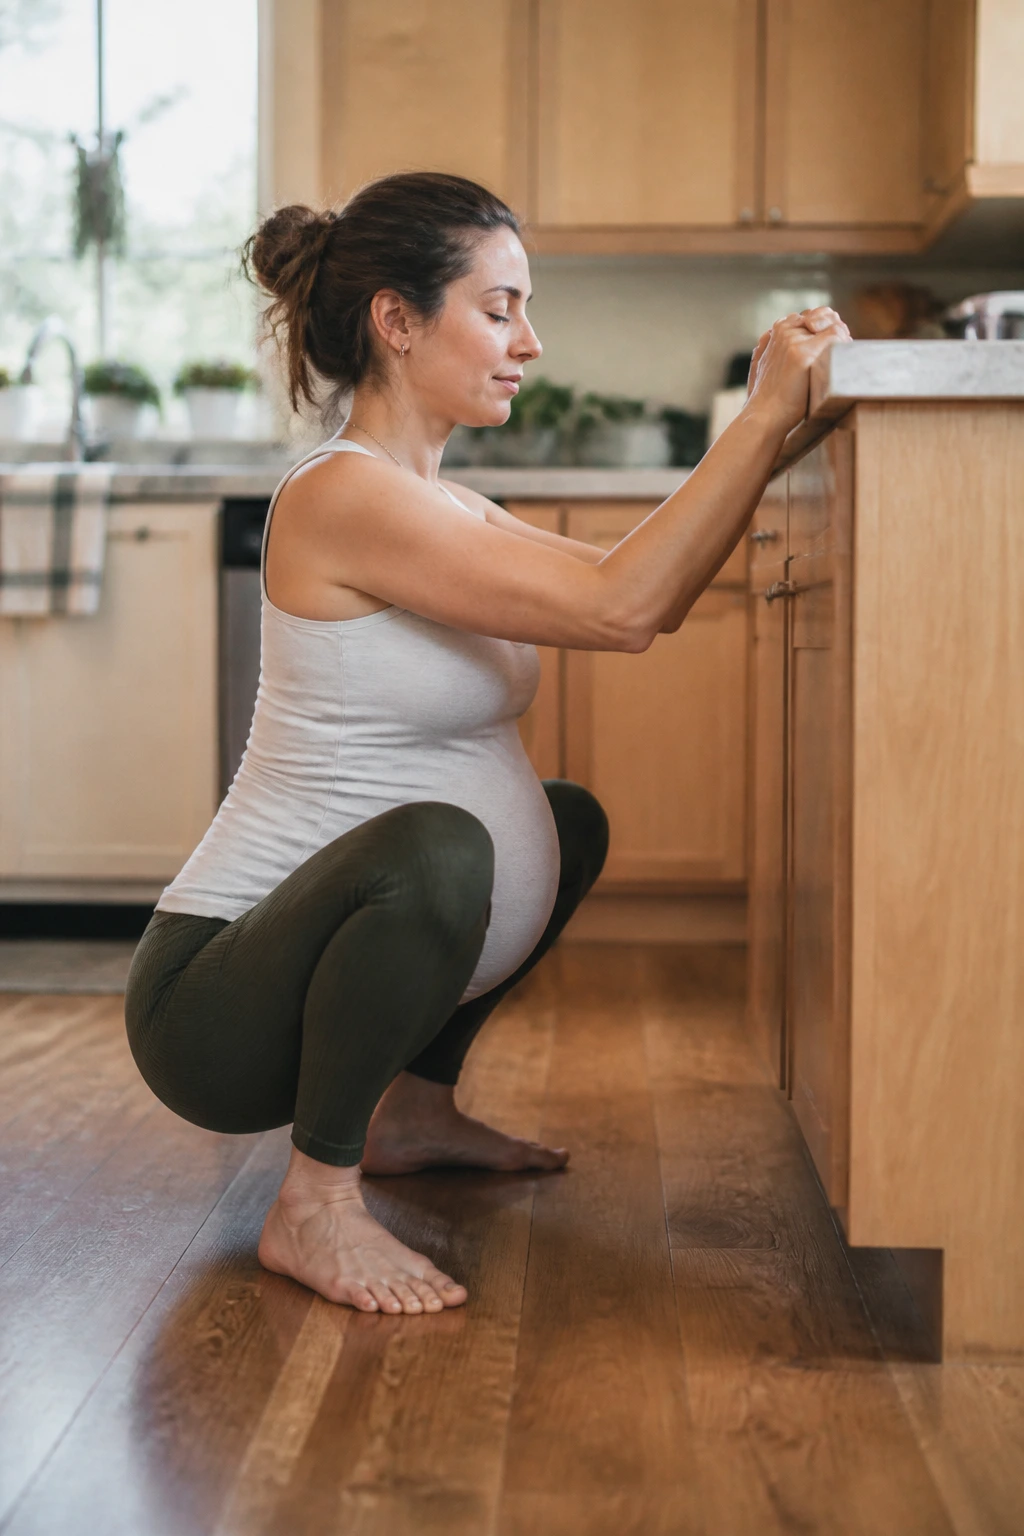
A deep squat is not a party trick here.
Used well, it can help lengthen the pelvic floor, open the hips, and make bowel movements easier. Used badly, it turns into a strain fest. So keep it supported. Hold onto a counter, doorway, or sturdy table, and squat only as deep as your heels and breathing allow. If your heels lift, place a folded towel or a small wedge underneath them.
Do not force depth
- Hold for 3 to 4 slow breaths
- Keep the chest relaxed
- Let the belly soften on the inhale
- Come up slowly, not in a jerk
If you feel bulging, pressure, or a pulling sensation at the scar, stop and stay higher. Some bodies need a half-squat for weeks before a deep squat feels useful. That is fine. Useful beats heroic.
This is a smart one to revisit as you recover, because it pairs strength, mobility, and pelvic floor release in a way that carries over into real life. Getting off the floor gets easier too. Nice side effect.
17. Step-Ups
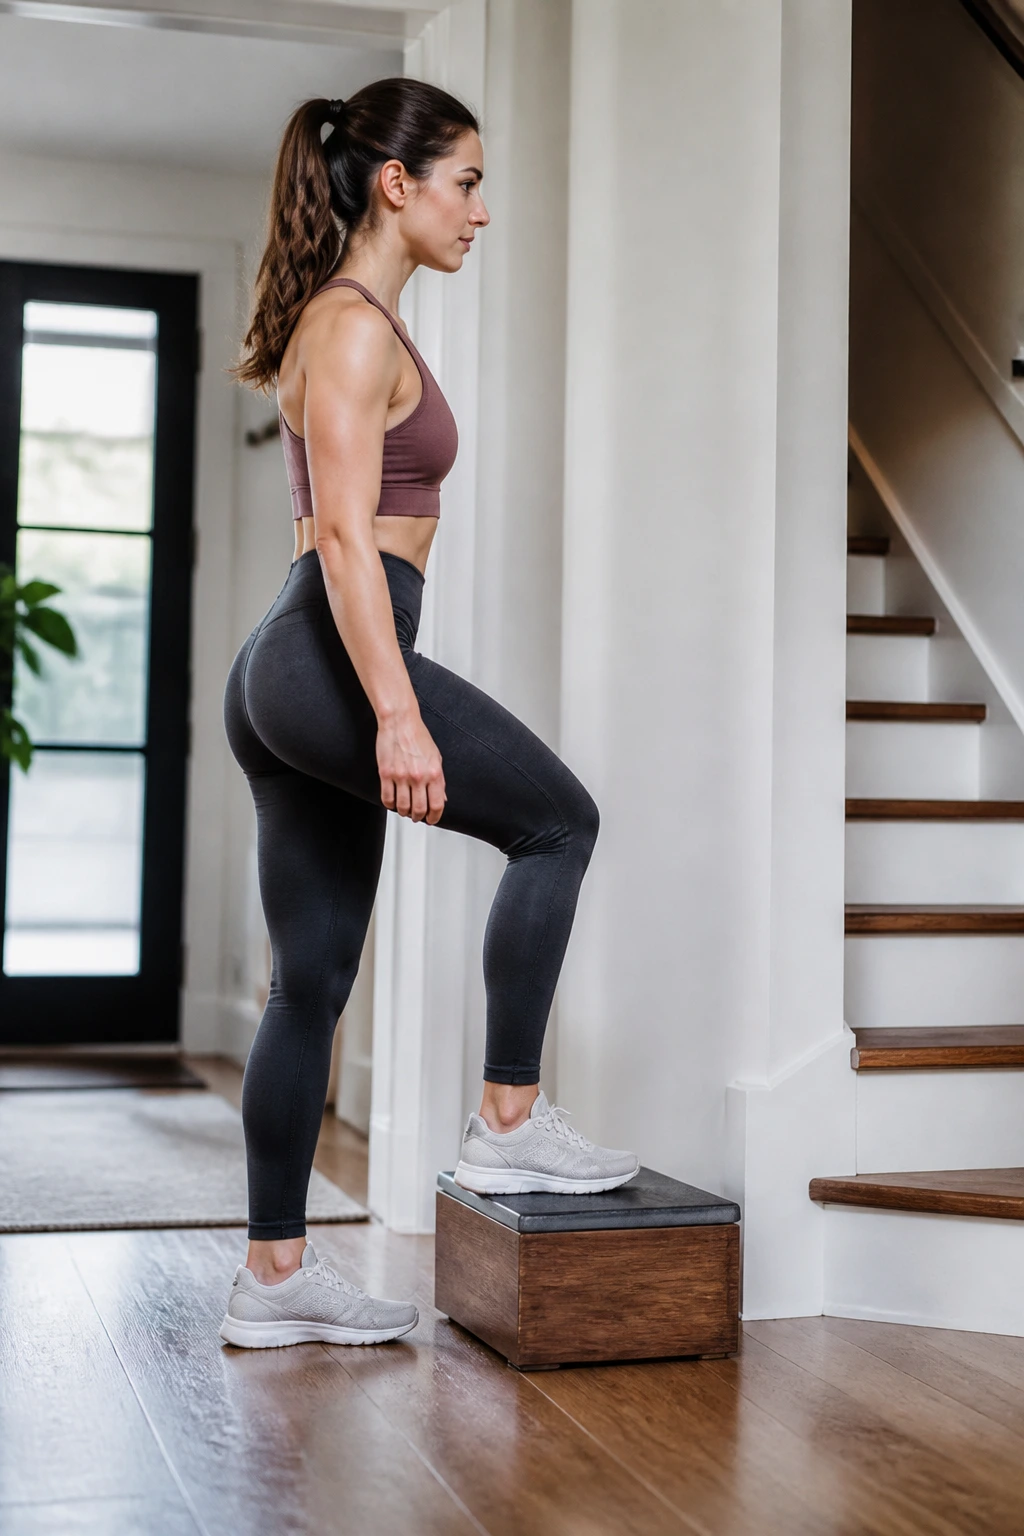
Stairs are a rehab tool whether you like it or not.
Use a low step, a single stair, or a sturdy platform about 4 to 6 inches high. Put one foot fully on the step, exhale as you stand up, then lower down under control. The trail leg should help only a little; the working leg should do the work.
Good form looks like this
- Whole foot on the step
- No lunging off the back leg
- Pelvis stays level
- Breath stays quiet
If one side feels much weaker, start there and match the same number of reps on the stronger side. Don’t let the stronger side run the show. That only teaches compensation.
Step-ups are useful because they mimic real life without asking for fancy equipment. Grocery bags, porch steps, and holding a baby while climbing stairs all live in the same neighborhood.
18. Side Plank From Knees
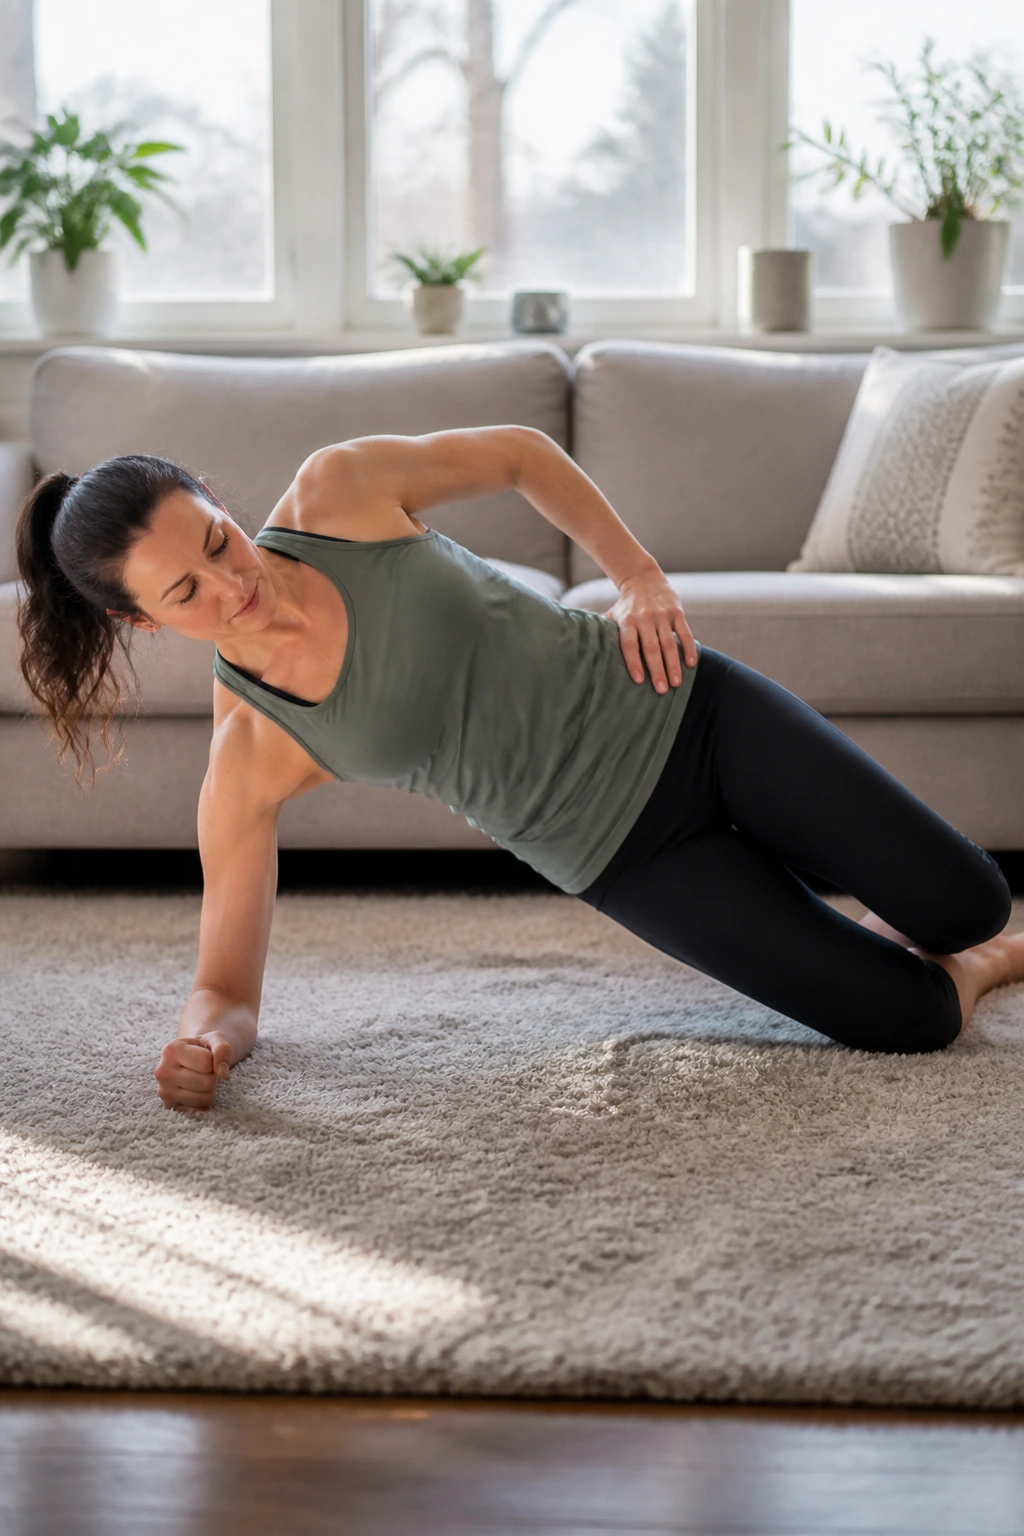
Can side core work be postpartum-friendly? Yes, if you scale it honestly.
Set up on one forearm with knees bent and stacked. Lift the hips just a few inches so the body forms a straight line from shoulder to knee. Hold for 10 to 15 seconds while breathing, then lower with control. If that’s too much, do it against a wall first with the forearm or hand pressing into the wall.
When to skip or simplify
- If you feel midline doming
- If your shoulder is tired or painful
- If your belly pressure rises sharply
- If you cannot breathe through the hold
The side plank trains the obliques and the deep support system around the pelvis. It is a more advanced move than the others on this list, and it should feel like that. A tiny, clean hold is better than a longer ugly one.
Some postpartum women love this move. Some hate it for a while. Fine. You do not need to force a stance your body is not ready for yet.
19. Suitcase Carries
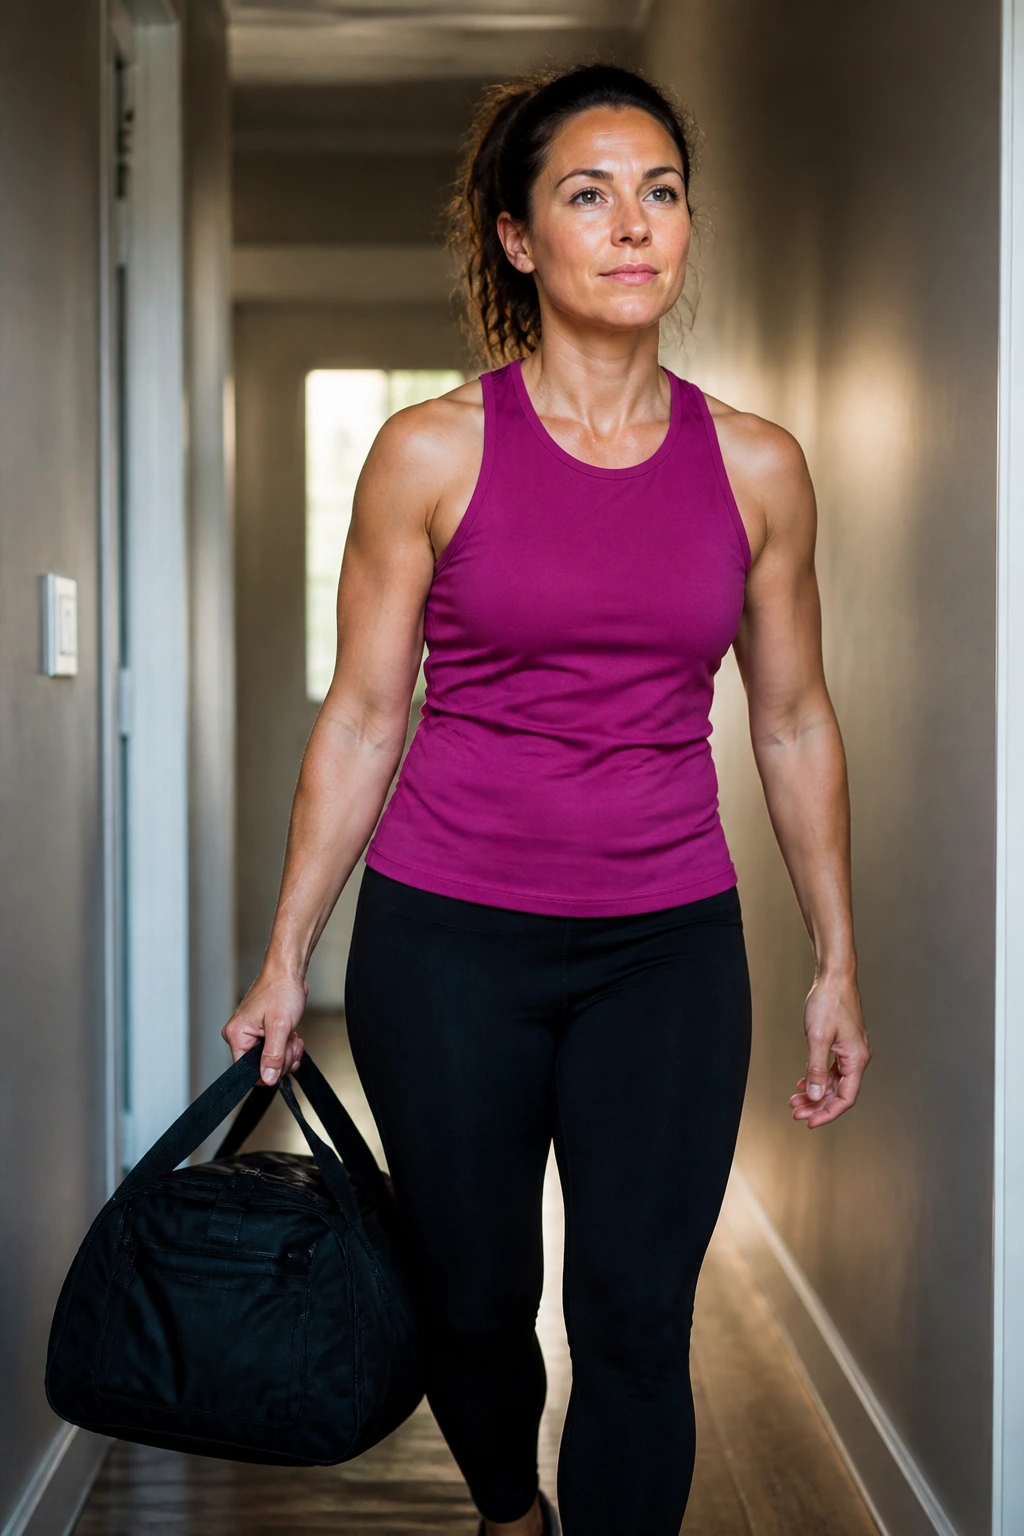
One heavy bag on one side is enough to expose weak spots fast.
Hold a dumbbell, kettlebell, or even a loaded grocery bag in one hand and walk for 20 to 30 steps. Stay tall. Don’t lean toward the weight. Don’t let the ribs flare. Switch sides and repeat. The goal is to keep the trunk and pelvic floor steady while one side tries to pull you off line.
How to dose it
- Start with 5 to 15 pounds
- Walk 20 to 40 seconds
- Rest a breath or two between sides
- Use a hallway if space is tight
This one is gold for real-life strength. It teaches the body to resist side-bending, which matters when you’re carrying a child on one hip, a laundry basket in one hand, and your patience in the other.
If it feels too heavy, it probably is. Your posture should stay clean from first step to last.
20. Wall Pushes With an Exhale
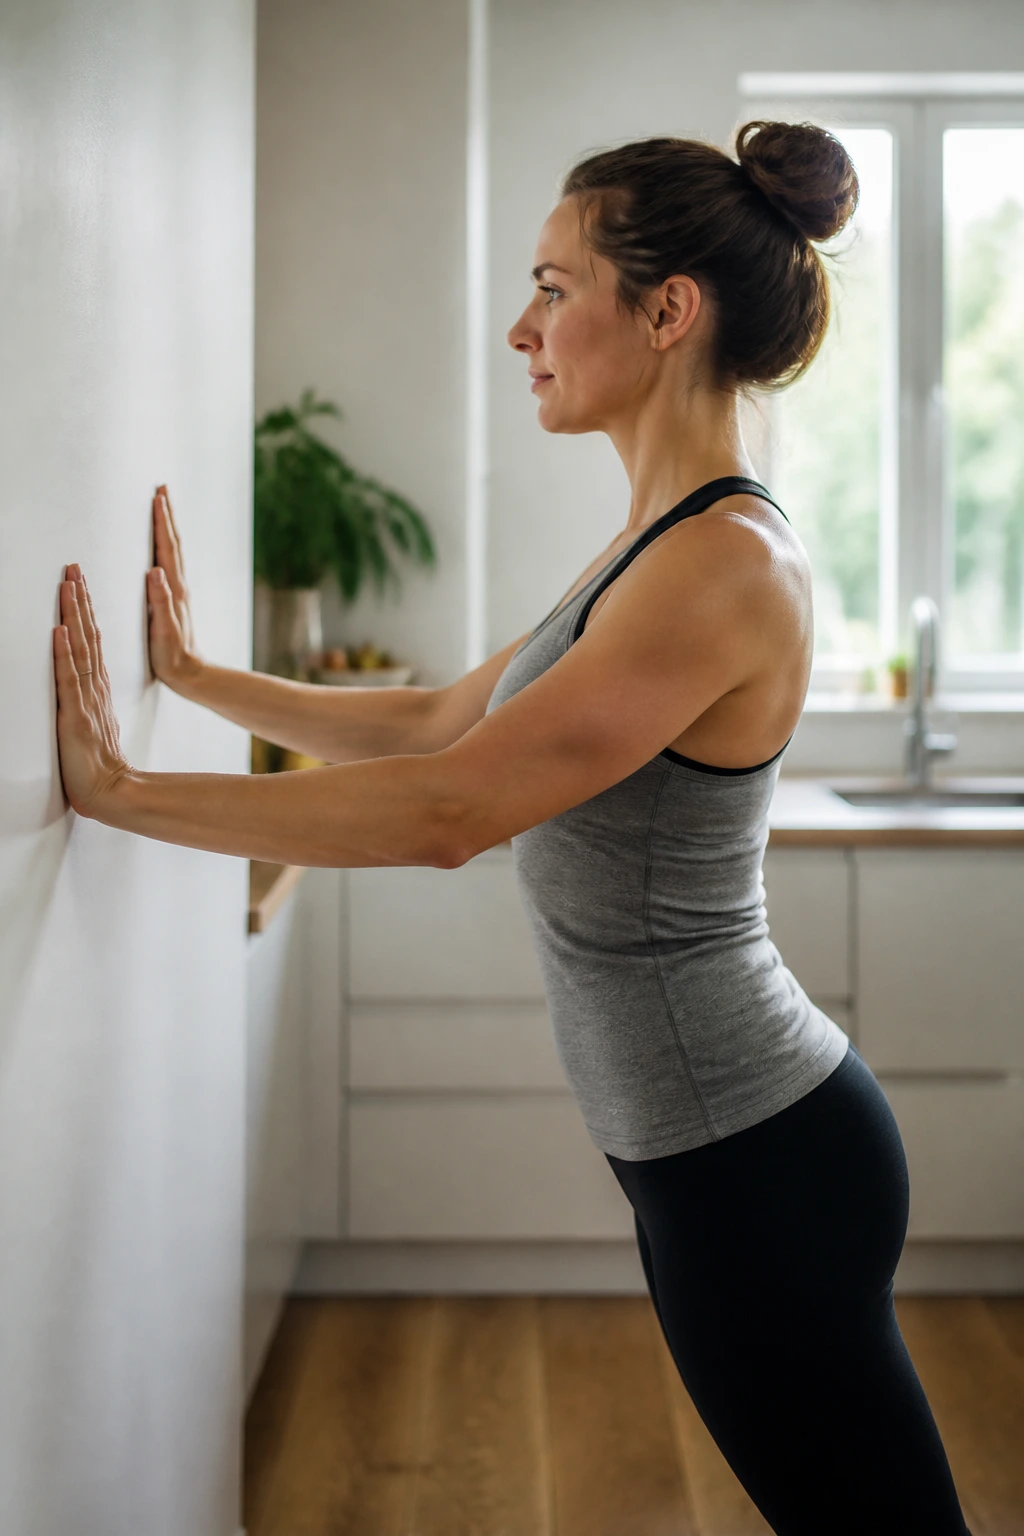
You do not need a mat for this one.
Stand arm’s length from a wall with hands flat against it. Inhale and let the ribs expand. On the exhale, gently push into the wall as if you’re trying to move it an inch, and feel the lower belly gather without hard bracing. Keep the shoulders down and the neck soft. The effort should be moderate, not aggressive.
Why it works so well
- It links upper body pressure with the core
- It’s easy to do while standing in the kitchen
- It teaches exhale-on-effort without floor work
- It scales down beautifully on tired days
Do 6 to 8 repetitions. If you feel your jaw clench, lighten the push. If the belly sucks in hard, soften it. The clean version feels almost too easy the first time, which is usually a sign you’ve found the right level.
Some days, this plus a few rounds of breathing is enough. Some days you’ll want bridges, squats, and carries too. That’s normal. Recovery after birth is not a neat ladder; it’s more like a set of tools you pick up depending on what your body is saying that day.
