



Low impact strength workouts at home have a funny reputation. People hear “low impact” and picture something gentle, almost easy, then they try one slow set of split squats or wall push-ups and realize their legs are shaking and their arms are failing by rep eight.
That’s the part I like. No jumping. No pounding. Still plenty of work.
A chair, a wall, a backpack, and a little floor space can cover the major movement patterns that matter most: squat, hinge, push, pull, carry, brace. That’s the real trick with low impact strength training at home. You are not trying to punish your joints. You are trying to give your muscles a reason to get stronger without all the extra noise.
And yes, tempo matters. So does range of motion, pause length, and the angle of your body against gravity. A slow rep can be far harder than a bouncy one, especially when you keep the motion clean and stop cheating the last few inches. The first move below is a good place to start because it looks harmless and rarely is.
1. Chair Squat Pulses for Low Impact Strength at Home
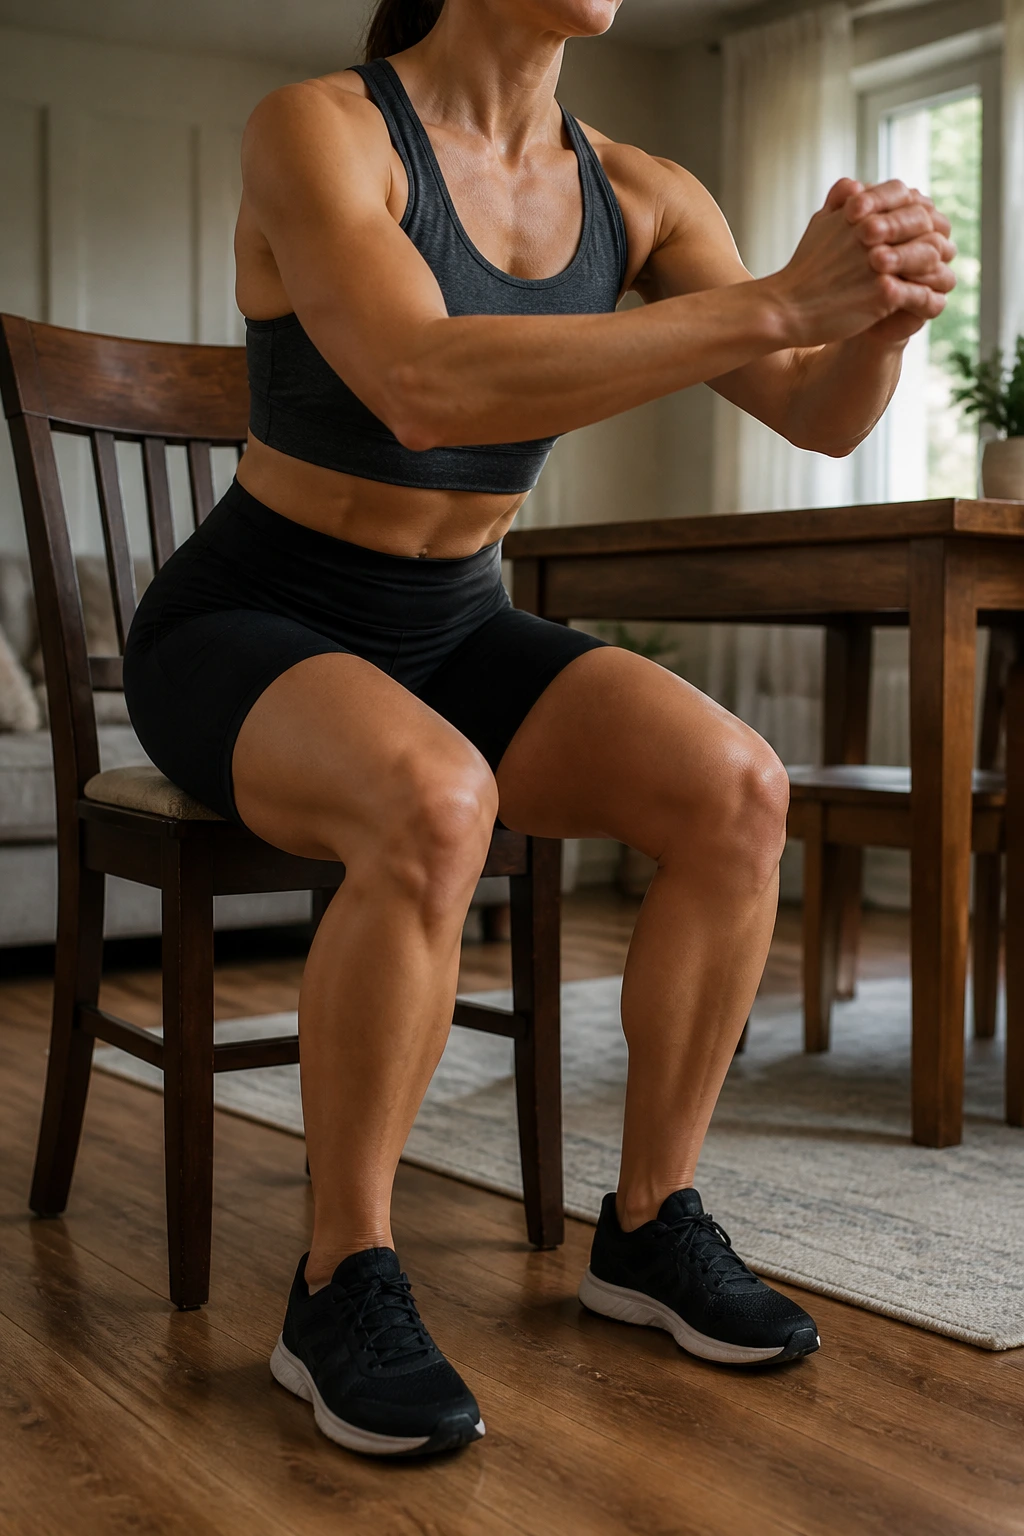
A chair squat pulse is one of those moves that looks almost too simple. Then you hold the bottom position for a few seconds, pulse an inch or two, and your thighs start speaking up fast.
Why It Works
The chair gives you a clear depth target, which is useful if you tend to squat too high or drop too low. Your hips sit back, your chest stays tall, and the sit-to-stand pattern gets trained in a way that feels friendly on the knees. The pulses add time under tension without adding impact. That matters.
- Sit back to the chair lightly, don’t crash into it.
- Stand up halfway, then lower again with control.
- Keep your feet about hip-width apart and your heels planted.
- Aim for 2 to 4 sets of 8 full squats plus 8 to 12 pulses at the bottom.
Best cue: imagine you are trying to keep a book balanced on your chest. If your torso folds forward, the load shifts and the move gets sloppy fast.
2. Wall Push-Ups
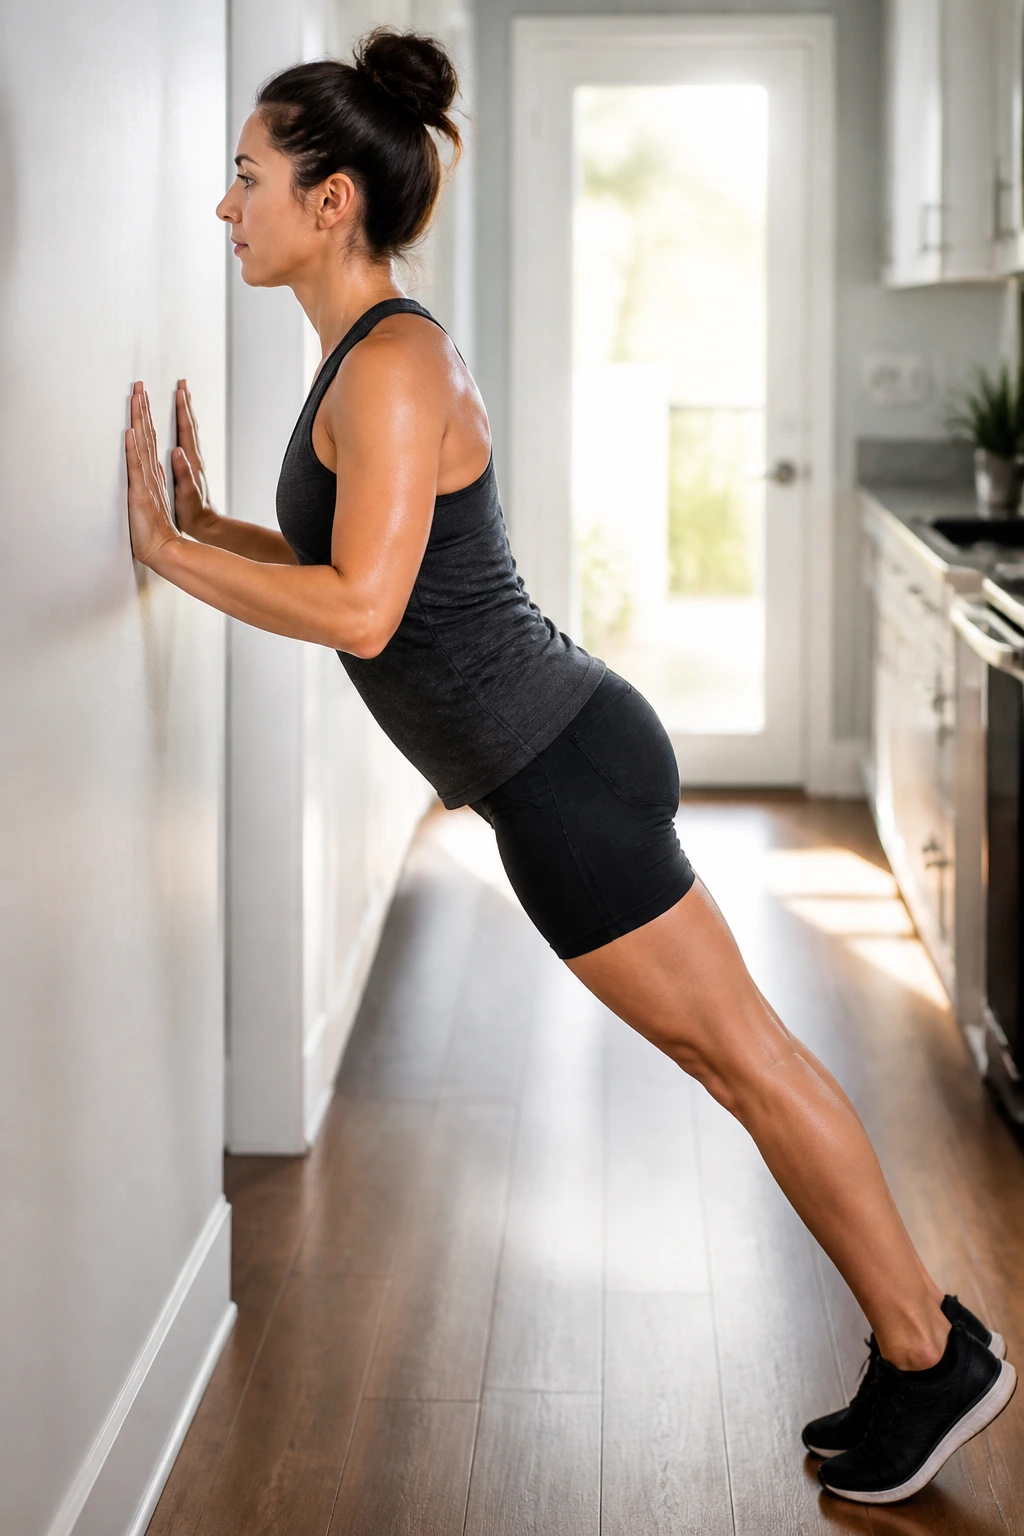
Wall push-ups are underrated because people compare them to floor push-ups instead of treating them as their own thing. That’s a mistake. Done with a straight line from head to heel and a slow lower, they can light up your chest, shoulders, triceps, and core in a very honest way.
The key is body angle. Stand farther from the wall and the move gets harder; stand closer and it eases off. Hands should sit around chest height, a little wider than shoulders. Lower your chest toward the wall under control, pause for a beat, then press away as if you are pushing the wall through the room.
I like wall push-ups for anyone who wants a clean upper-body push without floor strain. Wrists stay happier. Shoulders usually do better too. Try 2 to 4 sets of 8 to 20 reps, and stop one or two reps before your form turns into a shrug-fest. No need to make it ugly.
3. Glute Bridge Hold and Squeeze
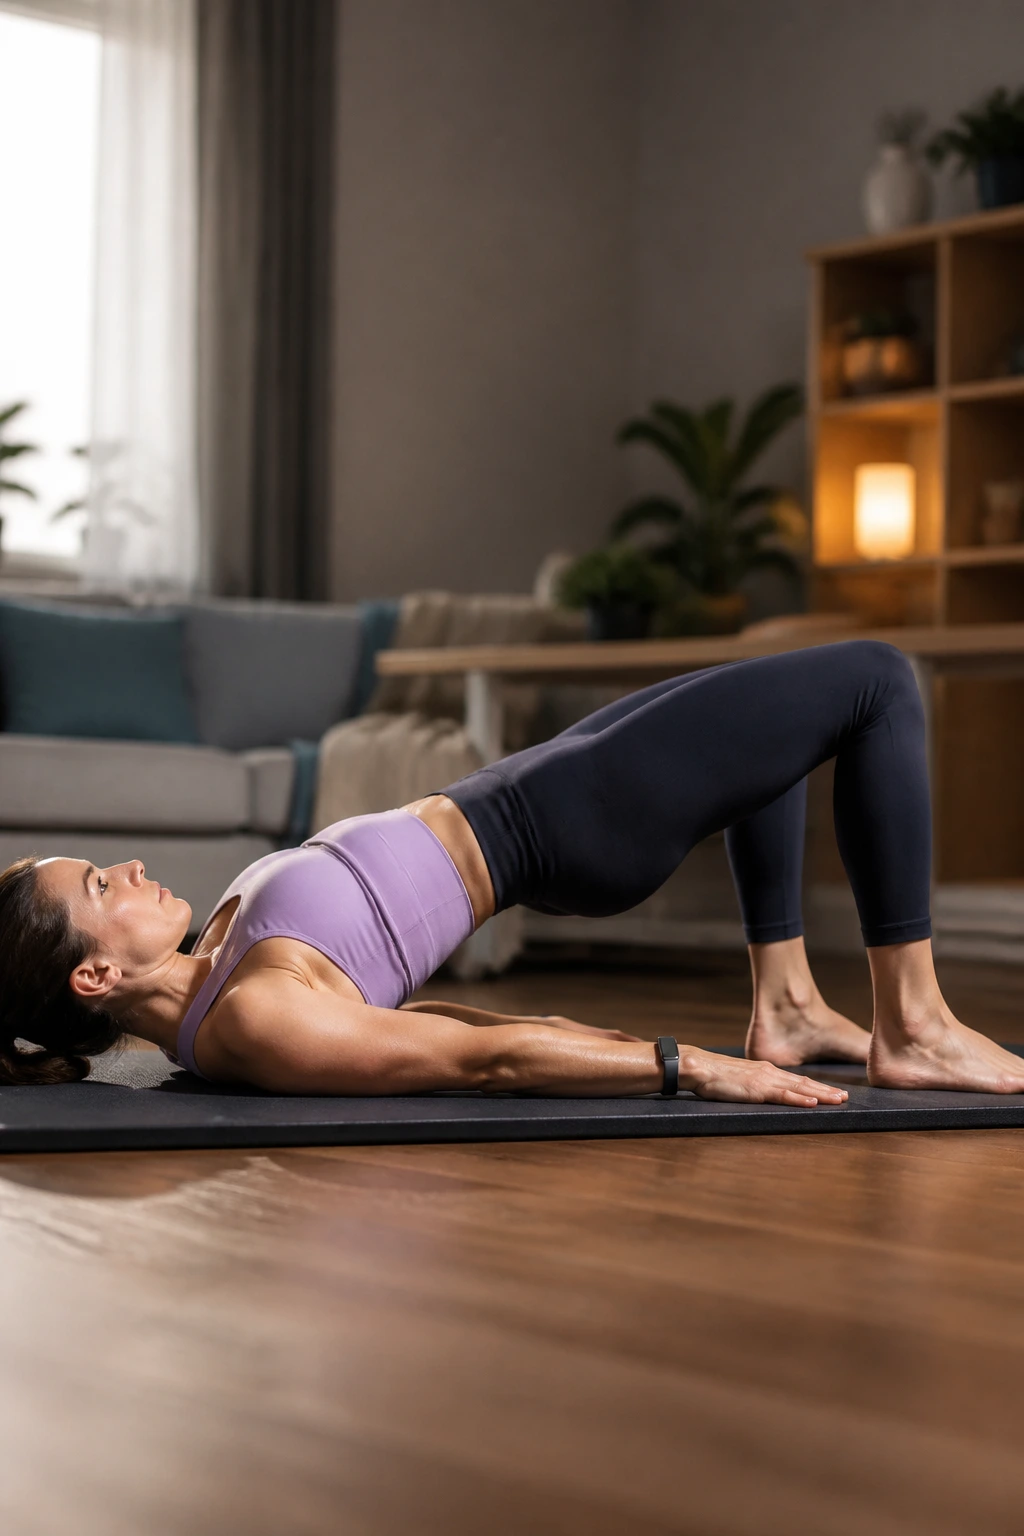
Why do glute bridges show up in so many home routines? Because people sit a lot, their hips get lazy, and the bridge gives the glutes a job they usually ignore.
Start on your back with knees bent and feet flat. Before you lift, exhale and tuck your ribs down so your lower back does not do all the work. Then press through your heels and raise your hips until your body makes a clean line from shoulders to knees. Hold the top for 20 to 30 seconds, or do 10 to 15 small pulses if you want a little burn.
How to Make It Harder
Keep one foot hovering an inch off the floor for a single-leg version, or place a mini band above your knees and gently press out as you lift. Don’t rush the lowering phase. That’s where a lot of the work hides.
The best bridges feel like your hamstrings and glutes are doing the job together, not your lower back pinching and stealing the show.
4. Dead Bug with Slow Reach
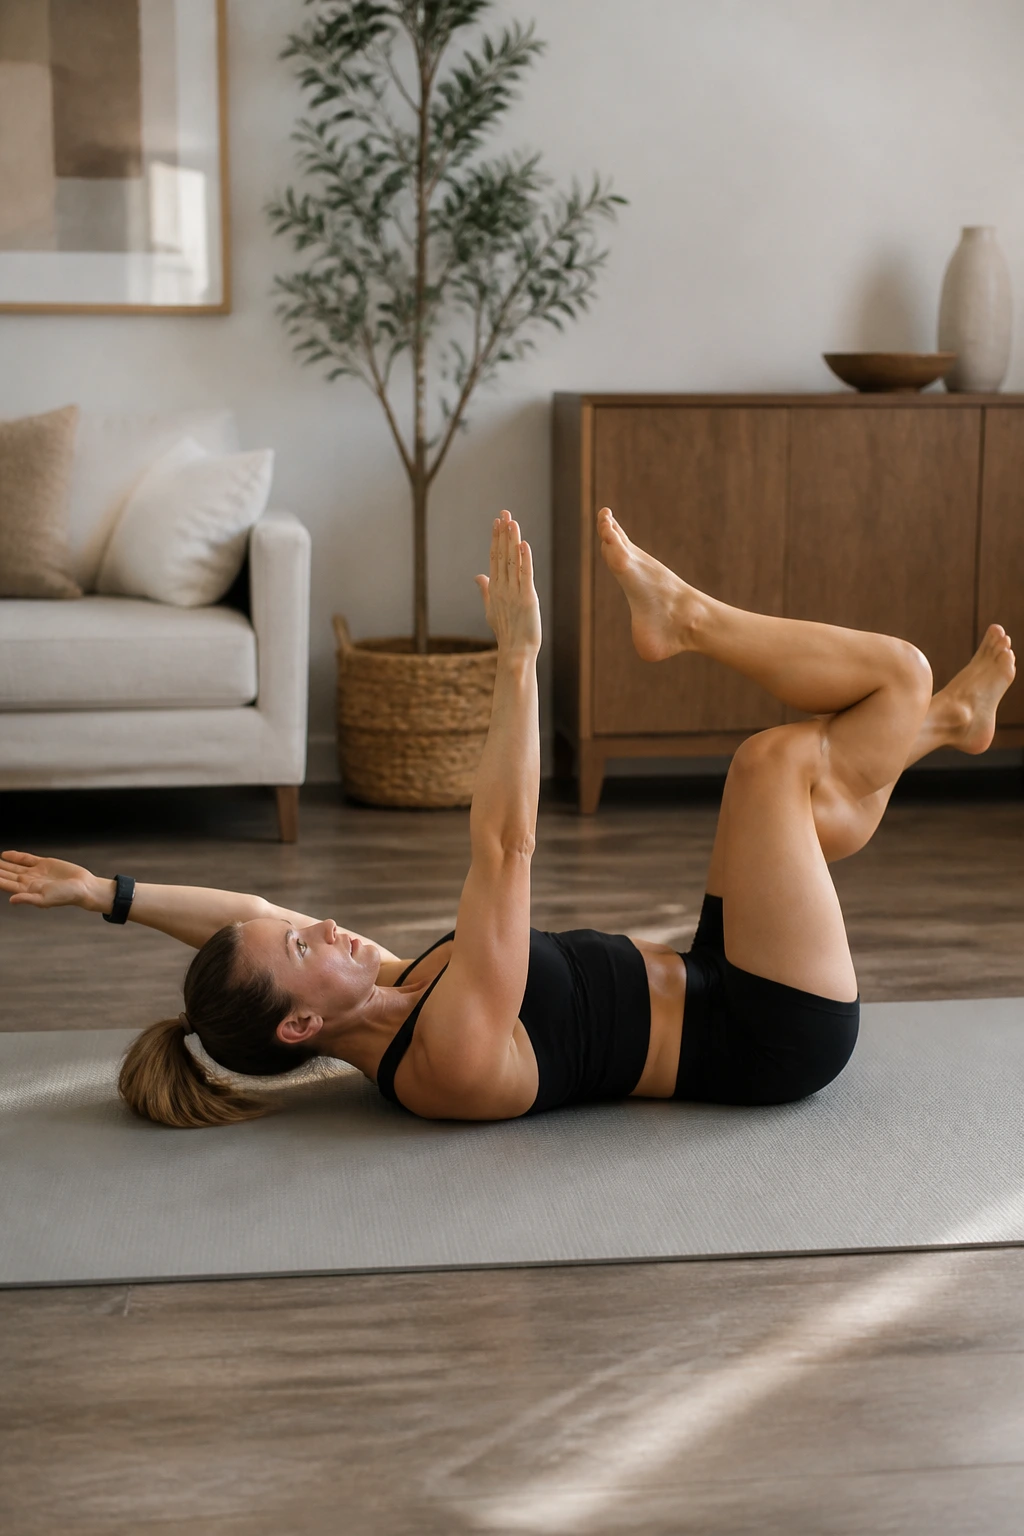
A dead bug is for the days when your core needs a little discipline. Not drama. Discipline.
Lie on your back with arms pointed at the ceiling and knees stacked over hips at about 90 degrees. From there, extend one opposite arm and leg slowly, but only as far as you can go while keeping your lower back heavy on the floor. If your back arches, the range is too big. Simple.
- Move with a 3-second lower and a 1-second pause.
- Exhale as the arm and leg reach away.
- Do 6 to 10 reps per side.
- Keep the neck relaxed; don’t crane your chin forward.
The dead bug is a sneaky good choice for low impact strength workouts at home because it builds trunk control without loading the spine. If your hips wobble or your ribs pop up, slow down. That wobble is the point. It tells you exactly what needs attention.
5. Reverse Lunge to Chair Tap
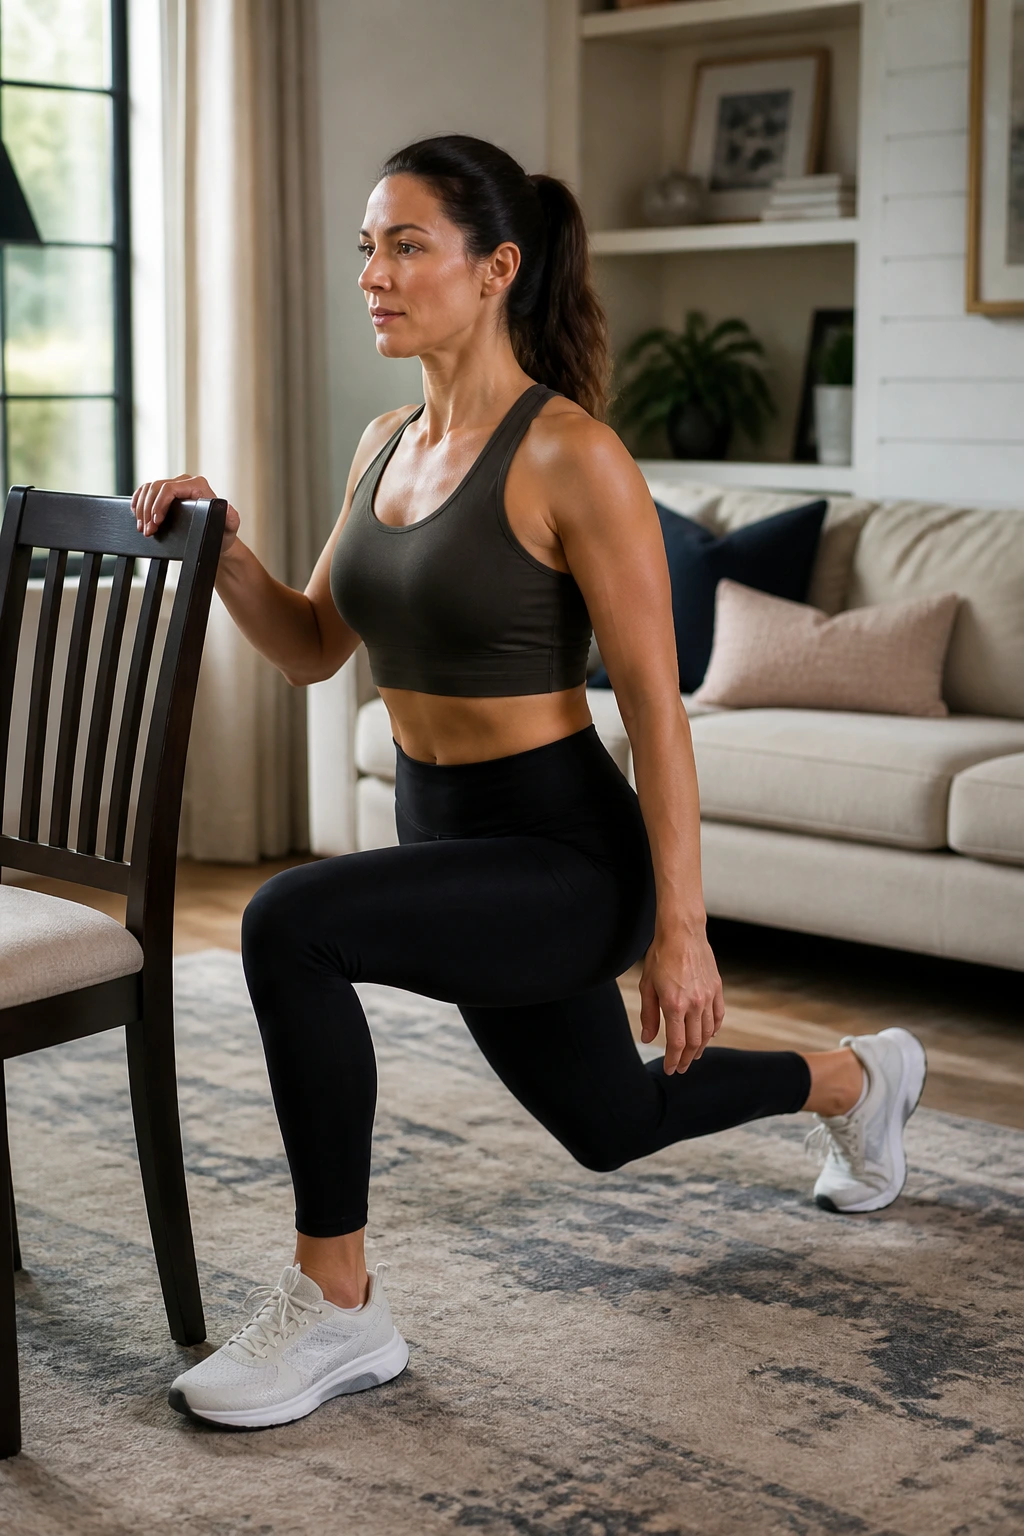
A reverse lunge to chair tap is kinder than a forward lunge for a lot of people, and that is not a minor detail. Stepping back usually feels easier on the knees, and the chair gives you a clear target so you can keep the motion clean.
Step one foot back, lower until the back knee hovers near the floor, and lightly tap the chair with your fingertips for balance if you need it. Then drive through the front heel to stand. You should feel the front leg doing most of the work, especially in the glute and quad.
Forward lunges have their place. I just think reverse lunges are a smarter starting point for home training because the balance demand is lower and the motion feels more controlled. Try 8 to 12 reps per side, or split it into two sets if your legs get shaky.
What to Watch For
Keep your front knee tracking over your middle toes. Don’t let it cave inward. And don’t push off the back leg like you are jumping. That steals the work from the leg you’re trying to train.
6. Incline Push-Ups on Counter or Couch
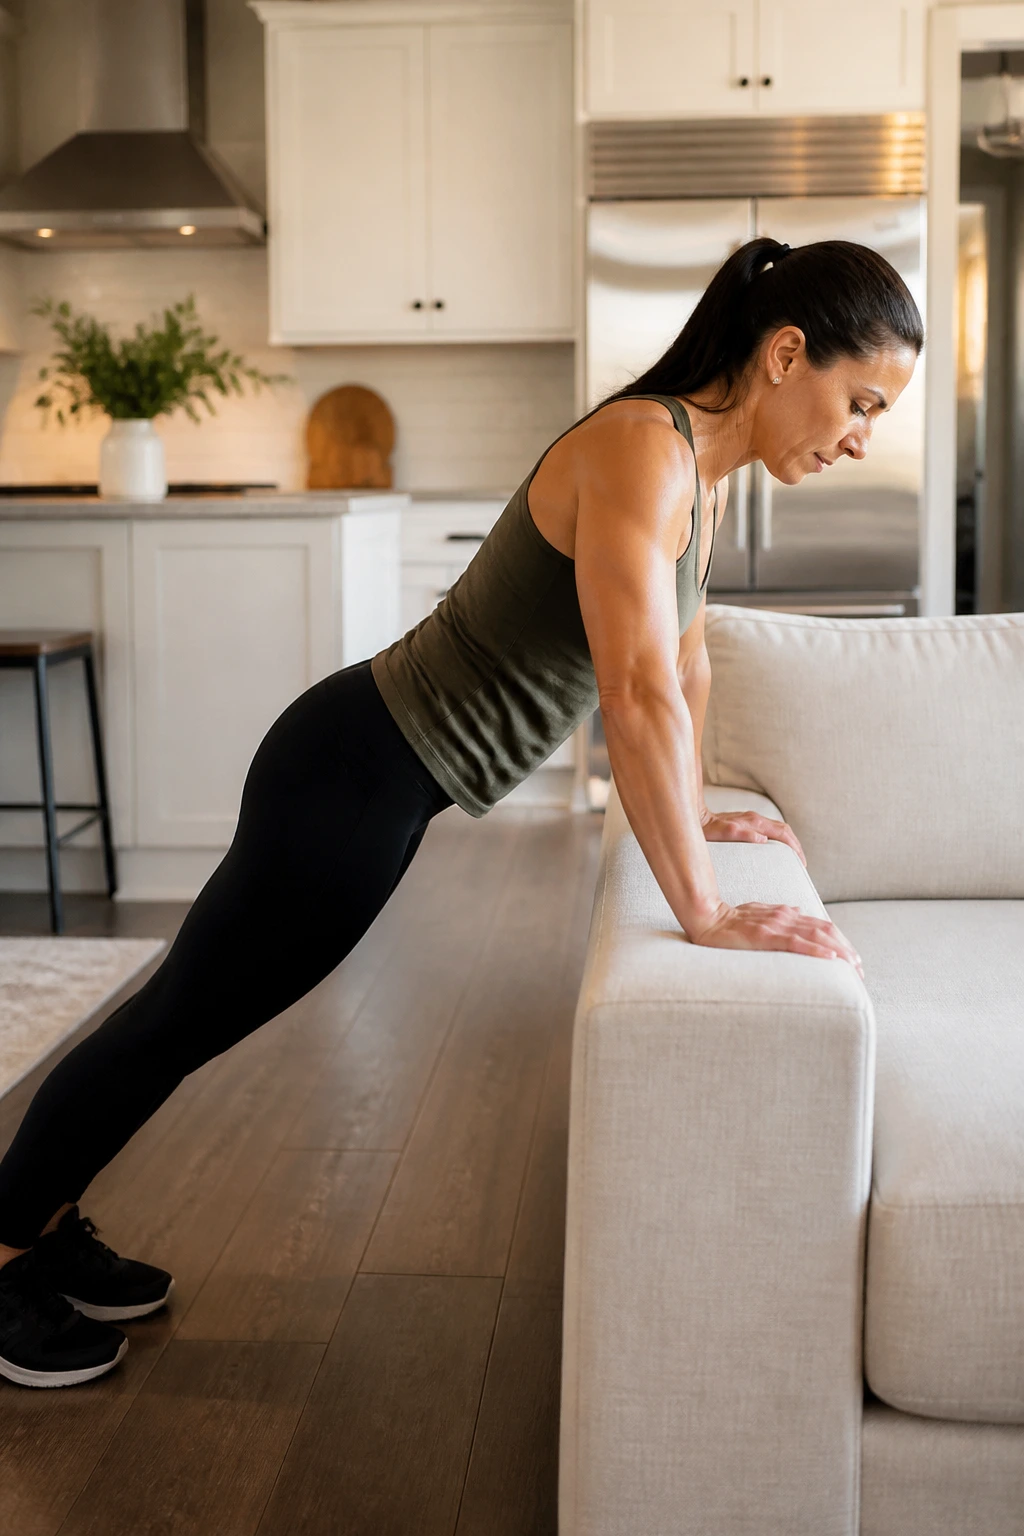
A higher surface is not cheating. It is a sensible way to build pressing strength without dumping too much load on your shoulders or wrists too soon.
Hands on a kitchen counter, sturdy table, or the arm of a firm couch work well. The more upright your body stays, the easier the push-up becomes. Lower your chest toward the edge under control, keep your body in one line, and press up without locking out aggressively at the top. 8 to 15 reps is a useful range, but the real target is clean form.
This is one of my favorite low impact strength workouts at home for people who hate the floor. It bridges the gap between wall push-ups and full floor push-ups without making you feel like you need a spotter or a gym floor mat. Lower the surface over time. That’s the progression. Simple, and better than forcing ugly reps.
7. Backpack Hip Hinge
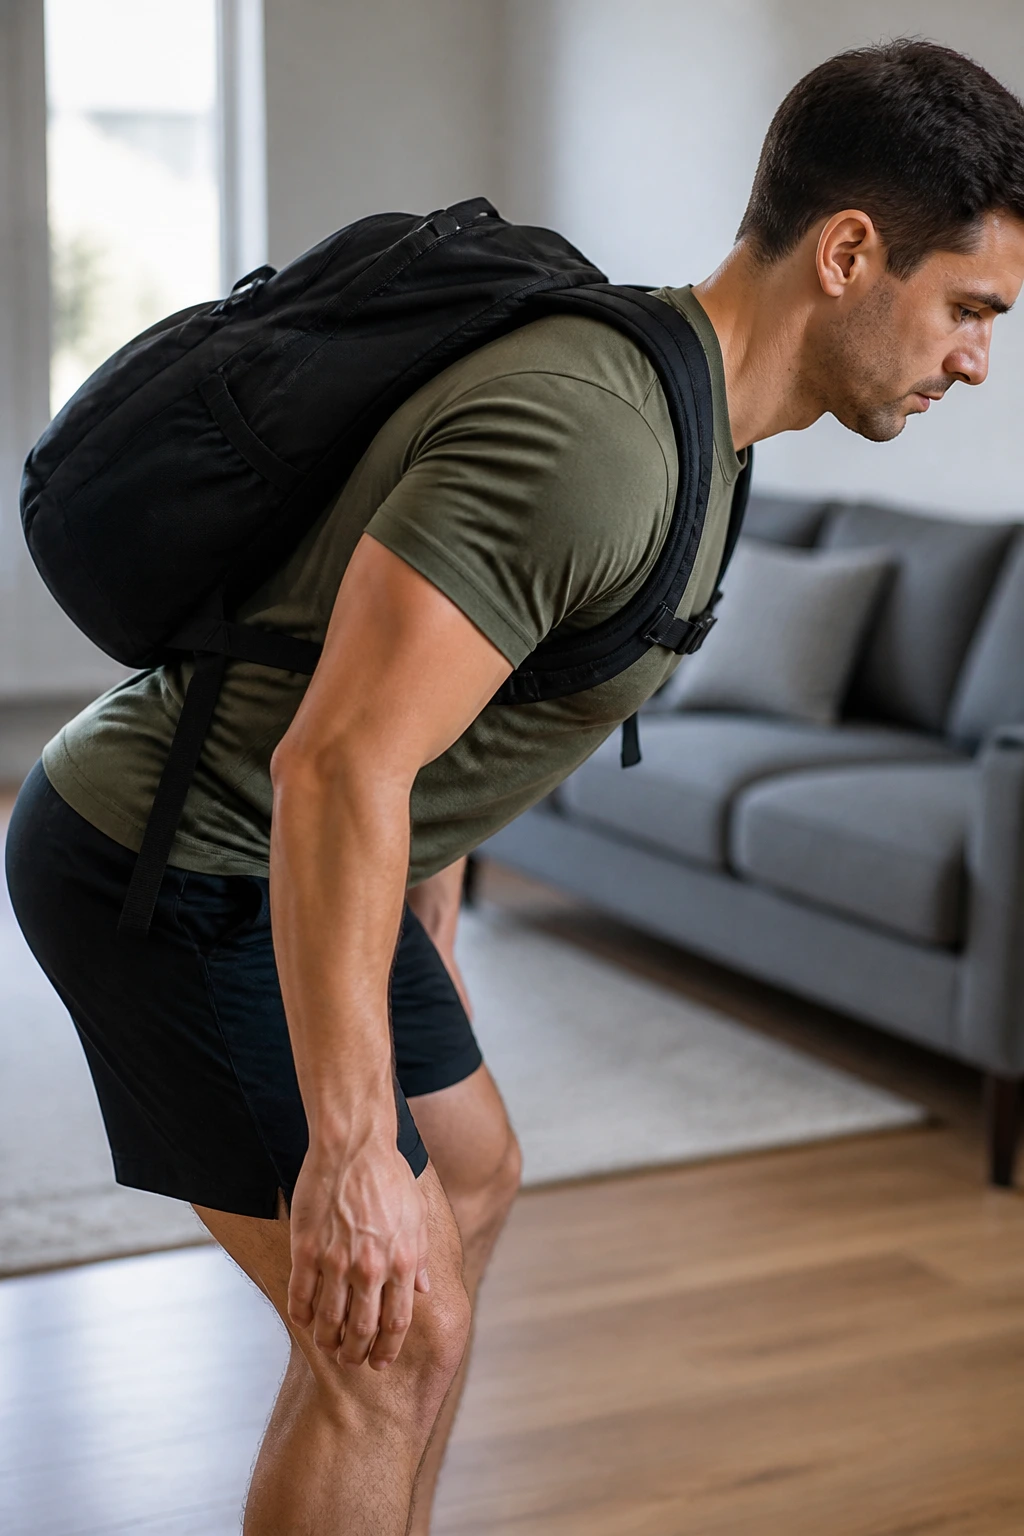
A hip hinge is one of the most useful patterns you can train at home, and it’s also one of the most ignored. People squat when they should hinge. Then their lower back pays for it later.
Put a backpack on your chest with both hands or hold it close to your thighs, feet hip-width apart. Push your hips back as if you are closing a car door behind you. Your knees bend slightly, your back stays long, and the weight tracks close to your legs. Come back up by driving the hips forward, not by yanking your shoulders up.
Why This Feels Different
Your hamstrings should stretch. Your glutes should turn on. Your spine should stay steady. If you feel the load mostly in your lower back, the hinge is too deep or too loose.
- Use 2 to 4 sets of 10 to 15 reps.
- Start with a light backpack and add books slowly.
- Keep your shins nearly vertical.
- Stop the descent when your back starts to round.
That last point matters. A smaller range done well beats a bigger range done badly.
8. Wall Sit March
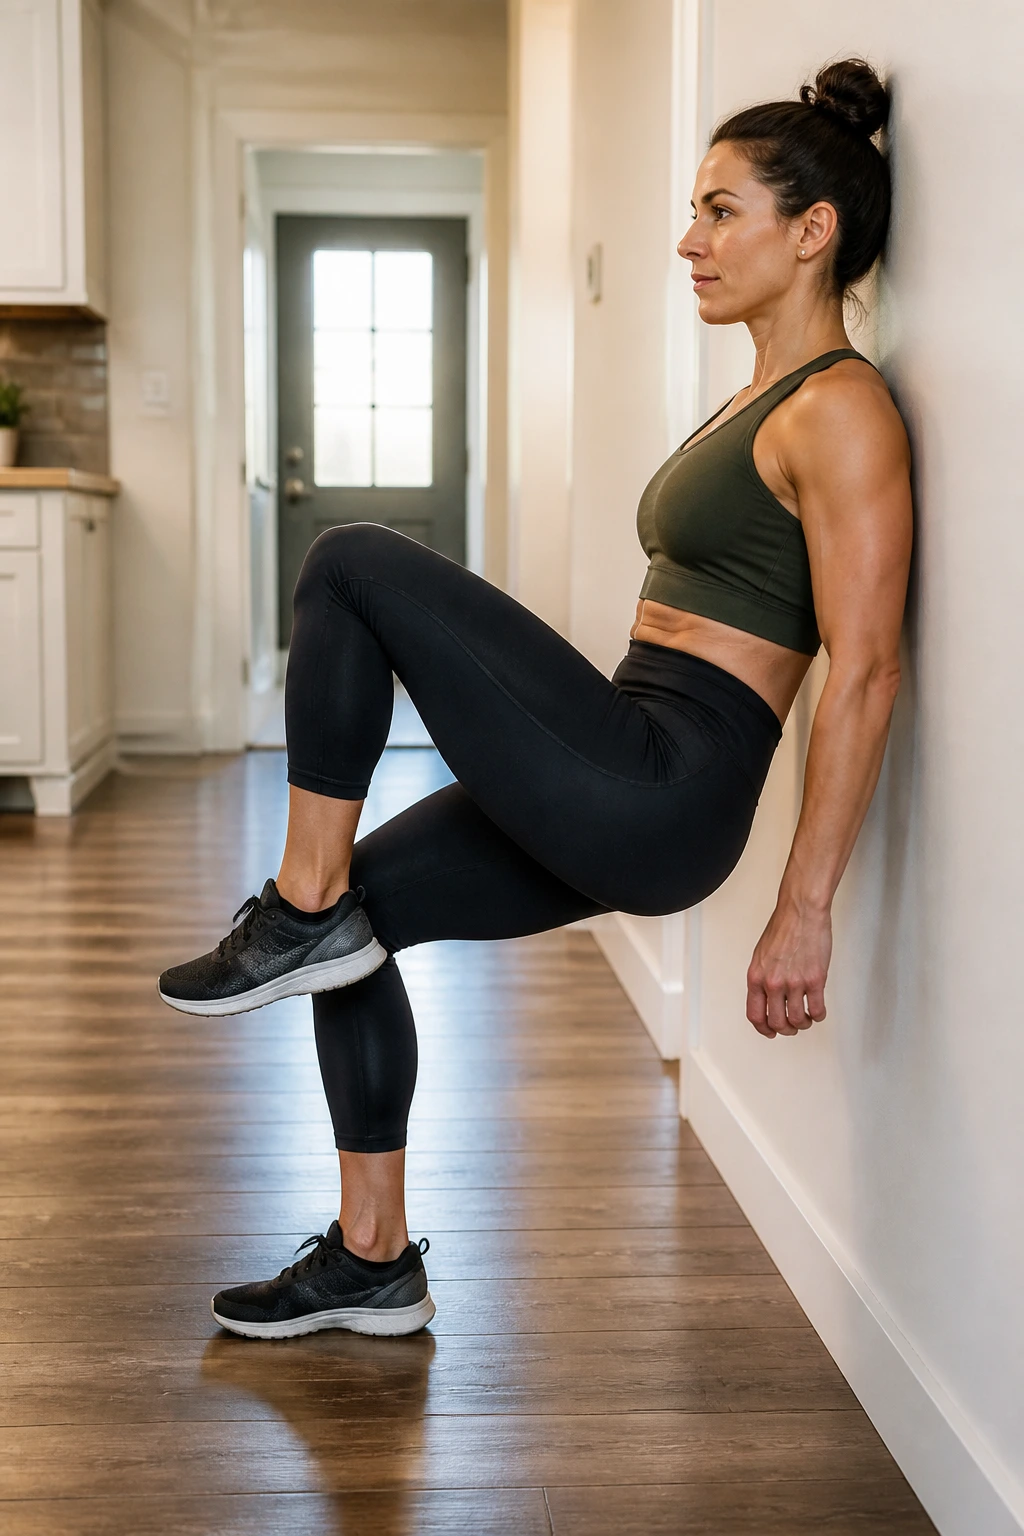
A wall sit looks static. Then you try lifting one foot and the whole thing gets rude.
Sit your back against a wall with knees bent roughly at 90 degrees, or a little higher if that angle is too sharp. Once you find the hold, lift one foot an inch off the floor for a slow march, then switch. Keep your back glued to the wall and your hips level. The move turns a simple isometric into a balance and core challenge without any jumping.
You can hold the position for 20 to 40 seconds and add 6 to 10 alternating marches before standing up. I like this because it hits the thighs hard without asking for a lot of space. It also exposes weak links fast. If your knees shake or your torso twists, you found the edge of your current strength. Good. That is useful information.
Don’t sit so low that your lower back flattens and your knees ache. A slightly higher wall sit is still a real wall sit.
9. Bird Dog Reach
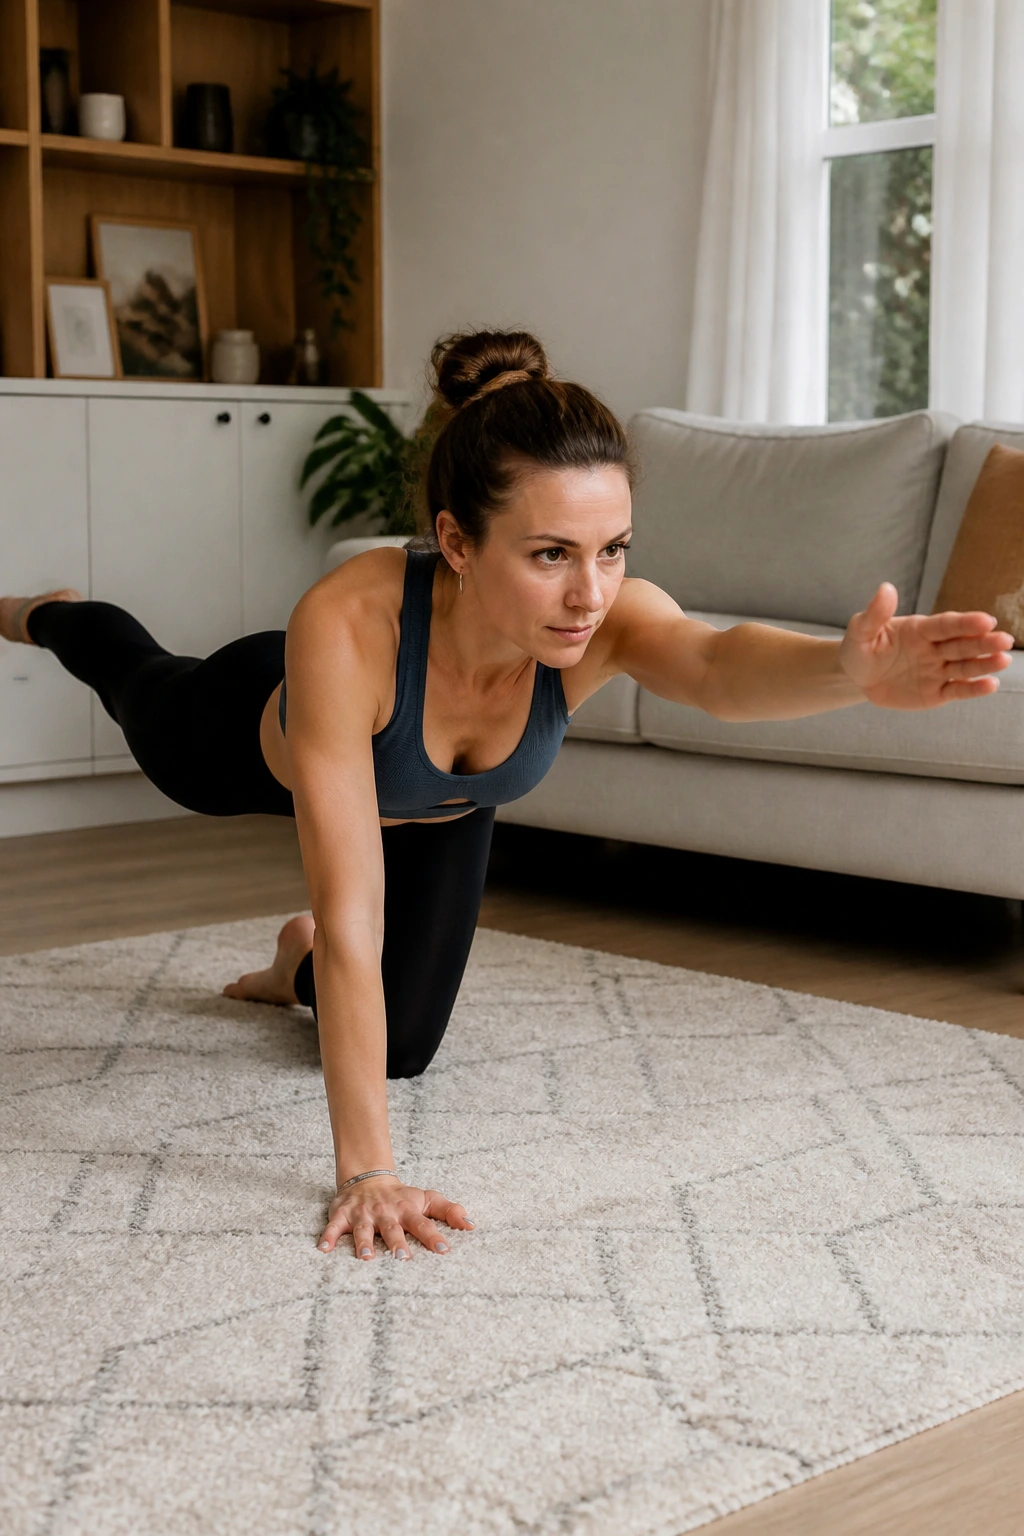
Bird dog is one of those exercises people rush through because it looks easy. Then they try holding the opposite arm and leg straight for five seconds and the whole room starts wobbling.
Why does it work so well? Because it asks your core, hips, and shoulder stabilizers to cooperate. Not one of them gets to hide. Start on hands and knees. Reach one arm forward and the opposite leg back, but keep the hips square to the floor. Pause. Breathe. Return with control.
How to Use It
If the full reach is too much, slide the foot instead of lifting it high. That tiny adjustment keeps the spine quiet and the movement honest.
- Aim for 6 to 8 reps per side.
- Hold each reach for 3 to 5 seconds.
- Keep your ribs pulled in.
- Avoid twisting open to one side.
Bird dog is especially useful on days when your lower back feels fussy. It gives you work without pounding anything, and that is a rare combination.
10. Standing Calf Raises for Low Impact Strength at Home
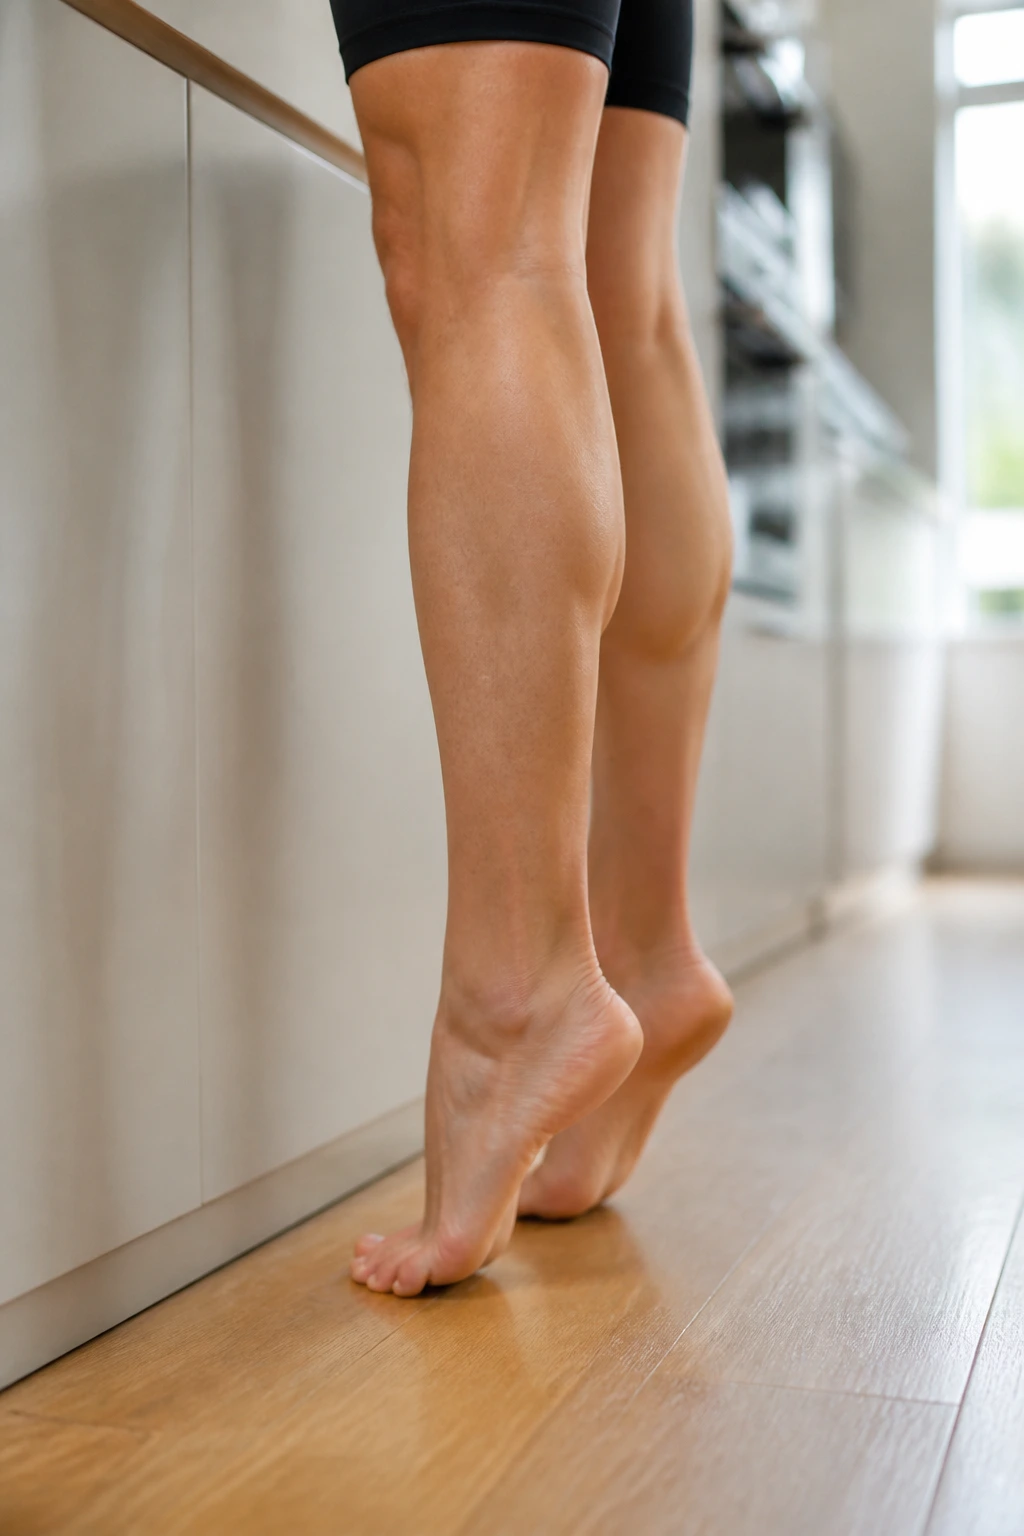
Calf raises are easy to ignore until your ankles feel stiff, your balance gets sloppy, or a longer walk leaves your lower legs tired in a way you did not expect.
Stand near a wall or counter for light support. Rise up onto the balls of your feet, hold for a second at the top, then lower slowly until your heels almost kiss the floor. The lowering phase should be deliberate. That is where the calf muscles earn their keep. Try 15 to 25 reps on two legs, then move to 8 to 12 reps per side once that feels too tame.
Quick Details
- Keep pressure through the big toe and second toe.
- Don’t let your ankles roll outward.
- Pause at the top for a full second.
- Use a stair edge only if your balance is steady.
A lot of people bounce through calf raises and get almost nothing from them. Slow them down and they turn into a real lower-leg strength move. Not glamorous. Useful.
11. Side-Lying Leg Raise
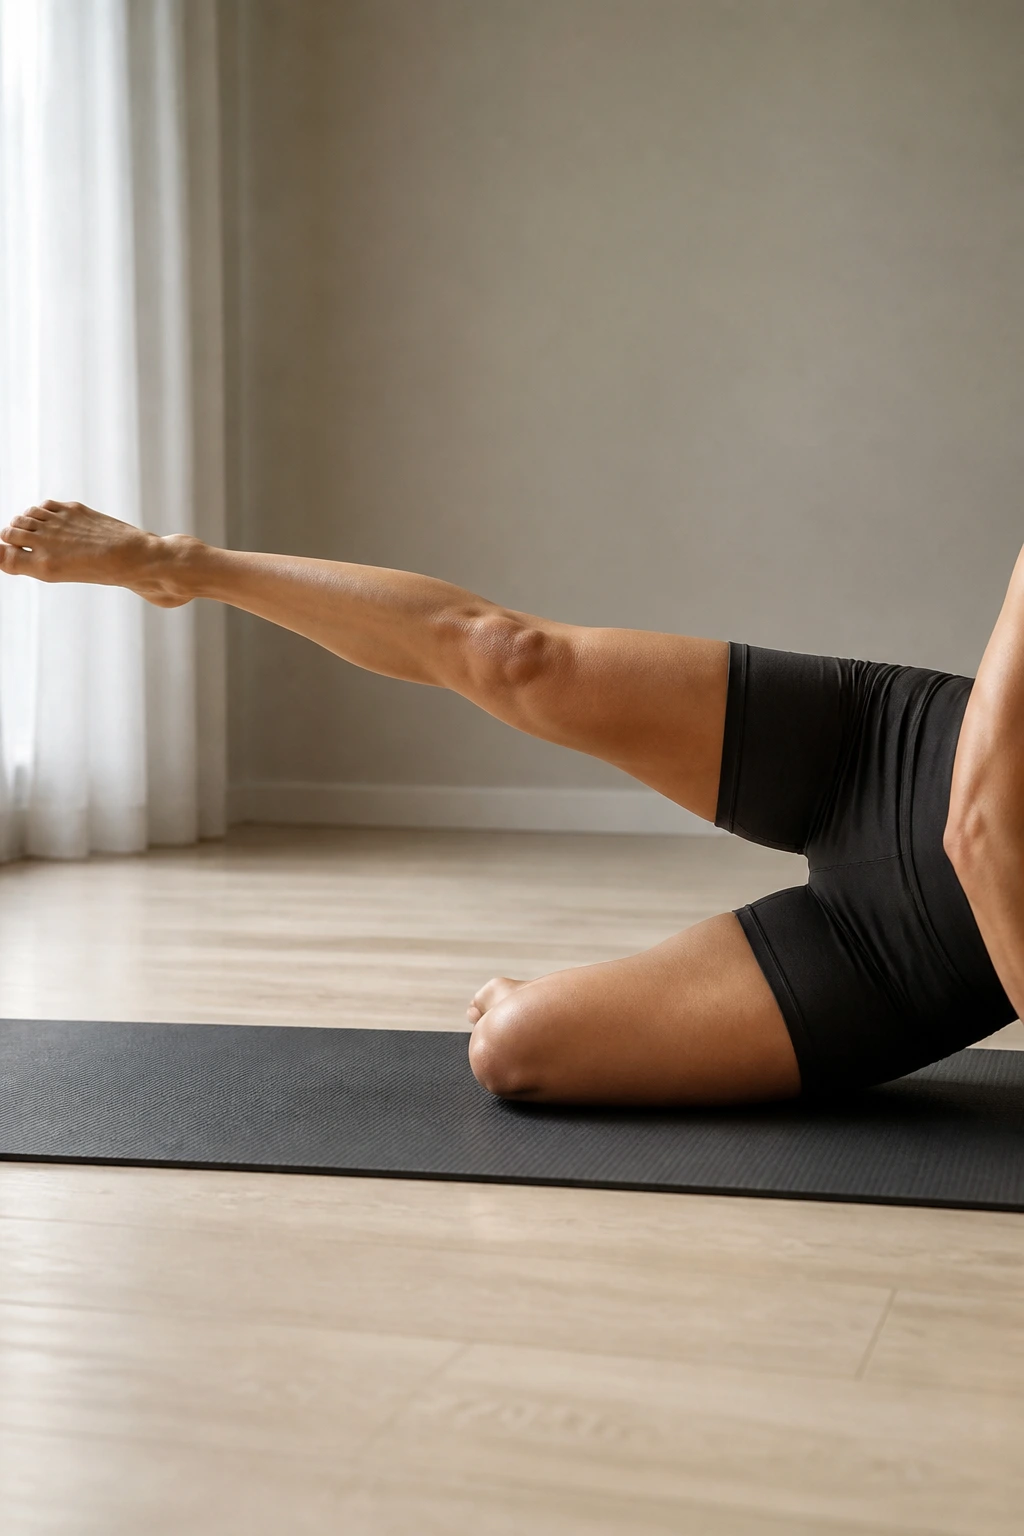
Side-lying leg raises are the kind of move that seems almost too small to matter, then you do them correctly and your outer hips start complaining in the best possible way.
Lie on one side with your bottom knee bent slightly for support and your top leg straight. Keep your toes pointed a little downward, not straight up. Lift the top leg about 12 to 18 inches, pause for a second, then lower slowly. If you swing the leg or lean your torso back, the work moves away from the hip.
What I like here is the honesty. There is no hiding. If your upper hip rolls backward, you will feel it. If your foot points too high, the front of the hip may take over. Keep the motion small and controlled. 12 to 20 reps per side is plenty.
You can add an ankle weight or a loop band later, but start with clean form first. That usually matters more than the gear anyway.
12. Split Squat Iso Hold
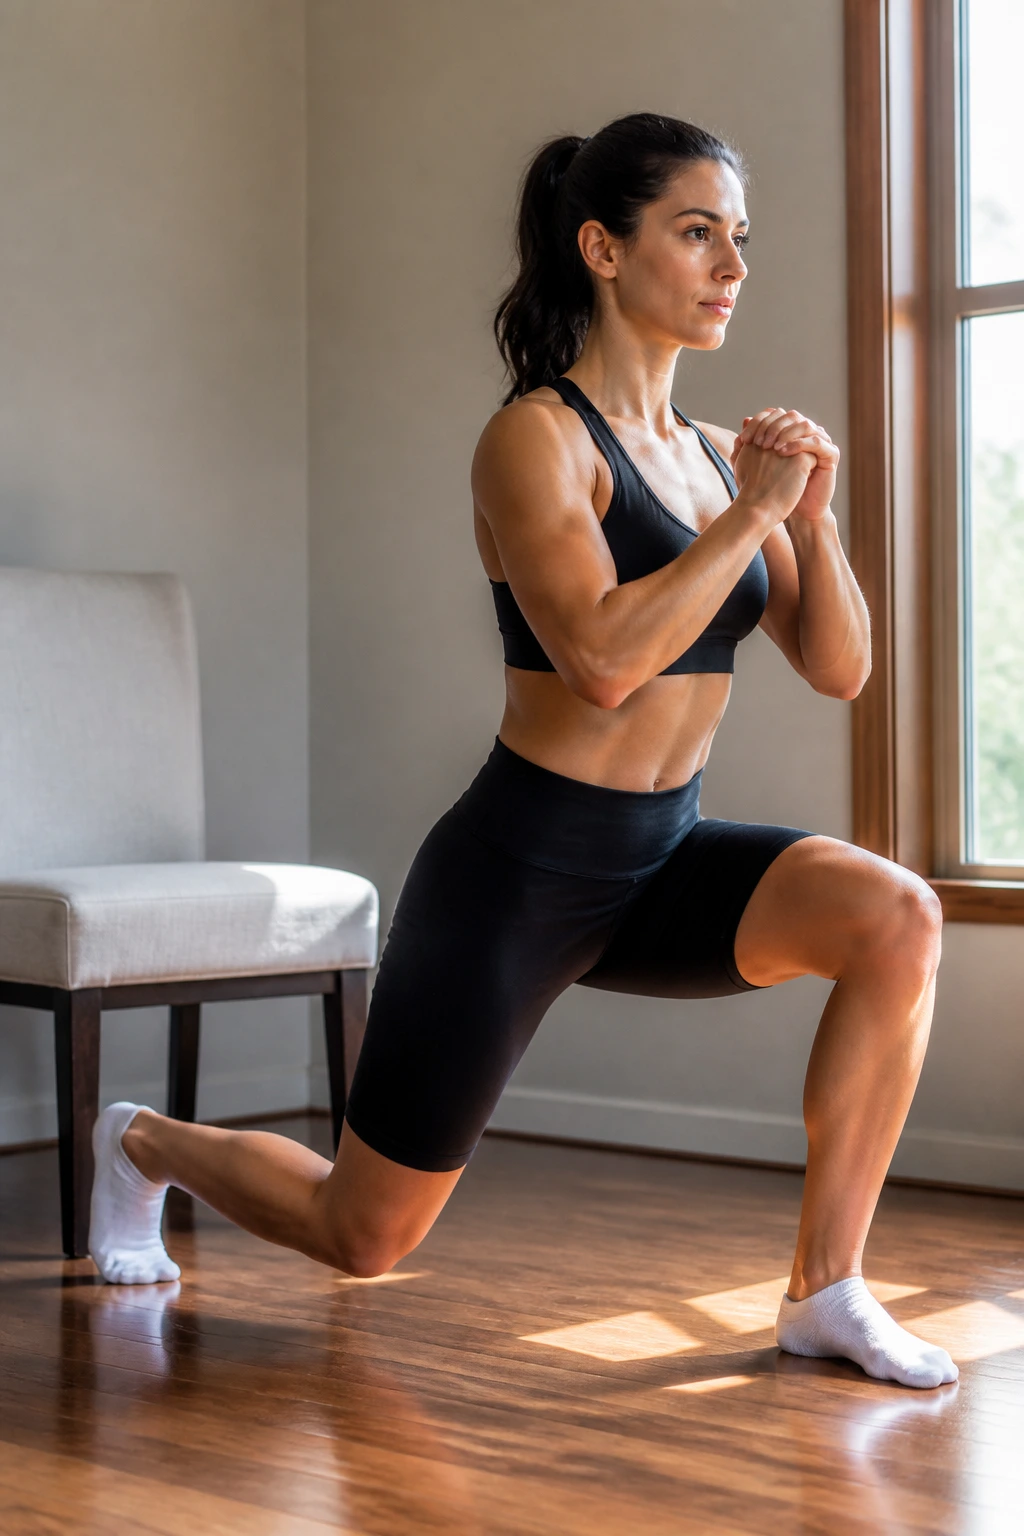
A split squat iso hold is a quiet little beast. It looks like a lunge frozen in place, which is exactly why it works.
Set one foot forward and the other back, feet on train tracks rather than a tight line. Lower until both knees bend and hold that position for 20 to 30 seconds. Your front foot stays flat. Your torso stays tall. Your back heel lifts slightly, and that is fine. The goal is control, not theatrics.
Compared with moving split squats, the hold keeps the muscles under tension without adding extra joint movement. That makes it a good pick when you want leg work but your knees feel a bit touchy. It also builds patience, which sounds silly until you try breathing through a hold.
If balance is an issue, stand near a wall or lightly touch a chair. Don’t hover in a half-rep. Sink into a real hold, then come out of it cleanly. That’s the part that counts.
13. Overhead Press with Water Bottles
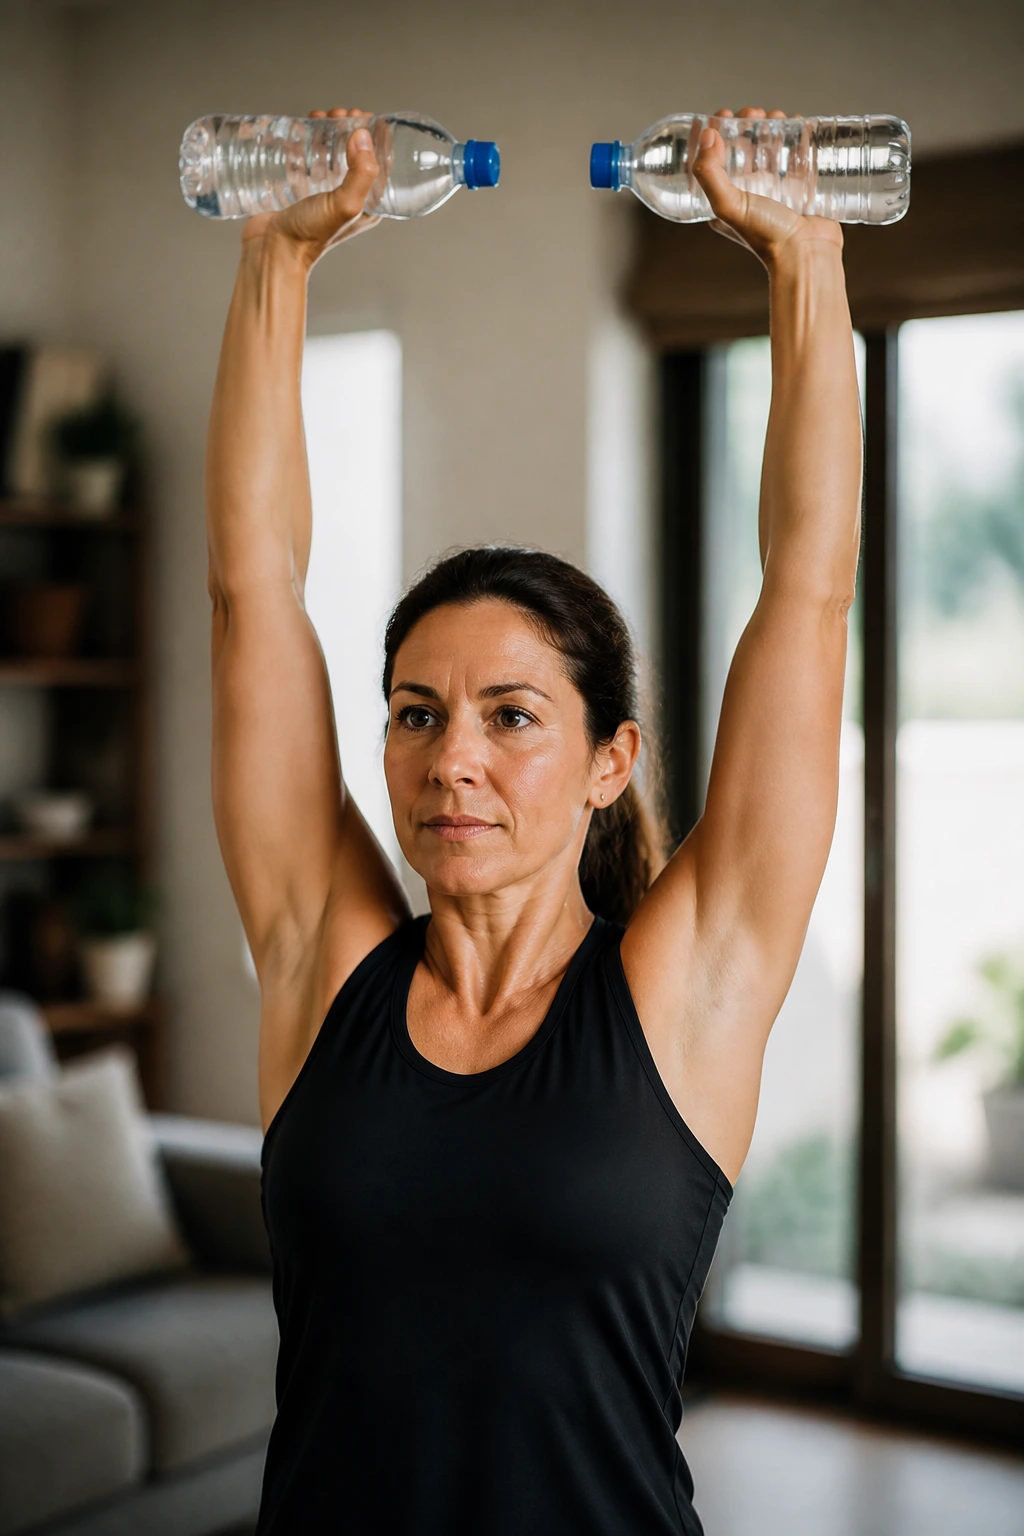
A pair of filled water bottles can do more than people give them credit for. Not forever. But enough.
Stand or sit tall, brace your ribs down, and press the bottles straight overhead without leaning back to cheat the movement. Your wrists should stay stacked over your elbows. Lower them under control to shoulder height and repeat for 8 to 12 reps. If one side is weaker, you’ll feel it fast. That is useful feedback, not a problem.
How to Get the Most From It
Use a slightly staggered stance if you feel unstable. Or sit on a firm chair if standing makes you sway. The exercise should feel solid, not wobbly.
- Press in a straight line, not forward.
- Keep your neck long.
- Stop the set if your lower back starts arching.
- A slow lower makes the move harder without needing more weight.
Overhead pressing at home can be annoyingly effective when you keep it strict. Loose reps do not teach much. Clean reps do.
14. Bear Hover Shoulder Tap
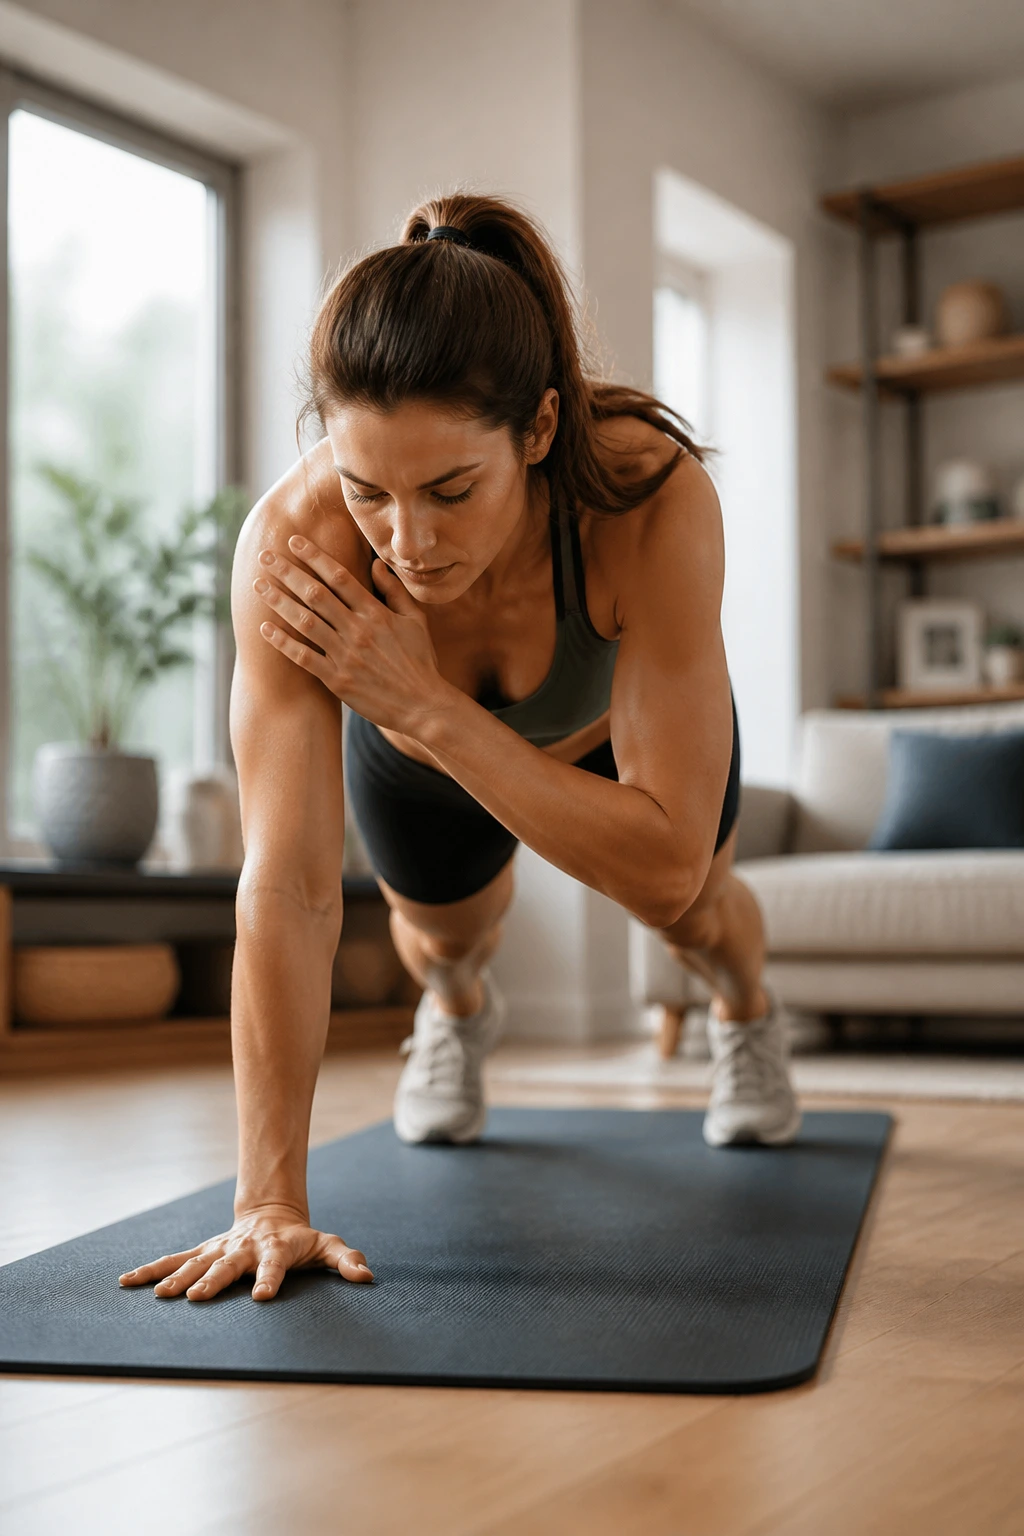
Bear hover shoulder taps are where low impact meets real challenge. Not impact. Challenge.
Start on hands and knees, then lift your knees just an inch or two off the floor. That tiny hover is the whole game. From there, tap one shoulder with the opposite hand, then switch sides, moving slowly enough that your hips do not sway. If your knees are too close together, the move gets messy fast. Widen your feet a little and the base of support improves.
What to Watch For
Your goal is not speed. Your goal is a still torso.
- Keep the hover low.
- Tap without rocking.
- Breathe out on each tap.
- Start with 4 to 6 taps per side if that is all you can control.
This is one of the better low impact strength workouts at home for core and shoulder stability, especially if you want something harder than a plank but without jumping. It is sneaky. And a little rude, which I respect.
15. Sumo Squat and Reach
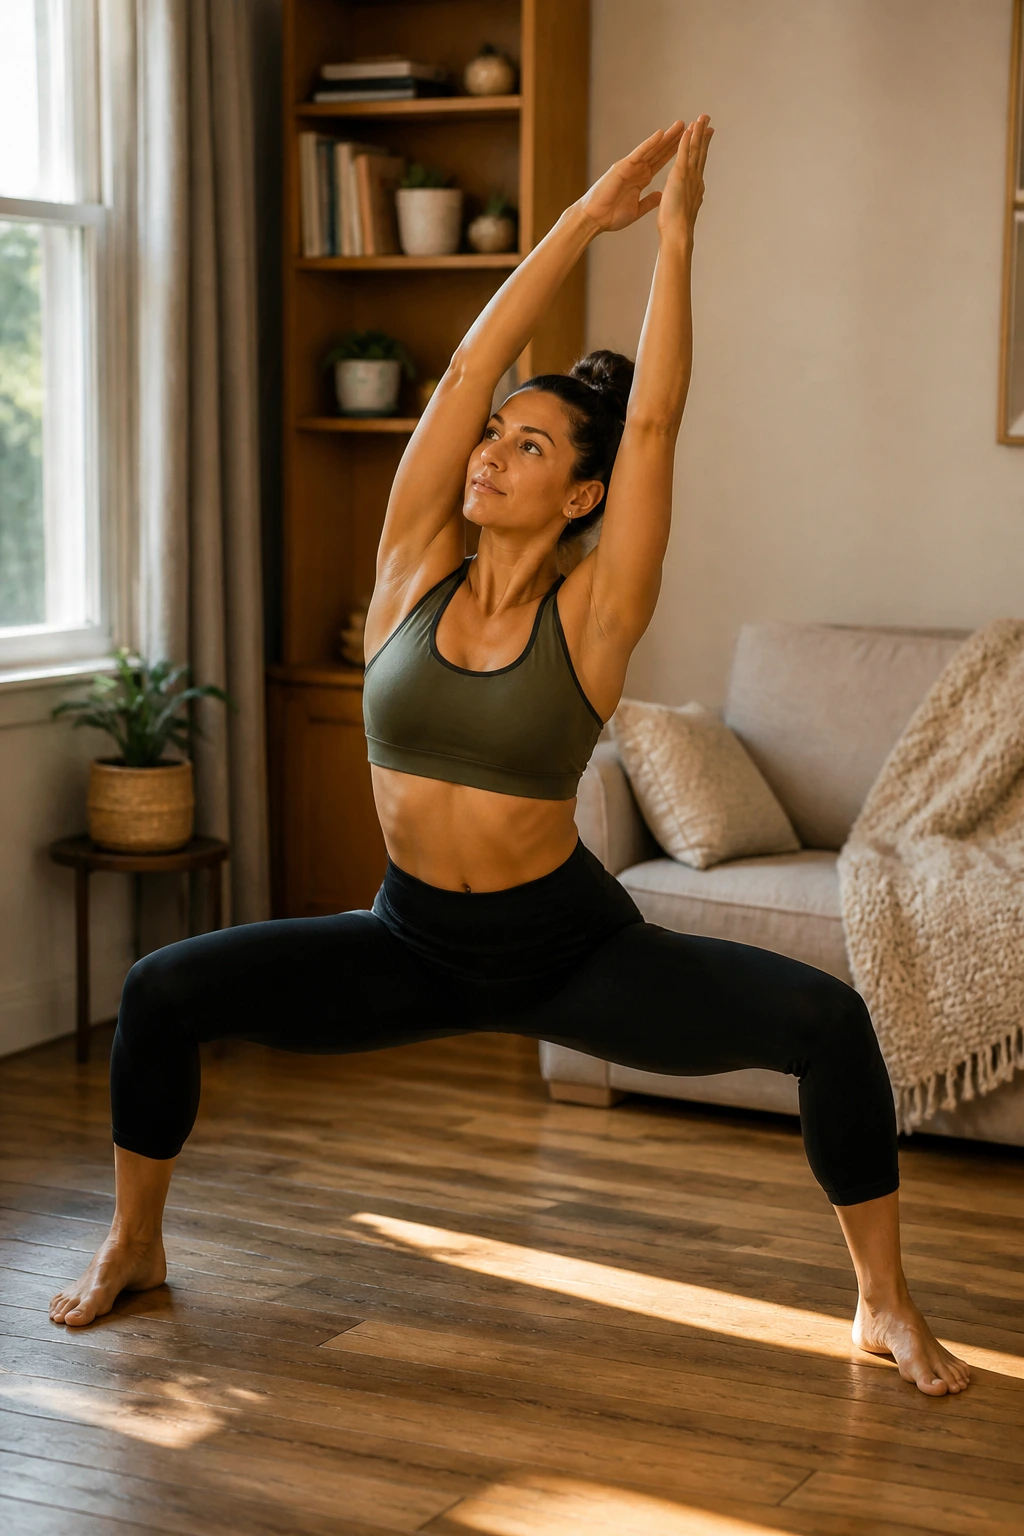
A wide-stance squat can feel friendlier on tight hips and grumpy adductors than a narrow stance, and that is why I keep coming back to it.
Set your feet wider than shoulder-width with toes turned out about 20 to 30 degrees. Drop into a squat as far as you can without your heels peeling up, then stand and reach both arms overhead or diagonally across your body. The reach is not there for decoration. It opens the torso and keeps the movement from getting stale.
If your inner thighs feel tight, this can be a good warm-up before harder leg work. If your knees cave inward, shorten the depth a little and press the knees out gently as you rise. 10 to 15 slow reps is a solid target.
The move works because it trains the squat pattern with a broader base and a bit more hip opening. That’s not glamorous. It is useful.
16. Triceps Kickback Hinge
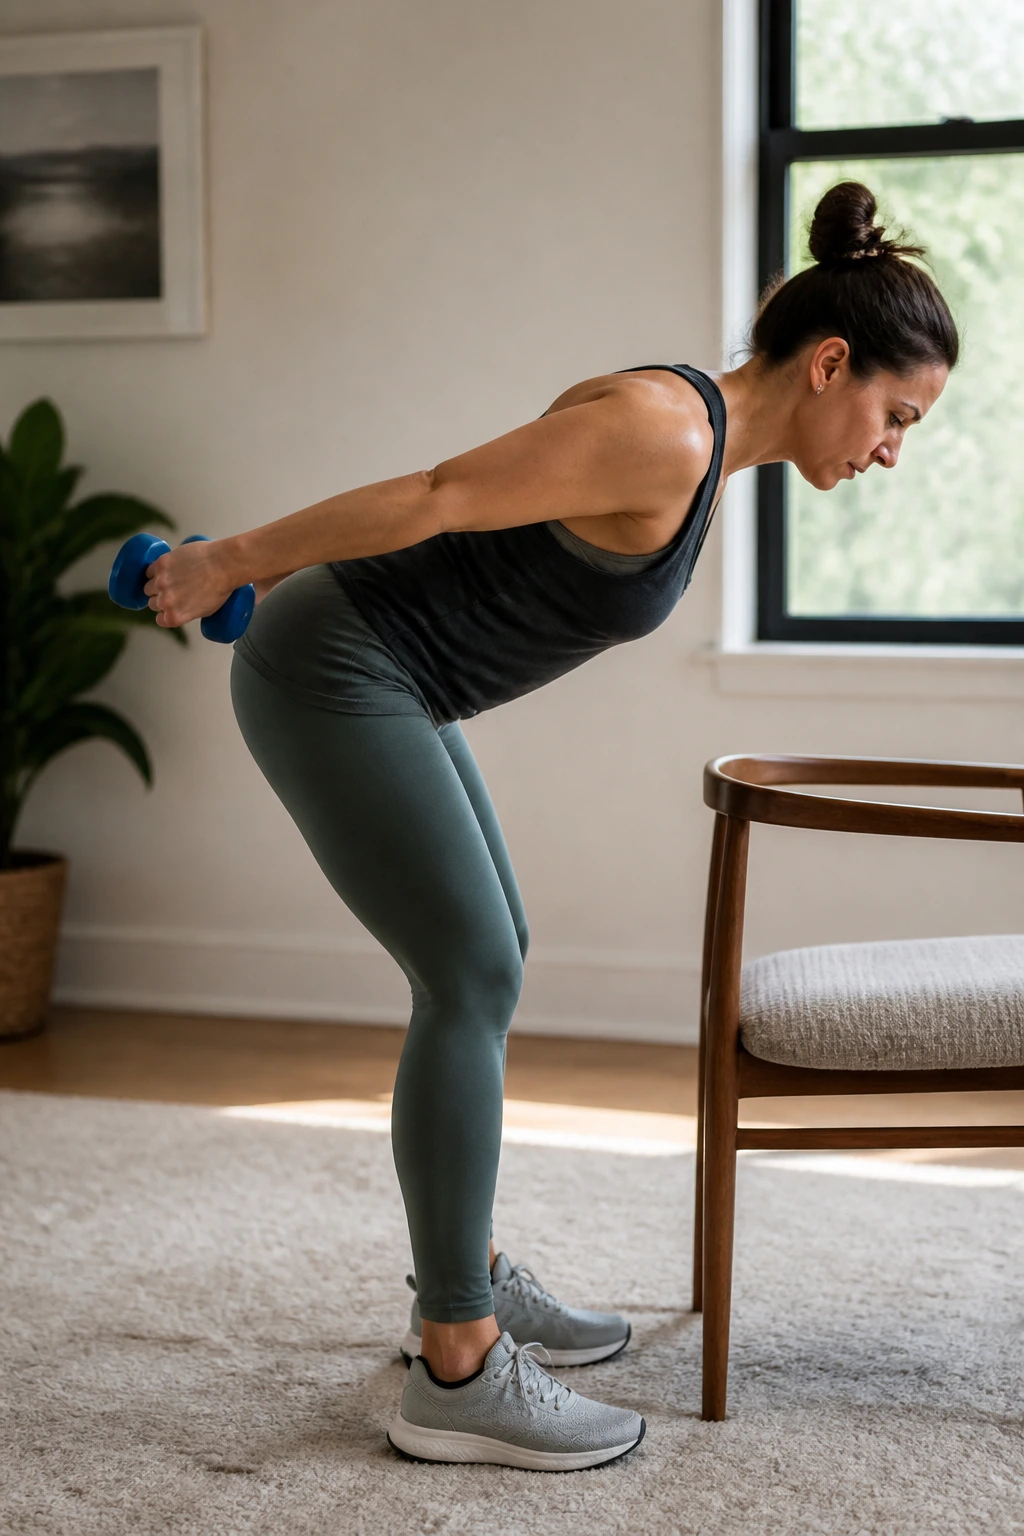
Triceps kickbacks are not flashy, and I think that’s part of their charm. They’re plain old arm work, done cleanly, without needing a bench or a cable machine.
Hinge forward slightly, keep your upper arms tucked close to your sides, and extend the forearms back until the elbows are straight. Then return with control. The upper arm should stay almost still. If the shoulder swings, the triceps lose the point of the exercise.
Compared with overhead triceps extensions, kickbacks feel lighter on the shoulders and easier to manage at home with water bottles, soup cans, or small dumbbells. They’re also good as a finisher because they don’t take much room or setup. Aim for 10 to 15 reps, and keep the pace deliberate.
If you want more challenge, pause for one second at the top. Tiny pause. Big difference.
17. Step-Up to Balance
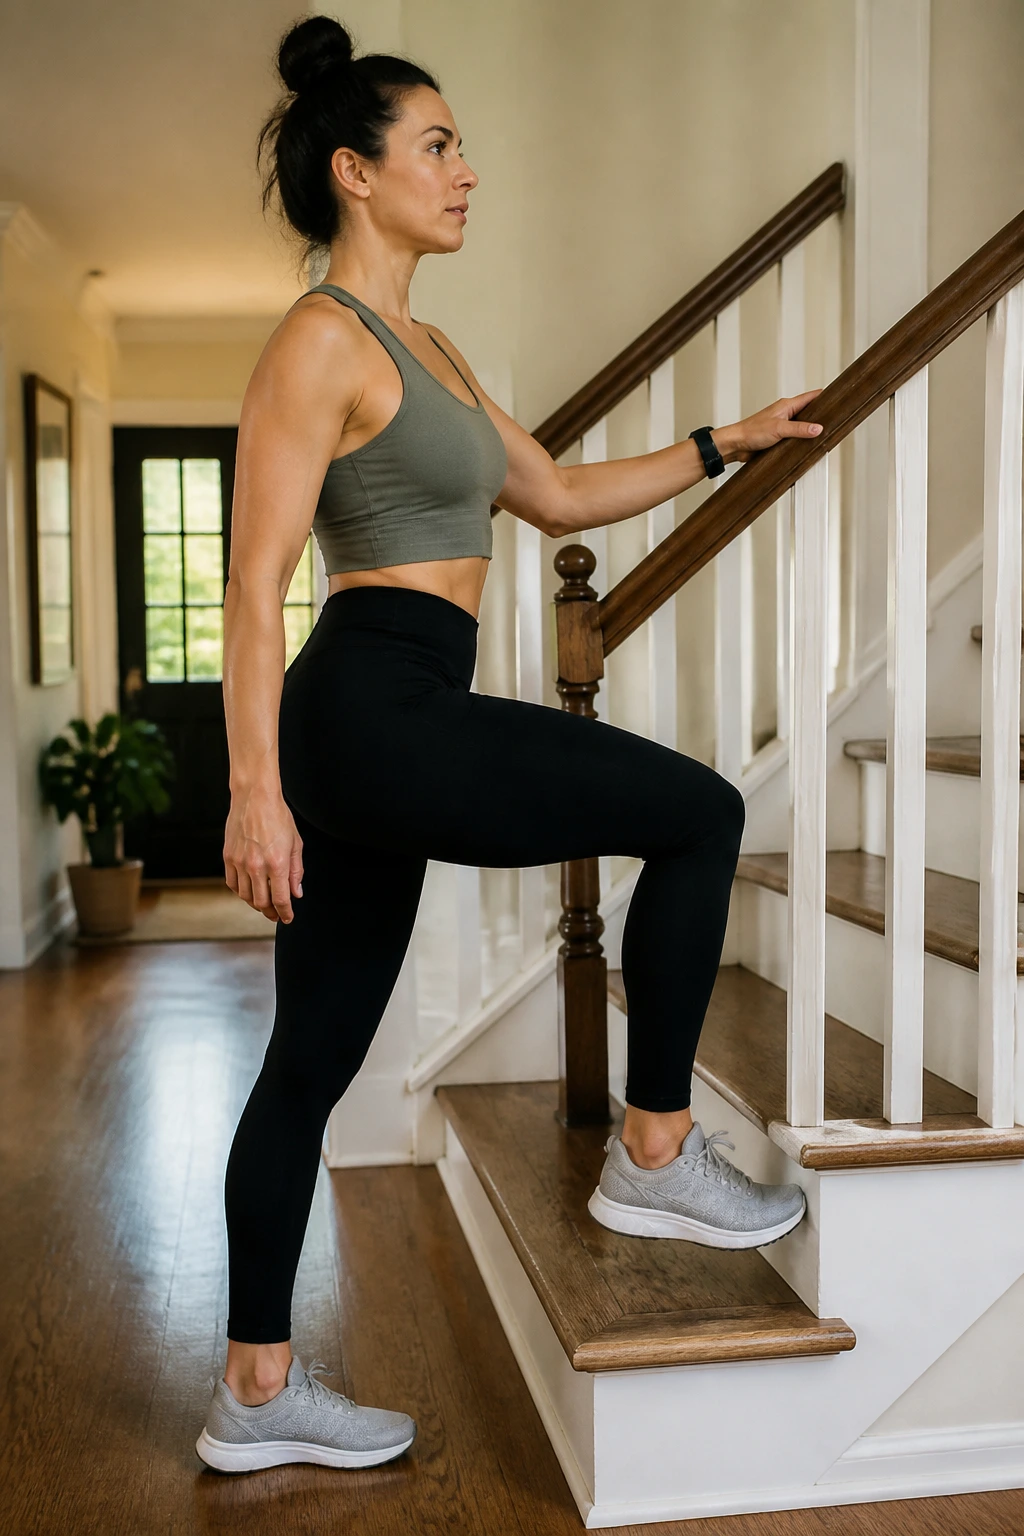
A step-up is one of the most practical home moves around because stairs are already in most houses, and a low step can train the legs without any impact at all.
Place one foot on a sturdy step or bottom stair, drive through the heel, and stand up fully. At the top, pause for 2 seconds before stepping back down slowly. Don’t bounce off the rear foot like it’s helping more than it should. It should assist, not launch.
This move teaches single-leg strength, which matters more than people think. Walking, climbing, carrying groceries — all of it asks one leg to do the job while the other gets out of the way. 8 to 12 reps per side is enough to start. Use a railing or wall if balance feels off.
A lower step keeps the move low impact. A higher step makes it harder, but also messier if your form slips.
18. Side Plank Knee Support
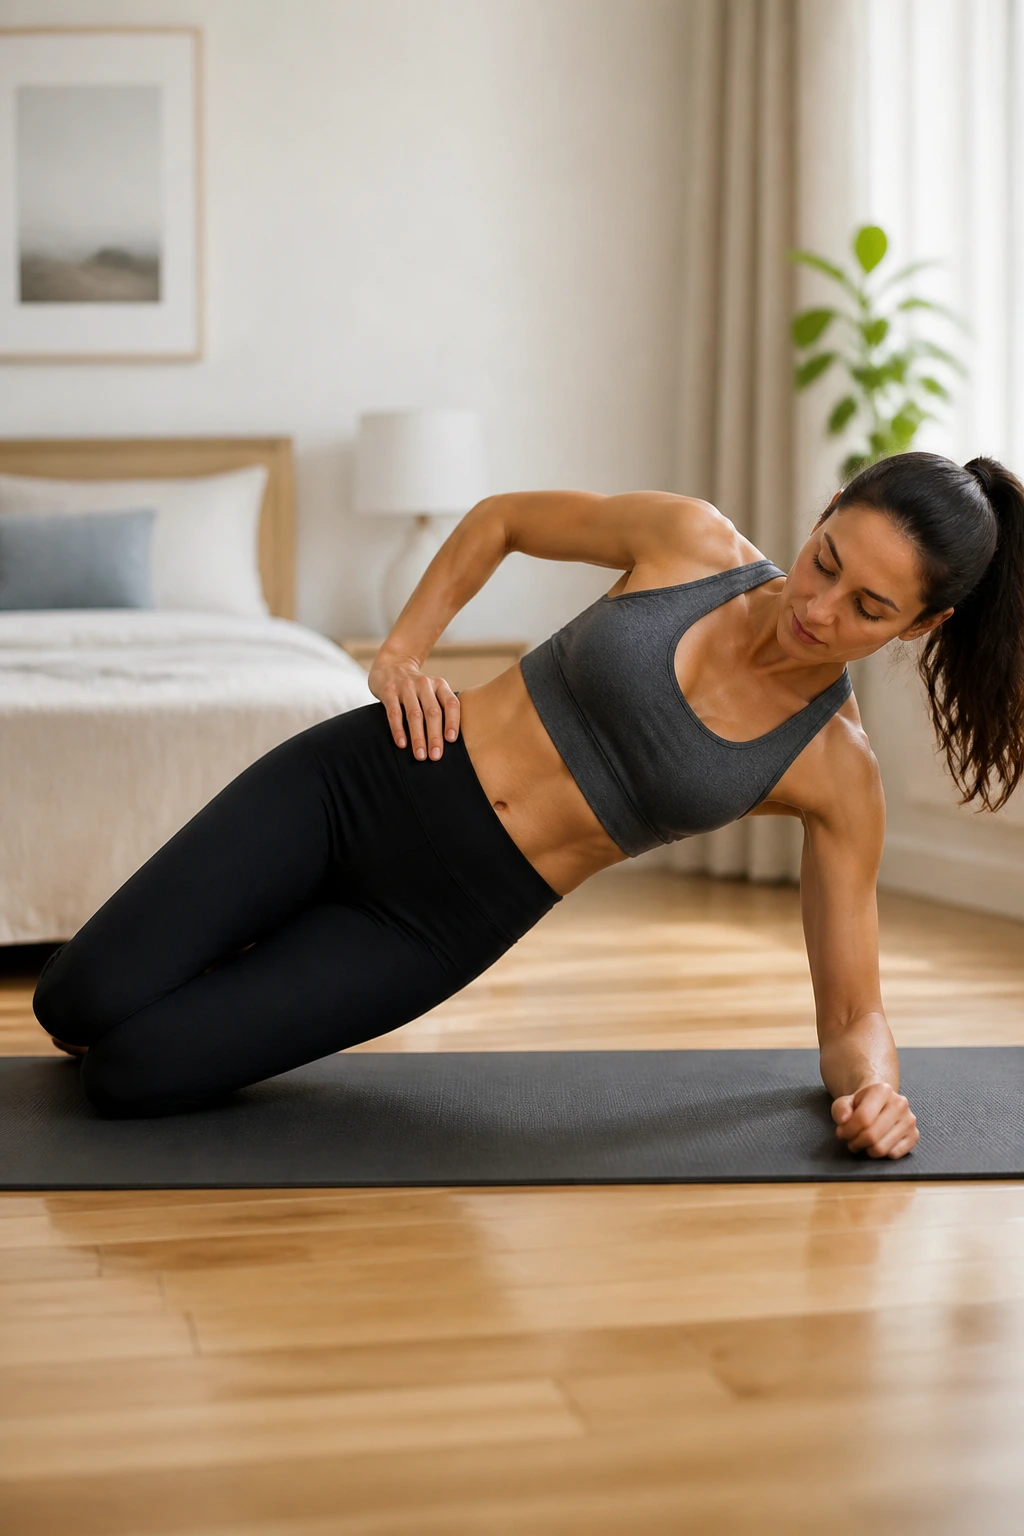
The knee-supported side plank is the version I wish more people used before they tried the full one and got discouraged.
Lie on one side, prop yourself on one forearm, and bend your knees so the lower legs stack behind you. Lift your hips so your body forms a straight line from shoulder to knee. Hold for 15 to 30 seconds. That’s long enough to matter and short enough to keep the shape honest.
Compared with the full side plank, this version is easier on the shoulders and usually easier on the lower back too. It still works the obliques, the outer hip, and the shoulder stabilizers. If you want a stronger side body without fancy gear, this is one of the cleaner options.
Keep your chest open and don’t let the top shoulder roll forward. If the hold feels too easy, straighten the top leg or add a slow hip dip. Careful. That one gets spicy quickly.
19. Farmer Carry March in Place
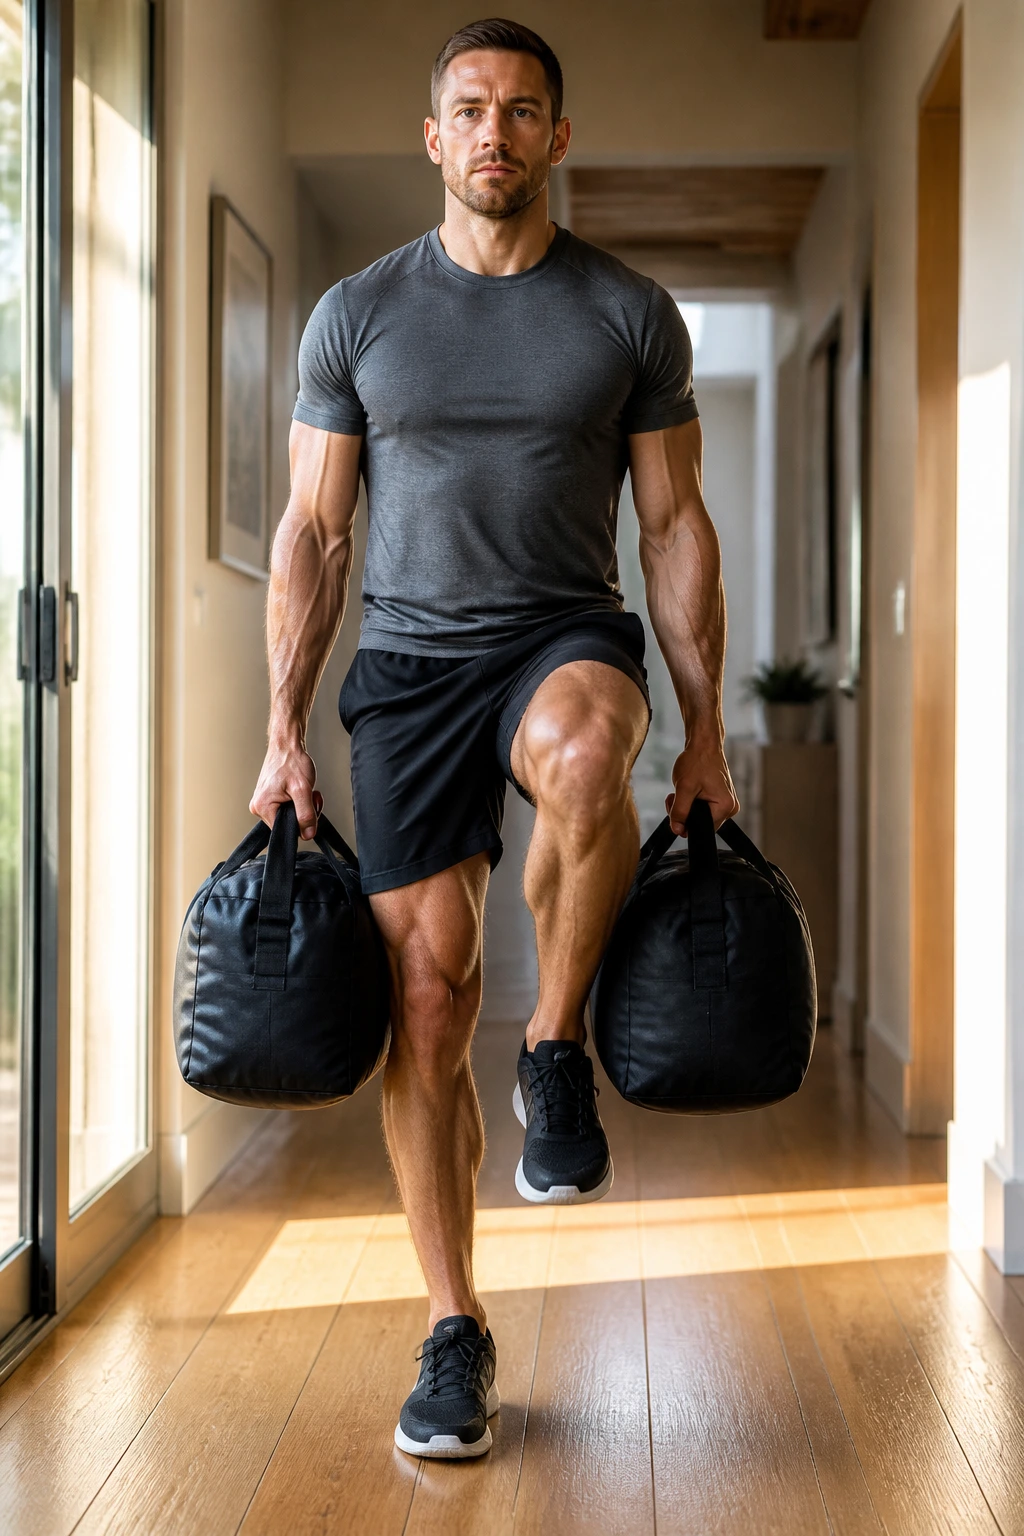
Carrying weight is strength work. Full stop.
Grab two heavy bags, dumbbells, or water jugs and stand tall. Then march in place slowly while keeping your shoulders down and your ribs stacked. Each knee lift should be controlled, not sloppy. Try 30 to 45 seconds per round. Rest, then repeat for 3 to 5 rounds if your grip and posture hold up.
Why It Works
This move trains grip, posture, core stability, and hip control at the same time. That’s a lot for something that looks almost boring.
- Keep your neck relaxed.
- Don’t lean from side to side.
- Walk slowly enough to stay tall.
- Use a load heavy enough that you notice it by the end of the interval.
Farmer carries are one of my favorite low impact strength workouts at home because they feel practical. Real-world strong, not gym-bro dramatic. If you’ve got a hallway or a clear patch of floor, you’ve got a carry lane.
20. Backpack Rows for Low Impact Strength at Home
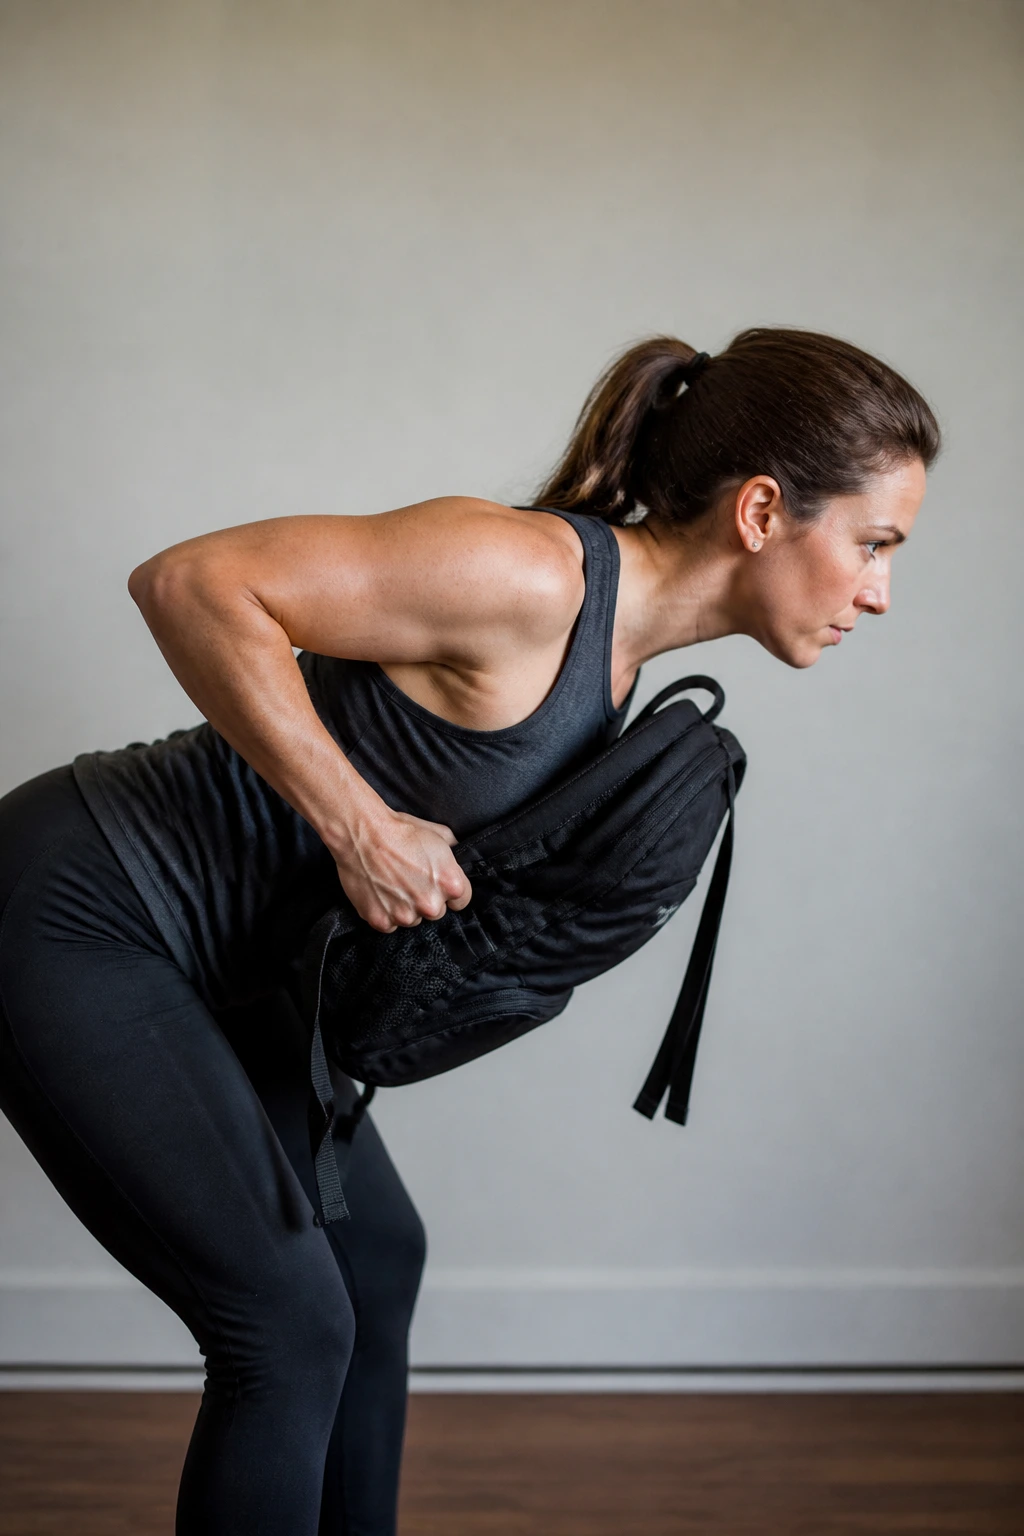
Pulling strength is easy to miss in home workouts because people spend so much time pressing and squatting. That’s a bad trade. Your upper back wants work, too.
Fill a backpack with books or towels, hinge forward with a flat back, and row the bag toward your lower ribs. Pause for a second at the top, then lower slowly. The elbows should track close to your sides. If you yank the bag with your shoulders, you’re cheating yourself and probably your posture as well.
This is one of the simplest low impact strength workouts at home for the back of the body. It balances all the pushing, helps posture, and gives you a pulling pattern that does not require a bar or machine. Use 8 to 15 reps, and keep the hinge position steady.
If the backpack swings, pack it tighter. If one strap digs into your hand, hold the bag by the top handle with both hands or switch to one-arm rows supported on a chair. Little fixes like that matter.
Final Thoughts
Low impact strength work does not need to be soft to be smart. A slow squat, a clean press, a tight hinge, and a good carry can cover a lot of ground without beating you up.
The best home routine is the one you can repeat without dreading it. Pick four or five of these movements, keep the reps honest, and make the exercise harder by slowing the lowering phase before you chase bigger load. That order matters.
And if a move feels too easy, don’t rush to abandon it. First make the range cleaner. Then make the tempo slower. Then add weight. That path tends to build stronger bodies with fewer irritated joints, which is a trade I’ll take every time.
