



That dull, persistent ache in the knee after a long day, or that sharp, stabbing sensation when you stand up from a chair — it’s a universal language of physical limitation. If you are dealing with it, you know exactly what I am talking about. It changes the way you navigate the world. You stop taking the stairs. You hesitate before sitting on the floor to play with your kids or pets. You modify your entire life to accommodate a joint that feels like it’s failing you.
Most people assume the knee is the problem. They focus entirely on the joint itself, rubbing balms on the area, wearing heavy braces, or simply avoiding movement altogether to “let it rest.” But here is the reality that physical therapists and athletic trainers have known for decades: the knee is the middleman. It sits between the hip and the ankle, forced to absorb whatever forces those other joints cannot handle.
If your hips are weak, your knees take the hit. If your ankles lack mobility, your knees compensate by twisting in ways they were never designed to move. Strengthening the muscles around the knee is the most effective way to offload pressure from the joint itself. You are not just building muscles; you are creating a biological brace that protects your cartilage and ligaments.
The exercises below are designed to address the entire kinetic chain. We are going to focus on the quads, hamstrings, glutes, and calves. Some of these moves might seem simple, almost deceptively so, but doing them with precision is where the magic happens. A “simple” quad set performed with maximum neural drive is worth more than a dozen sloppy squats. Let’s look at how to build that support system, one movement at a time.
1. Quad Sets
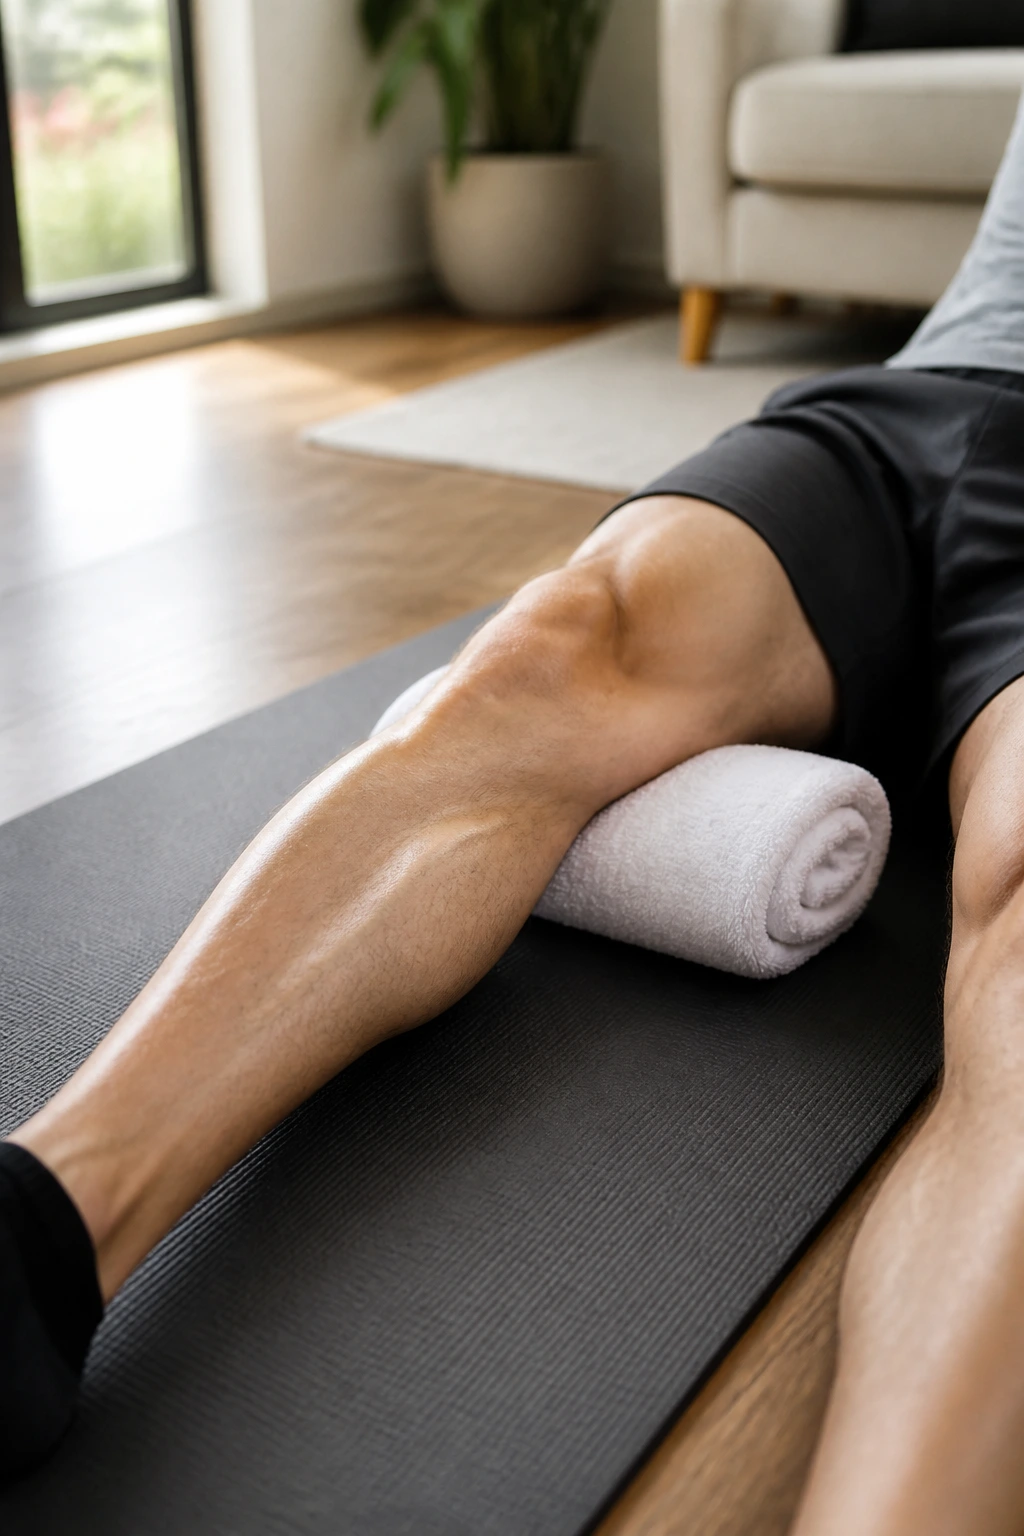
This is the foundational movement for anyone dealing with knee pain. Most people don’t realize how quickly the quadriceps — specifically the VMO, or the teardrop muscle on the inside of the knee — atrophy after an injury or chronic pain episode. If the quad is “asleep,” the kneecap doesn’t track correctly.
How to execute it
Lie on your back with your legs extended straight out on the floor. Place a rolled-up towel or a small foam roller under your knee. Now, focus entirely on tightening the muscle on the top of your thigh. Do not just pull your toes back; mentally command that muscle to squeeze. You want to push the back of your knee firmly into that rolled-up towel. Hold that contraction for a solid five to ten seconds.
Why this works
You aren’t moving the joint through a range of motion, which makes this perfect for days when your knees feel inflamed. You are retraining the neural connection between your brain and your quad. It’s a low-risk, high-reward isolation exercise that reminds your body how to stabilize the joint from the front.
2. Straight Leg Raises
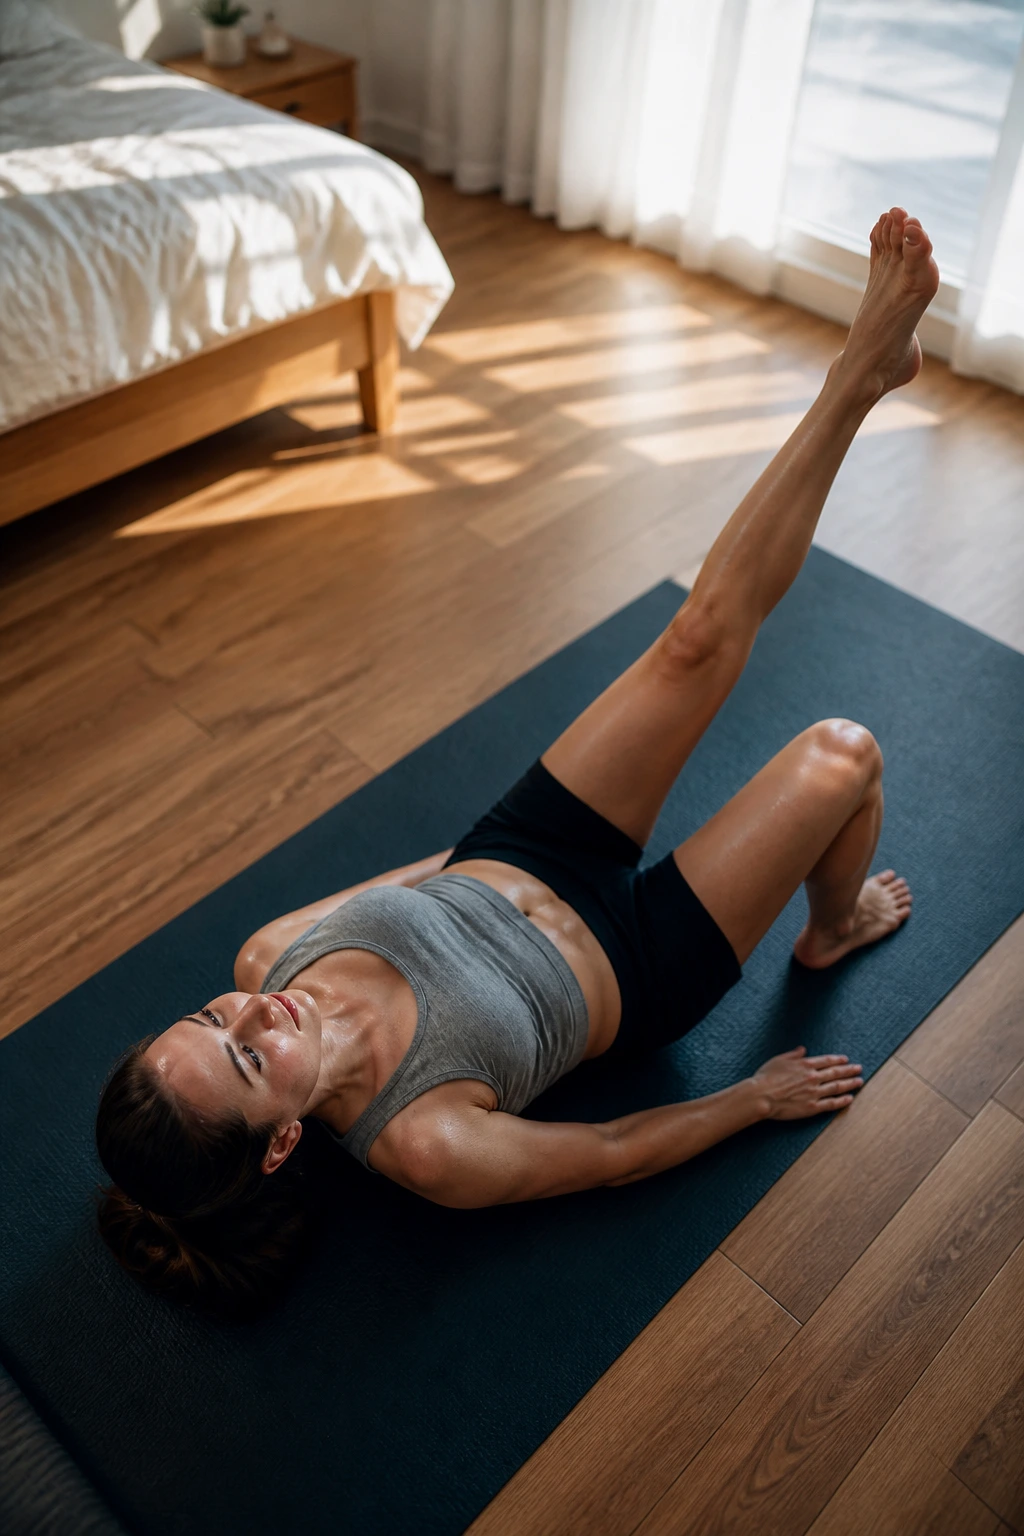
This move seems almost too easy until you actually try it. When you have knee pain, doing a full squat is often impossible. The straight leg raise allows you to work the quadriceps and hip flexors without putting any shear force or compression on the knee joint.
The technique
Lie on your back with one leg bent, foot flat on the floor, and the other leg completely straight. Tighten the quad on the straight leg — keep it rock hard. While keeping the knee locked, lift your entire leg up until it is level with the knee of your bent leg. Hold for two seconds at the top, then lower it slowly. The descent should take three full seconds.
Pro tip
If you feel your lower back arching, your core isn’t tight enough. Keep your belly button pulled toward your spine. If you cannot keep the knee perfectly straight, your quad isn’t strong enough yet; that’s okay, just lift the leg slightly lower and focus on the lock-out.
3. Wall Sits
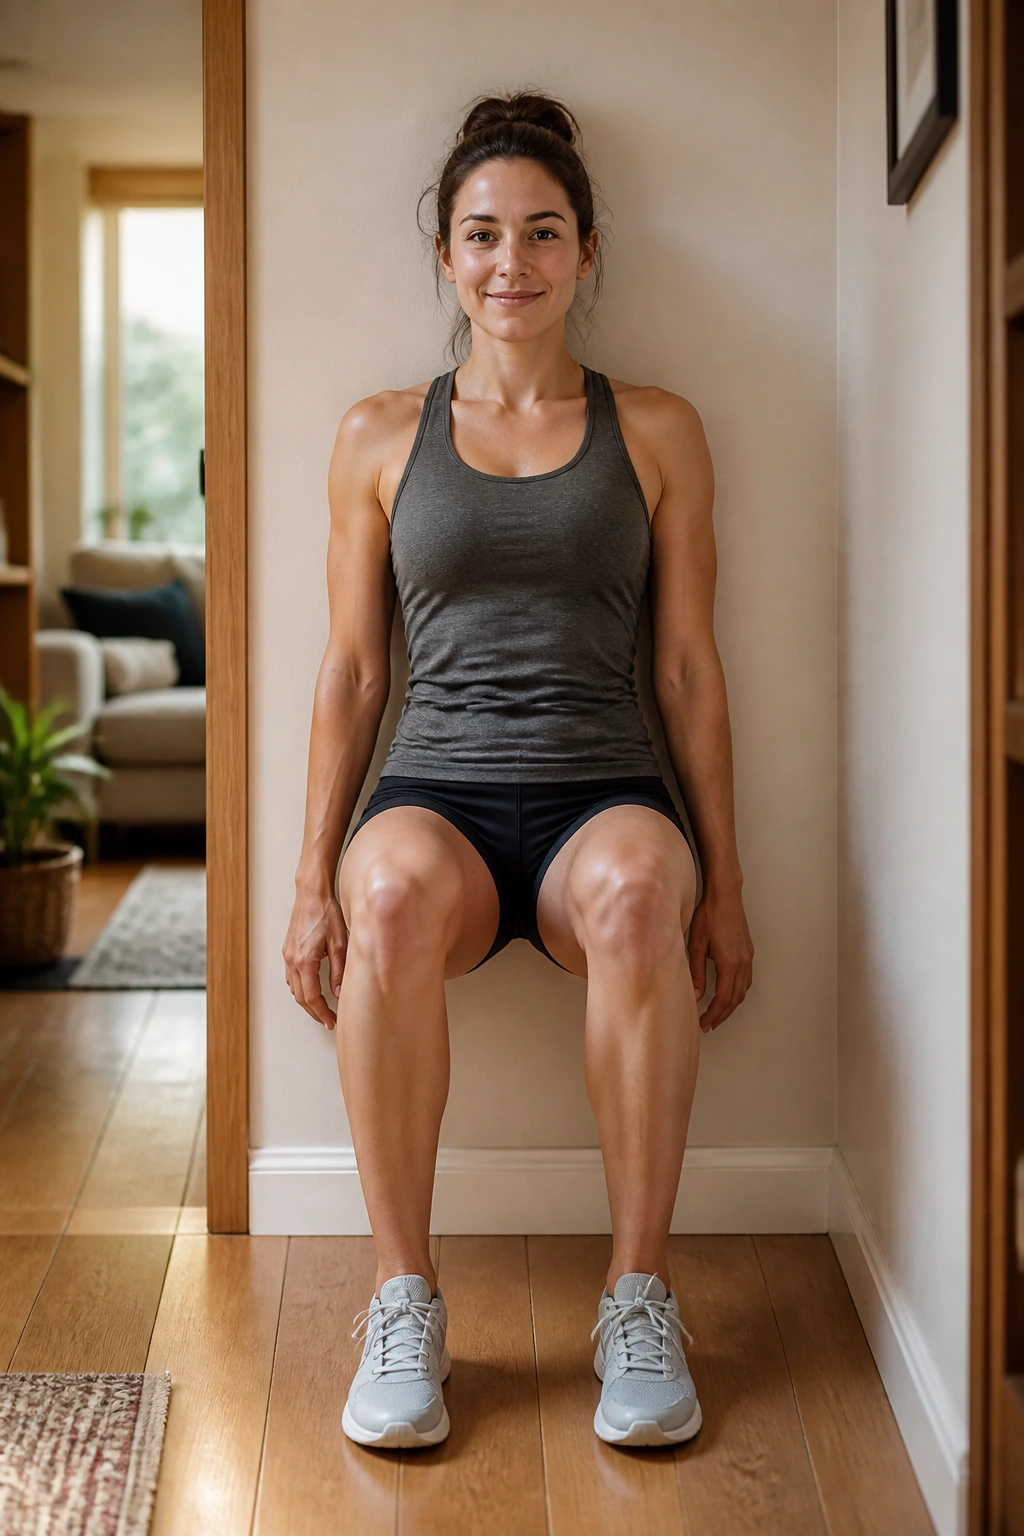
Isometric training is one of the “secret weapons” in rehabilitation. Because you aren’t moving the joint, there is minimal friction, yet you are placing the muscles under significant tension. This is how you build endurance in the quads without the grinding pain of a heavy squat.
Finding the right angle
Find a sturdy wall. Slide your back down until your thighs are at a comfortable angle — start with a 45-degree angle, not a deep squat, if you are new to this. Your knees should be directly over your ankles, not pushing forward past your toes. Press your lower back into the wall.
Holding the position
Set a timer. Start with 30 seconds. If your knees start to shake, that is actually good; it means your muscle fibers are working hard to stabilize the joint. Do not let your knees collapse inward. Keep them tracking in line with your second toe.
4. Clamshells
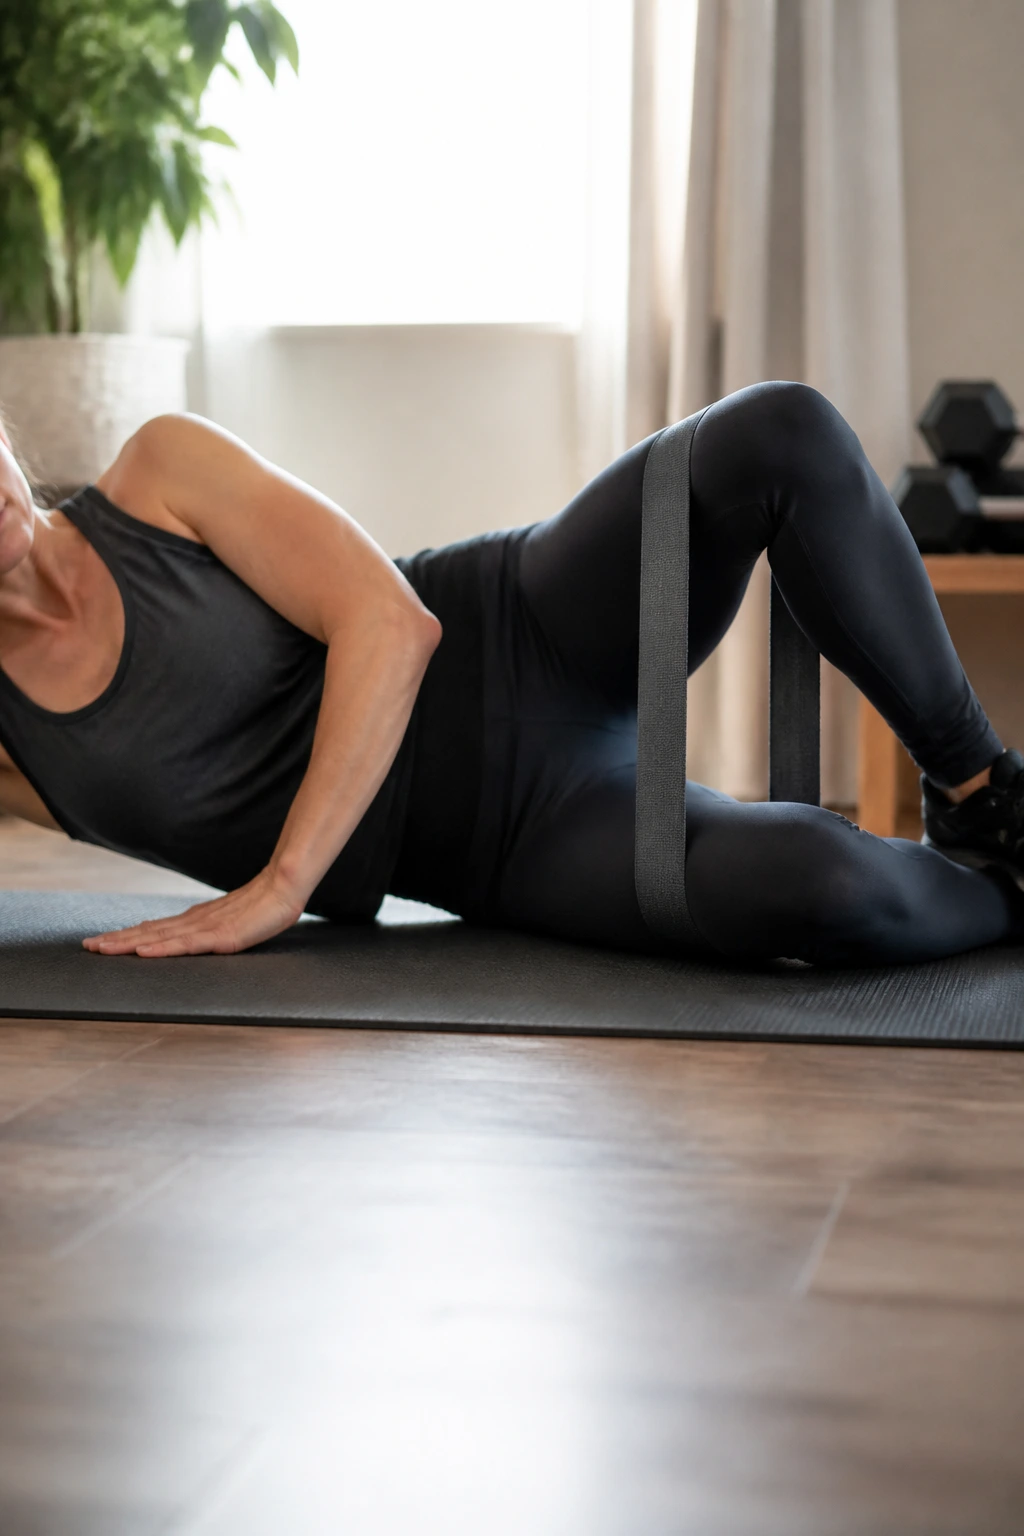
Wait, why are we doing glute work for knee pain? Because the gluteus medius is the primary stabilizer of the hip. If your hip collapses inward when you walk or squat, your knee must cave inward, too. This is called valgus collapse, and it is a leading cause of runner’s knee and meniscus irritation.
The setup
Lie on your side, legs stacked and knees bent at a 45-degree angle. Keep your feet touching. Open your top knee toward the ceiling, like a clam shell, while keeping your hips perfectly stacked. Do not roll your pelvis backward to get more height.
The focus
You should feel this in the side of your hip, right where your pocket would be. If you feel it in your lower back or the front of your hip, readjust. This small, isolated movement is the key to keeping your knees from caving in during daily activities.
5. Glute Bridges
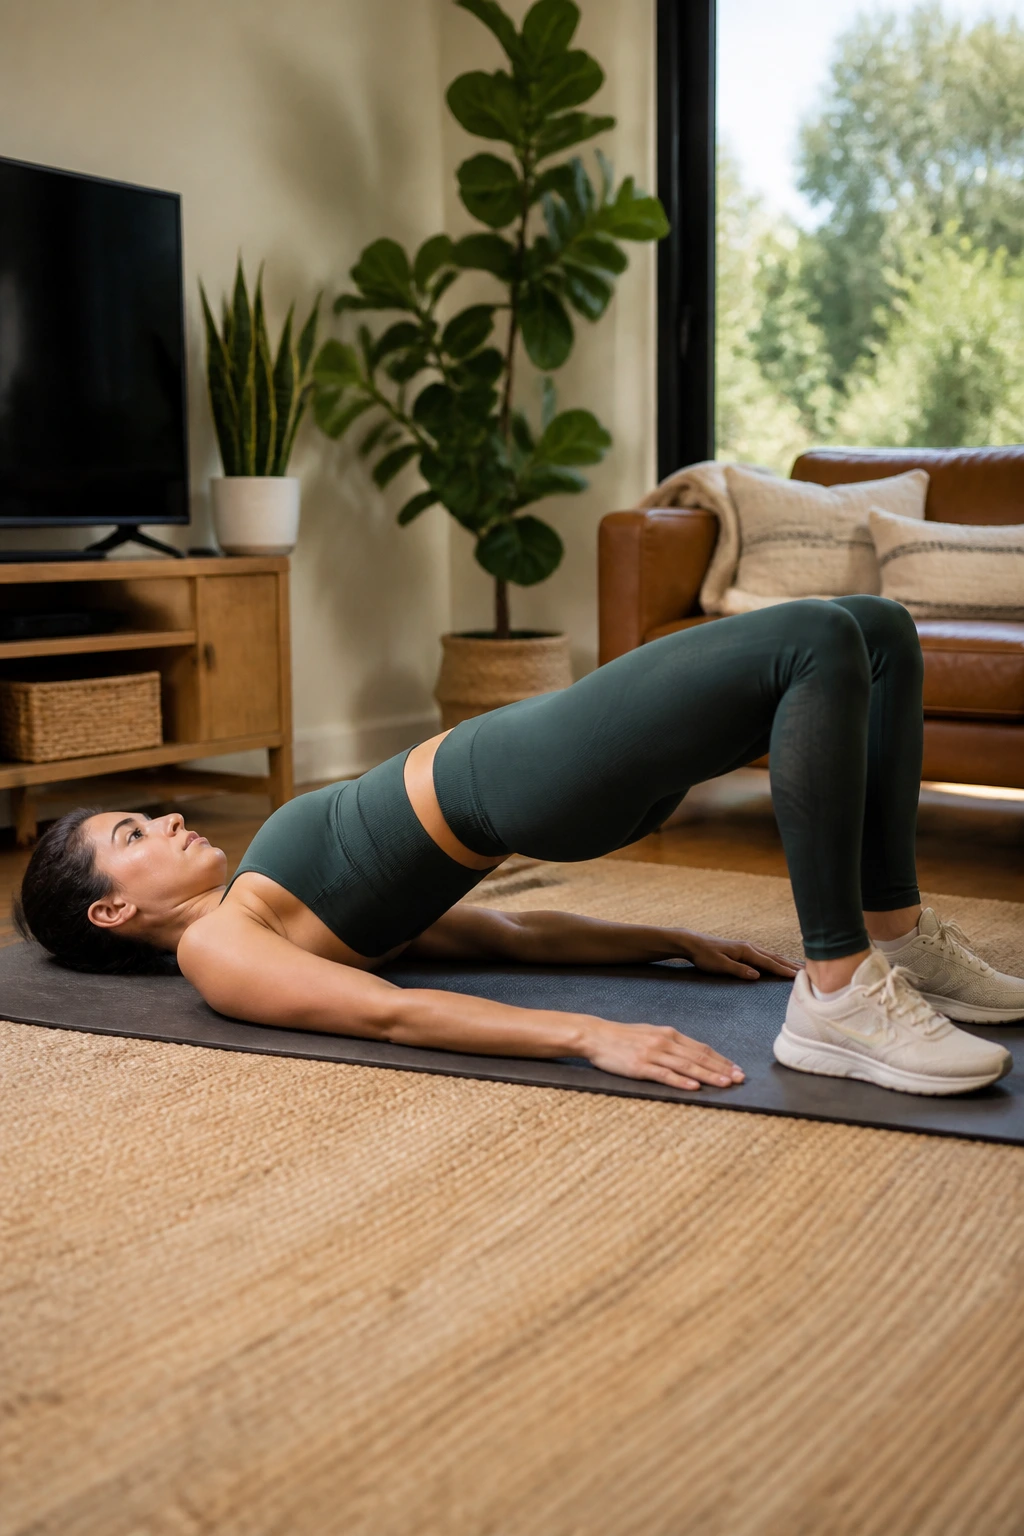
The posterior chain — your glutes and hamstrings — acts as the brake system for your body. When these muscles are weak, your quads have to do all the work, which puts excessive pressure on the patellar tendon. The bridge fixes this imbalance.
How to do it
Lie on your back, knees bent, feet flat on the floor about hip-width apart. Drive through your heels to lift your hips toward the ceiling. At the top of the movement, squeeze your glutes as hard as you can. Your body should form a straight line from your shoulders to your knees.
Why consistency matters
Do not rush the lowering phase. Control the descent. If you just flop back down, you miss out on the eccentric strength training that is vital for tendon health. This movement is excellent for anyone who sits at a desk all day, as it counteracts the “tight-hip, weak-glute” cycle.
6. Standing Hamstring Curls
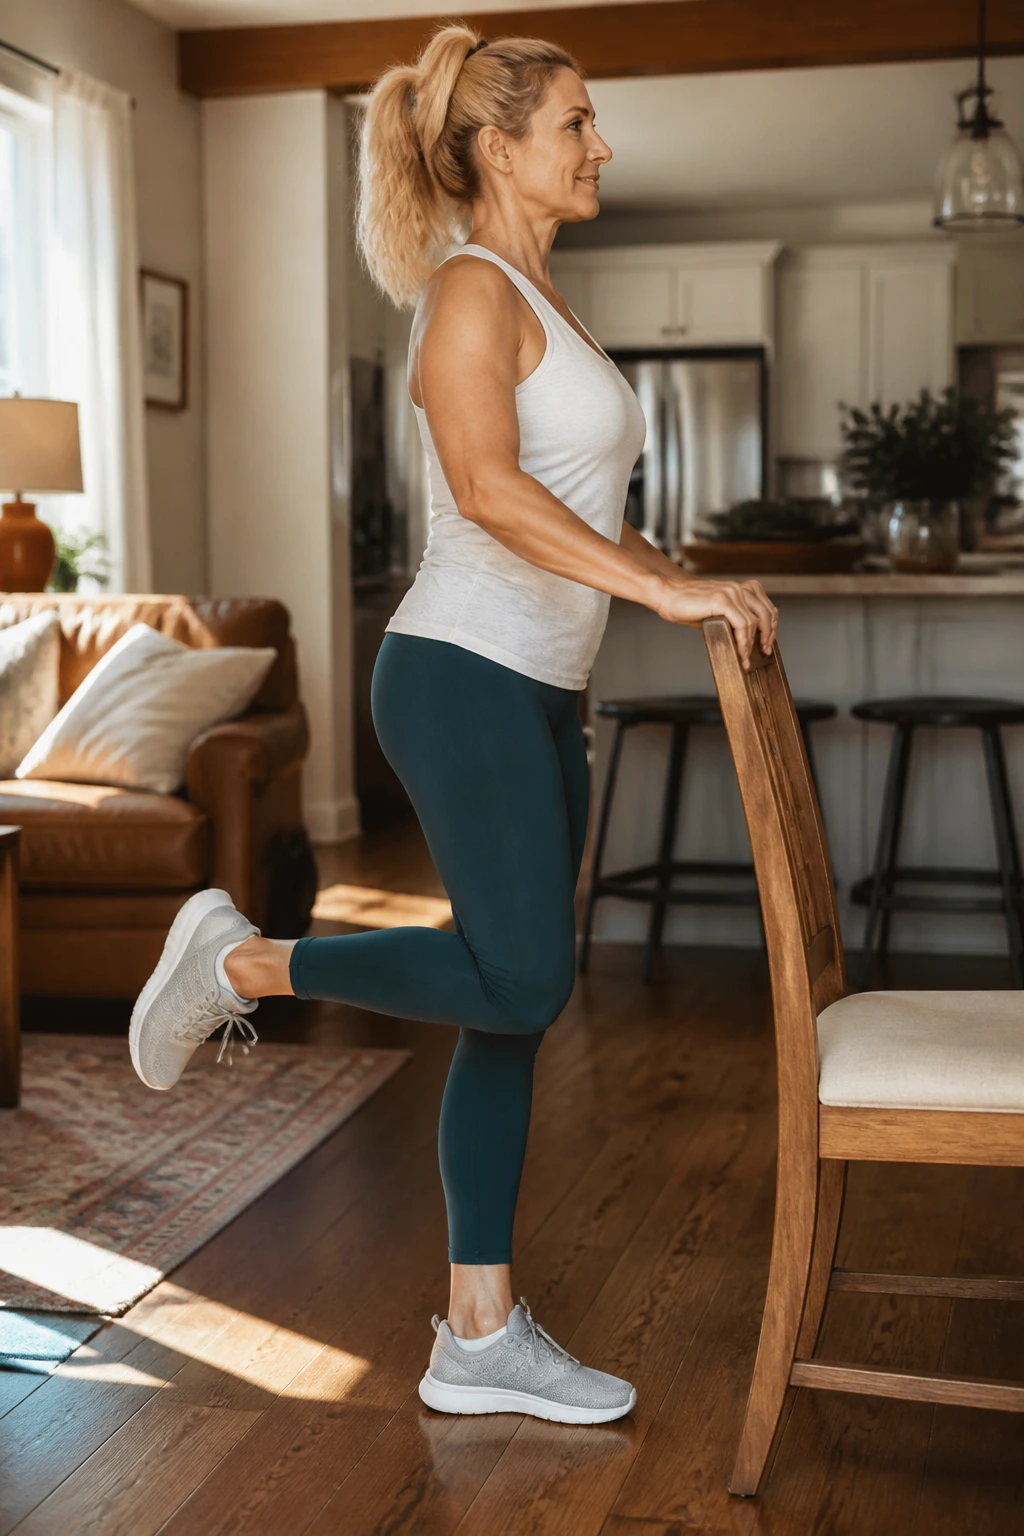
Weak hamstrings often contribute to knee instability because they cannot provide the counterbalance needed for the quads. You can do this at home without a machine. Just stand behind a sturdy chair or countertop for balance.
Movement cues
Shift your weight to one leg. Keep your chest up and your core engaged. Bend the other knee and bring your heel toward your glute. Do not let your thigh swing forward; keep the knee of the working leg pinned to the side of the supporting leg.
The visual check
Imagine you are trying to kick yourself in the butt. If your knee drifts forward, you are cheating. Pin that thigh in place. You will feel a strong contraction in the back of your leg. If you feel a cramp, that’s a sign your hamstrings are under-trained — stop, massage it out, and try a smaller range of motion.
7. Step-Ups
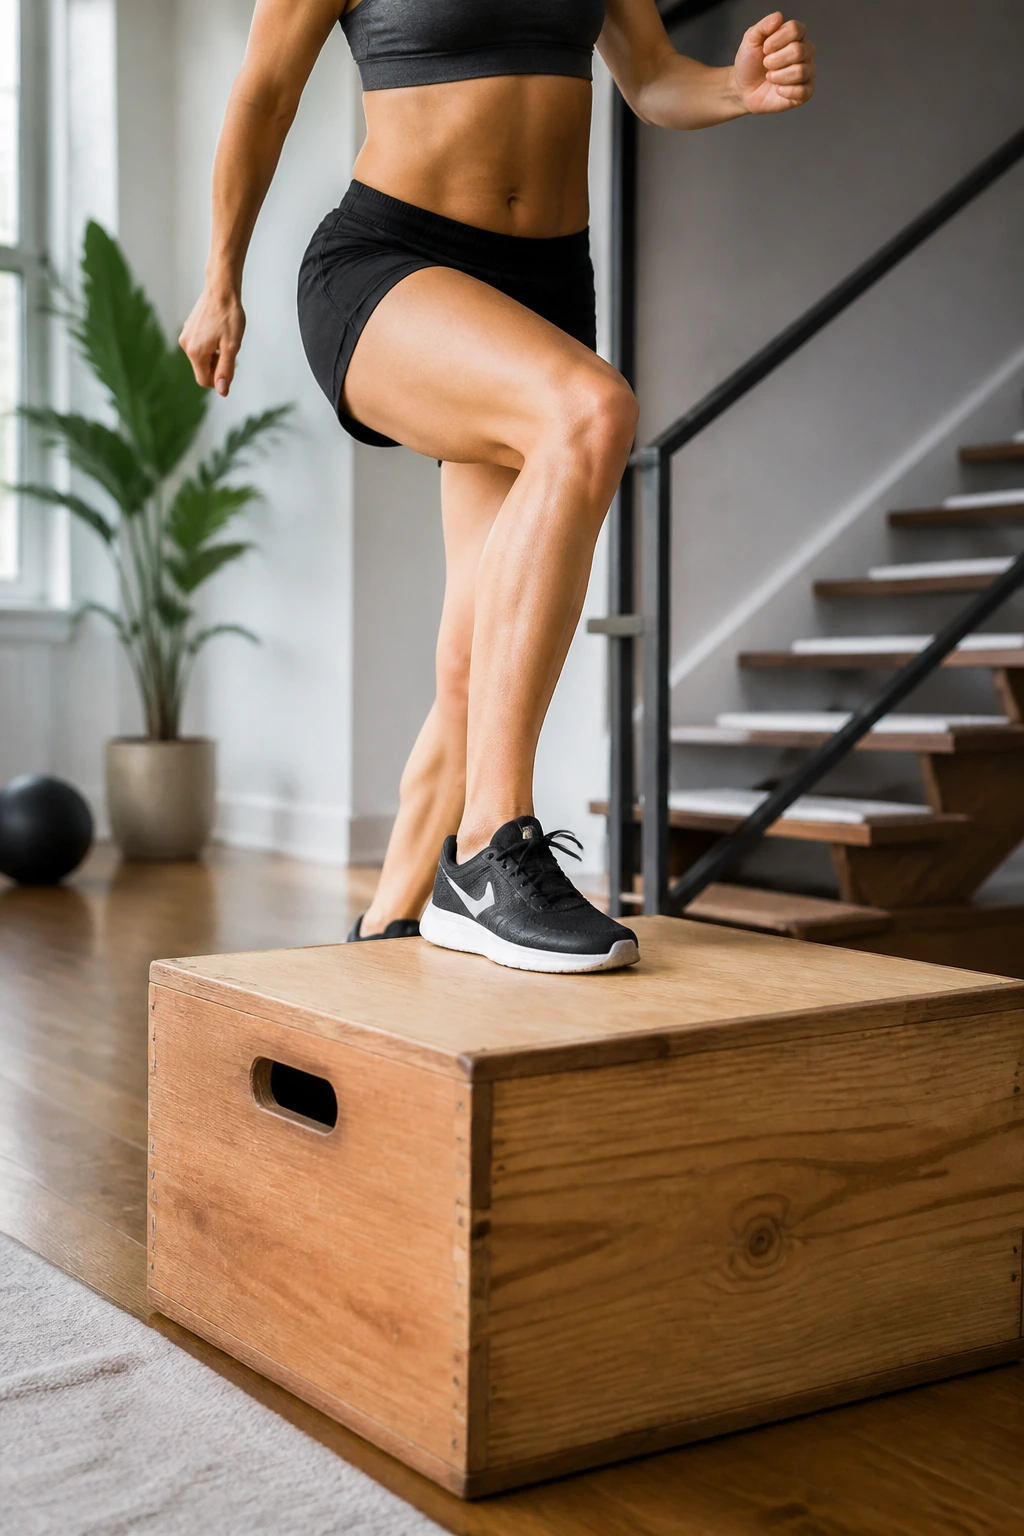
Step-ups are a functional powerhouse. They force you to handle your own body weight on a single leg, which is the ultimate test of knee stability. You do not need a tall box. In fact, for bad knees, a lower step is better.
Selecting the right height
Start with a stair or a platform no higher than 6-8 inches. If the step is too high, you will likely lurch forward, putting unnecessary stress on the knee. Step up with one foot, driving through the heel, and bring the other foot to meet it. Step down with the same lead leg.
The eccentric focus
Most people focus on the step-up, but the step-down is where the strength is built. Lower your body as slowly as possible. If you are dropping down fast, you are missing the benefit. Use your quad to control the descent.
8. Calf Raises
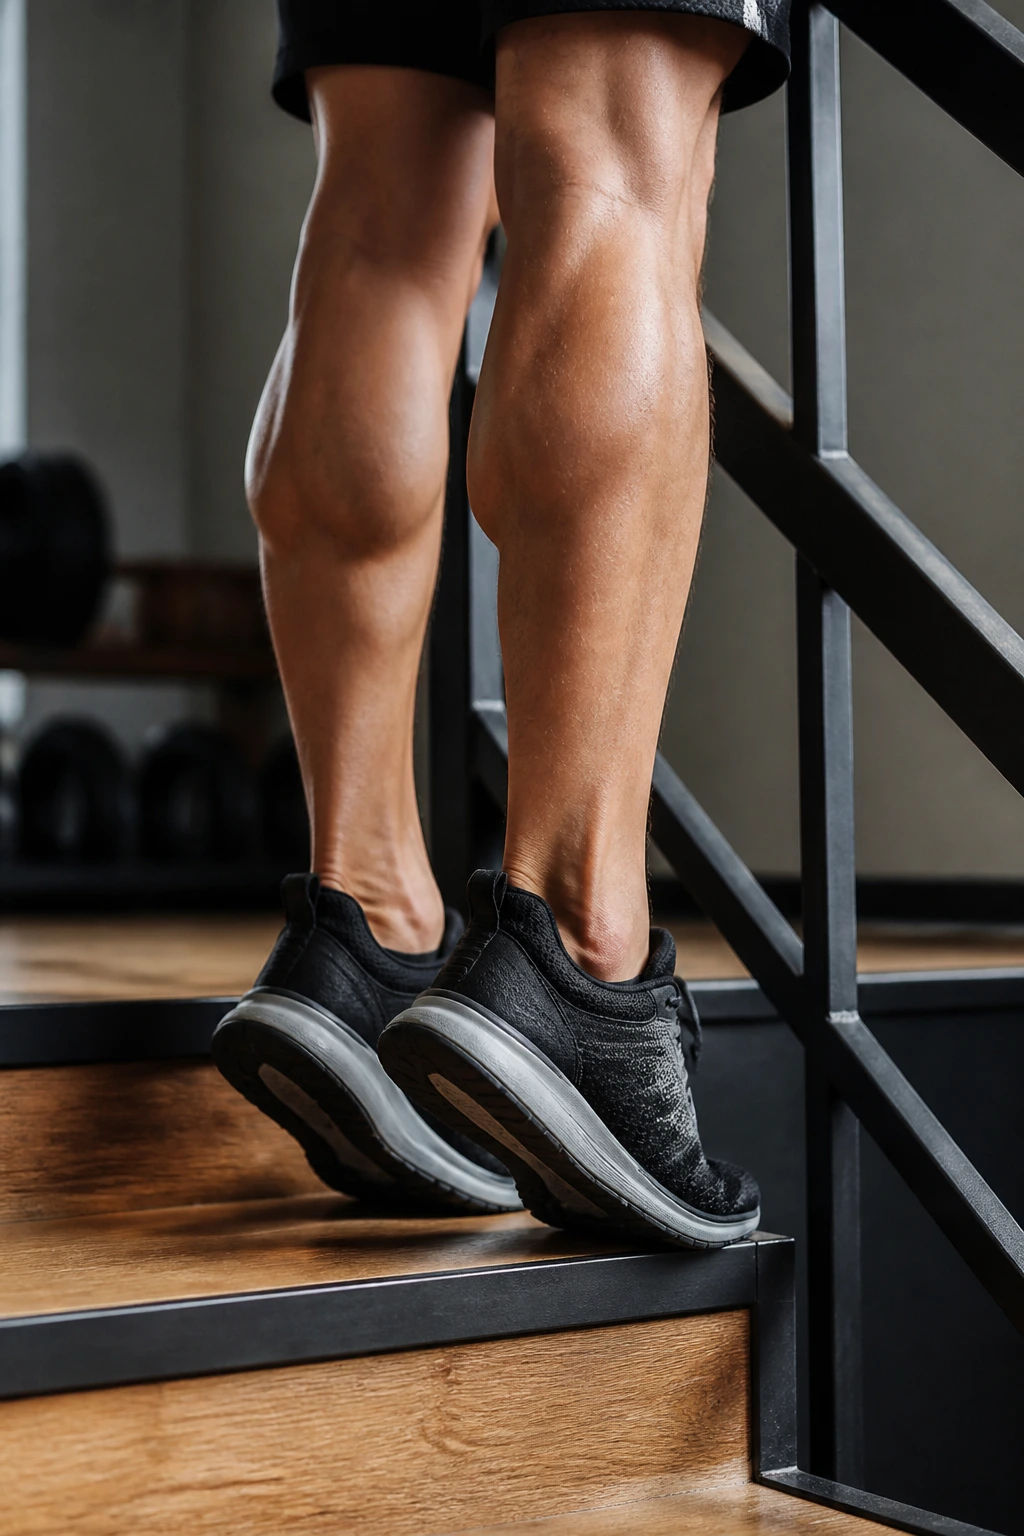
The calf muscle (specifically the gastrocnemius) crosses the knee joint. If your calves are tight or weak, they alter the mechanics of how your foot strikes the ground, which sends a shockwave right up to the knee. Strong, flexible calves are non-negotiable for pain-free knees.
The proper form
Stand on the edge of a step, heels hanging off. Hold onto a rail for balance. Rise up onto the balls of your feet, squeezing the calves at the top. Then, lower your heels below the level of the step to get a full stretch.
Variation for safety
If the full range of motion hurts, do these on flat ground first. The goal isn’t to get the biggest range of motion immediately; it’s to build muscular endurance in the lower leg so that the ankle remains stable when you walk.
9. Side-Lying Leg Lifts
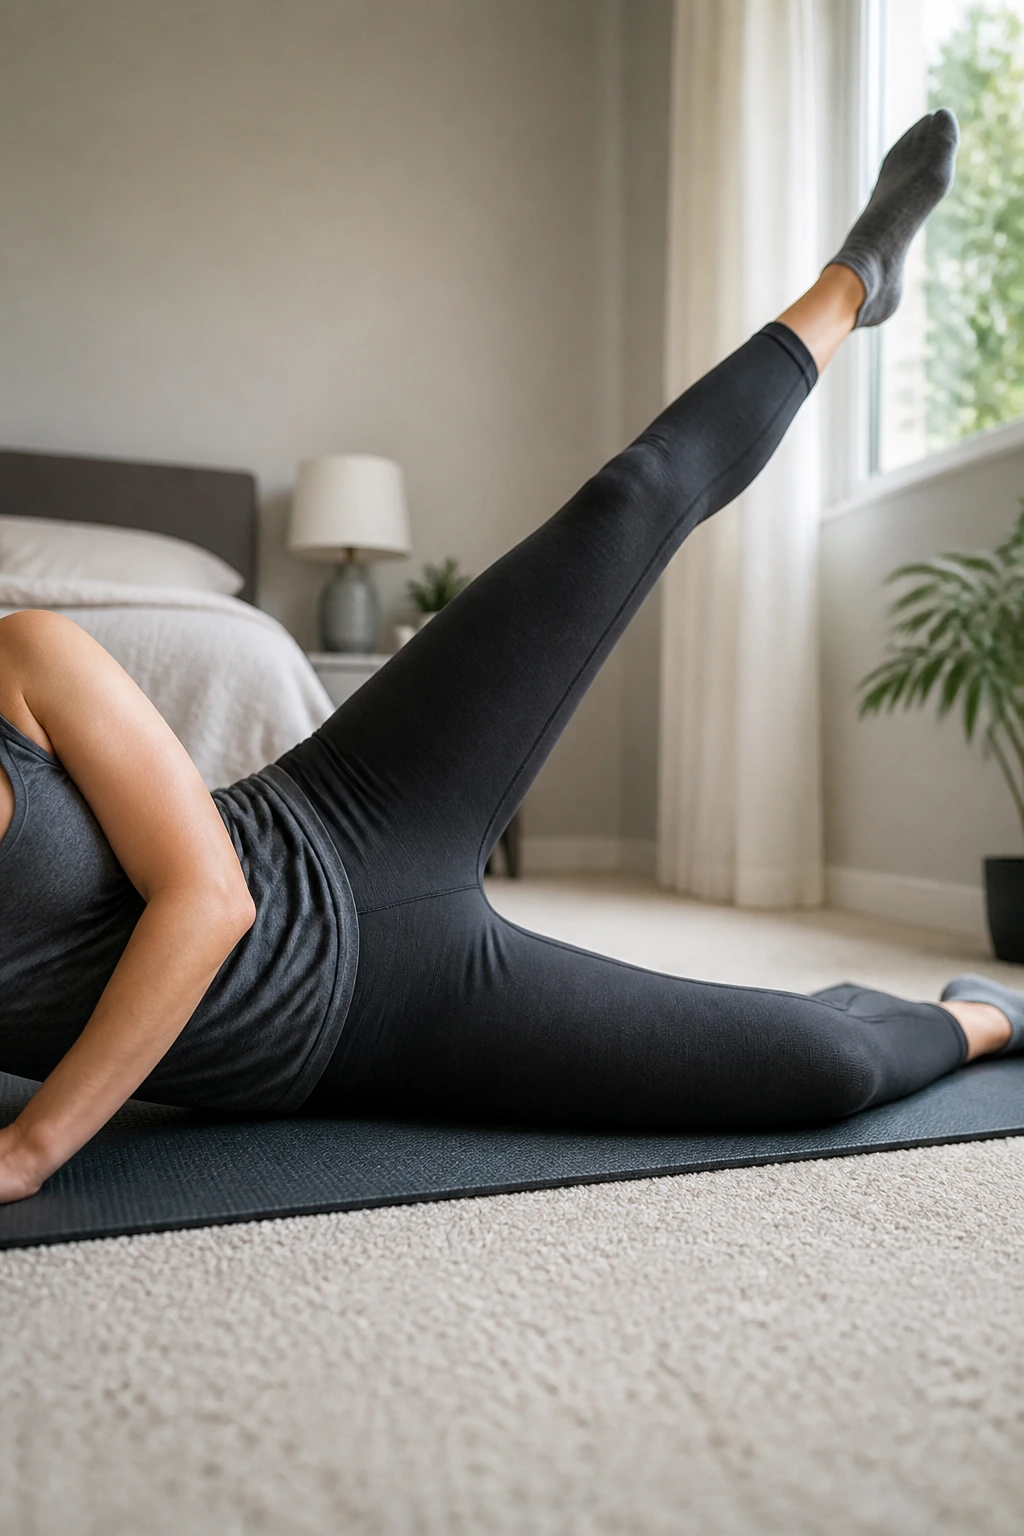
This is the sibling to the clamshell, but it targets the gluteus medius and tensor fasciae latae (TFL) in a straight-leg position. These muscles are responsible for keeping your pelvis level. When they are weak, your stride becomes uneven, often leading to IT band syndrome, which manifests as sharp knee pain.
Executing the lift
Lie on your side, legs completely straight, stacked one on top of the other. Flex your top foot and lift it toward the ceiling. Keep the leg straight and lead with your heel, not your toe. If you point your toe, you engage the hip flexors, which is not what we want here.
Why this changes things
You will feel this in the side of your hip very quickly. Keep your trunk stable. If you start rocking your torso to get the leg higher, decrease the range of motion. Precision beats height every single time.
10. Terminal Knee Extensions (TKEs)
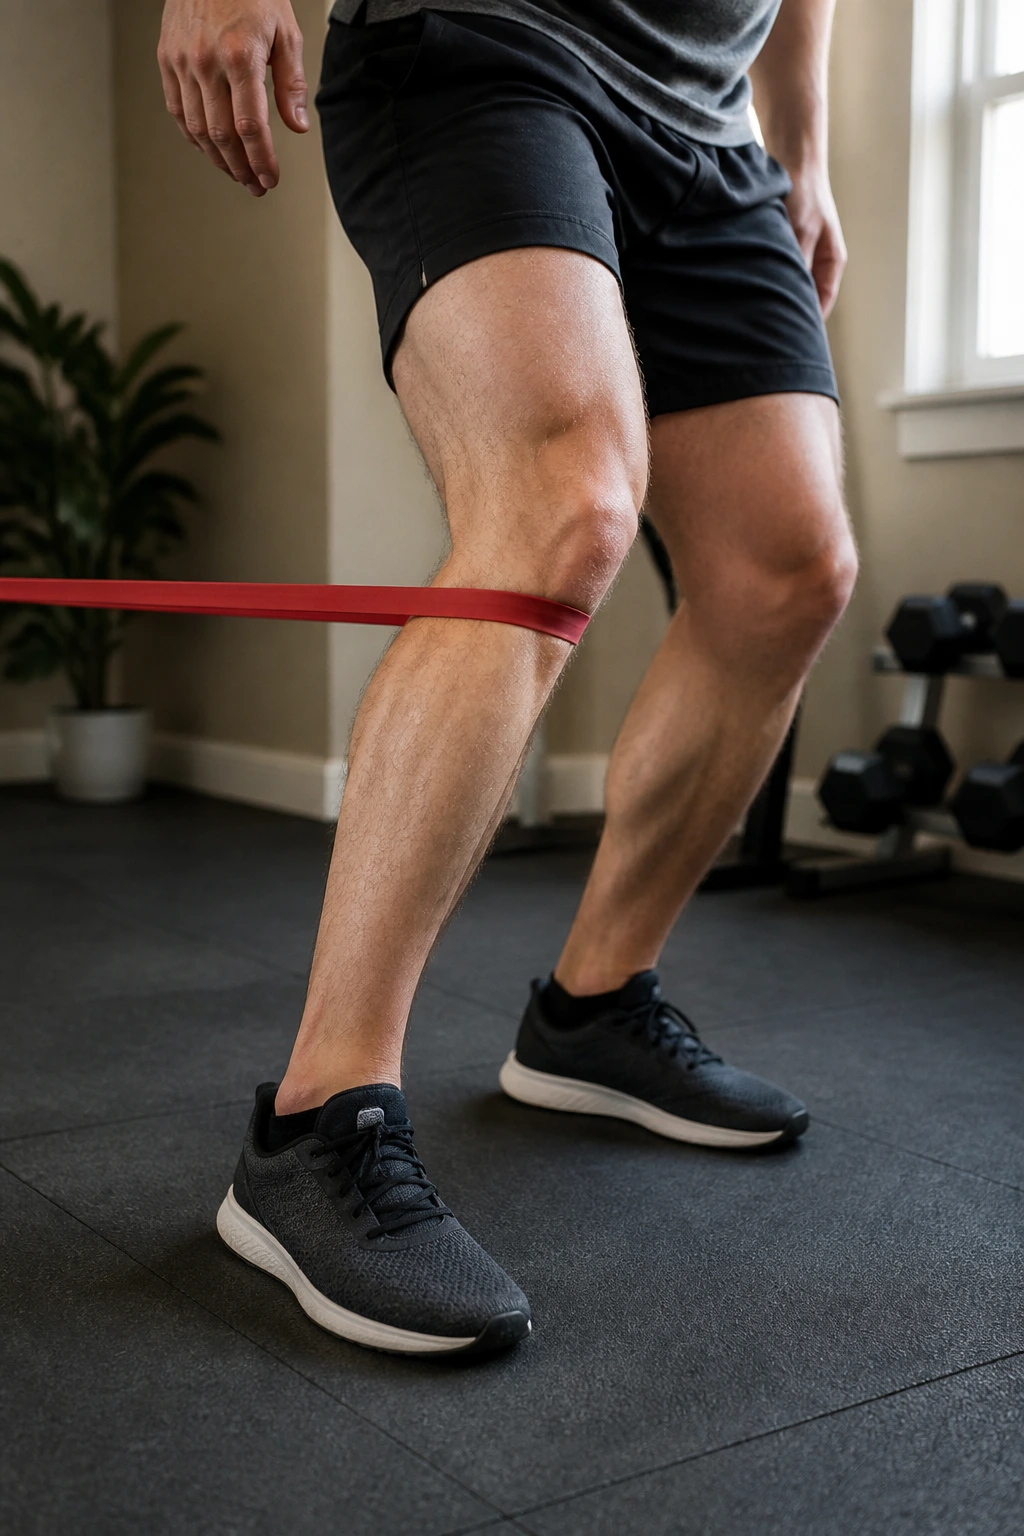
This is a staple in physical therapy clinics for a reason. It specifically isolates the VMO muscle — the part of the quad that pulls the kneecap into its groove. If you have “crunchy” knees or patellar tracking issues, this is your go-to exercise.
How to set it up
You need a resistance band. Tie it to a sturdy anchor point at knee height. Step inside the band so it sits behind the back of one knee. Stand on the other leg, slightly bent. The band should pull your knee forward. Now, straighten the knee against the band’s resistance.
The squeeze
At the very end of the movement, when the leg is straight, squeeze your quad as hard as possible. That end-range squeeze is where the VMO is recruited. Hold for a second, then let the band bend the knee slightly. Repeat.
11. Chair Squats
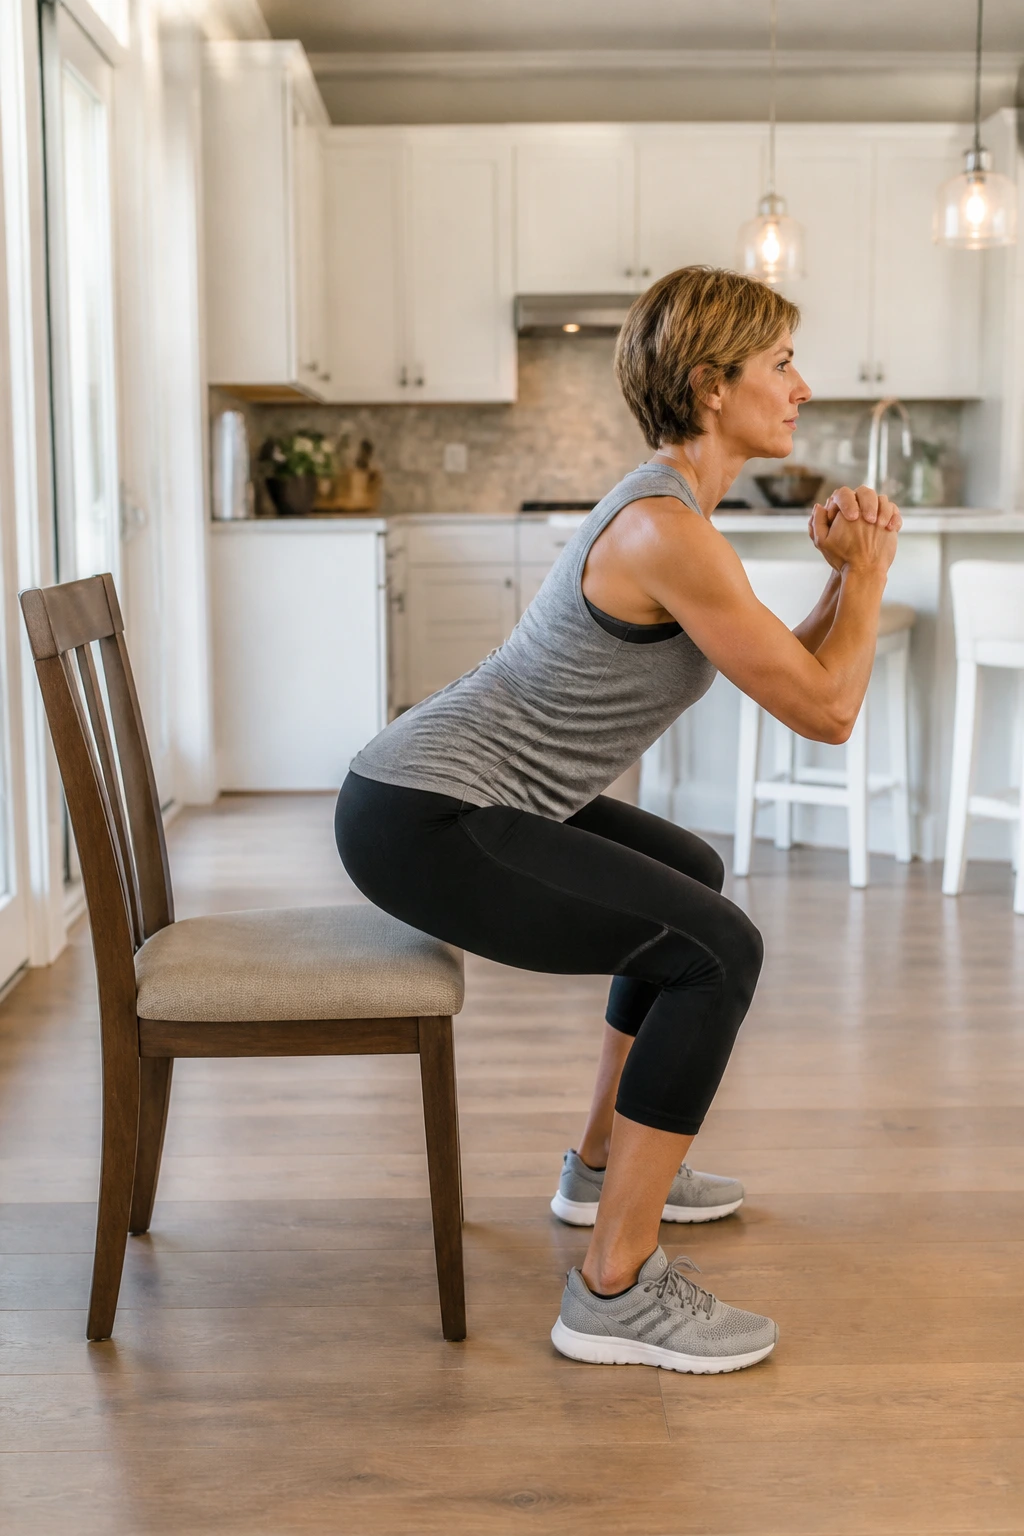
The squat is a foundational movement, but doing it from a standing position often causes fear of pain. Using a chair gives you a target and a safety net. It teaches you how to sit back, not down, which is essential for preserving knee cartilage.
The mechanics
Stand in front of a chair, feet hip-width apart. Start the movement by pushing your hips backward, as if you are reaching for the chair with your glutes. When your glutes lightly tap the seat, stand back up. Do not sit down and relax your muscles; just tap and go.
Preventing knee drift
Watch your knees in a mirror. They should not collapse toward each other. Keep them tracking over your middle toes. If they cave inward, widen your stance slightly or place a small resistance band around your knees to force yourself to push outward.
12. Reverse Lunges
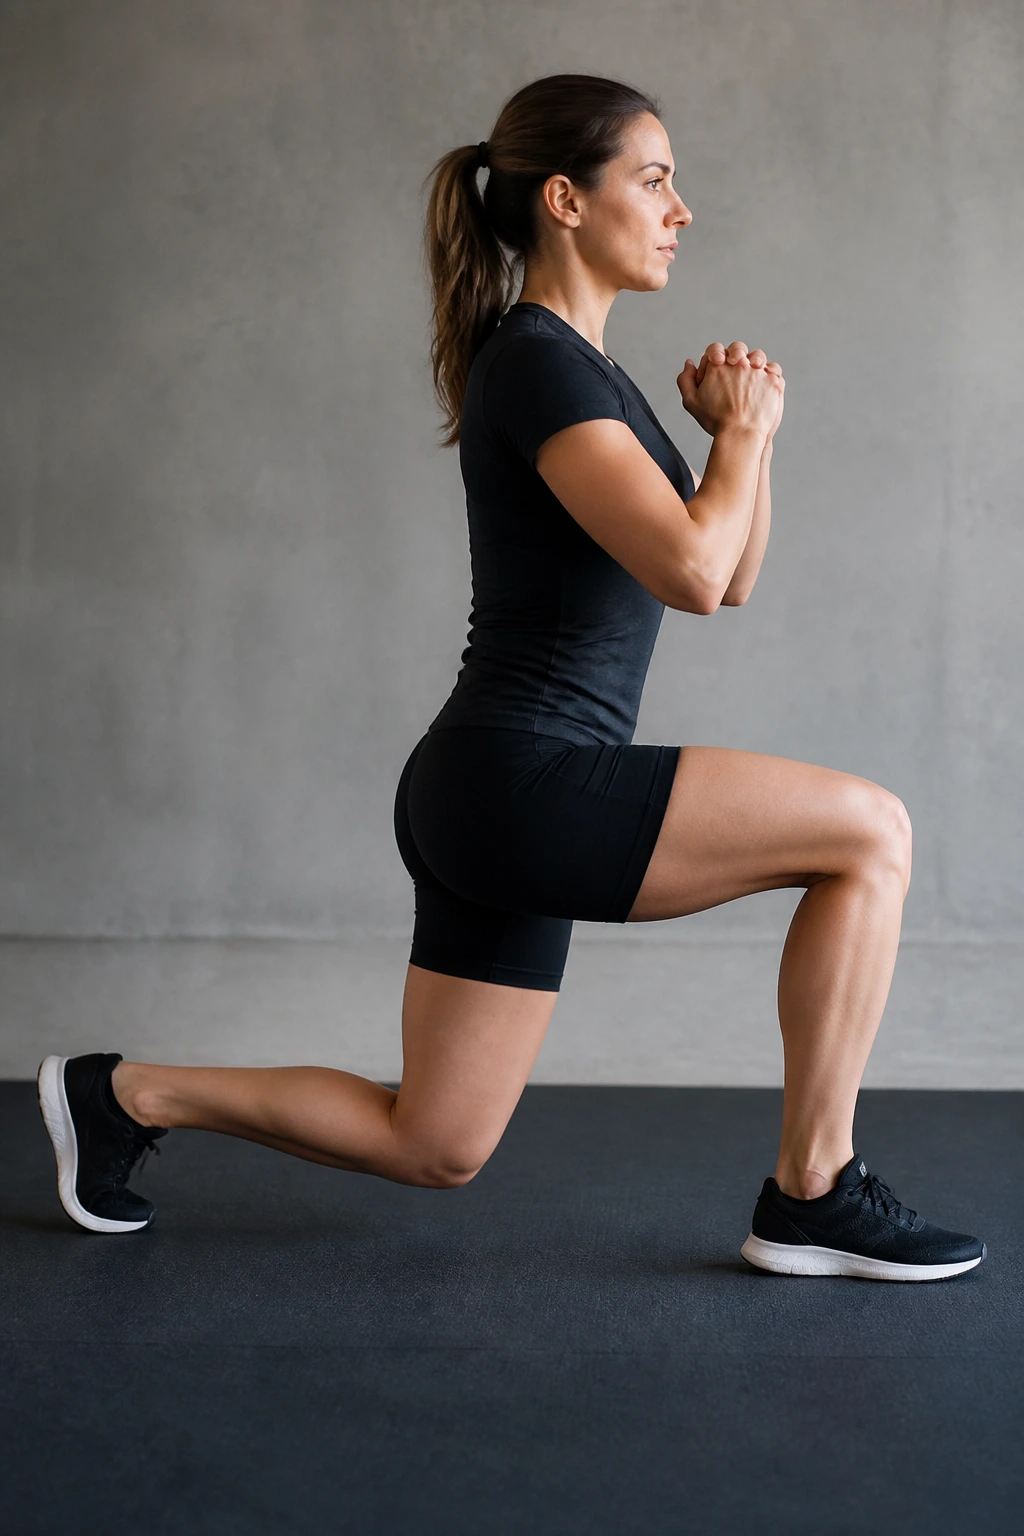
Forward lunges are notoriously hard on the knees because the momentum of your body carries you forward, placing high shear force on the patellar tendon. Reverse lunges, however, place the load on the hip and glutes, which is exactly where you want it.
The movement
Stand tall, step one foot backward, and drop the back knee toward the floor. Keep your front shin vertical — do not let the front knee travel past the toes. Push through the heel of the front foot to return to the starting position.
Why it feels better
The center of gravity stays centered over the front leg, rather than shifting forward into the knee. You will find that this variation is significantly more tolerable for people with chronic knee issues, provided you maintain an upright torso.
13. Side-Lying Hip Abduction (with a twist)
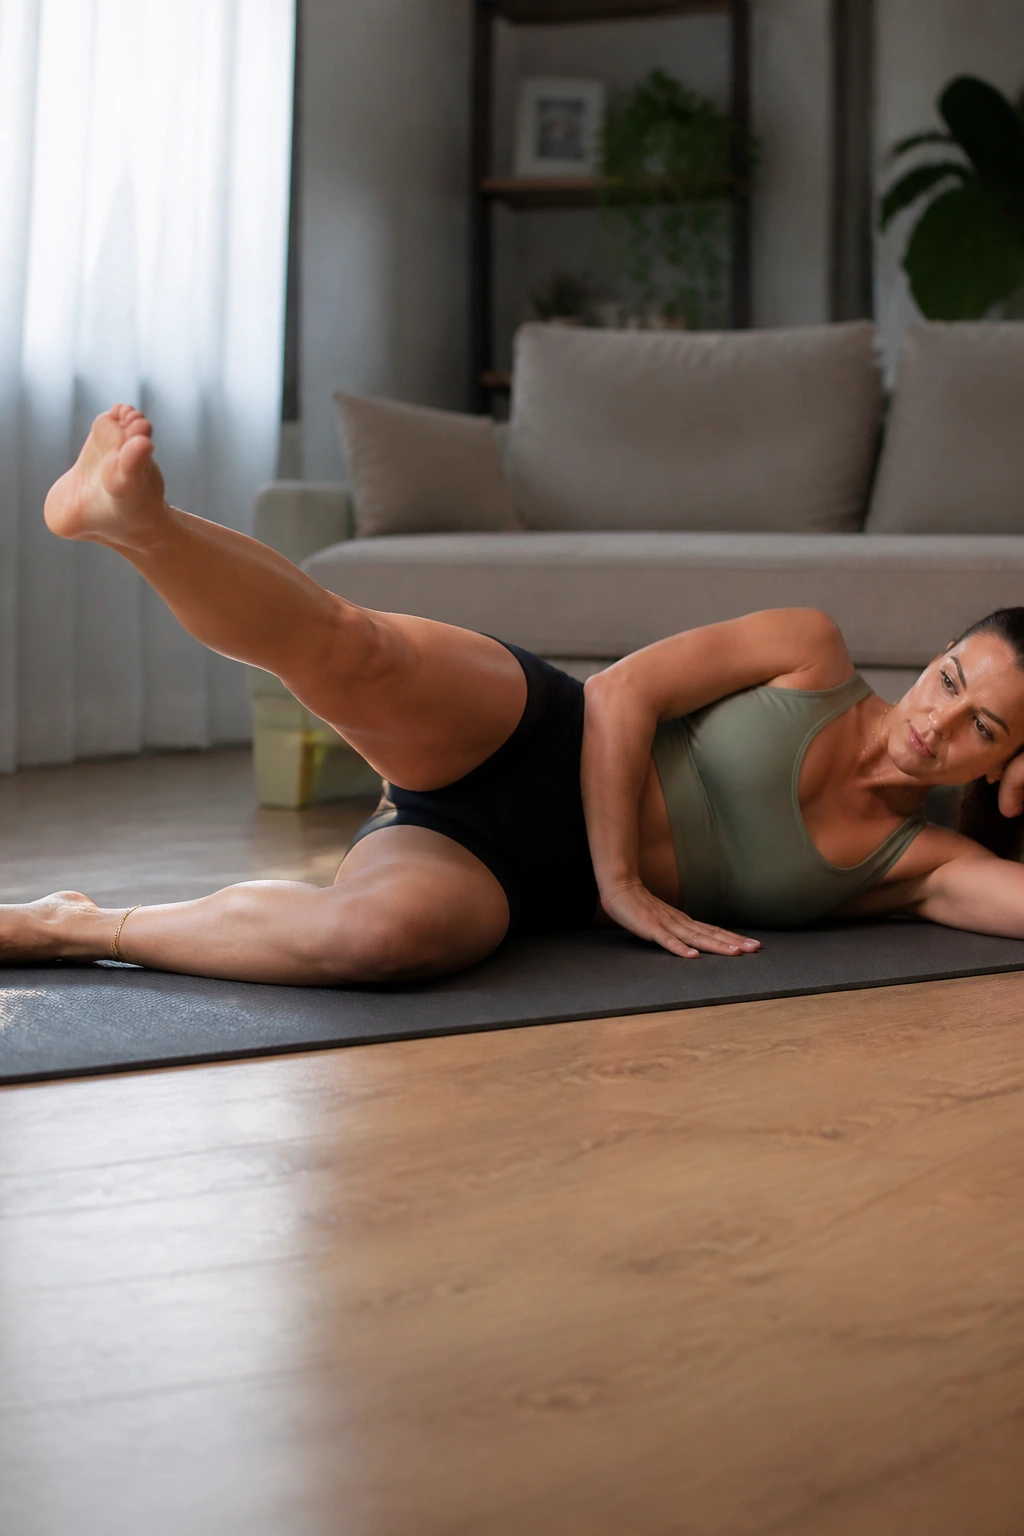
We touched on the side-lying lift, but let’s look at a variation that builds better knee stability. This version requires you to rotate your leg slightly. By rotating the toes slightly toward the ceiling, you change the angle of pull on the hip.
The adjustment
Lie on your side. Before you lift, turn your top foot so the toes point slightly toward the ceiling. Now, lift the leg. This small rotation engages the hip external rotators more aggressively.
The benefit
External rotators are the enemies of knee collapse. When these muscles are strong, they “turn on” the hip to keep the femur from rotating inward, which in turn keeps the knee joint properly aligned. It is a tiny tweak for a massive stability gain.
14. Bird-Dogs
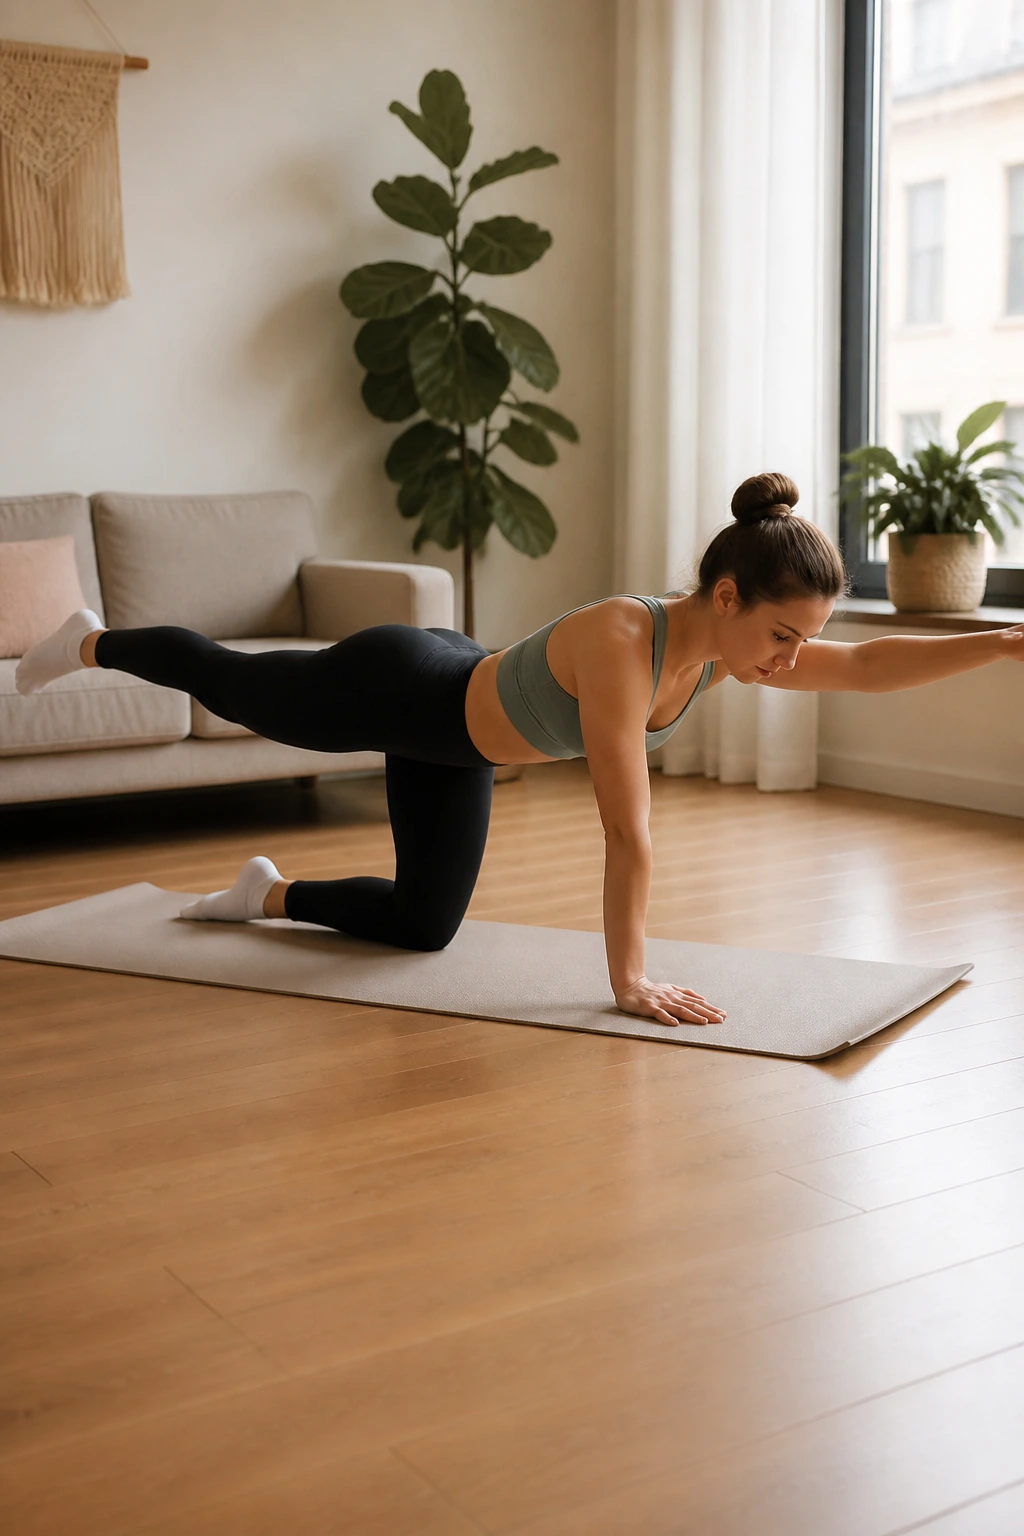
Wait, an ab exercise for the knees? Yes. If your core is weak, your pelvis tilts anteriorly (forward), which changes the angle of your femur, which forces your knees into a sub-optimal position. A stable core is a stable knee.
The form
Get on your hands and knees in a tabletop position. Reach your right arm forward and your left leg straight back simultaneously. Keep your back flat as a tabletop — do not let it dip. Hold for five seconds.
The challenge
The goal is to move without your body swaying. If you are wobbling, slow down. This exercise forces your entire body to create tension, which teaches you to stabilize your joints against opposing forces. It’s excellent for long-term knee health.
15. Single-Leg Balance
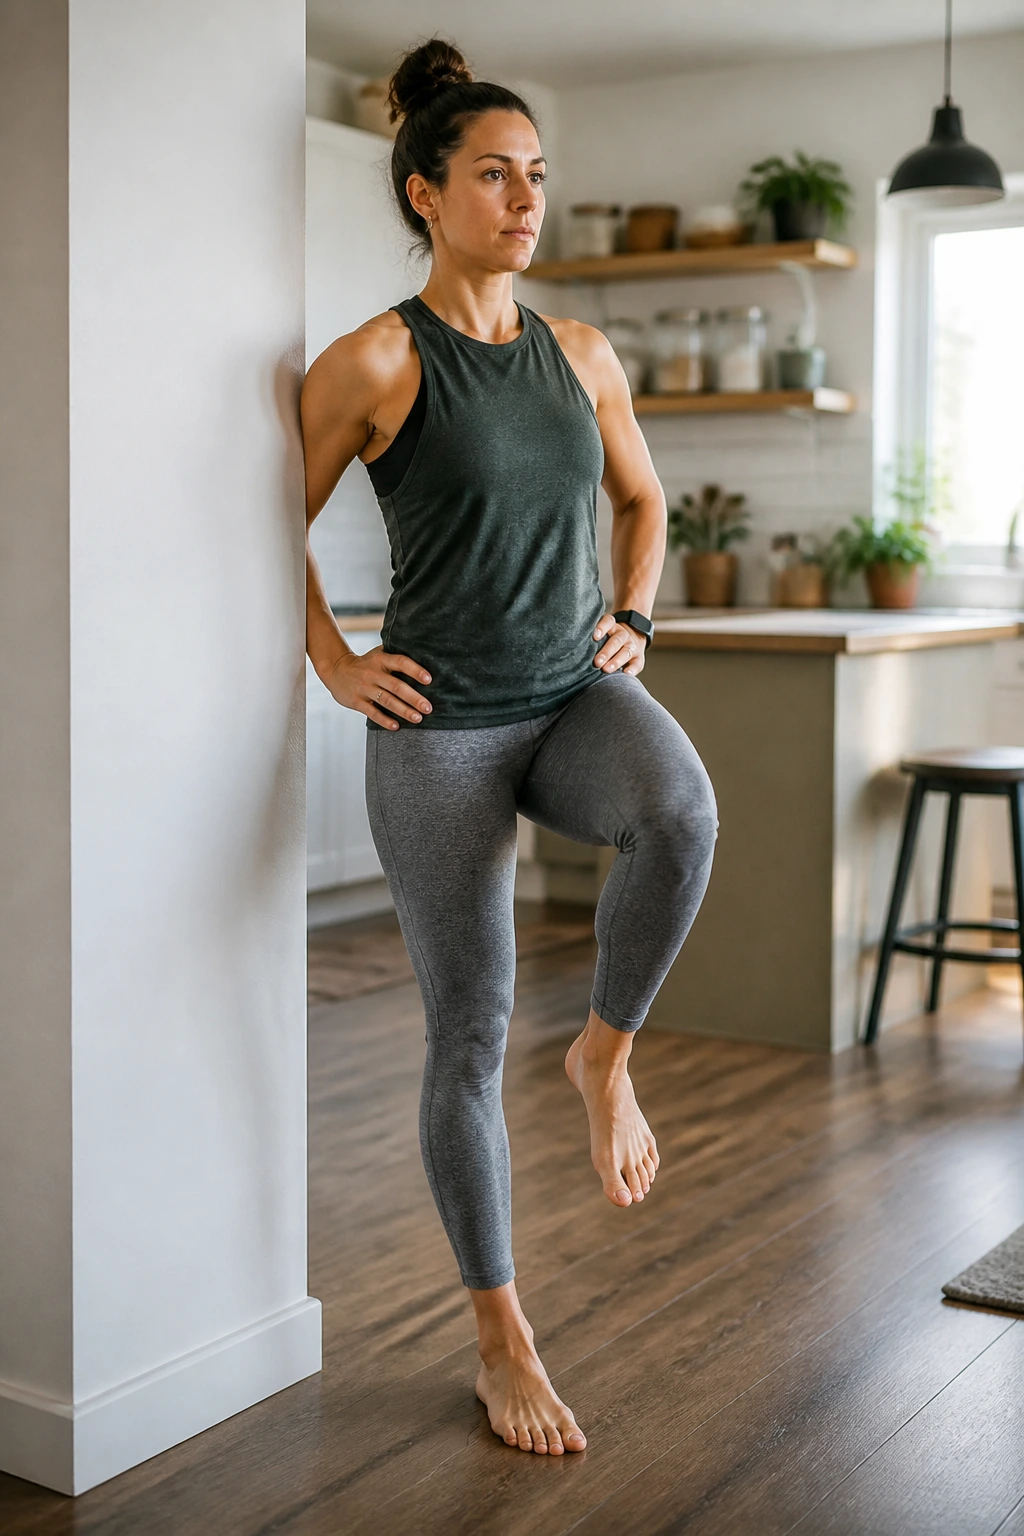
Proprioception is the body’s ability to sense its position in space. Often, people with “bad knees” have lost the ability to stabilize their joints because the nervous system has become protective and “shut down” the stabilizing muscles. You have to retrain this.
How to do it
Stand on one leg, near a wall or counter in case you lose balance. Keep a soft bend in the standing knee — never lock it out. Lift the other foot slightly off the floor. Just hold it.
Progression
Once you can hold this for 30 seconds easily, close your eyes. Closing your eyes removes visual input, forcing your brain to rely entirely on the proprioceptors in your ankle and knee to keep you upright. It is humbling, but essential for joint longevity.
16. Hamstring Slides
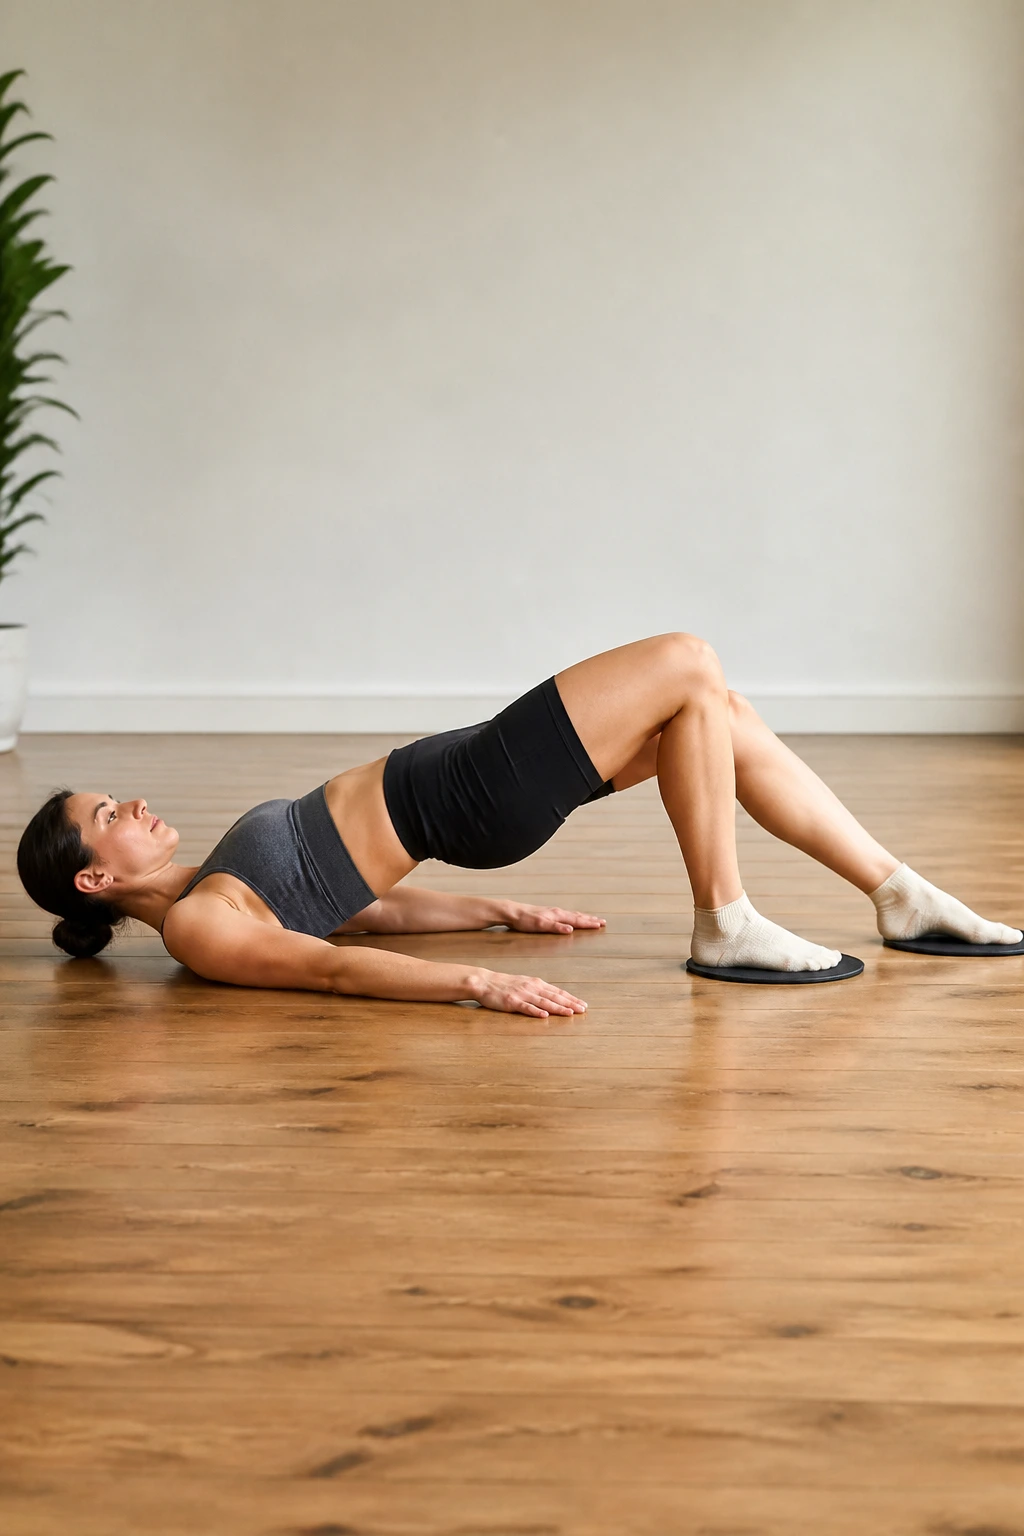
You need a smooth surface (like wood or tile) and a pair of socks or a sliding disc (a paper plate works too). This creates a “closed-chain” exercise where your foot stays fixed, which is generally safer for the knee joint than an open-chain exercise like a leg extension machine.
The movement
Lie on your back with your heels on the sliders. Lift your hips into a bridge position. While keeping your hips elevated, slide your heels out until your legs are almost straight, then curl them back in toward your glutes.
The burn
You will feel this in the hamstrings immediately. If you feel this in your lower back, lower your hips slightly. The key is to keep the glutes engaged the entire time. This is a difficult move, so start with short ranges of motion.
17. Sumo Squats
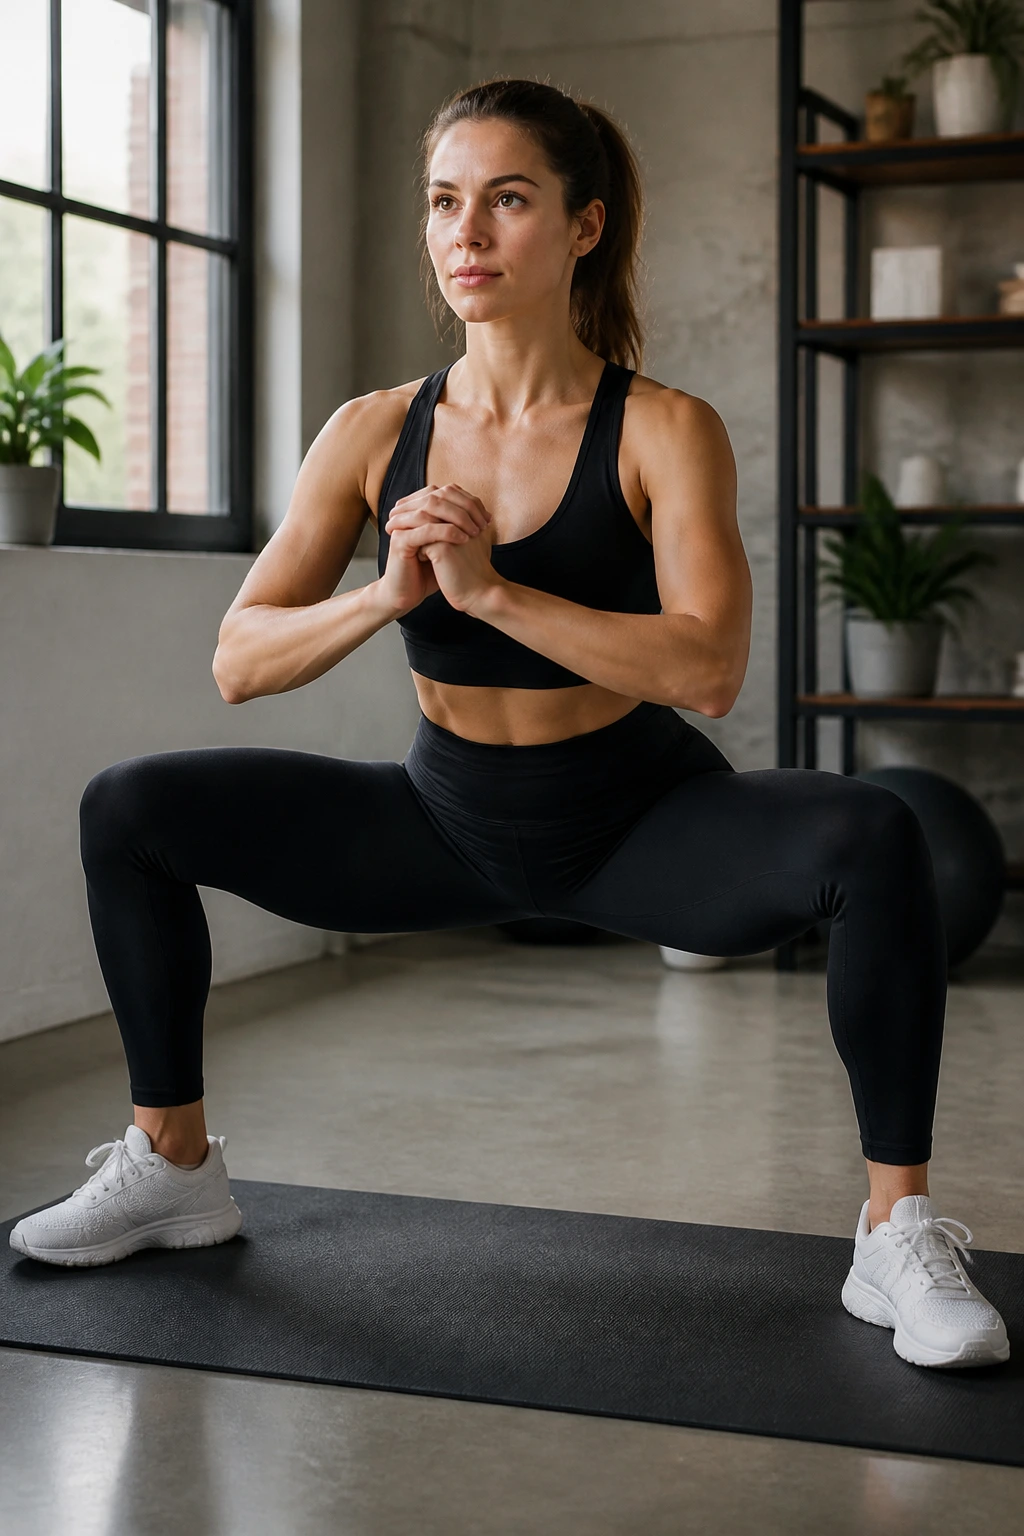
A standard squat can sometimes put pressure on the kneecap. By widening your stance and turning your toes out, you shift the focus to the inner thighs (adductors) and glutes. This wider base of support often feels much more comfortable for people with sensitive knees.
The stance
Take a stance wider than shoulder-width, toes turned out about 45 degrees. Drop your hips straight down, keeping your knees in line with your toes. Do not let the knees cave in.
Why this helps
The adductors are massive muscles that contribute to hip stability. Strengthening them helps keep the pelvis level, which reduces the grinding forces that often cause knee pain. This is a great way to squat if you find the narrow stance uncomfortable.
18. Heel Slides
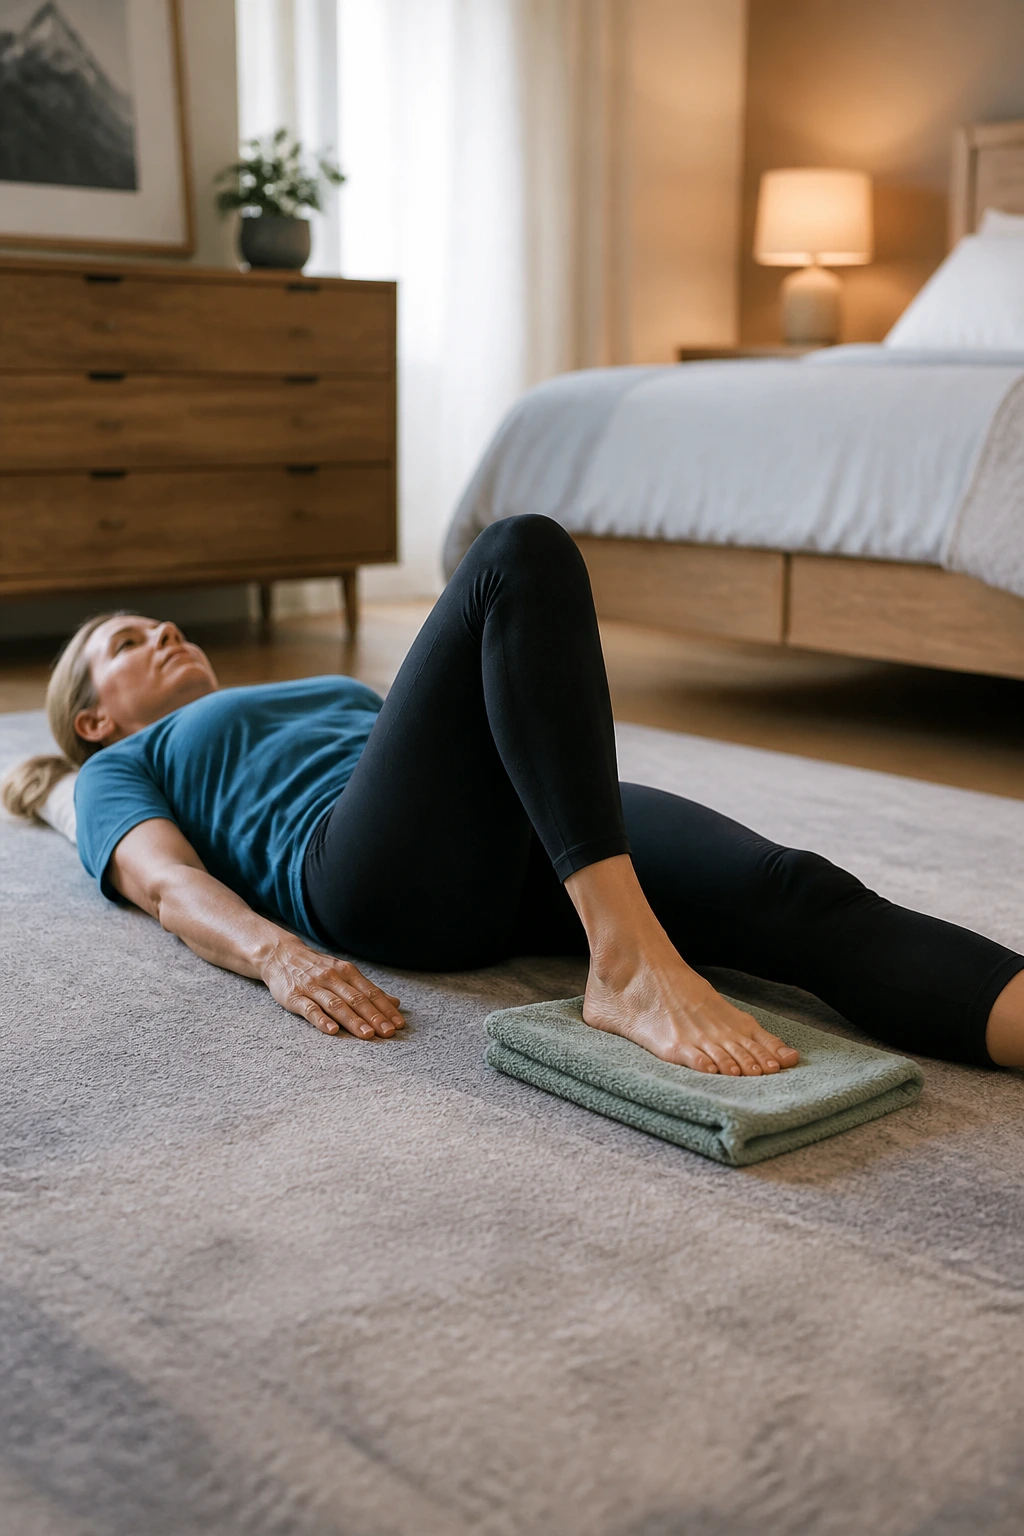
This is a classic rehab move used to regain range of motion. If you have had surgery or a period of inactivity, your knee likely feels “stiff” and stuck. This is a gentle way to lubricate the joint.
The technique
Lie on your back, legs straight. Slowly slide the heel of your painful leg toward your glute, bending the knee as much as is comfortable. Use a towel under your foot to help it slide if the floor is too grippy.
The goal
Pause at the point where you feel the tightness, but not pain. Hold it for a few seconds, then slide it back out. Do not force it. The knee joint thrives on motion, but it hates being forced past its current limit. Consistency here is better than intensity.
19. Step-Downs
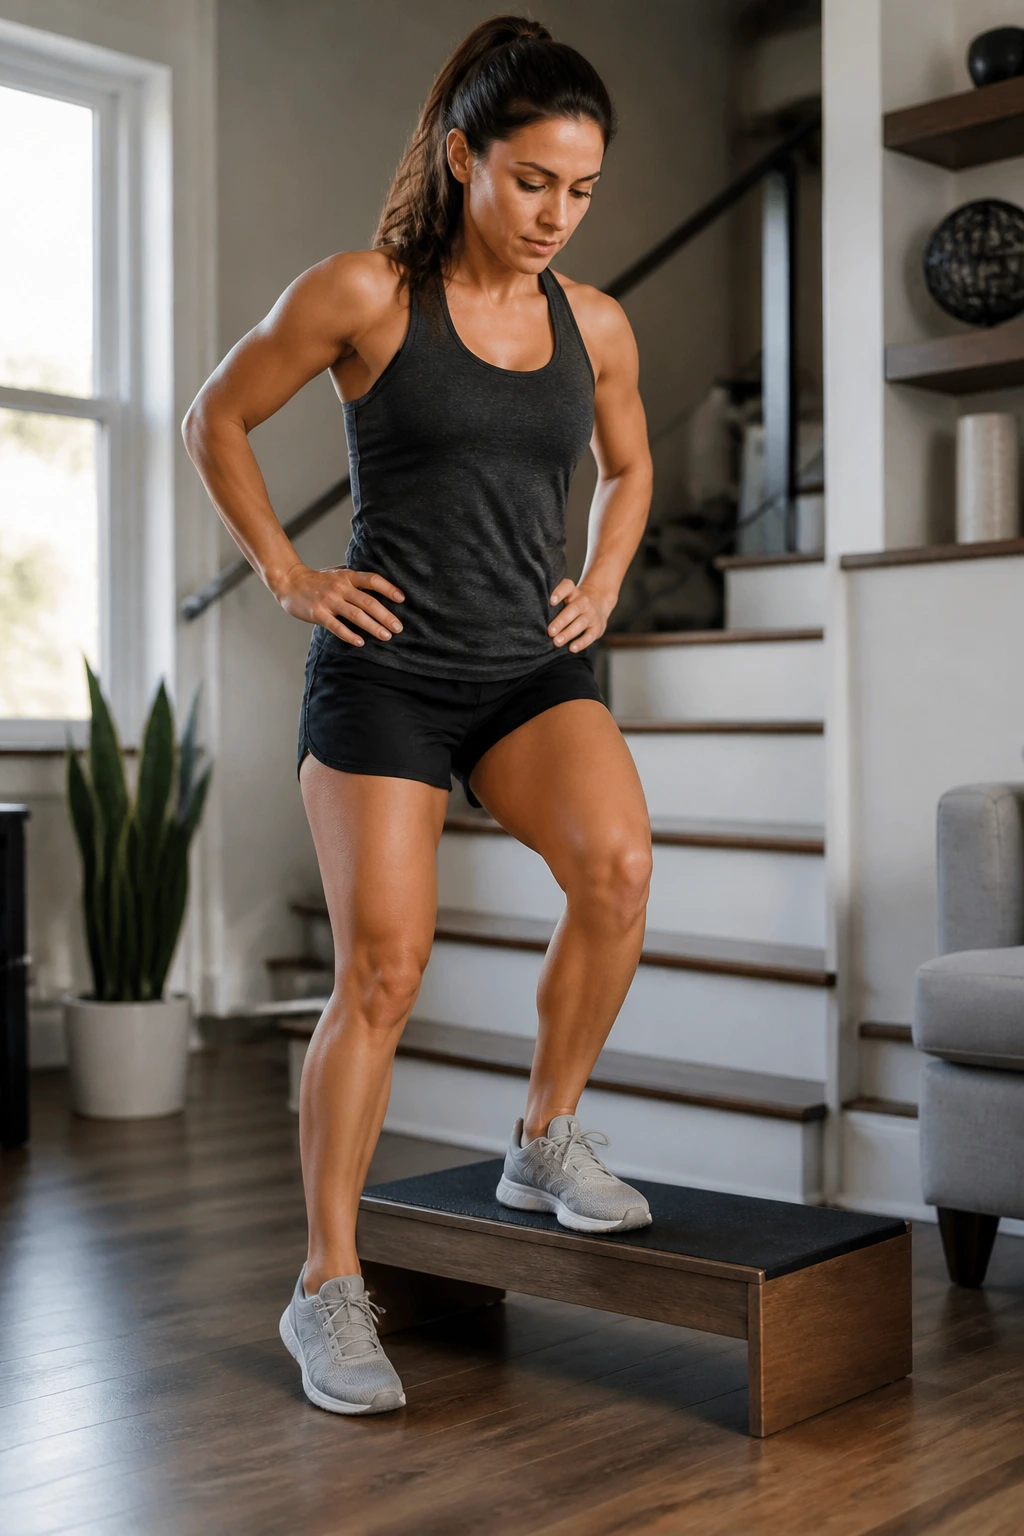
This is the ultimate eccentric exercise for the quadriceps. Eccentric strength — the ability to control a muscle as it lengthens — is essential for walking down stairs and hiking downhill without knee pain.
How to execute
Stand on a low step with both feet. Shift your weight to one leg. Slowly lower your other foot toward the floor by bending the supporting knee. Lightly tap your heel on the floor and push back up.
The warning
Your knee must track over your toes. If it starts shaking or caving inward, the step is too high. Find a lower surface, like a thick book or a low step. You are teaching your knee how to absorb force, which is the exact opposite of what happens when you just “let” your leg drop.
20. Seated Leg Extensions (With Caution)
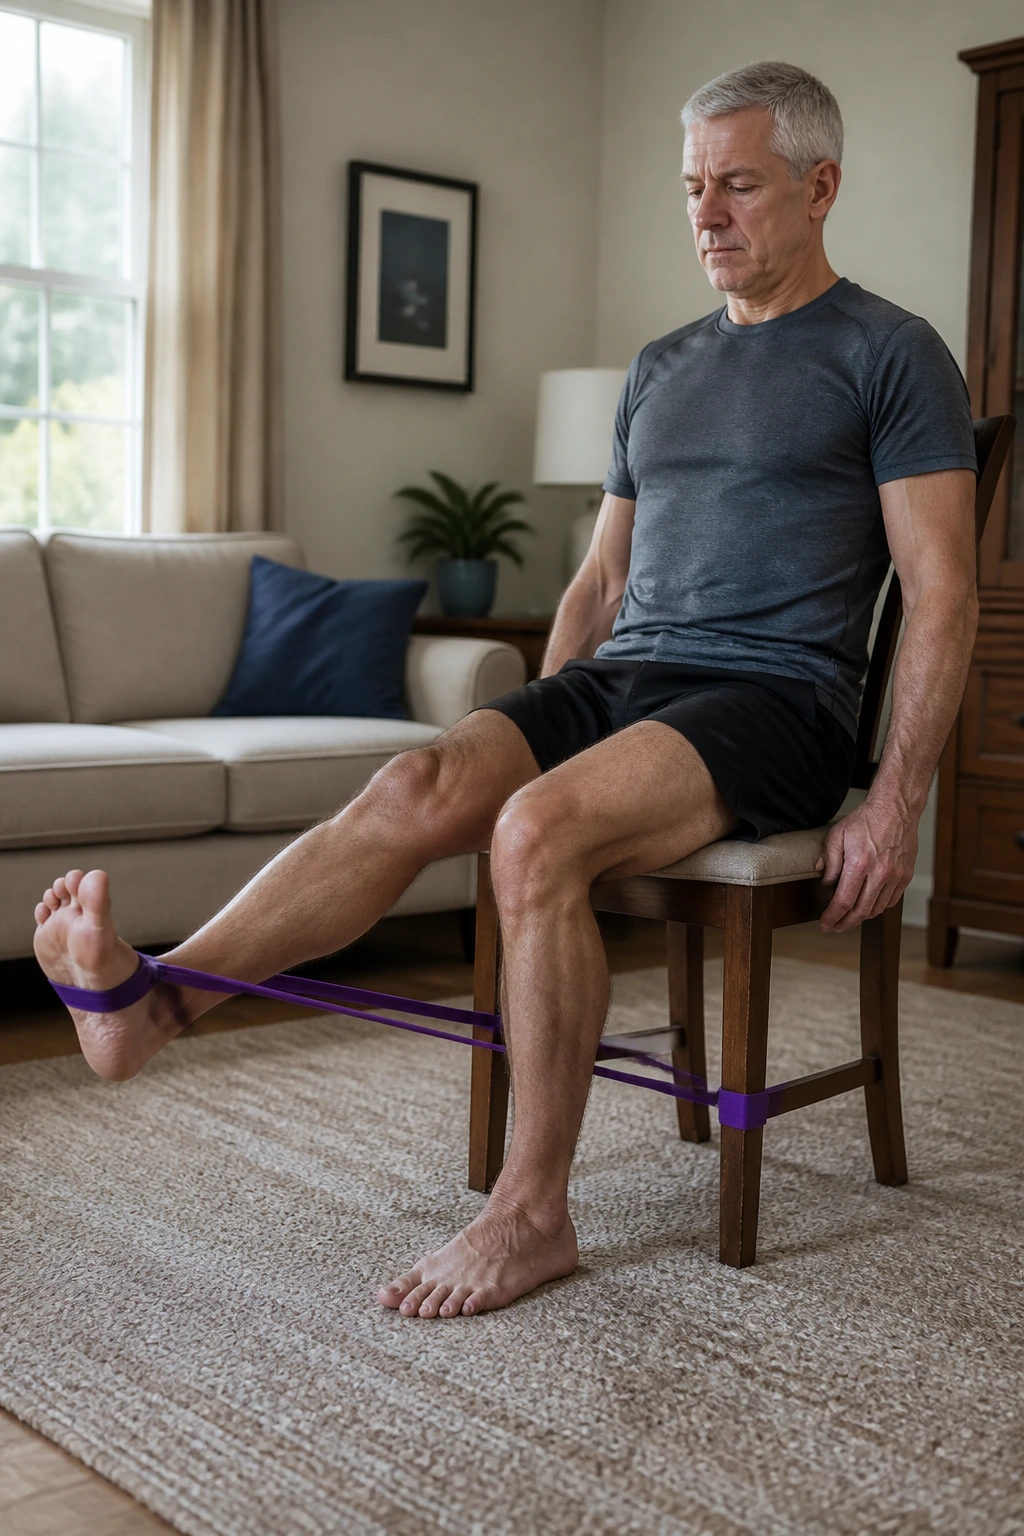
I mention this last because it’s controversial. Traditional leg extension machines at gyms can be brutal on the knee because of the shear force they place on the ACL. However, doing them without weight or with very light resistance bands is actually a great way to isolate the quad.
The modification
Sit in a sturdy chair. Straighten your leg out in front of you. Squeeze your quad at the top, then lower it slowly. Do not use a machine with heavy weights. If you want resistance, use a light resistance band tied to the chair leg.
The takeaway
The goal is not to lift heavy, but to build endurance in the quad. If you feel any pain in the kneecap, stop immediately. There are 19 other exercises on this list that are safer and more effective; do not force a movement that doesn’t feel right for your anatomy.
The Long-Term Approach
You might be tempted to try all 20 of these tomorrow, but that is a recipe for an inflammatory flare-up. Treat this list like a menu. Pick three or four that feel “right” for your body today. Integrate them into your routine two or three times a week.
Consistency is the only variable that actually matters. You cannot “fix” a knee in one session. You are essentially rebuilding the engine of your lower body, and that takes time. Some days, your knees will feel great, and you will want to push harder. Other days, they will feel stiff, and you will need to back off.
Listen to your body. If a movement causes sharp, stabbing pain inside the joint, stop. Discomfort from muscle fatigue is acceptable; structural pain is not. Over time, as those muscles get stronger, you will notice that the “bad knee” days become fewer and farther between. The goal isn’t just to make the pain go away; it’s to build a body that can handle the life you want to live. Take it slow, stay focused on the form, and give your joints the support they have been missing.
