



Waking up with stiff joints can feel like you’ve aged ten years overnight. You roll out of bed, your knees pop, your lower back complains, and that first step toward the kitchen feels more like an old machine trying to start in the winter than a natural human movement. This isn’t necessarily about injury or chronic medical conditions. Sometimes, it is simply the byproduct of a life that involves sitting too long, sleeping in odd positions, or perhaps just letting the body get too accustomed to a single range of motion.
Joints operate on a “use it or lose it” principle. Synovial fluid, the natural lubricant inside your joints, requires movement to circulate and keep everything gliding smoothly. When you stay static for hours, that fluid becomes viscous and sticky, which leads directly to that rusty, stiff sensation. The good news is that you don’t need a gym membership or expensive equipment to start reversing this. Gentle, consistent movement is usually the most effective way to signal to your body that it’s time to lubricate those joints and wake up your muscles.
These movements are designed to be accessible. You do not need to be flexible to start. In fact, if you feel inflexible, that is exactly why you need these. The goal here is not to force your body into extreme positions but to gently coax it back into its full, natural range. Listen to your body every step of the way; if a movement causes sharp, shooting pain, stop immediately. Discomfort or a deep, pulling sensation is standard, but pain is a warning signal you should always respect.
1. Neck Tilts

Your neck carries the weight of your head all day—literally. When you stare at a screen or look down at a phone, the muscles in the back of your neck shorten and tighten, while the muscles in the front get weak. Neck tilts help re-establish that length and relieve the constant pressure on your cervical spine.
How to Do It
Sit upright in a chair with your feet flat on the floor. Slowly drop your right ear toward your right shoulder. Keep your shoulders down; do not let them scrunch up toward your ears. Hold that gentle stretch for 15 seconds. Bring your head back to center and repeat on the left side.
Pro tip: Imagine you are trying to push your left shoulder down toward the floor while your right ear leans toward the right. This creates an opposing force that deepens the stretch without you needing to pull on your head with your hands.
2. Shoulder Rolls

The shoulders are often the first place we hold stress. We unconsciously hike them up toward our ears when we are anxious or busy, leading to tension headaches and limited mobility. Rolling them out helps reset your posture and releases the buildup of tightness in the trapezius muscles.
Why It Works
Movement in the shoulder girdle forces the scapulae (shoulder blades) to glide across your ribcage. This constant grinding and sliding is what helps break up the “stuck” feeling that develops after hours of keyboard work.
- Stand or sit with a straight spine.
- Inhale as you lift your shoulders up toward your ears.
- Exhale as you roll them back and down, pinching your shoulder blades together slightly.
- Repeat this rotation 10 times, then reverse the direction to roll them forward.
Watch out for: Avoid jerky, fast movements. The slower you move, the more you can feel the individual muscles engaging and releasing.
3. Cross-Body Shoulder Stretch

When your shoulders feel tight, it often pulls on the upper back and chest area. This stretch provides a nice, deep release for the back of the shoulder capsule, which often gets neglected. It’s a very simple move that you can do almost anywhere, even while waiting for your coffee to brew.
The Technique
Reach your right arm across your chest. Use your left hand to gently hook behind your right elbow and pull it closer to your body. You should feel a stretch in the back of your shoulder and upper arm. Hold for 20 seconds. Relax, then switch sides.
This is particularly effective because it targets the rear deltoids. If you spend your day reaching forward—driving, typing, or cooking—these muscles are constantly elongated and fatigued. Pulling them across the body helps reset that tension.
4. Triceps Overhead Stretch
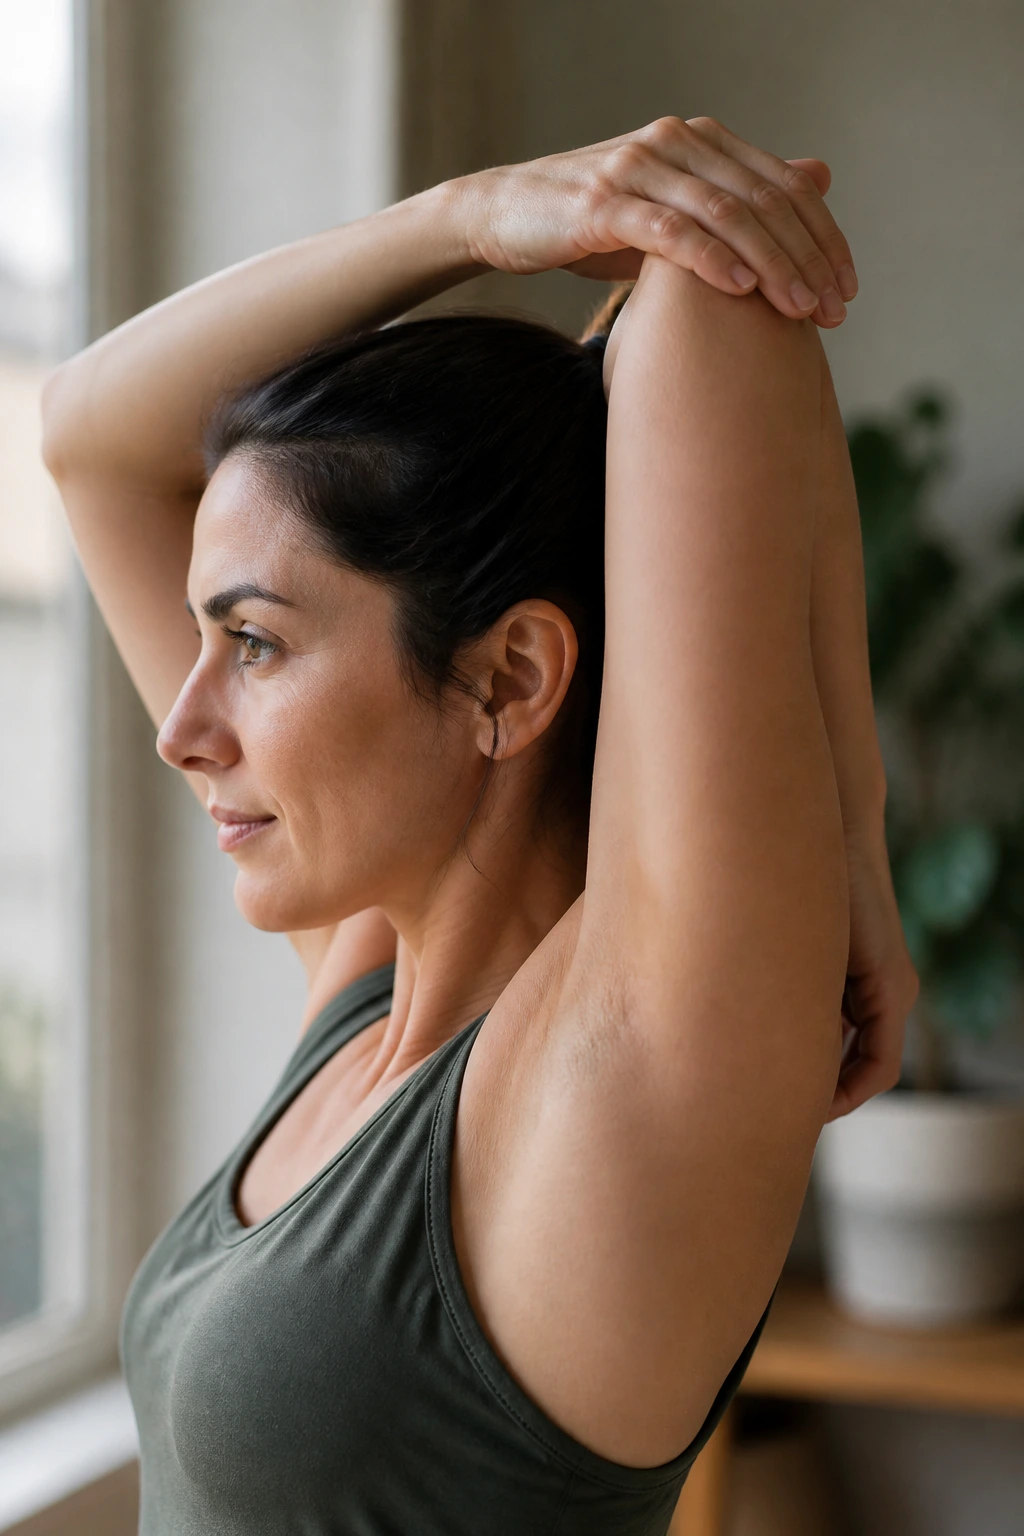
The triceps sit on the back of your arms and connect to your shoulder joints. When they are tight, it can actually limit your ability to reach overhead. This stretch helps clear out that restriction, making daily tasks like reaching for a high shelf much easier.
Step-by-Step
Reach your right arm overhead and bend the elbow so your hand drops behind your head, toward the middle of your back. With your left hand, gently press down on your right elbow. You’ll feel the stretch travel down the back of your arm.
- Keep your chest lifted; don’t slouch forward.
- Take deep, steady breaths—this prevents your body from bracing against the stretch.
- Switch after 20 seconds.
5. Wrist Extensions
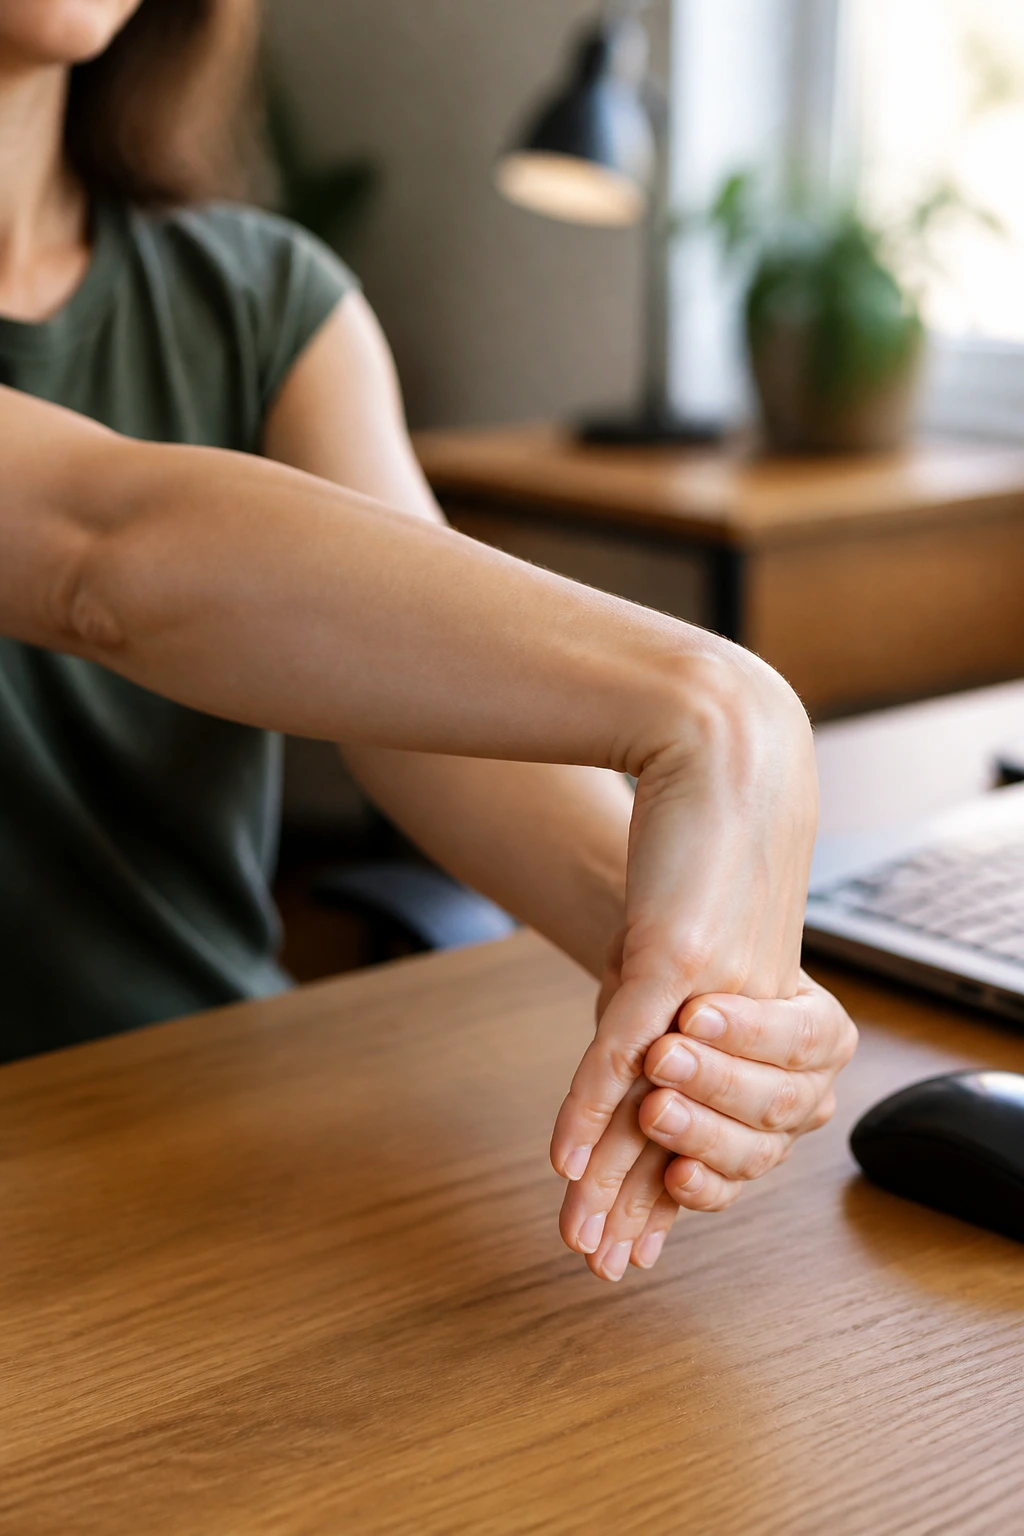
We often ignore our wrists until they start aching from hours of mouse-clicking or typing. The forearm muscles control your wrist movement, and when they get tight, they pull on the wrist joints, leading to soreness. Wrist extensions are the antidote.
Why This Matters
If you do any kind of weight-bearing exercise, tight wrists are a bottleneck. Even for non-athletes, constant forearm tension is a leading cause of mild wrist discomfort.
Hold one arm straight out in front of you, palm facing down. Use your opposite hand to gently pull your fingers back toward your body until you feel a stretch along the top of your forearm. Hold for 15 seconds. Then, flip your palm to face up, and pull your fingers down toward the floor. This targets the other side of the forearm. Repeat on both wrists.
6. Seated Torso Twist

Your spine is designed to rotate, but most of us spend our days moving only in a straight forward-and-back plane. A seated torso twist gently lubricates the small joints (facet joints) along your spine, which helps reduce stiffness in the mid-back.
The Proper Form
Sit on the edge of a chair. Keep your feet planted firmly. Place your right hand on the outside of your left knee. Reach your left arm behind you, grabbing the back of the chair if possible. As you exhale, gently rotate your torso to the left, using the grip on your knee to assist the twist.
Remember: Do not force the rotation. It should feel like a wringing out of the spine, not a yank. Turn only as far as your body allows comfortably, then hold for a few breaths. Switch sides.
7. Cat-Cow Stretch
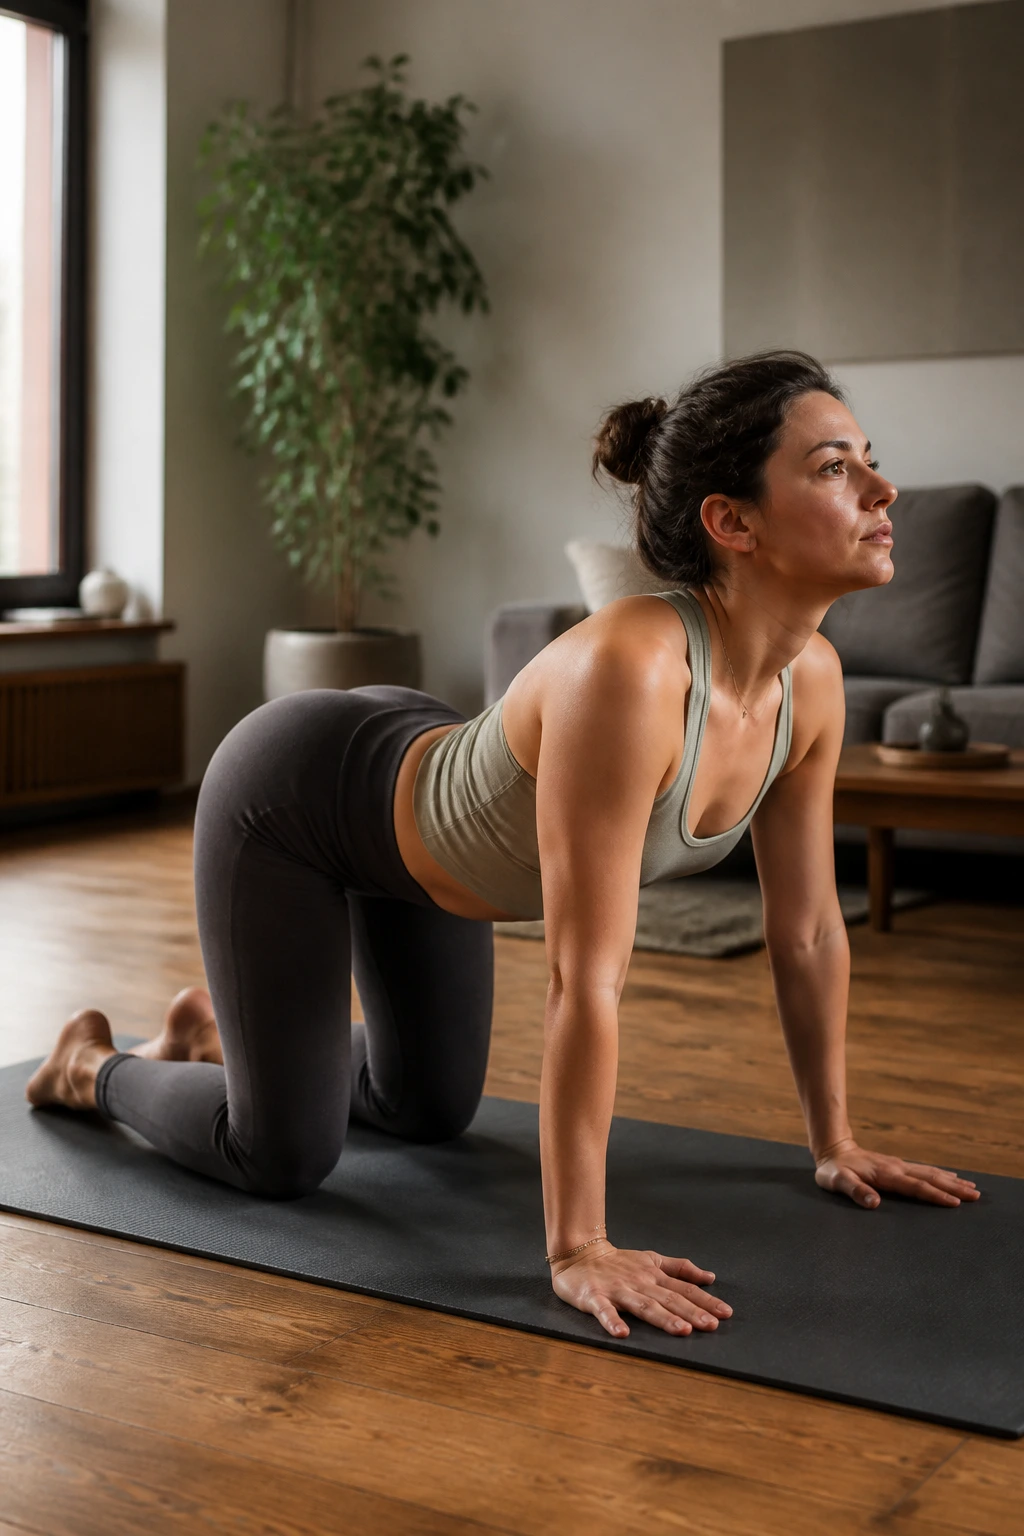
This is a classic for a reason. Cat-Cow moves the entire spine through flexion and extension, which is essential for maintaining spinal health. It works best on a mat or a soft rug where you can comfortably get onto your hands and knees.
- Cow: Inhale, drop your belly toward the floor, and look up toward the ceiling, arching your back.
- Cat: Exhale, round your spine toward the ceiling, tucking your chin toward your chest.
Move slowly between these two positions. Think of your spine as a chain; try to move one vertebra at a time, starting from the tailbone and finishing with the neck. This fluid motion helps hydrate the spinal discs and warms up the entire core.
8. Child’s Pose
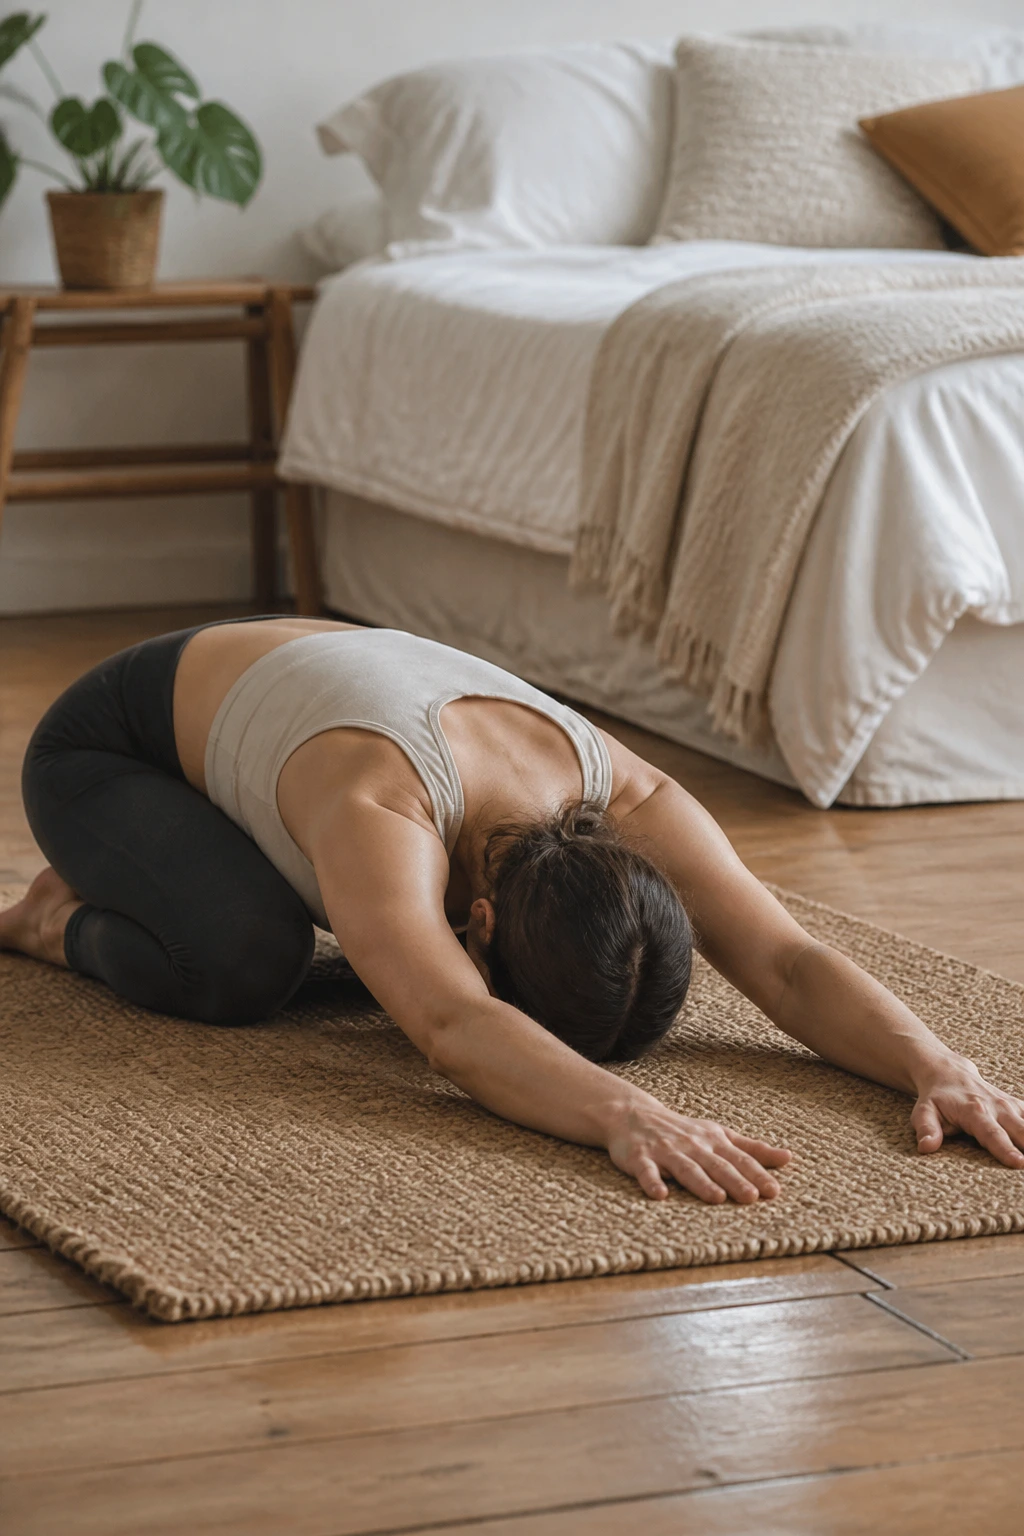
This is the ultimate recovery position. It stretches the lower back, hips, and thighs, while simultaneously providing a moment of mental calm. It’s an essential counterbalance to the stresses of the day.
How to Settle In
Start on your hands and knees. Spread your knees wide, but keep your big toes touching. Push your hips back until they rest on your heels. Reach your arms forward on the floor and let your forehead rest gently on the mat.
If your hips are tight, they might not reach your heels immediately. That is fine. Just go as far as you can and let gravity do the work. Over time, as your hips open up, you will sink lower. Stay here for as long as you like—it’s a great way to transition into a resting state.
9. Butterfly Stretch
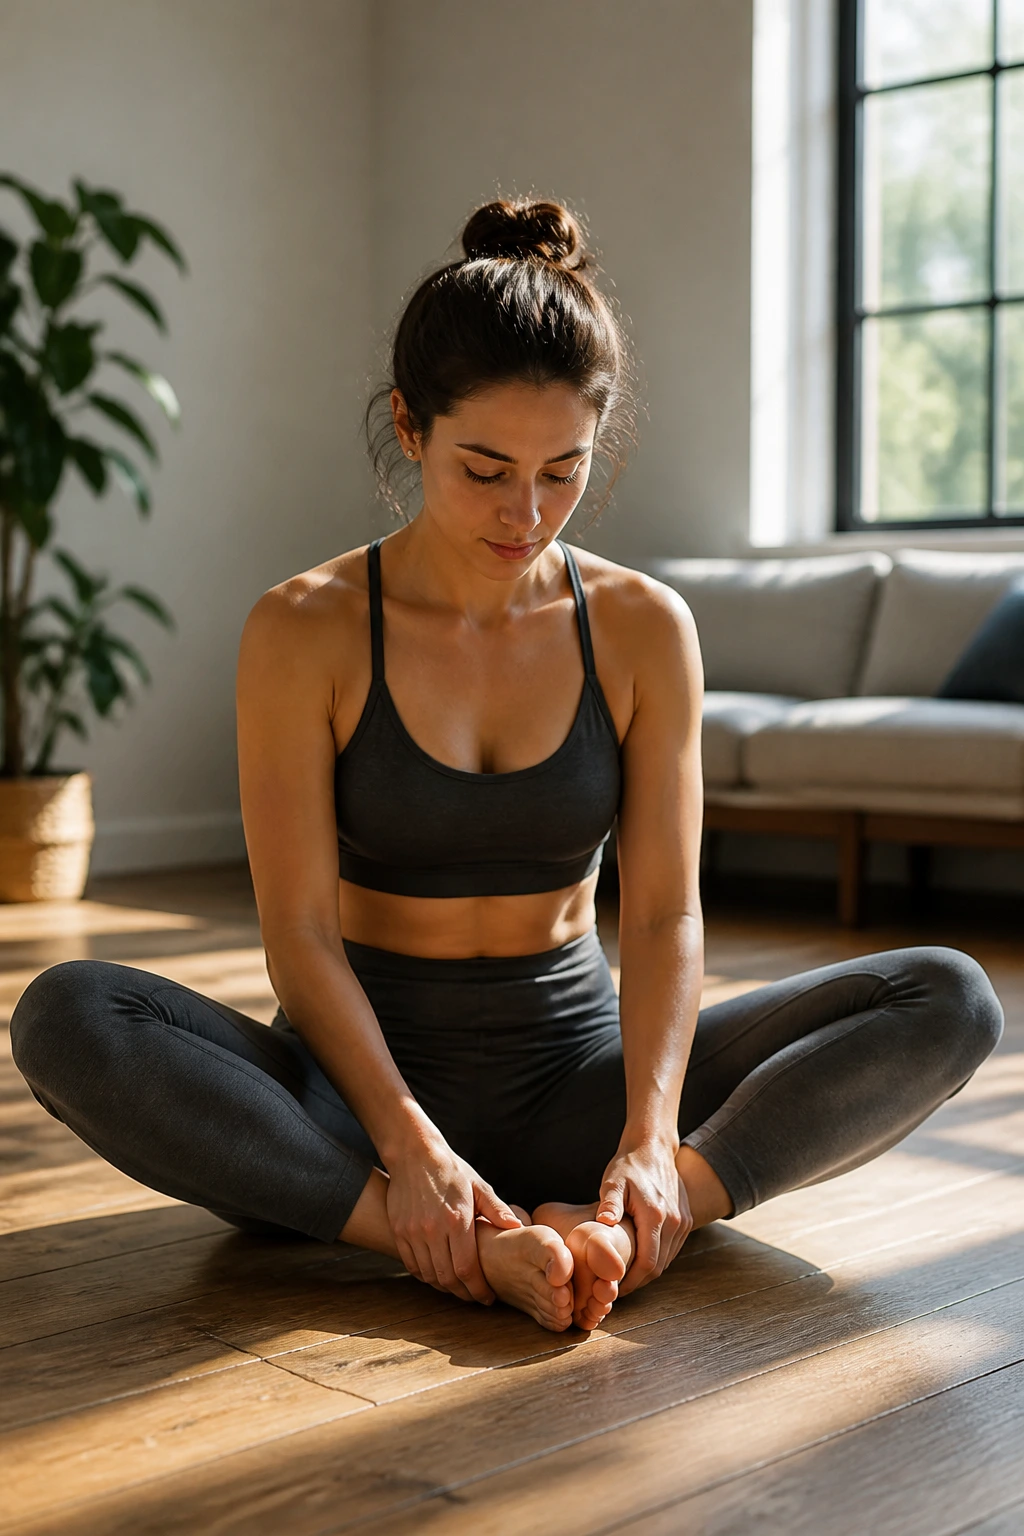
The inner thighs (adductors) and hips are hotspots for tension. If you sit a lot, these muscles often become chronically tight. The butterfly stretch is an easy way to address this without needing to be on the floor in a complex position.
The Setup
Sit on the floor with your feet together, soles touching. Let your knees fall open toward the floor. Hold your ankles or feet with your hands. To increase the stretch, keep your spine tall and lean slightly forward from your hips, not your waist.
Pro tip: If your knees are high in the air, don’t worry. Place a cushion or a rolled-up towel under each knee for support. This allows your muscles to relax into the stretch rather than fighting against it.
7. Figure-Four Stretch
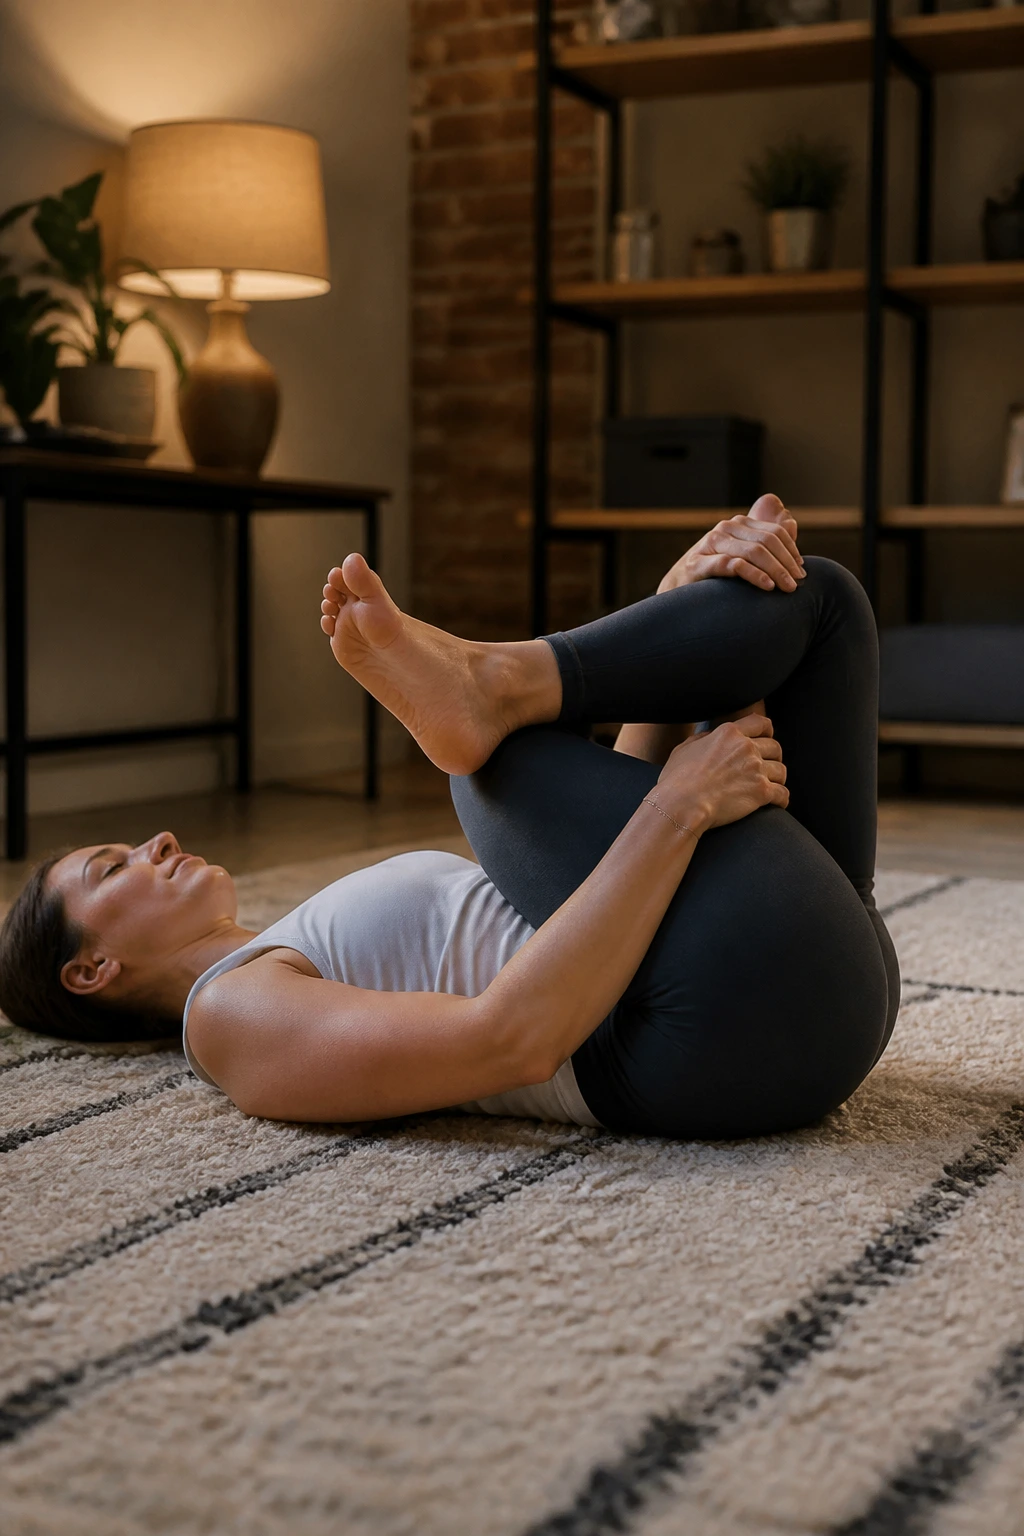
The glutes and the piriformis muscle deep in your hip can cause a surprising amount of discomfort in the lower back when they get tight. The figure-four stretch is perhaps the most effective way to target this area, especially if you have trouble with other hip stretches.
Execution
Lie on your back with your knees bent and feet flat on the floor. Cross your right ankle over your left knee. Reach through the opening of your legs and grab the back of your left thigh. Gently pull your left thigh toward your chest. You will feel a deep, satisfying stretch in the right glute.
Hold for 30 seconds and switch sides. If you can’t reach your thigh, use a towel or a strap around your left leg to pull it toward you.
11. Hip Flexor Lunge
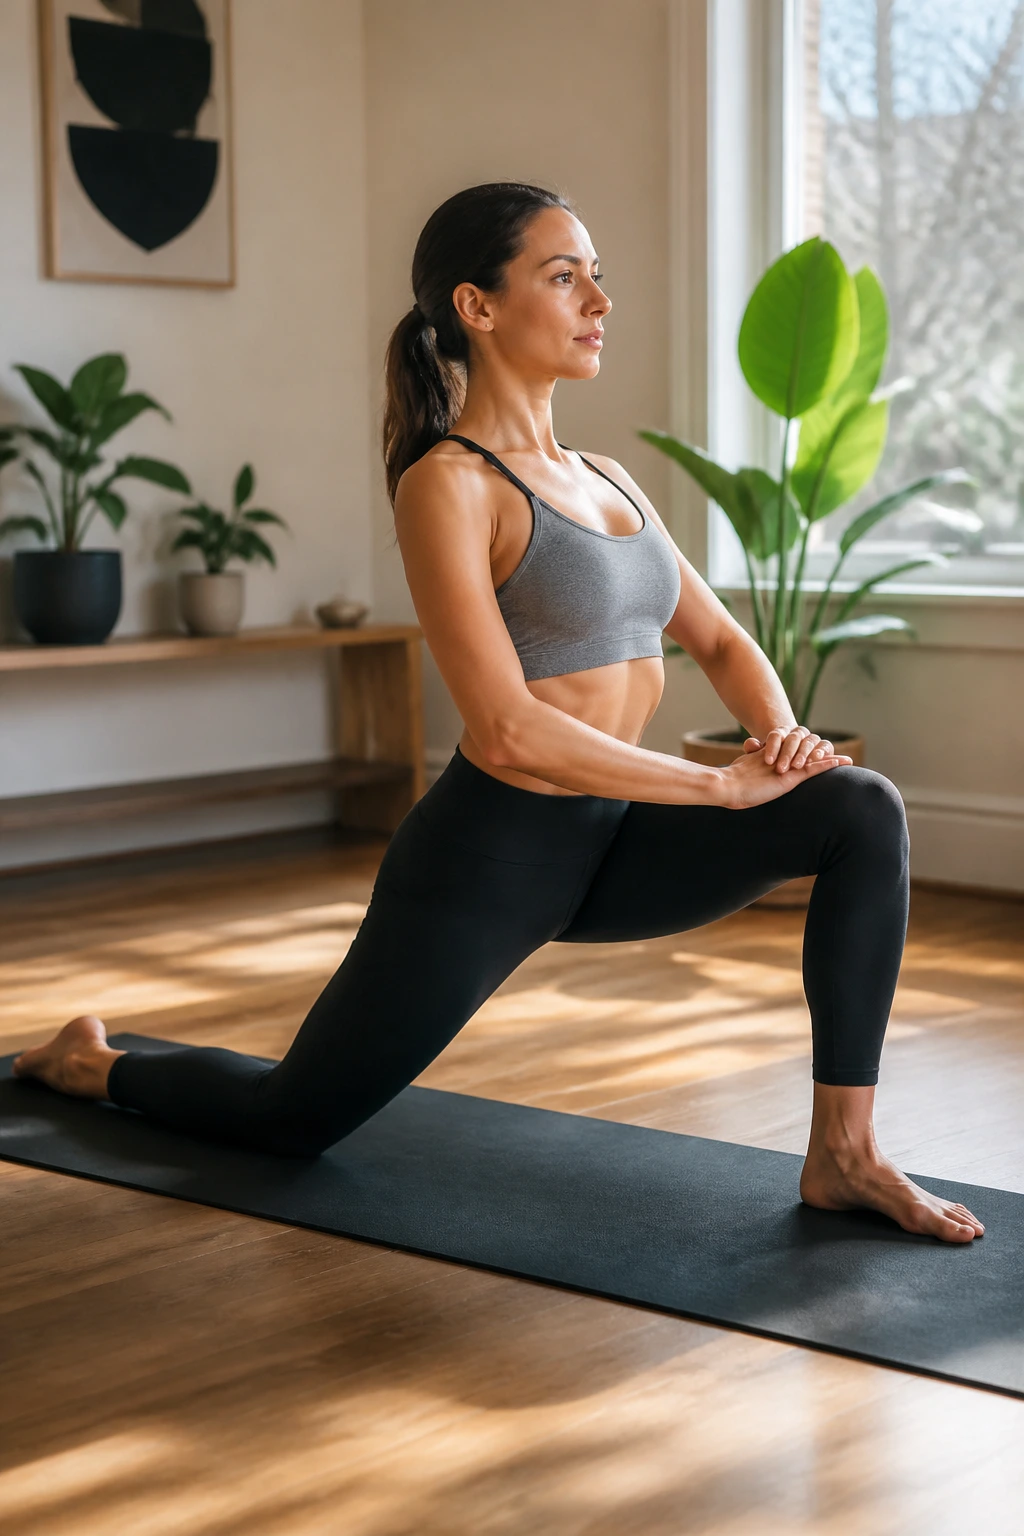
Your hip flexors are the muscles at the front of your hip. If you spend time sitting, these are essentially locked in a shortened position for hours. A low-lunge stretch is the best way to lengthen them back out and take the strain off your lower back.
The Mechanics
Step one foot forward into a lunge. Drop your back knee to the floor. Keep your front knee directly over your ankle. To deepen the stretch, engage your glutes and press your hips slightly forward. You should feel a stretch in the front of the back hip.
Keep your upper body tall. If you lean forward, you lose the stretch in the hip flexor. If you want more, reach your arm (on the same side as the back knee) up toward the ceiling.
12. Standing Quad Stretch
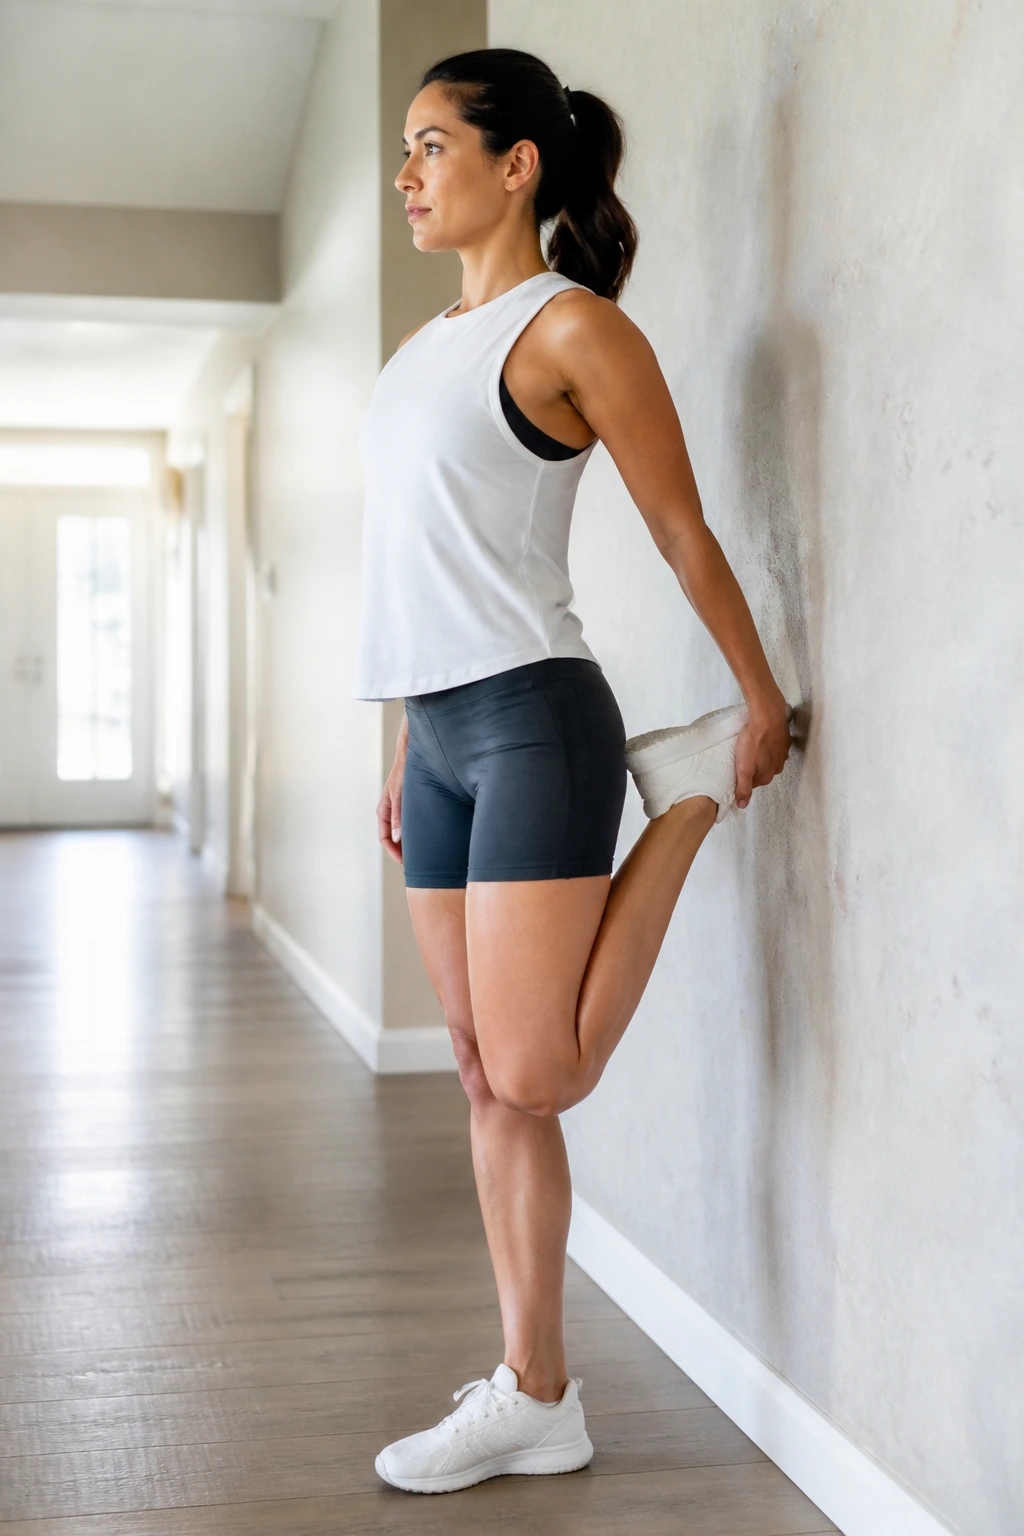
Your quadriceps (the big muscles on the front of your thighs) have a massive impact on your knee joint. When they are tight, they can pull your kneecap out of alignment, causing persistent knee aches. A standing quad stretch is a quick way to relieve that pull.
How to Balance Safely
Stand next to a wall or a sturdy chair for balance. Bend your right knee and grab your ankle with your right hand. Pull your heel toward your glutes. Keep your knees close together—do not let your right knee splay out to the side.
Keep your torso upright; don’t lean forward. If you can’t reach your ankle, loop a belt or a strap around it and hold the ends. This allows you to get a great stretch without losing your balance or straining your shoulder.
13. Hamstring Heel Dig
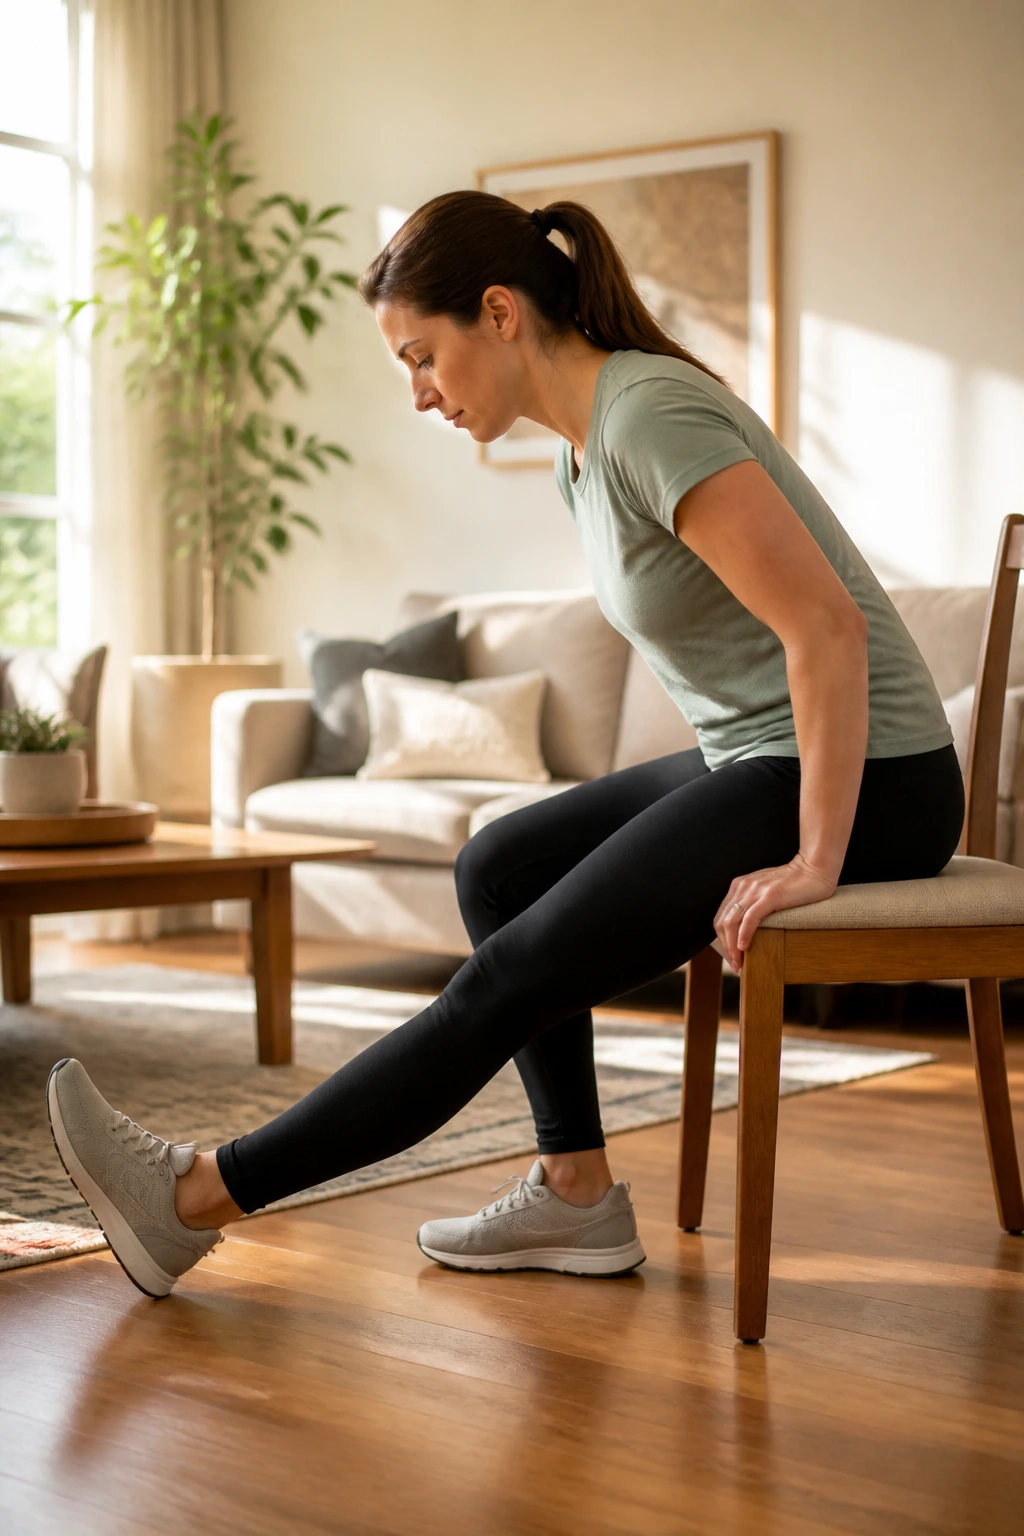
Hamstrings are notorious for being tight, and they are directly connected to your pelvis. When they are tight, they pull the pelvis into an unnatural tilt, which usually leads to lower back pain. You don’t need to do intense, painful touching-your-toes stretches to fix this.
The Approach
Sit on the edge of a chair. Extend your right leg straight out, resting your heel on the floor. Keep your back straight, hinge at your hips, and lean your upper body slightly forward. You’ll feel a pull in the back of your thigh.
Do not round your spine to get lower. The goal is to keep your back flat, which ensures the stretch stays in the hamstring rather than moving into your lower back. Hold for 20 seconds, then switch.
14. Calf Raises
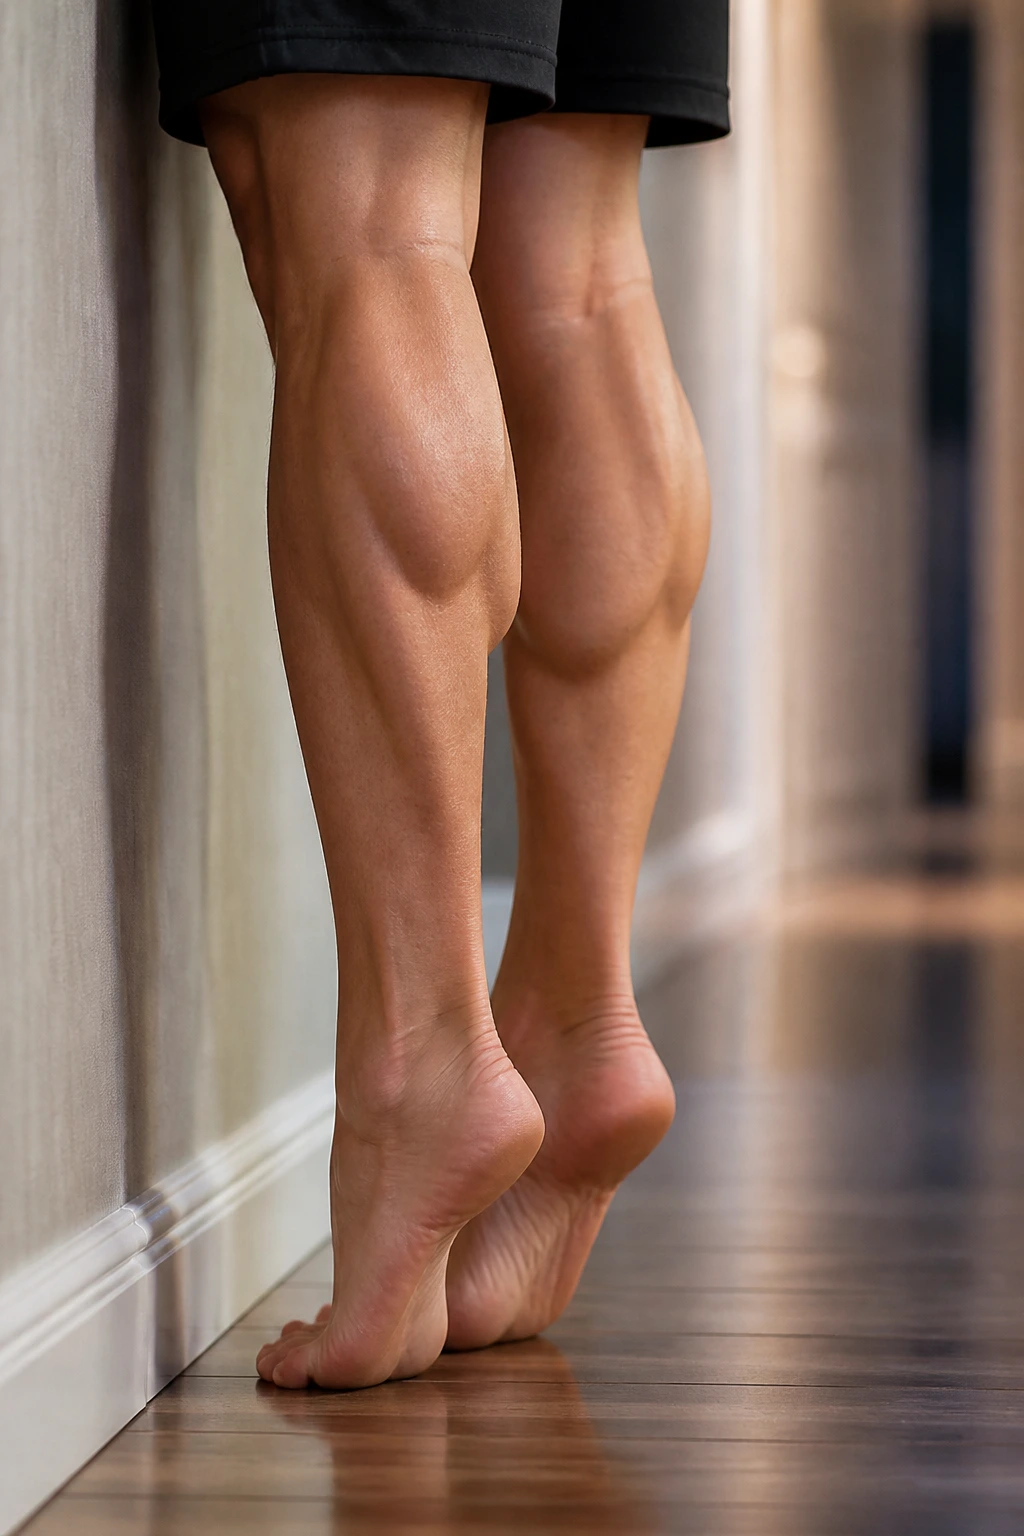
The calves are often overlooked in mobility routines, but they play a critical role in ankle health and stride efficiency. When calves get tight, it forces the foot to pronate or supinate abnormally, which can cause pain in the ankles, knees, and even hips.
The Movement
Stand near a wall for balance. Rise up onto the balls of your feet, lifting your heels as high as possible. Pause at the top, then slowly lower your heels back to the floor. Do this 15 times.
Why this helps: It is as much a strengthening exercise as it is a stretch. Strengthening the muscles around the ankle joint provides support, which is often the best form of pain relief. It also moves the ankle through its full range of motion.
15. Ankle Circles
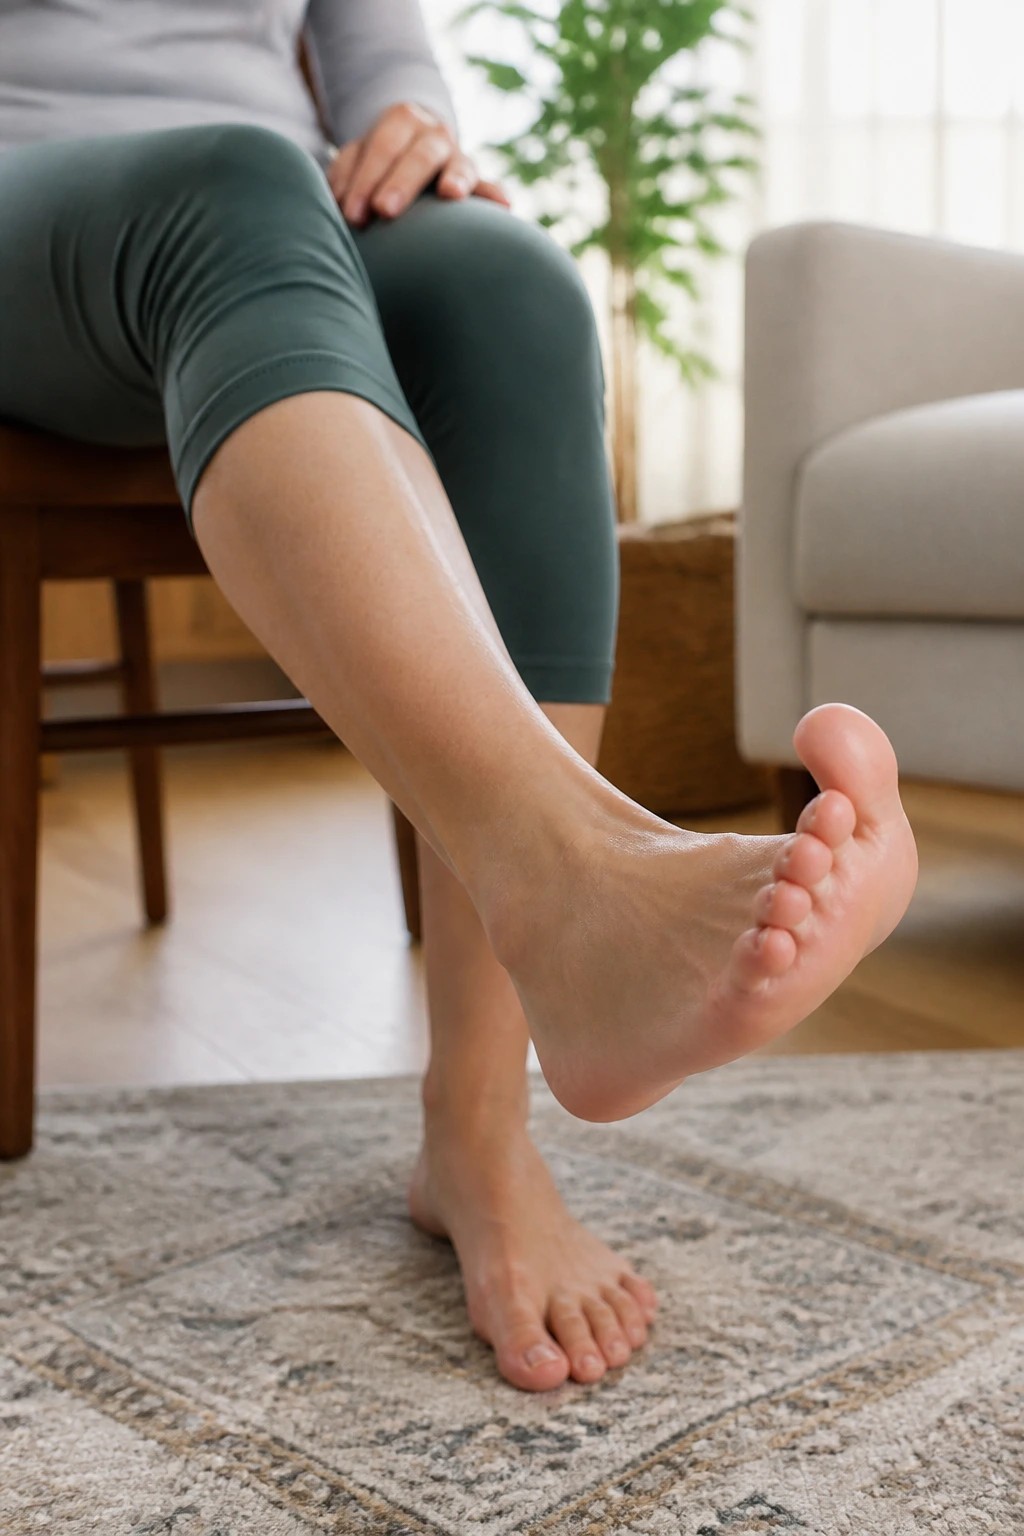
Ankles are complicated joints that handle the impact of every single step you take. When they get stiff, it creates a chain reaction of compensations up the leg. Ankle circles are the simplest way to maintain mobility in this joint.
The Drill
You can do this seated or standing. Lift one foot off the floor. Slowly rotate your foot in a circle, making the biggest circle you possibly can with your toes. Do 10 circles clockwise, then 10 counter-clockwise.
Focus on the quality of the movement. Don’t just wiggle your foot around. Really push through the full range of motion—point your toes down, pull them up, and rotate to the sides. This ensures you are hitting all the little stabilizer muscles in the ankle.
16. Toe Taps
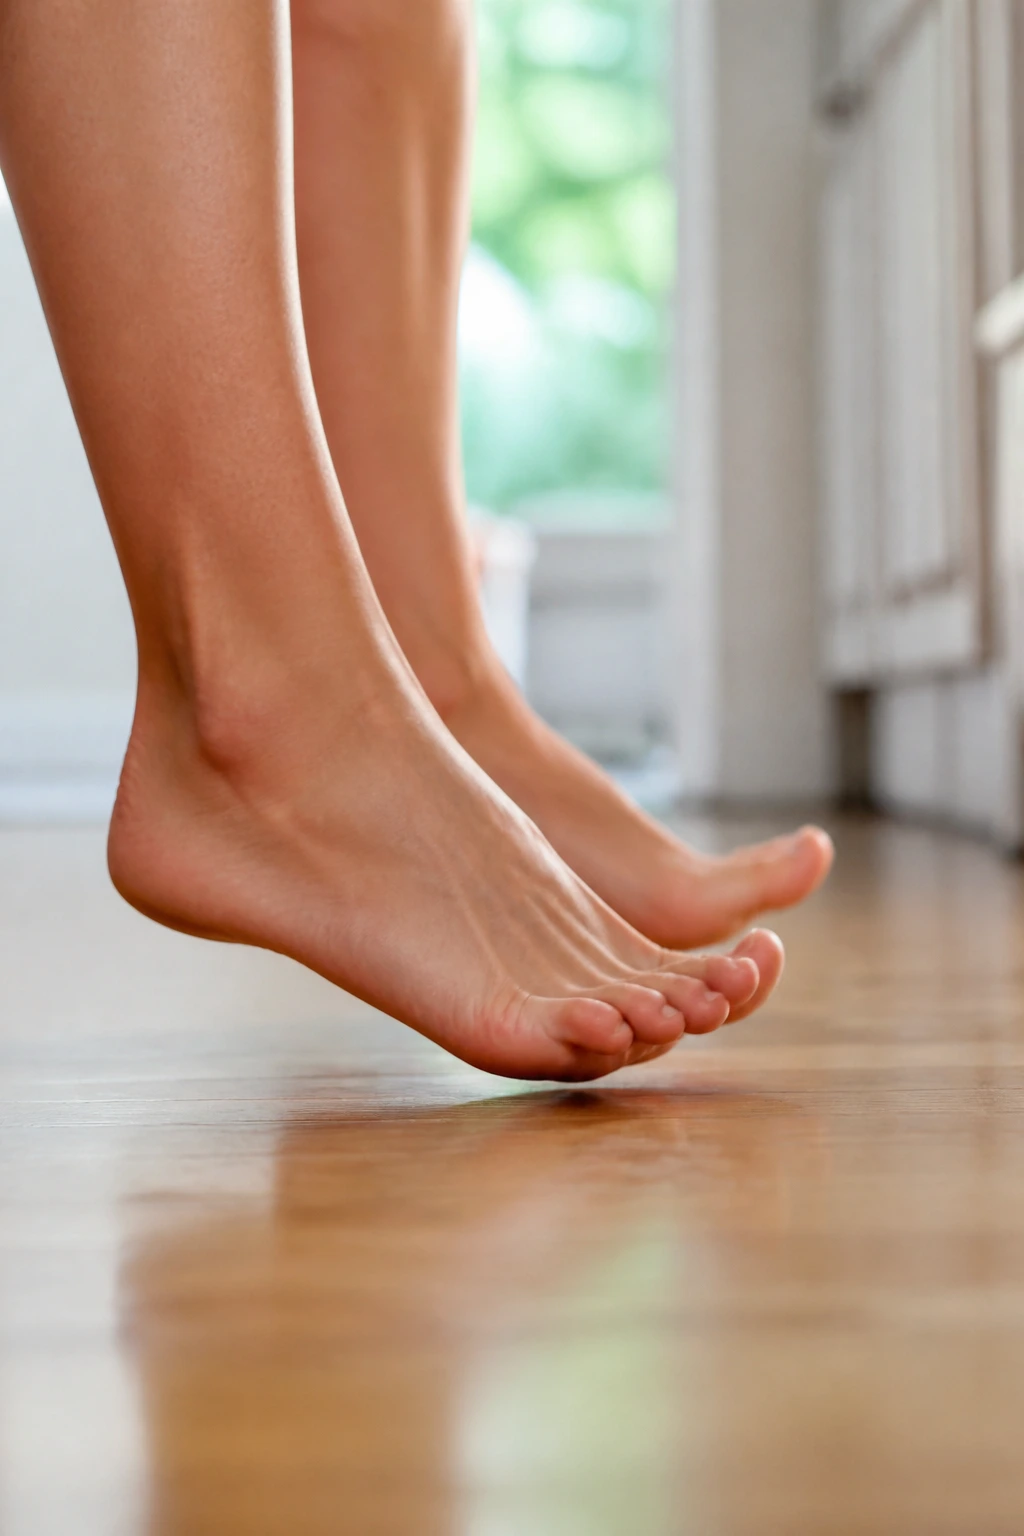
Foot pain is frequently ignored, yet it is the foundation of your entire skeletal alignment. Toe taps help wake up the small muscles in your feet and toes, which is especially helpful if you wear stiff shoes or spend a lot of time on hard floors.
How to Do It
Stand comfortably. Lift your toes off the floor, keeping your heels down. Tap your toes back down to the floor, then lift them again. Do this quickly, like you are drumming your fingers, but with your feet.
Aim for 30 to 40 taps. This might feel silly, but it builds strength in the arch and helps release tightness in the bottom of the foot (the plantar fascia). It is a fantastic way to relieve foot fatigue after a long day.
17. Glute Bridges
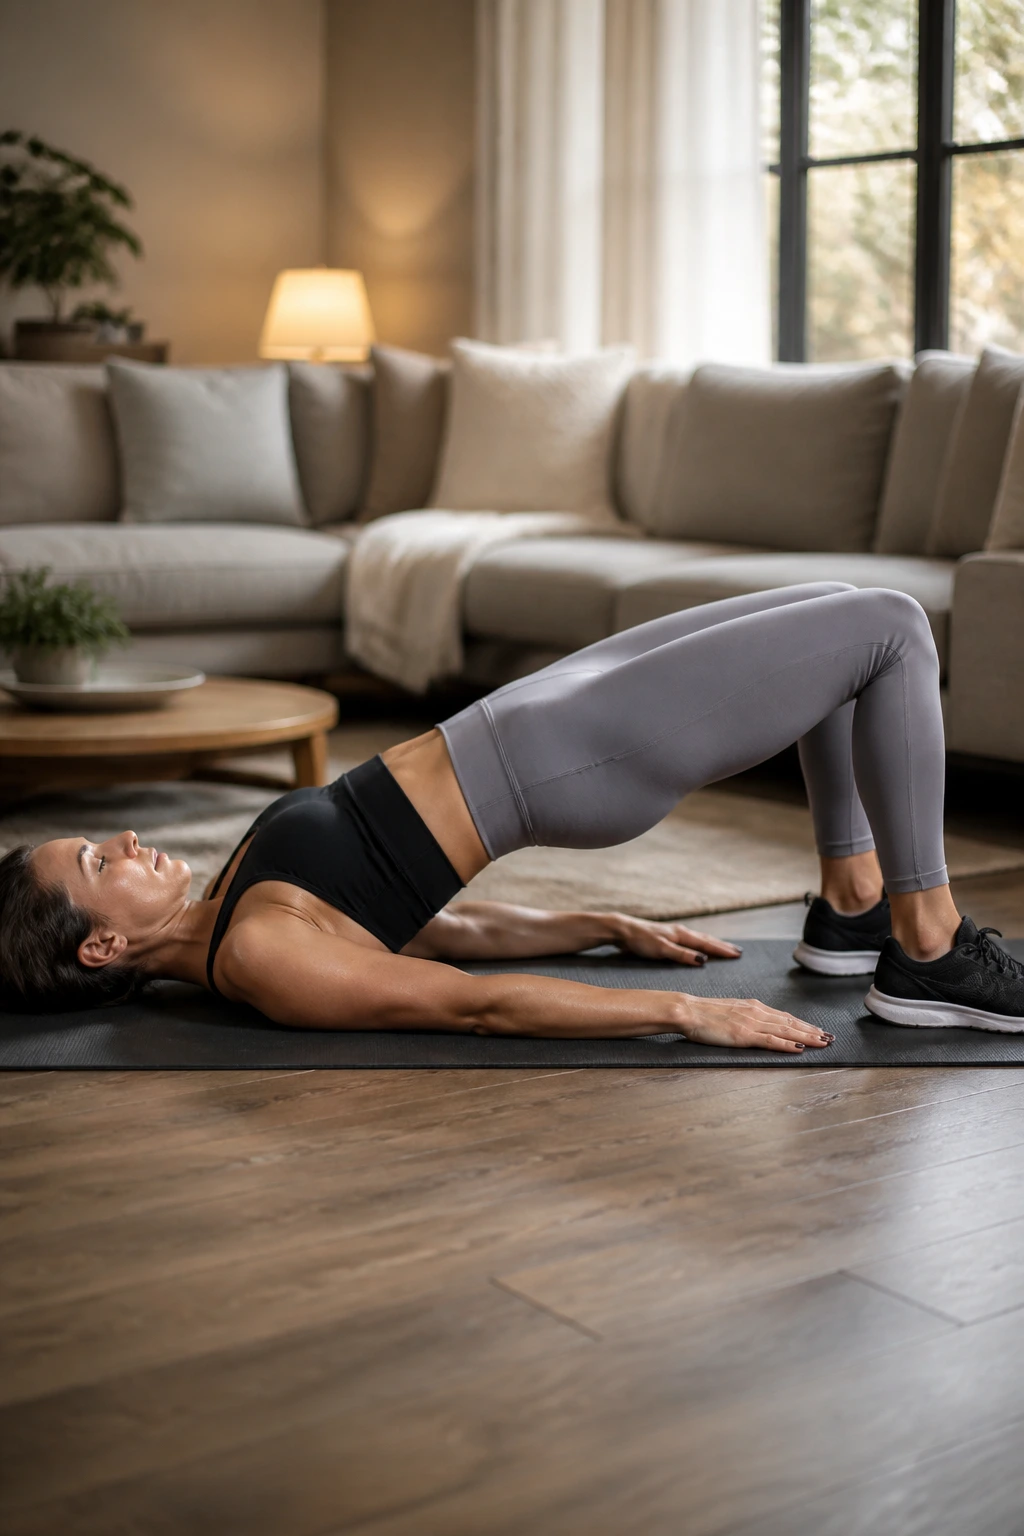
While this is technically an exercise, it is essential for anyone dealing with hip and lower back pain. Weak glutes often force the lower back muscles to work overtime, leading to chronic stiffness. Bridges help activate those glutes and reset your pelvis.
The Steps
Lie on your back with knees bent, feet flat on the floor, about hip-width apart. Engage your core and push through your heels to lift your hips off the floor until your body forms a straight line from knees to shoulders. Squeeze your glutes at the top, hold for a second, then lower back down.
Do 10 to 12 repetitions. Ensure you are pushing with your glutes and hamstrings, not your lower back. If you feel it in your back, lower your hips a bit and refocus the squeeze on your glutes.
18. Gentle Spinal Twist
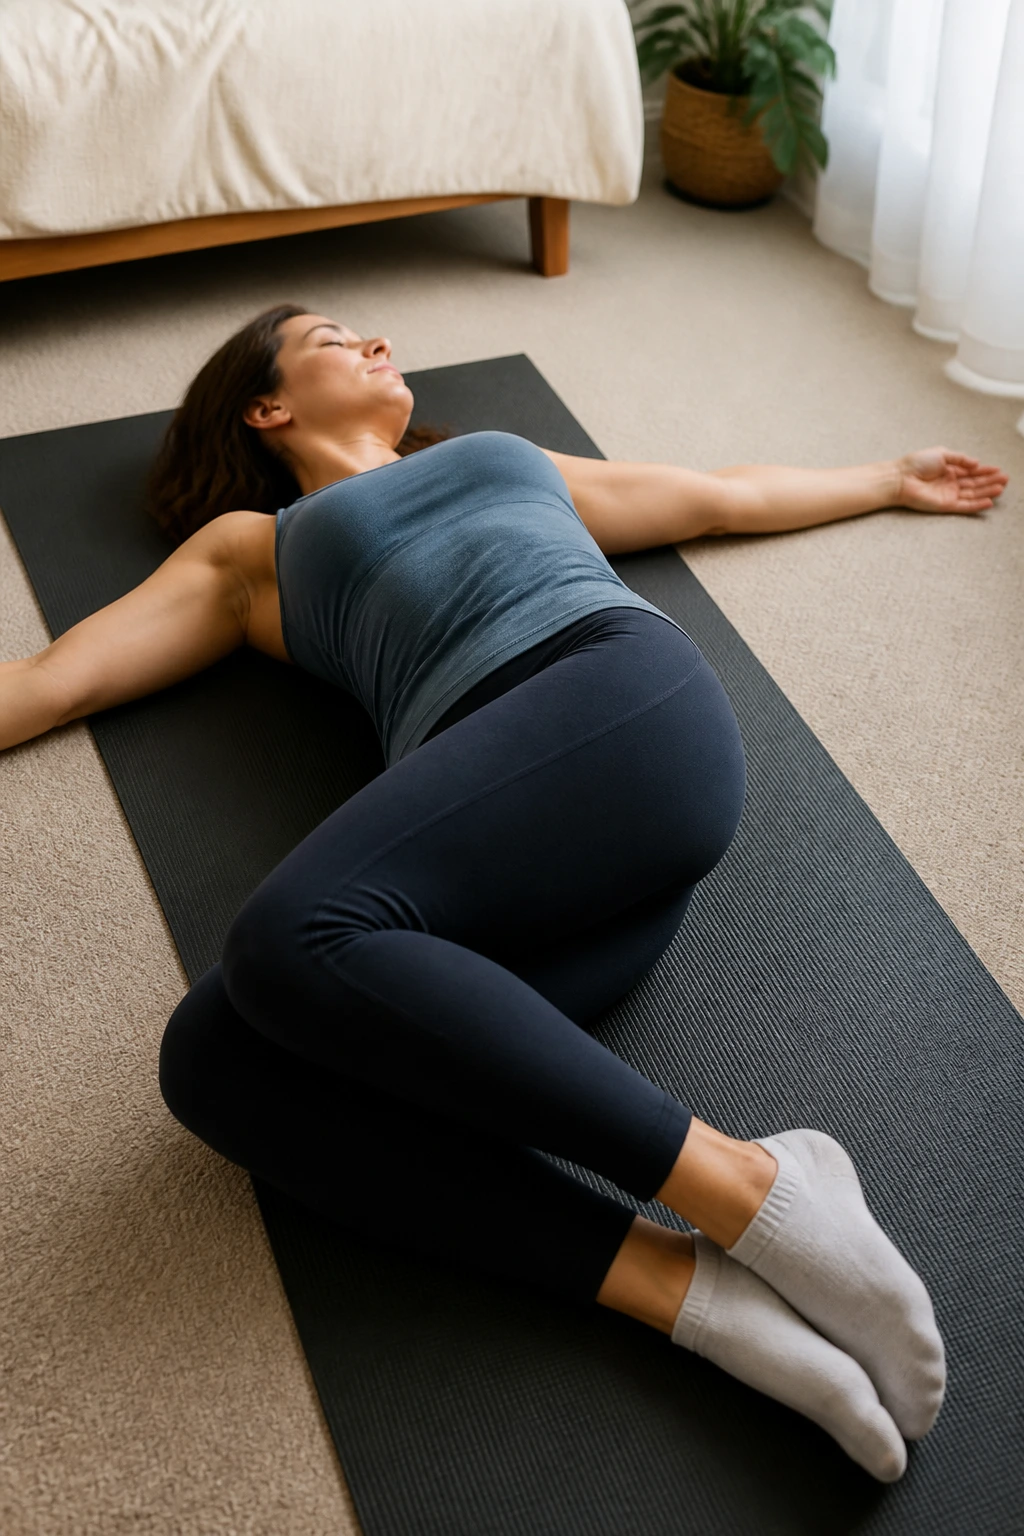
A supine spinal twist is the ultimate “end of the day” release. It’s relaxing, helps decompress the spine, and gently stretches the muscles around the torso and shoulders. It is much easier on the back than a standing or seated twist because the floor supports your entire spine.
The Setup
Lie on your back with your knees bent. Open your arms out to the sides in a T-shape. Gently drop both knees to the right side, keeping your shoulders pinned to the floor. If your knees don’t reach the floor, place a pillow under them. Hold for 30 seconds, breathe deeply, then switch to the left.
The key here is letting the floor do the work. Don’t try to force your knees down. Just relax and let gravity pull them toward the ground. Your spine will naturally find a comfortable rotation.
19. Standing Side Bend
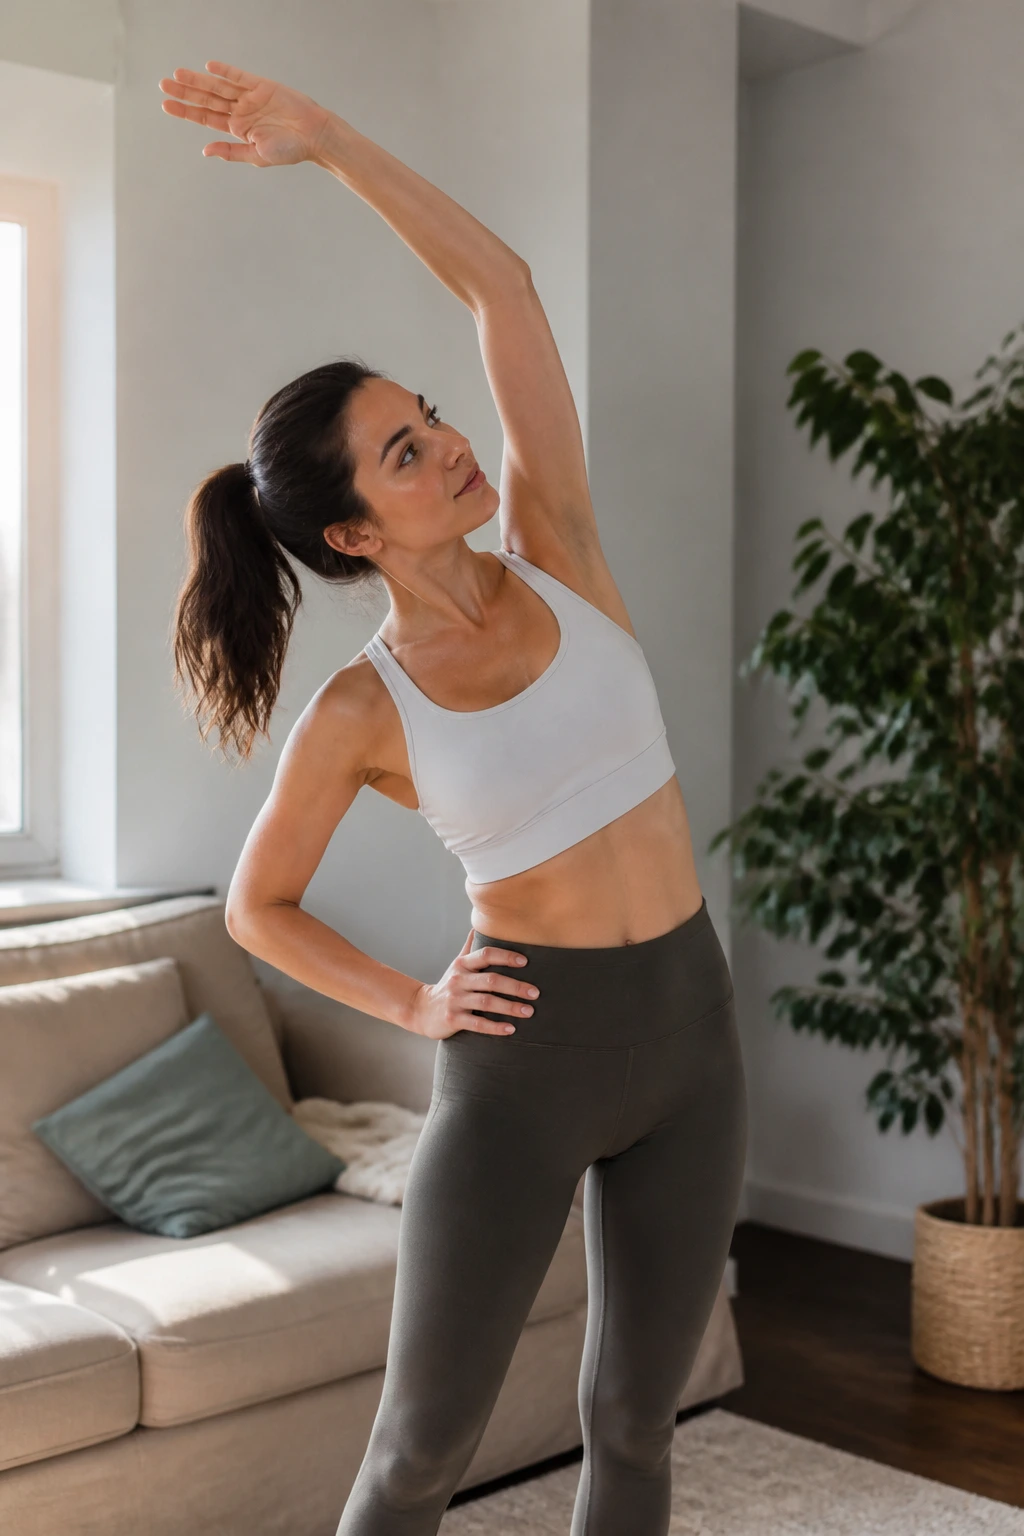
We move forward and backward all day, but we rarely move side-to-side. The muscles between your ribs (intercostals) and the obliques along your torso need to be stretched to allow for deep breathing and full spinal flexibility.
The Action
Stand with your feet shoulder-width apart. Reach your right arm straight up toward the ceiling. Keep your left hand on your hip. Lean your upper body to the left, feeling the stretch all along your right side, from your armpit down to your hip.
Keep your chest facing forward. Do not twist as you lean. Hold for 15 seconds, then switch sides. This stretch feels particularly good if you have been hunched over a desk for hours.
20. Overhead Reach

Sometimes, the simplest movement is the most effective. An overhead reach resets your posture, engages your core, and gives your shoulders a moment of freedom. It is the perfect way to finish any stretching routine.
Closing It Out
Stand with feet hip-width apart. Interlace your fingers, palms facing up. Reach your arms toward the ceiling as high as you possibly can, rising onto your toes if your balance allows. Take a deep breath in as you reach, expanding your ribcage.
Exhale, let your heels drop, and bring your arms down slowly to your sides. Feel the length you have created in your spine. Repeat this three times. It is a full-body reset that signals to your nervous system that it is time to move on with your day.
Establishing a Consistent Routine
Consistency is the secret sauce here. Doing these stretches once a week will feel good in the moment, but it won’t create lasting change in your joint mobility. The goal is to make these movements a part of your daily rhythm, similar to brushing your teeth. You do not need to do all 20 every single day. Pick three or four that address your primary areas of stiffness—perhaps the neck and shoulders if you sit at a desk, or the hips and calves if you are on your feet all day.
If you are just starting, treat it like a low-pressure habit. Do five minutes in the morning while the coffee is brewing, or five minutes before bed while watching television. Your joints don’t know the difference between a “formal workout” and a “gentle stretch.” They only know movement. Over time, you will find that these movements become second nature, and the “rust” you feel upon waking begins to disappear.
Listening to Your Body’s Feedback
Always remember that your body is a reliable narrator. If a stretch feels good, your body is telling you it needs that release. If a stretch feels like a sharp, “wrong” pain, back off immediately. There is a very real difference between the tension of a muscle stretching (which is generally a “good” discomfort) and the pinching of a joint or a sharp nerve pain (which is a signal to stop).
You might notice that one side of your body is significantly tighter than the other. This is common. Most of us are right-handed or left-handed, which leads to subtle imbalances in how we move and hold ourselves. When you find a tighter side, spend a little extra time there. Don’t force it to catch up in one day, but give it 10 or 15 seconds more of gentle, patient stretching. Patience is often the missing ingredient in mobility training. Your joints didn’t get stiff in a day, and they won’t become perfectly fluid in a day, either. Stay the course, keep moving, and let your body adapt at its own pace.
