



You know that specific, nagging ache at the base of your spine that shows up after sitting at a desk for too long or just standing in the kitchen? It’s miserable. Most of us reach for a heating pad or pop an anti-inflammatory, hoping the discomfort will just evaporate. While resting has its place, the truth is that the lower back is often the victim, not the culprit. When your glutes, hamstrings, and hips aren’t pulling their weight, your lumbar spine has to take the load—and it isn’t built for that kind of heavy lifting.
Leg workouts are arguably the most effective tool in your arsenal for long-term lower back relief. Strengthening the posterior chain—that vital group of muscles running from your glutes down to your heels—creates a natural corset of support. When these muscles are strong, they absorb the forces of daily life, shielding your spine from unnecessary stress. You don’t need a gym membership or heavy barbells to make a dent in this pain. In fact, some of the most effective movements for back health require nothing but floor space and a bit of focus.
This isn’t about building massive quads or hitting personal records on a squat rack. It is about waking up dormant muscles, fixing imbalances, and teaching your hips to function the way they were designed. If you are tired of the constant low-level pain, it is time to shift your focus away from the back itself and start paying attention to what supports it.
1. Glute Bridges
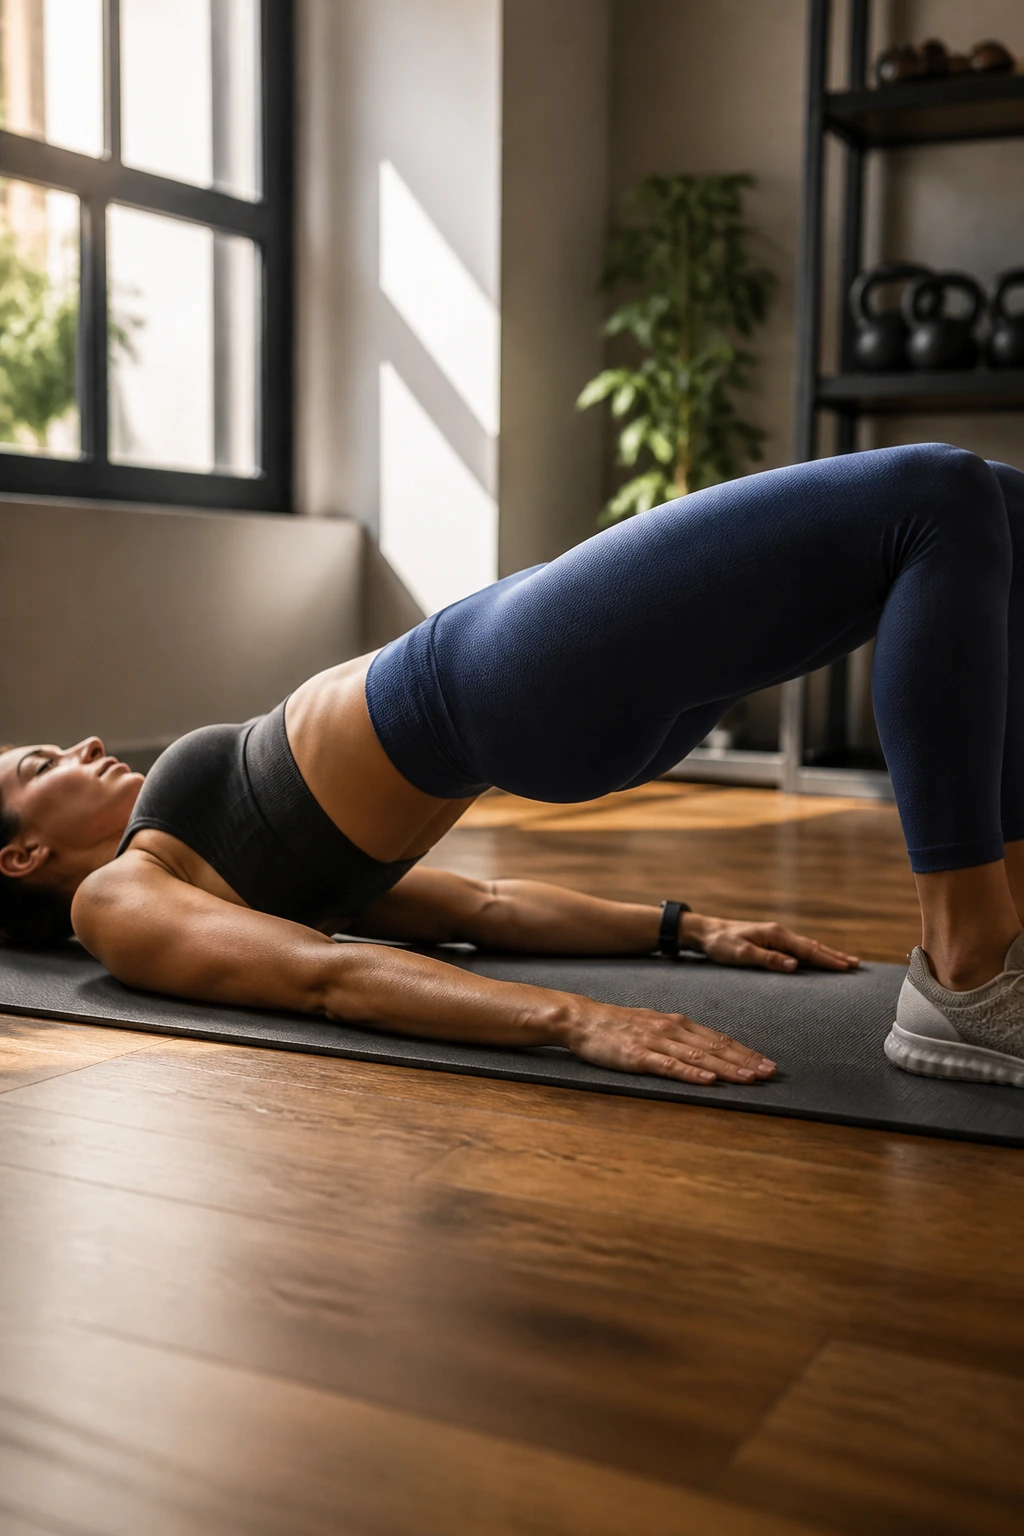
The glute bridge is the undisputed king of back-friendly leg exercises. It targets the posterior chain directly while keeping your spine firmly supported against the floor. When you lift your hips, you force the glutes to do the work rather than the lower back muscles, which is exactly the correction most of us need.
Why This Matters for Your Back
When your glutes are weak or “asleep” from hours of sitting, your hamstrings and lower back muscles often overcompensate to handle hip extension. By isolating the glutes, you retrain your body to use the right muscles for the job.
- Execution: Lie on your back with knees bent and feet flat, hip-width apart.
- The Squeeze: Drive through your heels to lift your hips until your body forms a straight line from shoulders to knees. Squeeze your glutes at the top.
- The Control: Lower your hips slowly, touching the floor lightly before the next rep. Do not arch your back at the top; focus on driving your tailbone toward your knees.
Pro tip: If you find your hamstrings cramping, move your feet a few inches further away from your body.
2. The Bird-Dog
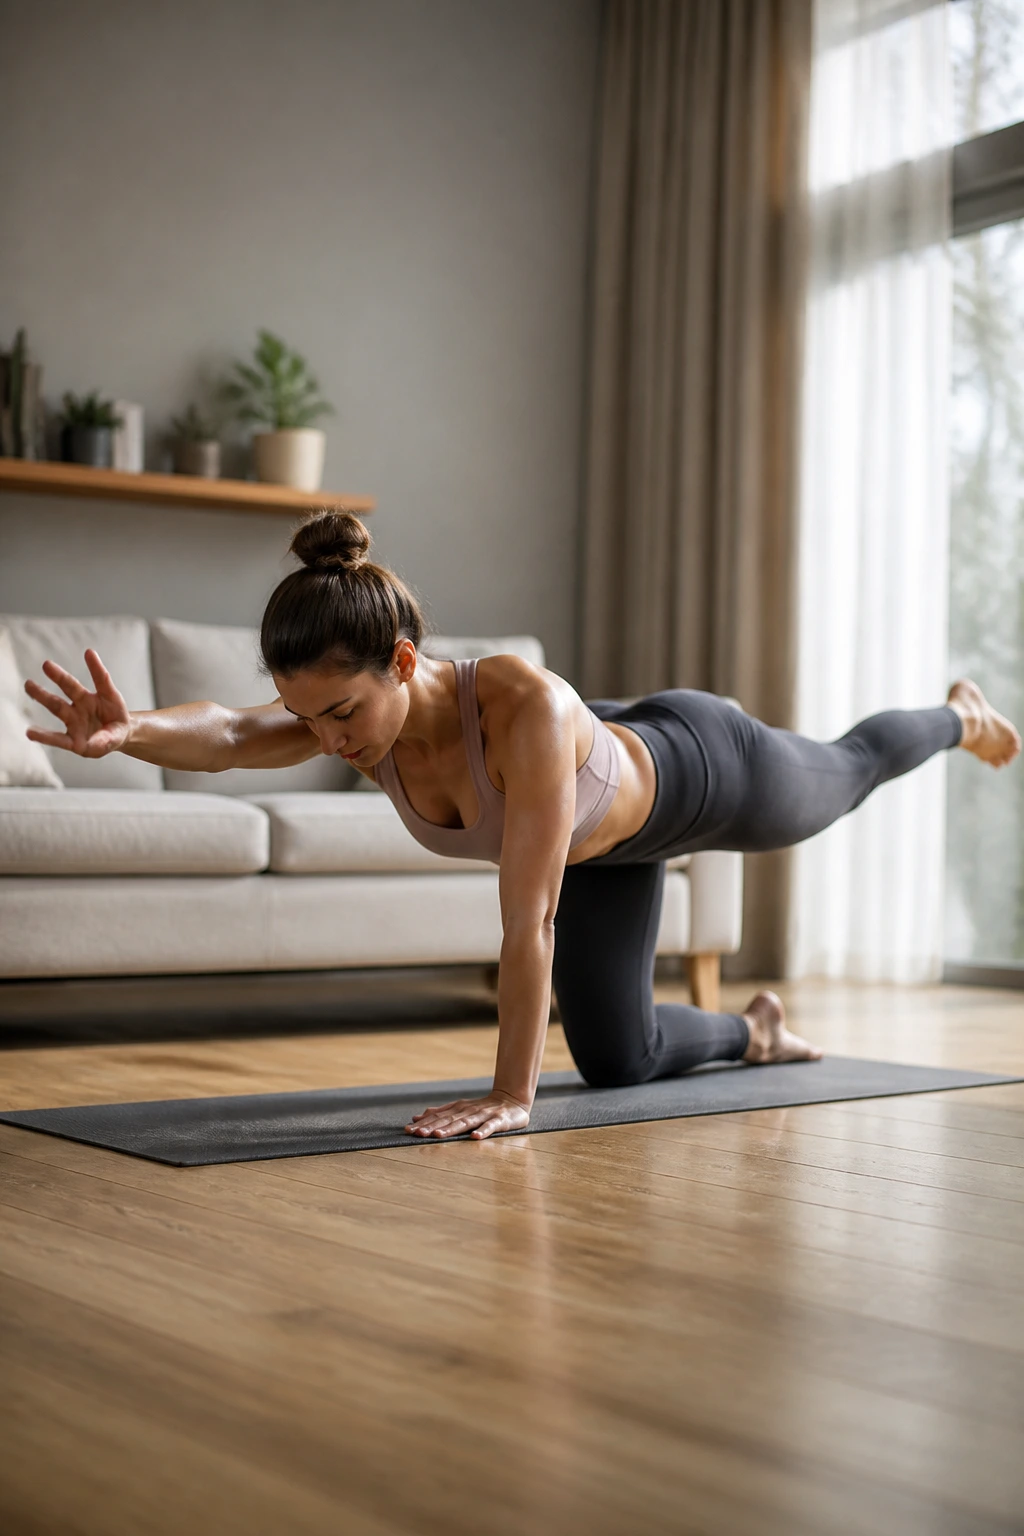
This is less of a “leg workout” in the traditional sense and more of a total-body stability masterclass. It forces you to engage your core and leg muscles simultaneously while your spine remains in a neutral, safe position. It is excellent for teaching your body how to maintain spinal stability while your limbs move.
Start on all fours with your wrists under your shoulders and knees under your hips. Keep your back flat—imagine you are balancing a glass of water on your spine. Slowly extend your right arm forward and your left leg backward, aiming to keep them parallel to the floor. Hold for a heartbeat, then return to center.
The real magic happens in the not arching. Most people let their lower back dip as they extend their leg. Fight that urge. Engage your abs as if someone is about to poke you in the stomach. Move with agonizing slowness. Speed is not the goal here; absolute control is.
3. Clamshells
Your glute medius—a muscle located on the side of your hip—is frequently ignored, yet it is essential for pelvic stability. When this muscle is weak, your pelvis can tilt or shift when you walk or stand, throwing your entire lower back alignment off balance.
Lie on your side with your legs stacked and knees bent at a 45-degree angle. Keep your feet touching. Open your top knee as wide as you can without letting your pelvis roll backward. It should feel like a book opening. Pause at the top, feeling the burn in the side of your hip, then slowly close.
Do not rush the movement. If you feel your hips rocking back and forth, place your back against a wall for feedback. If you can feel your hip rocking, you are doing it wrong. The torso should remain stone-still while only the hip joint moves.
4. Side-Lying Leg Lifts
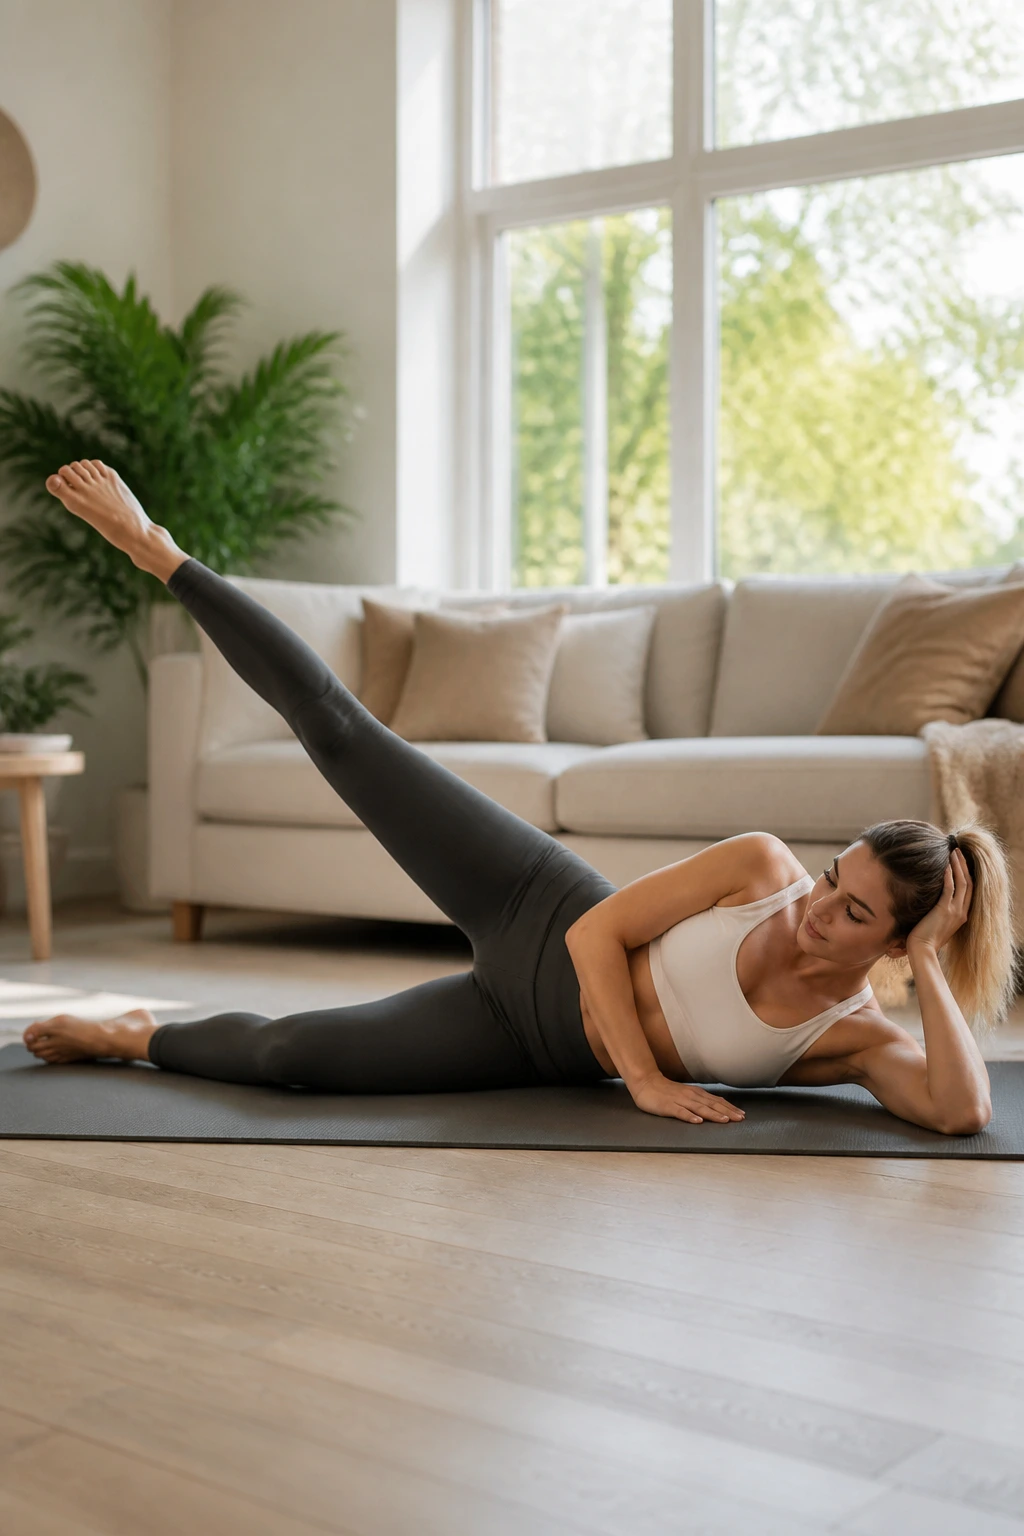
This exercise is a direct follow-up to the clamshell and is just as effective at targeting the glute medius and tensor fasciae latae. These muscles act as stabilizers for the pelvis, preventing the lumbar spine from wobbling during movement.
Lie on your side with both legs fully extended. Lift your top leg toward the ceiling, keeping your foot flexed and toes pointing forward—not toward the ceiling. Raise it only as high as you can without tilting your hip toward your ribcage.
You will feel this in the side of your hip almost immediately. If you don’t, you might be using your hip flexors instead. To fix this, pull your top leg back slightly, so your heel is behind your other foot. This simple adjustment shifts the tension back to the glute medius, where it belongs.
5. Dead Bugs
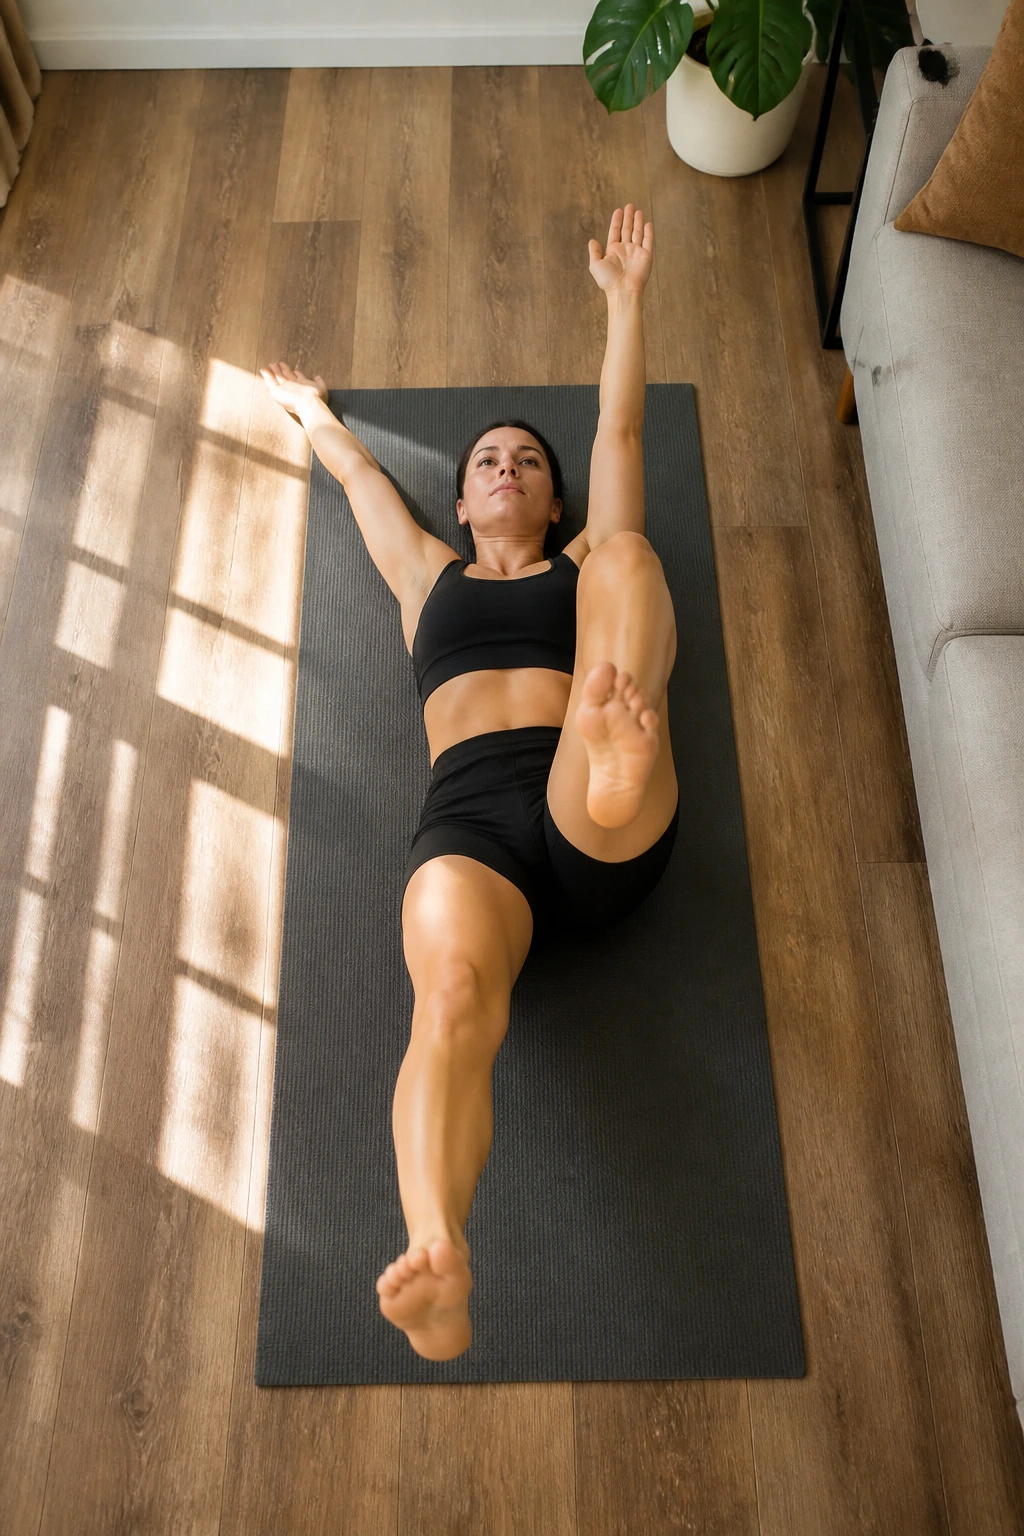
The dead bug looks silly, but it is one of the most effective exercises for teaching your core to support your spine while your legs are moving. If you struggle with lower back pain, you likely have trouble keeping your spine pressed into the floor when your core is under tension. This fixes that.
Lie on your back with your arms extended toward the ceiling and your legs in the air, knees bent at 90 degrees. Press your lower back into the floor—this is the most important part. If your back lifts, you lose the benefit.
Slowly lower your right arm behind your head while extending your left leg straight out. Stop just before your lower back peels off the floor. Return to the starting position and switch sides. It is a slow, methodical grind. Think of it as a moving plank.
6. Single-Leg Glute Bridges
Once you have mastered the standard glute bridge, you need to add a challenge. The single-leg variation doubles the load on one hip, forcing your pelvis to work harder to stay level. This is phenomenal for addressing one-sided back pain or imbalances.
Lie in the bridge position. Extend one leg straight out in the air—keep your knees aligned so the extended leg isn’t dropping low. Drive through the heel of the planted foot and lift your hips.
The goal is to keep your hips perfectly level. Most people will find their hip dipping on the side of the extended leg. This is exactly what you are trying to correct. Use your core to keep the pelvis steady as you lift. If you cannot keep your hips level, stick to the two-legged version for another two weeks.
7. Standing Hip Abduction
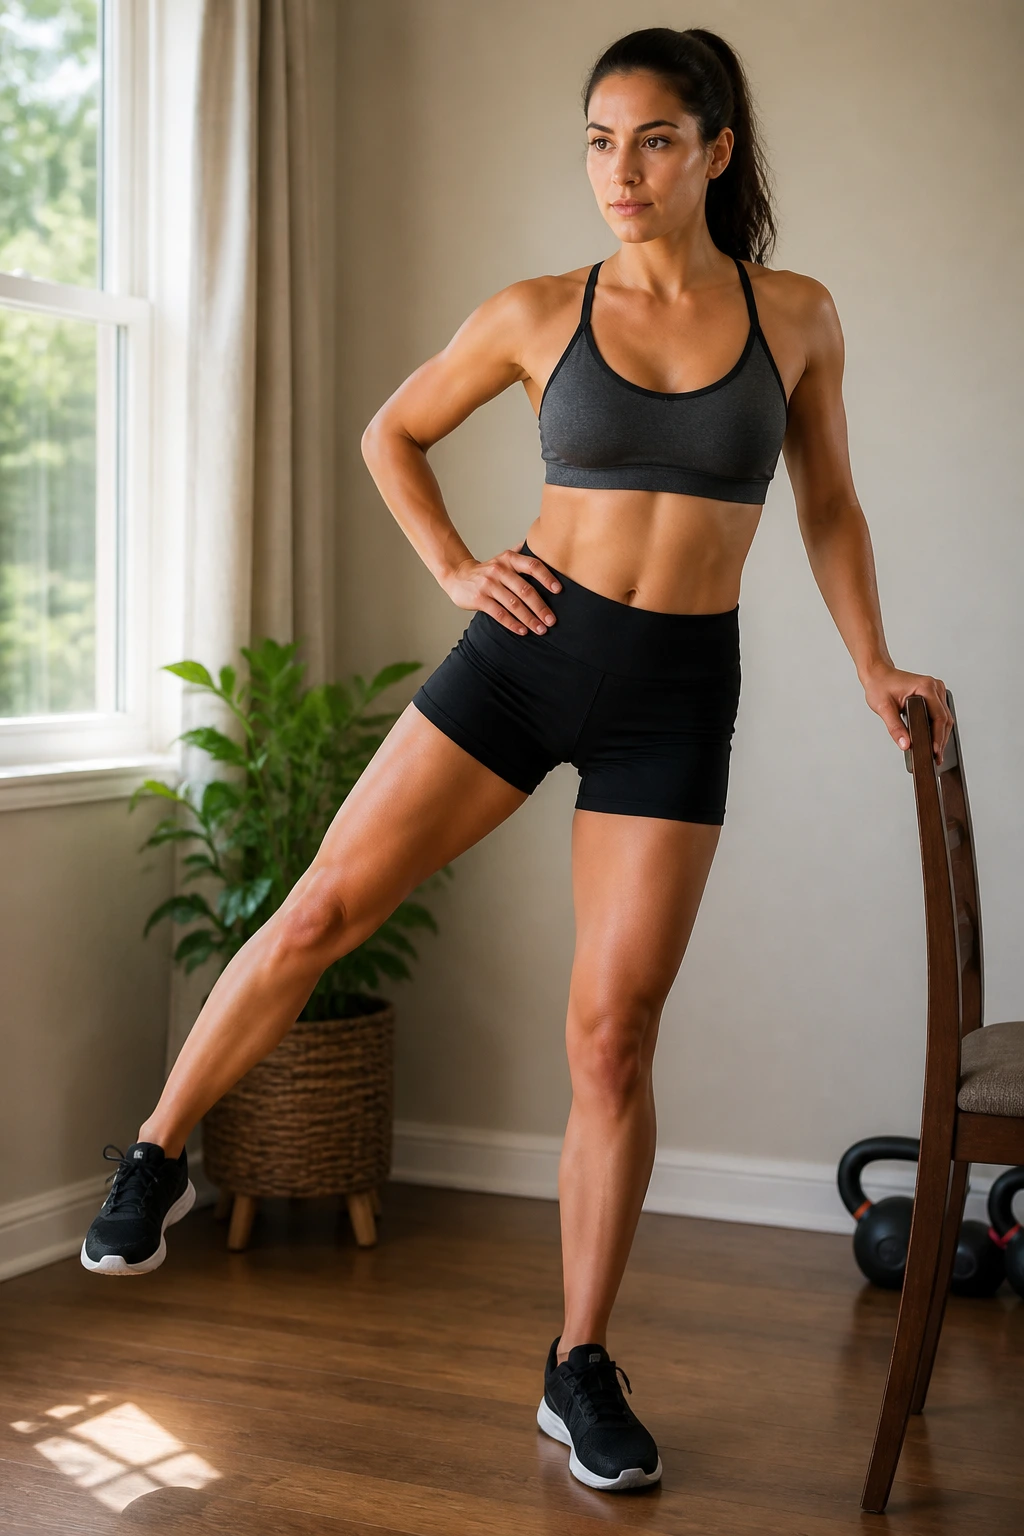
We spend so much time sitting that our hips lose their ability to handle gravity properly. Standing hip abduction forces your standing leg to stabilize your entire body weight, which is a fantastic endurance workout for the glutes.
Stand next to a wall or a sturdy chair for balance. Keep your standing leg slightly bent—never lock your knee. Slowly lift your outer leg out to the side, maintaining a straight, upright posture. Do not lean your torso to the side to get your leg higher.
If you lean, you are just cheating the range of motion. Keep your shoulders directly over your hips. Even a small lift is effective if your form is perfect. This is a subtle movement that packs a serious punch for hip stability.
8. Cat-Cow Stretch
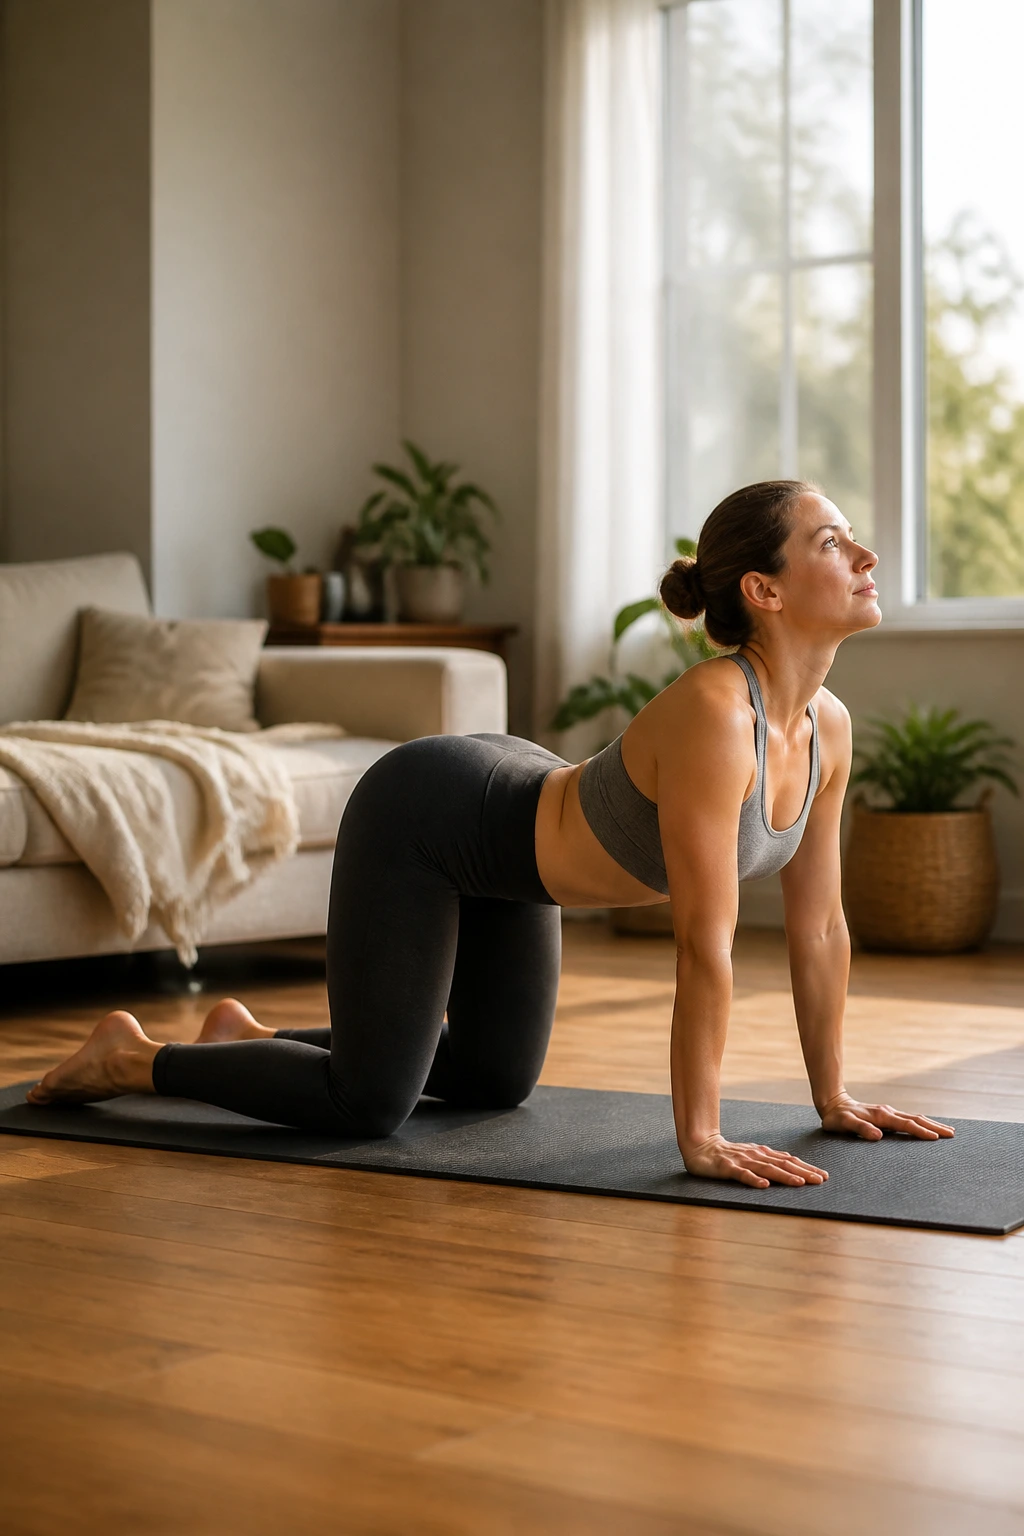
While this is technically a mobility drill, it is essential for anyone dealing with lower back pain. It gently massages the spinal discs and wakes up the muscles surrounding the spine without applying any load.
Start on all fours. As you inhale, drop your belly toward the floor, lift your chin, and look up, arching your back gently (the “cow” position). As you exhale, tuck your chin to your chest, arch your back toward the ceiling, and pull your belly button in (the “cat” position).
Move slowly. This isn’t a race; it is a way to lubricate the spine. If a certain part of your back feels stiff, pause there and take an extra breath. Think of your spine as a series of pearls that you are articulating one by one.
9. Wall Sits
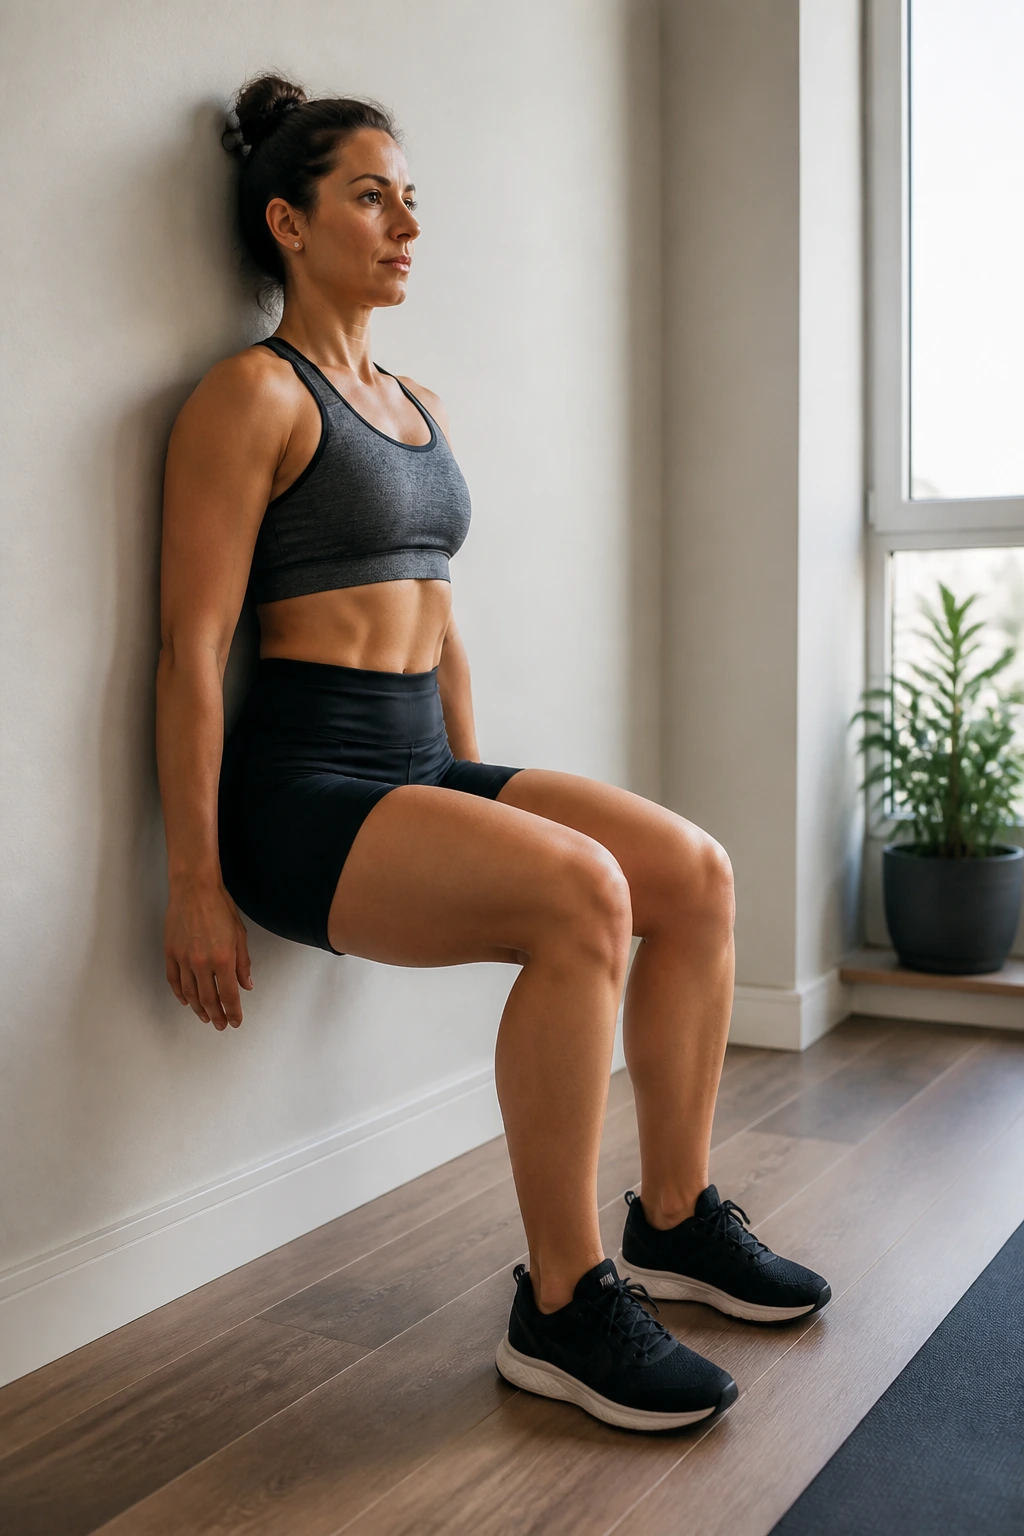
Isometrics are a secret weapon for back pain. Because there is no movement, there is no risk of a “bad” rep or awkward jerking motion. A wall sit forces your quadriceps, glutes, and core to engage simultaneously to hold you upright.
Lean your back flat against a wall and slide down until your knees are bent at a 90-degree angle. Keep your feet flat on the floor, hip-width apart. Your lower back should feel pressed firmly against the wall.
If your lower back arches away from the wall, you are likely too tired or your core is weak. Slide up a few inches to adjust the angle. Hold for as long as you can maintain perfect form. When your legs start shaking, that’s when the stabilization work actually begins.
10. Bodyweight Squats
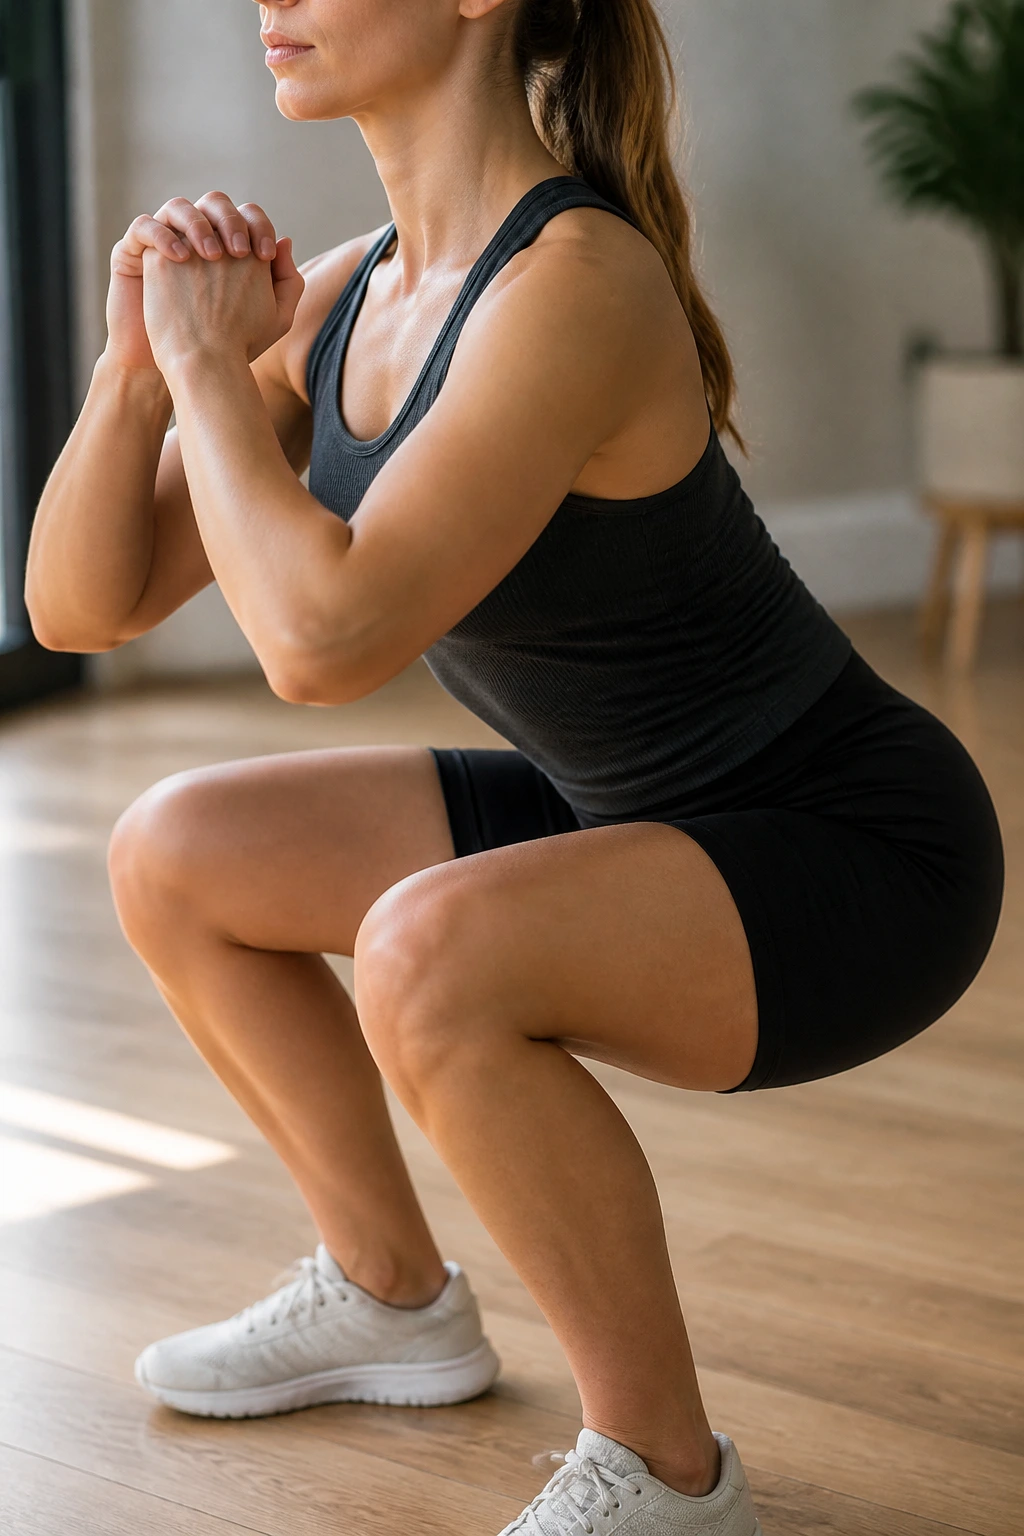
Squats are often blamed for back pain, but when done properly, they are one of the best ways to build a bulletproof back. The problem is usually poor form—rounding the back or collapsing at the bottom.
Stand with feet shoulder-width apart, toes turned out slightly. Keep your chest up and your gaze forward. Initiate the movement by pushing your hips back as if you are reaching for a chair.
Go down as far as you can while maintaining a flat back. If your heels lift off the floor, you are going too deep or have limited ankle mobility. If your back rounds, stop just above that point. The depth doesn’t matter; the spine position does. Keep your weight in your heels.
11. Lunges
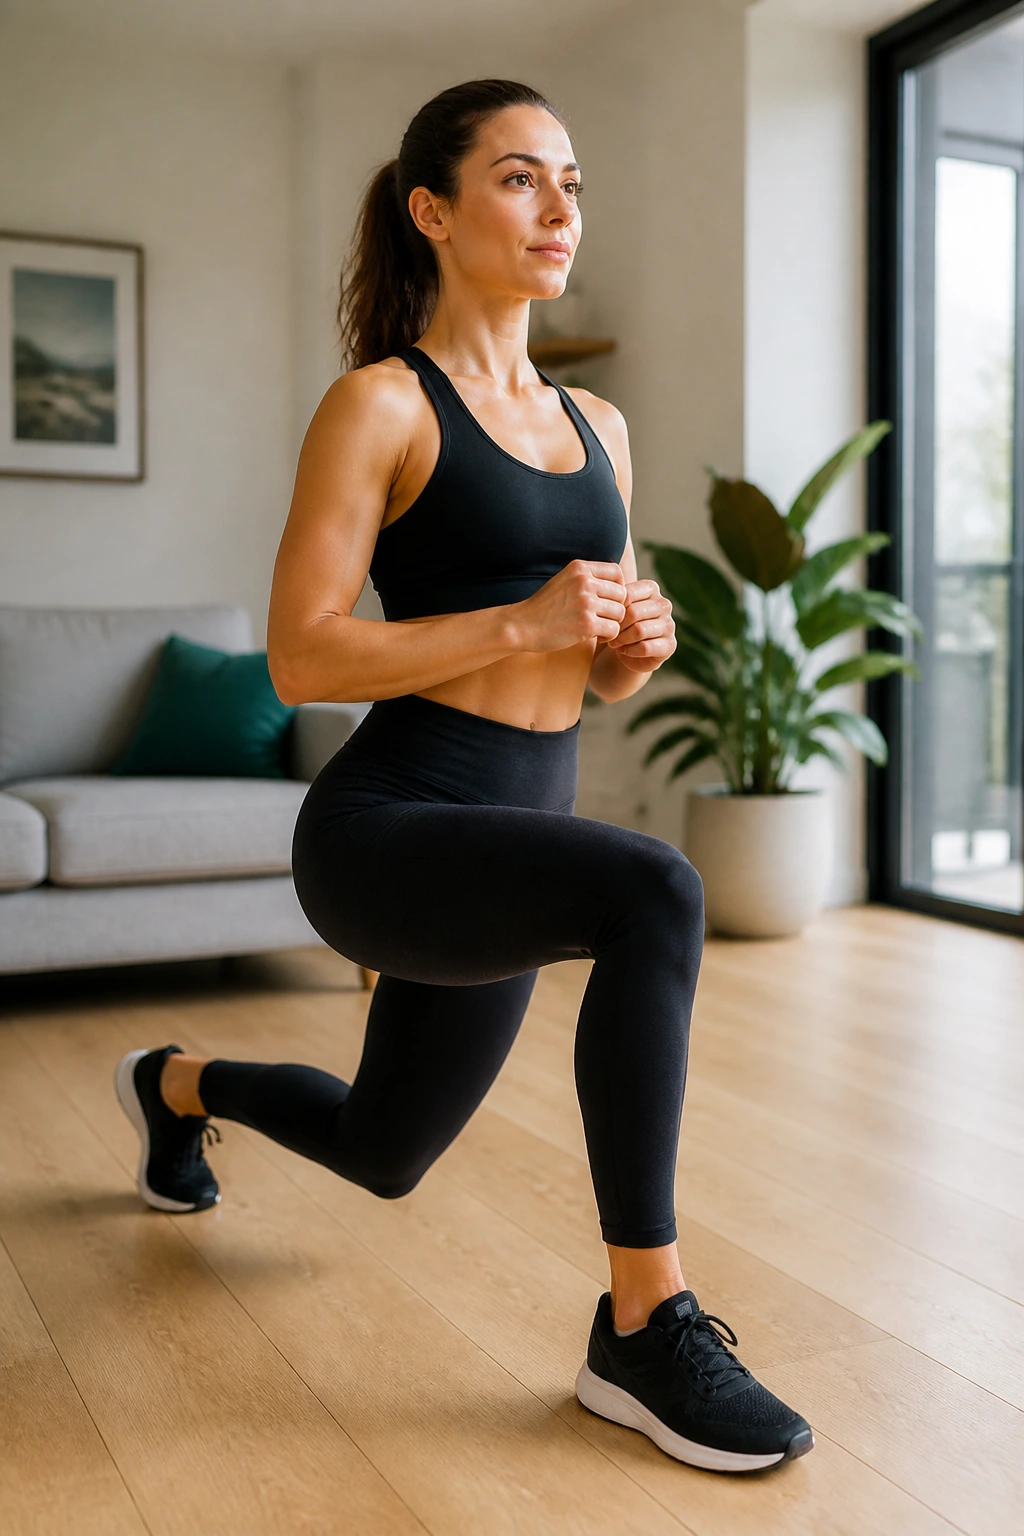
Lunges are superior to squats for many people with back pain because they require less spinal compression and improve unilateral stability. They force you to balance, which engages the deep stabilizing muscles of the core and hips.
Stand tall, take a large step forward with your right leg, and lower your hips until both knees are bent at approximately 90 degrees. Your back knee should hover just above the floor. Keep your torso upright—do not lean forward over your front knee.
If you find yourself leaning, you are likely using your lower back to balance. Imagine a string pulling the top of your head toward the ceiling. Push through the front heel to return to the starting position. Keep your movements controlled and rhythmic.
12. Step-Ups
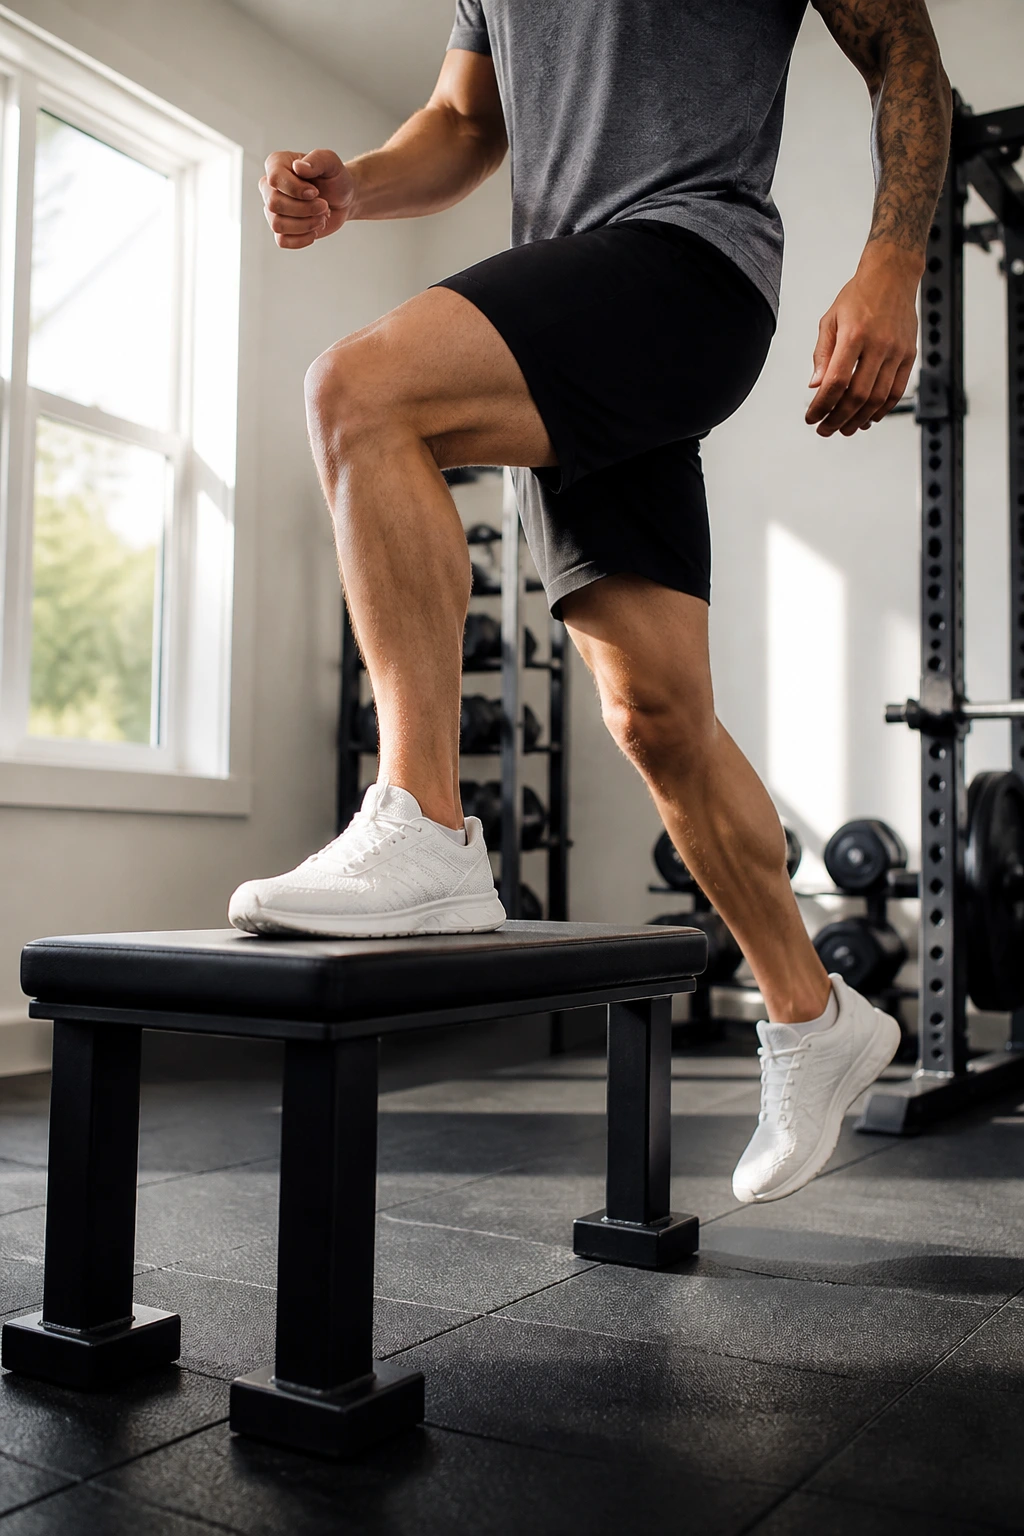
Step-ups are excellent for functional strength. They mimic climbing stairs or stepping over an obstacle, movements we do daily. By performing these slowly, you force the glutes to control the ascent rather than relying on momentum from your back.
Find a sturdy chair, bench, or box. Place one foot fully on the surface. Drive through that heel to lift your body up, placing your other foot next to it. Step down with control.
The “down” phase is actually more important than the “up” phase. Do not just drop down; use your leg muscles to lower your body gently. This eccentric control builds tendon strength and muscle stability, which is highly protective for the joints.
13. Romanian Deadlifts (Bodyweight or Light Weight)
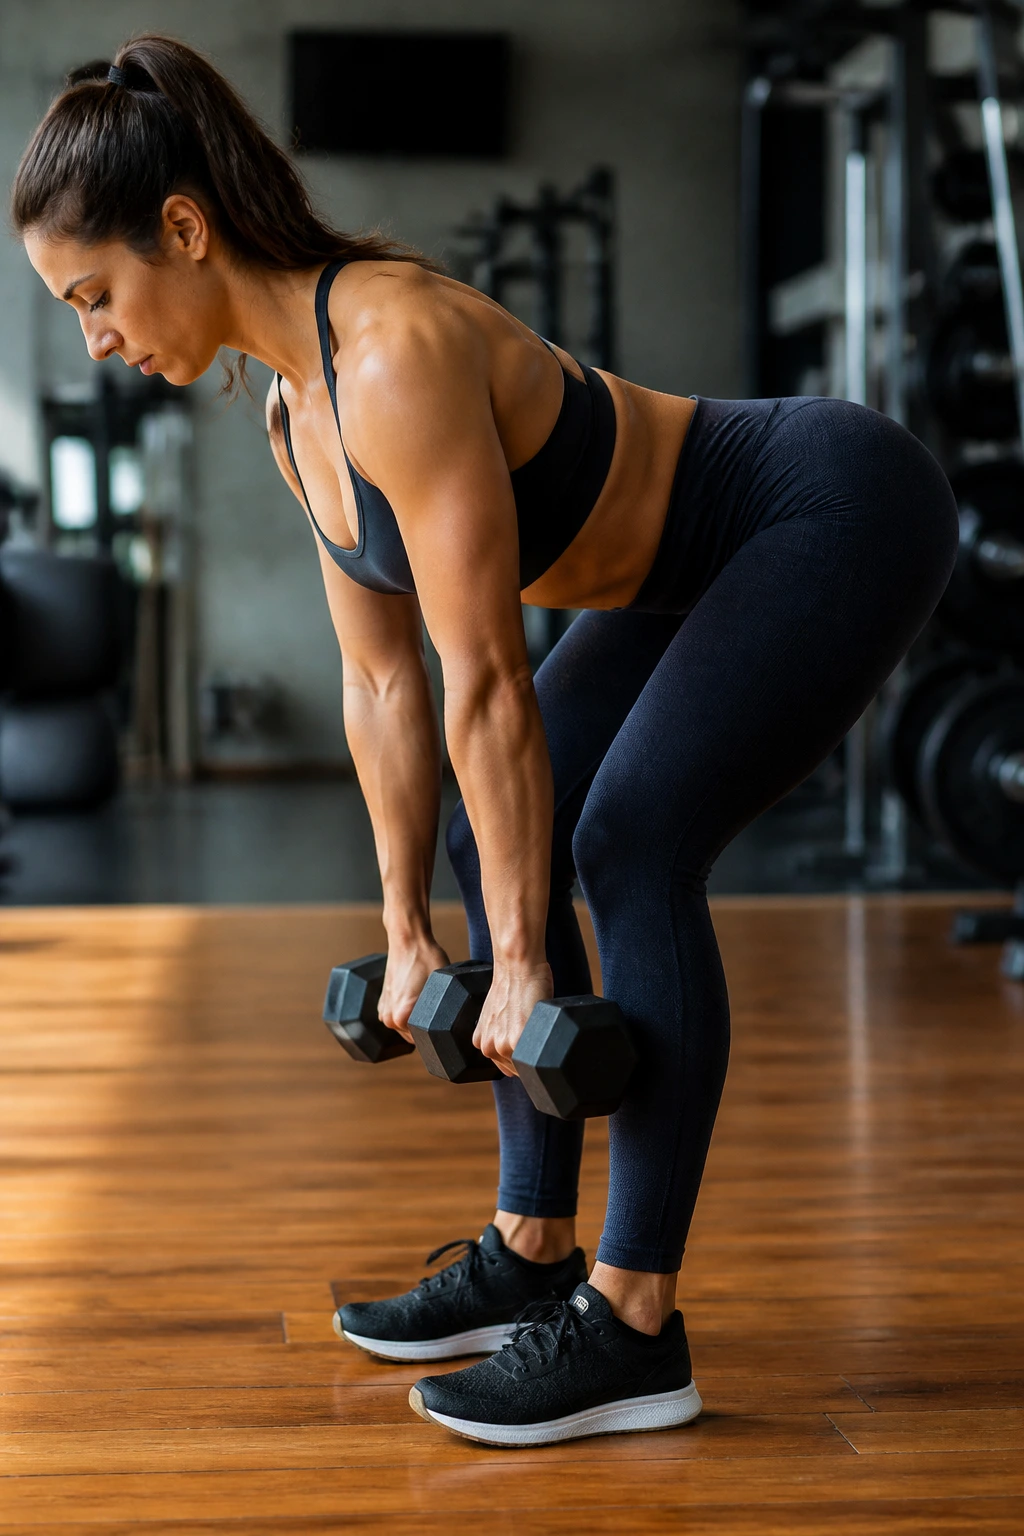
The Romanian Deadlift (RDL) is the best exercise for the hamstrings, but it requires a strict hinge movement. Many people do these wrong by bending their back instead of their hips, which is a recipe for disaster.
Stand with feet hip-width apart. Keep a slight bend in your knees—don’t lock them. Hinge at the hips, pushing your butt backward as if trying to touch the wall behind you. Keep your back completely straight.
Only go as low as your flexibility allows before your back starts to round. You should feel a deep stretch in your hamstrings. Squeeze your glutes to pull yourself back up to a standing position. Think of this as a “butt-back” movement, not a “bend-over” movement.
14. Plank to Down Dog
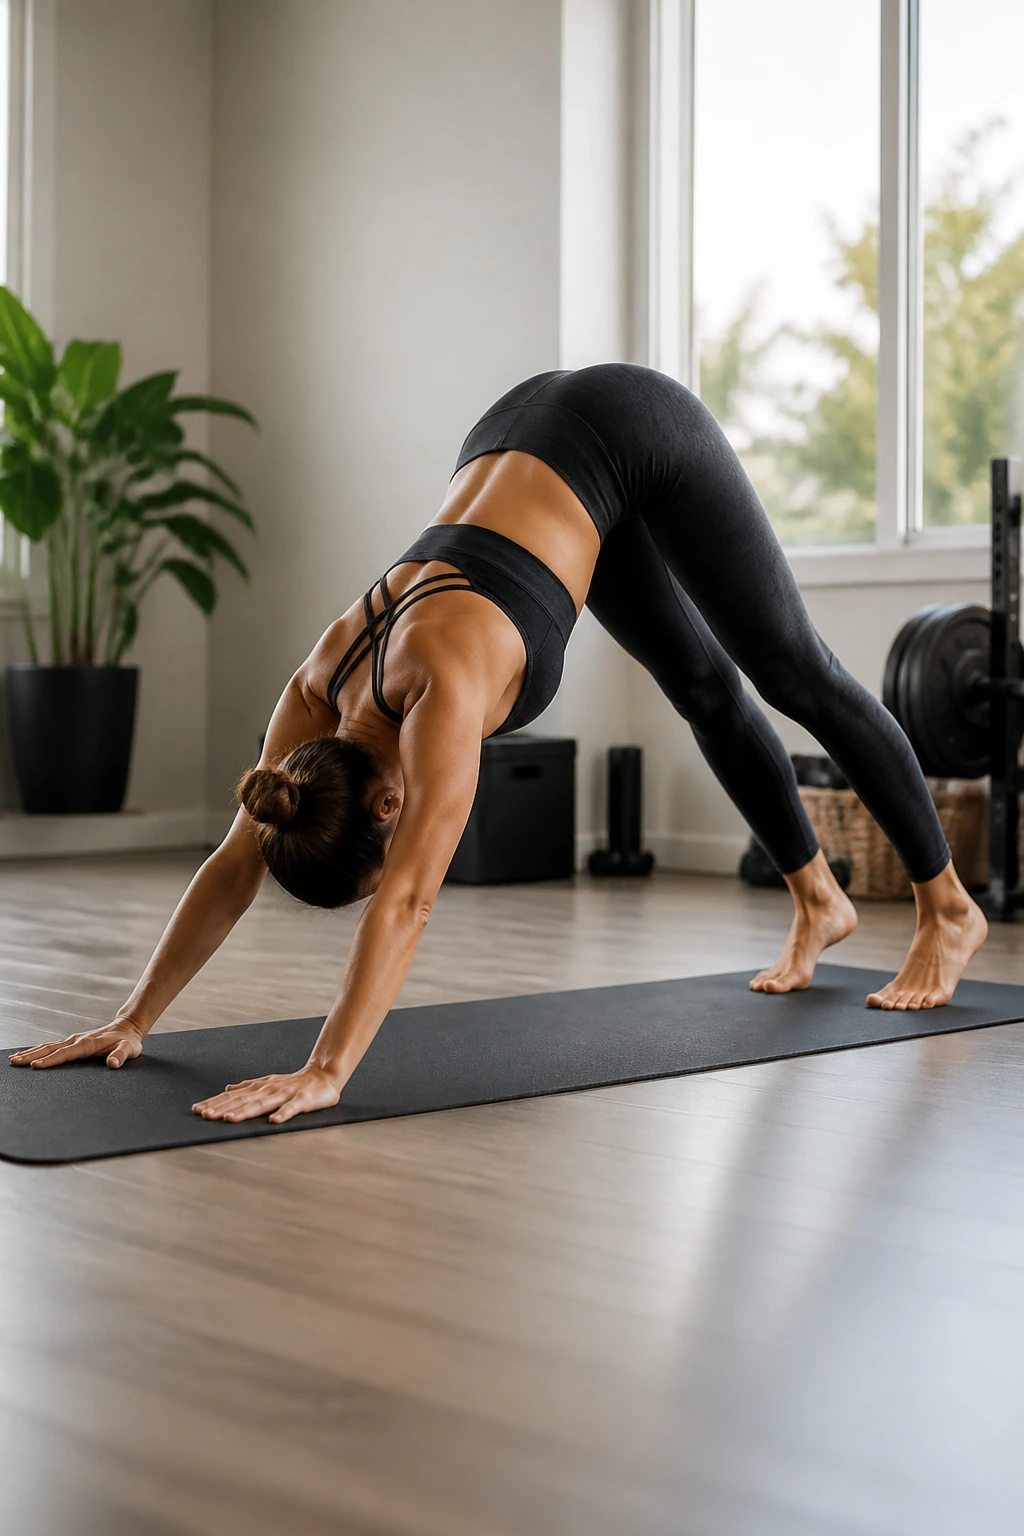
This movement combines core strengthening with dynamic stretching. It helps decompress the spine while forcing the legs and core to work in tandem.
Start in a standard plank position. Ensure your body forms a straight line. Hold this for a second, feeling your core brace. Then, push your hips up and back into a Downward Dog position, forming an inverted “V.”
Push your heels toward the floor to get a hamstring stretch. Flow between these two positions smoothly. Do not rush. The transition is where the stability work happens. This is one of the few movements that feels as good as it works.
15. Side Planks
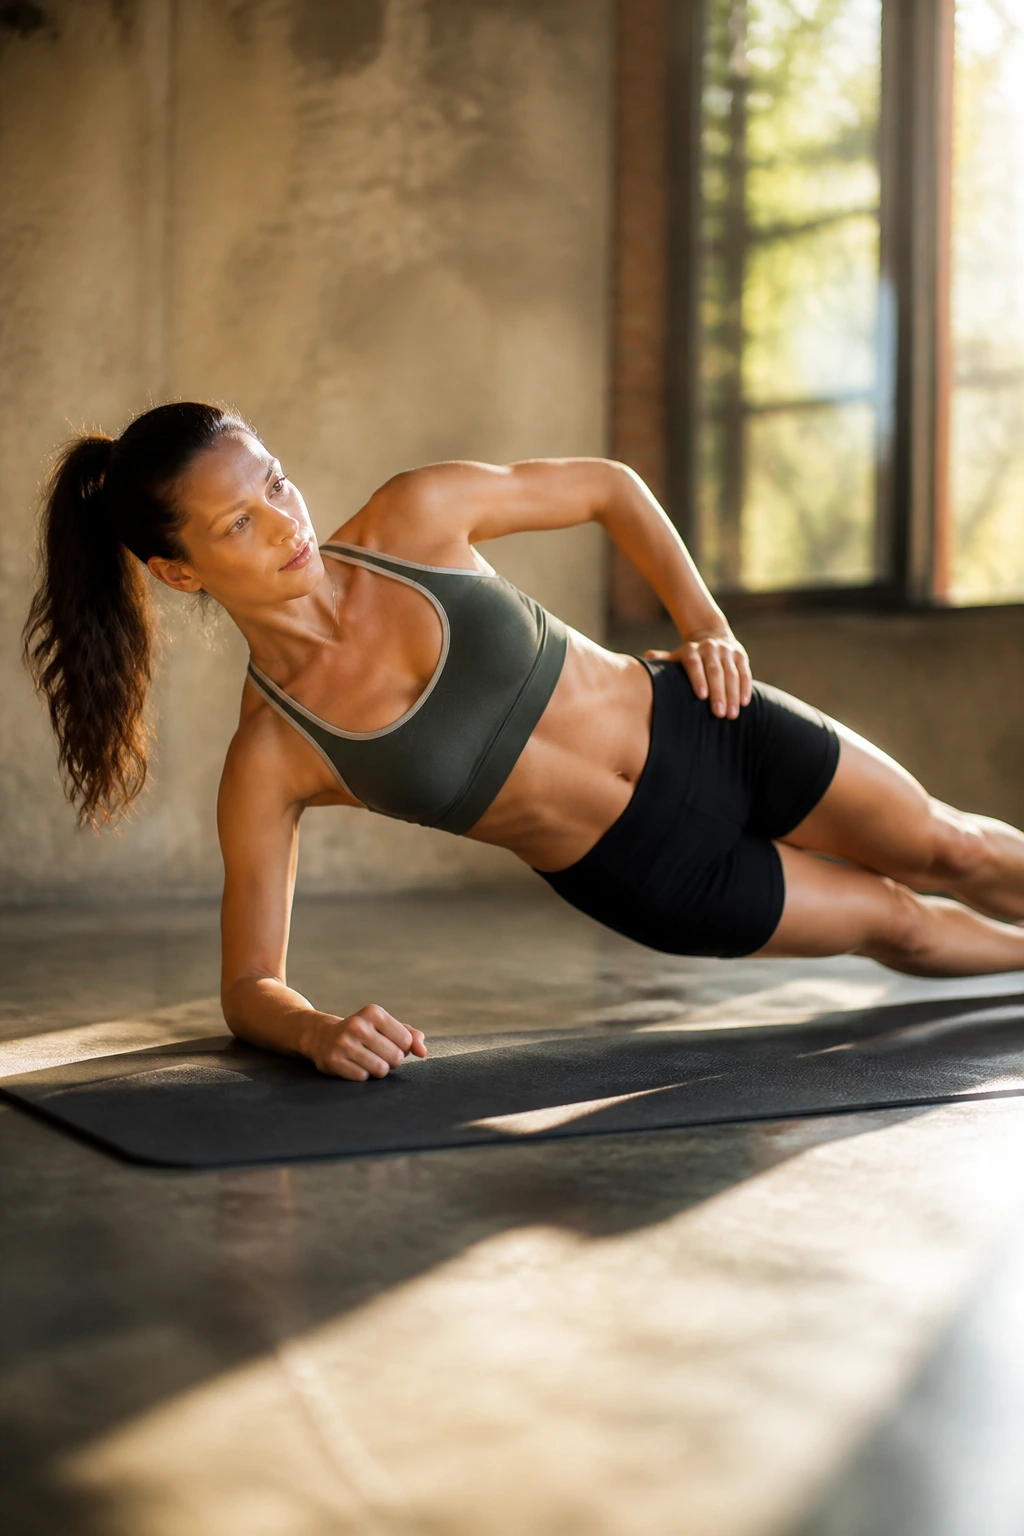
If you have lower back pain, you need strong obliques. The obliques provide lateral stability for the spine. A standard front plank is great, but a side plank is far superior for isolating the stabilizers that keep the spine from shifting side-to-side.
Lie on your side with your legs stacked. Prop yourself up on your forearm, directly under your shoulder. Lift your hips so your body forms a straight line from ankles to shoulders.
If this is too difficult, bend your knees and perform the plank from your knees instead of your feet. This takes the load off without sacrificing the core activation. Hold for 20 to 30 seconds, then switch sides. Focus on keeping your hips lifted—don’t let them sag toward the floor.
16. Glute Kickbacks
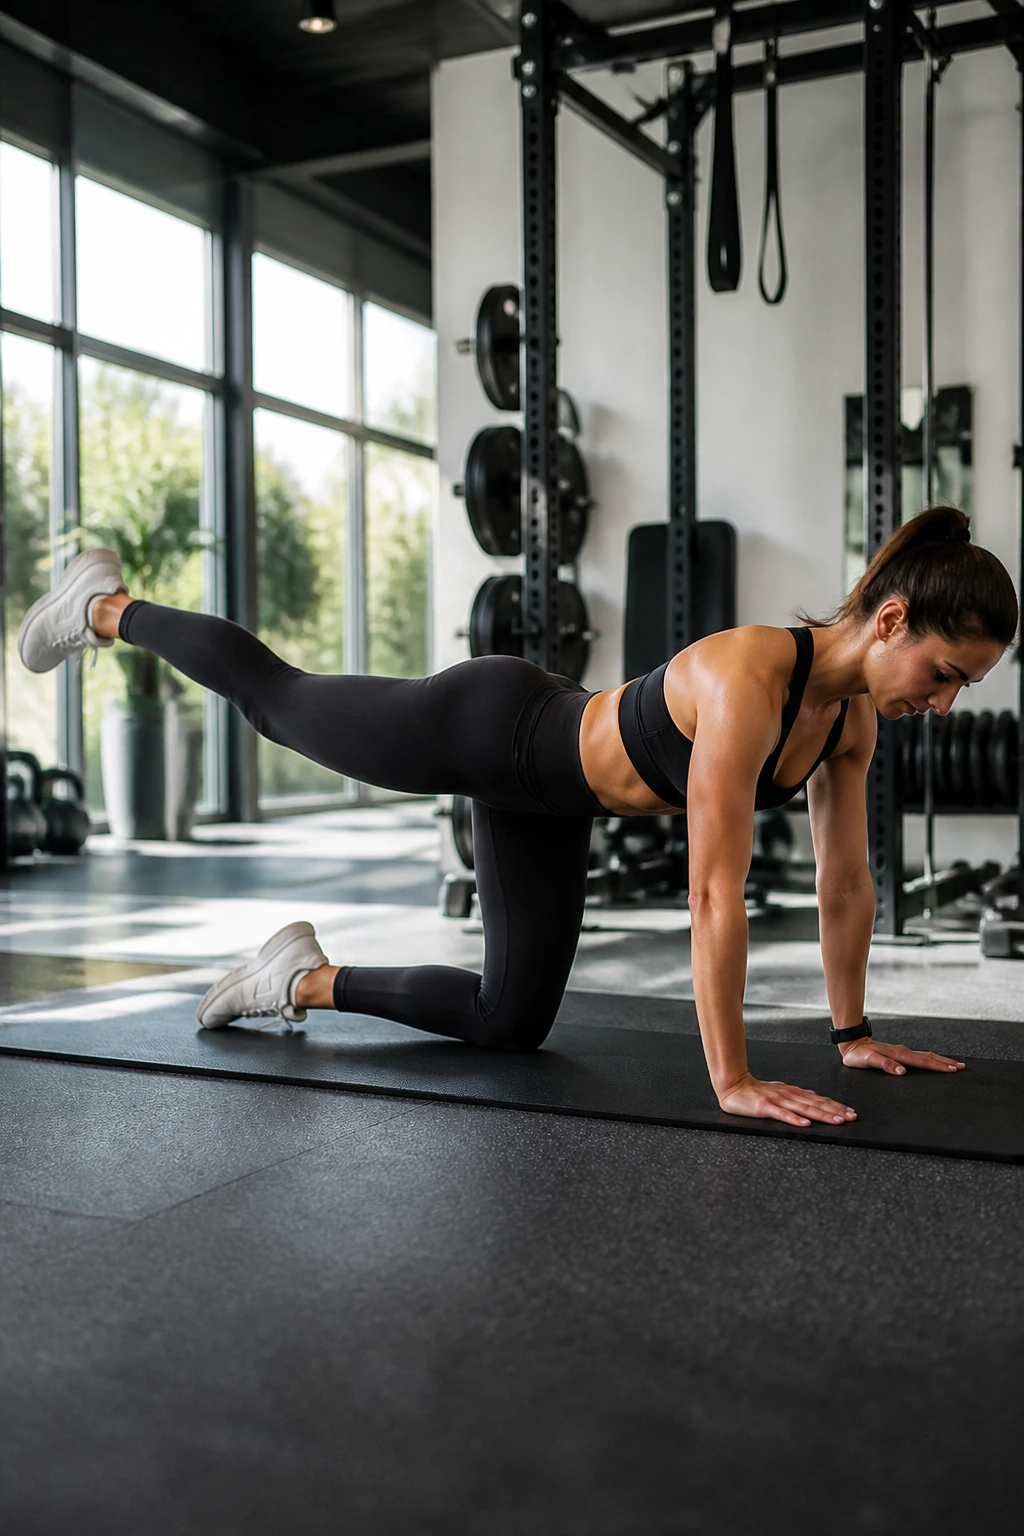
Glute kickbacks are an isolation exercise that hits the gluteus maximus—the primary muscle responsible for hip extension. When this muscle is underactive, the lower back takes over the work of walking and standing.
Get on all fours. Keep your back flat and your core engaged. Kick one leg straight back, squeezing your glute at the peak of the movement. Avoid arching your lower back to get your leg higher.
This is a common mistake. You don’t need to kick toward the ceiling. Kick toward the back wall. The height of the leg is irrelevant; the intensity of the glute contraction is everything. Keep your pelvis square to the floor.
17. Fire Hydrants
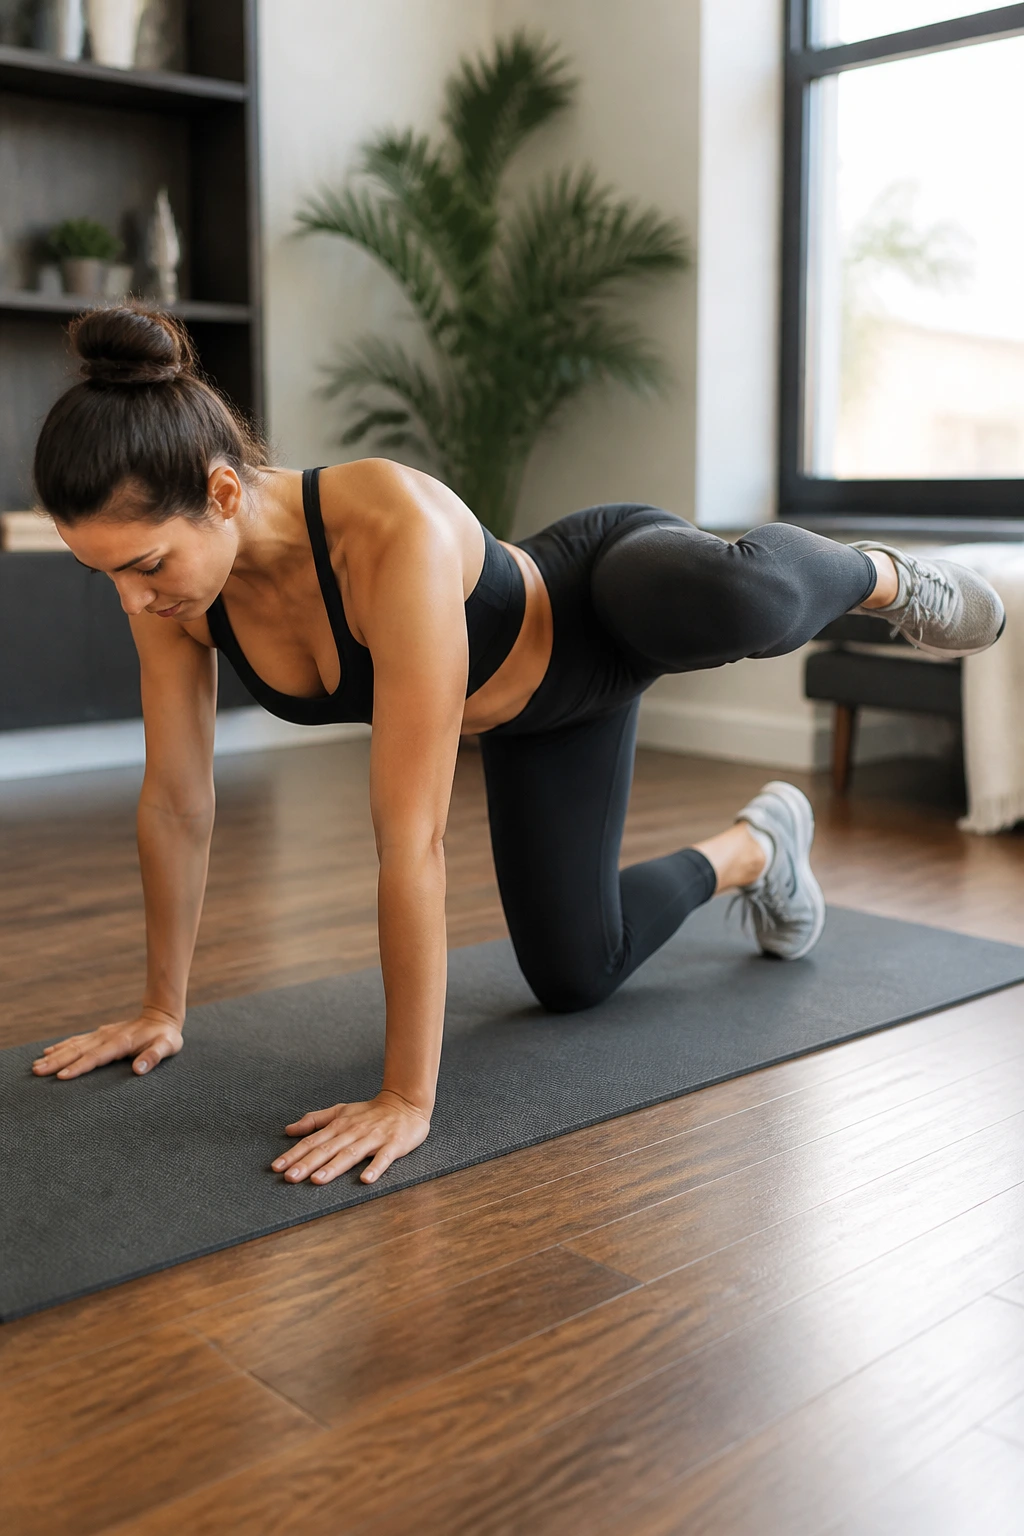
This movement targets the hip abductors and rotators. It improves hip mobility, which is essential for offloading the lower back. If your hips are stiff, your lower back has to rotate more than it should, leading to pain.
On all fours, keep your knee bent at 90 degrees. Lift your leg out to the side like a dog at a fire hydrant. Try to keep your back perfectly still. Do not rotate your torso to get the knee higher.
You will notice one side feels tighter than the other. This is normal. Spend extra time on the tighter side, but don’t force the range of motion. The goal is steady, consistent hip health, not acrobatics.
18. Supine Hamstring Stretch
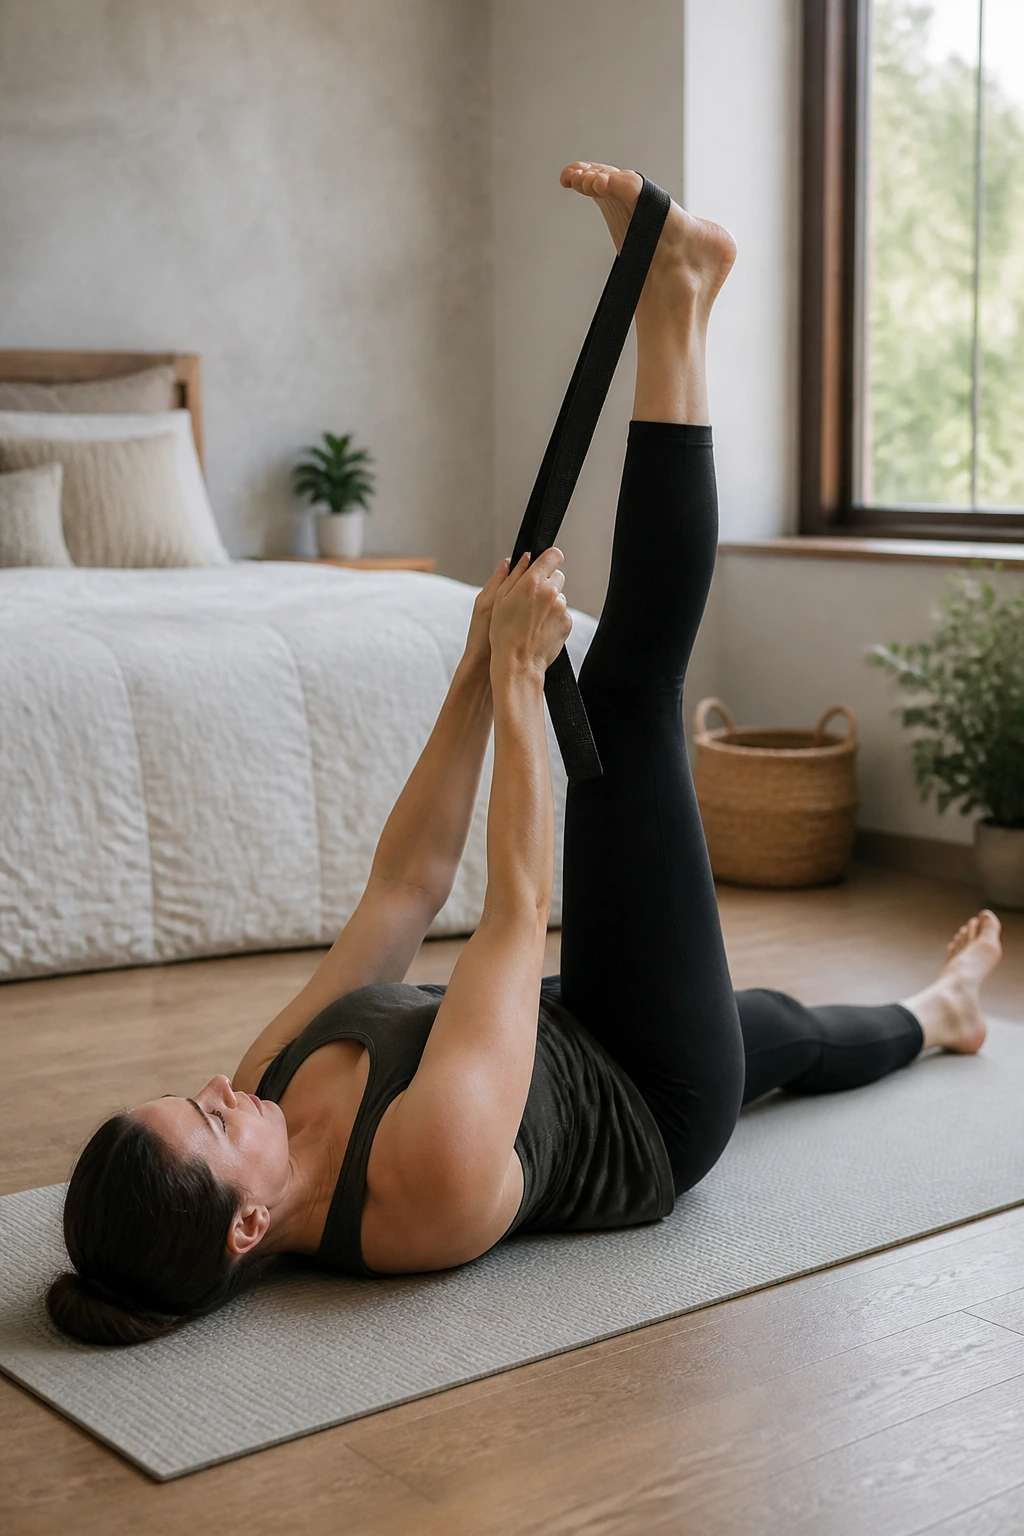
Tight hamstrings are a leading contributor to lower back pain. Because the hamstrings attach to the pelvis, when they are tight, they pull on the pelvis and cause a chain reaction that puts strain on the lower back.
Lie on your back. Keep one leg flat on the floor. Take your other leg and use a towel or a strap wrapped around your foot to gently pull it toward your chest. Keep the knee as straight as possible, but don’t lock it.
You should feel a gentle pull in the back of your leg. If you feel it behind your knee or in your lower back, you are pulling too hard or your leg is too high. This should be a release, not a struggle. Hold for 30 to 60 seconds.
19. Modified Sumo Squats
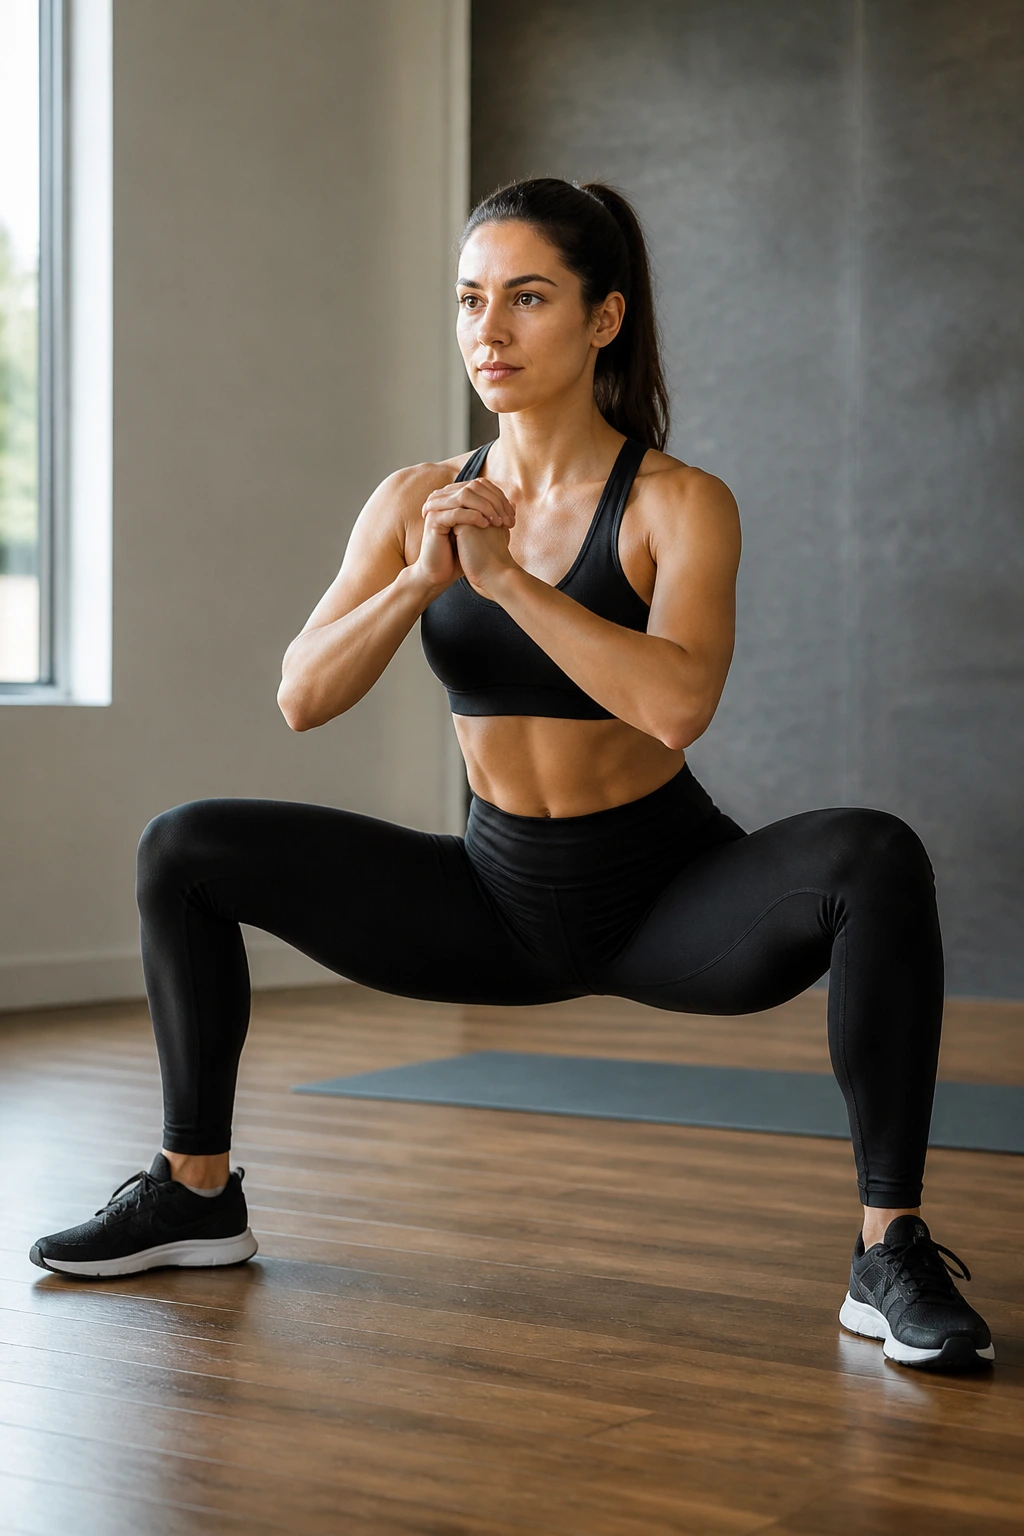
A wider stance in a squat shifts the load from the lower back and knees to the inner thighs and glutes. This can be a game-changer for those who find traditional squats irritate their back.
Stand with your feet wider than shoulder-width, toes turned out at about 45 degrees. Keep your chest up and core tight. Squat down, keeping your knees tracking over your toes.
Because your stance is wide, your torso will naturally remain more upright, which drastically reduces the shearing force on the lumbar spine. This is a much “friendlier” squat for people with back sensitivity. Focus on pushing the knees outward rather than letting them cave in.
20. Pelvic Tilts
This is the most fundamental movement for lower back health. It teaches you how to control your pelvis and engage your deep core muscles. It is subtle, almost imperceptible to an observer, but profoundly effective.
Lie on your back with knees bent. You will notice a small gap between your lower back and the floor. By contracting your abs, try to flatten that gap, pressing your spine into the floor. This is a posterior pelvic tilt.
Relax and let your back return to its natural curve. Repeat this until you can find the movement without using your glutes or legs. This internal awareness of where your pelvis sits is the key to preventing the “sway-back” posture that causes so much unnecessary lower back pain.
Final Thoughts
Relieving lower back pain isn’t about finding a single magic exercise that works overnight. It is about consistently showing your hips, glutes, and core that they have a job to do. When you strengthen your legs and hips, you are quite literally building a platform for your spine to rest on.
Be patient with yourself. Some of these movements might feel awkward at first, especially if you have spent years relying on your lower back to move your body. That awkwardness is just proof that you are retraining your muscles to function the right way. Start with the exercises that feel most manageable, focus entirely on your form, and remember that slow, controlled movement is always safer and more effective than fast, sloppy reps. You are playing the long game here, and your back will thank you for it.
