



Some yoga sessions feel like a test. Gentle yoga flows for beginners should feel more like loosening a stiff hinge: slow, controlled, and easy enough that your breath stays calm.
That matters more than people think. If you’re new to movement, or if your body hates being rushed, a harsh sequence can make you clamp down instead of open up. Tight shoulders, cranky wrists, a low back that talks back after a long day — all of that responds better to small, steady shape changes than to big ambitious poses.
A mat helps. A folded blanket helps more than most people expect. A block, a wall, a chair, even the edge of a sofa — those are not shortcuts. They’re smart tools that keep the work where it should be, which is in the muscles and breath, not in your lower back trying to do everything at once.
Some of the flows below are standing and wakeful. Others are floor-based and slower. A few are there for the days when you feel bent in half by sitting, sleeping badly, or just carrying too much tension in your neck. Start with one that matches your energy, then repeat it a few times before trying anything fancier.
1. Neck-and-Shoulder Release Flow
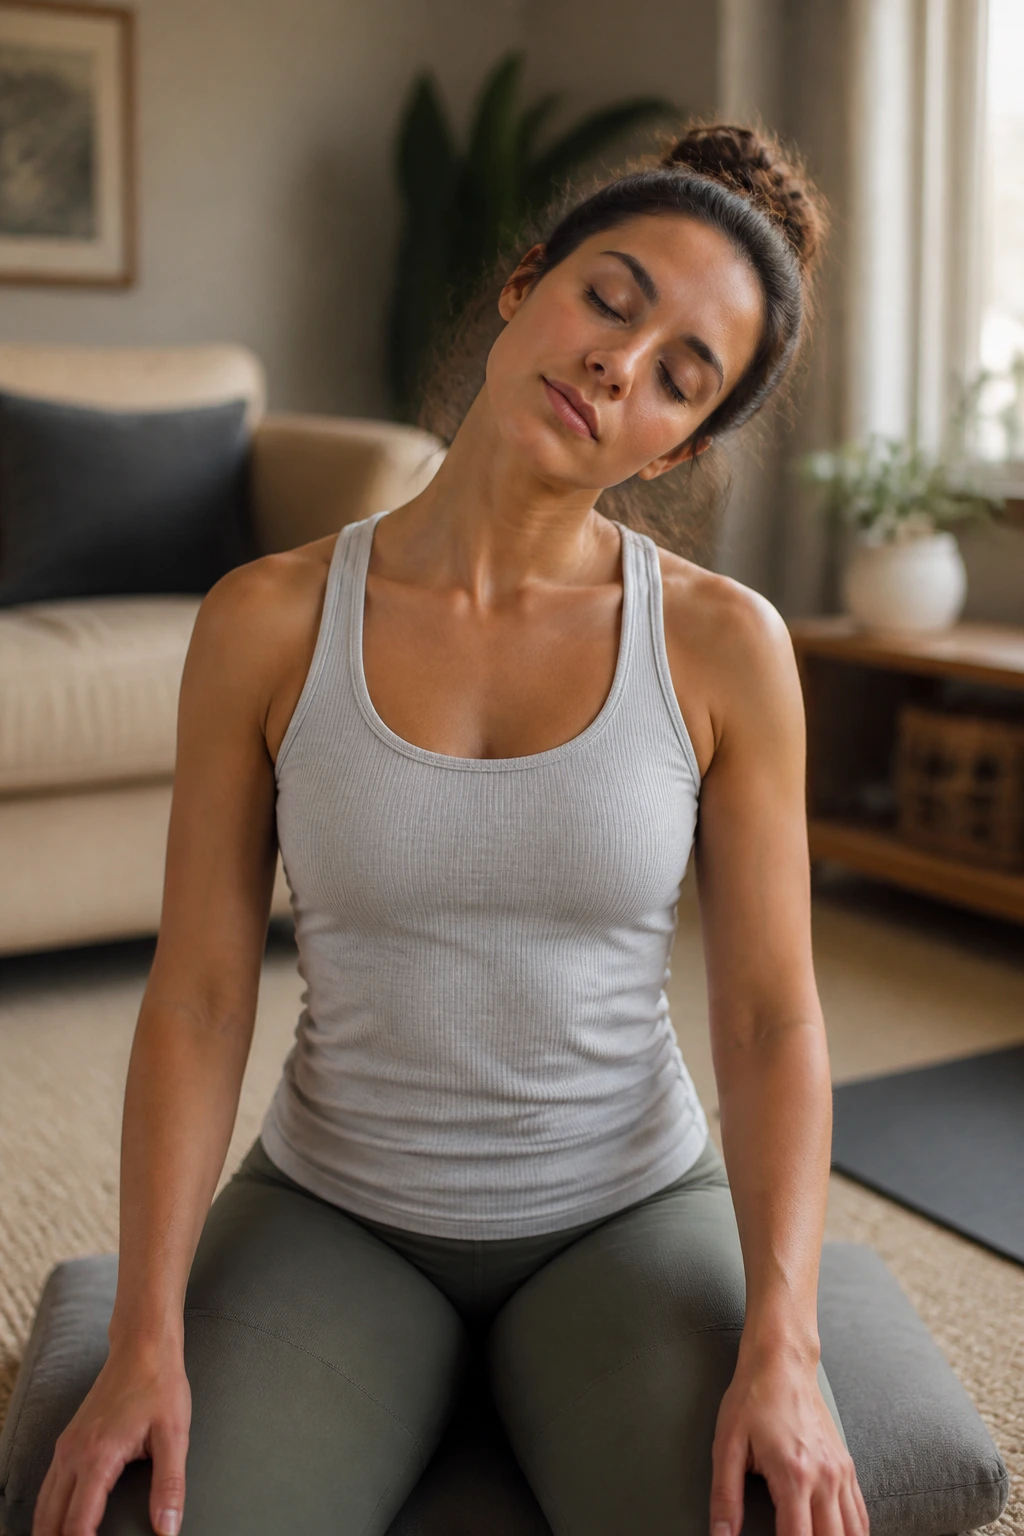
A stiff neck can ruin an entire day. This small flow is one I’d give almost anyone who sits at a desk, drives a lot, or wakes up with shoulders pulled toward the ears.
Sit tall on the floor, on a cushion, or in a chair. Roll the shoulders up, back, and down three times. Then take one ear toward one shoulder for a slow breath or two, return to center, and switch sides. Add a gentle chin tuck so the back of the neck lengthens, not compresses.
What to Notice
Your jaw should soften. Your breath should stay easy. If your neck feels pinched, stop lowering and make the circle smaller. That tiny adjustment matters.
- 3 shoulder rolls in each direction
- 2 slow neck tilts per side
- 5 gentle chin tucks
- 1 seated side bend on each side, with one hand reaching overhead
Keep the movement tiny. Big neck circles can feel sloppy fast. Slow and small works better here.
2. Cat-Cow to Child’s Pose Reset
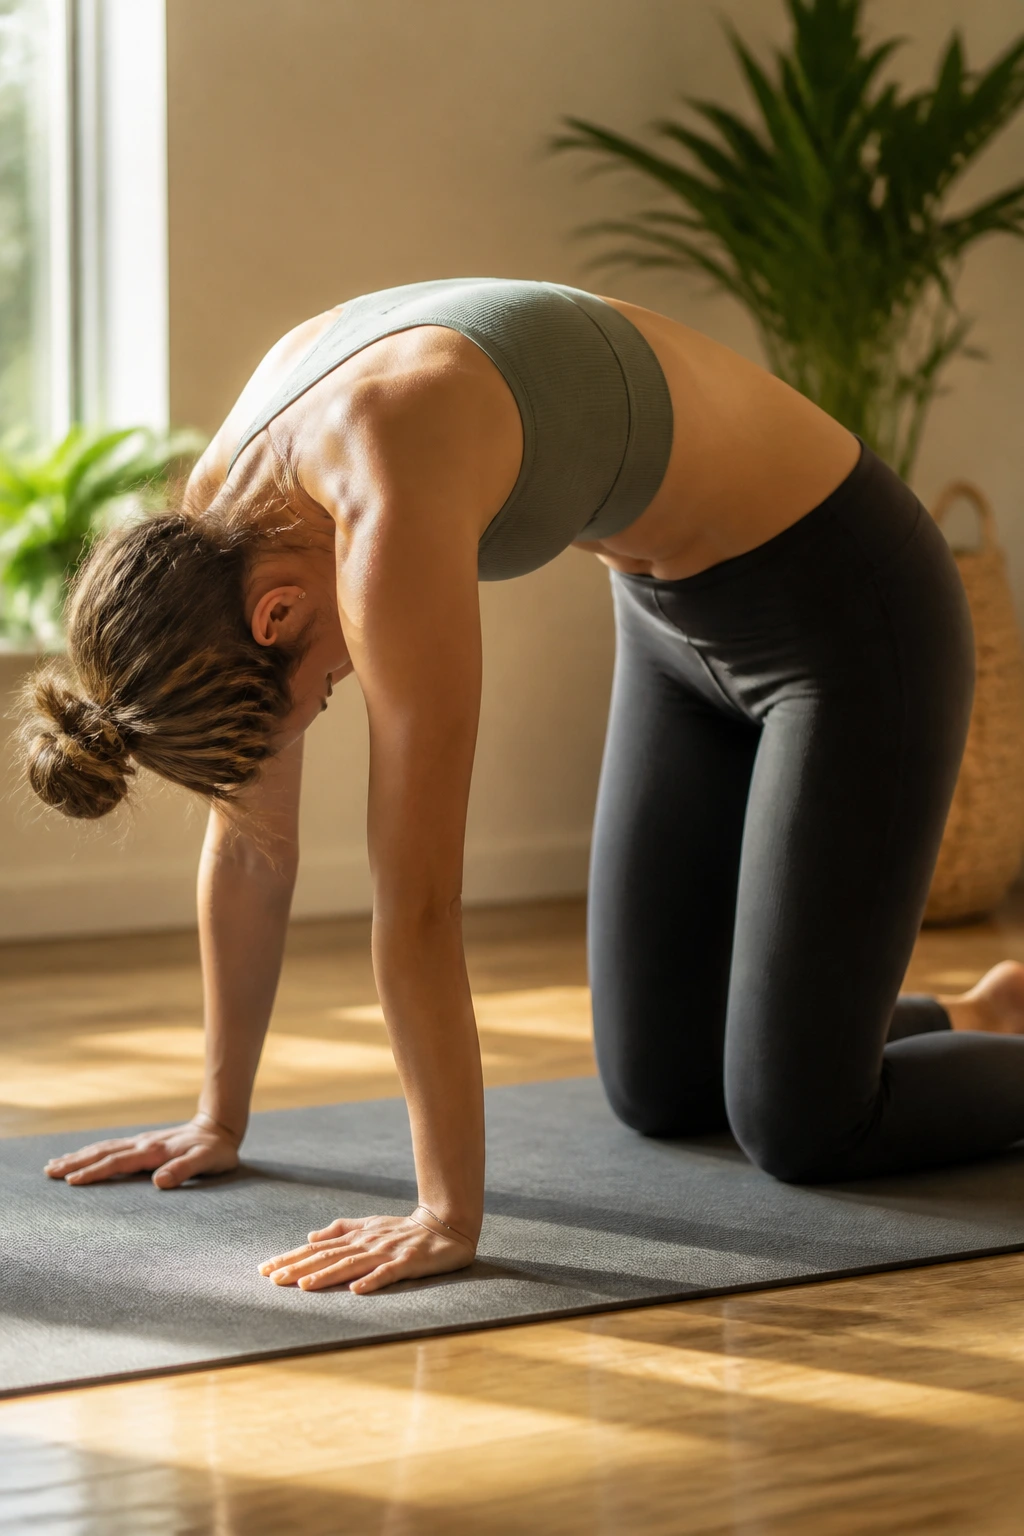
Want a flow that makes the spine feel more alive without asking much from the body? This is the one. Cat-cow wakes up each vertebra, and child’s pose gives you a place to land when your back wants a break.
Come onto hands and knees with wrists under shoulders and knees under hips. Inhale as you drop the belly and lift the chest for cow. Exhale as you round the back and press the floor away for cat. After 5 to 8 rounds, sit the hips back toward child’s pose and rest your forehead down.
That round-trip from movement to stillness is the magic. The spine gets motion, then it gets space. Beginners often stay stuck in one or the other.
If your wrists get tired, lower to forearms for the child’s pose portion. If your knees are sensitive, slide a folded blanket under them. Small fixes. Big difference.
3. Standing Forward Fold and Half Lift
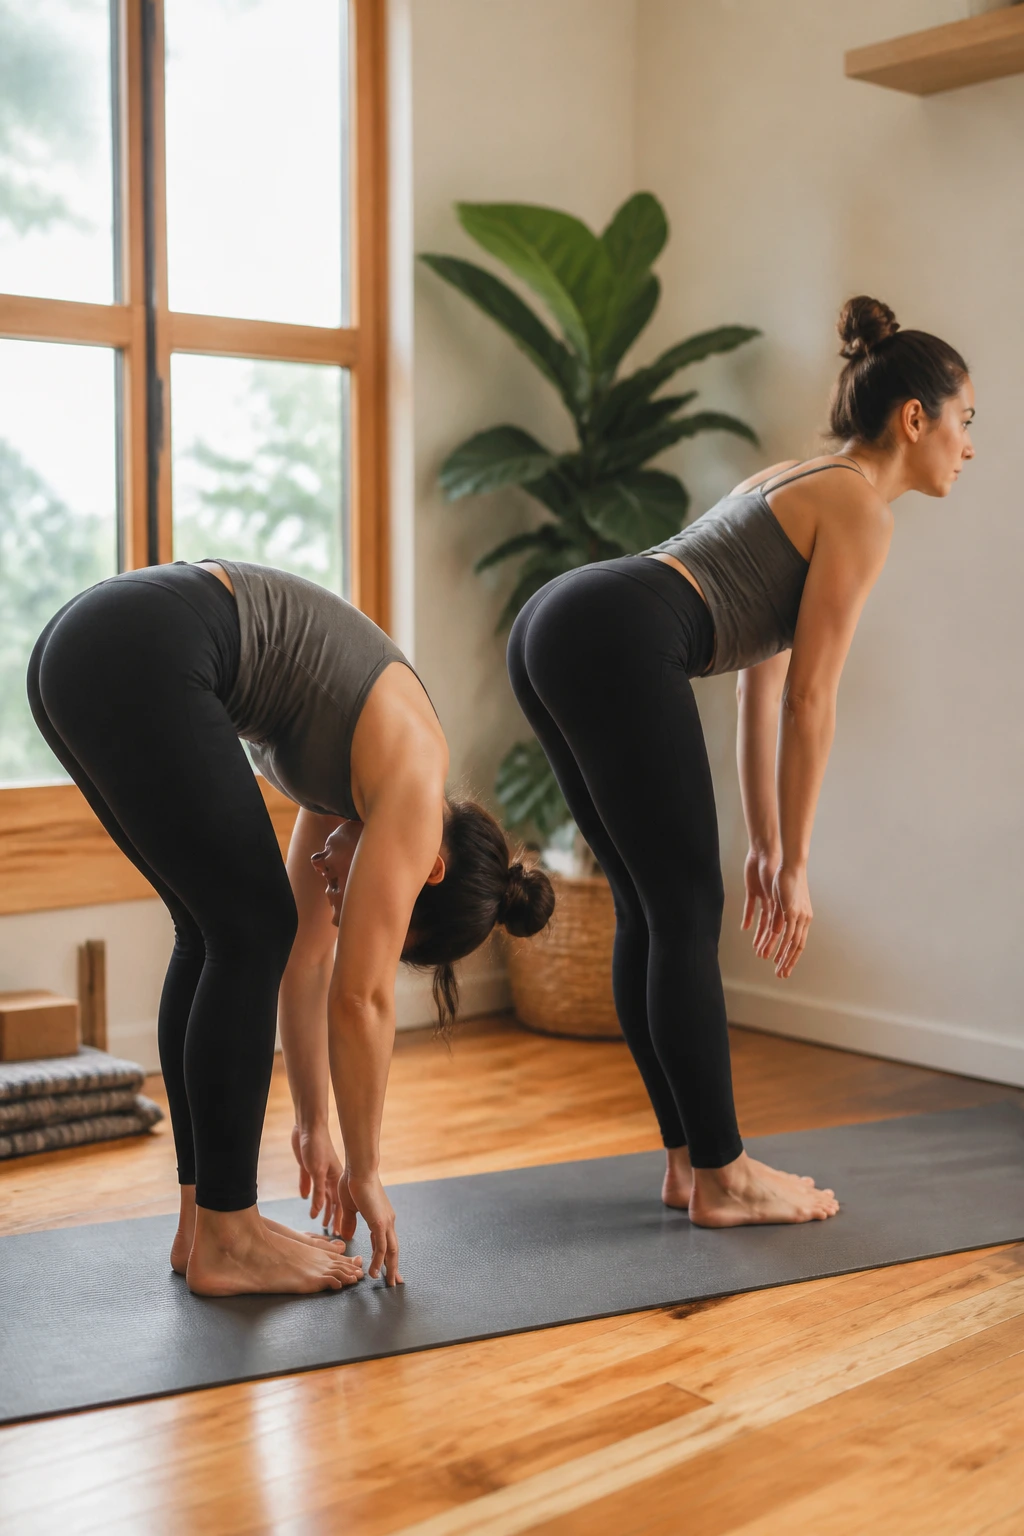
This flow is simple enough to feel almost plain, which is exactly why it works. A standing fold releases the back body, while a half lift keeps you from collapsing into the low back.
Stand with feet hip-width apart and soften the knees. Fold forward from the hips, not the waist, and let the arms hang. Then inhale halfway up, lengthening the spine until the back feels long and flat. Exhale and fold again. Repeat that little pattern 4 or 5 times.
The point is not to touch the floor. The point is to keep the hamstrings awake without yanking them. A generous bend in the knees is not cheating. It is the move.
If you feel pressure behind the knees, bend them more. If your lower back rounds hard on the half lift, bring your hands to shins or thighs instead of chasing depth.
4. Low Lunge Hip Opener Flow
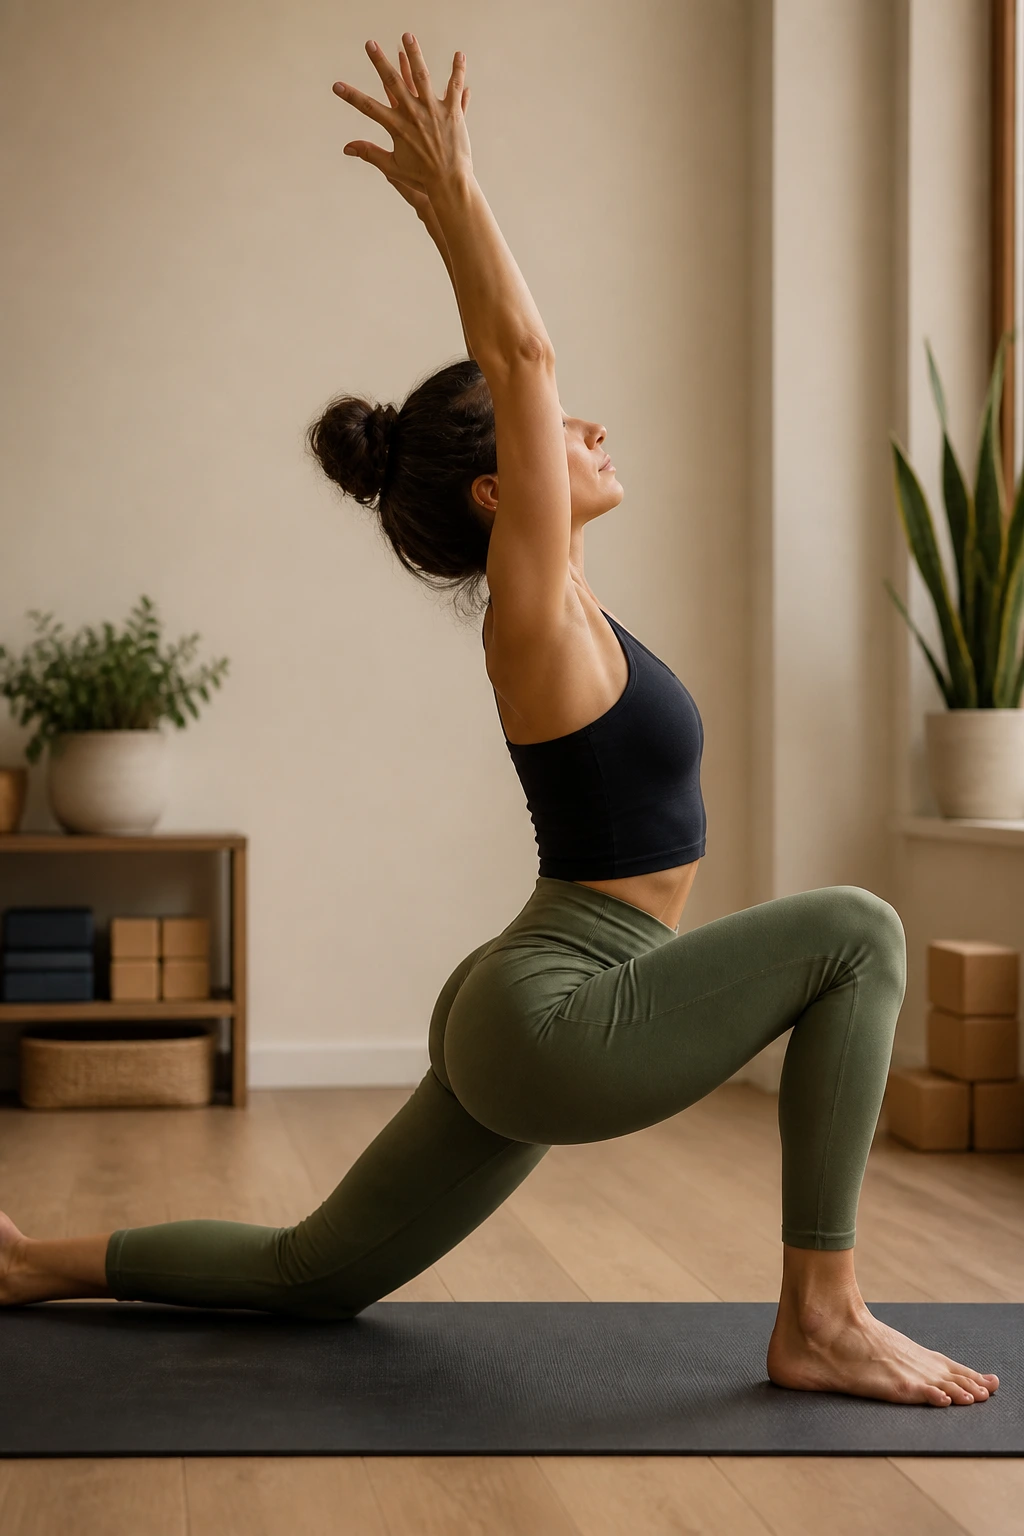
Sitting tightens the front of the hips in a way that sneaks up on people. One minute you feel fine; the next, standing up from a chair feels like untangling rope.
Step one foot forward from hands and knees into a low lunge, back knee on the floor. Keep the front knee stacked over the ankle and let the pelvis sink only as far as it can without a pinch in the low back. Reach both arms up, or keep the hands on the front thigh if the shoulders feel crowded.
Where the Stretch Should Land
You want the stretch across the front of the back hip and maybe a little in the groin of the front leg. You do not want a stab in the front knee or a squeeze in the lower spine.
Make It Easier
- Pad the back knee with a folded blanket
- Keep the hands on blocks if balancing feels shaky
- Tuck the pelvis slightly under to reduce lower-back arching
- Stay for 3 to 5 breaths per side
A wall behind you can help too. Honestly, a wall saves more beginner confidence than most people admit.
5. Chair Pose Mini-Sequence
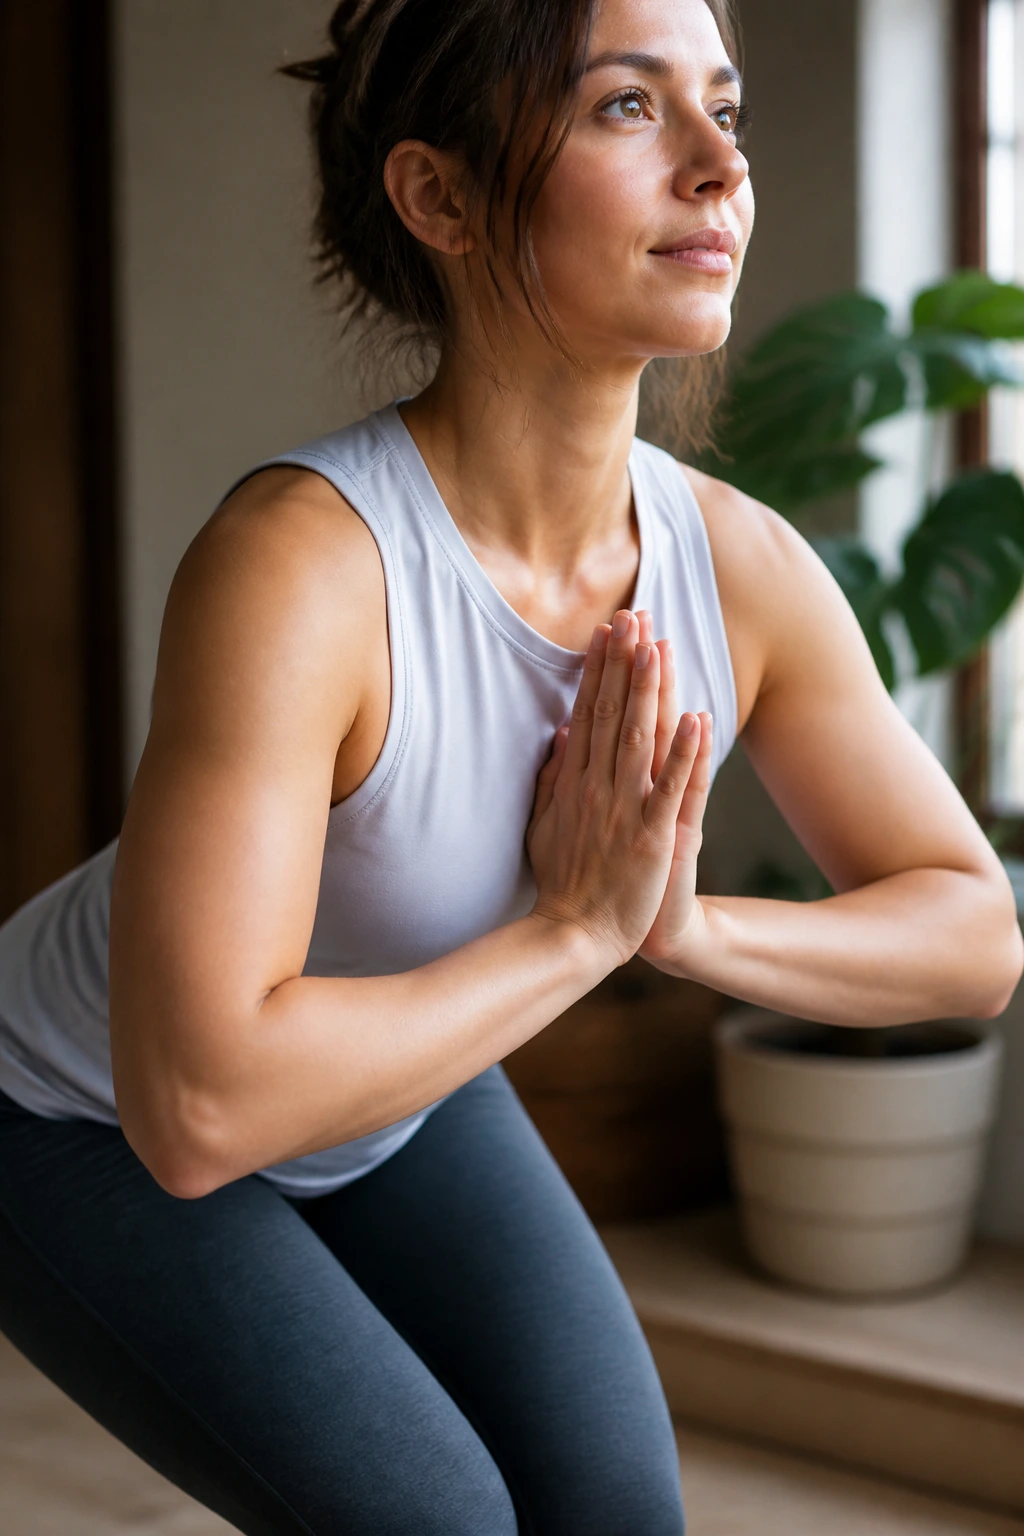
Chair pose has a bad reputation because people turn it into a squat contest. That is unnecessary. A gentle version feels like sitting into air for only a few inches.
From standing, send the hips back and bend the knees a little, as if you’re reaching for a chair that sits farther away than expected. Keep the chest lifted and the weight in the heels and midfoot. Hold for 3 breaths, lift to standing, then repeat 2 or 3 times.
Arms overhead make it harder. Hands on hips make it calmer. I like the hands at heart center for beginners, because it keeps the ribs from flaring open and the shoulders from creeping up.
No heroics here. If your knees complain, bend less. If your thighs start shaking after two breaths, that is enough. Move on before form gets sloppy.
6. Sphinx-to-Baby-Cobra Back Release
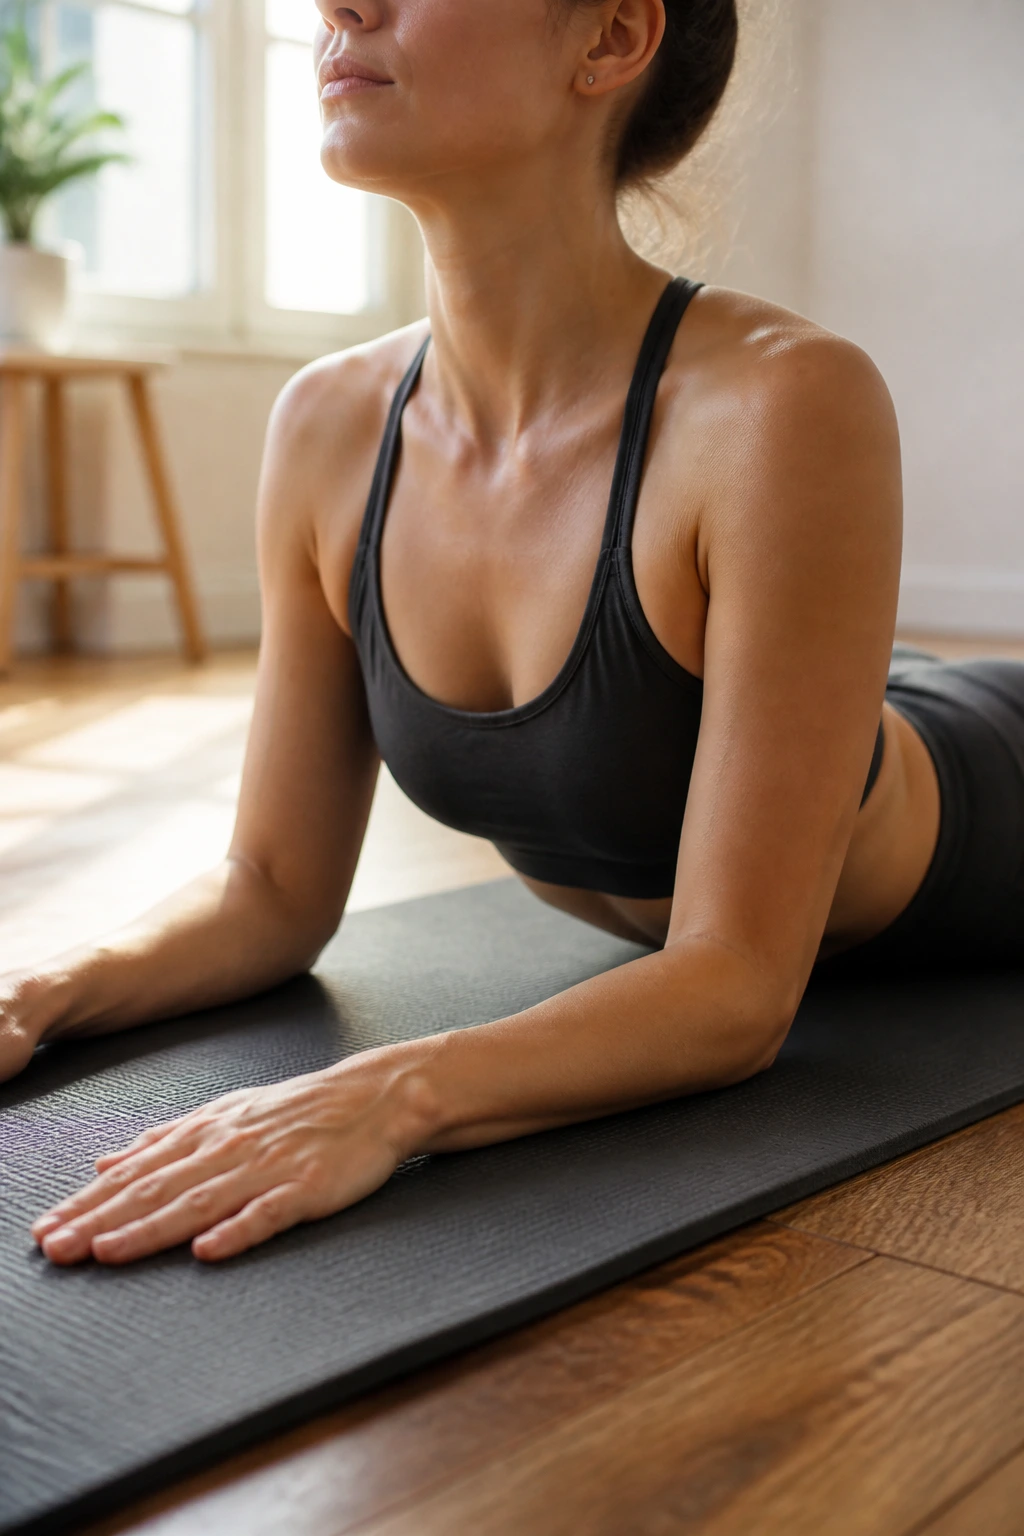
A backbend does not have to be deep to be useful. In fact, deep backbends are the wrong place to start if your low back is sensitive or your core feels asleep.
Lie on your belly and come up onto your forearms for sphinx. Elbows sit under the shoulders, legs long, tops of the feet pressing down. Stay for a few breaths, then lower and press the hands lightly into the floor for baby cobra, lifting the chest only a few inches. Repeat 3 to 5 rounds.
The Small Setup That Saves Your Lower Back
Keep the pubic bone anchored. Lightly engage the glutes. That keeps the bend from dumping into the lumbar spine, which is where beginners usually get into trouble.
A baby cobra should feel like a brightening across the chest, not a crunch in the low back. If your shoulders creep toward your ears, lower sooner. If your neck feels compressed, look a little forward instead of straight up.
This is a release, not a test. Easy wins here.
7. Bird-Dog Stability Flow
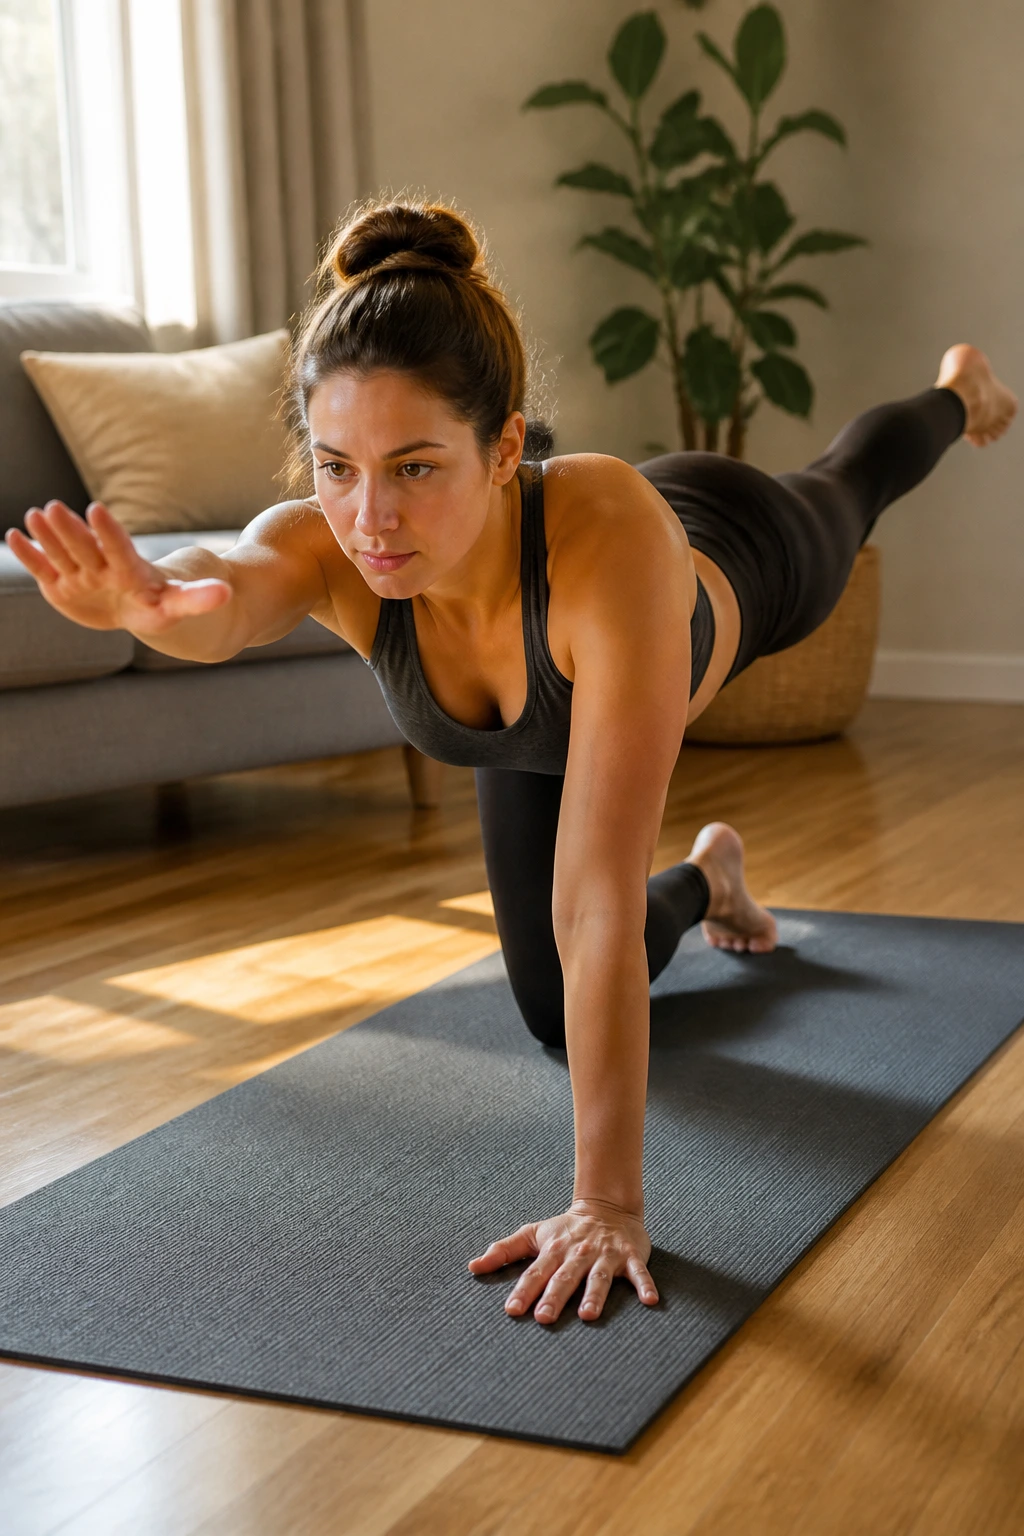
Why does such a small move feel so hard? Because bird-dog asks the body to stay organized, and beginners are often surprised by how much wobble shows up when one arm and one leg leave the floor.
Start on hands and knees. Reach one leg back, toes pointed down or lightly tucked, then extend the opposite arm forward. Hold for one breath, return to center, and switch sides. After that, try a slower version where you slide the foot and fingertips along the floor before lifting.
How to Keep It Steady
- Press the floor away with the supporting hand
- Keep the hips level
- Reach long instead of high
- Move slower than you think you need to
This flow is excellent for people who want core work without crunches. It also tells you the truth about left-right imbalances. One side often feels smoother. That is normal.
If the balance is too much, lift only the leg or only the arm. A partial version still counts.
8. Downward Dog to Plank Micro-Flow
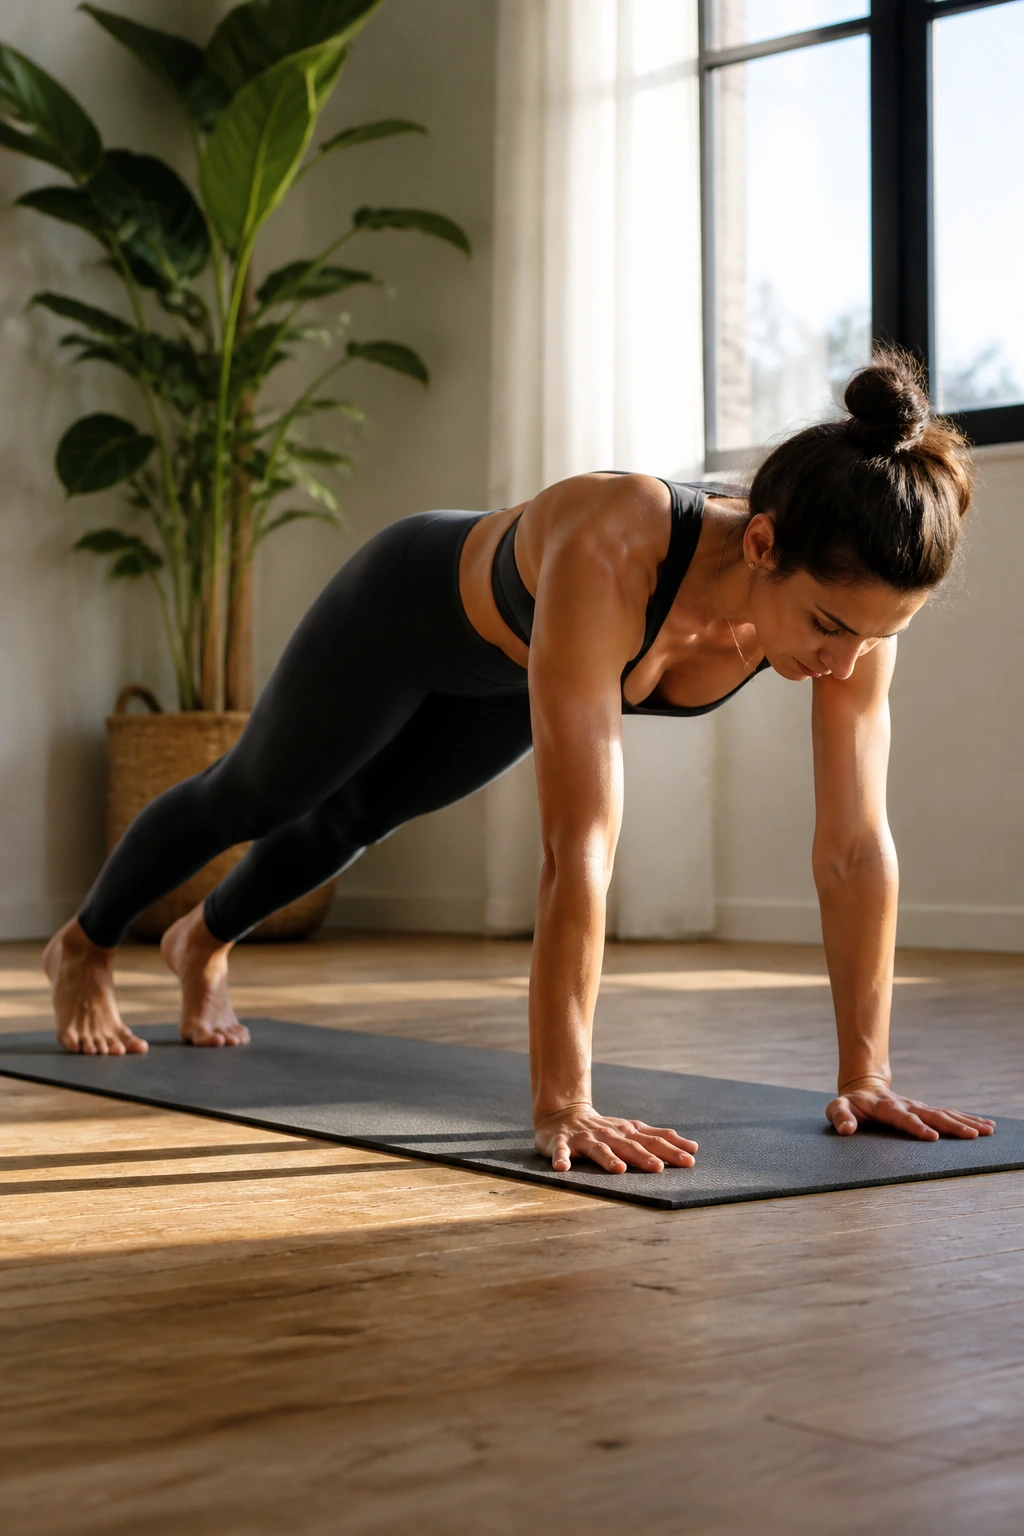
Downward dog gets treated like a fixed shape, but it’s better as a place to move through. A tiny back-and-forth between down dog and plank wakes up the shoulders, calves, and wrists without needing speed.
Come into down dog with bent knees if your hamstrings are tight. Pedal the feet for a few breaths. Shift forward into plank with the knees down or lifted, then send the hips back again. Repeat that transition 4 to 6 times, moving slowly enough that your wrists stay happy.
If plank feels like too much, lower the knees before the shift forward. If your shoulders are not ready for full weight bearing, stay in a puppy-like stretch with hands on a wall or on a bench. That version still teaches the same pattern.
The key is smoothness. Jerky movement makes the wrists protest. Controlled movement feels like a warm-up instead of a fight.
9. Warrior I Beginner Balance Flow
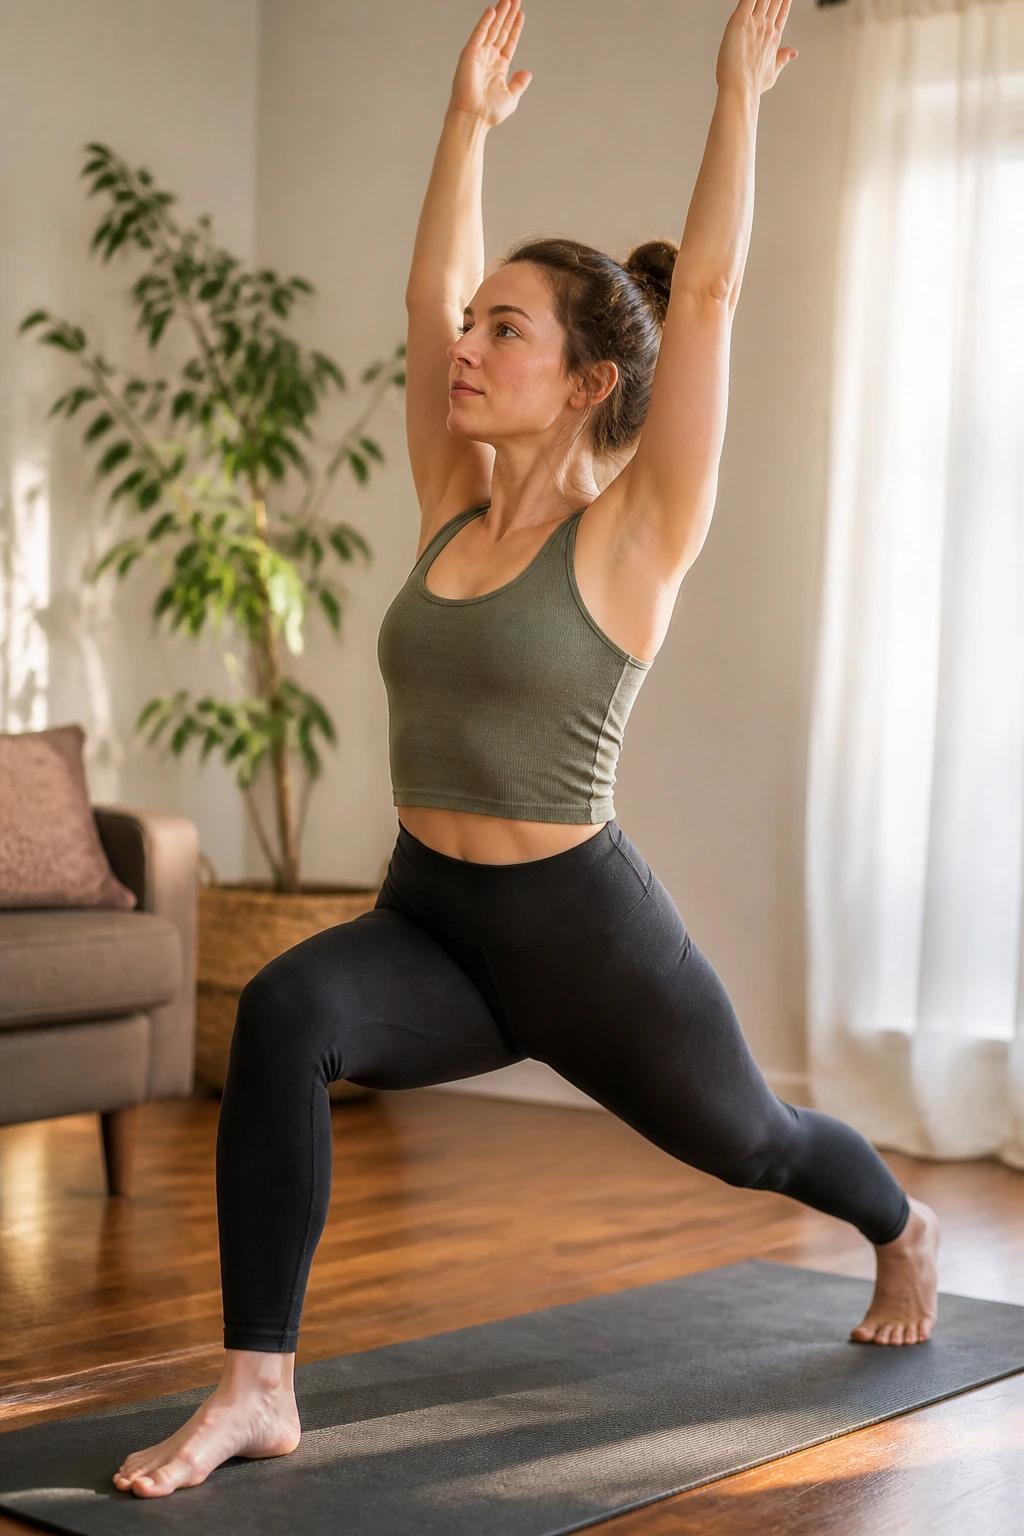
Warrior I looks dramatic, but a beginner version can be very quiet. The posture is really about finding a stable split stance and letting the chest open without tipping the low back forward.
Step one foot back into a short lunge, with the back heel grounded if that feels steady, or lifted if it does not. Square the hips as much as you can without forcing them. Raise the arms only if your shoulders tolerate it, and keep the front knee bent over the ankle.
Hold for 3 breaths. Step back to standing. Switch sides. That alone is enough.
Warrior I can feel awkward at first because the feet and hips want different things. A narrow stance usually makes it cleaner for beginners. If you’re wobbly, keep the hands on the hips and use the wall lightly for support.
10. Warrior II Side-Body Flow
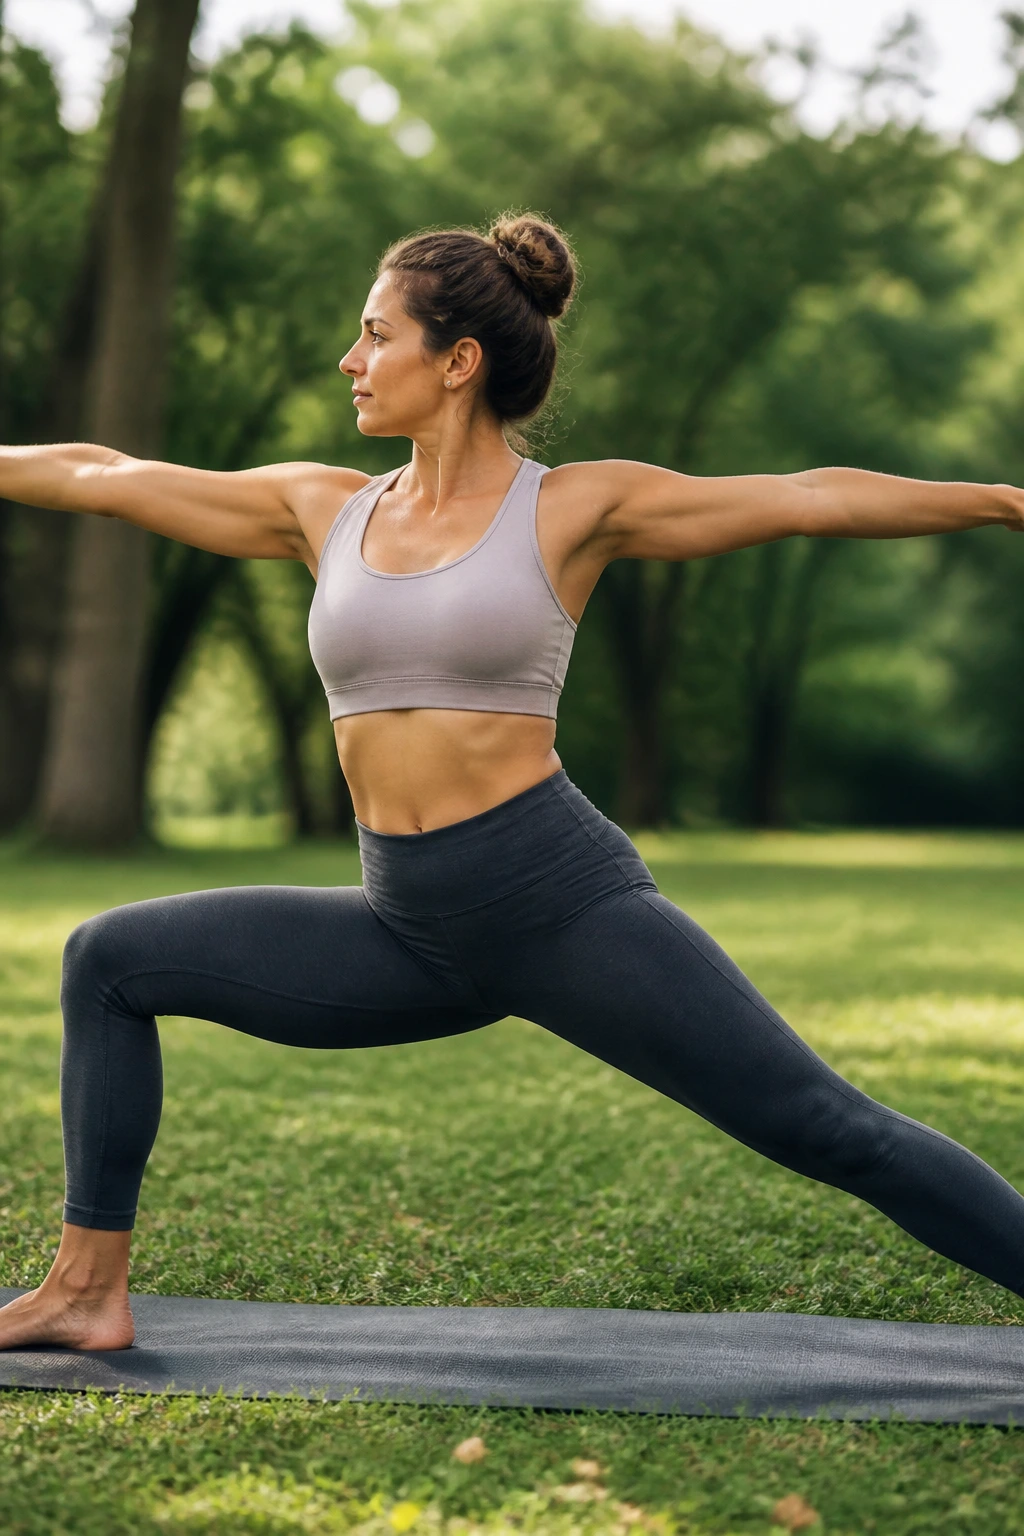
Warrior II is one of those poses that looks simple and still gets a lot done. The legs wake up. The outer hips work. The side body starts to stretch, which is a relief if you spend much of the day rounded forward.
Set your feet wide, turn the front toes out, and bend the front knee. Reach the arms long in opposite directions and settle the gaze over the front fingertips. Then breathe into the ribs for 3 to 5 breaths.
From there, you can straighten the front leg for a moment and reach the front arm overhead into reverse warrior, then return to warrior II. Keep the movement small. The goal is to feel spacious, not theatrical.
I like this pose for beginners because it teaches shape and strength at the same time. The stance feels grounded, but the upper body gets room to move. If your front thigh burns too fast, back off the bend a little. Clean alignment beats depth every time.
11. Triangle Pose Grounding Flow
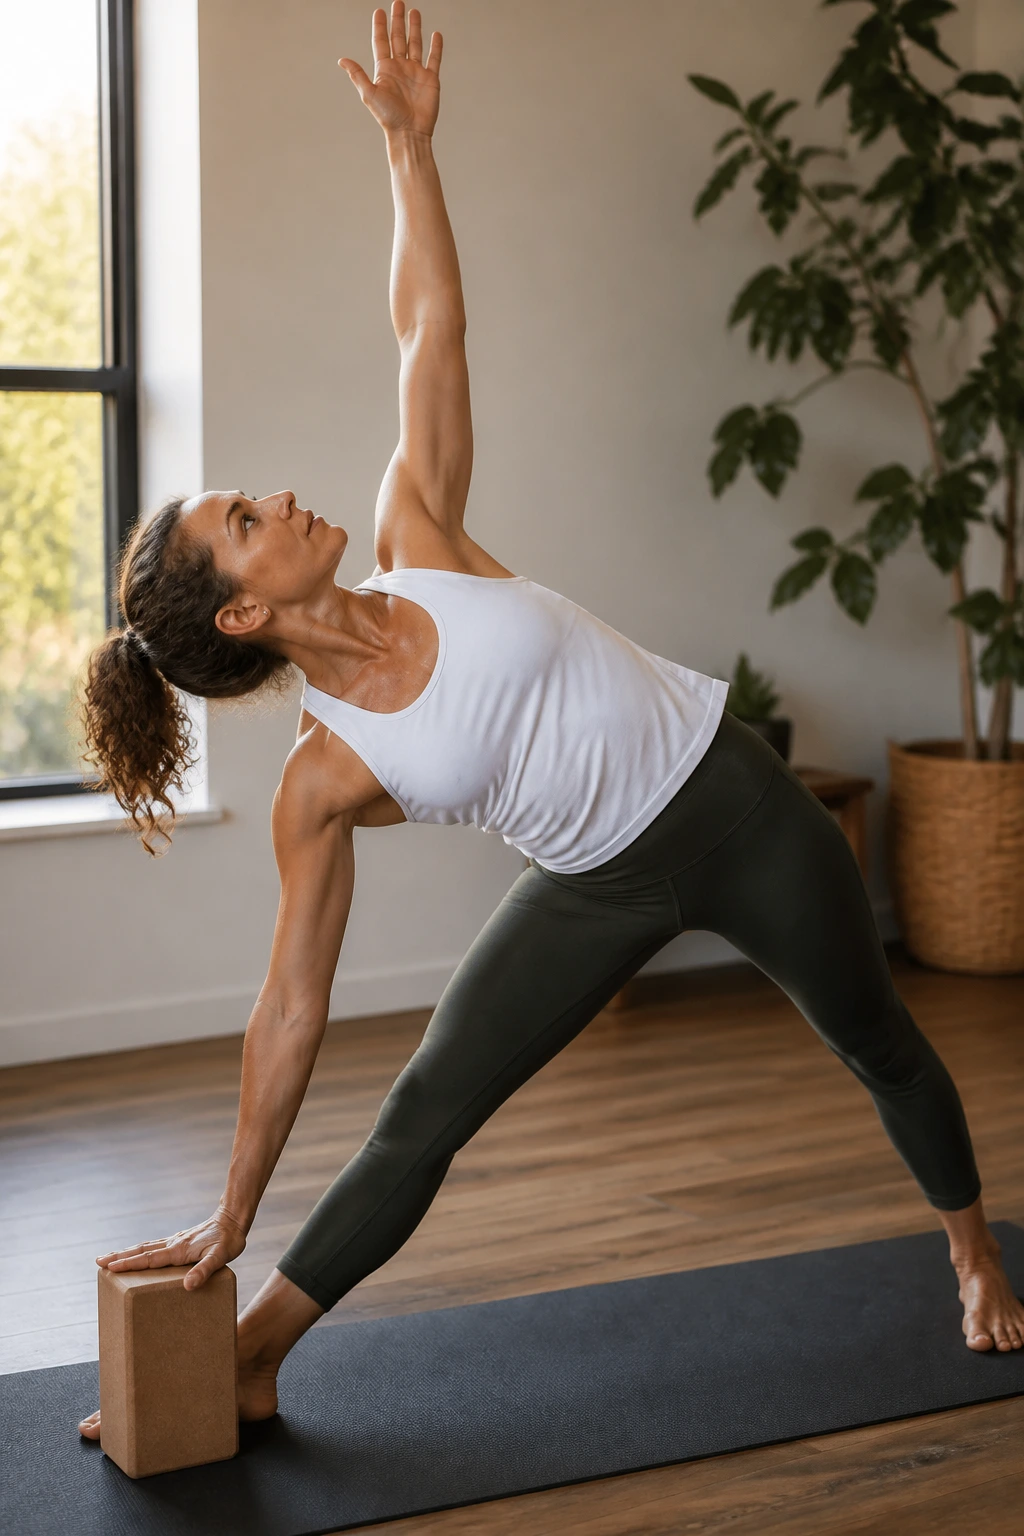
Can a standing pose be both calm and demanding? Triangle does that nicely. It asks for leg strength, a long spine, and enough patience to avoid collapsing into the side bend.
Start from a wide stance. Turn the front foot out and the back foot in a little. Reach the front hand down to a block, shin, or the floor if it’s there without strain. The top arm reaches up, but only if the chest can stay open.
A block is not a beginner prop by accident. It shortens the distance to the floor and keeps the torso from folding into a side crunch. Use one under the lower hand and keep a soft bend in the front knee.
If the hamstrings complain, bring the stance a little shorter. If the neck feels weird looking up, let the gaze rest straight ahead or down. Small choices make triangle feel elegant instead of wobbly.
12. Wide-Leg Forward Fold and Gentle Twist
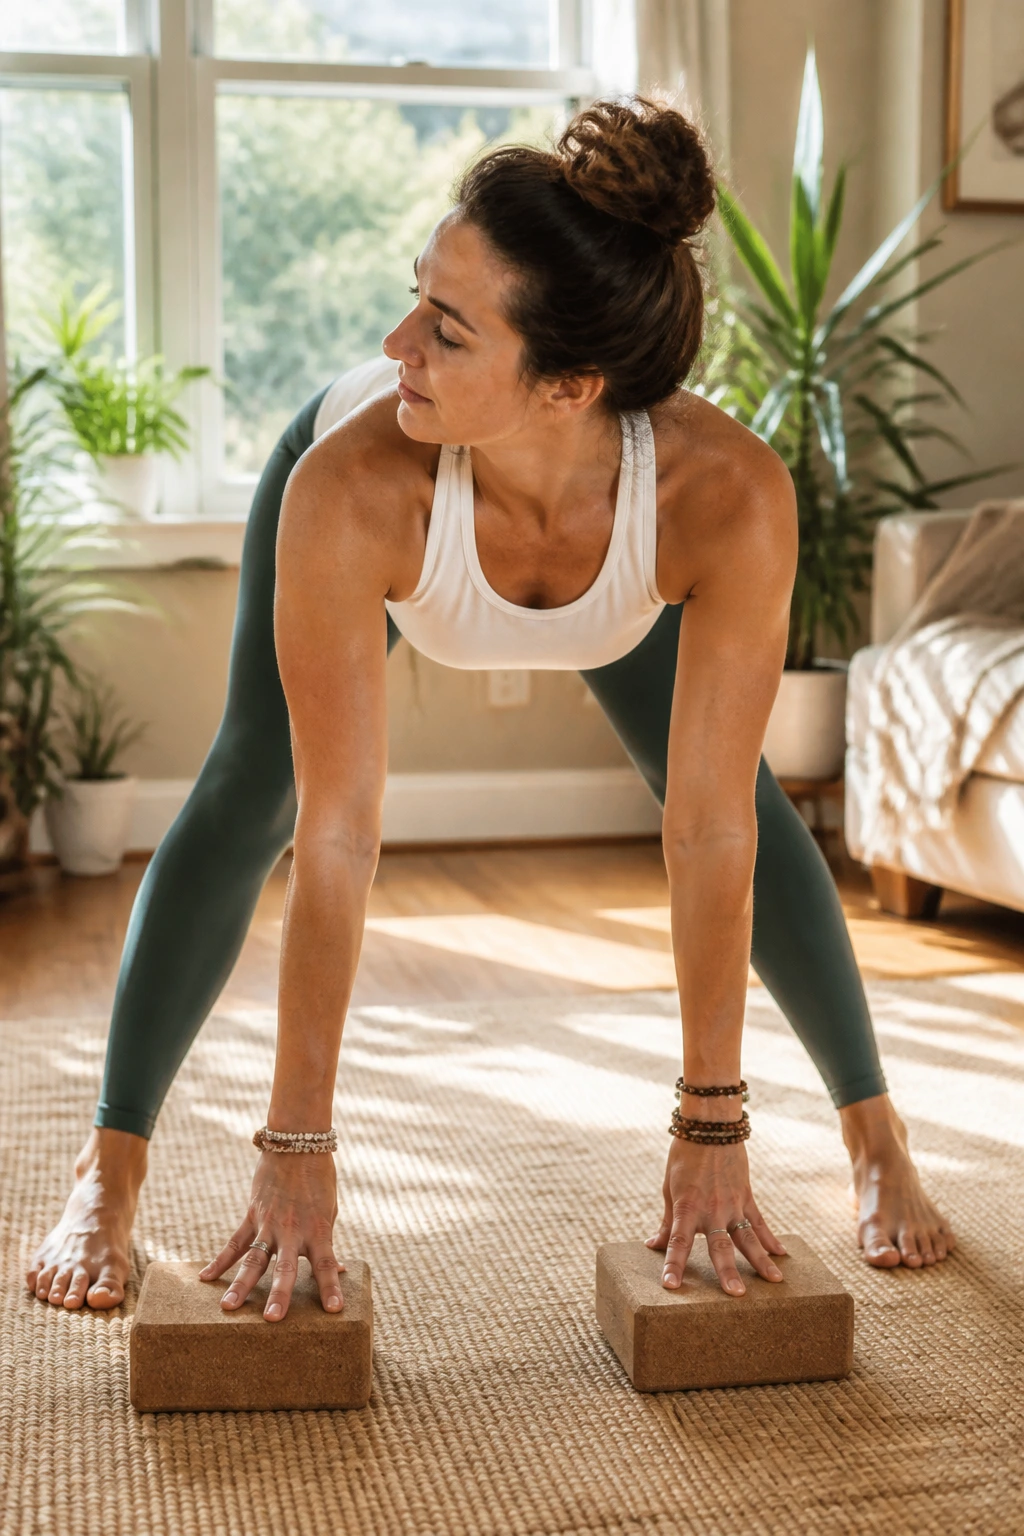
This one is the yoga version of spreading out and taking a deep breath. A wide stance opens the inner legs, and the fold gives the back a break after all that standing work.
Step the feet wider than the hips and keep the knees softly bent. Fold from the hips, hands to blocks, shins, or the floor. Stay for a breath or two, then place one hand on the floor or block and rotate the other arm up for a gentle twist. Switch sides.
The twist should feel like it comes from the upper back, not from wrenching the low spine. If your back is sensitive, keep both hands down and simply turn the chest a few degrees.
What to Watch For
- Don’t lock the knees
- Don’t force the heels to stay glued down if it hurts
- Don’t yank the twist deeper than the breath allows
A wide-leg fold can be oddly calming. The shape feels a little private, which is part of why people like it. There’s room to breathe.
13. Supine Hamstring Release with a Strap
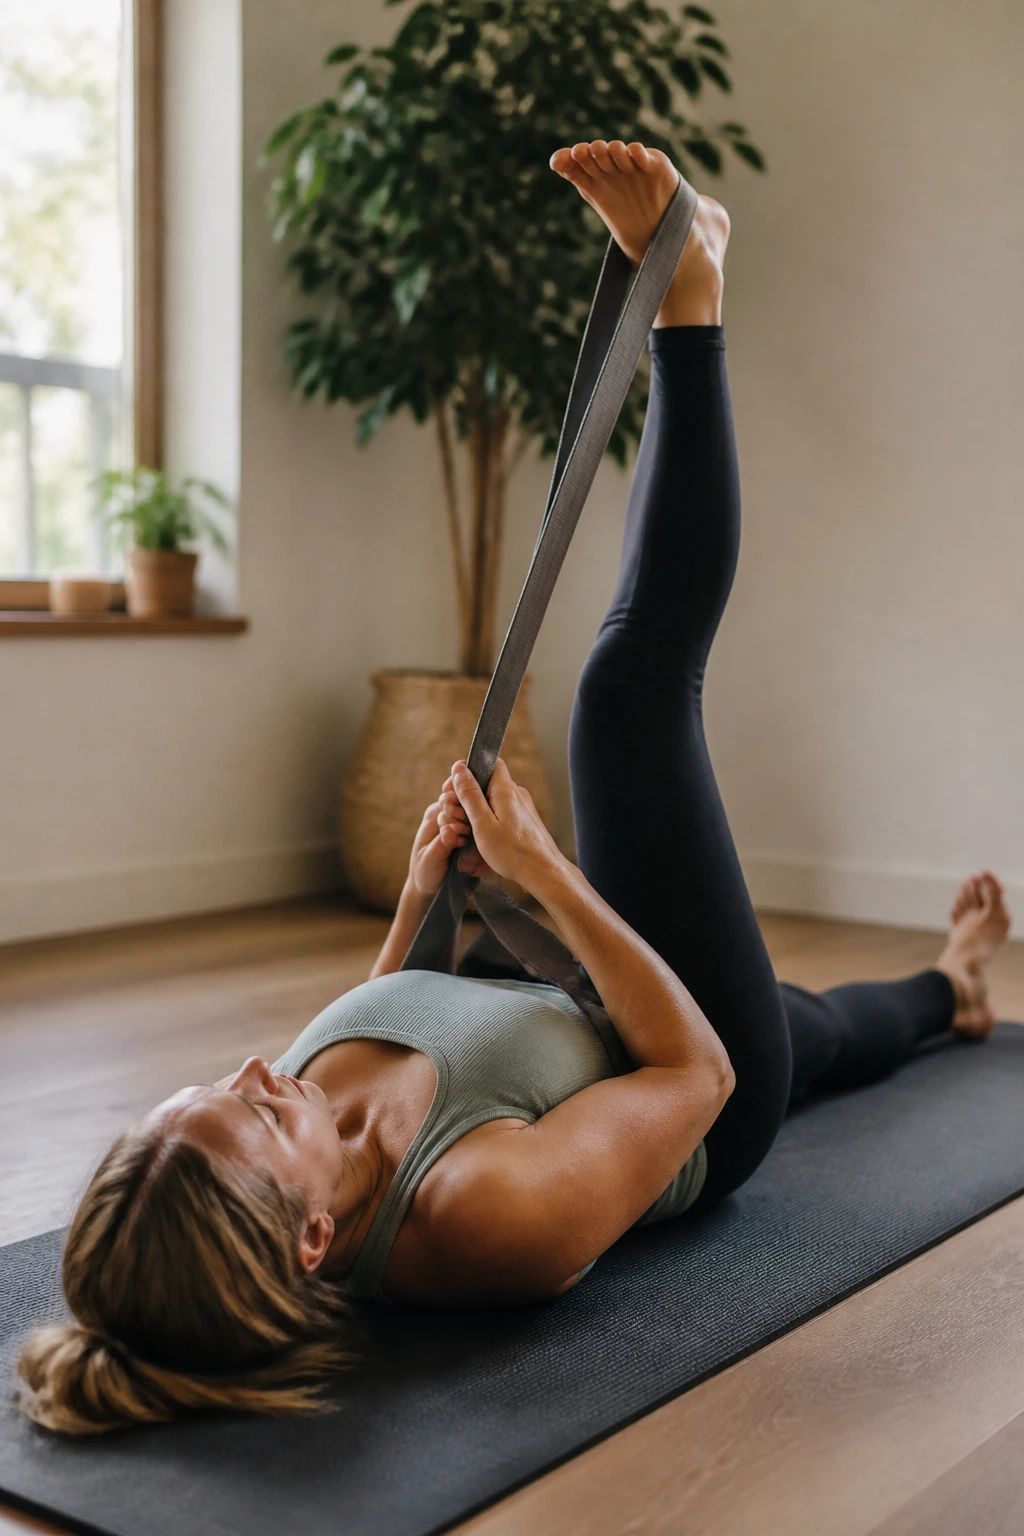
If you want hamstring work without the usual pulling contest, this is the one I’d put near the top of the list. Lying down takes the strain out of the posture and lets the leg release more honestly.
Lie on your back and loop a strap, towel, or belt around one foot. Extend the leg toward the ceiling with a soft bend in the knee. Hold the strap lightly and let the other leg rest long on the floor. Stay for 5 to 8 breaths, then switch sides.
Strap Setup
Keep the pelvis heavy. If the lifted leg wants to drift too far toward the face, ease it back. A slight bend in the knee is often better than a straight leg that turns the whole pose into a tug-of-war.
You can also circle the ankle once or twice while the leg is up. That adds a little movement without changing the shape much. Good on days when the hamstrings feel sticky.
If you don’t have a strap, a bath towel works fine. Seriously. Fancy gear is not the point here.
14. Figure-Four Hip Reset
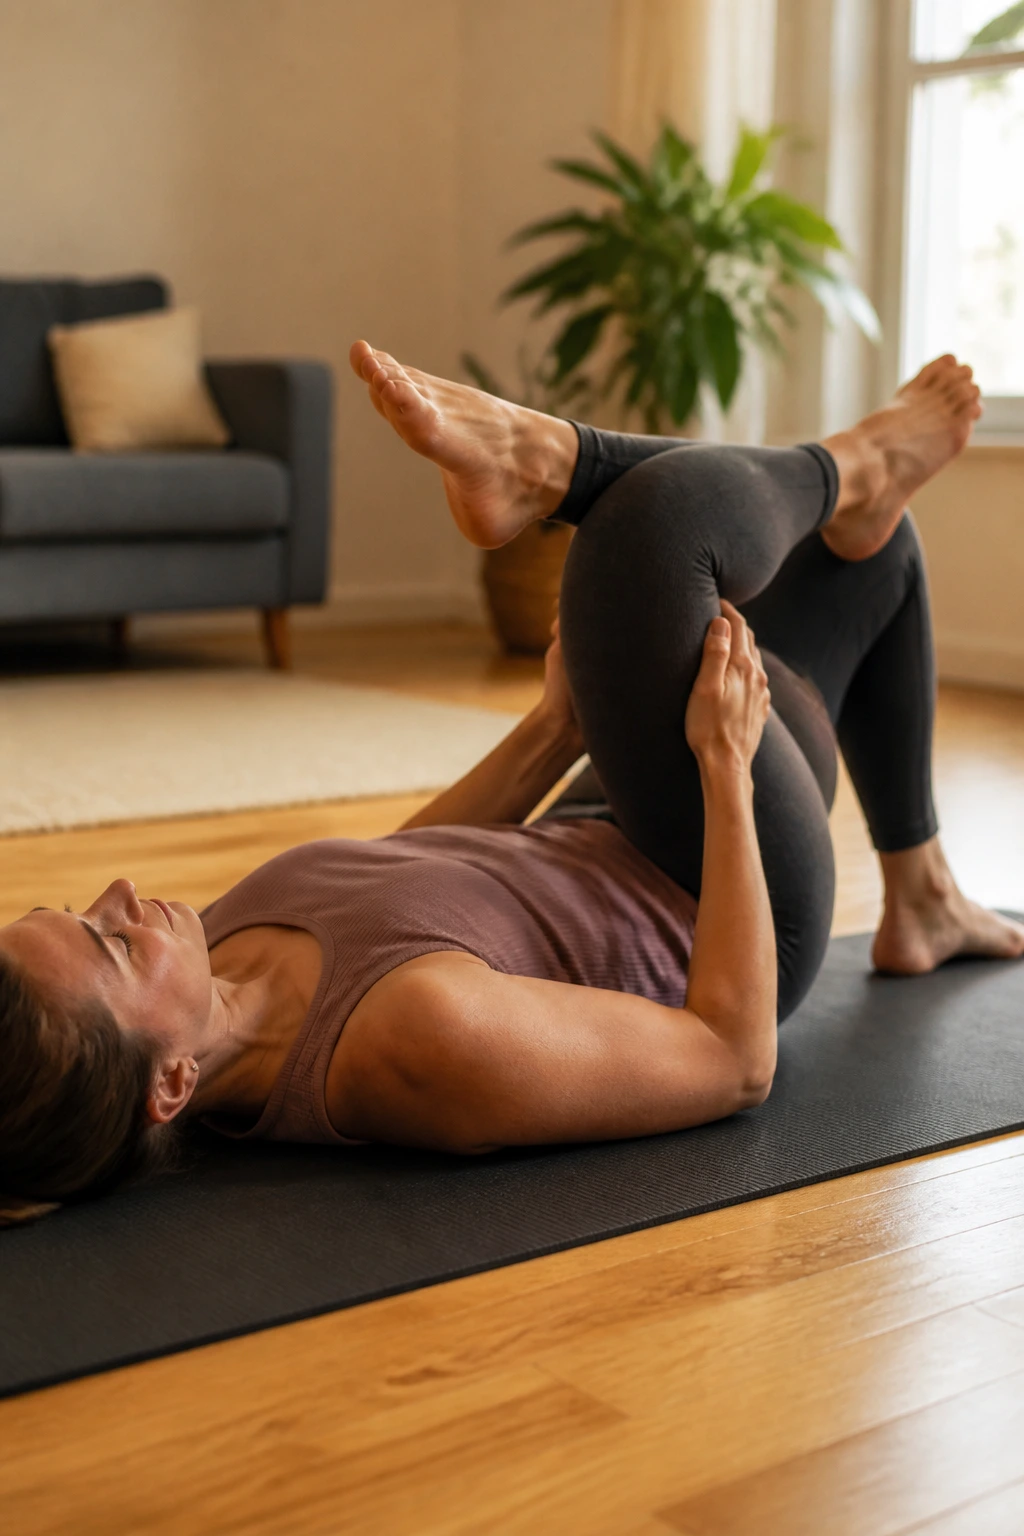
A lot of people think hip openers need to be big standing lunges. Sometimes the simplest one is lying flat and giving the glutes a chance to let go.
Cross one ankle over the opposite thigh, making a figure-four shape. Thread the hands behind the lower thigh and draw the leg toward you until you feel the stretch in the outer hip. Stay for 4 to 6 breaths, then switch sides.
Compared with seated stretches, this version is easier to control. The back stays supported, and you can choose exactly how close the legs come. That matters if your hips are tight and your lower back tends to take over.
If the stretch lands in the knee instead of the hip, back off immediately. Your ankle can sit farther down the thigh to reduce strain. A wider angle often helps more than people expect.
15. Butterfly and Forward Fold
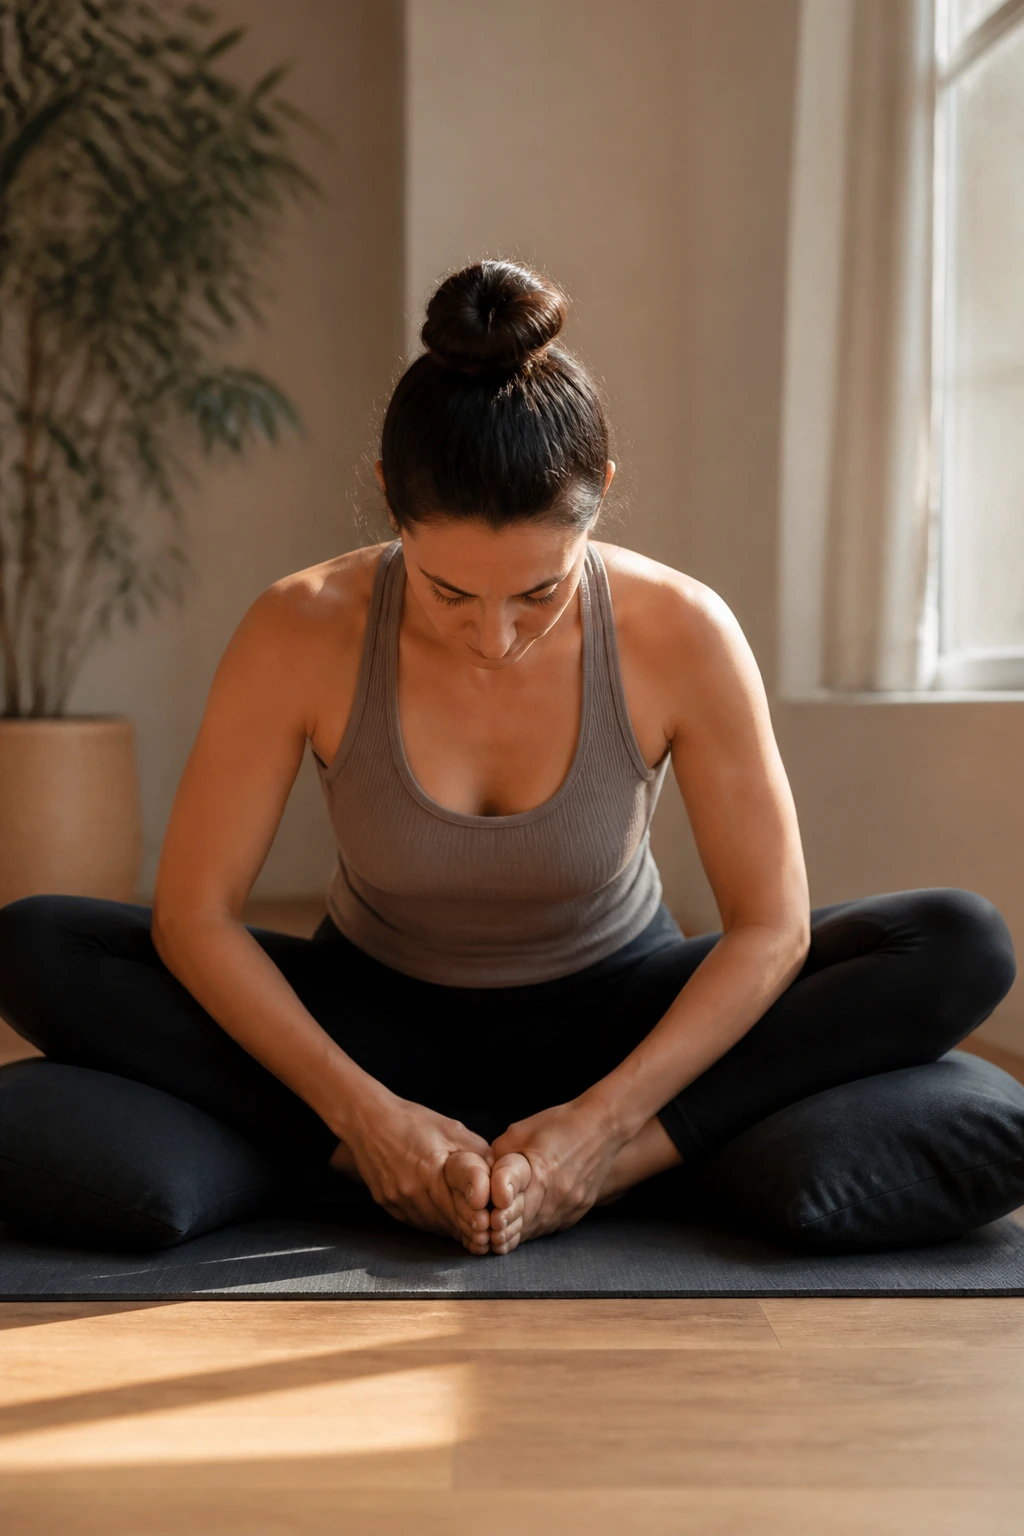
There’s something almost old-fashioned about butterfly pose. Sit, bring the soles of the feet together, and let the knees drop out to the sides. It feels unhurried, which is rare and useful.
Sit on a folded blanket if the pelvis rounds under. Hold the feet and keep the spine tall for a few breaths, then hinge forward only as far as the low back stays long. Come up when the shape starts to feel forced.
The inner thighs may feel warm first. Then the hips loosen a little. The fold should come from the hips, not from collapsing the chest into the feet.
A cushion under each knee can make this much friendlier. A lot of beginners skip that and then wonder why the pose feels sharp. Padding is not indulgence. It’s smart.
16. Seated Spinal Twist
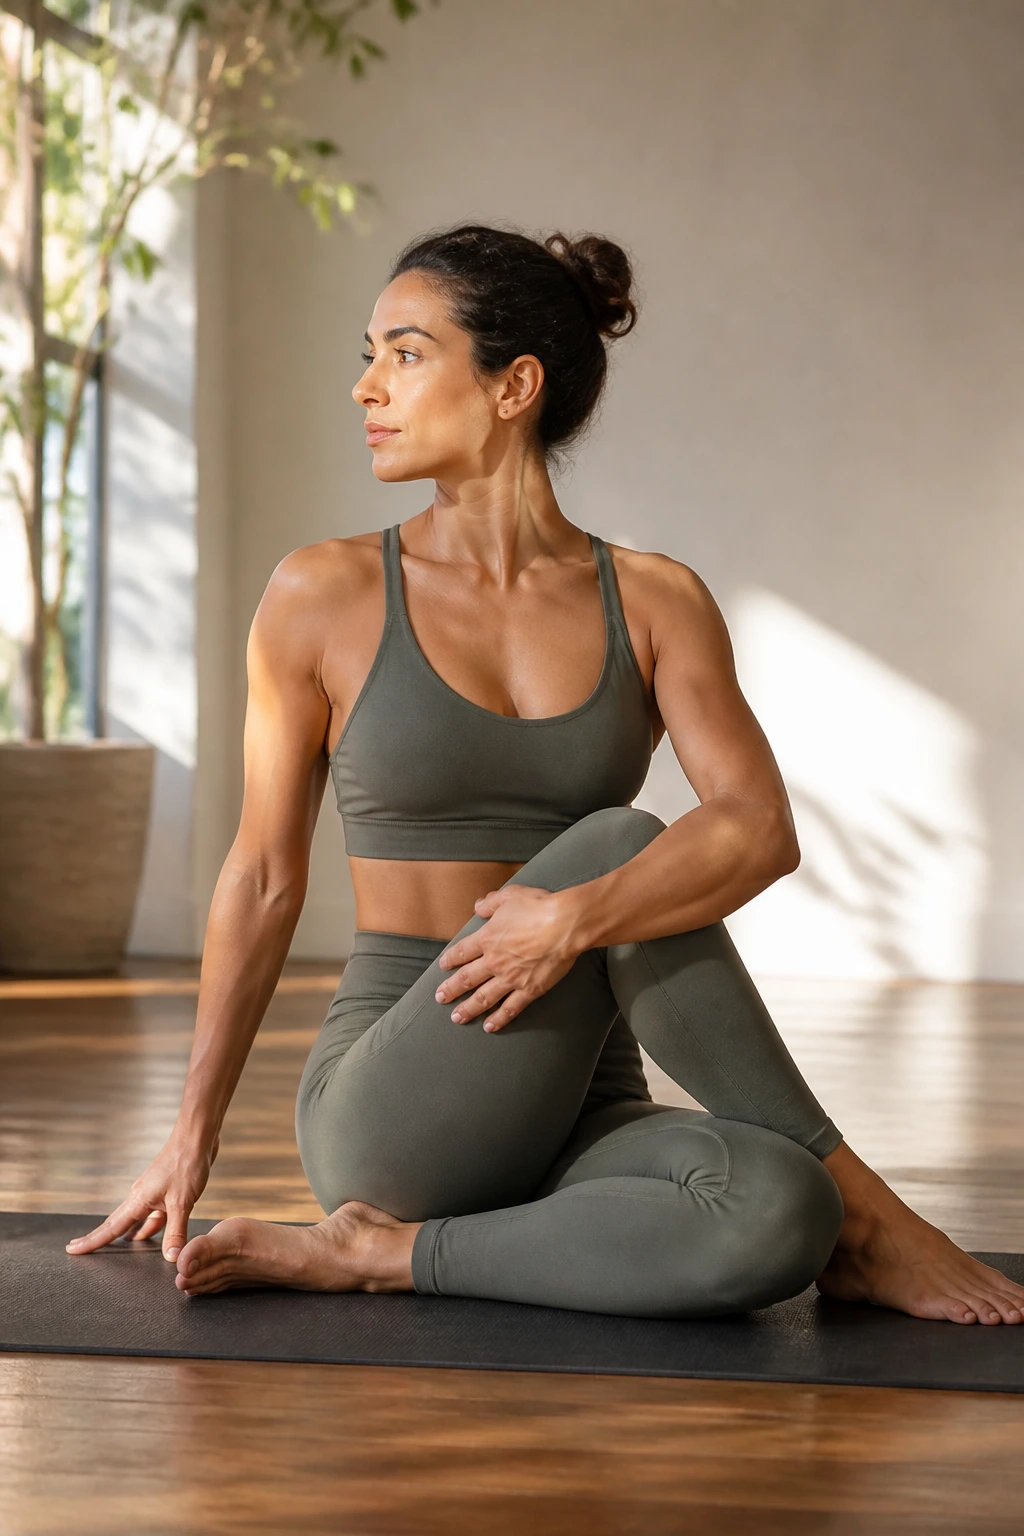
Twists are useful, but beginners often try to wring themselves around like a dish towel. That is not the goal. A seated twist should feel like a steady rotation through the ribs.
Sit tall with one leg extended or both legs crossed, then place one hand behind you and the other hand on the opposite knee or thigh. Inhale to lengthen the spine, exhale to turn a little deeper. Keep the shoulders relaxed and the chin level.
What a Good Twist Feels Like
- Length first, turn second
- Breathing stays smooth
- The belly has room
- The neck does not crank
If you feel a pinch in the low back, reduce the turn and sit up on a blanket. That usually helps more than trying to muscle through. Twists are quieter when they’re done well. No need to chase range.
I like this one after a forward fold or hip opener. The body feels tidier afterward, almost reassembled.
17. Legs-Up-the-Wall Recovery Flow
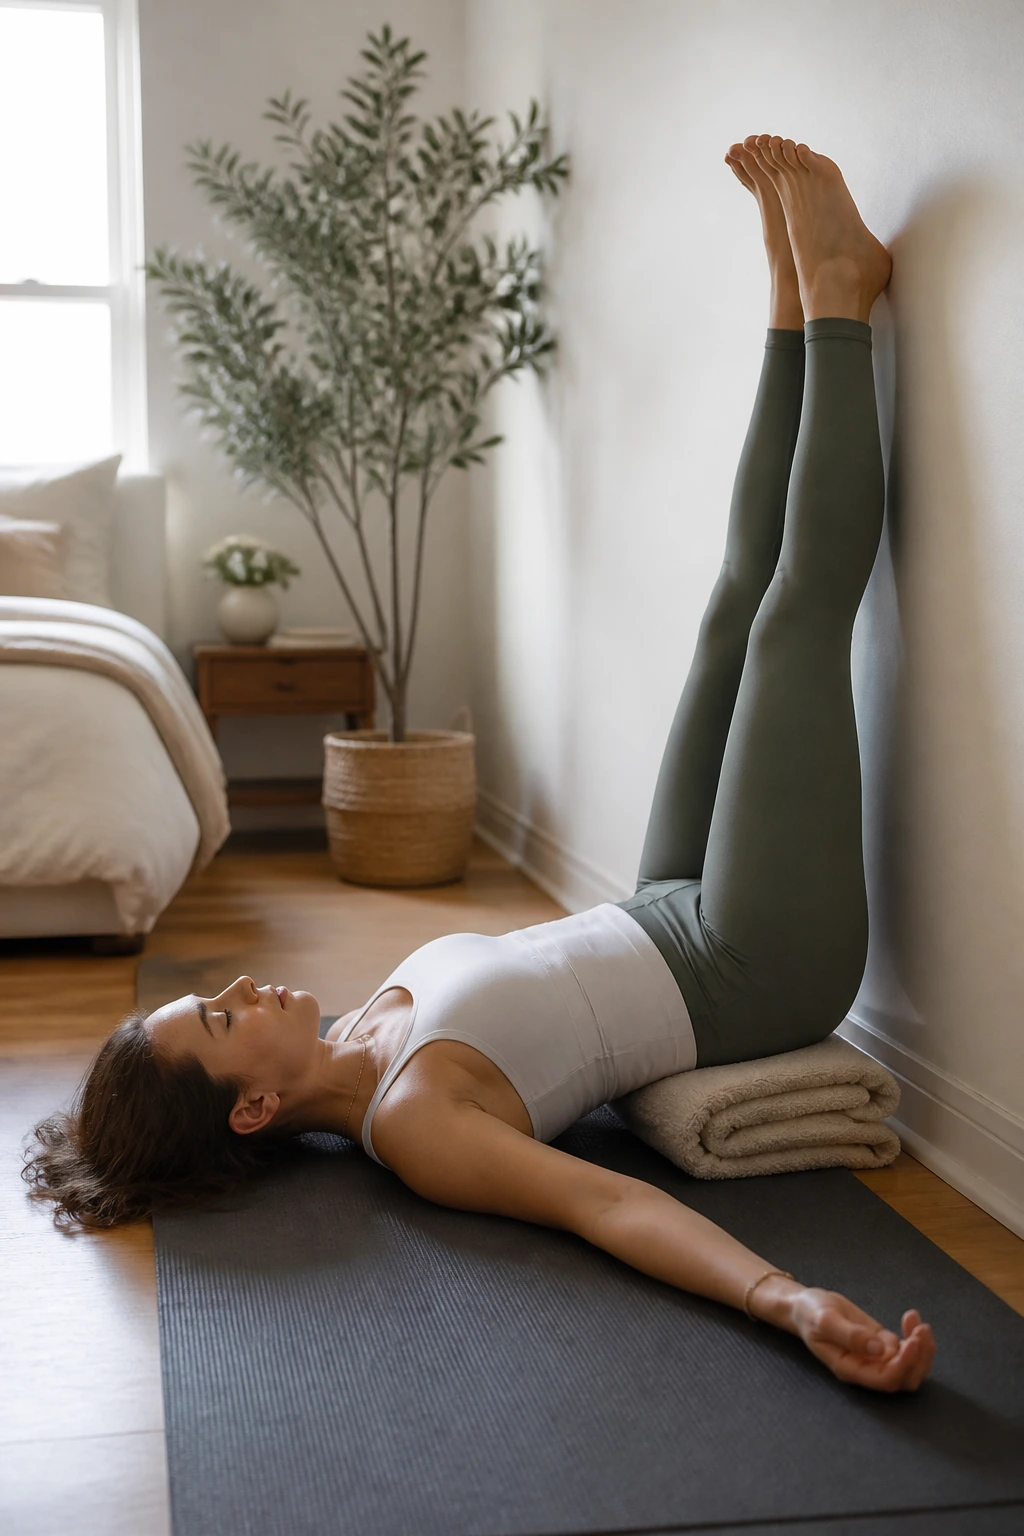
This is the pose I reach for when the legs feel heavy and the brain won’t switch off. It looks almost too simple to matter, which is a funny thing to say about a posture that can change the whole pace of an evening.
Sit beside a wall, swing the legs up, and lie back so the sit bones are close to the baseboard or a few inches away if hamstrings are tight. Let the arms rest wide or by your sides. Stay for 5 to 10 minutes.
How Long to Stay Here
- 3 minutes if you’re impatient
- 5 minutes for a short reset
- 10 minutes when the legs feel swollen or overworked
A folded blanket under the hips can make the position feel more supported. If your low back arches too much, slide a little farther from the wall. If the head feels tense, place a thin pillow underneath it.
This is a recovery shape, not a challenge. Keep the room quiet if you can. The stillness does half the job.
18. Kneeling Crescent Lunge Flow
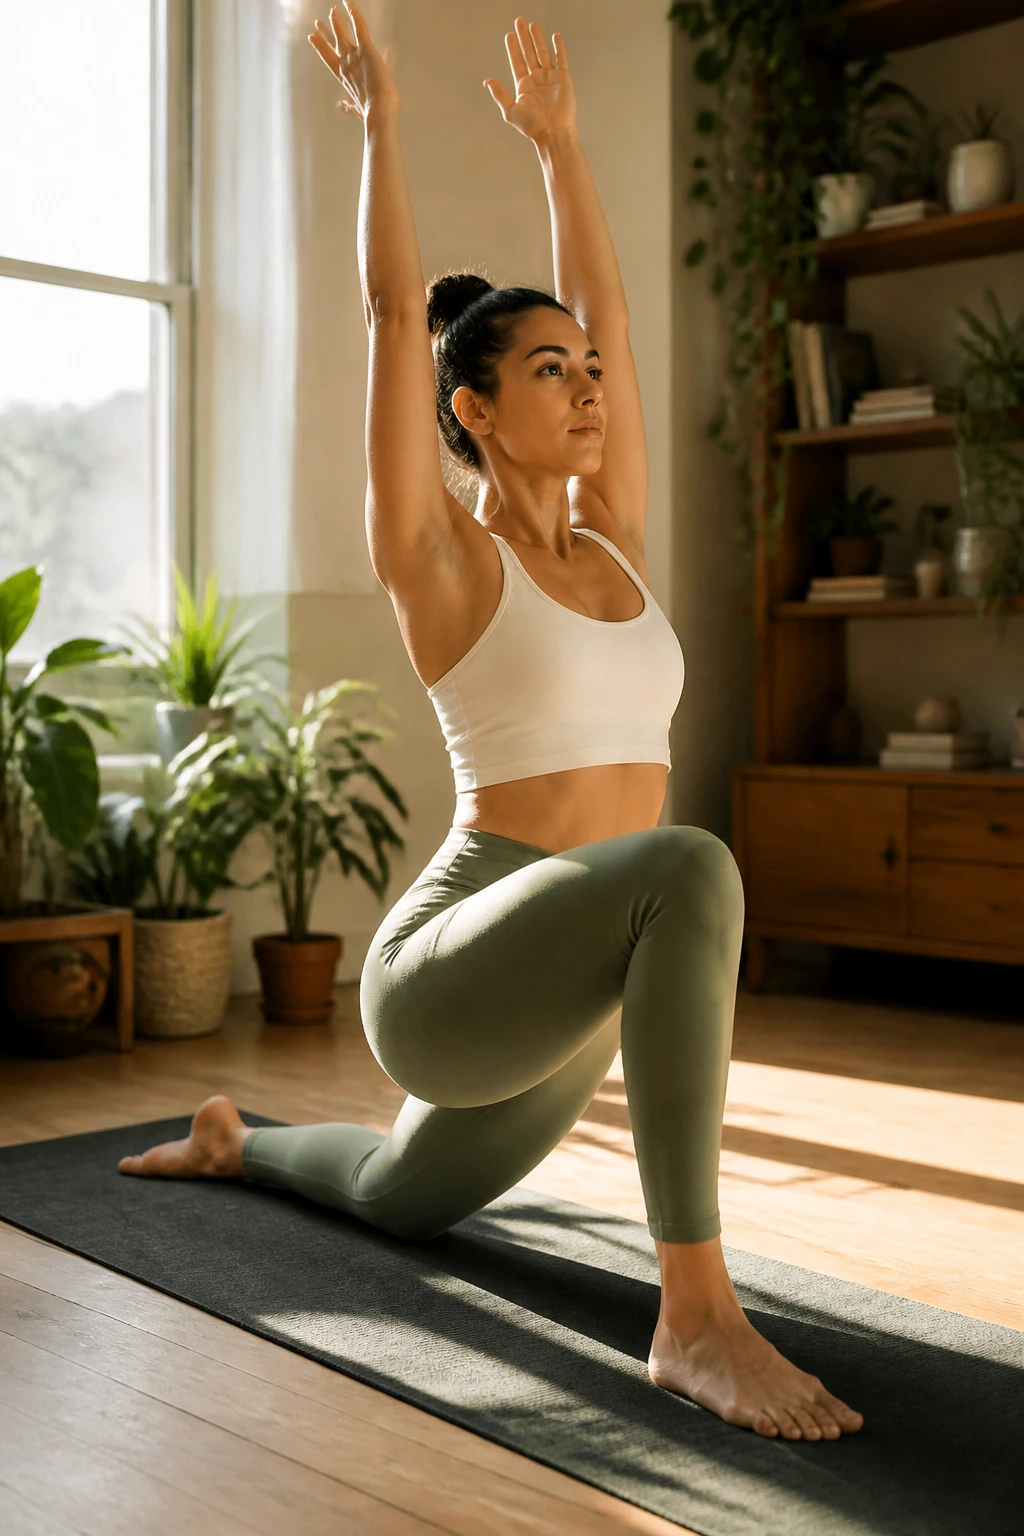
Need a little more heat without jumping into hard balance work? Kneeling crescent lunge gives you that middle ground. It wakes up the thighs, opens the front hip, and still feels manageable for a true beginner.
Begin in a low lunge with the back knee down. Tuck the back toes and lift the knee if that feels stable, or keep it grounded for a gentler version. Float the torso up and reach the arms overhead, then lower the hands to the front thigh and repeat once or twice.
The back leg will do more work here than it looks like it should. That’s normal. The front hip gets a stretch, the back glute gets involved, and the ribs learn not to flare open.
If your balance feels shaky, shorten the stance. If your front knee drifts far past the ankle, pull it back a touch. Little fixes, not major redesigns.
19. Gentle Sun Salutation A
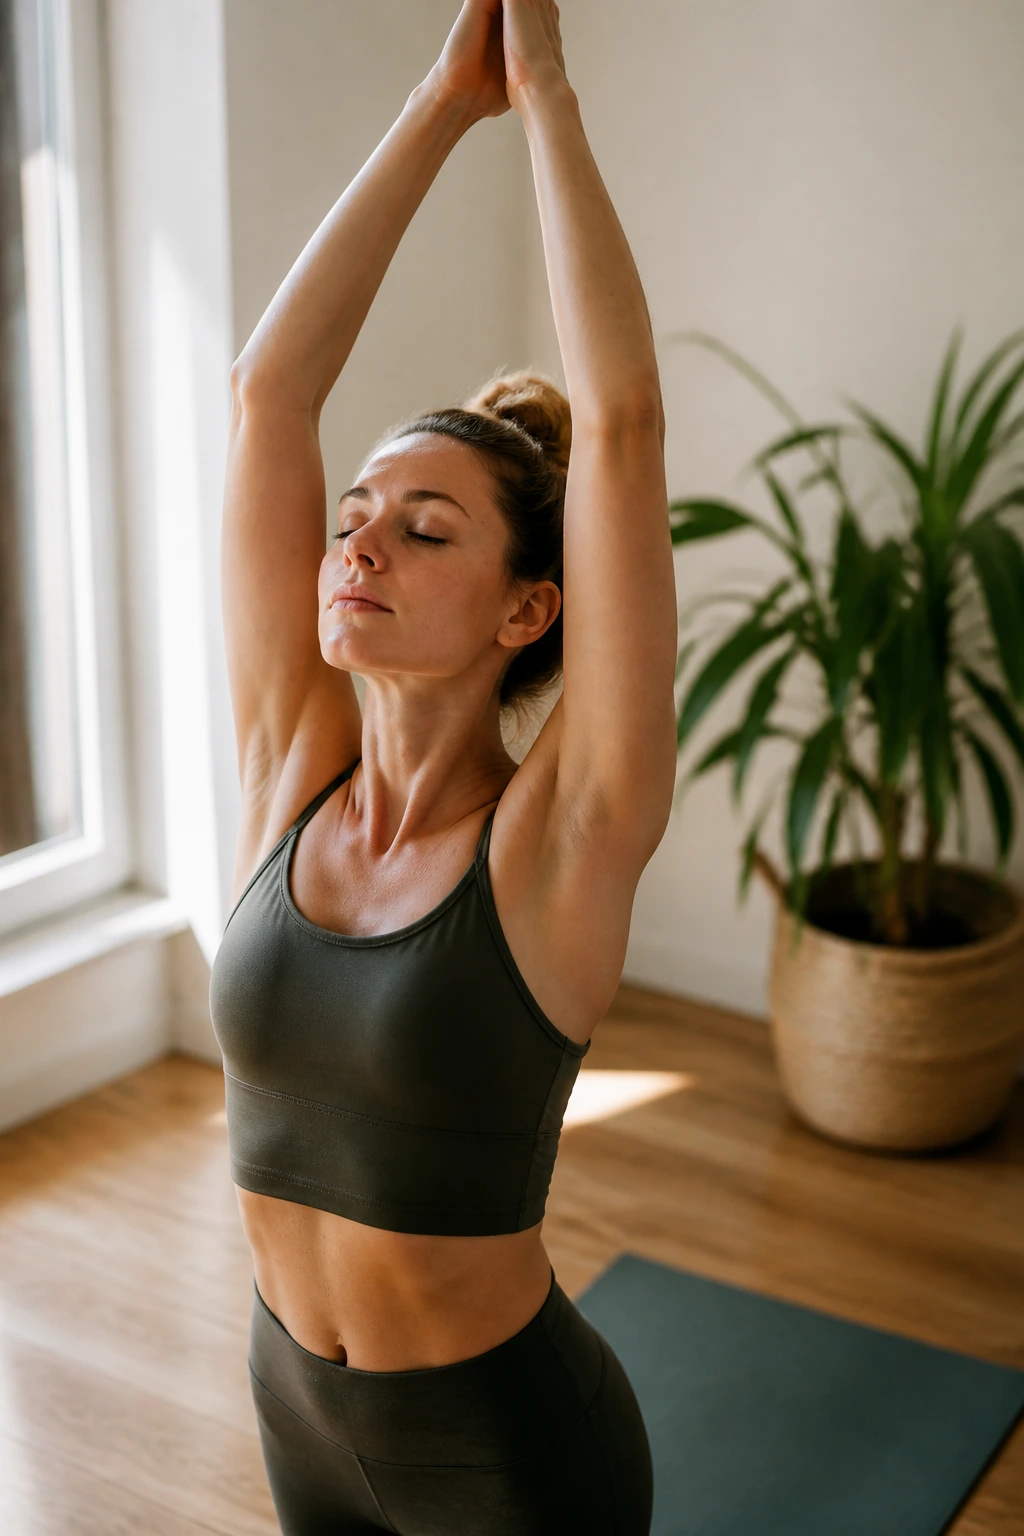
A lot of people meet sun salutations too early and get confused by the pace. A gentle version strips the sequence down to what matters: breath, shape, and enough space to move without rushing.
Stand at the top of the mat. Inhale the arms up. Exhale into a fold with bent knees. Inhale to a half lift, hands on shins or thighs. Step back to plank with the knees down if needed, then lower all the way to the floor or come into baby cobra. Exhale to child’s pose or down dog. Step forward and stand again.
That’s the backbone. You can keep it slow and repeat it 3 times. Or stop after one round if your body says enough.
Gentle Version
If the wrists complain, skip full plank and lower straight from the knees. If the hamstrings are tight, keep the knees bent in every fold. If your shoulders get tired reaching overhead, leave the arms at the sides and keep the breath moving.
A sun salutation should build heat without dragging you into strain. Clean transitions matter more than how far you can step or how low you can fold. Smooth beats deep here.
20. Bedtime Full-Body Wind-Down
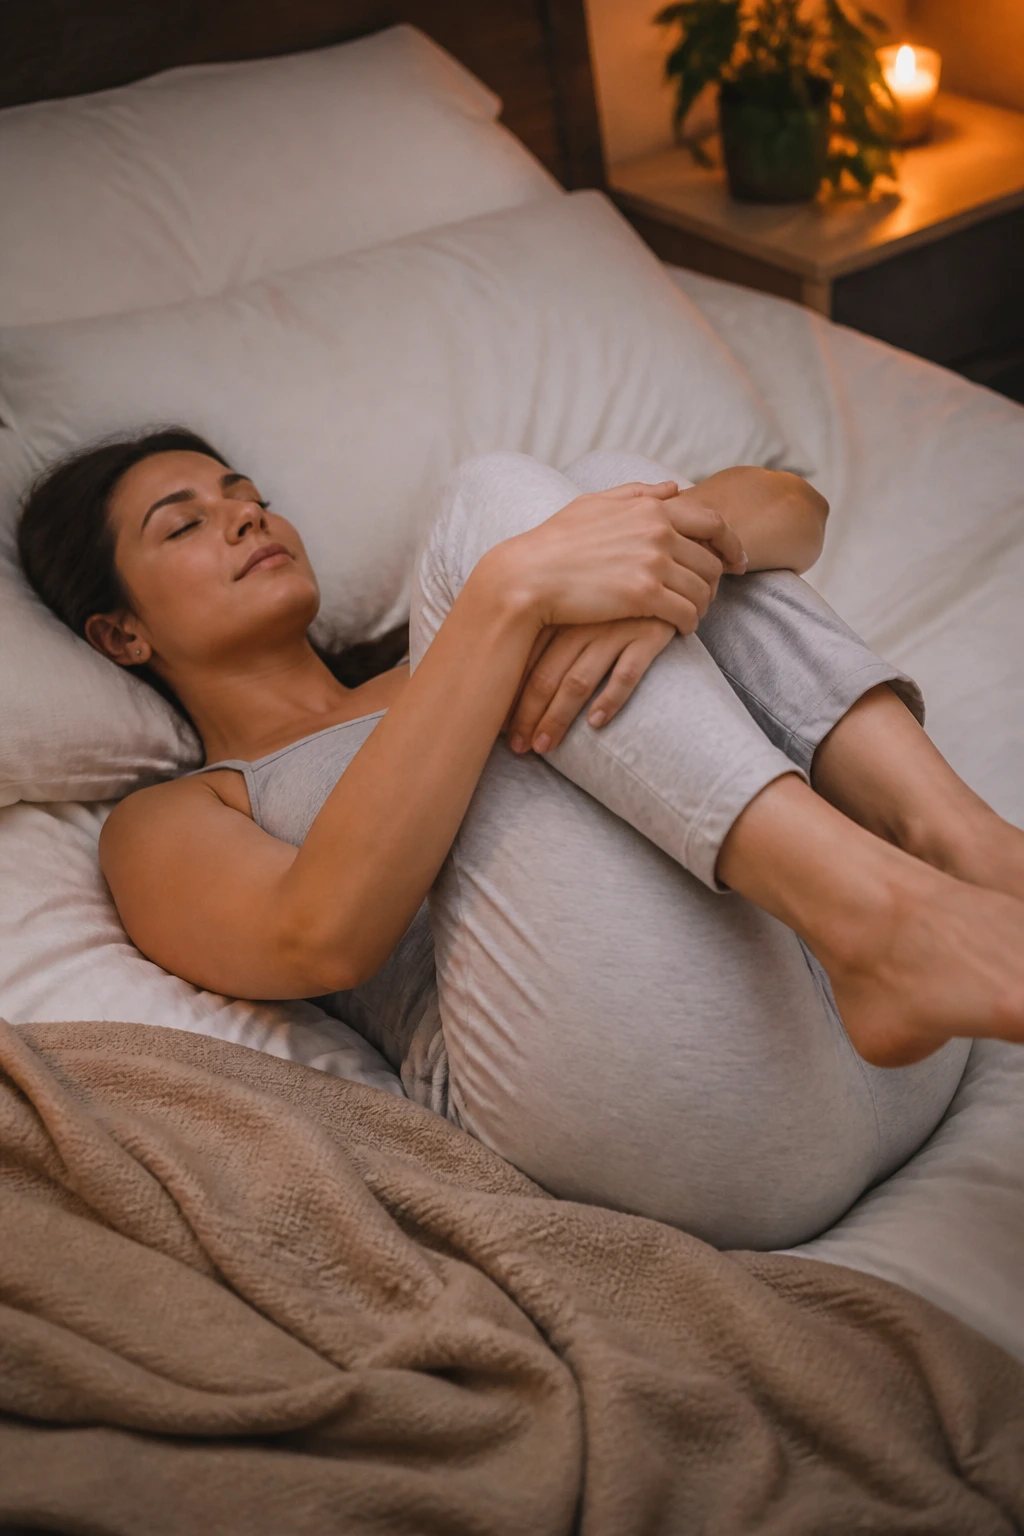
Some flows should leave you a little sleepy. This is one of them. I like to think of it as a clear signal to the nervous system that the work is over and the floor can take over.
Lie on your back and hug one knee in, then the other. Roll into a gentle twist on each side. Move into a figure-four release or a light hamstring stretch with bent knees. Finish in bound angle pose or simple savasana with the feet wide and the palms open.
The order matters less than the pace. Use long exhales. Give each shape 3 to 5 breaths. If you fall asleep midway through, fair enough.
This is also the easiest place to practice not doing too much. No deep stretch needed. No goal beyond lying down, breathing, and letting the body get heavy.
Final Thoughts
The best beginner yoga is rarely the flashy stuff. It’s the flows that make your breath smoother, your joints less cranky, and your mind a little less noisy by the end.
Pick two or three of these and repeat them often. That matters more than trying to collect every pose in one session. A ten-minute practice done most days will usually beat a long, complicated one that you only tolerate once a month.
And if you only remember one thing, make it this: gentle does not mean pointless. It means you’re giving your body enough room to respond instead of forcing it to comply.
