



That “shake” you feel in your thighs during a barre class—the one where your legs seem to have a mind of their own and decide to tremor uncontrollably? That is not a sign of failure. In the barre world, that is the gold standard of success. It means you have finally reached the point of muscle fatigue where the small, stabilizing muscles are forced to wake up and do the heavy lifting. If you are new to the discipline, those tremors can be startling. You might think you are doing something wrong. You are not. You are simply changing your body’s chemistry and neuromuscular control.
Barre workouts are unique because they borrow from ballet conditioning, Pilates, and functional strength training. They are not about massive range of motion or throwing heavy weights around the room. It is about precision. It is about the one-inch pulses, the isometric holds, and the mental focus required to keep your hips square while your leg does the work. You do not need a dance background to start. You do not even need a ballet barre; the back of a sturdy chair or a kitchen counter works perfectly well.
What follows is a breakdown of twenty foundational movements that essentially build the DNA of a complete barre practice. We are stripping away the fluff and focusing on the mechanics. Whether you are working out in your living room or stepping into a studio, these movements are the building blocks you will use for the rest of your life.
1. Parallel First Position Plies
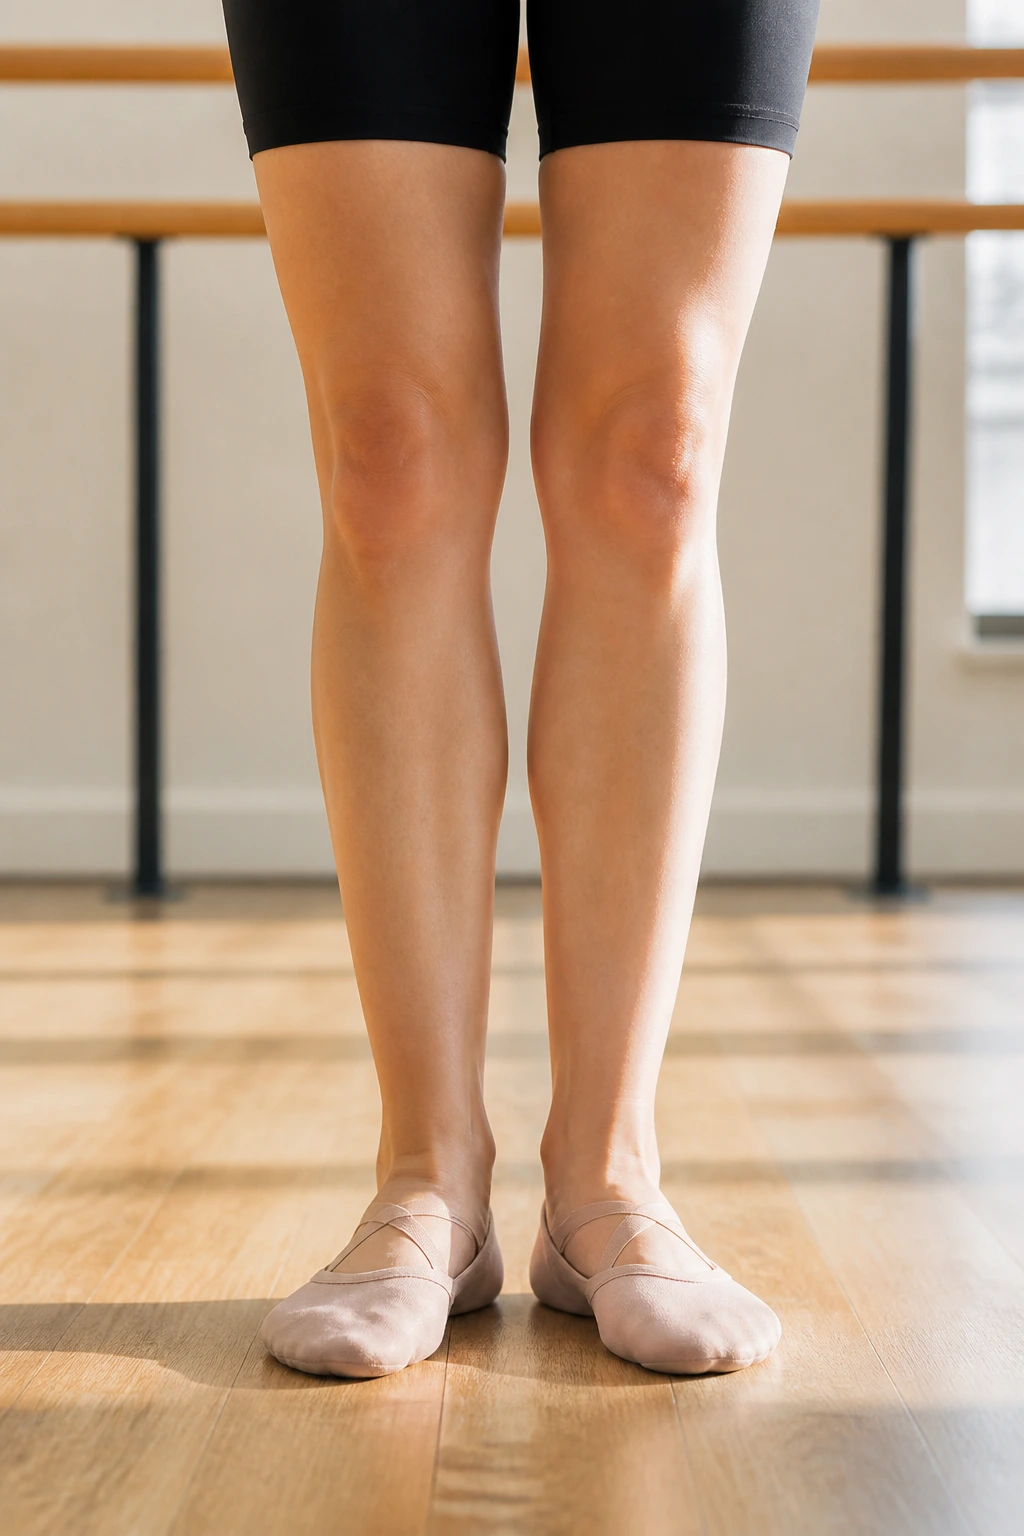
The parallel first position is the bread and butter of barre. It is the most honest position you can stand in because it offers nowhere for your alignment to hide. Start with your feet hip-width apart, toes pointing forward. Your knees must track directly over your second toe. If your knees cave inward, you are putting stress on your joints rather than engaging your quads and glutes.
Why This Position Matters
When your feet are parallel, you engage the quadriceps evenly. There is no rotation of the hip socket here, which makes it safer for beginners who are still learning to identify their pelvic floor muscles. It sets the foundation for your posture throughout the rest of the workout.
How to Master the Movement
- Stand tall with a neutral spine, avoiding the common mistake of arching your lower back.
- Lower your hips as if you are sitting into a chair behind you.
- Keep your weight in your heels, not your toes.
- Pulse at the bottom of the movement—just one inch down, one inch up—to really feel the heat.
Pro tip: Imagine you are sliding your back down a wall. If your chest leans forward, you are cheating yourself out of core engagement.
2. Second Position Grand Plies
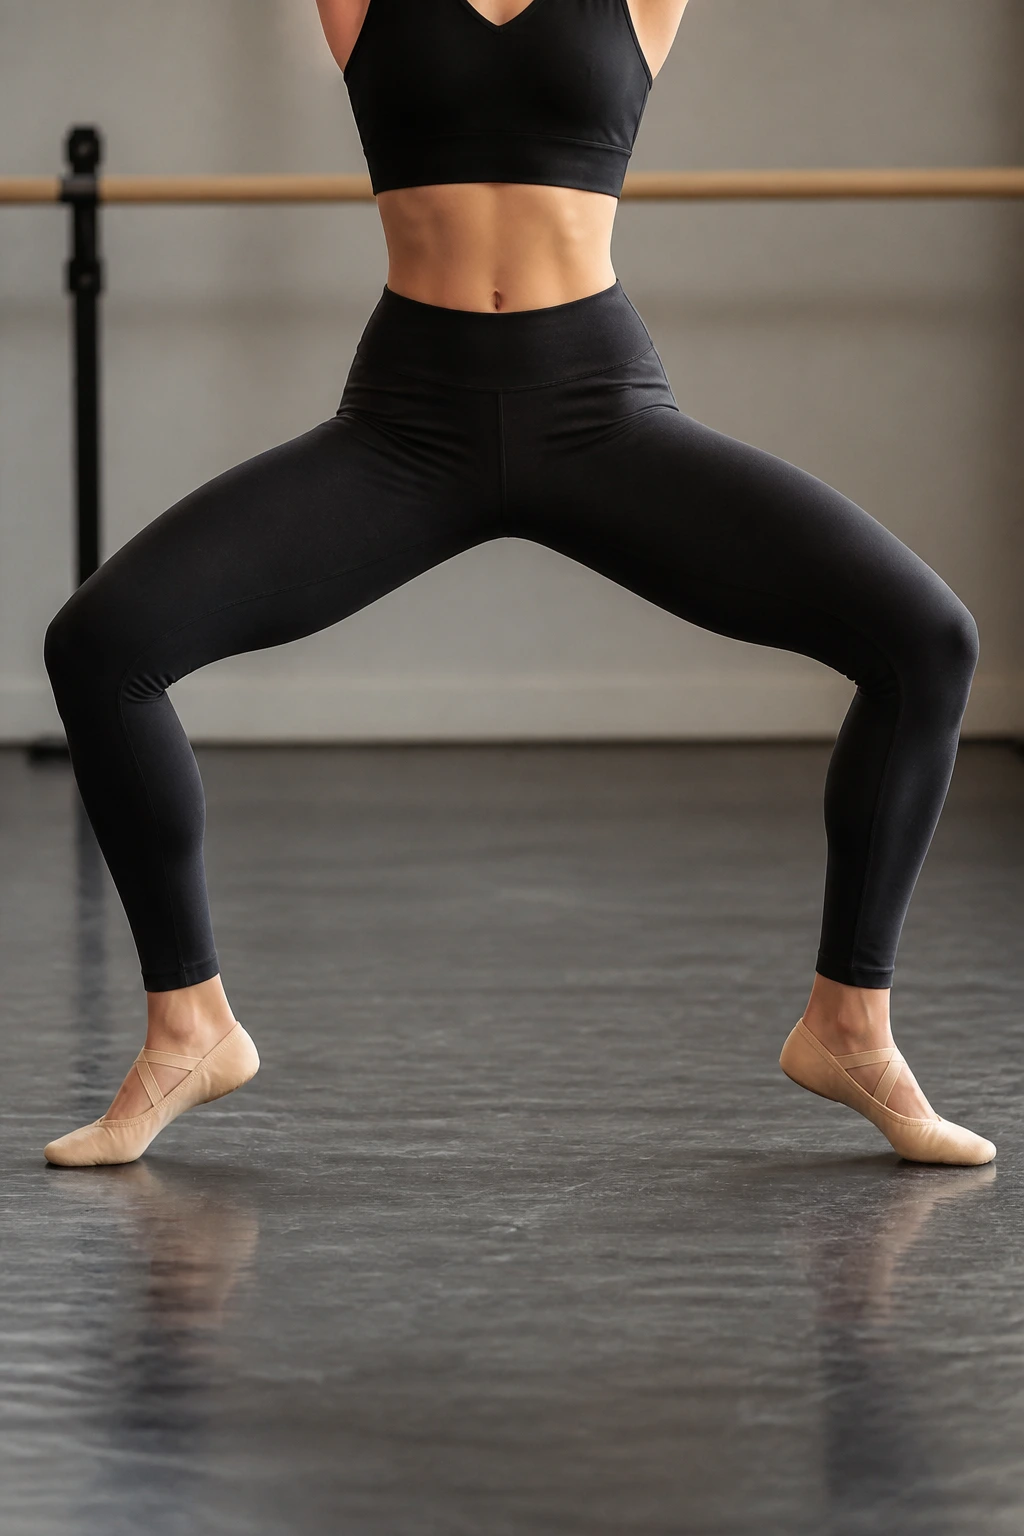
Now we take that foundational squat and widen the stance. Step your feet out wider than your hips and turn your toes slightly outward. This is second position. Unlike the parallel stance, this rotation changes the focus from the front of your legs to the inner thighs. It feels completely different because it demands more stability from your hips.
Many beginners make the mistake of over-widening their stance. If your knees cannot stay over your ankles when you sink down, your legs are too wide. Bring them in slightly. Your goal is a 90-degree angle at the knee joint when you are at the bottom of the movement.
When you sink into this, think about zipping up your inner thighs. It is not just about going down; it is about the active effort of squeezing your legs together as you stand back up. You should feel a distinct activation in your pelvic floor muscles. If you do not feel anything, try thinking about pulling your heels together against the floor without actually moving them. That friction is where the work happens.
3. Relevé Calf Raises
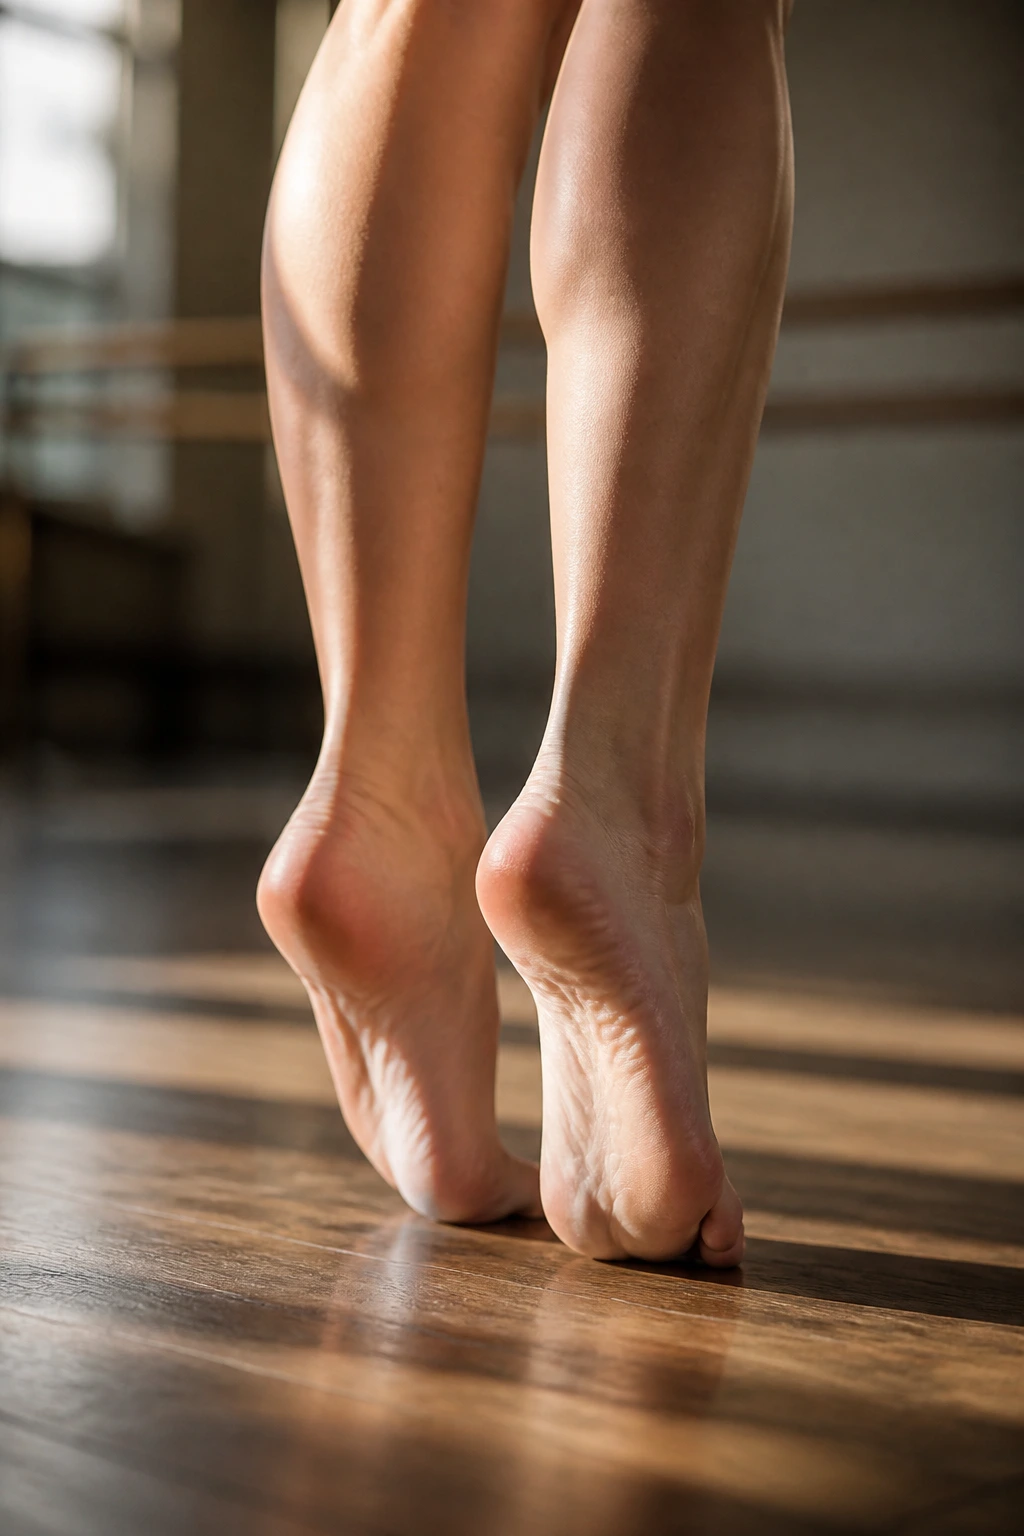
You cannot talk about barre without talking about the relevé. It is the ballet term for rising onto the balls of your feet. This movement targets the gastrocnemius and soleus muscles—the two main muscles that make up your calves. It is essential for ankle stability and balance.
The Mechanics of the Raise
Why do we do this? It forces your core to stabilize in a precarious position. When you lift your heels, your center of gravity shifts. Your abdominal wall has to clamp down to keep you from toppling over. If you find yourself wobbling, look at a focal point on the wall in front of you. Do not look down.
Key Considerations for Beginners
- Lift your heels as high as possible—imagine you are wearing an invisible high heel.
- Keep your knees straight but not locked.
- Lower your heels with control; do not let them crash into the floor.
- Repeat until you feel that characteristic burn in your lower legs.
4. Chair Pose Pulses
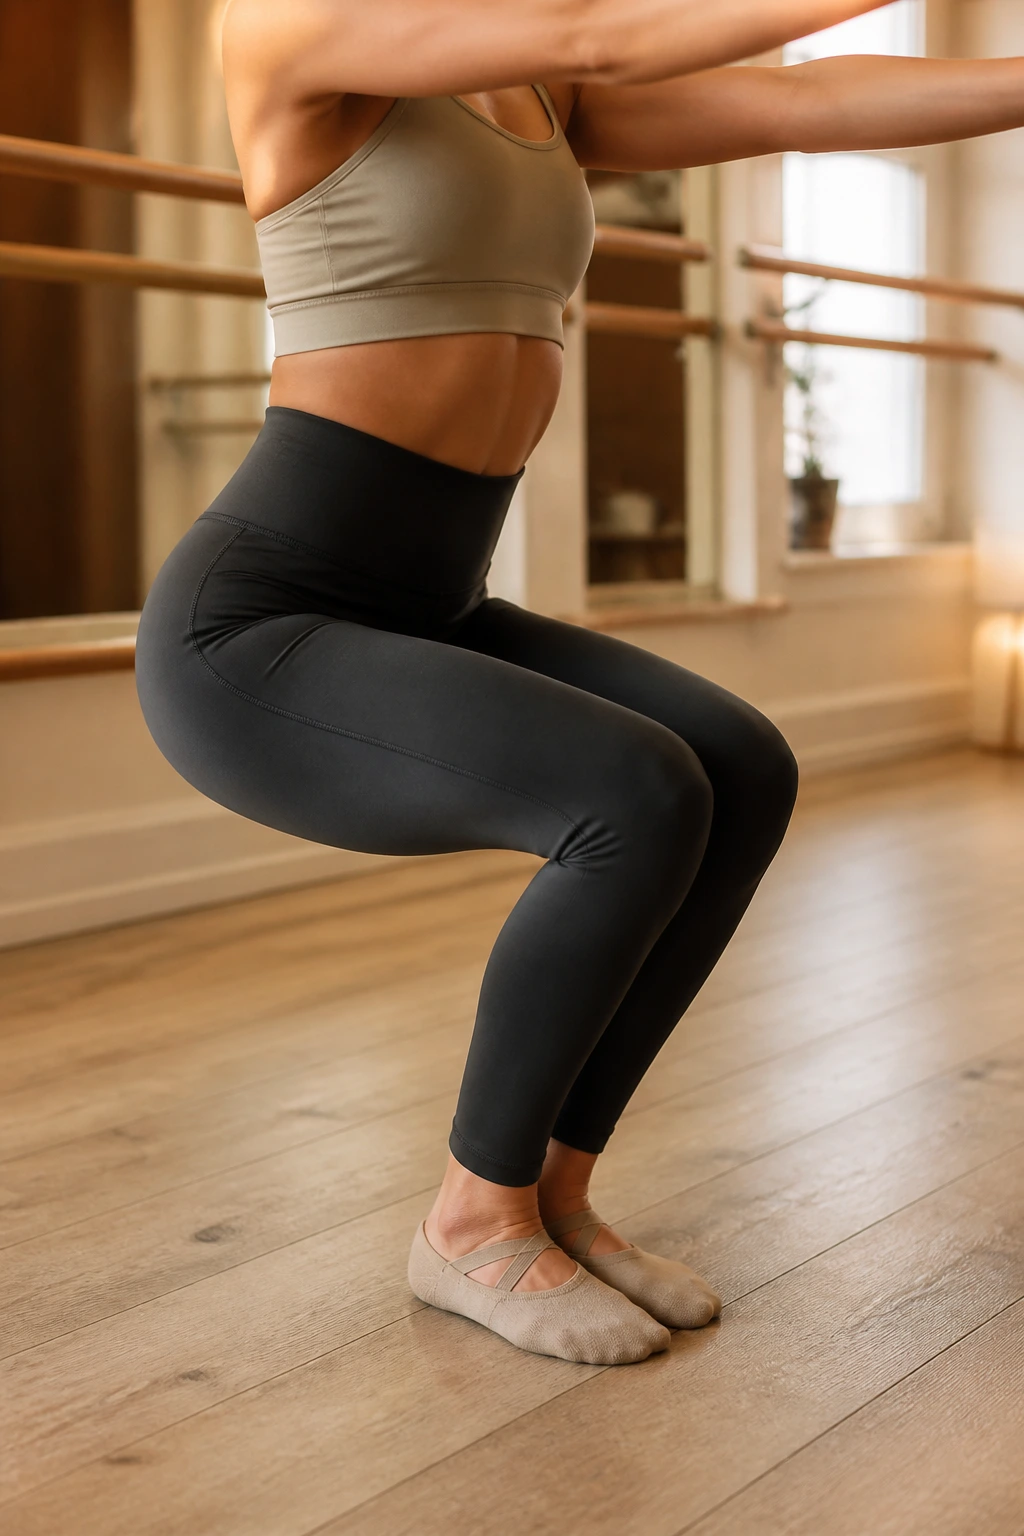
The chair pose is deceptive. It looks like a standard squat, but in barre, we hold the static contraction and add micro-movements. You are essentially turning your body into an isometric machine. You stand with feet parallel, sink your hips back, and keep your torso upright.
I remember my first week of barre, I thought holding a position without moving was “resting.” I was wrong. The static hold is often more demanding than the dynamic movement. When you hold, you are teaching your muscle fibers to sustain tension over time. That is endurance training at its finest.
The pulses are the “kicker.” While holding the low position, keep your chest open. Avoid the temptation to hunch forward. Think about pulling your shoulder blades together. This engages your upper back, which helps you stay upright. If your quads are screaming, that is the point. You are building the stamina required for more complex movements.
5. Barre Plié to Arabesque
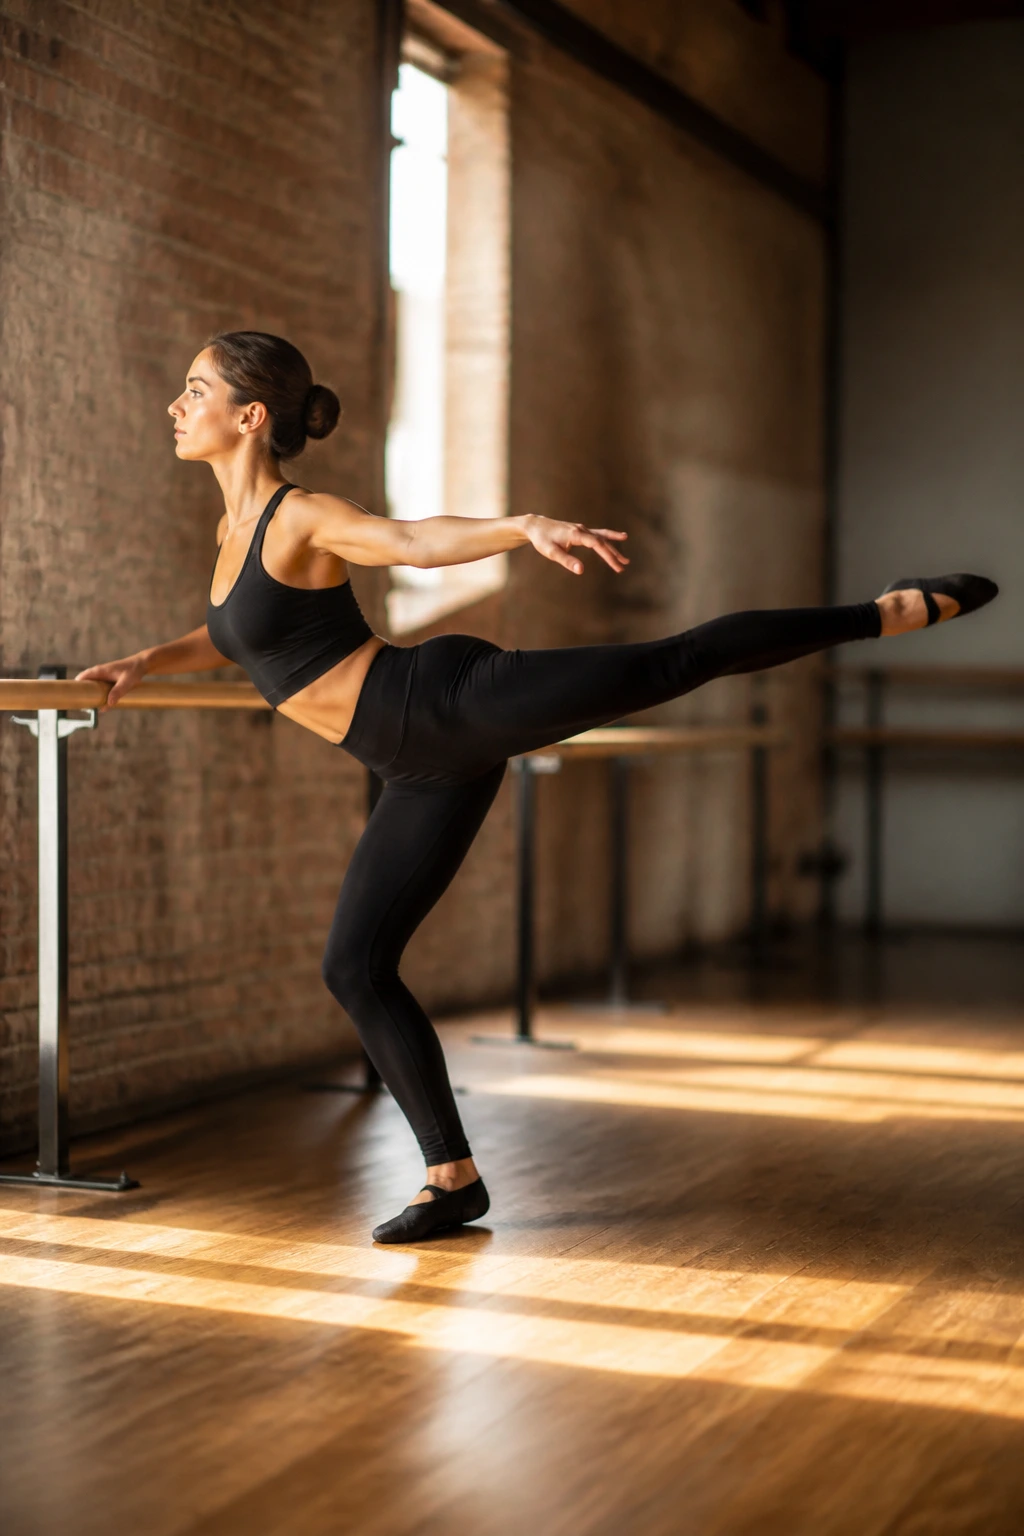
This movement introduces a flow from stability to balance. Start in a standard plie (a squat), and as you stand, sweep one leg back behind you into an arabesque. An arabesque is simply a straight-leg lift to the back. This works the connection between your glutes and your hamstrings.
The transition is where the magic happens. You are moving your weight from two legs to one, which creates an immediate challenge for your core. You have to stabilize your standing leg while actively lifting the other.
Do not worry about how high your leg goes. If you lift your leg too high, you will likely arch your back, which defeats the purpose. Focus on squeezing your glute to lift the leg, not using your lower back muscles. Keep your standing leg slightly bent to protect the knee, and your hips square to the floor. If you feel your hips opening up to the side, you have gone too far. Bring the working hip down.
6. Side-Lying Leg Lifts
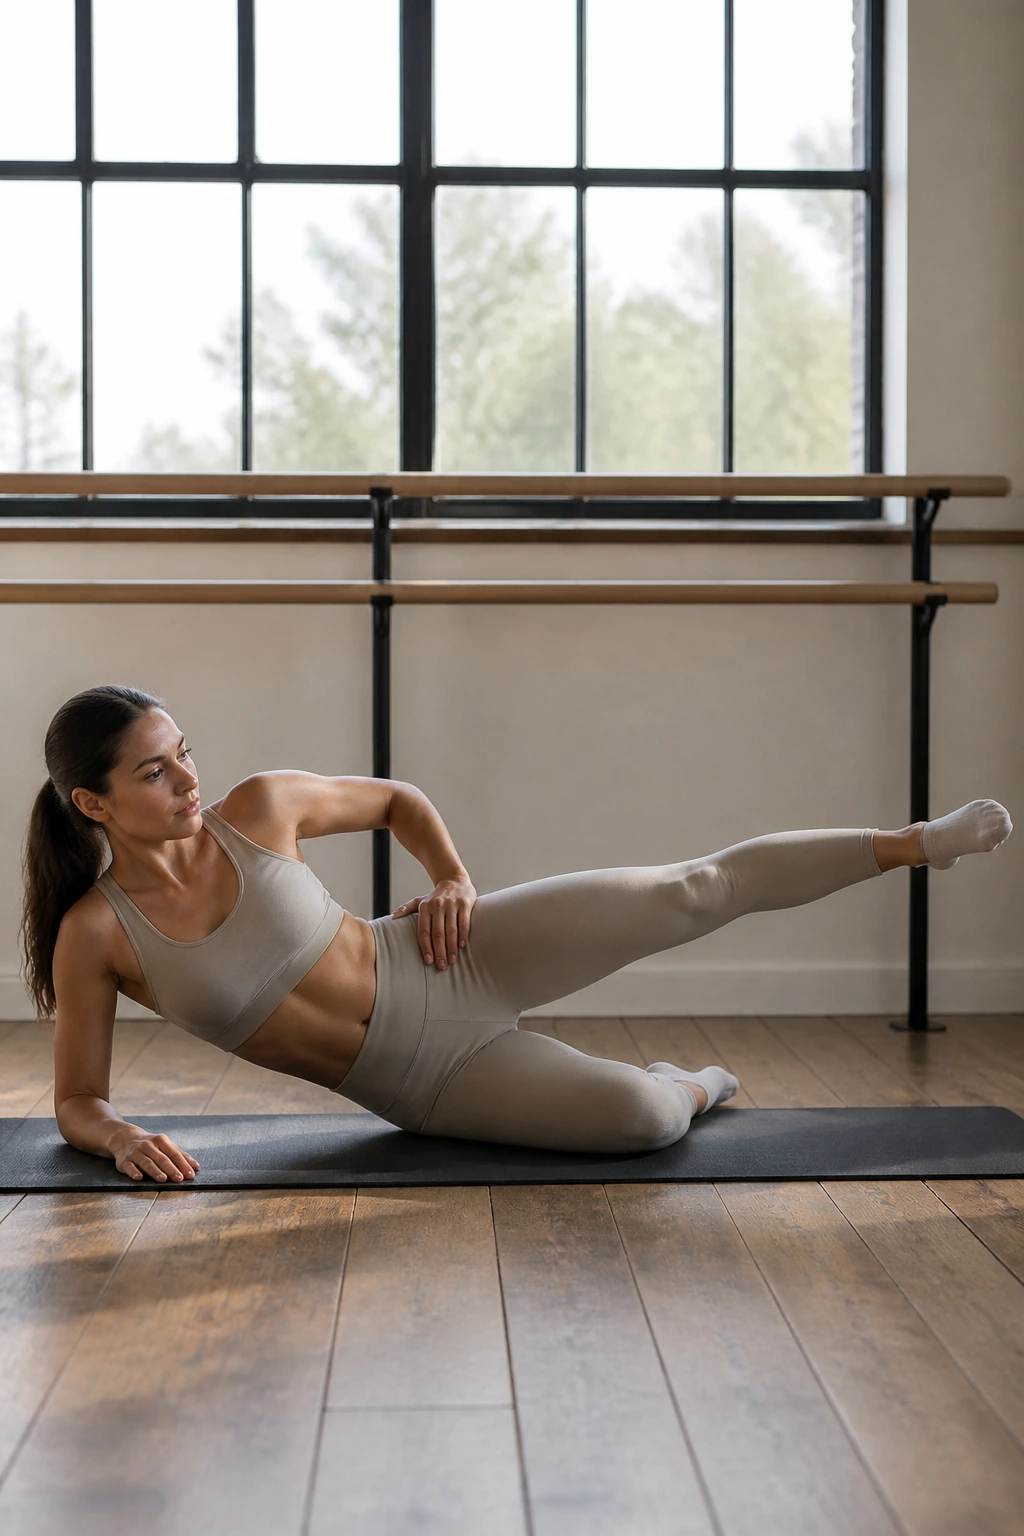
We are moving to the mat. These are arguably the most effective exercises for targeting the gluteus medius—the muscle on the side of your hip that gives your glutes shape and keeps your pelvis stable when you walk.
Lie on your side, propping your head up with your hand. Keep your legs stacked or slightly staggered. The key here is the alignment of your torso. If your hips are rocking backward or forward, you are moving from your spine, not your hip.
Make sure your bottom leg is bent for stability, but keep your top leg completely straight. Flex your foot toward your face. Lift the leg only to hip height, then lower with control. It is tempting to swing the leg up and down using momentum, but momentum is the enemy of muscle definition. If you move slowly, you will feel the burn much sooner.
7. Standing Glute Kickbacks
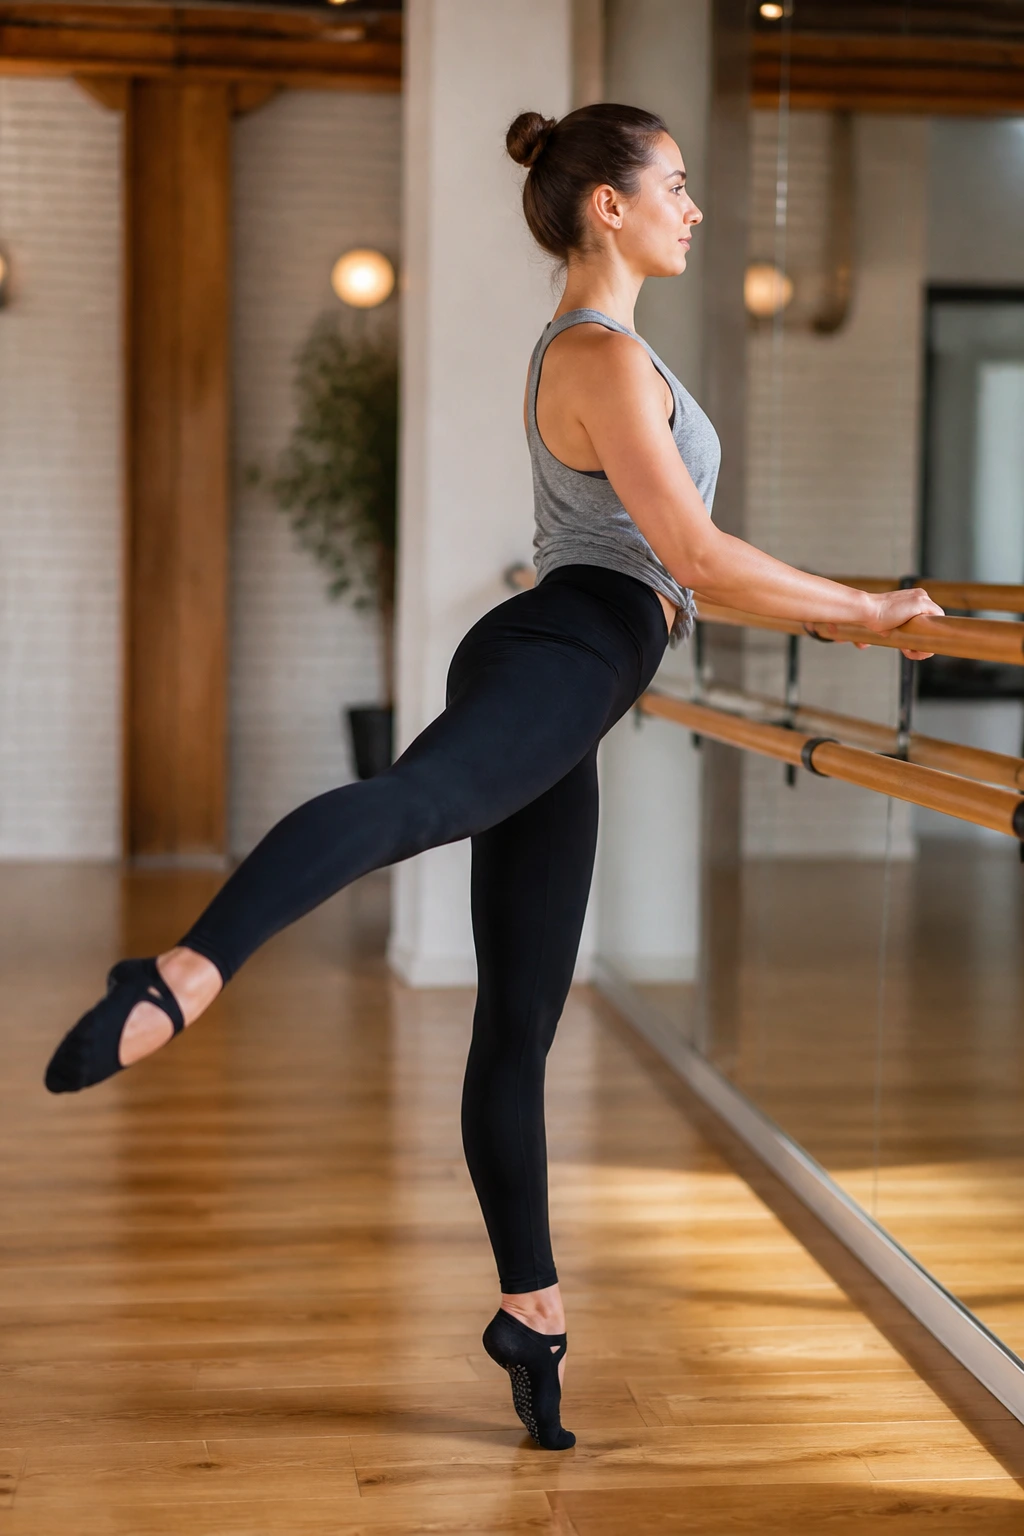
Back to the barre (or the counter). Face your support and lean your torso forward slightly. Keep your hands on the support, but do not dump your weight into them. Your weight should remain in your standing leg.
Extend one leg behind you, tapping your toe to the floor. Now, lift that leg, squeezing the glute, and lower it back down. This is the glute kickback.
Why It Works
It isolates the gluteal muscles without involving the quadriceps. Because your torso is leaning forward, your glute is working against gravity in a specific range of motion that standard squats often miss.
What to Watch For
- Arching: Your back should remain completely still. If you feel it in your lumbar spine, you are lifting your leg too high.
- Rotation: Keep your hip bone pointing directly at the floor. Do not let the hip open up toward the ceiling.
8. Barre Push-Ups (Wall-Based)
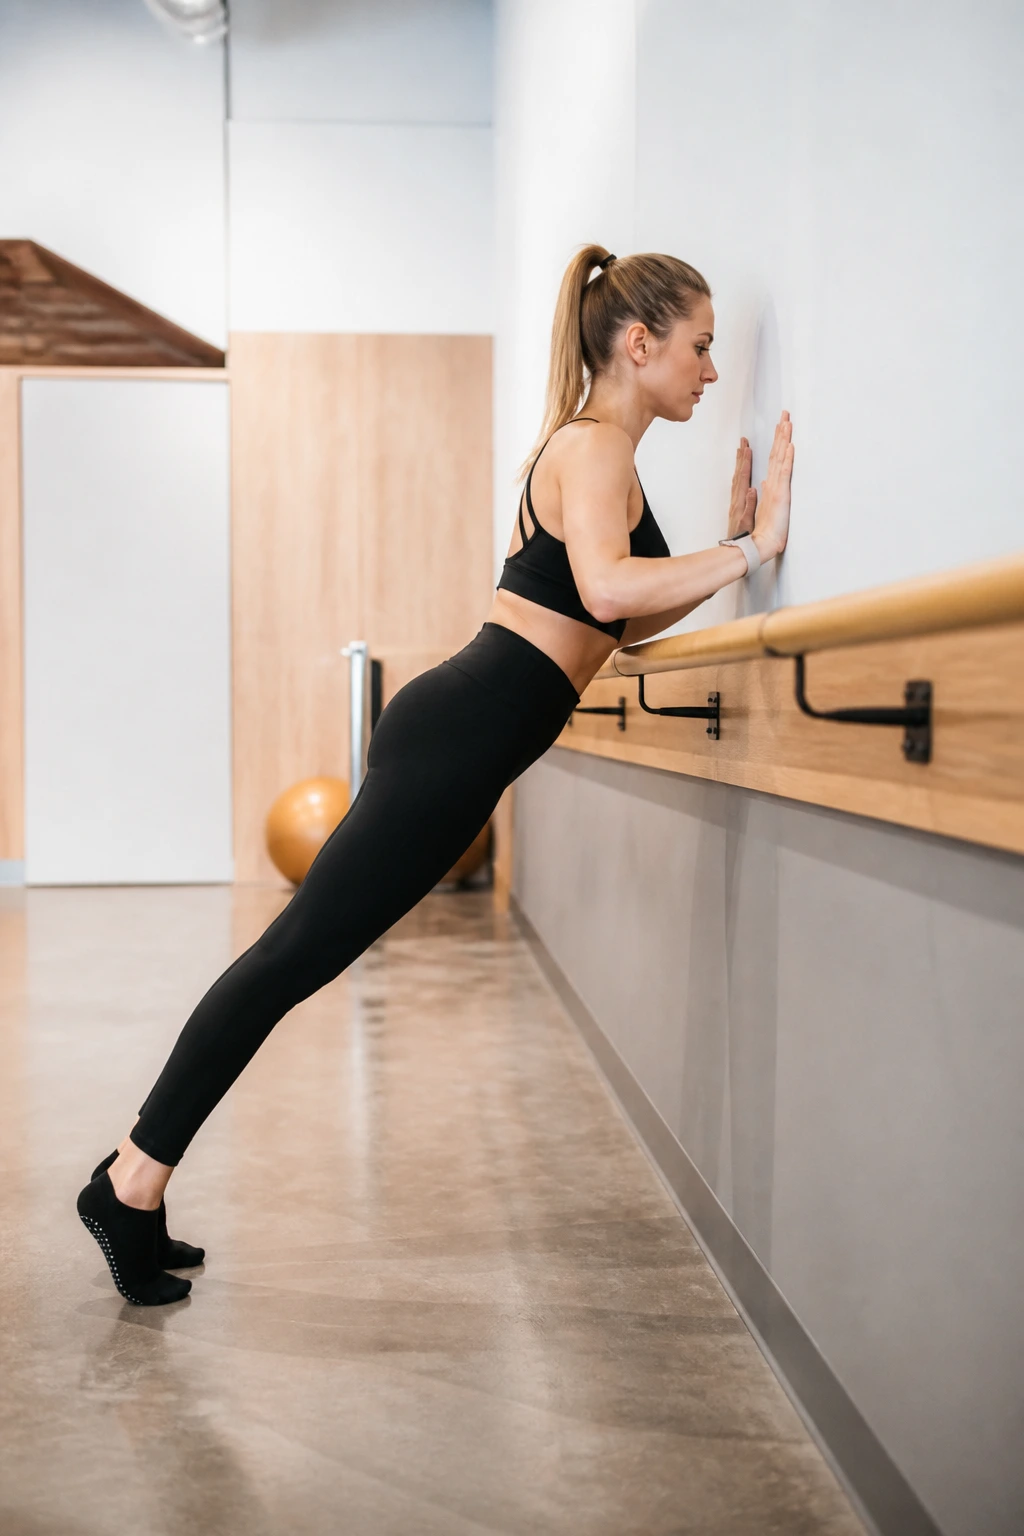
Yes, barre involves arm work. Often, we use very light weights or just body weight, but the push-up is a staple. Because many beginners are intimidated by floor push-ups, we use the barre or a sturdy surface to modify the angle.
Stand about two feet away from the surface, hands placed on it slightly wider than shoulder-width. Lower your chest toward the surface, keeping your elbows tucked at a 45-degree angle from your body—not flared out like a chicken wing.
Push away with power. You are not just working your chest; you are working your triceps and your entire core. If your belly sags toward the surface, you are not engaging your abs. Keep your body in a straight line from heels to head. It is a full-body plank that moves.
9. Tricep Dips on the Barre
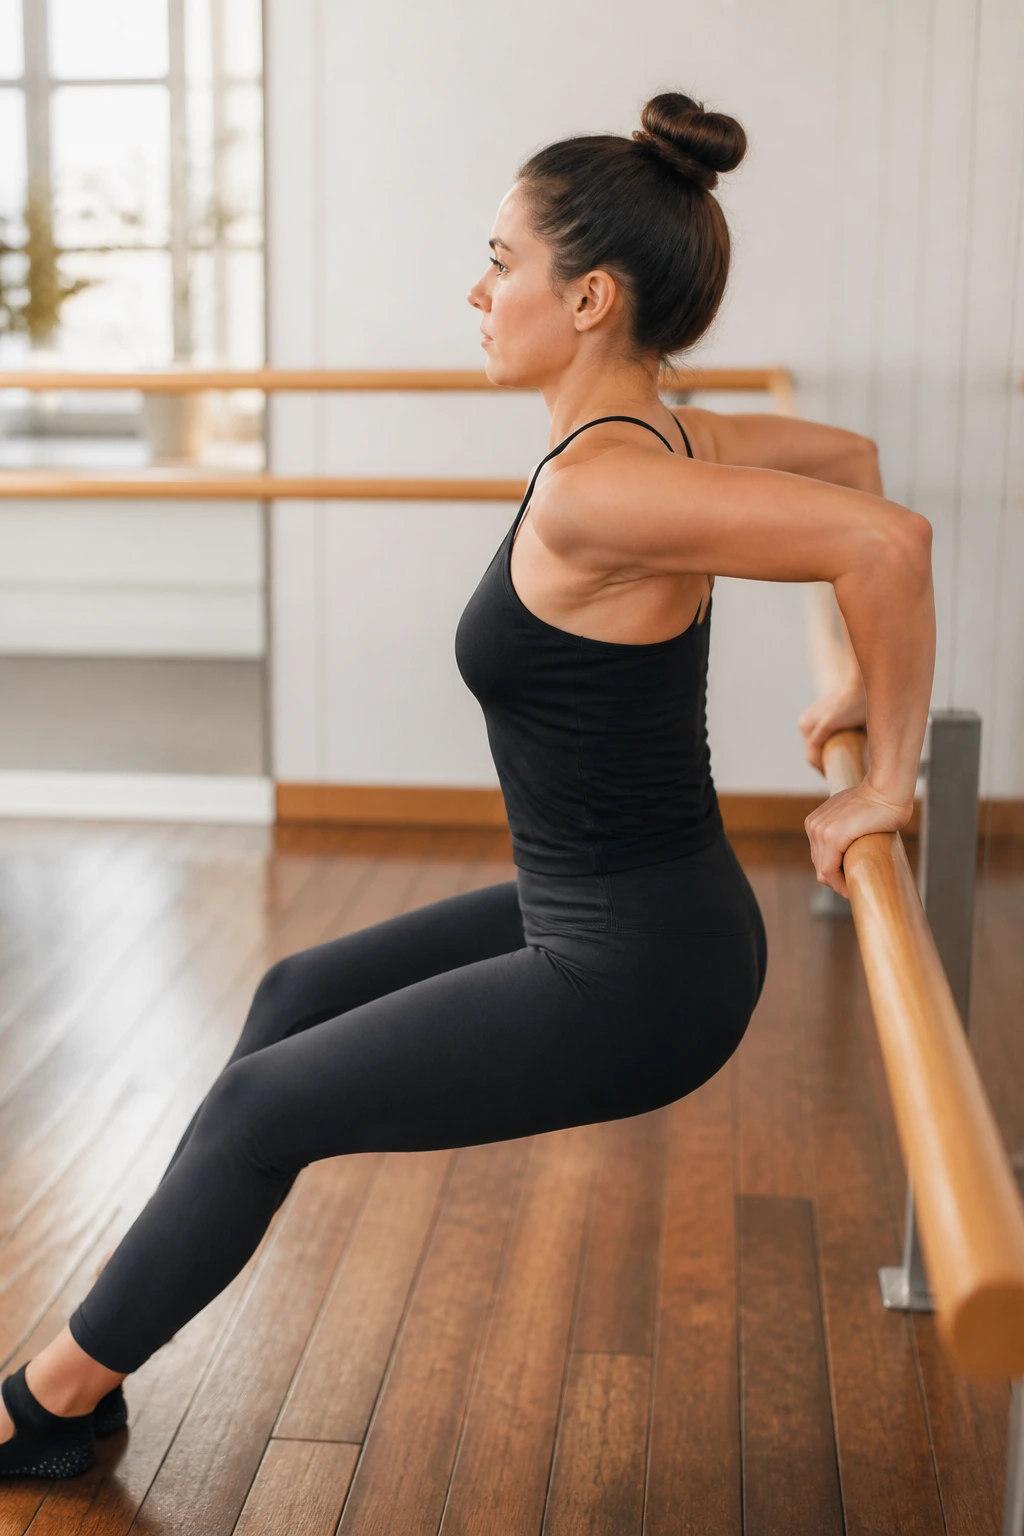
The tricep is a stubborn muscle group. It is the back of the arm, and it is notoriously hard to tone without specific isolation. Tricep dips are the classic solution. Using your chair or barre, place your hands behind you with your fingers facing forward. Walk your feet out until your knees are bent and your hips are hovering just in front of the chair.
Lower your hips toward the floor by bending your elbows. Then, push back up using only your triceps. If you use your legs to help, you are losing the benefit.
A major mistake is letting the shoulders roll forward. Keep your chest proud and open. If you feel pain in your shoulders, do not go so deep. It is better to do a smaller range of motion with perfect form than a deep dip with compromised posture.
10. Standing Knee Tucks
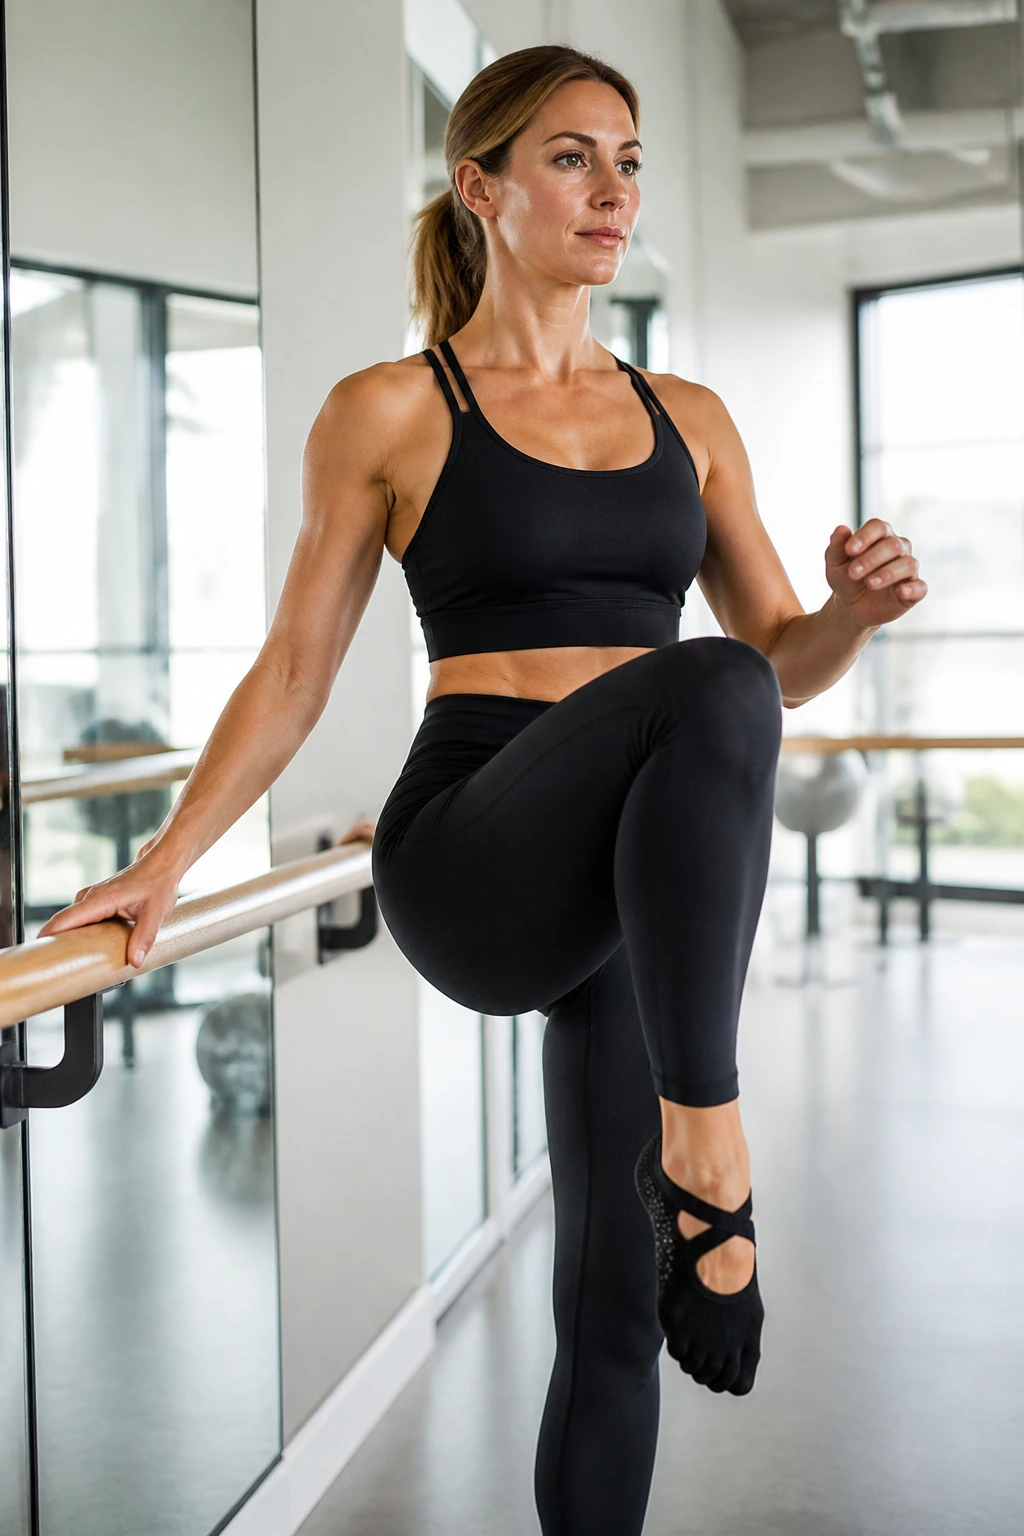
This is a standing core exercise that challenges your balance. Stand sideways to the barre with one hand on the support. Lift your outside knee toward your chest while pulling your core in tightly.
You are creating a crunch while standing. This forces your standing leg to stabilize you while your abs contract to lift your leg. It is a multi-tasking move.
Try to bring your knee as high as possible, but do not hunch your shoulders to get it there. Keep your posture long. Imagine there is a string pulling the crown of your head toward the ceiling. As you tuck the knee, exhale forcefully. That breath helps engage the transverse abdominis, the deepest layer of your abdominal muscles.
11. Plank to Pike
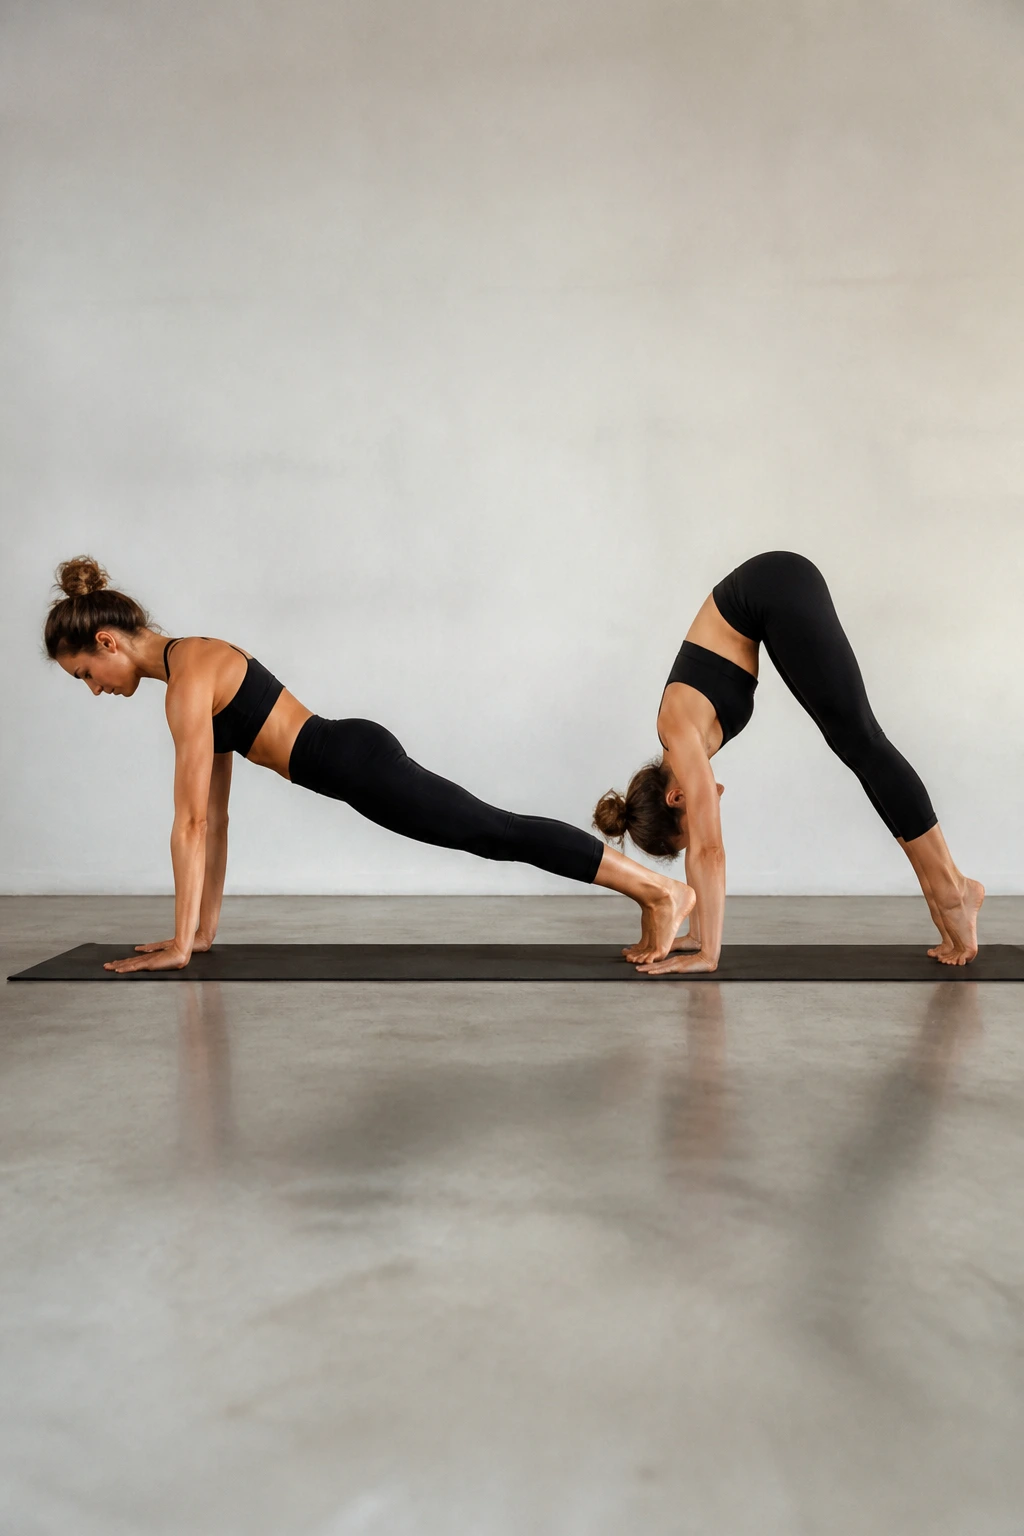
We are transitioning to the floor again. Start in a high plank position, hands under shoulders, body in a line. This is a classic, but we add a twist: the pike.
From your plank, lift your hips toward the ceiling, creating an inverted “V” shape with your body. Then, slowly lower back down into the plank.
This move requires immense control. Most people rush the transition. Do not. Use your core to pull your hips up, and use your core to stop your hips from sagging when you return to the plank. If you feel this in your lower back, your core is not engaged enough. Tighten your glutes to protect your spine.
12. Forward Fold Stretch
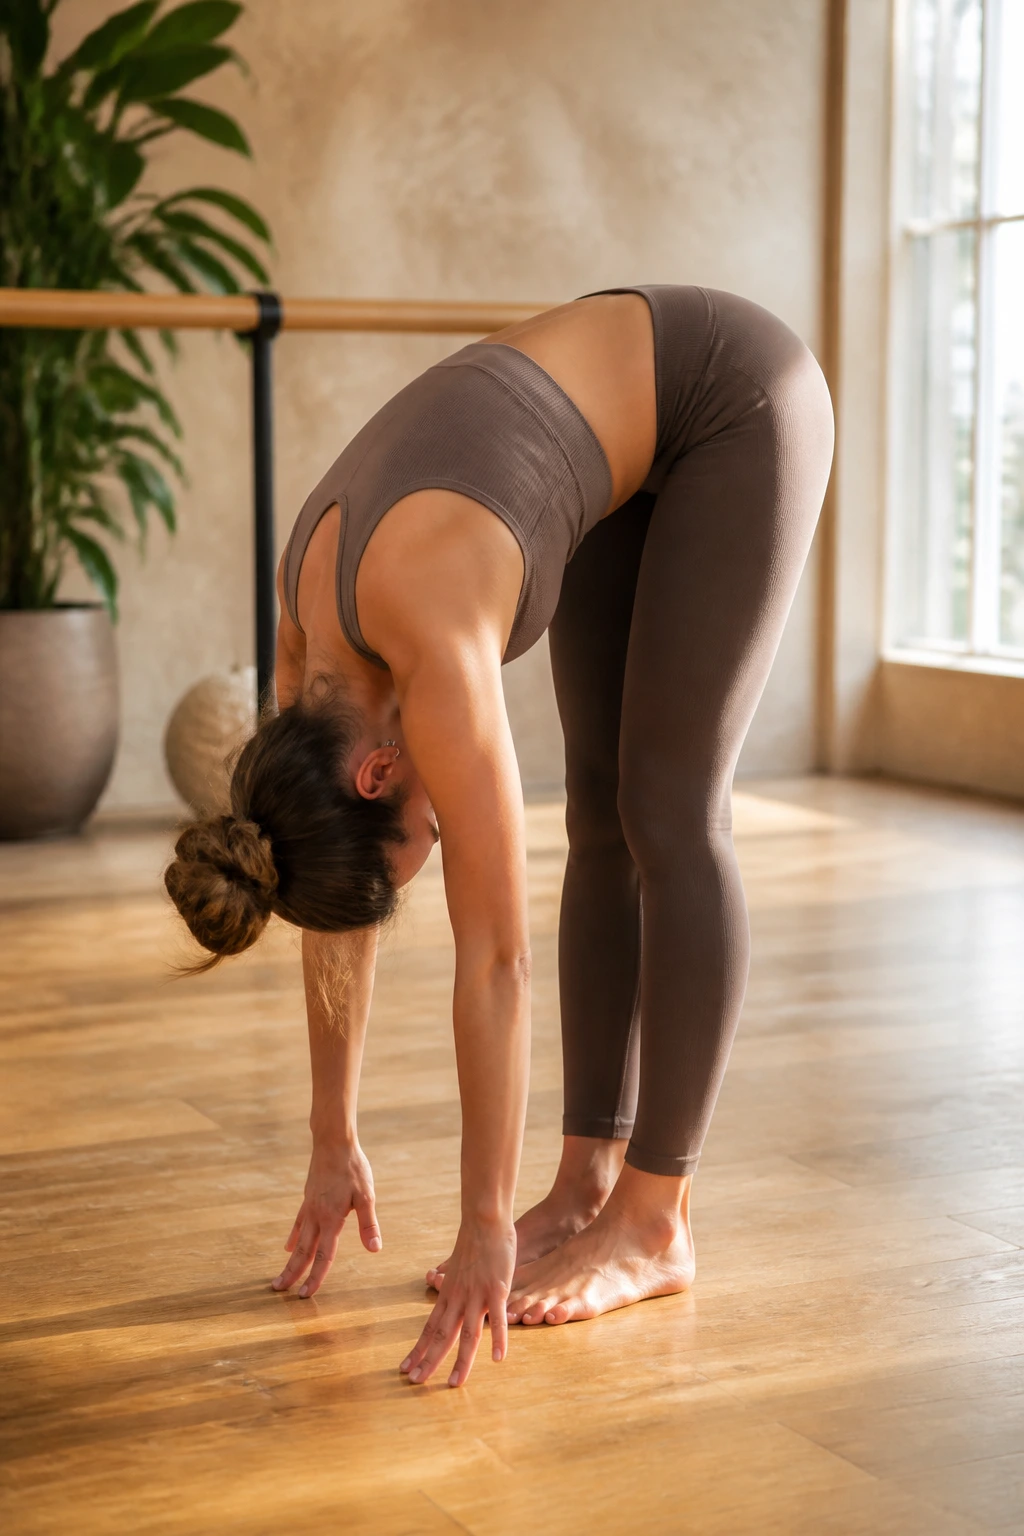
You cannot spend the entire workout contracting muscles. You need to stretch them out. The forward fold is the ultimate release. Stand with feet hip-width apart and hinge at your hips, letting your upper body hang over your legs.
Why This Is Essential
Your hamstrings and calves carry a lot of tension from the previous exercises. If you do not stretch, you risk tightness that can lead to injury. This is not just about flexibility; it is about muscle recovery.
The Technique
- Keep a slight bend in your knees. Never lock them.
- Let your head hang heavy.
- Use your breath to sink deeper on each exhale.
- If you cannot touch the floor, grab opposite elbows and let gravity do the work.
13. Tabletop Leg Extensions
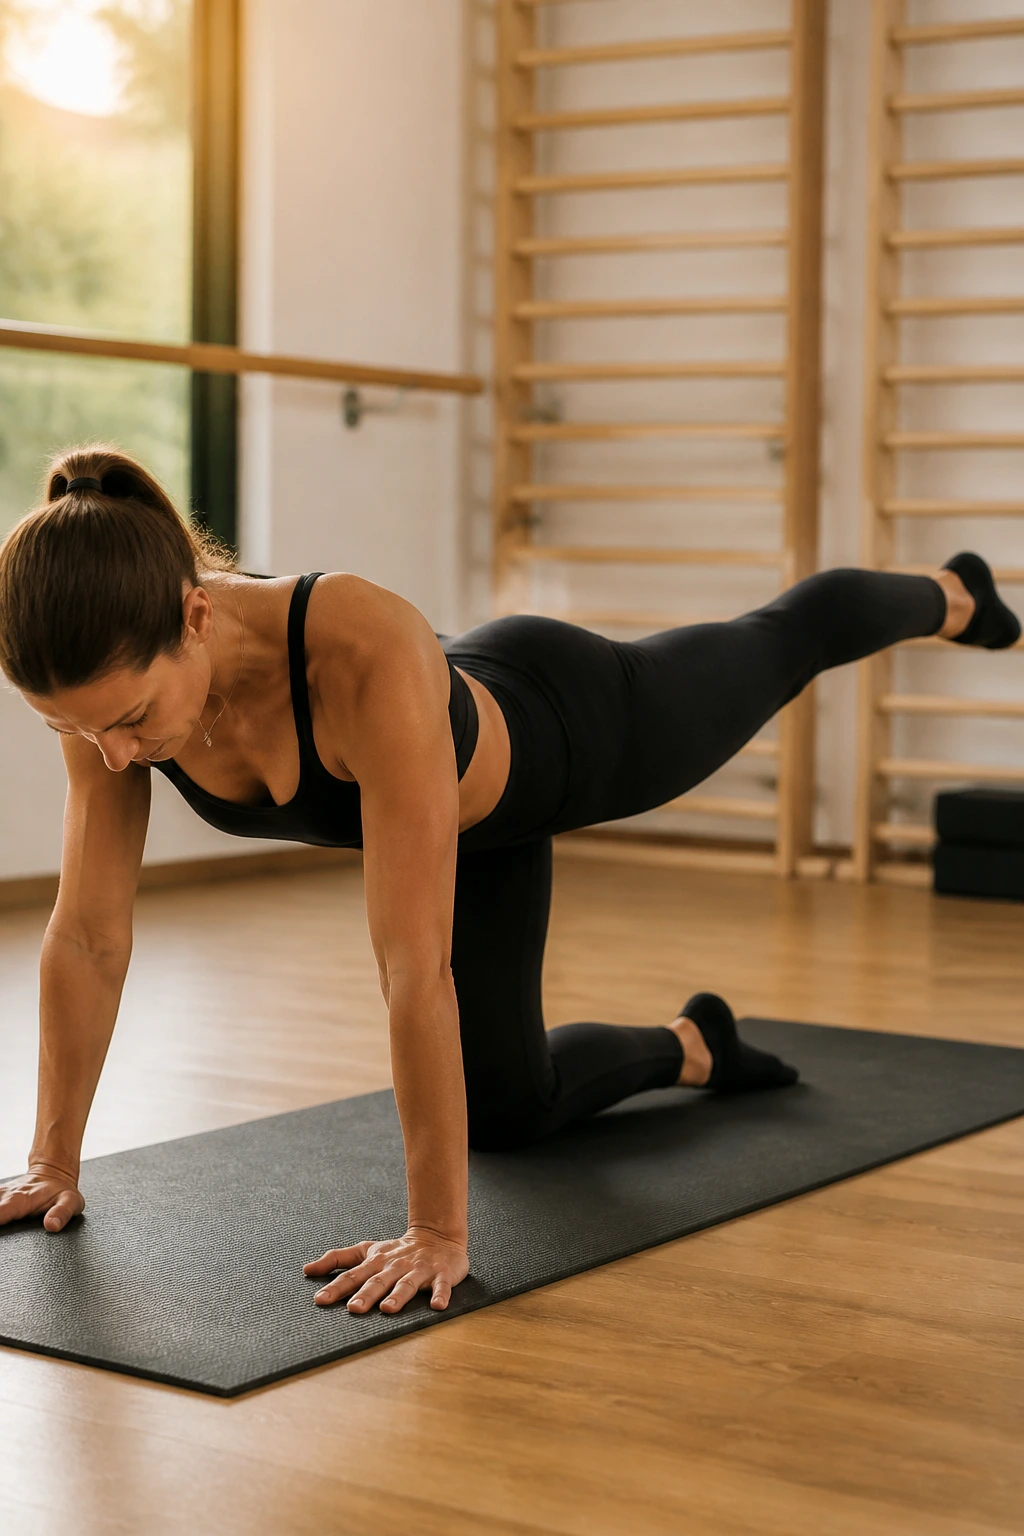
Get onto all fours—hands under shoulders, knees under hips. This is your tabletop position. Extend one leg straight back behind you, lifting it until it is parallel to the floor.
This is a fantastic move for posterior chain strength. You are hitting the glutes and the hamstrings again, but from a different angle. Because your torso is supported by all four limbs, you can focus entirely on the leg movement without worrying about balance.
Ensure your back stays flat. Do not let your belly button drop toward the floor. Visualize a glass of water resting on your lower back. If you move too quickly or arch too much, that glass spills. Slow, controlled movements are the only way to get the most out of this.
14. Standing Thigh Squeezes with Ball/Prop
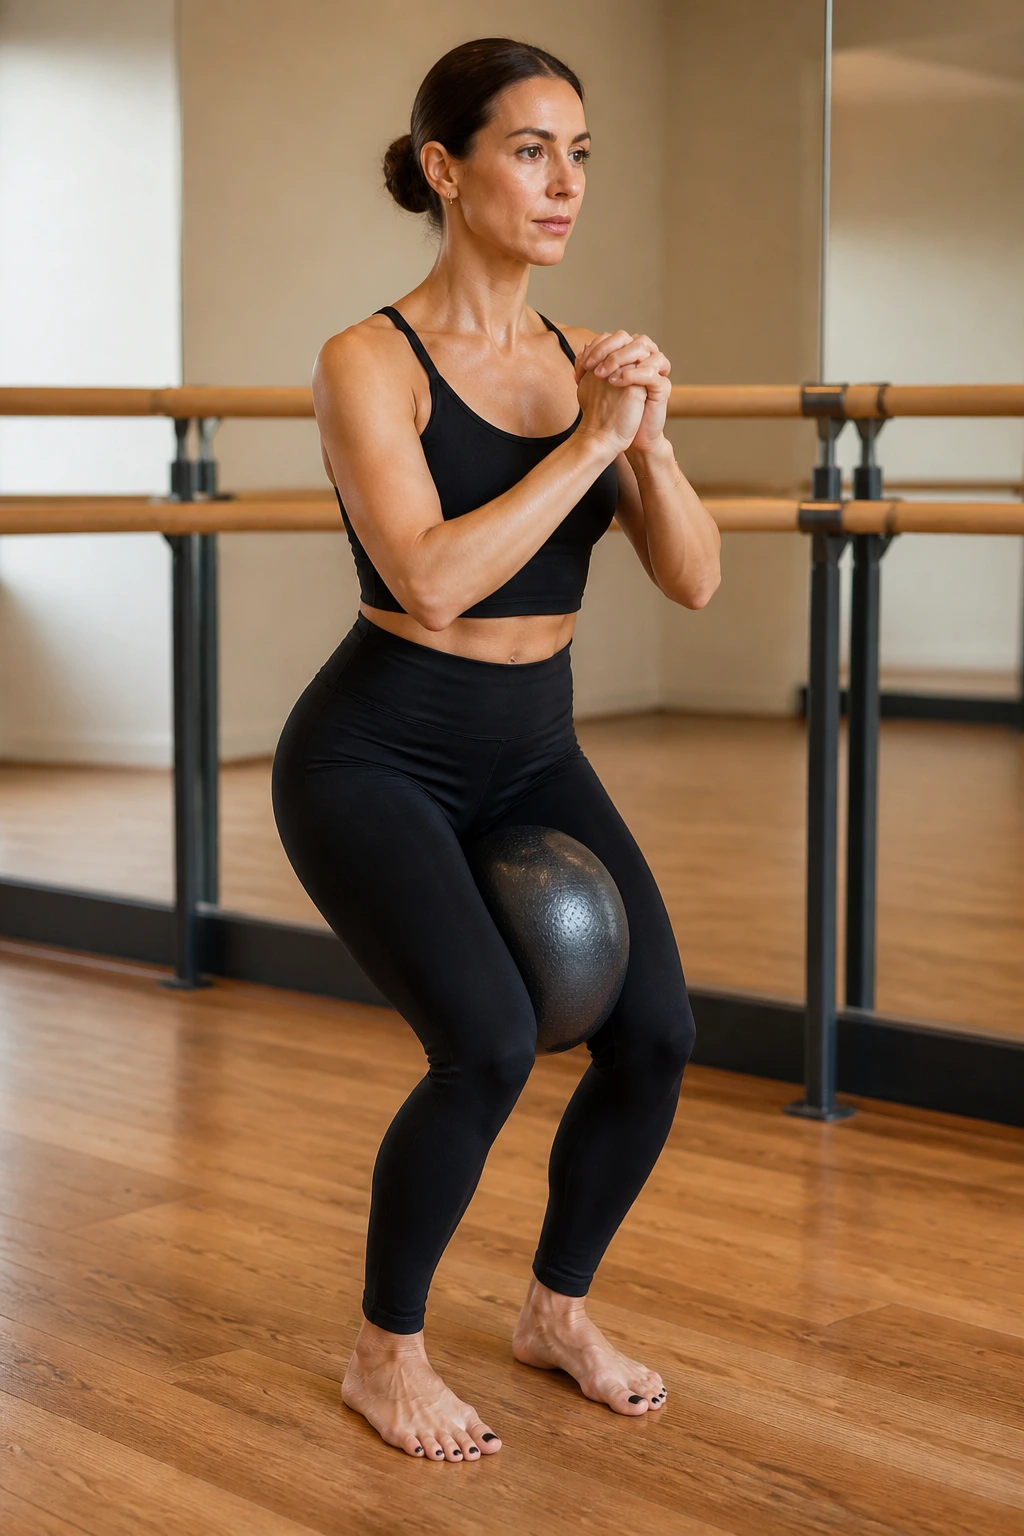
You might have seen people squeezing a small rubber ball between their thighs in barre classes. If you do not have a ball, a rolled-up towel or a yoga block works perfectly.
Place the prop between your thighs, just above your knees. Come into a narrow squat and squeeze the prop with everything you have. Then, pulse.
Why It Works
It forces the adductor muscles (inner thighs) to activate in a way that is hard to achieve with squats alone.
The Strategy
- The squeeze must be constant. Do not let the object drop.
- Focus on the inward pressure.
- Combine this with a slight tuck of the pelvis to engage the low abs.
- It is a small movement, but it creates deep fatigue very quickly.
15. Clamshells on the Mat
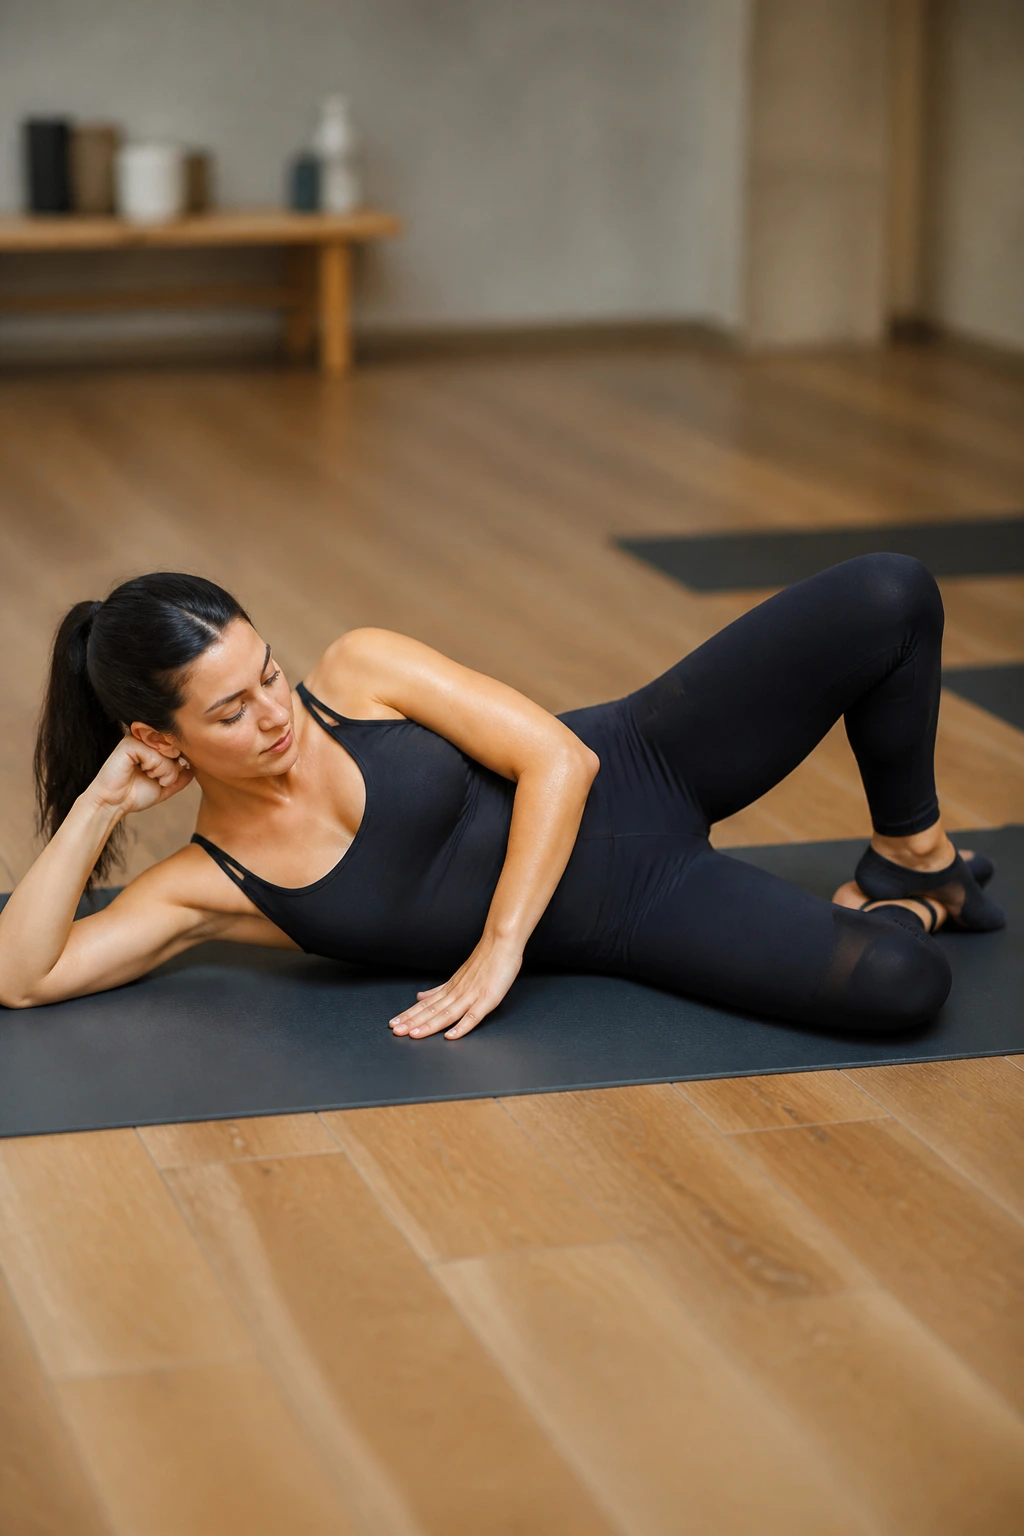
This move looks simple, almost lazy, but it is a powerhouse for the hips. Lie on your side, knees bent at 45 degrees, feet stacked. Keep your feet touching, and open your top knee like a book, while keeping your hips stacked.
Your pelvis should not move. If your top hip rolls backward, you are cheating. Place your hand on your top hip to ensure it stays pointing forward.
This targets the gluteus medius, just like the leg lifts, but with a different focus. It is rotational work for the hip. It strengthens the area that supports your lower back, making it a critical movement for anyone who spends long hours sitting at a desk.
16. Wide Second Squat Pulses
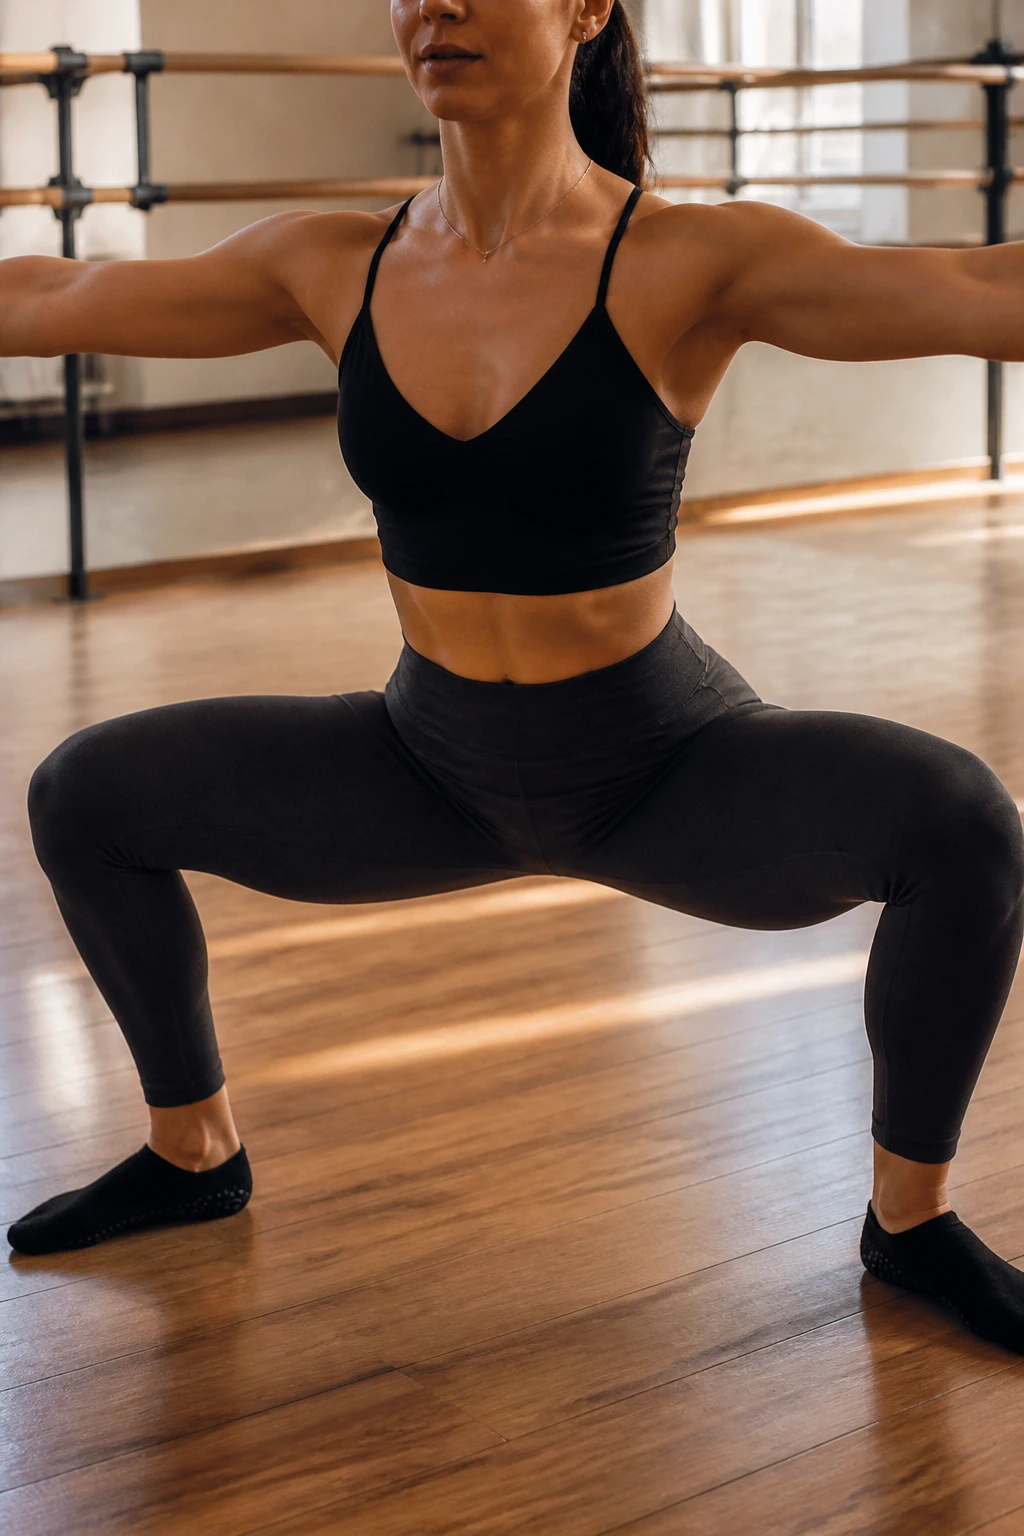
Remember the second position we talked about earlier? Now, we add the pulse. Sink into that wide squat, check your knees, and just bounce gently.
The range of motion should be tiny—no more than an inch. The goal is to keep the muscles under constant tension. Do not stand all the way up between pulses. Stay down in the “danger zone” where the work is happening.
If your knees start to shake, good. If your thighs start to burn, excellent. Hold your arms out to the sides for balance or up overhead for a core challenge. Keep your torso upright—a common tendency is to lean forward, which takes the weight off the glutes. Stay vertical.
17. Parallel Lunge Series
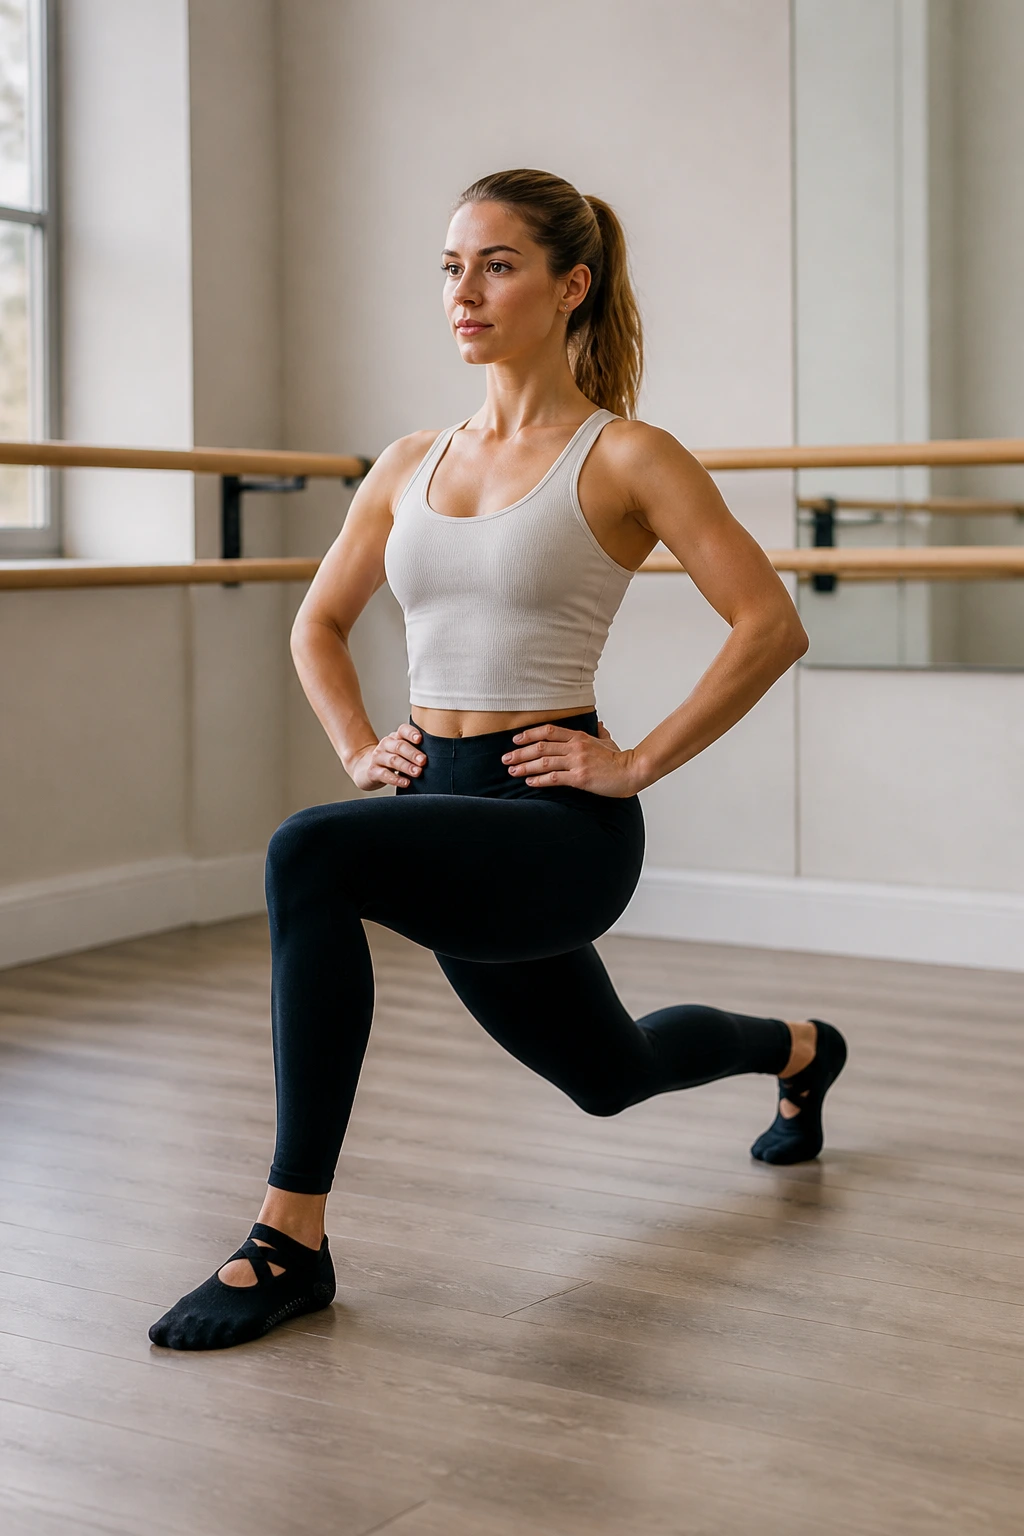
Lunges are the quintessential leg builder. Step one foot back into a lunge position, keeping both knees at 90-degree angles. Your front knee must stay over your ankle.
The danger in lunges is the wobble. To fix this, engage your core before you start moving. Think of your legs as a tripod, with your core locking everything into place.
Once in the lunge, pulse down and up. Then, try a hold. Static holds in a lunge are devastatingly effective. If you find your balance is off, place one hand on a wall or chair for support. There is no shame in using support to maintain proper form. Form is everything.
18. Core C-Curve Contractions
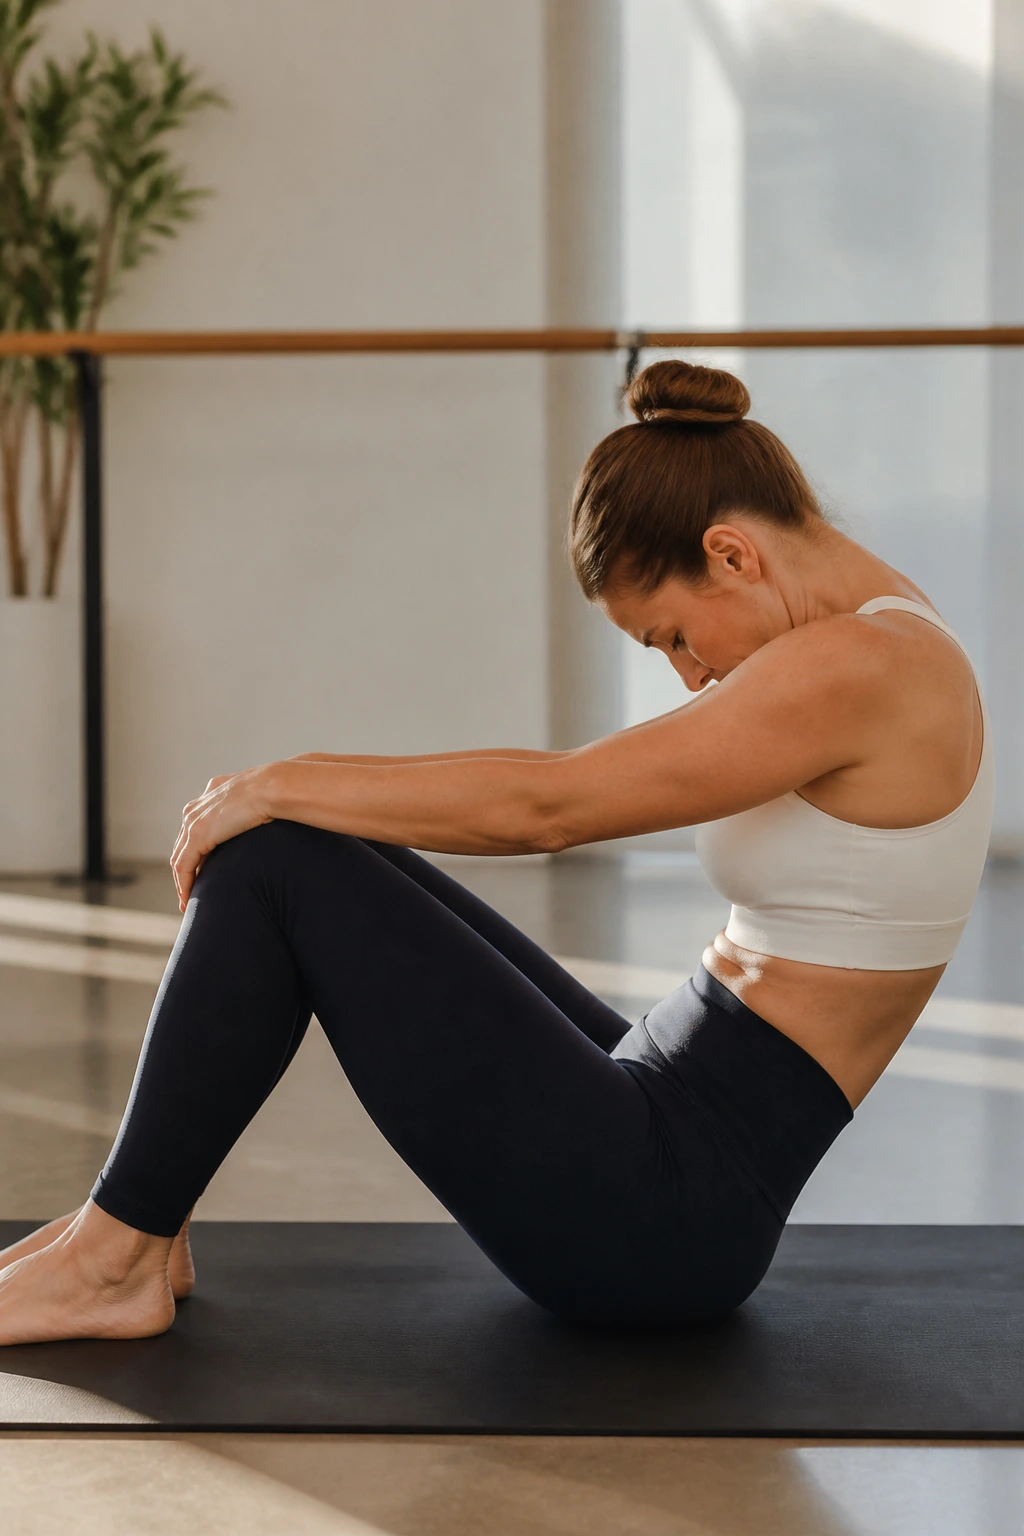
The “C-curve” is the signature barre ab move. Sit on the floor with knees bent, feet flat. Round your lower back into a “C” shape, tucking your pelvis under.
Lean back slightly until you feel your abs engage. Now, scoop your belly button toward your spine and hold. You can add small pulses here, drawing your belly in deeper with each pulse.
This is not a sit-up. It is a static contraction of the rectus abdominis. It teaches you to control your pelvic tilt—a key skill in dance and Pilates. It is hard, and it might feel like your abs are shaking, but this is the fastest way to build that “cinched” feeling in your core.
19. Standing Leg Lifts (Front/Side/Back)
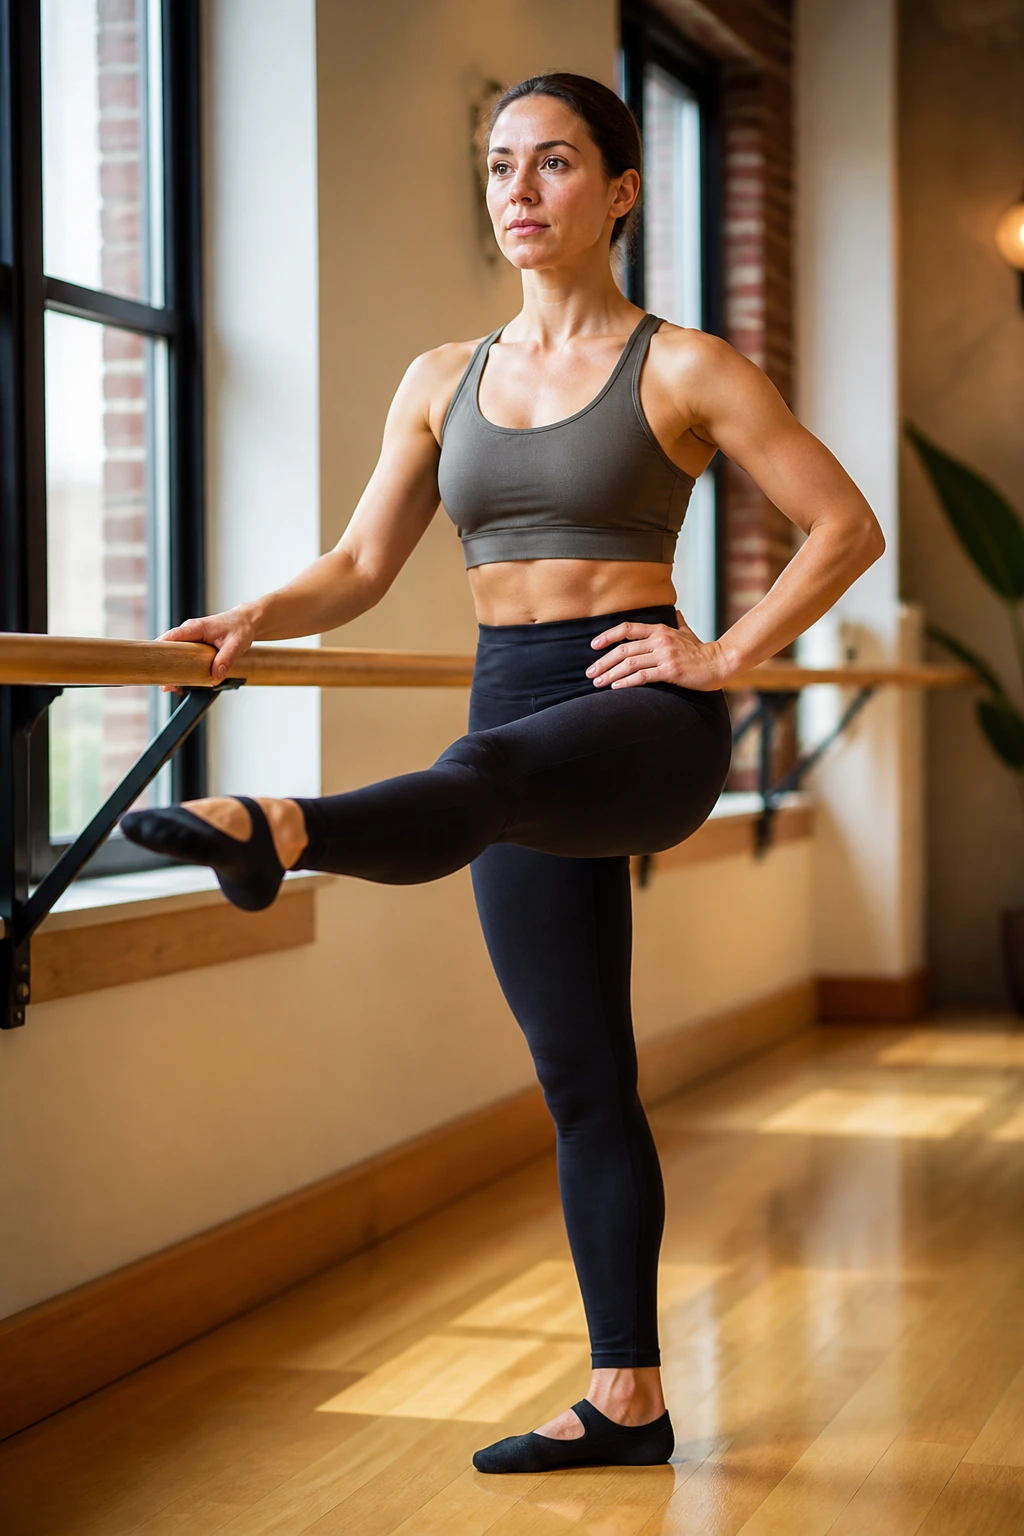
This is a classic “barre burner.” Stand at the barre. Lift your leg to the front, then to the side, then to the back. Do this slowly. This works the hip flexors, the outer glutes, and the hamstrings in one sequence.
The challenge here is the standing leg. It has to support you through all three planes of motion. Keep it slightly bent and strong. Imagine you are pushing the floor away with your standing foot.
Maintain your posture. Every time you switch directions, your hips will want to shift. Fight that. Keep your torso like a statue, only the working leg moves.
20. Final Cool Down Stretches
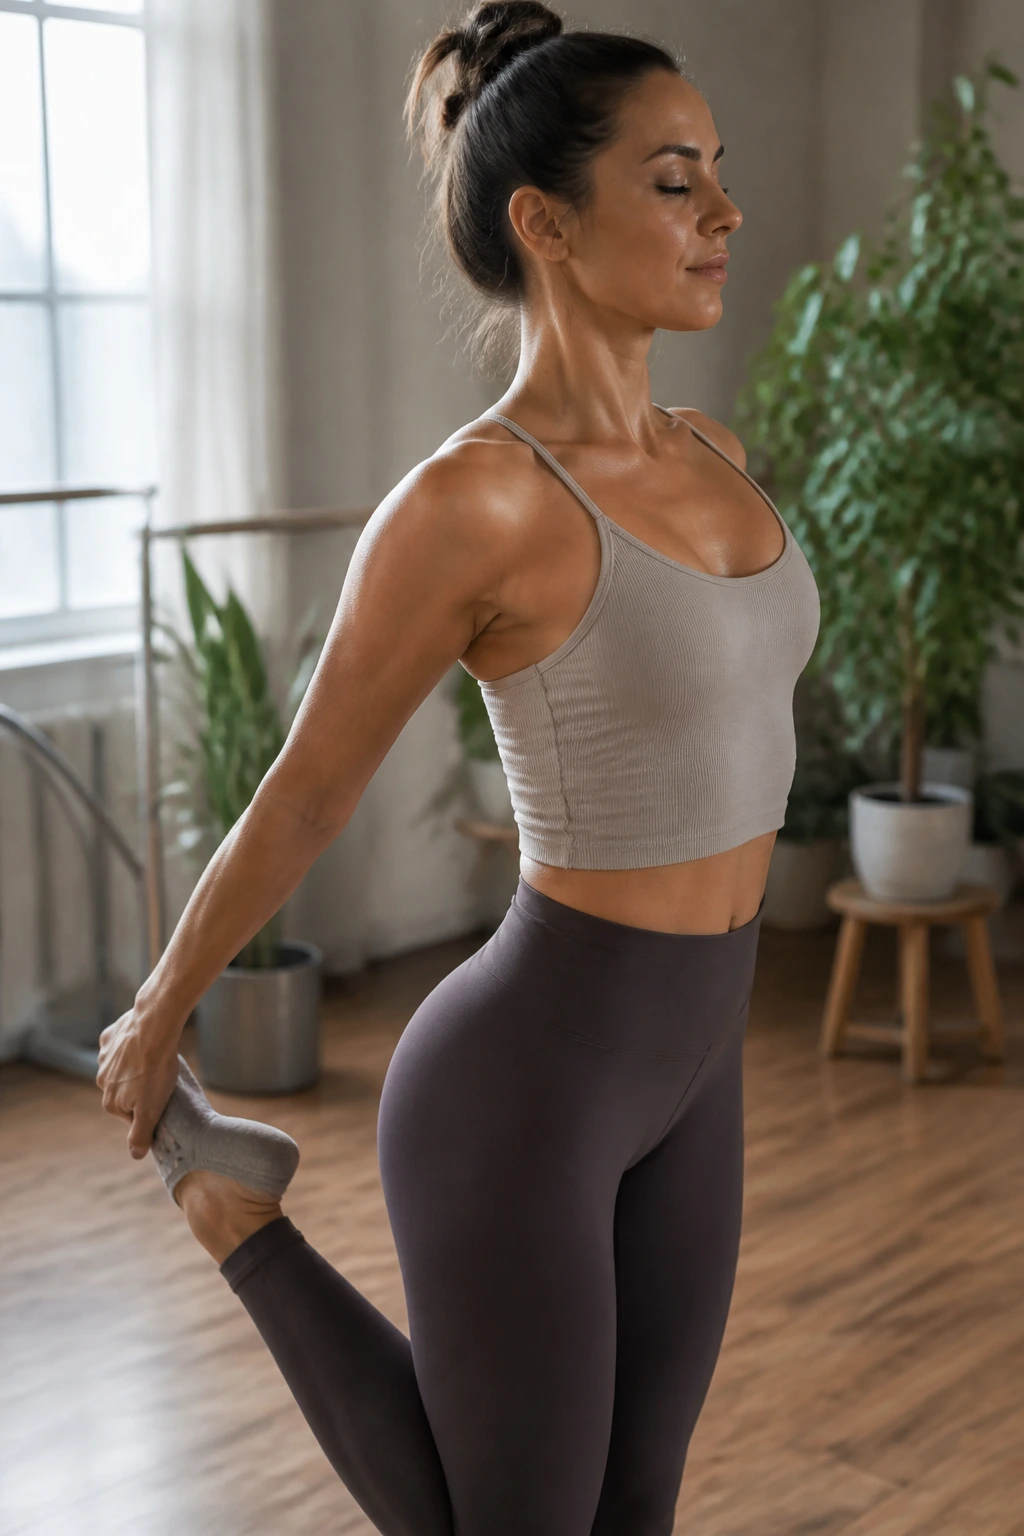
Never, ever skip this. After 19 exercises that have fatigued your quads, glutes, triceps, and core, your muscles are tight and full of lactic acid.
Spend time stretching your quads by pulling your heel to your glute. Stretch your hamstrings with a gentle fold. Open your chest by clasping your hands behind your back.
The Purpose of Cooling Down
- It lowers your heart rate gradually.
- It helps prevent excessive soreness for the next day.
- It is a moment to mentally celebrate what you just accomplished.
Barre is not a workout you conquer in a day. It is a practice you grow into. Your muscles will get stronger, your balance will improve, and that shake? You will start to crave it.
Final Thoughts
You now have the components of a comprehensive barre practice. Twenty movements may seem like a lot to track, but once you start moving, the flow becomes intuitive. Do not worry about perfection on your first attempt. It is more important to listen to your body than to hit a specific range of motion.
If your legs start shaking, remind yourself that it is just energy being spent. If you lose your balance, just reset and try again. That is the beauty of this style of training—it is incredibly forgiving. There is no ego in a barre workout, only the constant, quiet work of getting a little stronger, a little more stable, and a little more centered with every single pulse.
