



You do not need a rack of dumbbells to build arms that look strong in a fitted shirt. The best workouts for sculpted arms without a gym rely on leverage, tempo, pauses, and a little grit — a wall, a chair, a backpack, and your own bodyweight can do more than most people expect.
And no, this is not all curls, all the time. If you want arms that look shaped instead of just tired, you have to hit the triceps, biceps, shoulders, forearms, and the muscles that keep your shoulder blades steady while you move. That combination matters more than people think. A slow set of push-ups with tight form can do more for your arm shape than a dozen rushed reps with bad posture.
One more thing. Sculpted arms are not magic, and they’re not just about one exercise. The look comes from building actual muscle and then repeating the work often enough that the tissue adapts, the joints get cleaner, and the reps stop feeling like a guess.
The first move isn’t a curl. It’s choosing the right pattern.
1. Wall Push-Up Pyramid for Sculpted Arms
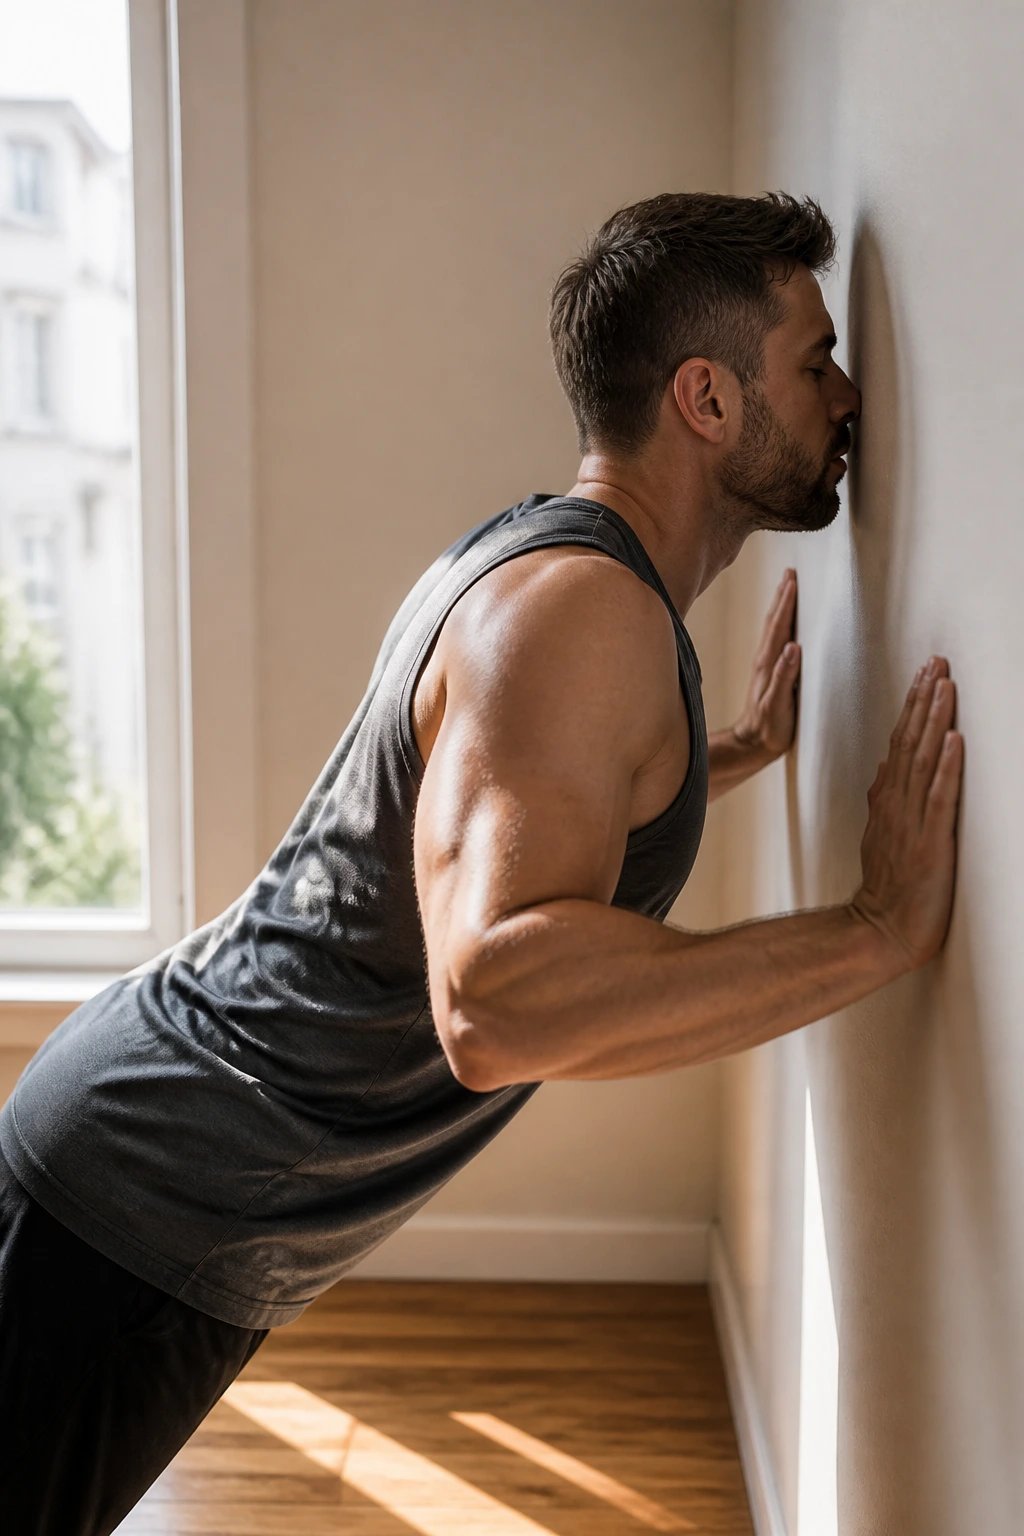
Wall push-ups look too easy at first. Then you slow them down, keep your ribs tucked, and realize your triceps and front delts are doing more work than expected.
Why It Works
Wall push-ups let you build pressing strength without beating up your wrists or shoulders. They’re also a clean way to warm up the elbows before harder arm work, which matters more than people admit. If your first set is sloppy, the rest of the workout usually follows that same bad mood.
Start with 3 rounds of 12, 10, and 8 reps. On the second round, lower for 3 seconds. On the last round, pause for 1 second with your nose close to the wall before pressing back. Keep your hands at chest height and your elbows at about a 30- to 45-degree angle.
- Step your feet farther from the wall to make it harder.
- Keep your head in line with your spine.
- Stop the rep when your chest reaches the wall, not when your chin sneaks forward.
Pro tip: if the last two reps feel too easy, don’t race them. Add time under tension instead. That’s where the change starts.
2. Countertop Incline Push-Up Flow
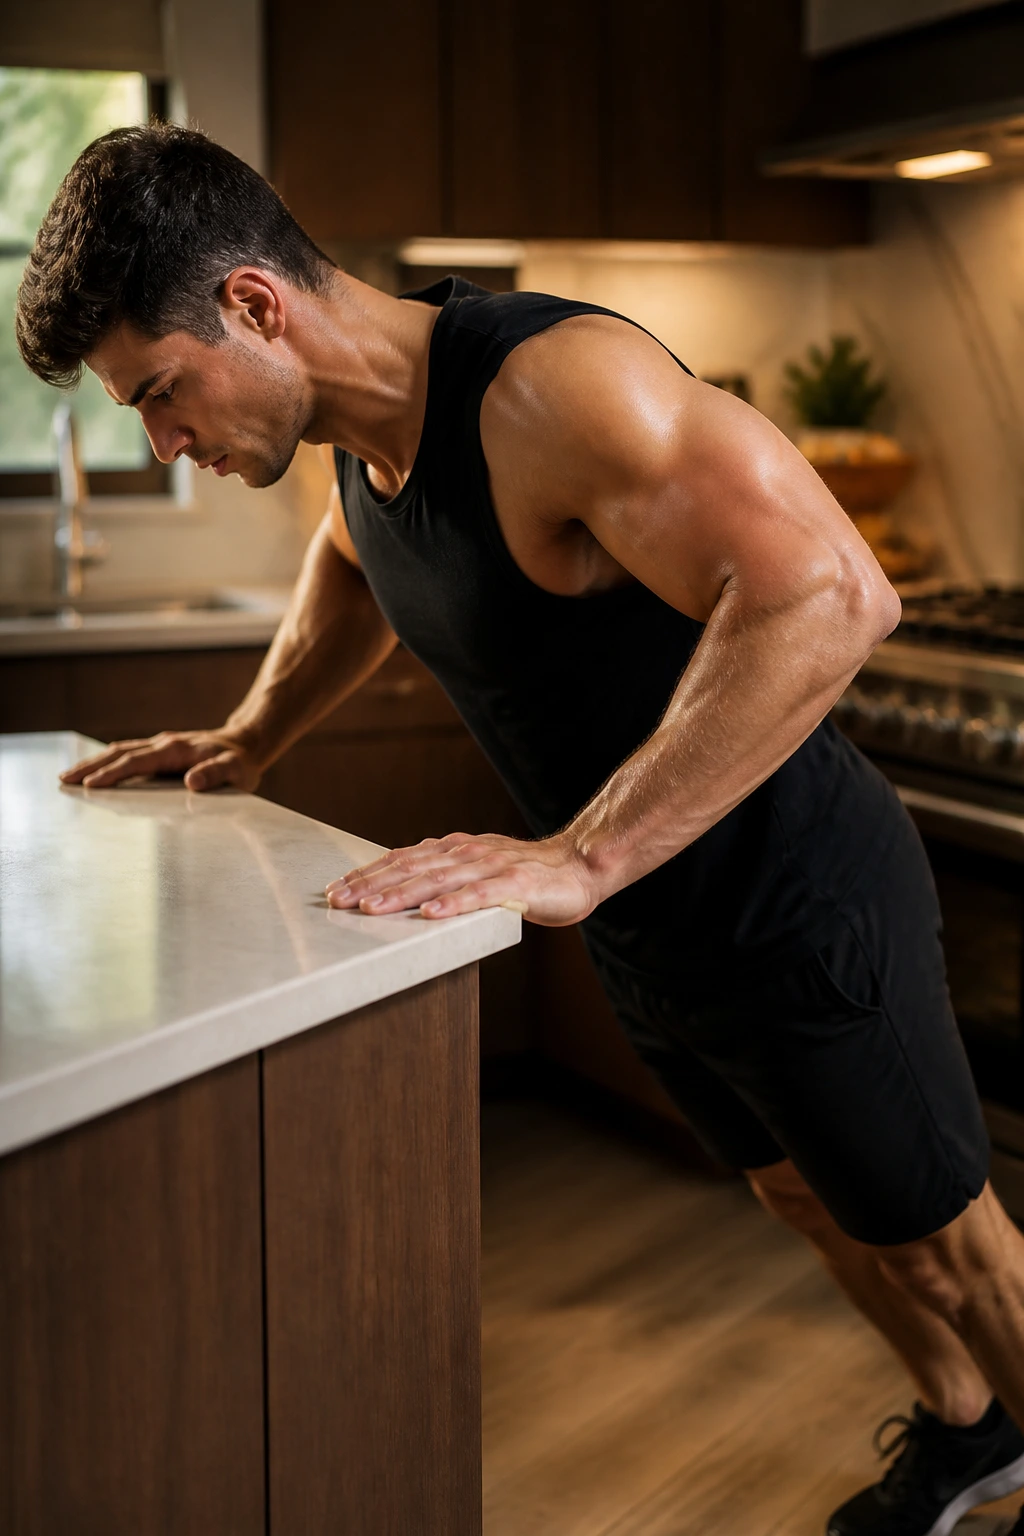
A countertop can do more for your arms than a lot of people give it credit for. The angle is gentle enough to keep form clean, but steep enough to make your triceps and shoulders work harder than they do against a wall.
Set your hands on a sturdy counter, kitchen island, or heavy desk. Walk your feet back until your body is straight from head to heels, then lower your chest toward the edge in a smooth 2-second count. Press back up without locking out so hard that your elbows snap at the top. That tiny bit of control keeps the tension where you want it.
Three sets of 8 to 15 reps is a good place to live here. If you can hit 15 with clean form, move your feet back an inch or two. If your lower back sags, shorten the range and tighten your core before anything else.
This is one of those moves that looks polite but feels sneaky. Polite from a distance. Not so polite after the second set.
3. Chair Triceps Dip Ladder
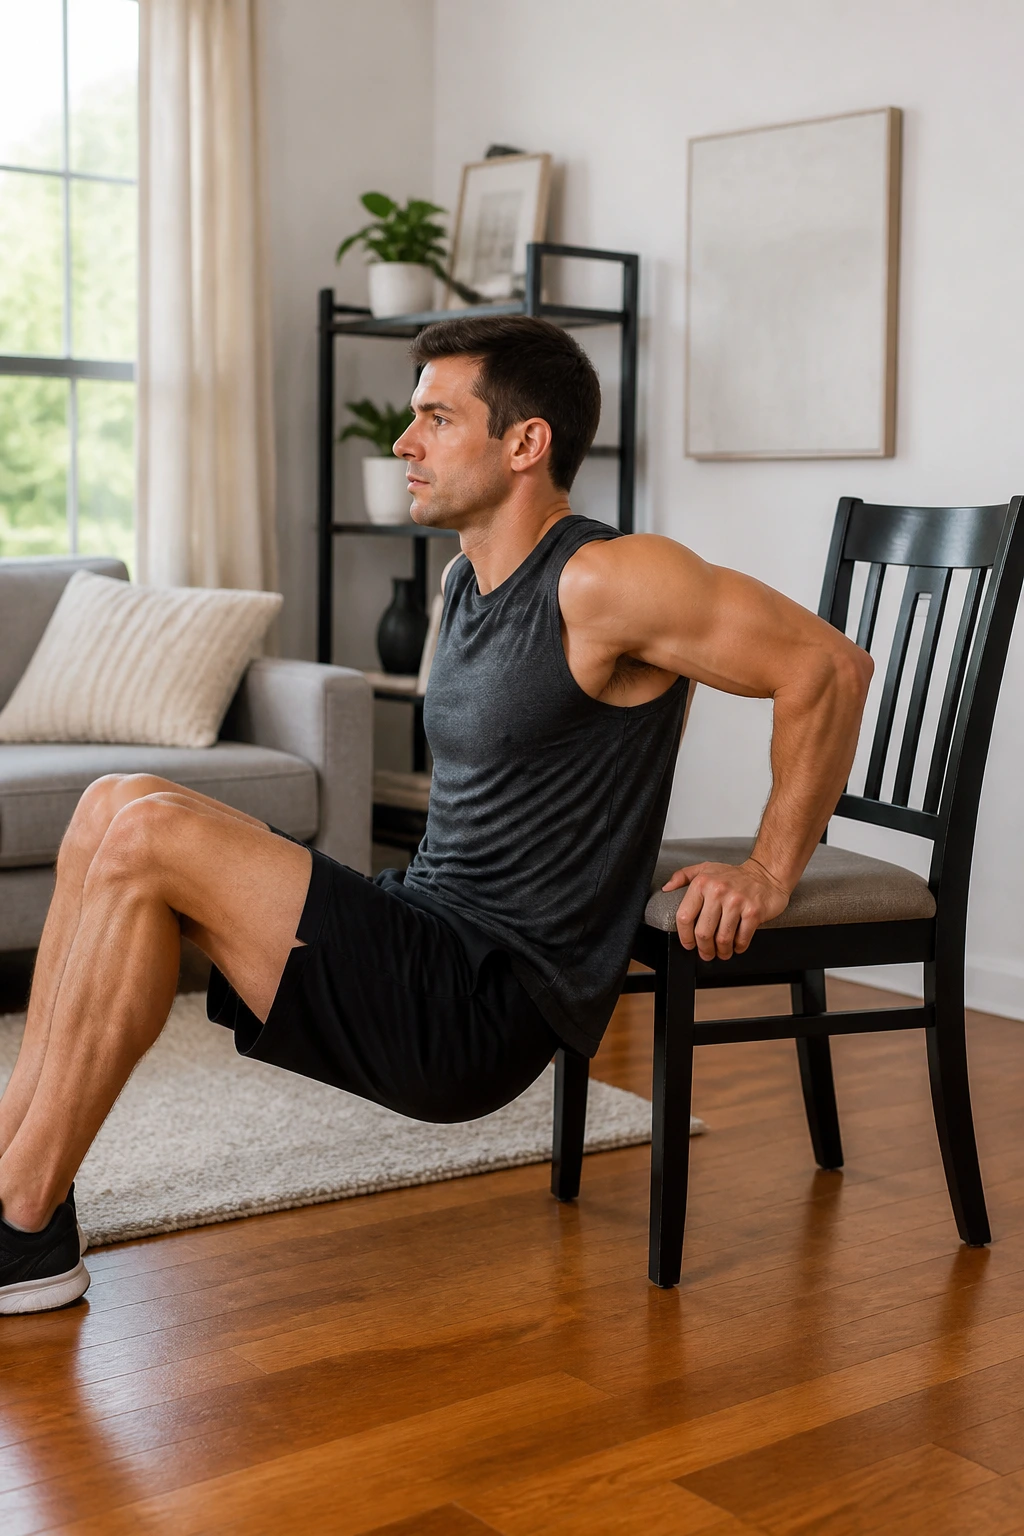
Chair dips are the move people either love or blame for sore shoulders. The truth is simpler: they work well when the chair is stable, your shoulders stay packed down, and you stop before your range turns ugly.
Sit on the edge of a solid chair with your hands beside your hips. Walk your feet out and slide your hips forward so your weight is supported by your arms. Lower until your upper arms are roughly parallel to the floor, then press back up. Do not dive so low that your shoulders roll forward. That’s where trouble starts.
Try a ladder: 6 reps, rest 20 seconds, 8 reps, rest 20 seconds, 10 reps. If that feels clean, repeat the ladder once more. If your chair wobbles even a little, skip it and use a sturdy bench or the edge of a couch with a hard frame.
- Keep your chest open.
- Keep your elbows pointing back, not flaring out.
- Bend your knees to make the move easier.
- Straighten your legs to make it harder.
Simple. Brutal if you do it right.
4. Backpack Biceps Curl Circuit
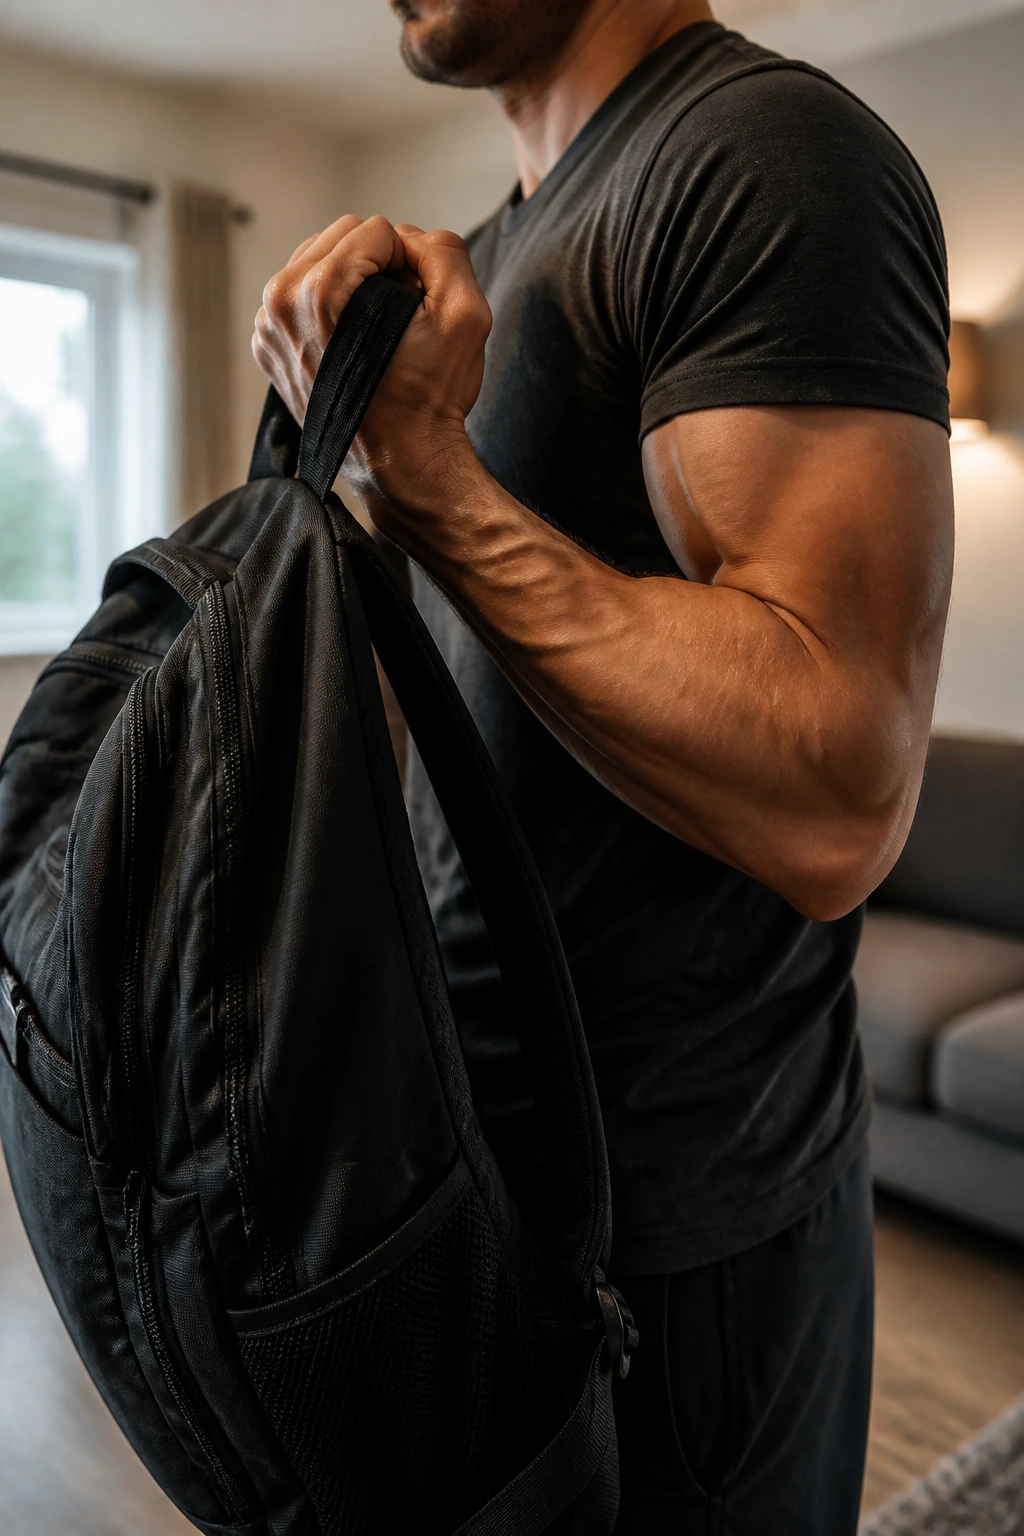
Can a backpack replace dumbbells? It can, if you pack it right and stop letting the bag swing around like laundry on a line.
Fill a backpack with books, canned food, or water bottles. Hold the top handle with one hand and curl it like a dumbbell, keeping your elbow close to your rib cage. If the load feels awkward, wrap a towel through the handle so your wrist stays in a neutral position. That small tweak makes the movement much easier to control.
How to Use It
Do 3 rounds of 10 to 12 curls per arm, then switch to 8 hammer curls per arm. Finish each round with a 10-second hold halfway up, where the biceps usually start complaining. That hold matters. It keeps tension on the muscle when momentum would normally take over.
If the backpack bangs into your thigh, shorten the strap or stand on a firmer surface. A messy curl turns into a half-rep fast, and half-reps have their place, but not when they’re accidental.
This is one of the few home moves that feels close to old-school weight training. No gimmick. Just load.
5. Towel Curl Isometric Hold
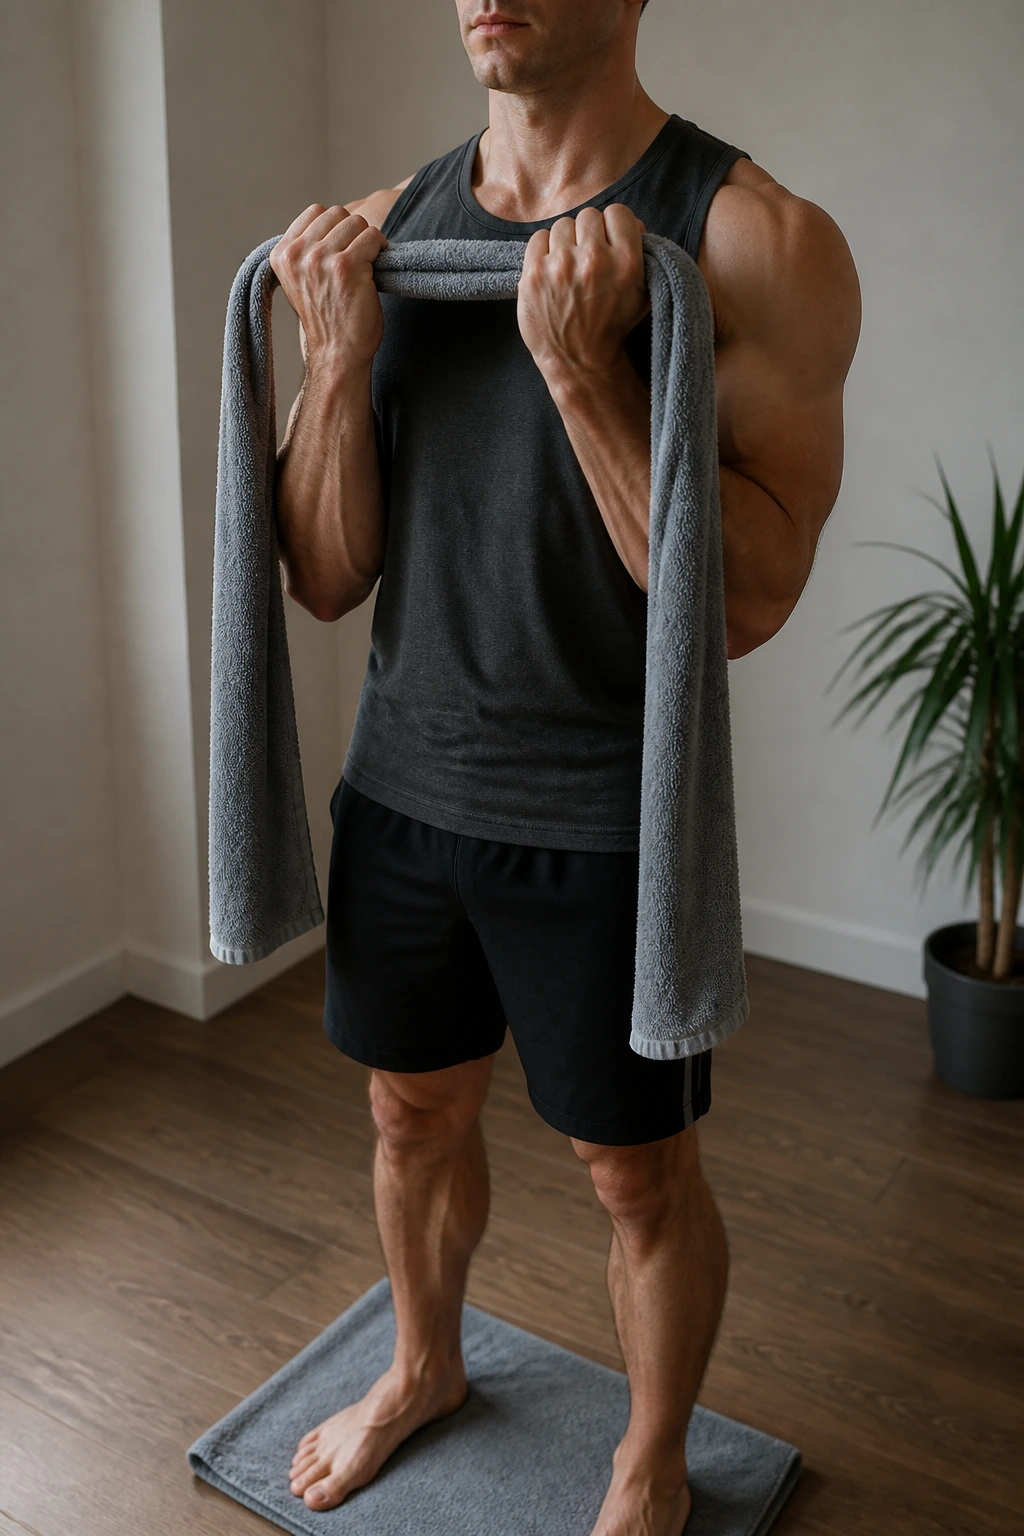
Isometric curls feel old-school because they are. They also work when you want the biceps to stay under tension without needing much space, and that makes them perfect for cramped rooms or days when your elbows want something calmer than fast reps.
Stand on the middle of a towel with both feet, grab each end, and curl upward against your own body weight. You won’t move much, which is the point. The biceps should feel pinned in place while your forearms and upper arms work to keep the tension steady. Hold the top position for 15 to 25 seconds, then lower slowly.
This move pairs well with regular curls because it stresses the muscle at a fixed angle. That’s a different kind of pain, and honestly, a useful one. After 3 holds, your arms will feel fuller and tighter than they do after a rushed set of 20.
What to Watch For
- Keep your shoulders down.
- Keep the towel tight.
- Don’t shrug to help the curl.
- Use a thicker towel if your hands start slipping.
It’s not flashy. It works.
6. Pike Push-Up Shoulder Builder
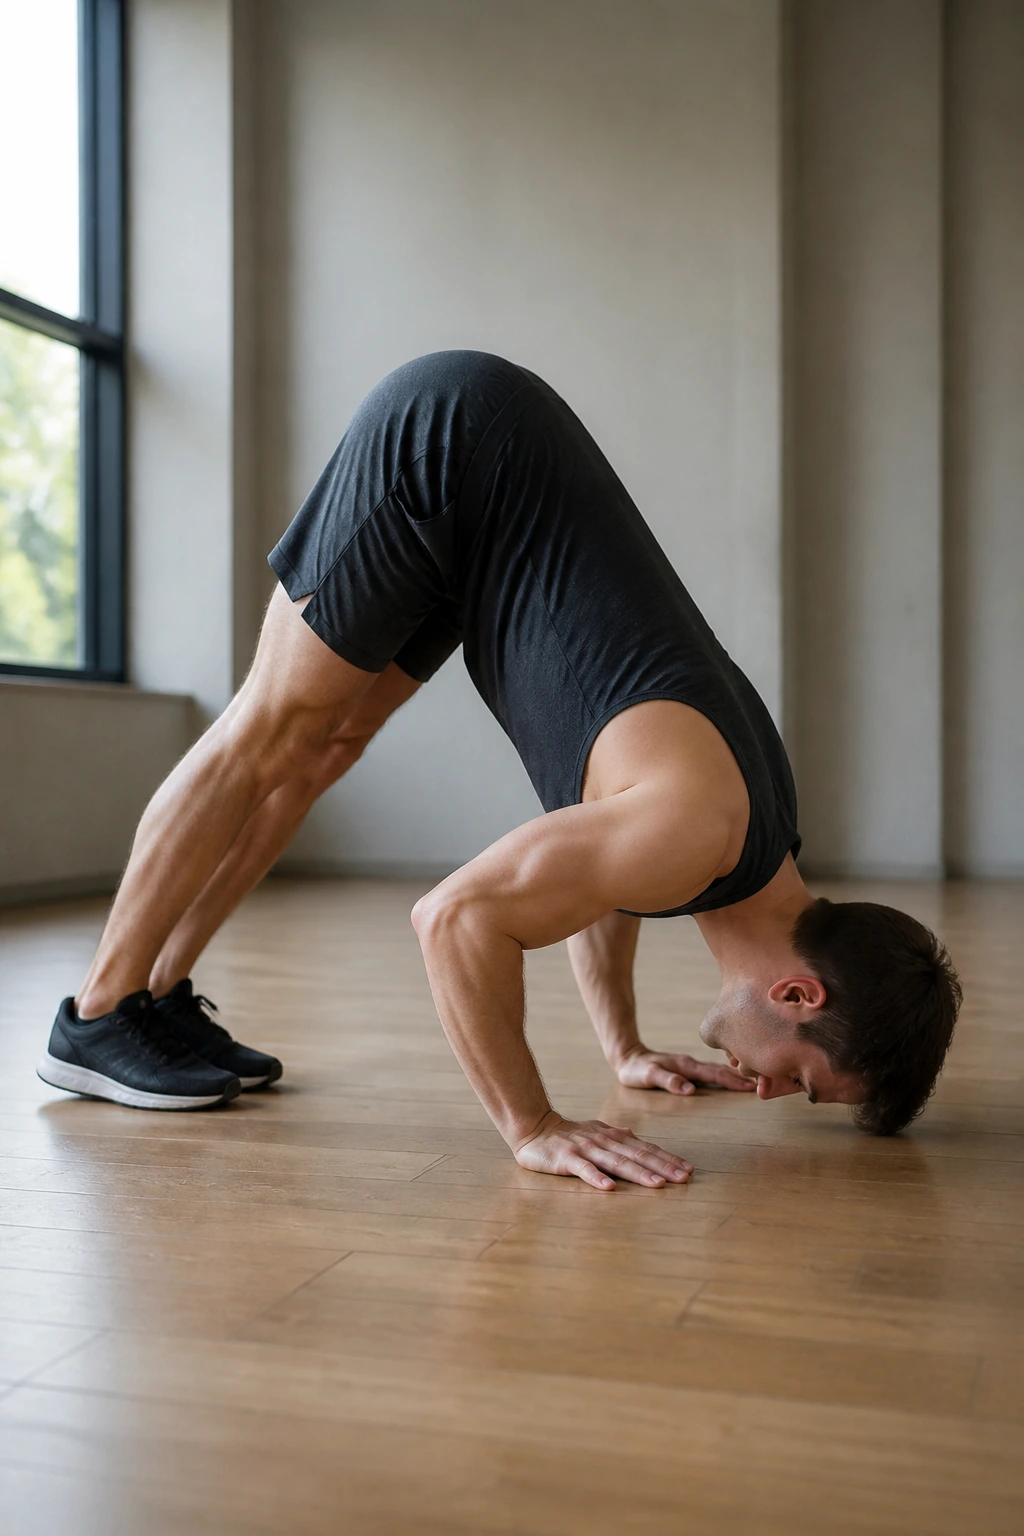
Shoulders change the whole outline of the arm. That’s why pike push-ups matter so much here: they build the front and side shoulder cap that makes the upper arm look broader even when you’re standing still.
Plant your hands on the floor, walk your feet in, and raise your hips so your body makes an upside-down V. Bend your elbows and aim the top of your head toward the floor, then press back up with control. The move should feel like a shoulder press done with your body instead of a pair of weights. If your neck is craning forward, you’ve lost the line.
Start with 3 sets of 5 to 8 clean reps. If that feels too hard, place your hands on the floor and your feet on a low step. If it feels too easy, put your feet on a chair or couch. The angle changes fast, which is why this move is useful. Small adjustments make a big difference.
No one does pike push-ups casually for long. They ask for attention. Good.
7. Plank Shoulder Tap Marathon
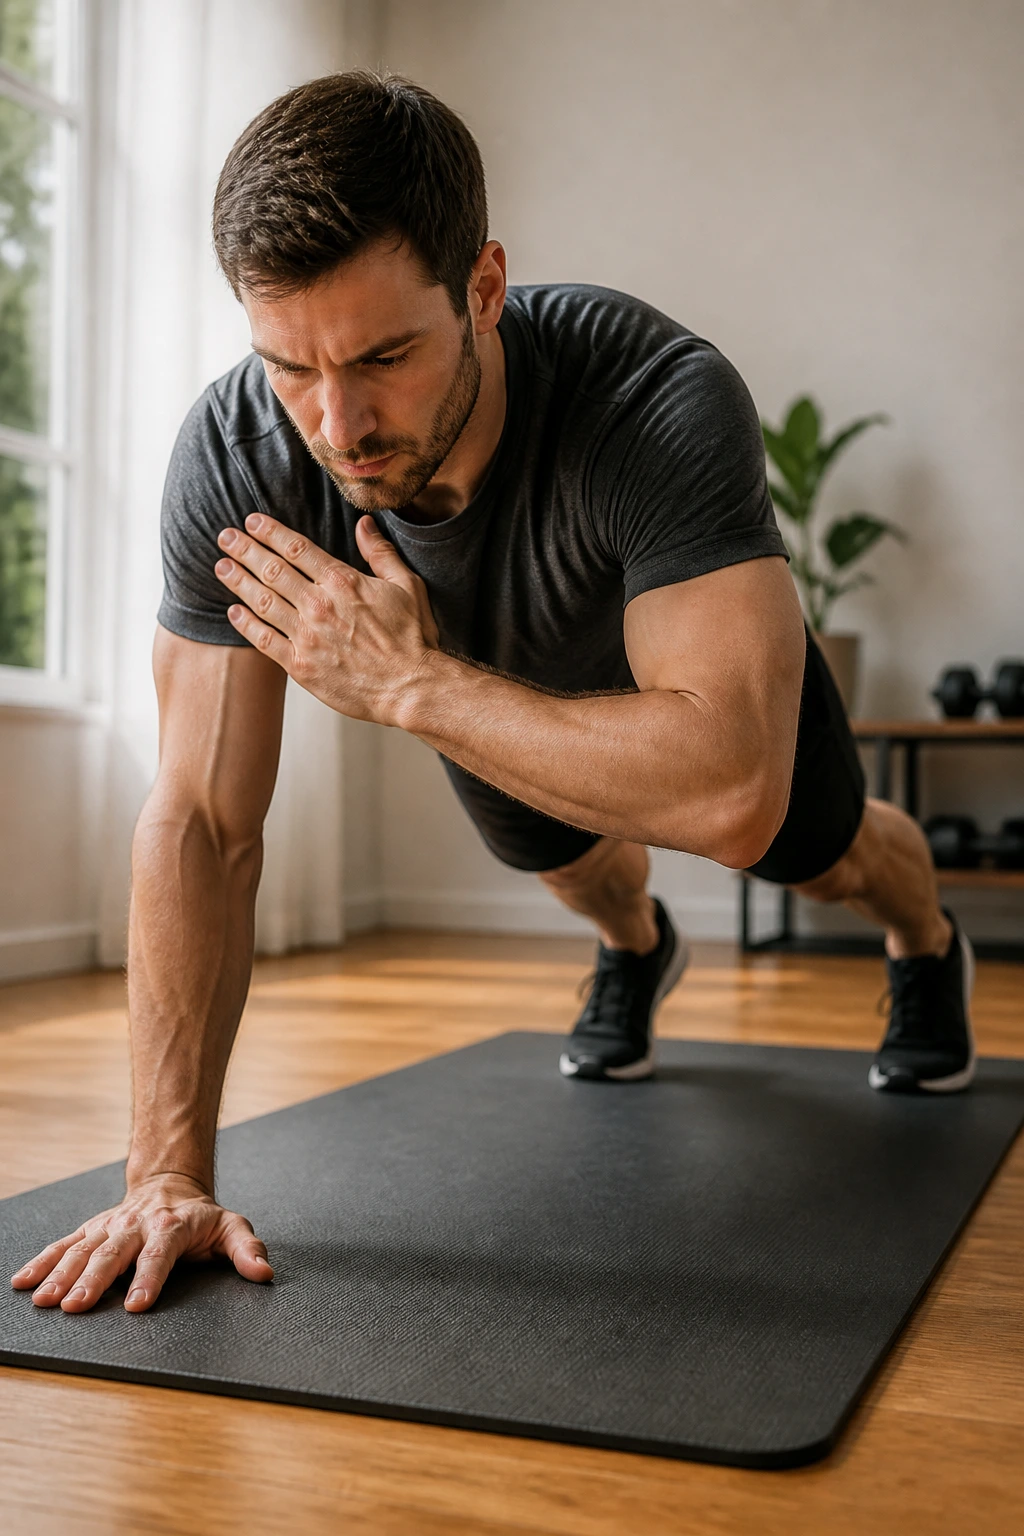
Speed is the enemy here. Plank shoulder taps work best when you go slow enough to stop your hips from swinging and your lower back from sagging.
Get into a high plank with your hands under your shoulders and your feet a little wider than hip-width if you need more balance. Tap your left shoulder with your right hand, then your right shoulder with your left hand. That’s one round. Keep the rest of your body still while the supporting arm, triceps, and shoulders fight to keep you steady.
Do 3 to 4 rounds of 20 taps, resting 20 to 30 seconds between rounds. If the taps get sloppy, widen your stance a little more or slow the pace down. The goal is not to rush through it. The goal is to make your body stay honest under load.
A clean plank tap is one of the best no-gym arm tests there is. It looks plain. Then your shoulders start shaking.
8. Diamond Push-Up Finisher
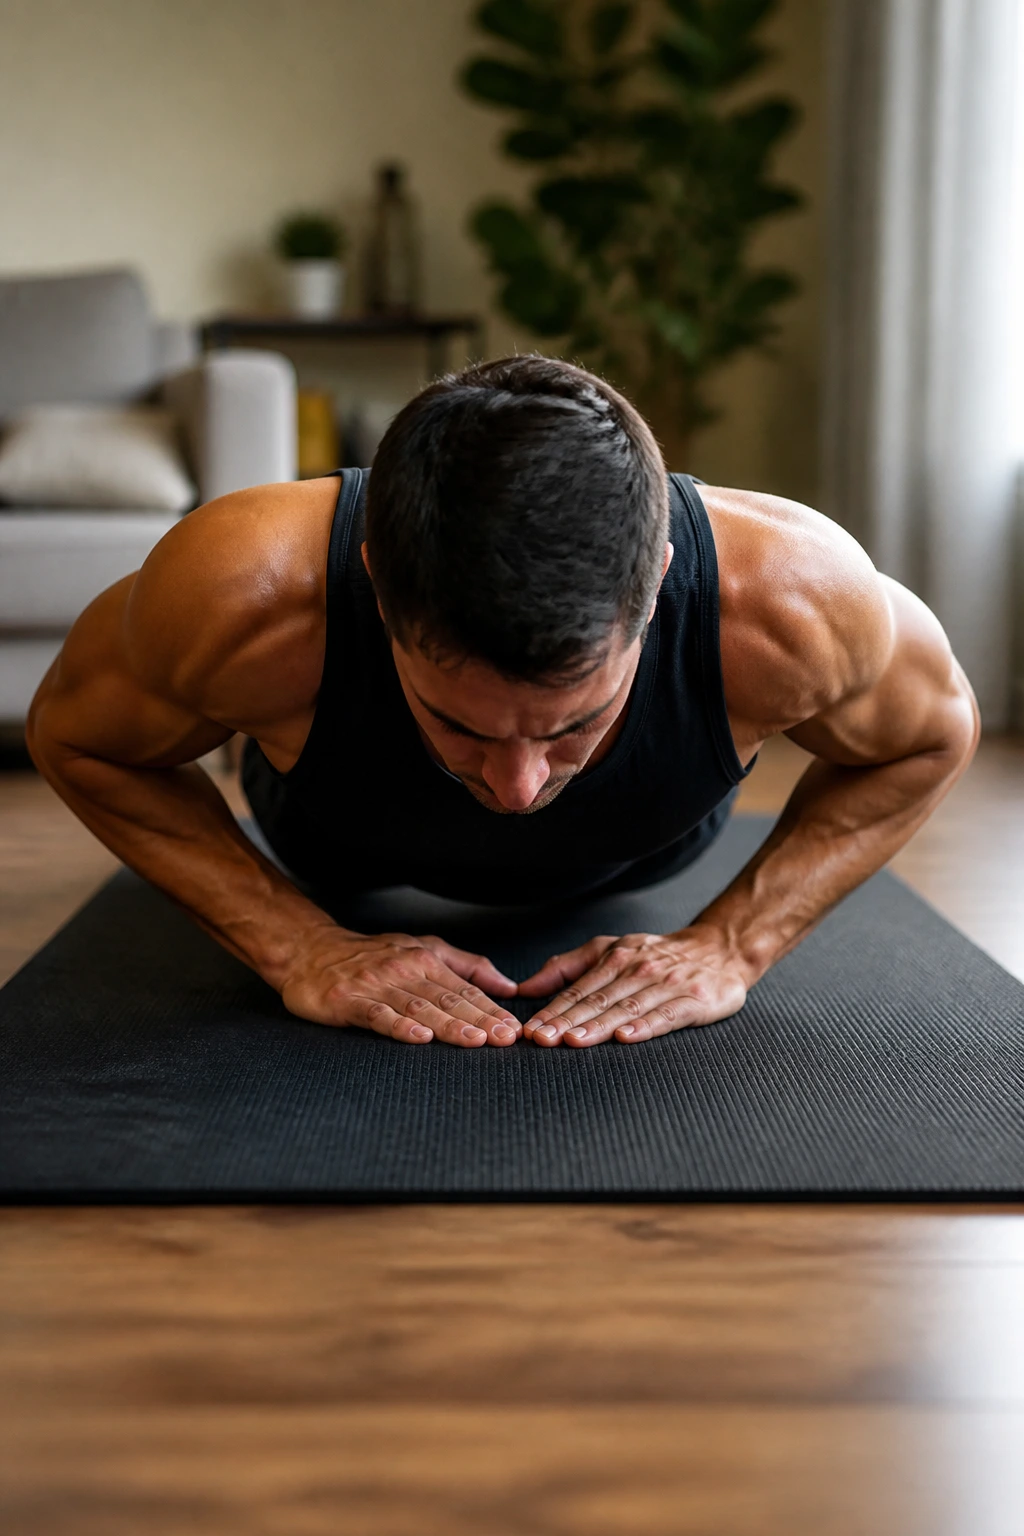
Put your hands together and suddenly the triceps have nowhere to hide. That narrow hand position shifts more of the work to the back of the arm, which is exactly why diamond push-ups earn a place in a home arm workout.
Set your hands under your chest so your thumbs and index fingers make a rough diamond or triangle. Lower your chest toward your hands while keeping your elbows tucked closer to your sides than they would be in a standard push-up. Press up without letting your hips sag. If your wrists hate the full diamond, place your hands a little wider and keep the same elbow path.
Try 2 to 4 sets of 6 to 12 reps. If you can’t get that many from the floor, put your hands on a bench, couch, or countertop and keep the same shape. The incline still hits the triceps; it just takes some load off your joints.
- Elbows stay close.
- Chest moves first, not the head.
- Lower with control.
- Stop before your lower back arches.
A good set leaves the backs of your arms talking.
9. Self-Resisted Curl and Press Series
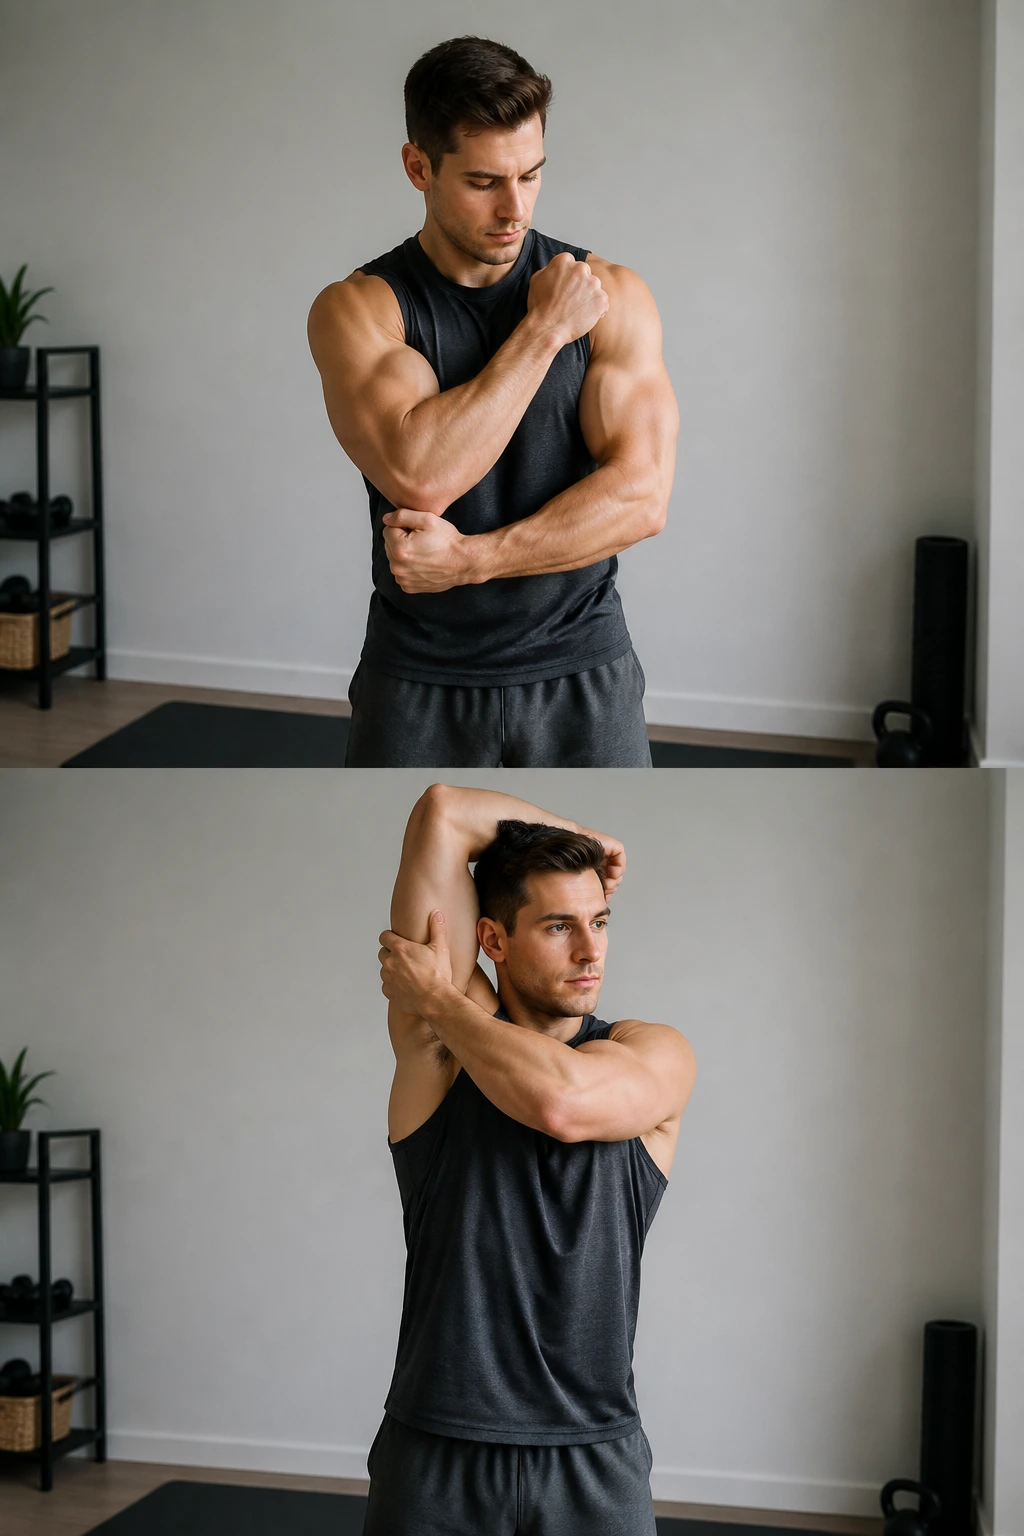
The simplest arm workout might be the one you argue with. Self-resistance sounds almost too plain to count, but it keeps constant tension on the muscle, and constant tension is hard to fake.
Use one arm to curl upward while the other hand presses down to resist the motion. Switch sides. Then do the same thing overhead, pressing one arm up while the opposite hand pushes it back down. The movement stays small, but the effort stays high. That’s the whole trick.
How to Use It
- 8 slow self-resisted curls per arm.
- 8 self-resisted overhead presses per arm.
- 10-second hold at the midpoint of each rep.
- 2 to 3 rounds total.
This works well when you’re traveling, short on space, or just tired of hauling furniture around for a workout. It also helps you feel the muscle more clearly, which sounds minor until you realize most people rush right past that feeling and call it training.
The burn shows up fast. Stay with it.
10. Overhead Triceps Extension with a Water Jug
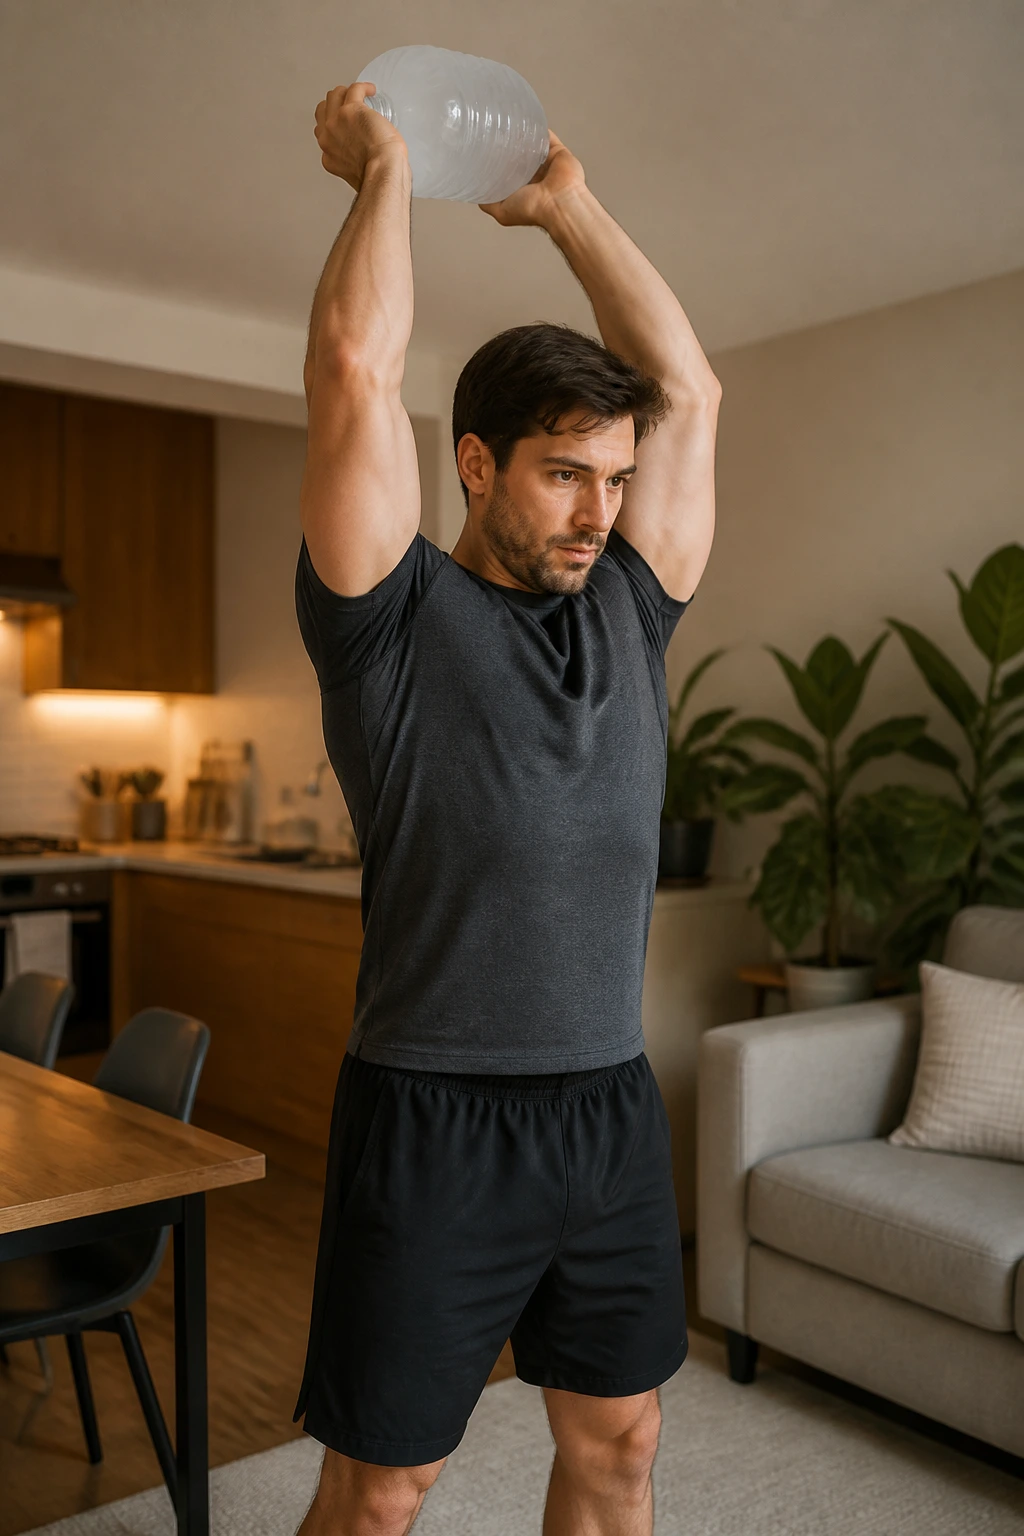
An overhead hold changes the feel of a triceps exercise fast. The long head of the triceps gets more stretch overhead, which is why this move often feels different from dips or push-ups in the best possible way.
Grab a filled water jug, a heavy bottle, or a loaded backpack with both hands. Press it overhead, then bend your elbows and lower it behind your head under control. Keep your upper arms mostly still, then extend back to the top without flaring the elbows too wide. The lower position should feel like a deep stretch, not a shoulder pinch.
This is a nice choice if dips bother your shoulders or if you want more direct triceps work after pressing exercises. Do 3 sets of 10 to 15 reps with a slow lower, about 2 to 3 seconds each time. If the object feels unstable, switch to a smaller load and control the path first.
Unlike dips, this one lets you keep the movement more vertical. That makes it friendlier for some people and a little less dramatic on the joints.
11. Bear Crawl Arm Crusher
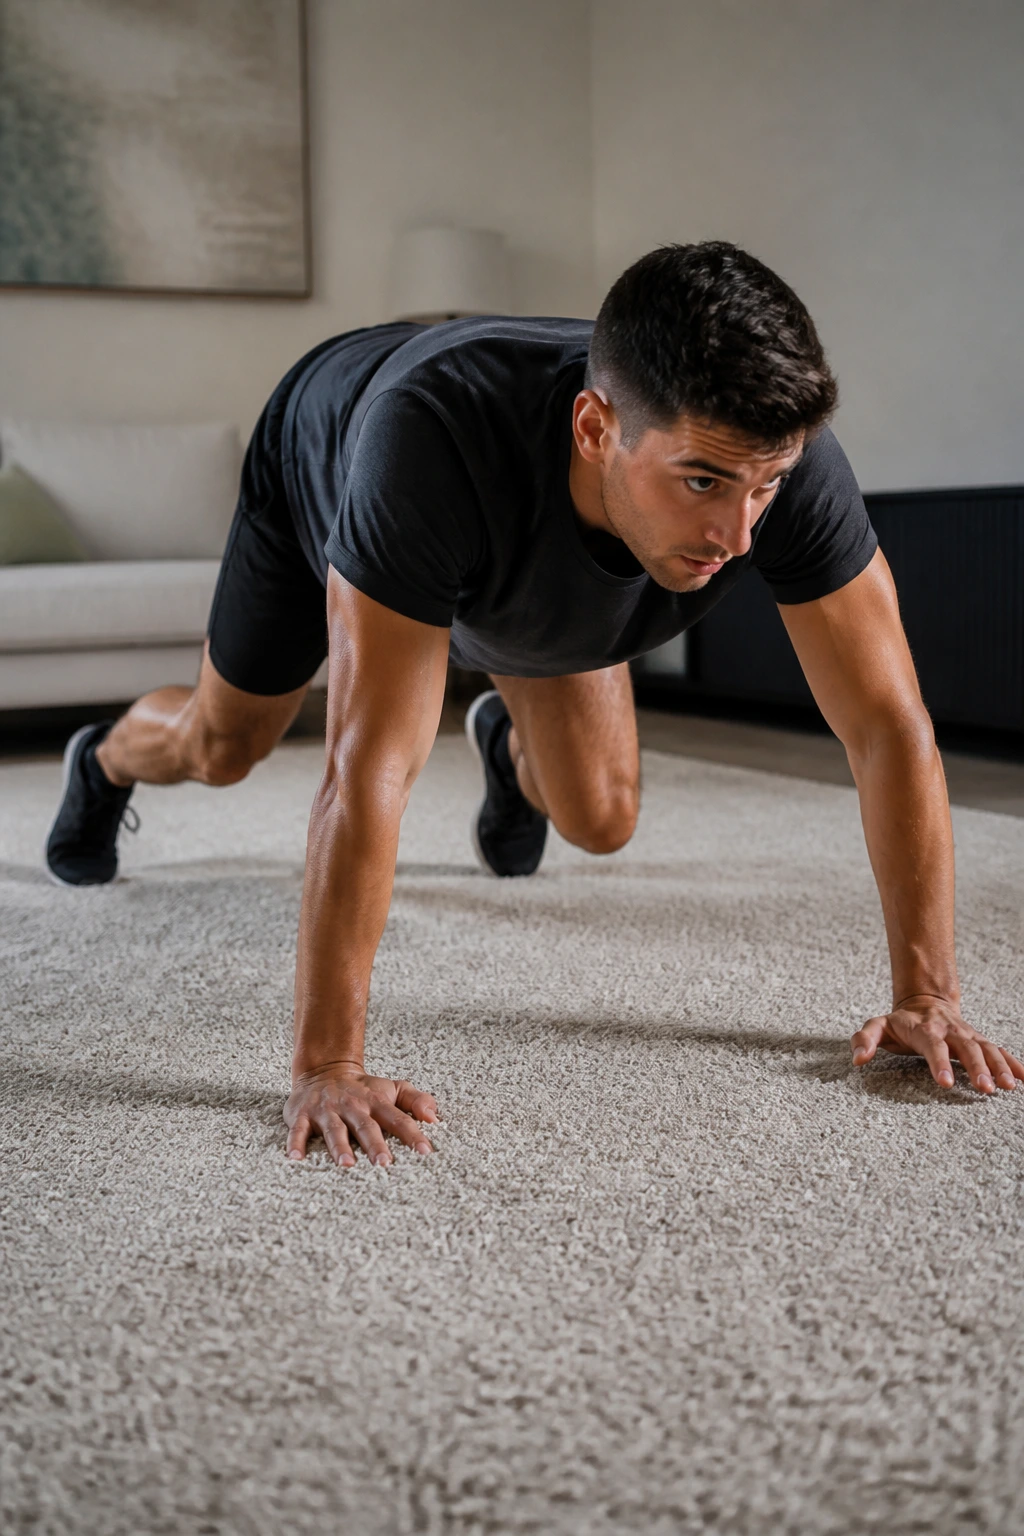
Bear crawls sound like a core exercise until your arms start shaking. Then the triceps, shoulders, wrists, and upper back all start pitching in like they just got called to the same meeting.
Get on hands and feet with your knees hovering 1 to 2 inches off the floor. Crawl forward with the opposite hand and foot moving together, then crawl back. Keep your steps short and your hips level. If your back arches or your knees drag, slow down and shorten the distance.
How to Use It
- 20 seconds forward crawl.
- 20 seconds backward crawl.
- 20 seconds rest.
- Repeat for 4 to 6 rounds.
If your wrists complain, place your hands on folded towels or do shorter intervals. The goal is tension, not punishment. A clean bear crawl should make your upper arms feel heavy and your shoulders feel busy without turning into a sloppy scramble.
It’s sneaky work. By round three, you know exactly where the effort is going.
12. Shadow Boxing Arm Endurance Rounds
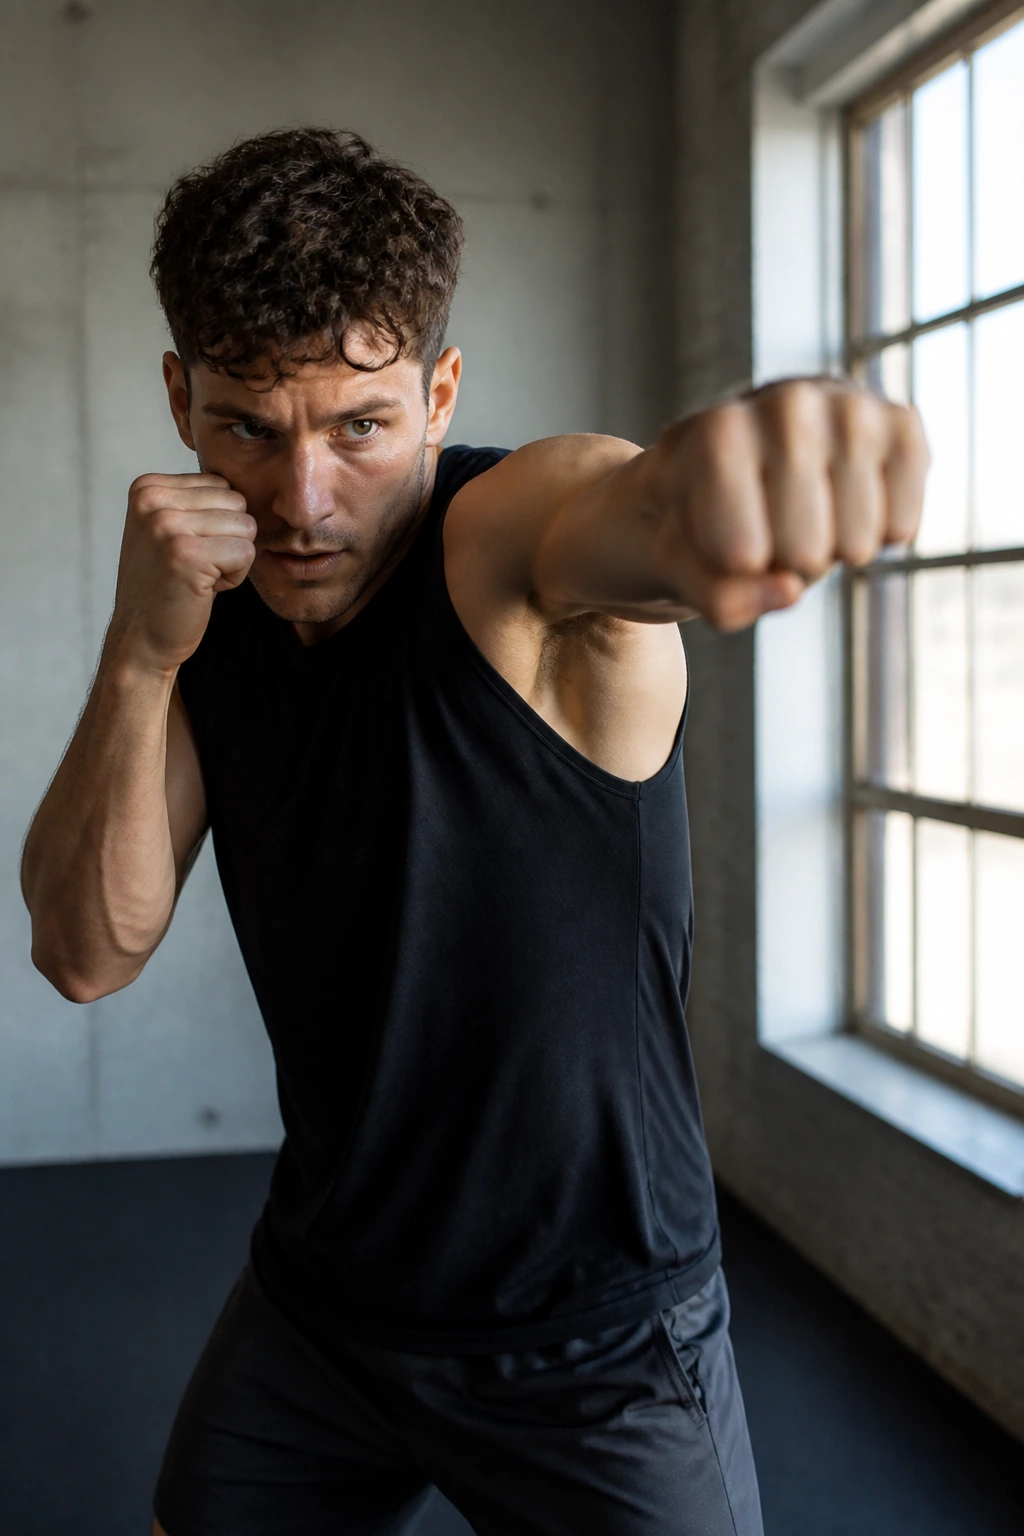
Shadow boxing burns slower than push-ups, but it lingers in the shoulders in a way that feels almost unfair. The arms have to stay up, snap forward, and return to guard over and over, which is a long, honest test of endurance.
Stand in a fighting stance with your hands near your cheekbones. Throw quick jabs, crosses, hooks, and uppercuts in the air, then snap each hand back to guard. Keep your shoulders relaxed between punches so they don’t lock up too early. The slower your hands return to position, the sloppier the set gets.
Try 3 rounds of 2 minutes with 30 to 45 seconds of rest. If you want more arm work, add 15-second bursts of fast punches at the end of each round. That little sprint changes everything. Your shoulders will light up, your forearms will tighten, and your upper arms will start feeling unusually dense.
This is not just cardio wearing gloves. It’s arm endurance with a rhythm to it.
13. Down Dog to Plank Flow
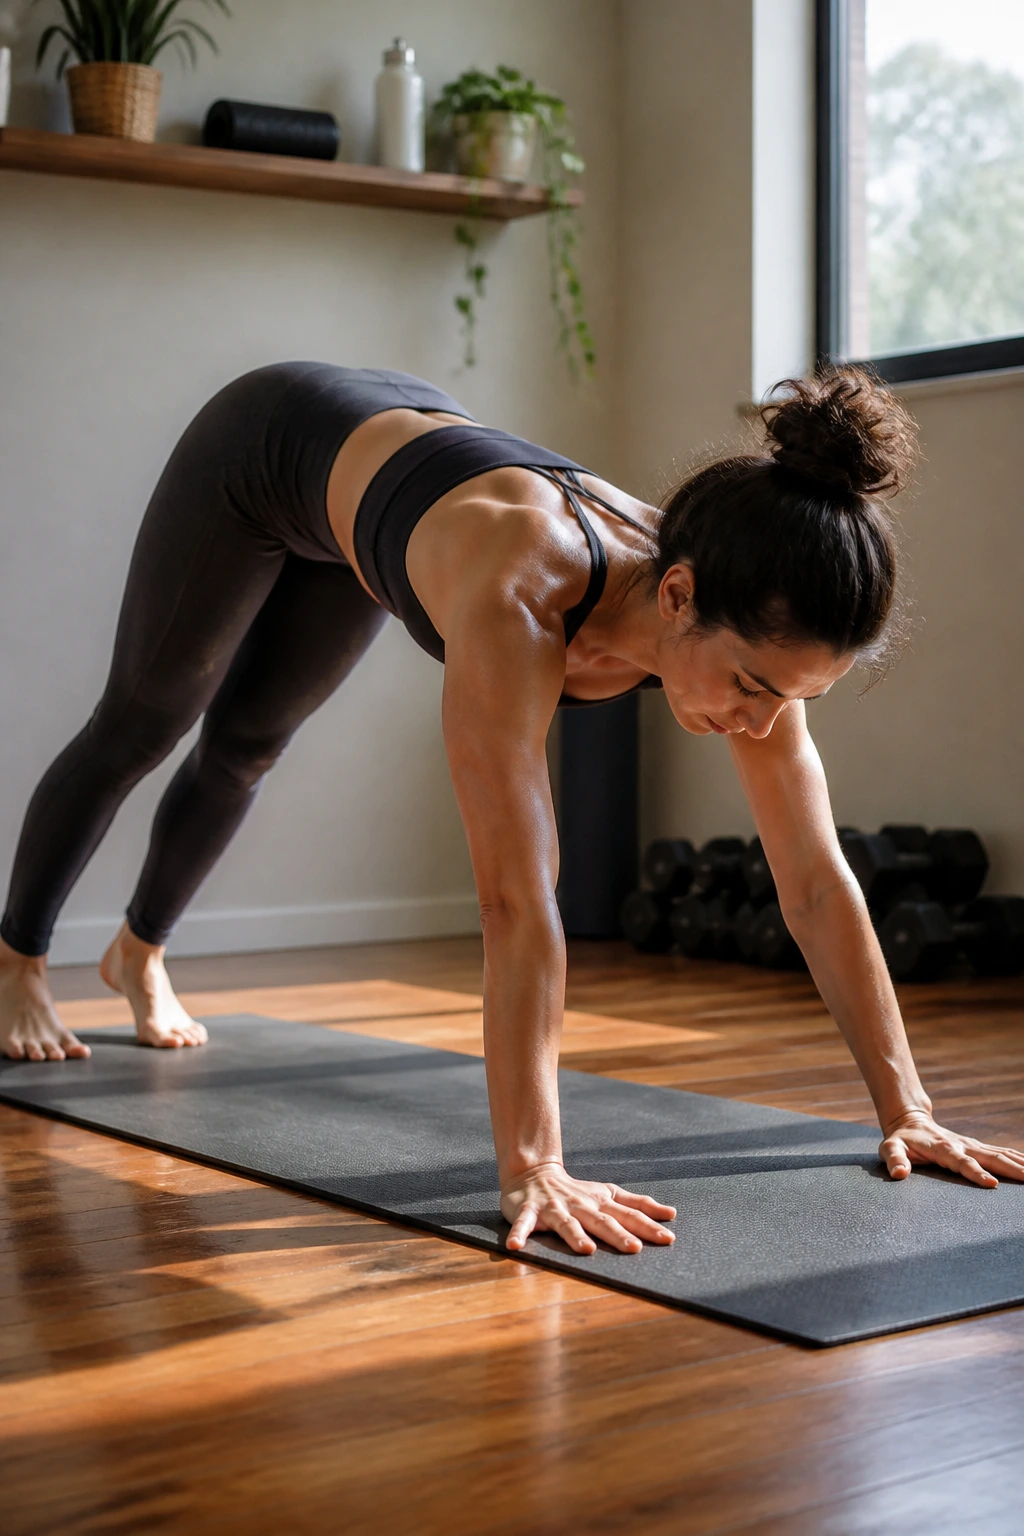
Down dog to plank looks almost calm from across the room. Do it slowly and the shoulders, triceps, and serratus start doing a quiet but hard job that most people miss.
Begin in a high plank. Push your hips back into downward dog, keeping your hands planted, then roll back forward into plank. Pause for a beat in each position and make the transition deliberate. If you rush the flow, it turns into a stretch instead of a strength drill.
Use 8 to 12 controlled reps. The nice part here is that the movement opens the shoulders on one end and loads them on the other, so the joints get a little movement while the arms keep working. That makes it useful on days when pure push-ups feel stale.
If you want more intensity, add a 2-second pause in plank before pushing back. That pause is where the shoulders stop pretending and start training.
14. Backpack Hammer Curl Ladder
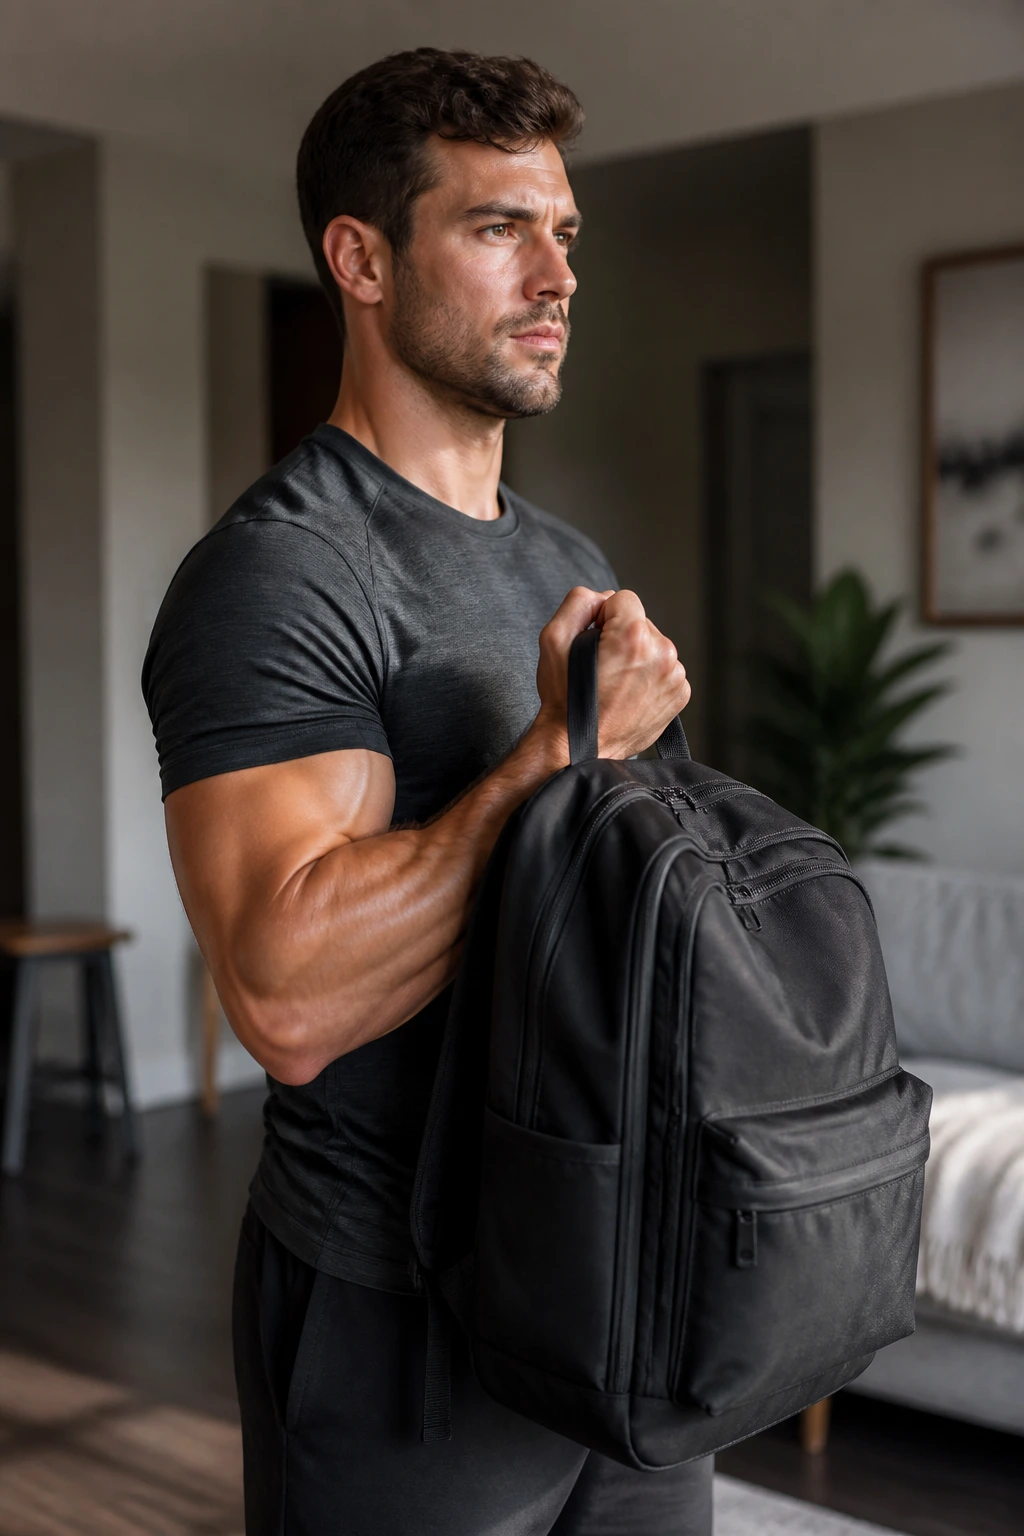
A backpack curl ladder is the sort of thing that makes a living room feel like a small training studio. It also hits the brachialis and forearms a little harder than a standard curl, which helps the upper arm look thicker from the side.
Hold the backpack by its top handle with your palm facing in, like you’re holding a suitcase. Curl it up in a hammer grip, keep the wrist straight, and lower under control. Pack a towel inside the bag so the contents don’t slam around when the weight shifts. That tiny detail saves the movement from feeling sloppy.
Ladder Format
- 5 reps right arm, then left.
- 7 reps right arm, then left.
- 9 reps right arm, then left.
- Rest 30 to 45 seconds between ladders.
If the backpack is too light, add more books or water bottles. If it’s too awkward, shorten the strap or switch to a grocery bag with a firm handle. The point is a neutral grip and a steady path. Everything else is noise.
This one has a nice, blunt payoff. Thick-looking arms usually start here.
15. Side Plank Reach-Throughs for Delts and Triceps
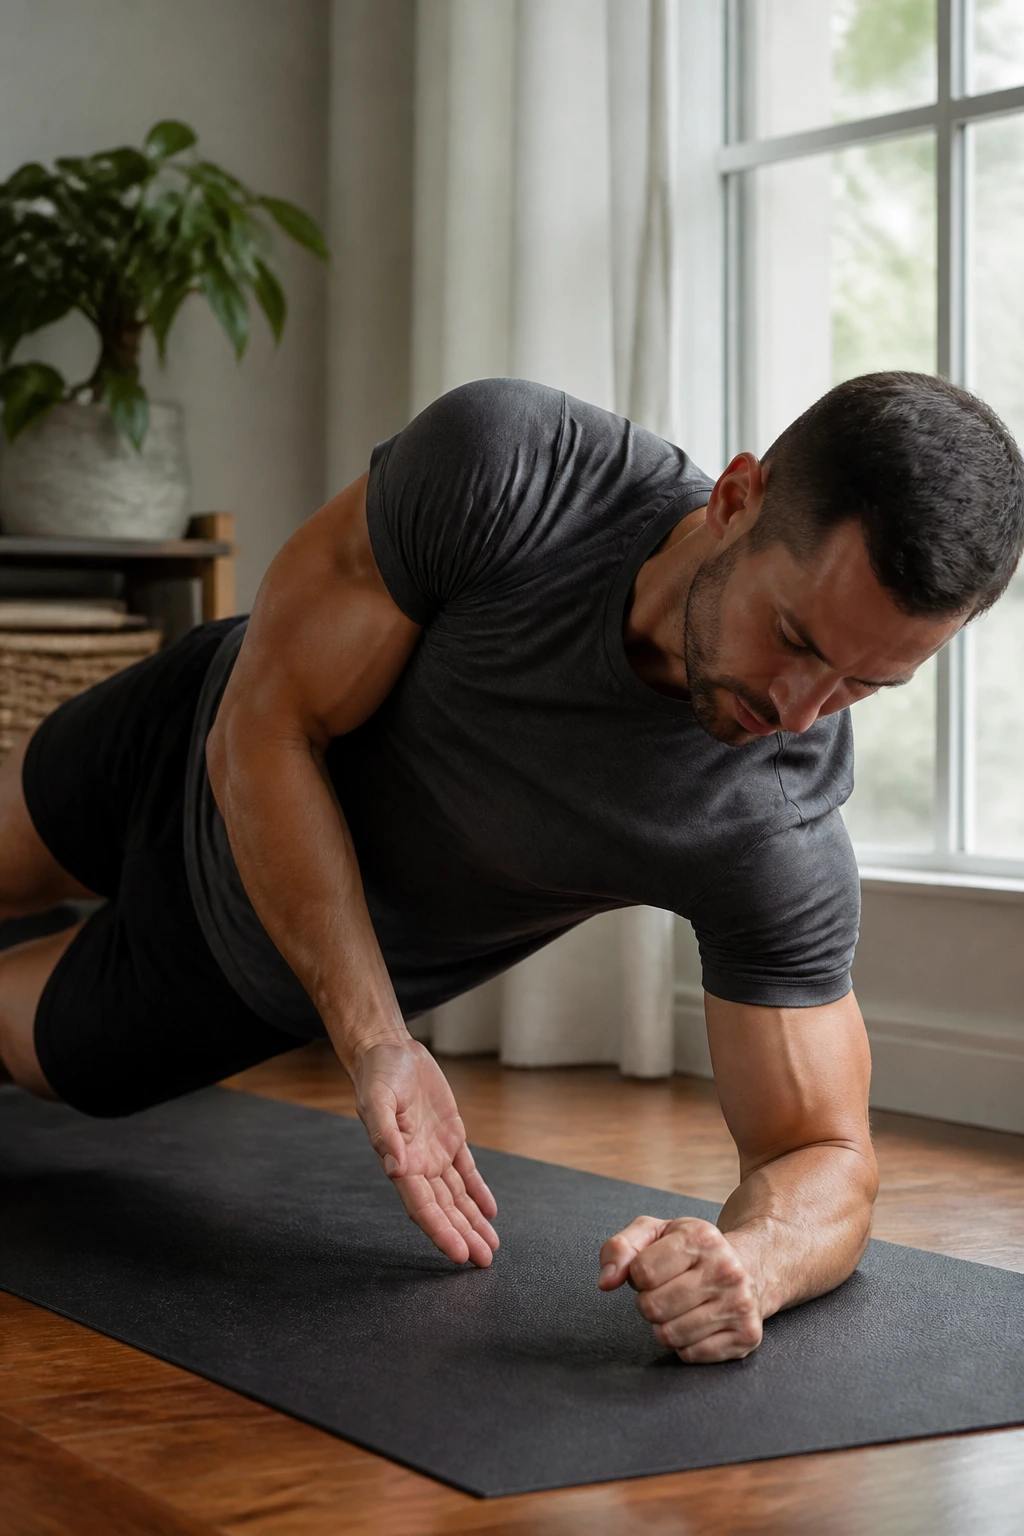
Side plank reach-throughs ask your shoulders to stay honest. They also make the supporting arm and triceps work harder than people expect, especially when the reach-under turns into a real rotation instead of a lazy wiggle.
Set up in a side plank on one hand or forearm. Reach your top arm under your torso, then open it back up to the ceiling. The supporting shoulder has to stabilize the whole shape while the moving arm keeps the rhythm. If your hips drop, shorten the set and rebuild the line first.
Do 2 to 3 sets of 6 to 10 reach-throughs per side, or hold the side plank for 20 seconds after each set. If wrist comfort is an issue, use the forearm version. If balance is the issue, stack your feet one in front of the other instead of fully on top of each other.
This move is a little slower and a little stranger than standard arm work. That’s part of the appeal. It asks for control, not just force.
16. Close-Grip Floor Press on the Floor
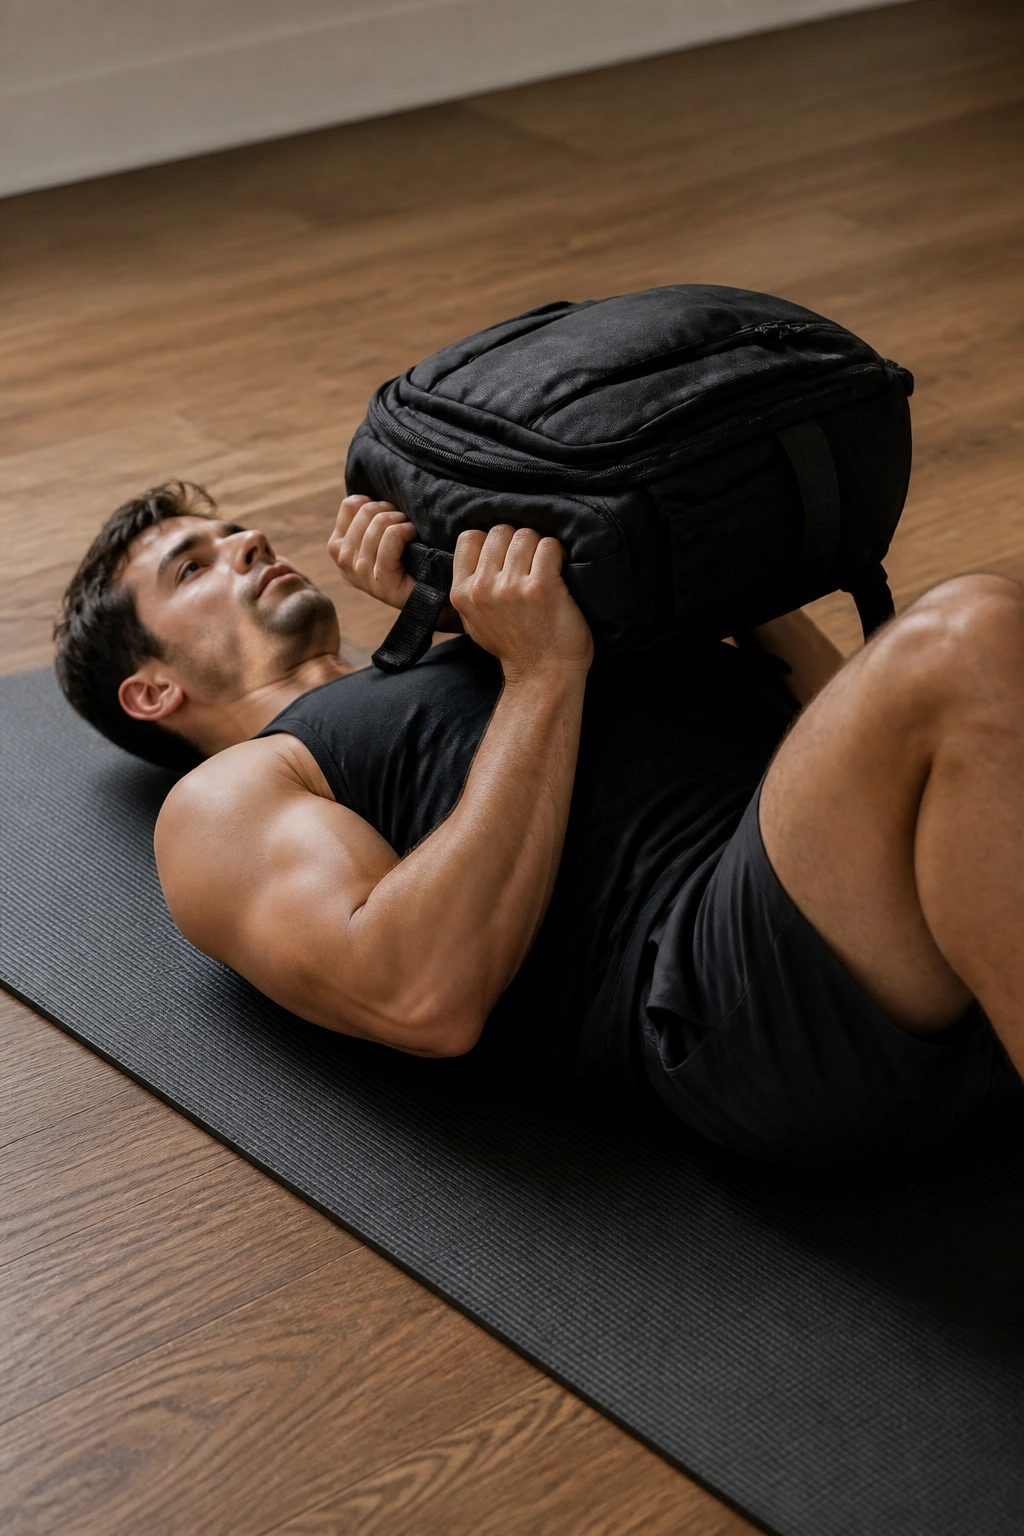
Floor presses are underrated at home. The floor stops your elbows from dropping too deep, which keeps the movement tighter on the triceps and a bit kinder to the shoulders than a full range floor-to-ceiling press.
Lie on your back with your knees bent and hold a backpack, water jugs, or two heavy household items close to your chest. Press them straight up, pause briefly, then lower until your upper arms touch the floor. Keep your elbows tucked closer to your sides than they would be in a wide chest press. The triceps should feel like they are finishing the rep, not the chest alone.
Do 3 to 4 sets of 8 to 12 reps. If the load is awkward, use one heavier item held with both hands instead of two separate pieces. That reduces wobble and keeps the line cleaner.
Unlike a bench press, the floor keeps your range shorter and your shoulders calmer. That’s a good trade when the goal is strong arms and not a pile of irritated joints.
17. Wall Handstand Hold Progression
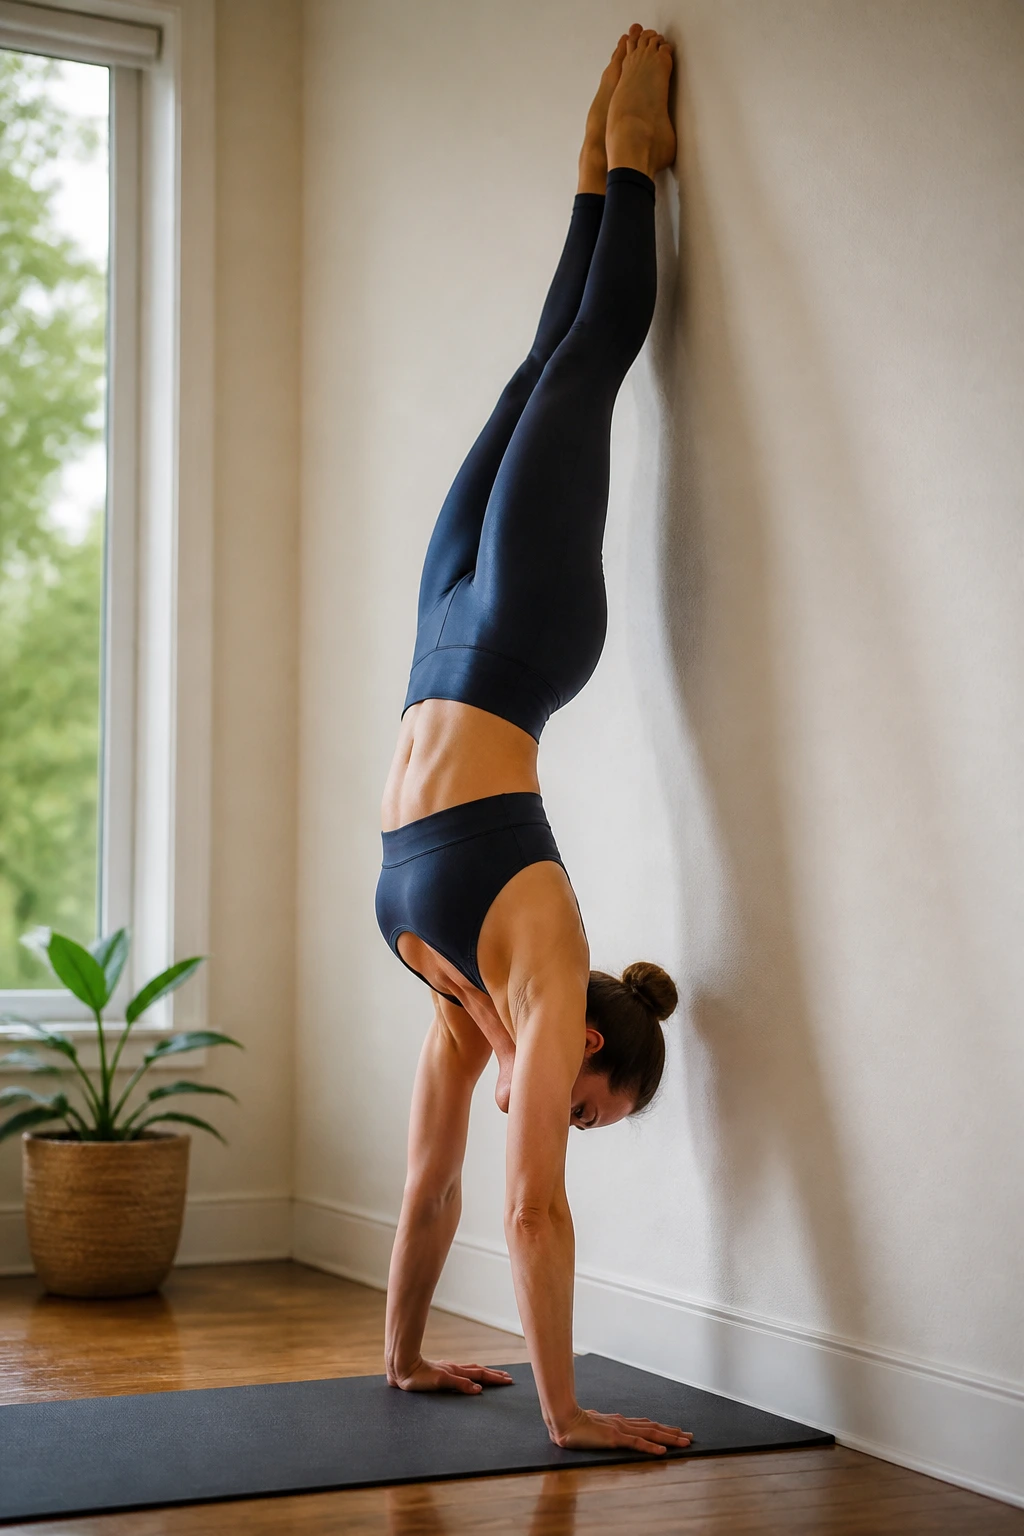
Wall handstands are not subtle. The second your feet go up, the shoulders, triceps, wrists, and upper back all have to work in a very direct way. That makes this one of the most useful advanced no-gym arm drills on the list.
Build It in Pieces
Start with a pike hold against a wall for 20 to 30 seconds. If that feels stable, walk your feet up the wall a little higher. If you’ve done that before, kick into a wall-supported handstand and hold for 10 to 20 seconds with tight ribs and straight arms.
- Fingers spread wide for balance.
- Elbows locked but not jammed.
- Ribs tucked so you don’t banana through the back.
- Stop if the wrists or shoulders feel sharp, not just tired.
This is not the move to rush. A shaky 10-second hold with clean shape beats a sloppy 30-second flop every time. If full handstands feel like too much, keep the pike version and make the hold longer. You still get the shoulder and triceps work.
Good handstands teach patience. Arms need that.
18. The 10-Minute Arm Density Circuit Without a Gym
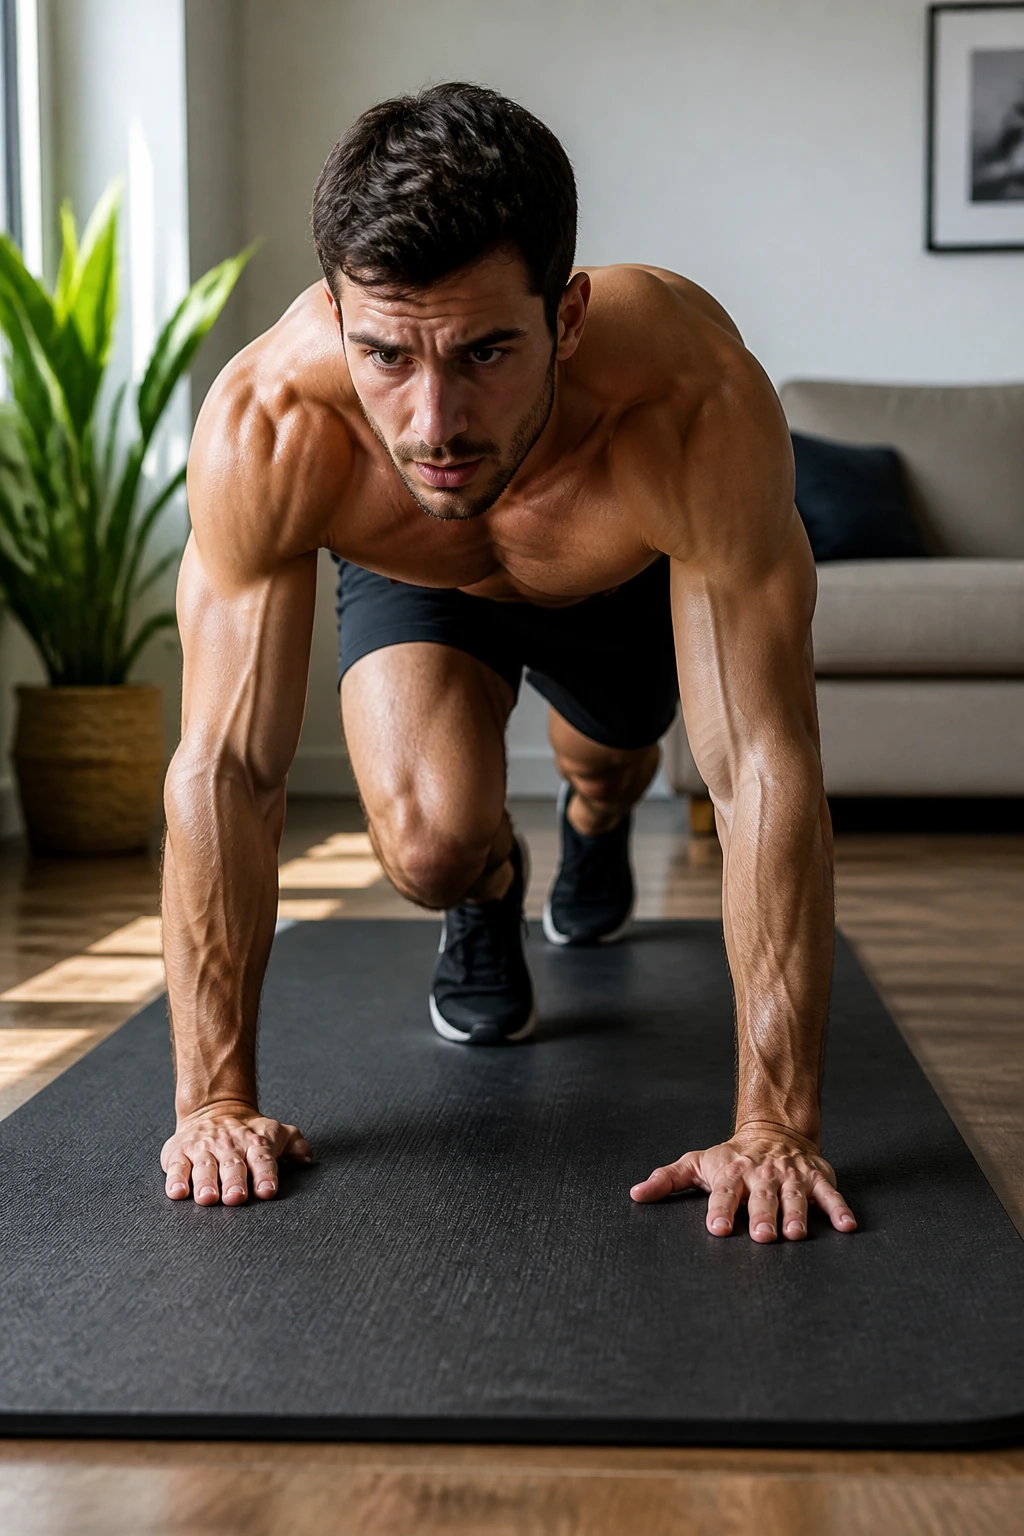
Ten minutes is enough if you keep the pace tight. That’s why a density circuit works so well: the work piles up fast, the rest stays honest, and the arms stay under pressure long enough to matter.
Pick four moves from this list — one press, one curl, one shoulder drill, and one finisher. A clean setup looks like this: 40 seconds of backpack curls, 40 seconds of incline push-ups, 40 seconds of chair dips, and 40 seconds of bear crawls. Rest 20 seconds between moves, then repeat for 2 to 3 rounds. Keep the transitions short or the workout turns into a lounge session.
If you want a simpler version, do wall push-ups, diamond push-ups, towel isometric curls, and plank shoulder taps. If you want more bite, add pike push-ups on the final round and cut the rest down to 10 seconds. The arms do not care how fancy the plan looks on paper. They care about tension, repetition, and enough honest load to force change.
Rotate these workouts across the week instead of trying to smash all 18 at once. Pick 3 to 5, train them hard, then come back and make the reps cleaner, slower, or heavier. That’s how home training starts to look less like improvisation and more like a real system.
