



Most people treat stretching exercises like a chore they half-finish between sets, then wonder why their flexibility barely changes.
A few lazy toe touches won’t do much. Real flexibility gains come from repeated exposure, steady breathing, and enough time in the position for your body to stop fighting you.
There’s a big difference between warming up and cooling down. Before training, you want movement that wakes joints up and leaves you feeling springy; after training, you can settle into longer holds and let the muscle tone drop.
Pain is not the point.
What matters is control. A hip flexor stretch feels different when your pelvis stays stacked. A hamstring stretch feels different when your knee is soft and your breath slows. Those small details are the whole game, and they’re why some stretching routines help while others feel like a sweaty waste of time.
1. Neck Tilt Stretch
A stiff neck can make the entire upper body feel junky, especially after long desk hours or heavy pulling work. The neck tilt stretch is one of those quiet fixes that people skip because it looks too simple. It isn’t fancy. It works because it targets the upper trap and levator scapulae without forcing the neck into a cranky position.
Sit or stand tall, anchor one hand on a chair seat or bench, and gently tip one ear toward the same-side shoulder. The other hand can rest lightly on the head for balance, but do not pull down on your neck. If you want a little more stretch, turn your nose slightly toward your armpit until you feel a broad pull along the back and side of the neck.
What to Feel
- A mild stretch along the upper shoulder and neck
- No pinching at the base of the skull
- No tingling or numbness down the arm
- Slow release as you exhale
Hold for 20 to 30 seconds per side, then repeat once or twice. I like this one after upper-body lifting, not before, because a cold neck can get grumpy fast.
Best cue: keep your chin gently tucked, like you’re lengthening the back of the neck before you lean.
2. Doorway Chest Stretch
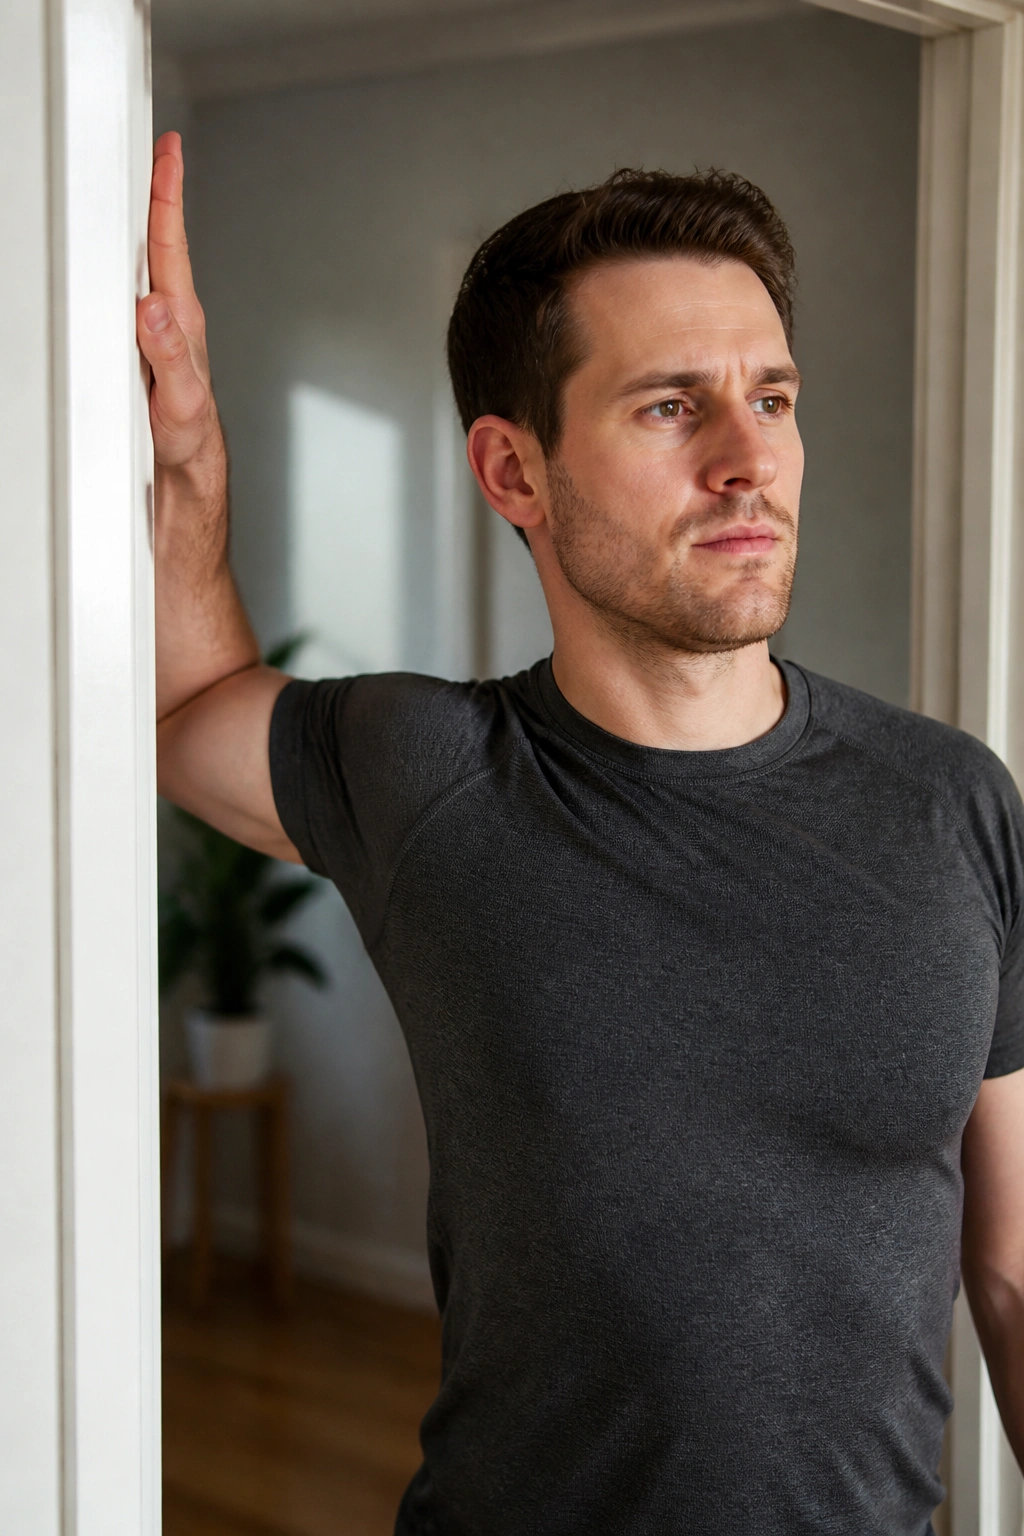
A tight chest does more than make your shoulders look rounded. It steals range from overhead pressing, reaching, and even simple things like grabbing a seatbelt. The doorway chest stretch opens the front of the shoulder and the pecs, which can feel almost rude the first time you do it correctly.
Place your forearm on a doorframe with the elbow just below shoulder height. Step one foot forward and let your chest drift through the opening until you feel a stretch across the front of the shoulder and upper chest. Keep your ribs from flaring up; that’s the mistake that turns this into a backbend.
If the shoulder feels pinchy, lower the arm a few inches and try again. A lower angle usually hits the pec major a little less aggressively and is friendlier on cranky shoulders. A higher angle tends to catch the upper chest and front deltoid, which can be useful after lots of pressing.
Hold 20 to 30 seconds, breathe out slowly, and let the sternum settle instead of forcing it. This is one of the few stretches where less effort usually gives you more.
3. Cat-Cow Flow
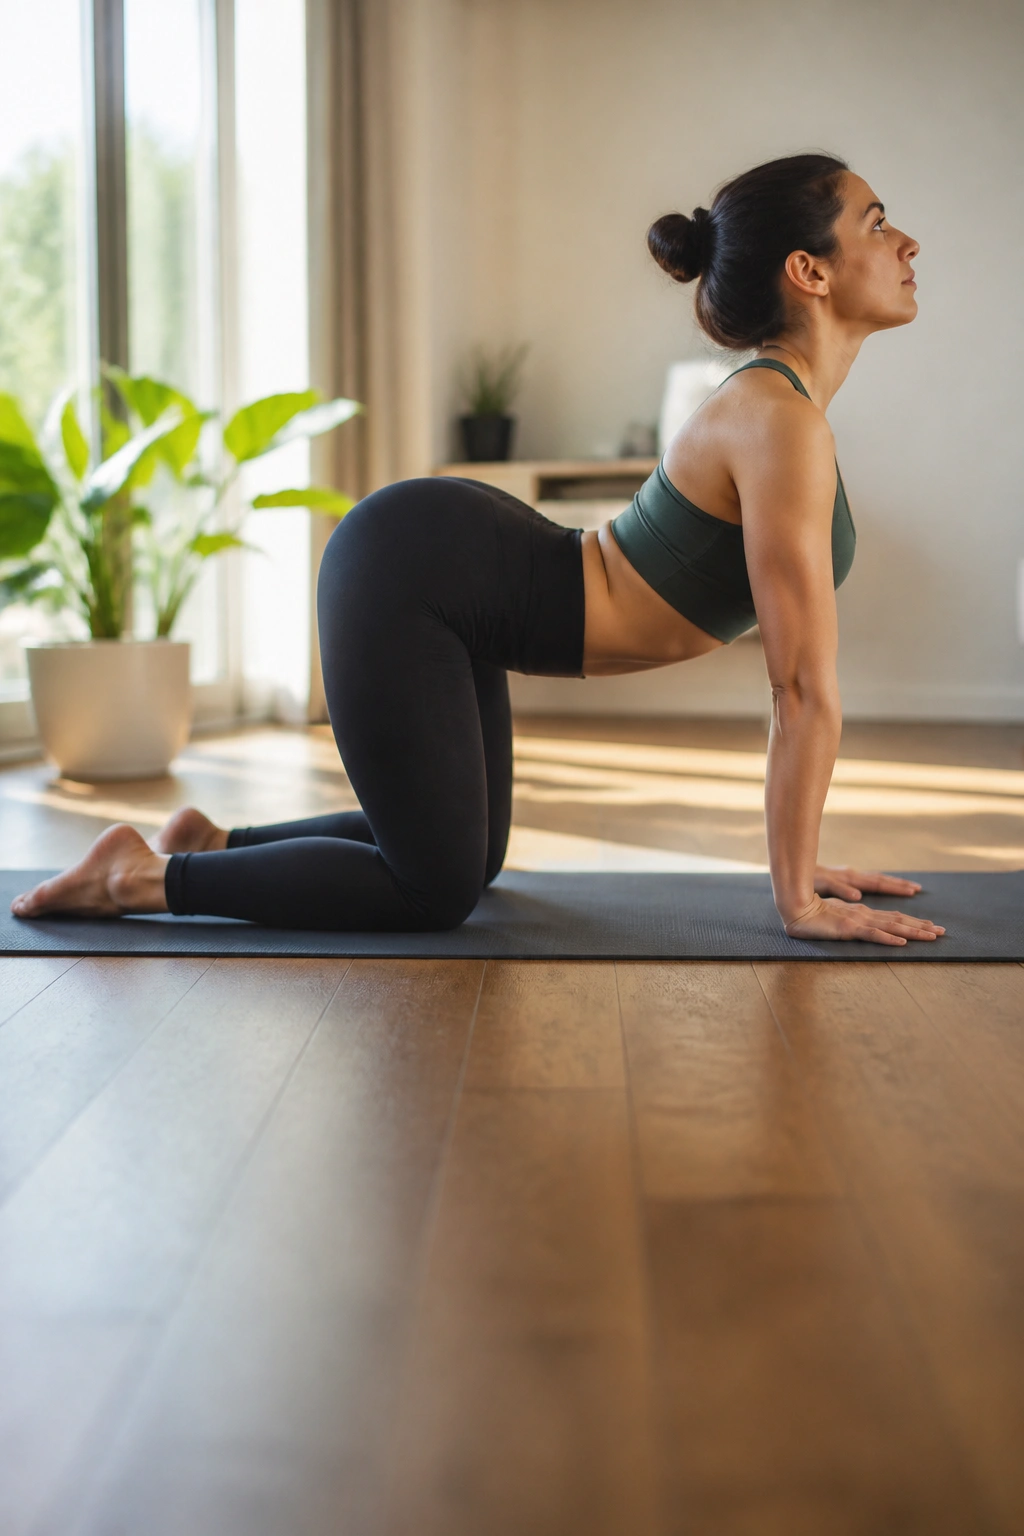
Why does a move that looks almost silly belong in a flexibility routine? Because cat-cow is not about looking dramatic. It’s about teaching the spine to move segment by segment while your breath stays calm, and that pays off before lifting, running, or anything that asks your torso to brace well.
Start on hands and knees with your wrists under shoulders and knees under hips. Inhale as you drop the belly and lift the chest for cow, then exhale as you round the spine and tuck the tail for cat. Keep the movement smooth, not jerky. You’re not trying to squeeze the most range out of each rep.
How to Use It
- Do 6 to 10 slow rounds
- Inhale on the extension, exhale on the curl
- Stop before the low back feels jammed
- Keep the elbows straight but not locked
If your lower back tends to overwork, think about moving from the middle back first. The ribs and pelvis should share the motion. That’s the whole point.
Cat-cow is one of my favorite pre-workout stretches because it warms the spine without draining energy. It’s calm. It’s useful. And it beats starting a session with a stiff torso.
4. Child’s Pose with Side Reach
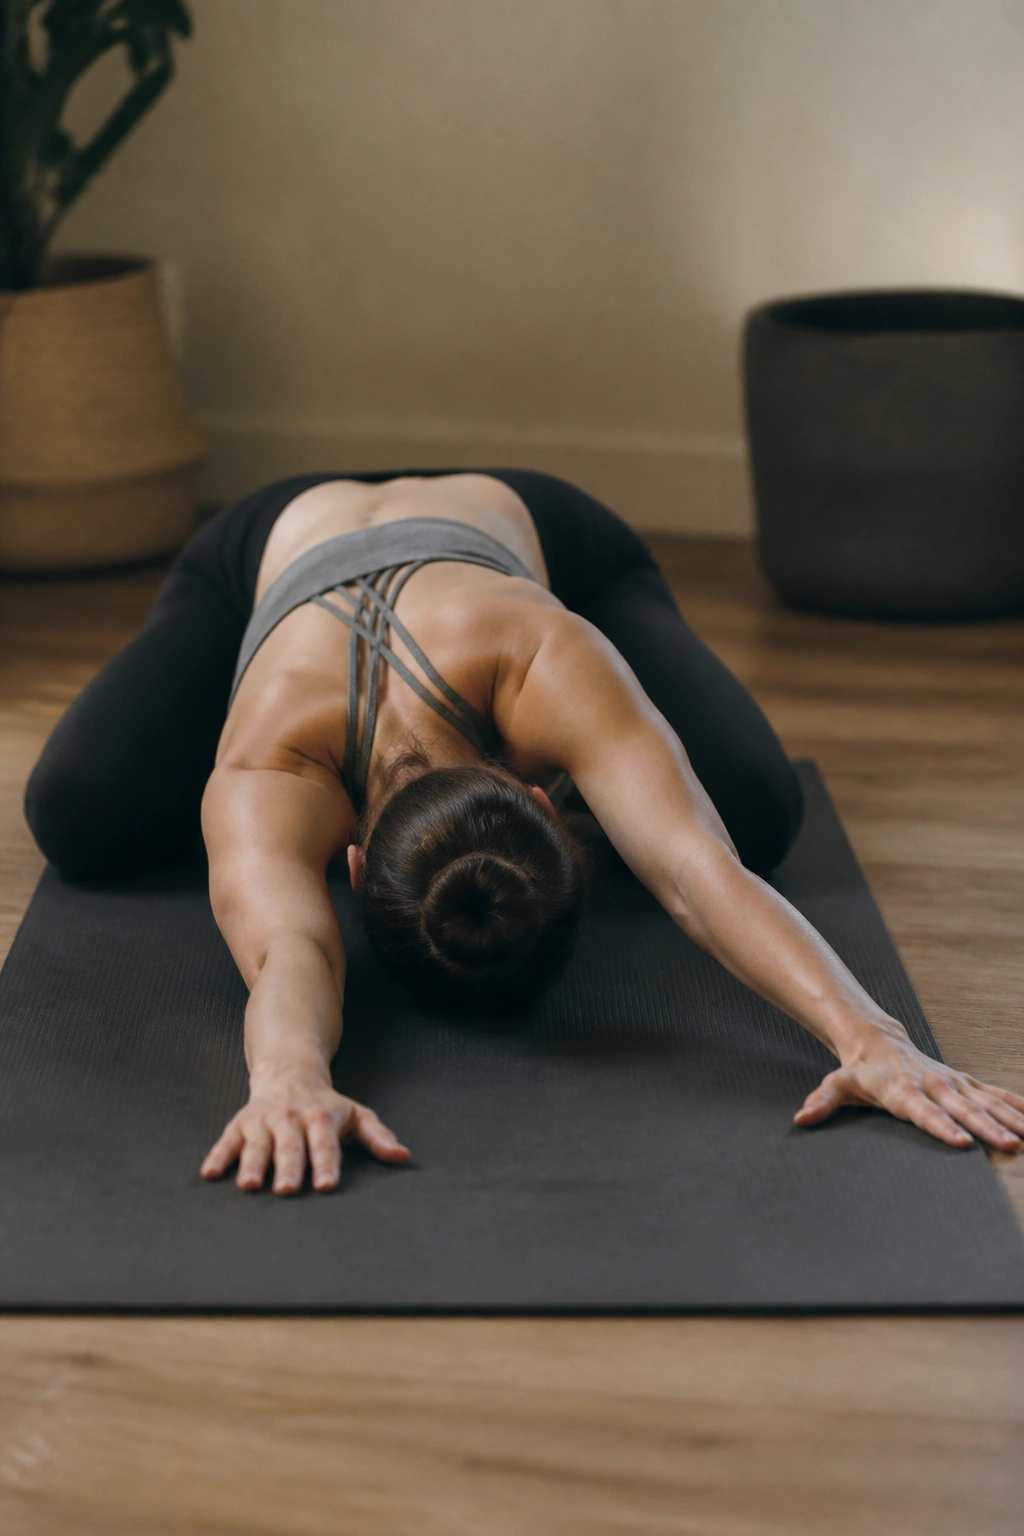
The wide-knee version of child’s pose is more than a rest position. With the arms walking to one side, it becomes a long line stretch through the lats, side ribs, and even the lower back. The floor does most of the work for you, which is exactly why it’s such a good cooldown choice.
Start on your knees, spread them wider than hips, and sit back toward the heels. Walk both hands to the right and let your left side lengthen. You should feel the stretch travel from the left armpit down into the flank and the side of the waist. Then switch sides and repeat.
Breathe into the back ribs rather than trying to force the shoulders lower. That shift matters. When your breath fills the ribs, the torso softens a little more with each exhale, and the stretch starts to feel deeper without extra effort.
If your knees complain, place a folded towel under them. If your shoulders feel jammed, keep the elbows slightly bent and the palms a little farther forward. This is a good one after rows, pull-downs, or a day spent hunched over a keyboard.
5. Thread-the-Needle Stretch
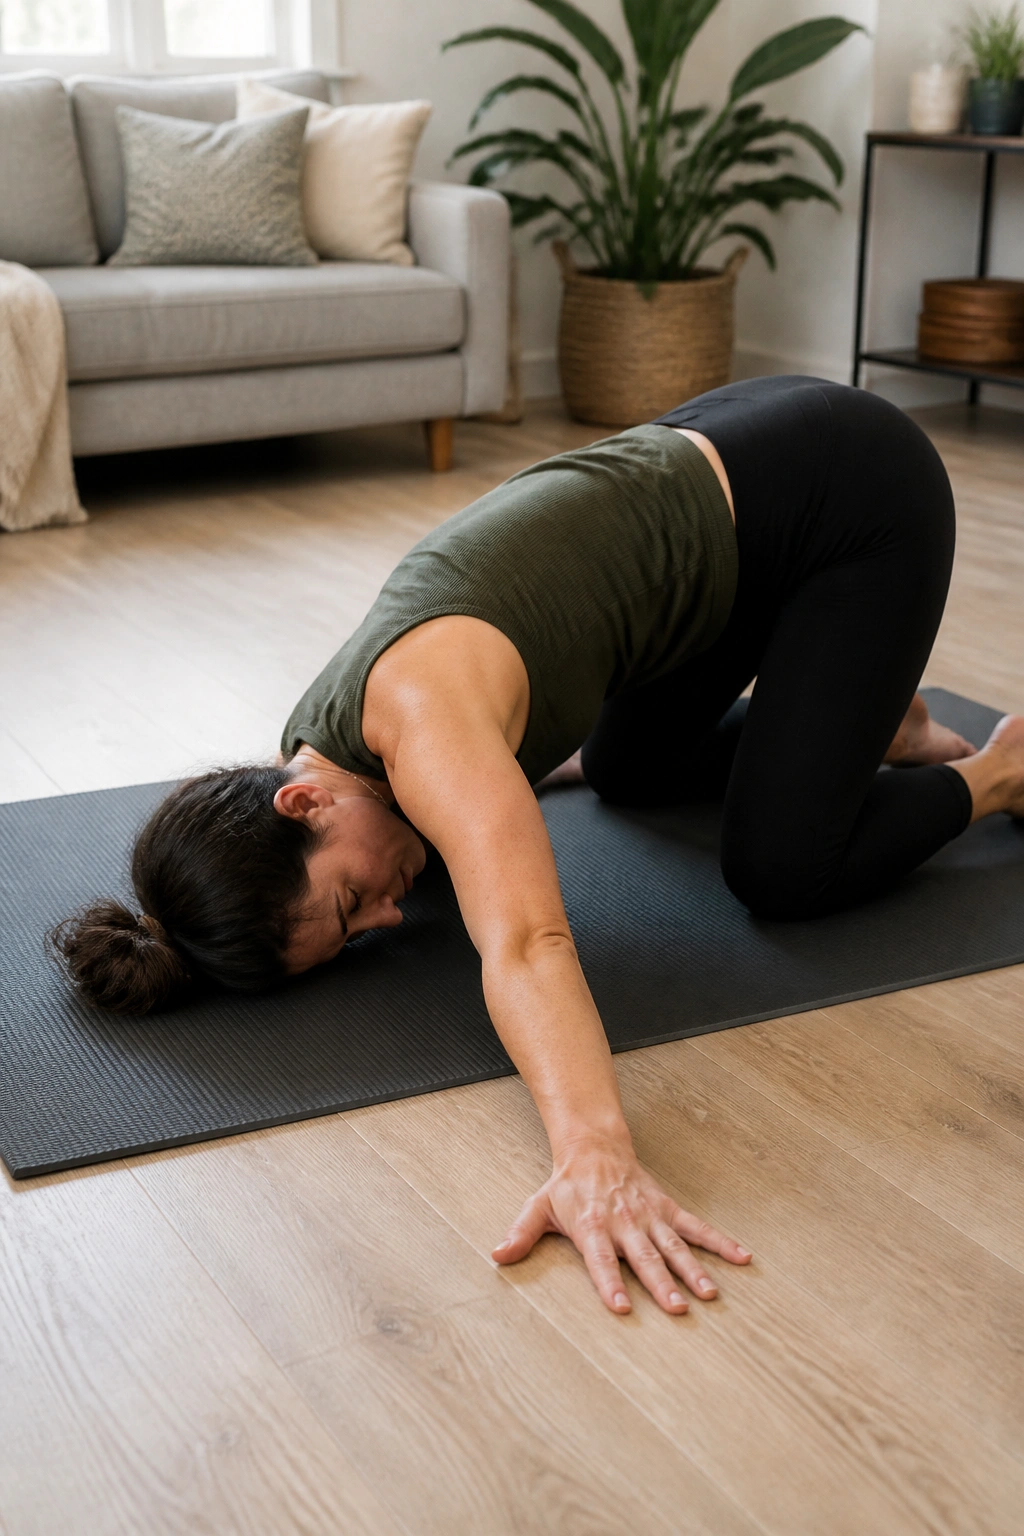
Unlike child’s pose, thread-the-needle asks your upper back to rotate instead of just lengthening. That makes it a smart pick for desk workers and lifters who spend a lot of time locked into one position. It reaches the thoracic spine, rear shoulder, and the space between the shoulder blades.
From all fours, slide your right arm under your left arm and lower your right shoulder and temple toward the floor. Let the left hand stay planted or stretch forward if that feels better. The goal is a clean twist through the rib cage, not a smash into the shoulder joint.
What to Watch For
- The stretch should sit in the upper back and rear shoulder
- The neck should stay relaxed
- The supporting arm should not shrug
- The front of the shoulder should never feel jammed
Hold for 3 to 5 breaths per side. If the floor feels too low, put a yoga block or folded towel under the shoulder so the twist stays comfortable.
I like this one after upper-body sessions because it makes the back feel less welded together. That little bit of rotation changes how the whole torso moves.
6. Half-Kneeling Hip Flexor Stretch
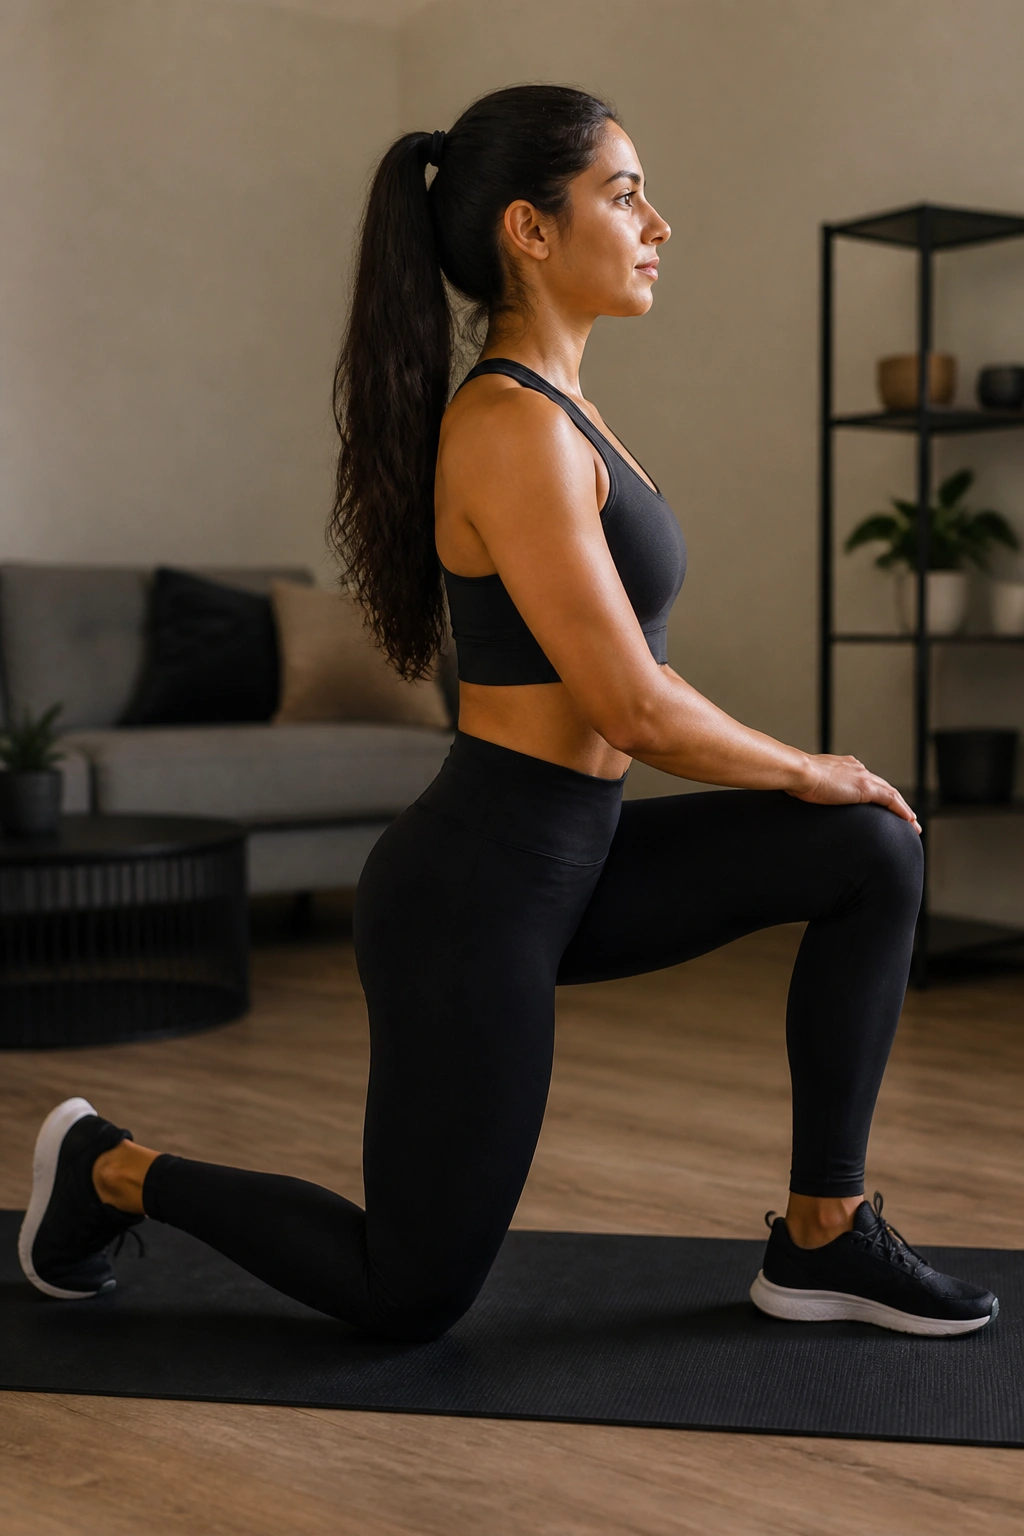
The missing piece in most hip flexor stretches is the back-leg glute. If you skip that, you usually end up arching the lower back and wondering why the front of the hip never opens. The half-kneeling version fixes that problem fast when you do it with a little precision.
Set one knee on a pad or folded mat and place the other foot in front so both knees are bent around 90 degrees. Tuck the pelvis slightly, squeeze the glute on the back leg, and shift forward only an inch or two until you feel the stretch in the front of the hip of the kneeling leg. That tiny shift is enough.
Setup That Matters
- Keep the ribs stacked over the pelvis
- Squeeze the back-side glute hard enough to feel it
- Move forward slowly, not in a lunge-and-collapse way
- Keep the front foot flat and stable
Hold 30 to 45 seconds per side. Reach the same-side arm overhead if you want a little extra line through the hip and side body, but don’t turn it into a backbend.
This stretch is gold after sprinting, cycling, or any leg day that leaves the front of the hips feeling short and grabby. Done right, it feels like a clean opening. Done wrong, it feels like your lower back is doing all the work.
7. Standing Quad Stretch
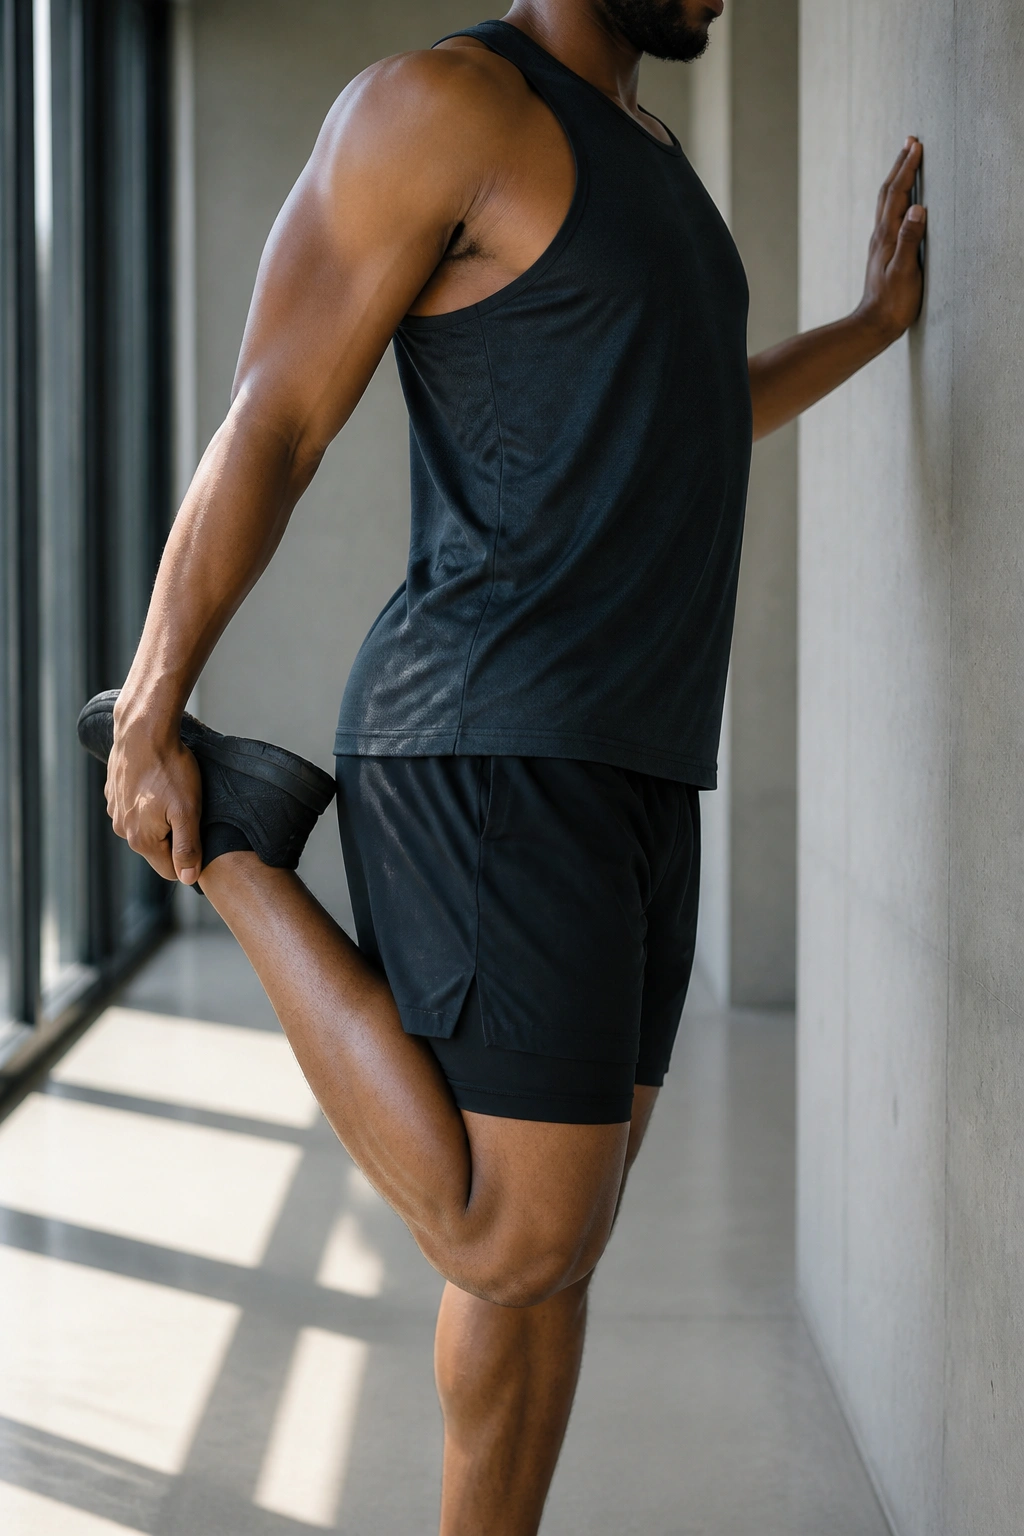
A sloppy quad stretch usually turns into a lower-back arch with one shoe in the air. The fix is boring and effective: stand tall, keep the knees close together, and stop the pelvis from tipping forward. That’s how you actually reach the quad instead of creating a wobble.
Grab one ankle, bring the heel toward the glute, and keep the standing knee slightly soft. If balance is an issue, put the free hand on a wall or rack. Press the standing foot down hard enough that you can feel the whole leg stabilize. Then gently tuck the pelvis and squeeze the glute on the stretched side.
That little pelvic tuck matters more than people think. Without it, the stretch drifts into the front of the hip and low back. With it, the quad lengthens in a cleaner line from the knee up toward the hip.
If your knee hates this position, switch to a side-lying quad stretch and bend the top leg behind you instead. Same muscle. Less balance drama. Use 20 to 30 seconds per side and keep the hold smooth, not yanky.
8. Low Lunge with Glute Squeeze
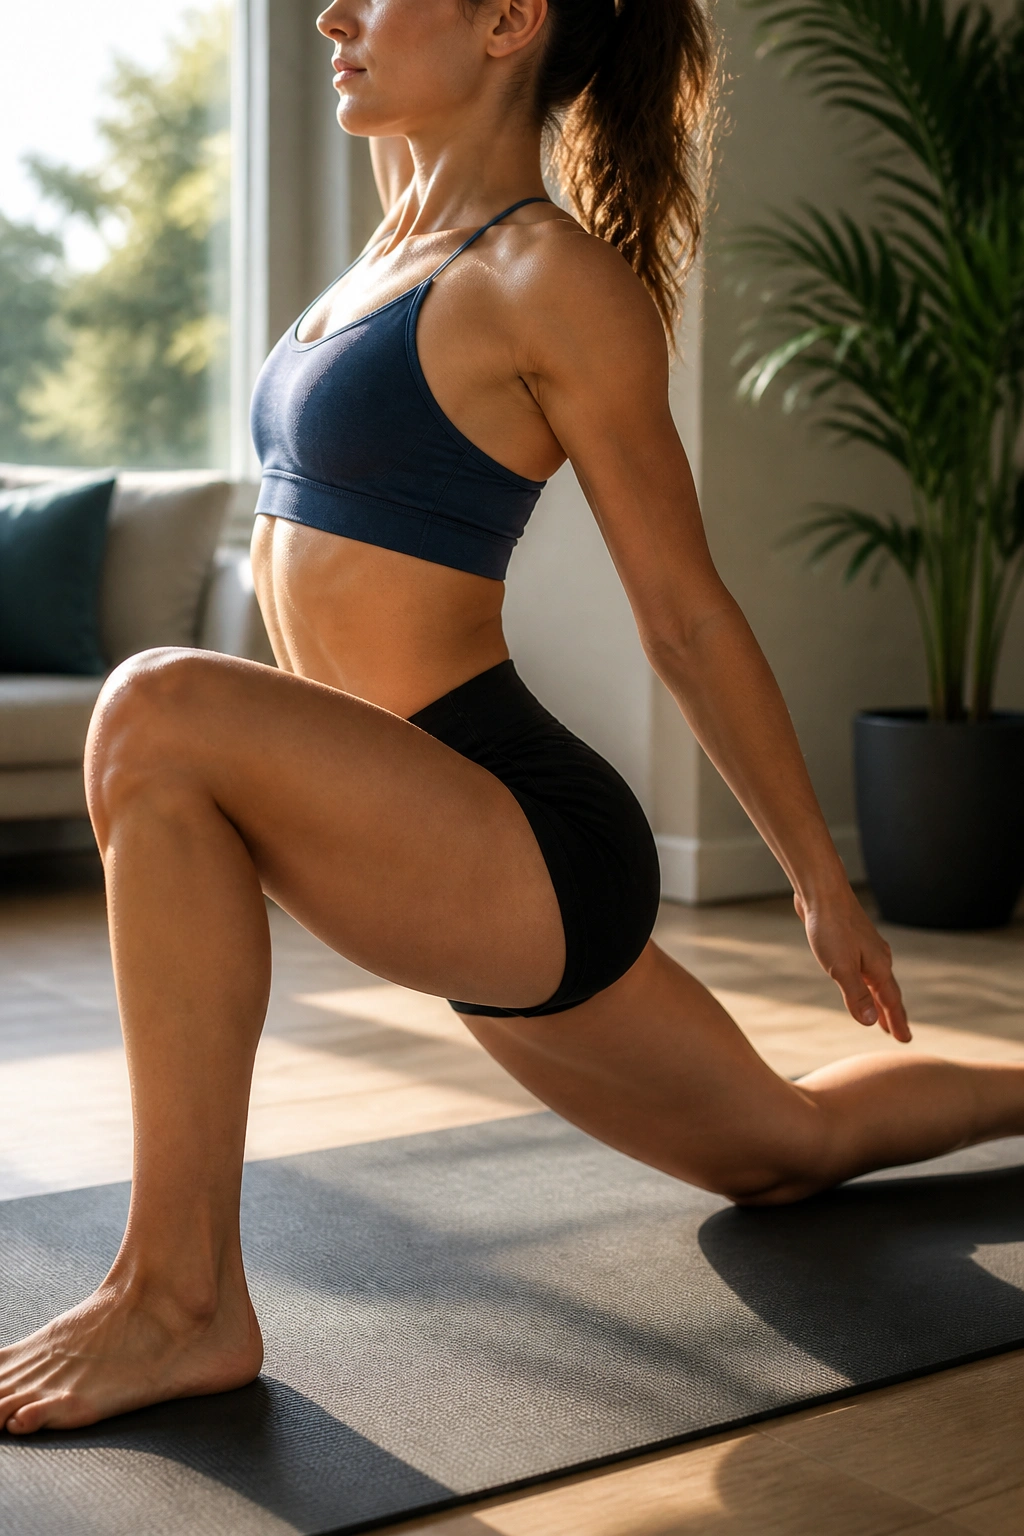
What if the half-kneeling stretch still feels too narrow? Use the low lunge. It opens the front of the hip, but it gives you a little more room to adjust the angle and find the exact spot that’s tight instead of forcing one fixed position.
Step one foot forward into a lunge and lower the back knee to the floor. Slide the back leg long behind you, then gently tuck the pelvis and squeeze the back glute. If you want more length, raise the arm on the kneeling side and lean a touch away from that side. The stretch should land across the front of the hip and upper thigh, not dump into the spine.
A lot of people push this stretch by shoving the hips forward. That usually just compresses the lower back. Better to move a little less and hold the shape for a little longer. That’s where the change comes from.
Hold for 20 to 40 seconds, breathe into the front ribs, and keep the front knee stacked over the ankle. This one is especially good after running, hiking, or any day that leaves the hip flexors feeling locked up.
9. Hamstring Strap Stretch
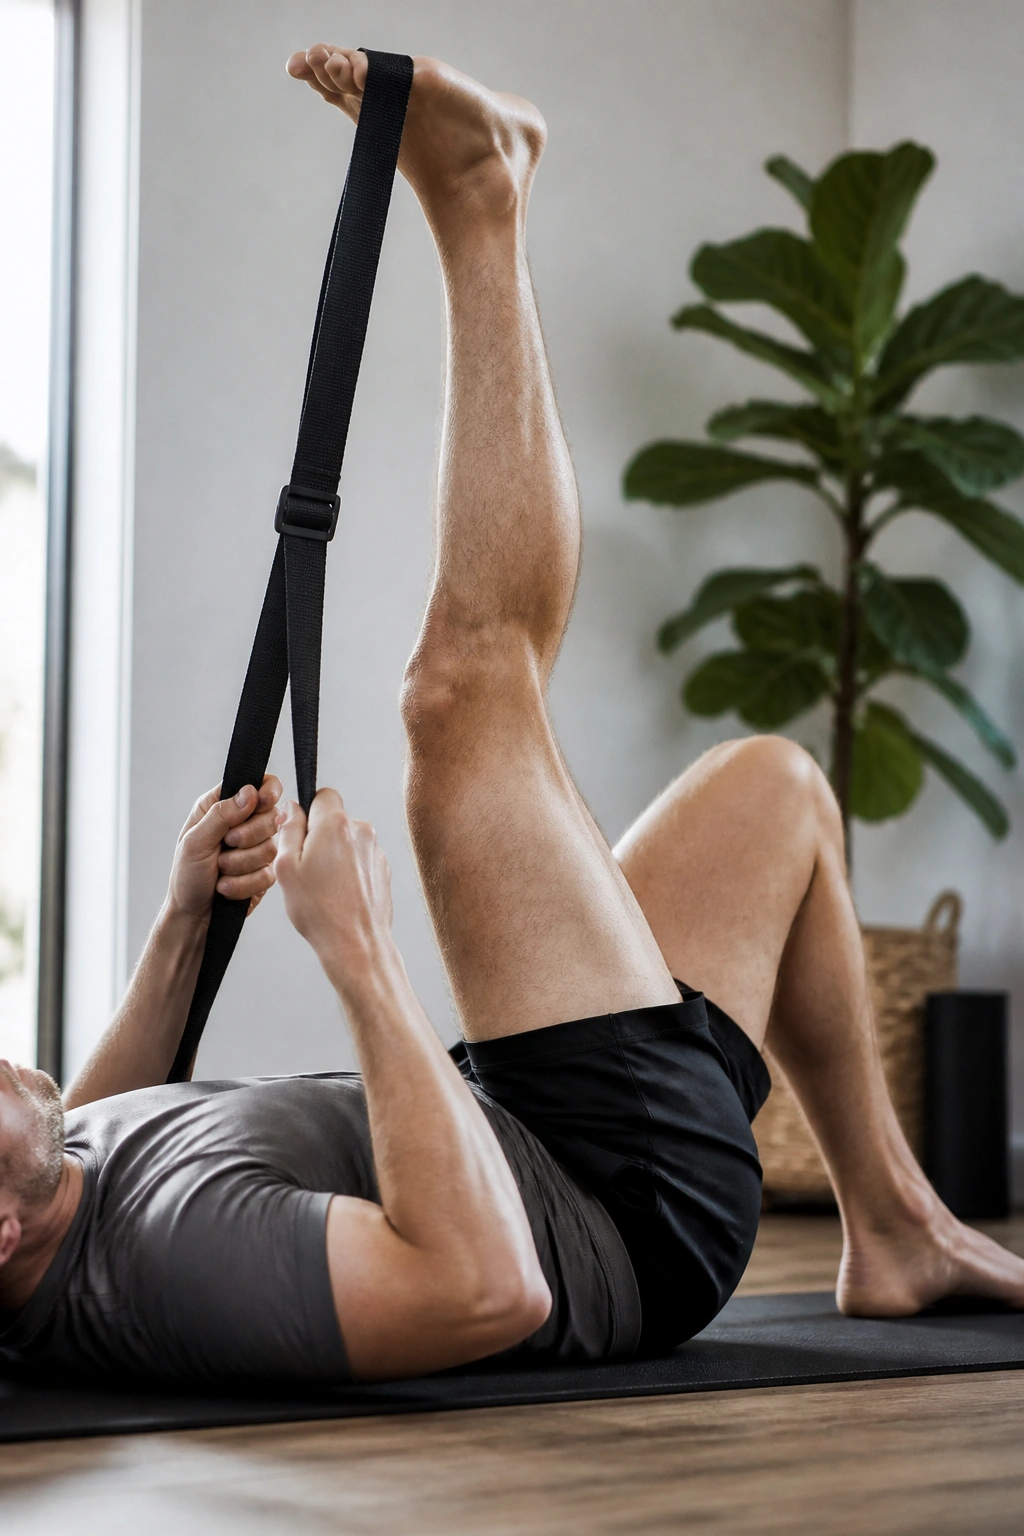
If your hamstrings shout at you every time you reach for your toes, lying on your back is usually kinder. The strap version lets you lengthen the back of the leg without rounding through the spine or yanking on the knee.
Lie on your back, loop a strap or towel around one foot, and extend that leg toward the ceiling. Keep the other leg bent if your lower back needs help staying settled. Gently pull until you feel a stretch through the middle of the hamstring. The sensation should stay in the muscle belly, not behind the knee.
Quick Checks
- The knee can stay slightly bent
- The foot can relax instead of hard-pointing
- The pelvis should stay heavy on the floor
- Tingling means back off a little
Hold for 30 to 60 seconds, then switch sides. If the stretch feels more like a nerve zing than a muscle pull, bend the knee a bit and reduce the height of the leg. That adjustment often changes everything.
I reach for this after lower-body sessions because it’s controlled and honest. You can’t cheat it much, which is probably why it works so well.
10. Figure-Four Glute Stretch
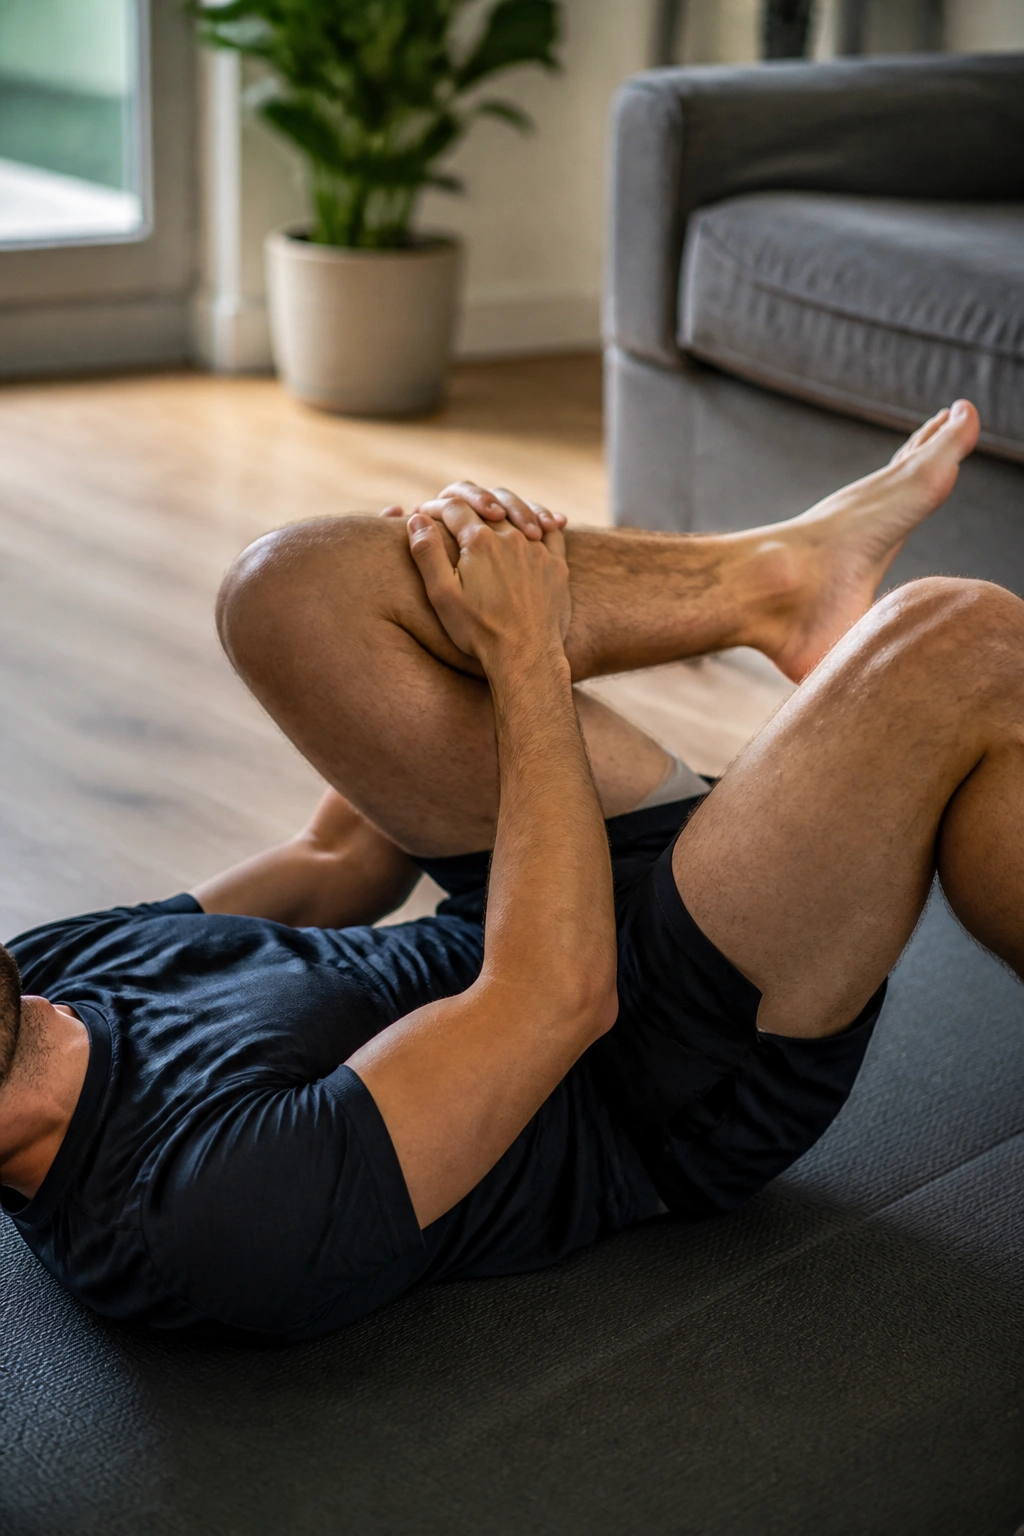
A lot of glute stretches are really just lower-back stretches in disguise. Figure-four is cleaner. It targets the outer hip and deep glute area without asking your spine to twist into a mess.
Lie on your back with both knees bent. Cross one ankle over the opposite thigh, just above the knee, then draw the uncrossed leg toward your chest. You should feel the stretch in the glute of the crossed leg, maybe a bit along the outer hip. Keep the neck relaxed and the shoulders down.
Do not crank the knee down with your hand. That’s how people irritate the hip and turn a useful stretch into a stubborn one. Let the leg weight do most of the work, and use your breath to soften the grip in the muscles.
This is one I prefer after squats, deadlifts, long walks, or a day of sitting in a car. It’s also easy to do on a couch if the floor sounds like too much trouble. Hold 20 to 45 seconds per side and let the hip settle before you switch.
11. Adductor Rock-Backs
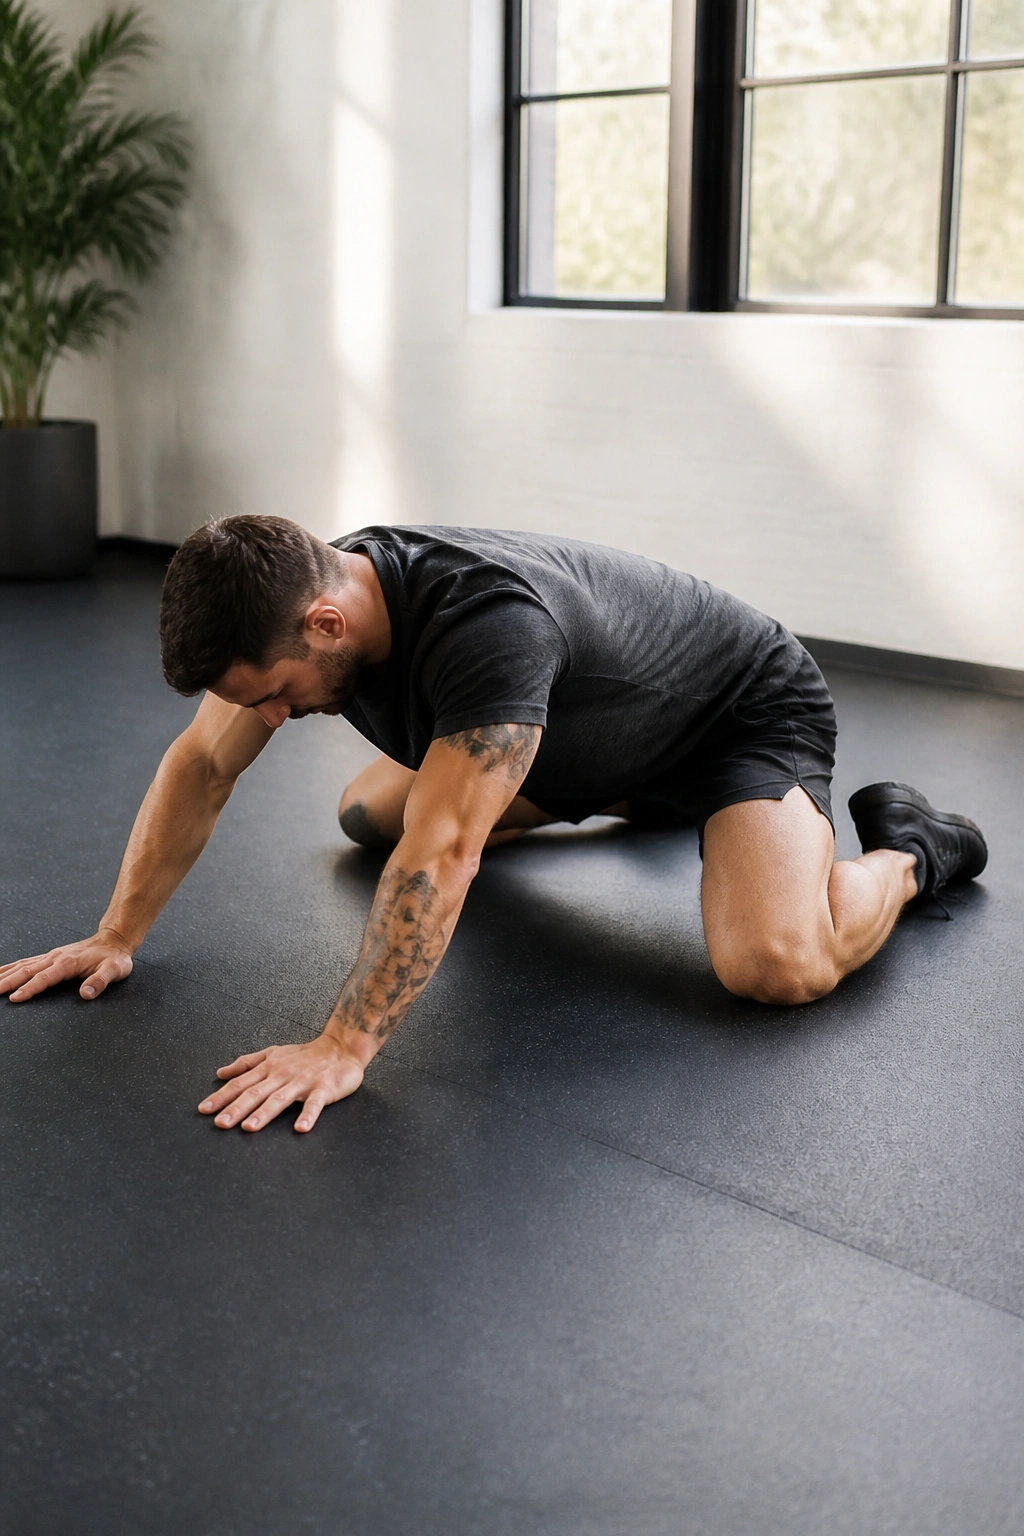
Unlike a long static hold, rock-backs keep the inner thigh moving while it lengthens. That matters if you want flexibility that shows up in squats, lunges, and side-to-side work instead of only in a floor stretch.
Start on all fours with the knees spread wide and the feet in line with the knees. Keep the spine neutral and rock the hips back toward the heels, then return to center. The movement should stay smooth and controlled. You’re not dropping into the floor.
How to Keep It Useful
- Do 8 to 12 controlled reps
- Keep the back flat, not collapsed
- Stop before the hips pinch
- Breathe out as you rock back
This one is excellent before squats because it warms the adductors without tiring them out. It also helps if your groin gets tight during wide-stance movements.
The nicest part is how quickly it tells you where your limit is. If one side feels shorter, you know it. If the hips feel blocked, you know that too. No guessing.
12. Frog Stretch
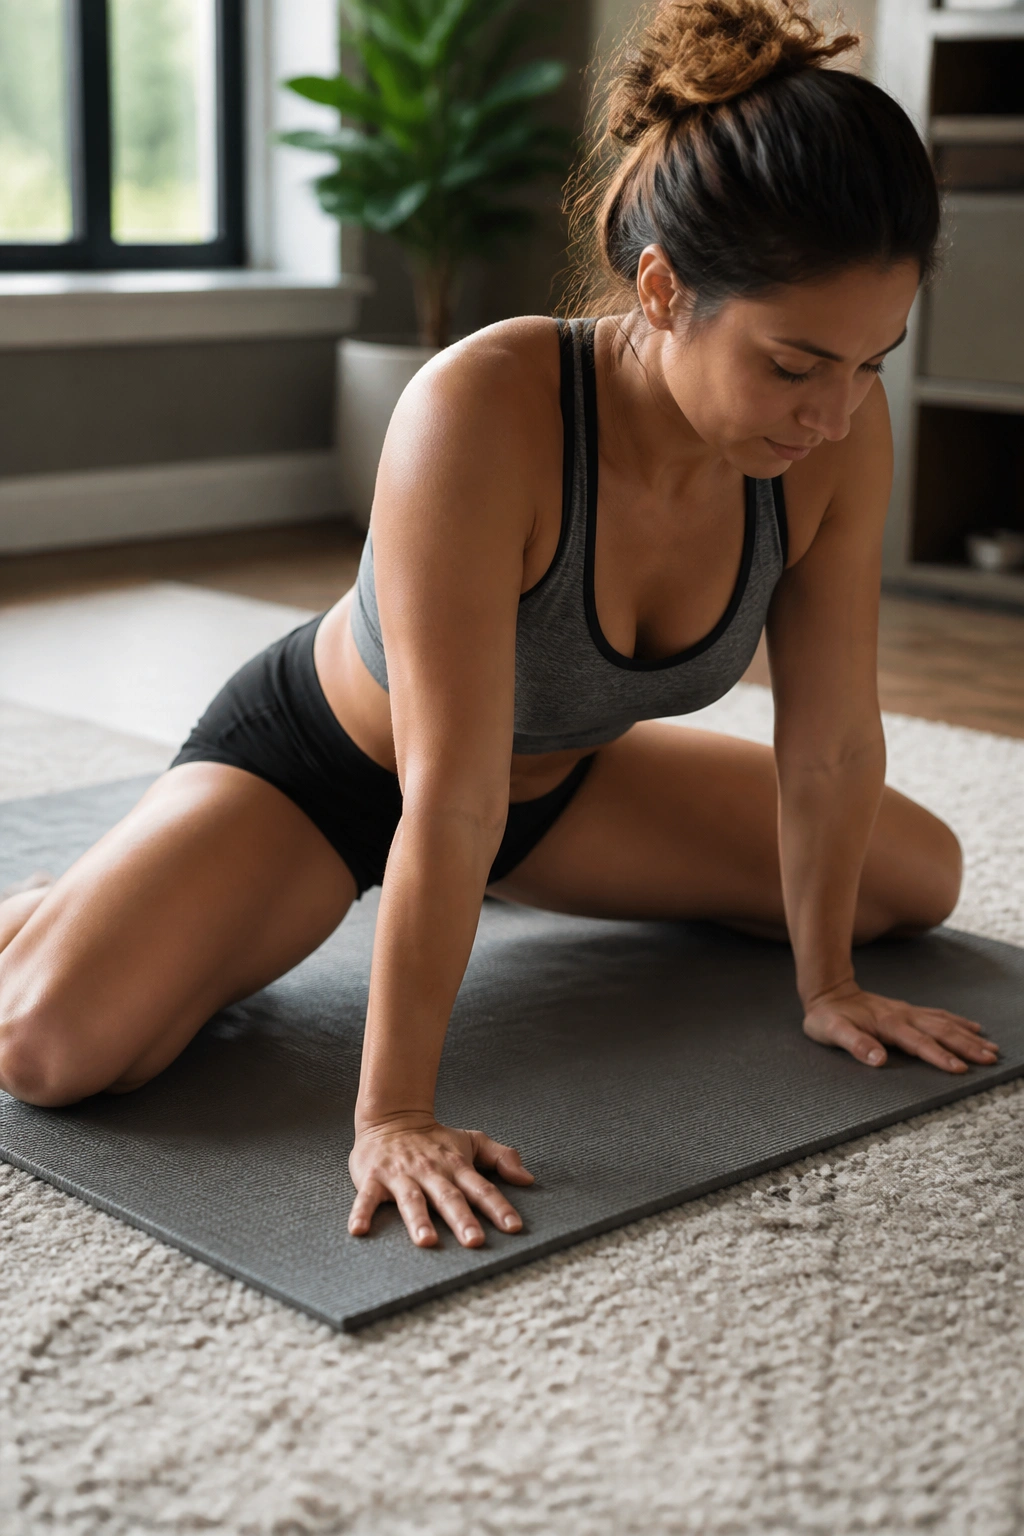
Frog stretch is not a “more is better” move. It’s a deep inner-thigh opener, and if you rush into it cold, it can feel like a complaint from every tissue in the area. Warm first. Always.
Get on hands and knees, then widen the knees and turn the feet out so the inner legs open. Lower onto forearms or stay on your hands if that’s already enough. The stretch should land in the adductors, the inner thighs, and maybe a bit near the groin. Keep the hips in line with the knees instead of sliding them way back.
What Makes It Work
- Use a folded mat under the knees
- Shorten the range if the knees feel stressed
- Hold for 20 to 40 seconds, not forever
- Breathe calmly and don’t bounce
A pillow under the chest can make this far more manageable. So can a smaller knee width. The first goal is a clean stretch, not a dramatic one.
I usually save frog stretch for the end of a session or a separate mobility block. It asks for patience. If you give it patience, it pays off.
13. Downward Dog Pedal
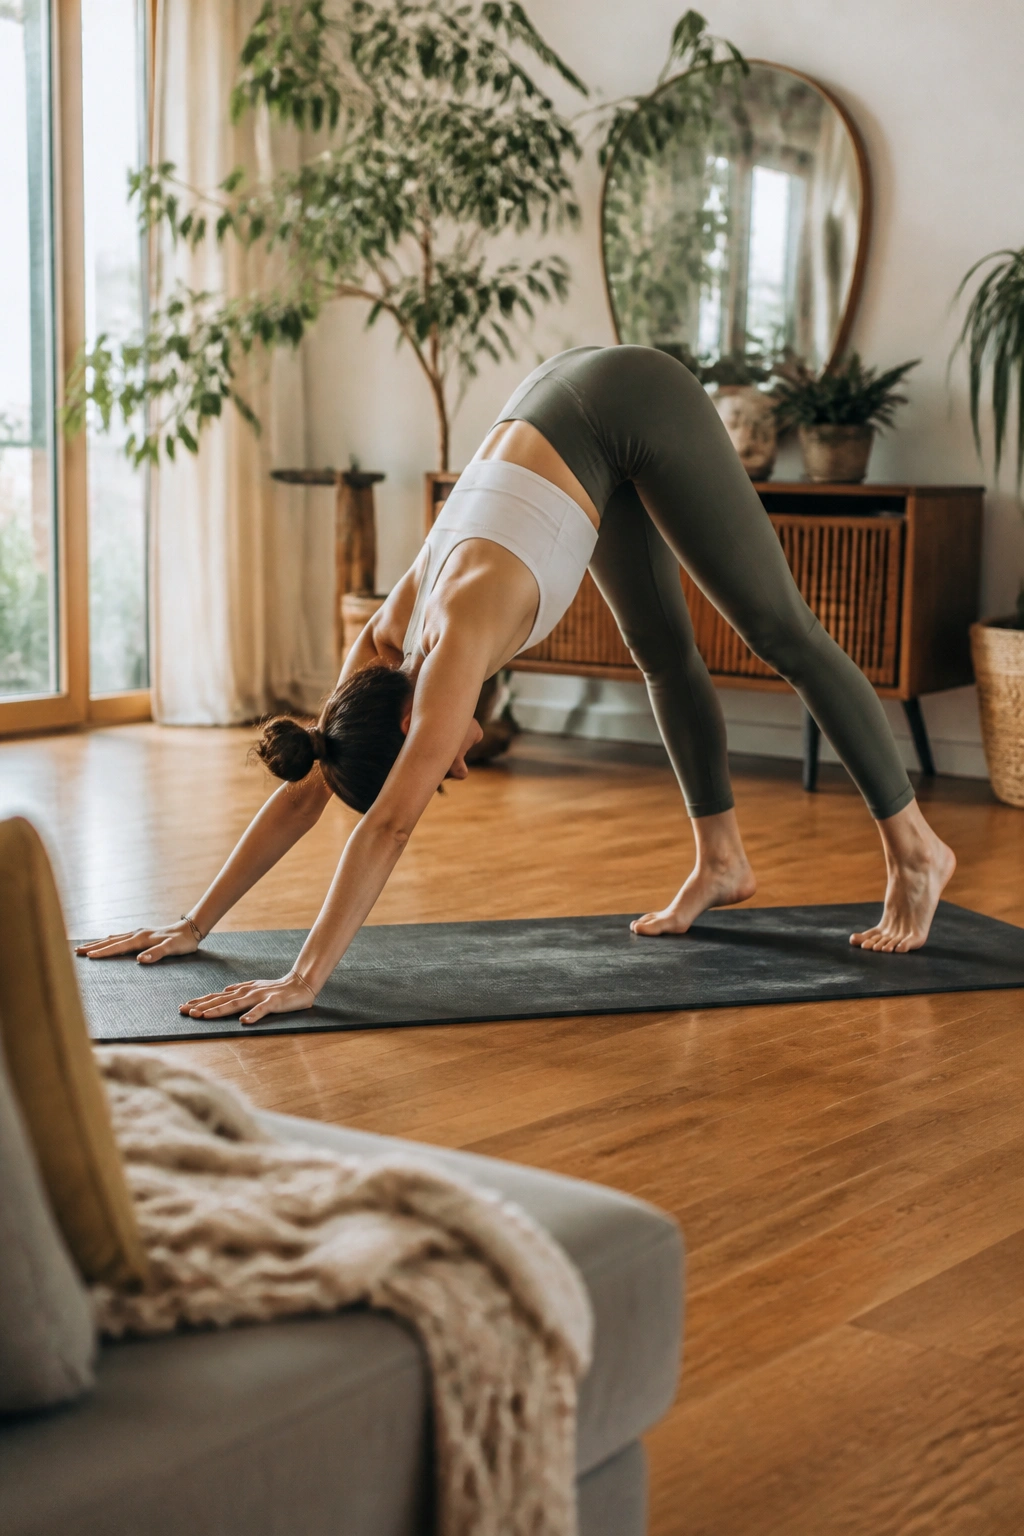
A good calf stretch changes more than ankle flexibility. It can make squats feel less blocked and running strides feel less wooden. Downward dog with a pedal takes that idea and turns it into a warm-up that moves.
From a push-up-like position, lift the hips up and back. Keep the hands planted and alternate pressing one heel toward the floor while bending the other knee. The heels do not need to touch. What matters is the back-and-forth shift through the calf and Achilles line.
A lot of people make this pose all about the shoulders. Fine, but the calves are doing useful work here too. If you’re stiff through the ankles, the pedaling motion often feels better than a static hold because it gives you just enough movement to stay relaxed.
Do 6 to 10 slow pedaling reps per side before lower-body work, or hold the shape for a few breaths after training. Keep the ribs from sagging. Keep the neck long. That’s enough.
14. Seated Spinal Twist
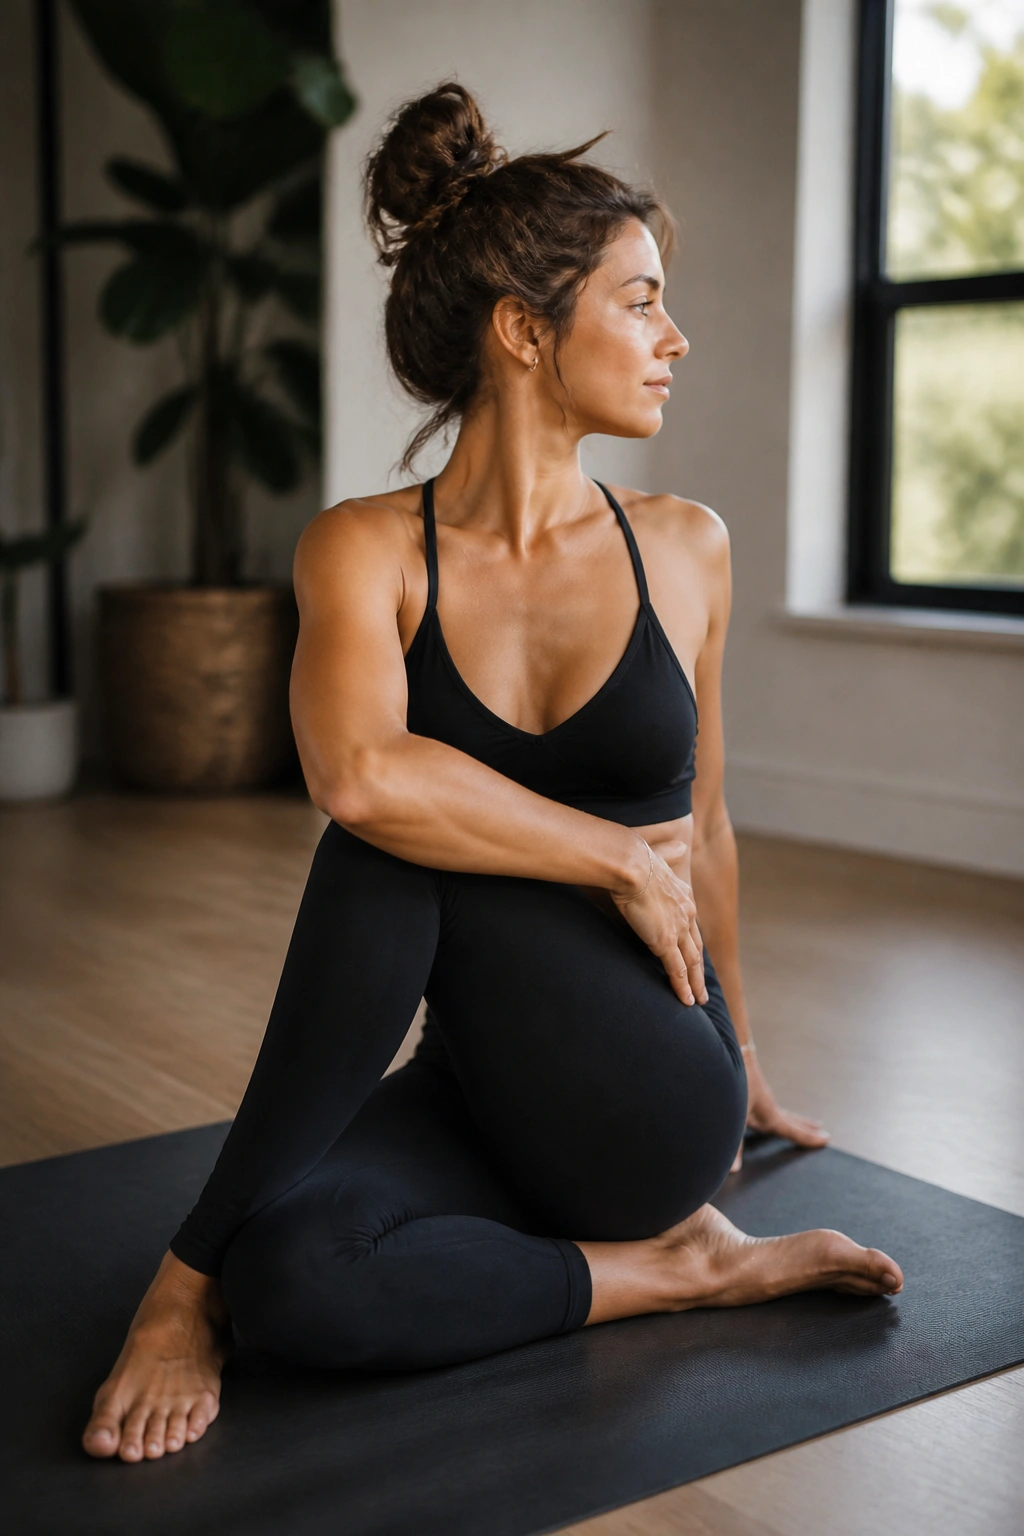
Can a twist help flexibility without turning the low back into a cranky hinge? Yes, if you keep it where rotation belongs: through the rib cage and upper back. That’s the part many people forget.
Sit tall with both sit bones grounded. Bend one knee, cross the opposite foot over, and use the arm to help you turn toward the bent knee. Keep the spine long before you rotate. If the lower back starts to round hard, you’ve gone too far. The twist should feel open, not jammed.
Where to Feel It
- Upper back and side ribs
- Rear shoulder line
- Sometimes the outer hip
- Never a sharp pinch in the low back
Take 3 to 5 slow breaths on each side. The exhale usually gives you a little more room, but don’t chase range like a person trying to pry open a stuck jar lid.
This is one of my favorite post-workout stretches because it cools the system down while keeping the torso mobile. It’s a good pairing with child’s pose and a hip opener.
15. Calf Wall Stretch
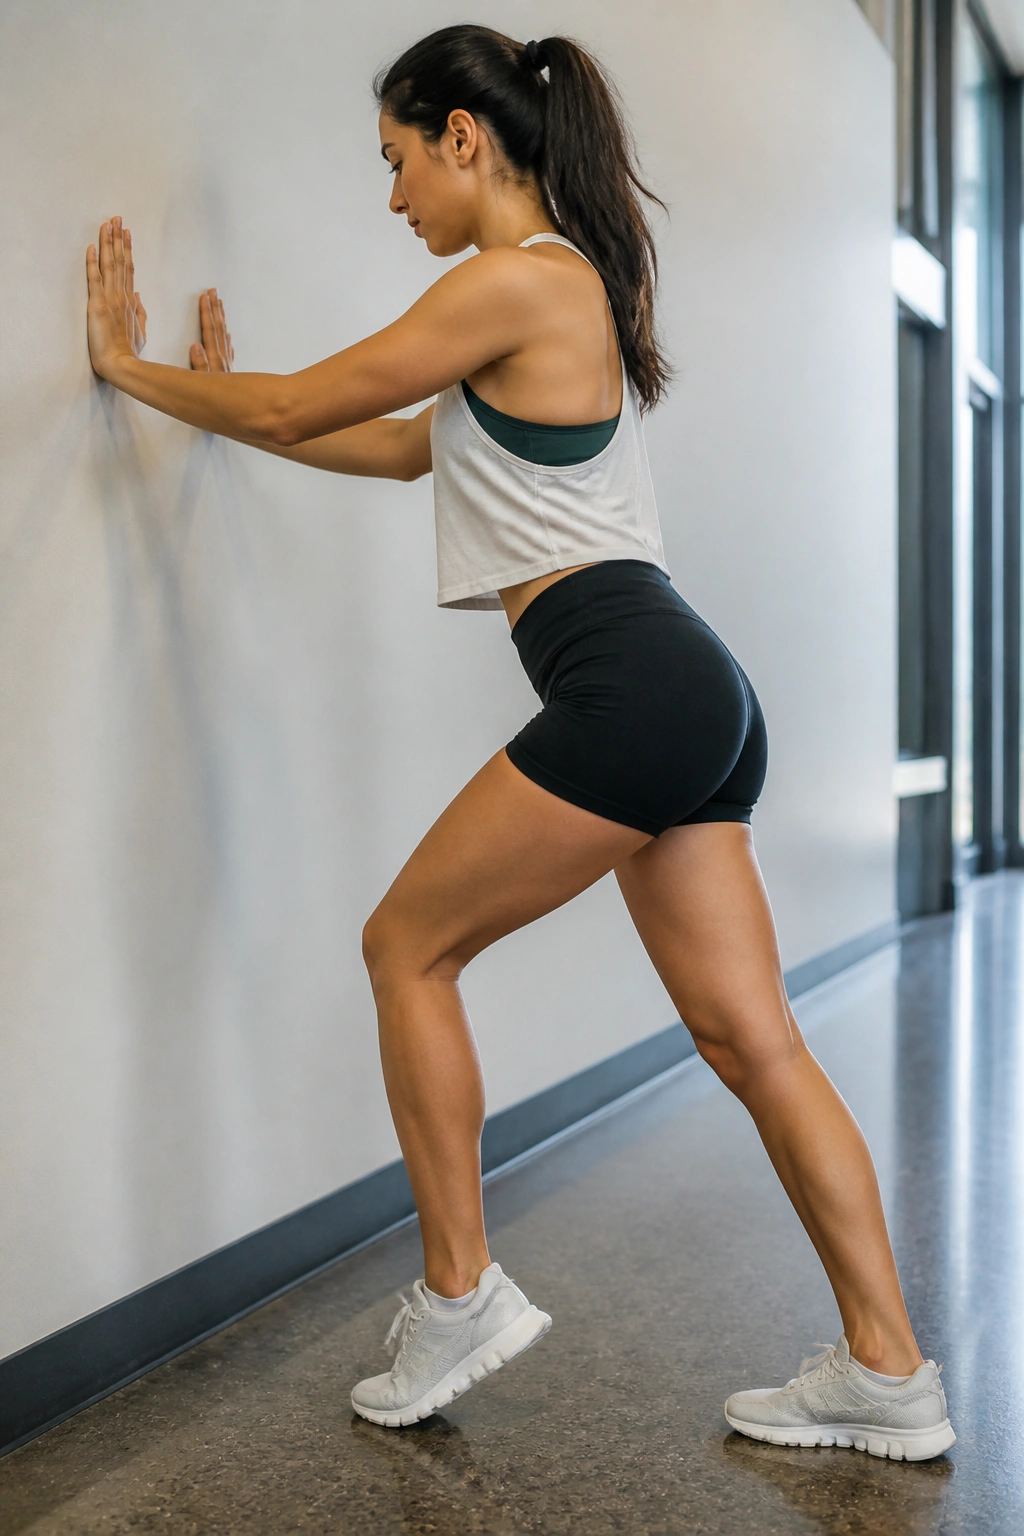
If your calves feel like tight bands after runs or leg days, the wall stretch is boring in the best way. It’s plain, easy to repeat, and easy to do correctly, which is more than most people can say for stretching advice on the internet.
Stand facing a wall and place both hands on it. Step one foot back, keep the heel down, and lean forward until you feel the stretch in the back calf. For a straighter-knee version, keep the back leg nearly straight. For a bent-knee version, bend that back knee a little and shift the stretch lower into the soleus.
The difference matters. Straight knee targets the larger calf muscle. Bent knee reaches a deeper layer lower down. If you run, jump, or squat a lot, both deserve attention.
Quick Form Notes
- Keep the back heel flat
- Aim the toes forward or slightly in
- Hold 20 to 30 seconds in each version
- Don’t let the arch collapse inward
I like this after lower-body training and after long walks in less-than-kind shoes. Small stuff adds up, and calves tend to complain about it first.
16. Overhead Triceps and Lat Stretch
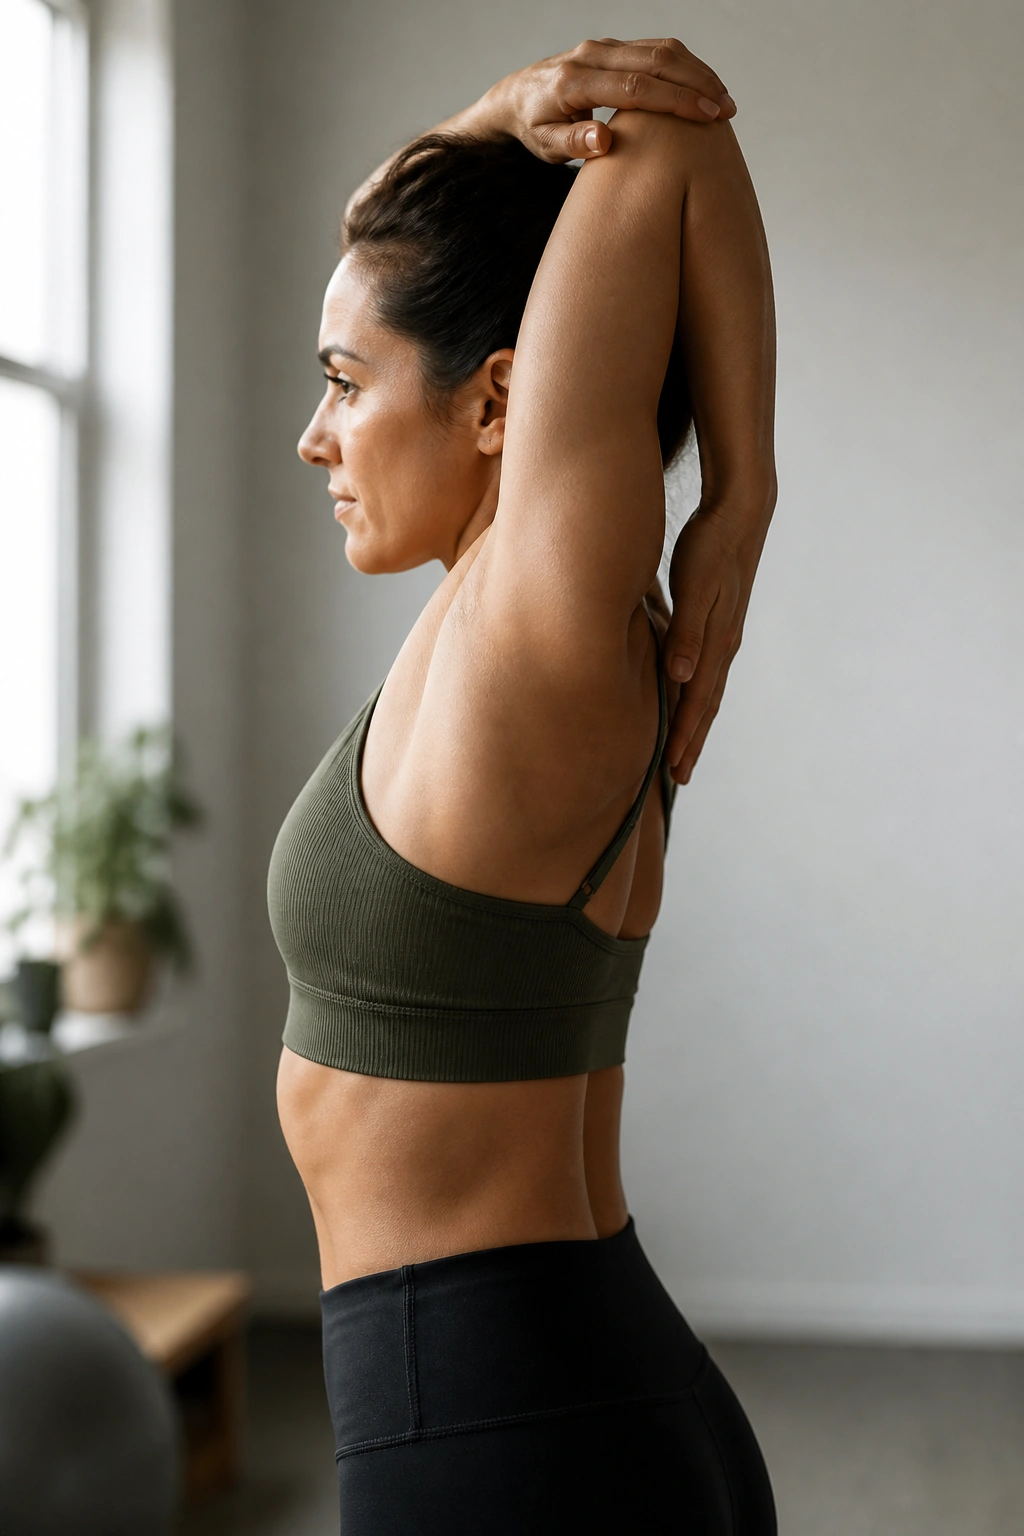
The overhead triceps stretch looks simple until you realize how many people turn it into a shoulder shrug. The real target is the triceps, the side of the upper back, and the lat along the rib cage. A clean setup makes all the difference.
Lift one arm overhead and bend the elbow so the hand drops behind the head or upper back. Use the opposite hand to gently support the elbow. Then pull the arm slightly toward the midline or lean a touch to the opposite side if you want to bring the lat into it. The stretch should stay long and smooth, not sharp.
Breathing matters here. If the ribs are locked up, the lat stays tense. A slow exhale lets the side body soften, and that’s usually when the stretch finally lands where it should.
I like this after pressing, climbing, or any overhead work. If your shoulder is sensitive, keep the elbow a little more forward and shorten the range. You still get a useful stretch without forcing the joint into a bad mood.
17. Pigeon Pose
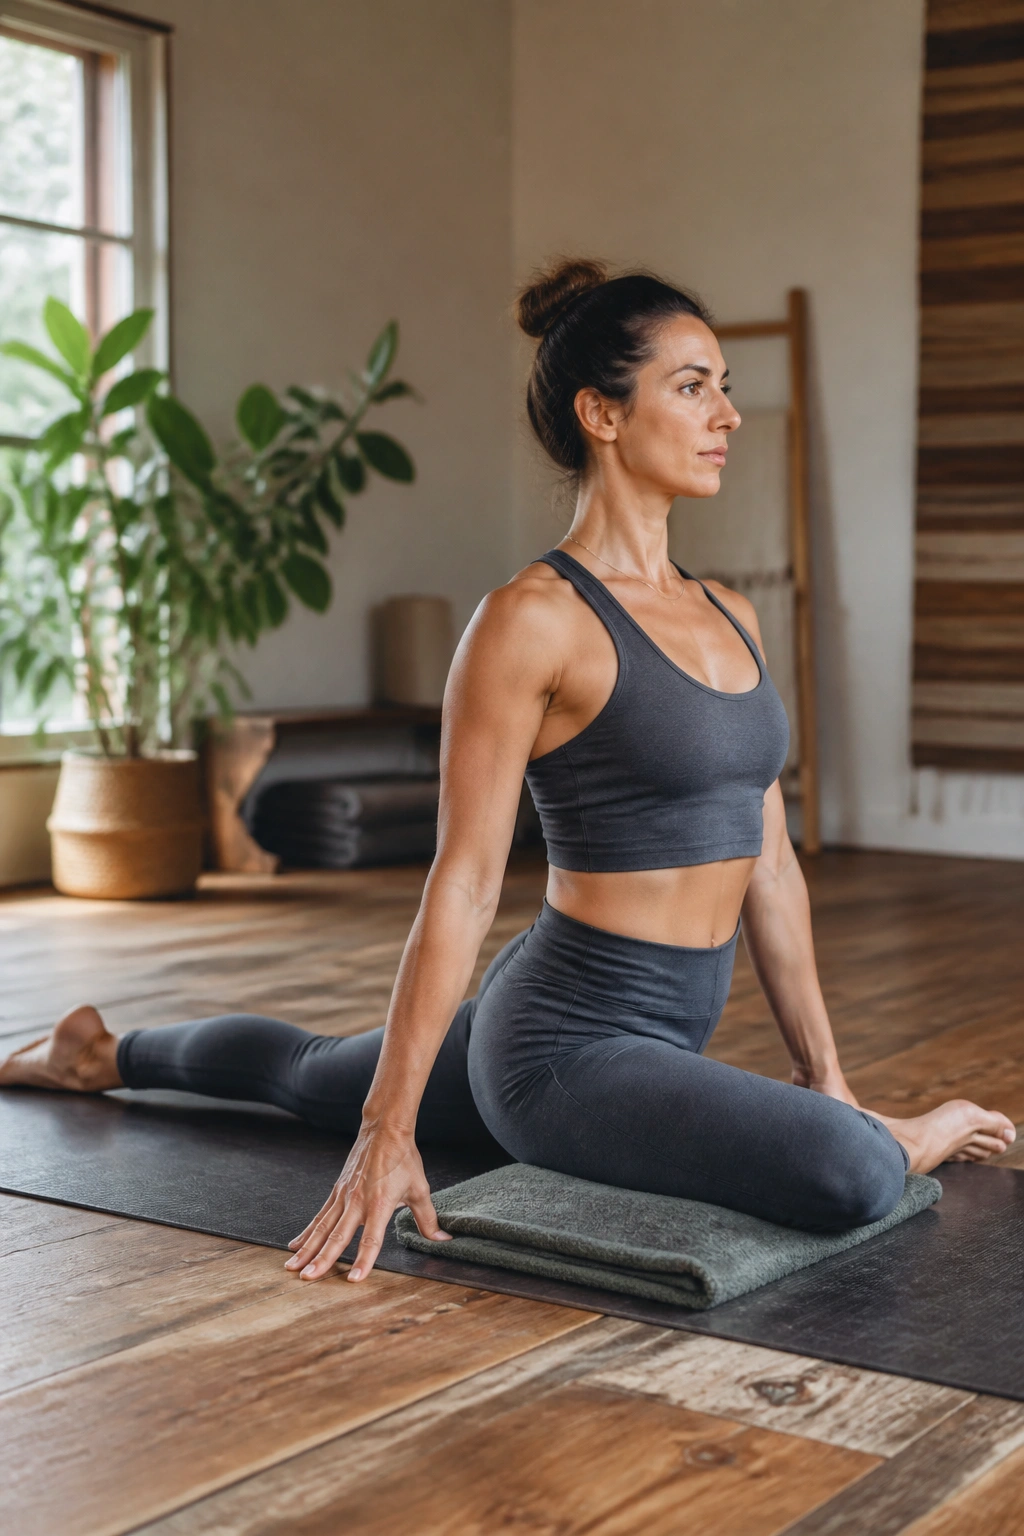
Pigeon pose looks a lot like figure-four on paper. In practice, it asks for more room in the hips and more patience from the person doing it. That’s why I save it for when the body is already warm.
From a plank or hands-and-knees position, bring one knee forward and place the shin on the floor at an angle, then extend the other leg back. Keep the front foot flexed if that helps the knee feel safer. Lower onto the forearms or stay upright. The stretch usually lands deep in the front hip and outer glute.
What to watch for? The front hip wants to dump to one side. The back leg wants to twist. The front knee may not love a big angle. If any of that happens, use a blanket under the front hip and shorten the position. There’s no prize for going low.
Figure-four is the gentler cousin. Pigeon is the deeper one. I recommend it for people who already know their hips tolerate floor work well and want a longer, slower cooldown. Hold 30 to 60 seconds, breathe, and back out the second it feels jointy.
18. Ankle Dorsiflexion Wall Drill
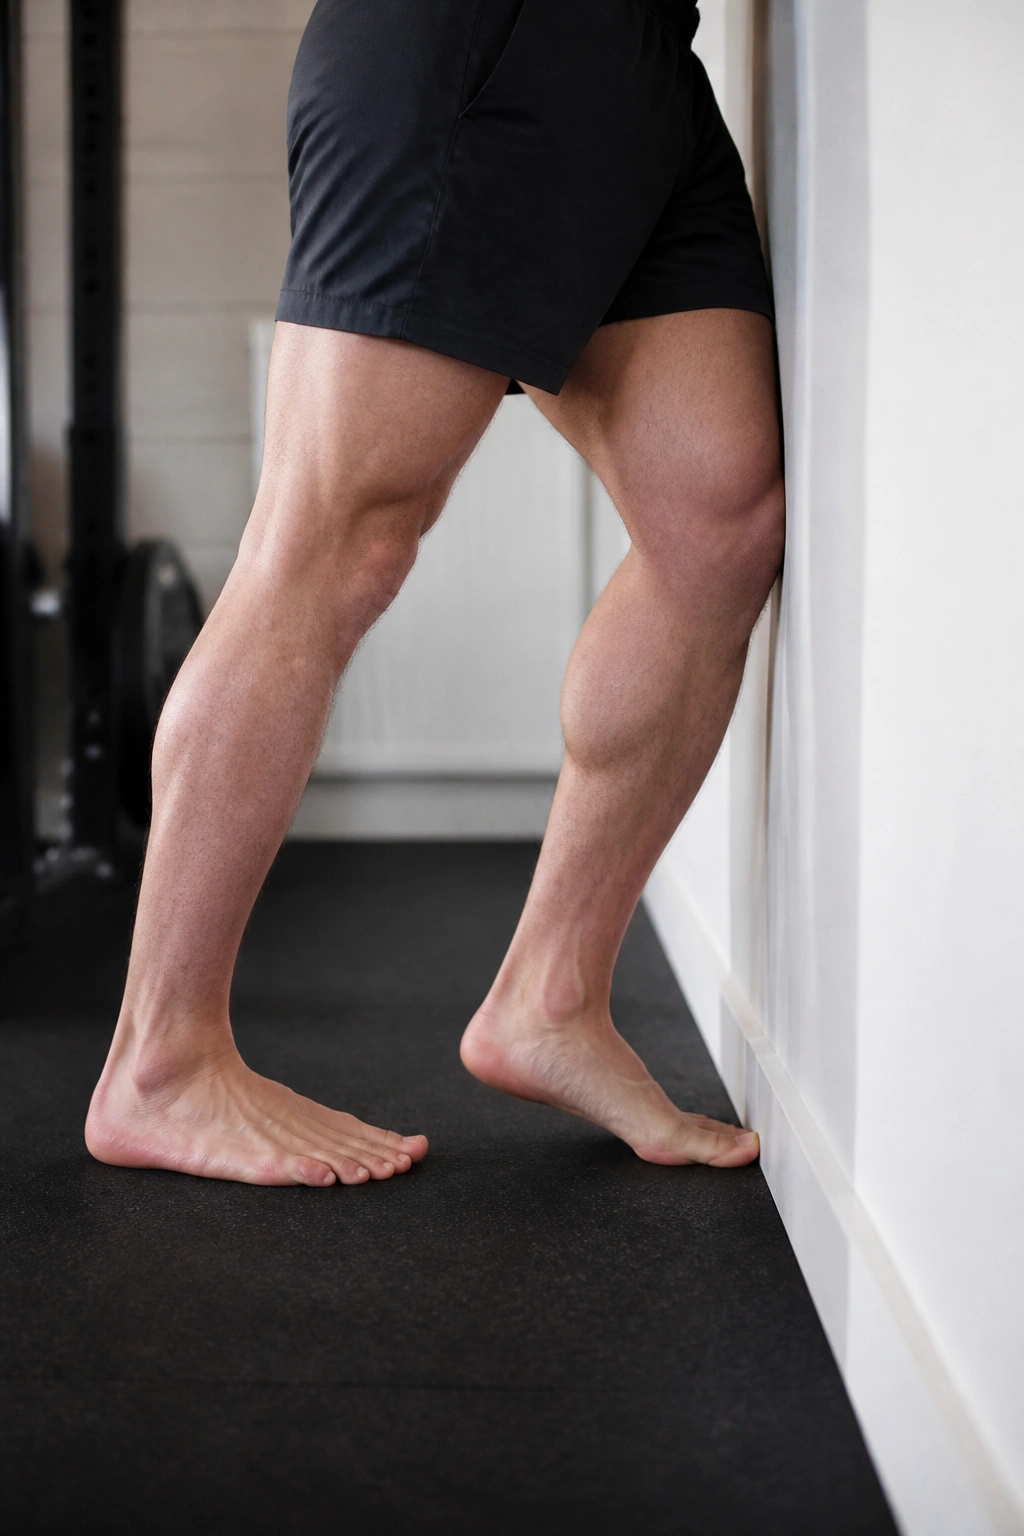
This is the stretch that quietly helps squat depth. It also matters for walking, landing, lunging, and just about anything that needs the shin to move forward over a planted foot. Ankle mobility gets ignored until it starts limiting everything else.
Stand facing a wall with one foot a few inches away from it. Keep the heel down and drive the knee toward the wall without letting the arch collapse or the heel pop up. If the knee barely reaches, move the foot a little closer. If it touches easily, move the foot back. The goal is clean dorsiflexion, not a heroic lunge.
How to Use It
- Perform 8 to 10 slow reps
- Pause for 1 to 2 seconds at the wall
- Keep the knee tracking over the second toe
- Stop if you feel sharp Achilles pain
You can also hold the end range for 20 to 30 seconds once or twice if that feels better. I prefer the rep version before workouts and the hold version after.
A lot of people blame poor squat form on the hips when the ankle is the real troublemaker. This little drill clears that up fast.
Final Thoughts

Flexibility changes when you give the body the right job at the right time. A warm-up wants movement and control. A cooldown wants longer holds, slower breathing, and enough patience to let the tissue soften instead of fight back.
The stretches that matter most are the ones you can repeat without drama. Ten focused minutes beats twenty distracted ones every time. So does a clean hip position, a soft exhale, and a stretch that lands in the muscle instead of the joint.
If one of these feels off, shorten it, change the angle, or pick a different one. That’s not failure. That’s good sense.
