



Sore muscles love to lie to you. They make simple things feel strangely hard — getting out of a chair, reaching for a shirt, walking down stairs like you’ve borrowed someone else’s legs. The right recovery exercises for sore tired muscles don’t look dramatic, and that’s exactly why they work. They keep blood moving, ease the stiff, chalky feeling, and stop you from turning a little tightness into a full-body grumble.
The worst thing after a hard session is usually doing nothing at all. A lot of people assume rest means lying still until everything feels normal again, but that often leaves the body more locked up than before. Gentle motion is different. It doesn’t ask tired tissue to perform; it asks it to wake up, clean out the cobwebs, and settle down.
I like recovery work that feels almost too easy. If you finish and think, “That barely counted,” you’re probably in the right zone. The trick is to pick movements that open the big problem areas — calves, hips, back, shoulders — without adding another workout on top of the one you already earned.
1. Easy Walking
Walking is the first thing I reach for when muscles feel battered. It’s plain, boring, and annoyingly effective. Five to ten minutes of relaxed walking can loosen the legs after squats, wake up the hips after a run, and stop your lower back from stiffening into a plank.
Keep the pace casual. You should be able to talk in full sentences without gasping or checking your watch every 30 seconds. If you’re still sweating hard, you’re going too fast for recovery.
- Walk on flat ground for 5 to 10 minutes.
- Let your arms swing naturally.
- Keep your strides short if your legs feel heavy.
- Breathe through your nose if you can.
- Stop before it turns into cardio.
A little walk after training often beats one long, lazy collapse on the couch. If your legs are cooked, two short walks — one right after training and one later in the day — can feel better than forcing a single longer one. Simple. Not flashy.
2. Diaphragmatic Breathing With Feet Elevated
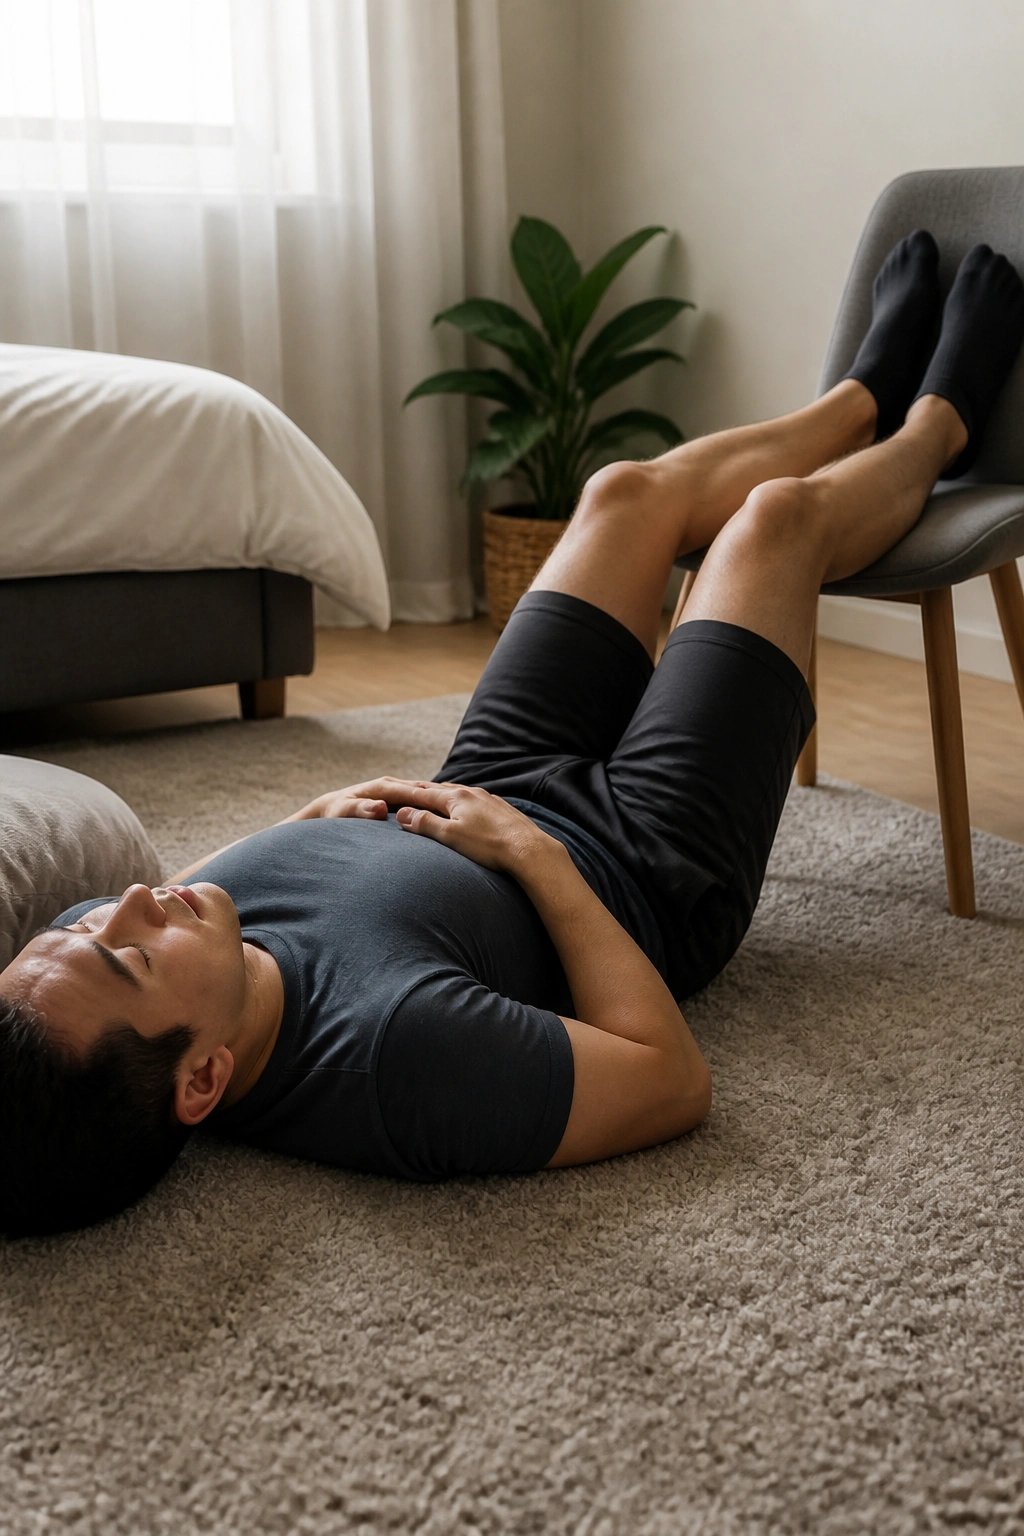
Why does breathing count as an exercise? Because sore muscles don’t live in isolation; the nervous system has a hand in all of it. When you’re tense, braced, and breathing high in the chest, your body stays in a kind of guarded mode. Slow belly breathing gives it a reason to let go.
Lie on your back and rest your calves on a chair, couch, or bench so your knees and hips are bent about 90 degrees. One hand goes on your chest, the other on your ribs or belly. Inhale through the nose for about 4 seconds, then exhale for 6 to 8 seconds. Five to eight rounds is enough.
How to use it
- Keep your jaw loose.
- Let the belly rise on the inhale.
- Make the exhale longer than the inhale.
- Do not force a giant breath; a smooth one is better.
- If your neck starts helping, you’re trying too hard.
This feels especially good after heavy lifting, sprinting, or anything that leaves your whole trunk clenched. It’s quiet work. That’s the point. And if you only do one recovery drill on a day when you feel wrecked, this is a strong place to start.
3. Cat-Cow Spinal Mobility
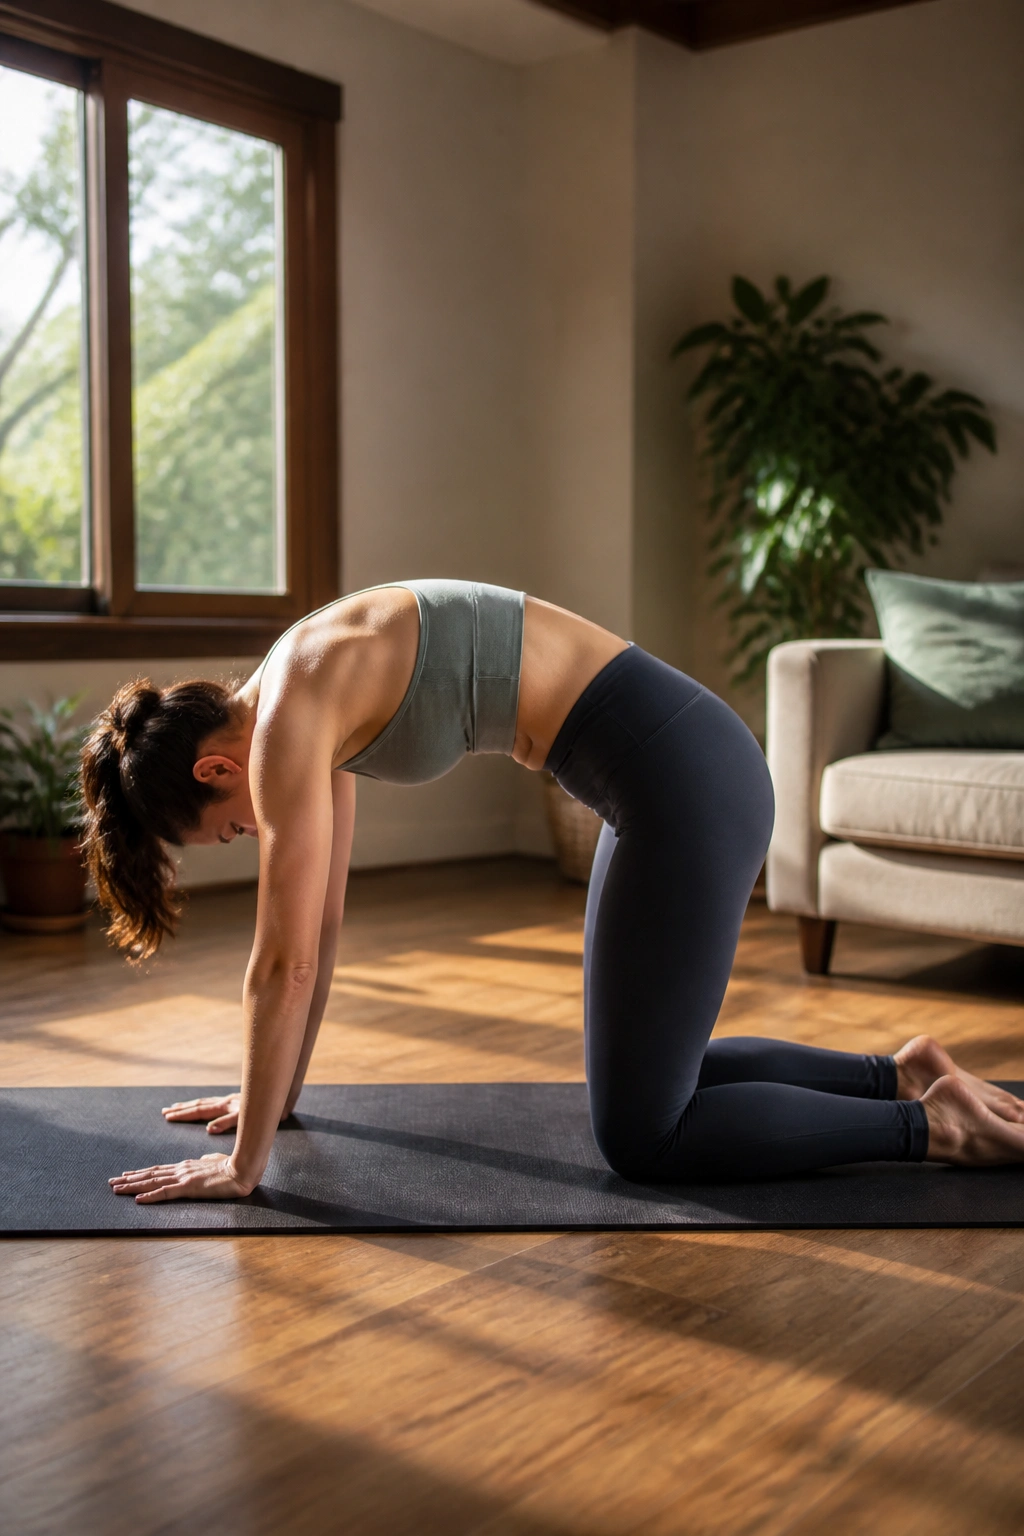
After deadlifts, rows, or a day of hunching over a desk, the spine can feel glued in one shape. Cat-cow is the antidote. It’s a slow, gentle way to move each vertebra through flexion and extension without yanking on anything.
Get on hands and knees with your wrists under your shoulders and your knees under your hips. As you exhale, round the back and tuck the tailbone. As you inhale, let the belly soften and lift the chest just a little. Six to eight controlled reps is enough.
What to feel
- Movement should travel from tailbone to upper back.
- The neck follows the line of the spine.
- No snapping into the end range.
- No rushing.
- The motion should feel smooth, not performative.
A lot of people crank their heads up and down like they’re trying to win a contest nobody else is watching. Skip that. Let the spine lead. If you’re sore through the low back, keep the arch small and the breath slow. You want a gentle wake-up, not a dramatic stretch.
4. Child’s Pose With Side Reach
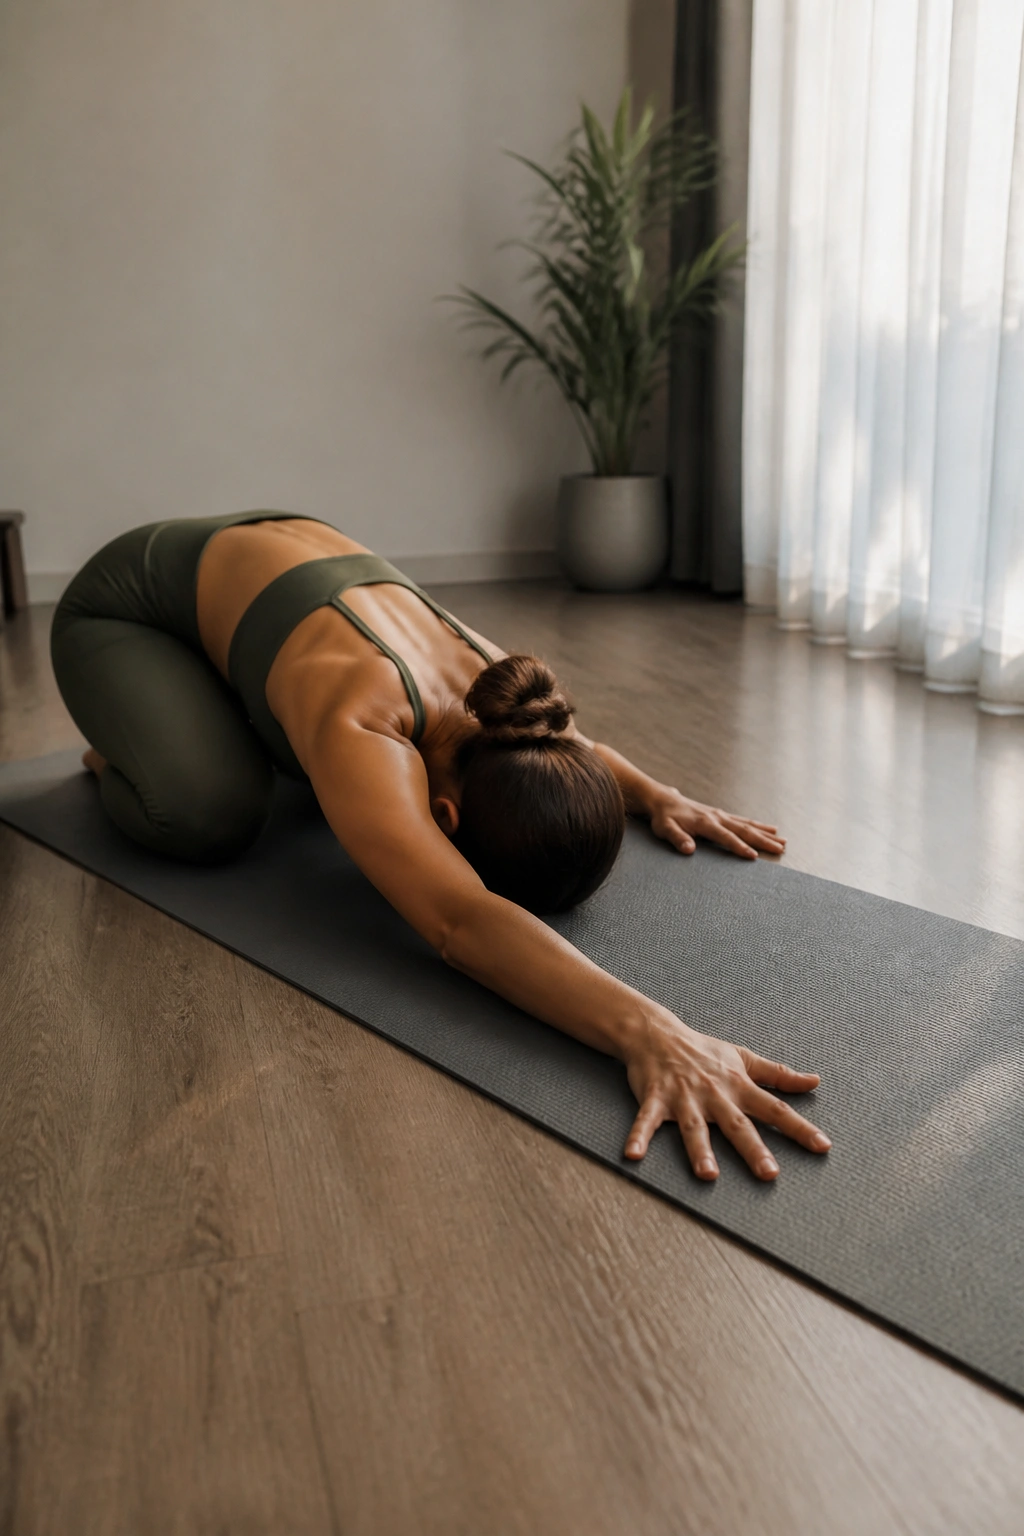
The first time a tired back drops into child’s pose, you can almost hear the sigh. Add a side reach and you get into the lats, the side body, and the tissues that tighten up when you’ve been pressing, pulling, climbing, or carrying groceries like a pack mule.
Start in child’s pose with your knees comfortably apart and your hips sinking toward your heels. Walk both hands a few inches to the right, breathe for 20 to 30 seconds, then switch to the left. If your knees complain, place a folded towel under them. If your hips hate the deep fold, keep your chest a little higher.
The feeling should be broad and mild, more like length than pain. You may notice the ribs opening on the side that’s reaching, and that’s the whole game. I prefer this to aggressive stretching because it tends to calm things down instead of poking the sore spots like a nuisance.
If your lower back is cranky, don’t force your hips down. A smaller shape is fine. Honestly, it’s often better.
5. Half-Kneeling Hip Flexor Rock-Back
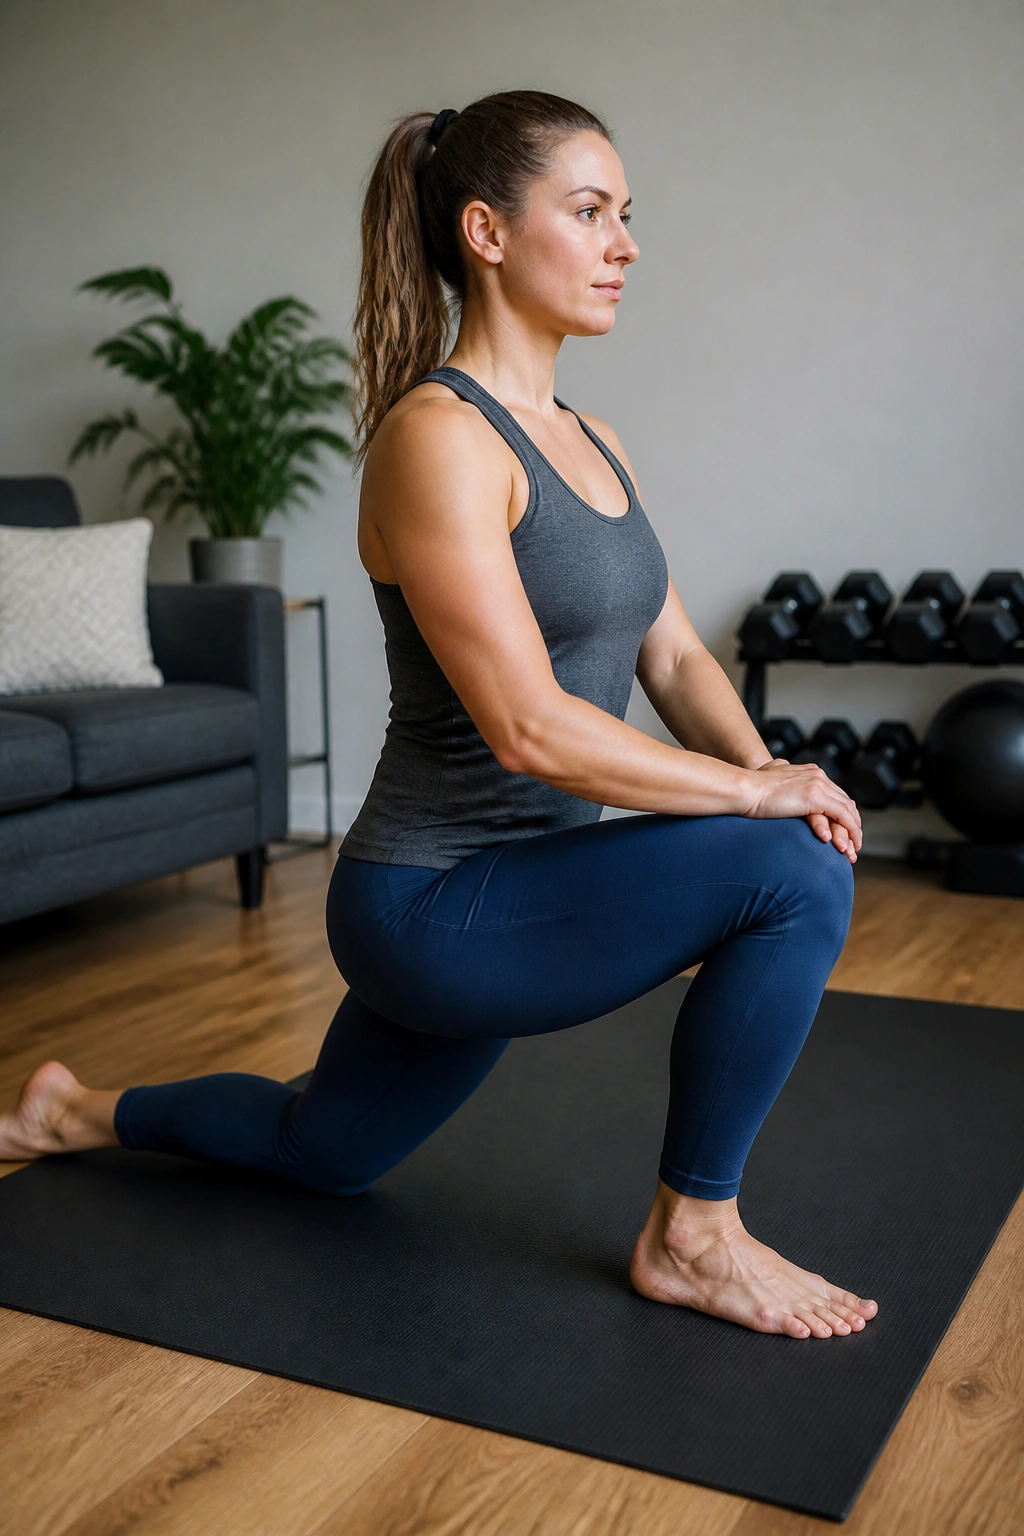
Hip flexors get grumpy fast. Sitting, running, squatting, cycling — all of it can leave the front of the hips feeling short and tight. A half-kneeling rock-back is cleaner than a hard lunge stretch because it lets you control the range instead of hanging on your joints.
Put one knee on a pad or folded towel and place the other foot in front of you. Lightly tuck the pelvis, then shift your hips back a few inches and forward again. Move slowly for 6 to 8 reps, then hold the end range for 15 to 20 seconds if it feels good.
Keep these details in mind
- Keep the torso tall.
- Squeeze the glute on the kneeling side.
- Do not arch the low back to fake a deeper stretch.
- If the front knee feels pinchy, shorten the stance.
- A soft, mild pull is enough.
This is one of those movements that gets better when you stop trying to “win” it. The point is to nudge the hip capsule and the front of the thigh back toward normal length. Not to force a split. Not even close. Just give the area a reason to relax.
6. Seated Figure-Four Stretch
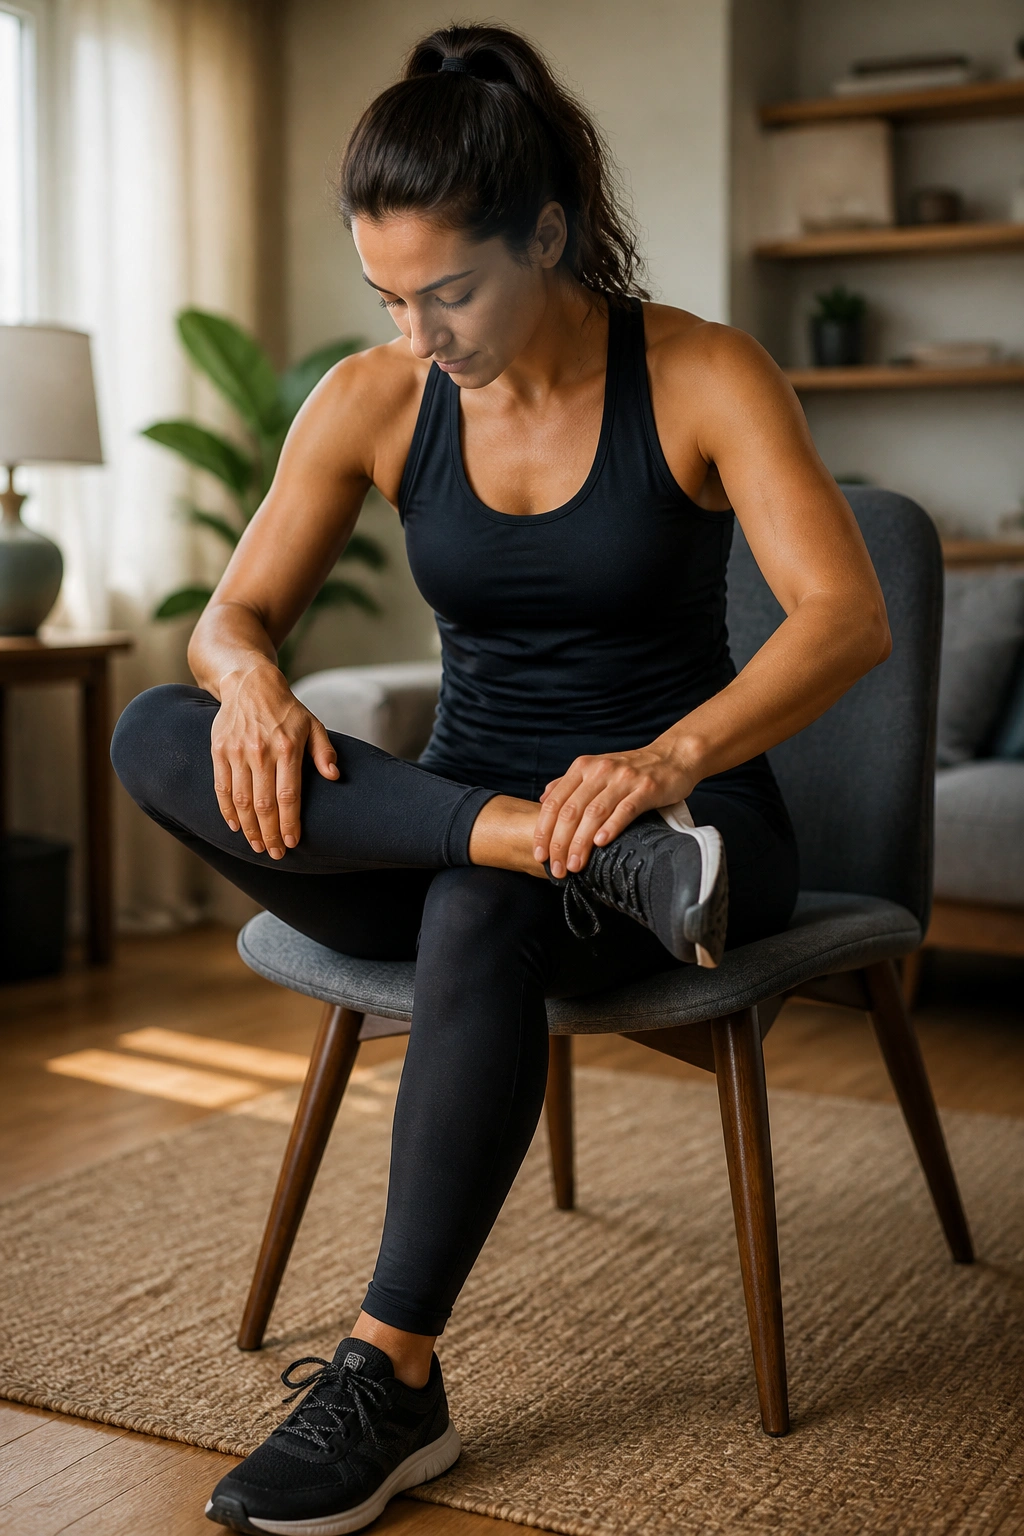
The glutes can hold a surprising amount of leftover tension, especially after squats, lunges, jumping, or hard downhill running. The seated figure-four stretch is a simple way to get at that deep, stubborn tightness without folding yourself into something awkward.
Sit tall on a chair or bench. Cross one ankle over the opposite knee so your legs make a rough figure four. Keep the back straight and hinge forward from the hips until you feel a stretch in the outer hip or glute. Hold for 20 to 30 seconds, then switch sides.
Do not push the knee down with your hand like you’re trying to make the stretch “stronger.” That usually just irritates the hip. Let gravity and a small forward hinge do the work. If sitting makes your back round, lie on your back and do the same shape there. That version is often kinder on tired bodies.
This one is nice after long runs because it doesn’t require much setup. Chair, bench, couch edge. Done.
7. Hamstring Flossing
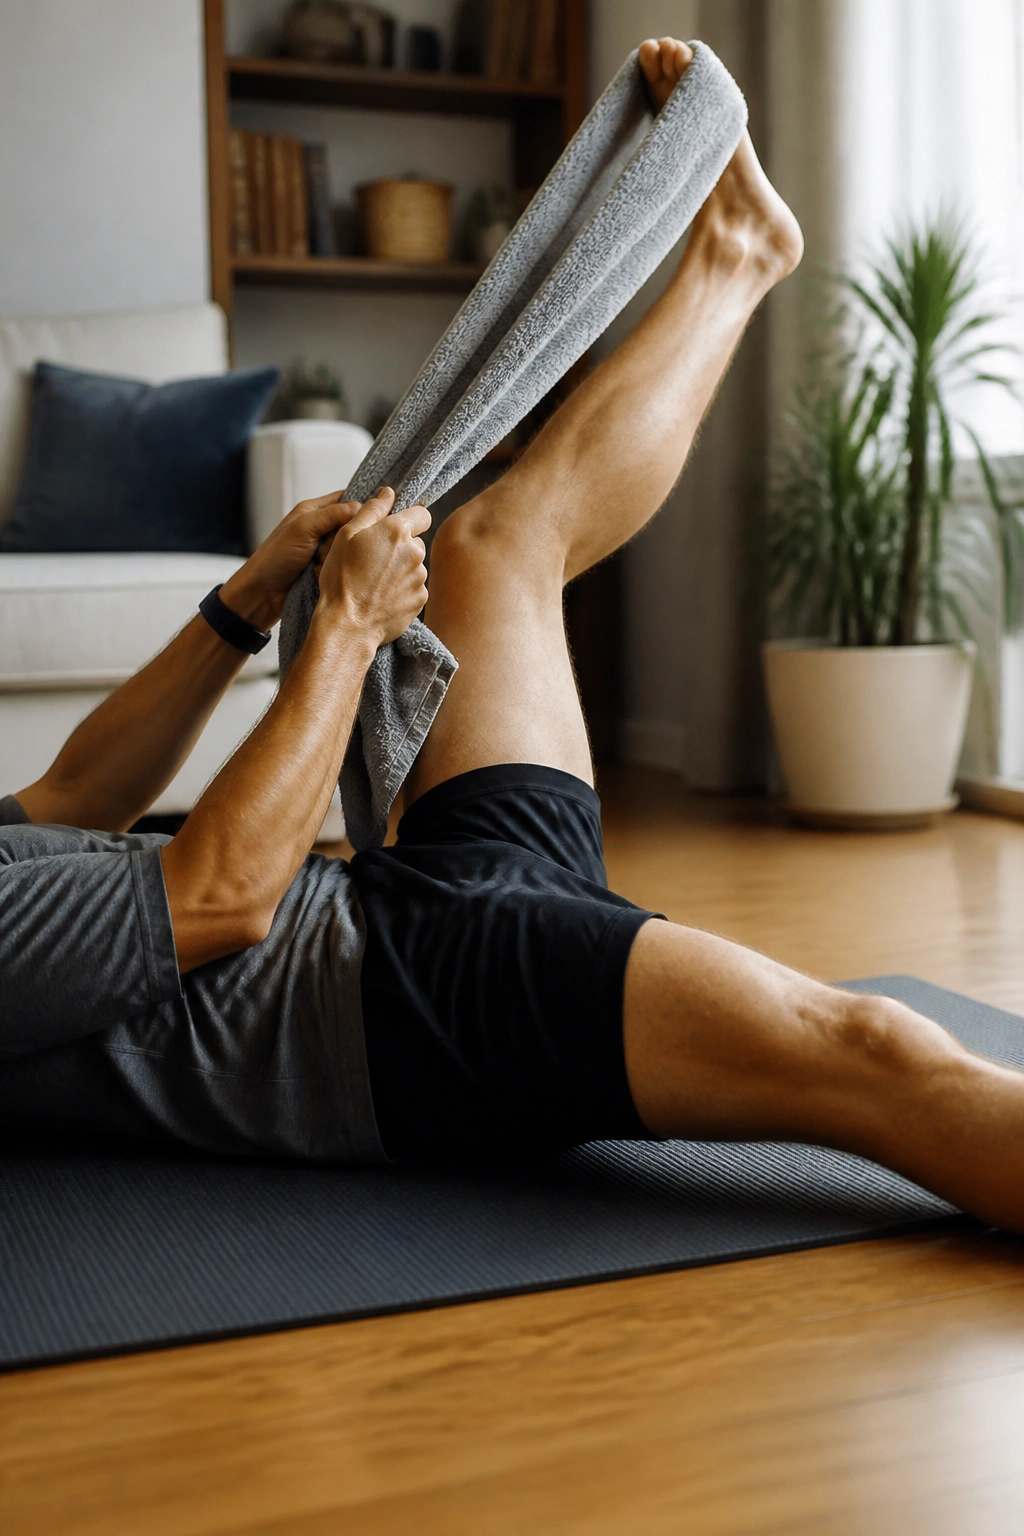
Why not just hold a hard hamstring stretch for a minute and call it a day? Because tired hamstrings usually like movement better than force. Flossing takes the muscle through a gentle range again and again, which can feel less clingy than a long static hold.
Lie on your back, loop a towel or strap around one foot, and lift the leg until you feel a light stretch behind the thigh. Then bend and straighten the knee slowly about 8 to 10 times. Keep the movement small enough that it stays comfortable. Switch sides.
What makes flossing different
- It moves through range instead of locking into one position.
- It keeps the stretch mild.
- It works well after running or hinge-heavy lifting.
- It’s less likely to leave you feeling yanked on.
- It plays nicely with breathing.
If your hamstrings cramp, back off a little and bend the knee more. Cramping is your body saying, “Too much.” Listen the first time. A hamstring that feels gently mobilized is useful. A hamstring that feels offended is not.
8. Ankle Pumps and Circles
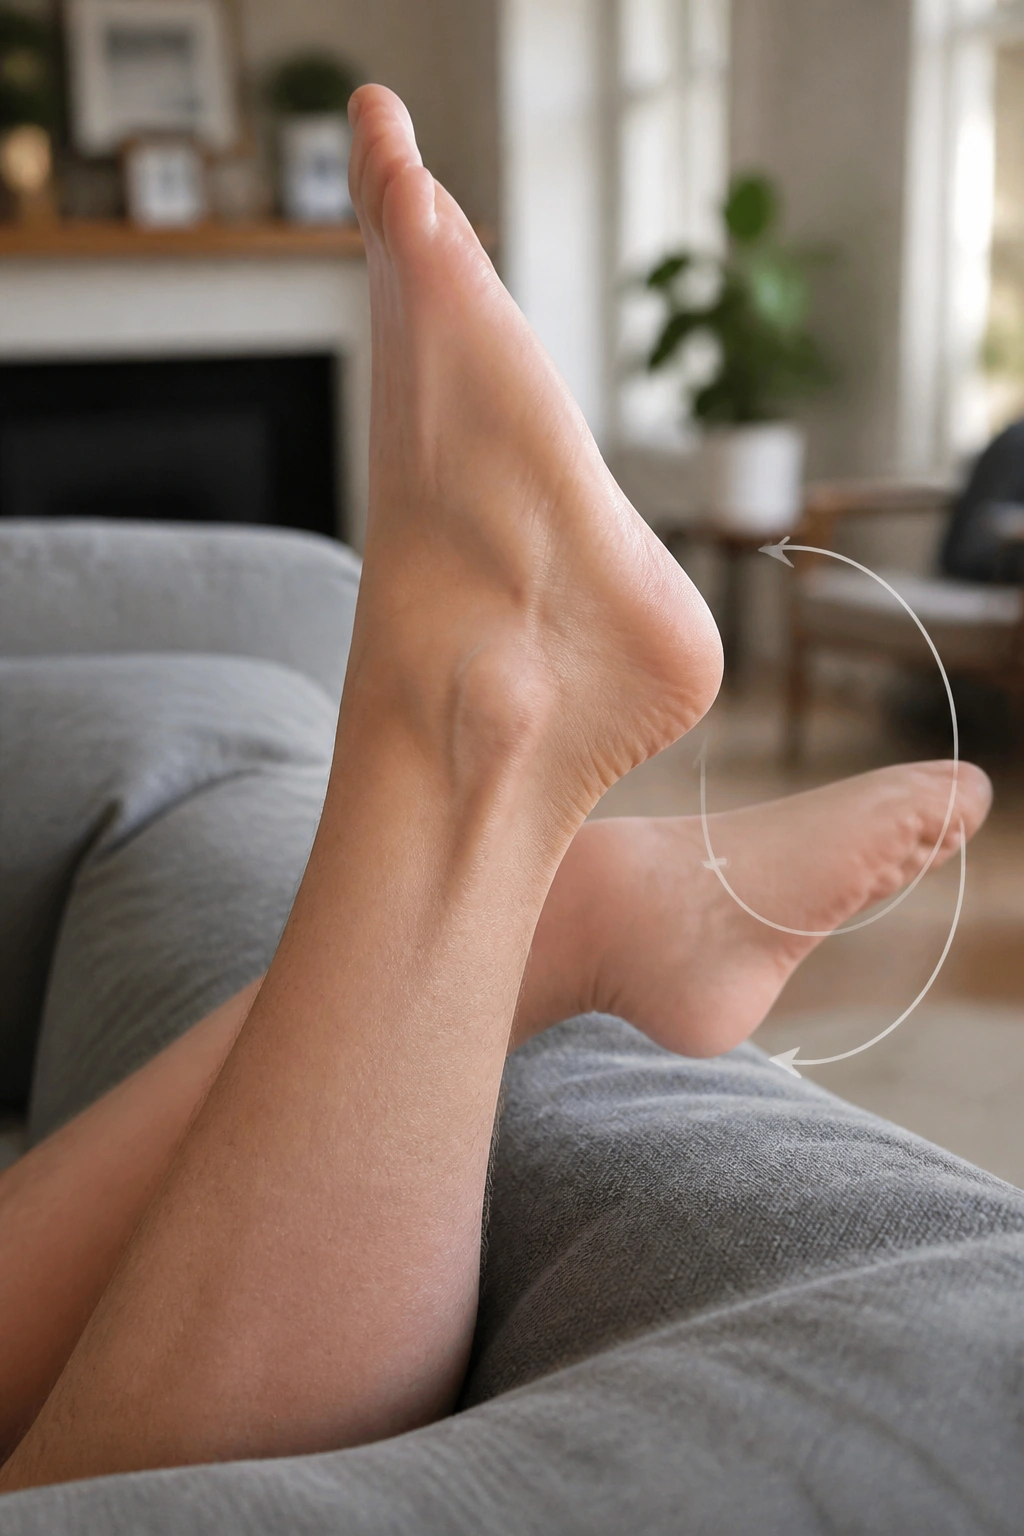
Small joints matter when the big muscles are sore. Ankles are a good example. After running, jumping, hiking, or a hard leg session, the lower leg can feel puffy and stiff, and the feet start to feel like they belong to somebody else.
Sit or lie down with one leg supported. Point and flex the foot 15 to 20 times, then make 10 slow circles each direction. Repeat on the other side. If the calves are the main complaint, do both feet together for a few rounds and you’ll feel the lower legs loosen a little.
A few useful cues
- Keep the motion slow enough to feel each end of range.
- Don’t jam the ankle through pain.
- Move the toes too, if they feel rigid.
- Use this as a warm-down after impact work.
- Pair it with calf stretching if the lower leg feels packed tight.
It’s a tiny drill, and I like it for that reason. Recovery work should not always feel like a grand event. Sometimes the best move is the one that gets fluid moving in a spot you forgot to notice until it started barking.
9. Wall Calf Stretch
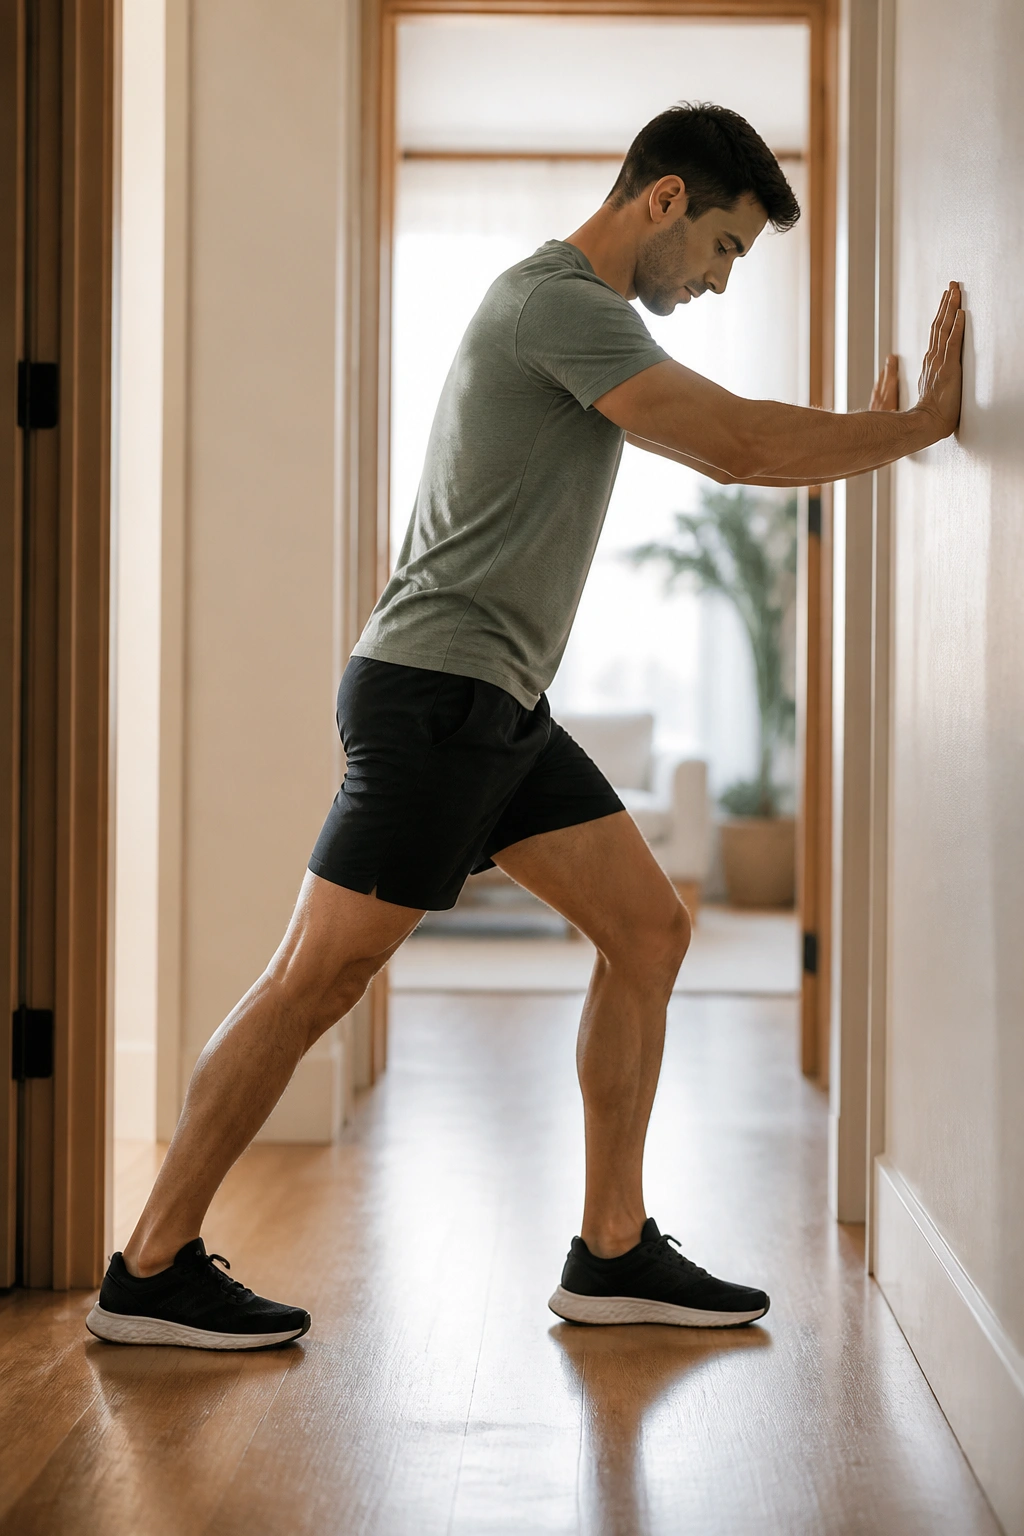
Calves can make a whole chain of movement feel off. Tight calves change how you walk, how you squat, and how your feet land. If they’re sore, even stairs can start to feel strange. A wall stretch gives you a clean way to ease them back without bouncing around.
Stand facing a wall and place both hands on it. Step one foot back, keep that heel on the floor, and lean forward until you feel the stretch high in the calf. Hold 20 to 30 seconds. Then bend the back knee slightly to shift the stretch lower, into the soleus muscle, and hold again.
Straight-knee versus bent-knee
- Straight knee: more of the upper calf.
- Bent knee: lower calf and deeper tissue near the Achilles.
- Keep the back heel down for both versions.
- Avoid bouncing.
- Stop short of sharp pull behind the ankle.
That bent-knee version is the one most people skip, which is a shame because it’s often the part that helps most after hard walking, running, or jumping. If the stretch feels too intense, bring your back foot closer to the wall and take less range. There’s no prize for suffering.
10. Open Book Thoracic Rotation
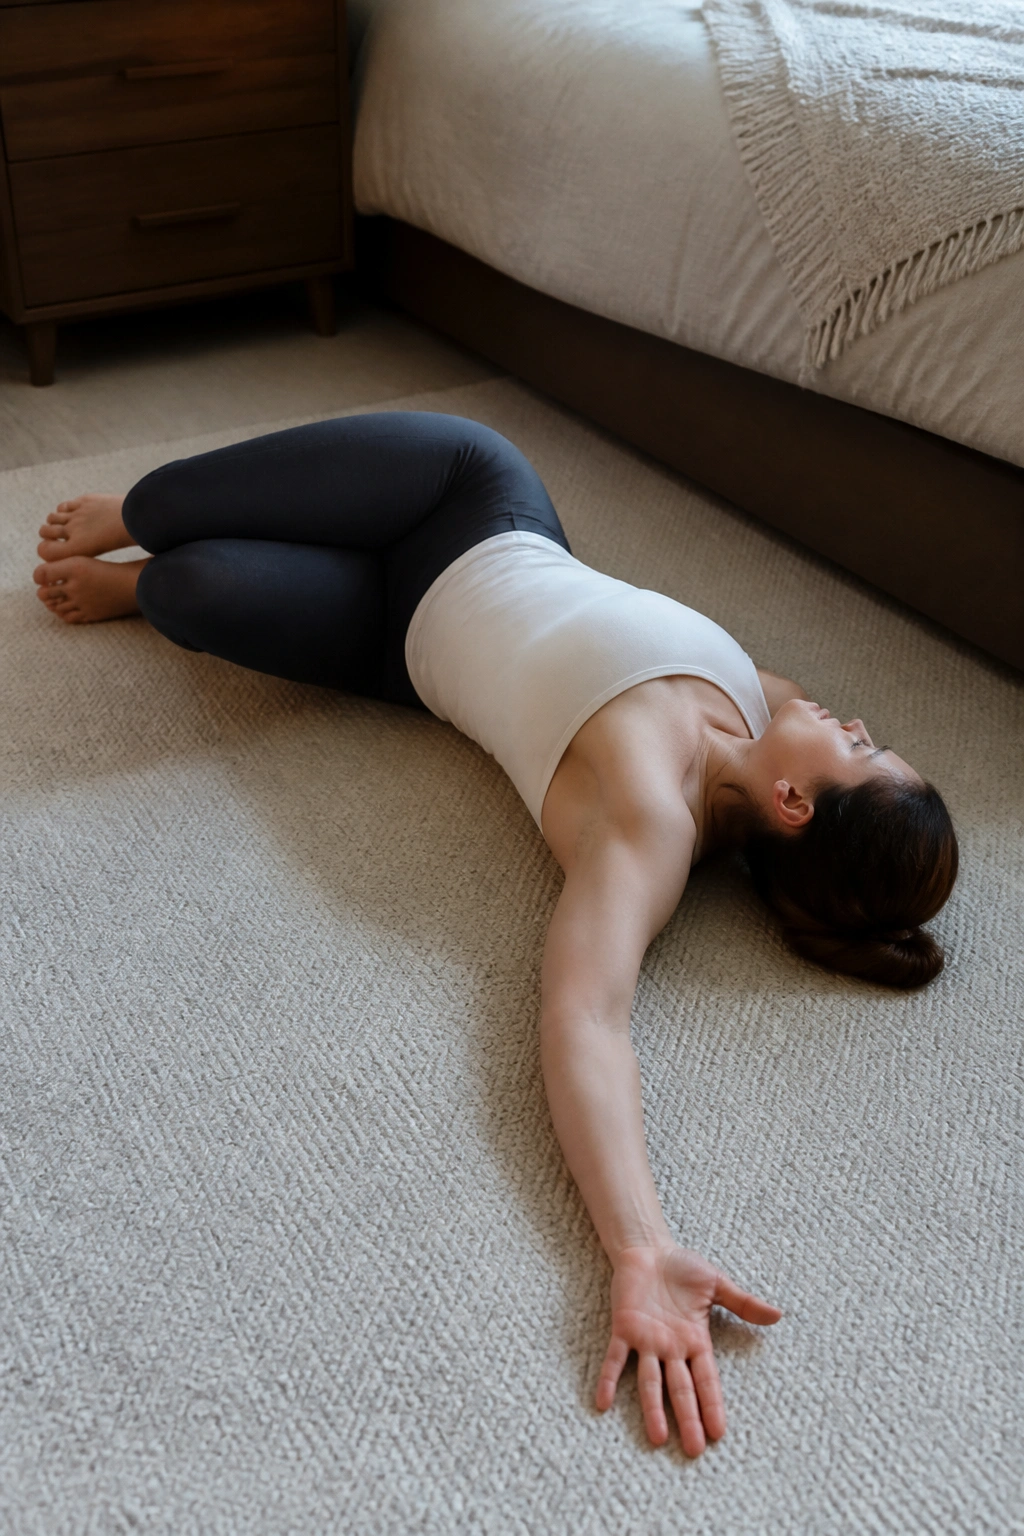
A stiff upper back can make the whole torso feel locked. The open book drill is one of my favorites because it wakes up the ribs, the mid-back, and the shoulder blade area without asking the lower back to do all the work.
Lie on your side with your knees bent and stacked together. Stretch both arms out in front of you, then open the top arm across your body and toward the floor behind you. Let your eyes follow the hand. Pause for a breath at the end, then come back and repeat 5 to 8 times on each side.
The motion should feel like your chest is turning open, not like you’re wrenching your spine. If your knees want to lift, place a pillow between them or pin them lightly to the floor with your bottom hand. That keeps the twist where it belongs.
I like this after pressing work and after long stretches of sitting. It’s gentle, and it tends to make breathing feel easier too. That’s a nice side effect.
11. Wall Slides
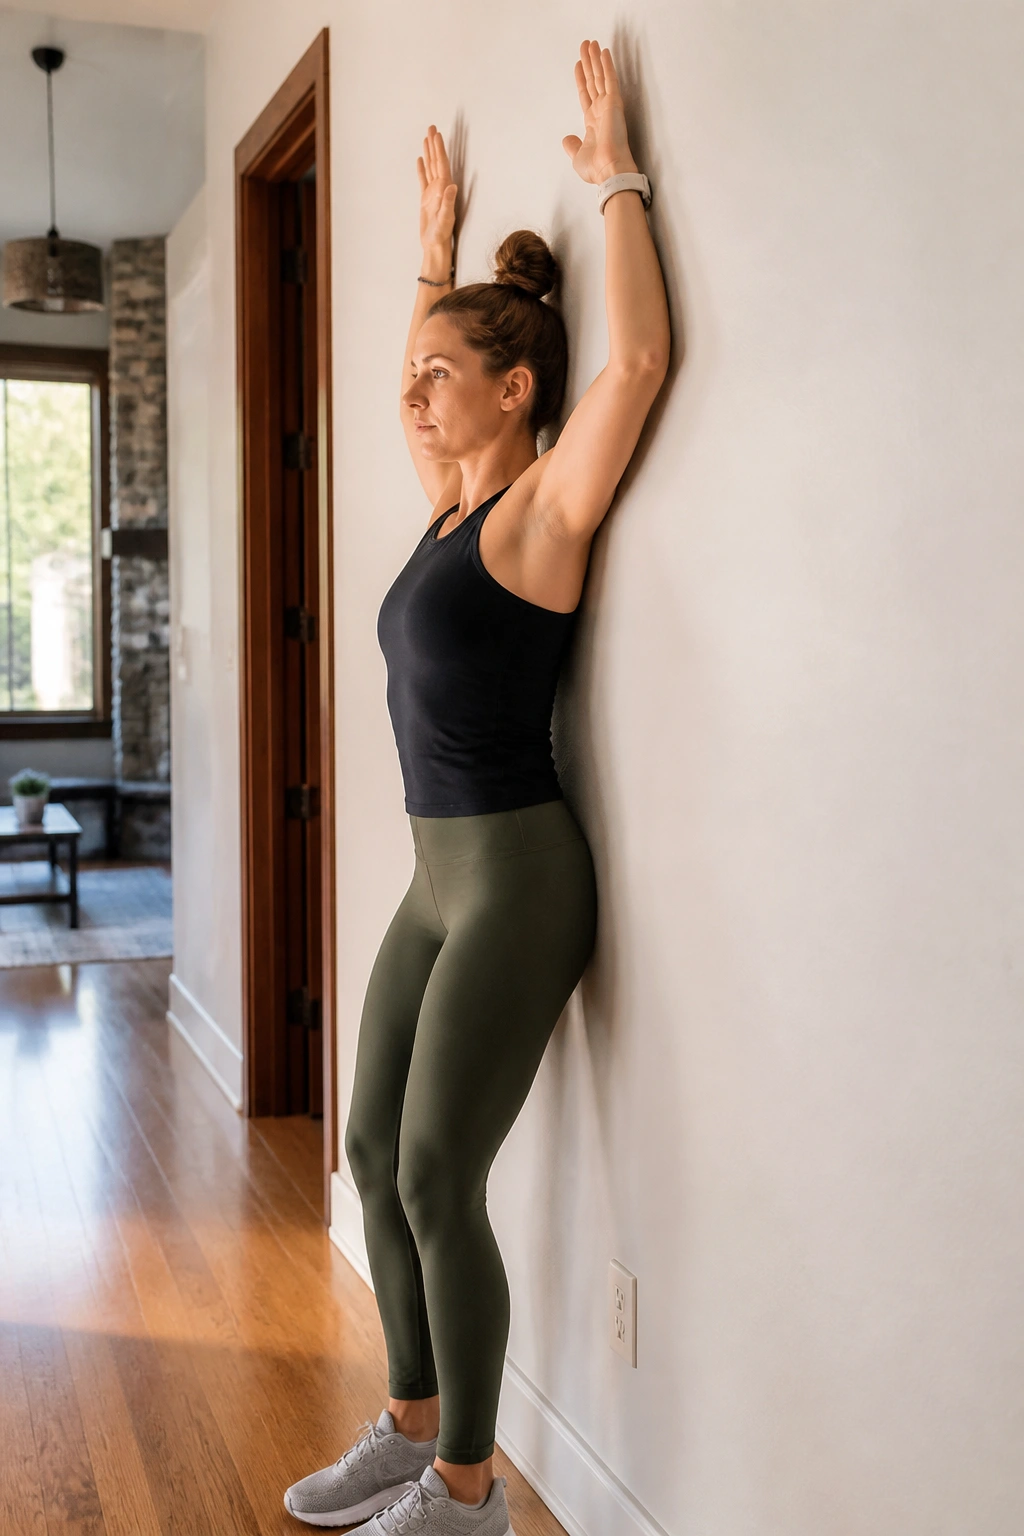
Shoulders that have been pressing, pulling, or carrying often need a reset more than a stretch. Wall slides are a neat way to bring the shoulder blades back into the conversation. They’re also a good test of whether your rib cage wants to flare and cheat.
Stand with your back against a wall, feet a few inches forward, and keep your lower ribs from popping up. Place your elbows and forearms against the wall in a goalpost shape. Slide the arms up as far as you can without arching your lower back, then lower them with control. Six to 10 reps is enough.
If the hands can’t stay flat, that’s fine. Keep the movement in a range you can own. The point is not perfect posture theater. The point is to get the shoulders moving while the trunk stays honest. And yes, that honesty matters more than looking tidy.
A lot of people feel this in the upper back and the side of the shoulder rather than the neck. That’s what you want.
12. Glute Bridges
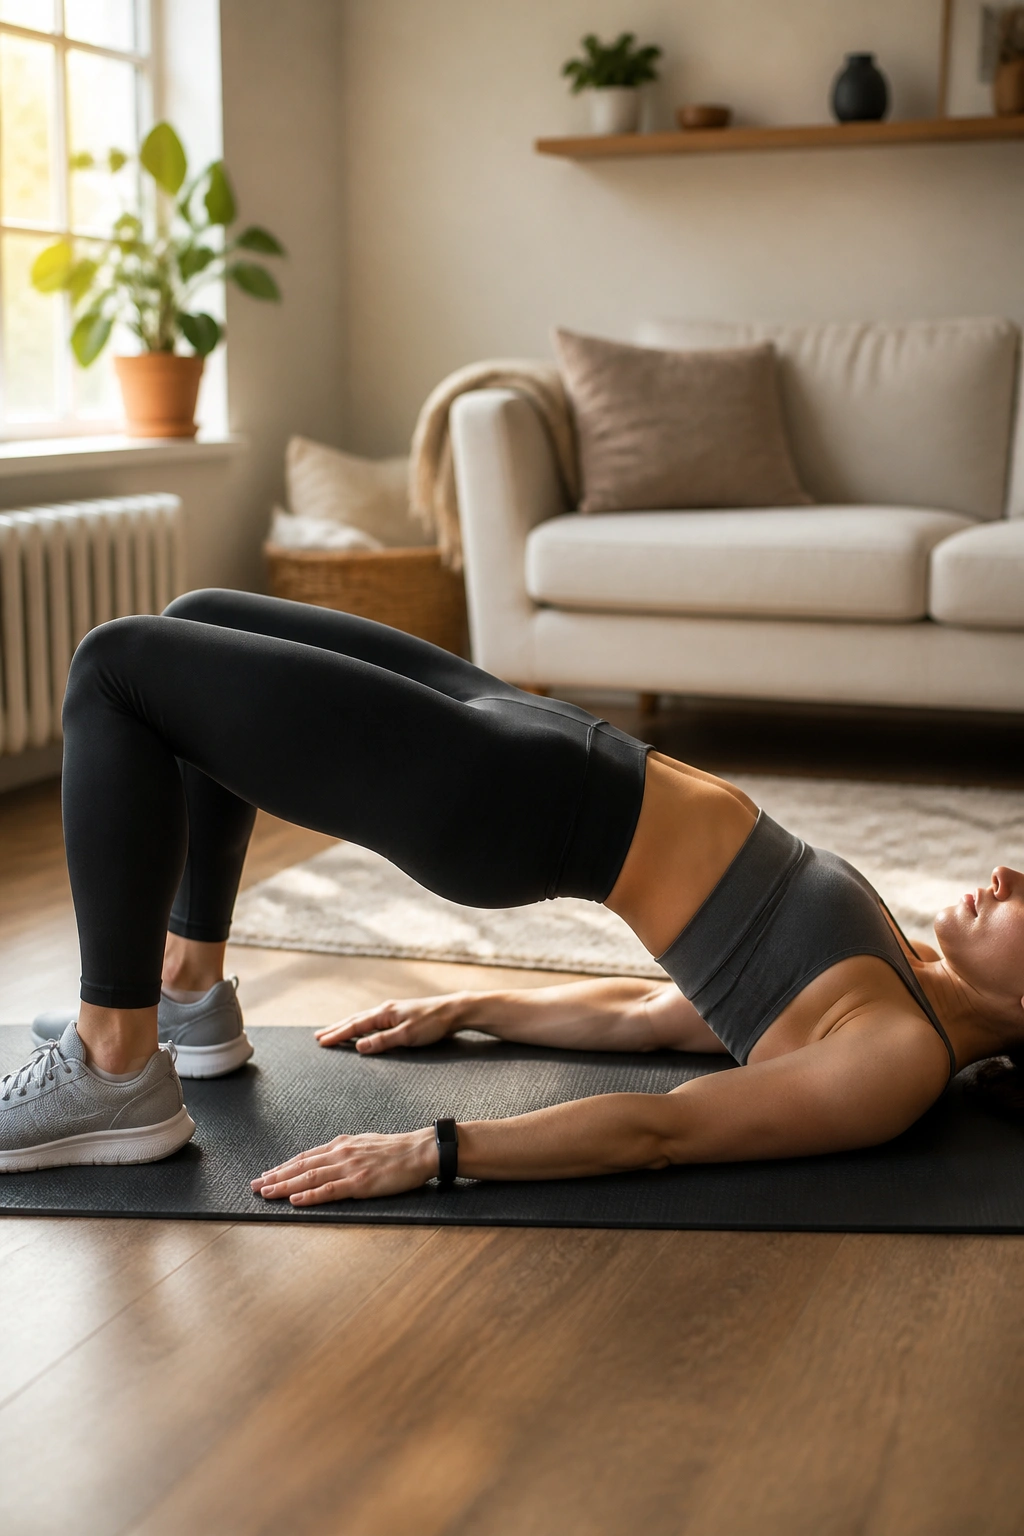
Want a recovery move that also wakes up sleepy glutes? Use bridges. They’re more active than a stretch, but they still count as recovery when you keep the effort light. The trick is to move with control and stop before you turn them into a burn session.
Lie on your back with knees bent and feet hip-width apart. Drive through the heels, lift the hips until your body makes a straight line from shoulders to knees, and squeeze the glutes for 1 to 2 seconds. Lower slowly. Eight to 12 smooth reps is plenty.
What to feel
- Glutes working first.
- Hamstrings helping, but not taking over.
- Ribs staying down.
- No lower-back pinch at the top.
- Weight even across both feet.
If your hamstrings cramp, pull your feet a little closer to your hips and tilt the pelvis slightly before you lift. That small tweak often fixes the problem. Bridges are useful after a run, after sitting all day, and after squat work when the backside feels flat and sleepy.
13. Foam Rolling Quads
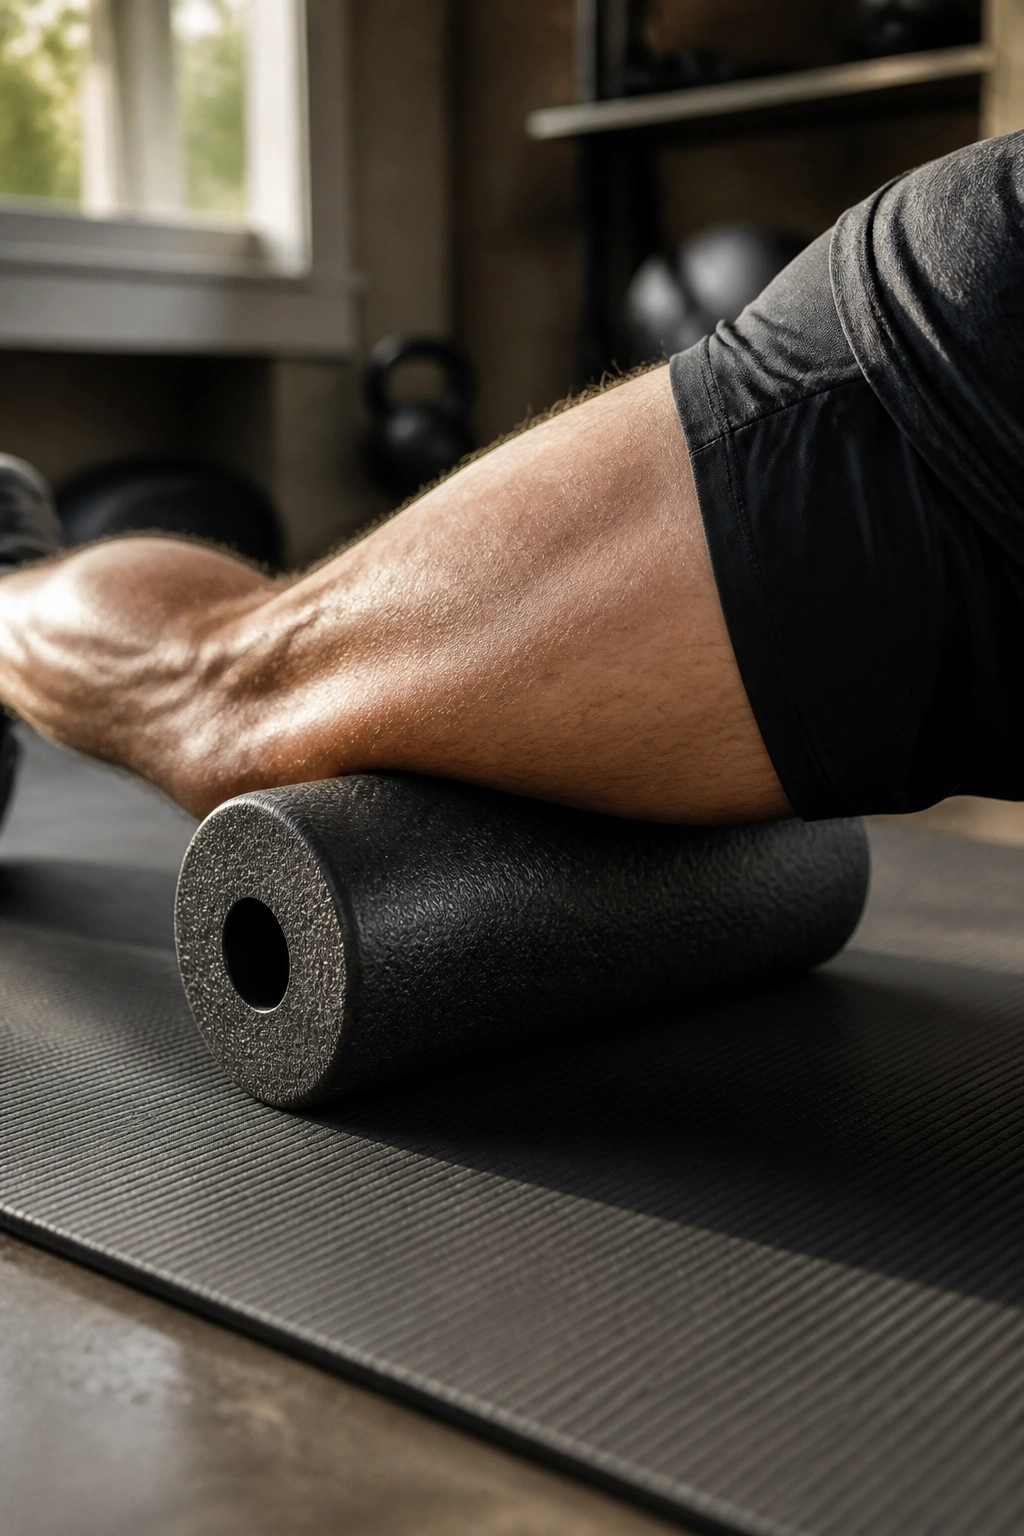
Foam rolling gets a lot of dramatic nonsense attached to it, but the basic idea is plain: apply steady pressure to a sore area and keep moving until the tissue stops arguing with you. The quads are one of the best places to start because they take a beating from running, squats, stairs, and constant sitting.
Lie face down with the roller under the front of one thigh. Support yourself on your forearms and roll slowly from just above the knee to just below the hip crease. Spend 30 to 60 seconds per side. When you find a tender spot, pause there for 10 to 15 seconds and breathe instead of mashing harder.
A few rules that save trouble
- Stay off the kneecap.
- Do not roll directly on the hip bone.
- Use body weight, not brute force.
- Keep the pressure tolerable.
- Stop if the pain feels sharp or zappy.
The odd part about rolling is that more pressure is not always better. A moderate ache usually does the job. If you’re grimacing and holding your breath, you’ve gone too far. Back off, breathe, and let the muscle settle on its own.
14. Foam Rolling the Upper Back
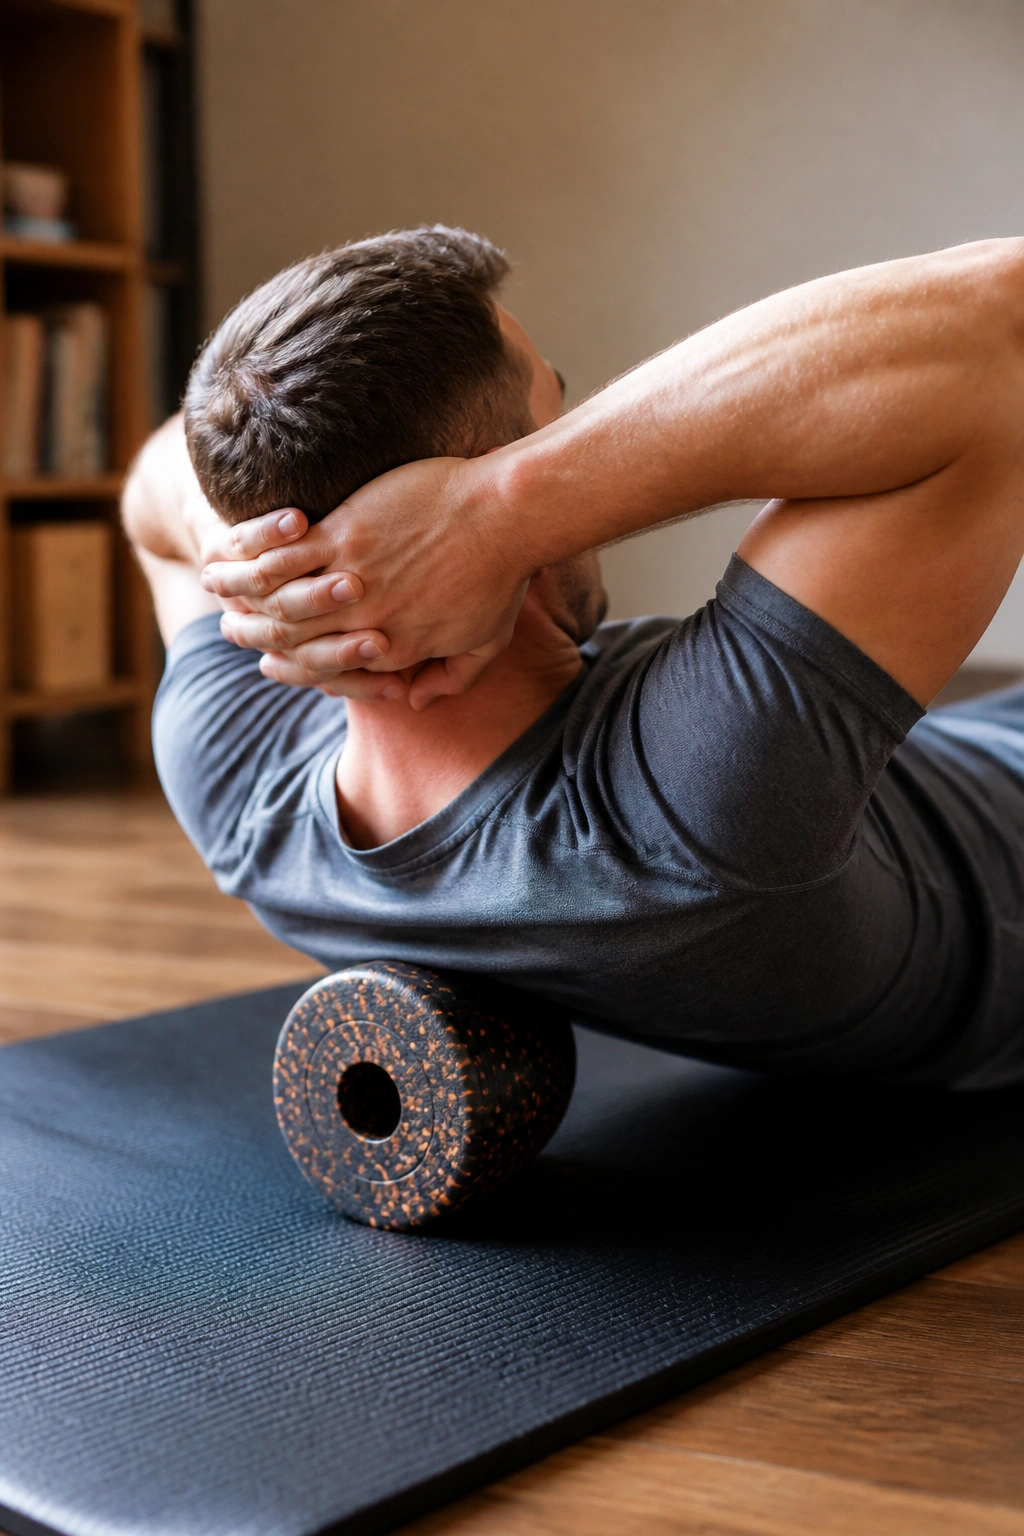
The upper back likes pressure in a way the lower back usually does not. That’s one reason I’m cautious about where people roll. The thoracic spine — the middle and upper back — can take gentle rolling well, especially after pressing workouts or long hours bent over a keyboard.
Place the roller under your shoulder blades and support your head with your hands. Roll slowly from the bottom of the shoulder blades to just below the neck. Spend 30 to 45 seconds in one pass, then pause on a tight spot and take two or three slow breaths. A tennis ball or massage ball against a wall works too if a foam roller feels clumsy.
There’s a nice little release that happens when the upper back stops guarding so hard. Shoulders sit a bit lower. Breathing opens up. The neck often quits complaining. It’s not magic; it’s just the body backing off a little.
Do not roll the lower back with the same kind of pressure. That area is fussier and less forgiving.
15. Easy Stationary Bike Spin
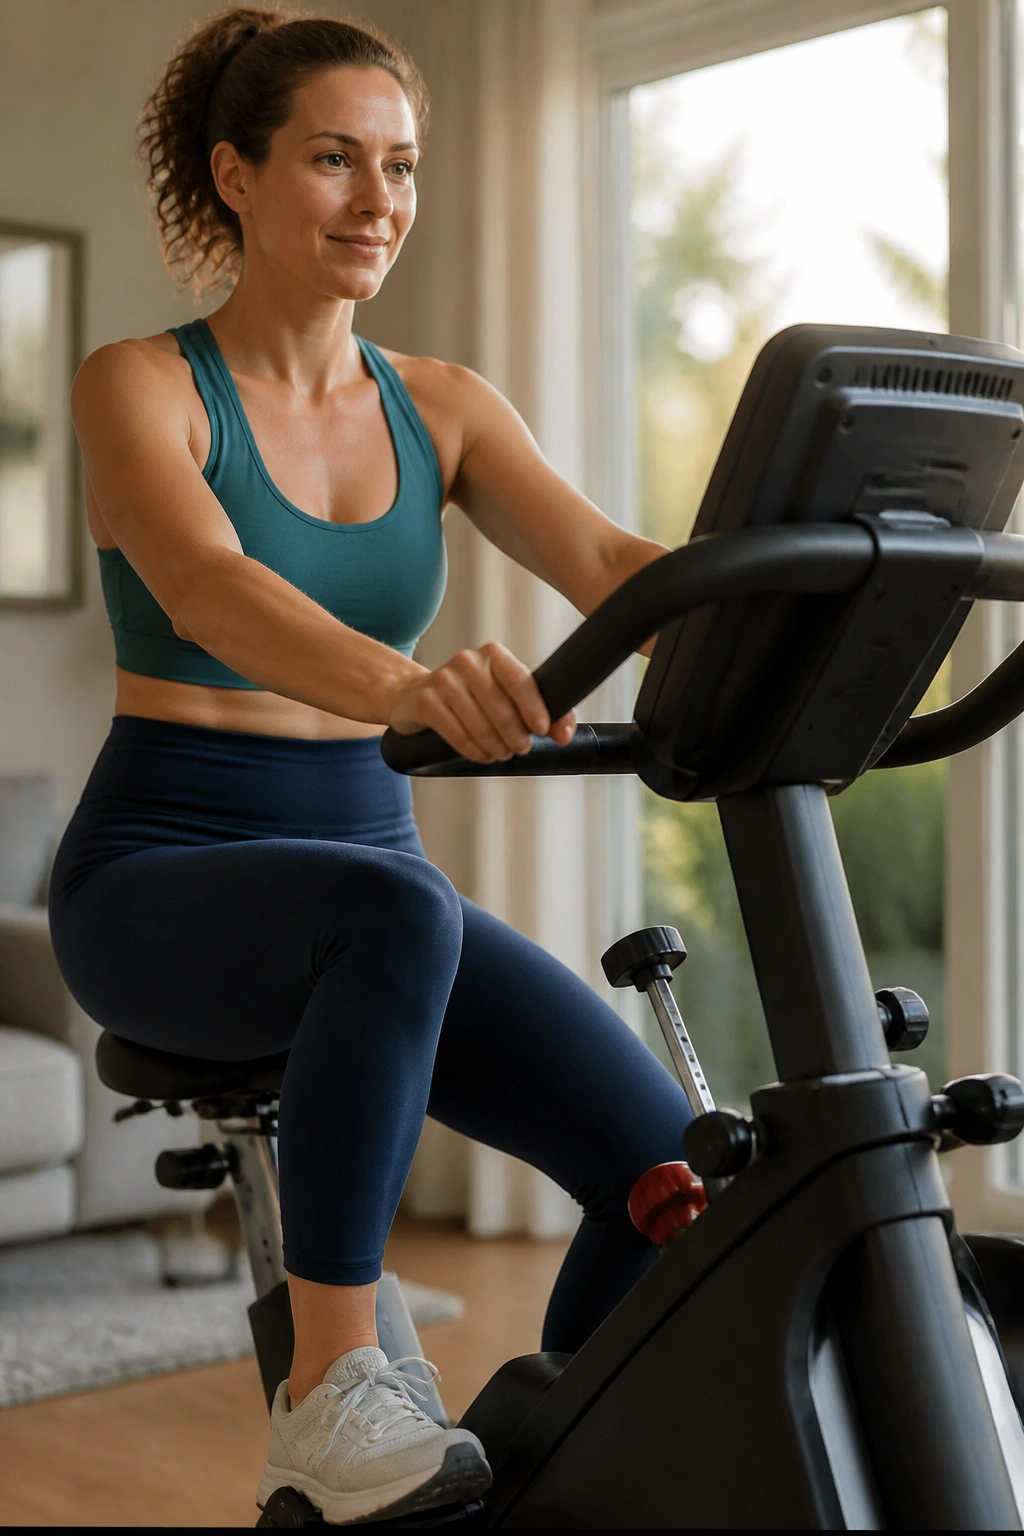
A light bike spin is one of the best active recovery tools for sore legs. It moves the quads, calves, and hips without the pounding you get from walking downhill or doing another impact session. If running or jumping left you feeling beat up, the bike lets you keep blood flowing while the joints stay calm.
Set the resistance low and pedal for 8 to 20 minutes at a pace where you can still breathe through your nose or hold a normal conversation. The legs should feel warm, not cooked. If your knees start to complain, lower the resistance first. If your hips feel jammed, raise the seat a touch.
Make it count
- Keep cadence smooth, not jerky.
- Use enough resistance to keep the pedals from spinning wildly.
- Stay seated if the legs are sore.
- End while you still feel better than when you started.
- Choose a recumbent bike if your back wants more support.
I like this one after long lower-body sessions because it feels like rinsing the legs out. That’s the best way I can put it. Not a workout. A rinse.
Final Thoughts
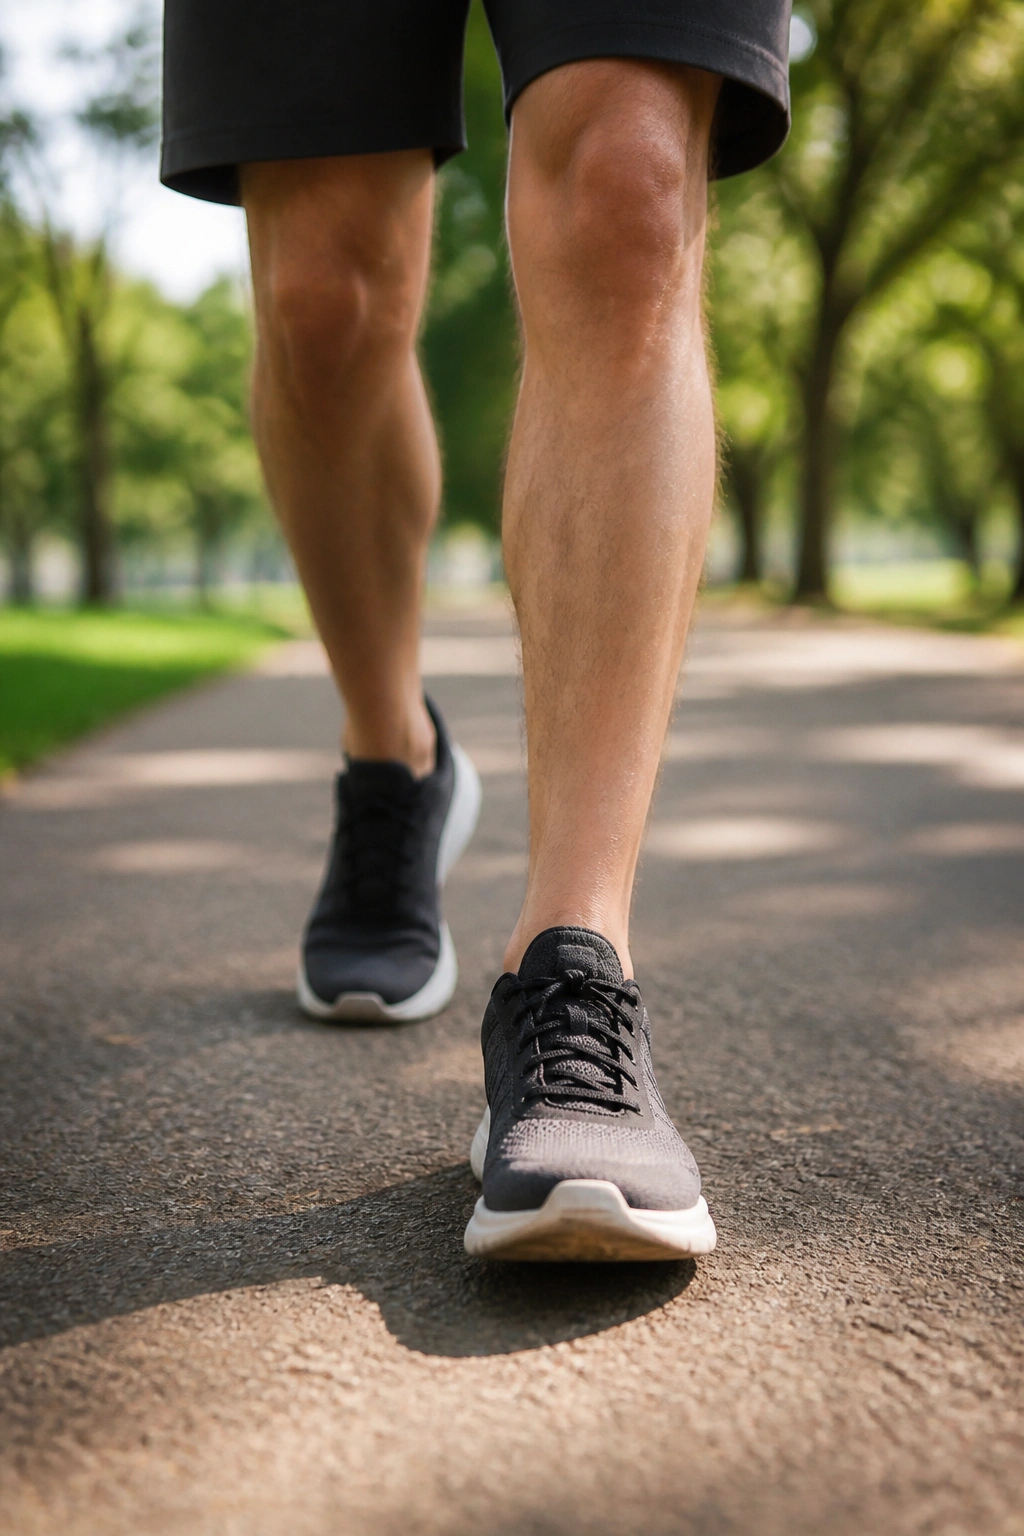
Sore tired muscles usually want two things: a little movement and a little patience. Not punishment. Not another hard session disguised as recovery. The best drills are the ones that leave you looser, warmer, and less cranky a few minutes later.
If your soreness is mild, pick two or three of these and keep them gentle. If the pain is sharp, one-sided, swollen, or tied to a joint instead of the muscle belly, stop and get it checked. Different problem. Different answer.
The nice part is that recovery work rarely needs much time. Ten minutes, a chair, a mat, a wall, maybe a foam roller — that’s usually enough to change how your body feels for the rest of the day.
