



Sore hips and tight hip flexors have a nasty way of making ordinary movement feel odd. Getting out of a car. Standing up from a chair. Taking the first few steps after you’ve sat too long. None of it feels dramatic, but all of it gets old fast.
The fix usually isn’t one heroic stretch held until your face turns red. Hips tend to respond better to a mix of motion, light strength, and positions that tell the body, “Yes, you can use this range.” That matters because the front of the hip isn’t one neat little muscle. The iliopsoas sits deep, the rectus femoris crosses both hip and knee, and the glutes often stop doing their share when sitting takes over the day.
That’s why a useful hip routine needs more than lunges. You want moves that rotate the joint, wake up the glutes, calm down cranky tissues, and teach your pelvis to stay put while the legs move around it. Some of the work will feel like stretching. Some of it will feel like strength. A few pieces feel a little awkward at first — and that’s normal.
Sharp pain, numbness, catching, or pain that shoots down the leg is a different story. That’s not the same as ordinary tightness, and it deserves a proper look. For the rest of us dealing with stiff, sore, desk-battered hips, the best place to start is with movement that opens the joint without picking a fight with it.
1. 90/90 Hip Switches for Stiff Hips
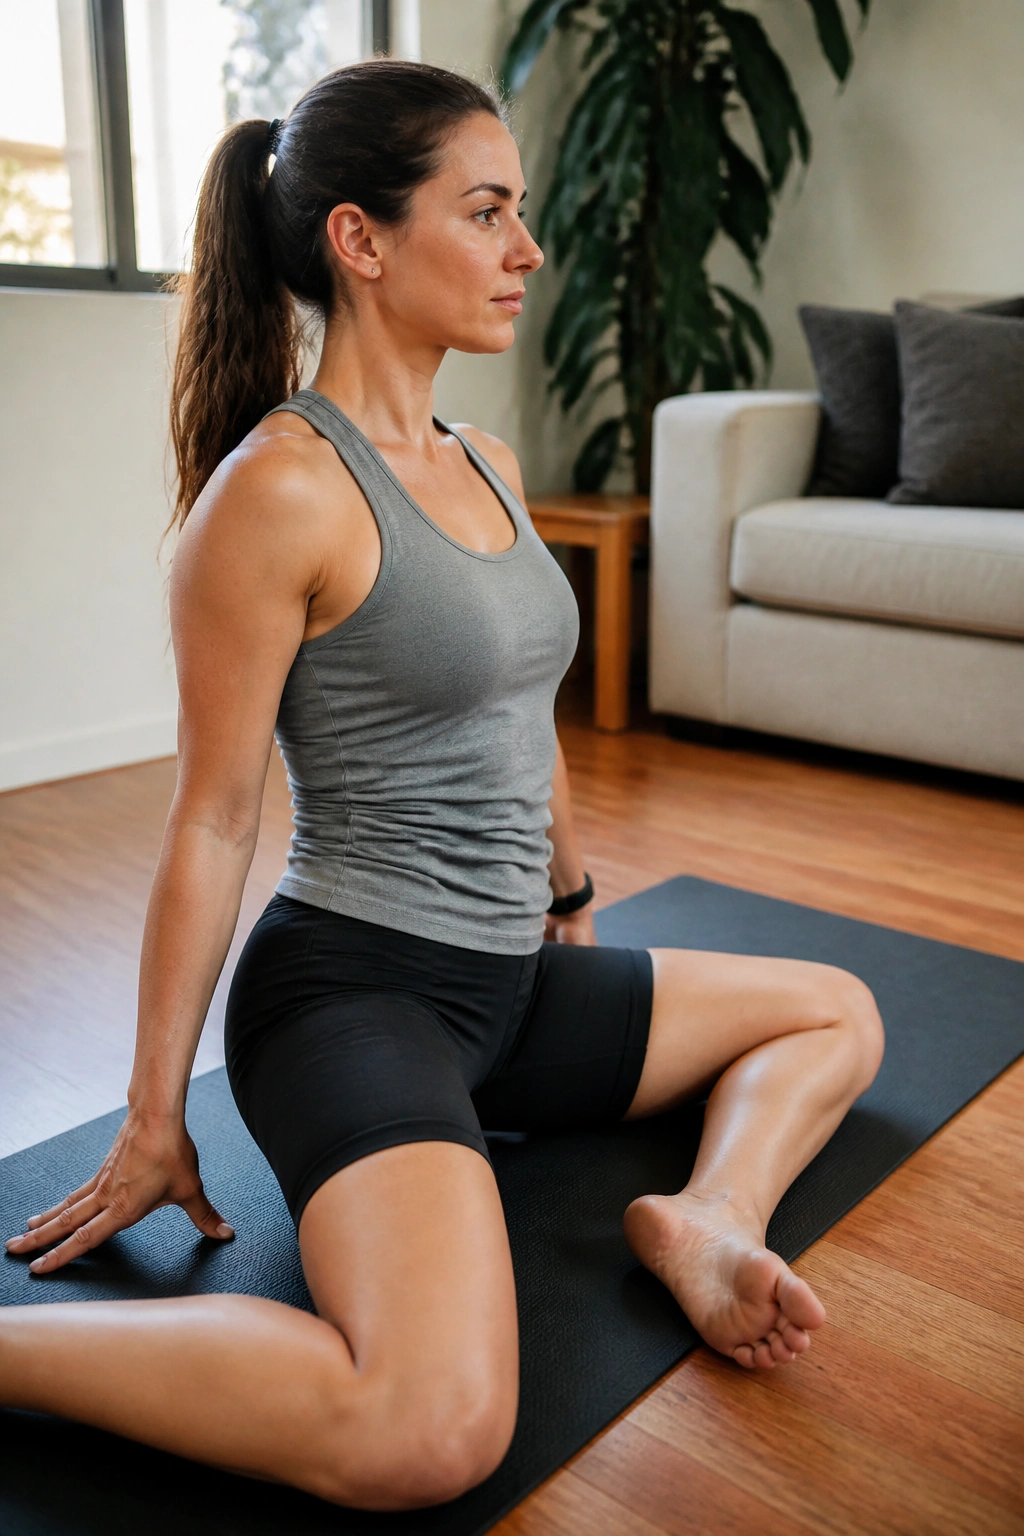
90/90 hip switches are one of those drills that looks easy until you try to move slowly and keep your torso upright. That’s the point. The shape asks your hips to rotate both in and out, which is exactly what gets rusty when you sit a lot or keep your training stuck in one plane.
Why It Helps
The front leg opens into external rotation while the back leg folds into internal rotation. That gives both sides of the hip joint work in one drill, and it often feels better than forcing a long stretch on one side of the body. A lot of people notice that the first few reps are clunky, then the movement starts to smooth out.
How to Do It
- Sit on the floor with both knees bent at about 90 degrees.
- Let one knee point forward and the other point out to the side.
- Switch sides under control, using your hands if needed.
- Do 5 to 8 slow switches per side.
Keep your chest tall. Don’t lean so far that the movement comes from your low back. Tiny range at first is fine. If the hips feel sticky, pause for a second in the middle and breathe out before switching again.
2. Couch Stretch for Tight Hip Flexors
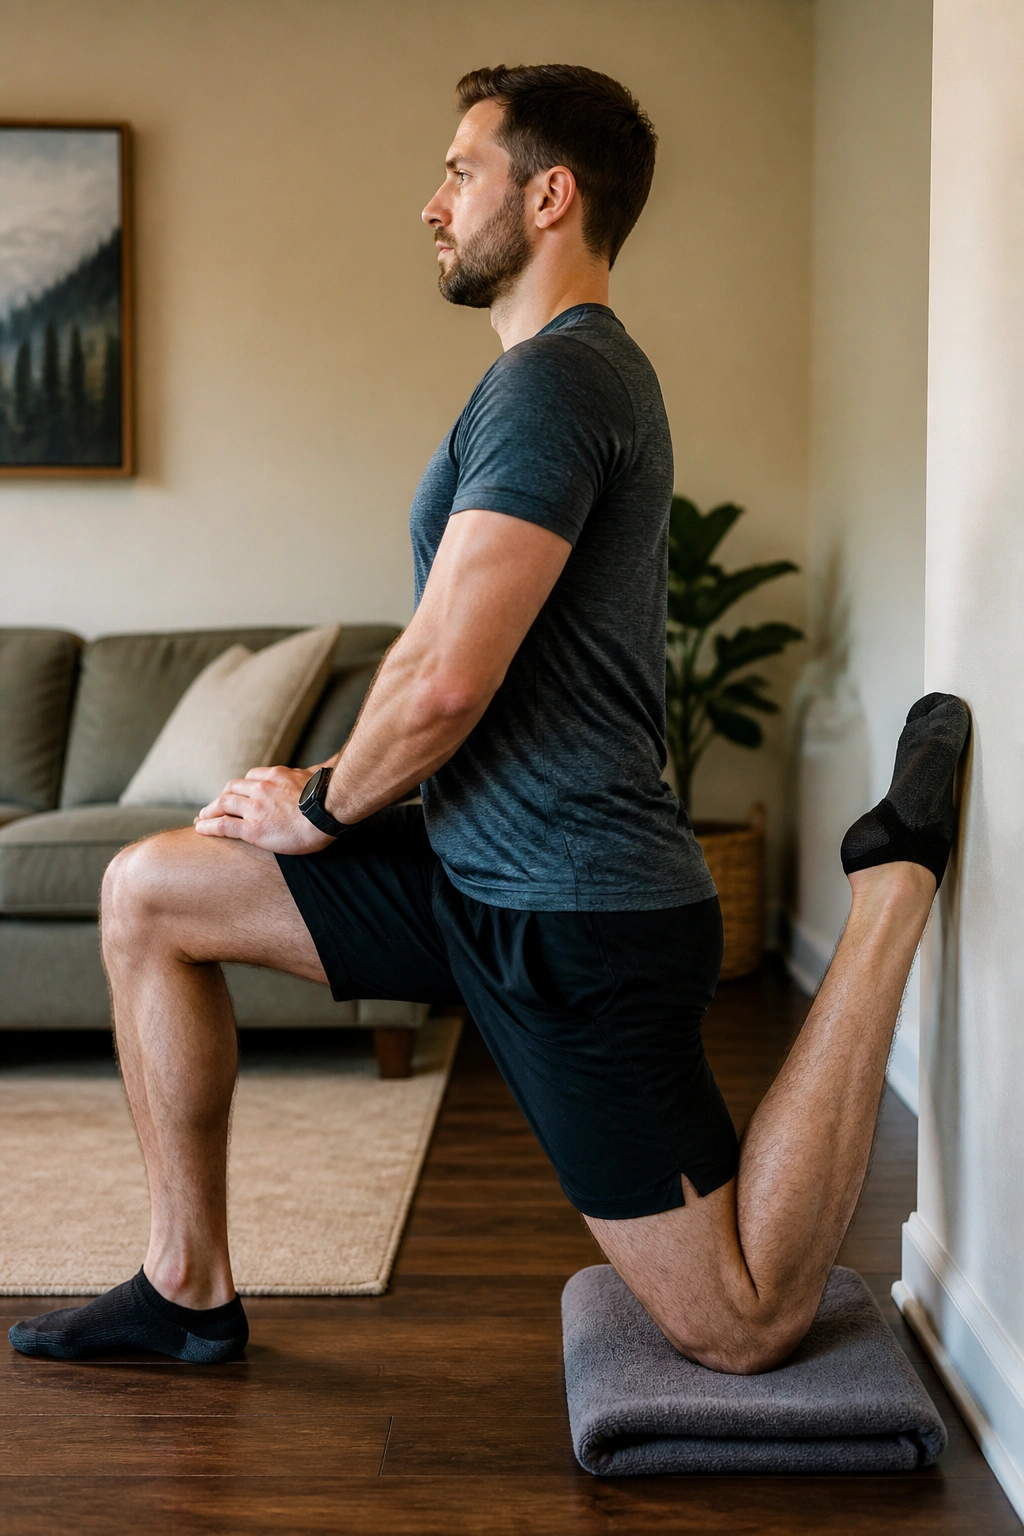
Why does a stretch that looks awkward on camera work so well in real life? Because the couch stretch hits the front line of the hip and quad at once, and that’s where a lot of sitting-induced tightness hides.
You want the back knee on a pad, shin up a wall or couch, and the front foot planted far enough forward that you can keep your balance. Then squeeze the back-side glute and tuck the pelvis slightly under. That little tuck matters. Without it, people tend to dump into the low back and miss the hip flexor stretch almost entirely.
How to Use It
- Hold for 20 to 45 seconds per side.
- Take 2 rounds if the hips feel stubborn.
- Keep your ribs down and breathe through the nose if you can.
The stretch should feel intense but controllable in the front of the thigh or hip. If you get a pinch in the low back, move the knee farther from the wall and reduce the arch. Do not crank through it. This is one of those moves that pays you back when you’re patient.
3. Glute Bridge March to Take Pressure Off the Front Hip
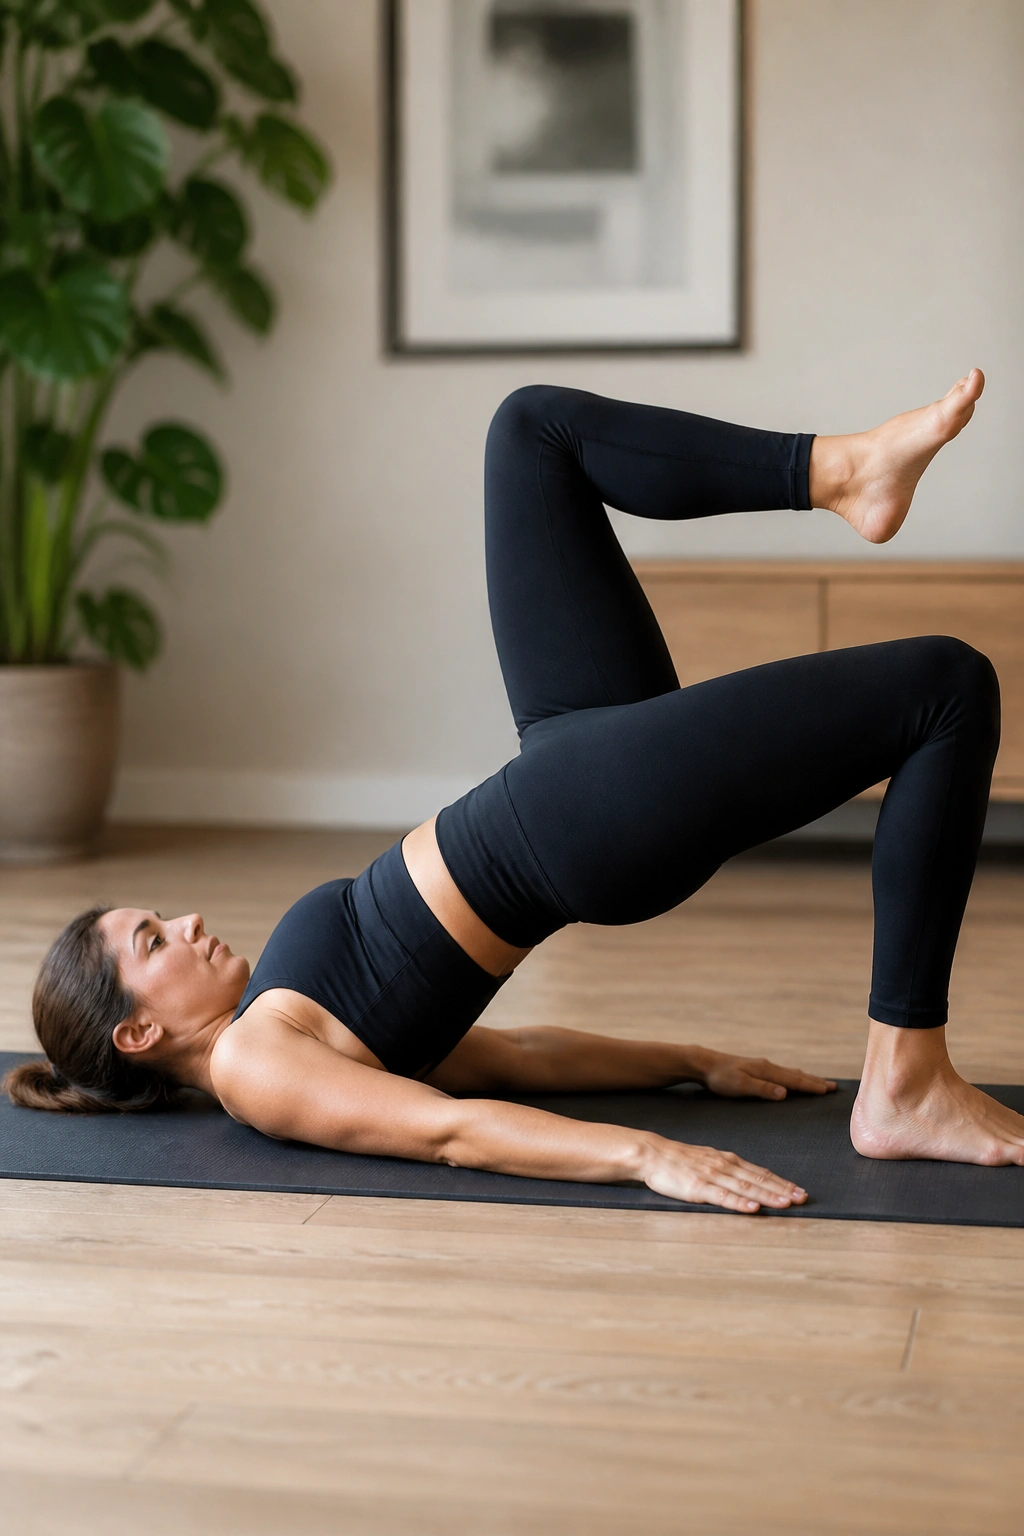
A lot of hip tightness is really a stability problem wearing a tightness costume. The glutes aren’t pulling their weight, the pelvis tilts forward, and the hip flexors end up doing overtime.
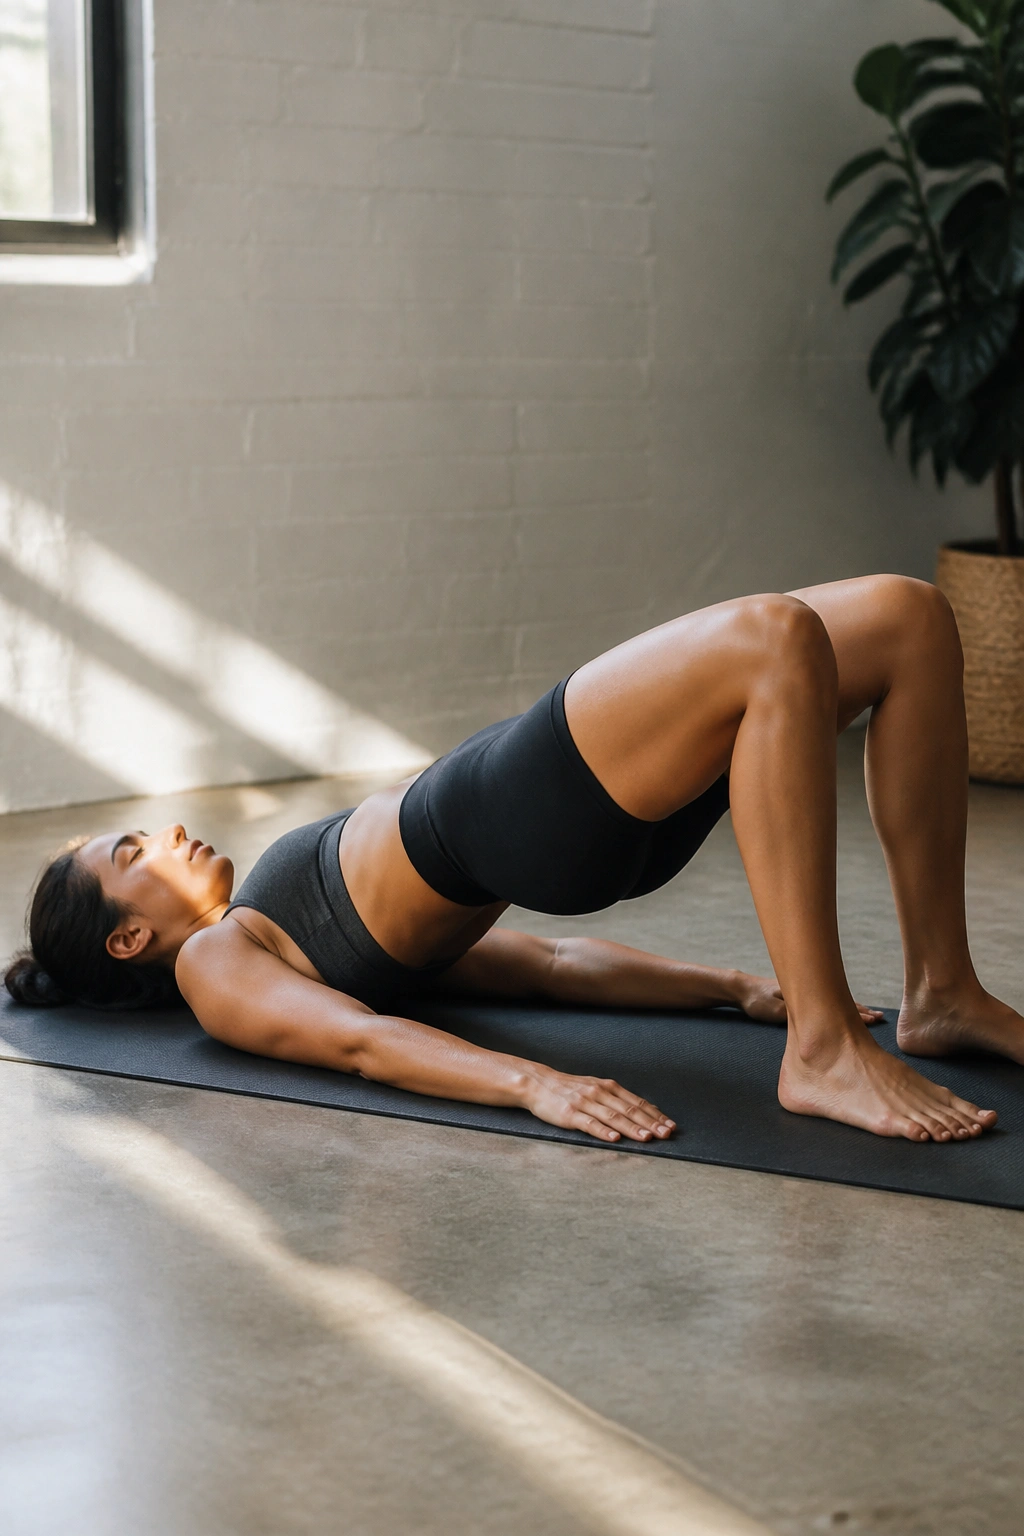
Glute bridge marches clean that up nicely. You lie on your back, feet flat, lift into a bridge, then march one knee up without letting the pelvis twist. It’s small. It’s a little boring. It works.
Quick Cues
- Press through the heels and lift the hips until your body makes a straight line from shoulders to knees.
- Hold the ribs down.
- Lift one foot a few inches, then set it back down without rocking.
- Alternate for 6 to 10 marches per side.
If your hamstrings cramp, bring your feet a little closer to your seat. If your low back takes over, lower the bridge height. The cleanest version is usually the best version. This drill helps because it teaches the hips to stay organized while one leg moves, which is a skill sore hips seem to forget.
4. Half-Kneeling Hip Flexor Stretch With Reach
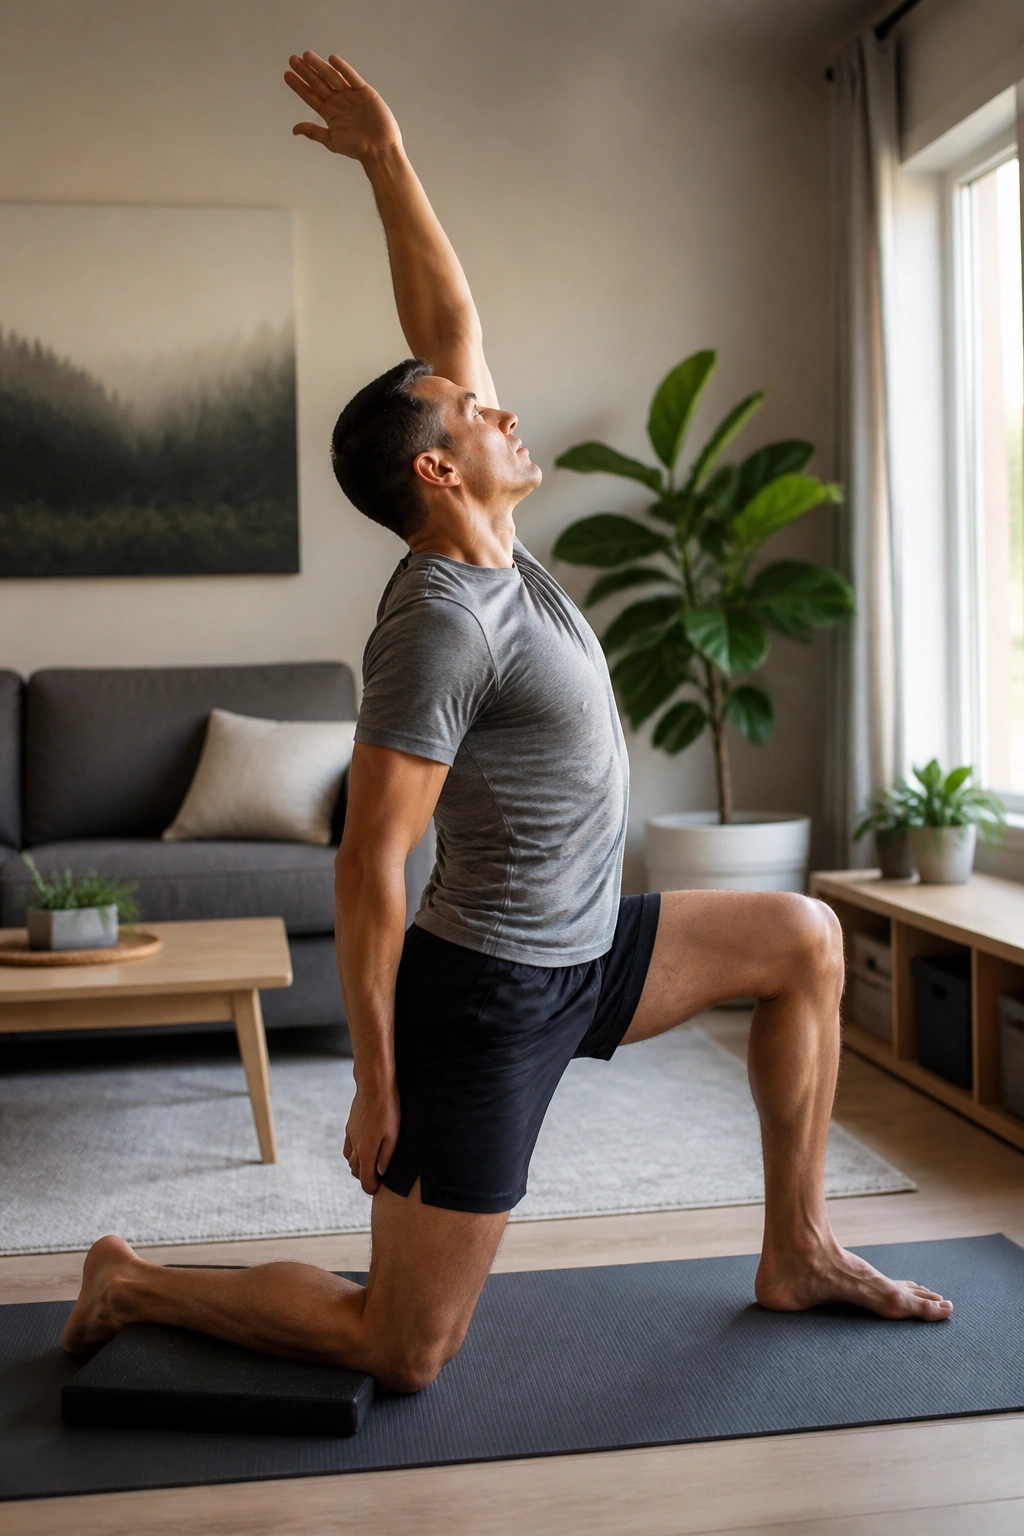
This is the one I like when the front of the hip feels glued shut. The half-kneeling position locks in enough stability that you can actually change something instead of wobbling around and calling it mobility.
Set one knee on the floor, other foot in front, then tuck the pelvis slightly and squeeze the glute on the kneeling side. From there, raise the same-side arm overhead and reach gently up and slightly away. That overhead reach creates a long line through the front of the body and tends to make the stretch feel more honest.
A few people overdo the lunge and think deeper means better. It doesn’t. Keep the stance modest, stay tall, and breathe out as the ribs settle. The stretch should land in the front of the hip, not jam into the lower back.
Hold it for 20 to 30 seconds, switch sides, and repeat once or twice. If you want to make it more useful, rock the pelvis forward and back by an inch or two before settling into the hold. Small change. Big difference.
5. World’s Greatest Stretch for Hips, Groin, and Back
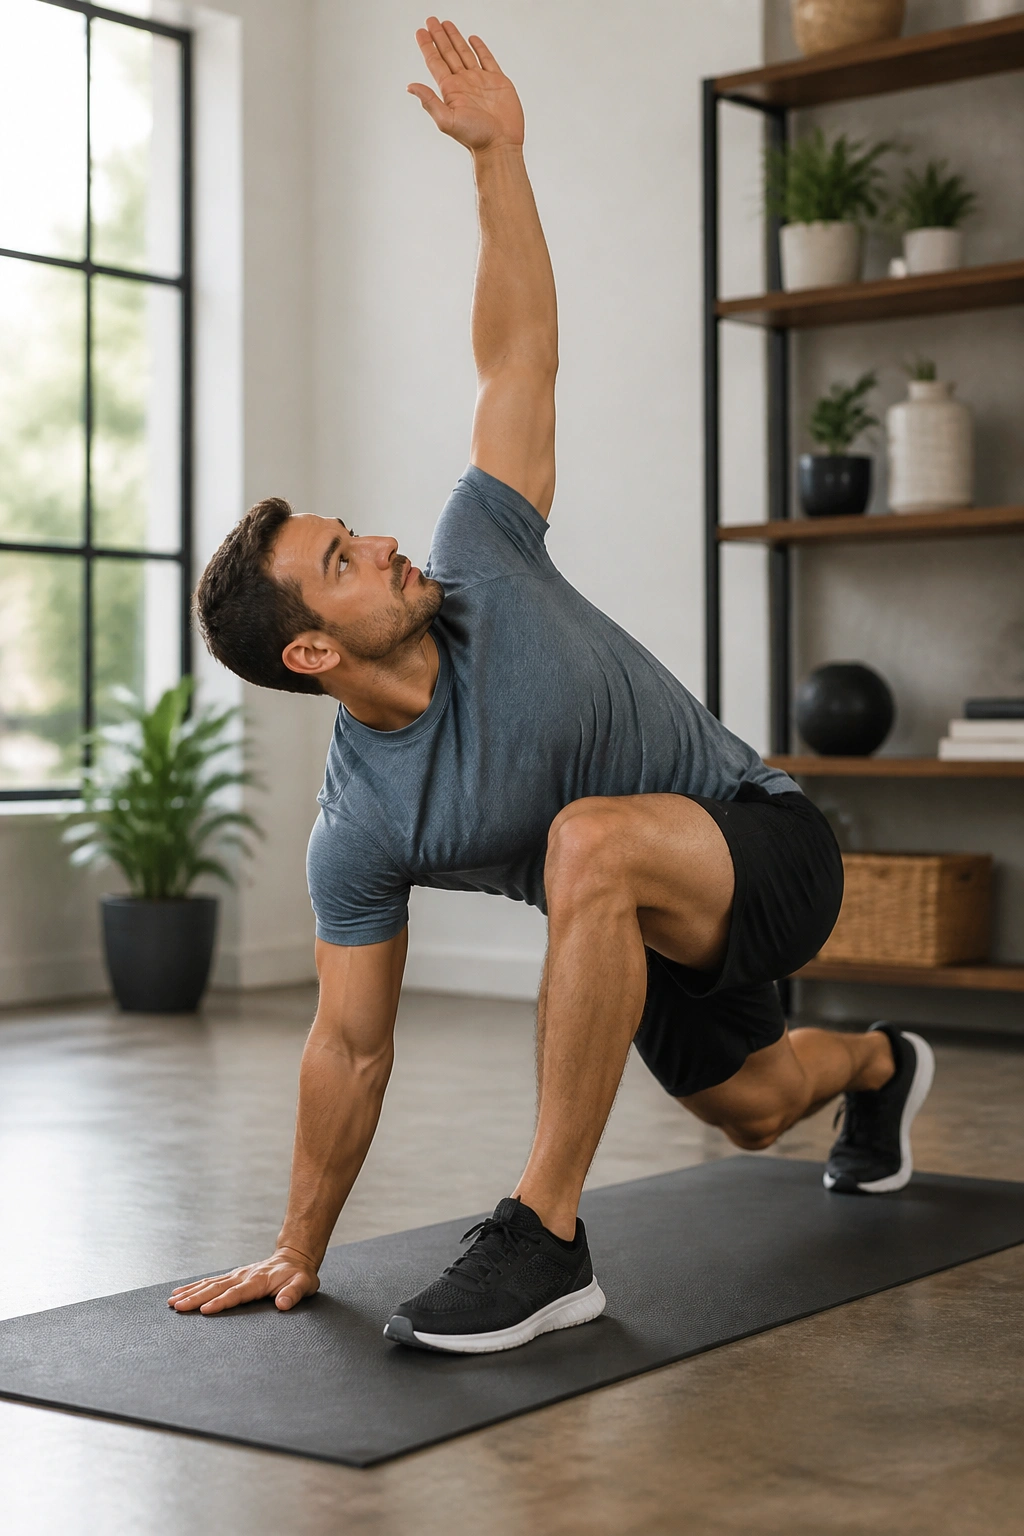
Unlike a static hip stretch, this one moves three places at once — hips, groin, and thoracic spine. That’s why runners and lifters keep coming back to it. It doesn’t just open a single corner of the body; it gets the whole chain talking again.
Start in a deep lunge. Put both hands inside the front foot. Drop the back knee if needed. From there, lower the opposite elbow toward the front instep, then rotate the chest open and reach the arm toward the ceiling. Step back out and repeat on the other side.
What Makes It Useful
- It opens the back hip in a way that feels more active than passive.
- It gives the inner thigh a gentle load.
- It adds thoracic rotation, which takes strain off the hips during walking and running.
Do 3 slow rounds per side before training, or use it as a reset after a long sit. If the front heel lifts, shorten the stance. If the elbow-to-instep piece feels too deep, keep your hand on the floor and rotate from there. This stretch works best when it stays smooth.
6. Dead Bug With Heel Tap for Quiet Hips
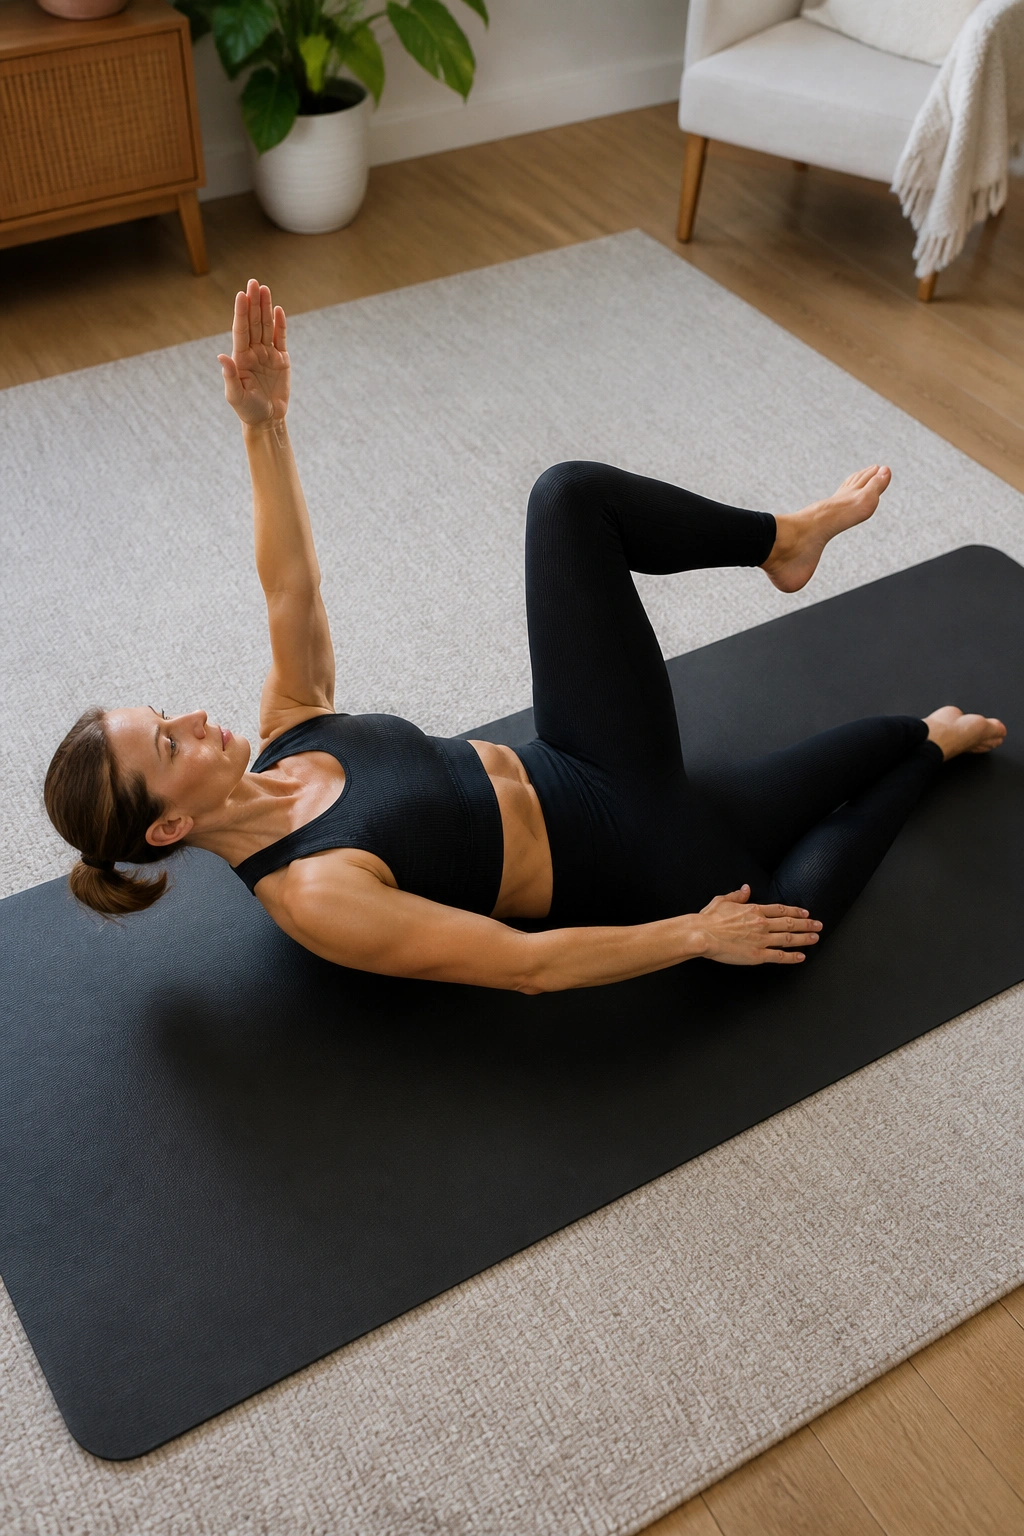
A lot of people chase hip flexor stretches when the real issue is that the hips are holding the pelvis in a weird position all day. Dead bugs help train the trunk to stay still while the legs move, and that often eases the tug in the front of the hip.
Lie on your back with knees up and arms pointing to the ceiling. Flatten the low back gently toward the floor, then lower one heel toward the ground while extending the opposite arm overhead. Tap lightly, bring it back, and switch sides. The motion should feel controlled, not dramatic.
When the low back arches, the hip flexors tend to jump in and take over. That’s why this drill matters. It teaches you to keep the ribs down and the pelvis steady while the legs move through a useful range. That control is the whole game.
A Small Fix That Helps
If the movement feels too hard, keep both knees bent and only tap the heel a few inches away from the floor. You can also slow the exhale on the way down. No race here. Aim for 6 to 8 reps per side and stop before your back starts waving the white flag.
7. Lateral Lunge and Shift for Tight Inner Thighs
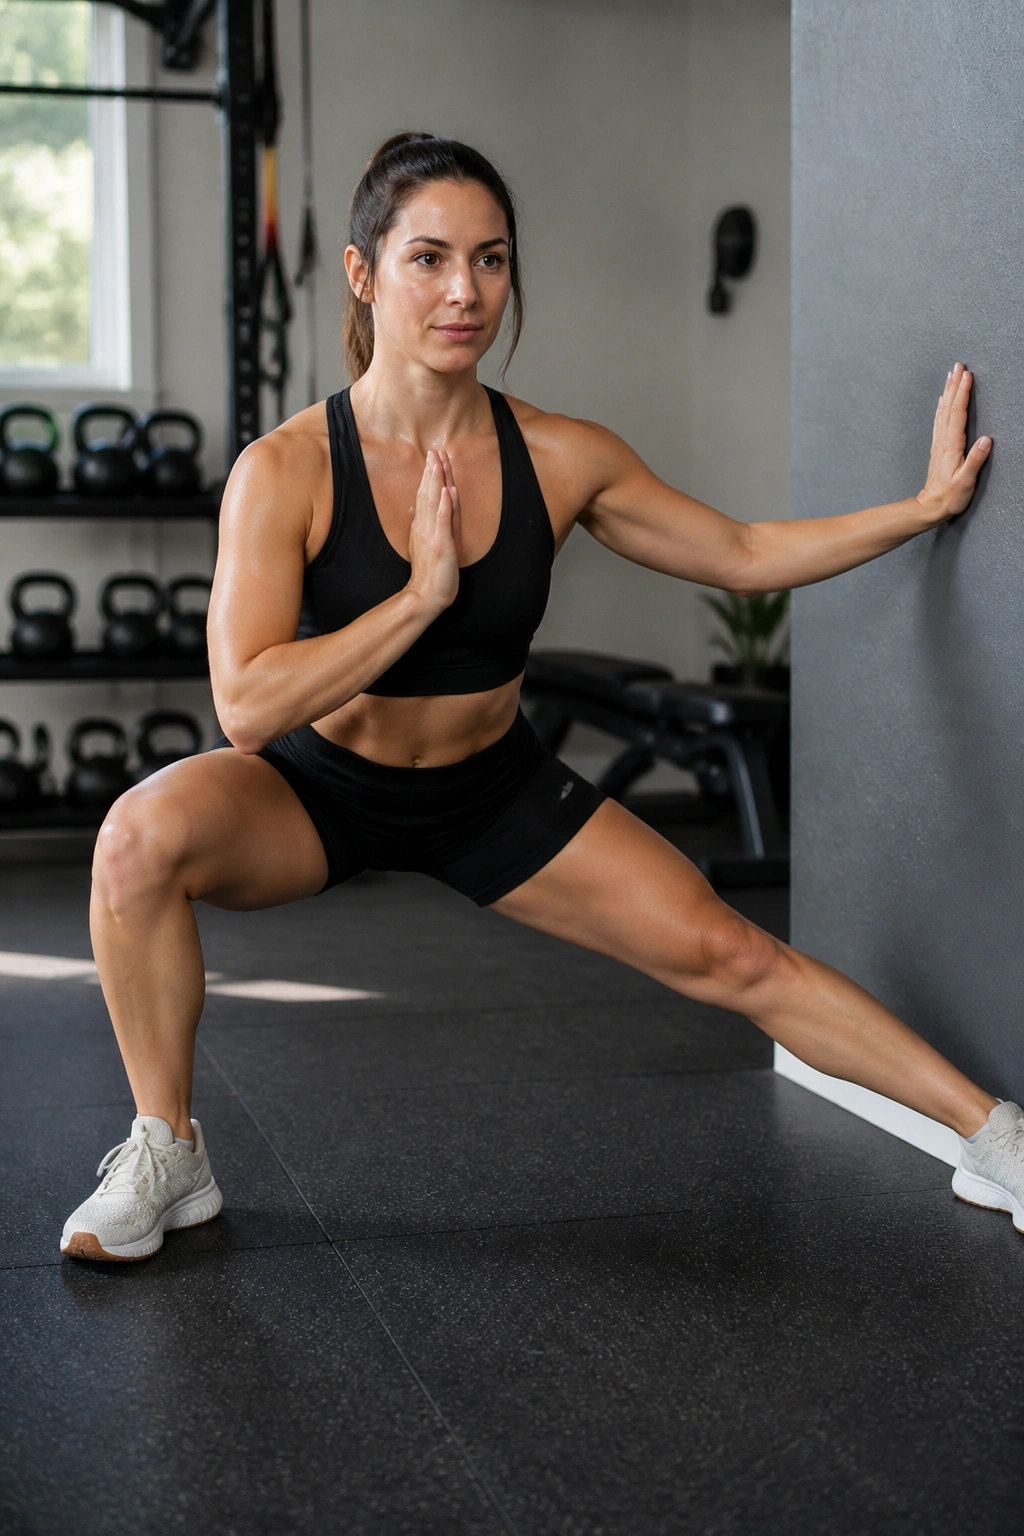
Why does a side-to-side move help sore hips so much? Because the hips are not built for forward motion alone. The adductors, outer hip, and joint capsule all want some load from the side, and a lateral shift gives them that without beating them up.
Step out to one side, bend that knee, and sit the hips back while the other leg stays long and straight. Then shift your weight back toward center and repeat. You don’t need a huge range. You need a clean one.
How to Use It
- Take 5 to 6 shifts per side.
- Keep the working foot flat.
- Let the straight leg stay straight, but not locked hard.
- Hold onto a wall or rack if balance is messy.
This move tends to wake up the groin and outer hip at the same time. That combo is useful for people who feel stiff when they get out of a chair or step sideways. If the inner thigh grabs, shorten the stance. The goal is a smooth side load, not a dramatic sink.
8. Cossack Squat for Deeper Hip Range
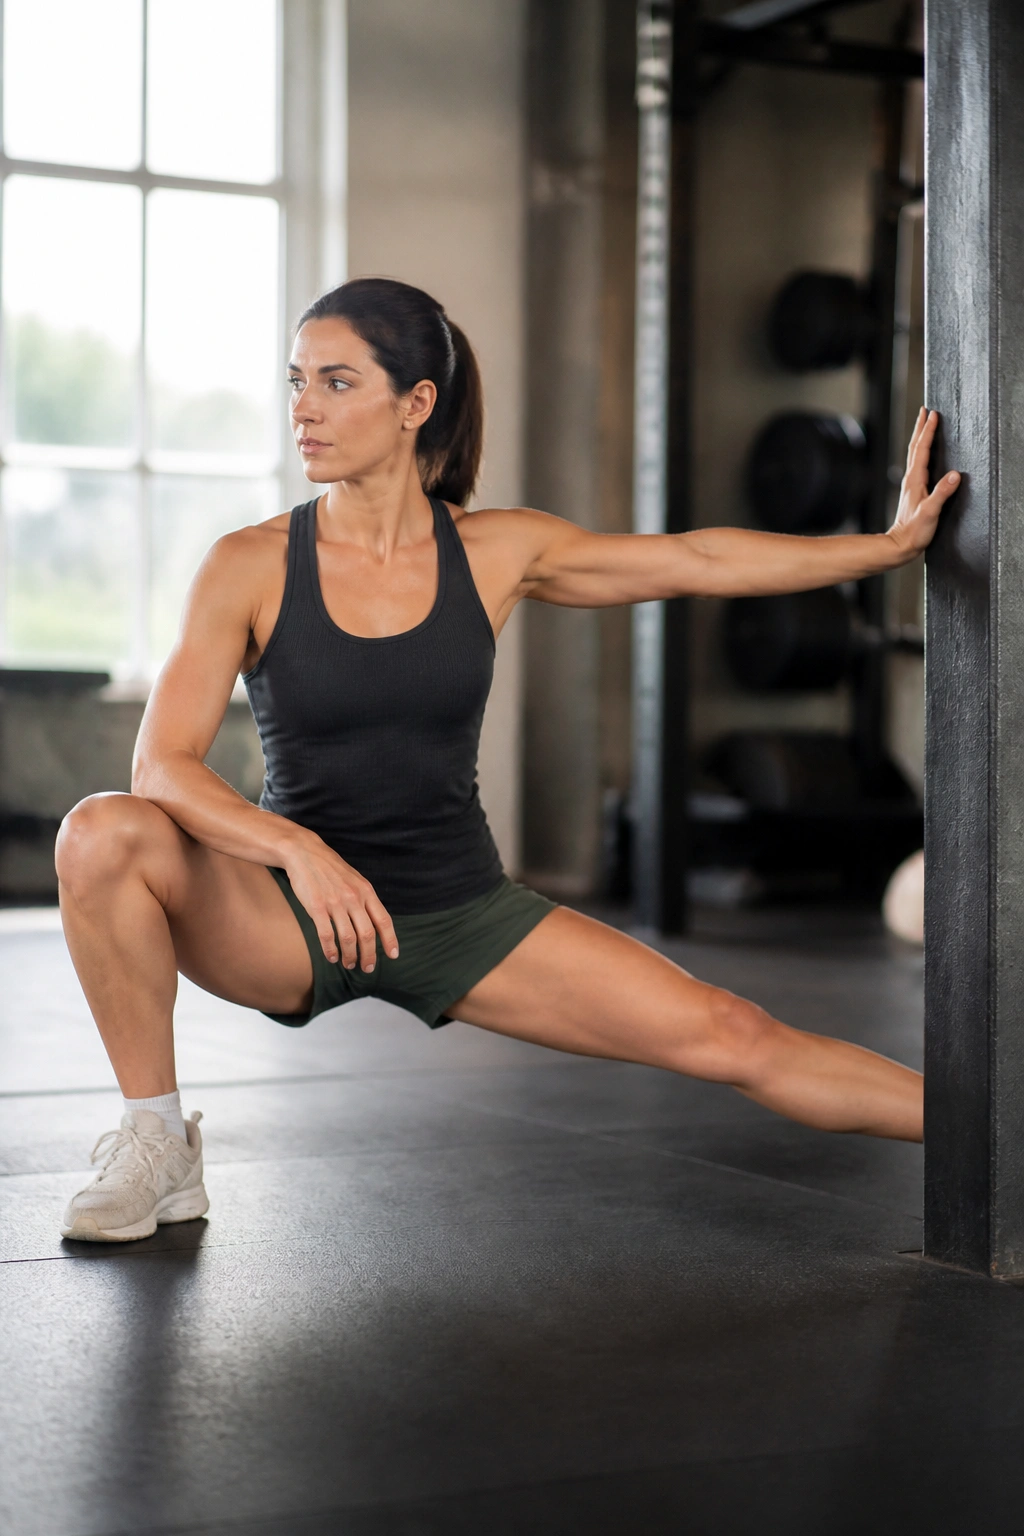
The Cossack squat looks fancy until you do it slowly. Then it turns into a very honest test of what each hip can do.
One leg bends deeply while the other stays long and the foot turns up. You shift side to side, keeping the chest lifted and the heel of the bent leg rooted. The straight leg gets a stretch through the inner thigh, and the bent side gets loaded in a way most daily movement never asks for.
Key Details
- Start shallow and build depth over time.
- Keep the working heel down if you can.
- Use a post or doorframe for support when balance wobbles.
- Move slowly enough that you can feel where the tight spot lives.
This is one of my favorite moves for people who say, “My hips hate deep positions.” Often, the hips don’t hate them — they just don’t trust them yet. A partial Cossack done well beats a sloppy deep one every time. Control first, depth second.
9. Frog Rock Backs for Inner Thigh and Hip Relief
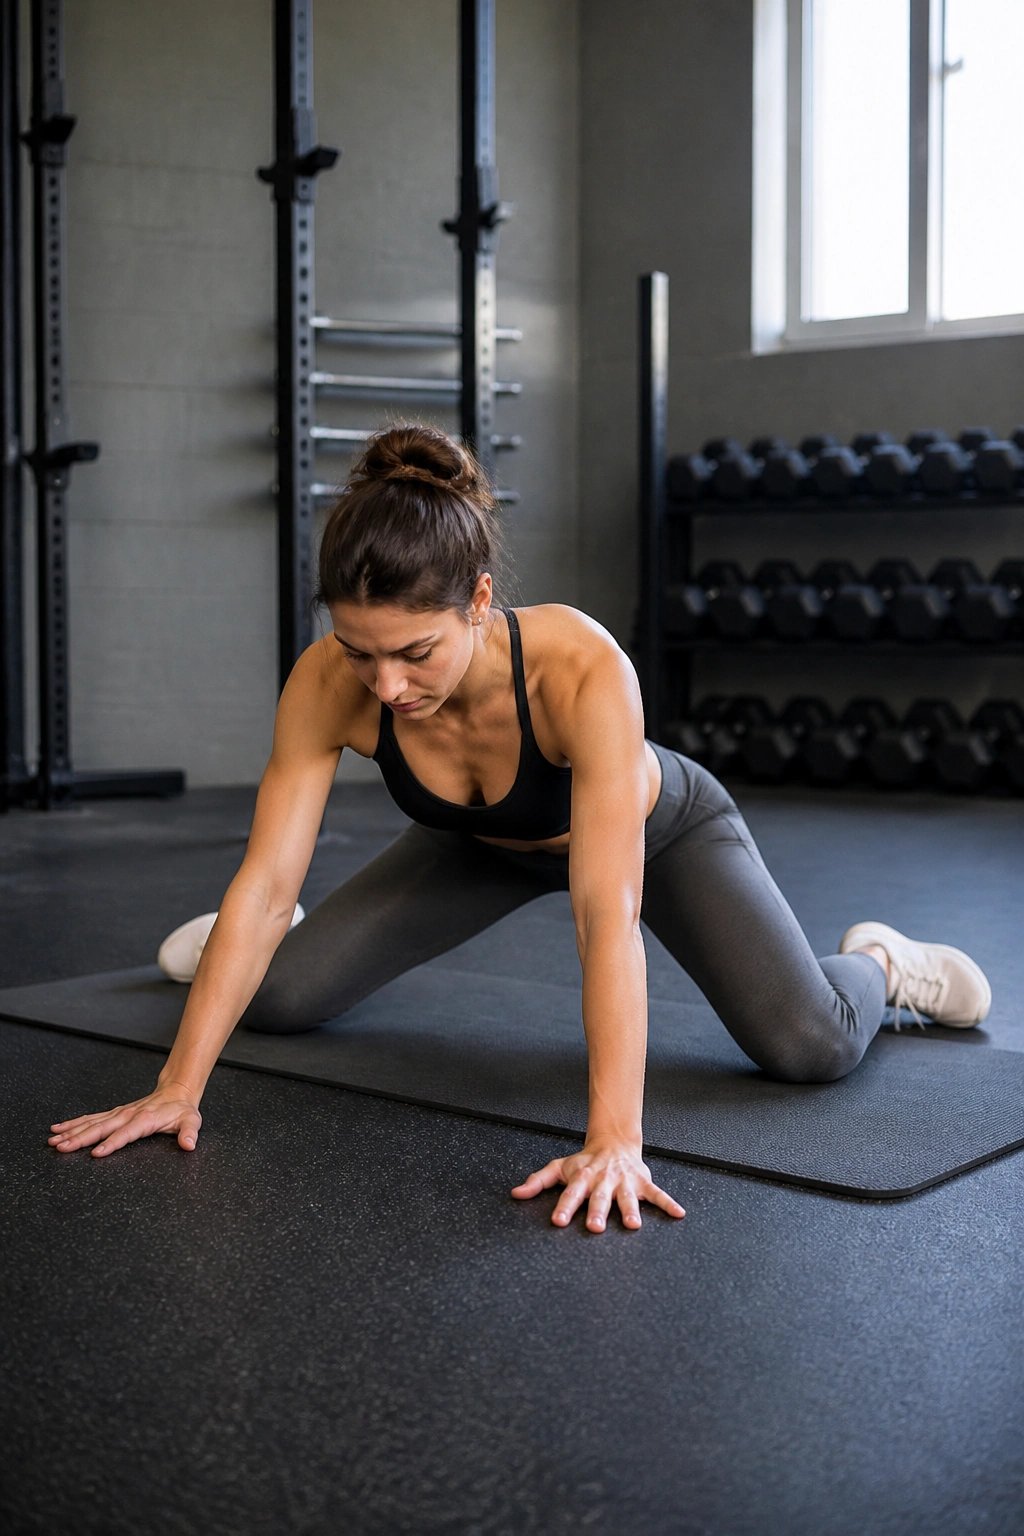
The floor gets a little weird here, and that’s fine. Frog rock backs put you on hands and knees with your knees opened wide and your lower legs turned out, then you rock your hips back and forward in a gentle rhythm.
That movement stretches the adductors and lets the hips glide through a bit of flexion without asking for a full squat. It’s one of the calmer choices when the inner thigh feels tight or the front of the hip feels grumpy after sitting.
A few things matter. Keep the back flat enough that you’re moving at the hip, not collapsing through the spine. Rock back only as far as the body allows without pain, then come forward again. Smooth beats deep here.
Do 8 to 10 rocks, pause, and breathe. If the groin feels pinchy or the adductor tendon near the pubic bone feels sharp, back out and shorten the range. This is not the time to prove anything to the floor. It’s a quiet drill, and it usually works better that way.
10. Reverse Lunge to Knee Drive for Hip Flexor Strength
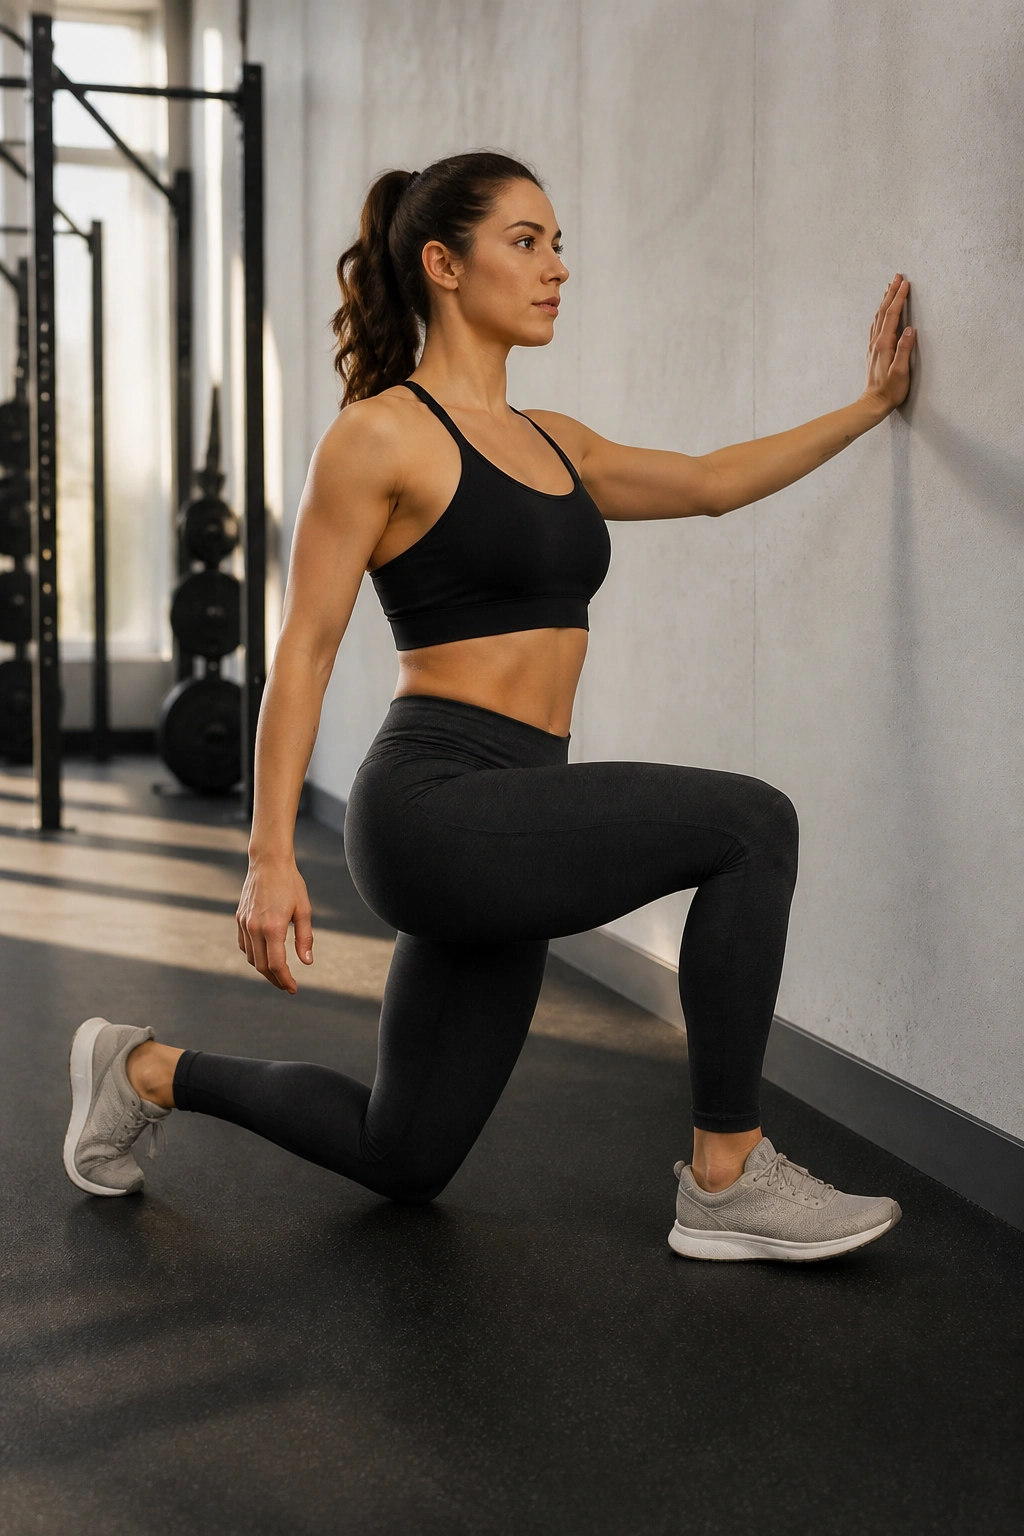
A tight hip flexor is often also a weak one. That sounds annoying, but it’s common. The muscle that feels short and cranky may also need to get stronger in a controlled way.
Reverse into a lunge, keeping the front heel down and the torso tall. Push through the front foot and drive the back knee up to standing. That knee drive gives the hip flexor a chance to contract hard after being lengthened, which is a useful kind of work. It teaches the hip to move through both ends of the range.
A Clean Version Looks Like This
- Step back, not forward, so the front knee stays easier to control.
- Lower with a steady count of 2 to 3 seconds.
- Pause for a beat before standing.
- Finish each rep with a tall knee drive and a small glute squeeze.
If balance is shaky, keep one hand on a wall or hold a light support. No swinging. Do 6 to 8 reps per side and keep the motion crisp. That combo often feels better than endless stretching because it gives the hip flexors a job instead of only a complaint.
11. Side-Lying Clamshell for the Outer Hip
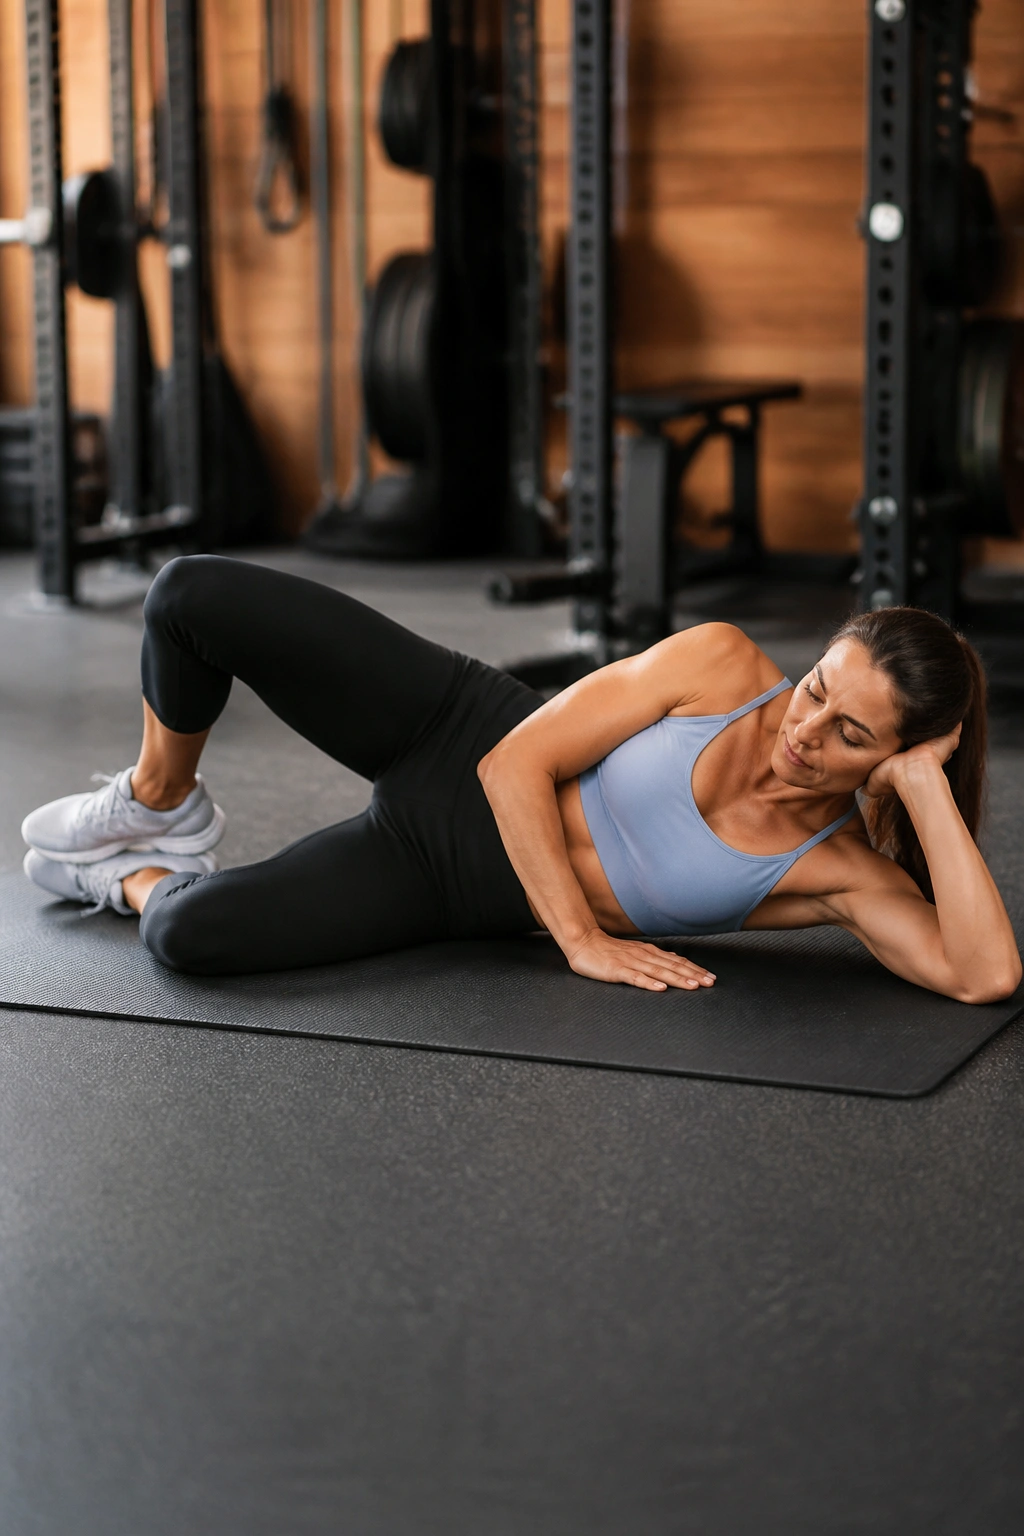
Unlike big leg exercises, the clamshell looks almost too small to matter. It matters a lot. The movement targets the glute medius and the other side-hip muscles that help keep the pelvis level when you walk, run, or stand on one leg.
Lie on your side with knees bent, feet together, and hips stacked. Keeping the pelvis still, open the top knee like a clamshell shell, then lower it back down under control. If the body rolls backward to fake the movement, the exercise loses most of its value.
A mini band above the knees can add resistance, but don’t rush to load it up. Clean movement comes first. You should feel the outside of the upper hip, not the low back.
Best Use
- Do 2 to 3 sets of 12 to 15 reps.
- Hold the top for 1 to 2 seconds.
- Stop before the trunk starts swaying.
This is a good pick when hip soreness comes from weak side support, not from the joint itself. It’s plain. It’s repetitive. It earns its keep.
12. Bird Dog With Reach for Hip Control
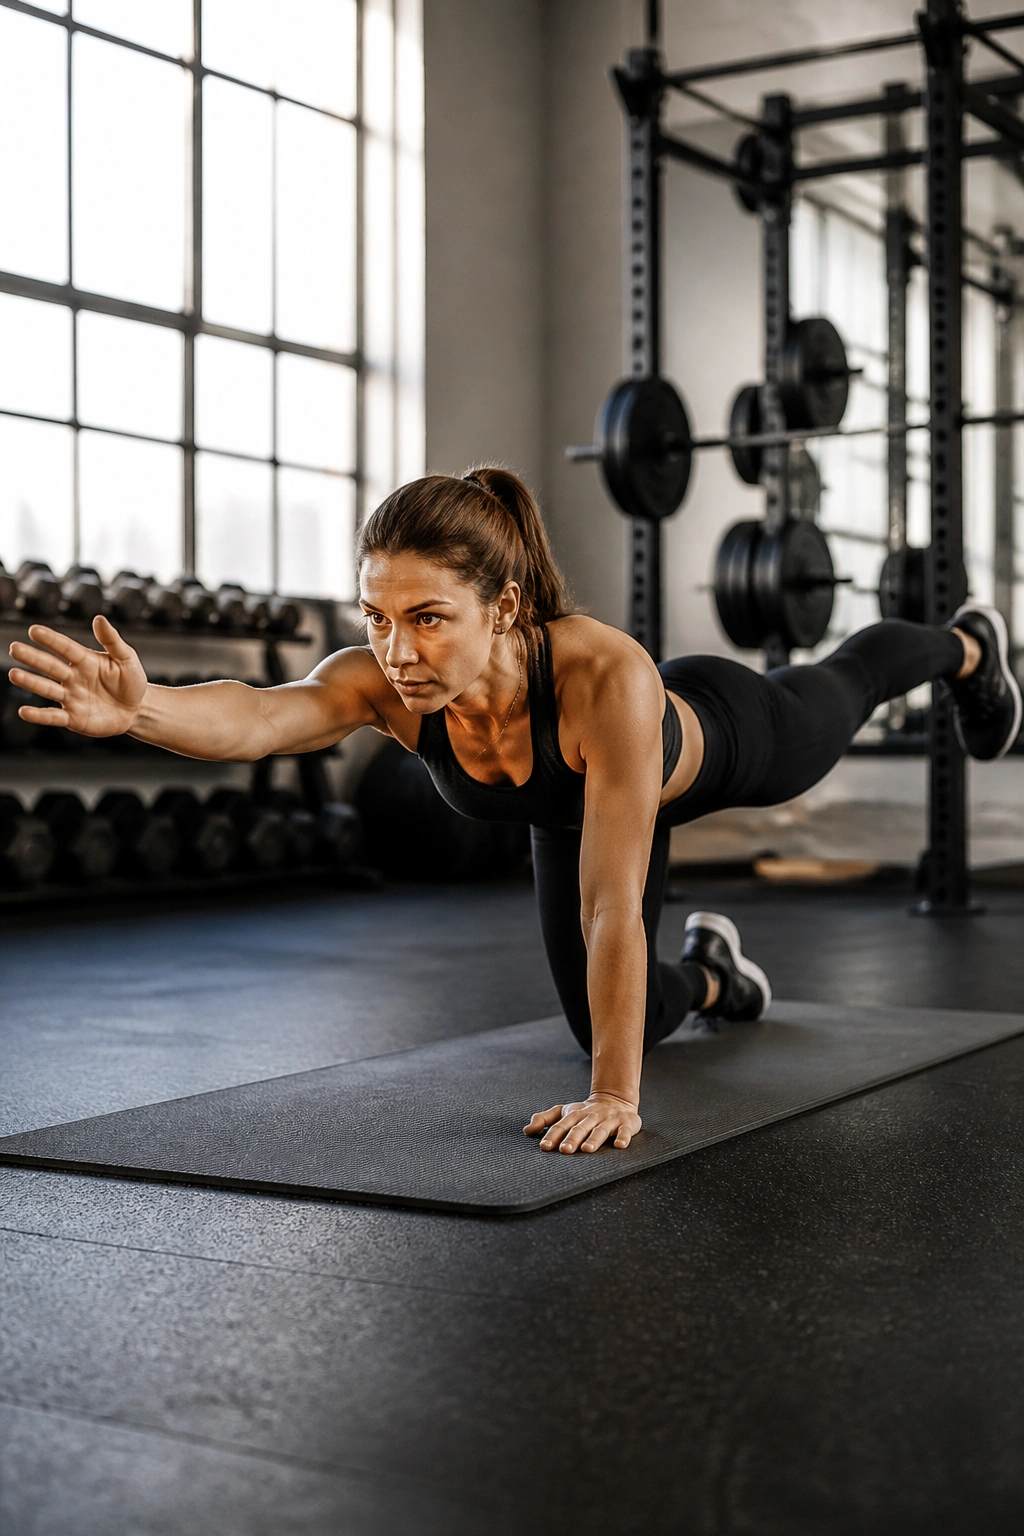
Can a slow hands-and-knees drill help tight hip flexors? Yes, because the problem is often not one muscle but poor control when the opposite arm and leg move together.
Set up on hands and knees with wrists under shoulders and knees under hips. Reach one leg straight back while the opposite arm reaches forward. The pelvis should stay level and the low back should stay quiet. If the movement gets wobbly, shorten the reach before trying to impress anyone.
Keep the Pelvis Quiet
- Brace lightly before moving.
- Think about reaching long, not high.
- Hold the top position for 2 to 5 seconds.
- Use 4 to 6 reps per side.
This drill teaches the hip to extend without the spine taking over. That matters for people who feel front-hip tightness when they walk, climb stairs, or run. Small range, clean line, steady breath. If your shoulders hate the floor, place your hands on a bench and keep the same pattern.
13. Deep Squat Hold With Breathing
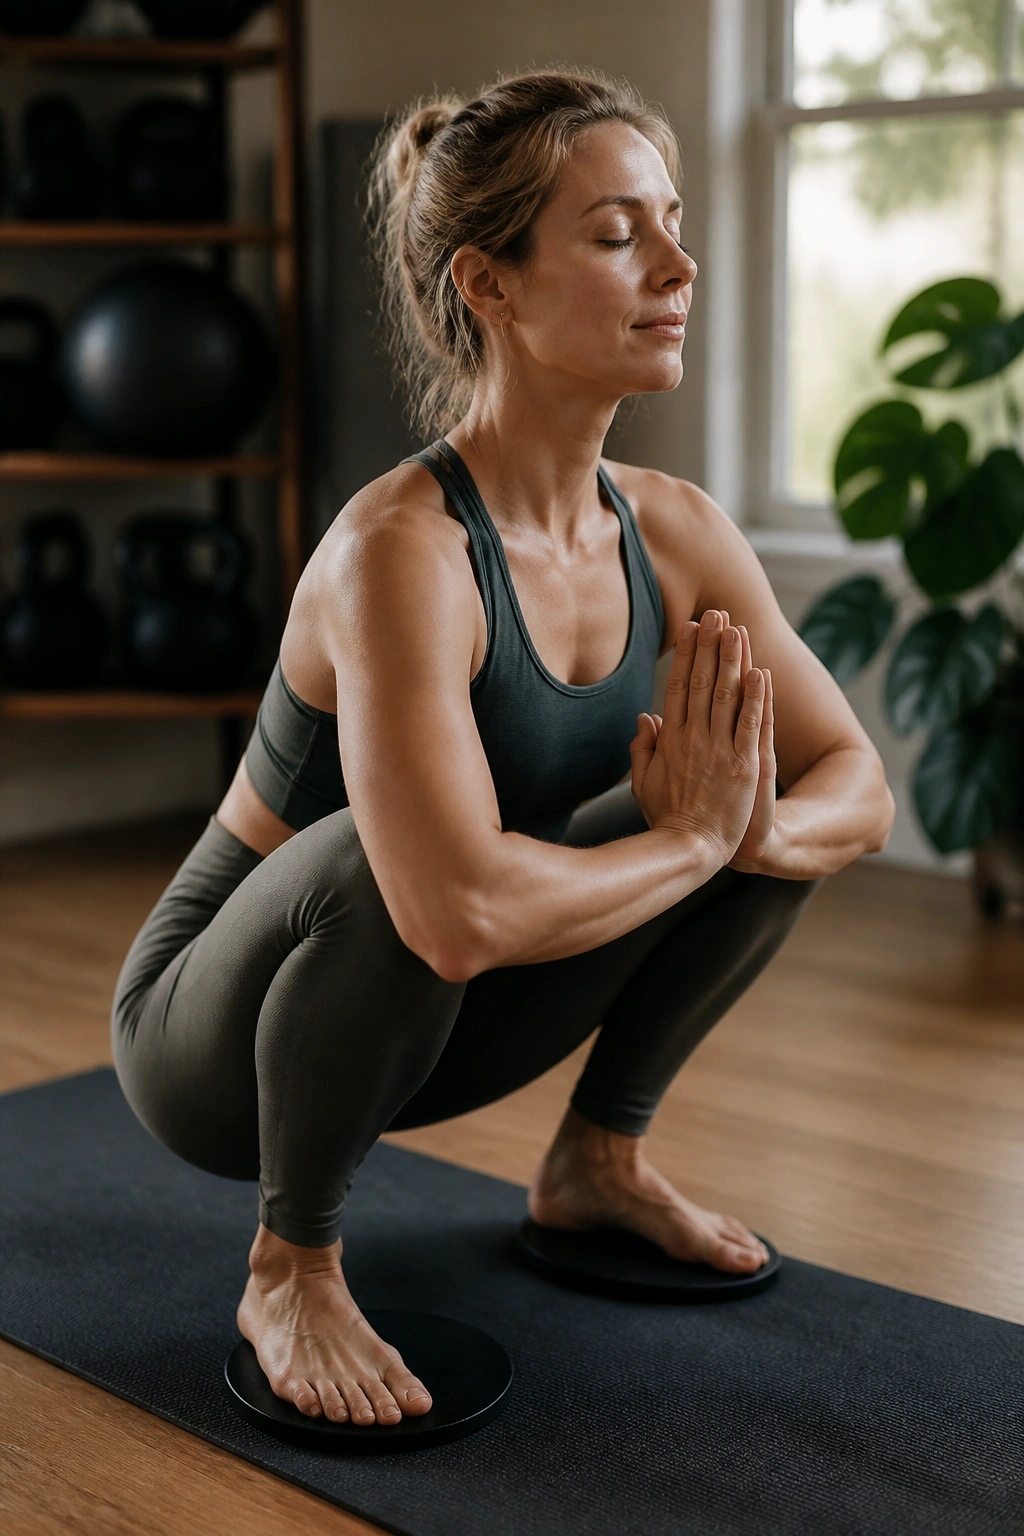
The deep squat is a useful position, but not everyone can drop into it cold and enjoy themselves. That’s fine. Use support, lift the heels if needed, and treat it as a position to breathe in rather than a test to pass.
Sink into the deepest squat you can hold with your feet flat or your heels slightly raised on a small plate. Keep the chest proud, let the elbows press gently inside the knees, and take slow breaths that widen the sides of the ribs. On a good day, the hips feel roomy. On a cranky day, the ankles complain first. Either way, the position gives you information.
One sentence worth repeating: Don’t force depth. A supported squat with calm breathing does more for sore hips than a collapsed one held for a minute out of stubbornness.
Try 3 to 5 breaths for 2 to 3 rounds. If the low back rounds hard or the hips pinch, sit on a yoga block or box. The goal is to hang out in a better shape, not to fold yourself in half.
14. Standing Knee Drive Holds for Front-Hip Strength
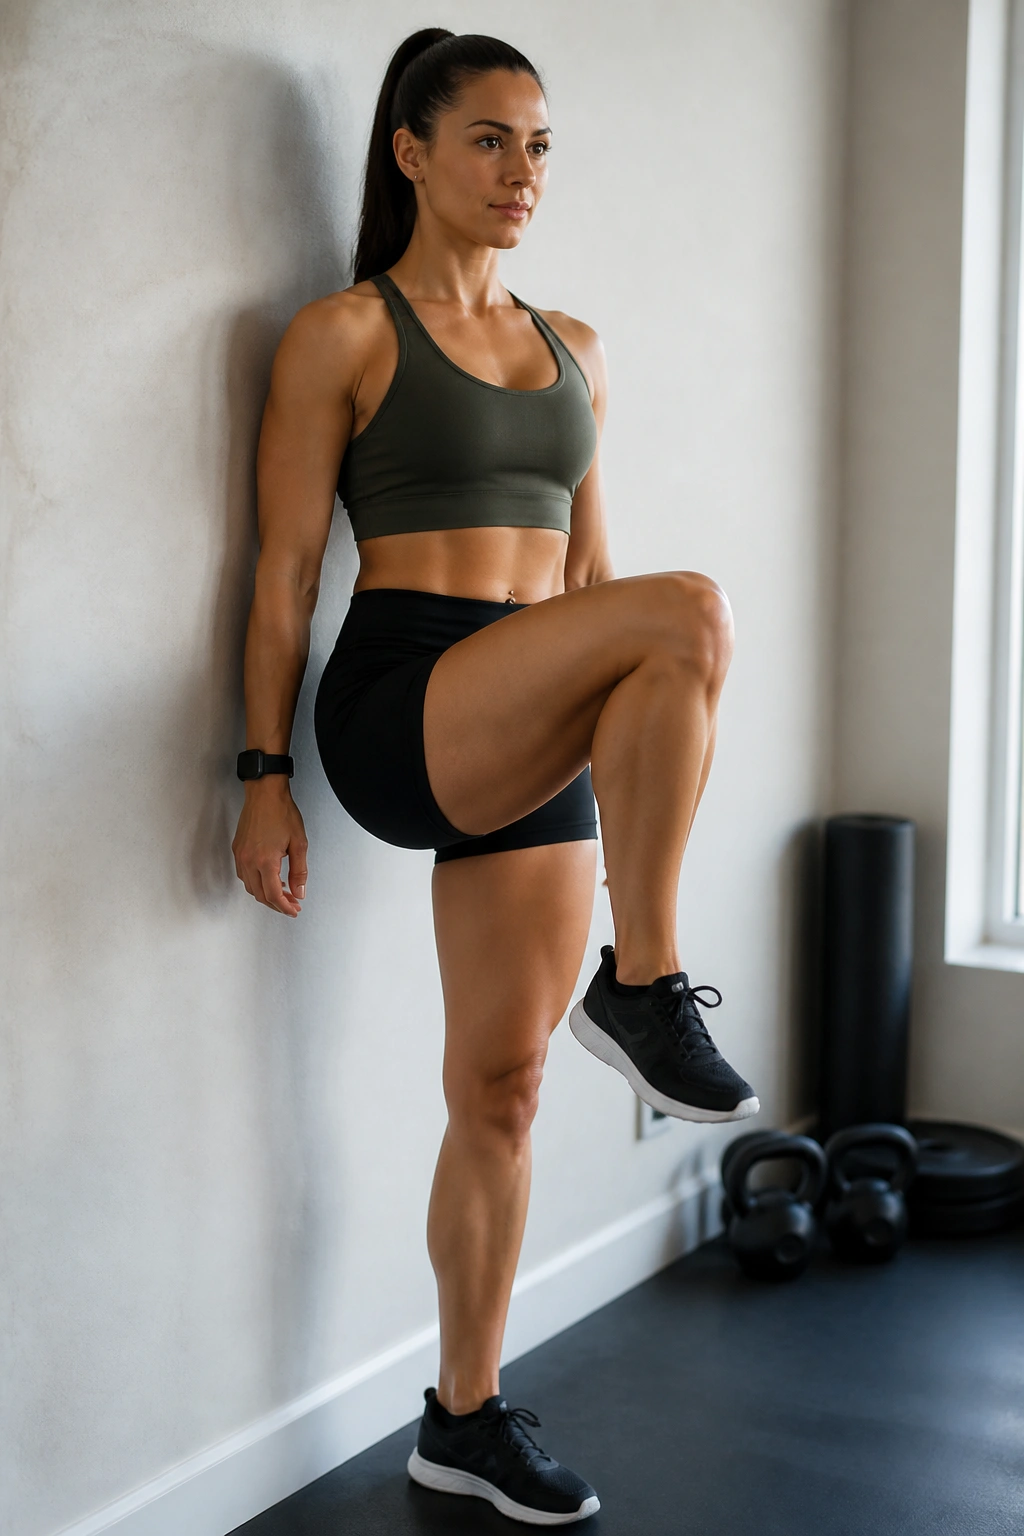
A lot of people stretch the front of the hip and never teach it to work. Standing knee drive holds fill that gap, and they’re surprisingly good for runners, hikers, and anyone who feels the front of the hip go dead after sitting.
Stand tall near a wall. Drive one knee up to hip height, pause, and hold the position for 3 to 5 seconds before setting it down slowly. The standing side should stay firm, the pelvis should stay level, and the lifted hip should feel like it’s doing honest work.
This isn’t about a huge march. It’s about control. The lifted leg should come up without the torso leaning back or the lower back arching to fake range. Keep the ribs stacked over the pelvis.
Do 5 to 8 holds per side. If balance is an issue, touch a fingertip to the wall. That small support makes the exercise cleaner, and clean is what you want here. It teaches the hip flexor to contract without dragging the rest of the body into the mess.
15. Seated Figure-4 Stretch for Glutes and Outer Hips
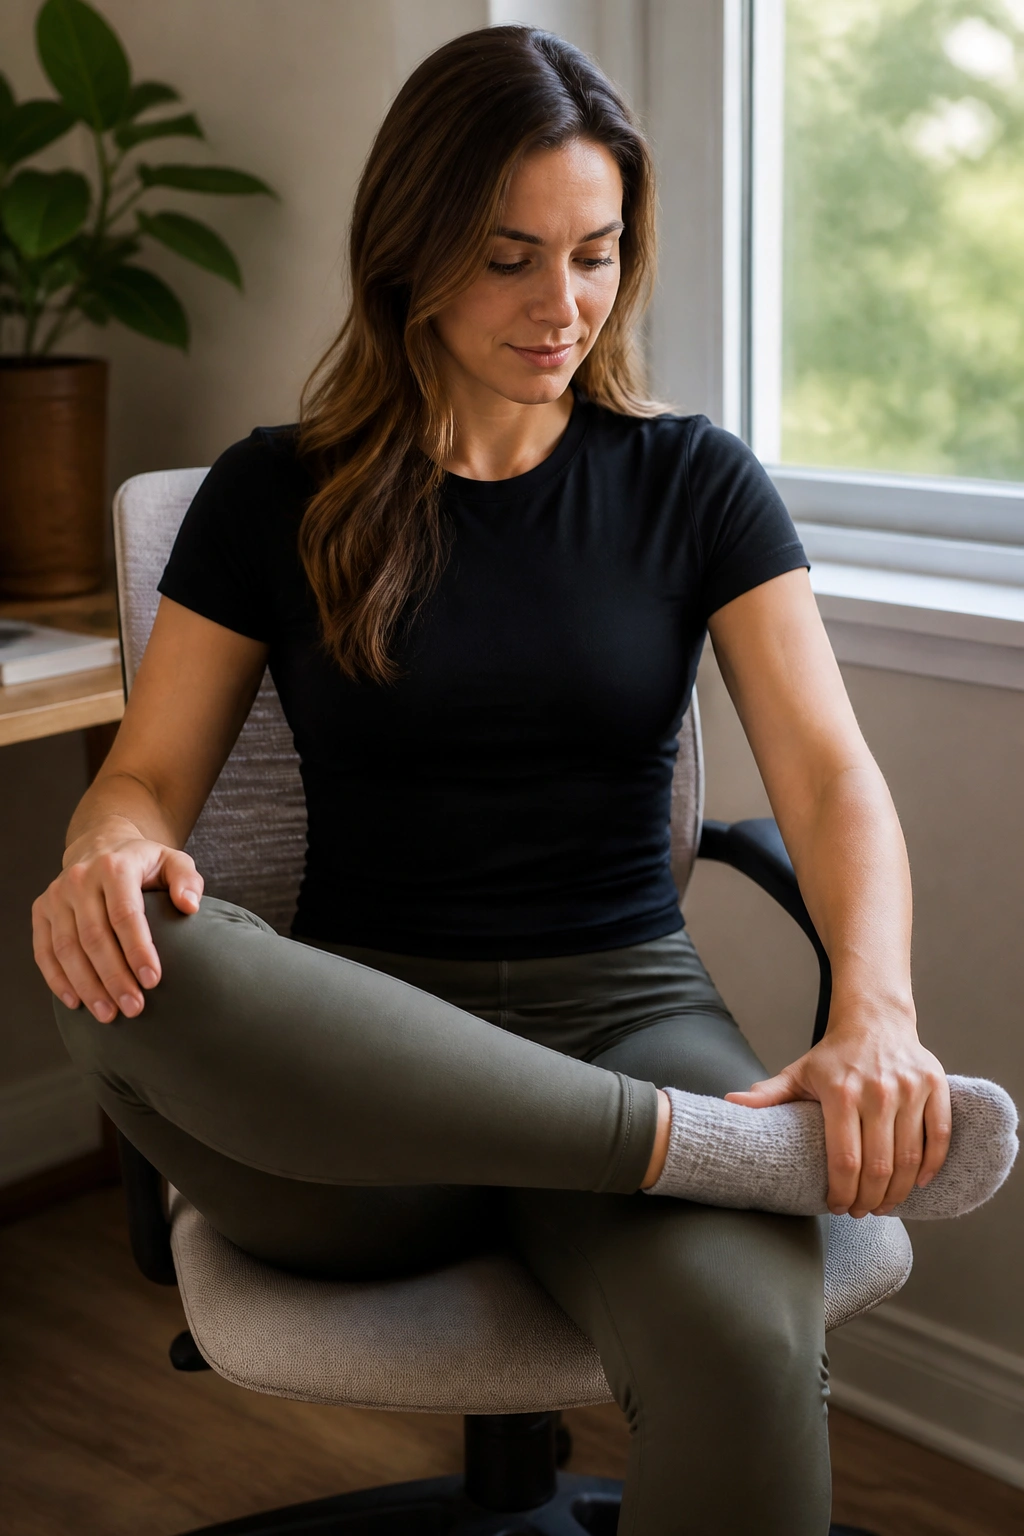
The seated figure-4 stretch is the old reliable when the outer hip feels packed up after travel, desk work, or a hard leg session. It doesn’t ask much space, and it’s easy to scale.
Sit in a chair, cross one ankle over the opposite thigh, and keep the spine long as you hinge forward slightly. You should feel the stretch in the back of the hip and deep glute, not a knee wrench. If the knee complains, lower the crossed leg a bit or skip this version and lie on your back instead.
Why I Like the Seated Version
- It’s easier to control than a sloppy floor stretch.
- You can use it at work without becoming a pile on the floor.
- The upright torso keeps the stretch from spilling into the low back.
Hold for 30 to 45 seconds per side and breathe normally. If one side feels much tighter, resist the urge to yank harder. A small hinge with a quiet breath usually does more than a pushy fold. Tension in the glute should ease, not spike.
16. Lizard Lunge Rocks for the Front of the Hip
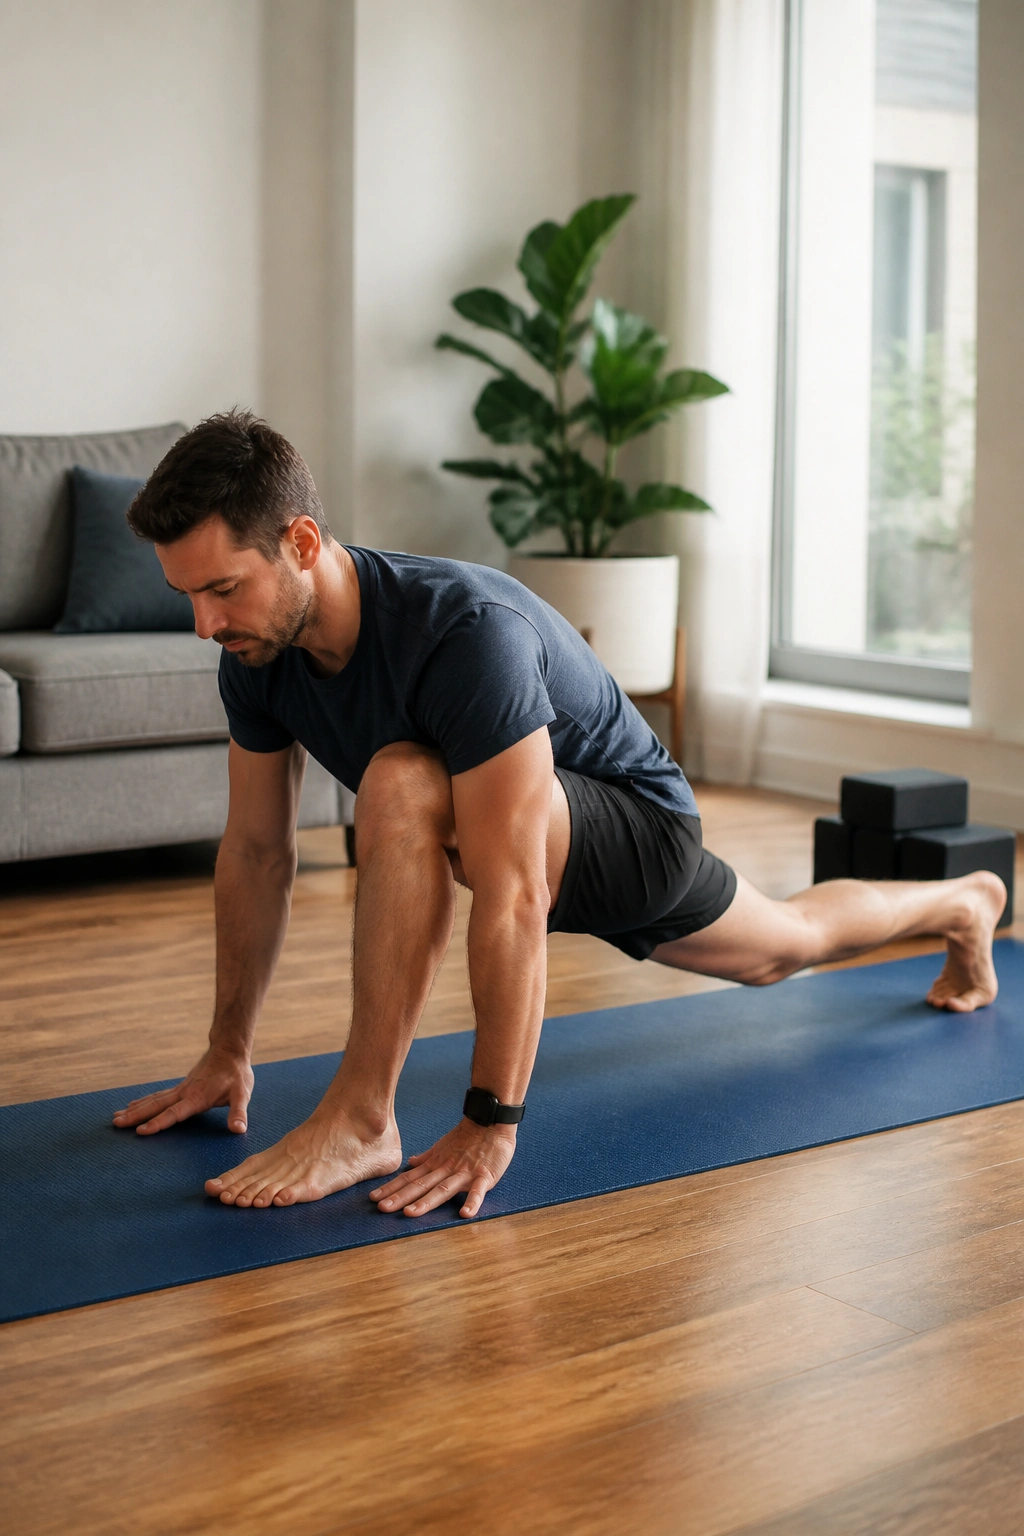
What makes lizard lunge rocks different from a regular lunge stretch is the movement. You’re not holding one shape and hoping for the best. You’re moving in and out of that shape so the hip can warm up and change.
From a low lunge, place both hands inside the front foot and let the back leg stay long. Rock the body forward a few inches, then back again. The front hip gets a blend of stretch and load, and the groin often feels included too. If the floor is too low, put your hands on blocks or a bench. No shame there.
A Few Cues Matter
- Keep the front foot planted.
- Move forward and back slowly for 8 to 12 reps.
- Stay out of a painful pinch at the top of the hip.
- Switch sides after a short rest.
This one works well before training because it brings blood into the area without draining energy. It’s dynamic, but not sloppy. That’s the sweet spot. If the back knee feels cranky, put a folded towel under it or keep the knee lifted.
17. Fire Hydrant for the Side Hip
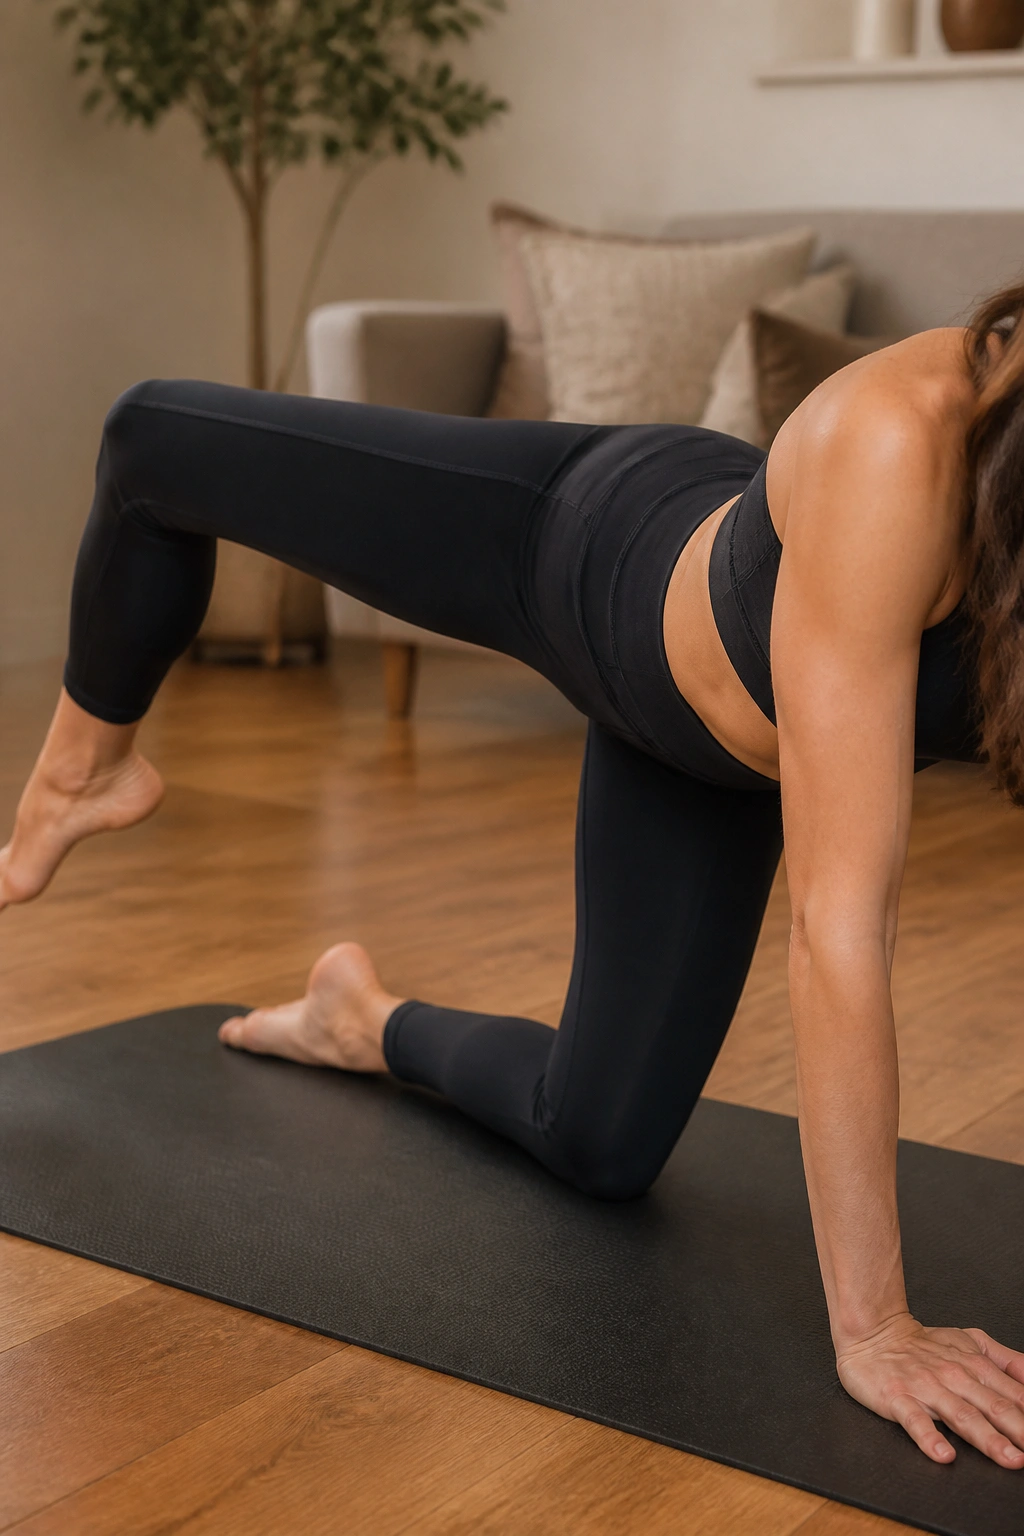
The fire hydrant is one of those exercises people mock until their outer hip is sore and they realize they can’t keep their pelvis still. Then it gets respect fast.
Start on hands and knees. Keeping the knee bent, lift one leg out to the side without twisting the torso or shifting weight into the opposite hip. The motion should be small and deliberate. If the leg swings high and the back arches, the body is cheating.
A mini band around the thighs can make the drill harder, but the quality matters more than the load. The outside of the hip should burn, not the low back. That’s the line.
Try 2 sets of 10 to 12 reps per side with a short pause at the top. This one is useful when the glutes feel sleepy and the hips feel like they’re doing all the work alone. It’s not glamorous. It earns its place by making walking and standing feel steadier.
18. Split Squat Isometric Hold for Irritated Hips
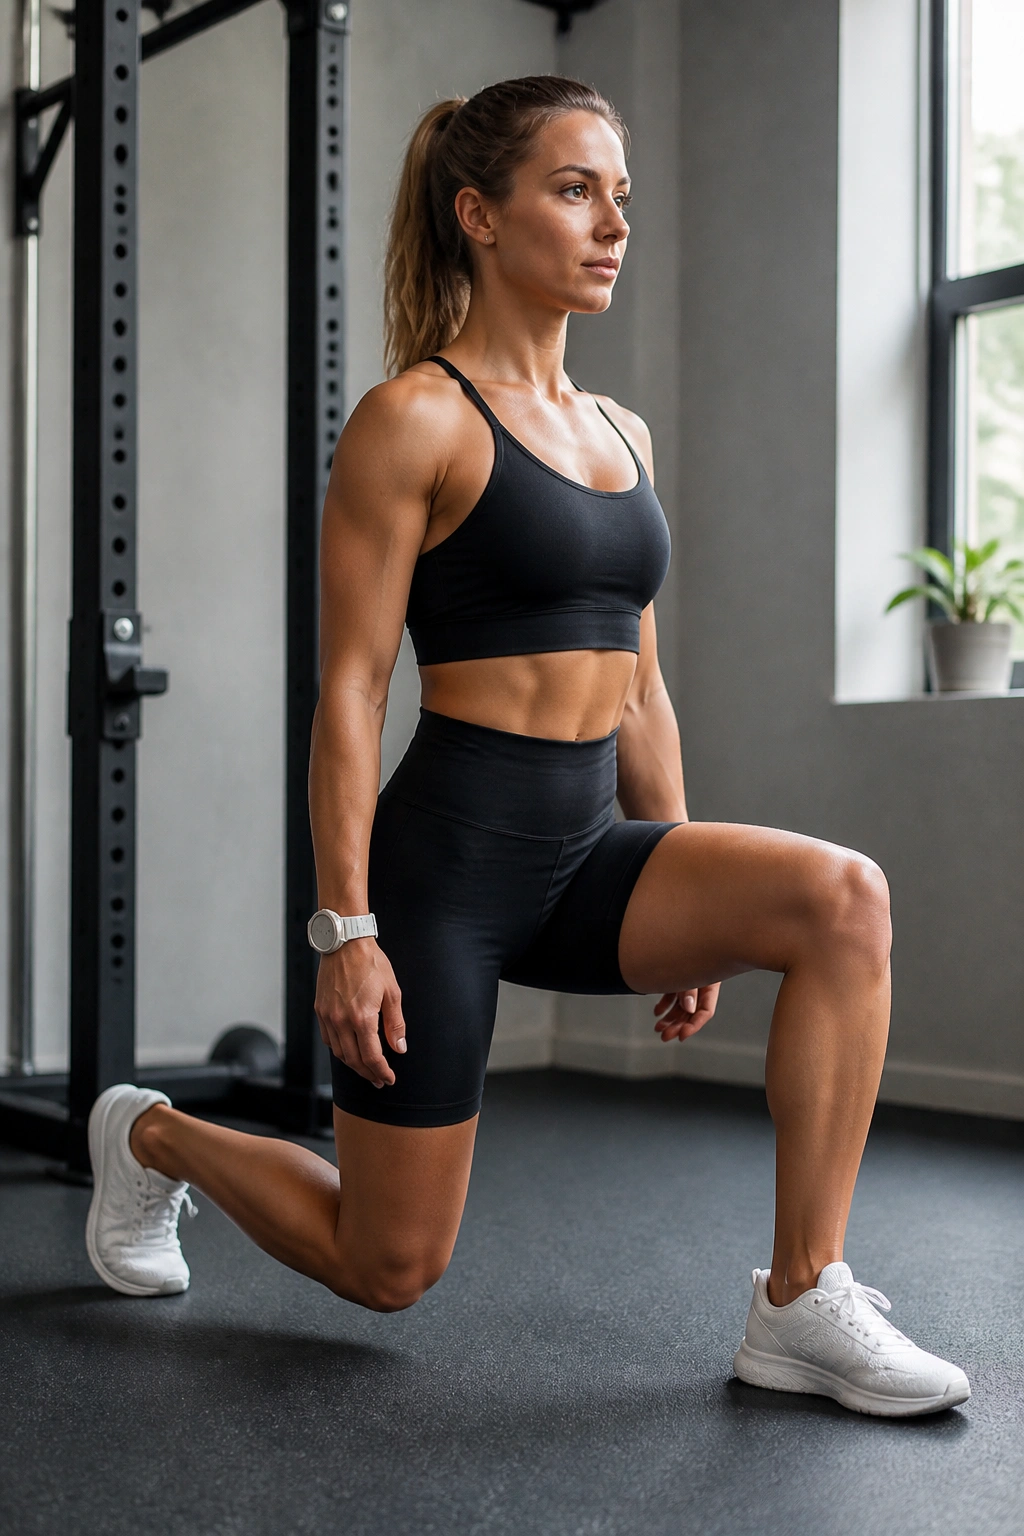
If repeated reps make your hips grumble, isometrics can be a smarter choice. A split squat hold puts the hip in a loaded position without the constant up-and-down pounding that sometimes annoys sore tissue.
Set up in a split stance, lower halfway down, and hold. Keep the front foot flat, the torso tall, and the pelvis square. You should feel the front leg working hard while the back hip gets a long, steady stretch. The hold can be shallow at first. That’s fine.
Why This One Helps
- It builds tolerance without a lot of motion.
- It asks the front hip to stabilize under load.
- It can feel calmer than full split squat reps when the area is tender.
Hold for 20 to 40 seconds per side, rest, and repeat once or twice. If the back knee doesn’t like the floor, pad it well or keep it hovering. Breathe through the hold. People tend to brace so hard they turn the exercise into a fight, and that usually isn’t useful.
19. Hip CARs for Clean, Controlled Mobility
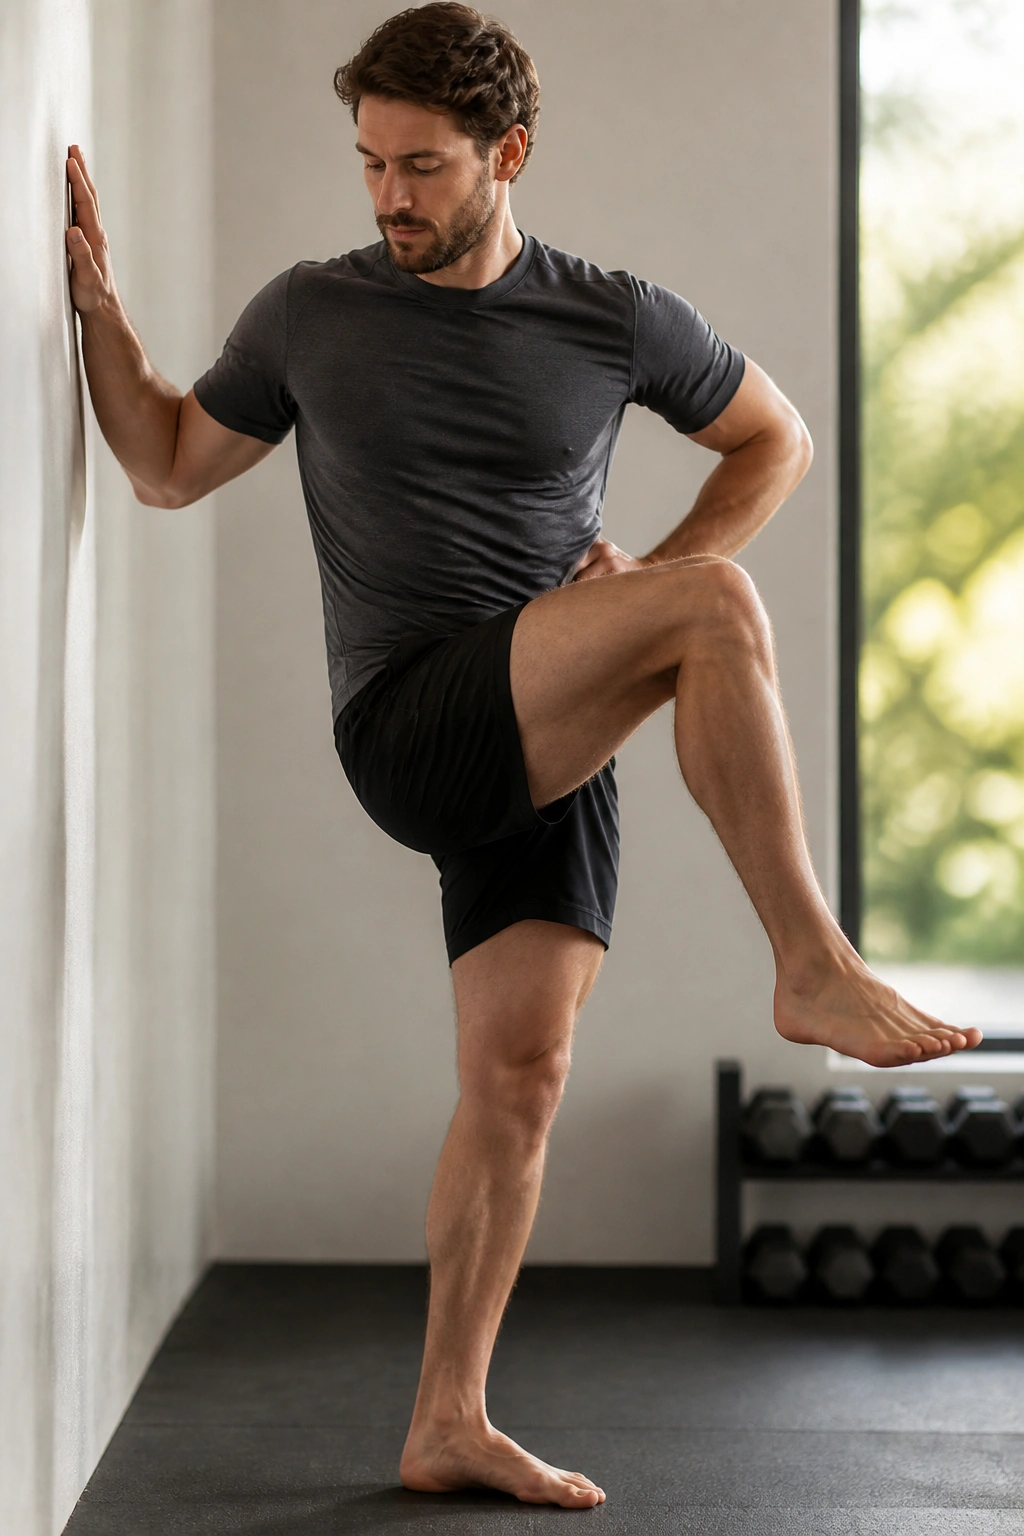
Hip CARs — controlled articular rotations — are part mobility drill, part honesty test. They show you where the hip moves well, where it grinds, and where the rest of the body tries to steal the job.
Stand next to a wall or hold a chair. Lift one knee, then slowly draw the leg through a wide circle: out to the side, back, around, and down. Keep the pelvis as still as possible. The circle should look controlled, not flung. If the range gets messy, make the circle smaller and slower.
How to Keep It Useful
- Move at a speed where you can feel every inch.
- Do 2 to 3 circles each direction per side.
- Keep the ribcage quiet.
- Stop before the low back starts helping.
These feel strange at first, and that’s part of the value. They teach you to own the hip instead of dragging it around with momentum. Clean circles beat big sloppy ones every time. If you want a quick hip check before a workout, this is one of the best places to start.
20. Five-Minute Hip Reset Circuit
Sometimes the hips don’t need a whole program. They need a short reset that hits a few good angles without turning your day into rehab theater.
Start with a small circuit: a few 90/90 switches, a short half-kneeling hip flexor stretch, a set of glute bridges, and a breathing squat hold. Keep each piece brief and controlled. The idea is to move the hip through rotation, extension, and a little loaded squat pattern in one tidy block.
- 90/90 switches: 5 reps per side.
- Half-kneeling hip flexor stretch: 20 seconds per side.
- Glute bridges: 10 controlled reps.
- Deep squat breathing: 3 slow breaths.
Use the circuit after a long stretch of sitting, before a lower-body workout, or on the kind of day when your hips feel stiff but not injured. If one move feels off, skip it and stay with the others. You do not need to force every piece.
This is the sequence I’d hand to someone who wants something realistic — not perfect, not fancy, just useful. A few minutes later, the hips usually feel less cranky and a little more willing to cooperate. Pick the pieces that fit your body, and keep them in reach for the next time your front hips start complaining.
