



Your arms do not need a dumbbell to start shaking. A solid set of arm workouts at home with no weights can light up the triceps, biceps, shoulders, and forearms with nothing more than a floor, a wall, and a chair.
The trick is not to treat every push-up like the same old push-up. Angle matters. Hand position matters. Tempo matters too. A slow lower with a hard pause can feel twice as hard as a sloppy, rushed set, and the difference shows up fast in your upper arms.
Some of these moves are sneaky. A wall push-up sounds easy until you slow it down for 30 clean reps. A towel curl looks harmless until your biceps are fighting your own pull the whole way up. That’s the fun of bodyweight arm training: the burn is real, and the setup is simple.
If your wrists are cranky, start with the gentler choices. If your push-ups already feel stale, the harder variations are waiting. Either way, the best place to begin is with the move that teaches your elbows and shoulders how to work together.
1. Close-Grip Push-Ups
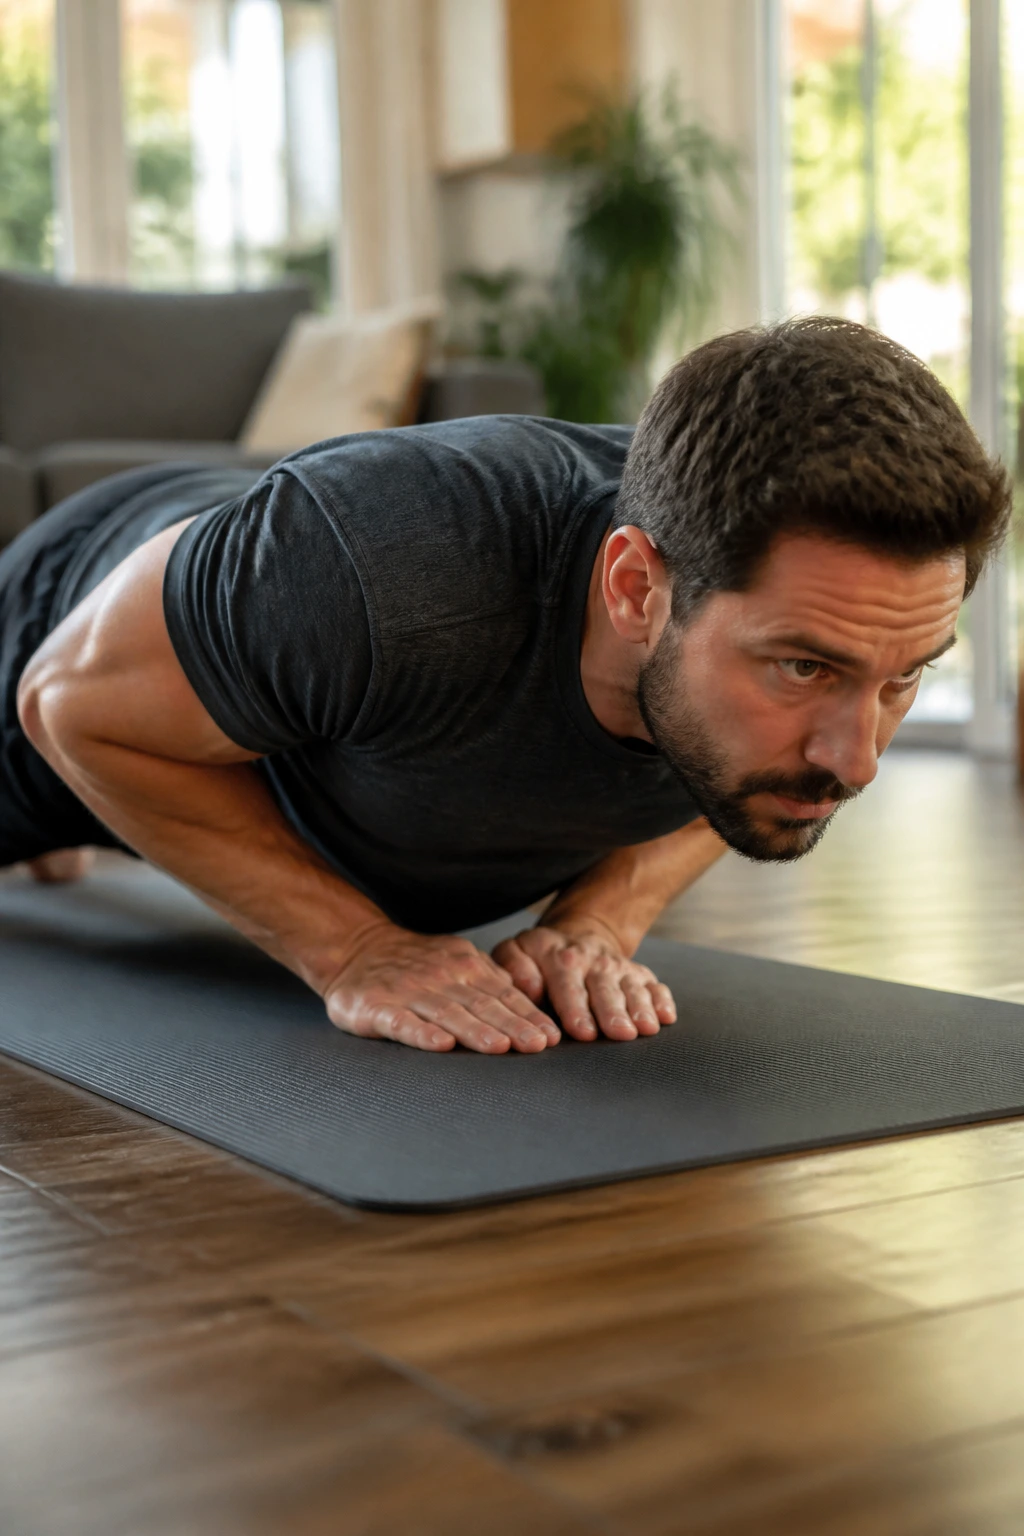
Close-grip push-ups are the first move I’d hand to anyone who wants stronger arms without equipment. They hit the triceps hard, and they also teach your chest and shoulders to stop hogging the job.
The setup is plain: hands under your shoulders or just inside them, elbows tucked about 30 to 45 degrees from your sides, body in one line from head to heels. Lower for a count of 2 or 3, pause for a beat near the floor, then press up without flaring your elbows out like wings.
Why It Hits the Triceps
Your triceps are the main elbow extenders here, so every clean rep forces them to do the heavy lifting. Keep your core tight or the hips will sag, and the load will leak into your lower back. No thanks.
- Do 3 to 4 sets of 6 to 12 reps.
- Use a 2-second lower and a 1-second pause.
- Stop the set when your torso starts twisting.
- If the full version is too much, drop to your knees and keep the same hand position.
Pro tip: think about pushing the floor away, not smashing your chest into it. That tiny mental shift keeps the movement cleaner.
How to Make It Harder
Once 12 reps feel manageable, slow the lowering phase to 4 seconds. You can also do a one-and-a-half rep: go down, come halfway up, go back down, then press all the way up. Ugly? A little. Effective? Very.
2. Wall Push-Ups
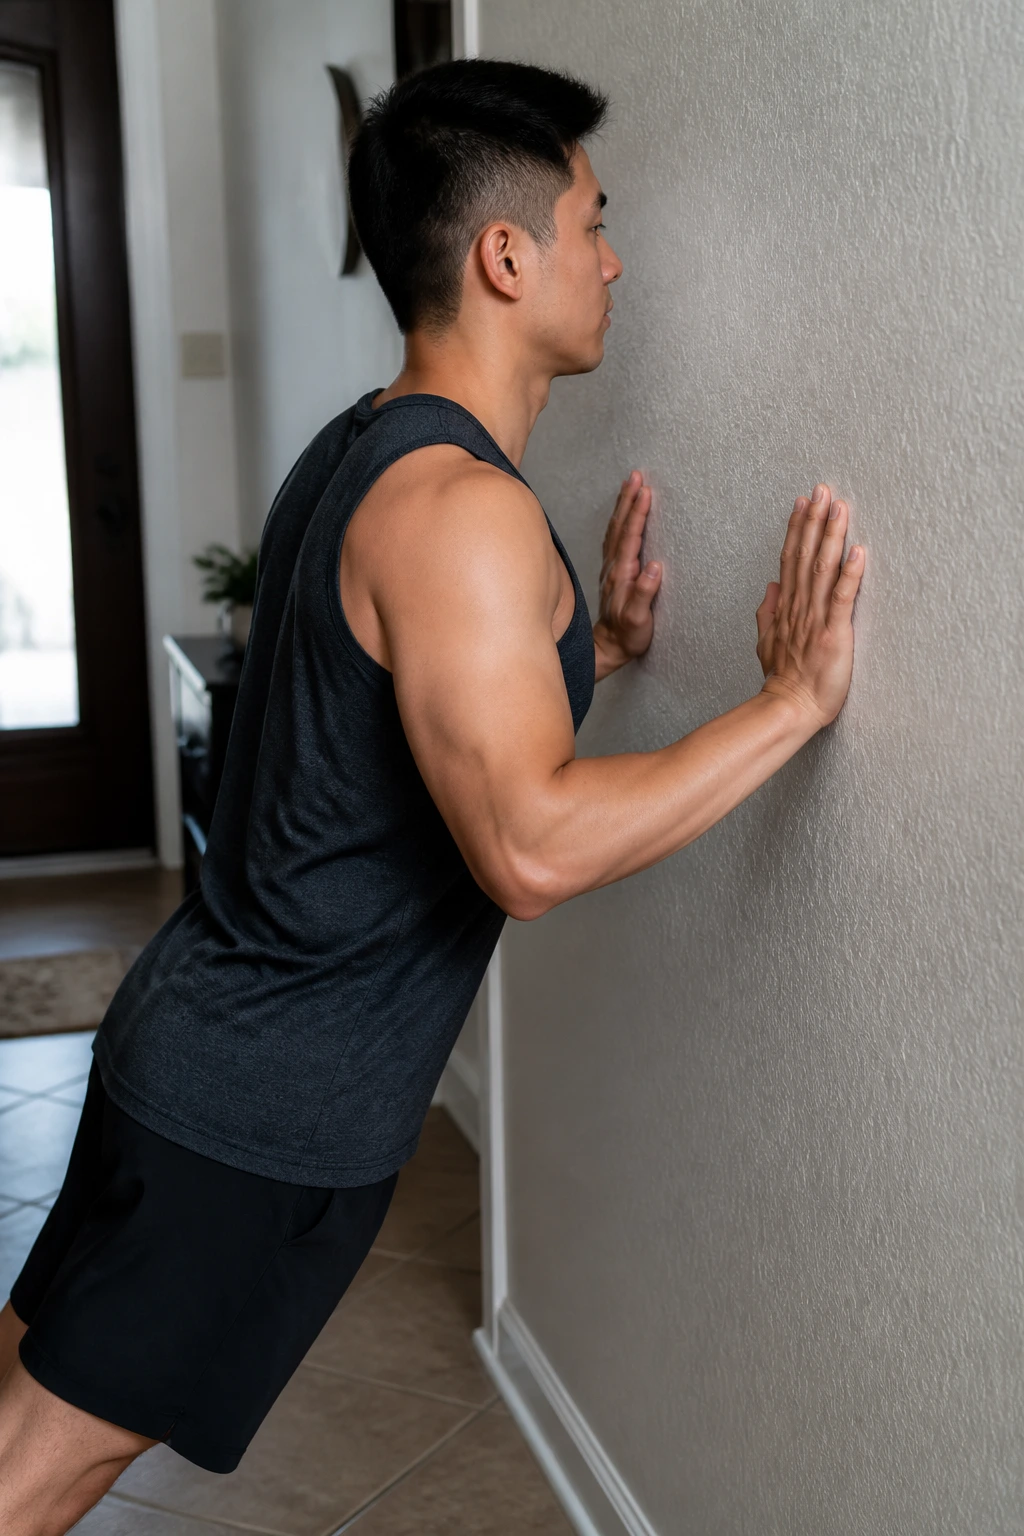
Wall push-ups look mild, which is exactly why people skip them. Bad idea. They are one of the cleanest ways to teach your elbows, wrists, and shoulders how to line up before you move to harder no-weight arm exercises.
Stand an arm’s length from a wall, place your hands at chest height, and lean in with a straight body. Bend your elbows until your nose is close to the wall, then press away until your arms are straight. The motion should feel smooth, not rushed.
The beauty here is control. You can slow the lowering phase, hold the bottom position for 2 seconds, and suddenly a move that looked like a warm-up starts smoking the triceps. If you’re coming back after a break, this is a smart place to begin. If you’re already fit, use it as a volume finisher for 20 to 30 crisp reps.
No drama. Just work.
A lot of people let their shoulders creep up toward their ears. Don’t. Keep them down and away from your neck, and let the elbows bend evenly. If the wall version feels too easy, step your feet farther back or lower your hand placement a little.
3. Incline Push-Ups on a Couch or Counter
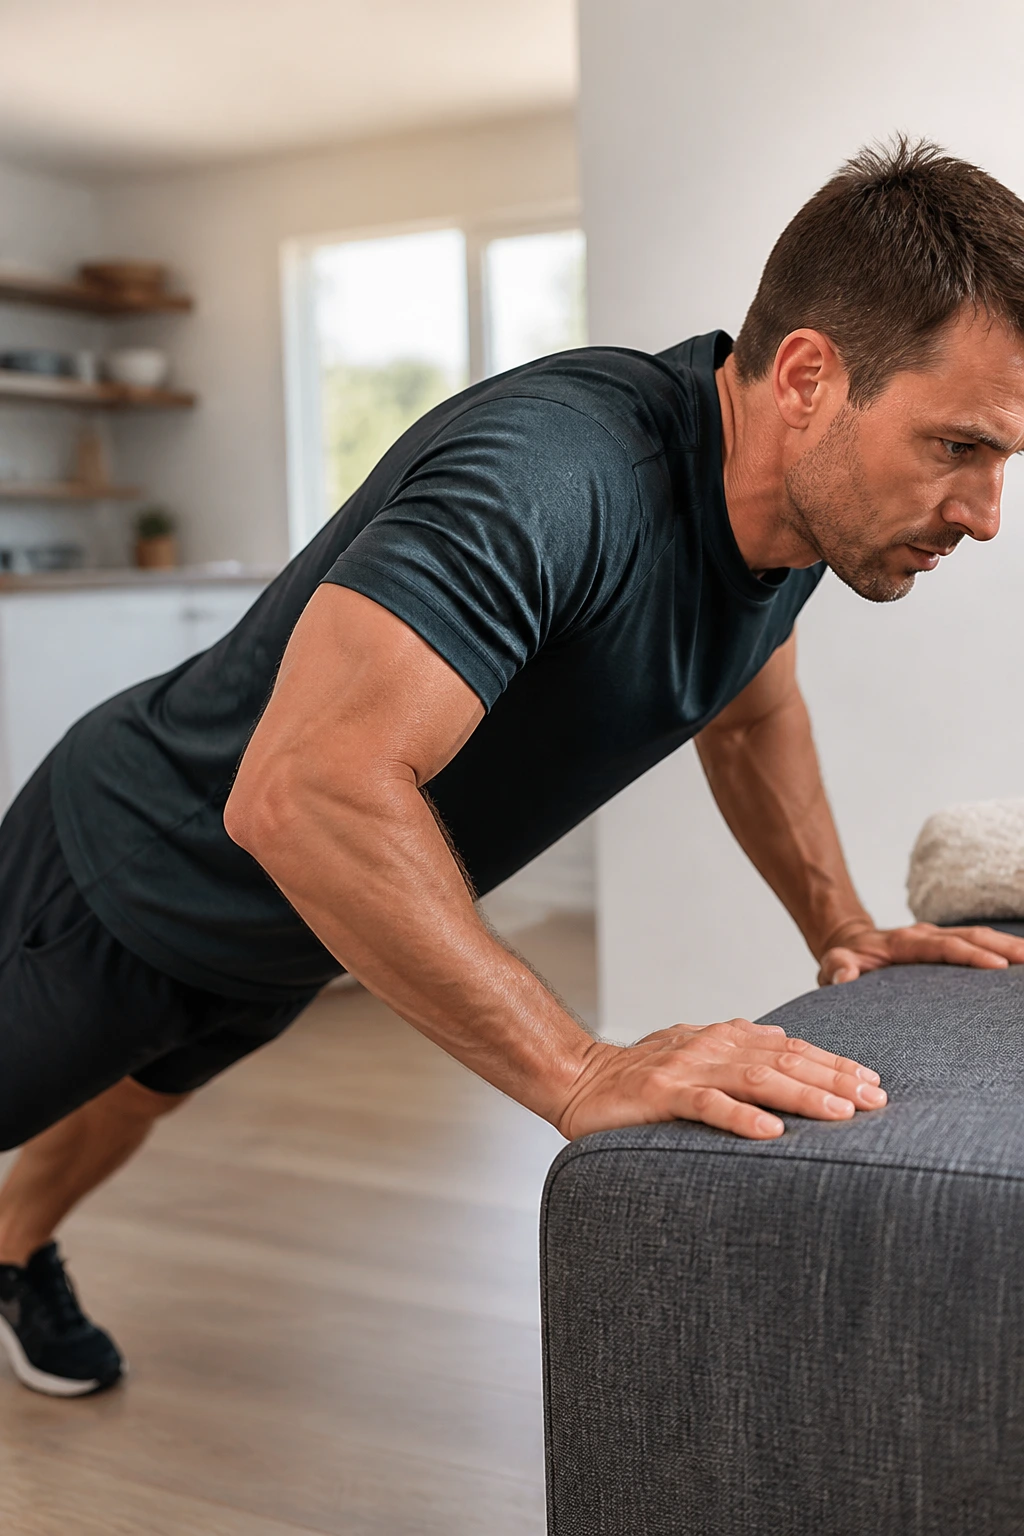
Incline push-ups sit in the sweet spot between wall work and floor work. They give you a little more load than a wall push-up, but they spare your wrists and shoulders more than the floor does. That makes them one of the best arm workouts at home with no weights if you want steady progress.
Use a sturdy couch arm, a bench, or a solid counter. Put your hands shoulder-width apart, brace your core, and lower your chest toward the edge in a straight line. The lower the surface, the harder the rep. A kitchen counter is easier than a couch, and a couch is easier than a coffee table.
Set-Up That Actually Works
Pick a surface that does not wobble. I mean that. If your hands are sliding around or the furniture creaks every time you lean in, the set-up is wrong.
- Keep your wrists stacked under or just ahead of your shoulders.
- Lower until your chest is a few inches from the edge.
- Press through the heel of your palm, not the fingertips.
- Use 3 sets of 8 to 15 reps with a slow 2-second descent.
Common Mistake
People often turn incline push-ups into a hip hinge. That steals tension from the arms. Keep your body straight and let the elbows bend, not your waist.
If you want a clean progression ladder, start high, then work lower over time. Counter first. Couch next. Floor later.
4. Diamond Push-Ups
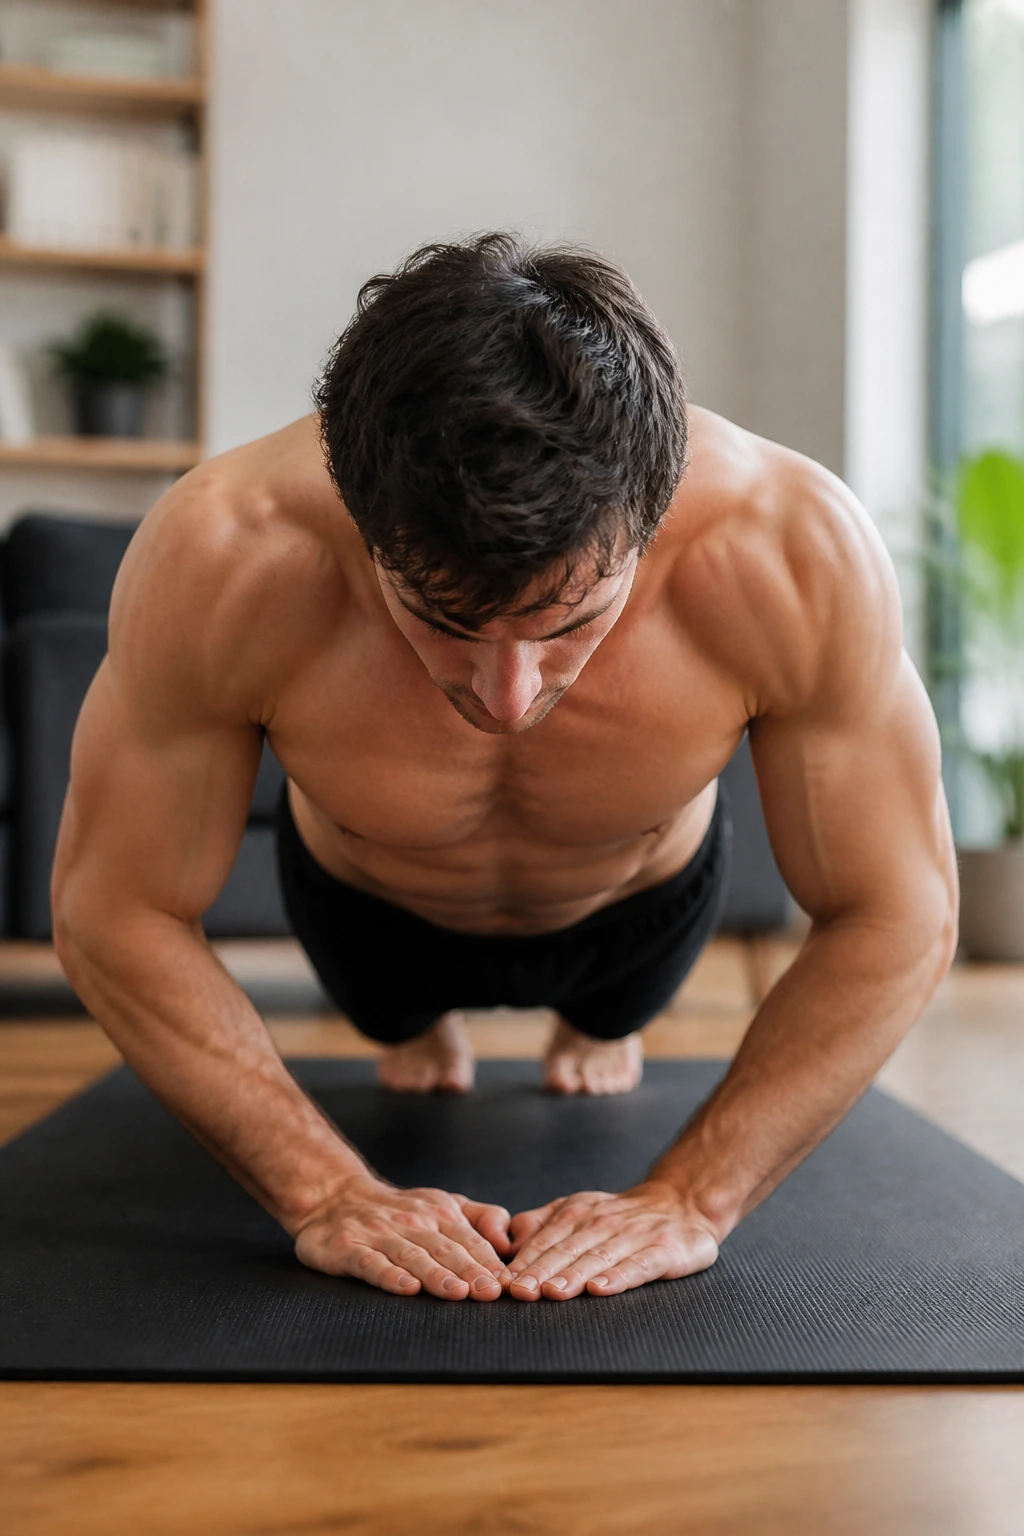
Diamond push-ups are brutal in a good way. They narrow the hand position so the triceps get a much bigger share of the work, and they punish sloppy form fast.
Bring your thumbs and index fingers together under your chest to make a diamond or a tight triangle. Lower with control, keep your elbows tucked, and press up without letting your shoulders dump forward. If you feel this mostly in your shoulders, the hands are probably too far forward.
Why do people love or hate this move? Because it tells the truth. If your triceps are weak, you know it by rep 4. If your core is loose, the whole thing gets shaky. If your wrists are stiff, the position will complain a bit, and you may need to do it on an incline first.
Start with 2 to 3 sets of 4 to 8 reps. That’s enough. You do not need high numbers here to make the movement useful.
How to Make It Usable
- Warm up your wrists with circles and gentle palm rocks.
- Keep your chest moving straight down, not forward.
- Stop the set before your lower back starts sagging.
- If floor diamonds hurt, do them with your hands on a couch or sturdy chair.
5. Chair Triceps Dips
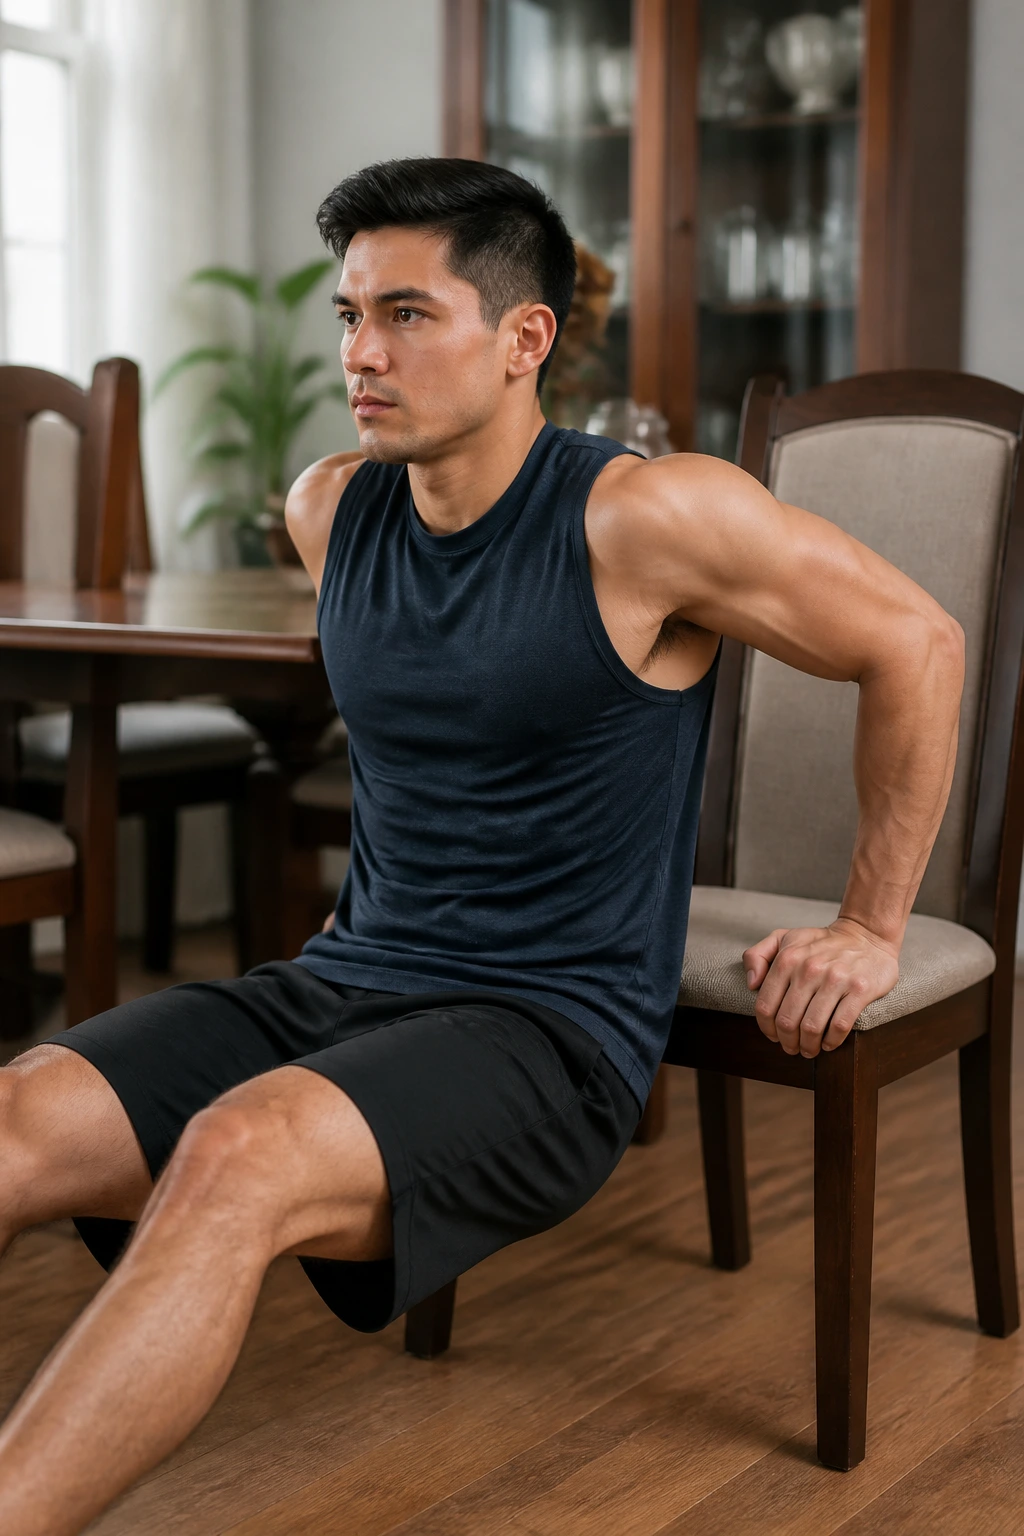
Chair dips are old-school for a reason. They smash the back of the arm, and if you keep the range clean, they can be one of the most direct triceps builders in a home setup.
Sit on the edge of a sturdy chair, hands beside your hips, fingers facing forward or slightly out. Walk your feet out, lift your hips off the seat, and bend your elbows until your upper arms are close to parallel with the floor. Then press back up until your elbows nearly straighten.
A lot of people go too low and turn this into a shoulder dump. That’s where the cranky feeling starts. Keep the movement controlled and stop when your shoulders feel stretched but still stable.
This move is simple, but it is not casual. A shaky chair is a bad chair. A low coffee table can be awkward. A solid bench or two heavy chairs with a steady grip tends to work better than whatever looks convenient.
- Keep your shoulders down and back.
- Use a 3-second lower for more tension.
- Try 2 to 4 sets of 6 to 12 reps.
- If your shoulders ache in the front, shorten the range.
If I had to name one mistake, it’s bouncing out of the bottom. That turns a useful arm workout into a joint complaint.
6. Countertop Triceps Extensions
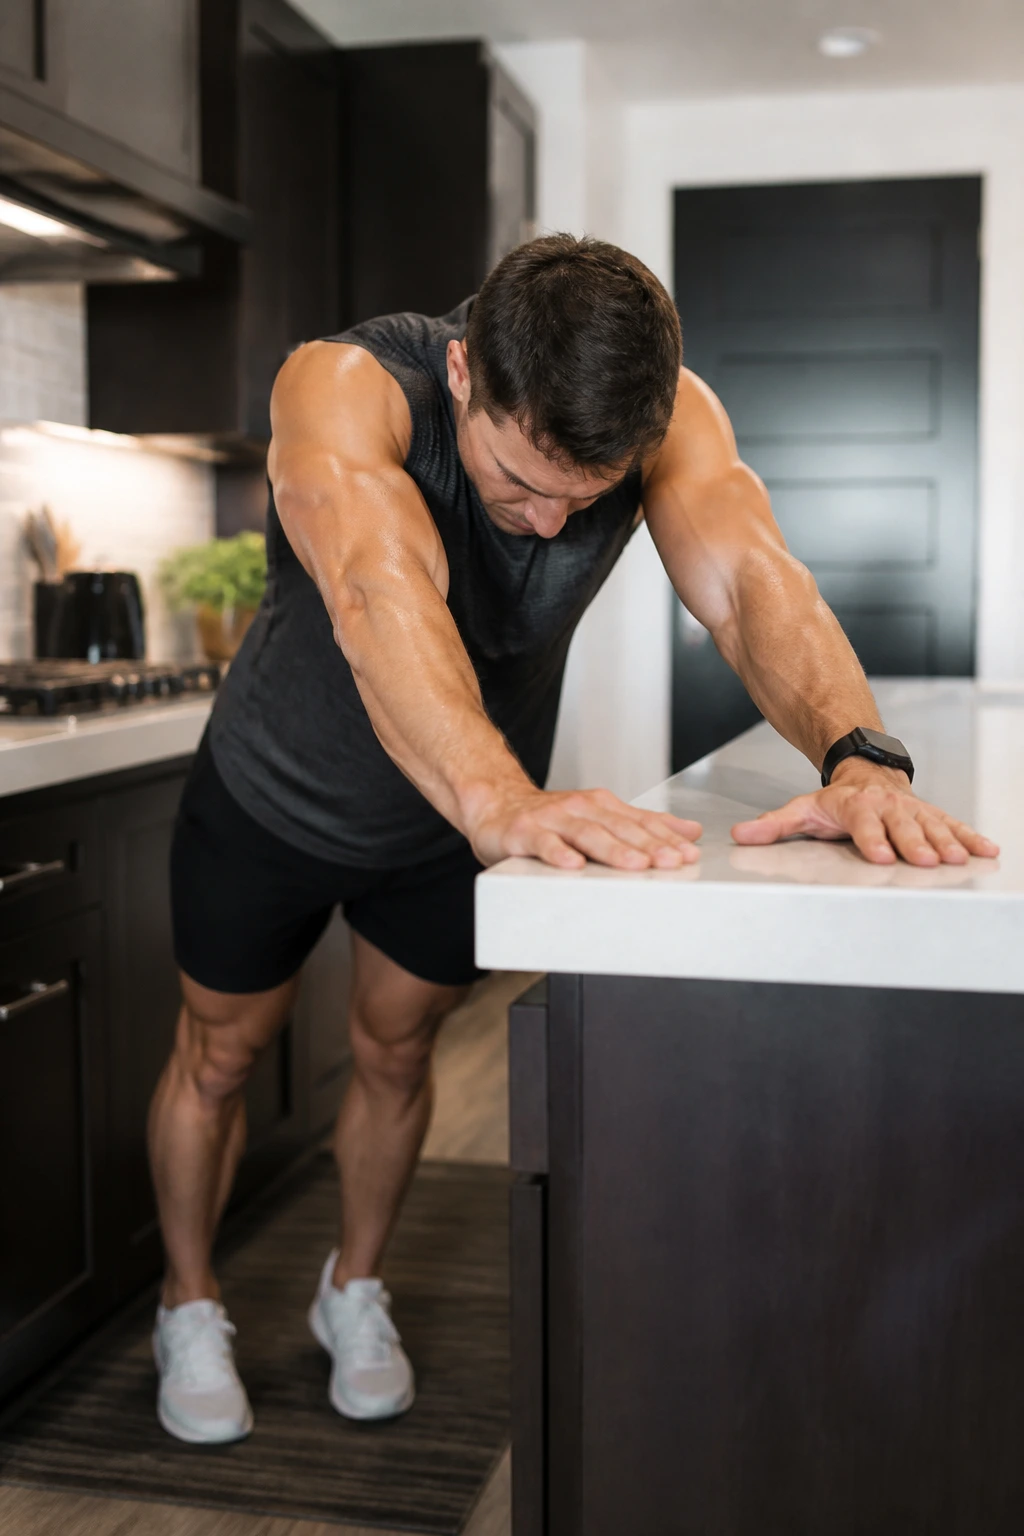
This one feels a little odd the first time, and that’s fine. Countertop triceps extensions are a bodyweight version of a skullcrusher, except your hands stay planted on a sturdy counter while your elbows do the bending.
Stand facing a counter, place your palms flat on the edge, and walk your feet back so your body leans forward in a straight line. Bend your elbows and bring your forehead or upper face toward the counter edge, then press back to straight arms. The farther your feet are from the counter, the harder it gets.
The exercise shines because the triceps have to control both the lowering and the press. Keep your elbows pointed forward instead of flaring wide. That keeps the tension where you want it.
It also gives people with sore wrists a better option than floor work. The hand angle is more forgiving, and the load is easier to scale by moving your feet.
A good target is 3 sets of 8 to 12 reps with a 2-second pause near the bottom. If you want extra sting, hold the bottom for a count of 3 before you press back.
Watch the counter. If it slides or flexes, stop and pick a safer surface.
7. Pike Push-Ups
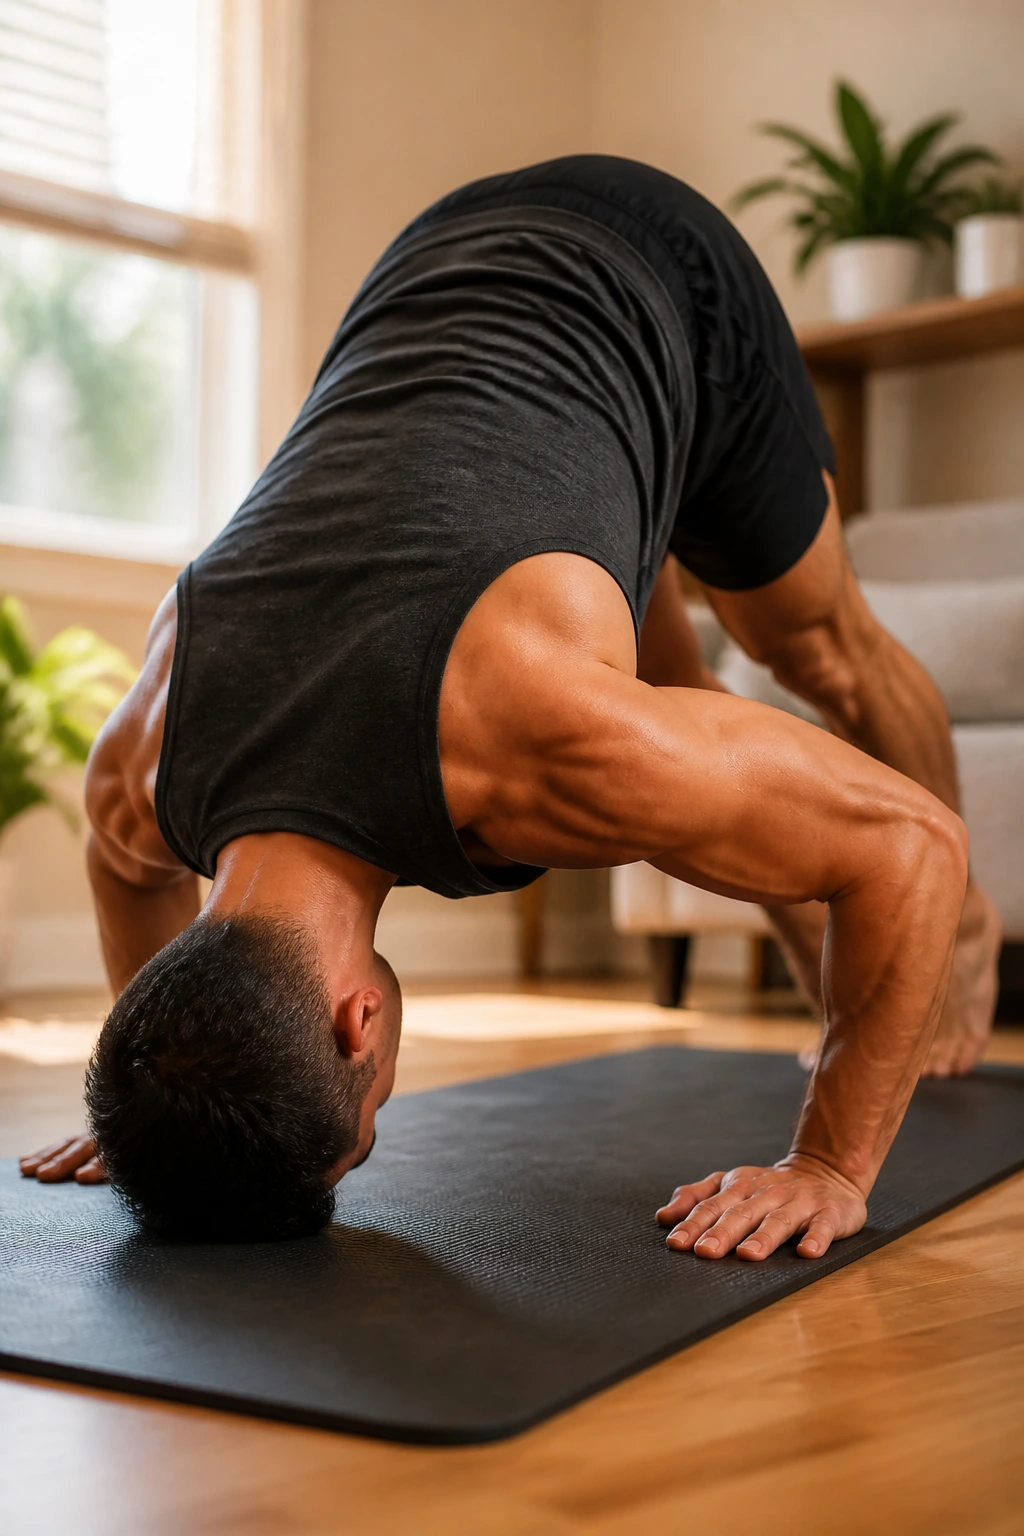
Pike push-ups are the closest thing to an overhead press without equipment. They hit the shoulders first, but the triceps work hard too, especially as you press out of the bottom.
Start in a downward-dog shape with your hips high and your hands shoulder-width apart. Bend your elbows and lower the top of your head toward the floor, then press back up. Your legs can stay straight, or you can bend them a little if hamstrings are tight.
What You Should Feel
The load should sit across the front and side of the shoulders, with the triceps joining in during the press. If your lower back is taking over, the hips are too low.
How to Set Up the Angle
- Hands slightly wider than shoulders.
- Head travels forward and down between the hands.
- Elbows angle back, not straight out.
- Aim for 3 sets of 5 to 10 reps.
A lot of people rush this move and miss the point. Slow it down. A 3-second descent and a brief pause near the bottom can make five good reps more valuable than fifteen half-reps.
If full pike push-ups are too hard, elevate your hands on a couch and work from there. That small change often keeps the movement honest.
8. Scapular Push-Ups
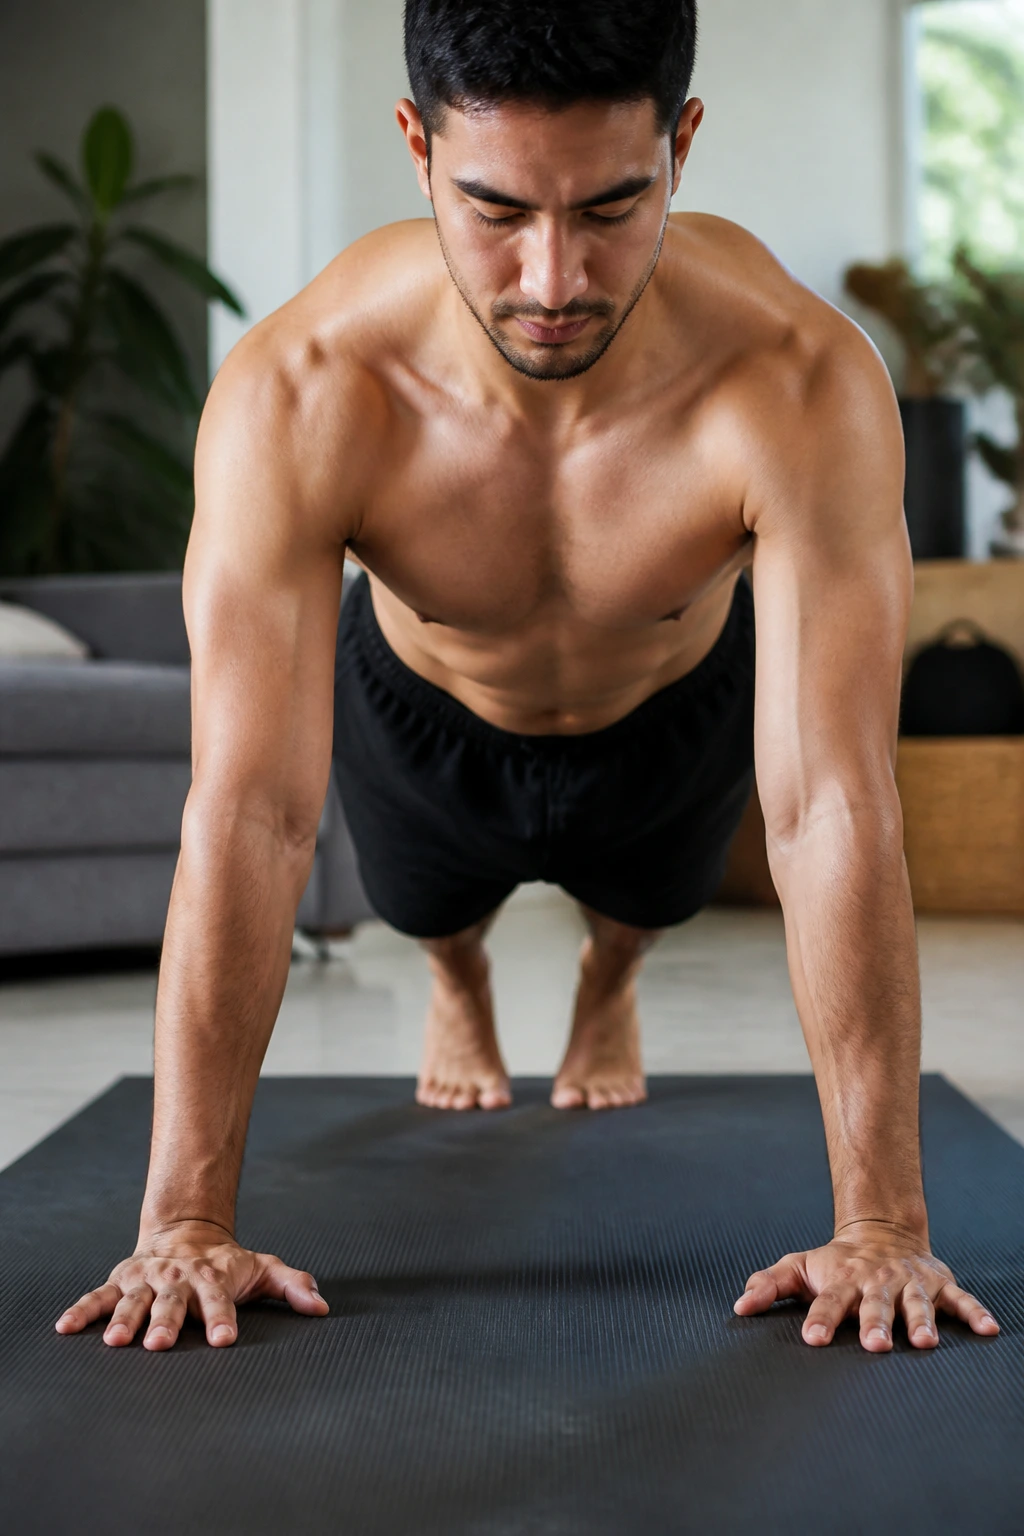
Scapular push-ups are not flashy. They are also one of the smartest arm-and-shoulder drills you can do at home if you want your push-ups to feel steadier and cleaner.
Set up in a high plank with straight elbows. Without bending your arms, let your chest sink slightly between your shoulders, then push the floor away so your shoulder blades spread apart. That’s one rep. The elbows stay locked. The movement comes from the shoulder blades, not the arms themselves.
Why does this matter? Because weak or lazy shoulder control can make every pressing move feel messy. Scapular push-ups teach the shoulder girdle to move smoothly, and that helps your triceps and delts line up better under load.
Use them as a warm-up or a finisher. 2 to 3 sets of 10 to 15 reps is enough. If your wrists dislike the floor, do the same motion against a wall.
No bend in the elbows. That’s the whole game.
If you shrug during the press, reset and try again. The motion should feel small but precise, almost like you are polishing the top of the push-up position.
9. Shoulder Taps in a High Plank
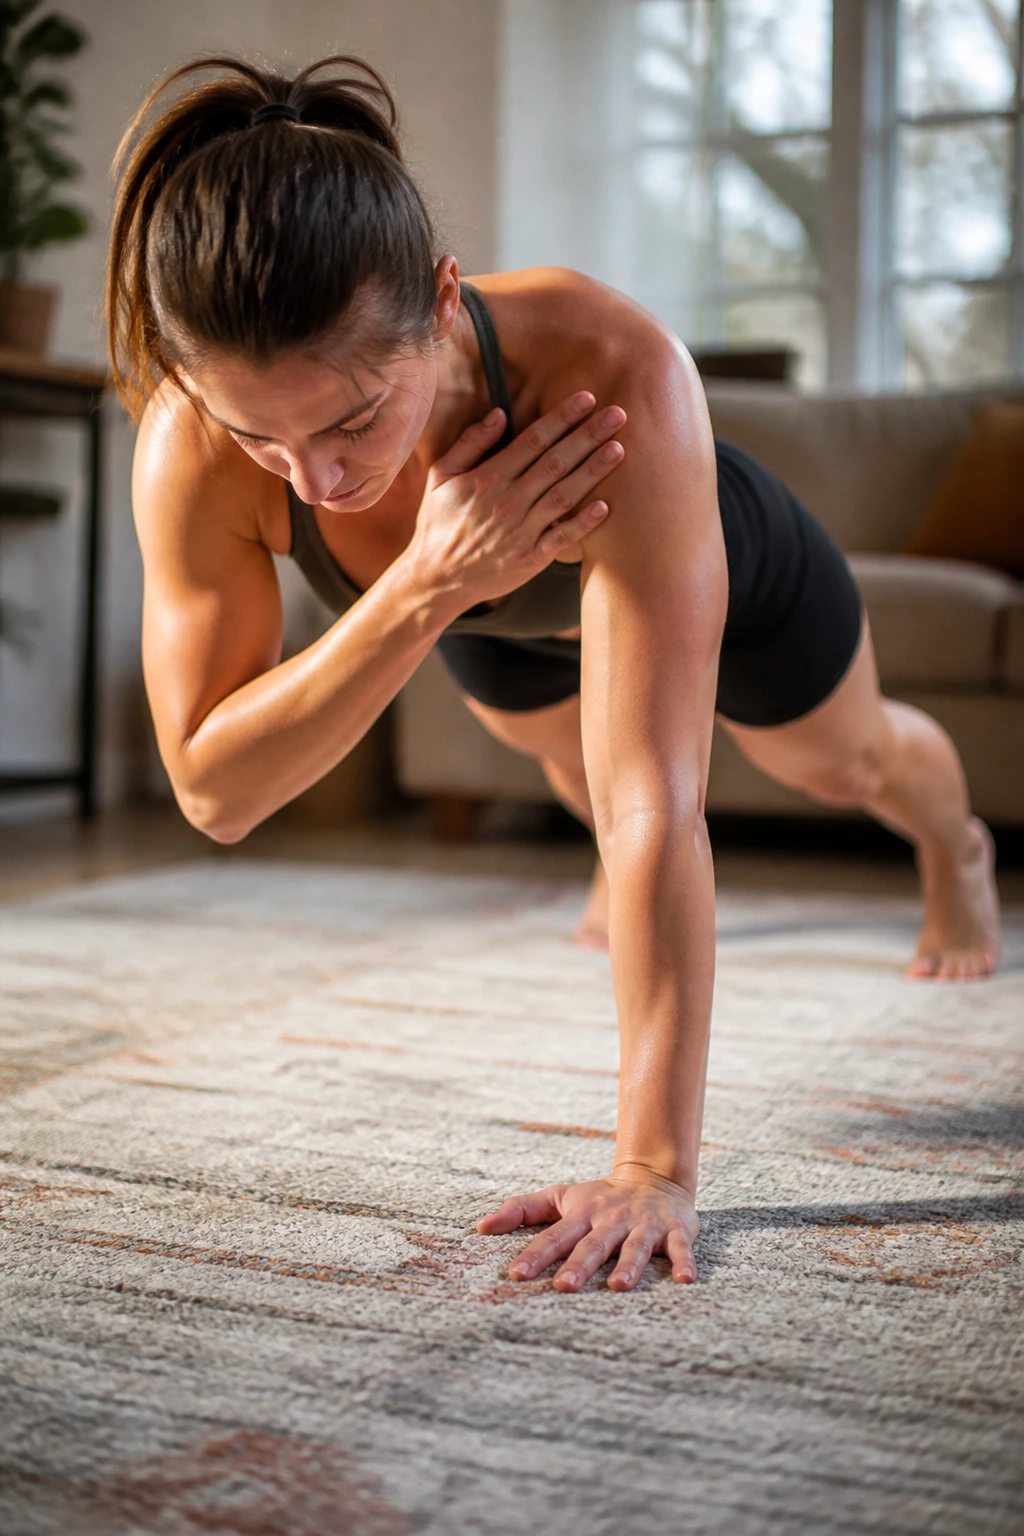
Shoulder taps look easy until your torso starts swaying like a shopping cart with one bad wheel. That wobble is the point. Your arms have to hold steady while one hand leaves the floor, and that demand hits the triceps, shoulders, and deep stabilizers all at once.
Start in a strong high plank with feet a little wider than hip-width apart. Tap your right shoulder with your left hand, then switch sides. Keep the hips as still as you can. If they twist, widen your feet a little more and slow down.
This is more than a core drill. Your planted arm has to support your body weight while the other side moves, which makes the shoulder and triceps work harder than people expect. The move also exposes weak wrists quickly, so warm them first.
Try 3 rounds of 20 taps total. If that’s too much, do 10 per side with a 1-second pause after each tap.
What to Watch For
- Keep your gaze a few inches ahead of your hands.
- Press the floor away with the supporting arm.
- Do not race the taps.
- Stop before your lower back starts dipping.
A clean plank with slower taps beats a fast set that turns into a hip wiggle contest.
10. Bear Crawl Holds and Steps
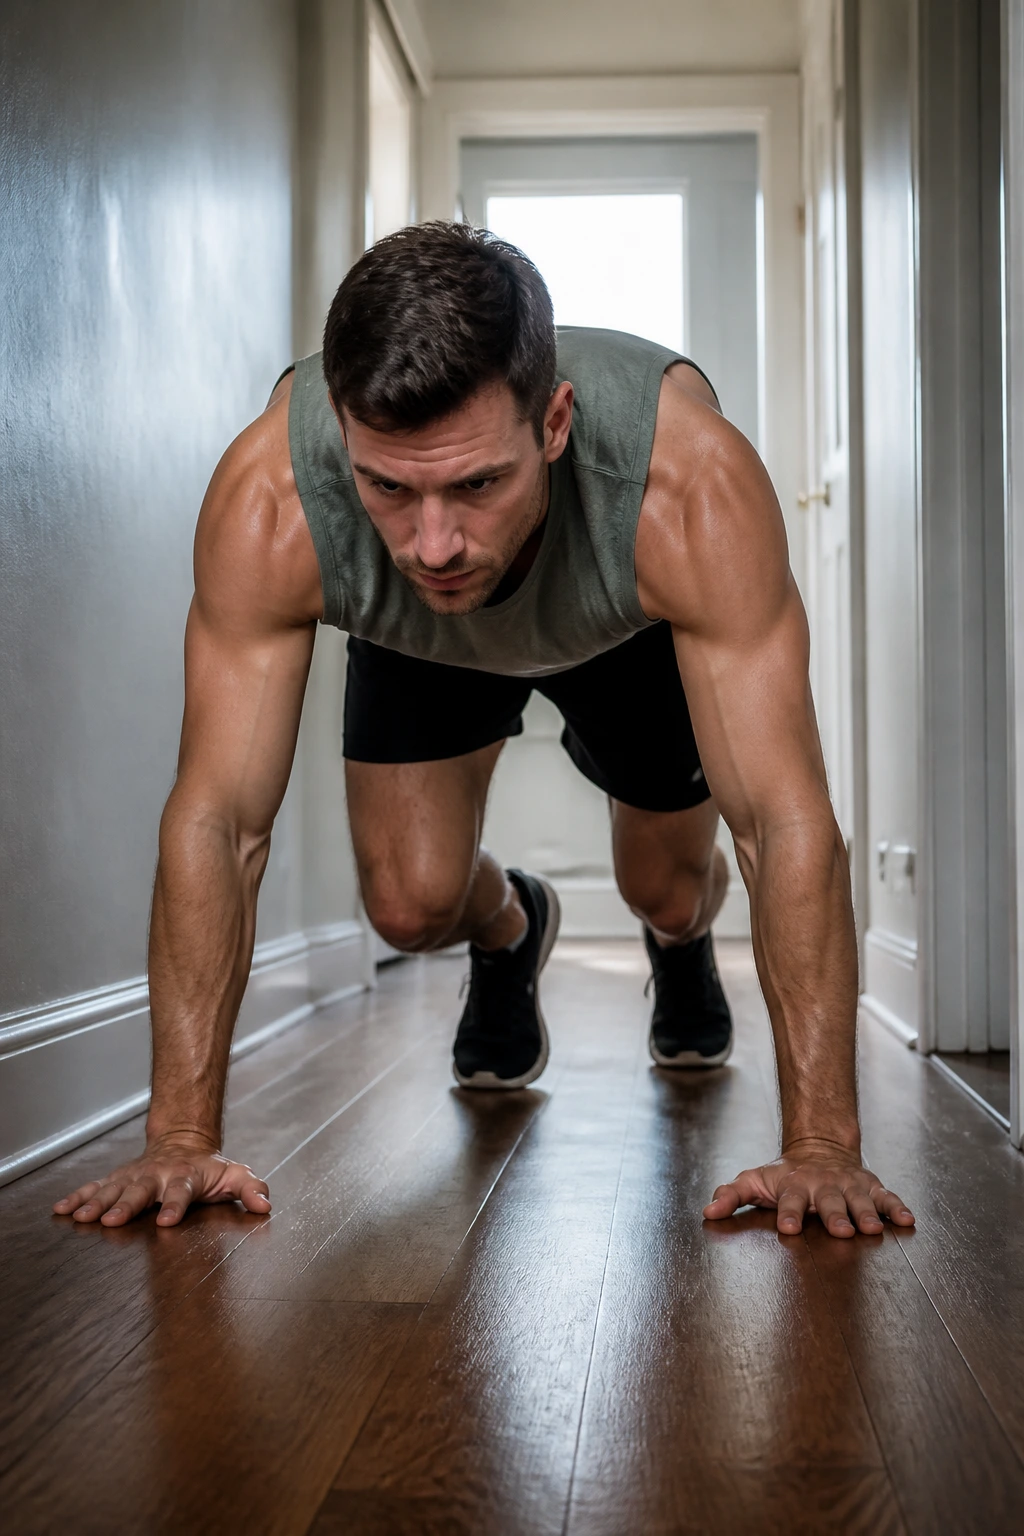
Bear crawls are messy in the best way. They train the arms to support body weight while the shoulders, triceps, and forearms brace under shifting load. You feel every inch of it.
Drop to hands and feet with knees hovering 1 to 2 inches off the floor. Hold that position for 10 to 20 seconds, then crawl forward 4 to 6 slow steps and back again. The hands and feet should move opposite each other, like you are crossing a tiny room under a low ceiling.
The hold alone is useful. The moving version is harder because every step asks the arms to stabilize while the body shifts. That is where the shoulder fatigue starts to build.
If your wrists are angry, shorten the hold and make the steps smaller. If your shoulders feel fine, lengthen the crawl and slow the pace. A 20-second crawl can feel more demanding than a 60-second plank because the load keeps changing.
- Use 4 to 6 rounds.
- Rest 30 to 45 seconds.
- Keep knees low but not dragging.
- Move quietly. Loud steps usually mean sloppy control.
The nice thing here is that you do not need much space. A hallway works. So does the living room.
11. Reverse Plank Holds
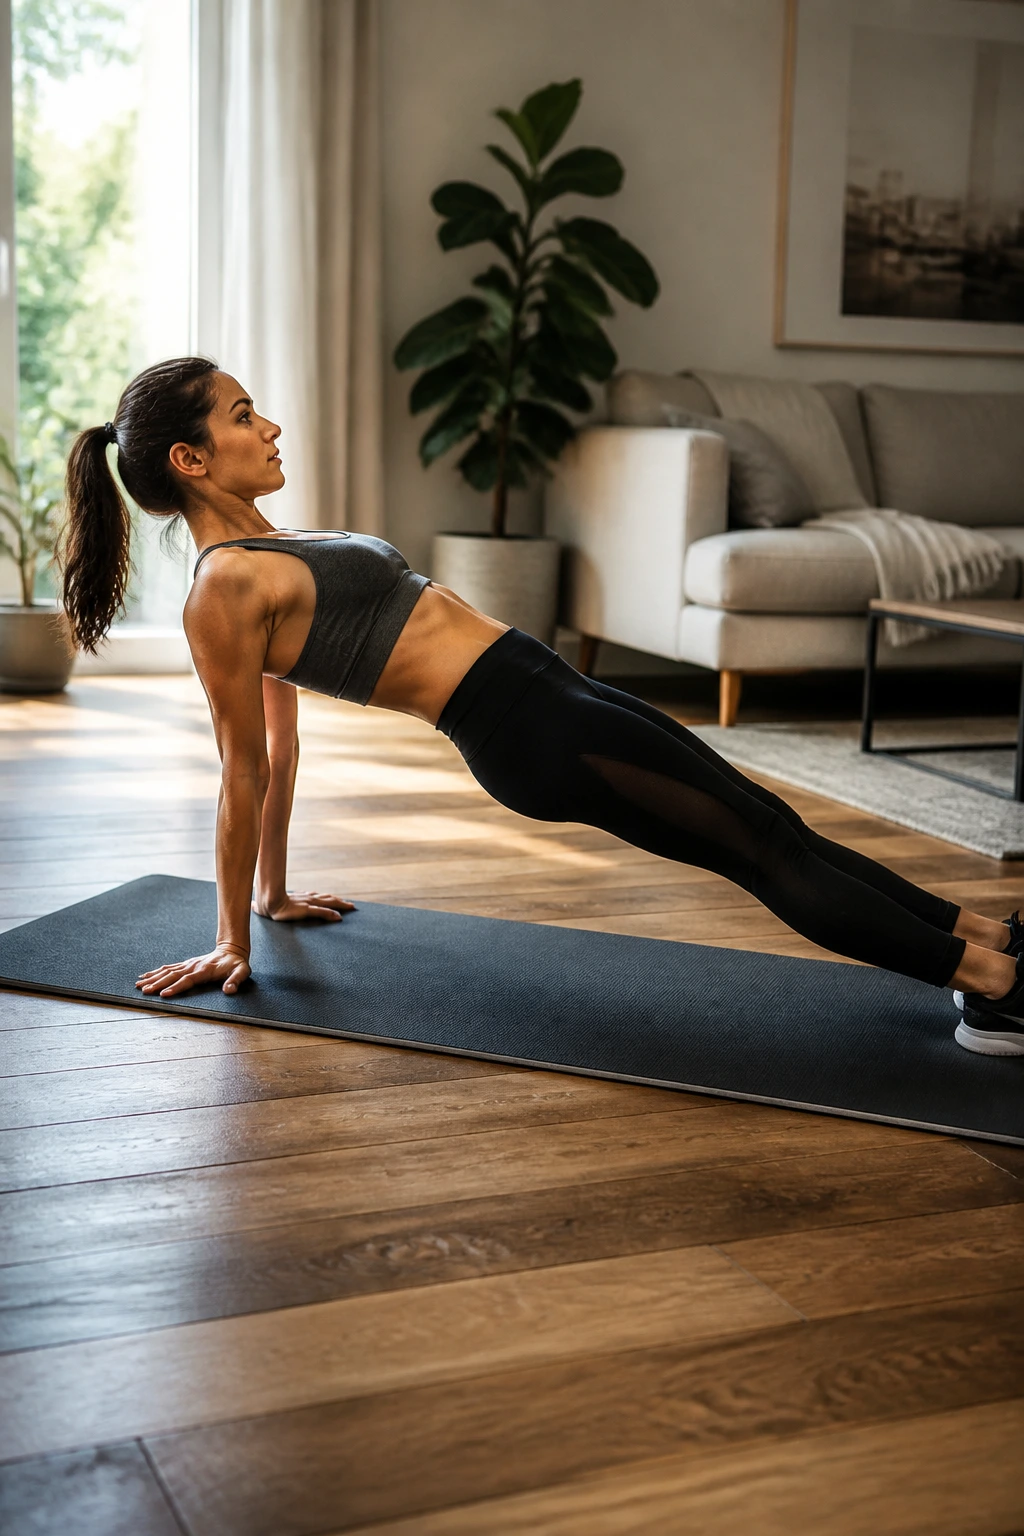
Reverse planks are sneaky because they look calm while the triceps are busy fighting gravity. The move also opens the front of the shoulders, which can feel odd if you spend a lot of time hunched over a desk.
Sit on the floor, place your hands behind your hips with fingers pointing toward your feet or slightly out, and lift your hips until your body makes a straight line from shoulders to heels. Hold there. Breathe. Try not to let the hips drop.
What makes this so useful is the angle. Your arms are behind you, so the triceps have to keep the elbows straight while the shoulders stay open. It’s a different stress than pushing forward, and that difference matters if you want fuller upper-arm work.
Start with 3 holds of 15 to 30 seconds. If that feels shaky, bend your knees and keep the hips high. If the wrists complain, turn the fingers out a little or use fists on a soft mat.
A lot of people forget to squeeze the glutes here. Do not. A tight backside helps keep the line from collapsing and takes pressure off the lower back.
12. Towel Biceps Isometric Curls
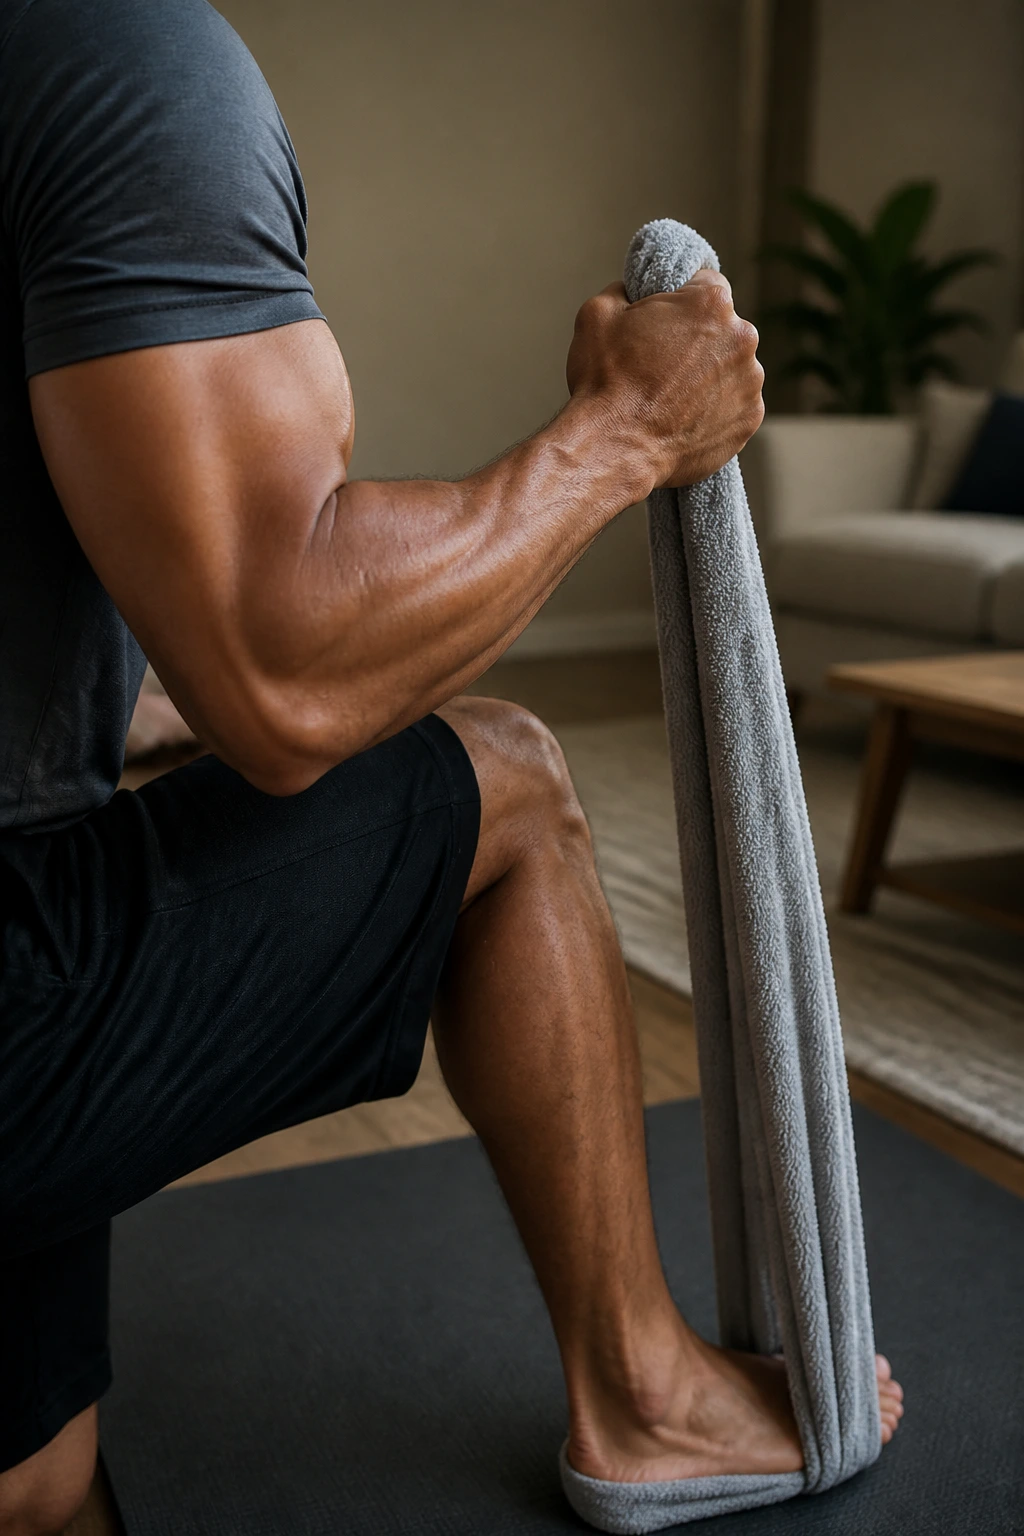
If your biceps need work and you have a towel, you have a plan. Towel isometric curls create resistance without a single dumbbell, and the tension can get brutal fast if you pull with intent.
Step on the middle of a towel with one foot. Grab both ends in one hand, palm up, and curl as if you are trying to lift a weight that refuses to move. Your foot should resist the pull just enough to keep the arm fighting through the whole range. Hold the top for 3 to 5 seconds, then lower slowly.
Why It Works
The biceps love elbow flexion, but they also respond well to long holds. The towel gives you a simple way to create your own resistance curve, and the fight gets harder near the top if you keep pulling.
- Do 3 sets of 8 to 12 curls per arm.
- Hold the top for 3 seconds.
- Lower for 3 seconds.
- Keep your wrist straight, not bent back.
If you want more load, pull harder against the foot. If your forearm takes over too much, relax your grip a touch and focus on the elbow bending.
This one looks mild from across the room. It is not mild.
13. Self-Resisted Biceps Curls
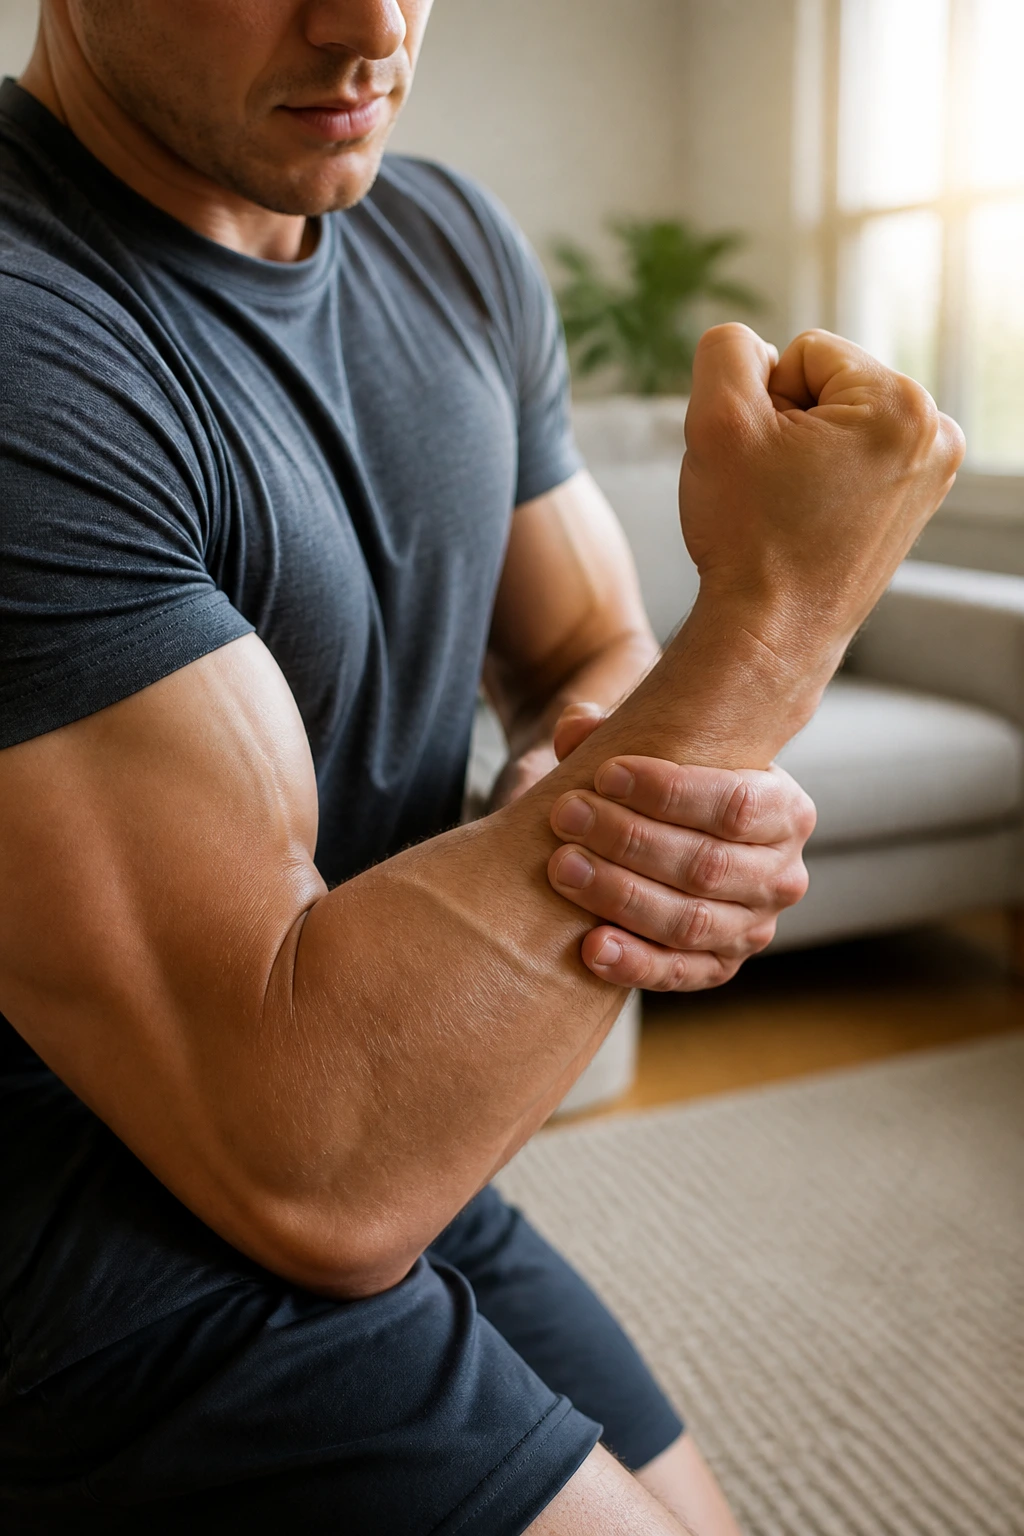
Self-resisted curls are old, awkward, and effective. I like them because they need no setup at all, and because they make cheating nearly impossible if you do them slowly.
Curl one arm up while the opposite hand pushes down against it. The working arm tries to bend the elbow, and the other hand creates just enough resistance to slow the movement. Switch roles after each rep or after a full set, depending on how you like to train.
The key is to keep the motion deliberate. If you rush, the resisting hand turns into a vague nudge and the exercise loses its bite. A 2-second up phase, a 2-second squeeze, and a 3-second lower works well.
This is a solid option when the floor work feels too much or when you want to finish a workout without jumping around the house. It also gives the forearms a nice dose of work because your grip stays busy.
- 2 to 3 sets of 8 to 10 reps per arm.
- Keep the upper arm close to your side.
- Press hard enough to feel tension, not pain.
- Stop if the wrist bends sharply.
Ugly little exercise. Useful little exercise.
14. Doorframe Biceps Isometrics
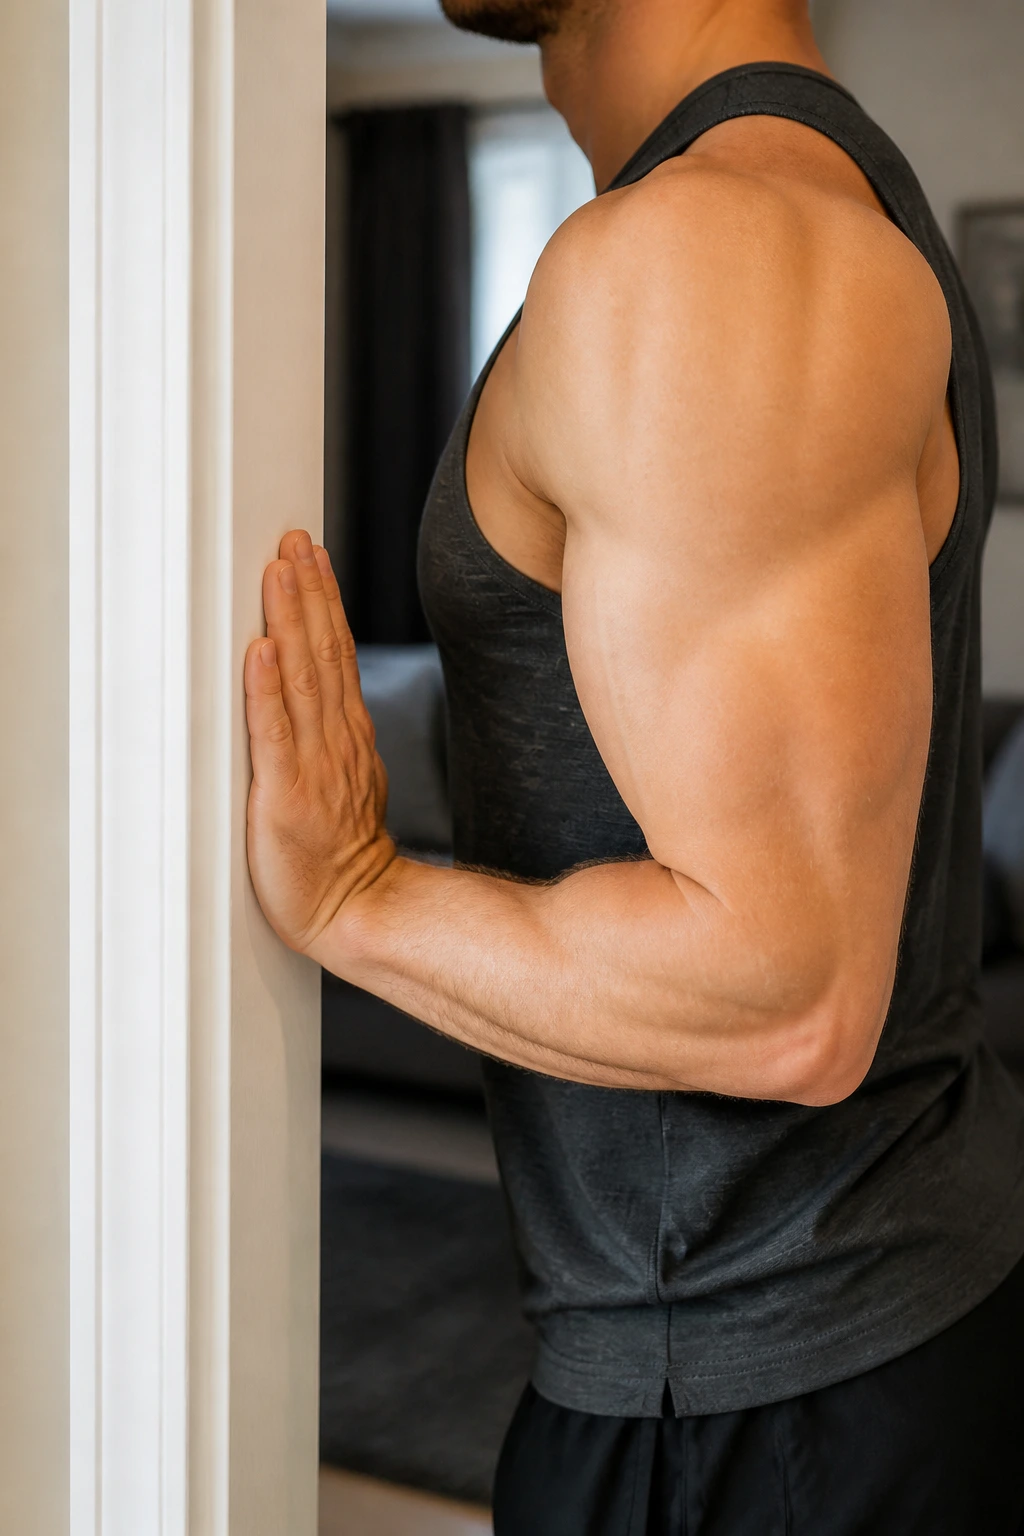
Doorframe isometrics are one of those home moves people either ignore or swear by. The setup is simple, but the angle can be nasty in a good way if you choose a solid frame and hold the pull with intent.
Stand beside a sturdy doorframe and place your palm against it at about waist height, palm up or slightly inward. Try to curl your hand toward your shoulder while the frame stops you. Hold the pull for 10 to 20 seconds, then switch sides.
Why bother with an isometric instead of a moving curl? Because static tension can be very effective when you hold it near the midpoint or the top half of the curl. That’s where the biceps usually feel the strain most clearly.
Safe Setup
- Use a solid frame, not loose trim.
- Keep the elbow close to your body.
- Pull smoothly, not with a jerky yank.
- Breathe through the hold.
If your shoulder shifts forward, reset and bring the elbow back in line. If your wrist feels pinched, change the hand angle a little. Small adjustments matter here.
I’d use this as a finisher: 2 to 4 holds per arm. Short, sharp, done.
15. Crab Reach Reps
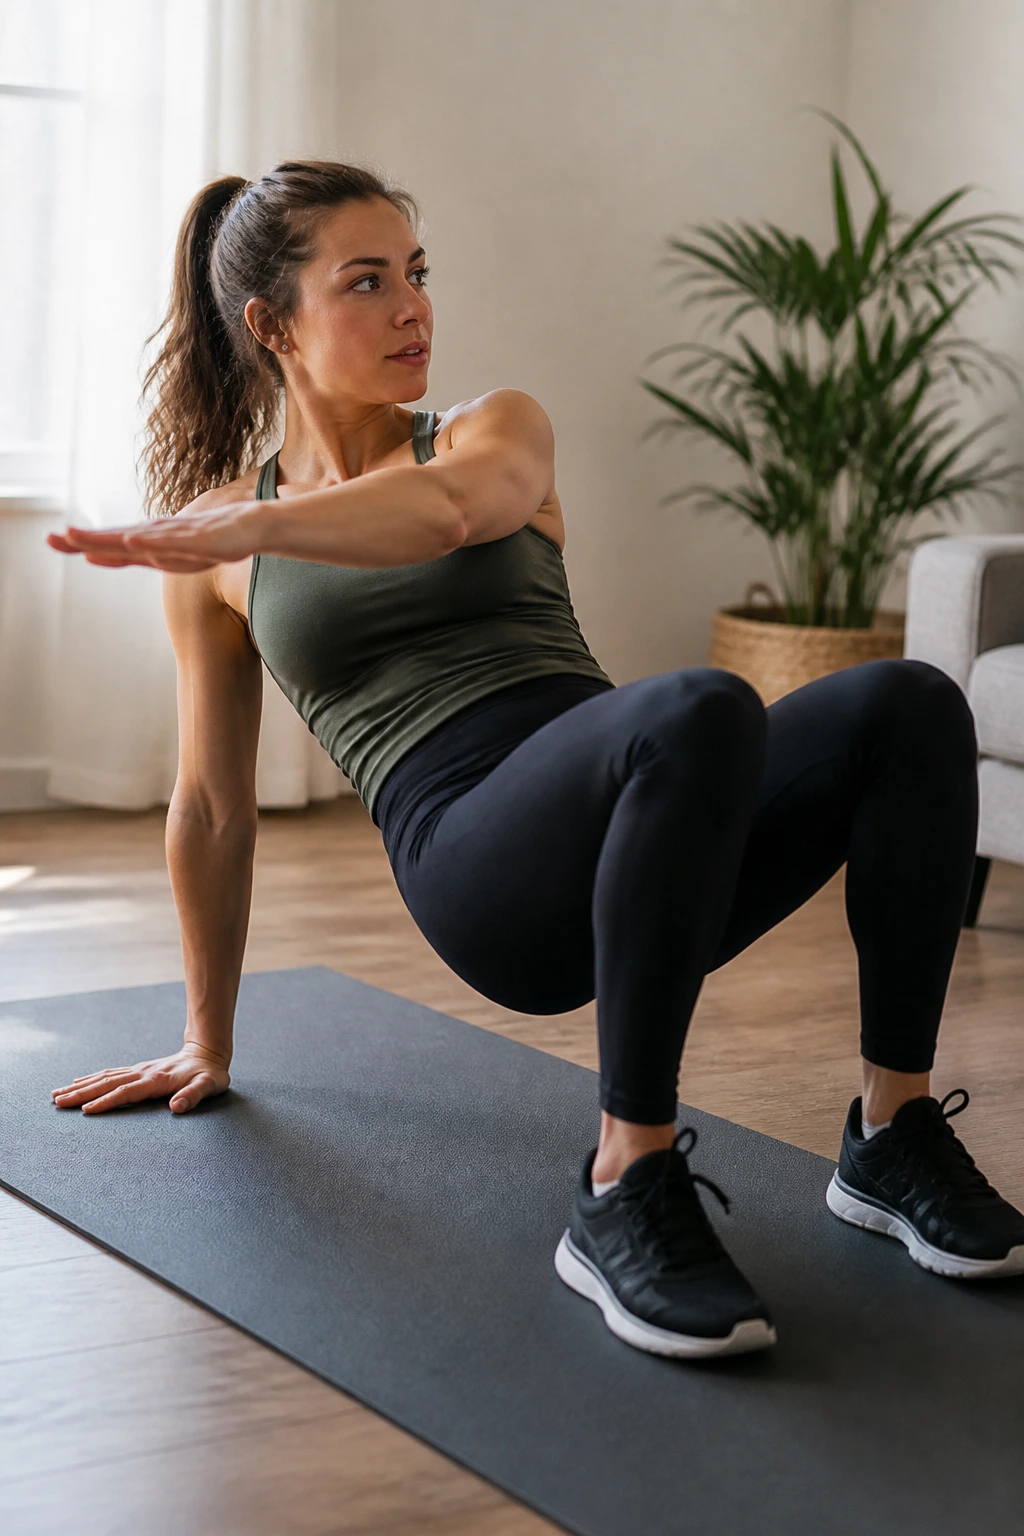
Crab reach reps mix shoulder stability, triceps work, and upper-back control in a way that feels a little clumsy at first. That is part of why they’re useful. The body has to coordinate more than one thing at once.
Start in a crab position: hands behind you, feet flat, hips lifted. Reach one arm up and across your body, then return it to the floor. Alternate sides. Each reach should keep the hips high and the shoulders open.
The supporting arm works hard to keep you off the floor. The triceps fire, the shoulder stabilizes, and the upper back keeps the whole shape from collapsing. If the hips sink every time you reach, shorten the range and slow down.
This is a good move for people who get bored with straight pressing. It adds motion, but it still respects the arms. Use it for 2 to 3 sets of 6 to 8 reaches per side.
A soft mat helps. A hard floor plus tight shoulders can turn the reach into a wrestling match.
If you want to feel it more, pause for 2 seconds at the top of each reach and keep the chest open.
16. Wall Handstand Holds
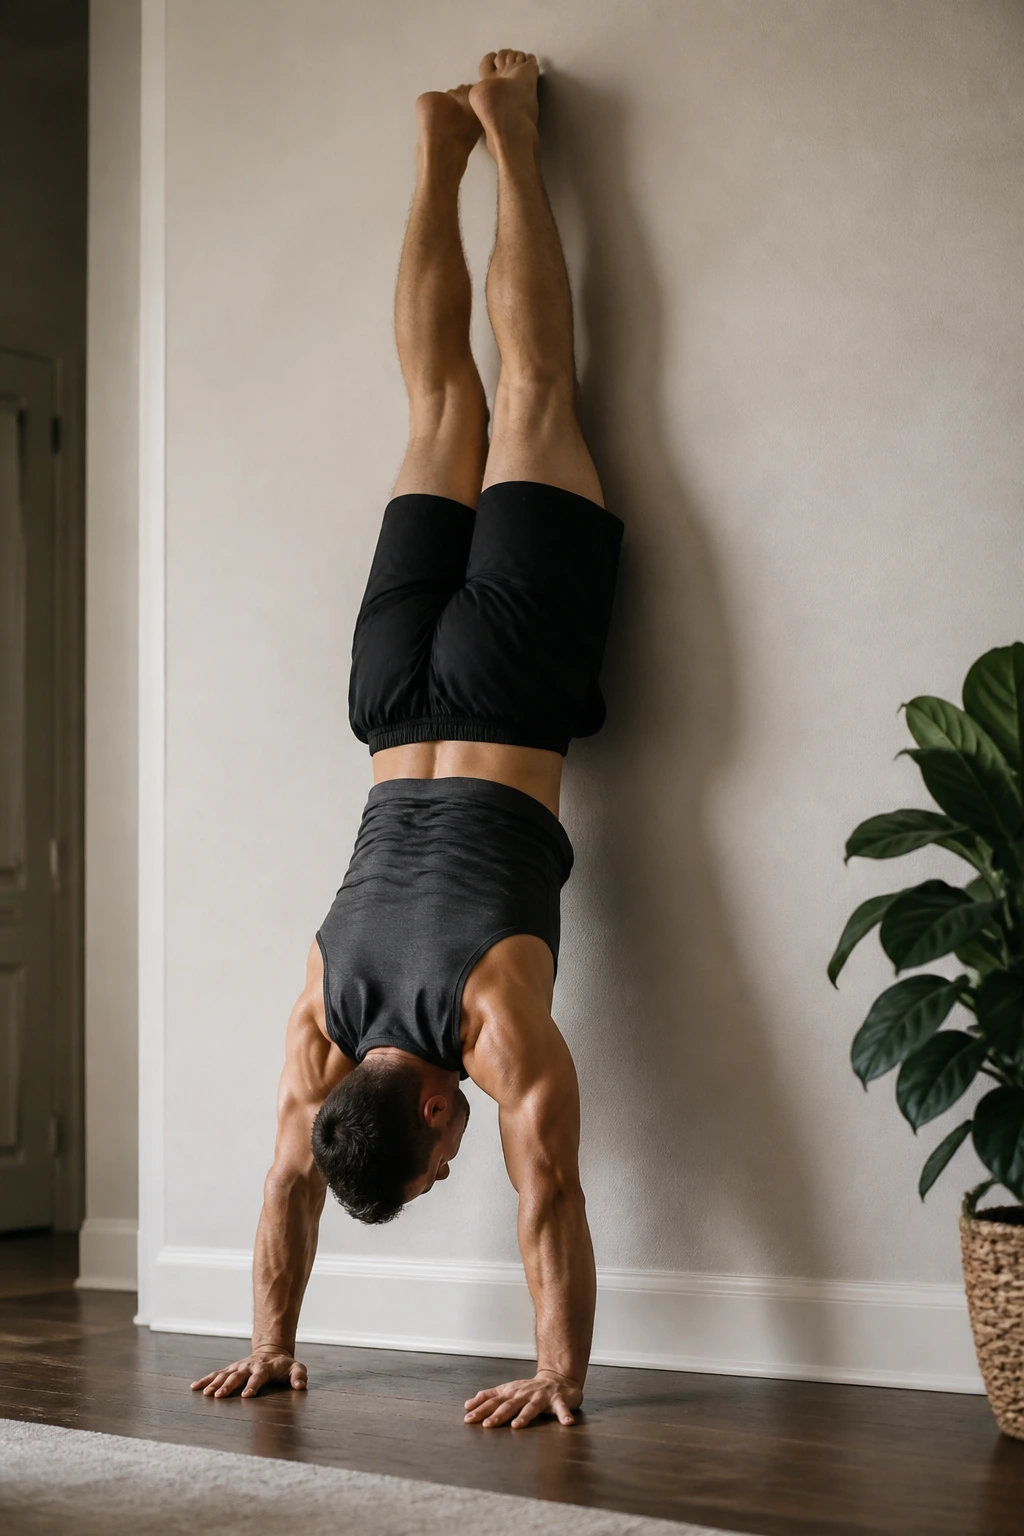
Wall handstand holds are the advanced end of the no-weights arm ladder. They are not a joke, and they are not for anyone who likes rushing. But if you want a serious shoulder-and-triceps challenge at home, this one delivers.
Kick up with control so your heels meet the wall, or walk your feet up the wall into a pike-to-handstand shape if the full kick-up is too much. Stack your wrists, elbows, and shoulders as neatly as you can. Hold for 10 to 30 seconds at first.
If You Can’t Kick Up Yet
- Start with feet on the wall and hands on the floor in a pike.
- Hold 15 to 20 seconds.
- Keep ribs tucked and glutes tight.
- Use a soft surface if wrist extension feels rough.
The big mistake is dumping all your weight into your lower back. That makes the hold feel unstable and ugly fast. Keep the belly tight and press through the fingers to balance.
I would not treat this like a high-rep exercise. It’s a quality hold. Three to five rounds is enough, and each one should feel sharp. If you can stay upside down for 20 clean seconds, your shoulders know they worked.
17. Arm Circles and Pulse Sets
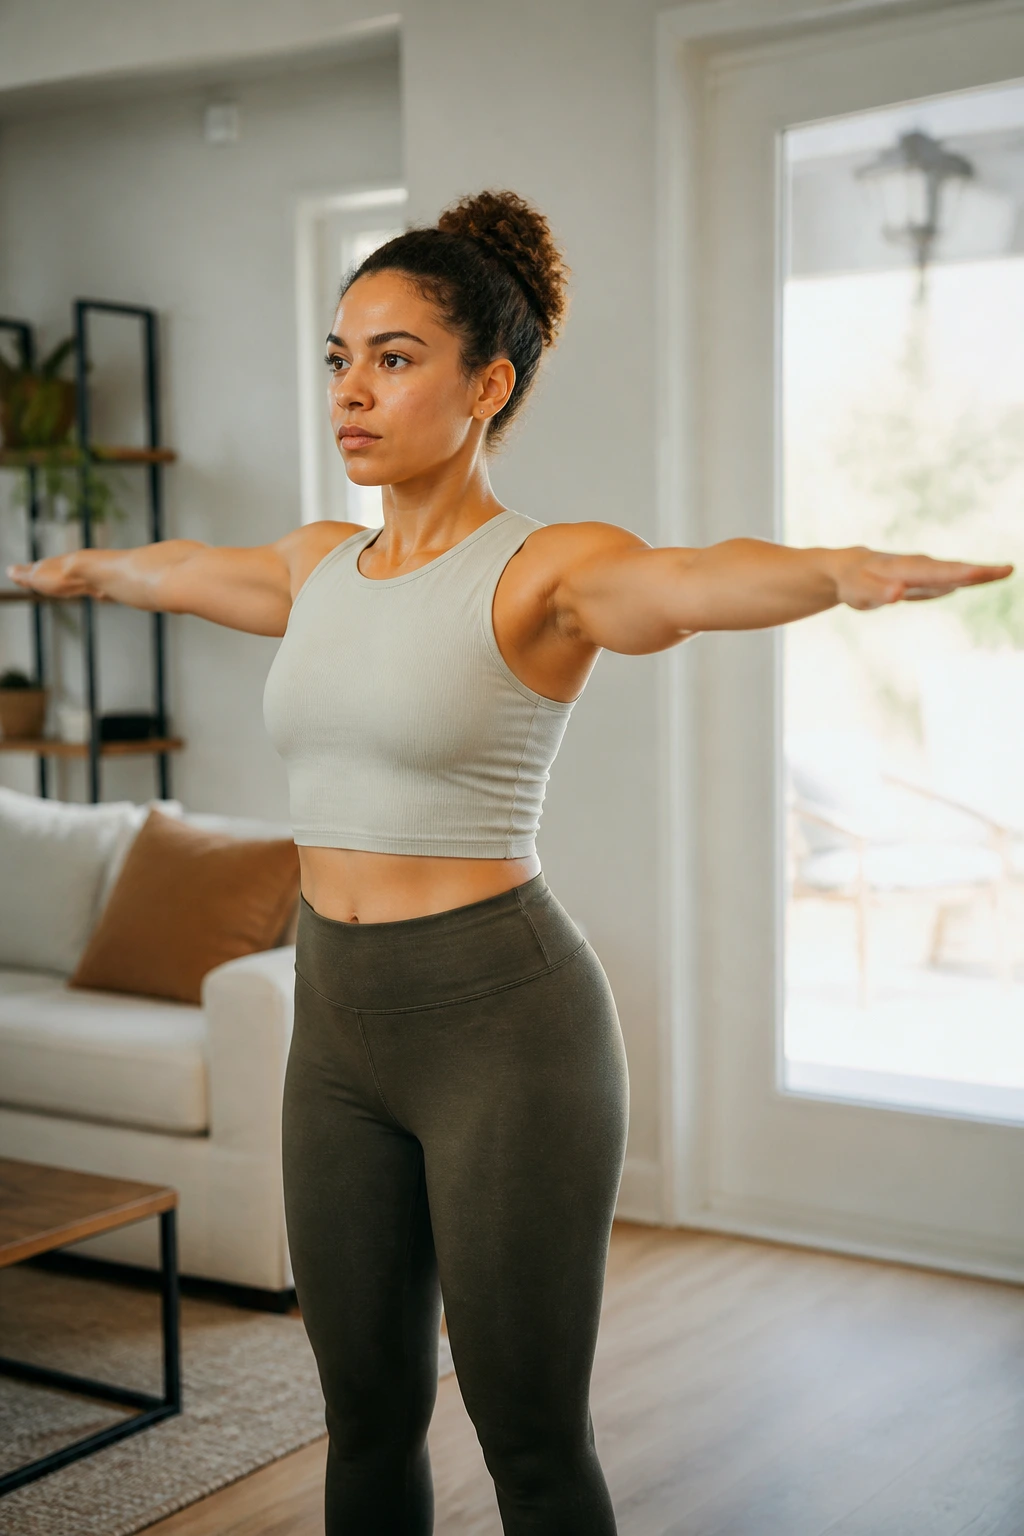
Arm circles are often treated like warm-up filler, and that sells them short. Done with enough control, they become a brutal endurance drill for the shoulders and upper arms, especially when you add tiny pulse sets at the end.
Stand tall with your arms straight out to the sides. Make small forward circles for 20 to 30 seconds, then reverse them for another 20 to 30 seconds. After that, hold the arms at shoulder height and pulse them up and down 2 to 3 inches for 15 to 20 reps.
The goal is not giant windmill motions. Small circles keep tension where it counts, and the burn builds fast when you stop swinging from the shoulders. If your neck starts tightening, lower the arms a little and reset.
This is a smart add-on after push-ups, dips, or handstand work. It won’t replace the heavy stuff, but it will expose weak endurance in a hurry.
- Use 2 to 4 rounds.
- Keep palms facing down for most of the set.
- Stop if the shoulders shrug.
- Breathe normally; people often hold their breath here.
It looks harmless. That is the lie.
18. Inchworms to Push-Ups
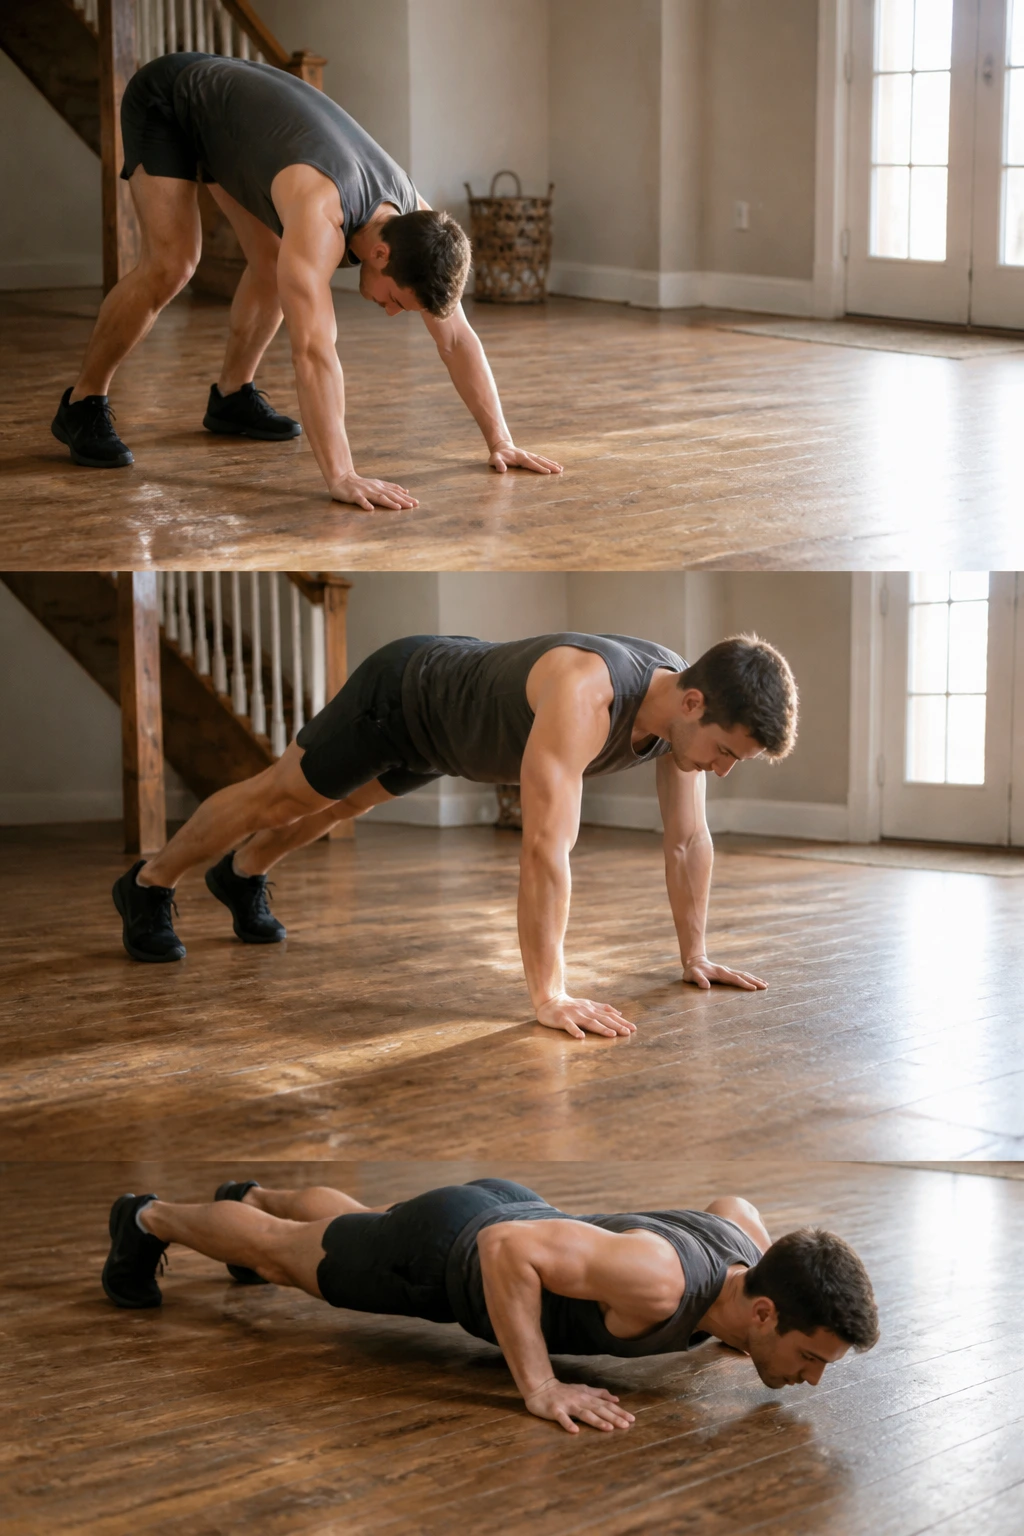
Inchworms are the kind of move that sneaks up on you. They stretch the hamstrings, wake up the shoulders, and then, if you add a push-up at the bottom, they turn into a full upper-body grinder.
Stand tall, fold forward, and walk your hands out until you’re in a plank. Add one push-up if you can keep the body line clean. Then walk the hands back to your feet and stand up. One rep sounds simple. After six or eight, it starts feeling like work.
How to Use Them as a Finisher
- Do 5 to 10 reps.
- Add 1 push-up at the bottom if your form stays tight.
- Move slowly on the walkout so the shoulders stay engaged.
- Keep the core braced to avoid sagging through the middle.
The walkout makes your arms support body weight before you even hit the push-up, so the triceps and shoulders get a double dose. If your wrists are sensitive, shorten the range a little or skip the push-up and use the inchworm as a lighter bodyweight sequence.
I like this move at the end of a home arm session because it ties everything together. You get pressing, stability, and a little bit of mobility all at once. Do enough of them, and even a room with no equipment starts to feel like a proper training space.
And that is the point, really. You do not need a garage full of gear to train your arms well. You need a few honest movements, enough control to slow them down, and the patience to make the easy ones hard.
