



Back pain relief at home usually starts with the least glamorous moves: breathing on the floor, tiny spinal motions, and exercises that look almost too easy to matter. They do matter. A sore back often wants less drama, not more, and the quickest way to make it angrier is to force a big stretch before the tissues have settled down.
Small motions count.
That part gets ignored all the time. People tend to jump straight to aggressive toe touches, long hamstring holds, or a random YouTube routine that treats every back the same, which is a bad bet. Some backs hate deep bending. Some backs hate standing still. Some backs feel better after five slow breaths and a short walk than after twenty minutes of stretching.
If your pain is sharp, follows a fall, comes with numbness or weakness, or shoots hard down one leg, that’s not a home-exercise problem. That’s a medical check problem. For the more ordinary kind of back crankiness — the tight, stiff, “I slept wrong” kind, or the ache that shows up after sitting and training — these exercises can help calm things down without turning your living room into a gym.
My bias is toward moves that do two things at once: they quiet the area and remind your body how to move again. Start with the gentlest work first, then build toward stronger, more load-bearing exercises. That order matters. A lot.
1. 90/90 Breathing with Feet on a Chair
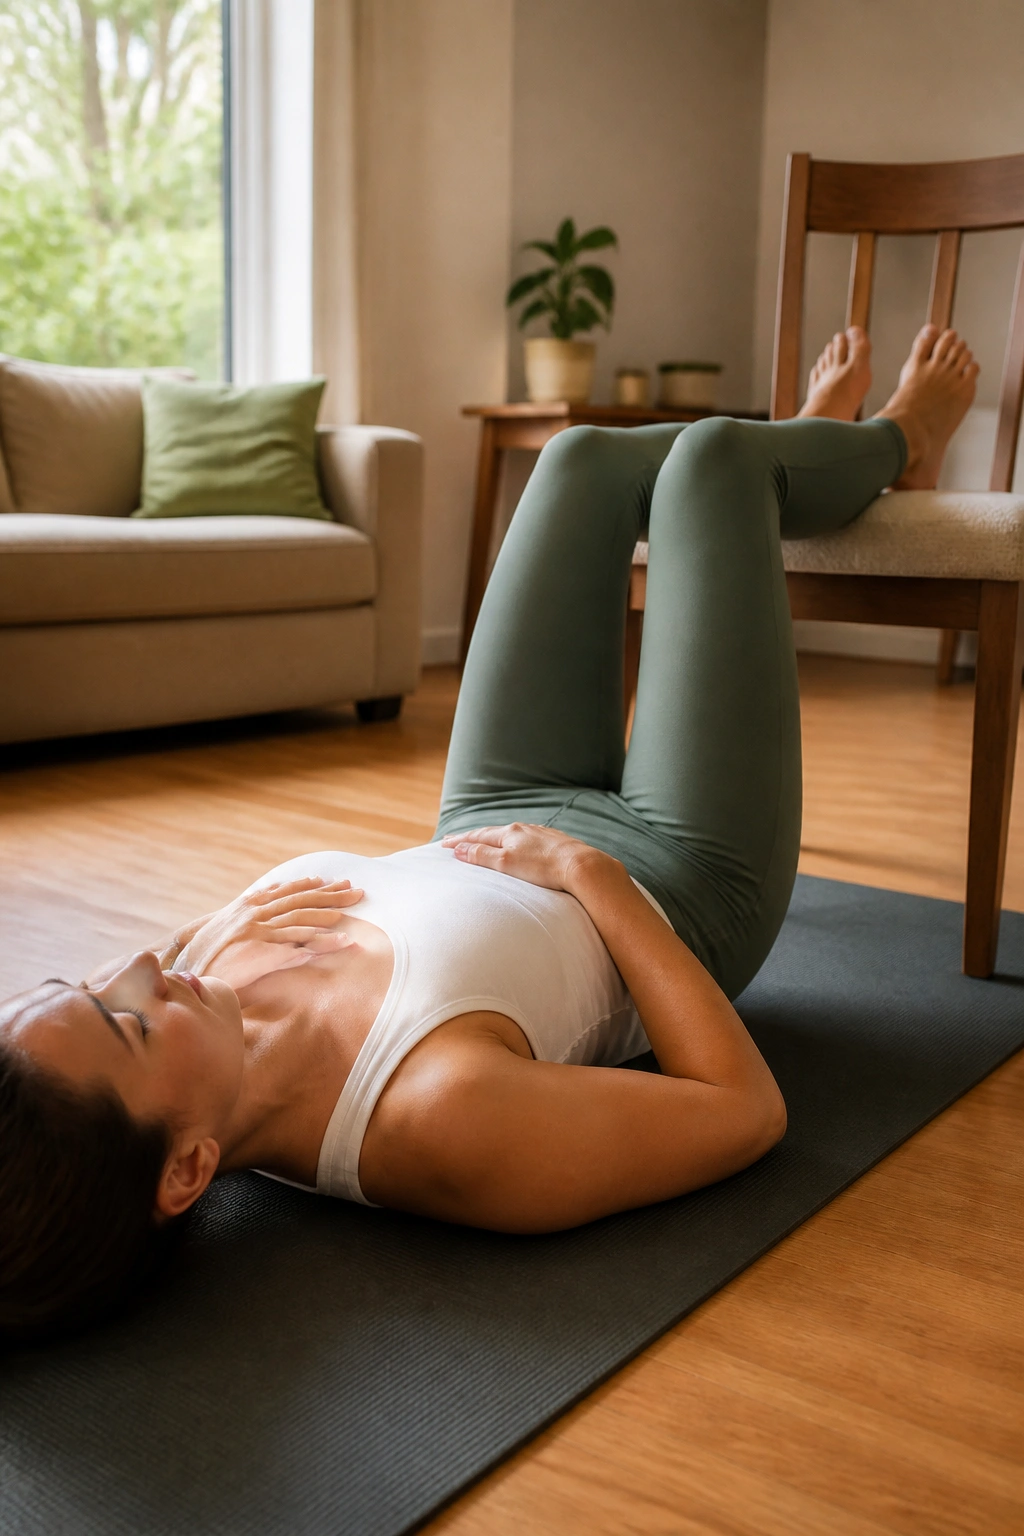
If your lower back feels braced before you even move, start here. This is the kind of exercise that looks boring and works anyway.
Lie on your back with your calves resting on a chair, couch, or ottoman so your hips and knees are bent about 90 degrees. Put one hand on your chest and one on your belly. Breathe in through your nose for about 4 seconds, then exhale slowly for 6 to 8 seconds. Aim for 5 to 8 breaths.
What You Should Feel
- Your ribs should soften down on the exhale.
- Your low back should feel heavy on the floor, not arched.
- Your neck and shoulders should stay quiet.
- The belly hand should move more than the chest hand.
Good sign: the back feels less guarded after a minute or two, not more tense.
This is a smart first move before a workout, too. It helps when your back is tight from sitting, and it gives the core a chance to switch on without a bunch of strain. If lying flat feels rough, slide a pillow under your head. No prizes for suffering through it.
2. Pelvic Tilts on the Floor
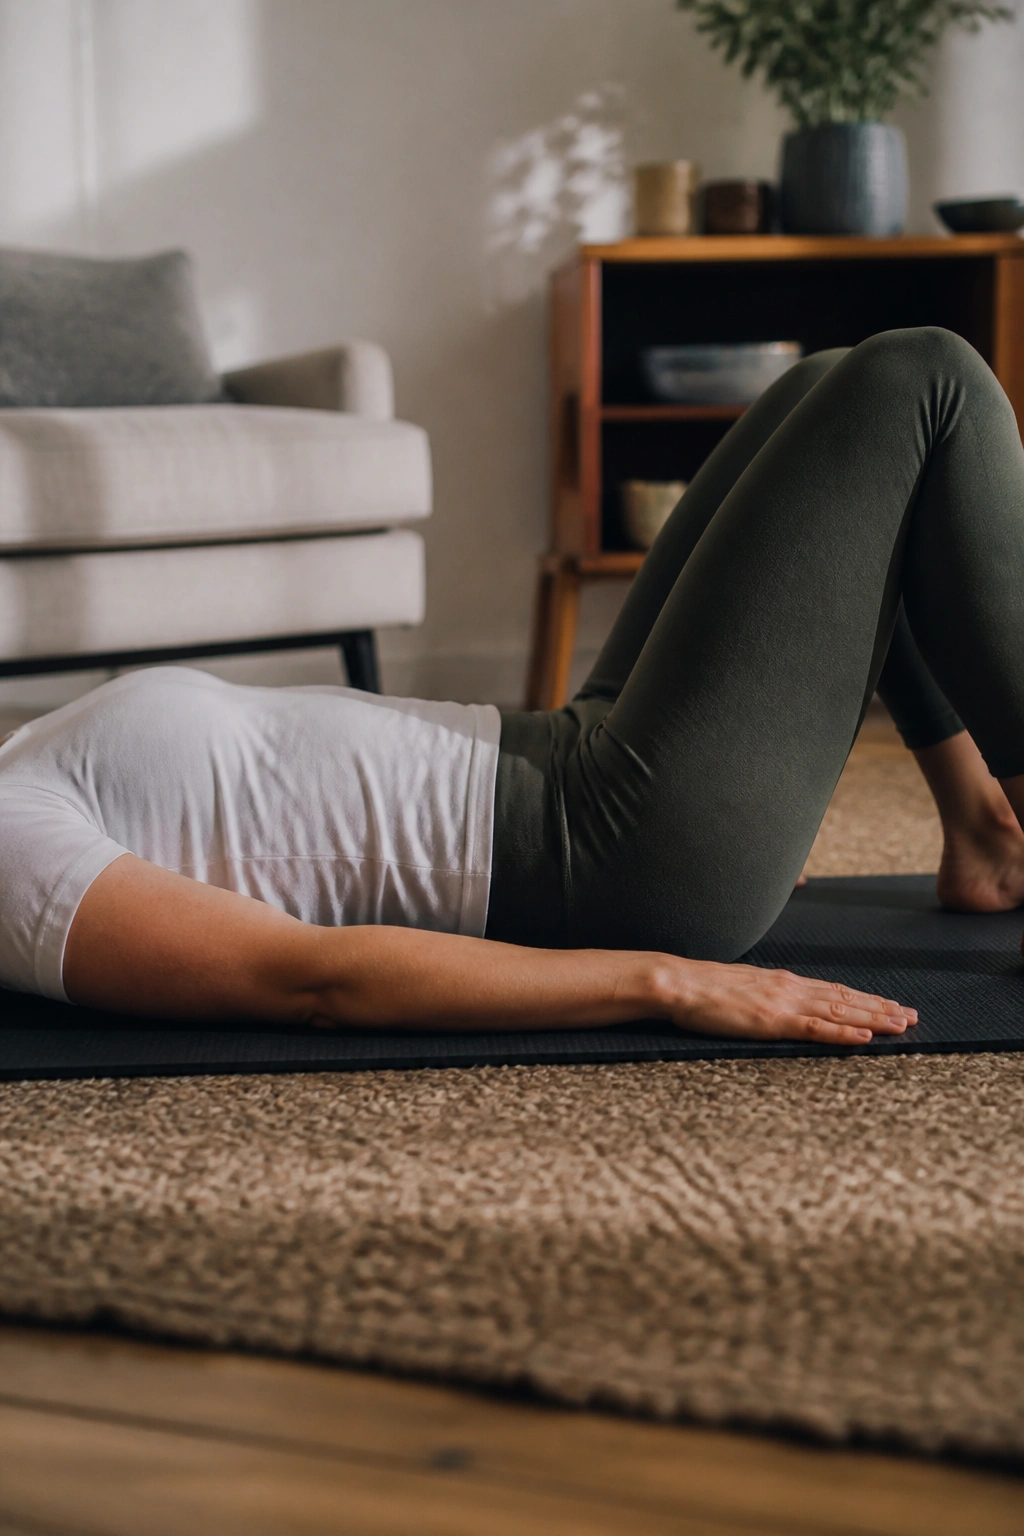
Pelvic tilts are one of those old-school drills people skip because they look too simple. That’s a mistake.
Lie on your back with your knees bent and feet flat on the floor. Gently flatten your low back toward the floor by tipping your pelvis up, then let it return to neutral. Don’t jam it. Don’t push hard. Think of it as a slow nod of the pelvis, not a crunch. Ten to 15 reps is enough for most people, and two rounds works well.
The motion should stay tiny. If your knees are flying around or your shoulders are tensing, you’re doing too much. The goal is to wake up control and ease stiffness, not to make the floor groan.
This move is useful after long sitting spells because it reminds the lumbar spine that it can move without panic. If it feels better to pair it with breathing, do that. In fact, that pairing is hard to beat. Breathe in as you return to neutral, breathe out as you gently flatten the back.
3. Cat-Cow on Hands and Knees
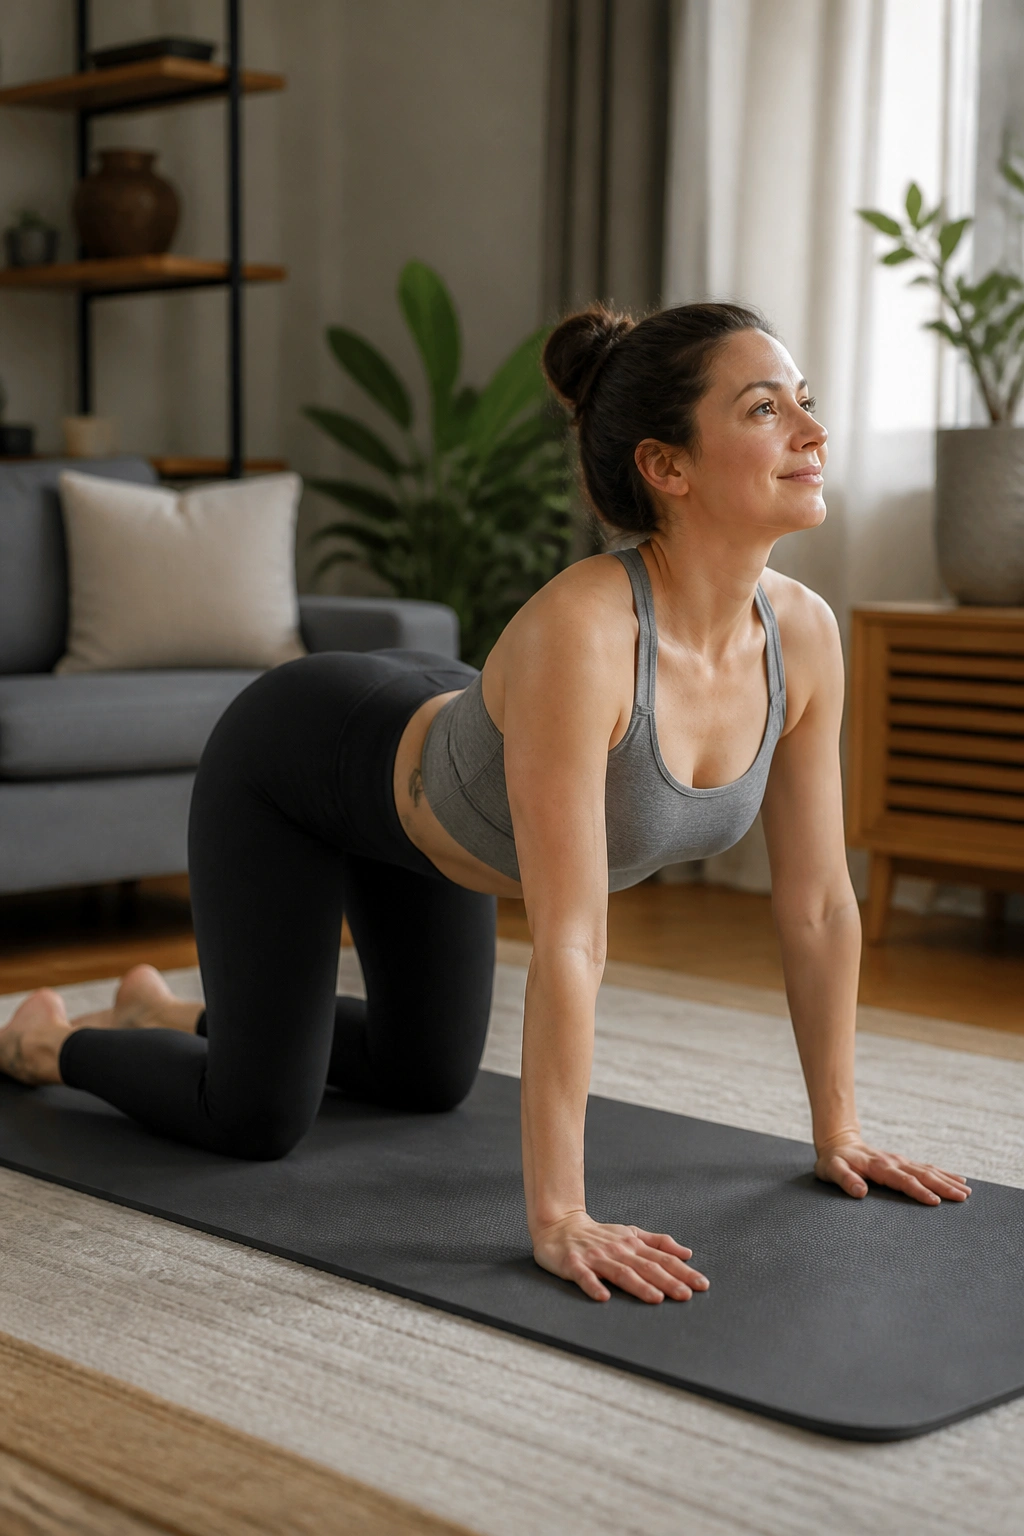
Cat-cow is popular for a reason, but it works best when you keep the motion modest. Huge spinal waves are not the point.
Set up on hands and knees with wrists under shoulders and knees under hips. On the inhale, let the chest open and the tailbone tip up a little. On the exhale, round the upper back and tuck the pelvis slightly. Six to 10 slow cycles is plenty.
Keep the Motion Small
- Move through the whole spine, not just the lower back.
- Keep the elbows soft.
- Let the neck follow the rest of the spine.
- Stop before the movement becomes a strain.
If your back feels pinchy in deep arching, shrink the range and stay smoother. If rounding feels worse, spend a little more time in the neutral middle. The beauty of this exercise is that it gives you a live read on what your back likes today.
I like cat-cow as a pre-workout warm-up because it brings blood flow without tiring anything out. It also tells you something useful: whether bending or extending is the friendlier direction for your body that day. That clue is worth more than a random guess.
4. Single Knee-to-Chest Stretch
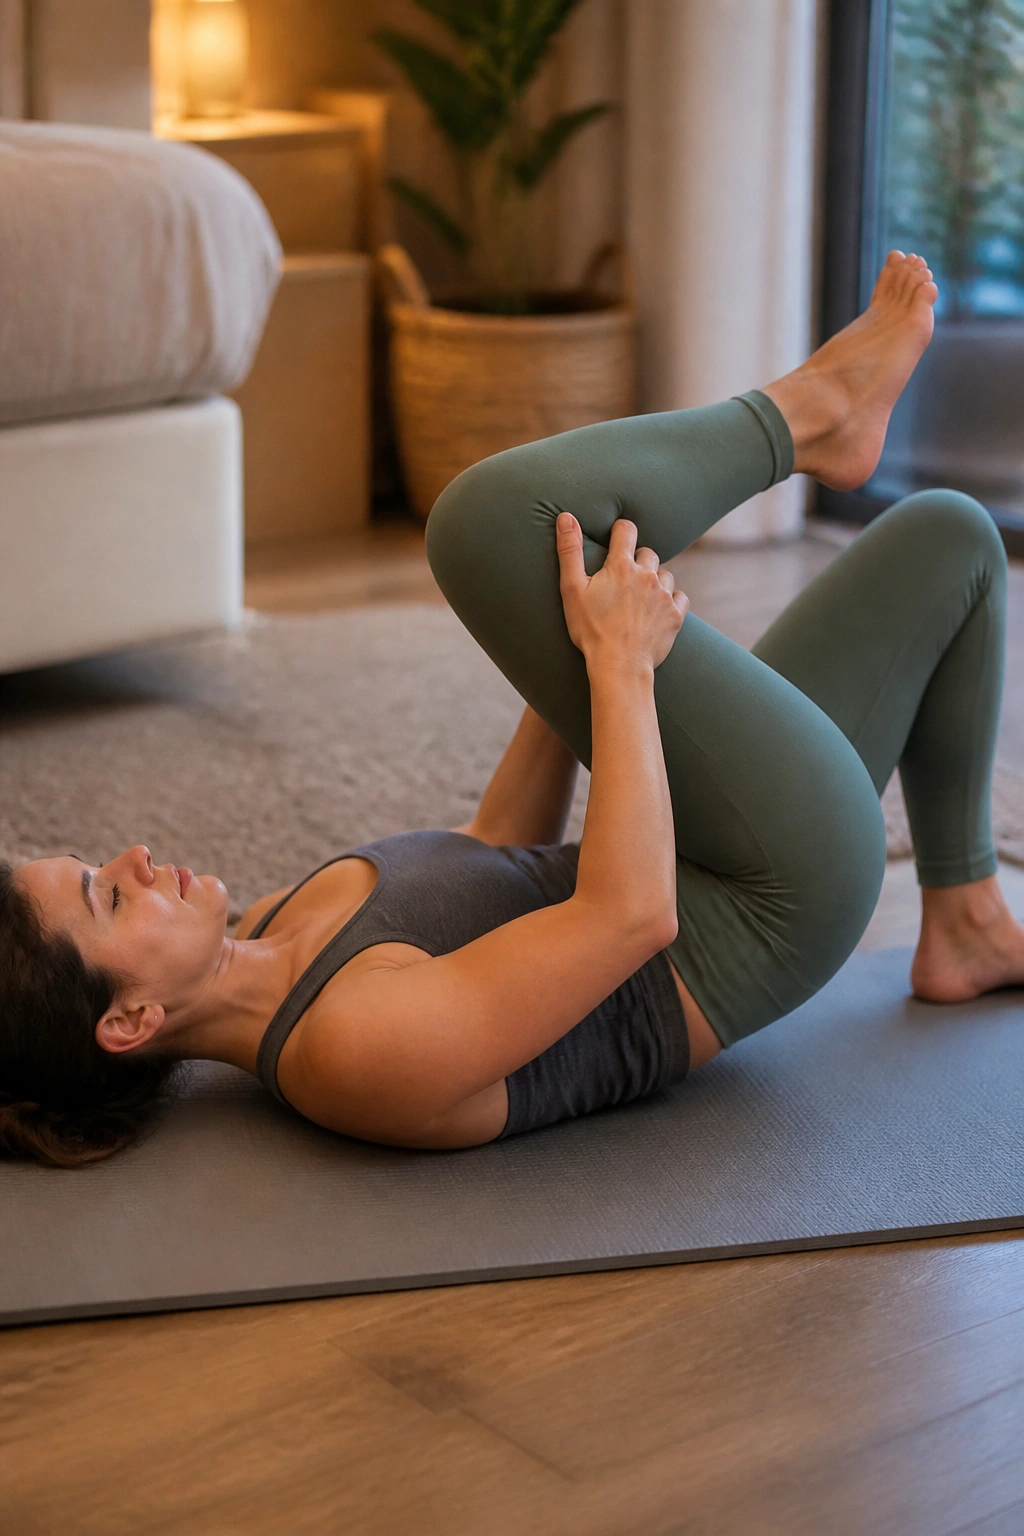
This is the first move on the list that can feel like pure relief when the low back is stiff from sitting. One side at a time keeps it easier to control.
Lie on your back with both knees bent. Pull one knee gently toward your chest while the other foot stays on the floor. Hold for 20 to 30 seconds, then switch sides. Two to three rounds per side is a solid dose.
The stretch should land in the lower back or upper glute, not in the front of the hip joint. If you feel a sharp pinch, back off a little. A soft pull is the target. A white-knuckle yank is not.
This one can be handy after a long drive or a long desk stretch where your back has gone into “locked up” mode. If your hamstrings are already tight, don’t force the leg all the way in. You’re trying to calm the area, not crank on it. A towel behind the thigh can help if your hands can’t reach comfortably.
5. Double Knee-to-Chest Stretch
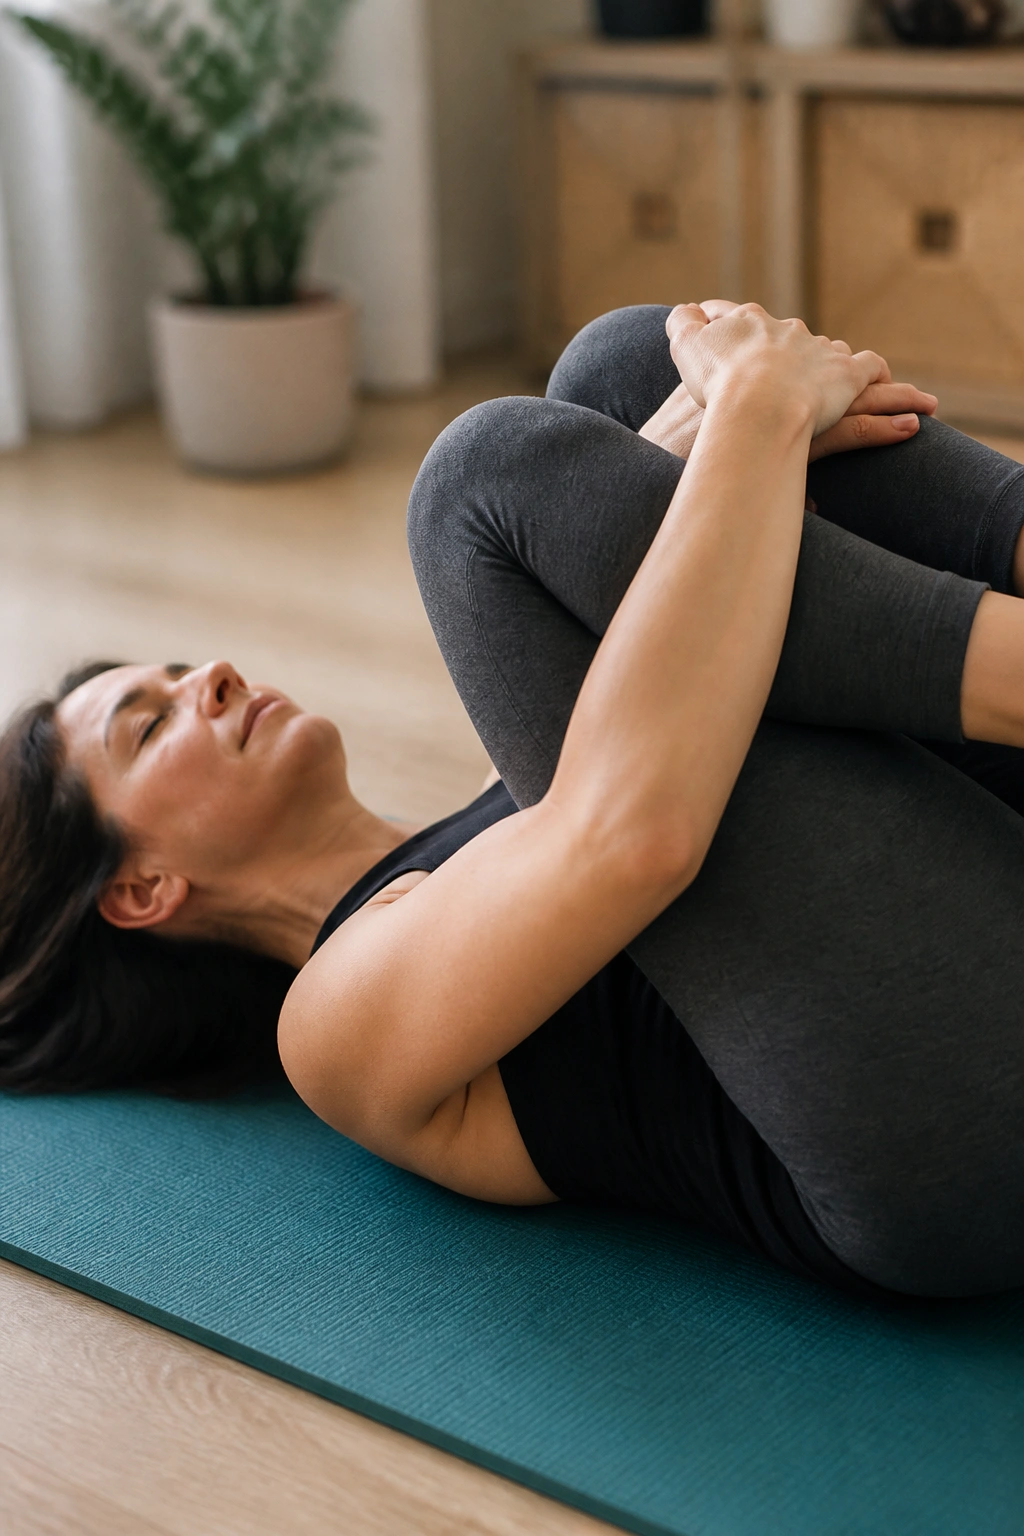
Double knee-to-chest feels more intense than the single-leg version, and that’s exactly why it needs a little respect.
Bring both knees toward your chest at the same time and hug them in with your hands behind the thighs or over the shins. Hold for 15 to 20 seconds, then lower with control. Three to five rounds is usually enough. If your back likes flexion, this can feel like a deep exhale for the spine.
But here’s the catch: some backs hate this position. If the stretch sends pain farther down the leg, pinches at the low back, or feels like too much compression in the abdomen, skip it and stick with the single-knee version. No hero points for forcing it.
I’d also avoid bouncing. That’s sloppy and rarely helps. Let the breath do the work. If you want a slightly gentler version, keep one foot on the floor and only pull the other knee in. Oddly enough, that half-step is often the sweet spot.
6. Lower Trunk Rotations
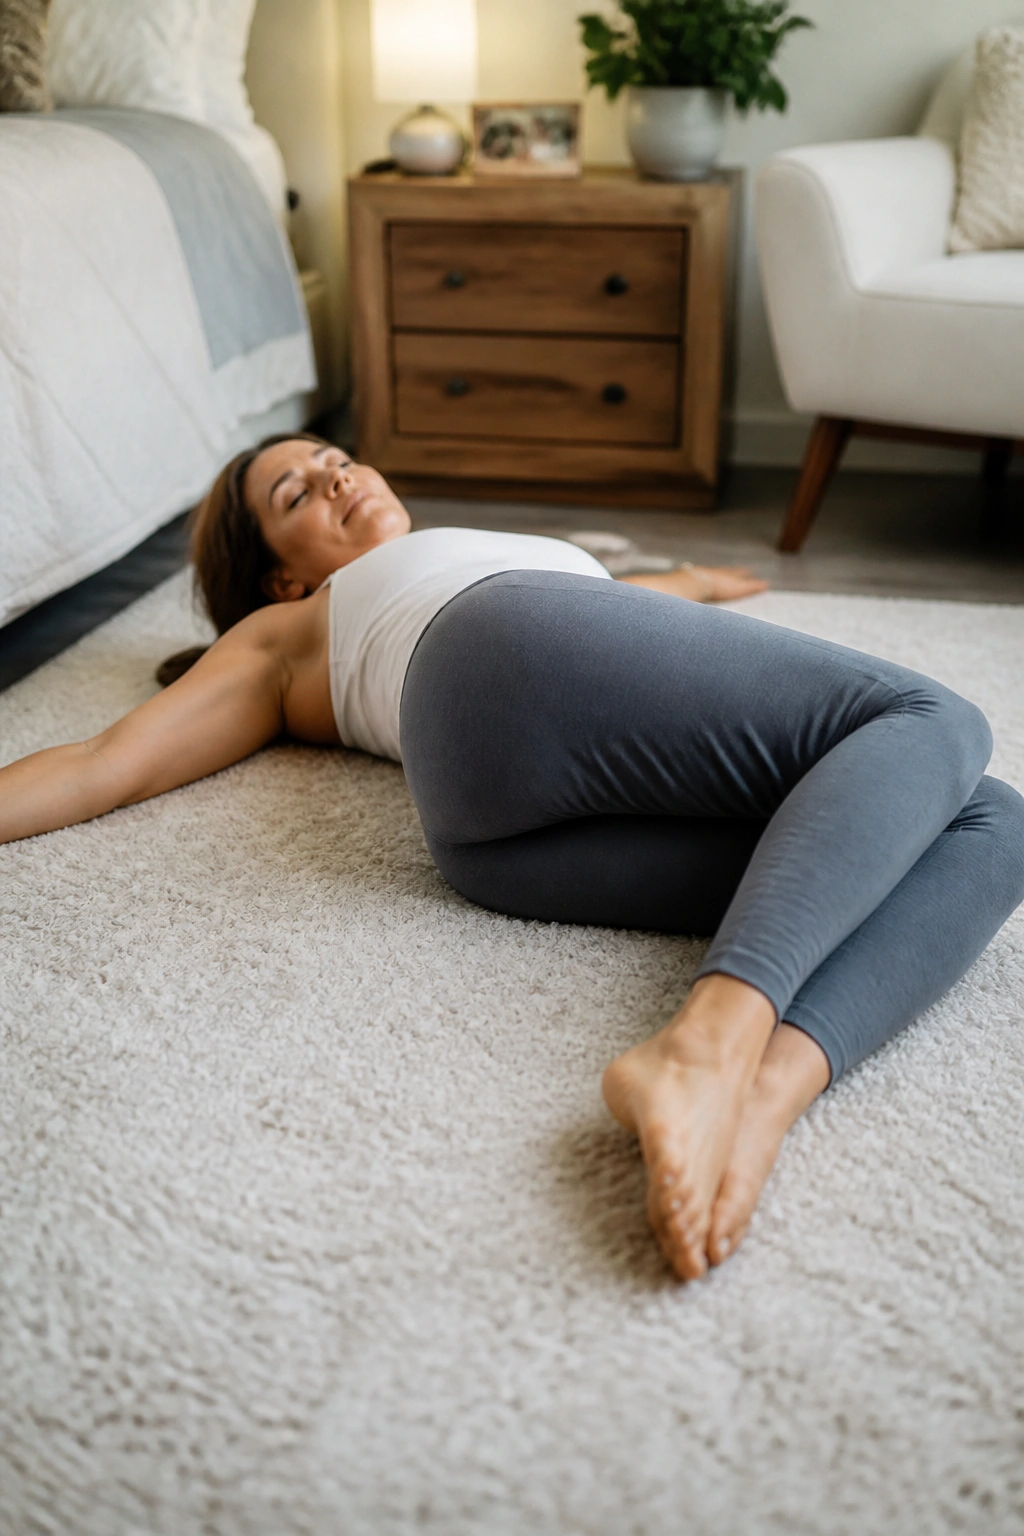
A stiff lower back often wants a little side-to-side motion before it wants strength. Lower trunk rotations give you that without loading the spine.
Lie on your back with knees bent and feet flat. Keep your shoulders on the floor, then slowly let both knees drop a few inches to one side. Come back through center and go to the other side. Eight to 10 reps per side is enough. The movement can be small; it does not need to touch the floor.
A Few Good Cues
- Keep both feet together.
- Let the hips follow the knees.
- Keep the breathing slow.
- Stop if you feel a sharp catch.
I like this one first thing in the morning because the back often feels like rusted hinges then. A few gentle rotations can loosen that. If you’ve been doing a lot of twisting in sport or yard work, this movement can also feel like a reset without being a stretch circus.
The key is to stay relaxed. If your shoulders are bracing, the whole thing gets clunky. Keep the jaw soft, and let the knees drift. That’s enough.
7. Child’s Pose with Side Reach
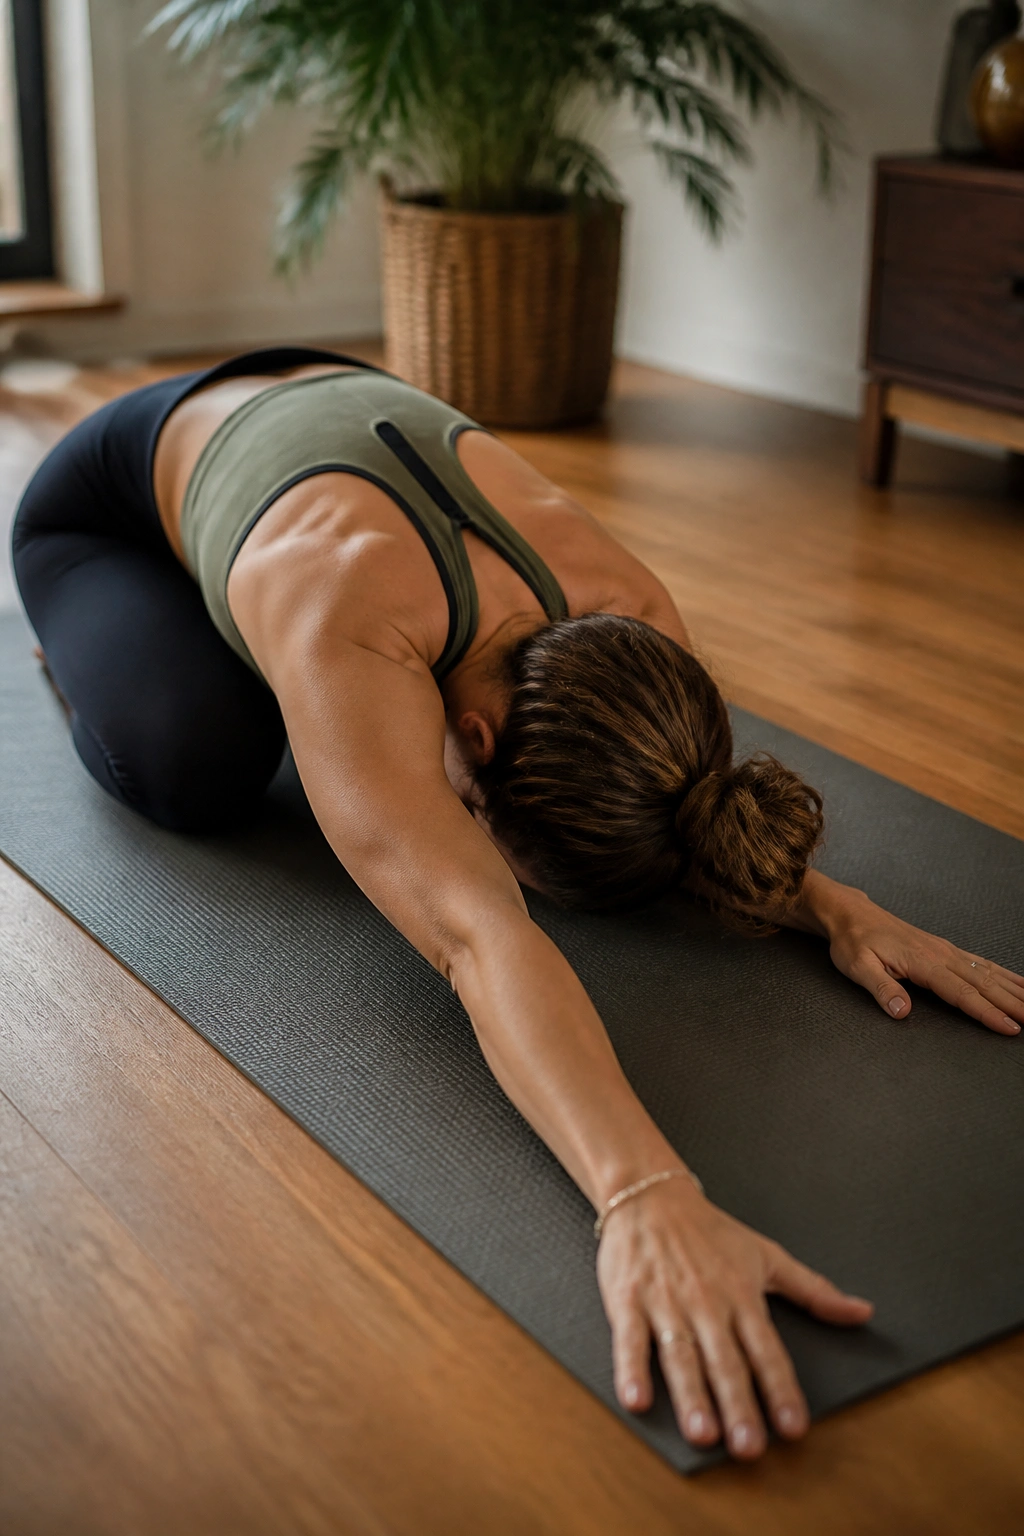
Child’s pose gets used as a catch-all stretch, but the side-reach version is the one I reach for most often. It opens the lats and the side body, which can ease the pull on the lower back.
Start on hands and knees, then sit the hips back toward the heels while reaching the hands forward. Walk both hands a little to the right and hold for 20 to 30 seconds. Come back to center, then walk them a little to the left. If your knees or hips don’t love the full position, put a pillow under your hips or a cushion between your thighs and calves.
The stretch should feel long through the ribs and side waist. You’ll often notice the difference more on one side, which is useful information. Tight lats can pull the rib cage down and make the low back do extra work.
Breathing matters here. Slow exhale, let the ribs soften, then inch a little farther if it feels good. That’s the pattern. Don’t jam your chest into the floor. It’s a stretch, not a contest.
8. Bird Dog
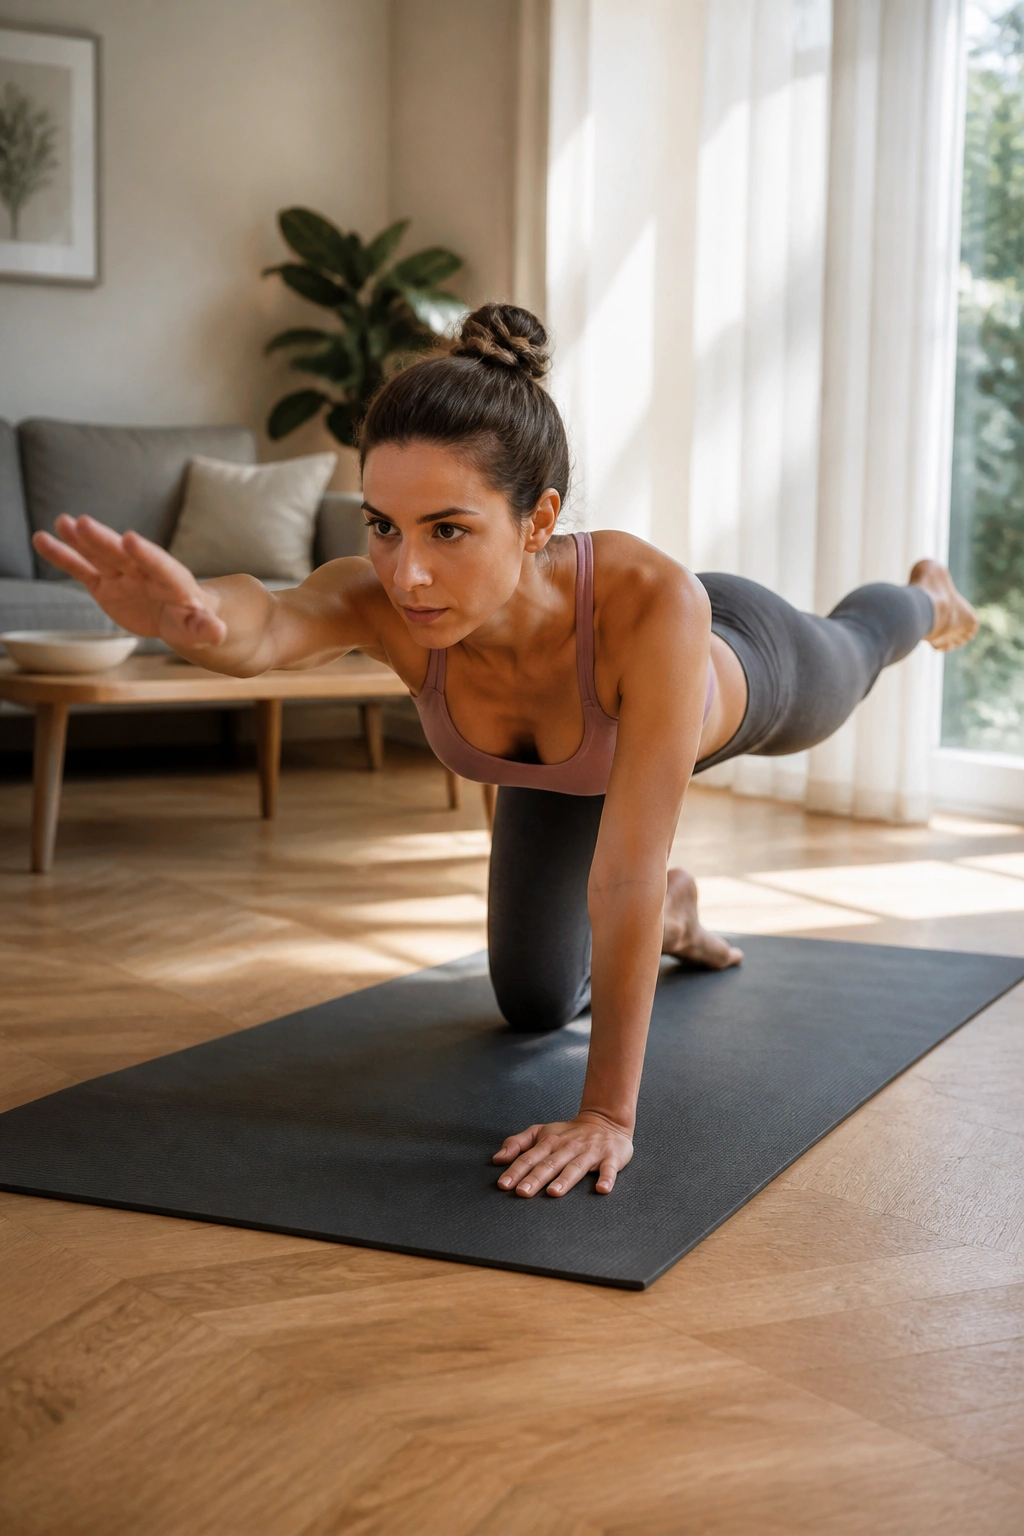
Bird dog is where gentle mobility starts turning into real support. It looks simple. It is not lazy.
Set up on hands and knees, brace your belly lightly, and reach one leg back while the opposite arm reaches forward. Keep the hips level and hold for 3 to 5 seconds. Lower with control, then switch sides. Six to eight reps per side is a strong starting point.
Three Cues That Matter
- Keep your low back from sagging.
- Reach long, not high.
- Move slowly enough to stay steady.
This is a back-saving exercise, especially if your pain shows up when you stand for a long time or carry groceries. Bird dog teaches your trunk to resist wobbling without making the spine rigid. That matters more than people think.
If the full version feels shaky, start by only sliding one leg back a few inches. Or only lift the arm. The goal is control, not a pretty pose. Wobbly is fine at first. Sloppy is not.
9. Glute Bridge
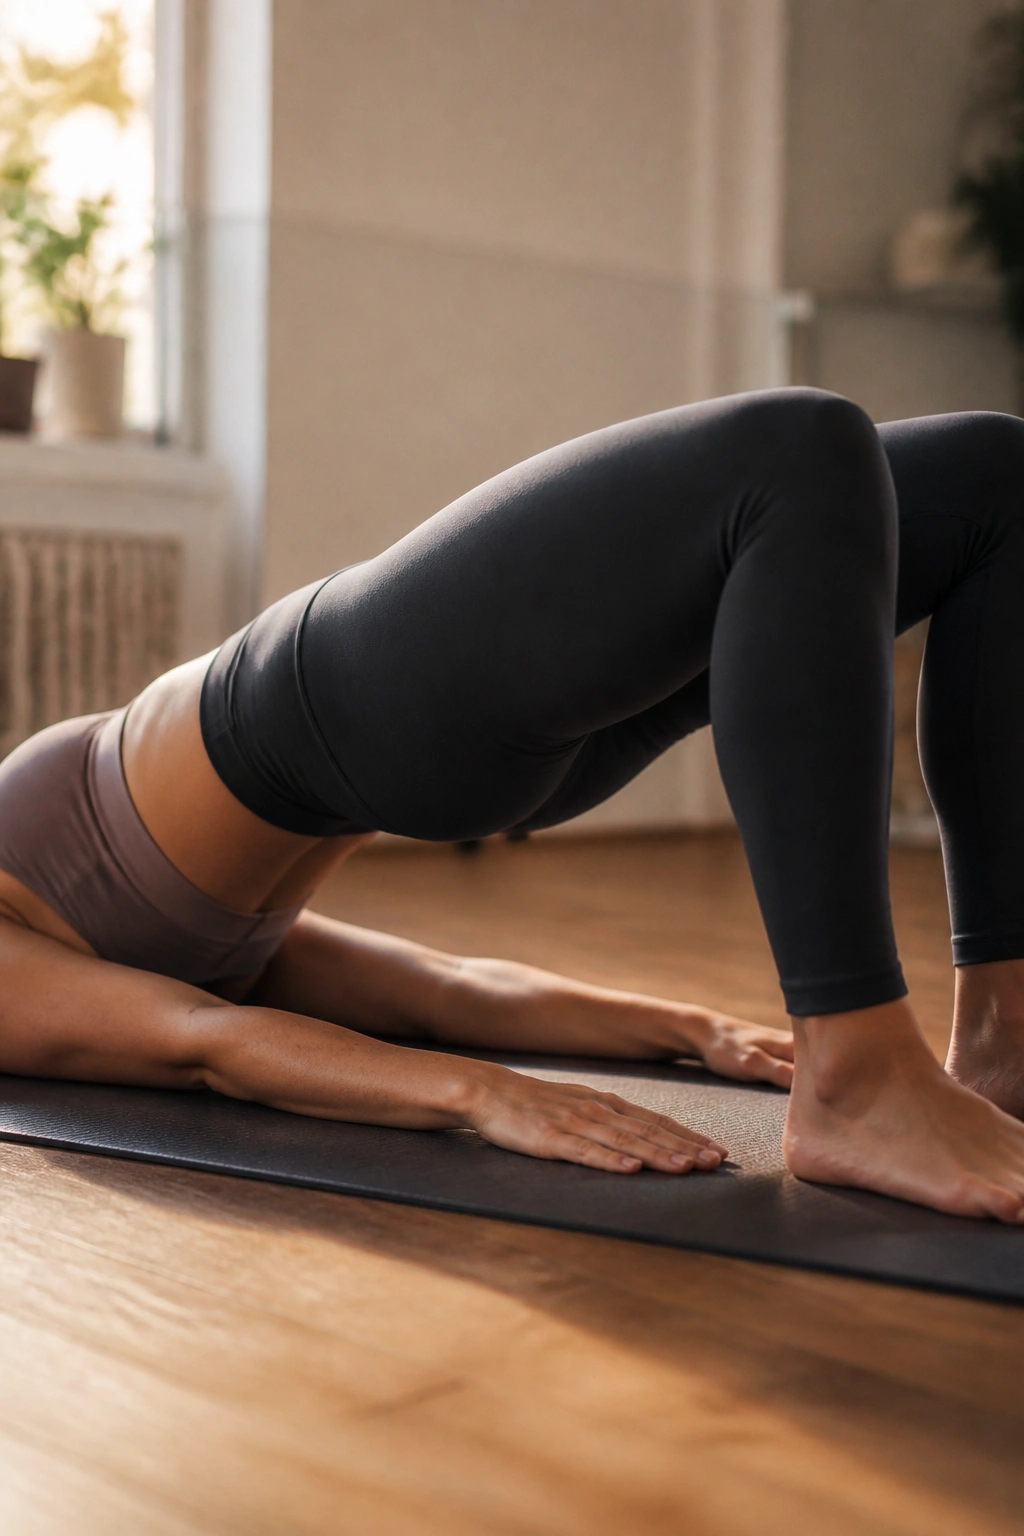
Weak or sleepy glutes can leave the low back doing way too much. Glute bridges help shift some of that work where it belongs.
Lie on your back with knees bent and feet flat about hip-width apart. Squeeze your glutes and lift your hips until your shoulders, hips, and knees make a straight line. Hold for 1 to 2 seconds, then lower slowly. Eight to 12 reps is a good set.
You should feel this in the glutes and maybe a little in the hamstrings. If the hamstrings are taking over and cramping, walk your feet a bit closer to your butt and keep the lift smaller. If your low back is doing the burning, the ribs are probably flaring up too much. Keep them down.
This is one of my favorite early strength moves because it bridges the gap between “I need to calm down” and “I need to get stronger.” It also works well after the softer floor drills. A few bridges at the end of a warm-up can make standing, walking, and picking things up feel less wobbly.
10. Dead Bug
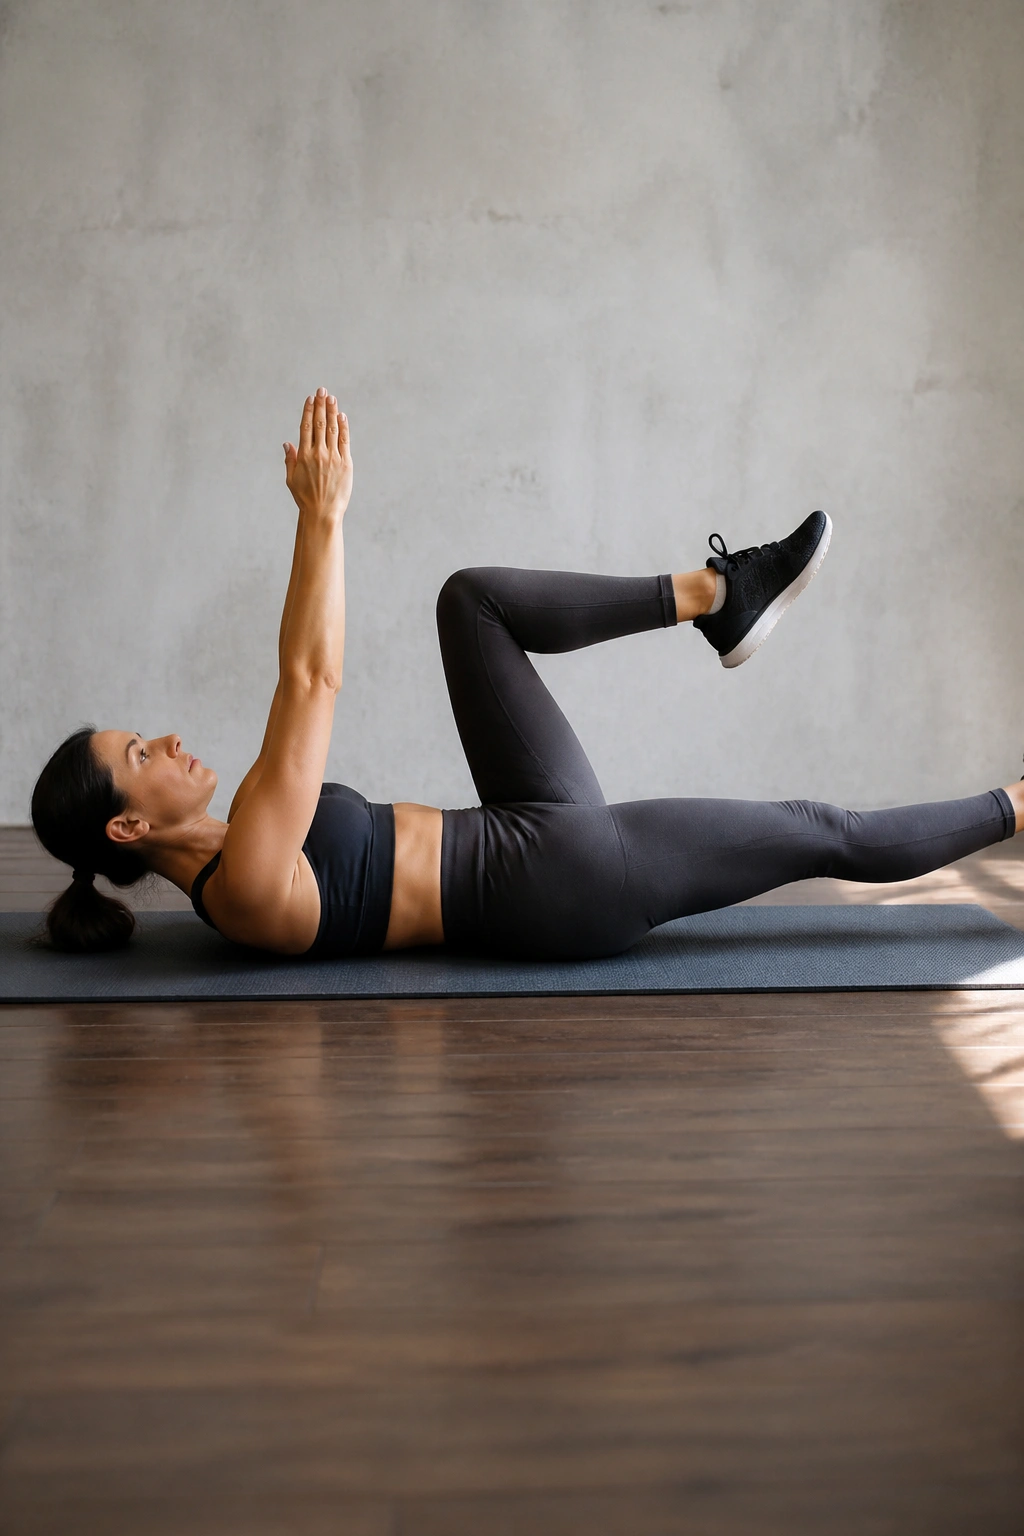
Dead bug is a sneaky core exercise. It looks calm. Your middle has to work.
Lie on your back with your hips and knees bent to 90 degrees and your arms reaching toward the ceiling. Keep your low back gently heavy on the floor as you lower the opposite arm and leg away from center. Go only as far as you can without your back arching. Return, then switch sides. Five to eight reps per side is enough to start.
What to Watch For
If your ribs pop up or your back arches, the lever is too long. Shorten the movement. A smaller range done cleanly is worth more than a dramatic leg reach with bad control.
This move is useful before lifting because it teaches trunk tension without compressing the spine much. It’s also a good choice if bridge work feels too glute-heavy or if you’re coming back from a cranky back and want something more controlled.
Slow is the whole game here. If you rush, the body cheats. If you move like you’re lowering a glass of water, the exercise starts to make sense.
11. Side Plank from Knees
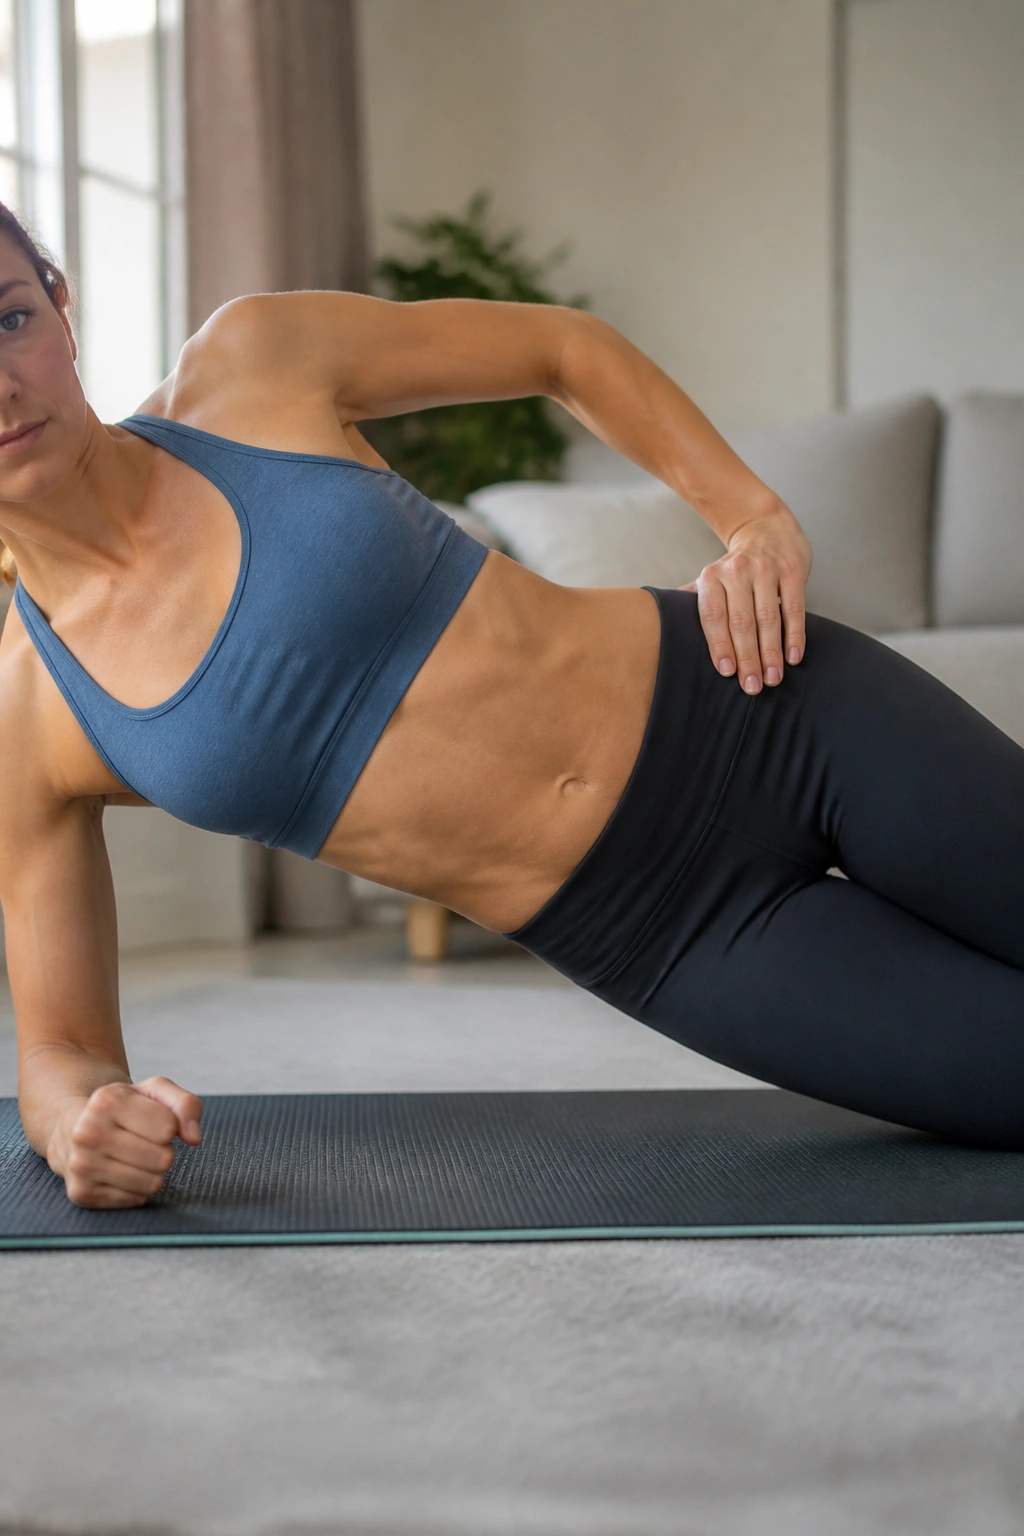
Side planks train the lateral core, which gets ignored more than it should. A lot of backs hate being tugged sideways all day, and this helps.
Lie on one side with the elbow under the shoulder and the knees bent. Lift the hips so the body makes a straight line from shoulders to knees. Hold for 10 to 20 seconds, then lower. Two to four holds per side is a useful dose.
The work should show up along the side of the waist and the hip, not in a pinch at the shoulder or a cramp in the low back. Keep the chest open and don’t let the top shoulder collapse forward. If you need to make it easier, hold the top hand on the floor in front of you for balance.
I like this because it fills a gap that most home routines miss. People do front core work and glute work, but they leave the side wall out. That’s a problem, especially if one side of your back always feels more irritated than the other.
12. Clamshells
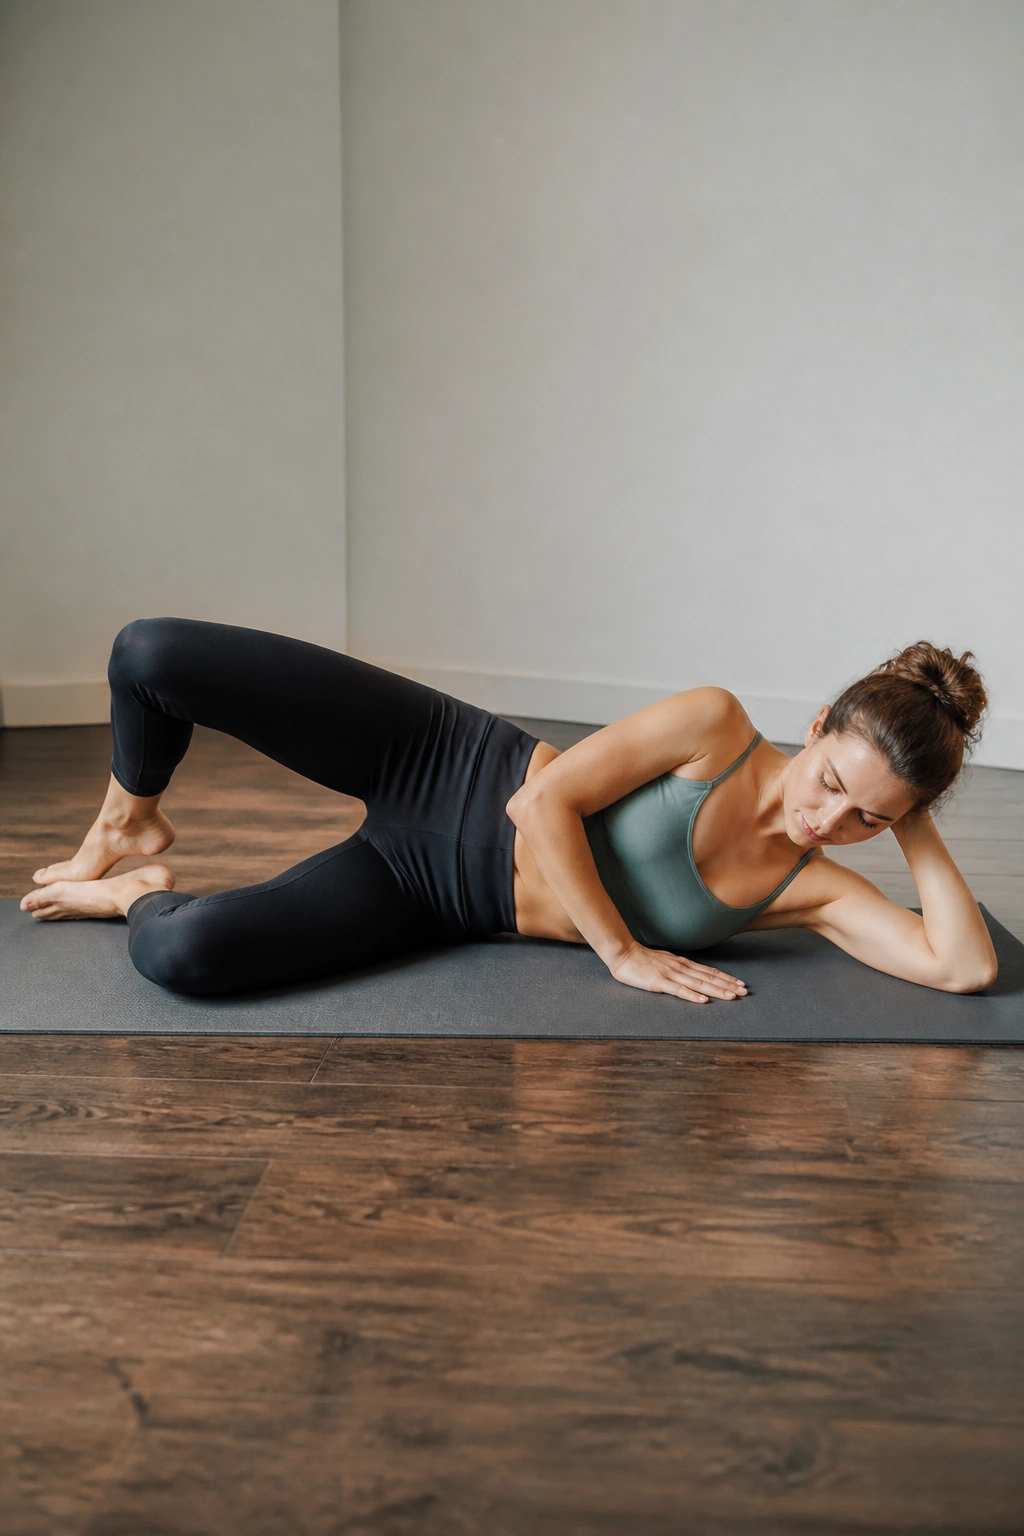
Clamshells are plain-looking, and they deserve more credit than they get. They wake up the hip muscles that keep the pelvis steady when you walk or climb stairs.
Lie on your side with hips and knees bent, feet together, and head supported. Keep the pelvis still as you lift the top knee a few inches, then lower it slowly. Ten to 15 reps per side works well. A light resistance band above the knees can add challenge, but it’s optional.
What It Should Feel Like
- Side of the butt, not the low back.
- Small movement, clean control.
- No rolling backward to cheat the lift.
- Slow lower on the way down.
If your torso starts twisting open, the range is too big. Keep the feet glued together and the motion tidy. This is one of those exercises that pays off later, when standing, running, or even doing chores feels less lopsided.
I’m a fan of clamshells when back pain seems tied to hip weakness or general instability. They don’t look flashy. They do a job, which is more than can be said for a lot of trendy stuff.
13. Half-Kneeling Hip Flexor Stretch
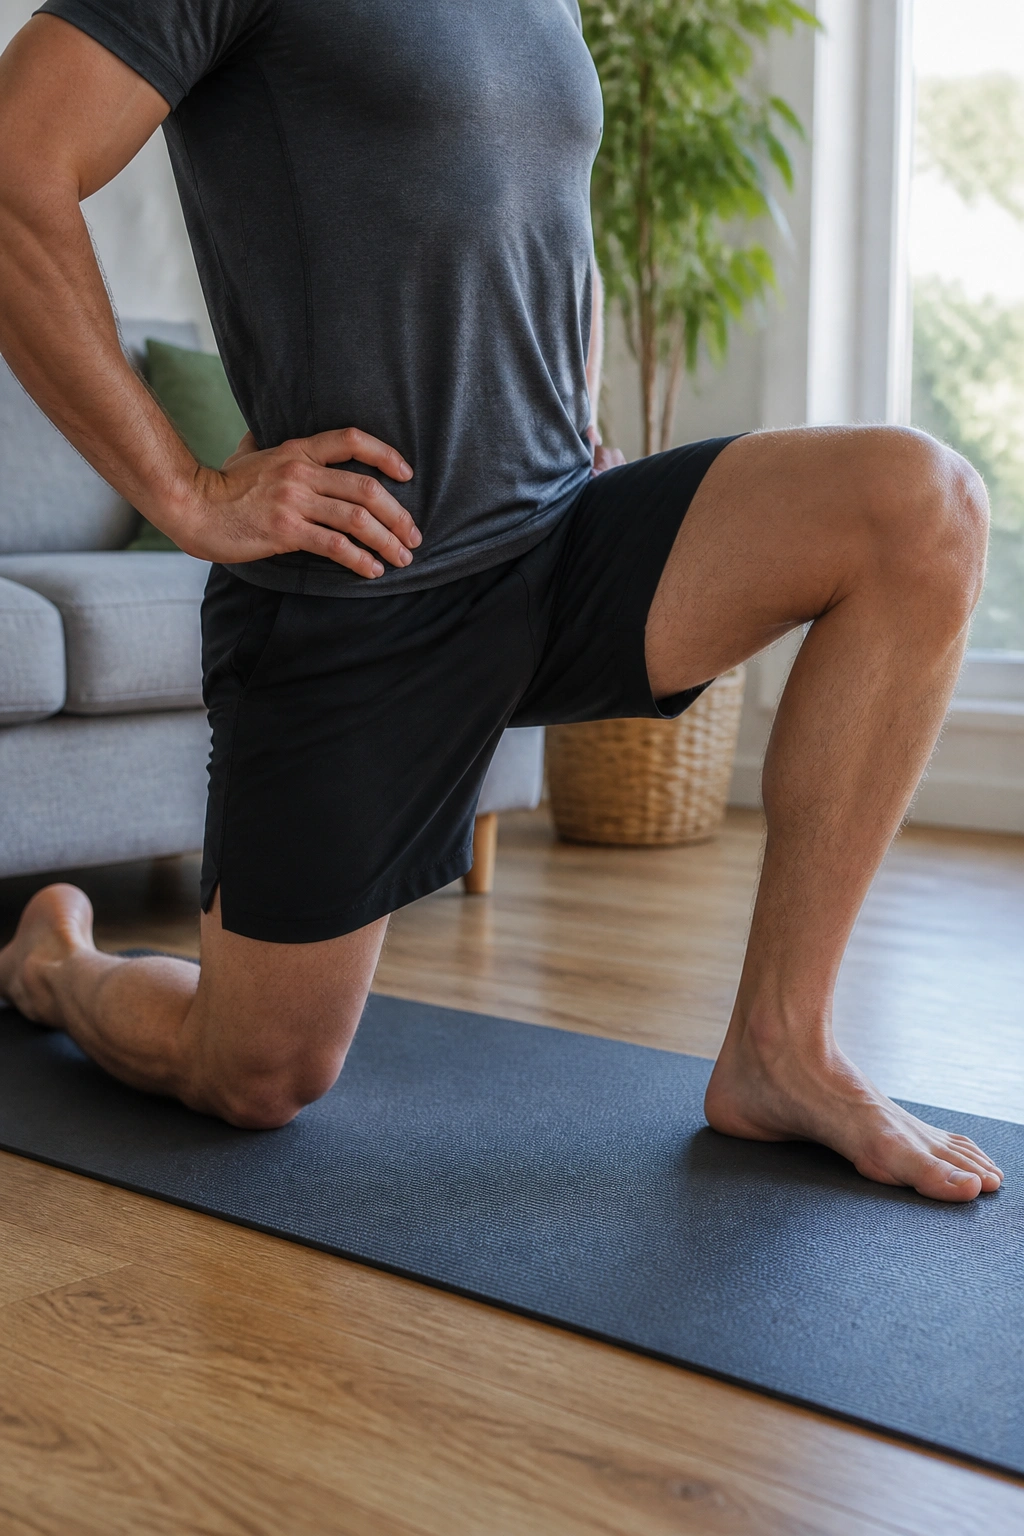
Tight hip flexors can pull the pelvis into an awkward tilt and make the low back work harder than it should. This stretch helps open the front of the hip without yanking on the spine.
Get into a half-kneeling position with one knee on the floor and the other foot in front, knee bent at about 90 degrees. Tuck the pelvis slightly, squeeze the back-side glute, and shift forward an inch or two until you feel a stretch in the front of the hip. Hold for 20 to 30 seconds per side.
If you want more, raise the arm on the kneeling side overhead and lean a touch away from that hip. That can deepen the line through the front of the body. But keep the ribs from flaring. Arching the low back to fake a bigger stretch is a bad trade.
This one matters a lot for people who sit a lot or train hard with lots of hip flexion. It also shows up as a quiet fix when standing tall suddenly feels easier after the stretch. That’s the kind of change worth chasing.
14. Hamstring Stretch with a Strap
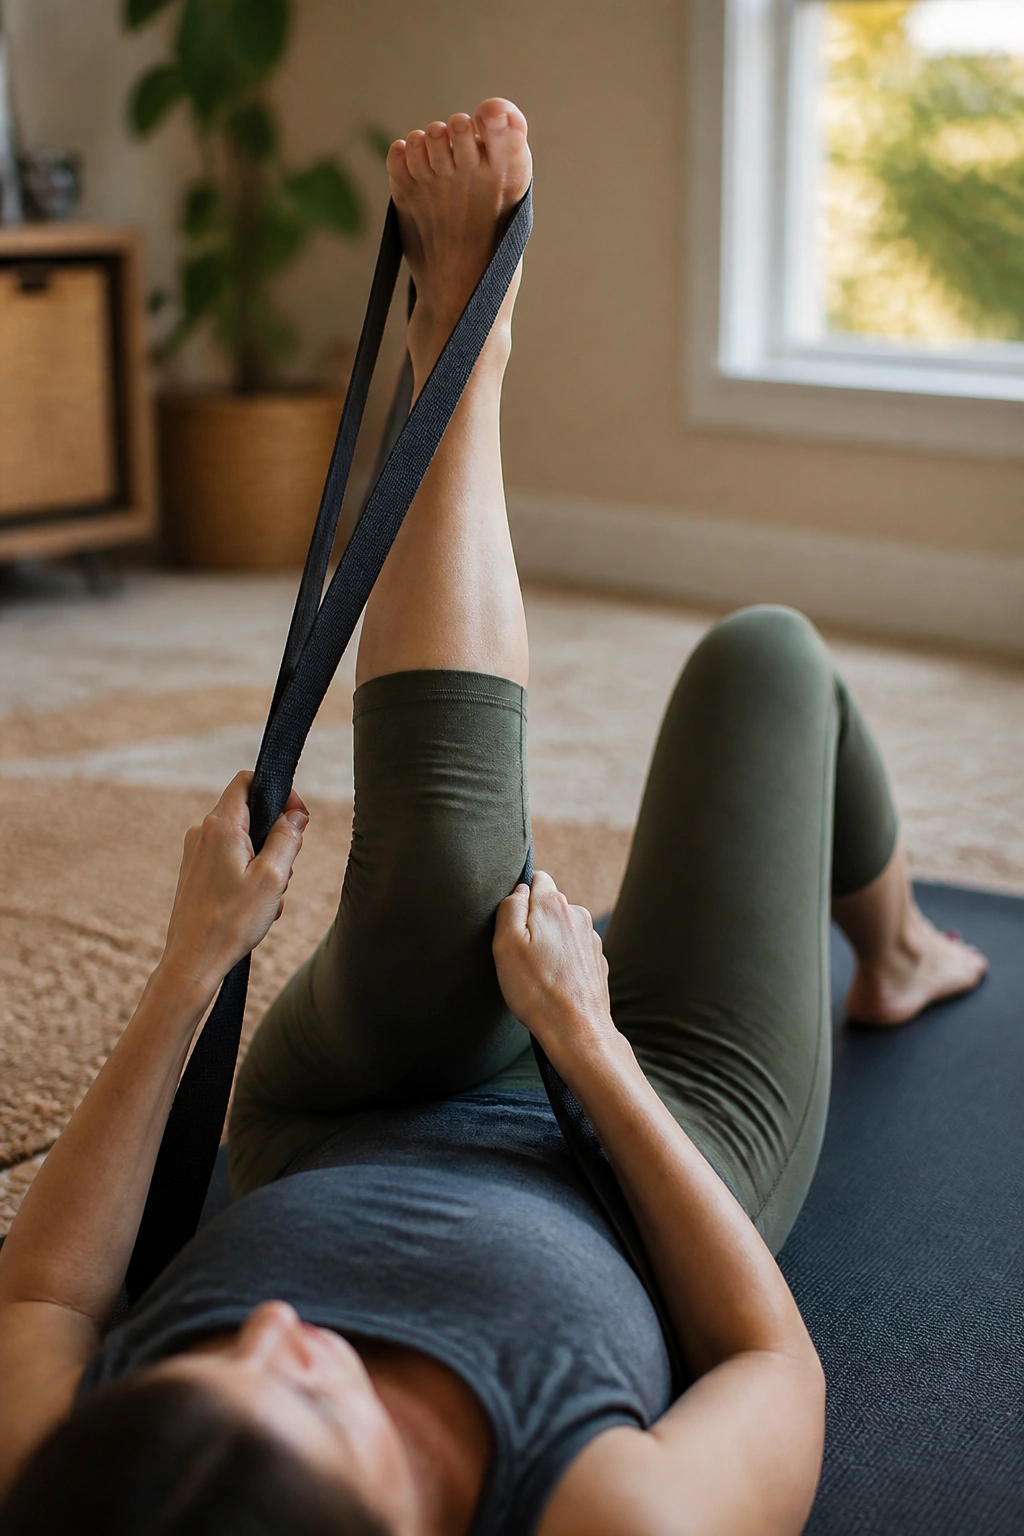
Hamstring stretches get overdone and underdone at the same time. People either force them hard or skip them entirely. A strap makes the job cleaner.
Lie on your back and loop a towel or strap around one foot. Raise the leg until you feel a gentle stretch in the back of the thigh. Keep a soft bend in the knee if needed. Hold for 20 to 30 seconds, then switch. Two to three rounds per side is plenty.
The big mistake here is rounding the low back to chase the leg upward. Don’t do that. If the back starts to curl, lower the leg a little. You want the stretch in the hamstring, not a tug at the spine.
A useful cue: keep the toes relaxed. People often point hard, tense the foot, and wonder why the back starts talking back. Relaxed foot, steady breath, small adjustment. Much better.
This stretch can feel especially nice after walking or after a workout that left the back and legs stiff together. It’s quiet work. That’s the point.
15. Figure-Four Stretch
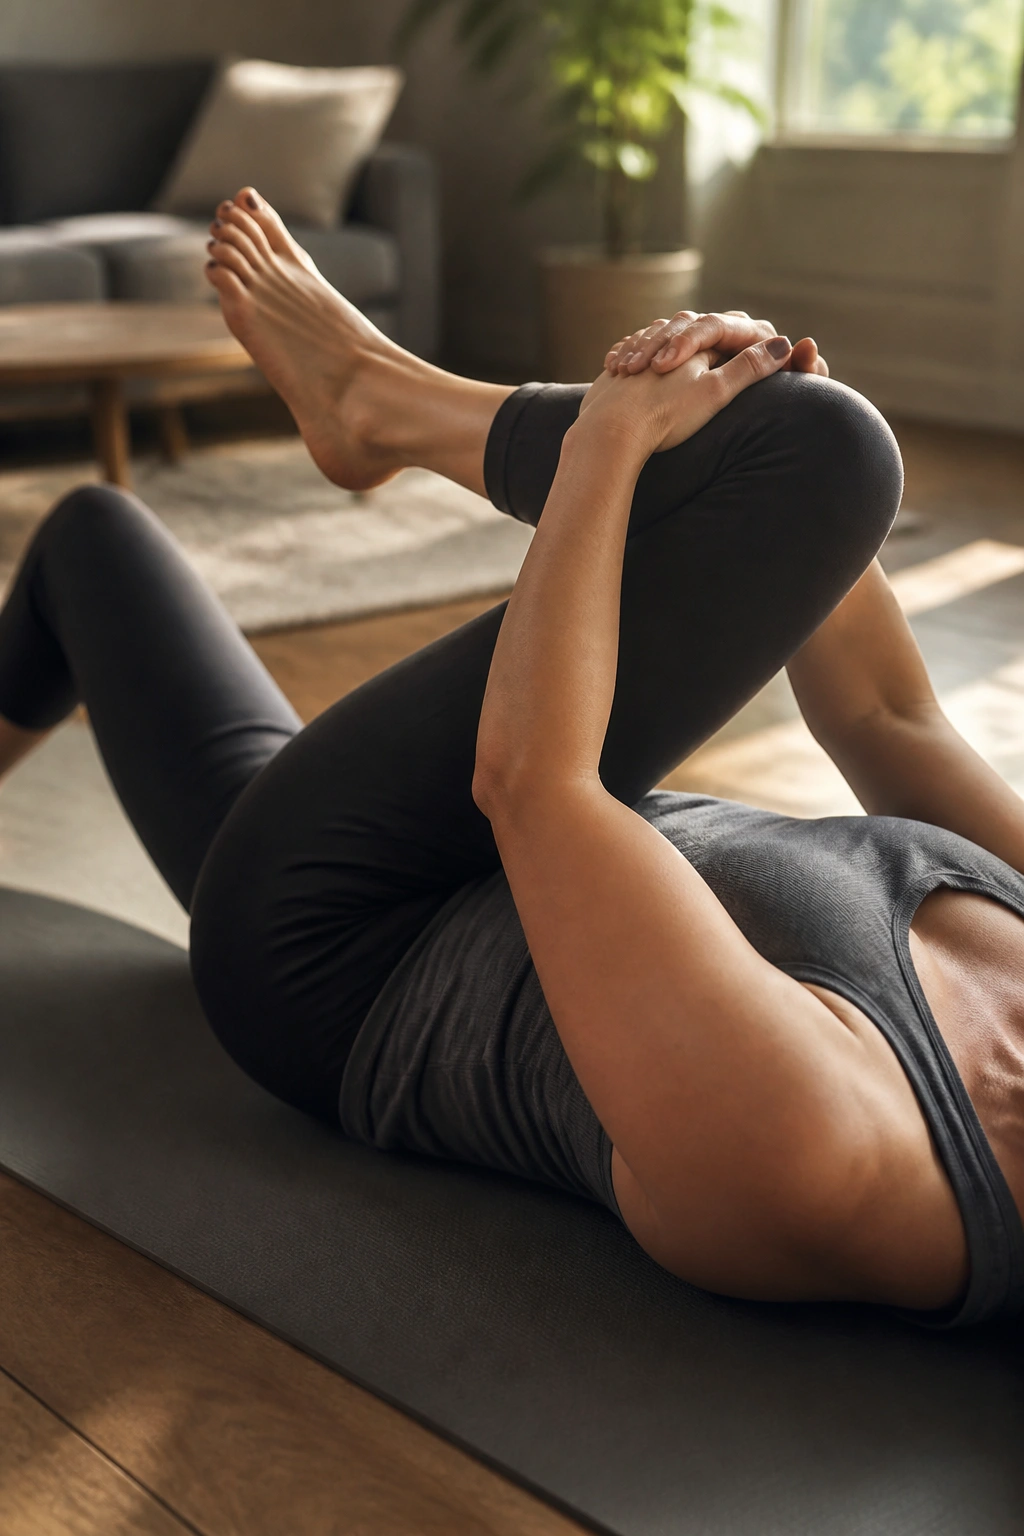
The figure-four stretch is one of the cleanest ways to loosen the outer hip and glute area without getting fancy.
Lie on your back with both knees bent. Cross one ankle over the opposite thigh, then draw the supporting leg toward your chest until you feel a stretch in the butt and outer hip. Hold for 20 to 30 seconds per side. Keep your head and shoulders relaxed.
If you’ve got a tight piriformis or just a grumpy glute area, this can feel like a release valve. If the knee on the crossed leg complains, back off. The stretch should live in the hip, not the joint itself.
I like this one after glute bridges or walking because it complements the stronger work. The bridge asks the hips to fire; the figure-four helps them unwind a bit after. That pairing is neat, and it tends to make the lower back feel less crowded.
16. Sphinx Press-Up
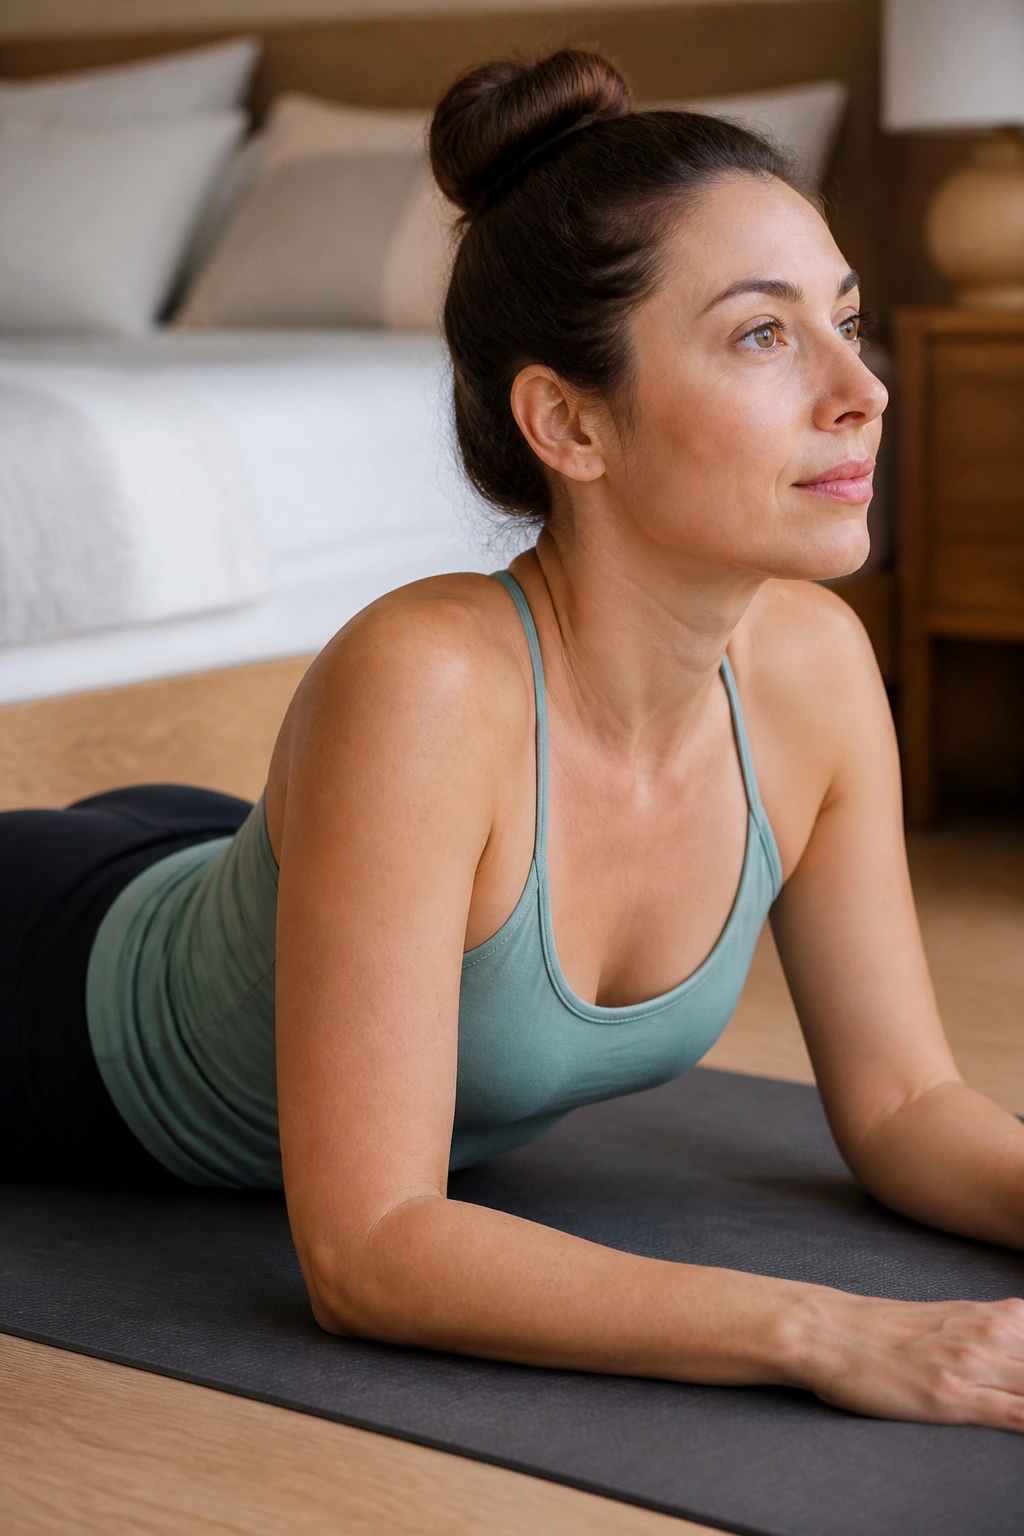
Here’s the contrarian one: sometimes bending backward helps a back that hates bending forward.
Lie face down and prop yourself on your forearms so the chest lifts a little while the pelvis stays on the floor. Hold for 5 to 10 slow breaths, or repeat 5 to 8 gentle press-ups if that feels better. Keep the lower body relaxed. The lift should come from the upper back and the spine’s gentle extension, not a hard shove from the arms.
If your back pain gets worse when you sit or hunch, this can be a useful test. If the discomfort moves closer to the center of the back or feels less sharp after a few reps, that’s a good sign. If pain travels farther down the leg, stop.
Do not force a giant cobra pose. Small press-ups are enough. This is one of those exercises where less can be more, and the difference between a mild relief and a bad flare-up often comes down to a few inches of movement.
17. Thoracic Extension Over a Rolled Towel
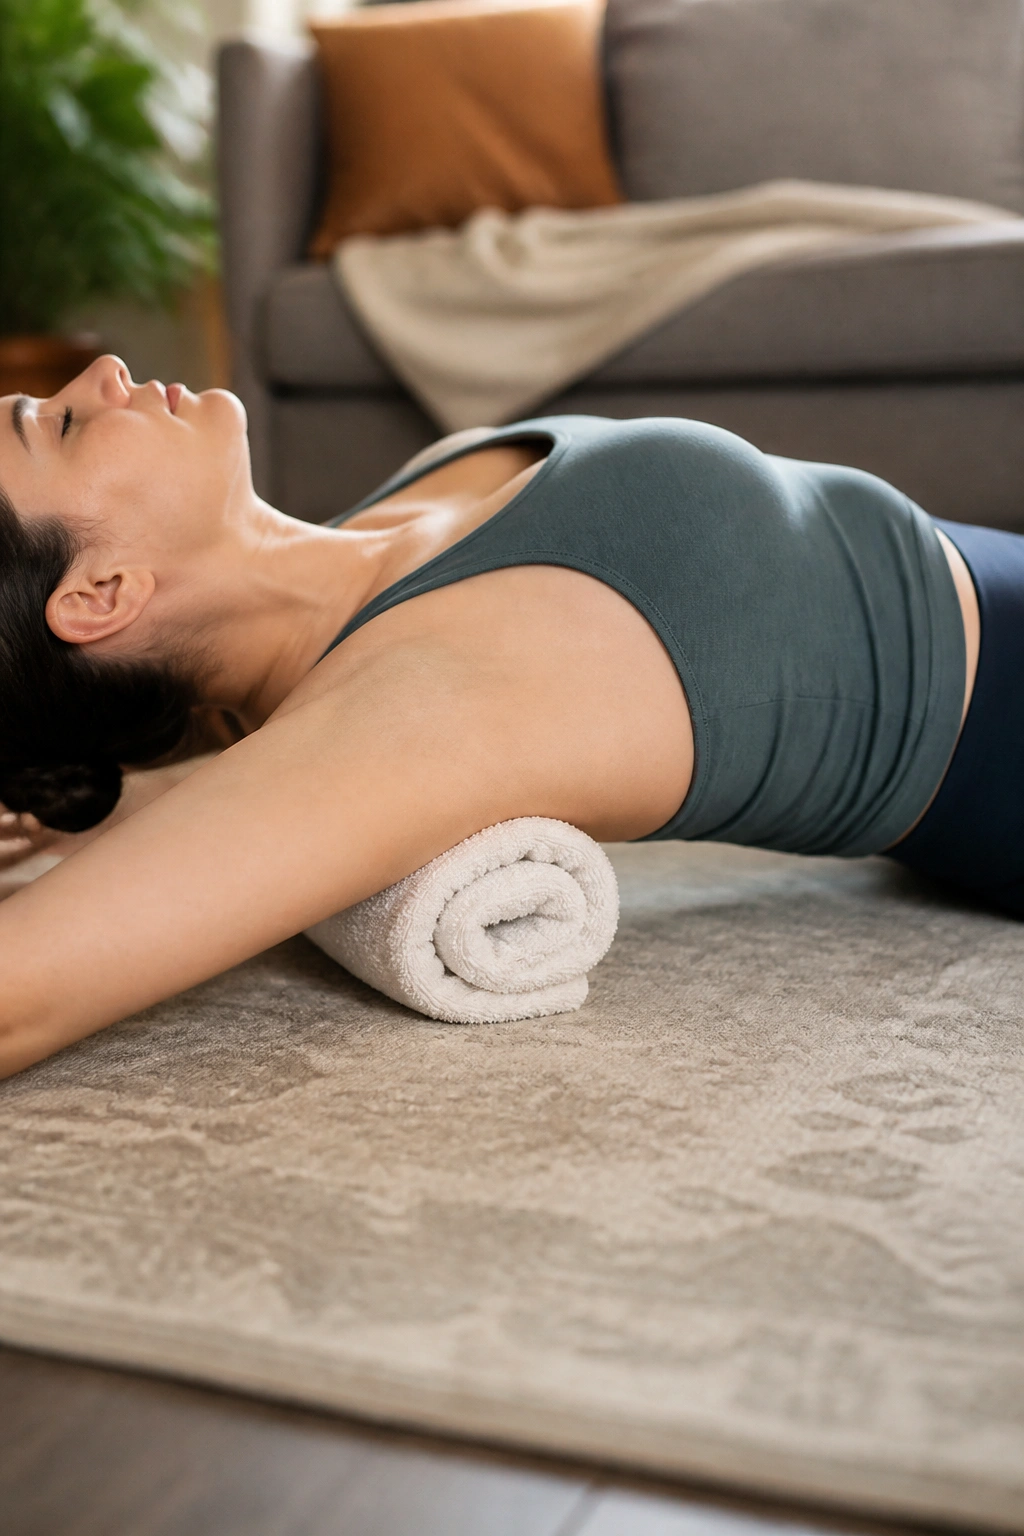
A stiff upper back can make the lower back pick up slack. That’s not glamorous, but it’s common.
Roll a towel into a firm tube and place it across the upper back while lying on the floor, not under the low back. Support the head with your hands or a folded towel if needed. Let the chest open gently over the towel and take 5 to 8 slow breaths. Move the towel up or down a few inches to find a comfortable spot.
Where the Towel Belongs
- Across the mid-back, not the waist.
- Under a place that feels tight, not painful.
- With the ribs softened, not flared.
- For a short hold, not a marathon.
This is a small thing with a good payoff. If your upper back barely moves, the low back often takes too much twisting and arching during daily life or training. Giving the thoracic spine a little motion can make the whole chain feel easier.
If lying on the towel feels too firm, use a thinner roll or a blanket. The pressure should feel like a mild opening, not a bruise.
18. Wall Angels
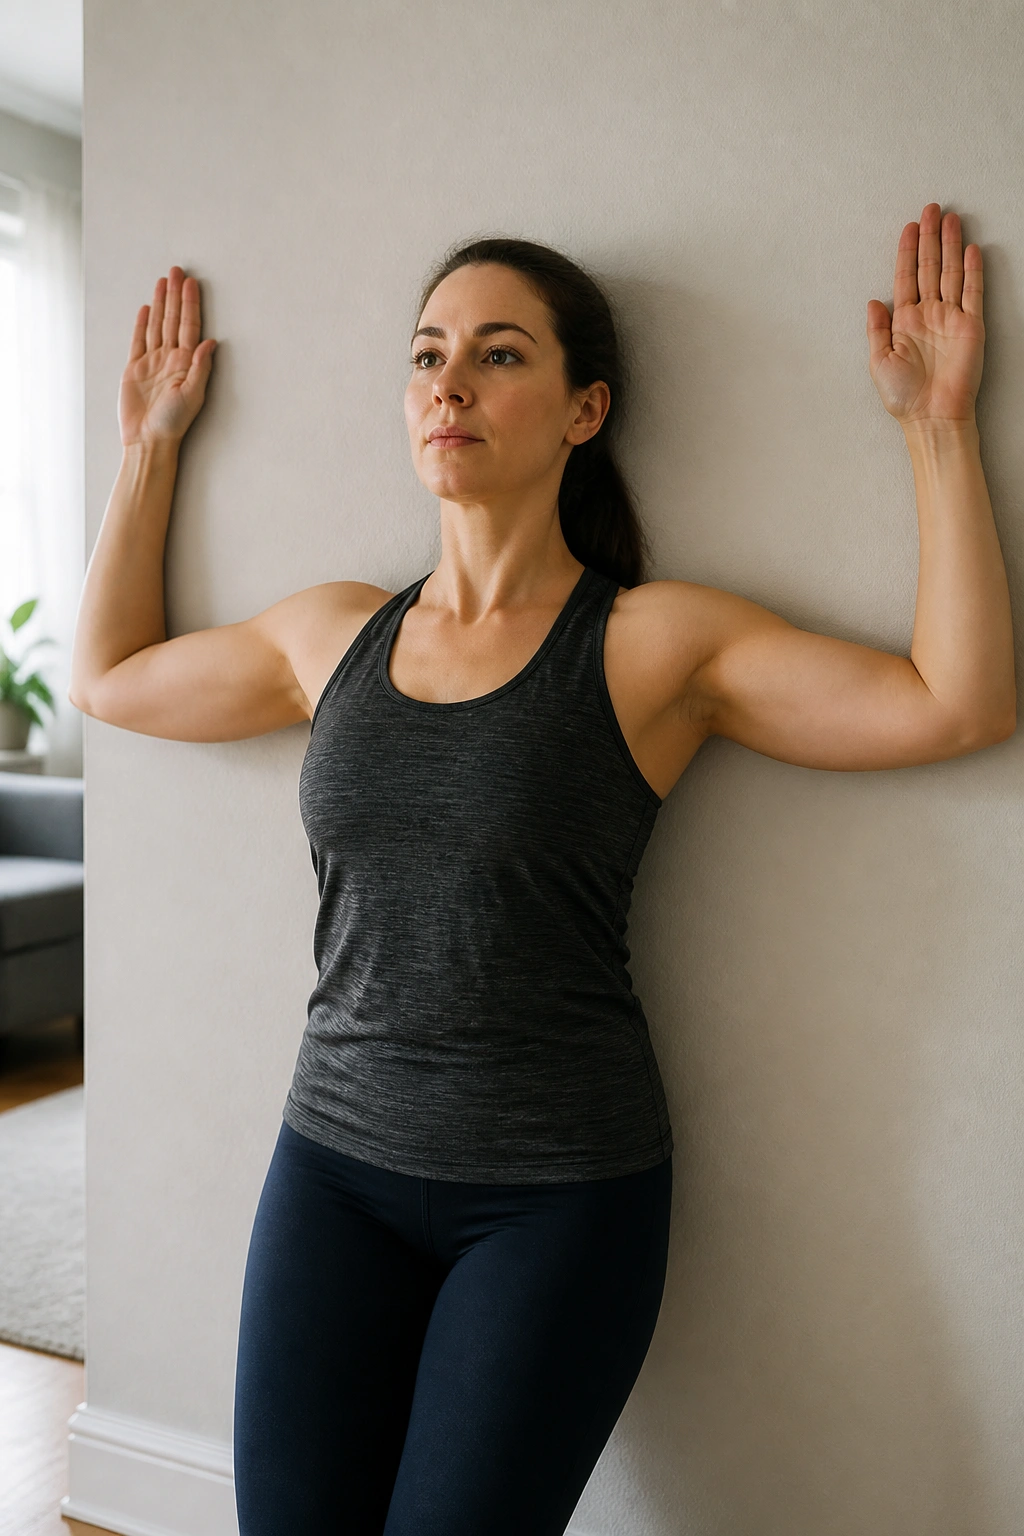
Wall angels are sneaky posture work. They help the upper back and shoulders move in a way that takes pressure off the low back’s compensating habits.
Stand with your back against a wall, feet about 6 to 8 inches forward, and keep the ribs stacked over the pelvis. Raise the arms into a goalpost position, then slowly slide them up and down the wall. Six to 10 smooth reps is enough.
If your lower ribs pop out, reset. If your chin juts forward, tuck it slightly. If the hands can’t touch the wall the whole time, that’s fine. Don’t fake it by arching the back. That defeats the point.
I like wall angels because they clean up the space between rib cage, shoulders, and pelvis. A back that’s always fighting for position often feels better when the upper body gets less sloppy. It’s not a miracle. It is useful.
This also works well after a workout with a lot of pressing or desk time. The body gets stuck in flexion and rounded shoulders more often than people admit.
19. Sit-to-Stand with a Hip Hinge
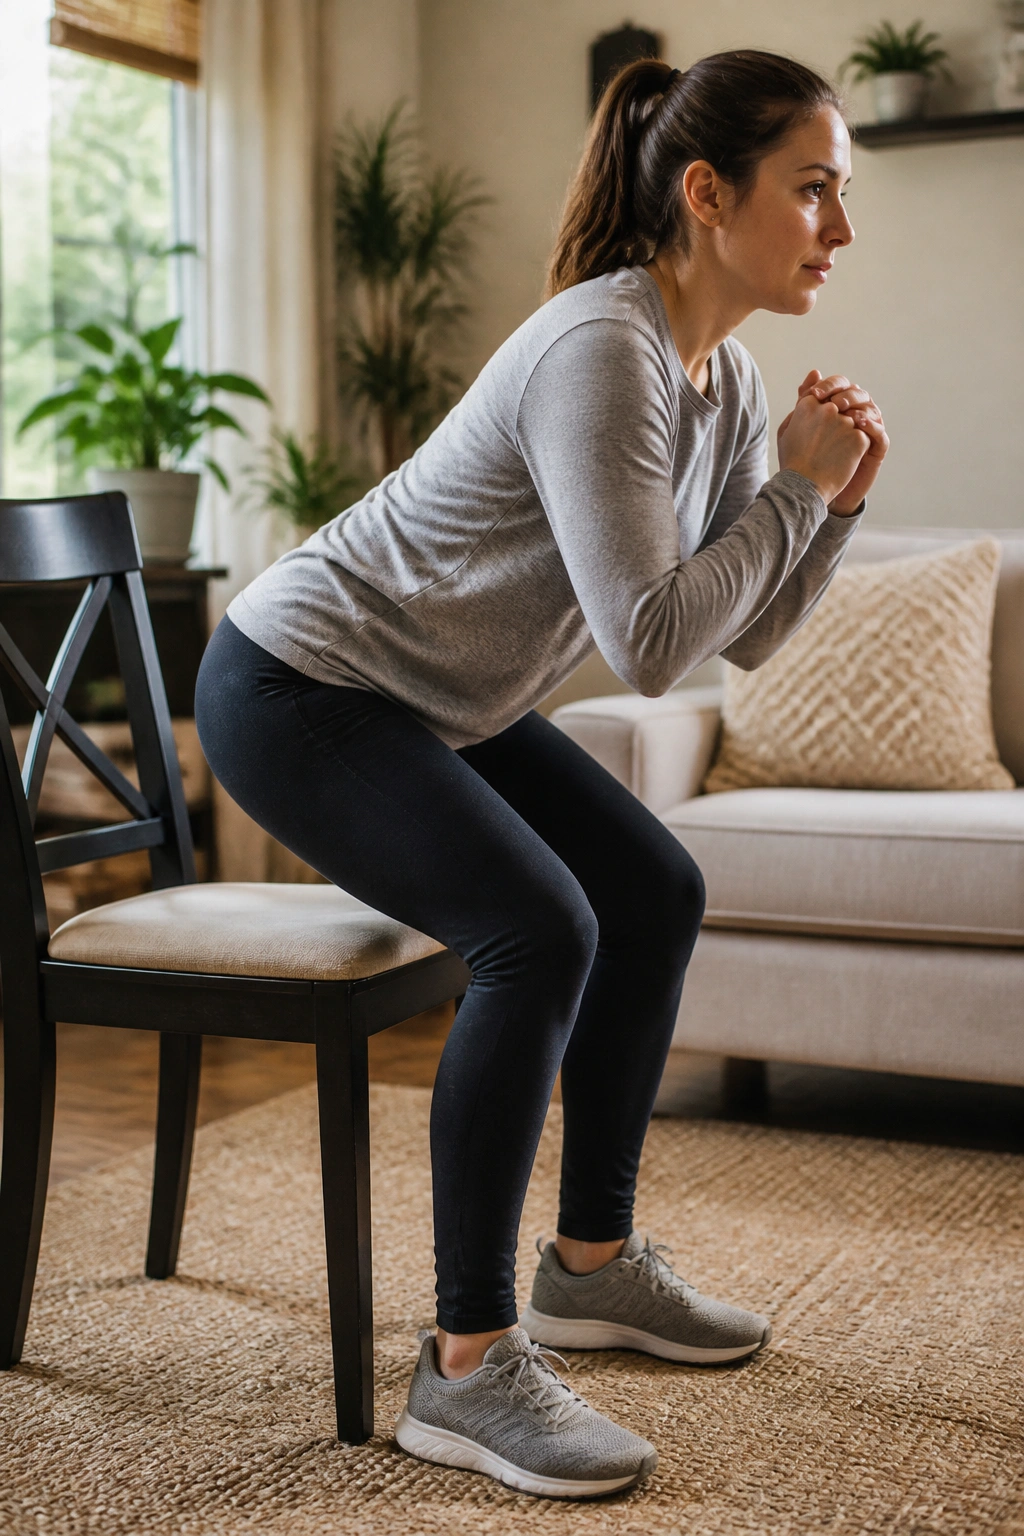
This is one of the most practical exercises on the list. It trains the exact pattern most backs want you to use in real life: getting up without folding like a lawn chair.
Sit on a firm chair with your feet flat and about hip-width apart. Lean your torso forward from the hips, press through the feet, and stand up without jerking your back. Lower back to the chair under control. Eight to 10 reps is a good start.
Form Checks That Matter
- Shins stay mostly vertical.
- Chest stays long, not rounded.
- Weight moves through the whole foot.
- The butt does most of the work.
If you want to make it easier, use a slightly higher chair or push lightly on the armrests. If it feels easy, hold a small weight close to your chest. But keep the move clean. A sloppy sit-to-stand teaches sloppiness, and your back will collect the bill.
This is the bridge from floor rehab to real life. If you can stand up well, you can usually pick things up better too.
20. Walking Intervals Around the House or Block

Walking may be the most underrated back exercise in the whole bunch. It’s not flashy. It works.
Start with 3 to 5 minutes of easy walking around the house, down the hallway, or outside if that feels fine. Repeat that 3 to 6 times across the day, or build up to a single 10- to 20-minute walk. Keep the steps smooth, the arms loose, and the ribs stacked over the pelvis.
If sitting makes your back stiff, walking is often the cleanest reset. If standing still hurts, walking can still be kinder because it keeps blood moving and stops the spine from locking into one shape. Pace matters less than consistency. Short and frequent beats one heroic walk that leaves you sore.
I like this as the final piece because it turns the whole routine into something you can actually live with. The floor drills calm things down. The strength drills help the back trust movement again. Walking is where that work gets used. And that’s the part people feel in real life — when they can stand, shop, cook, or train without thinking about their back every thirty seconds.
