



Most people treat core training like a relentless chore. You lie on a yoga mat, grind out fifty crunches, stare at the ceiling, and wonder why, after weeks of effort, your midsection looks exactly the same. The problem isn’t your work ethic. The problem is usually the toolset. Traditional crunches and sit-ups rely on gravity, which is fine for beginners but quickly plateaus as your muscles adapt to the load. Resistance bands offer something gravity simply cannot: constant, progressive tension throughout the entire range of motion.
When you use a band, your core muscles—specifically the deep stabilizers like the transverse abdominis—have to fire not just to lift, but to fight the pull of the elastic. This is the difference between going through the motions and actually forcing your muscle fibers to contract against resistance. You aren’t just moving your body weight; you are creating a reactive environment that forces your midsection to lock down and stabilize.
You might have heard that bands are for recovery or rehab, but that is a narrow view. When anchored properly or held with tension, a simple latex tube becomes a piece of heavy-duty equipment. It doesn’t put stress on your neck or lower back like a heavy plate might, and it provides a “snap-back” force that recruits more muscle fibers than a static weight ever could. The following exercises are designed to target the entire core—upper abs, lower abs, and obliques—using only your body and a few loops or tube bands. Forget the crunches. It is time to add some actual tension to the mix.
1. The Banded Pallof Press
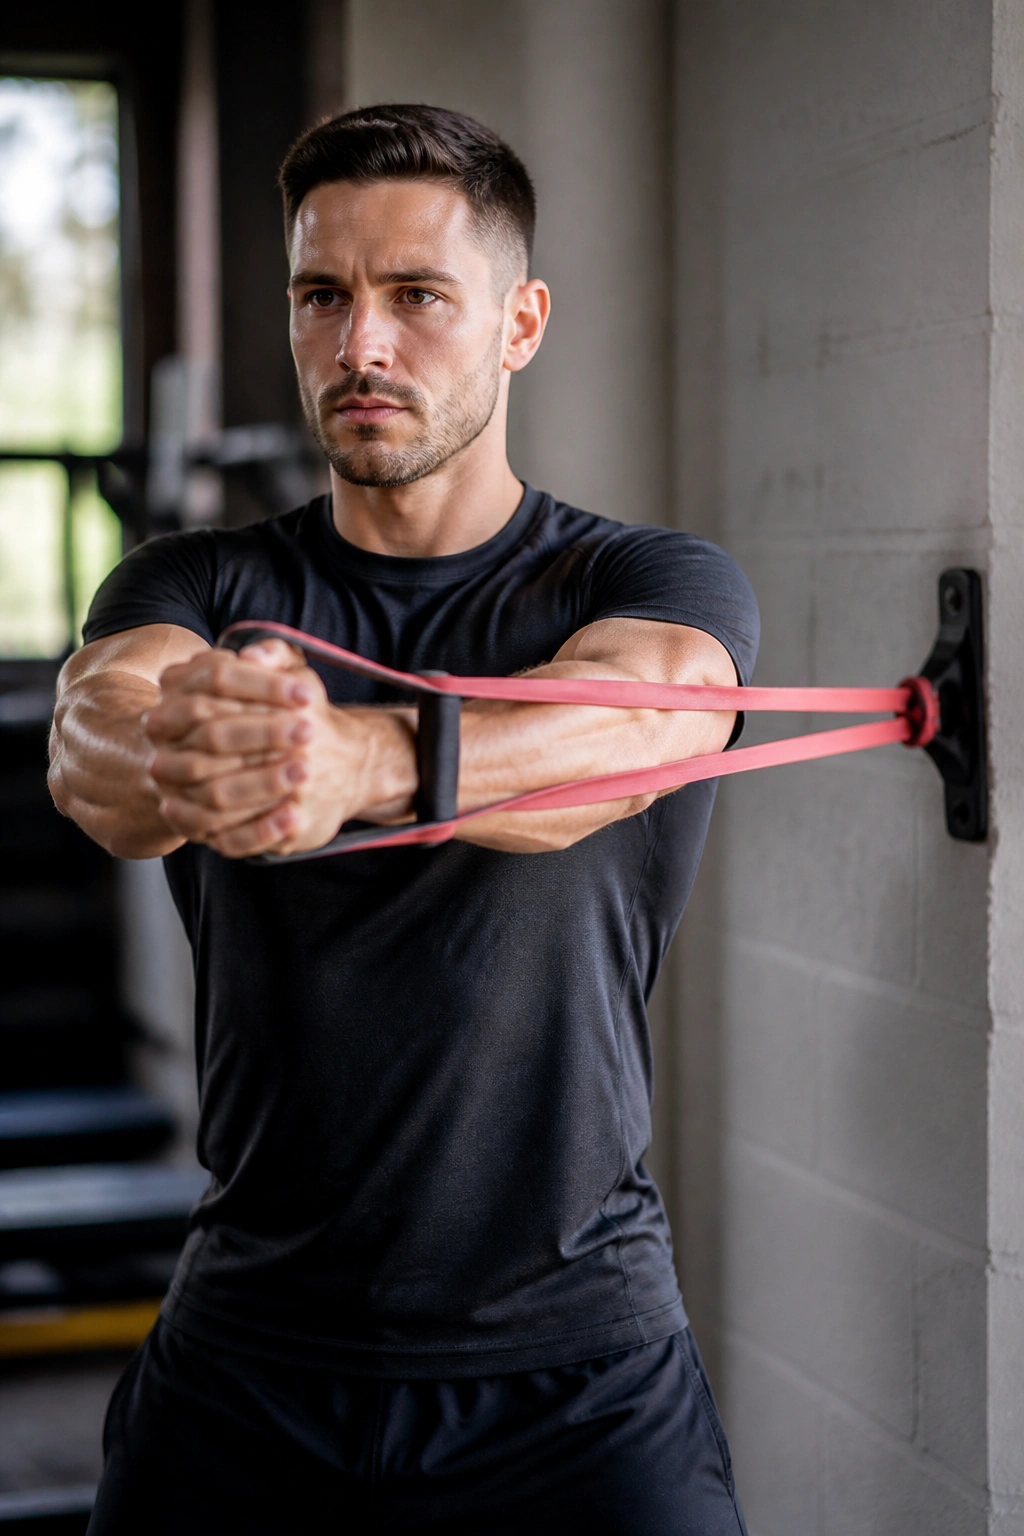
This is the king of anti-rotation. If you want a tighter waistline, you have to train your core to resist twisting, not just to crunch forward. You start by anchoring a resistance band at chest height. Step away from the anchor point so there is tension in the band, stand with your feet shoulder-width apart, and hold the band handle with both hands at your sternum.
Why It Works for Stability
Your objective here is to press the band straight out in front of you without letting your torso twist or your shoulders rotate toward the anchor. The band wants to pull you sideways, and your job is to keep your core rigid and unmoved. It forces the deep muscles of the trunk to fire instantaneously to maintain your position.
Pro Technique Tip
Never rush the press. Take three full seconds to push your hands out, hold for one second, and then take three seconds to bring them back. The slower you move, the harder your obliques have to fight to keep you centered. Focus on breathing through your nose while keeping your ribcage locked down.
2. Standing Banded Woodchops

Most abdominal exercises are sagittal, meaning they involve moving forward and backward. Real-world movement, however, is rotational. The woodchop replicates the motion of swinging a bat or throwing an object, which targets your obliques—the muscles responsible for that defined, “cinched” look around your waist.
Setting Up the Movement
Anchor your band high, perhaps at a door handle or a sturdy post. Stand with your side facing the anchor. Grab the handle with both hands, arms straight but not locked. Pull the band down and across your body in a diagonal chopping motion, rotating from your core while keeping your hips relatively stable. Return to the starting position with control.
Why This Matters for Your Midsection
Rotational work often gets ignored in standard ab routines. By training your obliques to handle resistance in a diagonal plane, you improve functional strength and core definition. Keep your glutes squeezed tight throughout the set to ensure the rotation comes from your thoracic spine and midsection, not your lower back.
3. Banded Dead Bug
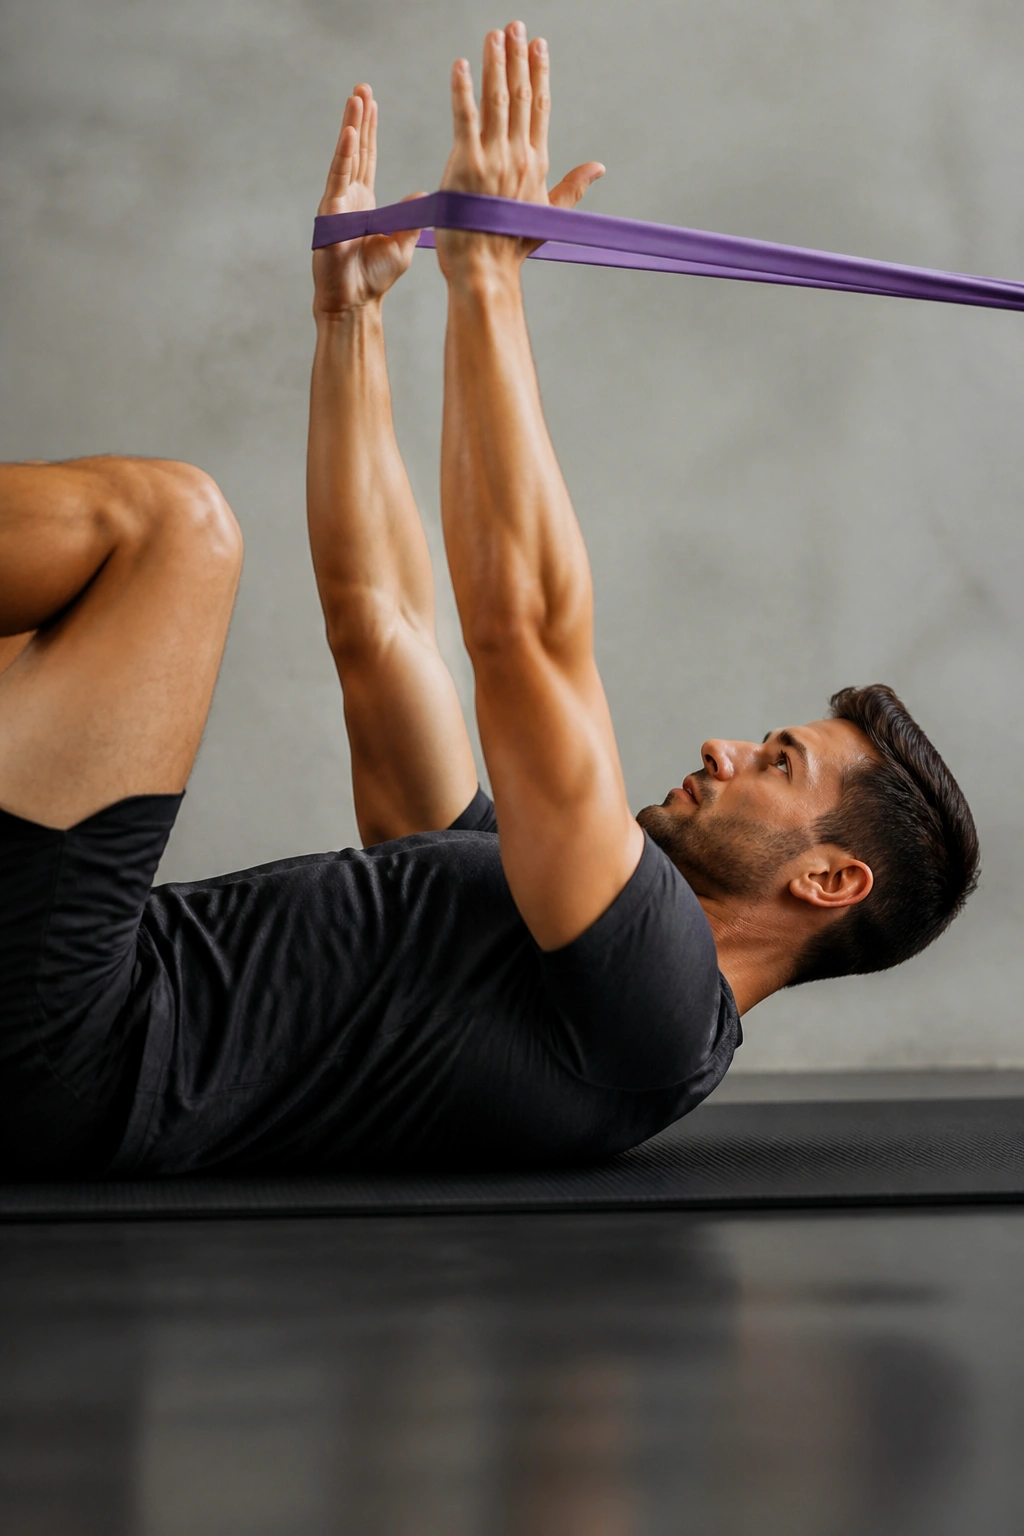
The dead bug is the ultimate test of lower back control. Adding a band turns a standard, bodyweight movement into a high-tension core drill. Lie on your back, anchor a band behind your head, and grab the handles with your arms extended toward the ceiling. Keep your lower back pressed firmly into the floor.
The Mechanics of the Move
With your arms extended holding the band, pull down slightly to create tension in your lats. Now, lift your legs into a tabletop position. Slowly lower one leg at a time toward the floor while keeping your arms static and fighting the pull of the band. If your lower back arches off the mat, you have lost the engagement.
Common Mistakes to Avoid
Do not let your shoulders creep toward your ears as you fatigue. Keep your shoulder blades pinned to the floor. The band is there to force your core to compensate for the instability created by the moving limbs. If you find your back popping up, your band tension might be too high; slide closer to the anchor point to reduce the pull.
4. Banded Bicycle Crunches
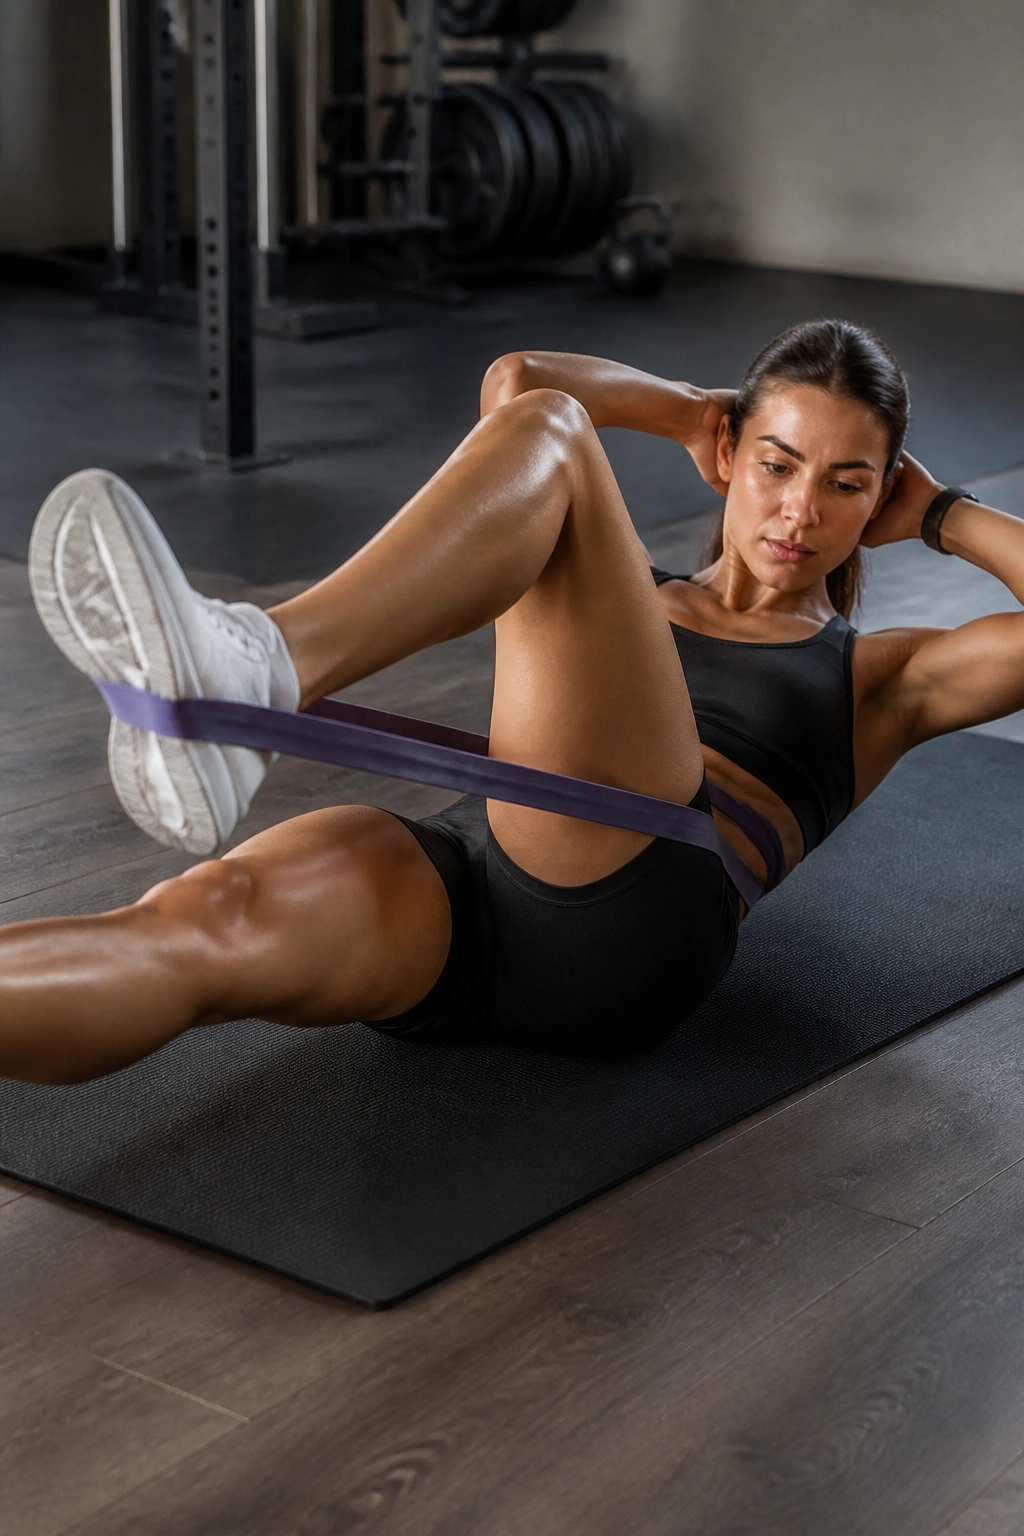
You have likely done bicycle crunches before, but have you ever tried them with a band hooked around your feet? It changes the sensation entirely. You need a looped band for this. Place the loop around the soles of both feet. Lie on your back, hands behind your head, and start the pedaling motion.
Feeling the Resistance
As you extend one leg, you have to push against the band’s resistance. As you bring the other knee in, you are working against the retraction force. This creates an intense burn in the lower abs and hip flexors. It is much harder than a standard crunch because the band prevents your legs from simply swinging through the air.
How to Maximize the Burn
Keep your shoulder blades off the ground for the entire set. Don’t let your upper back touch the floor. By keeping your torso in a constant state of flexion, you maximize the time under tension. If you feel this in your lower back, lift your legs higher toward the ceiling rather than pointing them straight out.
5. Banded Leg Raises
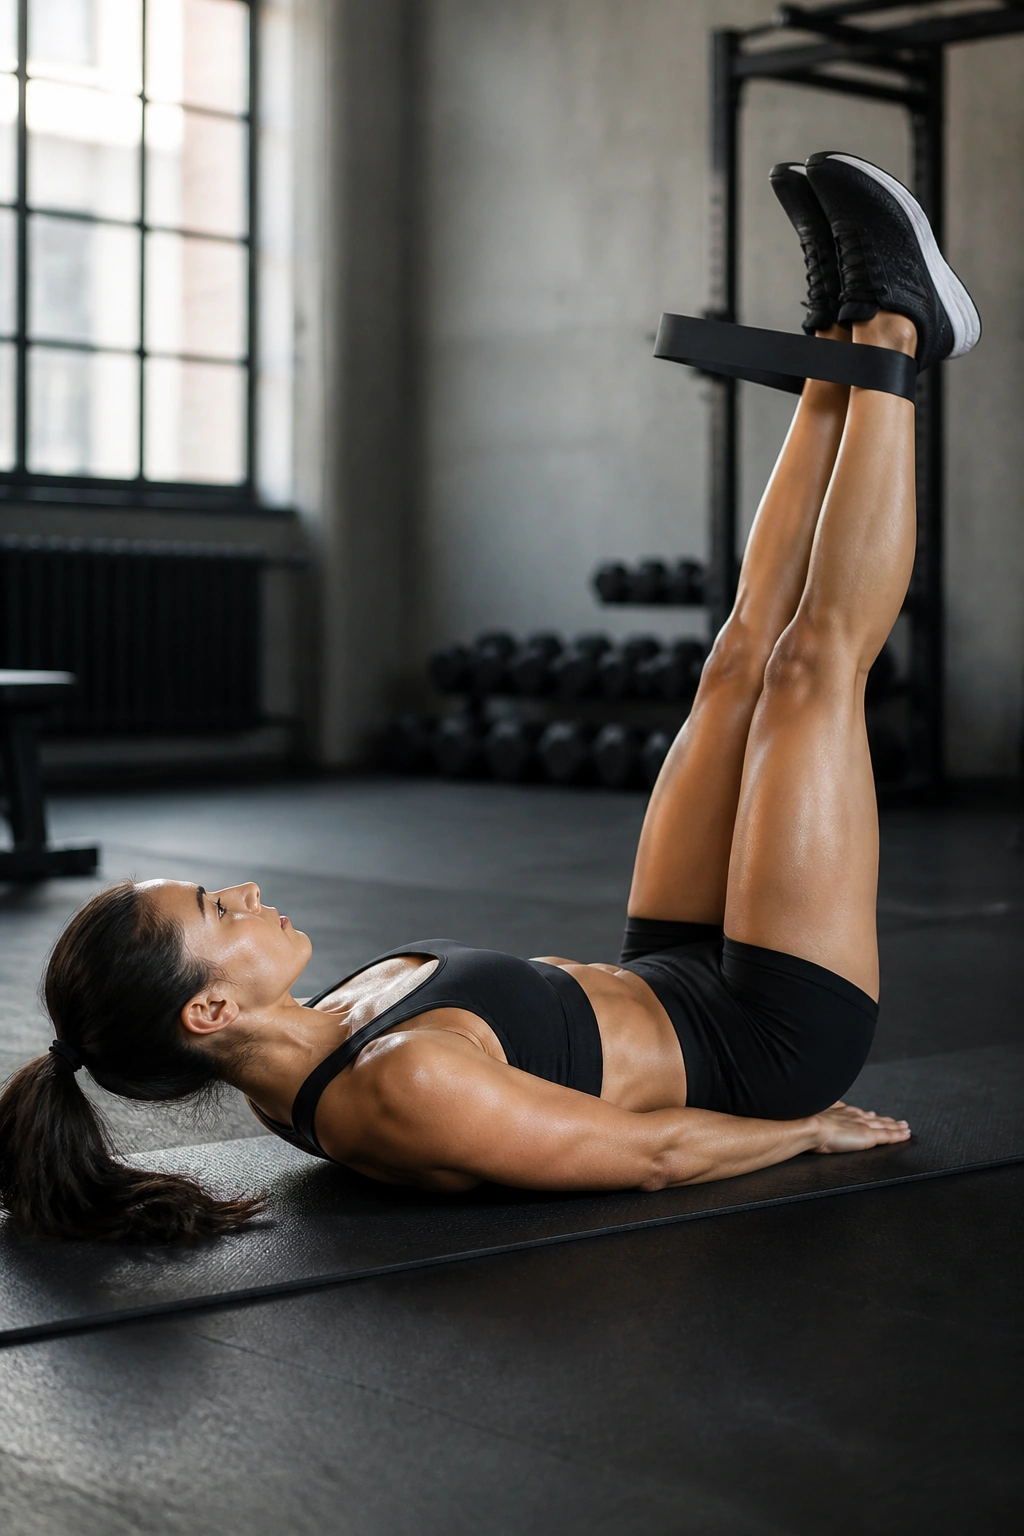
Lower abs are notoriously difficult to target because they are often overpowered by the stronger muscles of the hips and thighs. A resistance band can help isolate them by forcing you to work through the entire range of motion without momentum. Loop a band around your ankles and lie on your back.
The Controlled Descent
Place your hands under your hips for support. Lift your legs until they are perpendicular to the floor. Slowly lower your legs back down toward the mat, fighting the resistance of the band that wants to snap your legs together or pull them back to center. The secret is the negative phase.
Why Tempo Matters Here
Do not let gravity drop your legs. Control the descent for four full seconds. The resistance band will make your lower abs scream as they struggle to control the weight of your legs while fighting the elastic pull. This is one of the most effective ways to build strength in the lower core.
6. Banded Plank Pull-Throughs
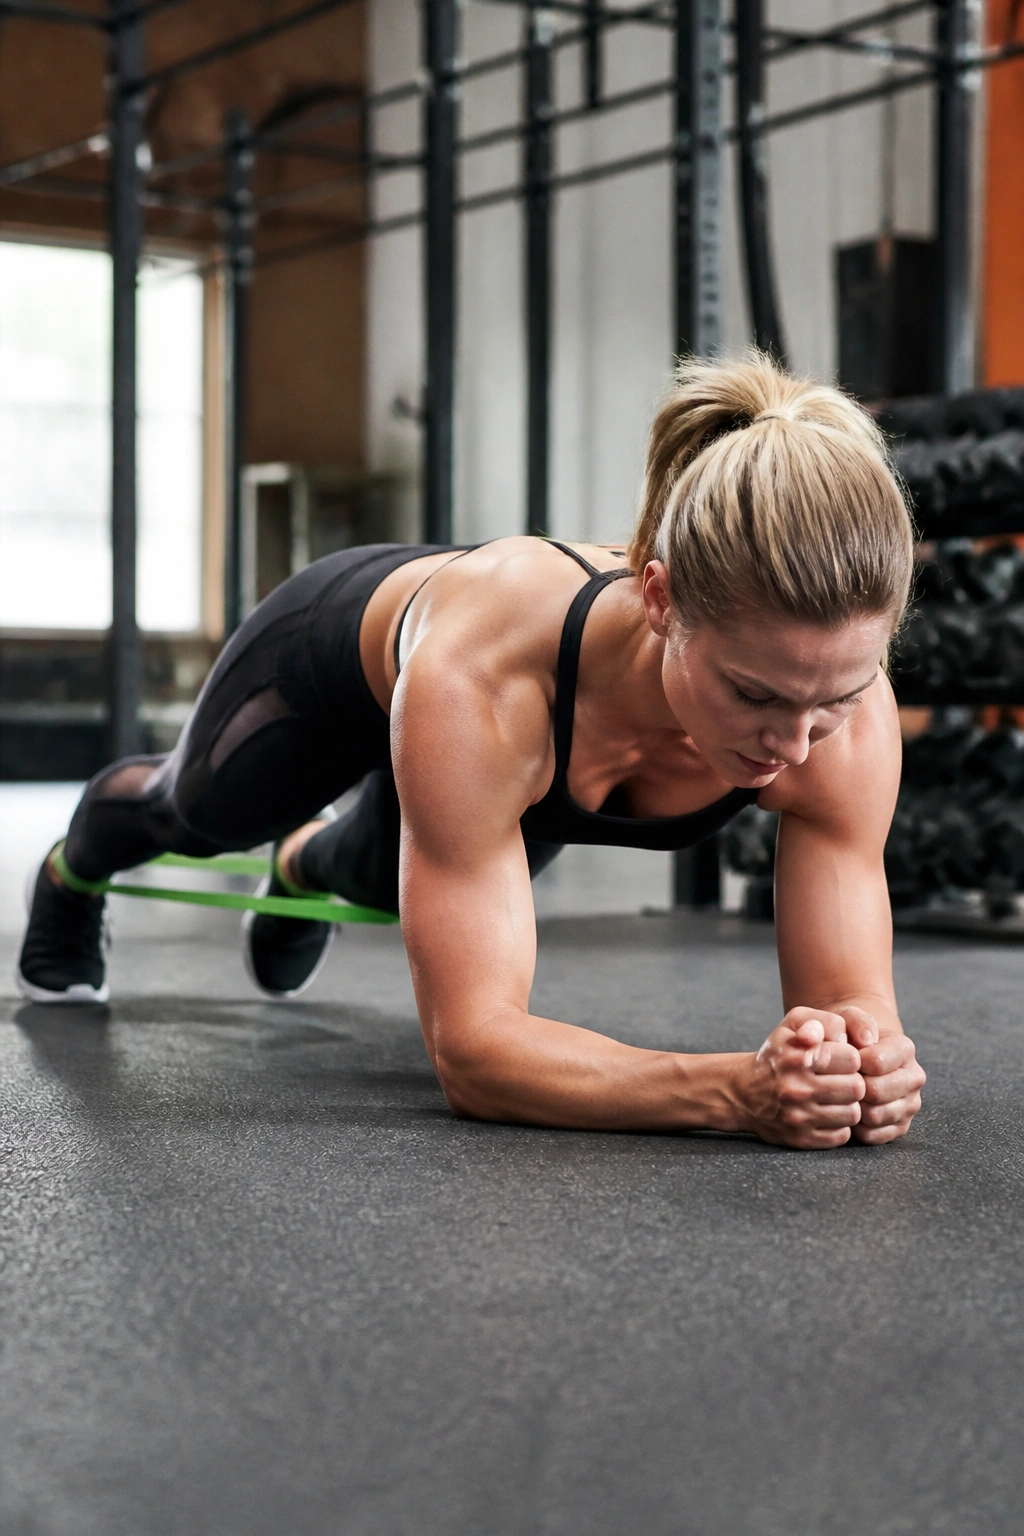
Planks are boring if you just hold them. Make them dynamic. Get into a standard plank position with a resistance band looped around your ankles. Now, perform a mountain climber motion with one leg, pulling your knee toward your chest against the resistance of the band, then return it slowly.
Creating Stability
The goal is to move the leg without rocking your hips. If your hips are swaying back and forth, you are missing the point. Your torso needs to stay rock-solid, like a statue. The band provides enough tension to make every single rep count, turning a simple plank into an active abdominal challenge.
Why This Beats a Standard Plank
Standard planks rely on endurance. Banded planks rely on force production. By adding the band, you force the abdominal wall to work significantly harder to keep your spine straight. You will feel this in your entire core, not just your hip flexors. If your lower back hurts, tighten your glutes even harder.
7. Banded Mountain Climbers
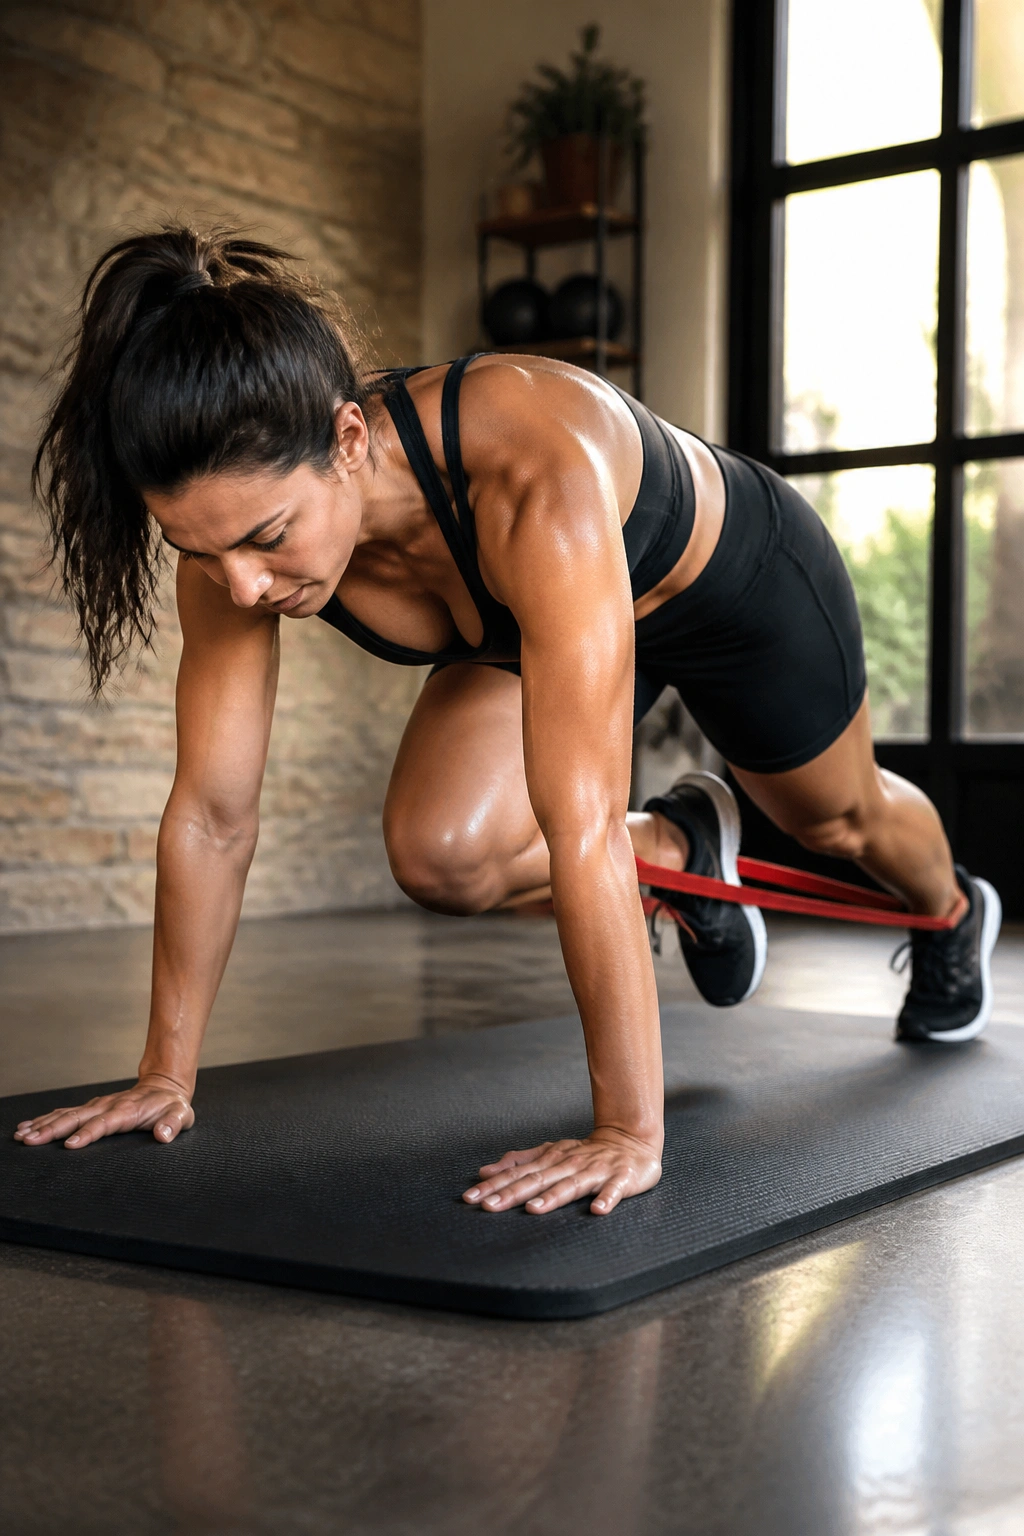
We are taking the classic cardio move and making it a focused core exercise. Secure a resistance band around your feet. Get into a push-up position. Drive your knees toward your chest, one at a time, fighting the tension of the band as you pull your knee forward.
The Tempo Factor
Most people do mountain climbers as fast as they can. Do the opposite. Slow down. Use a 2-second count for the drive and a 2-second count for the return. The band will constantly pull your legs back together, forcing your obliques to stabilize your pelvis as you move.
What to Watch For
Your hands should be directly under your shoulders. Keep your head in a neutral position—don’t look at your feet. Looking down often makes your back round. Keep your gaze about six inches in front of your hands to maintain a flat, strong spine. This alignment is critical for core engagement.
8. Standing Banded Side Bends
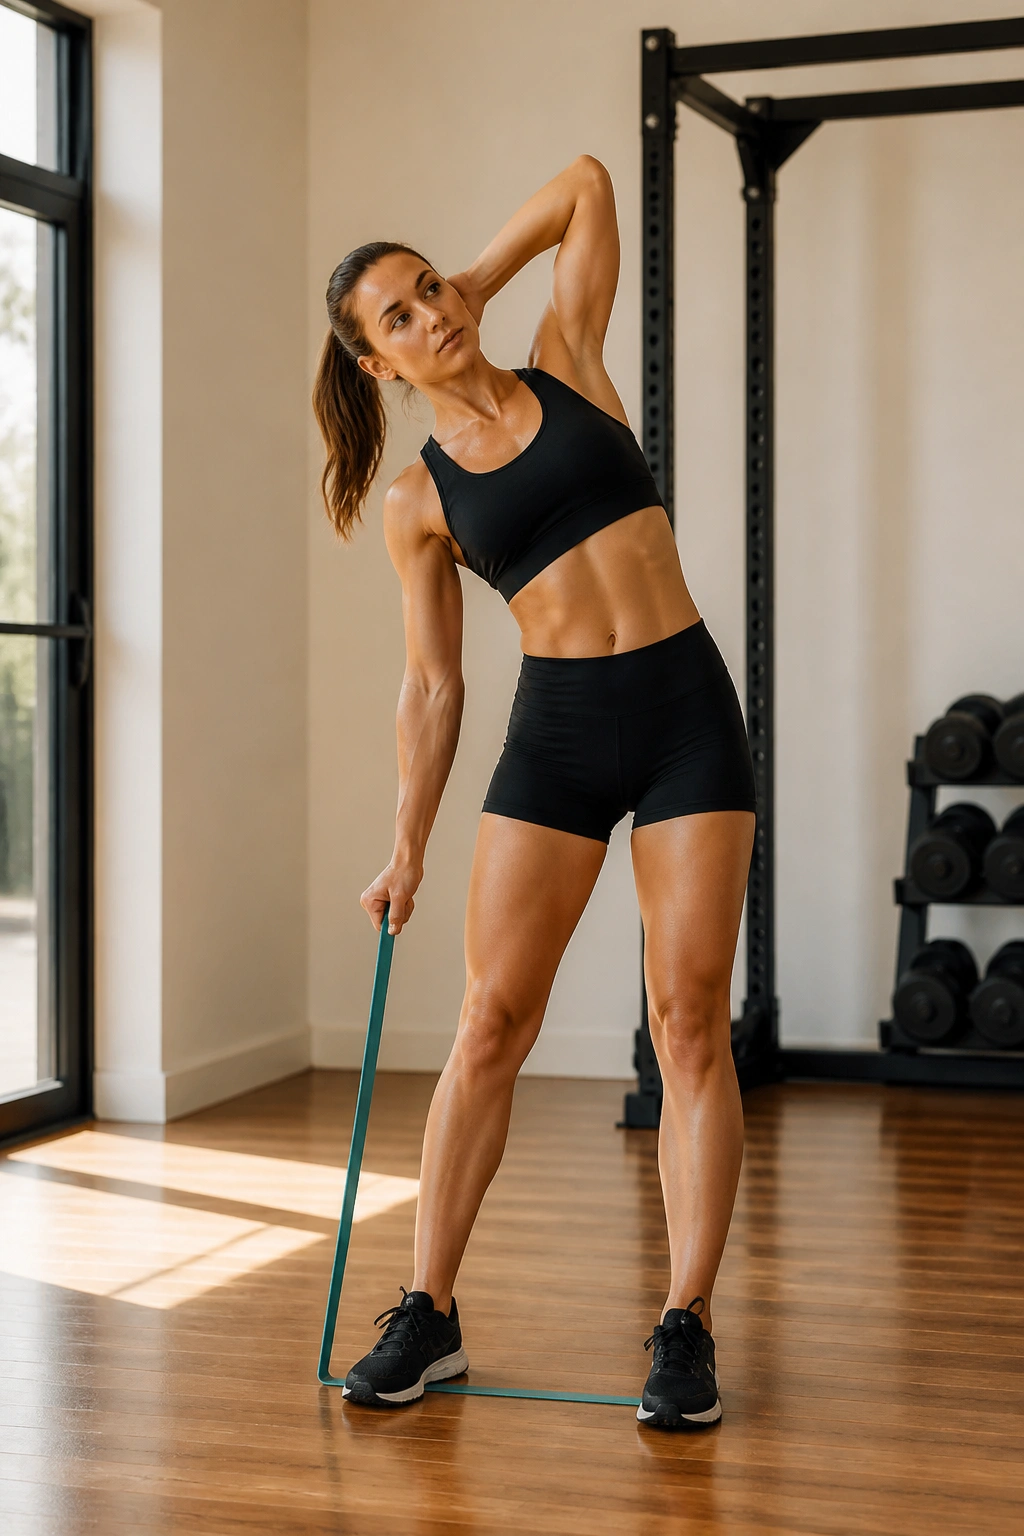
When people talk about trimming the waist, they often mean tightening the obliques. Side bends are the most direct way to do this. Stand on the middle of a resistance band with your feet hip-width apart. Hold one end of the band in your right hand, arm hanging by your side.
The Execution
Keeping your back straight, slide your right hand down toward your knee by bending at your waist—not your hips. You are working against the resistance of the band to pull your torso back upright. Perform all reps on one side before switching to the left.
Why This Is Different
Using a dumbbell for side bends can be awkward. A resistance band, however, provides tension that increases as you stretch it, putting more load on the muscle at the point of greatest contraction. Keep your chest up and your shoulders squared. Do not lean forward; stay perfectly lateral.
9. Banded Boat Pose Hold
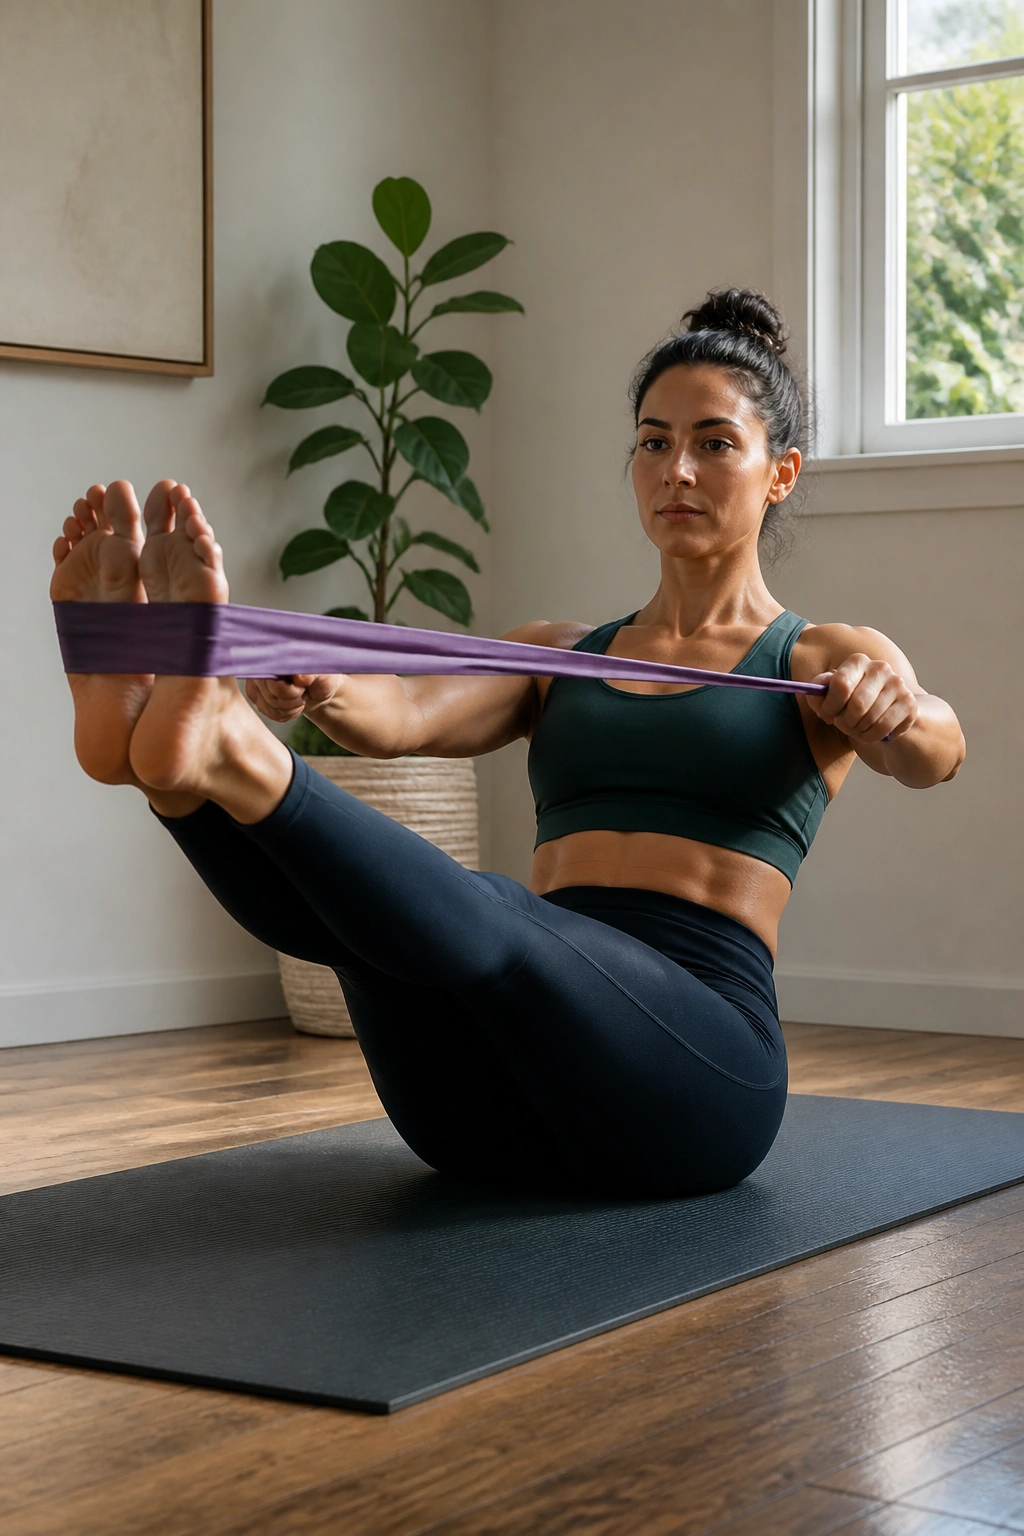
Yoga enthusiasts know the boat pose as a test of core endurance. By adding a band, you turn it into a powerhouse movement. Sit on the floor, loop a band around your feet, and hold the other end with your hands. Lean back, lift your legs, and extend your arms so the band is taut.
Maintaining the V-Shape
Your body should look like a V. Keep your chest lifted. If you hunch your shoulders, you lose the core engagement. The band tension will pull your arms forward, forcing your upper abs to work overtime to keep your torso upright. This is an isometric hold, but the band makes it anything but passive.
Breathing Technique
Many people hold their breath during holds. Do not do that. Short, controlled breaths are necessary. If you can’t breathe, you are likely compensating with your hip flexors. Lower your legs slightly and focus on pulling your belly button toward your spine. That is where the real work happens.
10. Banded Windshield Wipers
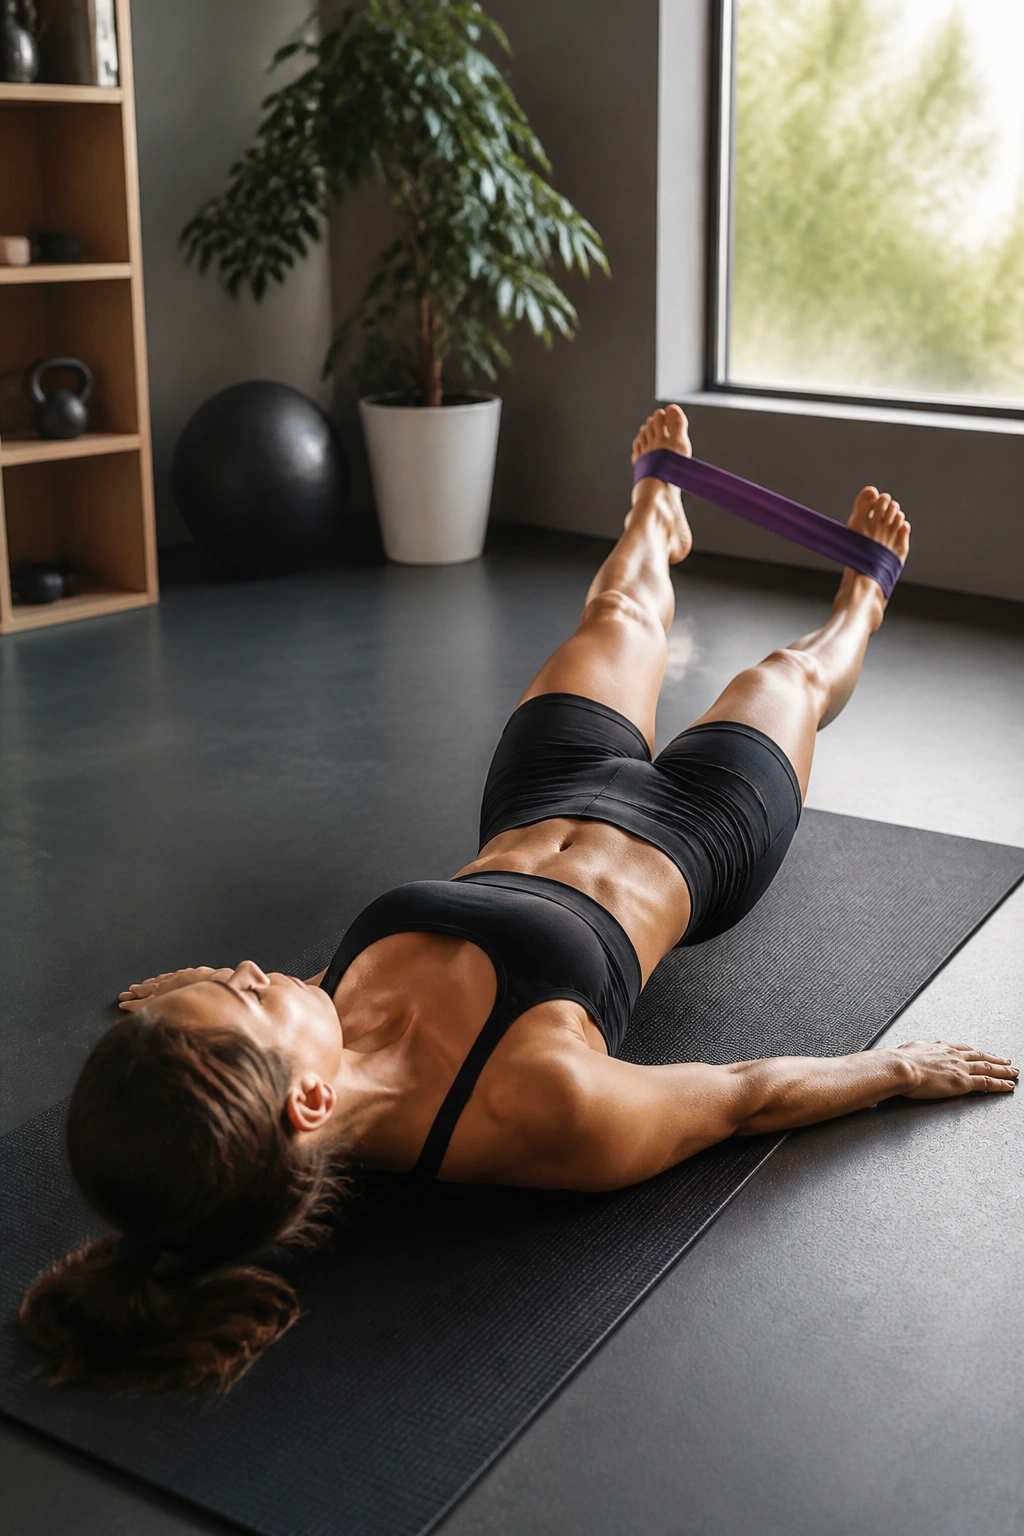
This is an advanced move, so be careful. Lie on your back, arms spread wide for stability. Hold a band taut between your hands, with the center of the band looped around your feet. Keep your legs straight and lift them to the ceiling.
The Rotating Motion
Slowly lower your legs to the right side, keeping them as straight as possible, until they are just hovering above the floor. Pause, then use your oblique strength to swing them back to the center and over to the left side. The band adds resistance to the legs, making the rotational force much higher.
Why It Works
You are training the entire chain of the core—from the upper ribcage down to the pelvic floor. It is an intense exercise that requires significant coordination. If the band feels too heavy, use a lighter resistance. The quality of the movement is far more important than how heavy the band is.
11. Banded Crunch with Overhead Hold
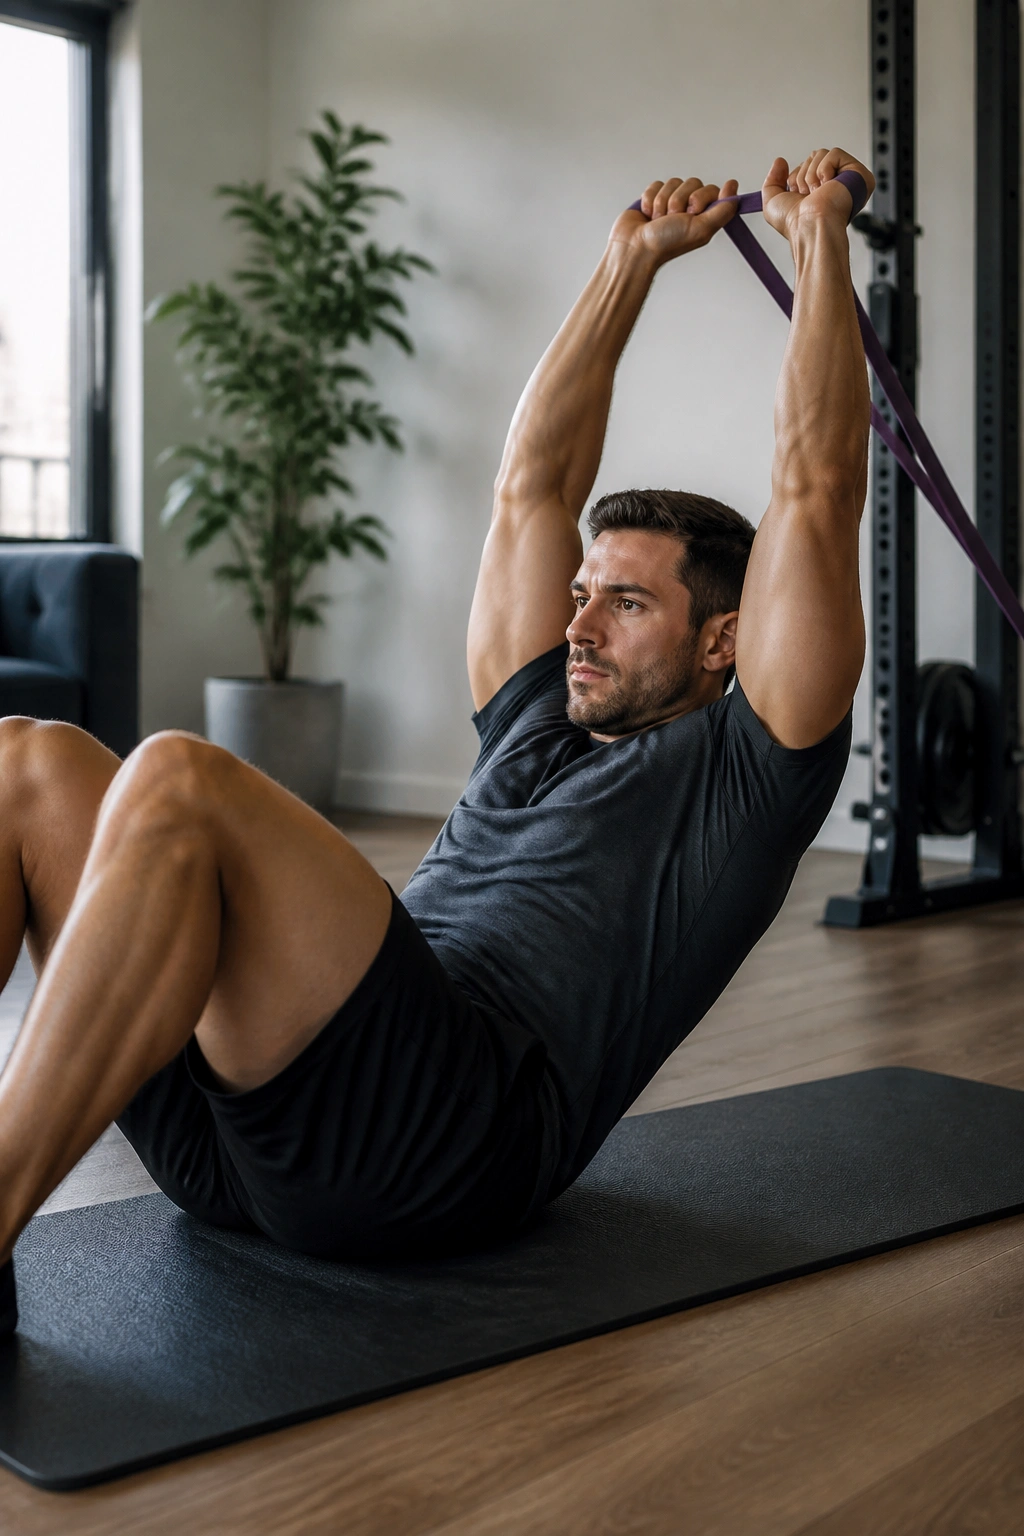
Most people crunch with their hands behind their head, which can lead to neck pulling. Use a band instead. Anchor the band behind you and hold the handles with your arms fully extended overhead. Perform a crunch while holding the band taut.
The Added Resistance
The band acts as a counterweight and an active resistance force. As you crunch up, you are pulling the band forward, which puts your abdominal muscles into a deep, shortened contraction. It is significantly more intense than a standard crunch because of that constant tension.
Keeping Tension Consistent
Do not let the band go slack at the bottom of the movement. Stop your torso just before you hit the mat so your abs remain under tension the entire time. If you relax completely on the floor, you are losing the benefits. Think of the floor as a momentary touchpoint, not a place to rest.
12. Banded Kneeling Crunches
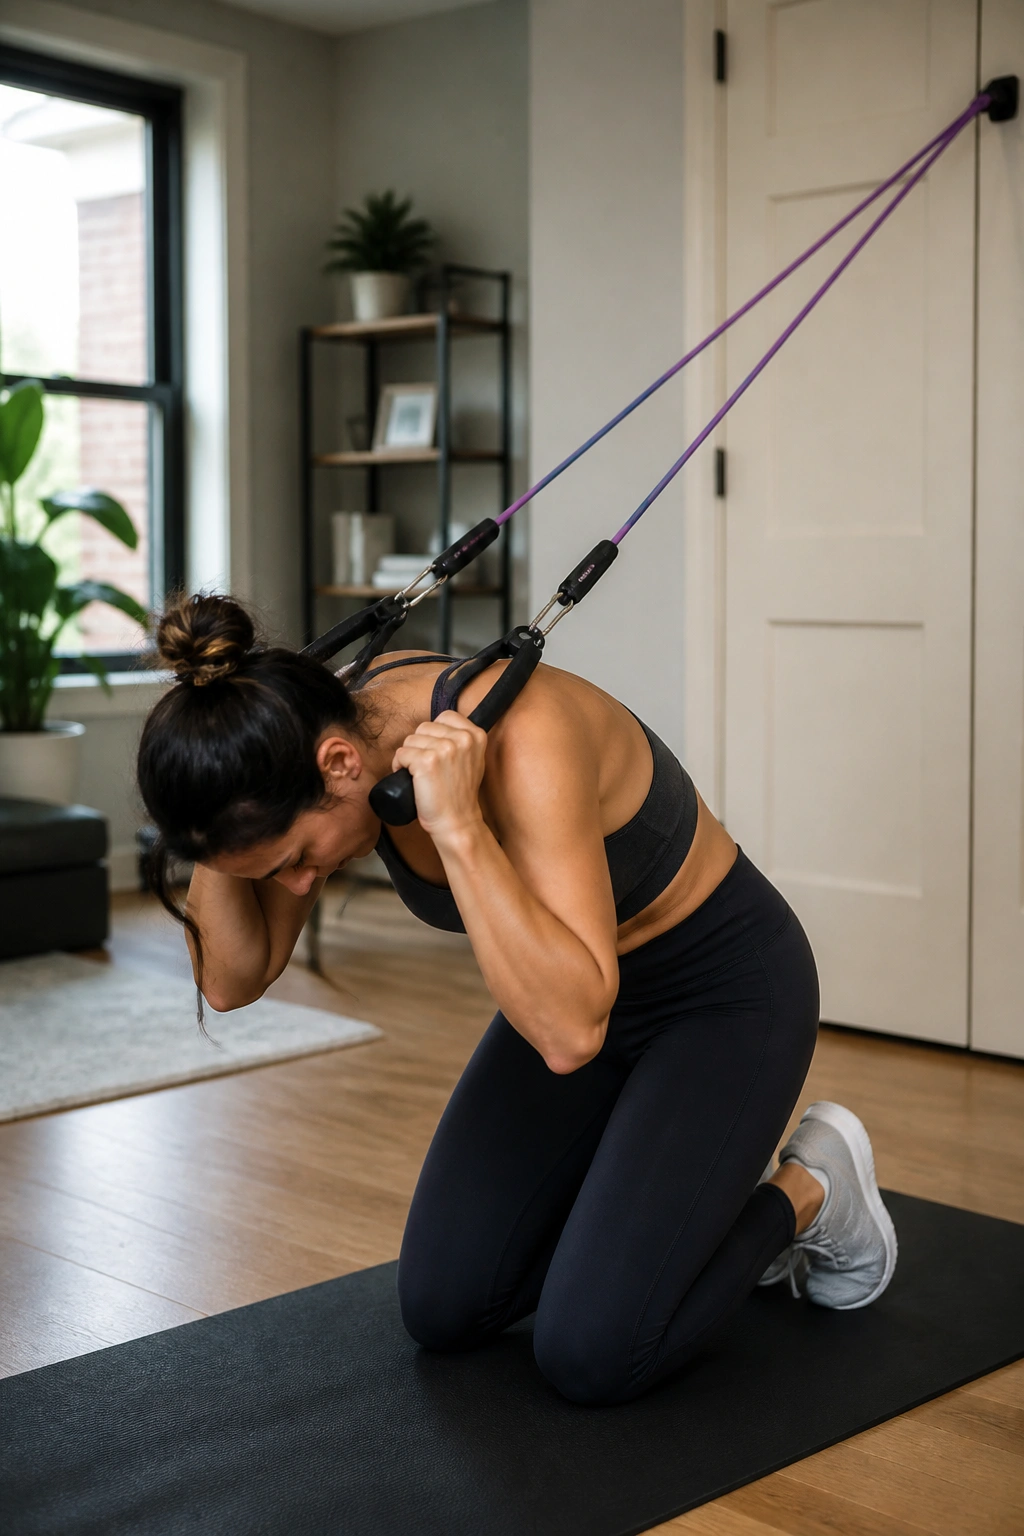
This is a fantastic way to overload the abs without involving the legs. Anchor a band high (on a door or pull-up bar). Kneel on the floor facing away from the anchor. Grab the handles and hold them near your neck. Tuck your chin and curl your torso toward the floor, using your abs to pull the weight.
Focusing on the Curl
This is not a bow. Do not just tip forward from the hips. You need to crunch your spine. Imagine you are trying to touch your forehead to your knees. The band should pull you back into extension at the top, forcing you to use your abs to control the return.
Pro Tip for Comfort
If you are doing this on a hard floor, use a thick mat or a folded towel for your knees. Kneeling for extended periods can be uncomfortable, and you want to focus on your abs, not your aching knees. Keep your hips stationary—they should stay in the same position throughout the entire movement.
13. Banded Flutter Kicks
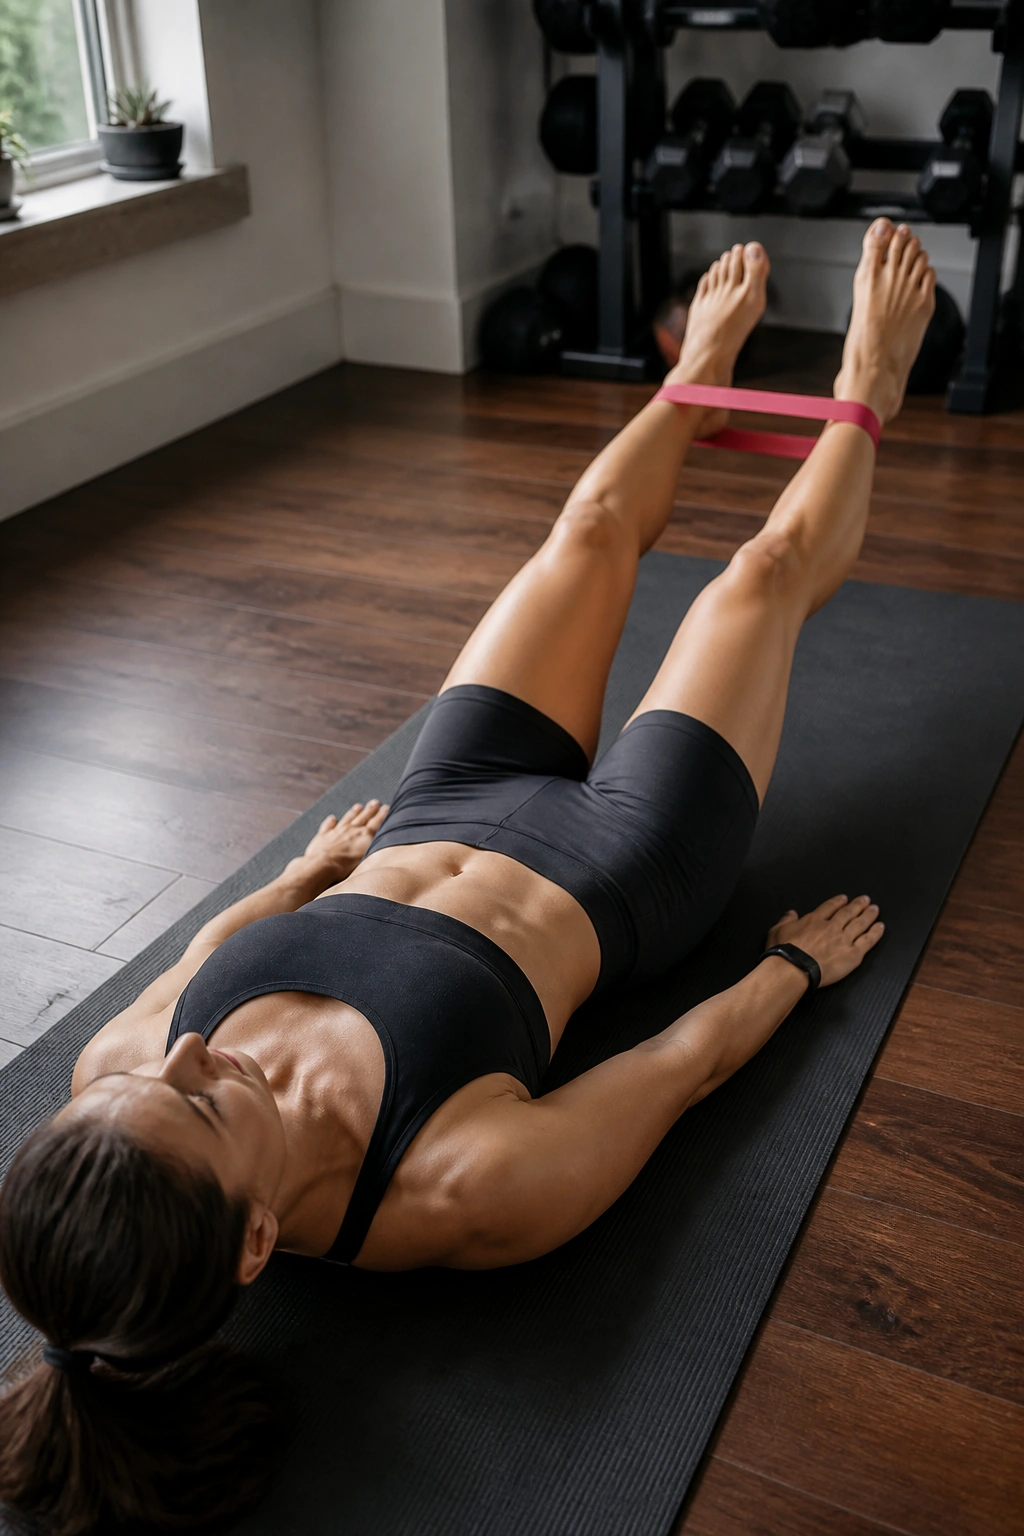
Flutter kicks are a classic, but they often turn into a hip flexor exercise. Using a band around your ankles keeps the focus on the lower core. Lie on your back, press your lower back into the mat, lift your legs six inches off the ground, and start the small, rapid kicking motion.
Why the Band Changes It
The band tries to pull your legs together, which means your lower abs and deep core have to constantly fire to maintain the spacing of your legs. It increases the stability requirement exponentially. You aren’t just moving legs; you are fighting the band’s desire to collapse your form.
Managing Fatigue
If your lower back starts to lift off the floor, stop immediately. Rest for ten seconds and reset. Your lower back is the anchor. If it lifts, your abs have failed, and your spine is taking the load. It is better to do five seconds of perfect, safe flutter kicks than thirty seconds of poor-form reps.
14. Banded Standing Trunk Rotations
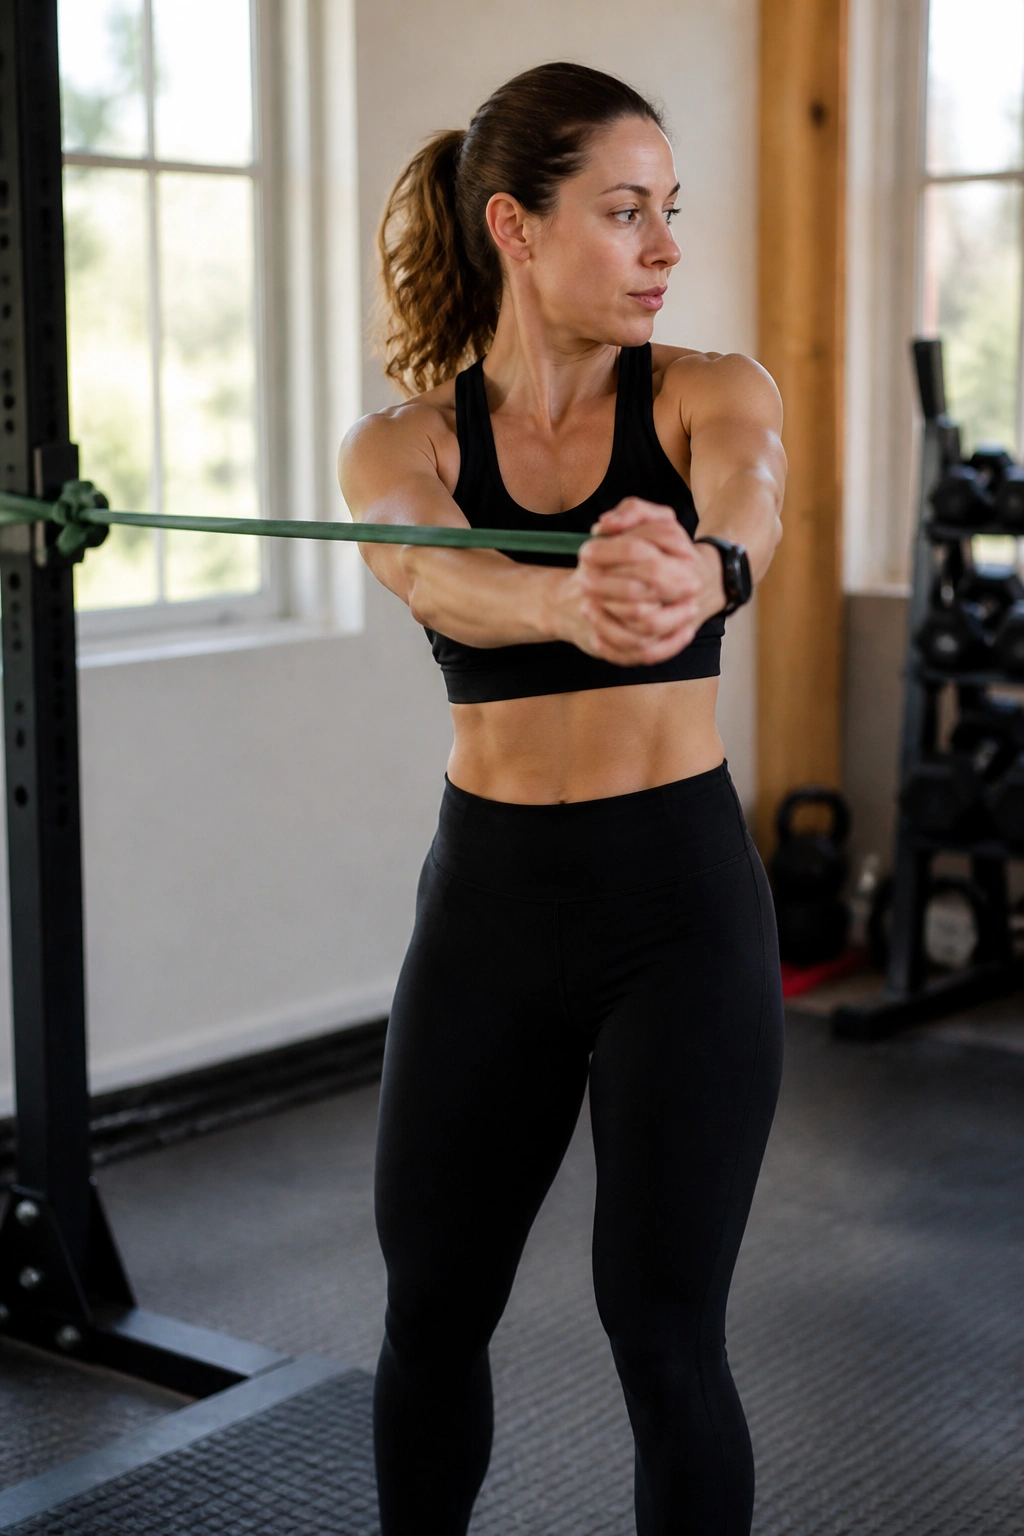
This is similar to the woodchop, but simpler and more focused on control. Anchor a band at chest height. Stand with your side to the anchor, hold the band with both hands at your chest, and press your arms straight out.
The Pivot
Instead of a chopping motion, rotate your entire torso to the side, away from the anchor, while keeping your arms locked in front of you. Your core should be doing all the rotating. Your feet stay planted, but your hips can pivot slightly.
Engaging the Deep Core
The real magic happens when you return to the center. Fight the band’s pull as you slowly rotate back to the front. The deceleration phase is where the core gets its biggest workout. If you let the band snap you back, you are wasting the effort. Control the return every single time.
15. Banded Toe Touches
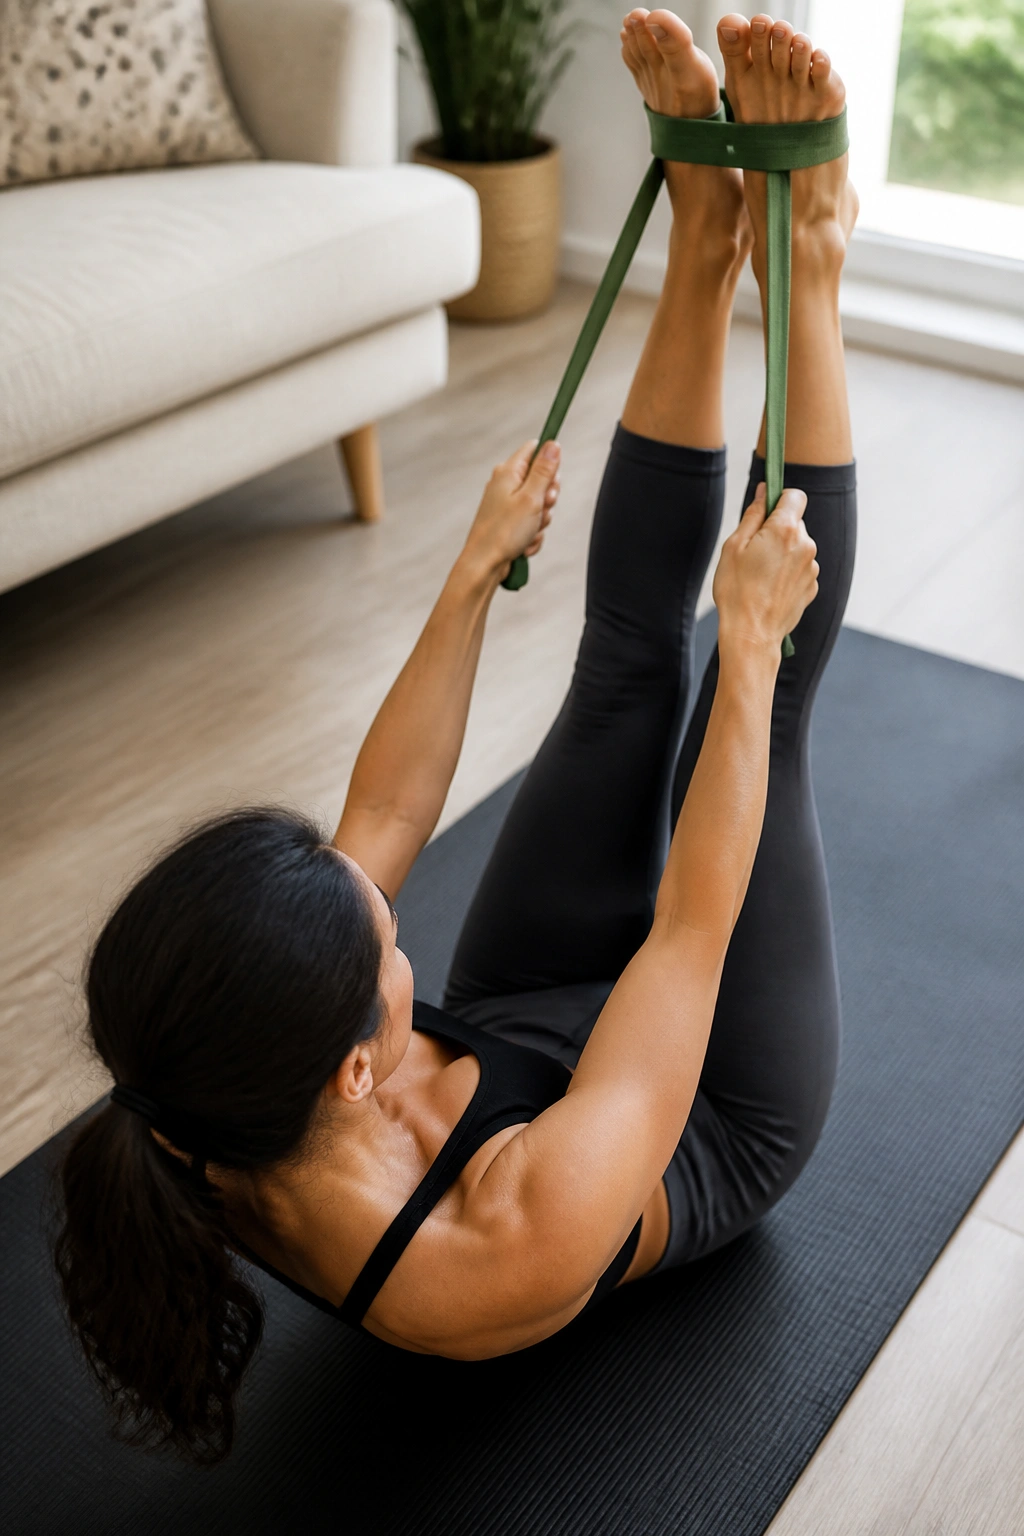
Lie on your back, legs extended up toward the ceiling. Hold a band with both hands, with the band looped around your feet. Lift your shoulders off the mat and reach your hands toward your toes.
The Resistance
Because the band is anchored by your feet and pulled by your hands, every inch you move upward requires effort against the elastic. It makes the reach toward your toes much harder than it would be without the band. You will feel this in the upper and middle abdominals immediately.
Perfecting the Reach
Don’t worry about actually touching your toes. Focus on lifting your shoulder blades as high as possible. It is about the contraction of the ab muscles, not the flexibility of your hamstrings. If you feel your neck straining, tuck your chin more and press your tongue to the roof of your mouth to stabilize your cervical spine.
Final Thoughts
The effectiveness of these movements comes down to one thing: intentional tension. It is tempting to breeze through these reps, letting the band snap back and using momentum to swing your body. Fight that urge. The band is a tool, not a shortcut. If you take the time to move slowly, control the eccentric phase—the part where you are returning to the start—and keep your core braced, you will find that a simple latex band is often more challenging than the heavy weights in the gym.
You do not need a gym membership or a massive rack of machines to build a strong, resilient midsection. You need consistency, gravity-defying resistance, and the willingness to let your core muscles burn for a little longer than you think you can handle. Pick three of these exercises to start with, integrate them into your routine, and focus on the quality of your movement. Your abs do not know what gear you are using; they only know how much work you are forcing them to do. Keep the tension high, keep your form tight, and be patient with the results.
