



You have probably done this before. You lie on the floor, count your reps, and crank out a hundred crunches. You do it every day, staring at the ceiling, waiting for that flat stomach to appear. And yet, weeks pass, and nothing seems to change. It is a frustrating cycle, and it happens to almost everyone who assumes that target training is the secret to fat loss.
Here is the truth: isolation exercises are fine for building muscle, but they are remarkably inefficient at burning the fat covering that muscle. If you want to reveal your midsection, you need a different strategy. You need intensity. You need to keep your heart rate up, force your body to work harder, and make the most of every minute you spend on the mat.
High-Intensity Interval Training, or HIIT, changes the equation entirely. When you combine intense cardio bursts with targeted core work, you stop just training your abs and start training your metabolism. This approach doesn’t just work while you are exercising; it keeps your body burning calories long after you have put your sneakers away. This is not about doing more reps; it is about doing more work in less time.
1. The Mountain Climber Tabata
The Tabata protocol is perhaps the most famous HIIT structure for a reason: it is brutally effective. The classic format is 20 seconds of maximum effort followed by 10 seconds of rest, repeated for 8 rounds. When you apply this to mountain climbers, you are essentially sprinting in a plank position for four minutes straight.
Why This Works
The mountain climber is a full-body move, but it is primarily an anti-rotation core exercise. You are holding a plank while driving your knees to your chest, which forces your deep abdominal muscles to fire constantly to keep your torso stable. By keeping the pace near maximum, you create a massive demand for oxygen.
How to Execute the Set
- Assume a high plank position, hands directly under your shoulders.
- Keep your back flat and your core tight—avoid letting your hips sag toward the floor.
- Drive one knee toward your chest, then switch legs as fast as you can.
- Do this for 20 seconds, rest for 10, and repeat 8 times.
Pro Tip: If your hips start to bounce, slow down just enough to regain control. It is better to have perfect form than to sacrifice stability for speed.
2. The Plank-to-Pushup Burner

This move forces your core to work while your upper body is also fatiguing. By transitioning from a forearm plank to a high plank and back, you force your abs to stabilize your trunk through a shifting center of gravity. It is deceptive, but after a minute, you will feel the heat in your midsection.
The Interval Breakdown
- Perform the movement for 45 seconds.
- Rest for 15 seconds.
- Repeat for 5 full rounds.
When you move from your forearms to your palms, keep your body as rigid as a board. Most people make the mistake of rocking their hips from side to side to make the transition easier. Do not do that. Keep your feet wide if you need extra stability, but force your core to do the heavy lifting. By adding this to a circuit, you are effectively turning an upper-body move into a core-stability challenge that leaves your abs screaming by the third round.
3. The Russian Twist Sprint

Most people treat the Russian Twist as a slow, deliberate exercise. For a HIIT session, we are going to change the tempo. This is about explosive, high-speed rotation. You want to move your hands from one hip to the other as fast as possible, but with control.
The Mechanism
The obliques are responsible for rotation, and they need speed to develop the “defined” look many people chase. When you snap your torso from side to side, you are forcing the obliques to fire and then immediately decelerate the movement. This rapid firing and stopping is exactly what builds endurance and definition.
Your Workout Plan
- Set a timer for 30 seconds of work followed by 15 seconds of rest.
- Maintain a slight lean back to keep your abs engaged the entire time.
- Keep your eyes on your hands as they move—this helps your torso rotate fully.
- Complete 6 rounds.
If you find that your lower back begins to ache, stop immediately. It means your abs have fatigued and your back is trying to take over the load. You can alleviate this by placing your heels on the floor to lower the intensity without stopping the workout.
4. The Bicycle Crunch EMOM

EMOM stands for “Every Minute on the Minute.” It is a classic CrossFit training tool that keeps you honest. For this workout, you will do 40 bicycle crunches at the start of every minute, then rest for whatever time remains until the next minute starts. If you finish in 40 seconds, you get 20 seconds of rest.
Why It Demands Perfection
Bicycle crunches are arguably the most effective move for the rectus abdominis and the obliques. When you do them for time, you must be careful not to pull on your neck. Keep your elbows wide, and focus on bringing your armpit—not just your elbow—toward your opposite knee.
The Strategy
- Set a timer for 10 minutes.
- At the start of each minute, perform 40 total reps (20 per side).
- Rest for the remainder of the minute.
If you find yourself finishing in 25 seconds, your speed is great, but make sure you are not “cheating” by not fully extending your legs. A bicycle crunch only counts if your leg fully extends and the opposite elbow makes solid contact with the knee.
5. The V-Up and Burpee Fusion
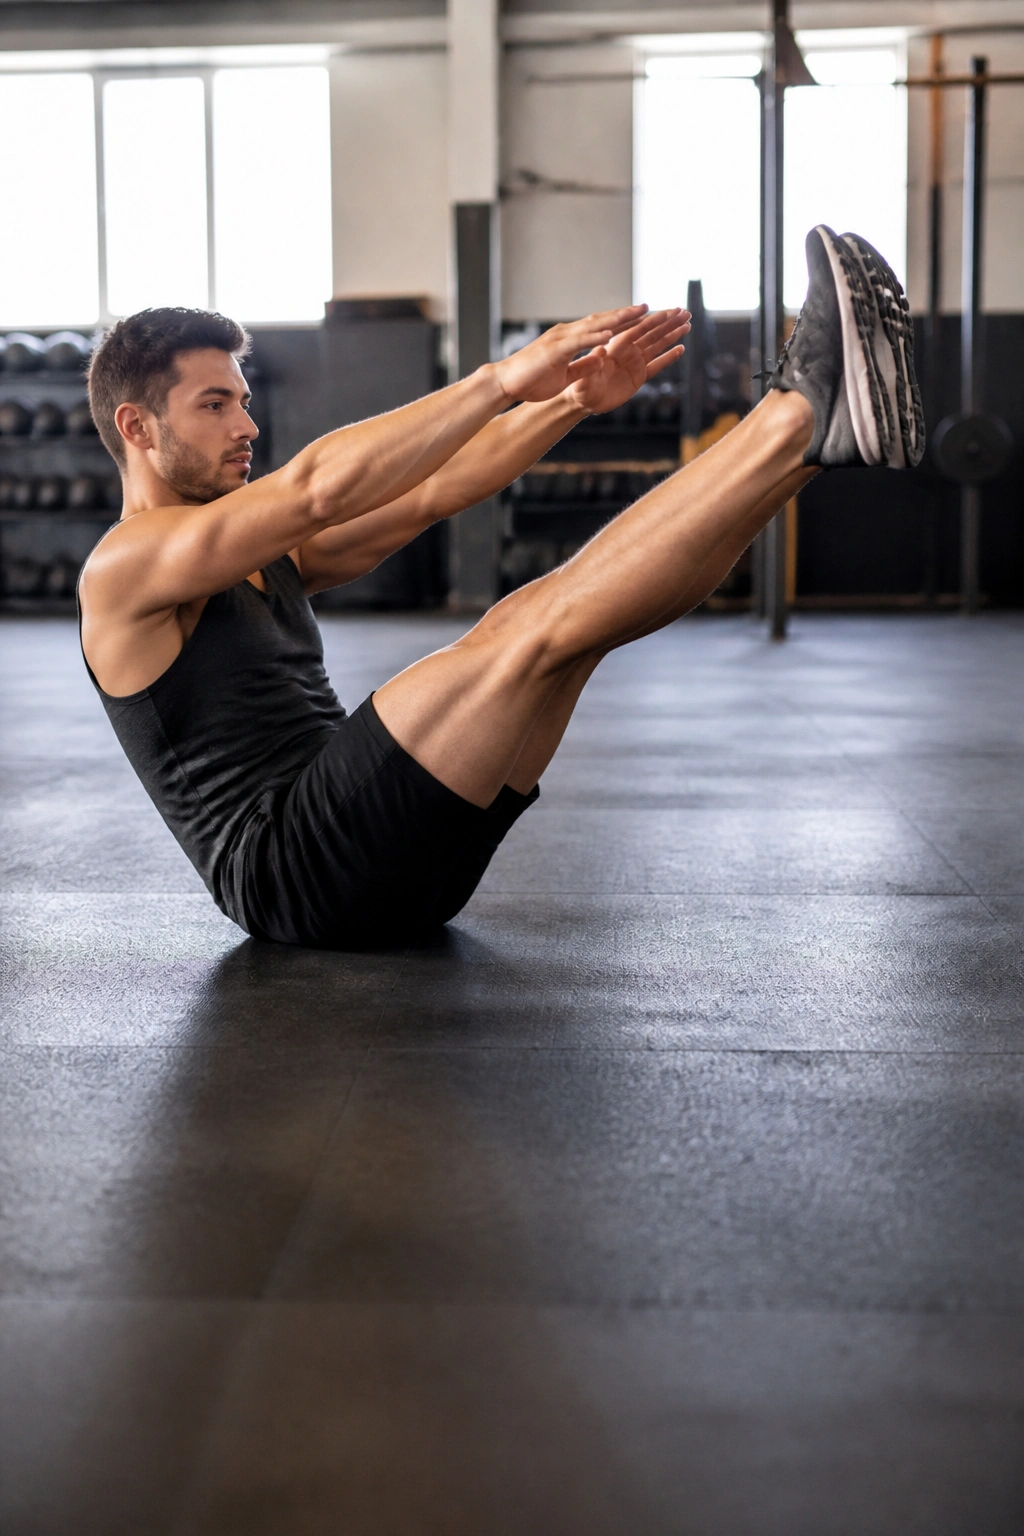
This is a high-octane combo that burns serious calories. You are pairing an intense lower-ab movement (the V-up) with a total-body cardiovascular powerhouse (the burpee). This creates a metabolic spike that is hard to match with any other pairing.
Structuring the Intensity
- Perform 10 V-ups.
- Immediately transition into 5 burpees.
- Repeat this cycle as many times as possible in 10 minutes.
The V-up requires significant hip flexor and abdominal strength. If your back lifts off the floor, you are losing the tension you need. When you jump into the burpee, do not worry about the pushup unless you want an extra challenge—focus on the explosiveness of the jump and the speed of getting your feet back under you. This hybrid move keeps your heart rate in the “fat-burning zone” for the entire duration.
6. The Flutter Kick Circuit

Flutter kicks are the ultimate lower-abdominal endurance move. In a HIIT context, they become a battle of mental fortitude. The goal is to keep your feet low to the ground and moving quickly, without letting your lower back arch.
Technique for Success
- Lie flat on your back, hands tucked under your glutes for support.
- Lift your legs six inches off the floor.
- Kick your legs in small, rapid, alternating motions.
The lower you keep your legs, the harder your abs have to work to keep your spine pressed against the floor. Perform these for 45 seconds, then jump up and do 15 bodyweight squats to flush the blood and reset. Repeat this for 6 rounds. The squats provide a “recovery” of sorts, but they also keep your heart rate high while letting your abs recover for the next round of kicks.
7. The Hollow Body Rock Interval
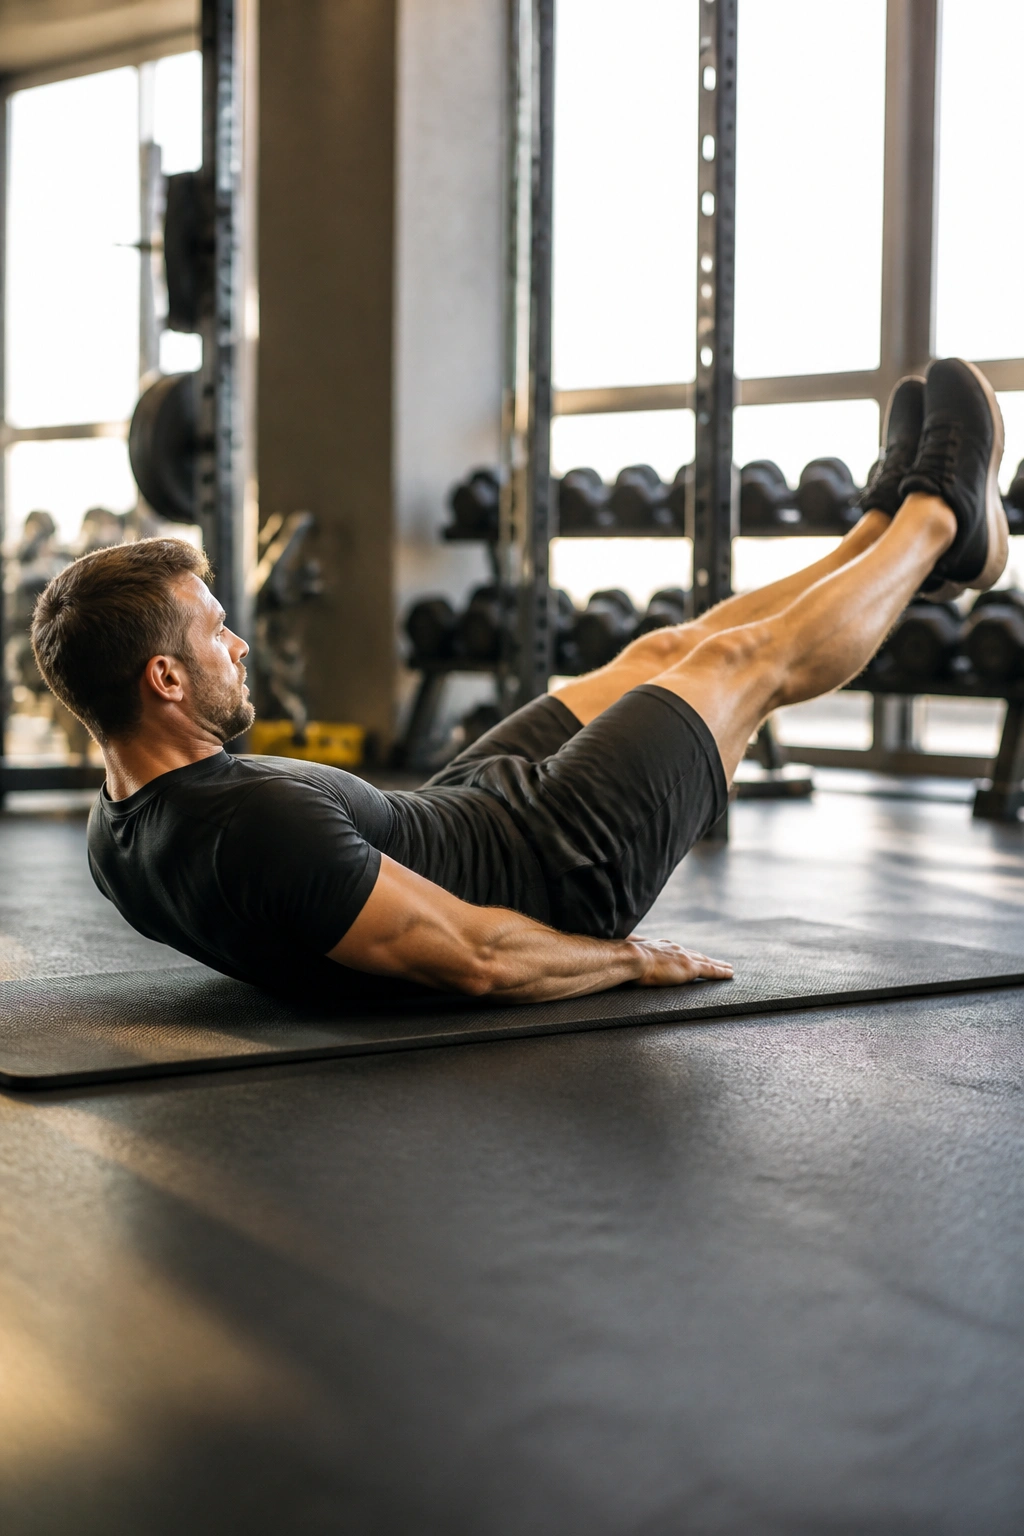
Gymnasts rely on the hollow body position because it is the most efficient way to engage the entire core. It involves lying on your back with your legs and shoulders lifted, creating a “banana” shape. Adding a rock to this makes it a dynamic nightmare for your abs.
Getting the Form Right
- Lift your shoulders and legs simultaneously.
- Squeeze your abs until your lower back is glued to the floor.
- Rock gently back and forth without losing that tension.
This is not a high-speed movement; it is an endurance movement. Do 40 seconds of hollow body rocks, followed by 20 seconds of jumping jacks to keep the heart rate elevated. Do this for 8 rounds. The contrast between the rigid, slow core work and the bouncing of the jumping jacks is excellent for full-body conditioning.
8. The Spiderman Plank Power Set

Most planks are boring, but the Spiderman plank adds a lateral component that hits your obliques hard. By bringing your knee to your elbow while in a plank, you are working the “side” abs that create that tapered look.
How to Build the Interval
- Get into a forearm plank.
- Drive your right knee toward your right elbow, feeling the squeeze.
- Return to center and switch to the left.
- Keep the rhythm steady for 60 seconds.
- Rest for 30 seconds.
- Repeat for 5 rounds.
The key here is not to rush. If you move too fast, you lose the squeeze. The effectiveness of the Spiderman plank comes from the contraction at the top of the movement. Hold the knee at the elbow for a split second before extending back. That tiny pause is where the muscle fibers really activate.
9. The Side Plank Rotation Interval

We often neglect the transverse abdominis and the obliques, focusing too much on the “six-pack” muscles. Side plank rotations fix this imbalance. This is a stability-focused HIIT movement.
The Workout Setup
- Start in a side plank, arm extended toward the ceiling.
- Reach your top arm down and under your torso, rotating your midsection.
- Return to the starting position.
- Do 30 seconds on the left side, then immediately switch to the right for 30 seconds.
- Rest for 30 seconds.
- Complete 5 full rounds.
This move is a coordination test. If you find yourself wobbling, plant your feet firmly. The rotation shouldn’t be about swinging your body—it should be about controlled, deliberate movement. You are essentially turning your torso into a wringing towel, which forces the obliques to contract deeply.
10. The Leg Raise Toe Touch Series

This is a two-part core movement. You begin with a straight-leg raise to target the lower abs, then transition into a toe touch to target the upper abs. It creates a continuous loop of abdominal tension.
Why Two-Part Moves Work
By combining two movements, you increase the “time under tension” for your core. Standard crunches last a fraction of a second. This combo lasts several seconds per rep. You are effectively doubling the work without doubling the volume.
How to Perform the Cycle
- Lie flat. Raise your legs to 90 degrees.
- Keeping your legs straight, reach your hands up to touch your toes (the touch).
- Lower your shoulders and legs slowly to the floor (the raise).
- Repeat for 10 reps, rest for 20 seconds, and repeat until you hit 5 minutes.
Do not use momentum to swing your legs. If your legs are flying up and down, you are just using your hip flexors and momentum. Keep the movement slow and controlled. You want your abs to pull the legs up, not your lower back or hips.
11. The Dead Bug Speed Session
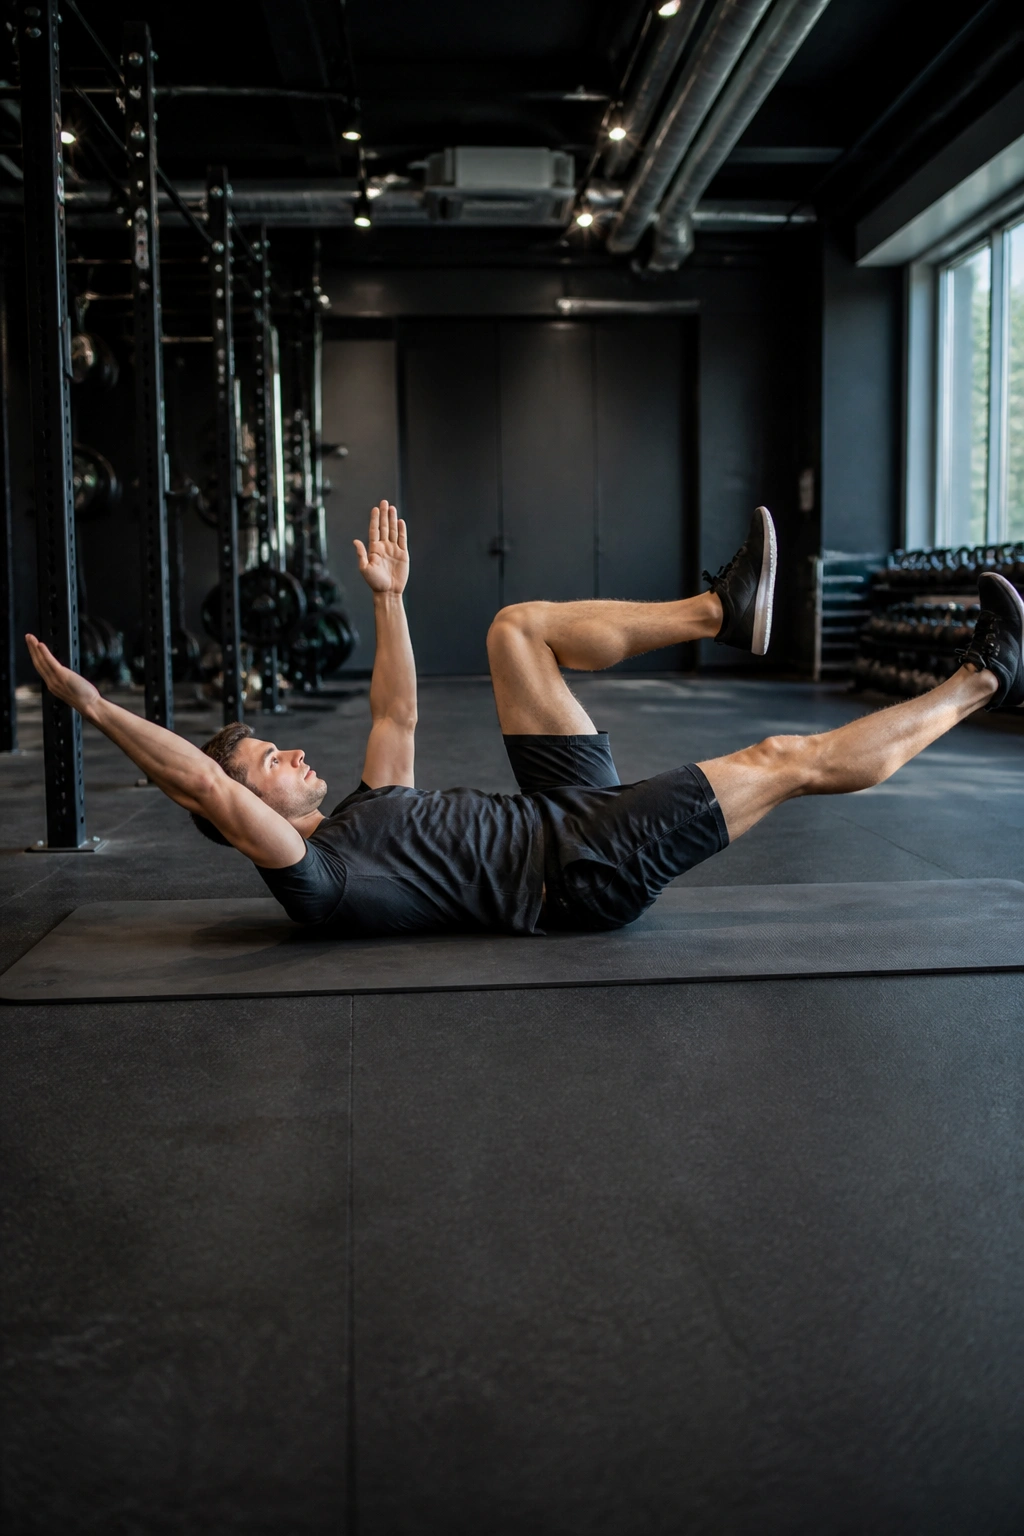
The “Dead Bug” sounds like a restorative yoga move, but done properly, it is one of the most intense core stabilizers in existence. In a HIIT format, we up the speed while maintaining rigid form.
The Secret to the Dead Bug
- Lie on your back, arms extended toward the ceiling, legs in a tabletop position.
- Extend your right arm and left leg simultaneously, keeping your lower back on the floor.
- Return to center and switch sides.
- Keep the rhythm fast, but never sacrifice the back-to-floor contact.
If your lower back arches, you’ve gone too far. The goal is to keep the spine neutral while your limbs move against that stability. Perform this for 45 seconds, then jump into 15 seconds of high knees. Repeat for 6 rounds. The dead bug stabilizes the core, and the high knees tax the cardiovascular system, making this a perfect metabolic pairing.
12. Plank Jacks and Tuck Jumps
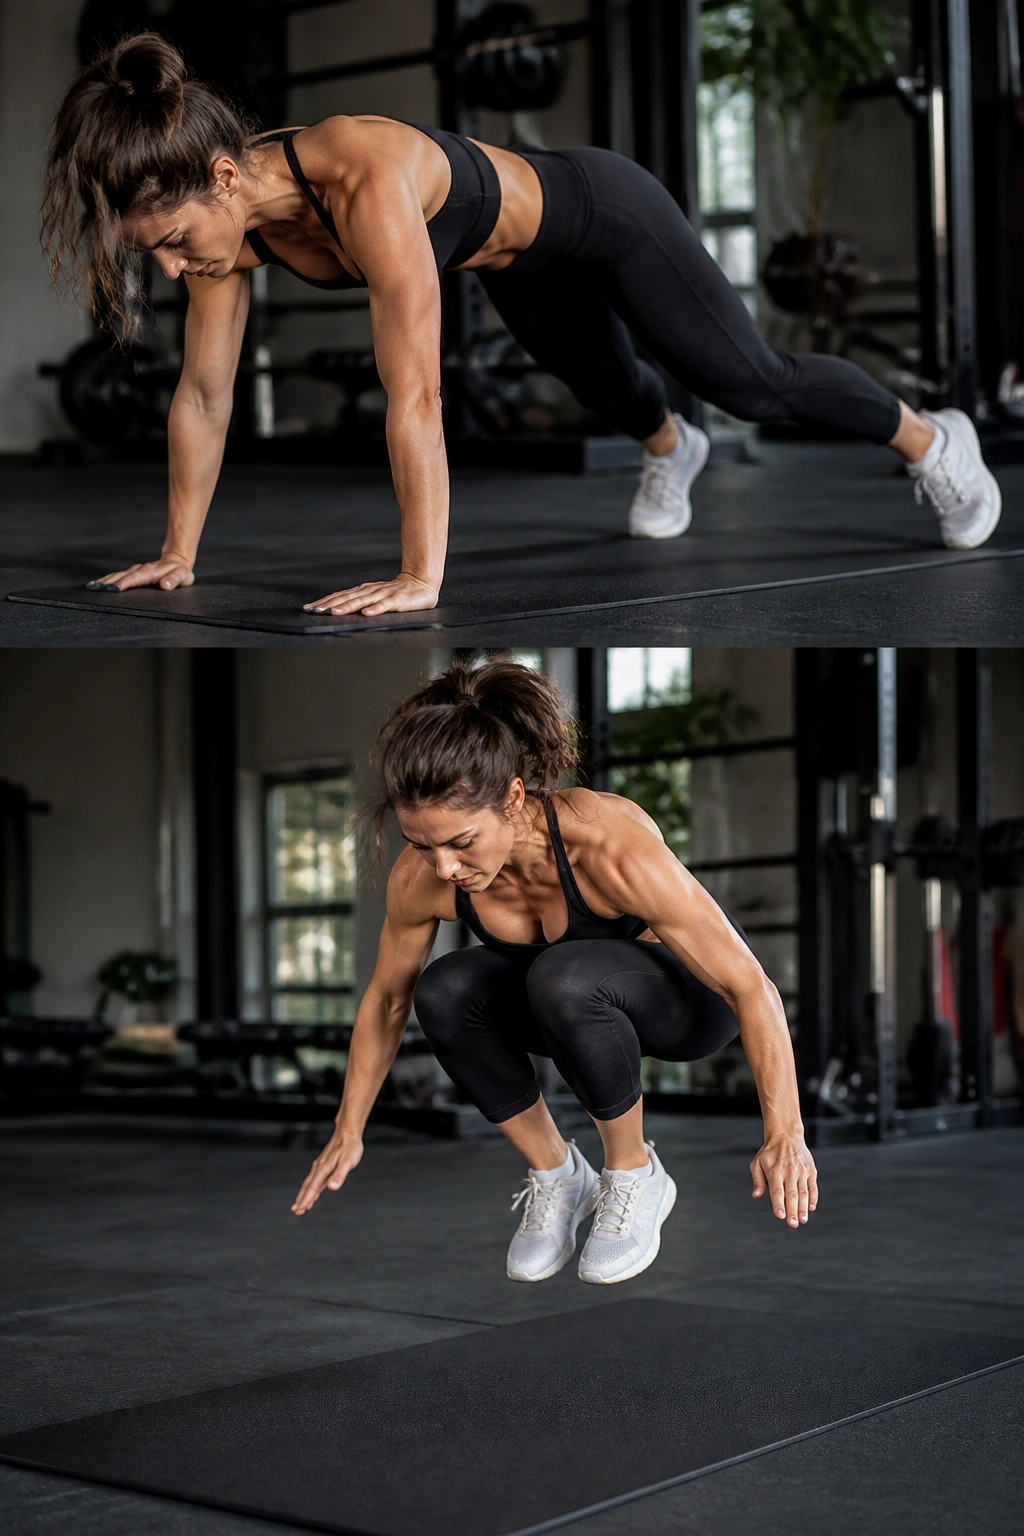
We are mixing a floor movement with an explosive plyometric move. The plank jack handles the core stability and oblique work, while the tuck jump spikes the heart rate.
The Combination Details
- Get into a high plank. Jump your feet out wide and back together (like a jumping jack) for 30 seconds.
- Immediately stand up and perform tuck jumps (jumping up and bringing your knees to your chest) for 30 seconds.
- Rest for 30 seconds.
- Repeat for 5 rounds.
This is a high-intensity session. The tuck jumps are meant to be hard. By the third round, your lungs will be burning, and your core will feel like it’s failing. That is the point. When your body is exhausted, your core has to work twice as hard to maintain the posture required for the jumps.
13. The Heel Touch Burnout

The heel touch (also known as the penguin crunch) is excellent for targeting the obliques. In a HIIT session, we do these for time, not reps, which keeps the intensity high and the fatigue setting in fast.
The Execution
- Lie on your back with knees bent and feet flat on the floor.
- Crunch your shoulders slightly off the ground.
- Reach your right hand to tap your right heel, then your left hand to tap your left heel.
- Move rapidly from side to side.
Do this for 60 seconds straight. Rest for 15 seconds. Repeat 5 times. The key to making this work is staying “crunched up.” If you let your shoulders drop back to the floor, you lose all the tension. Stay contracted throughout the entire 60 seconds. You will feel a burn in the sides of your waist that is hard to replicate with other movements.
14. The Scissor Kick Intensity Drill

Scissor kicks are a classic, but often done incorrectly. When you add a HIIT timer, you have to be precise. These hit the deep lower abdominals and require significant hip stability.
The Drill Format
- Lie on your back, legs straight.
- Cross your legs over one another in a scissor motion, keeping them low to the ground.
- Maintain a rapid, controlled tempo.
- Go for 40 seconds of work, 20 seconds of rest.
- Repeat for 8 rounds.
The hardest part of this move is keeping the legs low. As you get tired, your legs will naturally want to creep up toward the ceiling. Fight that urge. The lower your legs are, the longer the lever arm, and the more work your abs have to do to stabilize your pelvis. If you find your back is arching, slide your hands under your glutes to help maintain the pelvic tilt.
15. The Mountain Climber Burpee Finisher

We started with mountain climbers, and we end with them, but this time we add a burpee. This is the “burnout” round. It combines the core stability of the climber with the full-body explosiveness of the burpee.
The Final Challenge
- Perform 10 mountain climbers.
- Immediately perform 1 burpee.
- Repeat this sequence without stopping for 5 minutes.
It sounds simple, but it is grueling. You are forcing your core to brace for the climbers and then explode for the burpee, over and over again. By the time the 5 minutes are up, you will have done dozens of repetitions, and your heart rate will be through the roof. This is the ultimate test of your endurance and your abdominal capacity.
Understanding Metabolic Burn

You might wonder why we keep bringing up heart rate. If you only focus on “ab” movements, you are neglecting the fact that fat loss is a systemic process. You cannot force your body to burn fat only from your stomach. That is a biological myth. Instead, you create an environment where your body must use stored energy to fuel intense activity.
The workouts listed above create an “afterburn” effect. By pushing your intensity high, you consume more oxygen post-workout, which increases your metabolic rate for hours afterward. This is the secret to belly fat loss: you are not just exercising; you are changing how your body processes energy.
If you are just starting, don’t try to complete all 15 workouts in one week. Pick two or three and master them. Once your form is locked in and your endurance improves, you can add more volume. Remember that consistency—not perfection—is the path to progress. You are not training for a day; you are training for long-term health.
Final Thoughts

Getting a defined midsection is not about finding the perfect ab exercise; it is about combining intensity with movement. These 15 workouts are tools in your arsenal, but they only work if you actually show up and push yourself. If you coast through the intervals, you will get coasting results.
Listen to your body. There is a difference between the “burn” of working muscles and the “pain” of an injury. If something hurts—not just burns—stop and check your form. Be patient with the process. The results you want do not appear overnight, but if you stay the course, they will appear. Put the work in, respect the recovery, and keep moving forward.
