



Tight, tense muscles have a way of showing up at the worst times. A stiff neck before a meeting. A low back that feels like it’s been braced for bad news. Hips that complain the second you stand up after sitting too long. A handful of stretches at home for tight tense muscles can take the edge off that whole pattern, especially when you stop treating stretching like a punishment and start using it like maintenance.
The big mistake is going too hard, too fast. People yank on a hamstring, force a twist, or hold a deep lunge until their breath gets ugly and the muscle fights back. That usually leaves you feeling more guarded, not less. A better approach is boring in the best way: mild tension, slow breathing, 20 to 30 seconds per stretch, then a second round if the body feels like it wants it.
You also do not need fancy gear. A wall, a towel, a folded blanket, and a patch of floor will do a lot of heavy lifting here. If you’ve got a yoga mat, nice. If not, the carpet works.
What matters is picking the right stretch for the right tight spot. Neck and shoulders need something different from hips and calves. Spine rotations feel different from long holds for the front of the thigh. So let’s keep this practical and aim at the places that tend to lock up first.
1. Neck Side Bend for Upper Traps

The upper traps are usually the first muscles to get jumpy when your day is full of screen time, raised shoulders, or sleep in a weird position. This stretch is simple, but simple isn’t a flaw. Simple is why it works.
How to Set It Up
Sit or stand tall, then let your right ear drift toward your right shoulder without rolling the head forward. Keep both shoulders heavy. If you want a little more stretch, reach your left hand toward the floor or hold the seat of a chair. You should feel a clean pull along the left side of the neck, not a jab behind the ear.
Hold: 20 to 30 seconds per side.
Breathing cue: Exhale slowly and let the shoulder drop a little more on each breath.
What to avoid: No tugging on the head with your hand.
A tiny move goes a long way here. If you crank the neck around, the muscles clamp down and the stretch turns into a fight. That’s the opposite of what you want.
2. Doorway Chest Stretch
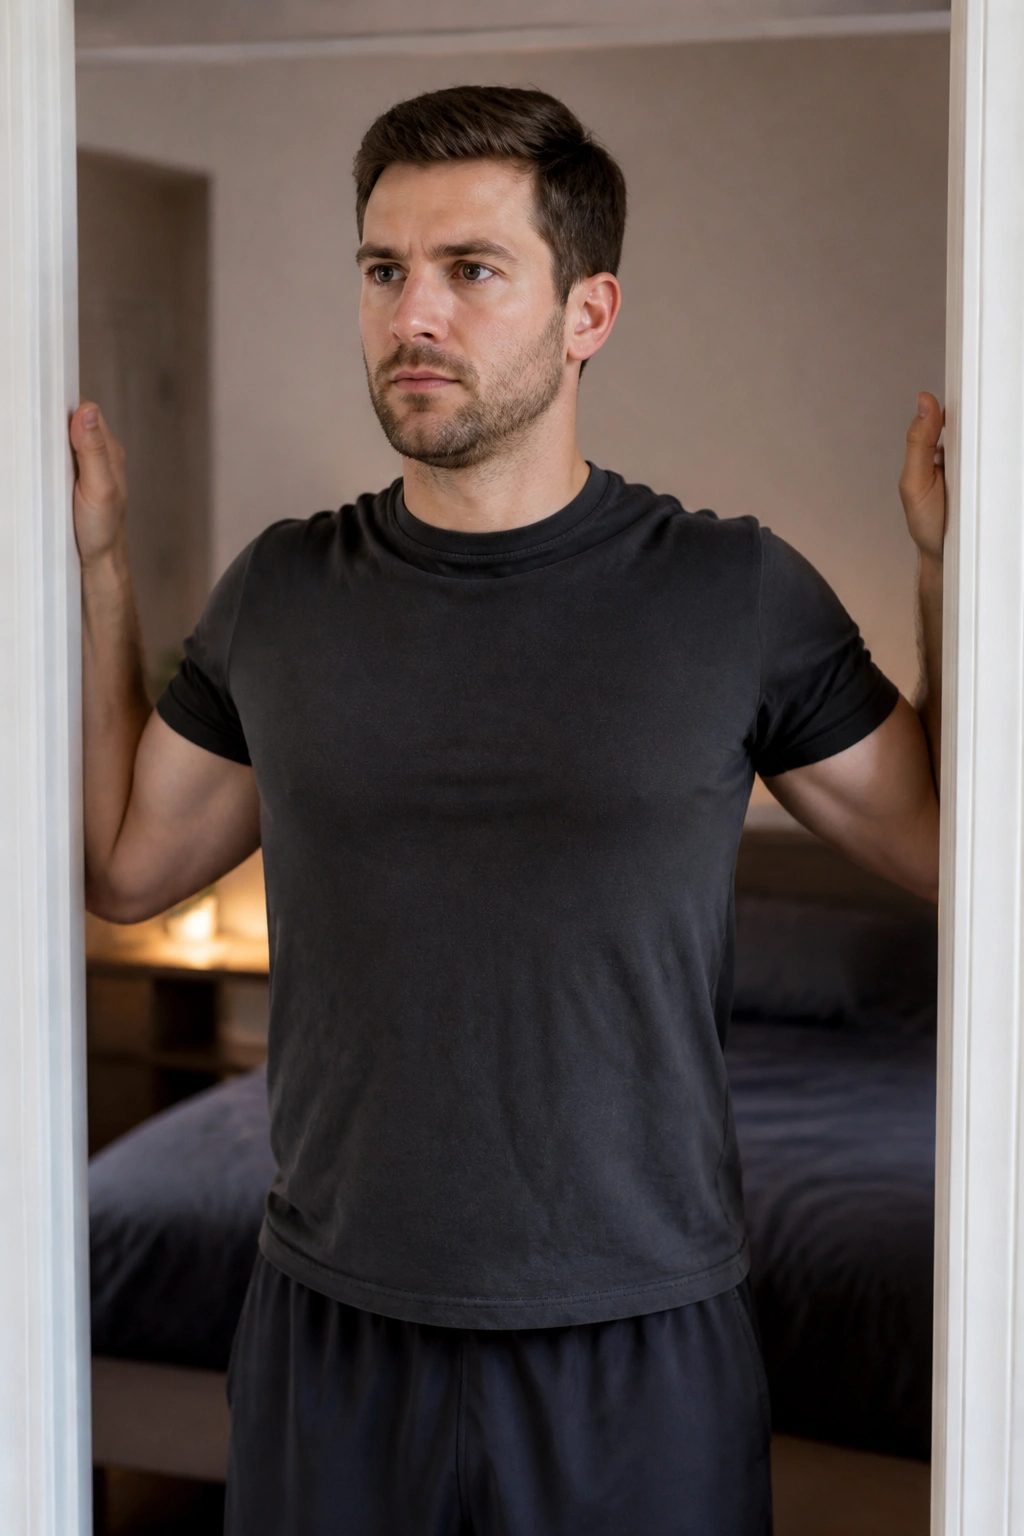
If your shoulders live in a rounded position, the front of the chest gets short and grumpy. You can feel it the first time you open your arms wide and the ribs want to flare. This doorway stretch is one of the most useful at-home fixes for that.
Stand in a doorway with one forearm on each side of the frame, elbows bent about 90 degrees. Step one foot forward and let your chest glide through the opening until you feel a stretch across the pectorals and the front of the shoulders. Keep your ribs from popping forward. That part matters.
I like this stretch for people who shrug without noticing it. The chest is often doing more than it gets credit for, and if it stays tight long enough, the shoulders start to feel stuck even when the shoulder joint itself is fine. A little opening here often makes overhead reaching feel easier right away.
Hold for 20 to 30 seconds, then reset and do a second round with your elbows a bit higher if the first angle feels too low.
3. Cat-Cow on the Floor
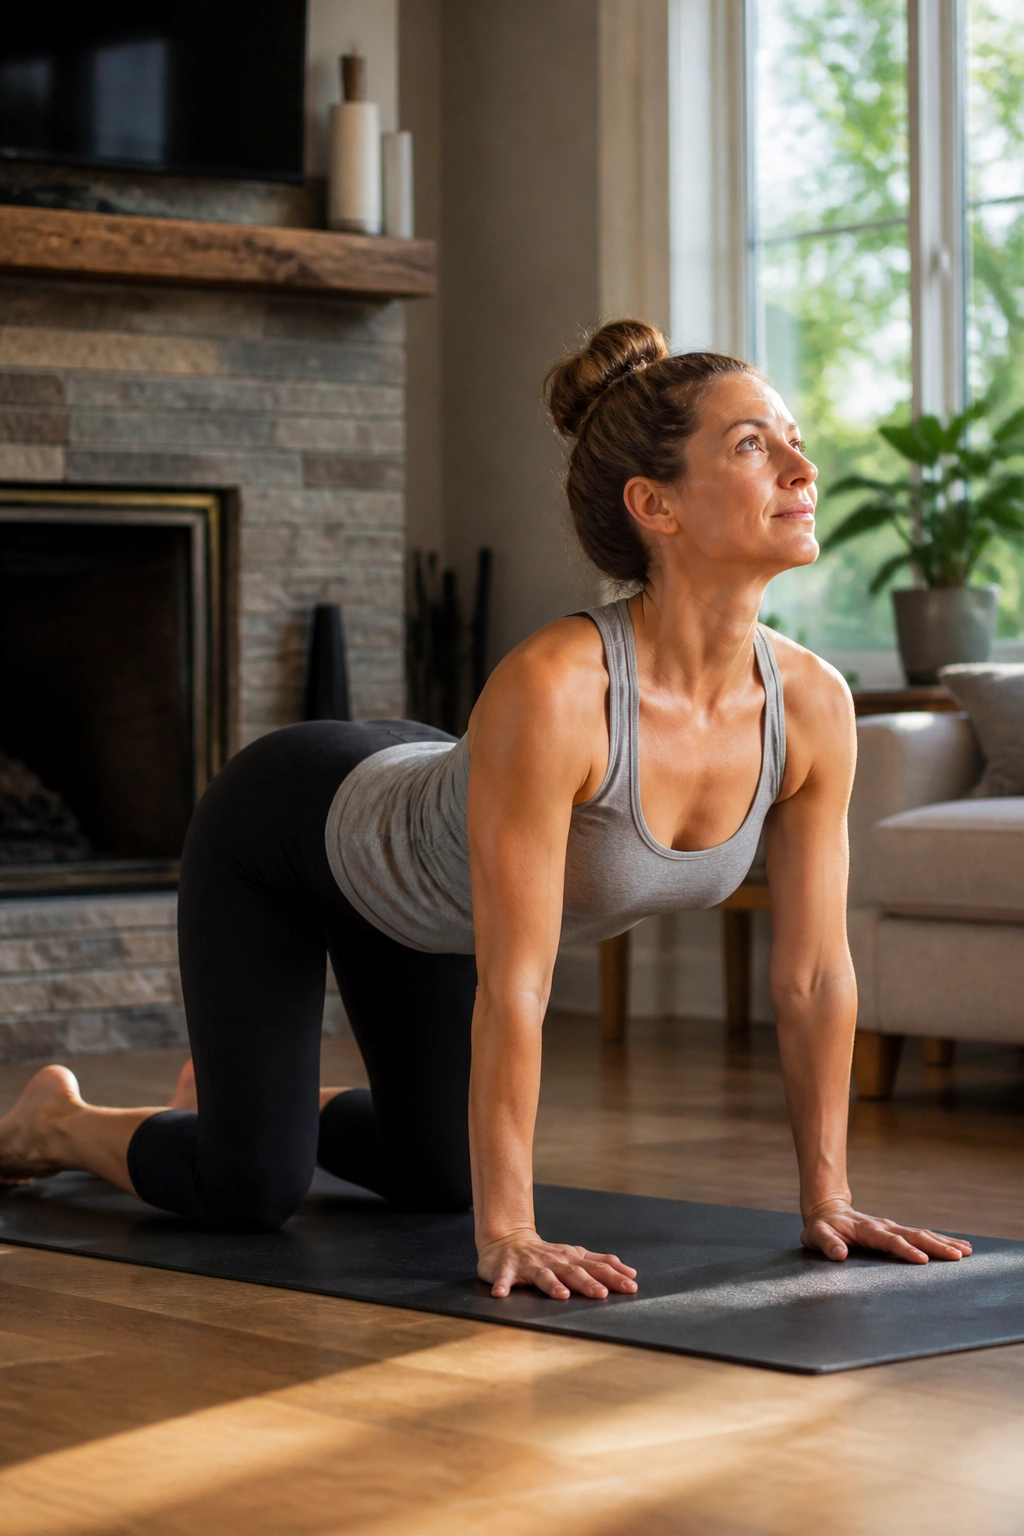
This one feels almost too easy until you do it slowly enough to notice what’s going on. Cat-cow is not a brute-force back stretch. It’s a controlled spinal rhythm, and tight backs usually respond better to rhythm than to yanking.
Why It Helps
Come onto hands and knees with wrists under shoulders and knees under hips. On the inhale, let the belly drop and lift the chest. On the exhale, round the spine and press the floor away. Move smoothly between those shapes for 6 to 10 rounds. The motion should feel like your back is waking up, not like you’re trying to win a contest.
How Many Rounds to Do
- 6 to 10 slow cycles for a quick reset
- 2 sets if your back feels glued up after sitting
- Move at the speed of your breath, not the speed of a workout
Do not force the end range. A small arc done well beats a huge, sloppy one. If your wrists are cranky, make fists or rest your hands on blocks, books, or a folded towel.
4. Child’s Pose with Side Reach
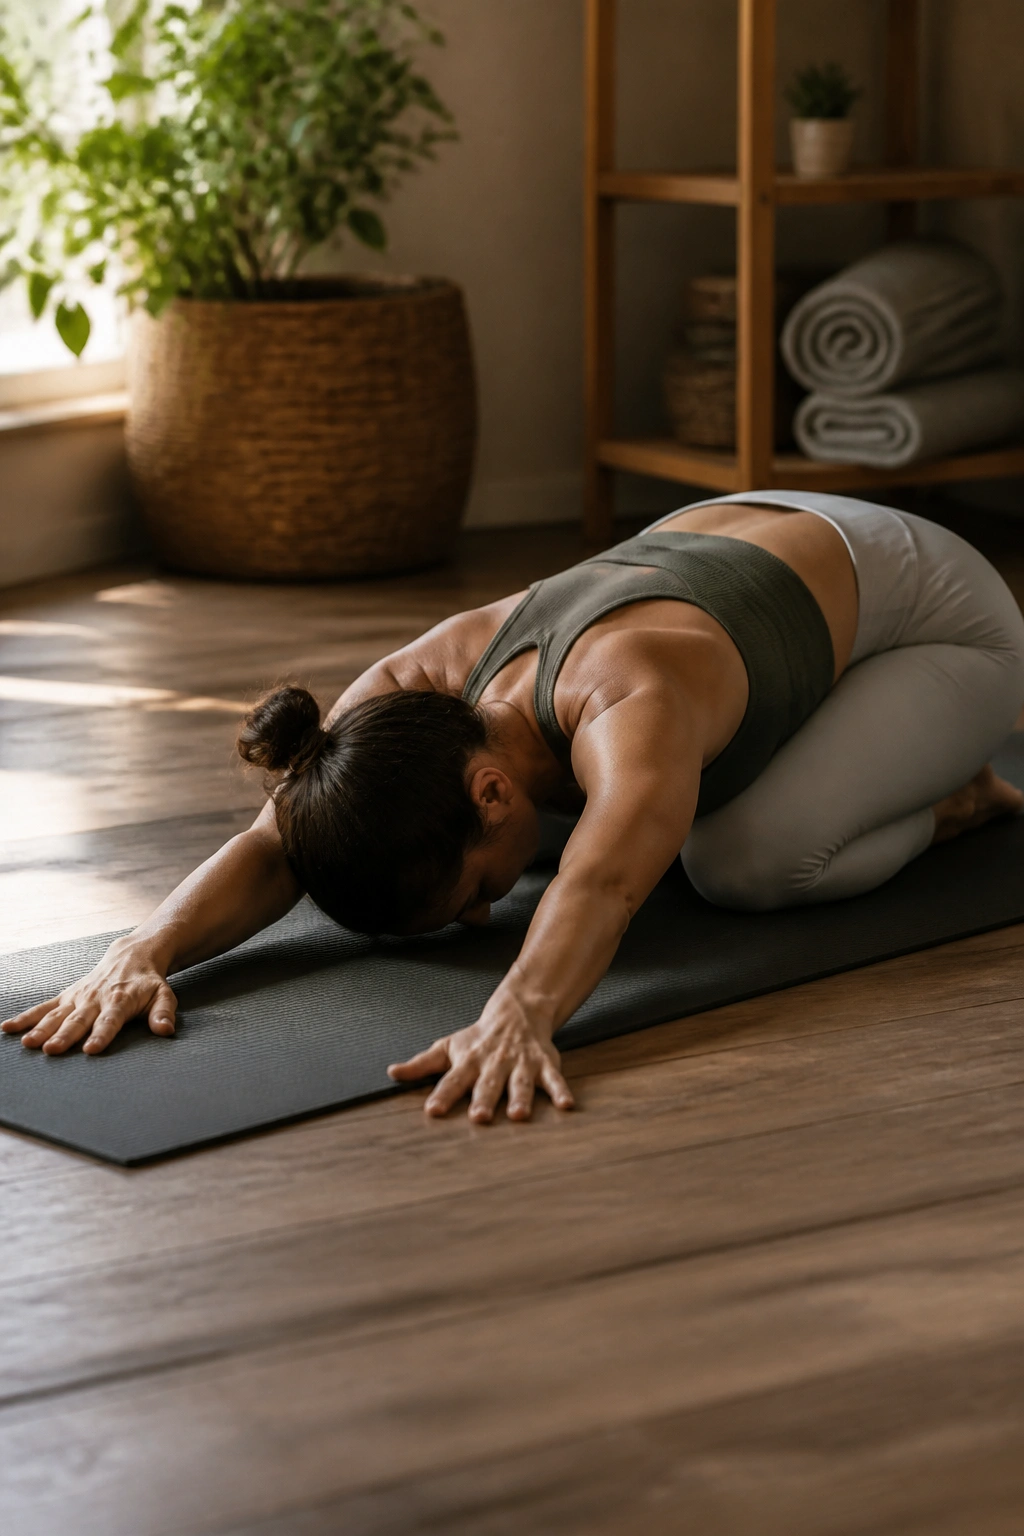
Child’s pose is a crowd favorite for a reason, but the side reach is the part that usually gets ignored. That’s a shame, because the lat muscles along the sides of the back get tight from lifting, carrying, reaching overhead, and even long hours at a desk.
Sit back toward your heels, then walk both hands forward. Once you’re settled, walk both hands a few inches to the right to stretch the left side body. Breathe into the ribs and the space under the armpit. Then switch to the other side. The pull should feel broad and calm, not pinchy in the shoulders.
A folded blanket under the knees makes this much kinder if your hips are cranky. If your forehead doesn’t reach the floor, stack your fists or use a pillow. The goal is support, not collapse.
This is one of those stretches that looks gentle and turns out to be sneakily useful. After a few breaths, the whole side of the torso often feels less clenched.
5. Thread the Needle Shoulder Release
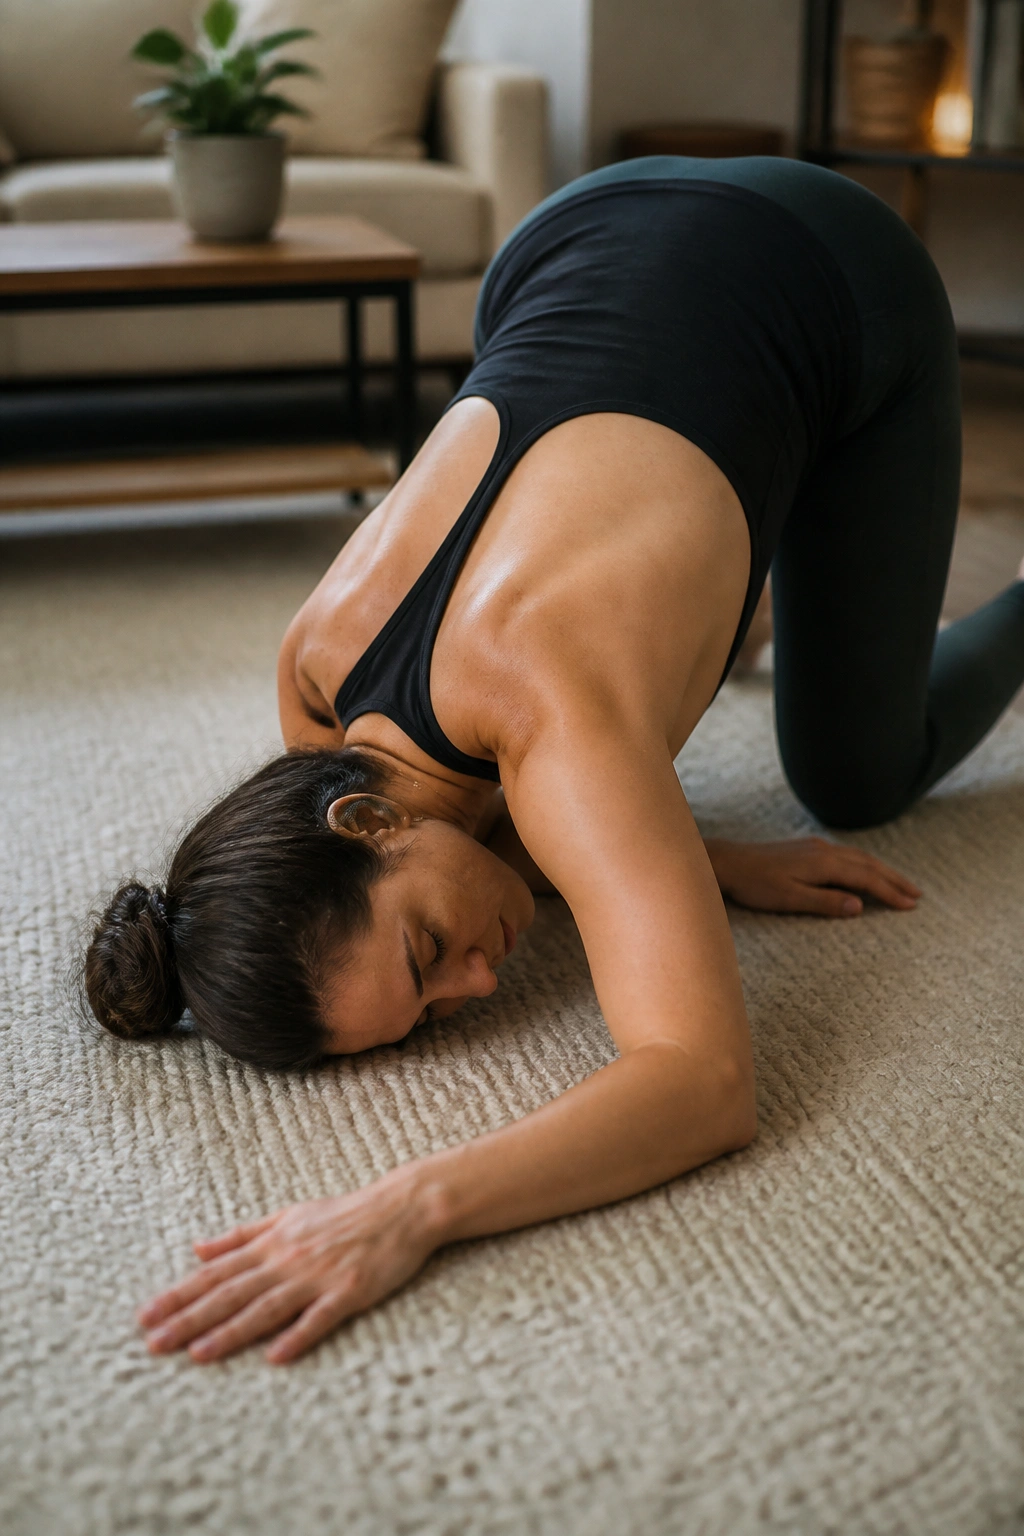
Shoulders love to hide tension until you try reaching into a back pocket, lifting a box, or putting on a jacket. Thread the needle addresses the back of the shoulder and the upper back in a way that overhead reaching never quite does.
Start on hands and knees. Slide your right arm under your left arm, palm up, and lower your right shoulder and right cheek toward the floor. Keep your hips stacked over your knees if possible. You should feel a stretch through the upper back, the back of the shoulder, and maybe even into the side of the rib cage.
What to Watch For
- If the stretch jams the neck, shorten the reach
- If the shoulder pinches, come out a little
- If the hips drift too far back, the stretch changes into something else
Unlike a simple arm pull across the chest, this one lets the shoulder blade move. That matters more than people think. Hold 20 to 30 seconds, then switch sides. Slow breathing helps here too, especially if you tend to brace through your upper body.
6. Seated Spinal Twist
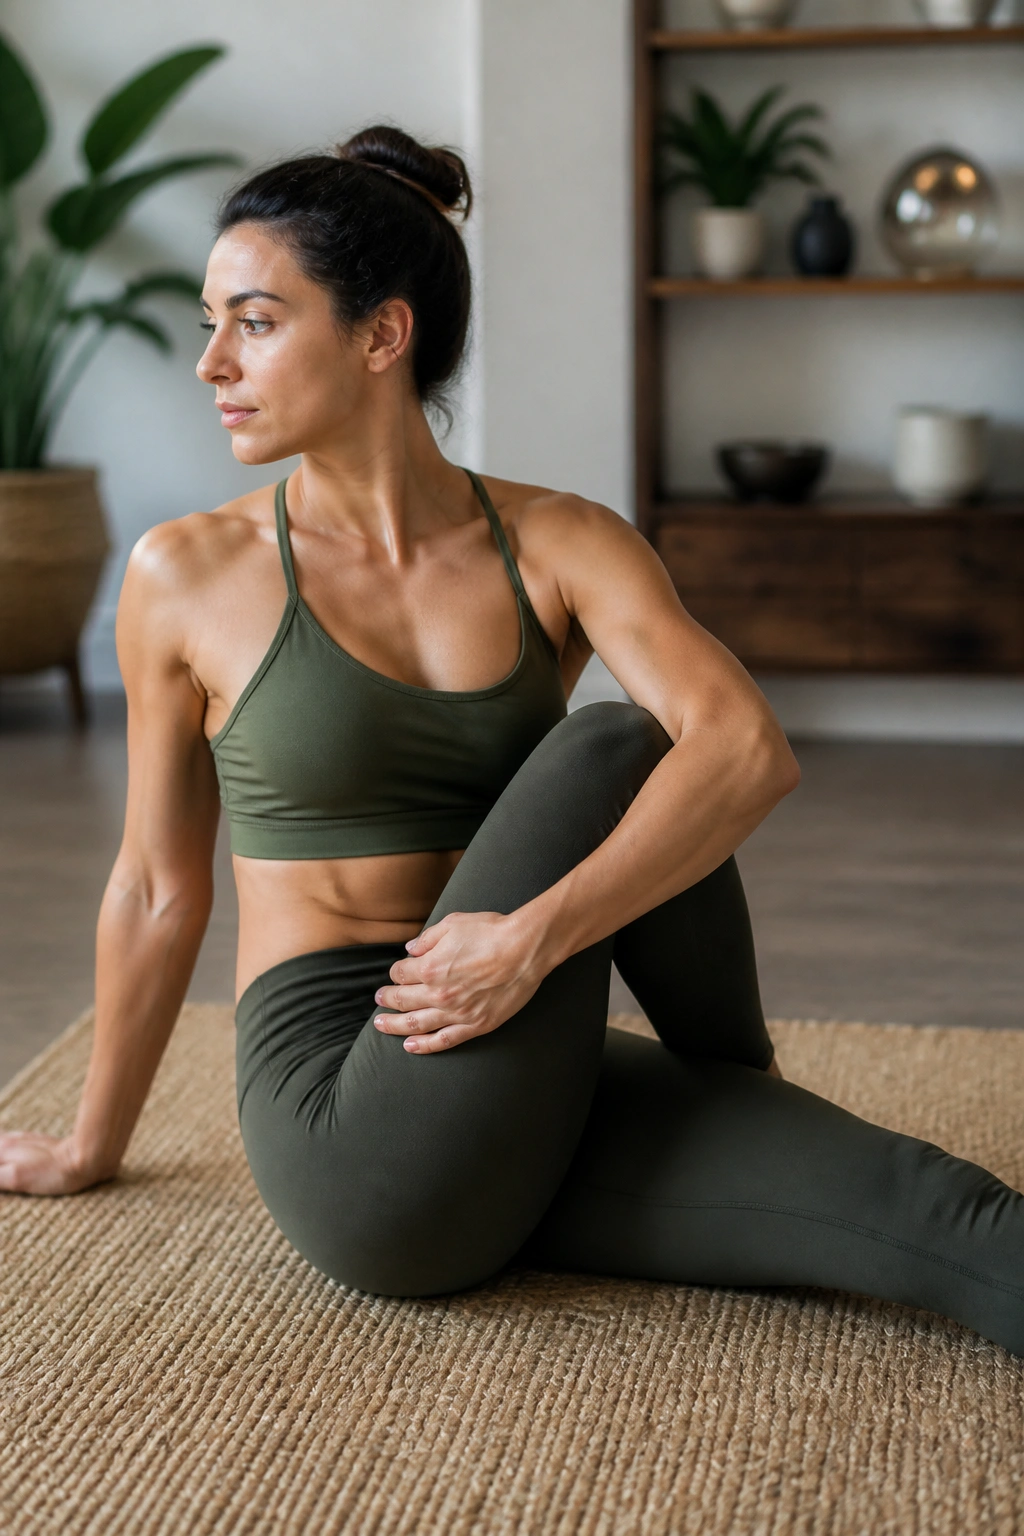
Some people twist too hard and end up feeling wrung out. That’s not the point. A good seated spinal twist should feel like a measured rotation through the ribs, lower back, and hips, not a crank through the spine.
Sit tall with both legs extended or with one leg bent over the other, then place your right hand behind you and your left elbow outside the right knee. Use the exhale to turn a little farther, but keep the chest open and the neck relaxed. If your lower back grumbles, sit on a folded towel so your hips are slightly higher than your knees.
A twist can be surprisingly calming when your back has felt stiff all day. It gives the spine a different direction to work in, which is often what tightness needs. Not more pressure. A different angle.
Hold each side for 20 to 30 seconds. If one side feels much tighter, do that side second so you don’t force the body cold into its least favorite direction.
7. Standing Hip Flexor Lunge
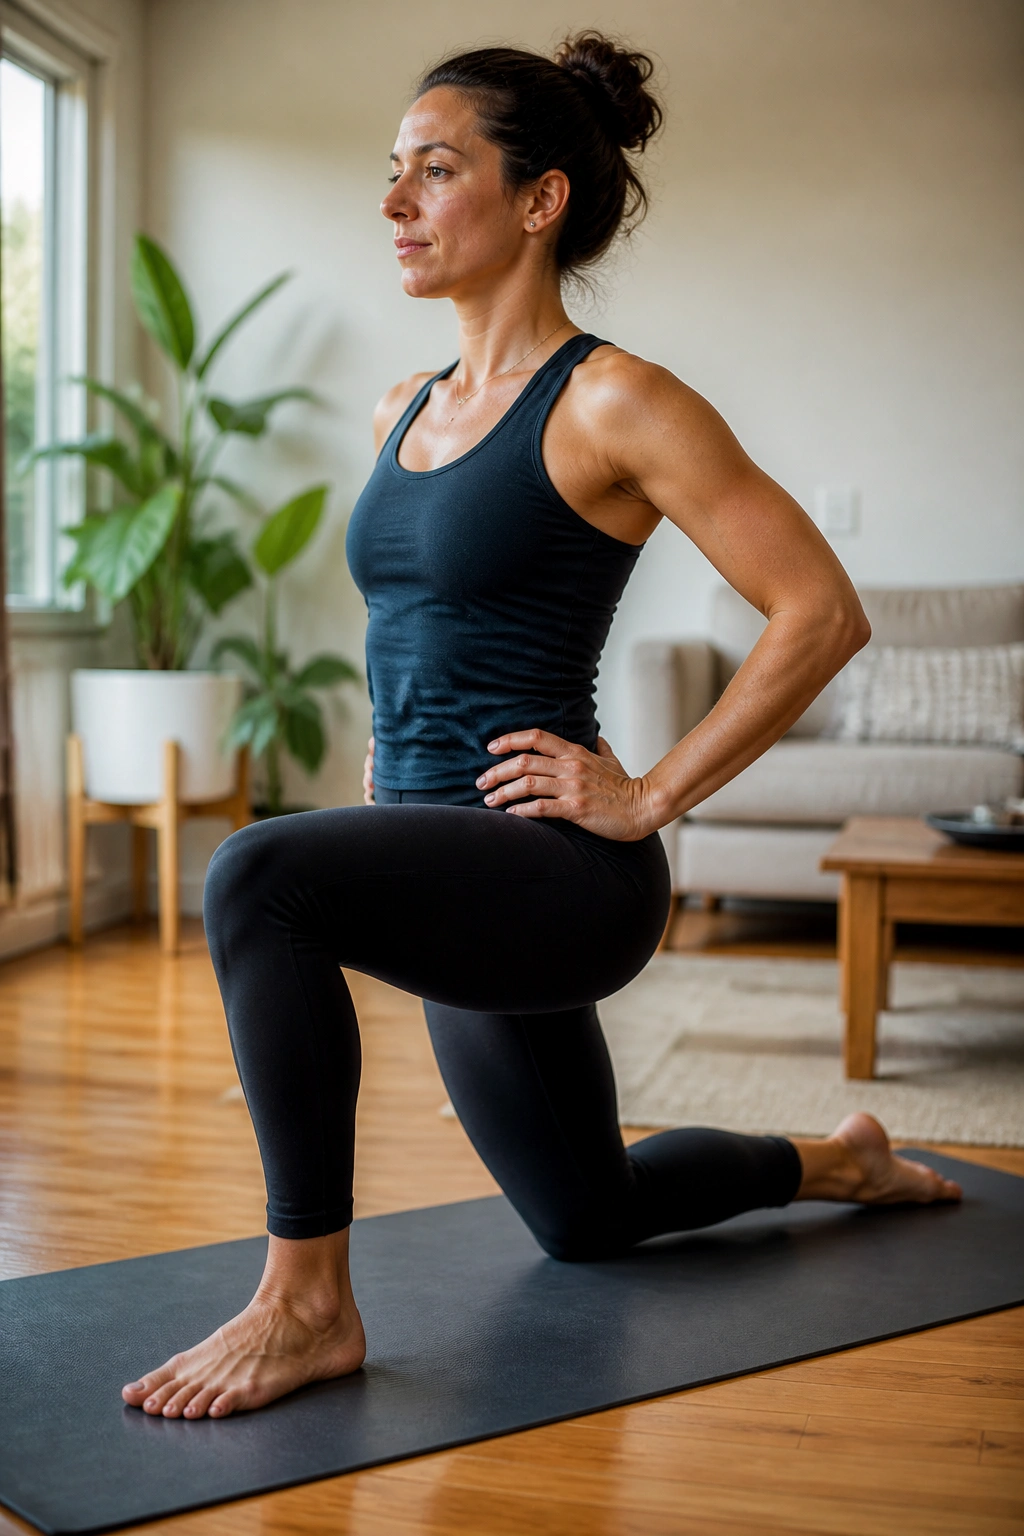
The front of the hip gets short when you sit a lot, and it usually complains in a sneaky way. Sometimes it feels like a low-back issue. Sometimes it just feels like your stride has gone small and stubborn. This stretch goes after that front-of-hip stiffness directly.
Step one foot forward into a short lunge and drop the back knee to the floor, or keep it lifted if that feels better. Tuck your pelvis slightly under—just a small tailbone tuck—and shift your body forward until you feel the stretch in the front of the back leg’s hip. Keep the ribs stacked over the pelvis. If you arch your back to “get deeper,” you miss the target.
The stretch should land in the hip crease, not in the low back.
That’s the key. If you feel it mostly in your spine, back off and reset the pelvis. A pillow under the back knee helps a lot on hard floors. Hold for 20 to 30 seconds per side, then repeat once if the hip feels very compressed.
8. Half-Kneeling Quad Stretch
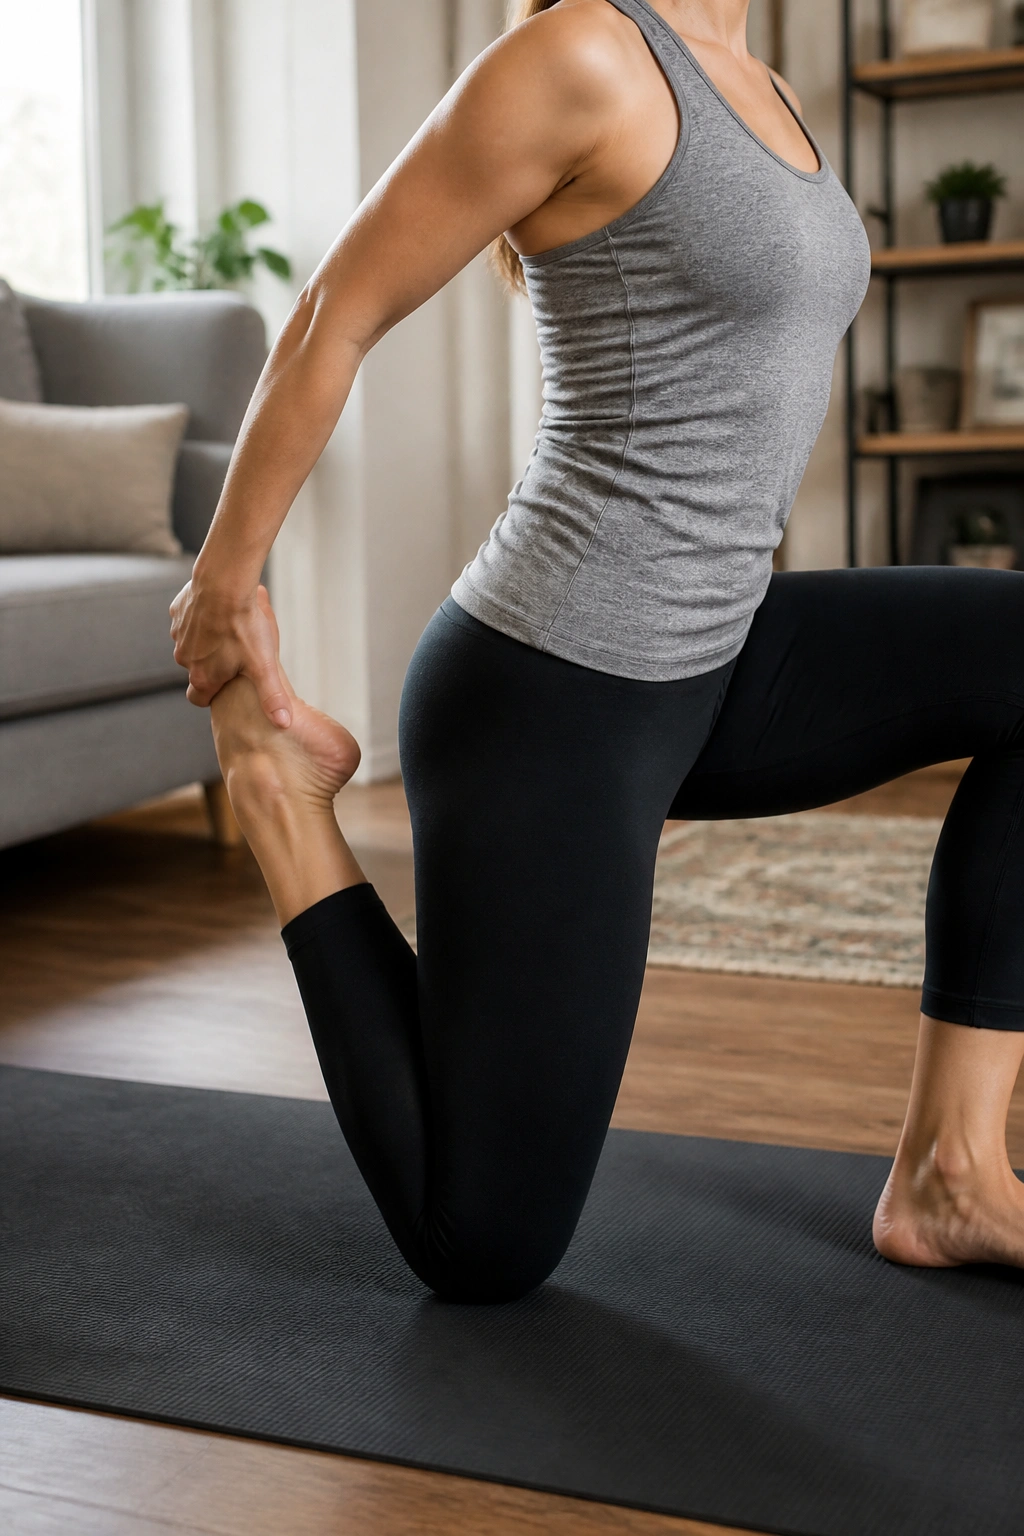
The quad stretch gets reduced to a quick heel-to-butt grab too often, and that version can be rough on the knee. Half-kneeling is steadier, more controlled, and usually easier to feel in the right place.
From a half-kneeling position, shift your weight slightly forward, then bend the back knee and reach back to catch the top of the foot. Keep the knees close together and the pelvis tucked a little under. If you lean back, the low back takes over. If you yank the foot too hard, the knee gets annoyed.
Make It Kinder on the Knee
Use a folded towel under the kneeling knee.
Keep the front foot far enough ahead that the shin is roughly vertical.
Stop if the knee feels sharp or compressed.
The stretch should show up along the front of the thigh and maybe near the hip flexor. That front line gets tight fast after running, squatting, stair climbing, or long sitting. Hold 20 to 30 seconds, breathe out, and let the thigh soften instead of trying to force it open.
9. Figure-Four Glute Stretch
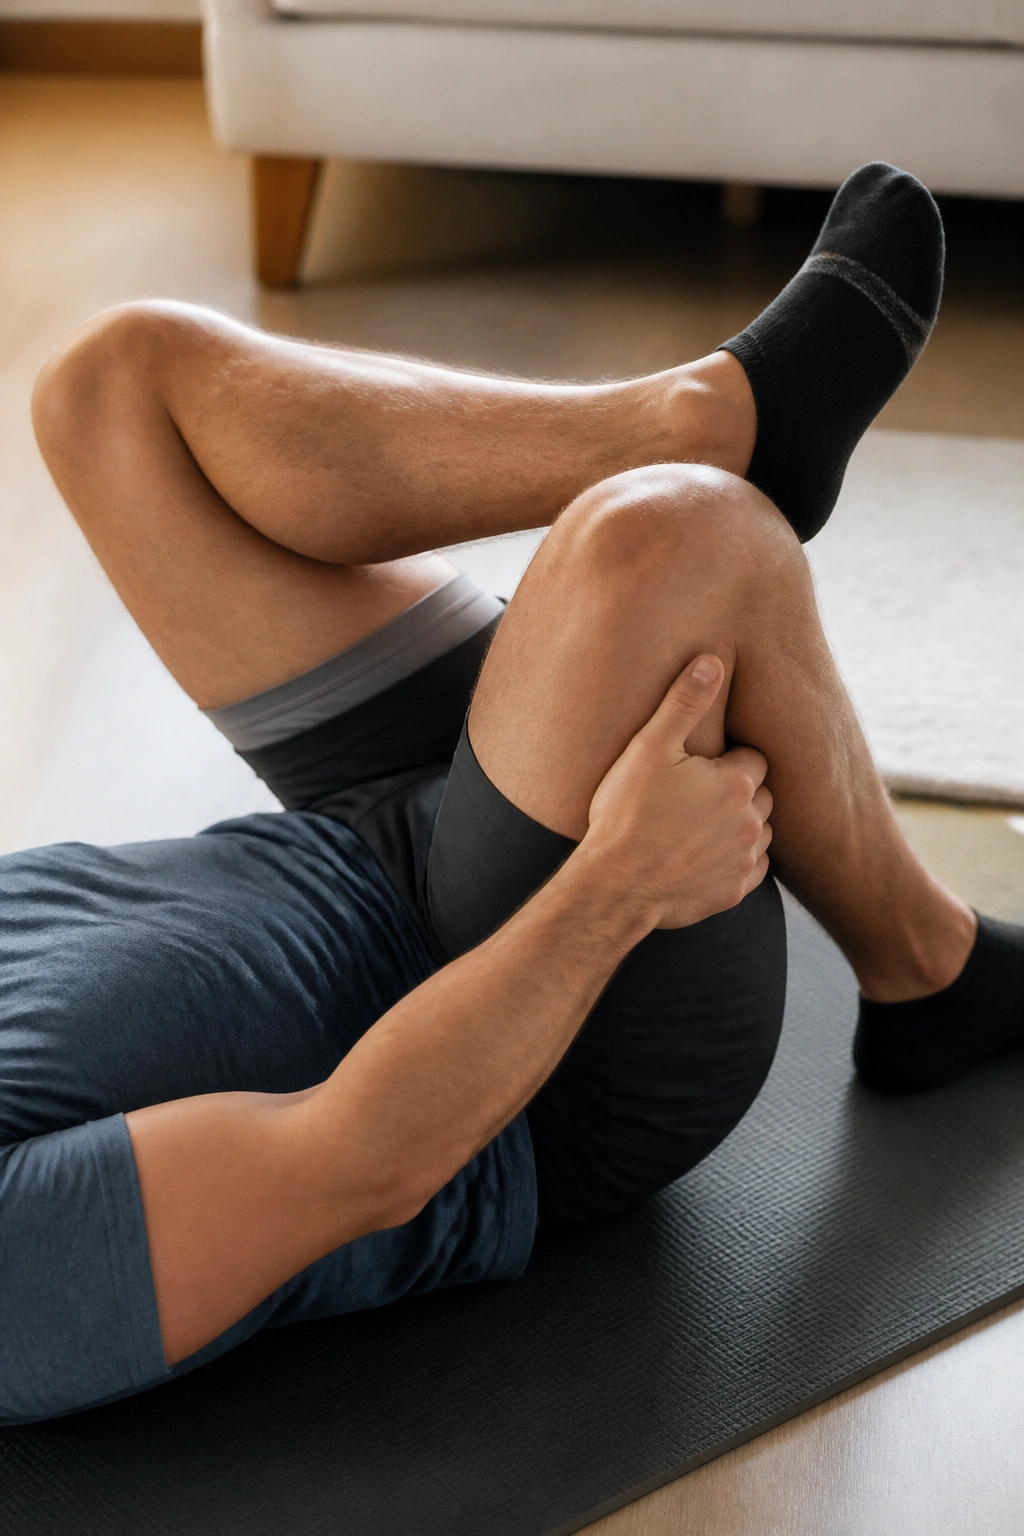
A tight butt can be real, but it’s often tied to hip work, sitting, or walking mechanics, not just the glutes themselves. The figure-four stretch is one of the few home moves that reliably reaches that deep outer-hip area without much drama.
Lie on your back with both knees bent. Cross your right ankle over your left thigh, just above the knee, then thread your hands behind the left thigh and pull the leg toward you. You should feel the stretch in the right glute and the outer hip. If your knee is sensitive, keep the crossed ankle flexed rather than letting the foot hang loose.
How to Use It After a Workout
- 20 to 30 seconds per side after walking, lifting, or cycling
- 2 rounds if the hip feels stubborn
- Keep your head relaxed on the floor
- Stop if the knee feels twisted
This one works best when the breathing stays easy. If you find yourself holding your breath, you’re probably pulling too hard. Ease up. A good stretch should feel like permission, not punishment.
10. Supine Hamstring Stretch with a Towel
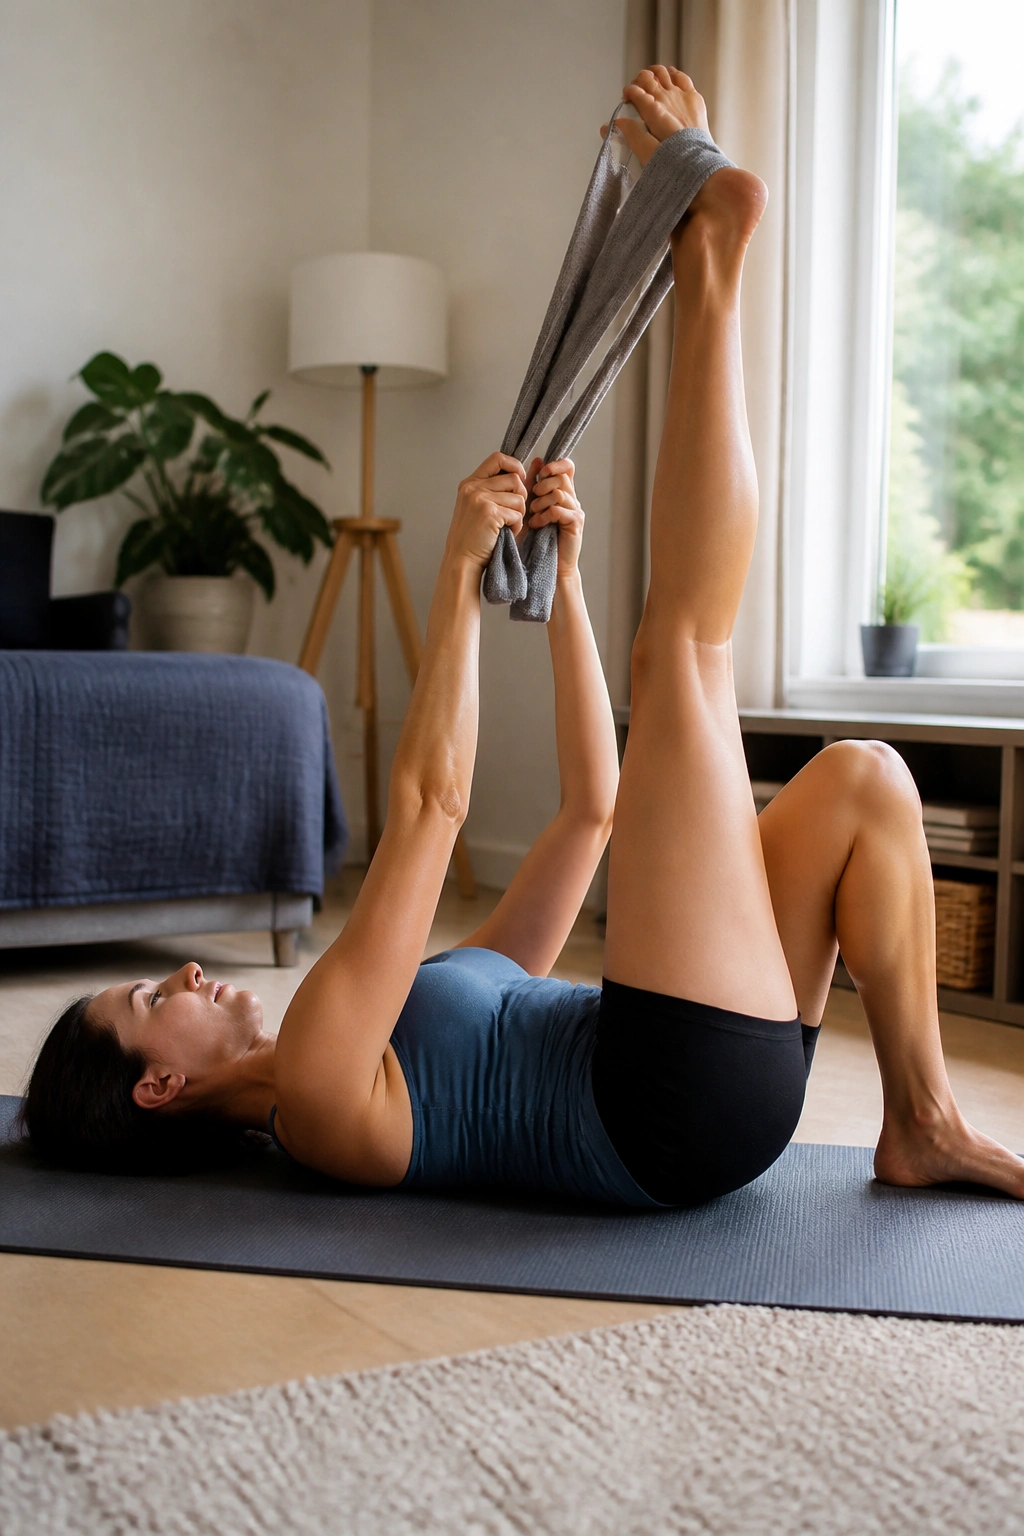
Hamstrings often feel tight because they are tight, but they also get cranky when the pelvis and low back are doing too much. A towel-assisted stretch lets you control the angle instead of fighting the whole chain at once.
Lie on your back and loop a towel, strap, or belt around one foot. Straighten the leg toward the ceiling while keeping the other leg bent or flat on the floor. Draw the leg up only until you feel a stretch behind the thigh. The knee can stay slightly soft if straightening it all the way makes the back round.
Do not chase a straight leg at the cost of your back.
That’s a bad trade.
If you feel the stretch mostly behind the knee, slide the leg a little lower and bend the knee a touch. If you feel it in the back of the pelvis, you’ve gone far enough. Hold 20 to 30 seconds and switch sides. Two gentle rounds usually beat one aggressive one.
11. Calf Wall Stretch
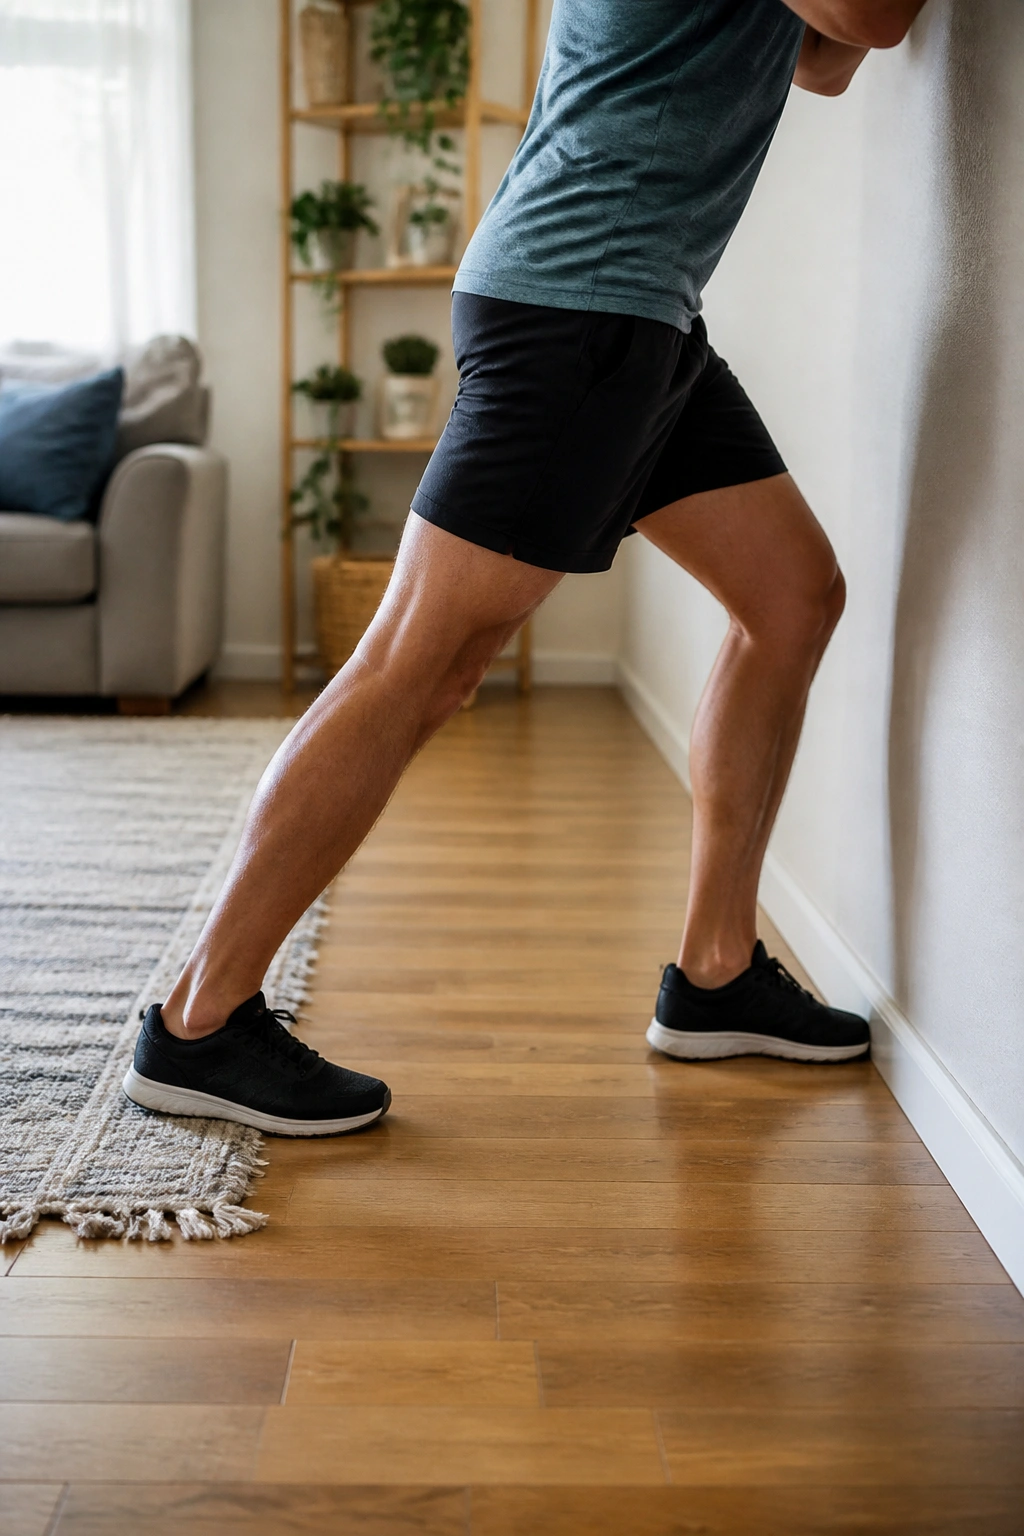
Calves get neglected until they start making stairs, running, or even long walks feel heavy. The wall stretch is basic, but it’s one of the few things that reliably reaches both the big calf muscle and the deeper one underneath.
Stand facing a wall, place both hands on it, and step one foot back. Keep the back heel down and the back knee straight to target the larger calf muscle. Then bend the back knee slightly to shift the stretch lower into the deeper muscle. The difference is small but real. You can feel it.
Key Details That Matter
- Back heel stays heavy
- Front knee bends a little
- Back foot points straight ahead or slightly in
- Hold each position for 20 seconds
If your heel pops up, shorten the stance. If the Achilles tendon is sore, don’t force the deepest angle. A mild stretch that you can breathe through is the right level here. Calves hate being bullied. They respond better to steady pressure.
12. Ankle Rockers Against the Wall
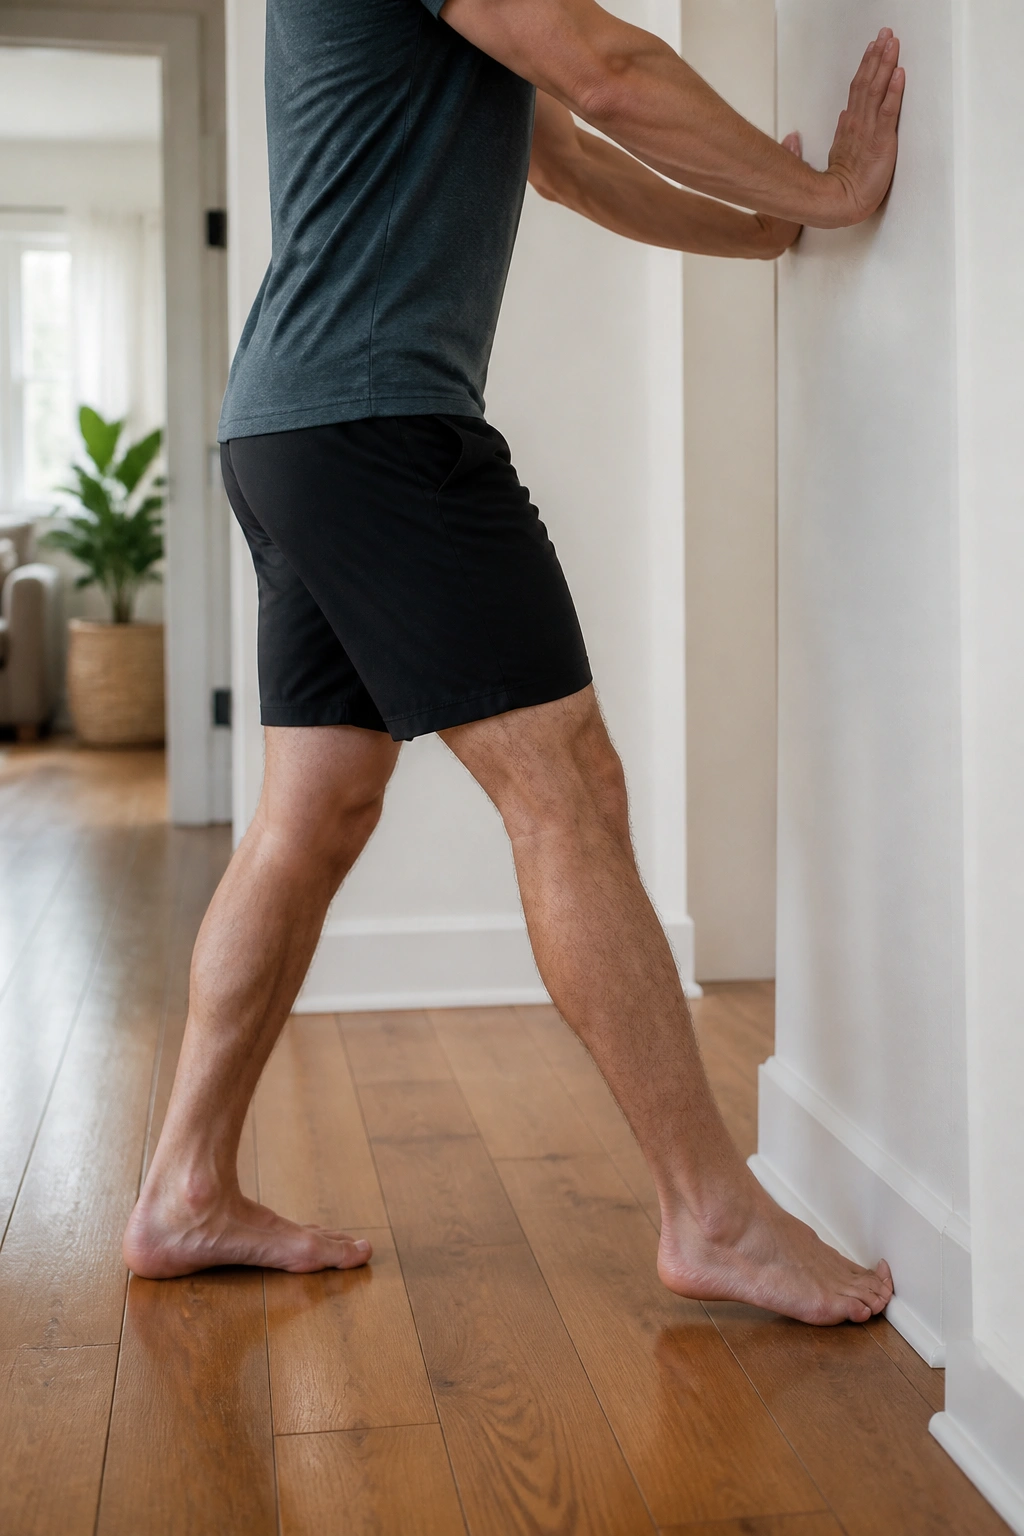
Tight calves and stiff ankles often travel together. When the ankle does not bend well, walking and squatting get clumsy, and the lower leg starts to feel tense even before you’ve done much. This isn’t a glamorous stretch. It is, however, useful.
Stand facing a wall with one foot a few inches away from it. Keep the heel down and drive the knee toward the wall without letting the arch collapse. Then back off and repeat 10 to 15 times. You’re not holding this one long; you’re exploring a small range of motion that often gets forgotten.
Unlike the long calf hold, this is a moving stretch. It wakes up the ankle joint and gives the calf a chance to lengthen under light load. That’s often what it needs more than another passive hold.
If the knee hits the wall too easily, move the foot back a little. If the heel lifts, move closer. Small adjustments matter more here than force.
13. Sphinx Pose for Lower Back Tension
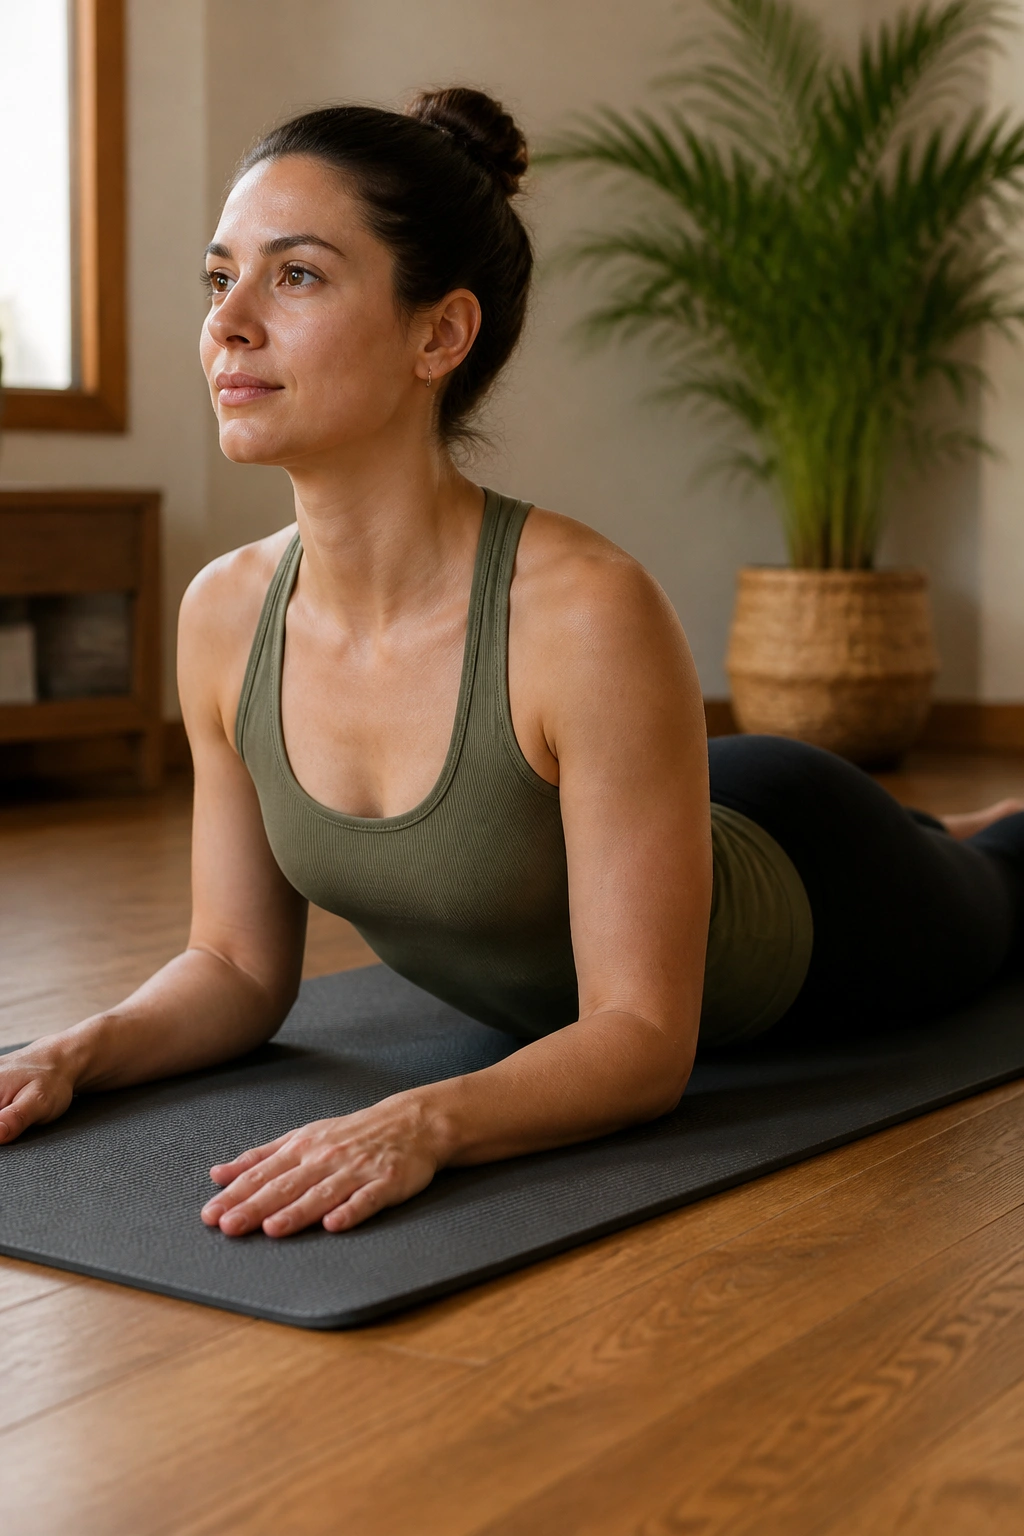
A sore, tense low back does not always want a forward bend. In some cases, it wants a little extension and a chance to stop guarding. Sphinx pose gives you that without cranking into a big backbend.
Lie on your stomach, bring your elbows under your shoulders, and let your chest lift gently as you press the forearms into the floor. Keep the glutes soft and the low back long. If the pressure feels too sharp, move your elbows farther forward or lower your chest a bit.
How Long Is Enough?
- Start with 15 seconds
- Build to 30 to 45 seconds if it feels good
- Use 2 rounds instead of one long hold
- Stop if the stretch shoots into the hips or legs
Some backs love this. Some don’t. That’s fine. If you feel a smooth opening across the front of the hips and the lower belly area, you’re in the right zone. If it feels pinchy, skip it and choose a gentler option.
14. Low Cobra with Forearms Down
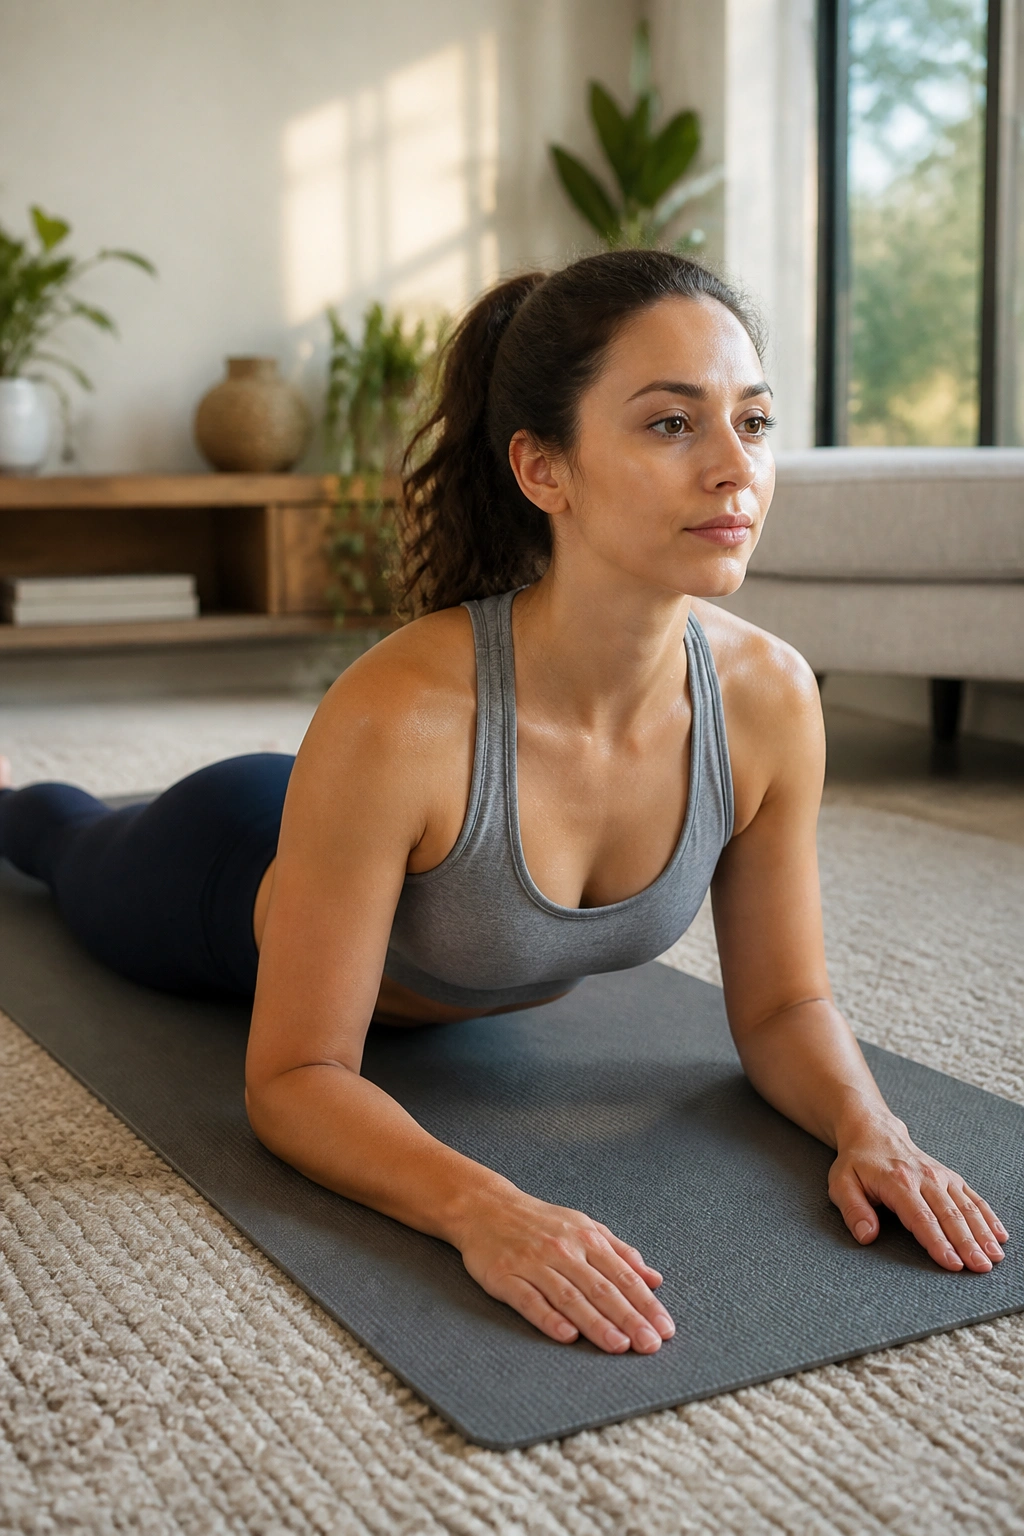
Low cobra is a step up from sphinx, but only a step. People often jump too high too soon, then wonder why their low back feels crankier afterward. Keep the lift modest and the effort spread out.
Lie face down with hands under the shoulders or slightly ahead of them. Press the tops of the feet into the floor and lift the chest a few inches, keeping the hips grounded. Your elbows can stay bent. Your chin should stay long, not jammed upward. The stretch should show up in the front of the body, with the low back doing some work but not all of it.
A lot of desk tension lives in the front line of the body, and this pose opens that line in a way that feels good when you’ve been curled forward for hours. Small lift, long breath, no strain. That’s the formula.
Hold for 10 to 20 seconds, lower down, then repeat once or twice if it feels clean.
15. Open Book Thoracic Rotation
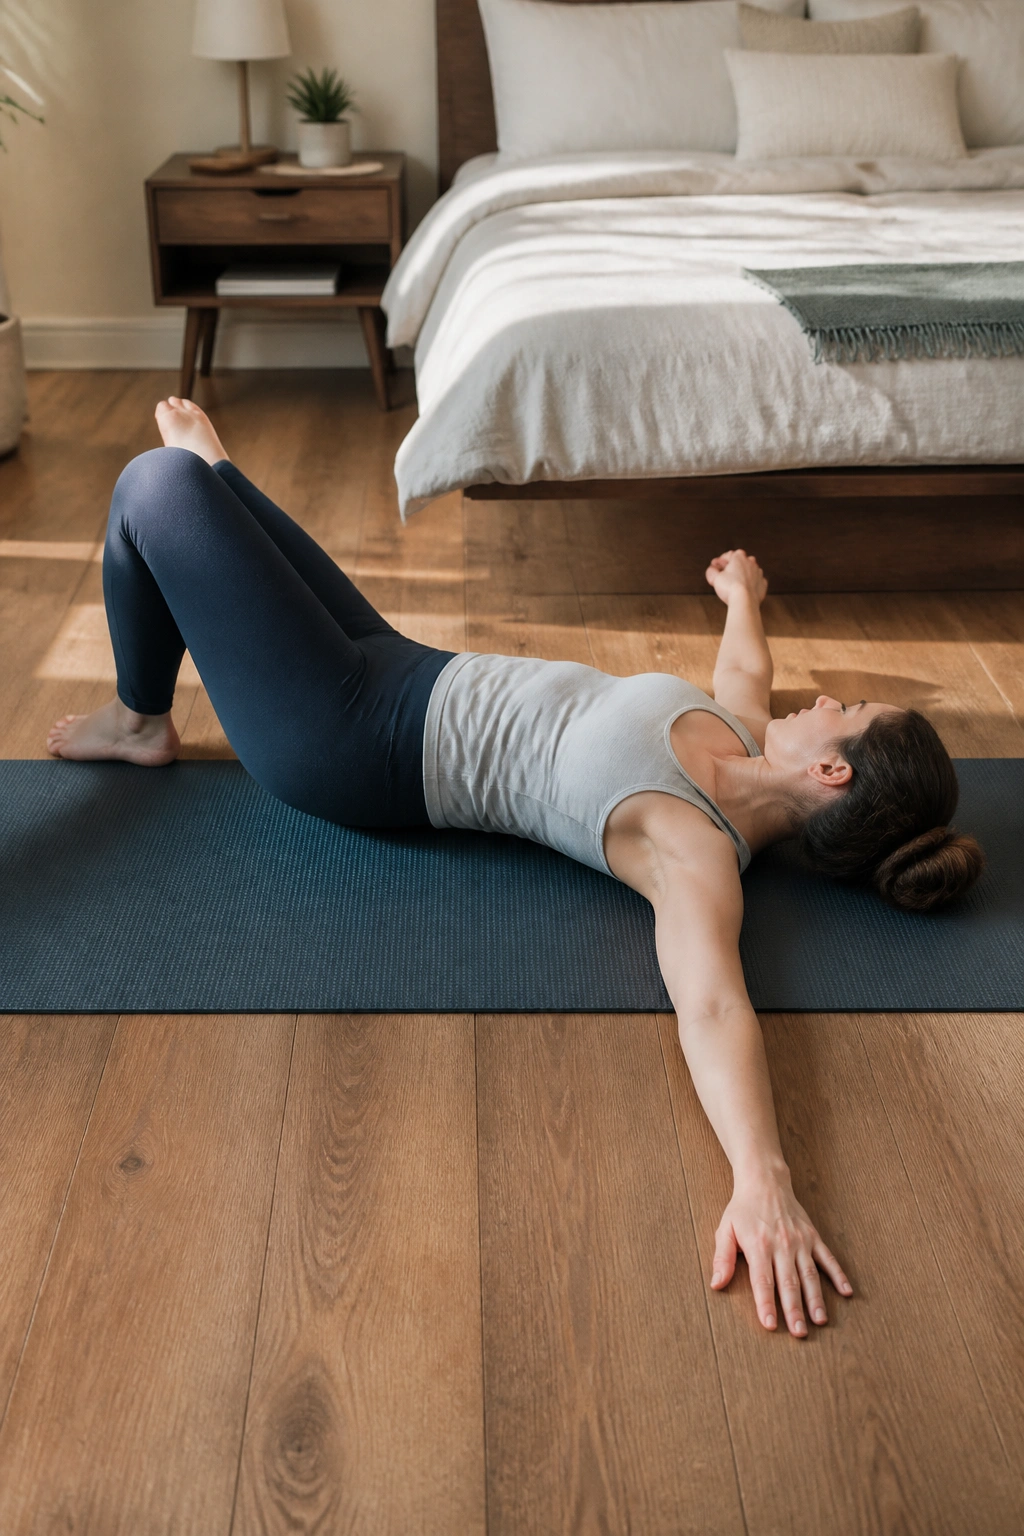
The upper back loves rotation more than people realize. If your shoulders feel locked, chances are your thoracic spine is part of the story. Open book is a clean, easy way to work on that without standing, twisting, or balancing.
Lie on your side with knees bent and arms straight out in front, palms together. Keeping the knees stacked, sweep the top arm open behind you until the chest turns and the top shoulder reaches toward the floor. Let your eyes follow the hand. Then return slowly and repeat 5 to 8 times before switching sides.
The name is a little silly. The stretch is not.
This one is especially useful if you sit with a rounded upper back or sleep curled on one side. It gives the ribs room to move, which often makes breathing feel easier too. Move slowly enough that you can feel the spine, not just the arm. That’s where the real work happens.
16. Wall Lat Stretch
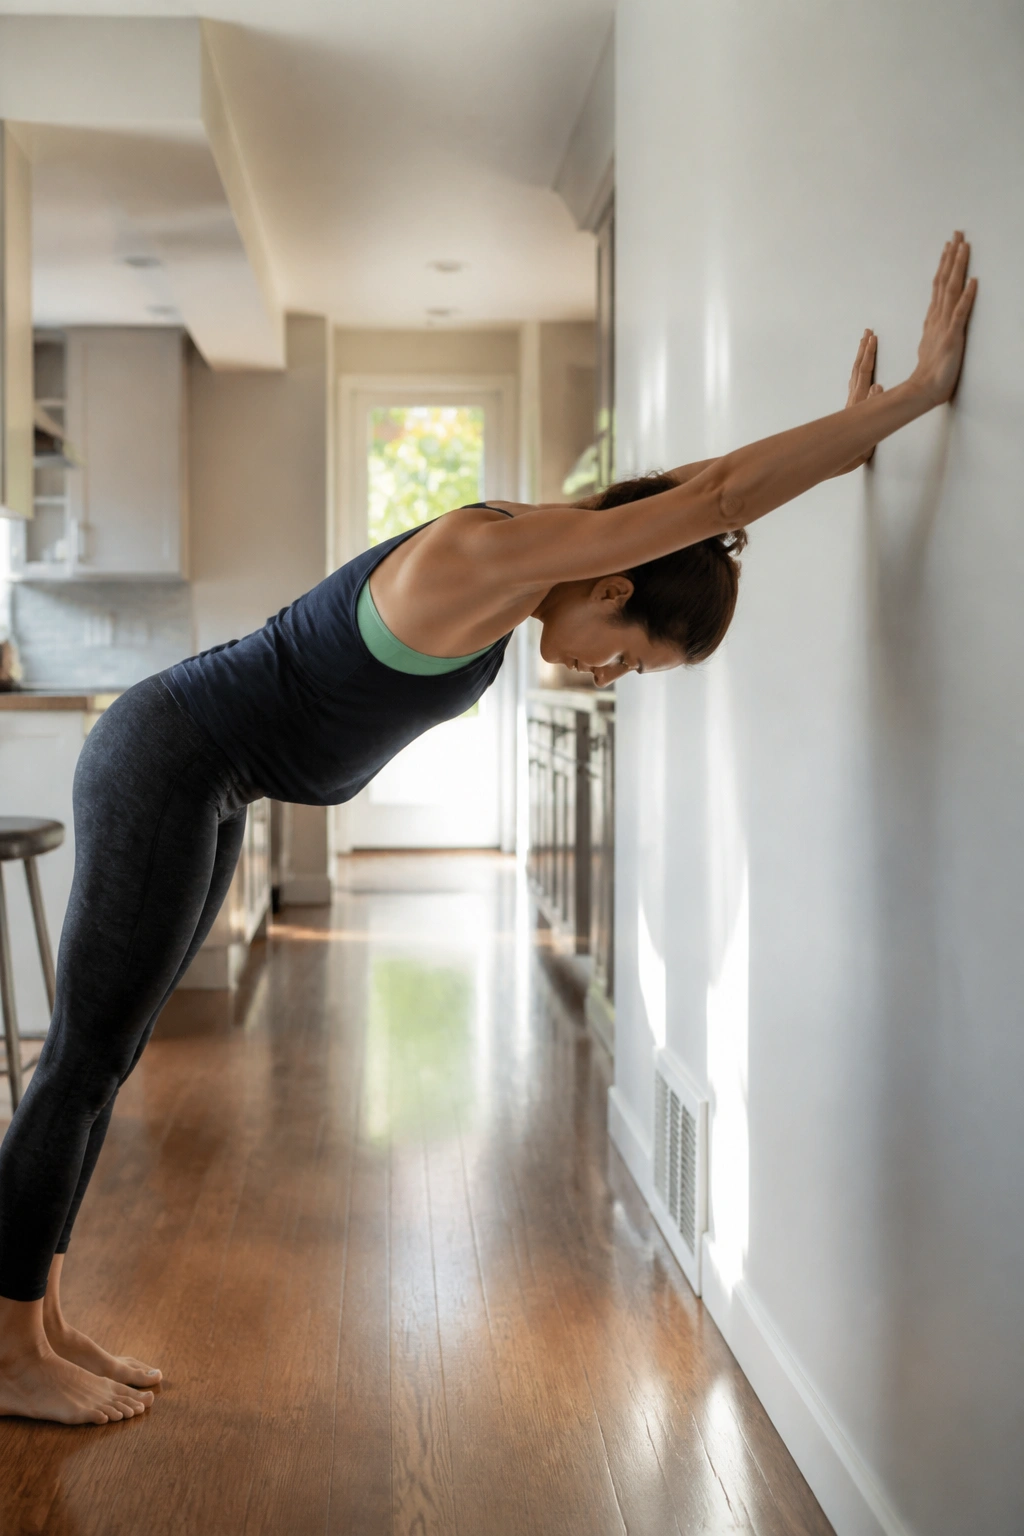
Lat tightness is sneaky. It can make overhead reaching feel blocked, it can tug on the ribs, and it often shows up after pulling, climbing, or carrying a heavy bag on one side. A wall stretch can get to it in a way the floor sometimes can’t.
Place both hands on a wall or countertop, then step back and hinge at the hips so your chest drops toward the floor. Walk your hands slightly to the right to stretch the left lat, or slightly to the left to stretch the right side. You should feel the stretch along the side of the rib cage and under the armpit.
What It Should Feel Like
- Broad, not sharp
- Easy to breathe into
- Strongest near the side ribs
- Relief should come, not strain
If your shoulders creep toward your ears, reset. If the lower back arches hard, bend the knees more and bring the ribs in. This stretch works best when you keep it long and simple.
17. Frog Stretch for Inner Thighs
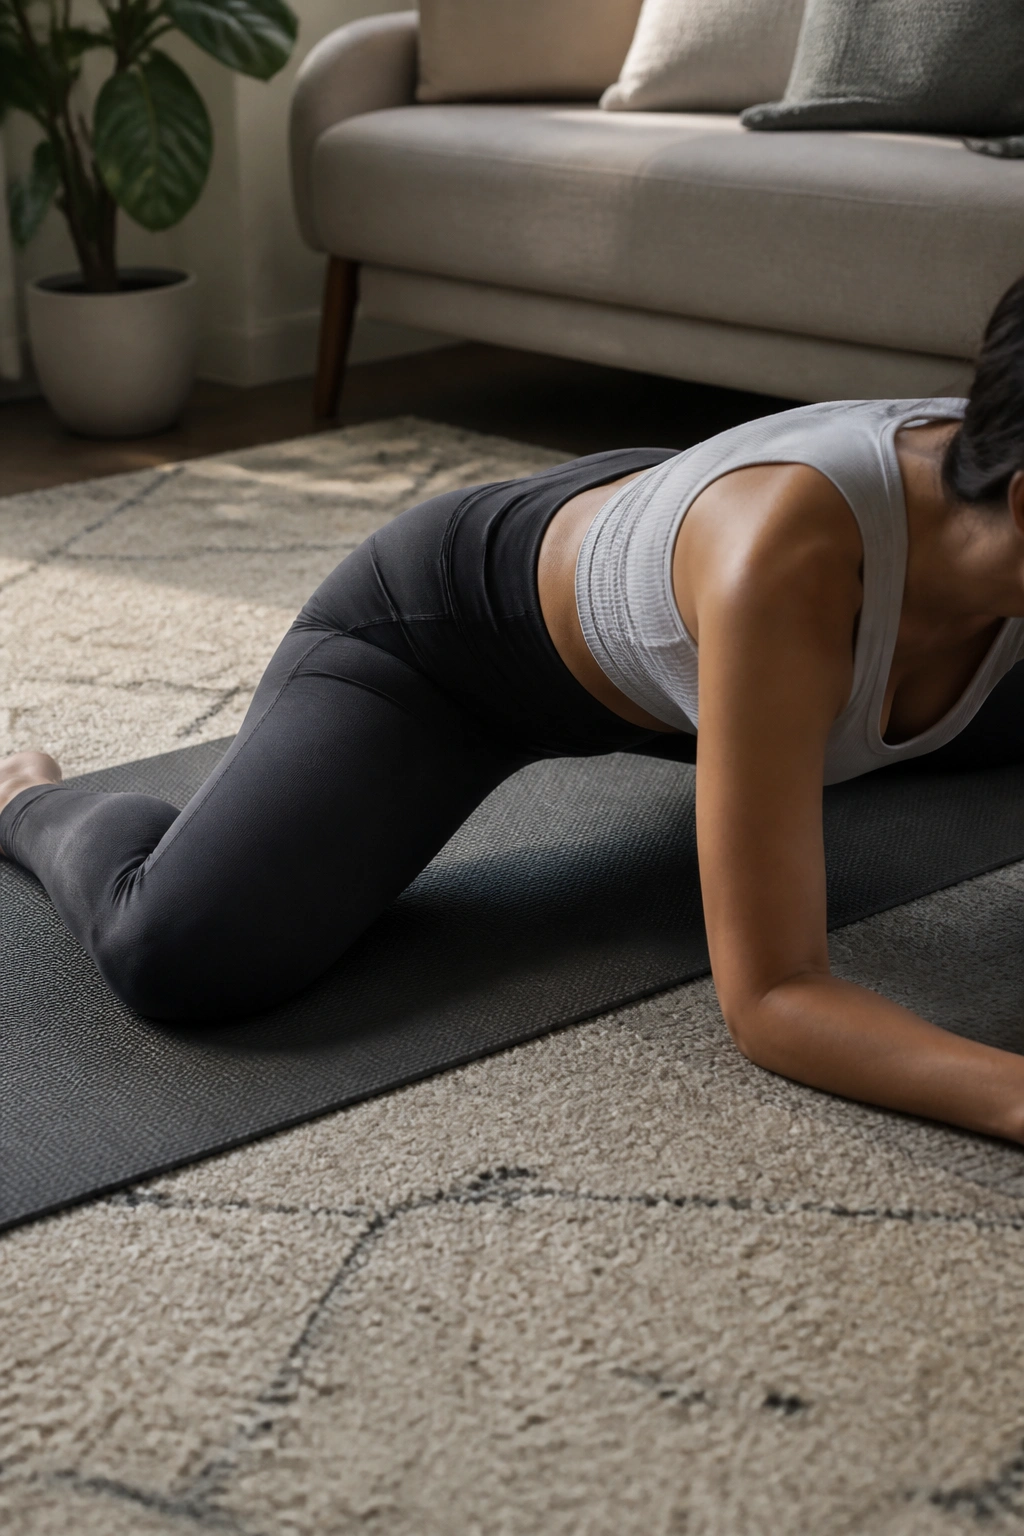
The inner thighs are often ignored until they feel tight during squats, lunges, or side steps. Frog stretch opens that inner line in a way that can feel dramatic, so ease into it like you mean it.
Start on hands and knees, then slide the knees wider apart while keeping the shins in line with the knees. Lower onto your forearms if that feels stable. You should feel a stretch through the groin and inner thighs. Go slow. Seriously. This is not the place to rush.
If the stretch is too intense, bring the knees in a few inches and stay there. If the floor is hard, use a blanket under the knees and forearms. Some people love this stretch. Some people hate the first 10 seconds and then settle in. Either way, the adjustment period matters.
Hold 20 to 30 seconds and breathe low into the belly. Do not force your hips down with your arms. Let gravity do the work.
18. Reclined Knee-to-Chest Stretch
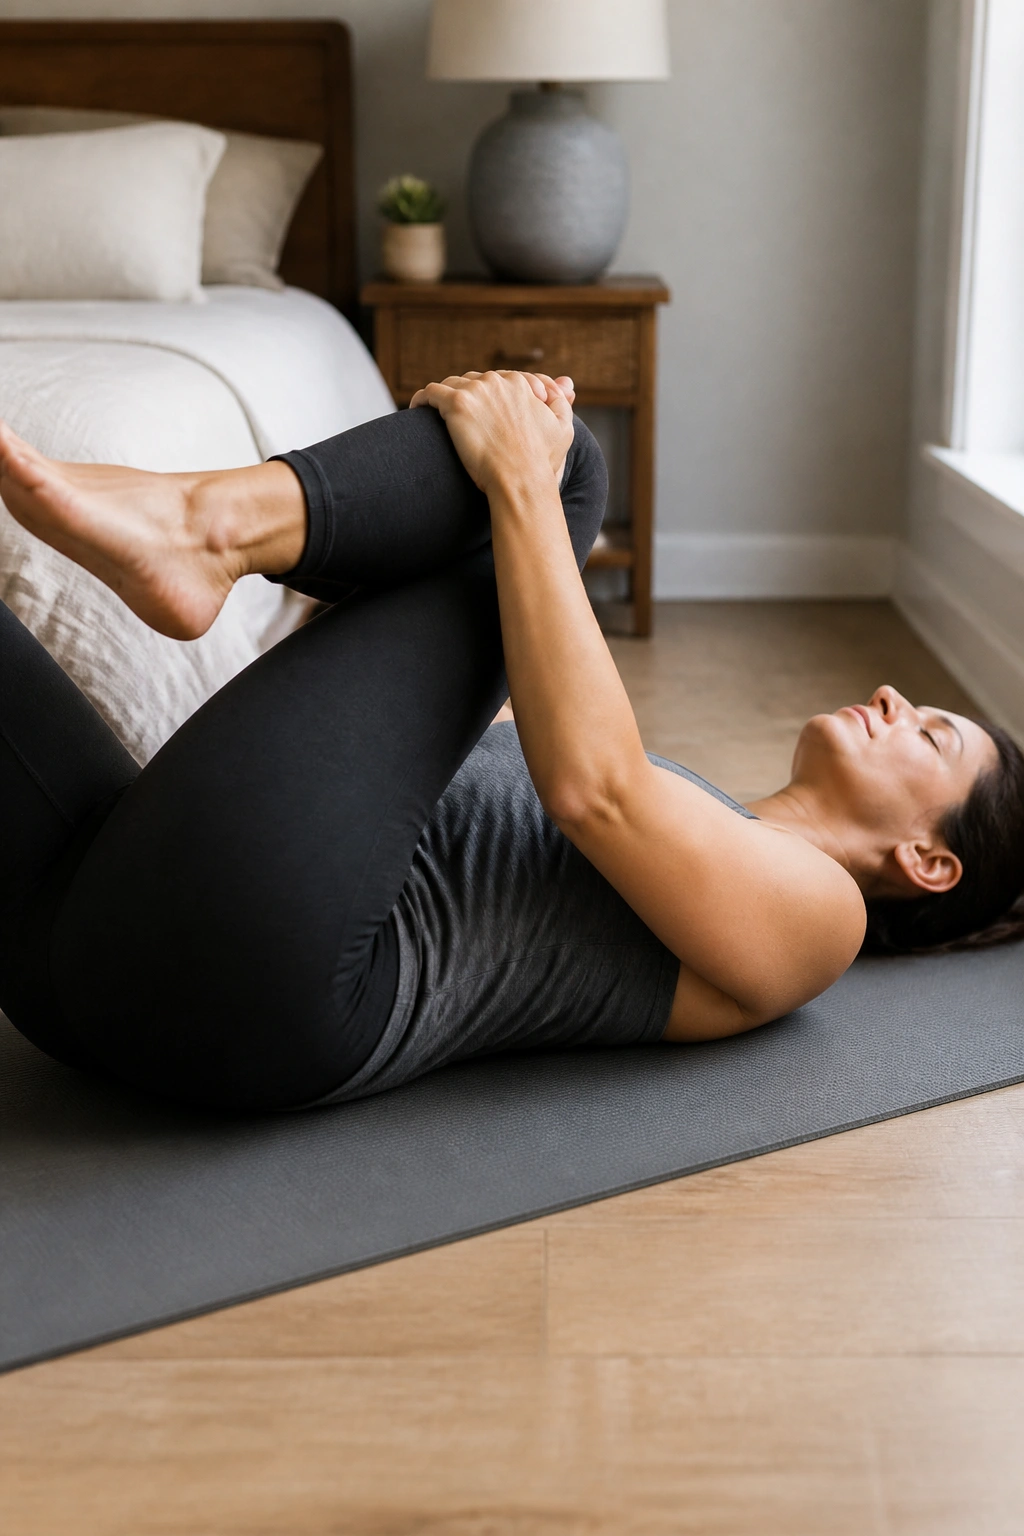
This is the stretch I’d reach for after a long day if the lower back feels compressed and the hips are sulking. It’s simple, but it’s one of the cleanest ways to give the lumbar area a break.
Lie on your back and draw one knee toward your chest, keeping the other leg bent or straight on the floor. You can hold behind the thigh or over the shin, depending on what feels better. If the stretch is supposed to calm you down, keep the grip light and the shoulders soft.
A few people pull the knee so hard that the pelvis jams up. Don’t do that. The point is a mild opening through the low back and hip, not a full fold in half. Hold 20 to 30 seconds, switch sides, then bring both knees in if your back likes the extra pressure release.
It’s a nice one before bed too.
19. Standing Side Bend with Overhead Reach
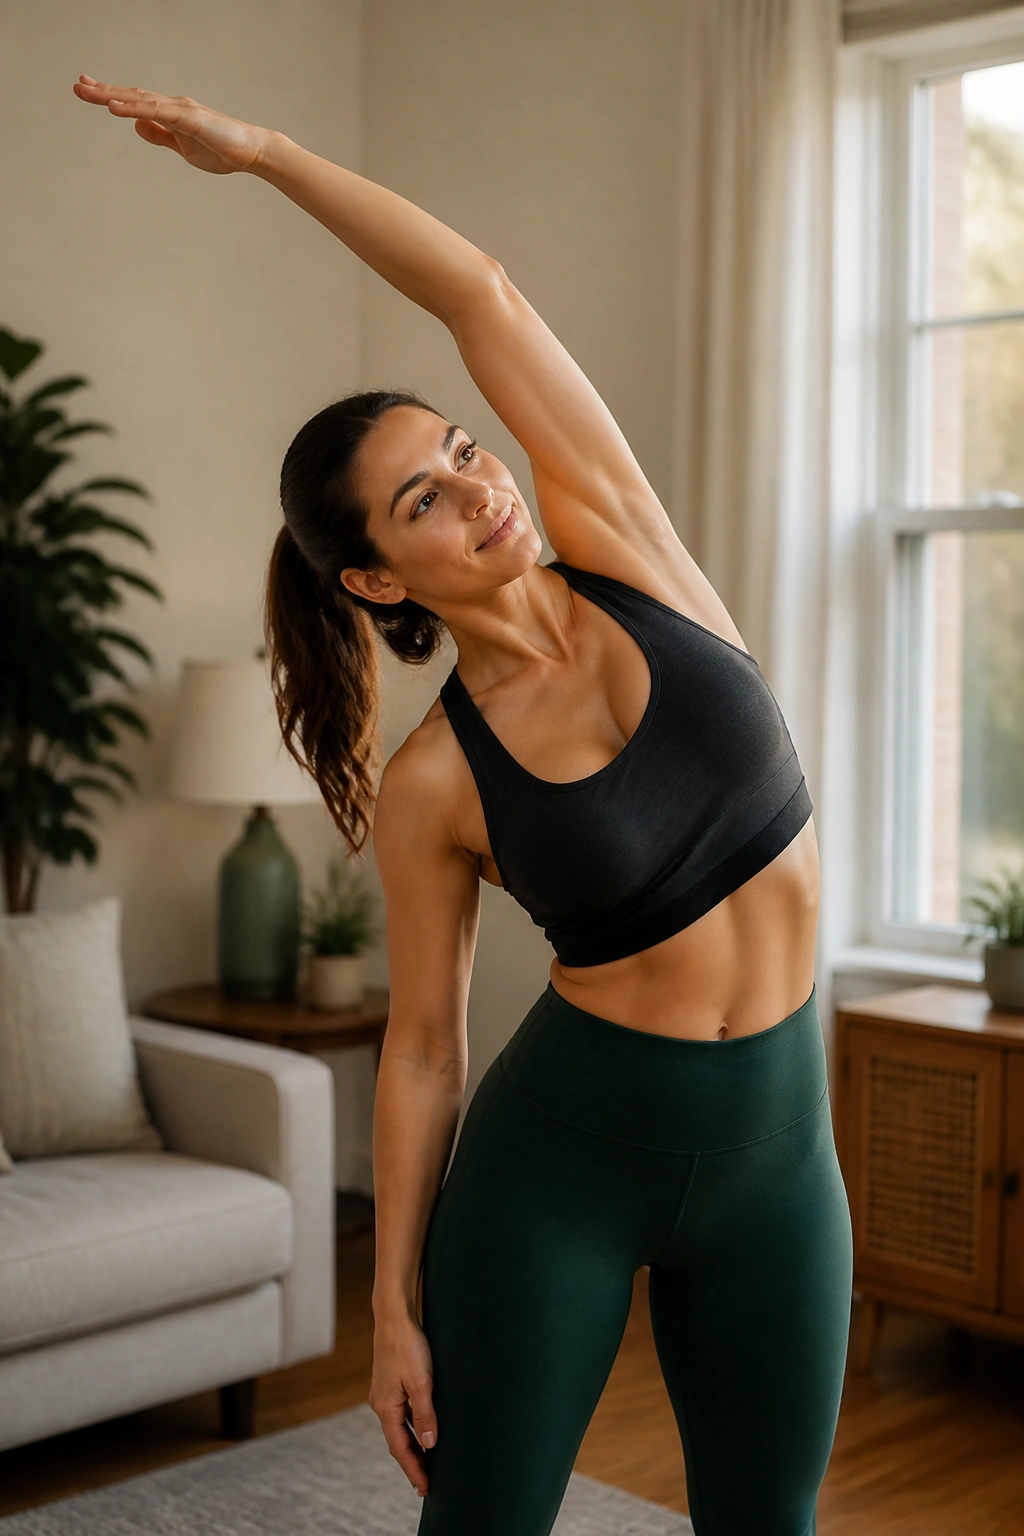
This stretch often gets used as a warm-up, but it’s also a solid way to chase down tension through the ribs, side waist, and lats after a day of carrying stress in your shoulders. It pairs well with the neck stretch earlier because it clears the side body instead of just the top.
Stand tall, reach your right arm overhead, and lean gently to the left. Keep both feet planted and avoid collapsing the chest forward. You want a long arc from the hand through the ribs to the hip. The stretch should feel clean along the right side of the torso, not jammed in the low back.
Try it with the feet about hip-width apart. That gives you enough balance to keep the movement honest. If you twist while you lean, the stretch gets blurry fast. Stay square.
Hold for 20 seconds per side. If one side feels much tighter, give it an extra round. Side body tension loves repetition more than force.
20. Legs-Up-the-Wall Reset
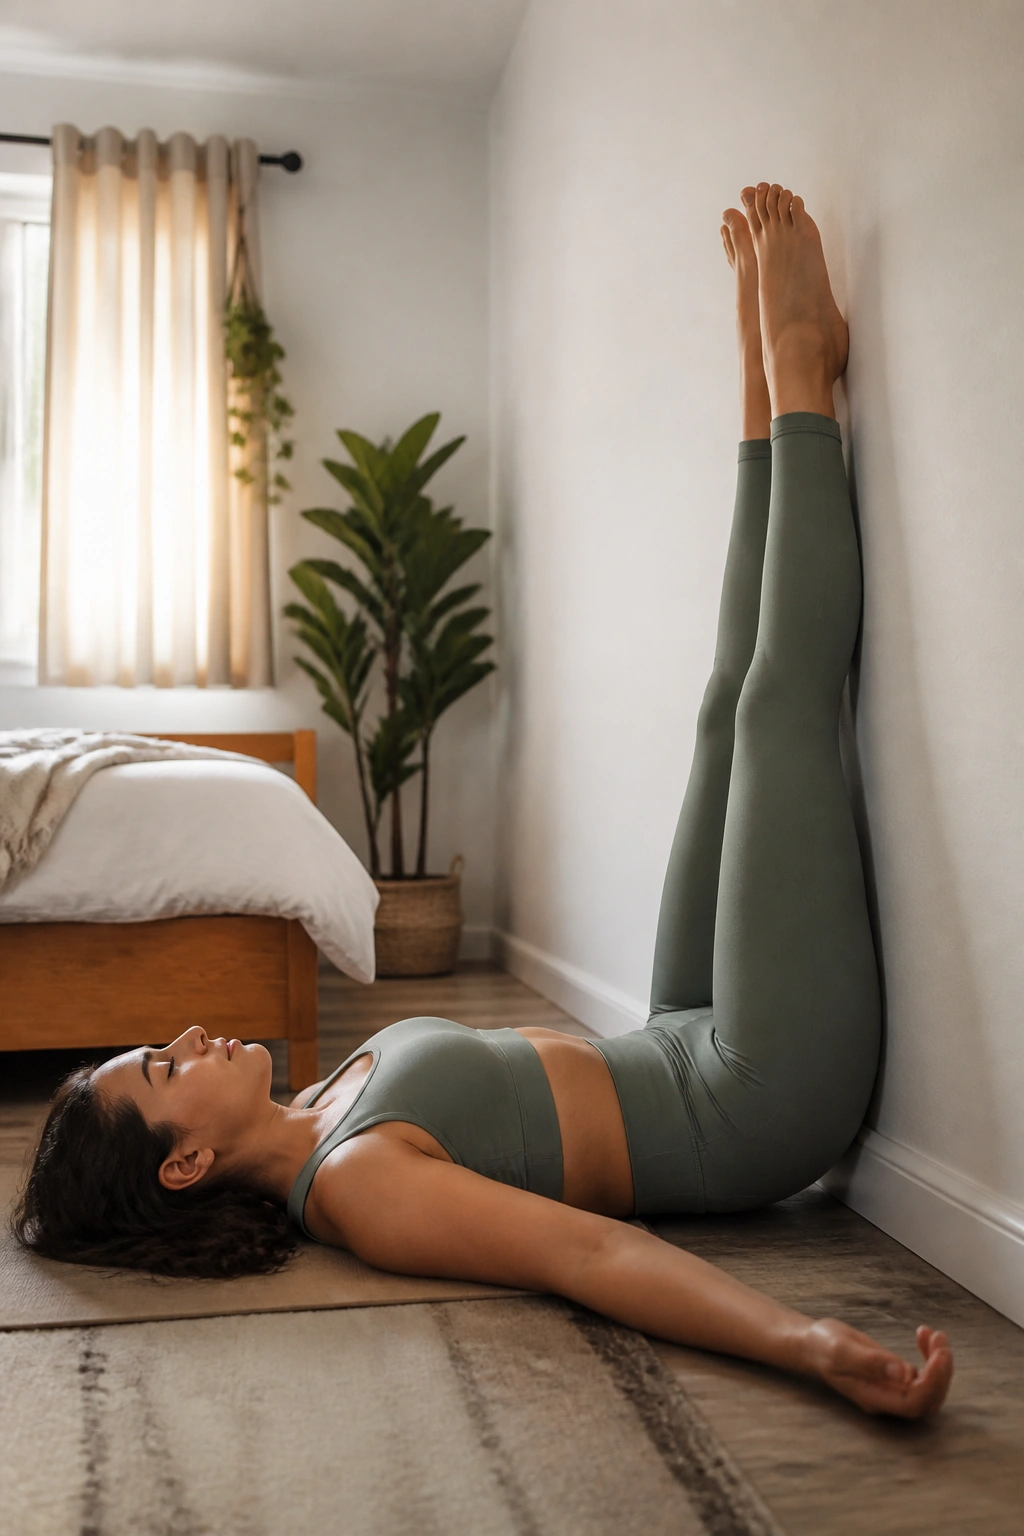
By the time the hips, calves, and back have all gotten their turn, the body usually wants a quiet finish. Legs-up-the-wall is part stretch, part recovery, and part permission slip to stop holding yourself together for a minute.
Sit close to a wall, swing your legs up, and lie back so your heels rest against the surface. Let your arms drop wherever they want. If the hamstrings feel tuggy, scoot a few inches away from the wall. If your low back feels better with a folded blanket under it, use one. No prize for suffering through the wrong setup.
This position is useful after walking, lifting, standing all day, or a workout that left your calves buzzing. It can also take the edge off general body tension when you don’t want a full routine. Stay here for 2 to 5 minutes, breathing slowly through the nose if that feels natural.
Best use: after the rest of these stretches, or on its own when you feel wound up.
Best cue: let the feet go slack.
Best result: less bracing, slower breathing, and a body that feels less busy.
If you only remember one thing, remember this: tight muscles usually like patience more than force. Pick two or three stretches that match where you feel locked up, hold each one with a calm breath, and repeat them often enough that the body starts expecting the easier pattern. That’s where the change comes from.
