



Mountain climber workouts for belly fat get sold like a shortcut, and that’s where a lot of people get annoyed. The move won’t melt fat off one spot on your body — nothing does that — but it can raise your heart rate fast, challenge your core hard, and help you stack up the kind of work that actually matters for fat loss.
That’s why mountain climbers stick around. They’re simple, they travel well, and they punish sloppy form in a way that makes you honest. If your hips are bouncing all over the place, you’re not training your midsection much at all. If your shoulders are stacked, your ribs stay down, and your knees drive with intent, the whole thing turns into a nasty little conditioning drill.
There’s also a practical reason people keep coming back to them. You don’t need a machine, you don’t need much space, and you can make the move easier or harder in a dozen different ways. Put them on the floor, on a bench, under a timer, or into a circuit, and they keep doing the job.
These 12 mountain climber workouts cover the whole spread, from beginner-friendly incline sets to heart-thumping finishers that leave you staring at the floor for a minute after. Use the one that matches your level, your wrists, and your patience. Then build from there.
1. Standard Mountain Climber Intervals
Standard mountain climbers are the plain white T-shirt of conditioning work. Nothing fancy. They earn respect because they’re easy to start and hard to fake.
The basic setup is simple: get into a high plank, brace your abs, and drive one knee toward your chest while the other leg stays extended. Switch legs quickly, but don’t turn it into a sloppy bounce. If your lower back sags or your hips shoot up, slow down and clean it up.
How to Run It
A solid fat-loss format is 40 seconds of work, 20 seconds of rest, for 10 rounds. That gives you 10 minutes of real output without burying you. If you’re new to the move, start with 20 seconds on and 40 seconds off. The point is quality reps, not frantic noise.
Quick Form Checks
- Hands should stay under your shoulders.
- Your chest should face the floor, not the wall.
- Knees should travel forward, not just up.
- Your breathing should sound sharp, not panicked.
Tip: If you can talk in full sentences, you’re probably not working hard enough. If you can’t keep your hips level for the full interval, shorten the set and keep the posture clean.
2. Cross-Body Mountain Climbers for the Obliques

Cross-body climbers hit different. They ask your torso to resist rotation while each knee drives toward the opposite elbow, and that extra twist makes the drill feel more demanding almost immediately.
The key is not speed. People love to fling the knee across and call it training. That’s just chaos with sneakers on. Pull the knee toward the opposite side of your body, keep your shoulders quiet, and squeeze your obliques as if you’re trying not to spill a glass of water.
You’ll feel these in the side wall of your abs more than in the straight-ahead version. That matters because a strong midsection doesn’t only look better when body fat comes down; it also keeps your posture from collapsing when the workout gets ugly. And yes, it gets ugly.
For a clean session, do 30 seconds hard, 15 seconds easy, for 8 rounds. If your form starts to wobble, slow the tempo and pull each knee with intention. Fast and crooked is a waste of energy. Controlled and hard is where the payoff lives.
3. Slow-Motion Climbers with Pauses

Why make mountain climbers slow when the whole point seems to be speed? Because slow work shows you exactly where your form falls apart.
Slow-motion climbers strip away the usual hiding spots. You can’t bounce through a weak plank. You can’t fling your knees and hope for the best. Each rep has to earn its place, which is why this version is so useful for people who want a stronger core and cleaner movement before they jump into the faster stuff.
How to Use It
Drive one knee forward over 3 seconds, hold for 1 to 2 seconds at the top, then return the foot to plank with control. Alternate sides for 6 to 8 reps per leg, rest 30 to 45 seconds, and repeat for 3 to 4 rounds. That sounds gentle until your abs start shaking.
What to Watch For
- Hips stay low.
- Shoulder blades stay spread.
- The lifted knee comes close to the chest.
- The lower back does not pinch.
If you’re rehabbing your conditioning after time off, this is a smarter place to start than a sprint version. Slow climbers also work well as a warm-up before a tougher circuit, because they wake up the core without chewing through all your gas. Clean reps first. Speed later.
4. Slider Mountain Climbers on Towels or Discs
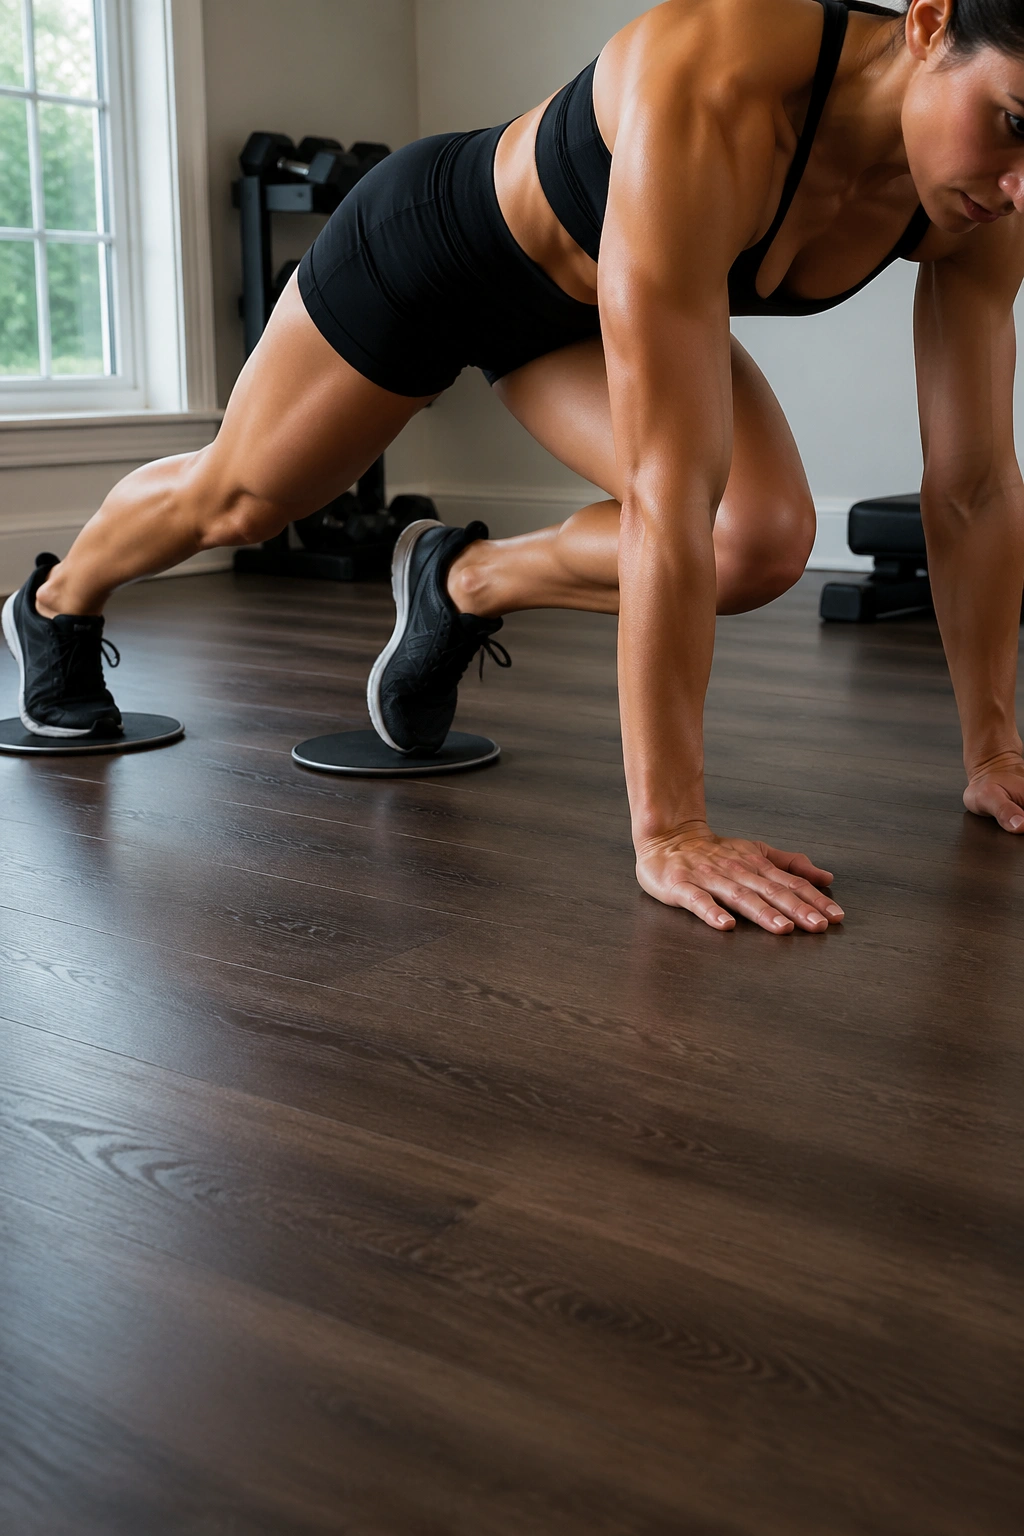
Picture this: your feet keep slipping on hardwood, your hands are planted, and suddenly the move feels twice as hard. That’s not a bad thing. That’s slider mountain climbers doing what they do best.
Use sliding discs, paper plates, socks on a smooth floor, or towels on a polished surface. The back foot has to travel under control instead of snapping off the floor, and that extra slide makes your hamstrings and lower abs work harder to keep the plank from folding. It also makes the move feel longer, which is sneaky in the best way.
The important part is friction management. Too much grip and you lose the slide. Too little and your feet skate around like you’re trying to escape a kitchen spill. The sweet spot is a smooth, controlled glide that lets you pull the knee in without losing the body line.
- Work interval: 20 to 30 seconds
- Rest: 20 to 30 seconds
- Rounds: 8 to 12
- Surface: smooth, dry, and stable
These are a little meaner than standard climbers, so don’t chase speed on day one. Once you can hold your hips down through the whole set, then you can press the pace. Before that, the exercise is still doing enough.
5. Incline Mountain Climbers on a Bench or Couch
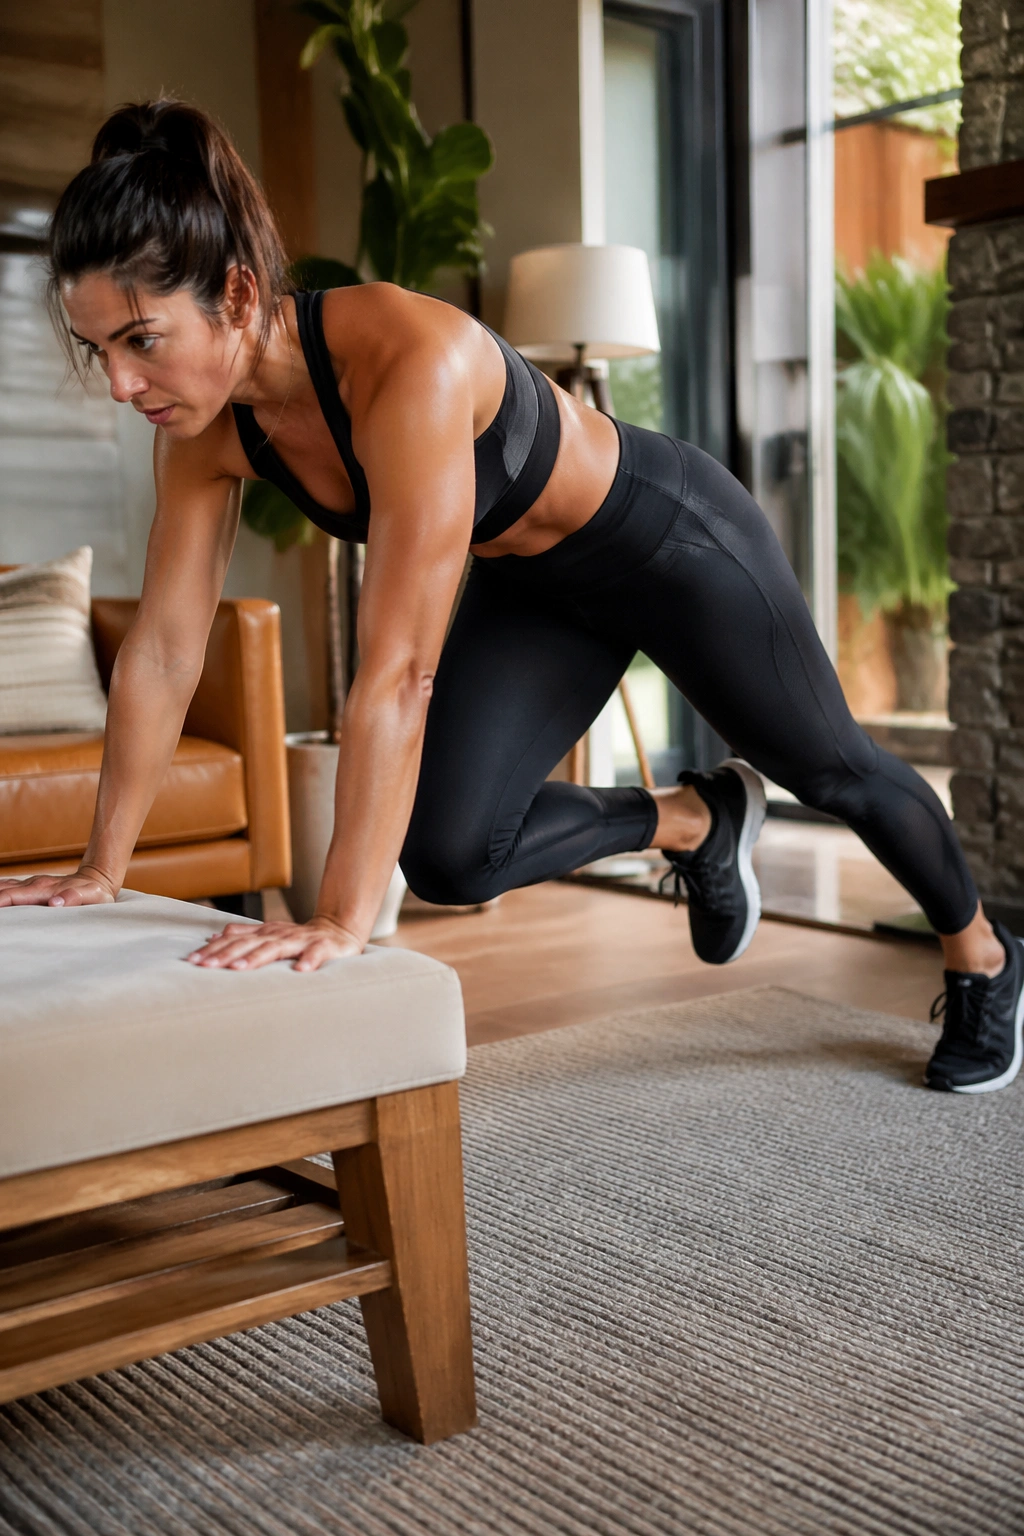
Incline mountain climbers are the version I reach for when wrists are cranky or the floor variation feels too aggressive. Same pattern, less stress.
Put your hands on a sturdy bench, box, low step, or even the edge of a solid couch if it will not move. From there, drive the knees forward one at a time while keeping your shoulders stacked over your hands. The angle takes some load off the shoulders and wrists, but don’t make the mistake of treating it like an easy option. If you keep the pace honest, your heart rate will still climb fast.
There’s also a form benefit here. Because the body is a little more upright, many people find it easier to see and fix the problem of hips shooting too high. That matters. A pretty plank is not the goal, but a stable plank is what lets the rest of the workout work.
Try 45 seconds on, 15 seconds off, for 6 to 8 rounds. If you’re using this as a finisher after strength work, that’s enough. If you’re using it as your main conditioning block, build to 10 rounds and keep the tempo sharp. Don’t let the incline fool you. It still counts.
6. Spiderman Mountain Climbers for a Bigger Range of Motion

Spiderman mountain climbers look a little strange the first time you do them, and that’s fine. Strange is often effective.
Unlike straight-ahead climbers, this version sends the knee wide toward the elbow on the same side. That opens the hip, lights up the obliques, and forces more control through the trunk. It feels less like a sprint and more like a crawling pattern with a purpose. I like that. It makes the body work in a way that’s closer to real movement instead of just fast foot traffic.
They’re also useful if regular climbers make your hip flexors feel tight. The wider path changes the angle enough to feel different without turning it into a totally new exercise. You still need a strong plank. You still need steady shoulders. But the side reach adds more demand to the midsection.
Use 30 seconds on, 30 seconds off, for 6 rounds if you want a focused burn. If you want more cardio, pair them with standard climbers in a two-move circuit: 20 seconds standard, 20 seconds spiderman, 20 seconds rest. Repeat that 6 times. Clean and aggressive. No flailing.
7. Single-Leg Mountain Climber Repeats

Single-leg climbers are one of those workouts that look simple until one side starts shaking faster than the other.
Why They Work
Working one leg at a time exposes weak links. If your left knee drives smoothly but your right side feels clumsy, that difference will show up fast. The move also makes your core fight harder against shifting weight, which is useful when you want more than a quick sweat session.
How to Do Them
Start in plank and bring the right knee toward the chest for 1 second, return it, then repeat the same side for 10 reps before switching. Rest 30 seconds and do 3 to 4 rounds. If that feels too easy, hold the knee in for 2 seconds on each rep. That pause changes everything.
What Usually Goes Wrong
- People rush the switch and lose balance.
- The planted foot twists too much.
- The hips rotate instead of staying square.
Keep the movement neat. A neat rep is a hard rep here. If one side keeps wobbling, don’t ignore it. That imbalance tends to show up again in faster cardio work, and it’s better to clean it up while the move is still slow enough to control.
8. Ladder Pyramid Mountain Climbers

A ladder pyramid is one of the best ways to keep mountain climbers from getting mentally boring. The body likes structure, and the brain likes to know there’s an ending in sight.
Start with 20 seconds of work, rest 20 seconds. Then go 30 seconds, rest 30. Then 40 seconds, rest 40. After that, come back down: 30, 20, and maybe 10 if you’re feeling smug. That whole sequence gives you a rising-and-falling stress wave that feels a little like interval running without leaving the room.
What I like about the pyramid is pacing. The short first rung lets you settle your form. The middle rungs force you to hold it together when the burn creeps in. The last descent is sneaky, because your legs are already cooked and the short intervals feel harder than they should.
You can run the pyramid with standard climbers, cross-body climbers, or spiderman climbers. I’d keep one variation per session instead of mixing all three at random. That makes it easier to notice progress, and progress is the point. If your 40-second rung stops feeling ugly, you know your conditioning is moving.
9. Every-Minute Mountain Climber Circuit

EMOM means “every minute on the minute,” and mountain climbers fit that format almost annoyingly well.
Here’s the clean version: set a timer for 12 minutes. At the start of each minute, perform 20 fast mountain climbers, then rest for the remainder of the minute. On minute 2, do 10 bodyweight squats. On minute 3, do 20 climbers again. Keep alternating like that until the timer ends. The rest between bursts is the gift. Don’t waste it standing around like you’re lost.
Why It Sticks
The minute format keeps the pace honest. If you blast the climbers too hard in the first round, you’ll pay for it when the next minute rolls around. If you move too slowly, the workout feels soft. There’s a narrow middle lane, and that lane teaches you how to work without blowing up.
A Simple Version
- Minute 1: 20 climbers
- Minute 2: 10 squats
- Minute 3: 20 climbers
- Minute 4: 8 push-ups
- Repeat 3 times
This style is nice when you want conditioning and a little strength work in the same block. It also keeps the session from turning into one endless plank. That matters more than people admit.
10. Tabata Mountain Climber Sprints

Tabata climbers are for the days when you want a short workout that feels long while it’s happening.
The format is brutally simple: 20 seconds all-out, 10 seconds rest, for 8 rounds. That’s 4 minutes total. Four minutes sounds polite on paper. It is not polite in practice. The trick is to move fast enough to spike your breathing, but not so wild that your hips bounce and your shoulders collapse.
If you’re doing this right, the last two rounds will feel like the floor is moving farther away. That’s normal. Your job is to keep the same clean plank shape you had in round one, even if the pace slips a little. Better a slight slowdown than a mess.
What to Watch For
- Hands stay planted.
- Knees drive, they do not fling.
- The neck stays long.
- The low back does not cave.
Use this as a finisher after lifting or as a standalone conditioning hit on a busy day. I would not stack it with another huge interval block unless you enjoy feeling cooked for the rest of the afternoon. Four honest minutes can do plenty.
11. Mountain Climbers and Push-Ups Together

Pairing climbers with push-ups makes the workout feel fuller, and honestly, a bit more adult. It is not just cardio anymore. It is a whole-body grind.
A simple combo looks like this: 5 push-ups, 20 mountain climbers, rest 30 seconds, then repeat for 6 rounds. If you need it easier, do the push-ups from your knees or raise your hands on a bench. If you need it harder, bump the climbers to 30 reps or shrink the rest to 15 seconds. Keep the push-up depth clean. Half-reps are cheap here.
This pairing works because the push-up taxes the chest, shoulders, and triceps before the climbers ask the core to stabilize everything. By the time you get into the second half of each round, your trunk has to work under fatigue. That’s useful. Fat loss workouts are not just about how tired you feel; they’re about how much work you can keep doing when tired shows up.
A little warning: if your shoulders hate push-ups, do the combo on an incline. No prize is handed out for grinding through ugly reps. The better move is the one you can repeat with control.
12. Descending Burnout Climbers
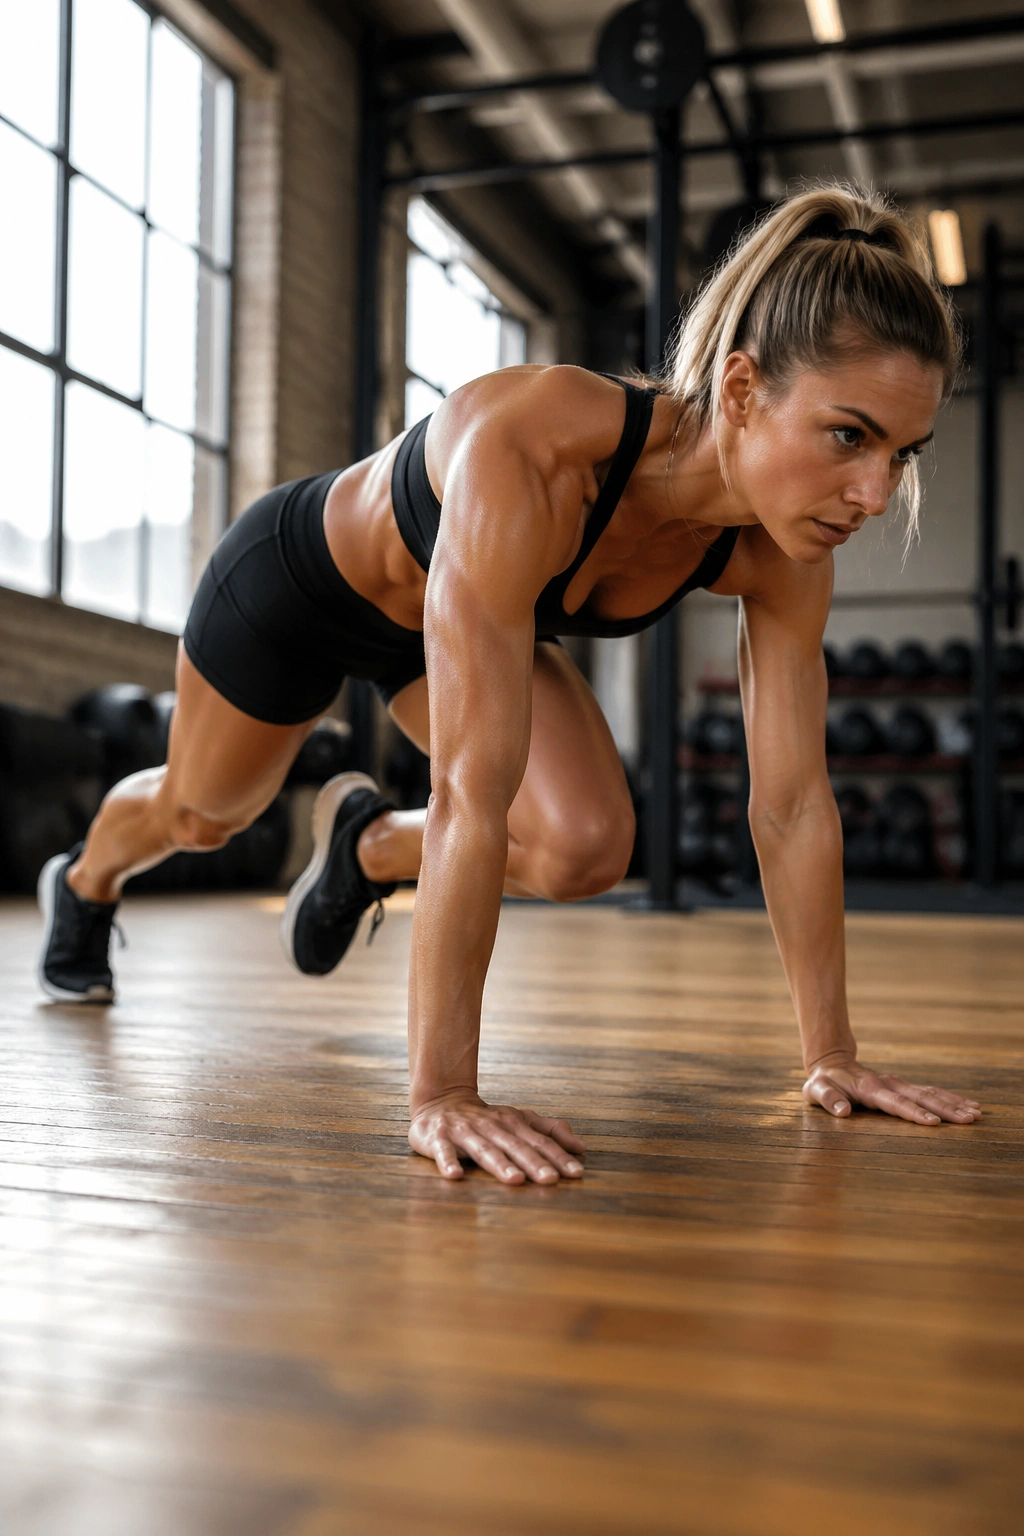
Finish with a workout that feels short on purpose and hard by design.
Start with 30 seconds of fast standard climbers, then 20 seconds of cross-body climbers, then 10 seconds of all-out sprint climbers, followed by 30 seconds of rest. That’s one round. Do 3 to 5 rounds, depending on how spicy you want the session to be. The descending time scheme gives you a little mental relief while the intensity ramps up. Weirdly, that makes the last 10 seconds feel even meaner.
This is the kind of finisher I like at the end of a full body workout or after a brisk walk, because it turns a decent session into a real conditioning hit without needing half an hour more. It also scratches the itch for variety without turning into circus training. Three intervals. One rest. Done.
If you want to make it more beginner-friendly, keep all three work blocks at 20 seconds and use the last 10 seconds only as a form check. If you’re more advanced, add a fourth movement like a plank hold between rounds. Just do not let the movement get sloppy because you’re chasing sweat. Sweat is not the point. Quality work is.
And that’s the part people miss with mountain climber workouts for belly fat: the move is useful because it helps you do more hard work, not because it has magic targeting powers. Keep the reps sharp, keep the intervals honest, and keep showing up with enough consistency for your body to actually change.
