



If your lower abs disappear the second you lie down, the problem usually isn’t a “bad core” — it’s a core that never gets asked to control the pelvis under load.
Leg raise variations for lower belly fat get sold like a shortcut. They aren’t one. Fat loss still comes from overall energy balance, regular movement, and training that keeps muscle on your frame while the waist leans out.
That said, leg raises do something worth caring about. They teach the lower abdomen to brace, stop the low back from arching, and make the front of the body work as a unit instead of letting the hip flexors take over.
Most people rush the rep, swing the legs, and feel the burn in the front of the hips. The better version is slower, smaller, and annoyingly strict. Boring? Maybe. Useful? Absolutely.
1. Bent-Knee Floor Leg Raise
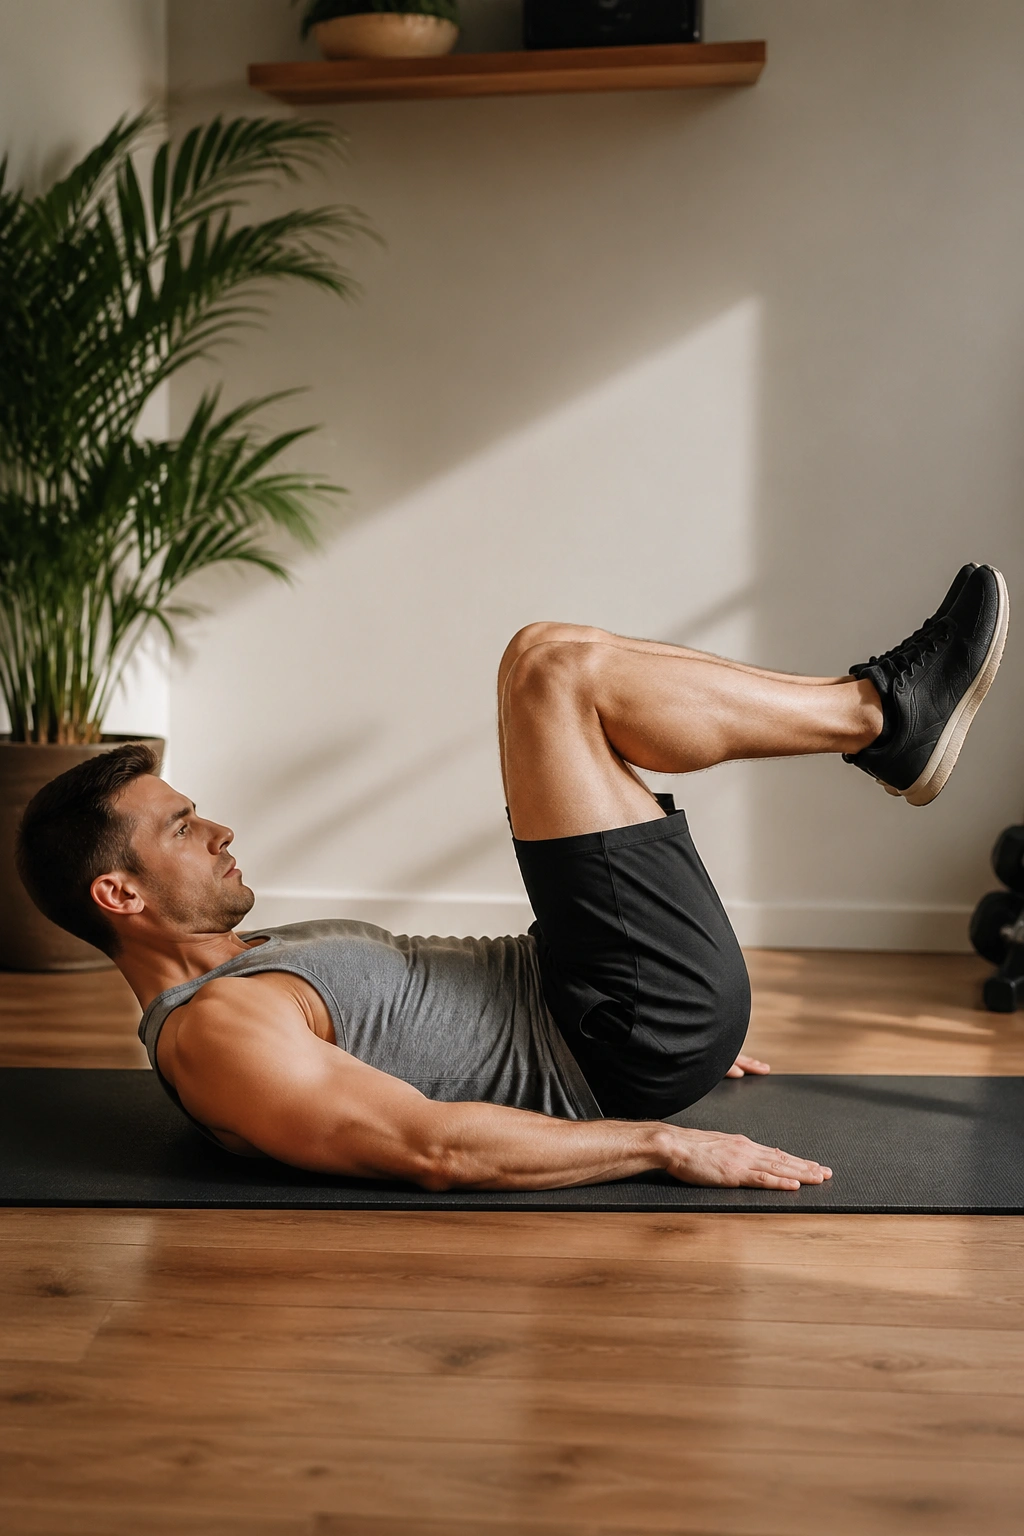
Bent-knee leg raises are where most people should start. They reduce the leverage on the hips and make it far easier to keep the low back pressed into the floor, which is the whole game here.
Lie on your back, bend your knees to about 90 degrees, and keep your shins parallel to the floor. From there, lower your feet a few inches at a time until your lower back wants to lift, then bring them back up with control. That tiny range can be humbling.
What to feel in the low abs
You want a steady brace below the navel, not a yanking sensation in the hip crease. If your thighs start burning first, the movement is probably too big or too fast.
- Keep your ribs down and your lower back heavy on the floor.
- Exhale as the legs lower, not after you’ve already lost position.
- Stop the descent the second your back starts to arch.
- Use 2 to 3 sets of 8 to 12 slow reps.
A lot of people try to make this look bigger than it is. Don’t. The smaller range is often the cleaner one, and the cleaner one is the one that actually trains the lower abdominal wall instead of rewarding a sloppy swing. If you can’t keep the back flat, the rep is over.
2. Straight-Leg Floor Raise
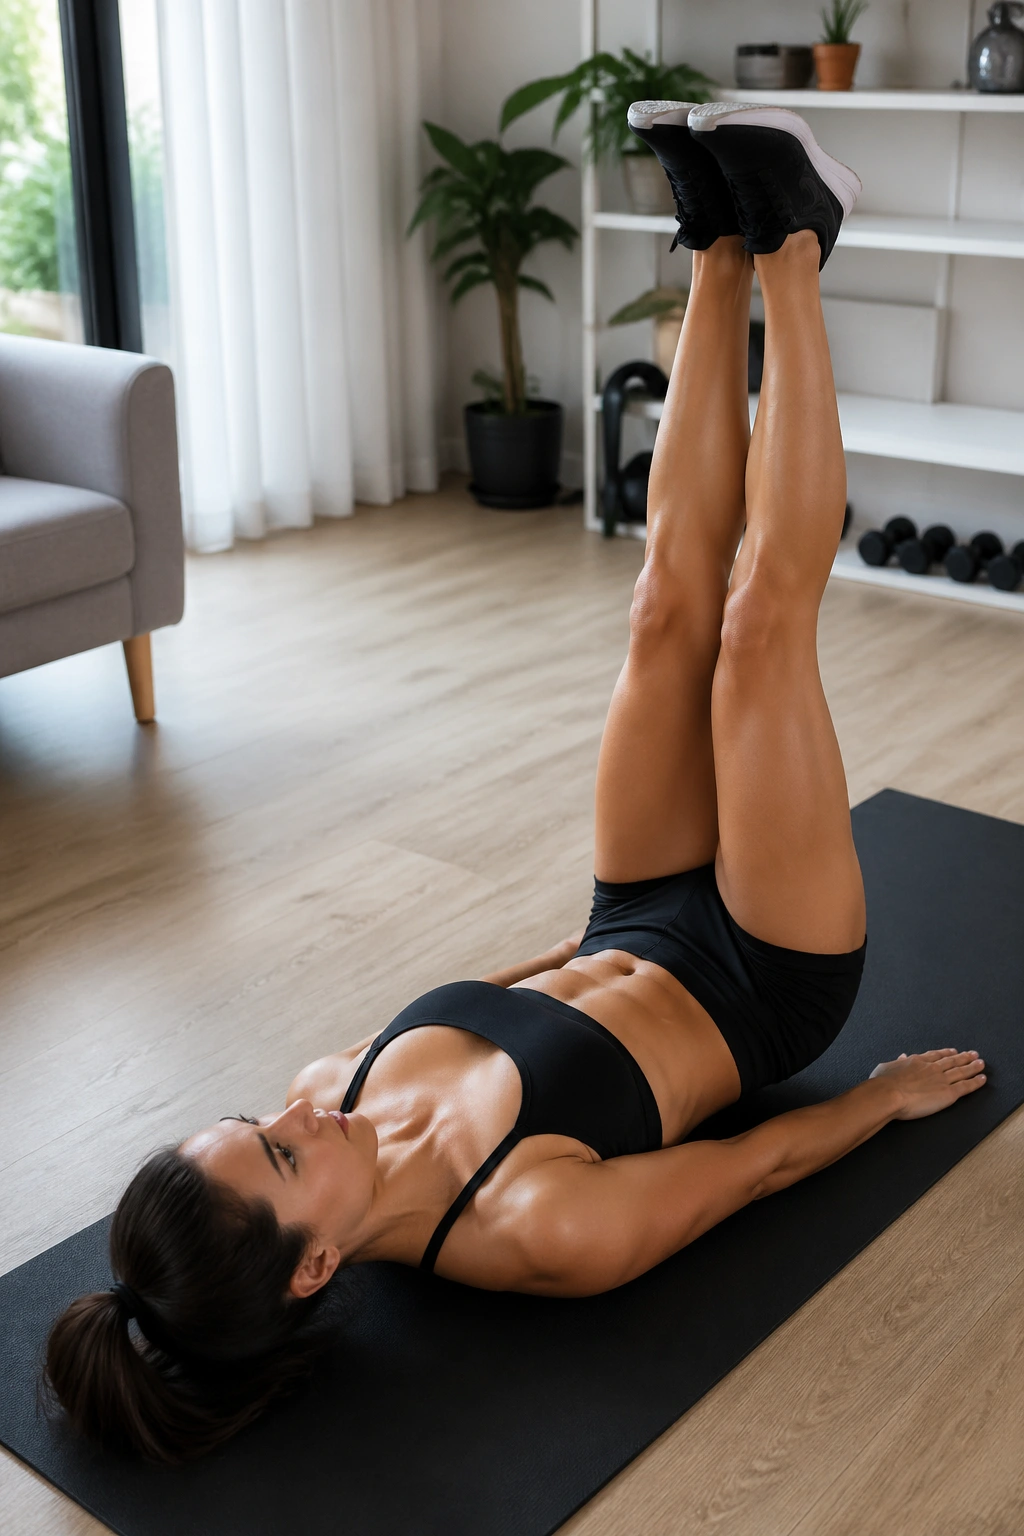
Why straighten the legs if the bent-knee version already burns? Because the longer lever changes everything.
With straight legs, the load shifts farther from your hips, which makes the lower abs work harder to keep the pelvis tucked. Lie down, squeeze your thighs, and lift both legs to about 90 degrees. Lower them slowly until you’re a few inches above the floor, then come back up without snapping your lower back off the mat.
The lever length changes everything.
This version is not about height. It’s about control on the way down, where the rep tends to fall apart. If you rush that lowering phase, the lower back arches, the hip flexors take over, and the set turns into a fight you were never going to win.
A cleaner target is 6 to 10 reps with a 3-second lowering phase. If your hamstrings cramp, soften the knees a little or stop the descent earlier. That is not cheating. It’s a sign that your range is honest.
The floor version can feel almost too simple until the second or third rep, when the burn shows up and the midsection starts shaking.
3. Reverse Crunch and Leg Raise Combo
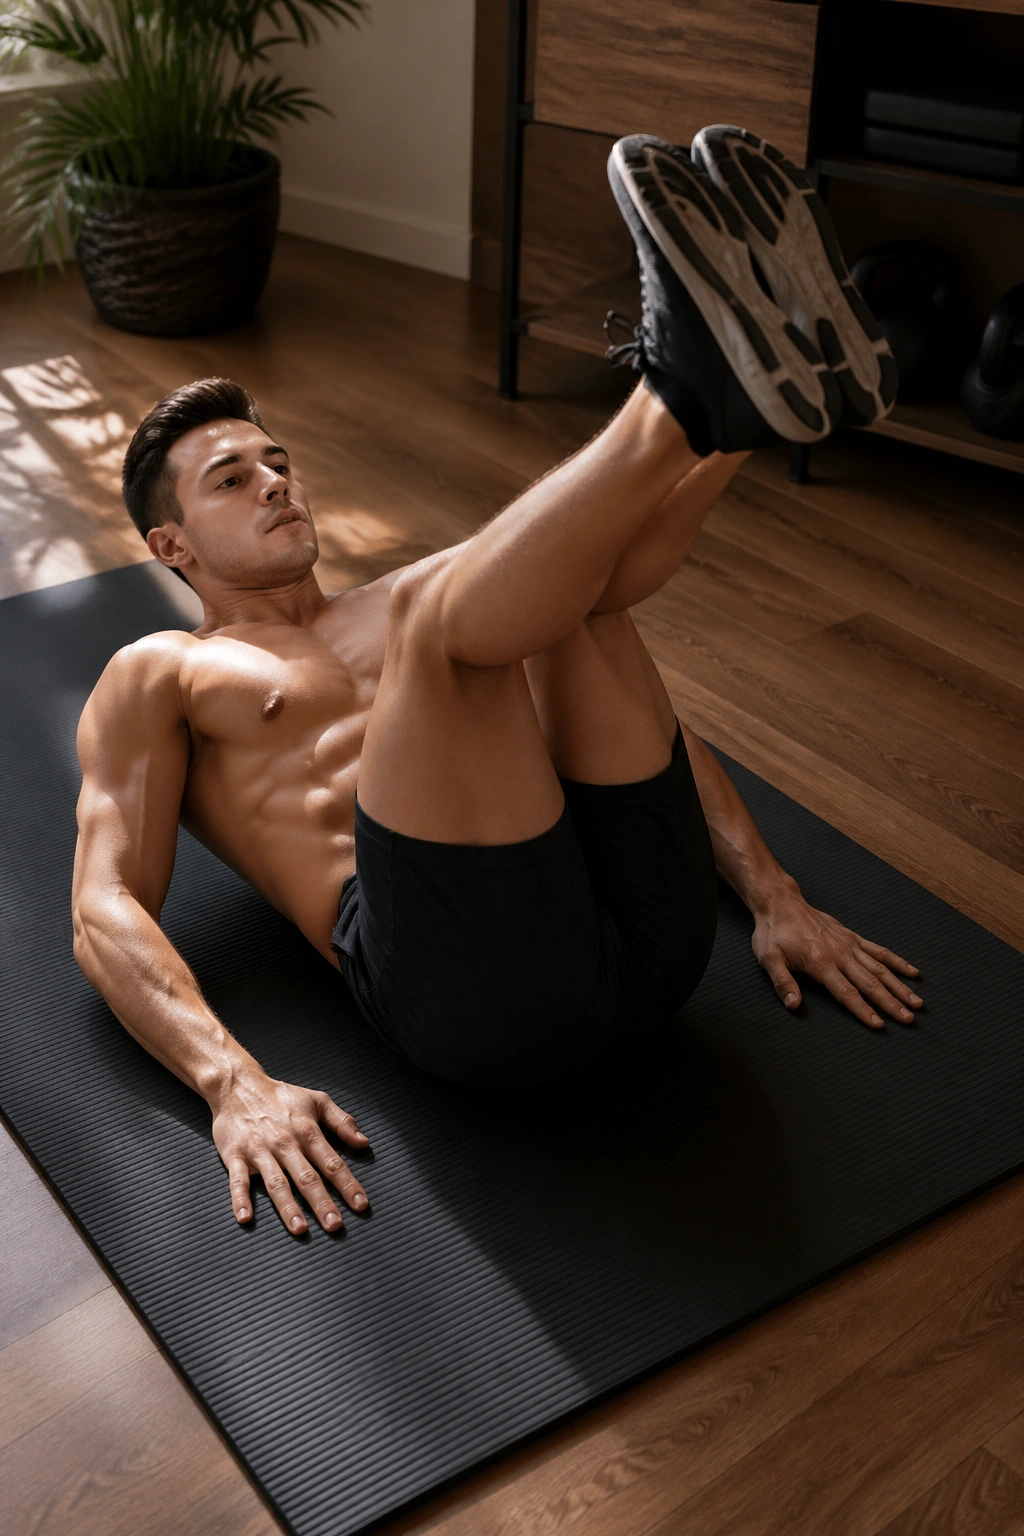
More range is not always better. Sometimes the smartest move is to add a small curl at the top instead of trying to kick your legs higher.
Start lying flat with your knees bent or your legs in tabletop. Lift your hips a few inches off the floor in a reverse crunch, then extend the legs away from your chest under control before bringing them back in. That little pelvic curl is what makes the exercise feel like lower abs instead of just hip flexors.
How to keep it out of the hips
- Exhale before you curl your pelvis upward.
- Think about bringing your tailbone off the floor, not just your knees toward your face.
- Keep the lowering phase slow, even if the lift feels easy.
- Use a small range until the back stays quiet for the full set.
This combo works well if straight-leg floor raises make your low back complain. It also suits people who want a stronger contraction at the top, because the reverse crunch gives the abs a cleaner finish than a pure leg lift.
The mistake to avoid is turning it into a fast bicycle motion. That looks busy. It does not train well.
4. Scissor Kicks
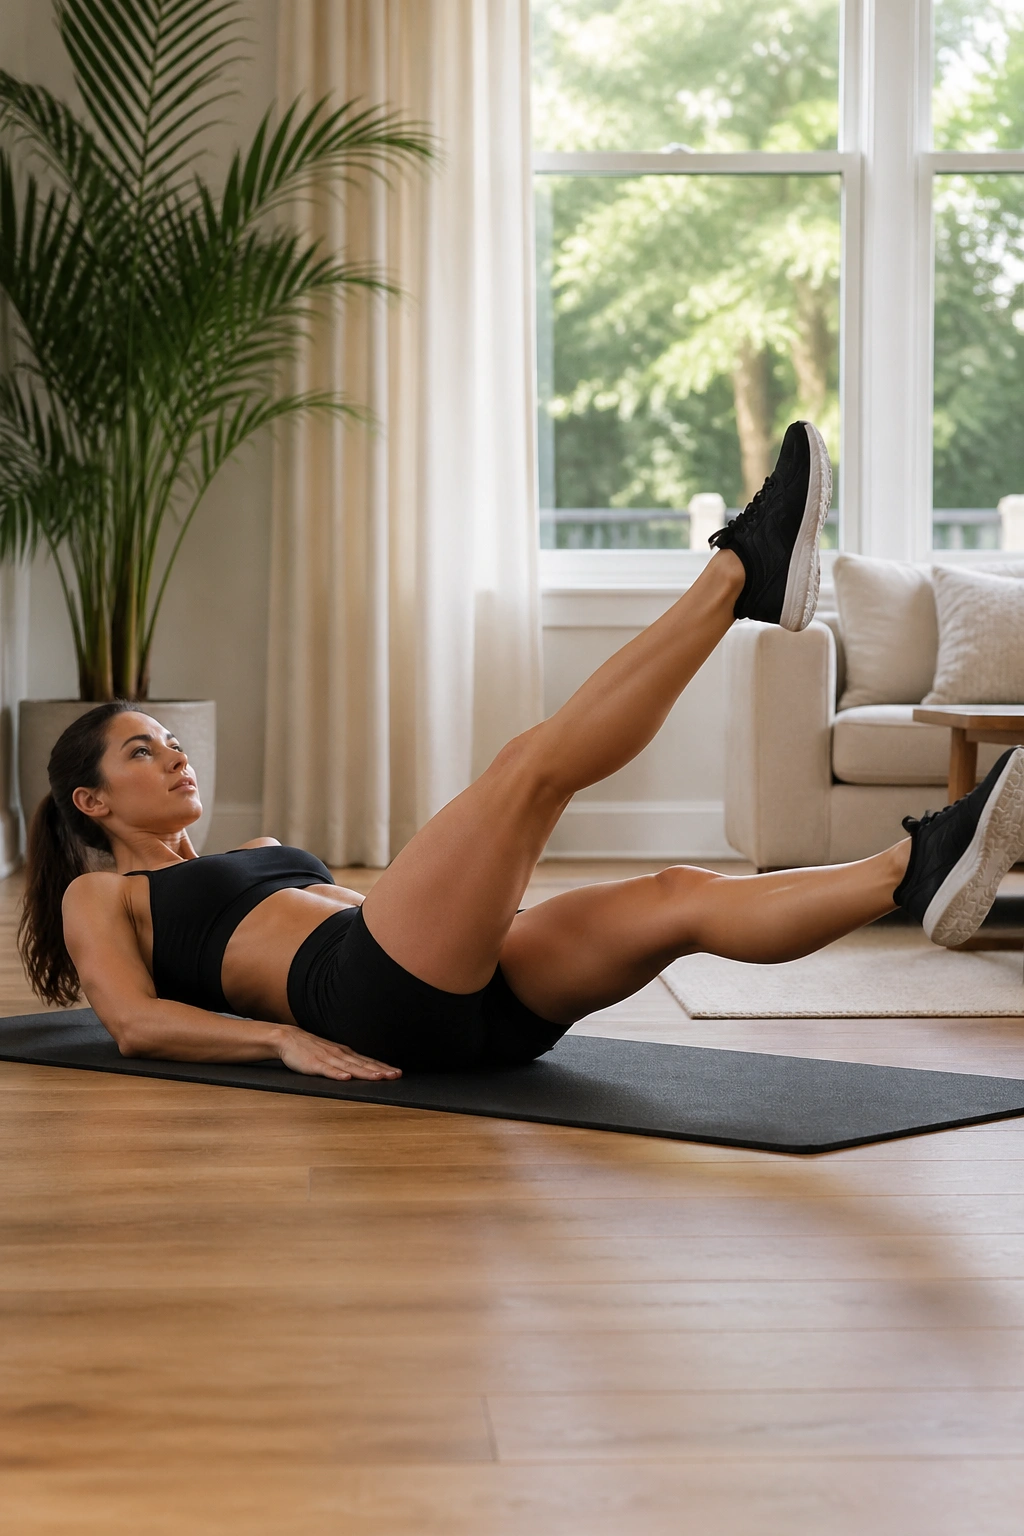
A move can look easy and still light up your whole midsection. Scissor kicks are like that.
Lie flat, lift both legs a few inches off the floor, and alternate them in a controlled crossing pattern. One leg hovers low, the other stays higher. The trick is to keep the distance small and the pelvis quiet, because the second the lower back starts to arch, the set stops being about the abs.
Fast kicks are junk.
Use this variation when you want more endurance and a bit of rhythm without heavy spinal flexion. It’s especially useful as a finisher after a harder core move, because the abs already tired out from the first exercise have to keep holding position while the legs keep moving.
- Keep the lowest leg only 2 to 6 inches above the floor.
- Cross the legs just enough to feel the shift, not enough to twist your hips.
- Hold each rep for a beat instead of flapping them around.
- Try 20 to 30 seconds on, then rest for 20 seconds.
If your hip flexors cramp, shorten the range. If your neck tenses, put your hands under your glutes or keep your head down. And if the low back pops off the floor, stop and reset. A clean scissor kick is small, sharp, and quiet.
5. Alternating Single-Leg Lowering
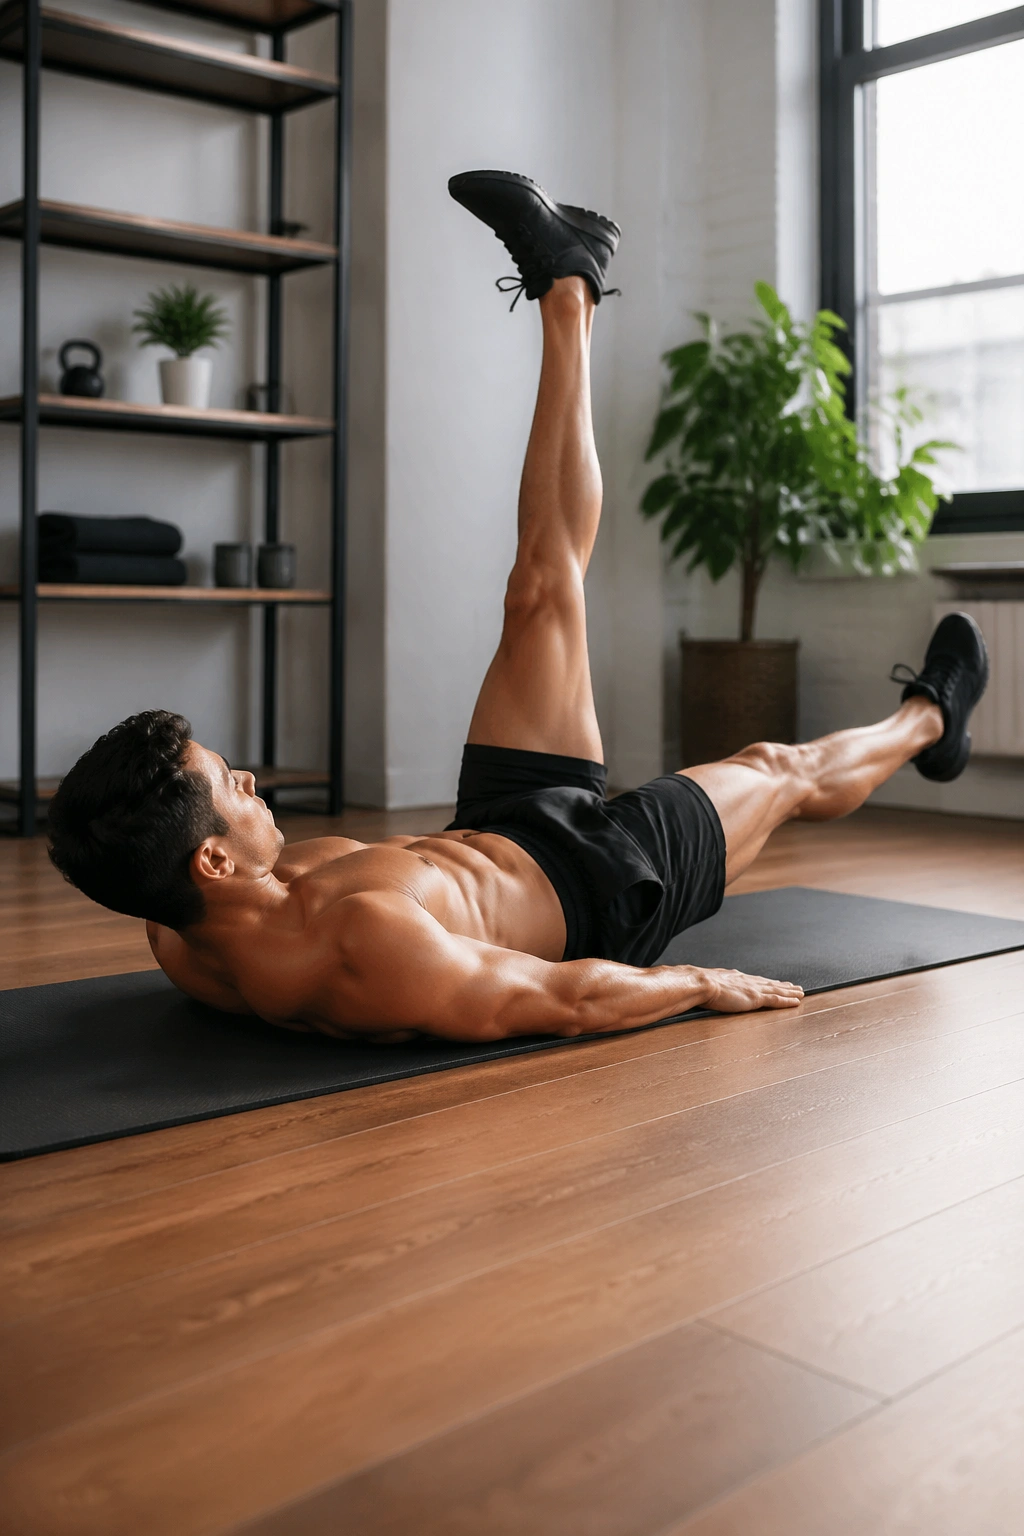
This is the strictest floor variation in the bunch. One leg stays up while the other lowers, and that tiny asymmetry tells on your core fast.
Lie on your back with both legs raised. Lower one leg slowly while keeping the other pointed toward the ceiling, then switch sides before the pelvis starts to rock. Sounds simple. It isn’t, not if you do it right.
The reason this one matters is control. Your body has to resist rotation while one leg does the work, which means the deep abs and obliques get involved instead of letting the motion spill into your low back. If one side feels shakier than the other, good. That’s useful information.
A lot of people discover that one leg drops much farther than the other before the back arches. That is not a coincidence. It usually means one side of the pelvis is less steady, or the hip flexors on that side are more dominant.
Your pelvis will snitch on you. Use that feedback.
If this feels too advanced, keep the working leg bent instead of straight. The move still teaches pelvic control, and the shorter lever gives you a chance to build the pattern without turning every rep into a rescue mission.
6. Hanging Knee Raise
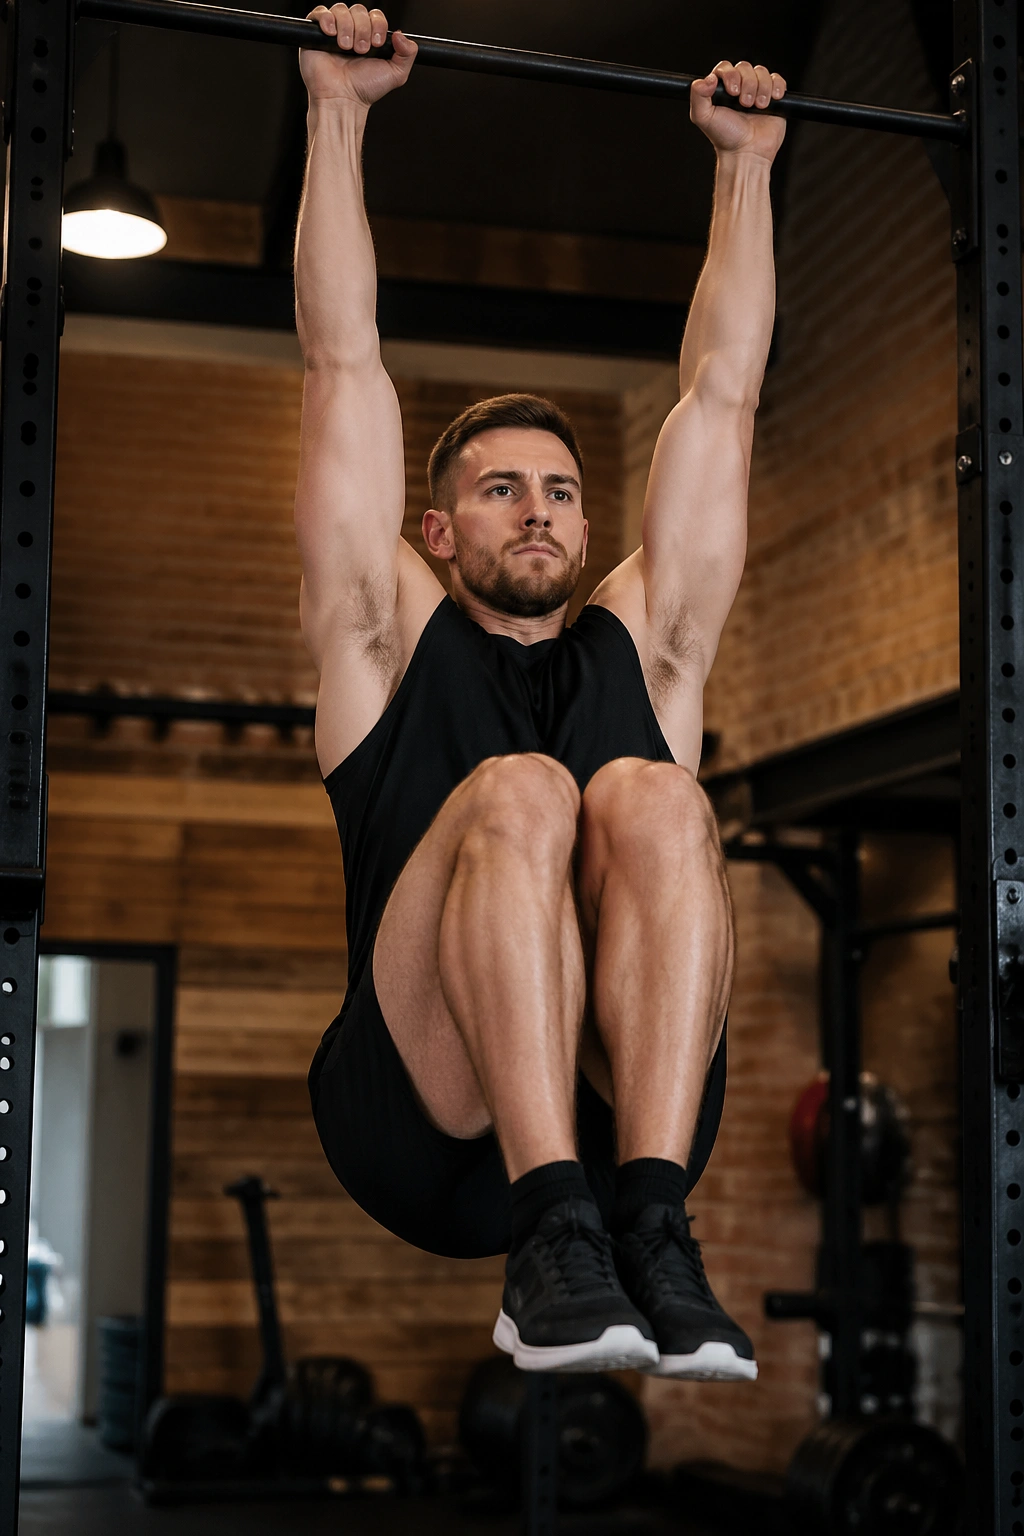
Need more challenge than the floor can give? Hang from a bar and your core has to earn its keep.
A hanging knee raise starts from a dead hang or a light shoulder-engaged hang. Pull the knees upward toward the chest while keeping the ribs down and the pelvis slightly tucked at the top. The lift should feel crisp, not wild. If you’re swinging back and forth, the bar is doing more work than your abs.
What to watch for
- Keep the shoulders down instead of shrugging into your ears.
- Raise the knees with a slight curl of the pelvis at the top.
- Lower slowly for 2 to 3 seconds.
- Use the smallest amount of swing possible.
This variation is a clean step up from floor work because gravity has more room to pull against you. It also teaches grip strength and shoulder stability, which people forget about until their hands give out early. That happens a lot.
A good target is 6 to 12 strict reps. If you can’t control the lowering phase, use fewer reps or switch to captain’s chair knee raises for a while. That’s not a downgrade. It’s smart training.
7. Hanging Straight-Leg Raise
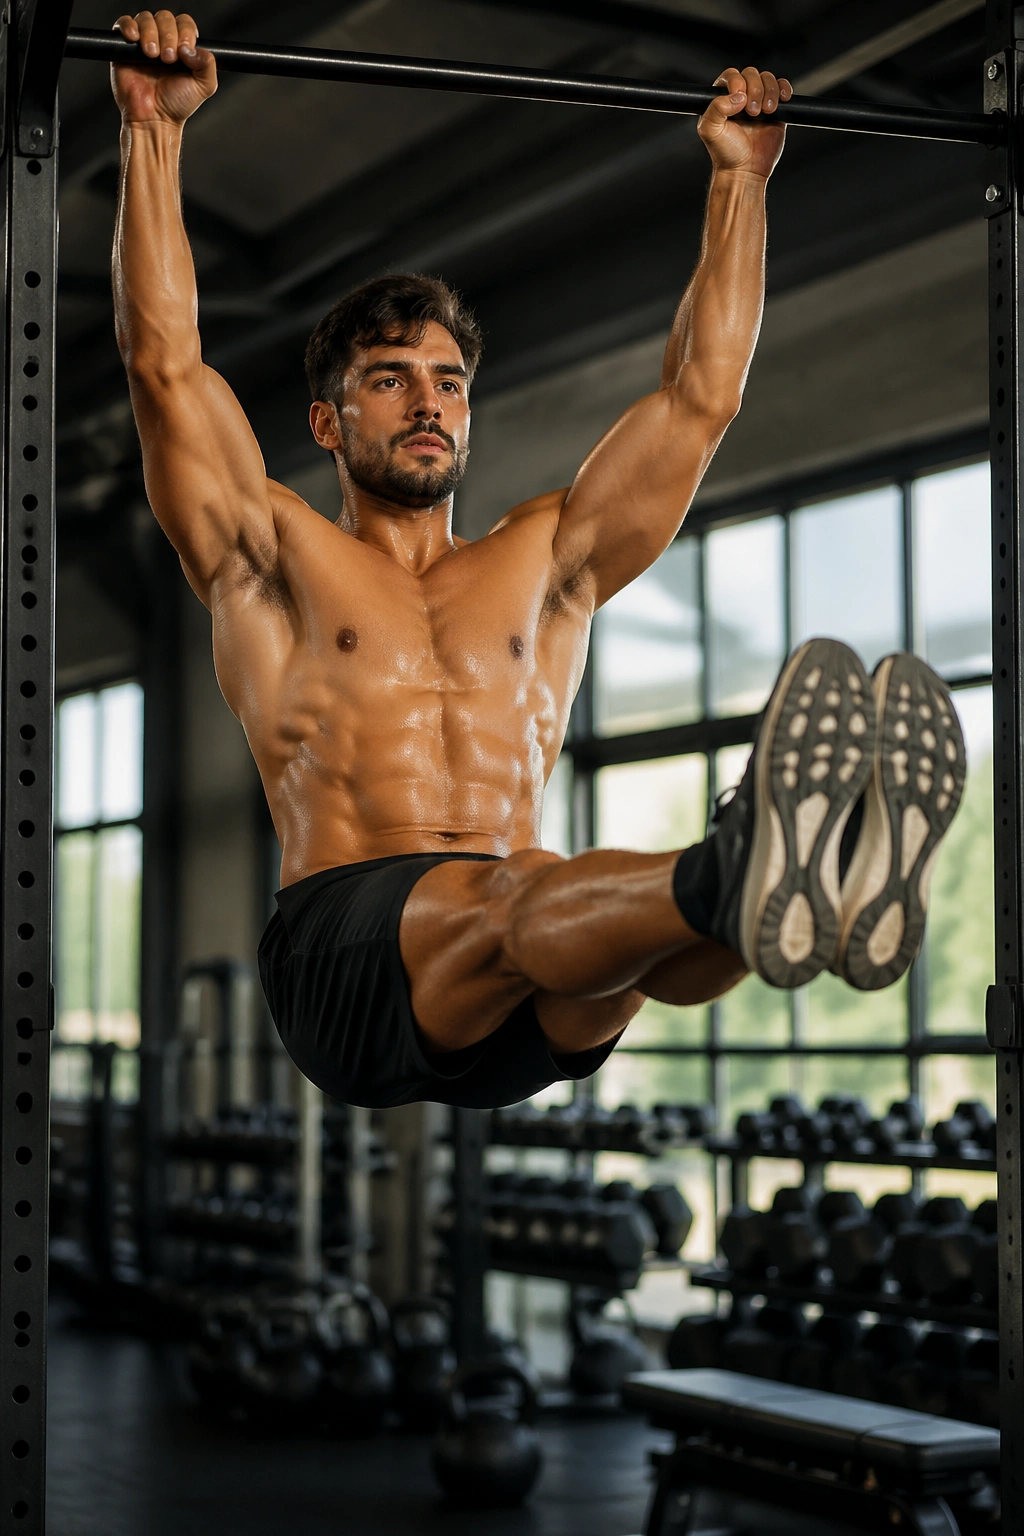
Do not rush this one.
Once the knees no longer feel challenging, straight-leg hanging raises bring the whole body into the fight. From a steady hang, lift both legs together until they reach parallel or a bit higher, then lower them under control without letting the torso swing. The straighter the legs, the longer the lever, and the more the lower abs have to fight to stop the pelvis from tipping.
The bottom half is where the work lives.
That lowering phase should feel almost slow enough to annoy you. If you drop fast, you hand the job back to momentum and the front of the hips. If you curl your spine at the top, you shorten the lever a little and get a stronger abdominal squeeze. Both can be true, and both are useful.
One thing to respect here is shoulder fatigue. Hanging work doesn’t only tax the abs; it asks the shoulders and forearms to hold the body still while the legs move. If your grip starts fading before the core does, use a shorter set, chalk, or a captain’s chair instead.
This is not a beginner move. It’s a polished version of hanging core work, and the polish only shows if every rep looks the same. No swing. No kip. No cheating.
8. Captain’s Chair Knee Raise
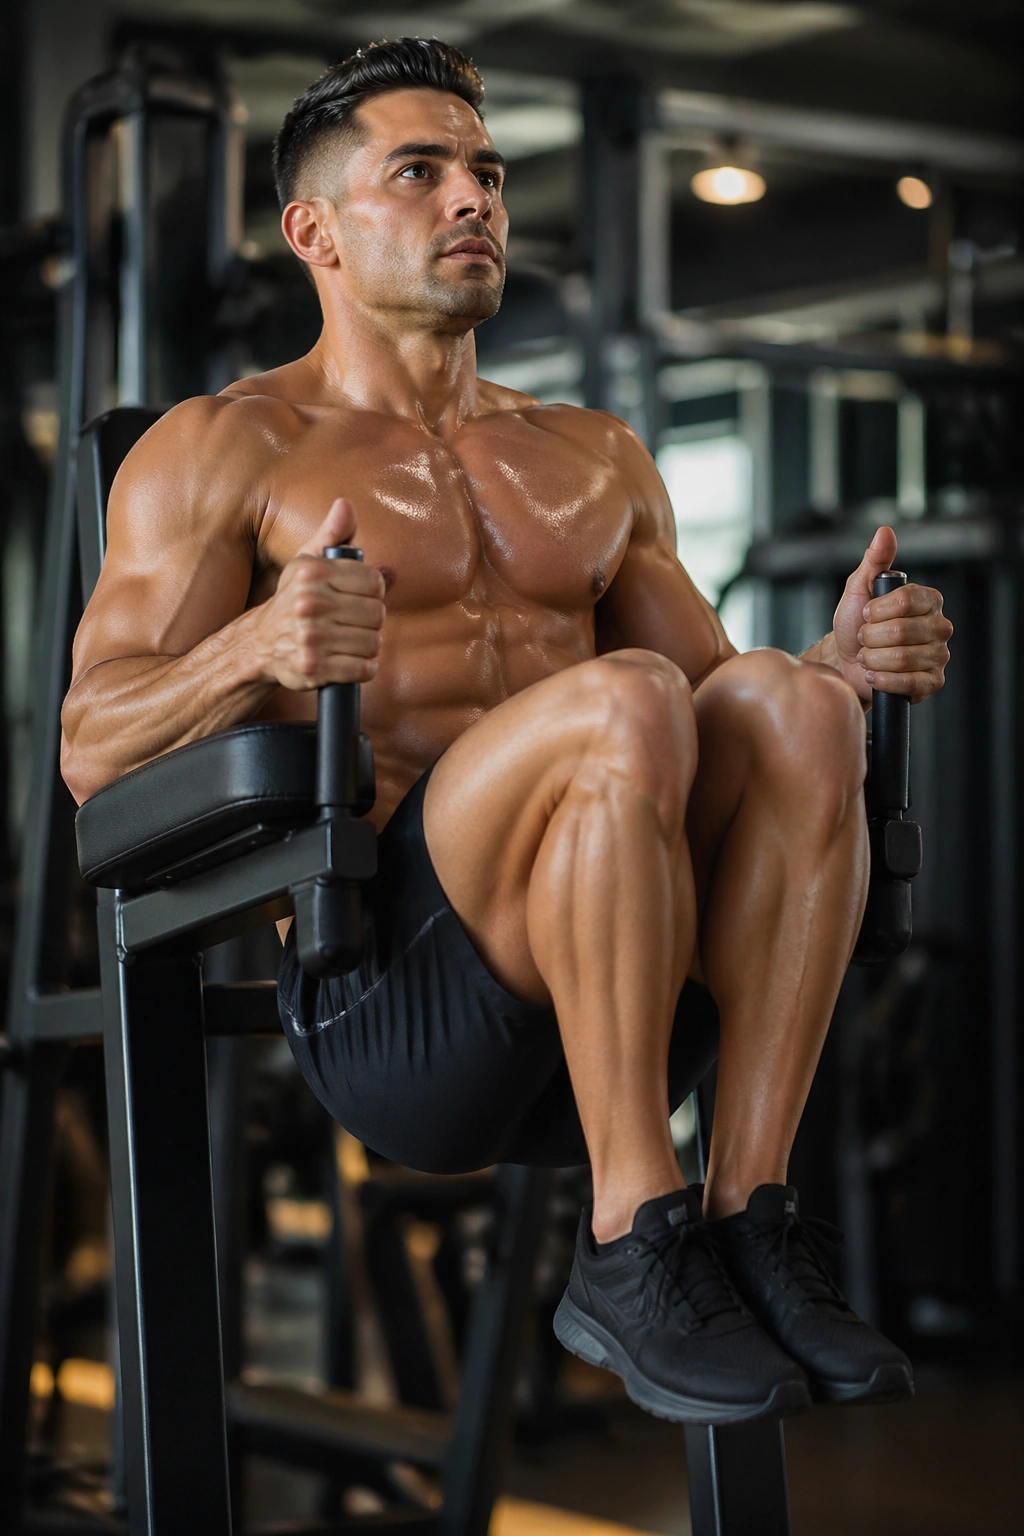
At the gym, the padded captain’s chair is the move people ignore until hanging leg raises start feeling sloppy.
The forearm pads and back support take some strain off the grip and shoulders, which lets you focus on the abdominal curl itself. Sit into the pads, plant your forearms, let your back stay long, and raise the knees with control. At the top, think about bringing the pelvis slightly forward instead of just lifting the thighs.
- Set the pads so your elbows don’t slide.
- Keep your shoulders down and away from your ears.
- Raise the knees only as high as you can without swinging.
- Pause for a second at the top and feel the lower abs finish the rep.
This version is useful if hanging from a bar aggravates your shoulders or if your grip gives out too early. It also helps beginners feel the difference between lifting with the hips and actually curling the pelvis, because the support removes some of the noise.
A lot of people treat this machine like a lazy option. It isn’t. It’s a cleaner option for certain bodies. And if your form is better here than on the bar, that matters more than bragging rights.
9. Frog Leg Raise
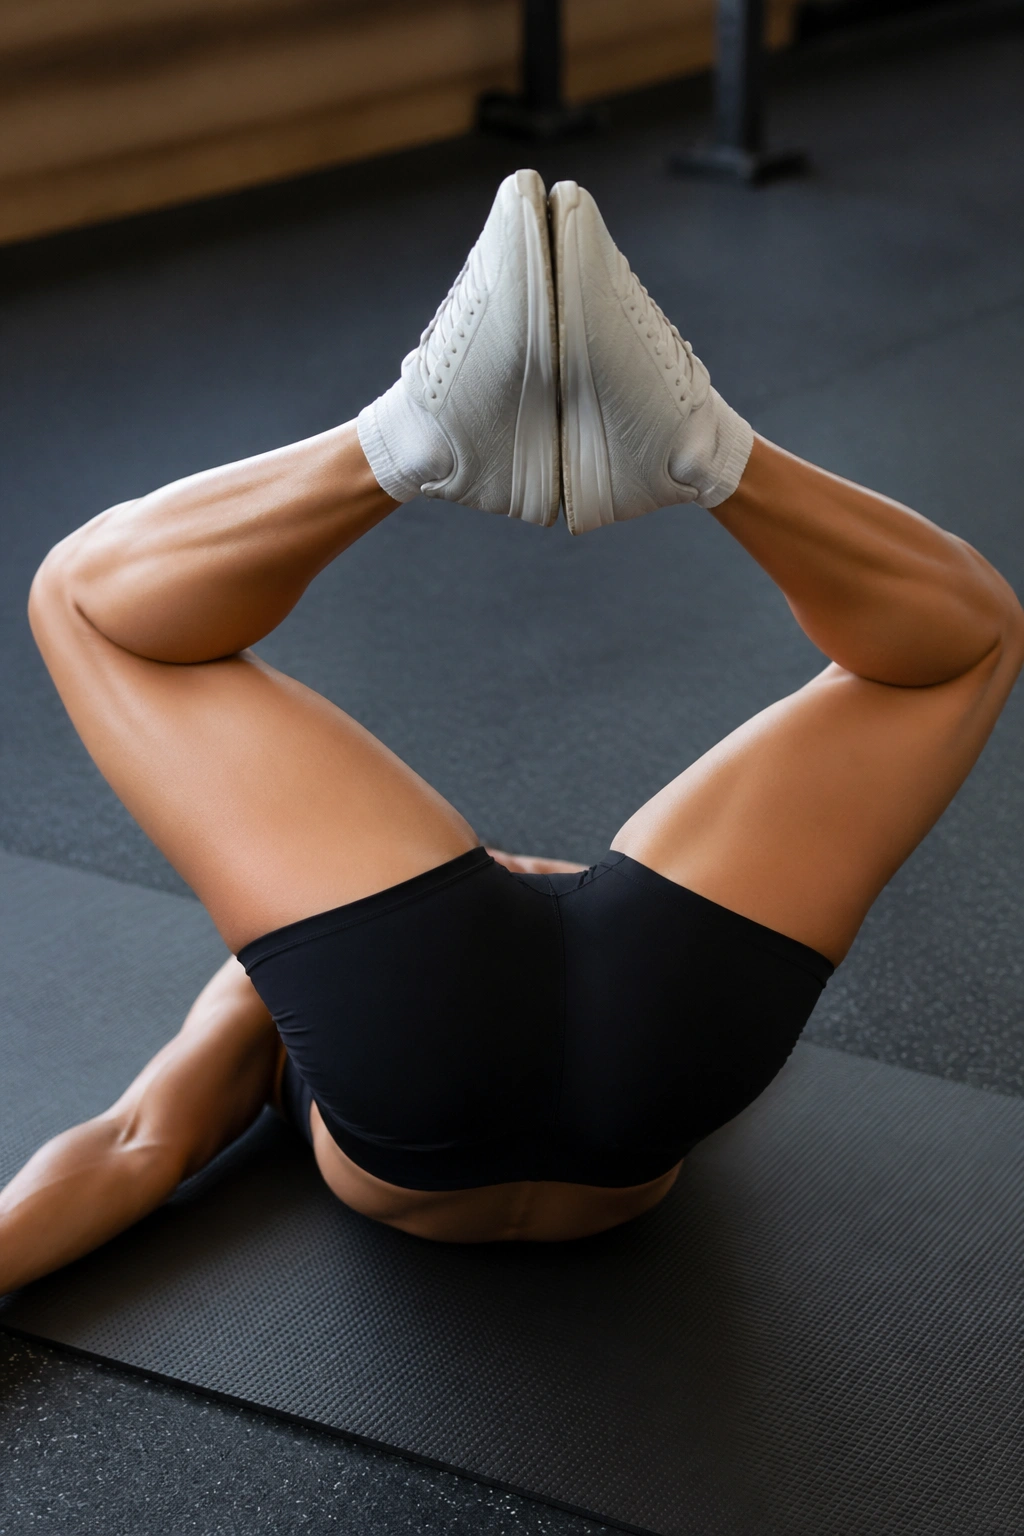
With the soles of your feet touching and your knees flared wide, the movement feels odd at first — almost lazy — and then your abs light up.
That’s the frog leg raise. Start on your back, bring the soles together, bend the knees out to the sides, and lift the legs as a unit. The shorter lever gives the hip flexors less room to dominate, which is one reason this variation works so well for people with tight fronts of the hips or hamstrings that fight every straight-leg raise.
Why the frog position helps
The bent, wide-leg shape makes it easier to keep the pelvis tucked. It also changes the feel of the rep enough that you can usually hold the low back down longer before form breaks.
- Keep the knees open instead of collapsing inward.
- Lift and lower slowly; fast reps just turn into noise.
- Stop the descent when the lower back starts to peel.
- Hold the top for a beat to finish the contraction.
This is one of my favorite regressions for people who hate classic leg raises. It still trains the lower abs, but it tends to feel less bossy on the hips. That said, it is sneaky hard when you pause at the bottom, because the abs have to keep the legs from drifting while the pelvis stays quiet.
10. Toe-Tap Lowering
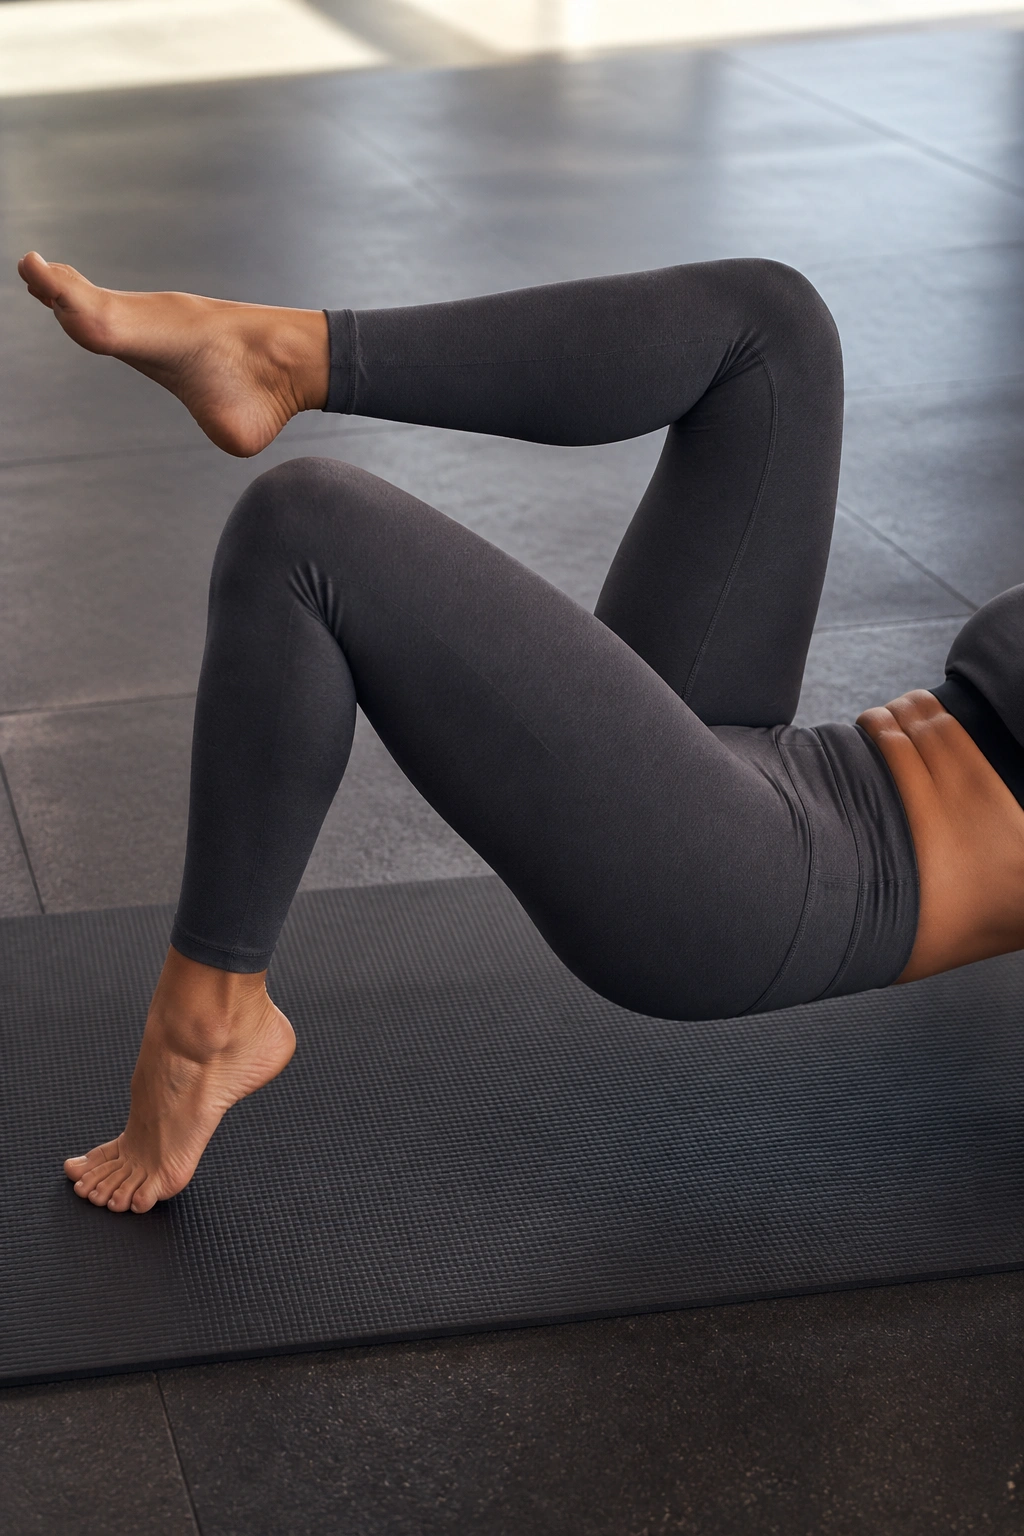
A tiny heel tap can be harder than a huge leg lift.
From a tabletop position, keep both knees bent about 90 degrees, then lower one foot to tap the floor before bringing it back up. Alternate sides with a steady, deliberate pace. The motion looks small because it is small. That’s the point.
This version is useful when full leg raises feel too aggressive on the lower back, but you still want a movement that trains pelvic control. The abs have to keep the spine from arching every time the leg drops, which makes this a solid bridge between dead-bug style work and more demanding leg raises.
The body wants to cheat here by letting the back tilt or the ribs flare. Don’t let it. If the low back starts to lift, shorten the range and make the tap lighter. A hover is fine if a tap feels too far.
A clean toe-tap lowering pattern often pairs well with exhaled breathing: breathe out as the leg lowers, brace again before it comes back up, then switch. It feels a little tedious. Good. Tedious is where control usually lives.
11. L-Sit Leg Raise Hold
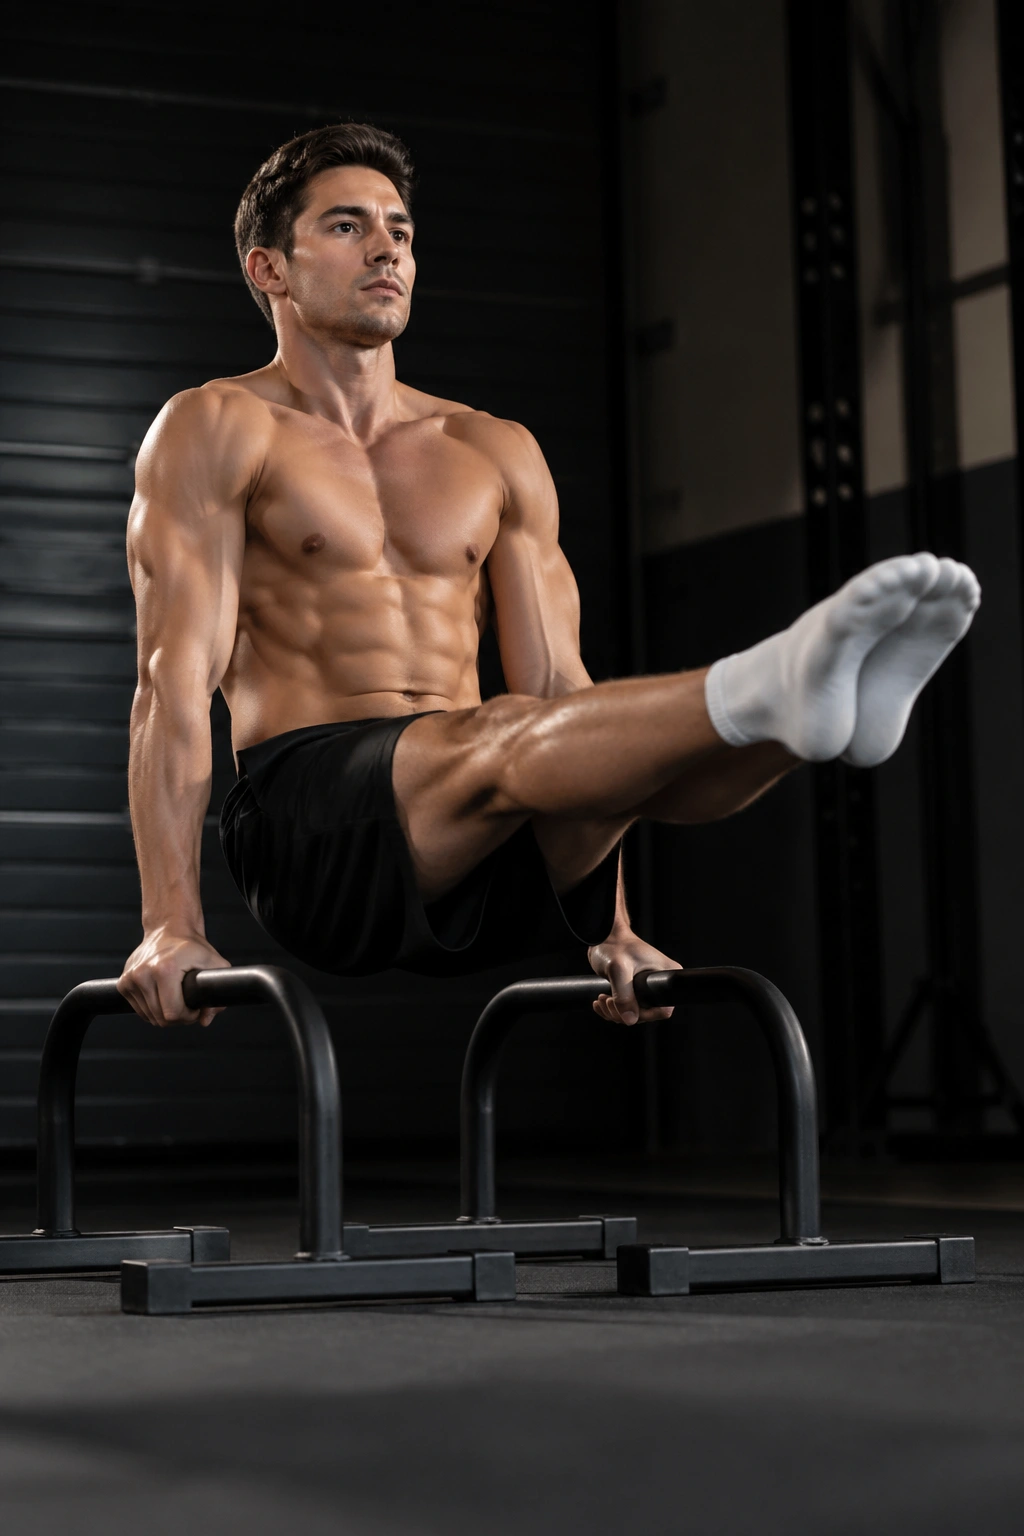
If you want the core to stop arguing with the hips, hold an L-sit and make both sides work at once.
Sit on the floor or on parallettes, place your hands beside your hips, and lift both legs off the ground. Keep them straight if you can; tuck the knees if you can’t. The goal is a compression hold, which means the thighs come toward the torso while the torso resists folding over the legs.
How to scale it down
- Start with bent knees and hold for 3 to 5 seconds.
- Use yoga blocks or parallettes if the floor is too low.
- Keep the shoulders pressed down and away from the ears.
- Build toward 10-second holds before chasing full straight legs.
This move is tough in a different way from the others. Instead of a slow raise and lower, you have to hold tension while everything shakes a little. The lower abs, hip flexors, and quads all get involved, but the real test is whether you can keep the pelvis from dumping forward.
It’s a good drill for people who want stronger, cleaner leg raises later on. Once you can hold the compression position with control, the floor and hanging variations start to feel more manageable. Not easy. Just less messy.
12. Decline Bench Leg Raise
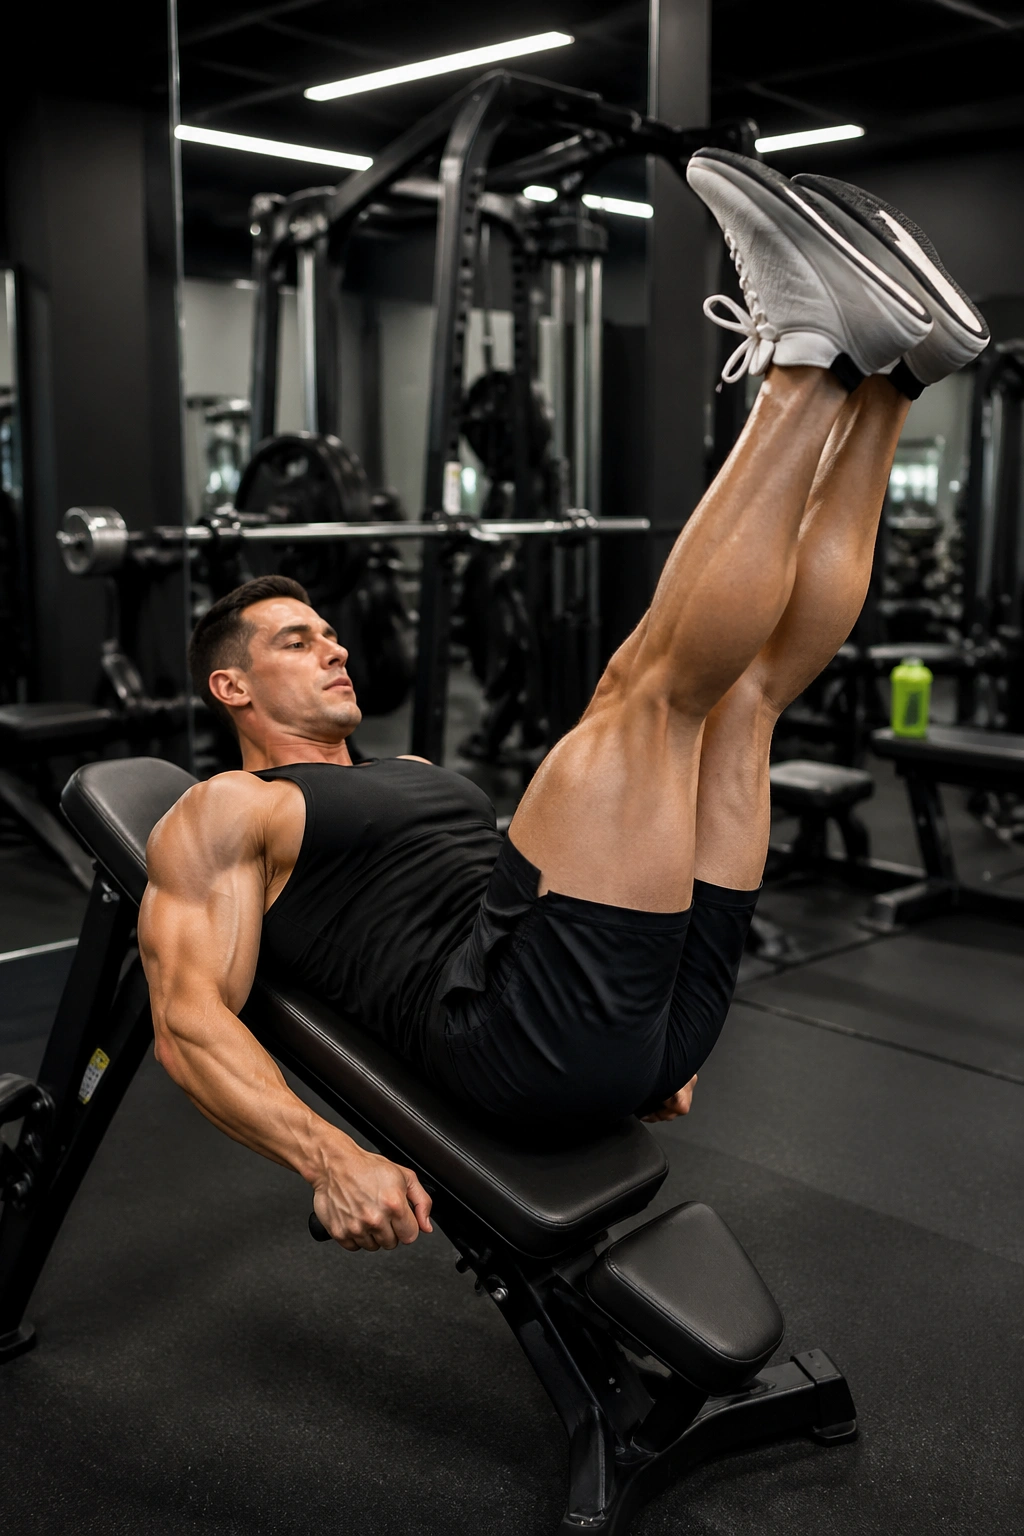
If the floor moves feel tame, angle the bench and the exercise gets honest.
A decline bench leg raise changes the line of gravity so the lowering phase becomes harder. Lie on a decline bench, grip the top or the sides, and lift the legs with control before lowering them slowly until the core has to catch them again. The decline makes cheating obvious. Swinging shows up fast, and the back starts talking if you rush.
This is a good place to use a slow tempo and a short pause at the top. The pause keeps the rep from turning into a bounce, and the slow lower makes the lower abs do what you came here for. If your neck tenses or your hips jerk upward, cut the range and clean up the setup before chasing more reps.
How to plug it into a workout
- Pair one decline set with one floor set if you want a balanced core finisher.
- Use 2 to 4 sets of 8 to 12 reps when form is solid.
- Rest 30 to 60 seconds between sets if you’re training for endurance.
- Put this exercise near the end of a workout, not before heavy squats or deadlifts.
That last part matters more than the angle of the bench. You want your core fresh enough to stay honest, but not so fresh that you turn the move into a speed drill. Keep the pelvis tucked, slow the lowering, and stop the set the moment the low back starts to win. That’s where the real work lives.
