



If you spend your day anchored to a chair, staring at a screen, your body is effectively writing a story in the language of structural collapse. By the time the afternoon hits, your shoulders have crept toward your ears, your lower back has lost its natural curve, and your head is jutting forward like a curious turtle. This isn’t a failure of character; it’s biology fighting ergonomics. Gravity eventually wins if you don’t fight back.
We treat posture as a passive state—something we “should” have, like good manners or a tidy desk. But real, functional posture is active. It requires muscle engagement, mobility in locked-up joints, and the occasional reset to undo the damage of prolonged sitting. You cannot fix a day of slouching with a single stretch at 5:00 PM. You have to break up the pattern throughout the day.
Most people try to fix this by “sitting up straight,” which usually results in rigid, tense muscles that fatigue within ten minutes. That’s not posture; that’s posture performance, and it’s exhausting. Instead, you need to cultivate a baseline of mobility and strength that makes upright sitting the path of least resistance. These exercises aren’t about gym training; they are about maintenance. They are the oil changes for your chassis.
1. Chin Tucks
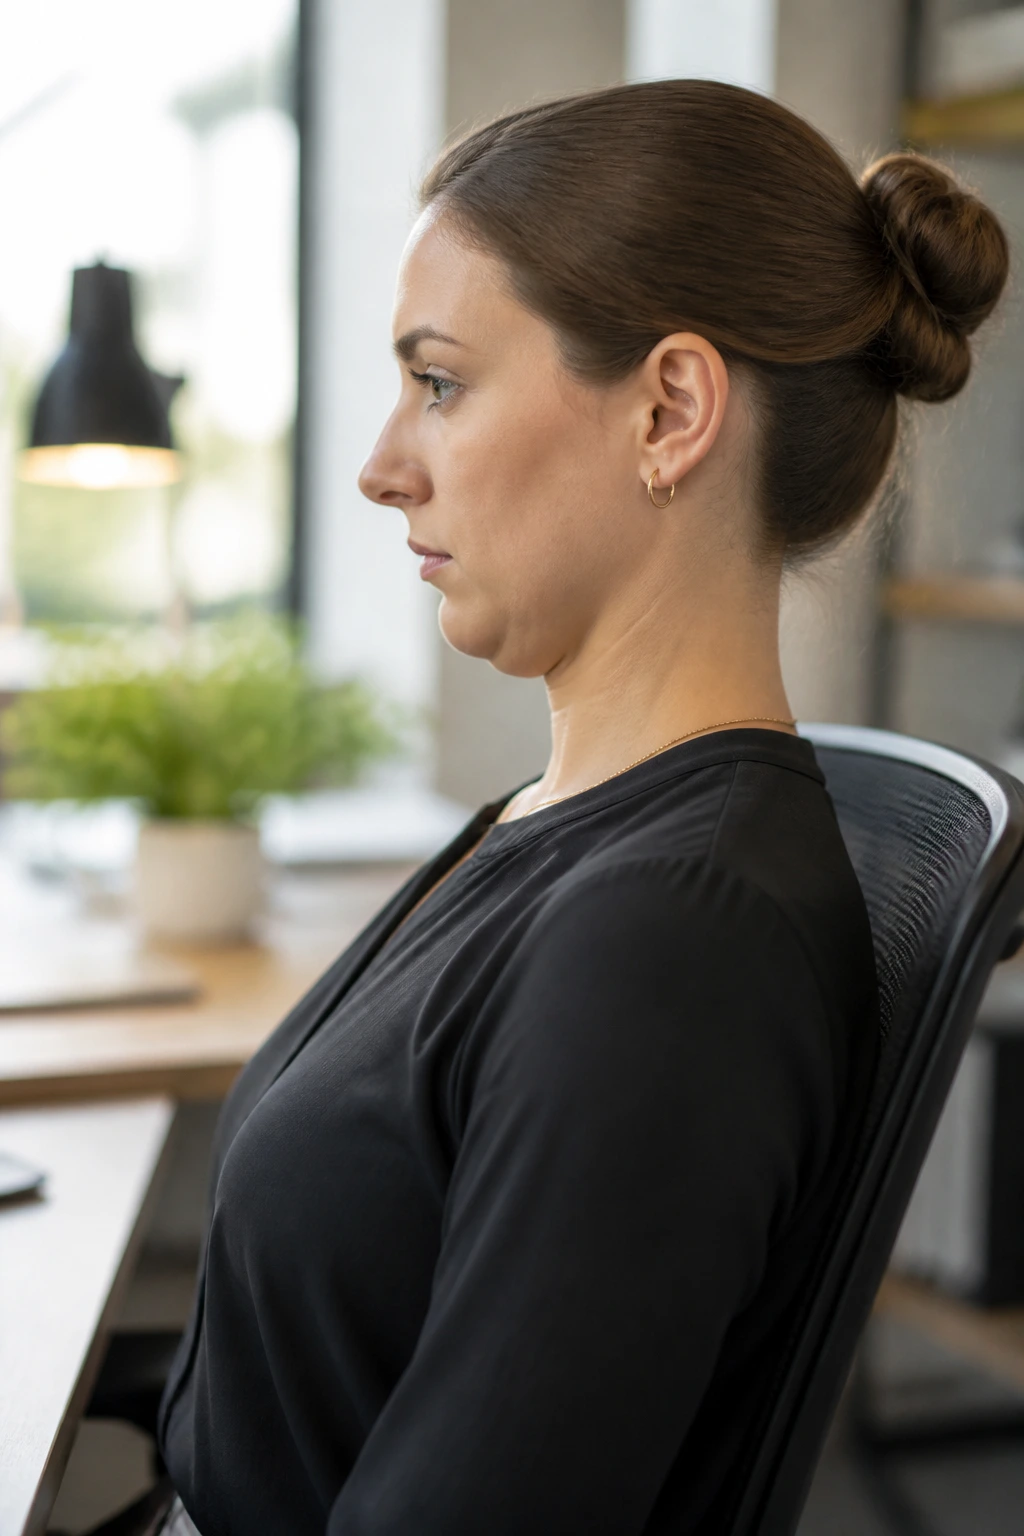
This is the single most effective antidote to “tech neck”—that persistent, forward-drifting head position caused by staring at monitors. When your head shifts forward by just an inch, the weight of it on your cervical spine increases dramatically, forcing your upper back muscles to work overtime.
The Mechanics of the Tuck
You aren’t trying to look down. Imagine there is a string attached to the crown of your head pulling you toward the ceiling, while simultaneously, someone is gently pushing your chin straight back, as if you’re trying to make a double chin. It should feel like you are lengthening the back of your neck.
Key Performance Cues
- Keep your eyes level with the horizon.
- Do not tilt your chin down toward your chest; slide it straight backward.
- Hold the position for five seconds.
- Feel the stretch along the upper cervical spine, right where your skull meets your neck.
Pro tip: Do this while driving or waiting for a page to load. It’s invisible, takes no equipment, and resets the alignment of your head over your shoulders instantly.
2. Scapular Retractions
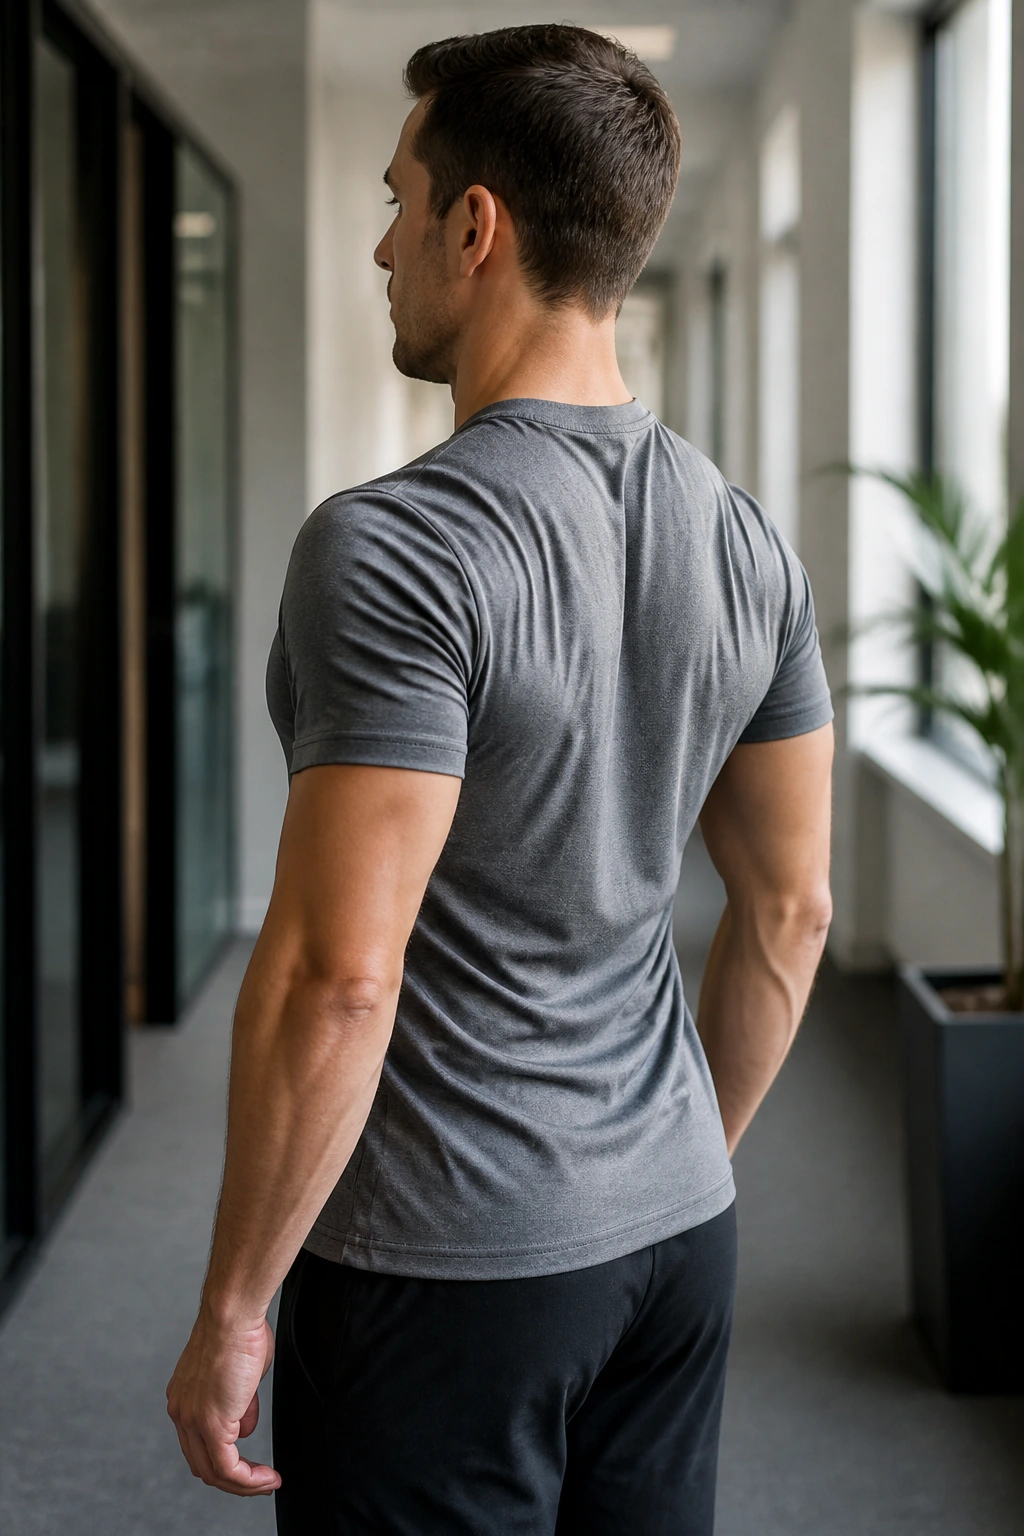
Your shoulders are prone to rolling forward because the chest muscles are tight and the upper back muscles are weak or overstretched from typing. Retraction is the process of pulling those shoulder blades together and down, as if you are trying to squeeze a pencil between them.
Why This Matters
Most people shrug their shoulders to bring them back. That’s incorrect. You want the movement to originate from the middle back, not the tops of your shoulders. If your traps feel like they’re doing all the work, stop and reset. Your goal is to move the shoulder blades, not the entire shoulder girdle.
Execution Strategy
Stand with your arms at your sides. Imagine your shoulder blades are two sliding doors that need to close toward the center of your back. Pull them together, hold for a heartbeat, and then release. Repeat this ten times. It helps to envision pulling your shoulder blades into your back pockets. That “down and back” motion is the secret sauce for an open chest.
3. Doorway Chest Stretch

Your pectoral muscles are the primary culprit for rounded shoulders. They are literally pulling your shoulders toward the front of your body all day long. Stretching them requires an anchor point, and a door frame is the perfect, accessible tool for the job.
It sounds simple, but the placement of your arm changes everything. Place your forearm against the door frame, elbow at shoulder height. Step through the door with one foot until you feel a deep stretch in the front of your shoulder and chest. If you don’t feel a stretch, rotate your torso slightly away from your arm.
Do not force the stretch. The chest is a delicate area—overdoing it can strain the insertion points near your collarbone. Spend 30 seconds on each side, breathing deeply. You want to feel the tension melt away, not fight against it.
4. Cat-Cow Stretch

This is a classic for a reason: it forces the spine to move through its full range of flexion and extension. When you sit for hours, your spine becomes a stiff rod. This movement reintroduces fluidity.
Start on your hands and knees in a tabletop position. Inhale as you drop your belly toward the floor, lifting your chest and chin toward the sky—this is the “cow” phase. Exhale as you tuck your chin, round your spine toward the ceiling, and push the floor away—this is the “cat” phase.
Focus on segmenting the movement. Don’t just collapse into the positions. Try to move your spine one vertebra at a time. It’s an exercise in control. If you do this with intention, your mid-back will thank you.
5. Bird-Dog
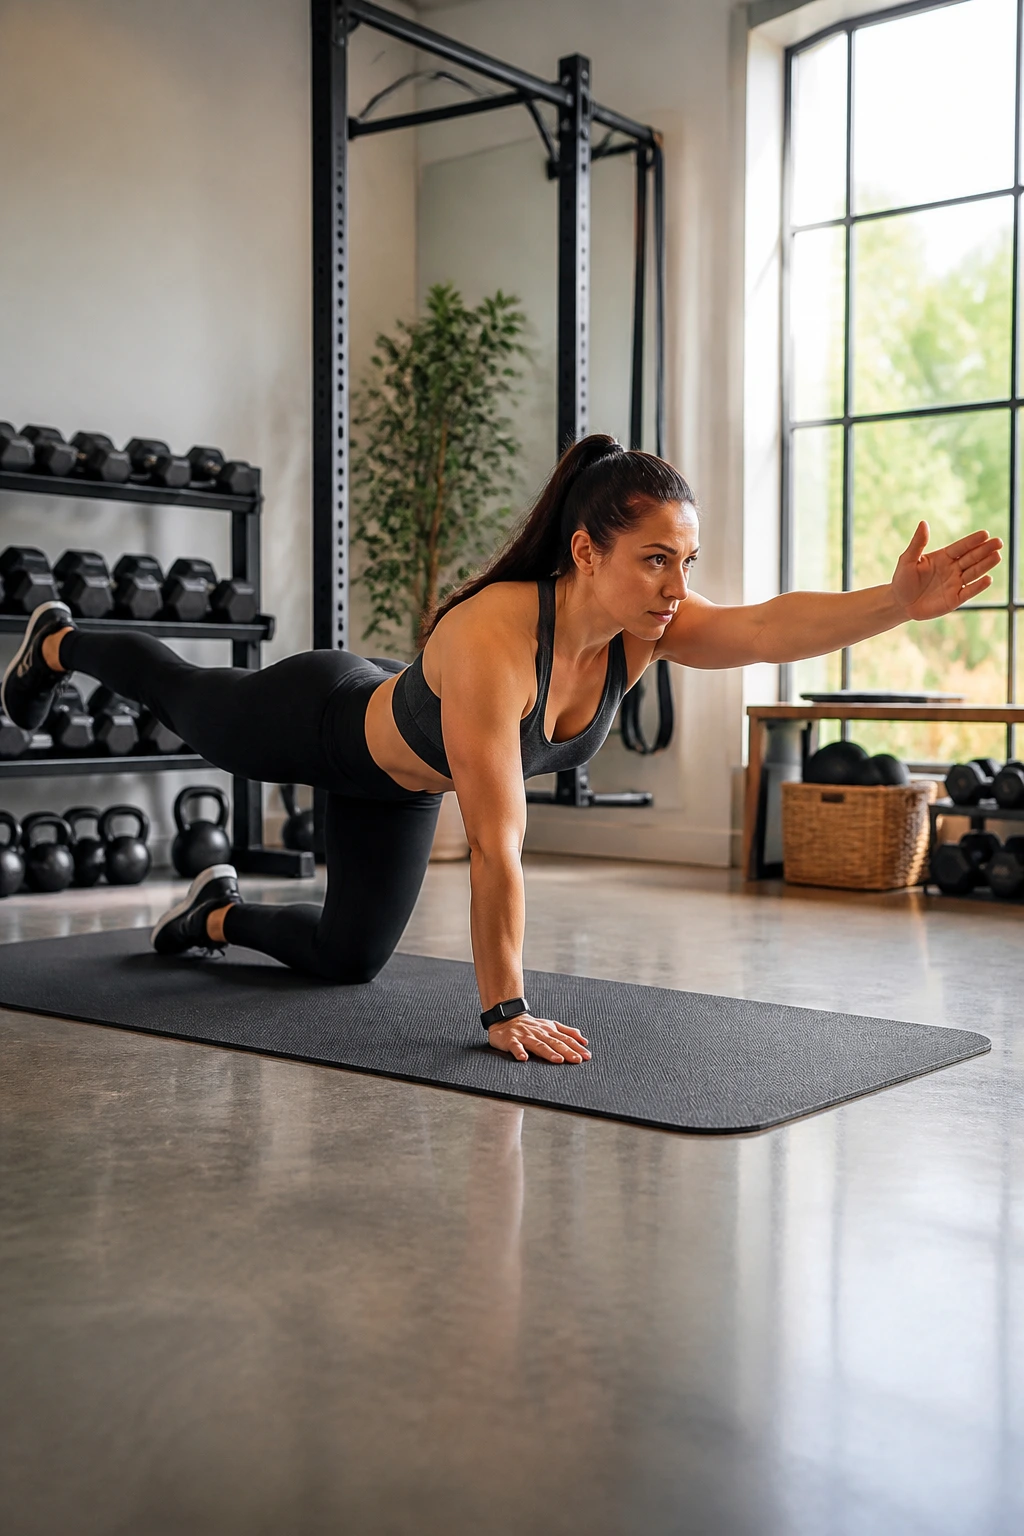
This is the ultimate exercise for core stability without the neck strain of a traditional sit-up. It forces your back to remain neutral while your limbs move, which is exactly the skill you need when you’re working at a desk and reaching for something.
Begin on all fours. Extend your right arm forward and your left leg backward simultaneously. Your goal isn’t height; it’s length. Reach for the walls in front of and behind you. Your back should remain as flat as a tabletop—no sagging, no arching.
If you struggle with balance, shorten the range of motion. Keep your core tight, as if you’re bracing for a gut punch. Hold for three seconds, then switch sides. Doing this consistently builds the deep stabilizer muscles that keep your spine safe.
6. Seated Thoracic Extensions
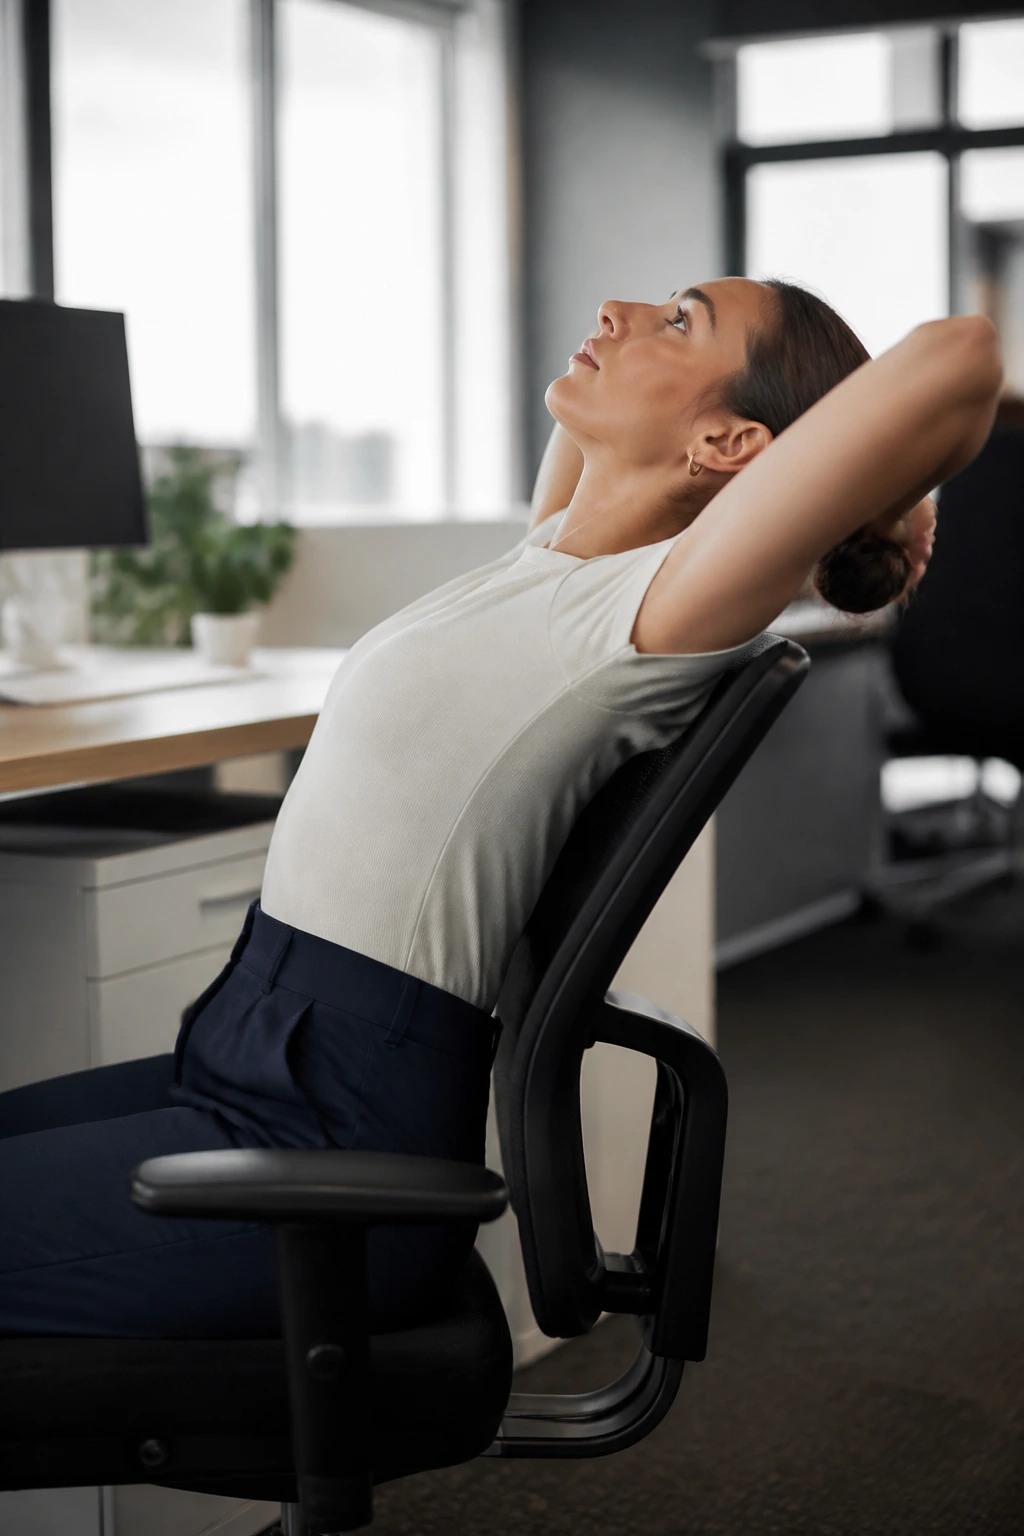
You don’t always have to get on the floor to improve your posture. If you’re stuck at your desk, this move uses your chair to your advantage. It targets the thoracic spine—the mid-back area that gets locked up from hunching over a keyboard.
Sit at the edge of your chair. Clasp your hands behind your head, keeping your elbows wide. Lean back over the top of the chair backrest, letting your upper back arch over the edge. Keep your lower back stable; you are only moving the upper part of your spine.
Inhale as you extend backward, looking toward the ceiling. Exhale as you return to upright. Do not use your neck to pull your head back; let the chair support the weight of your upper torso. It’s a gentle, controlled opener.
7. Wall Angels
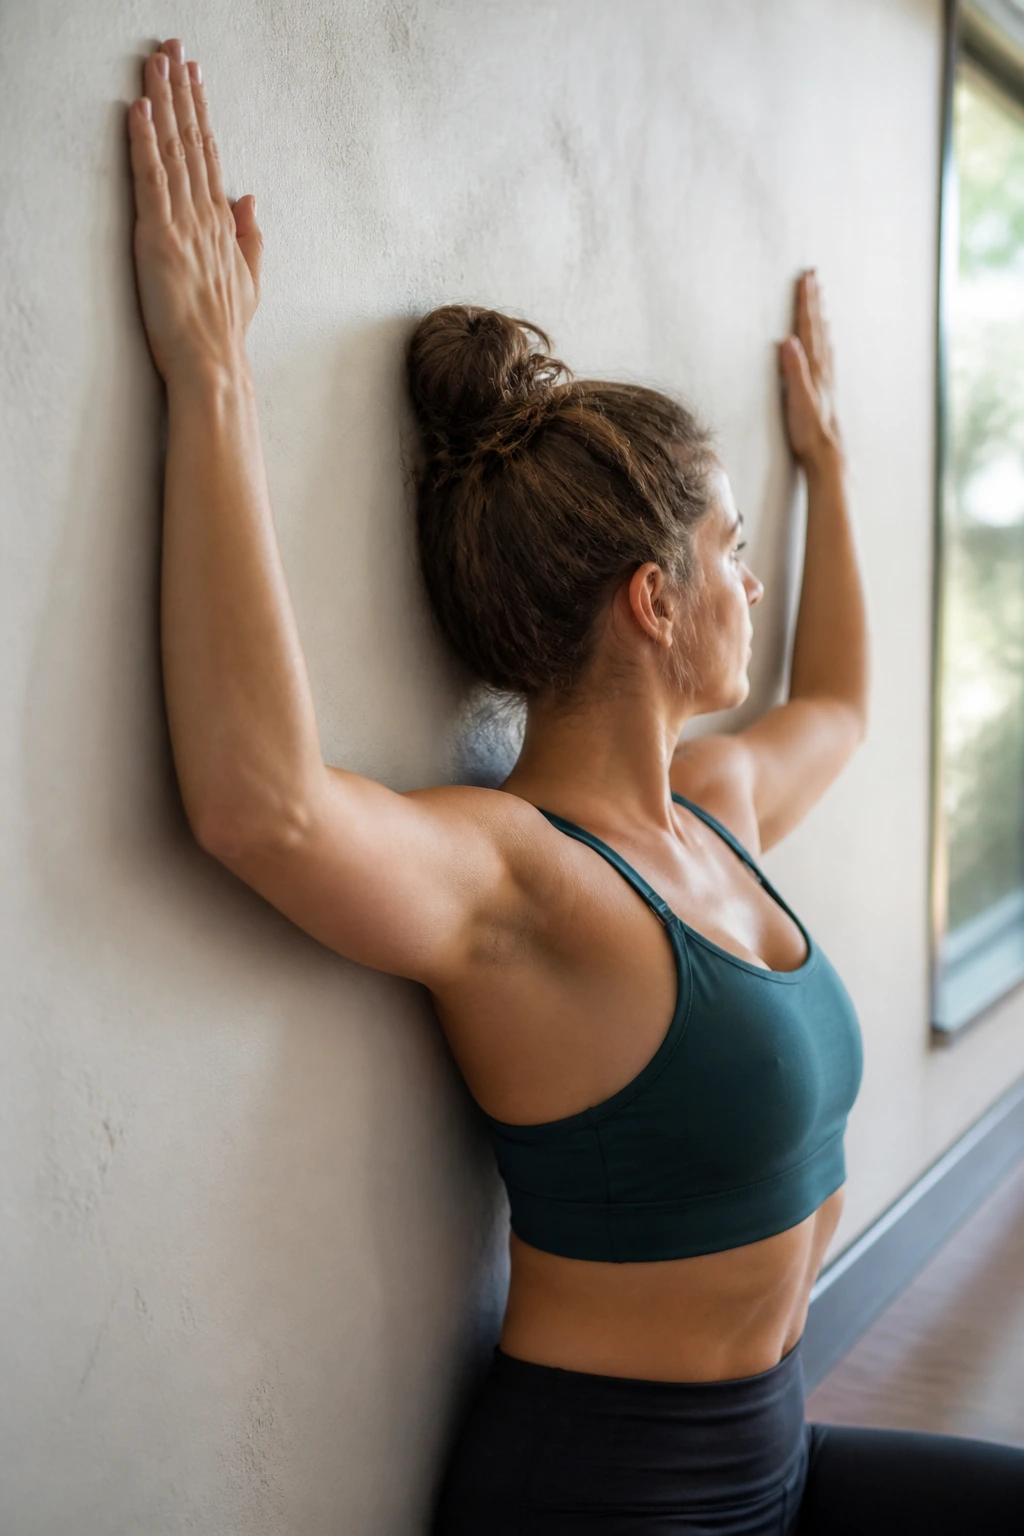
This is a deceptive exercise. It looks easy until you try to perform it while keeping your entire back, head, and arms touching the wall. It’s the ultimate diagnostic tool for checking your current posture and improving shoulder mobility.
Stand with your back flat against a wall. Your feet can be a few inches away. Bend your elbows to 90 degrees, forming a “W” shape with your arms, and try to touch the backs of your wrists, elbows, and shoulders to the wall.
Slowly slide your arms up into a “Y” shape and back down into the “W.” Keep contact with the wall the entire time. If your back arches, you’ve gone too far. If your elbows pop off the wall, your chest is too tight. Keep the range of motion small if you need to; quality of contact matters more than reach.
8. Glute Bridges
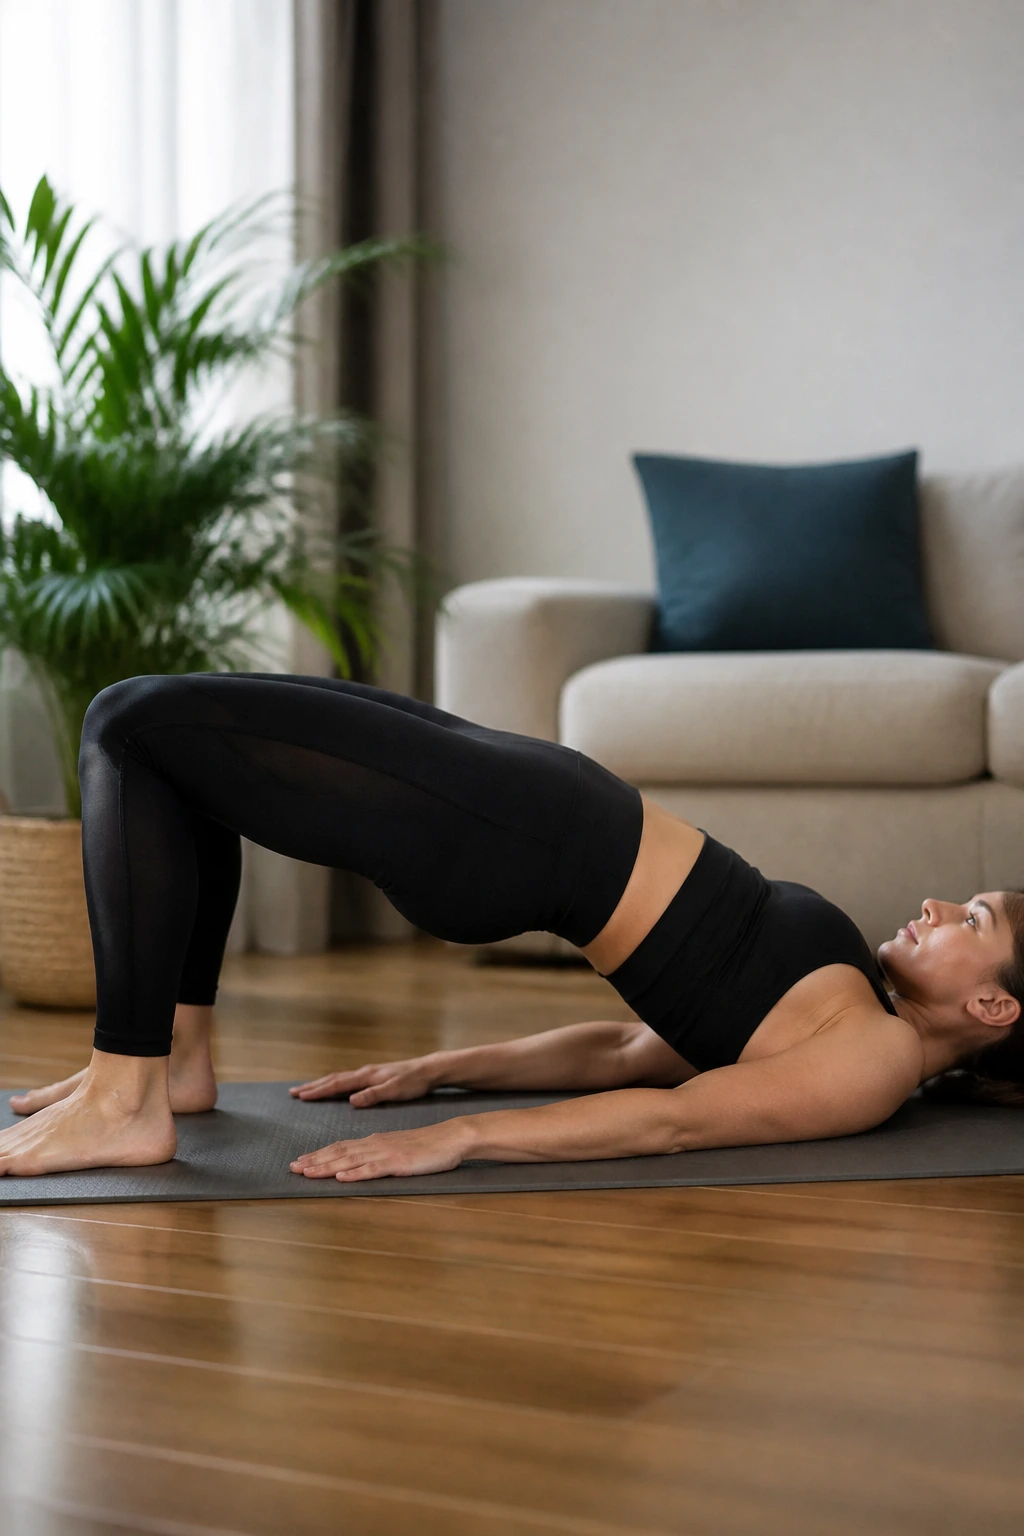
“Gluteal amnesia” is a real thing. When you sit all day, your glutes turn off, and your hamstrings and lower back take over the workload of stabilizing your pelvis. This leads to lower back pain. Glute bridges wake those muscles up.
Lie on your back with knees bent and feet flat on the floor, hip-width apart. Drive through your heels to lift your hips toward the ceiling. At the top, squeeze your glutes hard. Do not use your lower back to lift; the power must come from your hips.
Lower your hips back down slowly. Perform 15 repetitions. This is the single best way to counteract the “compressed” feeling of the lower body after hours of sitting.
9. Child’s Pose
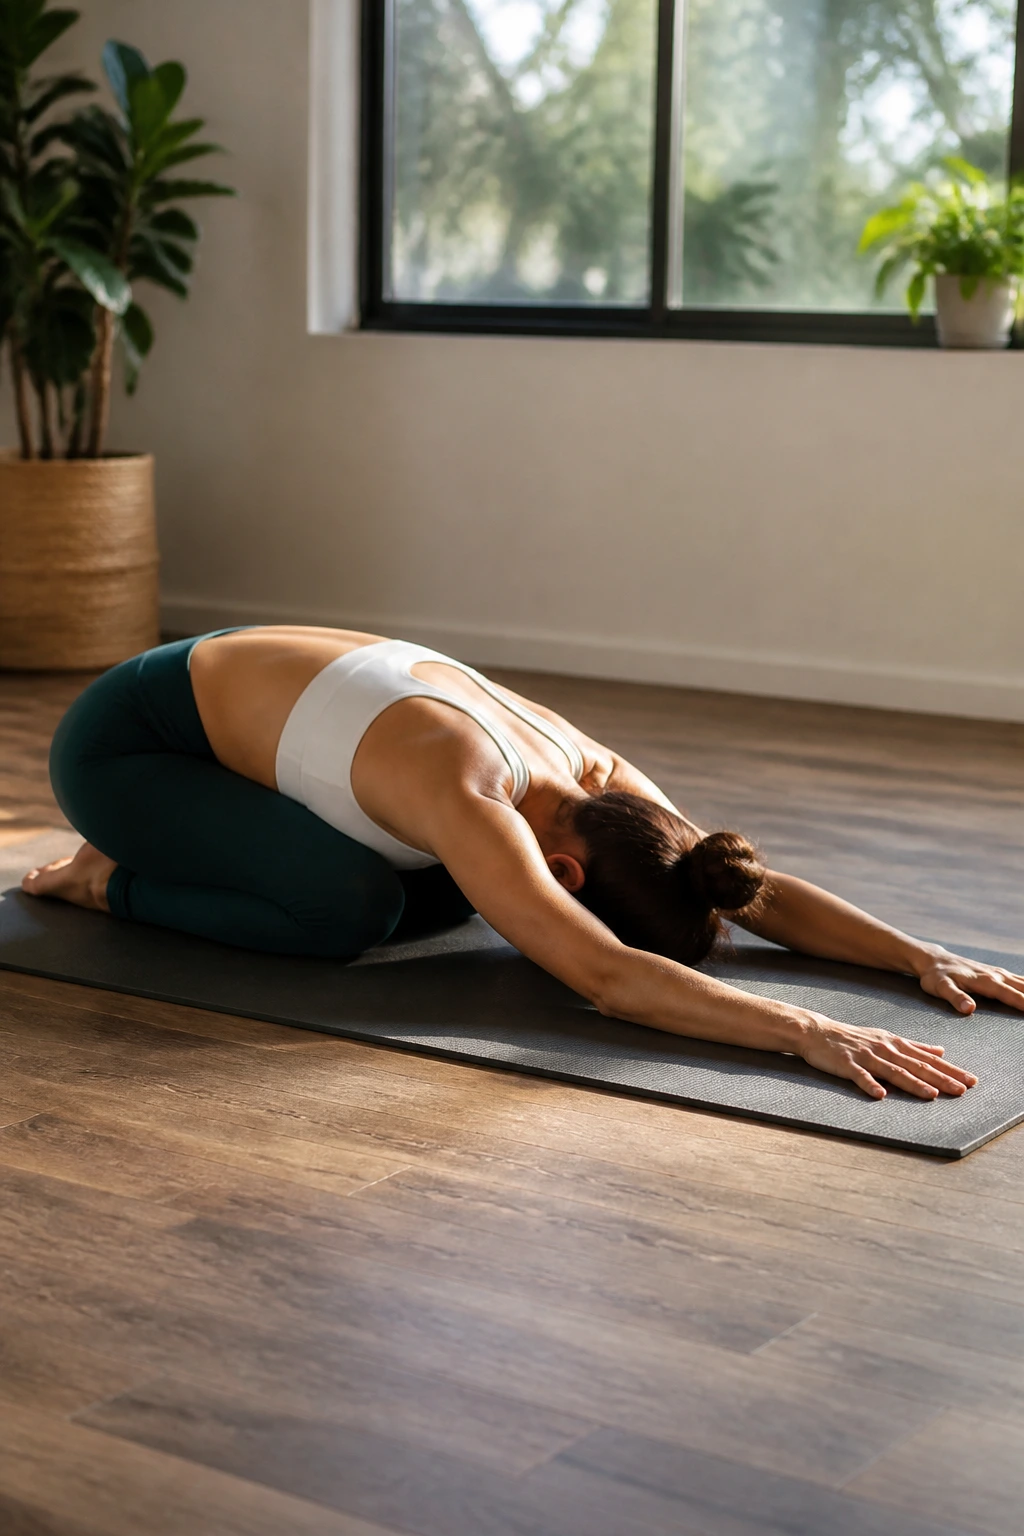
Sometimes, the best exercise is a sustained release. Child’s pose decompresses the lumbar spine and opens the hips, two areas that take the brunt of the office lifestyle. It’s a resting pose that should feel like an exhale for your entire skeletal structure.
Kneel on the floor, touch your big toes together, and sit back on your heels. Separate your knees about as wide as your hips. Exhale and lay your torso down between your thighs. Rest your forehead on the floor.
Extend your arms forward to create length in the spine, or bring them alongside your body for a deeper shoulder release. Stay here for one minute. Let gravity pull your hips deeper toward your heels. This is about surrender, not intensity.
10. Neck Stretches

The muscles on the sides of your neck—the trapezius and levator scapulae—become tight and knotted when we’re stressed or focused. A simple lateral stretch can provide immediate relief.
Sit tall. Drop your right ear toward your right shoulder. Use your right hand to gently—very gently—add pressure to the left side of your head. Do not pull. Just let the weight of your hand deepen the stretch.
To intensify the stretch, reach your left arm toward the floor. You’ll feel a line of tension stretching from your ear down to your shoulder blade. Hold for 30 seconds. Switch sides. Breathe slowly; the neck is sensitive, and jerky movements will only cause the muscles to spasm.
11. Thoracic Spine Rotations
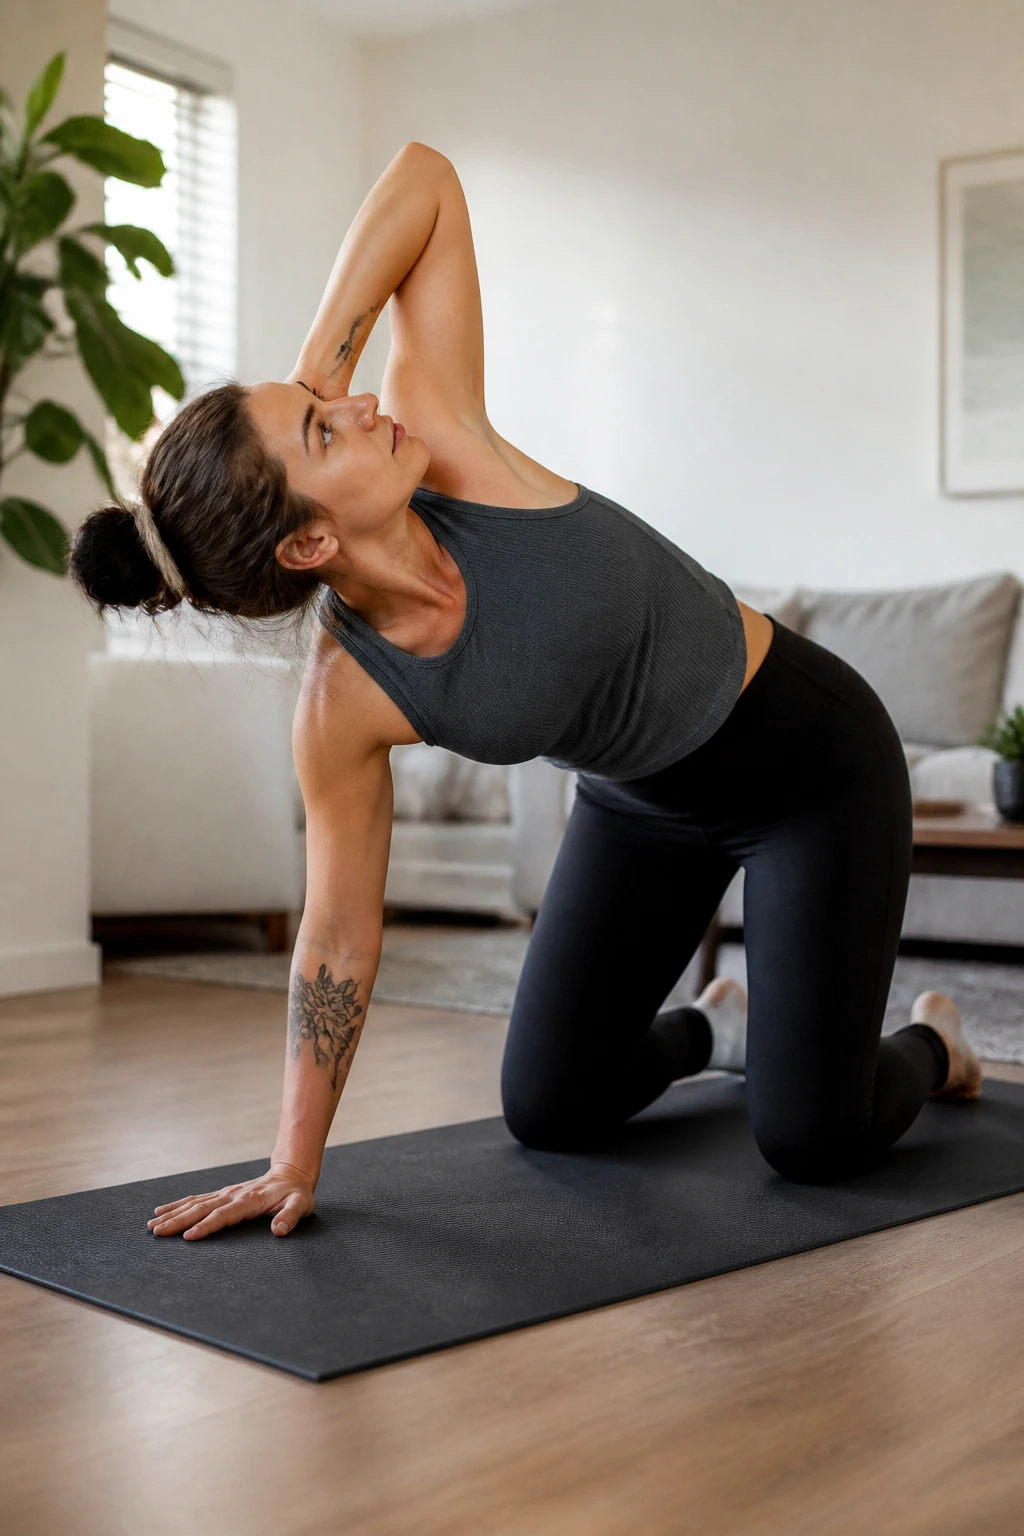
Your mid-back is designed for rotation. When you sit, you lose that ability, leading to a stiff torso that relies on the lower back for twisting movements—a recipe for injury. This exercise restores the rotational capacity of the thoracic spine.
Get on all fours. Place one hand behind your head, elbow pointing out. Inhale, and bring that elbow down to touch your opposite wrist. Exhale, and rotate your upper body, pointing that same elbow toward the ceiling.
Follow your elbow with your eyes to maximize the rotation. Do ten repetitions on each side. The goal is to rotate from your mid-back, not your hips. Keep your hips square to the floor.
12. Planks
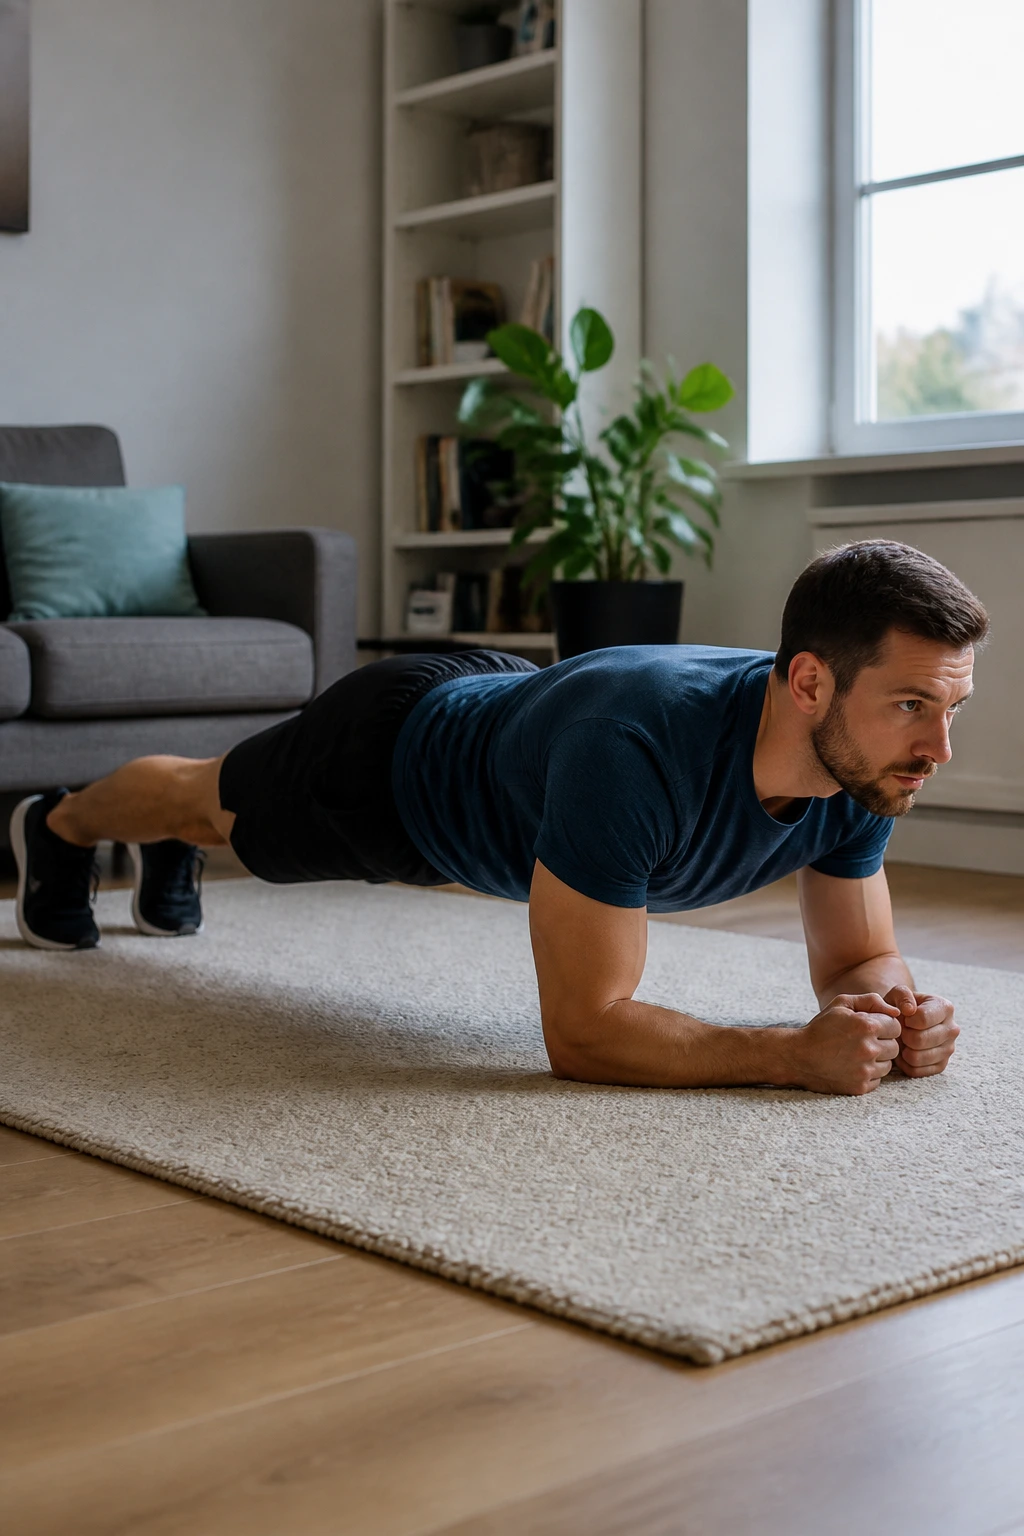
You don’t need to hold a plank for five minutes. You need to hold a plank with perfect form for 30 seconds. A proper plank engages the entire anterior chain, which acts as a support system for your spine when you’re sitting.
Get into a push-up position, but support your weight on your forearms. Your body should form a straight line from your head to your heels. Squeeze your glutes, engage your quads, and pull your belly button toward your spine.
The moment your hips sag, the exercise is done. The moment your shoulders collapse, it’s done. Perfection is the goal here, not duration. It’s about building a solid, unshakeable base for your torso.
13. Forward Fold
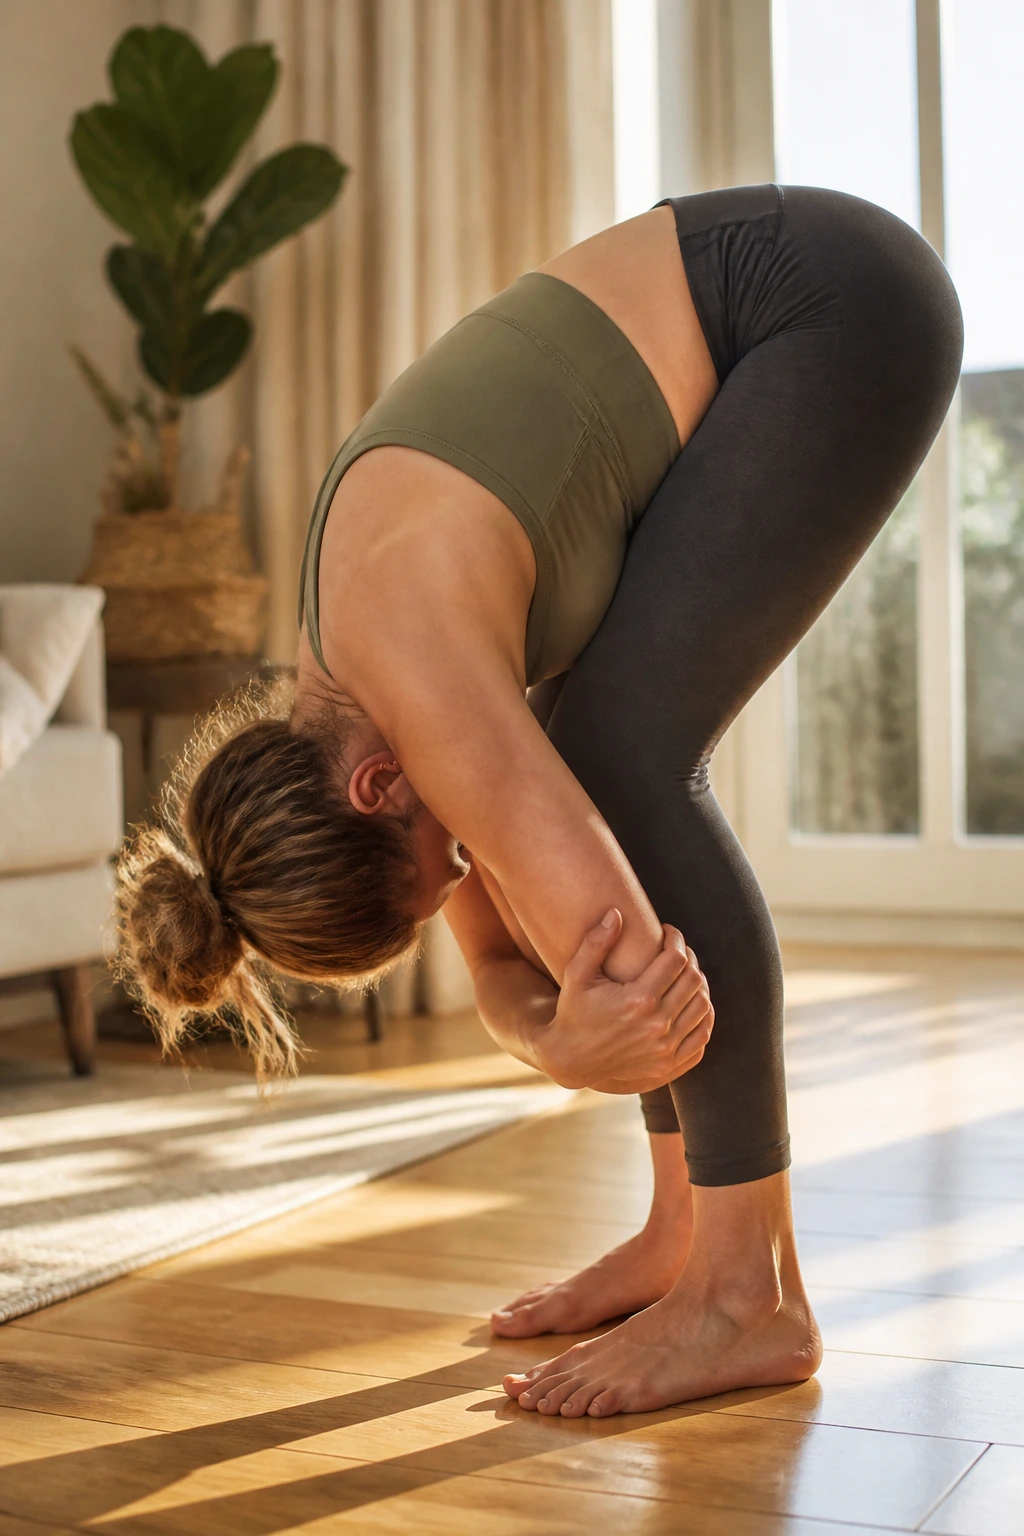
This is the ultimate hamstring and low-back opener. Sitting tightens the hamstrings, which in turn pulls on the pelvis and irritates the lower back. This simple fold re-lengthens those posterior muscles.
Stand with feet hip-width apart and knees slightly bent. Hinge at the hips—not the waist—and let your upper body hang over your legs. Let your head be heavy. Grab opposite elbows with your hands to add a bit of traction.
You don’t need straight legs. In fact, keeping a micro-bend in the knees is safer for the back. Sway gently from side to side. Let the weight of your torso elongate your spine, creating space between the vertebrae.
14. Dead Bug
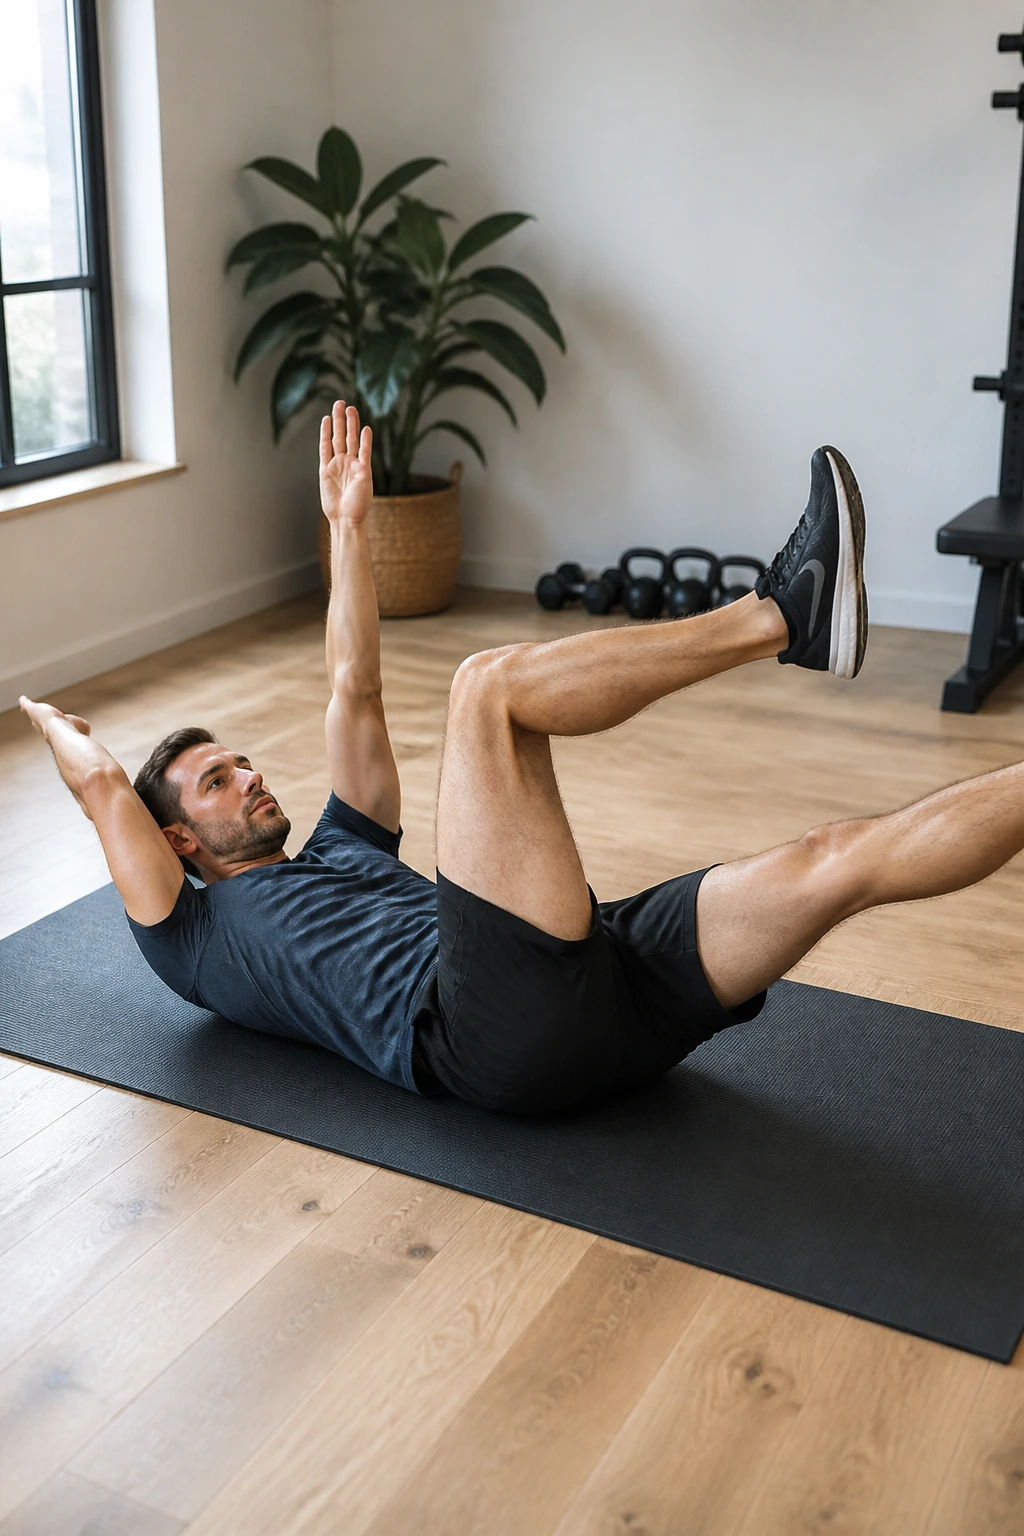
The “Dead Bug” is an exercise that sounds ridiculous but is arguably the most effective way to build core strength without stressing the neck or back. It teaches you to move your limbs while keeping your spine glued to the floor.
Lie on your back with arms extended toward the ceiling and legs in the air, knees bent at 90 degrees. Press your lower back into the floor; if there’s a gap, your core isn’t engaged enough.
Lower your right arm behind your head and extend your left leg forward, hovering just off the floor. Return to center and switch. Move slowly. If your lower back arches, stop and reset. This is the gold standard for anti-extension core work.
15. Cobra Pose
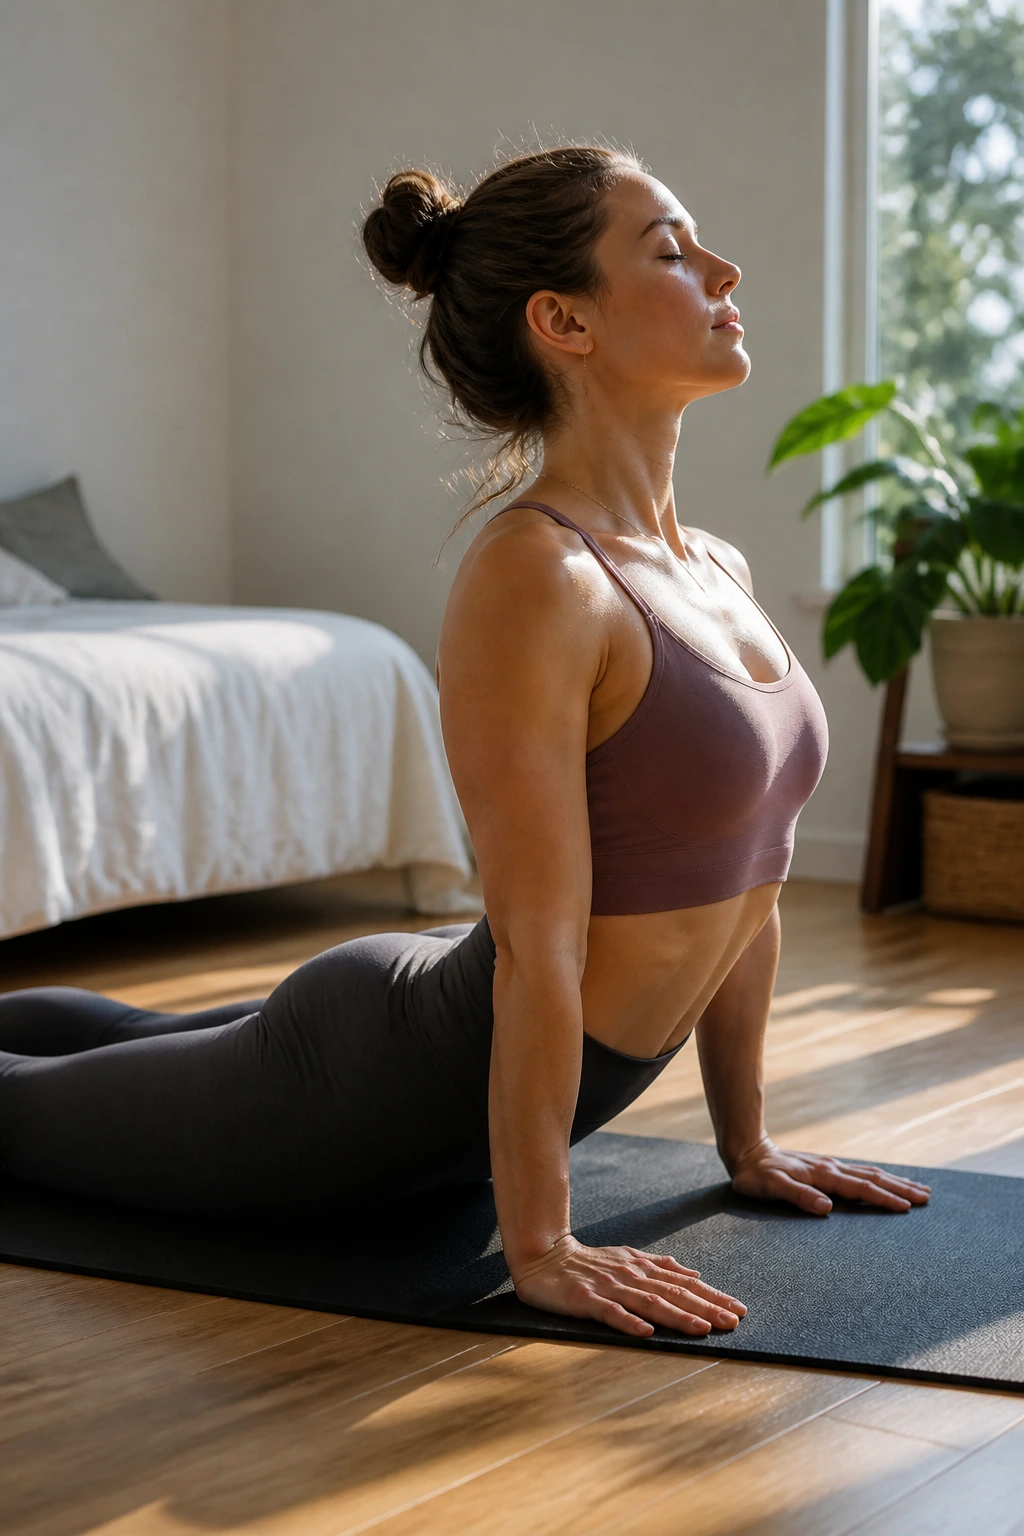
After hours of being folded over a desk, you need to introduce extension. The Cobra pose is a gentle backbend that stretches the abs and engages the muscles that pull your shoulders back.
Lie on your stomach. Place your hands under your shoulders, elbows tucked in. Press into your palms to lift your chest off the floor. Keep your hips firmly planted.
You don’t need to lock your arms out. Lift only as high as feels comfortable for your lower back. Think about pulling your chest through your shoulders. Engage your glutes to protect your lumbar spine.
16. Hip Flexor Lunge
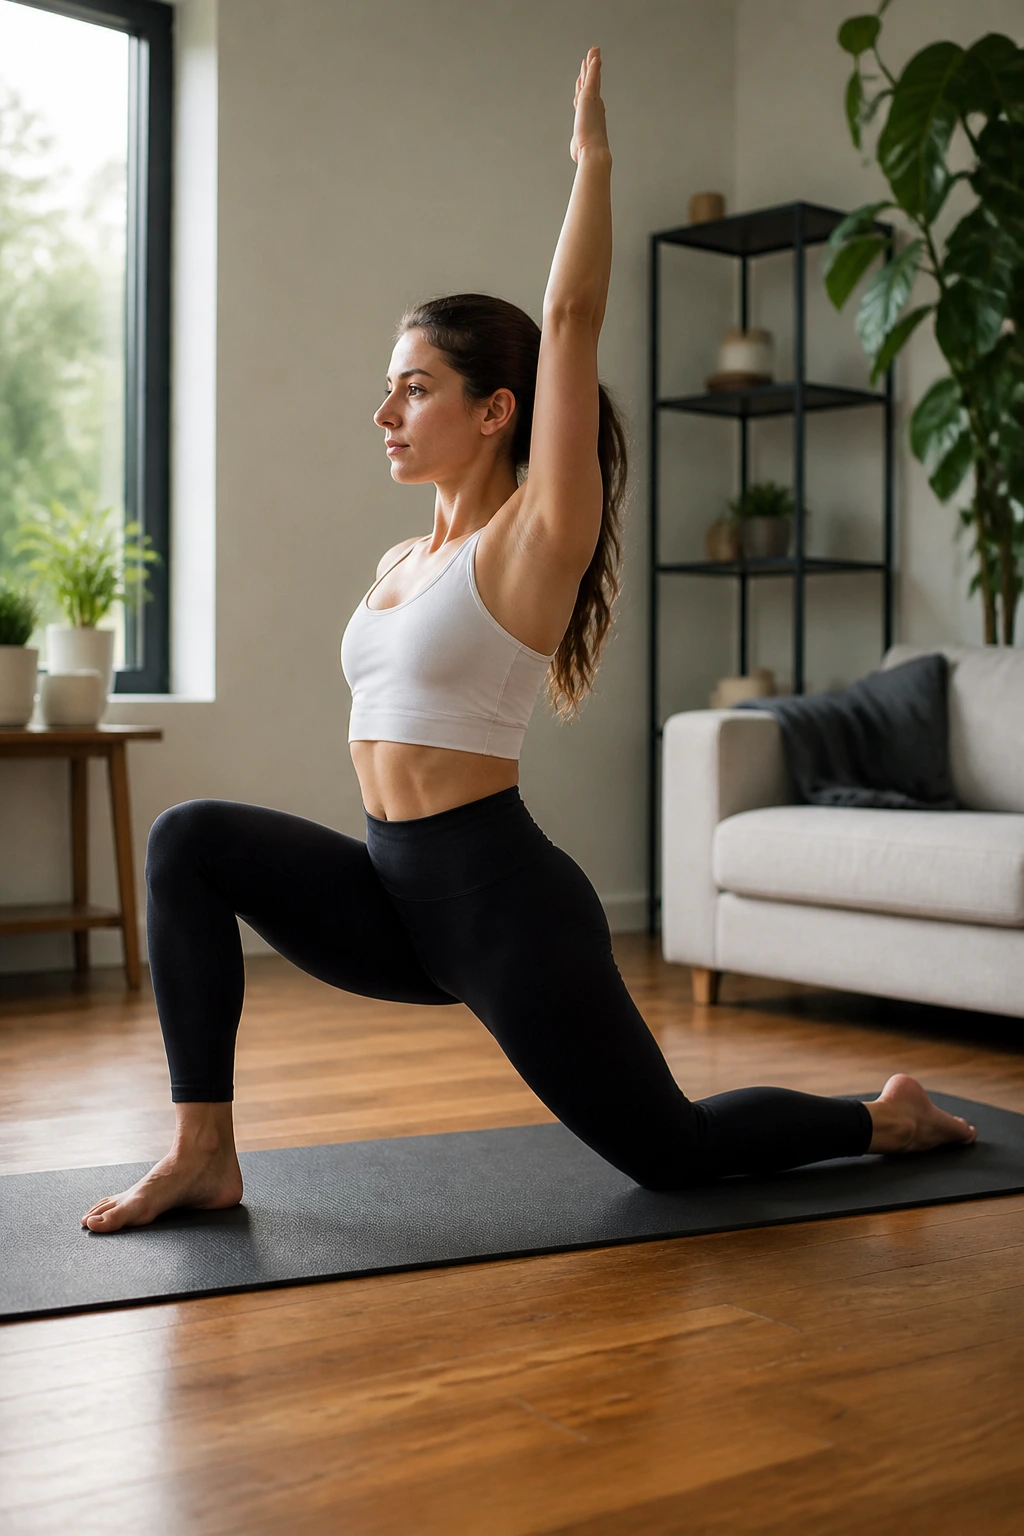
Your hip flexors, located at the front of your hips, are chronically shortened by sitting. When they get tight, they pull your pelvis forward, creating an exaggerated arch in your lower back. This lunge reverses that.
Step one foot forward into a deep lunge and drop your back knee to the floor. Keep your torso upright—don’t lean forward. Squeeze the glute of your back leg. That squeeze is the secret; it forces the hip flexor on that side to relax and stretch.
Reach the arm on the same side as the back knee up toward the ceiling to deepen the stretch. Hold for 30 to 45 seconds. This is often the “aha” moment for people with chronic lower back pain.
17. Resistance Band Pull-Aparts
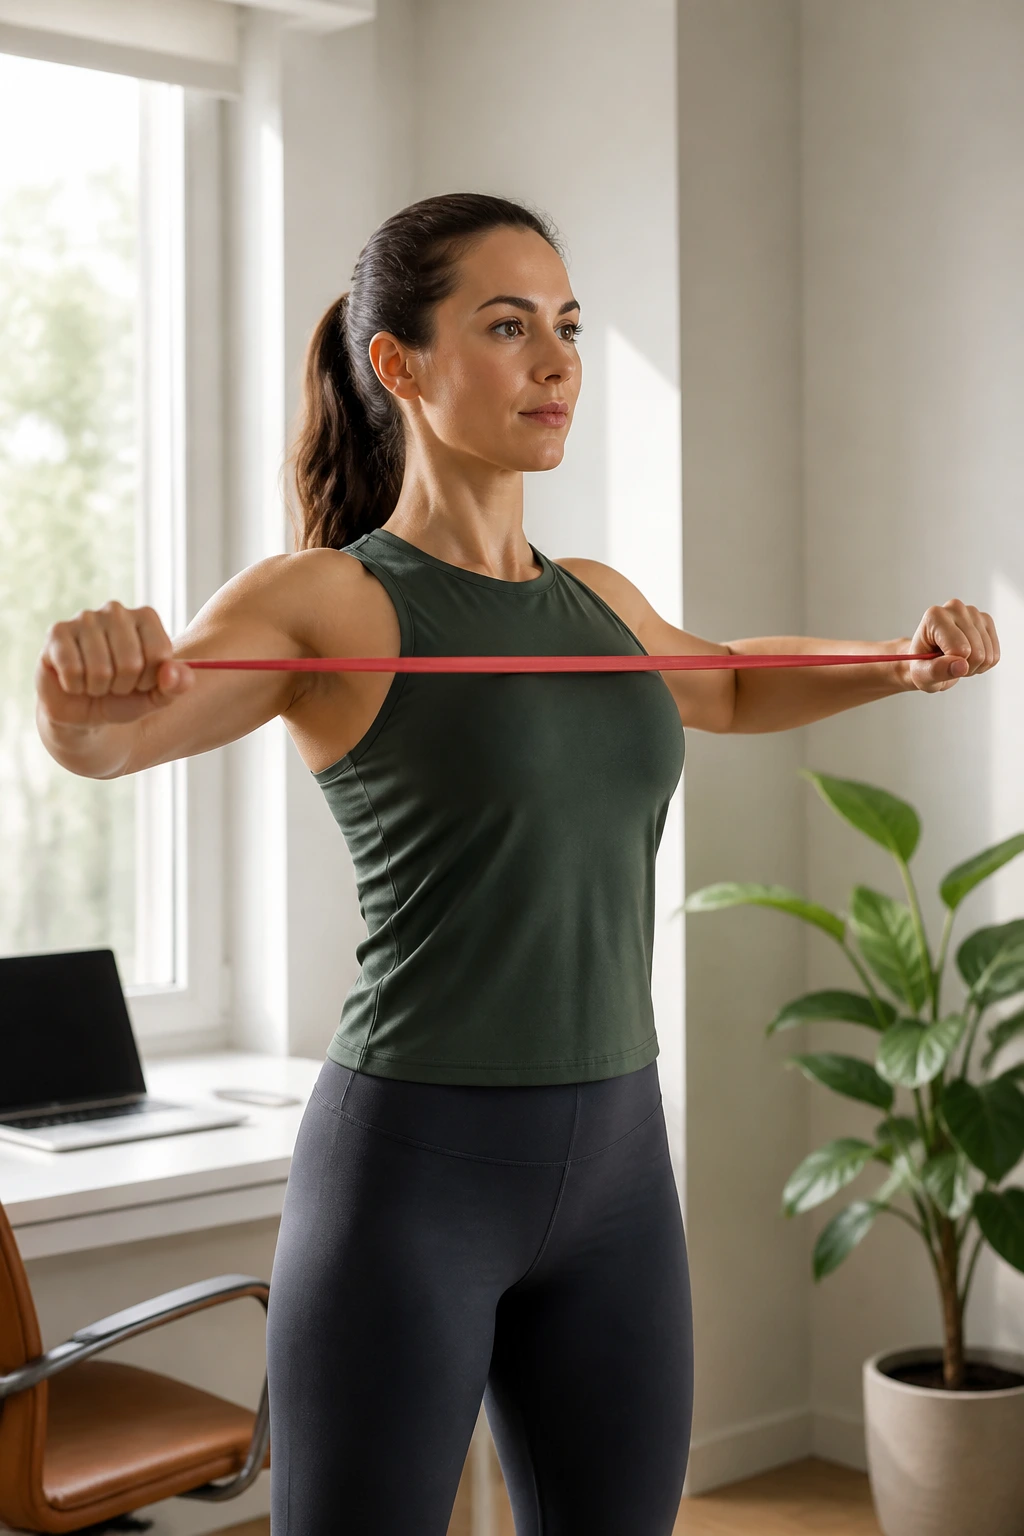
If you work in an office, keep a resistance band in your drawer. Pull-aparts are the best exercise for the rear deltoids and the muscles between your shoulder blades—the exact muscles that get long and weak from computer work.
Hold the band with both hands, arms extended in front of you at shoulder height. Keeping your elbows straight, pull the band apart, bringing your hands out to the sides until the band touches your chest.
Focus on squeezing your shoulder blades together. Do not let your shoulders shrug up. Control the movement on the way back in—don’t let the band snap your hands together. It’s a slow, deliberate squeeze.
18. Prone W-Raises
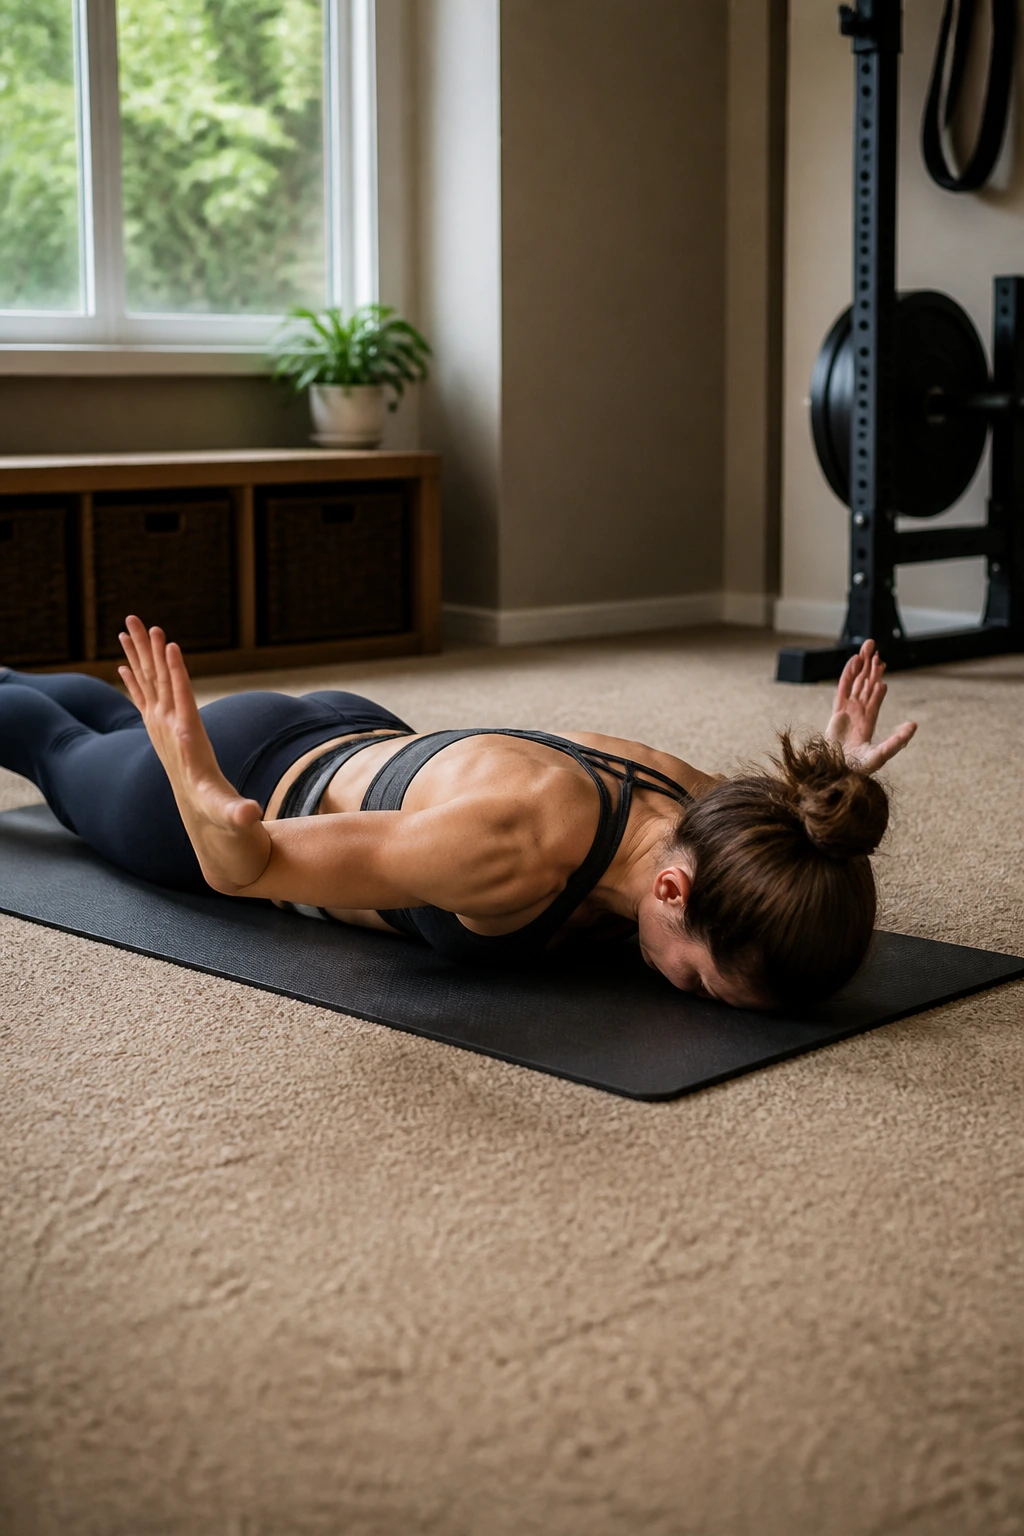
This exercise builds endurance in the lower trapezius—the muscle responsible for keeping your shoulders down and back. It’s an incredibly targeted movement that fixes the “slump.”
Lie on your stomach with your arms out to the sides, elbows bent at 90 degrees, forming a “W” shape. Your forehead can rest on the floor.
Squeeze your shoulder blades together and lift your arms and chest off the ground, keeping your elbows bent. Hold for two seconds at the top, feeling the burn in your mid-back. Lower back down. Repeat for 12 to 15 reps. It is harder than it looks.
19. The “Tabletop” Hold
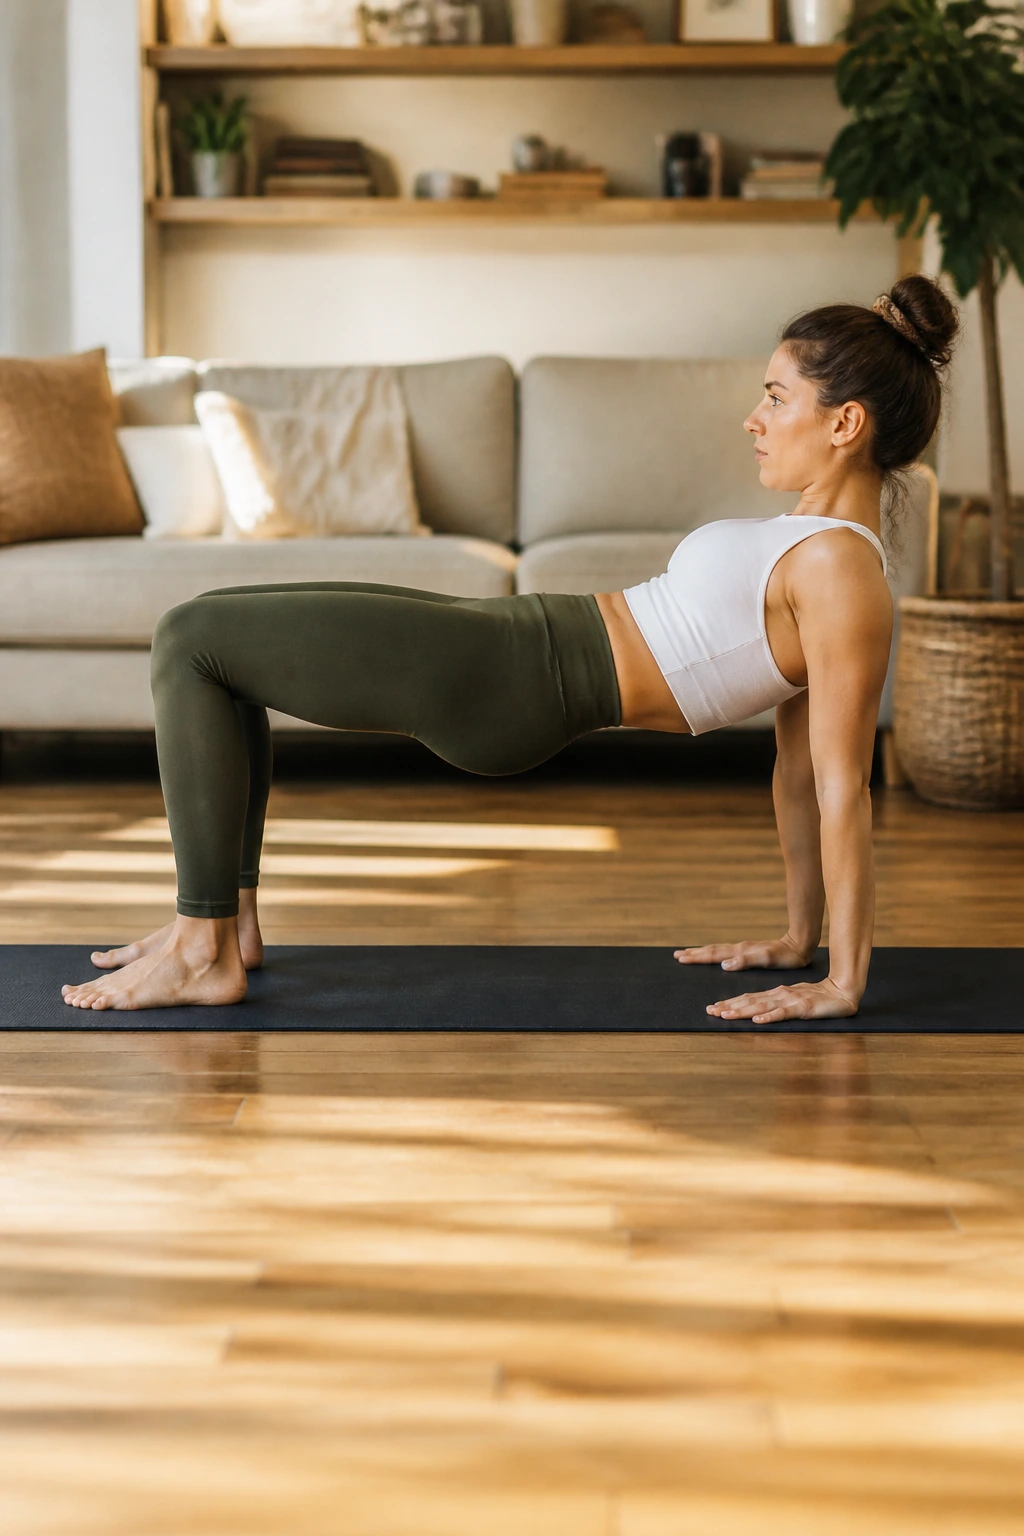
This is a great, functional way to open the chest and strengthen the posterior chain simultaneously. It’s the antithesis of the slumped desk posture.
Sit on the floor with knees bent and feet flat in front of you. Place your hands on the floor behind you, fingers pointing toward your heels. Lift your hips until your body forms a flat table from knees to shoulders.
Look straight ahead or slightly up. Squeeze your glutes and push your chest toward the ceiling. Hold for 20 seconds. It opens the shoulders, stretches the chest, and fires up the entire back of the body.
20. Spine Lengthening
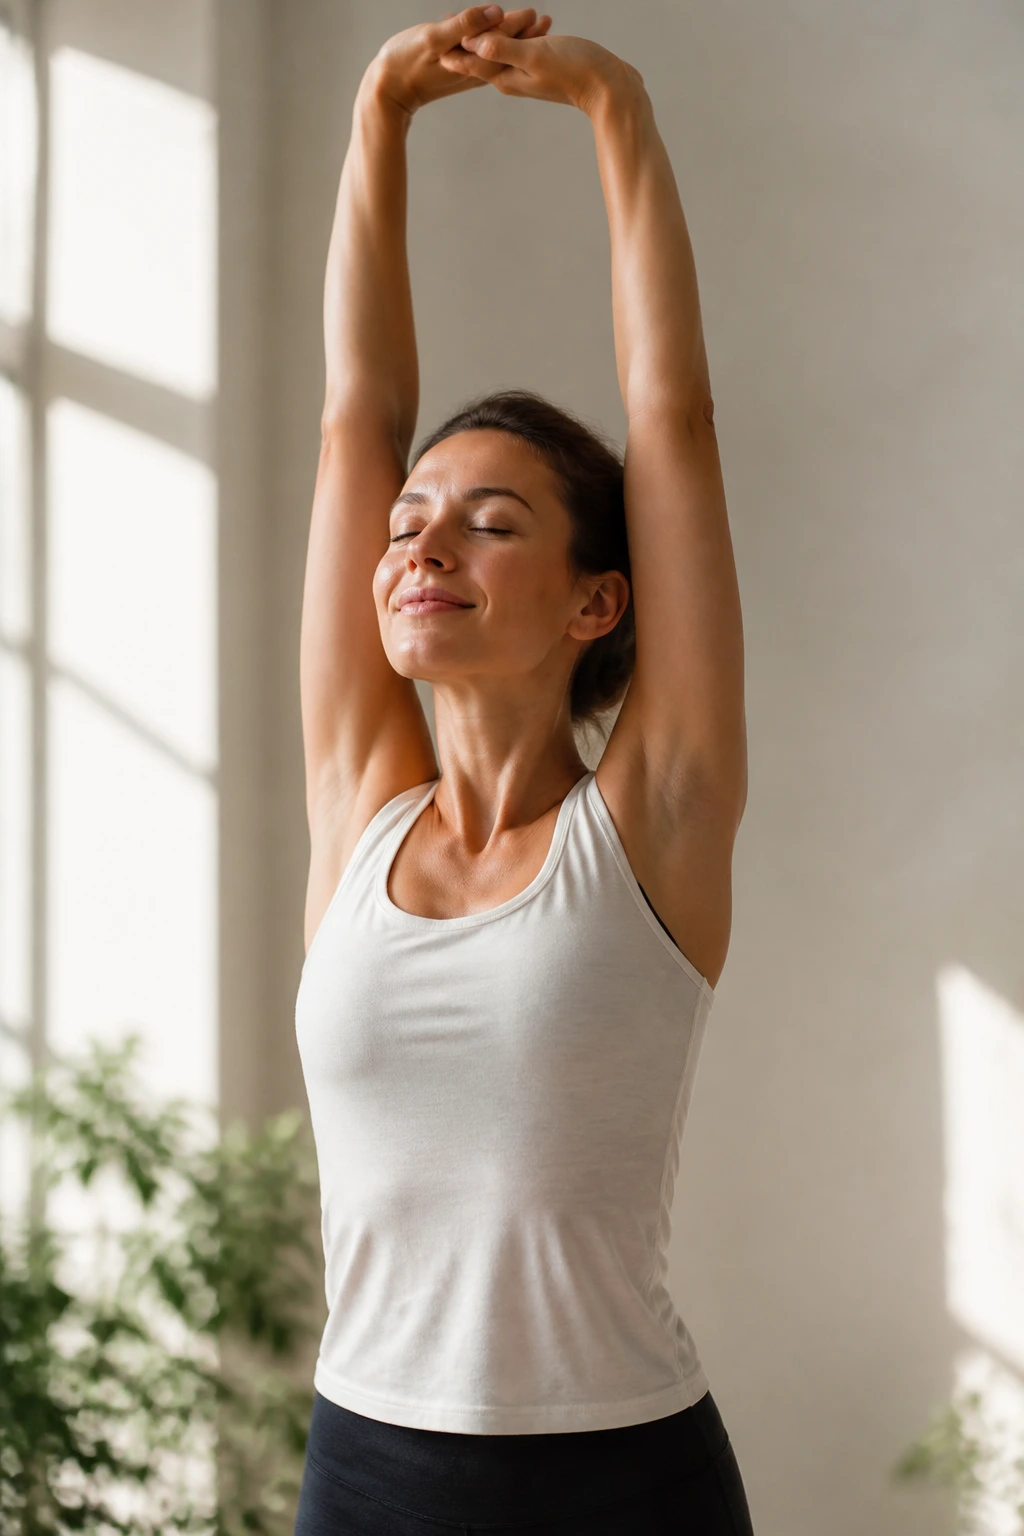
Sometimes, you don’t need a complex pose. You just need to re-establish the concept of “long.” This is a reset move you can do standing, sitting, or even waiting in line.
Stand tall, feet hip-width apart. Reach your arms toward the sky, interlace your fingers, and flip your palms upward. Take a massive breath in, and as you do, try to grow an inch taller.
Imagine your vertebrae stacking neatly, one on top of the other, with space in between. Hold the stretch for a few seconds. Release the arms and exhale, trying to keep that same length in your torso. Do this whenever you feel yourself shrinking into your chair.
Final Thoughts
Improving your posture is not a sprint; it’s a lifestyle adjustment. You aren’t training for a posture competition; you are training to survive your work week without chronic aches. The exercises listed here are effective, but they only work if you actually do them.
Pick three of these exercises to do in the morning. Pick two to do during your lunch break. Integrate one or two—like the chin tucks or seated extensions—into your hourly workflow. Movement is the enemy of stagnation, and stagnation is the enemy of a healthy back. Stop performing posture and start building the strength to support it naturally. Your future self will appreciate the investment in mobility, especially on those days when the desk feels like it’s never going to let you go.
