



If you have ever stood up from your desk chair after a three-hour block of deep work and felt like you needed a hydraulic lift just to get your spine straight, you know the feeling. The hips don’t just get tight; they seem to lock into a static, abbreviated position that makes walking feel mechanical and uncomfortable. You might notice a sharp pinch in the front of your hip crease or a dull, throbbing ache radiating through your glutes. This isn’t just a nuisance; it is the physical manifestation of keeping your body in a fixed shape for too long.
The human body was designed for movement, not for the structural compression of a chair. When you sit for prolonged periods, the hip flexors—specifically the psoas and the iliacus—remain in a shortened, contracted state. Over time, these tissues lose their elasticity. They essentially “forget” how to lengthen, which pulls your pelvis into an anterior tilt, destabilizes your lower back, and shuts down your glutes. Stretching is the antidote, but simply pulling a leg toward your chest is rarely enough to reverse the damage of a sedentary lifestyle. You need a targeted, methodical approach to re-establish mobility in the entire pelvic girdle.
1. The Butterfly Stretch
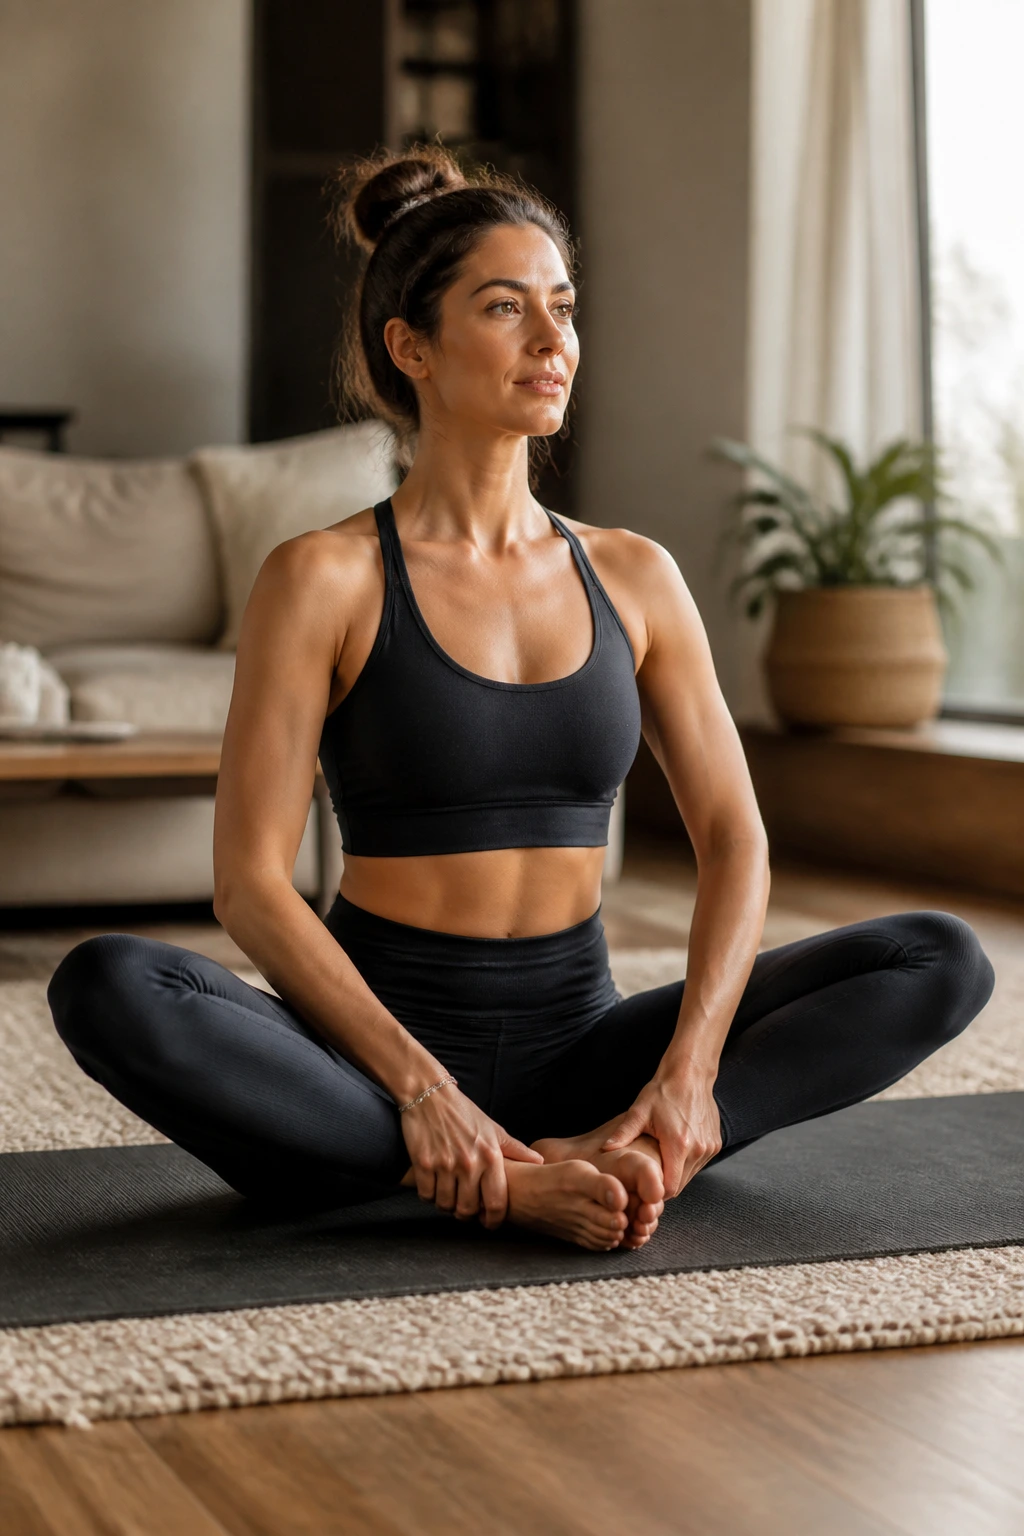
This is the classic groin opener, but most people do it wrong. They hunch their shoulders and round their spine, turning it into a back stretch rather than a hip release. Sit on the floor with the soles of your feet pressed together, but do not pull your heels as close to your groin as possible. Slide your feet about a foot away from you to create a diamond shape with your legs.
Why the Distance Matters
When you pull your heels in tight, you engage the adductor group, but you often sacrifice proper pelvic alignment. By keeping the feet further away, you shift the stretch into the deep rotators of the hip. Sit tall. Imagine a string pulling the crown of your head toward the ceiling. Use your elbows to gently press the knees toward the ground, but do not force them. If your back rounds, stop and reset. Your goal is to tilt your pelvis forward, not to touch your head to your toes.
2. Pigeon Pose
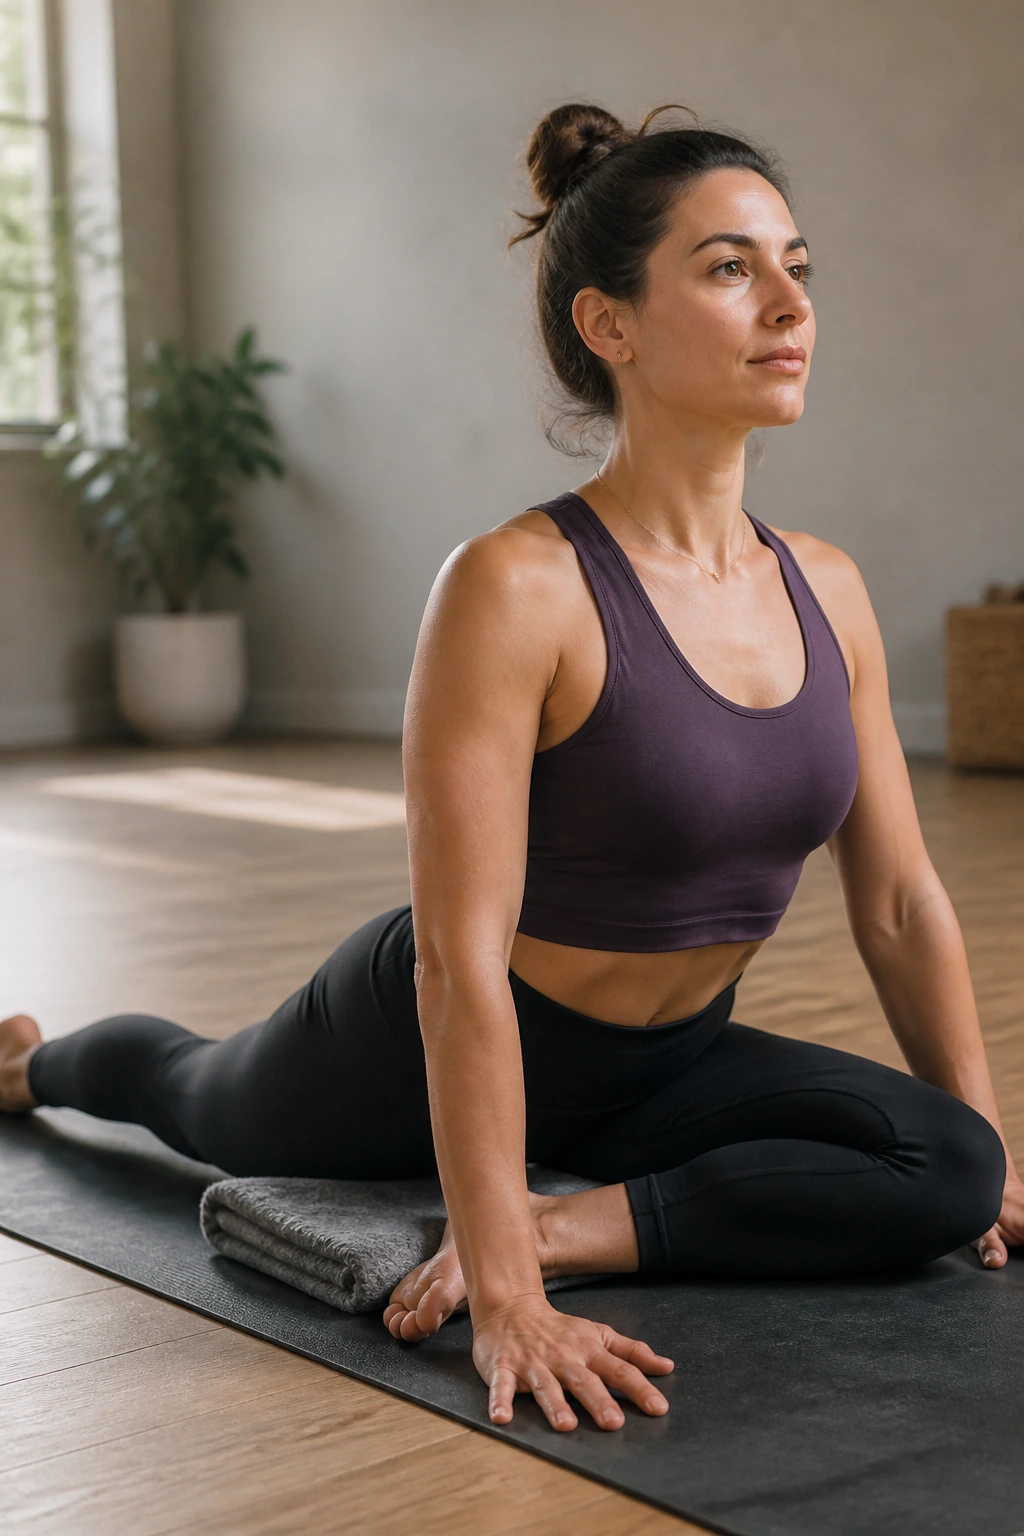
The Pigeon Pose is arguably the most effective tool for targeting the piriformis and the deep external rotators of the hip, but it carries a risk of knee strain if performed incorrectly. Start in a tabletop position on all fours. Slide your right knee forward toward your right wrist and place your shin at an angle across the mat, with your right foot tucked near your left hip.
Extend your left leg straight back behind you. Ensure your hips are squared to the front of the room—most people tend to collapse onto their right hip, which defeats the purpose of the stretch. If your right hip is hovering far off the floor, place a folded blanket or a block underneath it for support. Walk your hands forward and lower your chest as far as is comfortable. Keep the front foot flexed to protect your knee joint. You will feel this intensely in the outer hip and glute; breathe through it for at least 60 seconds before switching sides.
3. Kneeling Hip Flexor Stretch
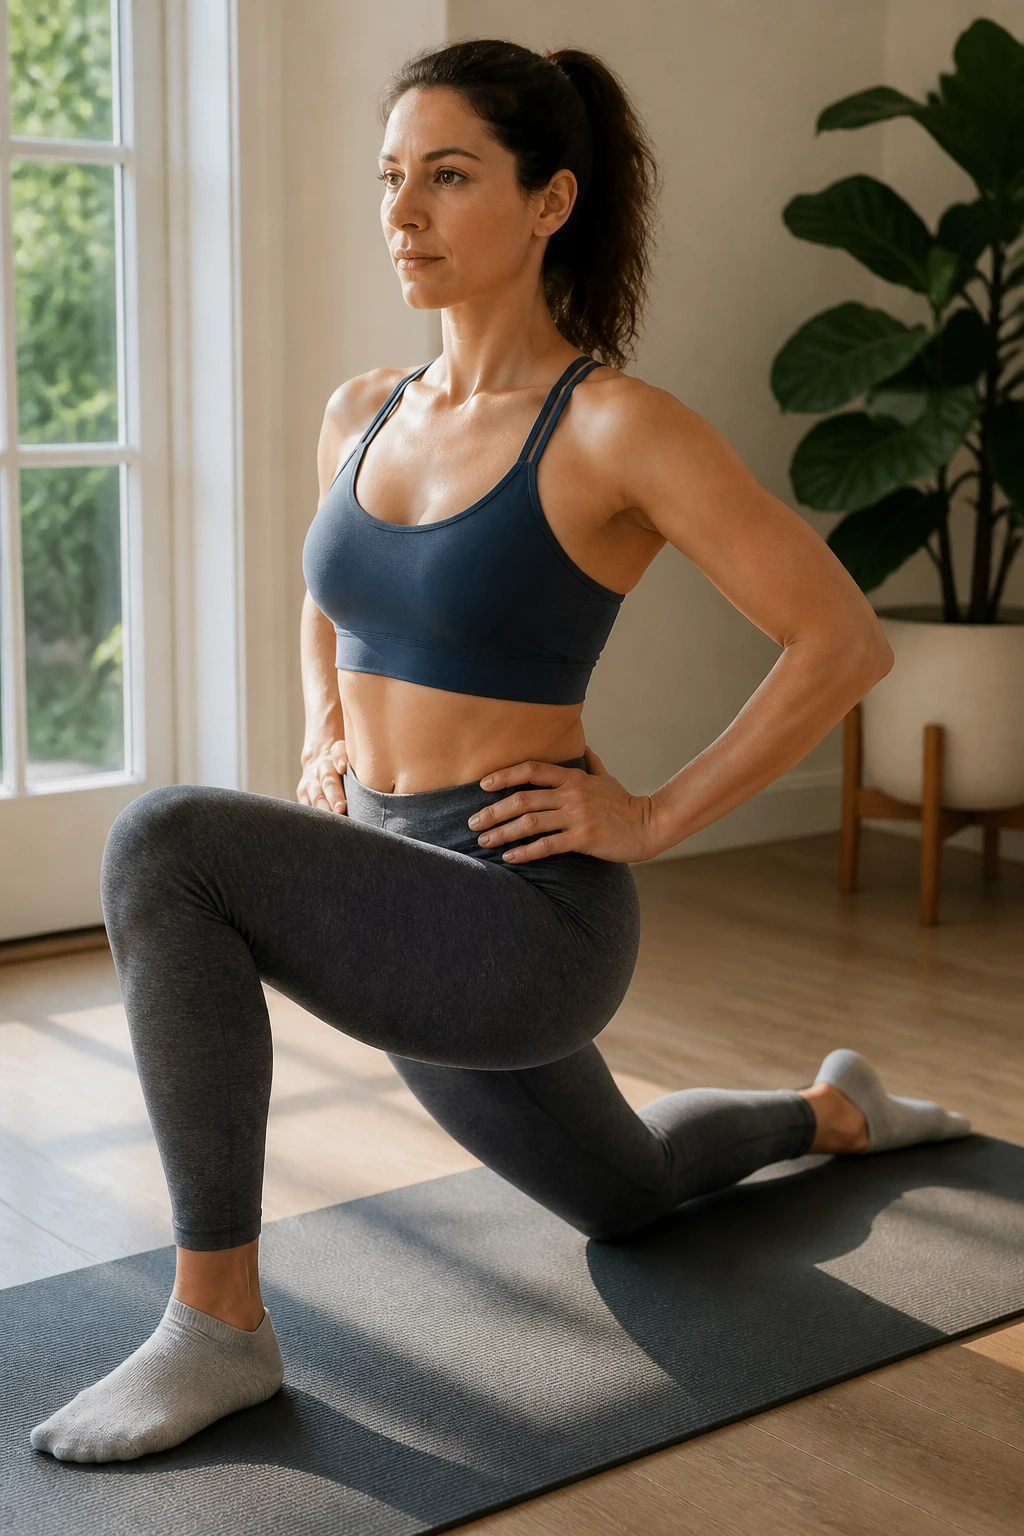
If there is one stretch that deserves a place in your daily routine, it is this one. This targets the psoas directly—the muscle that essentially glues itself short when you sit for hours. Kneel on one knee, with the other foot planted flat on the floor in front of you. Place your hands on your hips or your front knee for stability.
The critical secret here is the posterior pelvic tilt. Before you lean forward, tuck your tailbone underneath you as if you are trying to pull your belt buckle toward your chin. You will likely feel a massive stretch in the front of your kneeling hip without moving an inch forward. Once you have that tuck, gently drive your hips forward by an inch or two. Do not hyperextend your lower back. If you arch your back, you lose the stretch in the flexor and dump the pressure into your lumbar vertebrae. Hold this with active glute engagement on the kneeling side; squeezing that glute will force the front of the hip to relax.
4. Lying Figure-Four Stretch
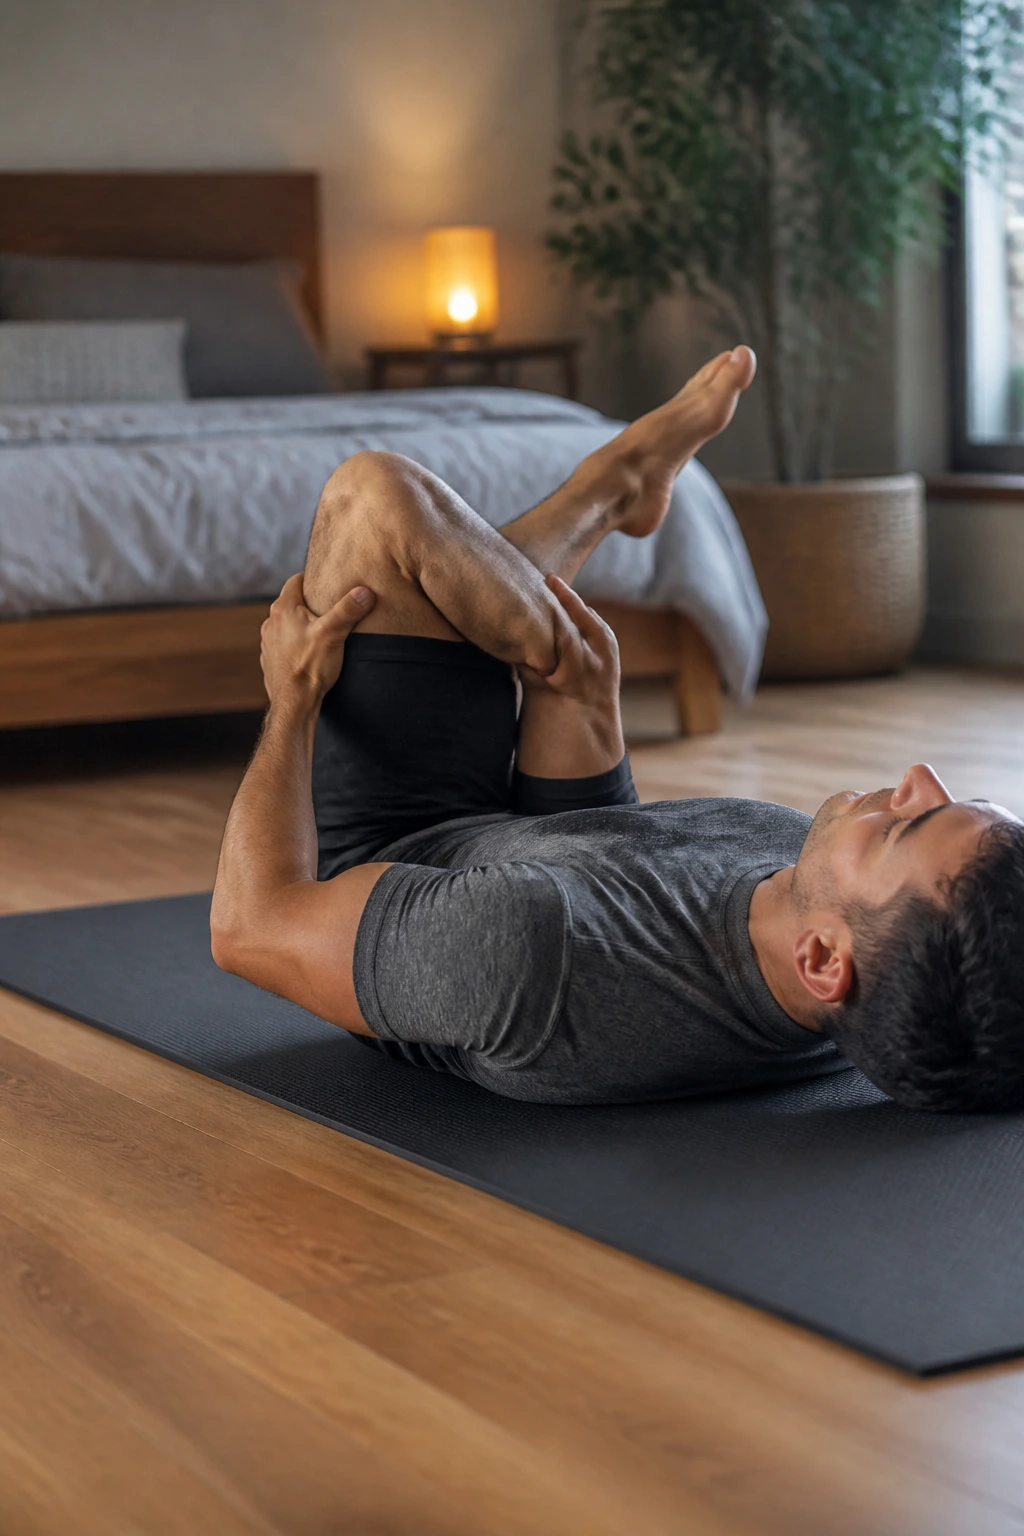
This is the safer, more accessible cousin of the Pigeon Pose, perfect for when you are tired or want to focus on deep relaxation. Lie flat on your back with both knees bent and feet flat on the floor. Cross your right ankle over your left knee, creating a number “four” shape with your legs.
Lift your left foot off the floor and grab the back of your left thigh with both hands. Gently pull your left leg toward your chest while simultaneously pushing your right knee away from you with your right elbow. Keep your head and shoulders relaxed on the mat. This creates a deep release in the right hip. If you cannot reach your thigh, use a towel or a yoga strap wrapped around the left hamstring. This modification allows you to keep your spine neutral and your neck relaxed, which is vital for getting the most out of the release.
5. Happy Baby Pose
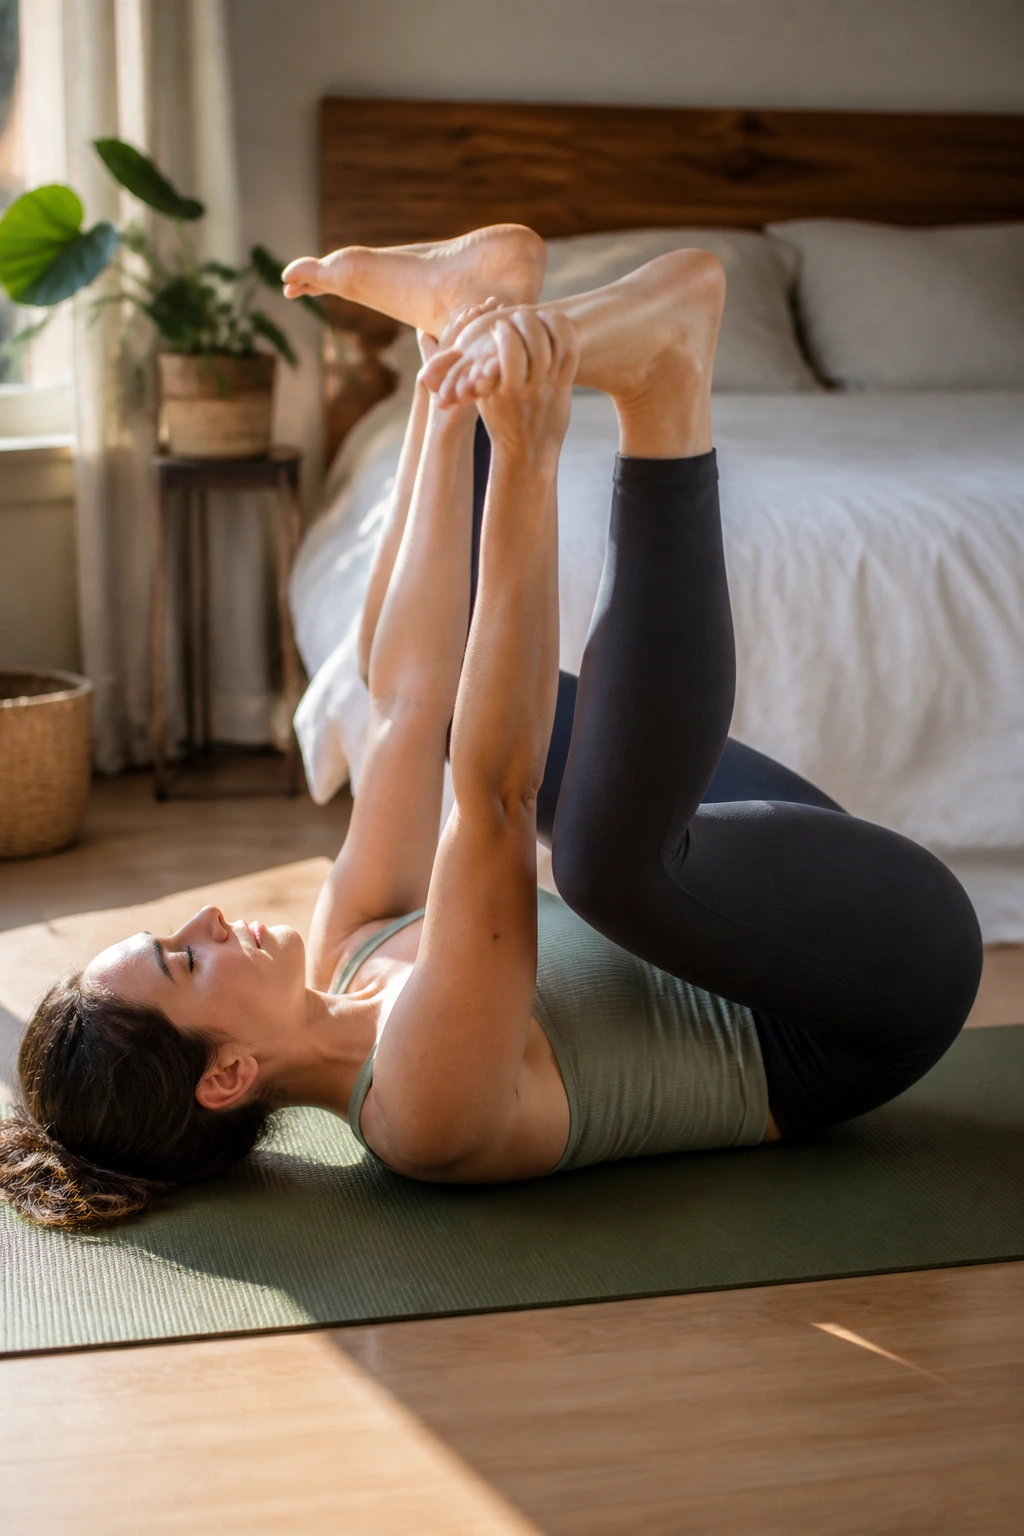
This pose looks slightly ridiculous, but it is one of the best ways to release the lower back and inner hips simultaneously. Lie on your back and bring both knees toward your chest. Reach up and grab the outsides of your feet—or your ankles, if grabbing your feet makes your shoulders tense up.
Open your knees wider than your torso and bring them up toward your armpits. Ensure your ankles are directly over your knees, creating a 90-degree angle. Press your feet into your hands as you pull down with your hands, creating a gentle resistance. Keep your sacrum glued to the floor. If you find your lower back lifting off the mat, you have gone too far; back off and focus on lengthening the spine. Gently rock from side to side to massage the muscles surrounding the hip joint.
6. Lizard Pose
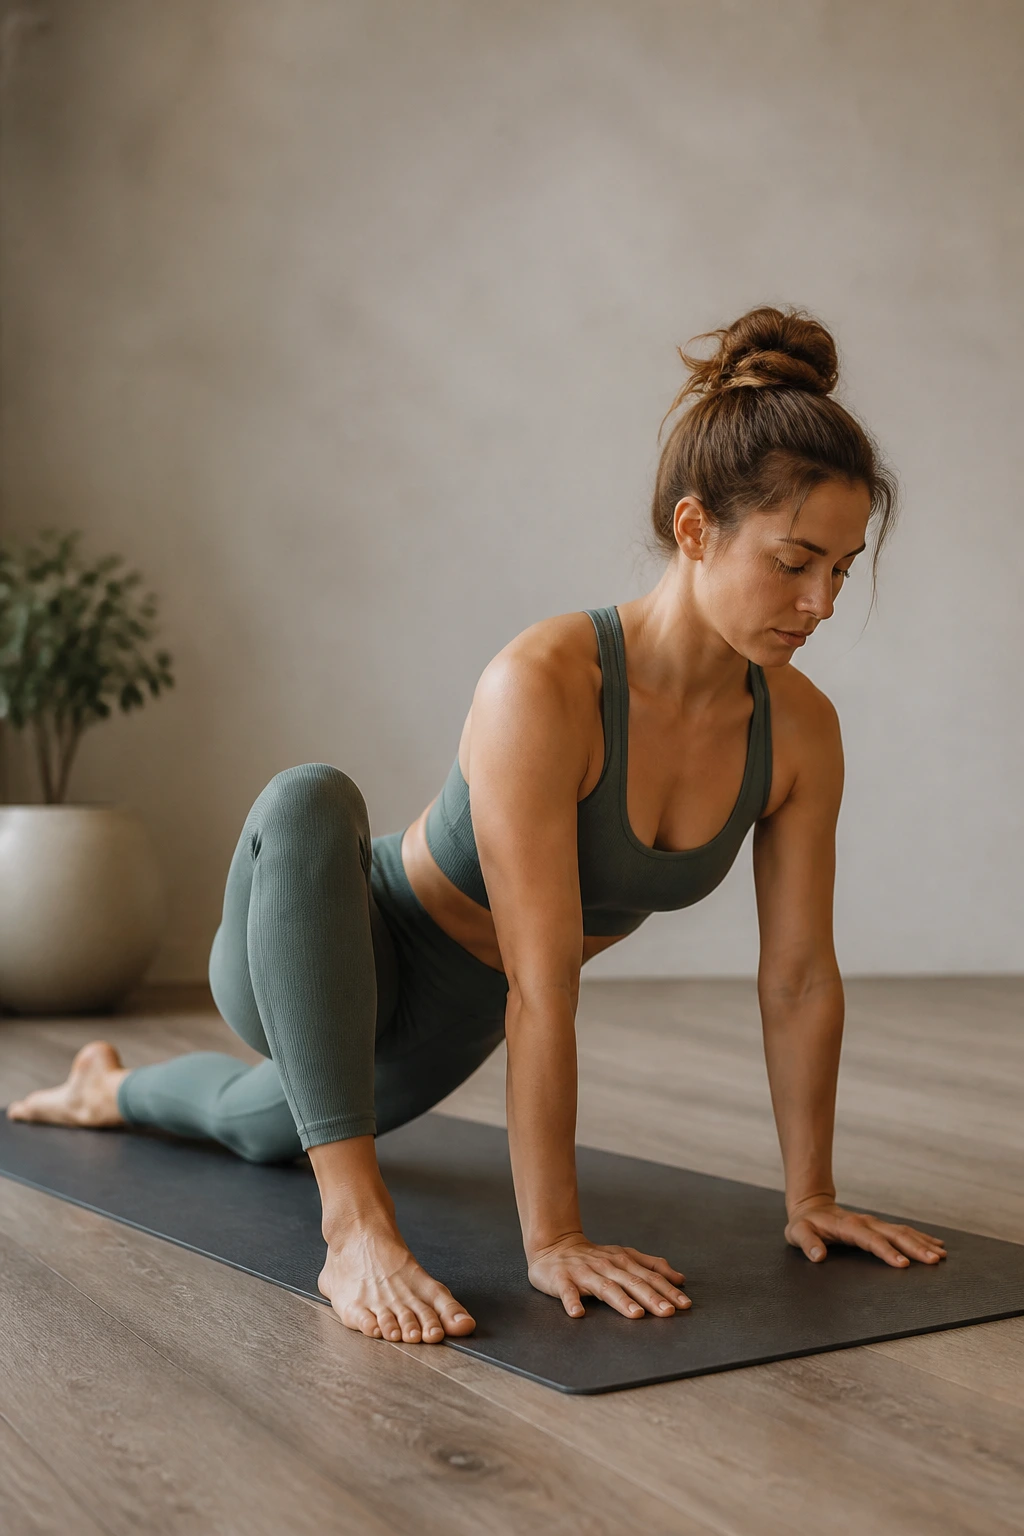
Lizard Pose is an aggressive, deep lunge that opens the hip flexors and the inner thighs. Start in a low lunge with your right foot forward and your left knee on the ground. Walk your right foot to the outer edge of your mat. Bring both of your hands to the inside of your right foot.
If your mobility allows, lower yourself onto your forearms, either on the mat or on a yoga block. Keep your right knee hugging in toward your right shoulder—don’t let it splay out unless you are intentionally working on an even deeper groin stretch. This move is intense. It works the psoas of the back leg and the adductors of the front leg. If you are extremely tight, stay up on your palms. The goal is depth of stretch, not depth of torso; do not force your body into a position that makes you hold your breath.
7. Cross-Legged Forward Fold
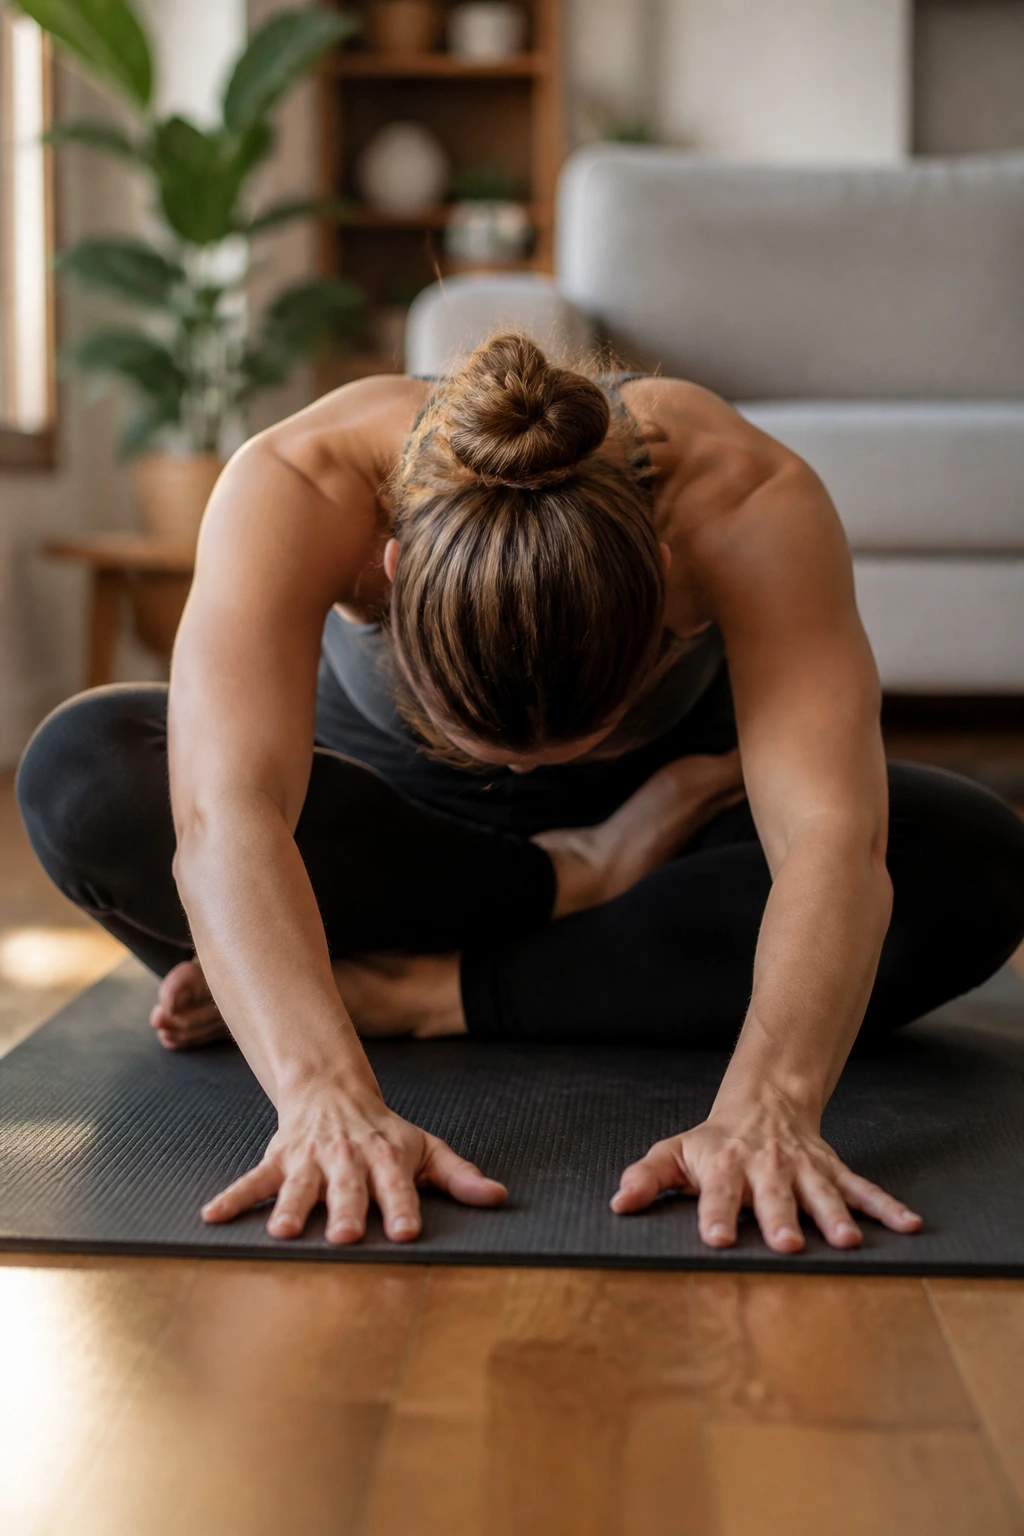
Sit in a standard cross-legged position—simple, easy, and accessible. However, the technique here is all about the tilt. Instead of just slumping forward, place your fingertips on the floor in front of you. Keep your spine as long as possible.
The Mechanism of the Fold
Begin to walk your fingers forward, maintaining that long, flat-backed position. Think about leading with your chest, not your forehead. As you fold, you will feel the external rotators of your hips release. When you round your back, you are just stretching your upper back, which is fine, but it ignores the hips. Keep your shoulders down away from your ears. If you want to increase the intensity, stack your shins on top of each other—a variation known as “Double Pigeon” or “Fire Log Pose”—before folding. This exponentially increases the pressure on the outer hips.
8. Gate Pose
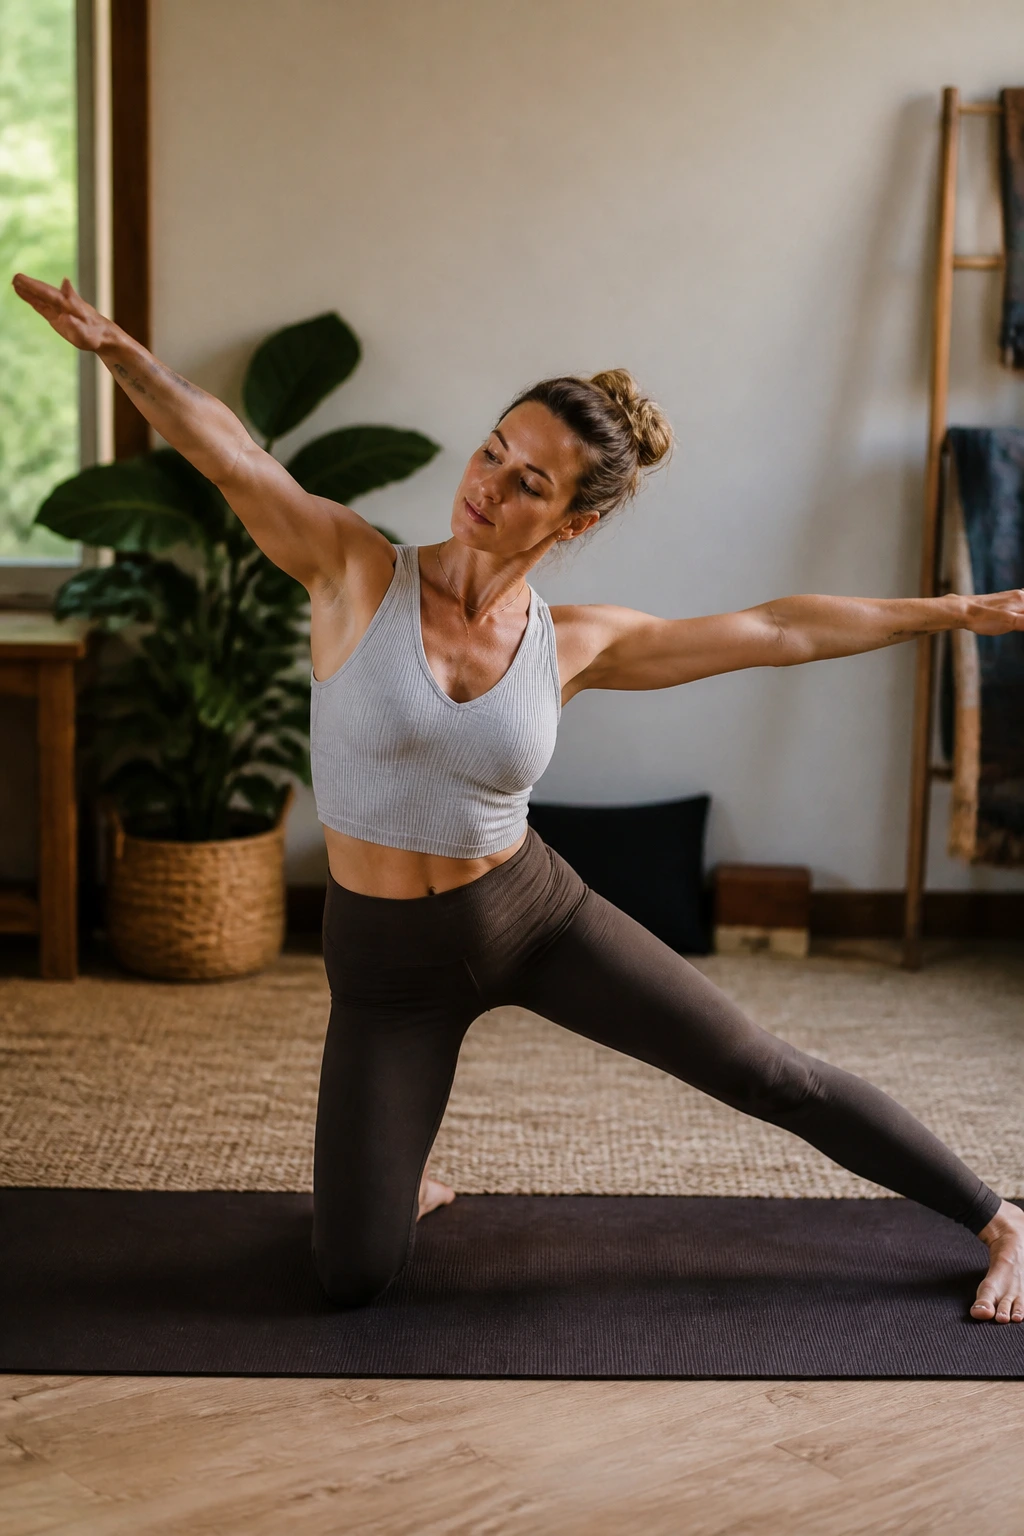
Gate Pose addresses the lateral aspect of the hip and the obliques, which are often overlooked when we talk about hip tightness. Kneel on both knees. Extend your right leg out to the side, placing the foot flat on the floor, in line with your left knee. Your right toes should point forward.
Raise your arms out to the side in a “T” shape. Exhale and lean your torso toward the right, reaching your right hand down along your right leg. Raise your left arm over your head, reaching toward the right side. You are looking for a long line of tension from your left knee, up through your rib cage, into your left armpit. This lateral stretch helps unlock the TFL (tensor fasciae latae) and the quadratus lumborum, muscles that stabilize the pelvis and get painfully tight from hours of chair-sitting. Keep your chest open to the ceiling; do not let your torso collapse forward.
9. 90/90 Hip Stretch
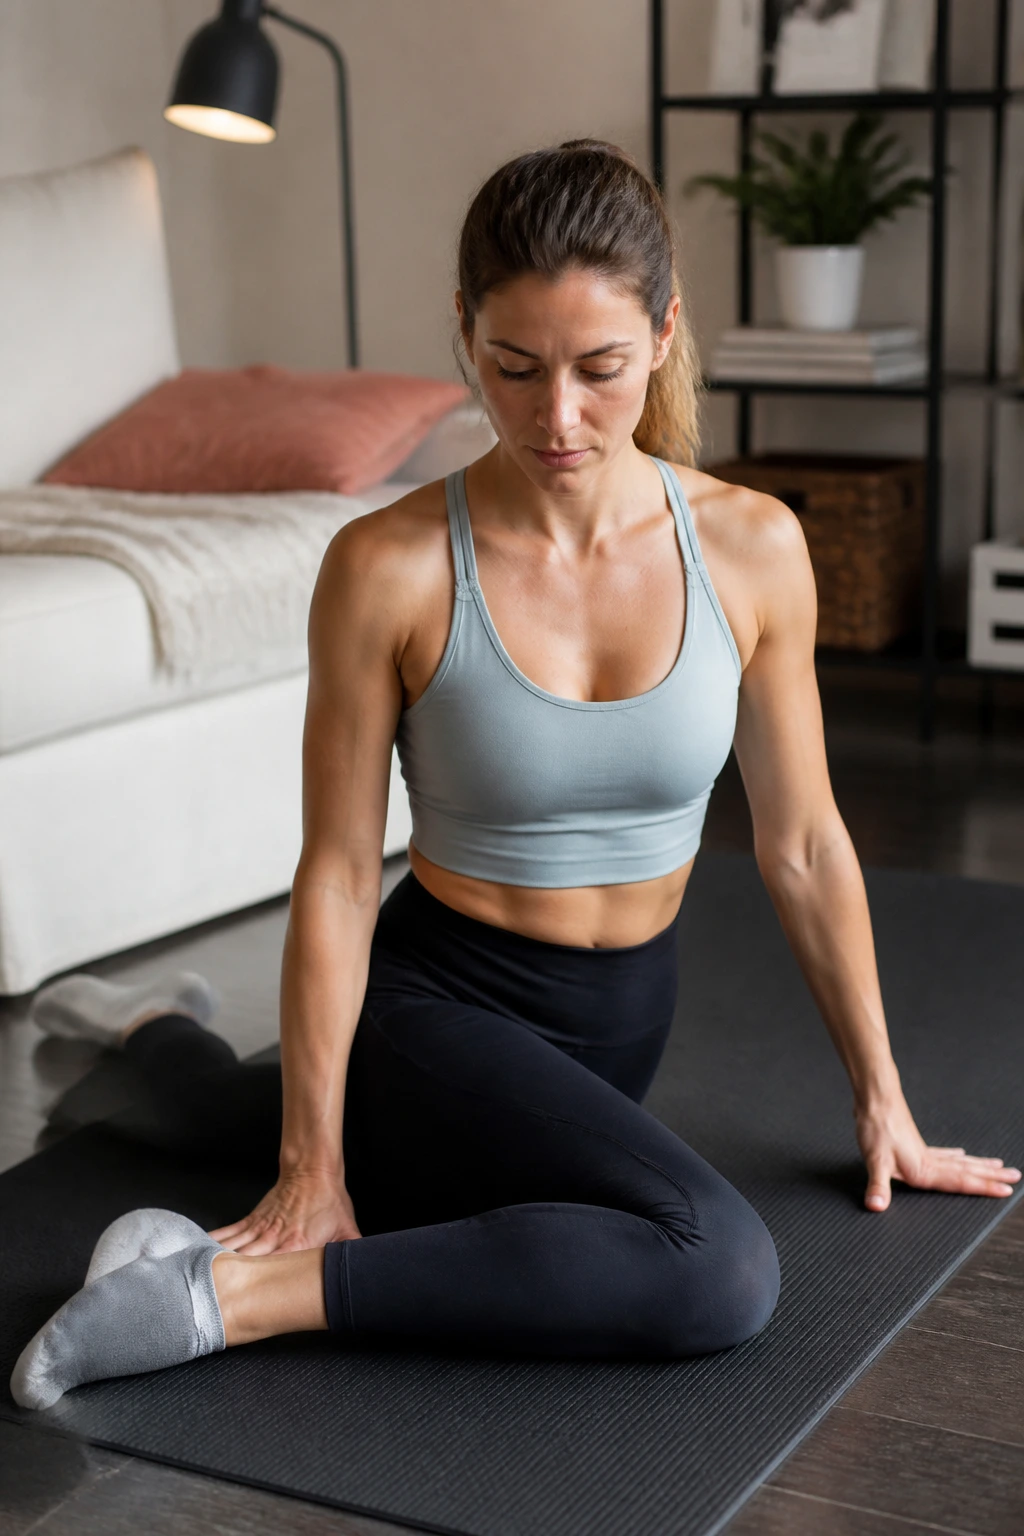
This is a gold-standard drill for rotational hip mobility. Sit on the floor. Bend your right knee in front of you at a 90-degree angle, with the shin parallel to your torso. Bend your left knee to the side, also at a 90-degree angle, with the shin parallel to the other side of your mat. Both knees are bent at 90 degrees.
Sit upright. Place your hands on the floor for balance. You should feel a stretch in the external rotation of the front hip and the internal rotation of the back hip. To deepen it, gently lean your torso forward over your front shin. Keep your spine neutral. If you feel pinching in the hip joint, back out immediately; this move should feel like a deep muscle stretch, not a bone-on-bone impingement. You can also rotate your torso toward the back leg to change the angle of the stretch in the back hip.
10. Standing Leg Swings
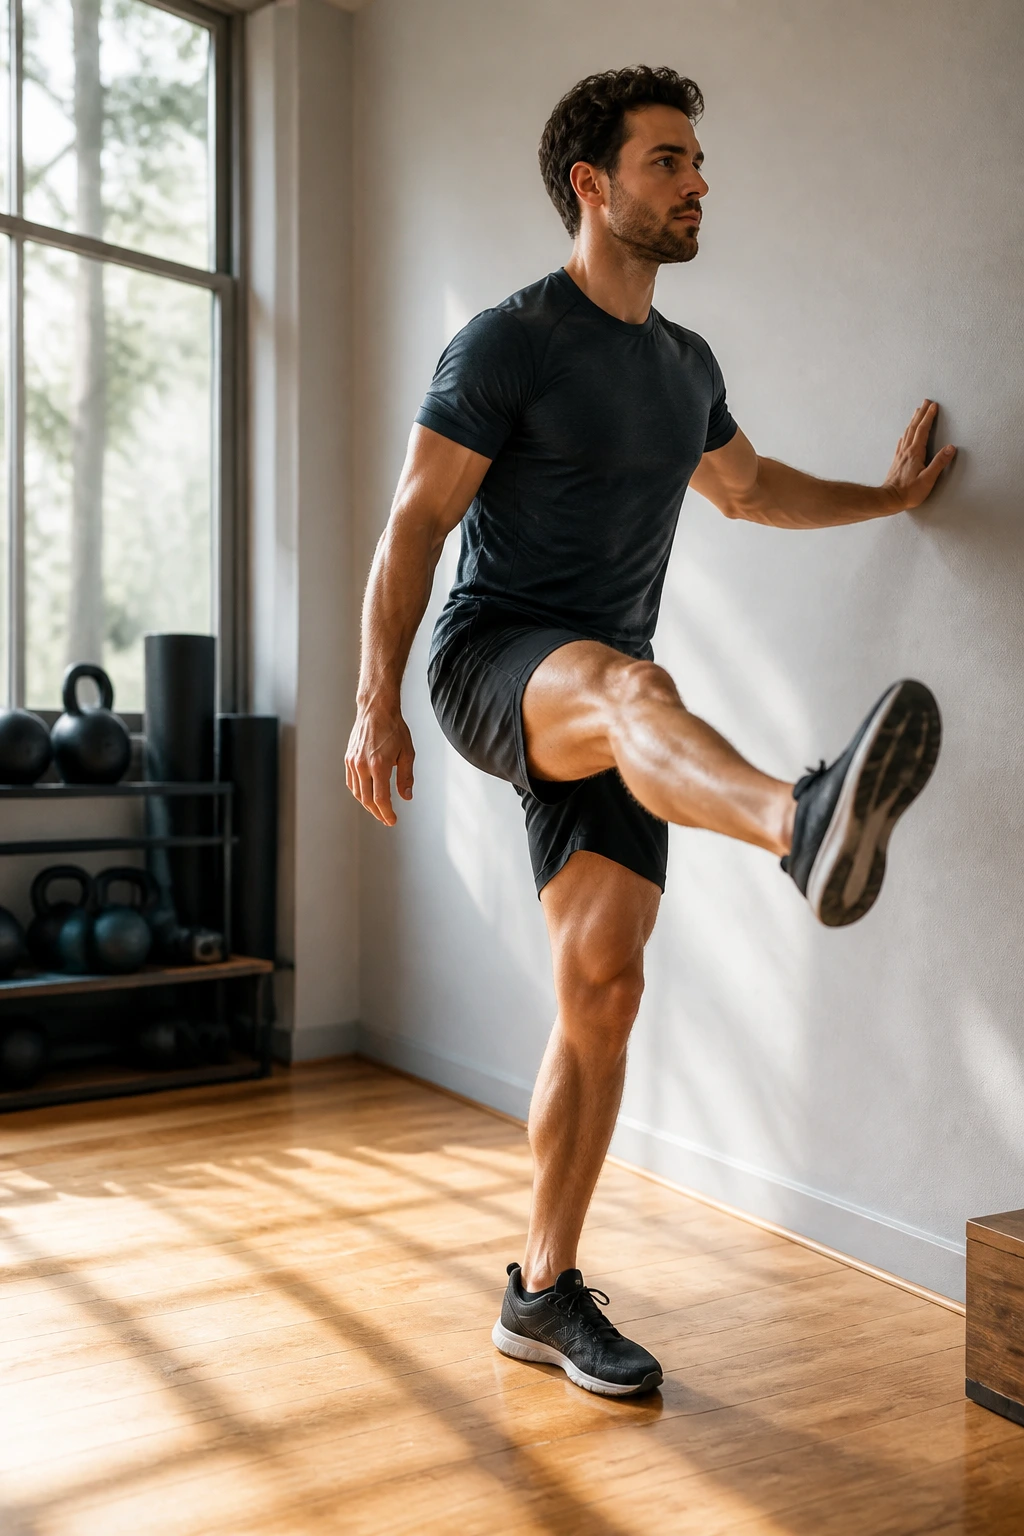
Sometimes, you need movement rather than static stretching to wake up the joint capsule. Stand next to a wall or a sturdy piece of furniture for balance. Shift your weight onto your left leg and keep it straight but not locked.
Swing your right leg forward and backward in a controlled, rhythmic motion. Do not use momentum to throw your leg; use your glute and hip flexor to drive the motion. Keep your torso upright and your core braced. Perform 15 repetitions on each side. This dynamic movement warms up the synovial fluid in the hip joint, providing temporary relief for the “stuck” feeling that occurs after a long period of inactivity. It also primes the muscles for more intense, static stretching.
11. Child’s Pose with Side Stretch
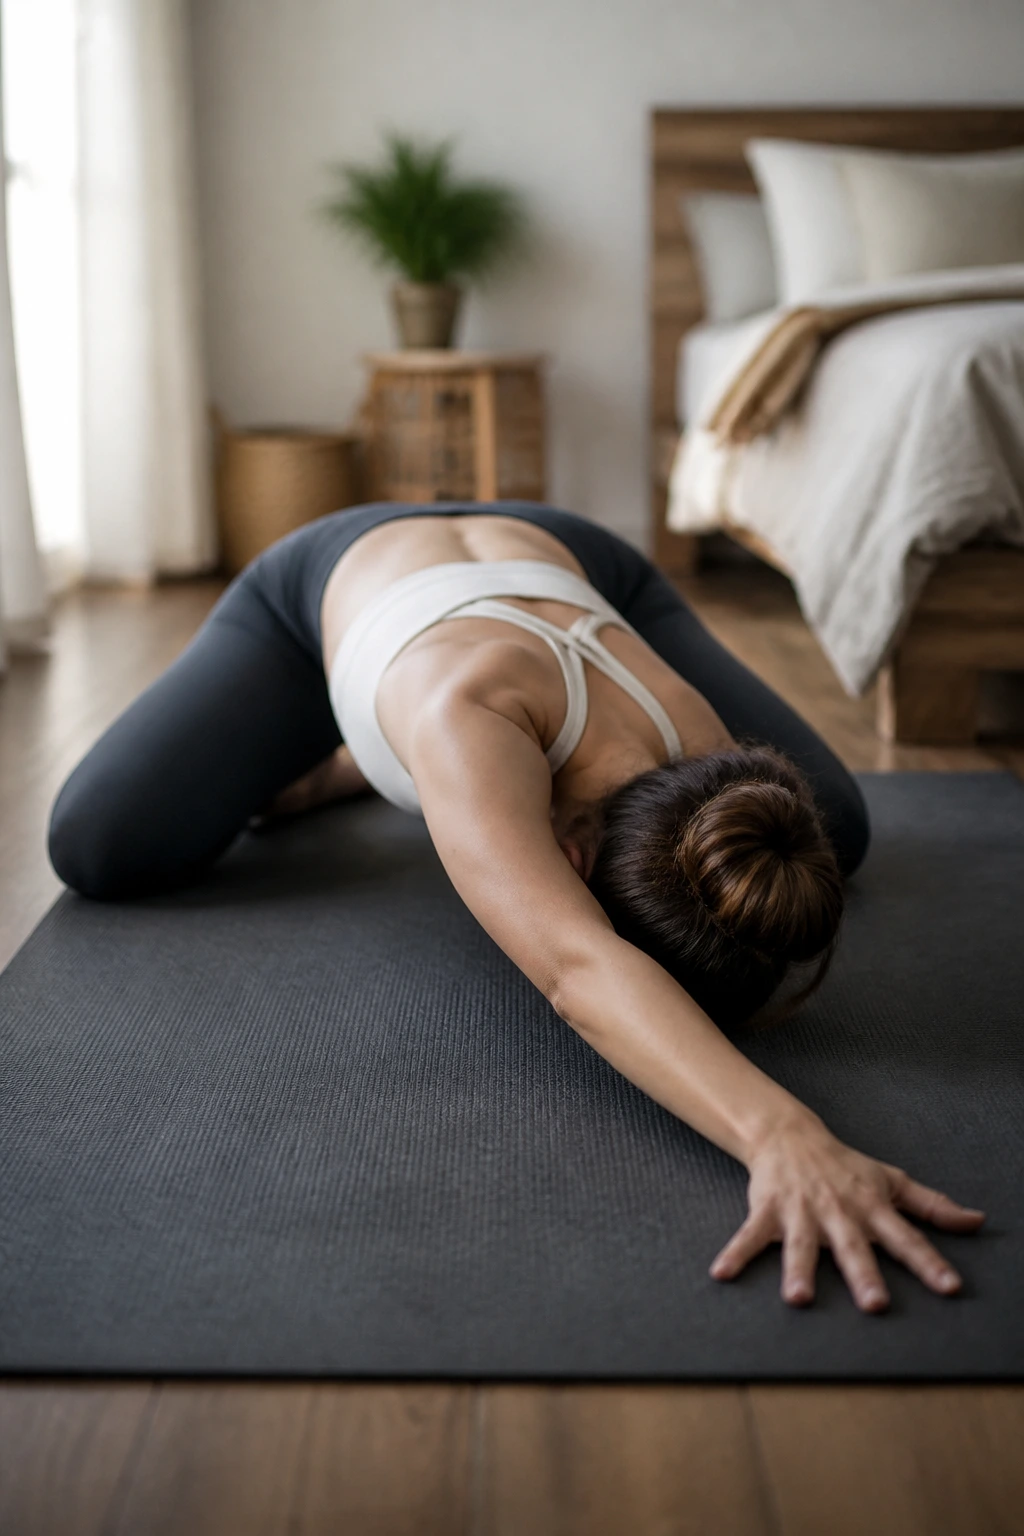
Child’s Pose is a resting position, but by modifying it, you can turn it into a fantastic hip and lat opener. Kneel on the floor, bring your big toes together, and separate your knees as wide as your mat. Sit your hips back onto your heels.
Walk your hands forward as far as possible, melting your forehead into the mat. To target the hips, widen your knees even further. To add the side stretch, walk both hands over to the right side of the mat. You will feel a deep, delicious stretch running down the left side of your waist and into your left hip. Breathe into the space you’ve created in your rib cage. Hold for 30 seconds, then walk your hands over to the left to stretch the right side.
12. Cow Face Pose (Legs Only)
This is a deep, seated external rotation stretch that targets the gluteus medius. Sit on the floor with your legs extended. Bend your right knee and place your right foot on the floor outside your left thigh. Now, bend your left knee and tuck your left foot under your right hip.
Ideally, your knees are stacked one on top of the other, with your feet pointing away from your hips. This is intense. If your knees aren’t perfectly aligned, that is fine. The focus should be on keeping both sit-bones on the floor. If one hip is lifting significantly, sit on a yoga block or a thick book. This pose requires patience. Don’t rush into it; let your weight and gravity slowly settle your hips toward the floor.
13. Standing IT Band Stretch
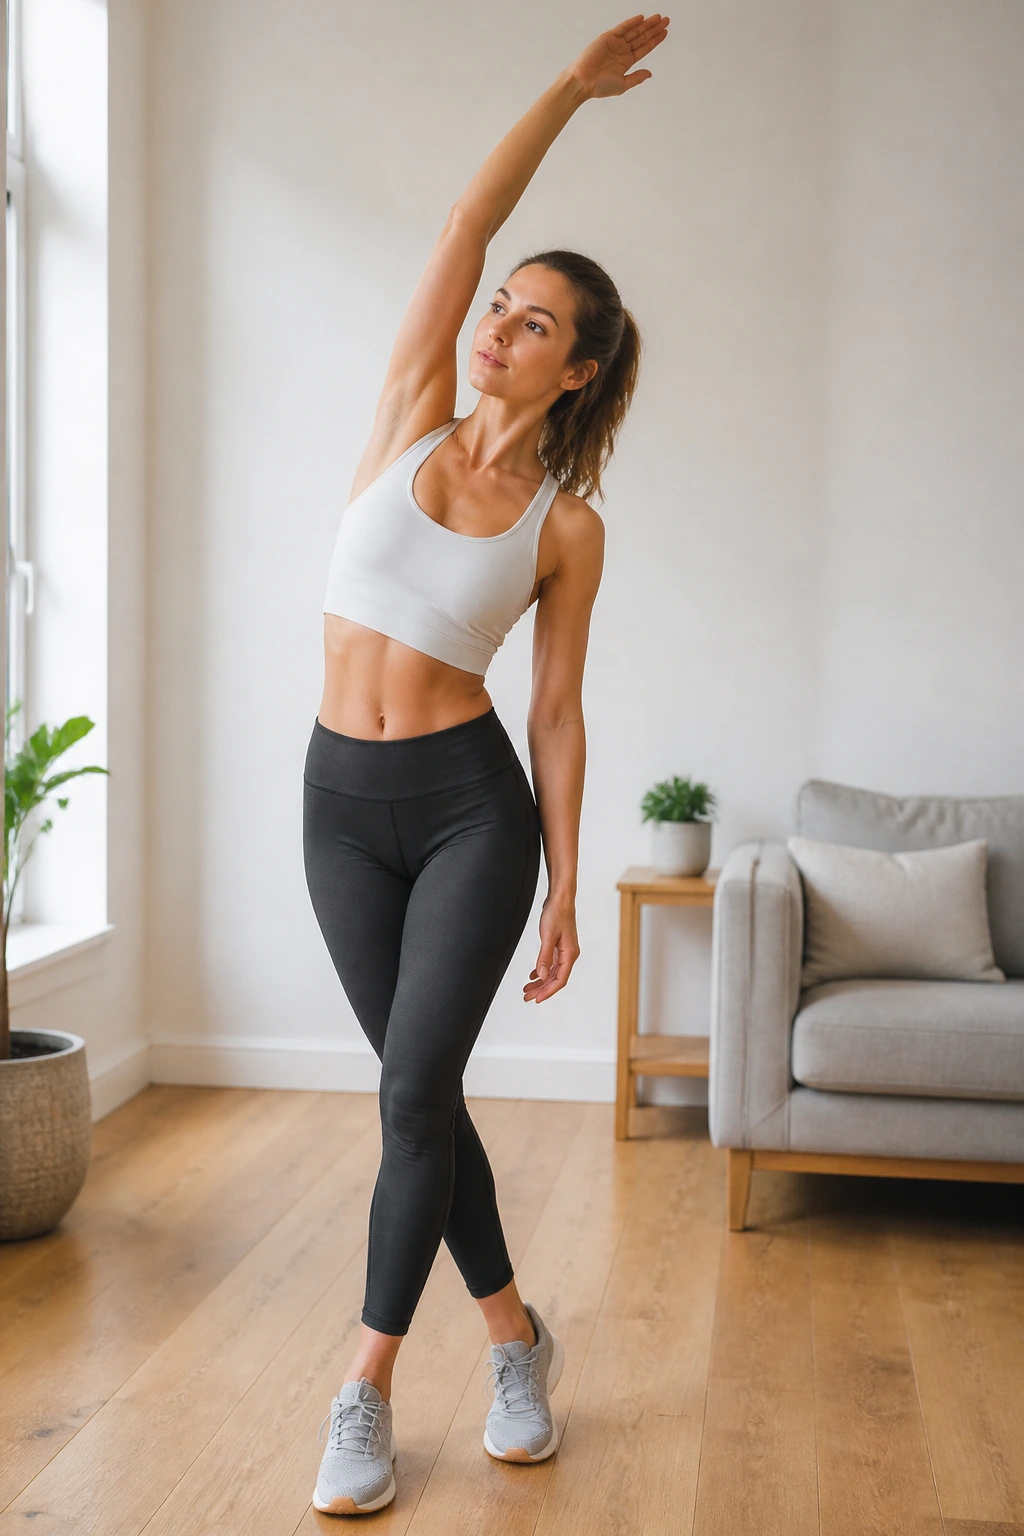
The iliotibial (IT) band runs down the side of your thigh, and when it gets tight, it pulls on your knee and hip. Stand tall with your feet together. Cross your right foot behind your left leg.
Place your right hand on your right hip and reach your left arm up toward the ceiling. Lean your torso to the left, pushing your right hip out to the right side. You should feel a distinct, taut stretch running down the outside of your right leg. If you don’t feel it, step your right foot further behind your left and increase the lean. Keep your weight evenly distributed between both feet. This provides a much-needed release for the lateral chain of muscles that often stiffen up during long commutes or desk work.
14. Fire Log Pose (Agnistambhasana)
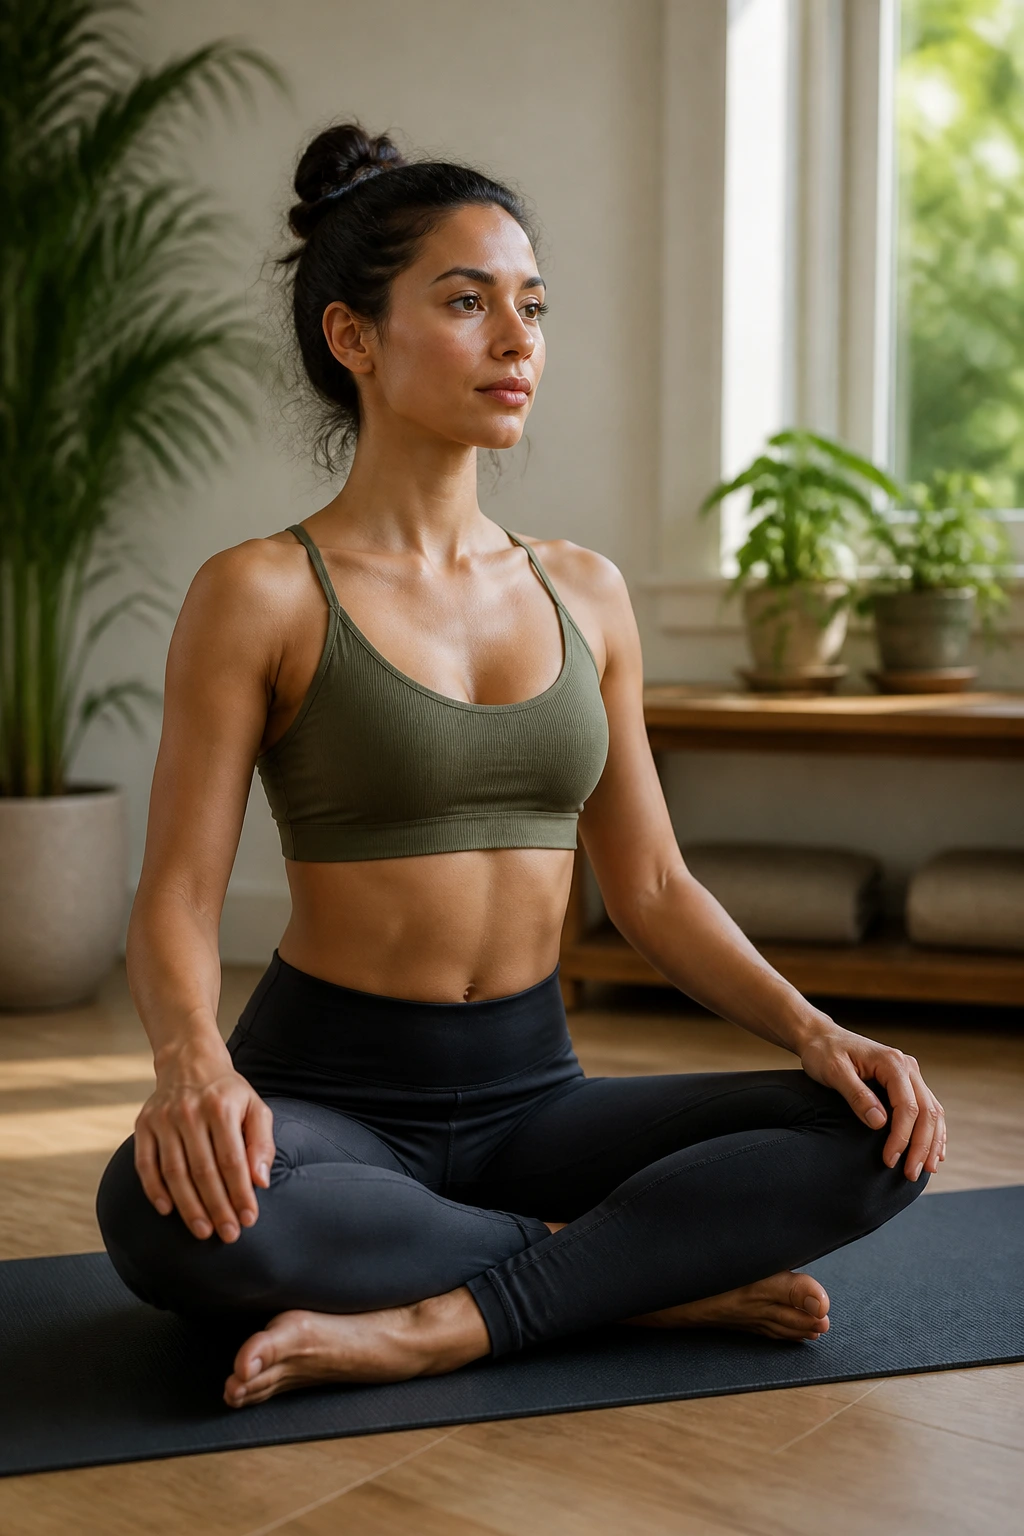
This is the ultimate test of outer hip flexibility. Sit on the floor with your legs extended. Bend your left knee and place your left shin on the floor, parallel to the front edge of your mat. Take your right leg and place your right shin directly on top of your left shin.
Your right ankle should rest on your left knee, and your right knee should rest on your left ankle. Your shins are stacked like two logs. If your top knee is hovering near your chest, that is normal. Do not force it down. Sit tall and focus on pressing the bottom leg into the floor. As you hold this, gravity will gradually encourage the top knee to descend. This pose creates a very deep sensation in the glutes and hips—breathe deeply and avoid clenching your jaw.
15. Deep Squat Hold
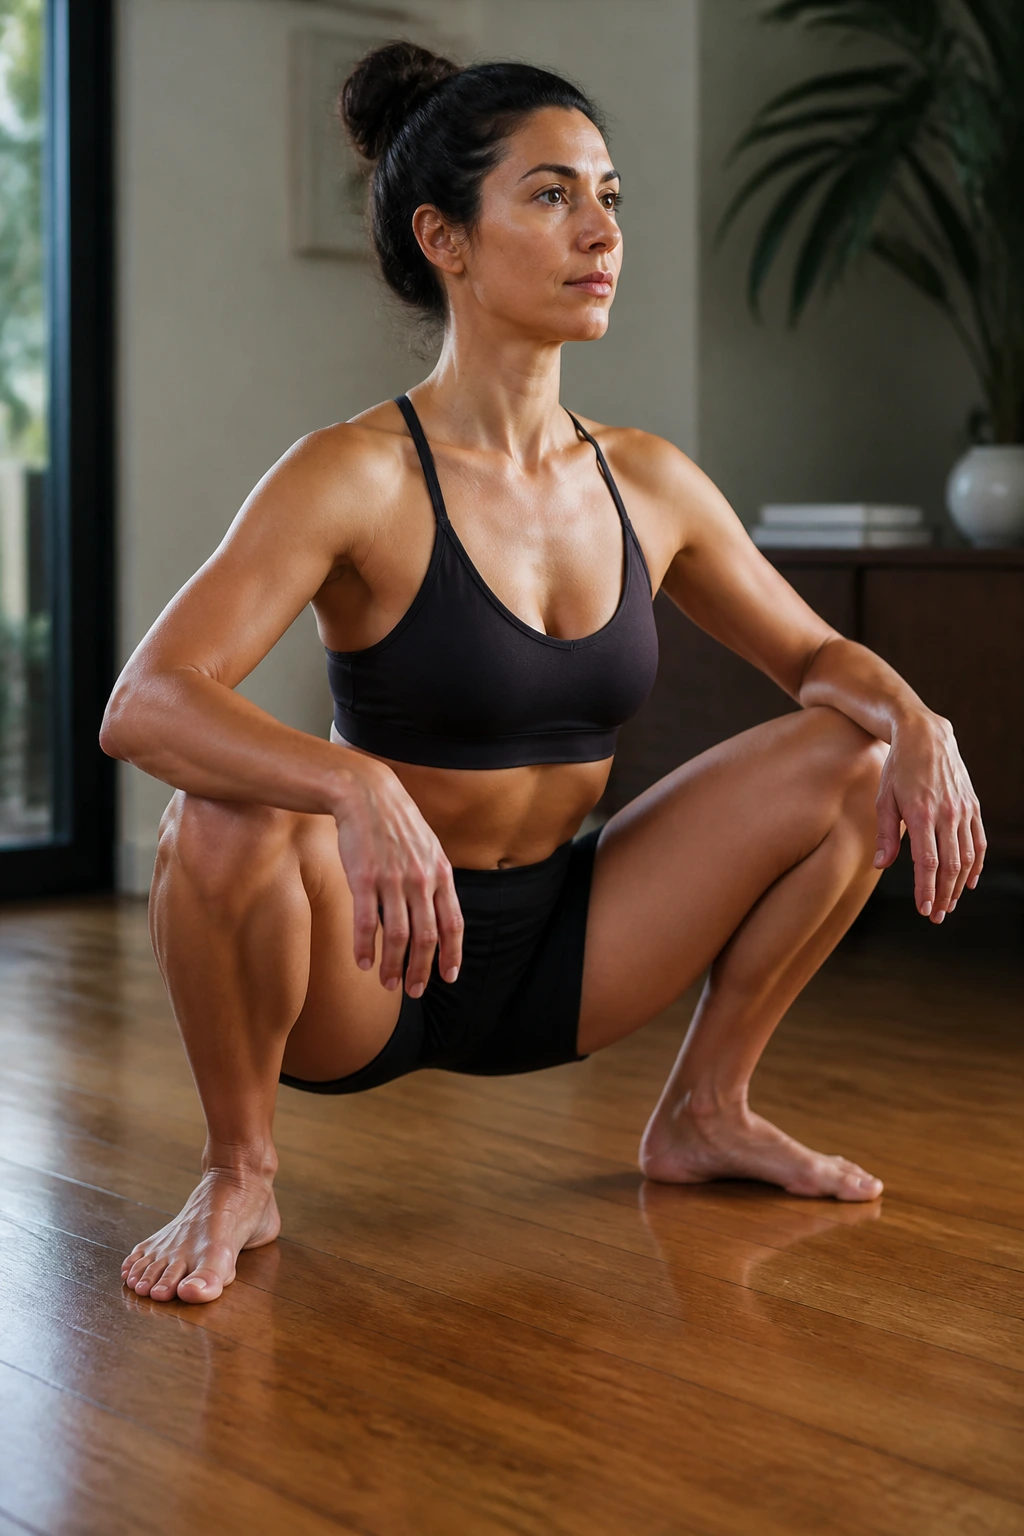
Functional mobility is often lost because we never go through the full range of hip flexion. Stand with your feet slightly wider than shoulder-width apart, toes pointed slightly outward. Slowly lower your hips toward the ground until you are in a deep squat.
Keep your heels on the floor. If your heels lift, place a rolled-up towel under them for support. Use your elbows to gently push your knees apart, further opening the hips. Keep your chest lifted and your spine neutral. This is a “gravity-assisted” stretch. It strengthens the legs while simultaneously creating an incredible release in the pelvic floor and the deep hip rotators. Stay here for a minute. If you need to, hold onto a doorframe or a sturdy pole in front of you for counterbalance until your balance improves.
16. Supported Bridge Pose
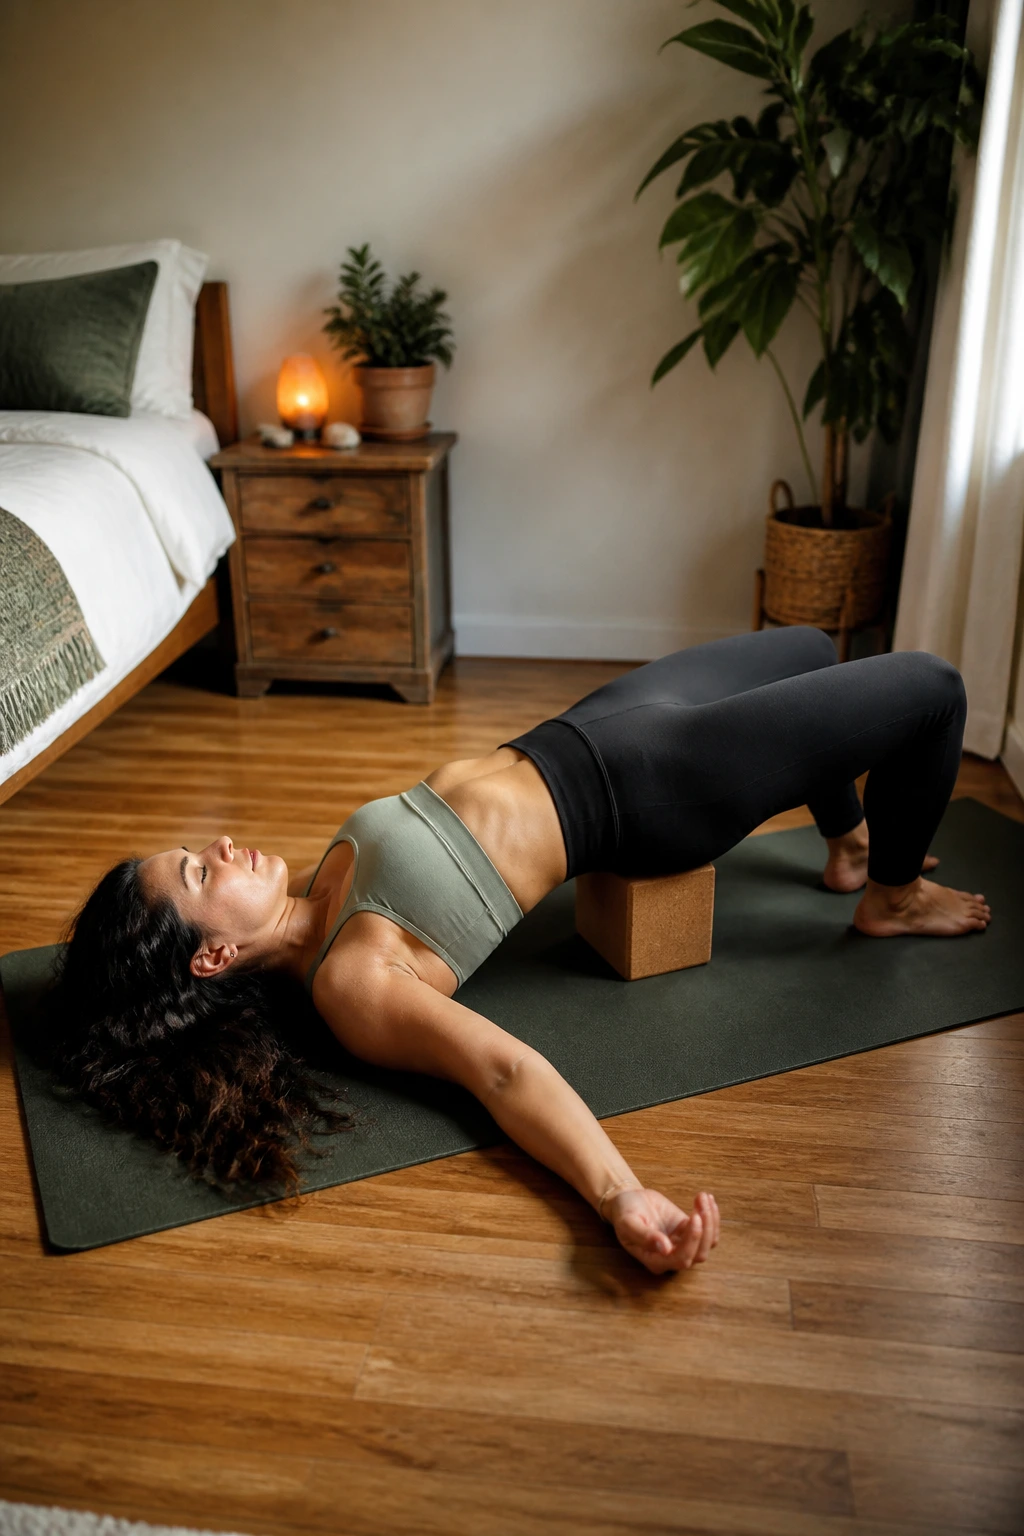
Sometimes the best way to release the psoas is to place the hip in a supported, neutral extension. Lie on your back with your knees bent and feet flat. Lift your hips and slide a yoga block or a sturdy, thick book under your sacrum—the flat, triangular bone at the base of your spine.
Rest your hips on the block. Extend your legs straight out in front of you, allowing your feet to flop open. This creates a gentle, passive stretch across the front of your hips without requiring any active muscle engagement. Stay here for three to five minutes. This is a restorative position that allows the chronically shortened hip flexors to finally relinquish their tension. Because the sacrum is supported, there is no strain on the lower back, making this one of the most effective ways to counteract hours of sitting.
17. Kneeling Lunge with Side Reach
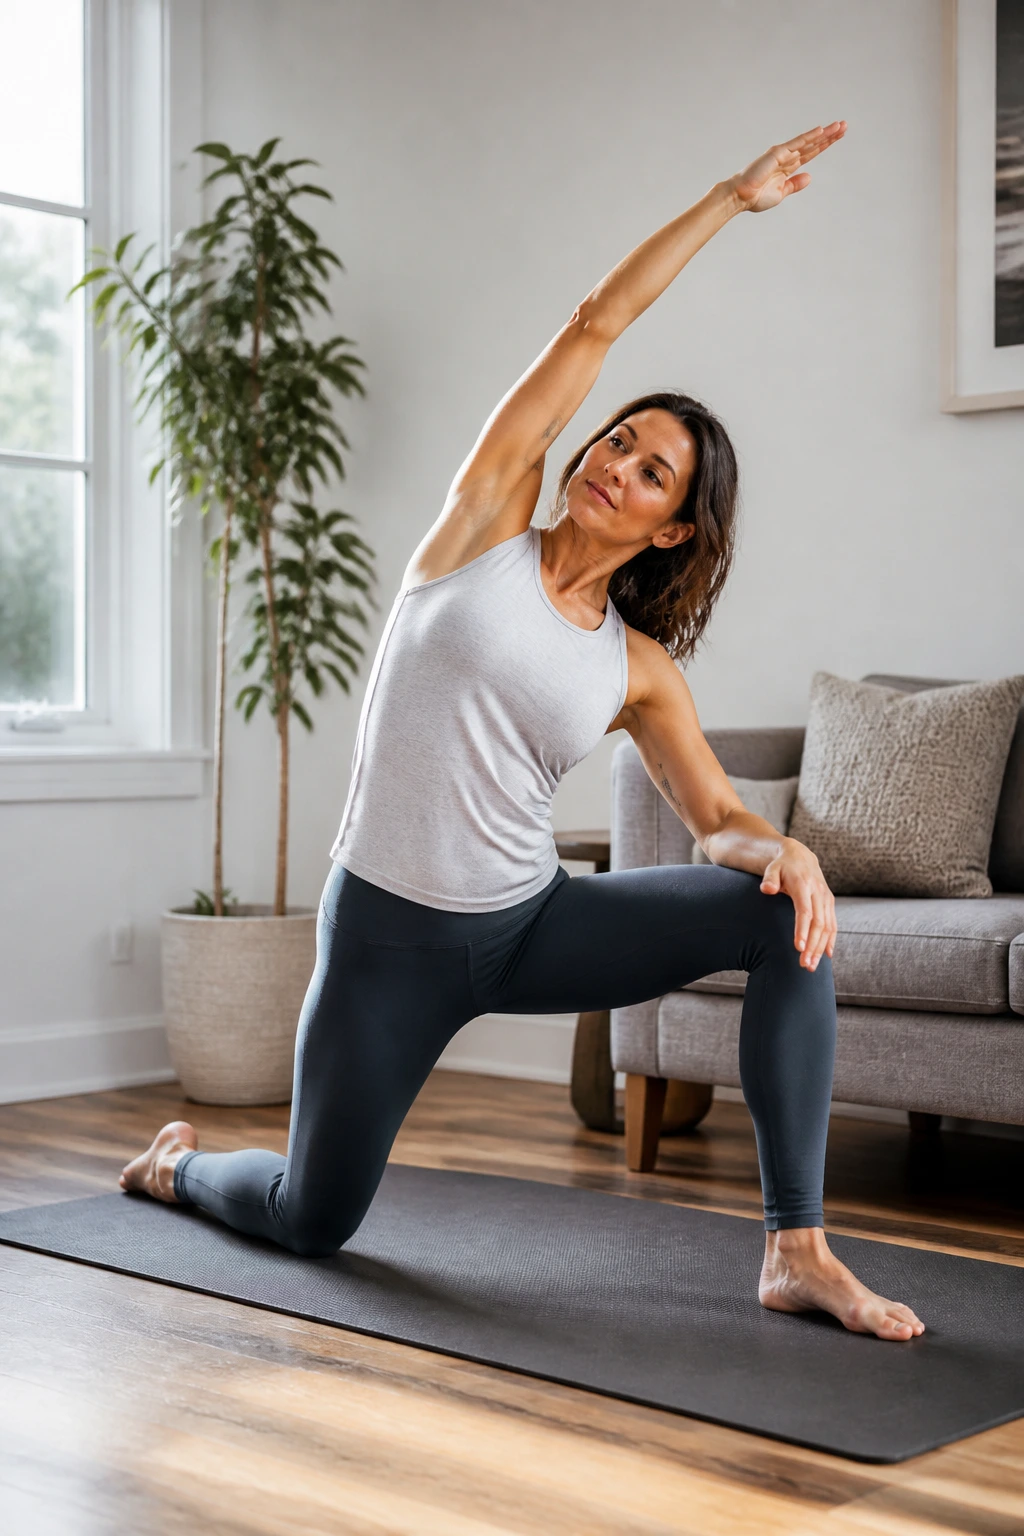
This is a dynamic variation of the kneeling hip flexor stretch that integrates the entire side body. Perform the standard kneeling hip flexor stretch (as described in step 3), with your right knee down and left foot forward.
Once you have established your posterior pelvic tilt and feel the stretch in your right hip, reach your right arm straight up toward the ceiling. Lean your torso to the left, bending toward the side of your front leg. This adds a lateral component to the stretch, pulling on the psoas and the obliques simultaneously. The psoas attaches to the lumbar spine, so adding a side bend helps stretch the muscle fibers more comprehensively than a straight-forward lunge ever could.
18. Supine Twist
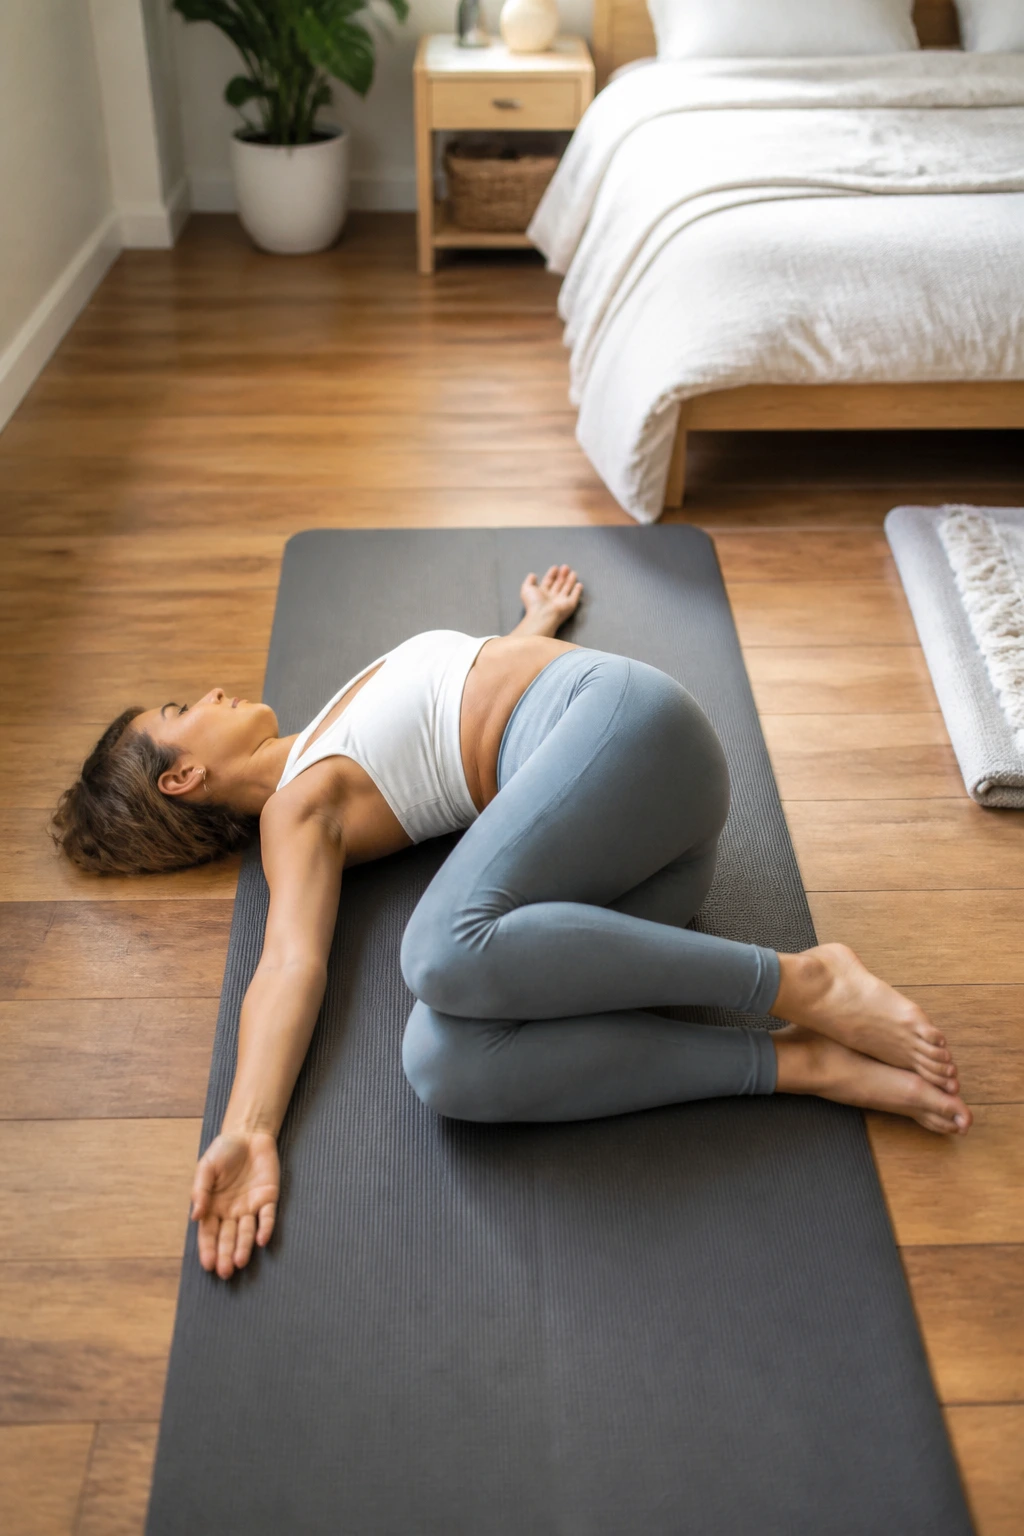
Rotational mobility is essential for hip health, as our hips are often tight in the transverse plane. Lie on your back, knees bent, feet flat. Extend your arms out to the sides. Let both knees fall slowly to the right.
Keep your left shoulder firmly glued to the floor. If your left shoulder lifts, stop rotating your knees. Place a pillow between your knees if they don’t comfortably reach the floor. This provides a gentle release for the lower back and the gluteus medius. It isn’t a “hard” stretch, but it is a necessary one for neutralizing the spine after a long day. Turn your head to look in the opposite direction of your knees to get a full cervical release, too.
19. Thread the Needle Variation
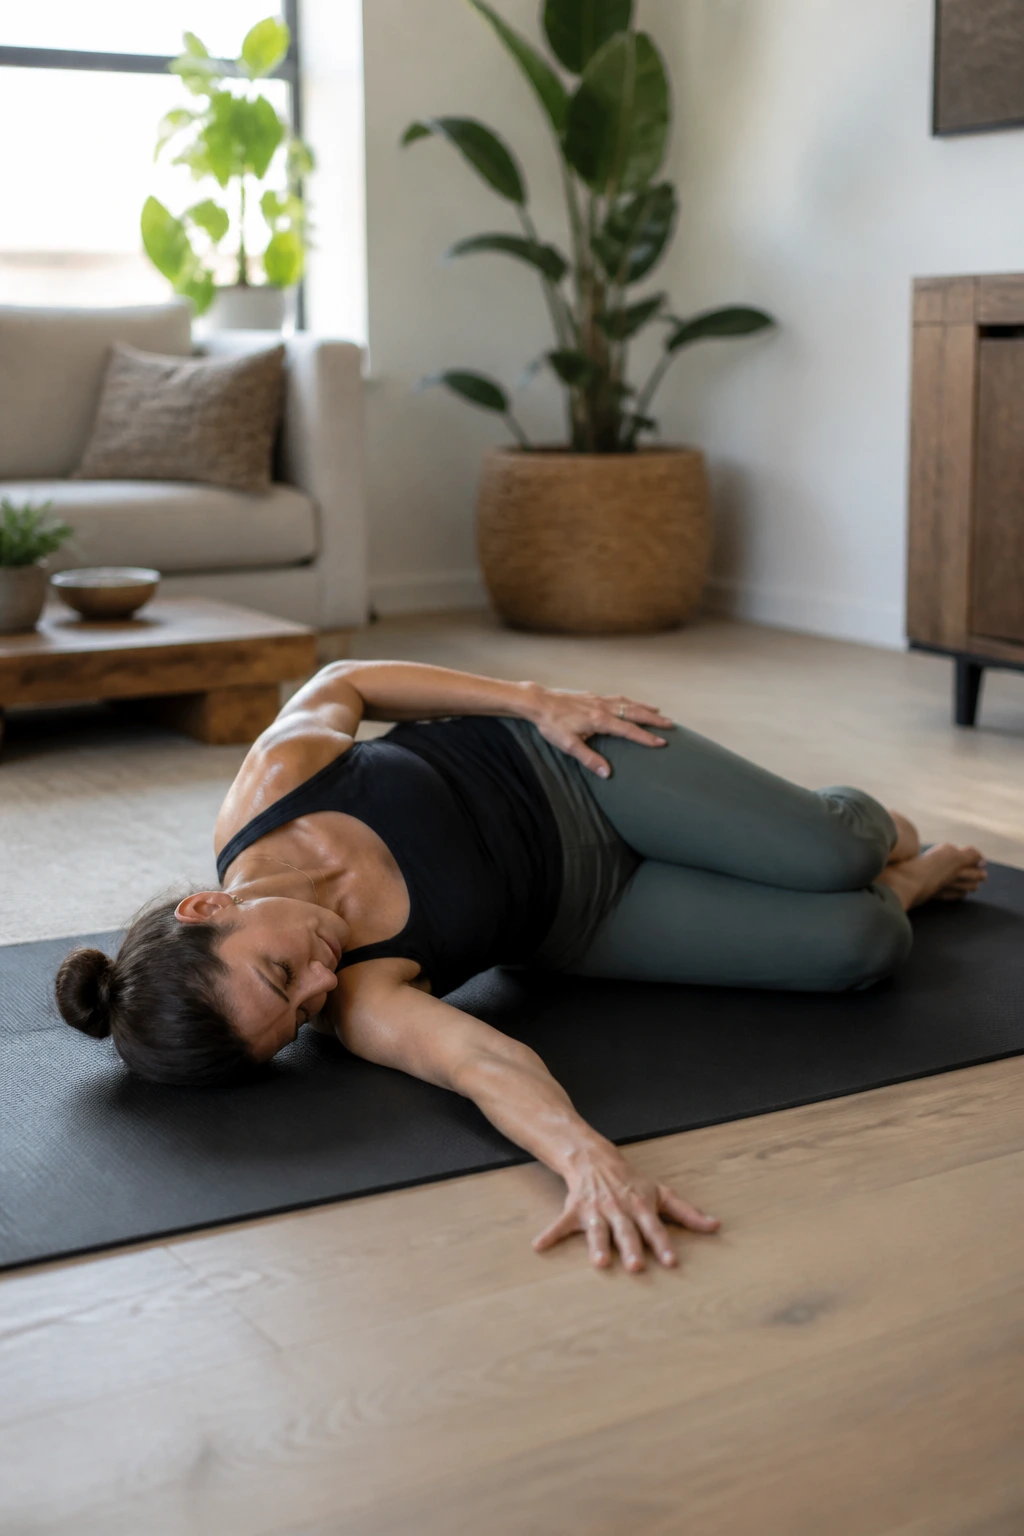
This is a gentle stretch for the outer hips and glutes that is particularly helpful for those with sciatic discomfort. Lie on your side, with your legs stacked and knees bent at a 90-degree angle.
Reach your top arm forward and slowly open it across your body, trying to touch your top shoulder to the mat behind you while keeping your knees stacked and touching the floor. If you need to, keep your bottom hand on your top knee to hold it down. This rotation creates a cross-body stretch that targets the hip, glute, and thoracic spine. It is a slow, methodical release. Do not snap into the rotation; let the weight of your top arm pull you into the stretch gradually.
20. Standing Quad Stretch
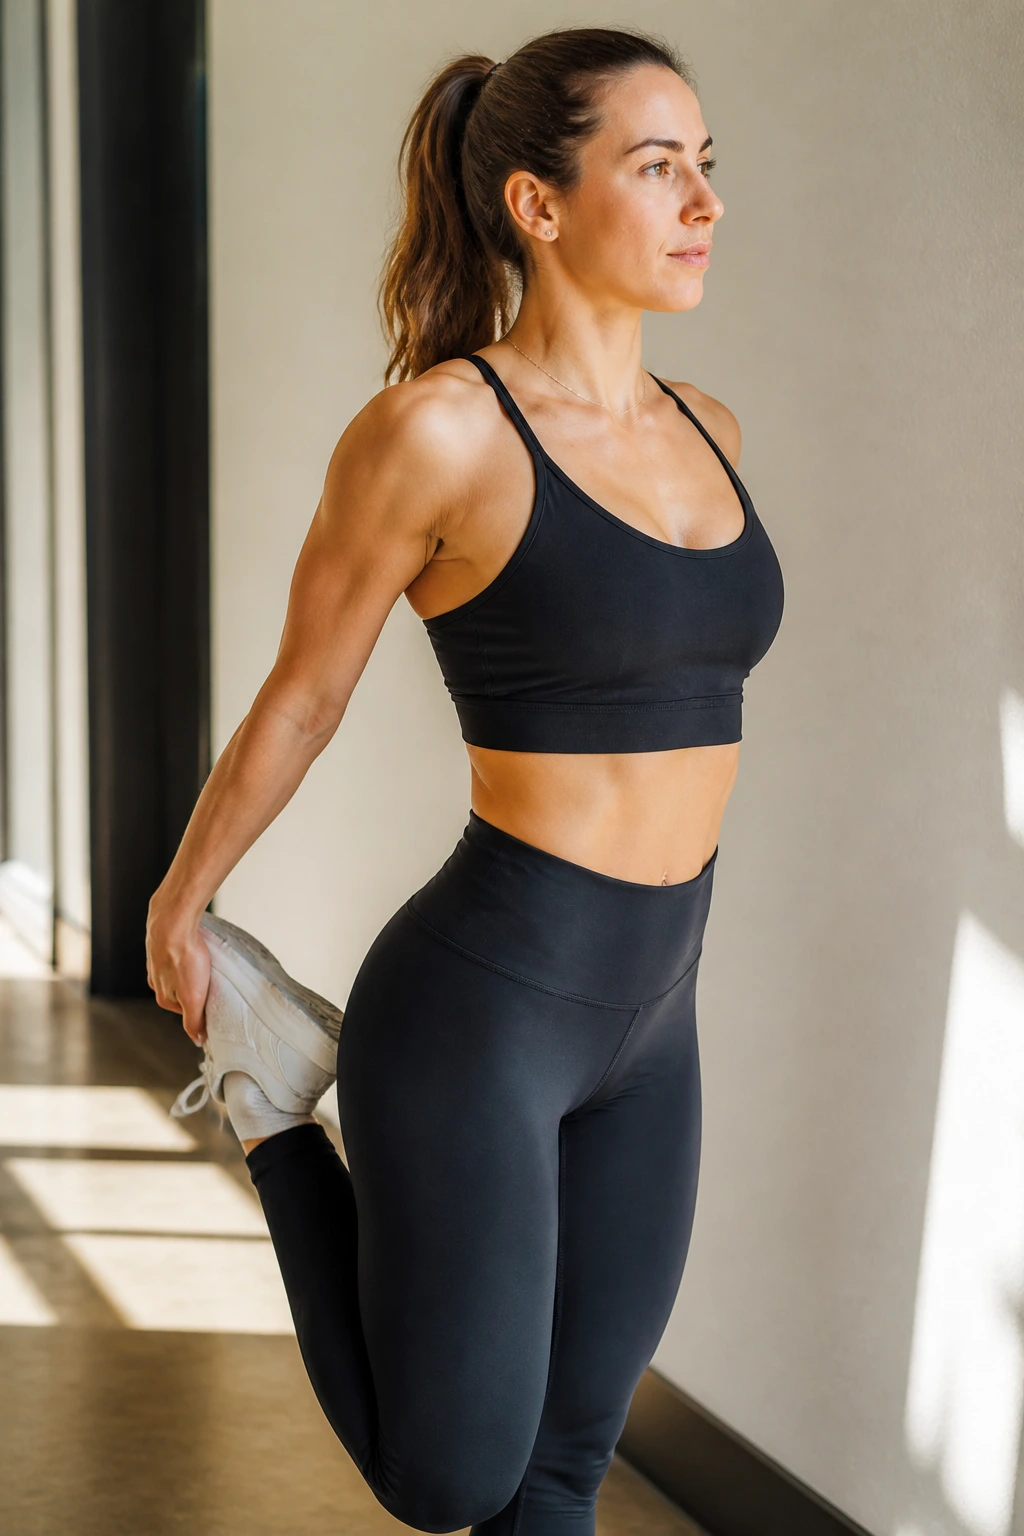
We often forget that the quadriceps and the hip flexors work in concert; a tight quad often pulls the hip into a compromised position. Stand on one leg. Reach behind you and grab your ankle—not your foot—with your hand.
Keep your knees close together. Do not let your knee splay out to the side. As you hold your ankle, focus on tucking your tailbone—that posterior pelvic tilt again. You should feel the stretch running from your knee, up the front of your thigh, and right into your hip joint. If you feel this in your knee joint, you are pulling your foot too far to the side. Keep the pull directly behind your glute. Use a wall for balance if you find yourself wobbling.
Final Thoughts
Consistency is the missing variable for most people. Stretching your hips once a week will not undo the structural adaptations caused by sitting eight hours a day. The key to lasting comfort is integrating these movements into your daily life. Keep a yoga mat near your desk. Pick two or three of these stretches to do during a lunch break or immediately after you finish work.
You do not need to do all twenty of these at once. In fact, doing just two or three with intention is far superior to rushing through the entire list without focusing on the muscle engagement. Listen to your body. If a certain stretch brings immediate relief, do that one more often. If another causes sharp pain or pinching, move on and find a variation that works for you. Your hips will hold onto tension until you give them a reason to let go. Make that release a habit, and the “desk chair ache” will become a thing of the past.
