



You wake up and reach for your morning coffee, only to feel a sharp, dull ache radiating across your upper back. It is not an injury, and it is not a strain from a heavy workout. It is simply the “desk hunch”—the cumulative result of spending hours hunched over a laptop or smartphone, letting your shoulders round forward and your chest collapse. That stiffness doesn’t just go away by shaking it off. It becomes a chronic pattern that eventually limits your range of motion and makes every overhead movement, from reaching for a top shelf to pressing a barbell, feel like a grind.
Most people try to fix this by blindly yanking on their arms or forcing their shoulders into uncomfortable positions. This usually backfires. Stretching isn’t about how far you can push a joint; it is about teaching the muscles—specifically the traps, deltoids, and the complex group of rotators—how to release tension and return to their neutral, resting length. When you treat these areas with intention, that feeling of constant armor-plating around your neck starts to dissolve, replaced by a sense of fluid, easy movement.
The following twenty stretches address the shoulder girdle from every angle. You do not need a gym membership or specialized equipment. All you need is a little floor space, maybe a doorway, and the patience to hold a position long enough for the nervous system to signal to the muscles that it is safe to let go.
1. Cross-Body Shoulder Stretch

This is the classic, reliable standby for a reason. By pulling your arm across your body, you are actively stretching the posterior deltoid, which is the muscle responsible for shoulder stability at the back of the joint. It is a fantastic starting point because it requires zero equipment and lets you calibrate the tension based on how your body feels at that exact moment.
How to Perform It Effectively
Stand with your feet shoulder-width apart. Bring your right arm across your chest, keeping it straight but not locked. Use your left forearm to hook underneath your right elbow, gently drawing it closer to your torso. Keep your right shoulder dropped down away from your ear; do not let it hike up toward your neck, as that defeats the purpose of the stretch.
- Hold for 30 seconds per side.
- Keep your chest facing forward—avoid twisting your torso to follow the arm.
- Focus on the sensation in the back of the shoulder, not the joint itself.
Pro tip: If you feel nothing, turn your gaze toward the shoulder you are stretching. This subtle rotation of the neck can sometimes hit that stubborn deep-tissue tension.
2. Doorway Chest Opener

Your shoulders are often tight because your chest muscles—specifically the pectoralis major and minor—are chronically shortened from typing or driving. If you only stretch the shoulders and ignore the chest, you are fighting a losing battle. The doorway stretch allows you to open up the front of the body, which naturally pulls the shoulders back into a better, healthier alignment.
Why It Works for Desk Stiffness
When your chest muscles are locked tight, they pull your shoulder joints forward, creating that rounded posture that causes pain. By placing your forearms against the frame of a doorway, you act as a lever, gently pushing your chest through the opening. This lengthens those pectoral fibers that have been stuck in a shortened position all day.
Execution Details
Find a standard doorway. Place your forearms on either side of the frame, with your elbows aligned roughly at shoulder height. Step one foot forward through the door, letting your chest move past your arms. You should feel a deep, expansive stretch across the front of your shoulders and your chest.
- Hold for 45 seconds.
- Avoid arching your lower back to get more leverage.
- Keep your neck neutral and your gaze forward.
3. Neck Release Stretch

Shoulder tension rarely lives in isolation. It almost always creeps up into the neck, specifically the upper trapezius and the levator scapulae muscles that attach at the base of your skull. If your shoulders are tight, your neck is likely feeling the strain, too. This simple move creates space between your ear and your shoulder.
Gently tilt your head toward your right shoulder. You can use your right hand to provide a very light, guided weight to deepen the stretch, but do not pull or tug aggressively. The weight of your arm alone is usually enough. At the same time, take your left hand and reach it toward the floor, actively lengthening through the left side of your neck.
You will feel a release all the way from the base of the ear down to the top of the shoulder blade. Switch sides after holding for 30 seconds. If you find a particularly tender spot, hold there and breathe deeply for a few extra seconds. The key is consistent, gentle pressure, not forceful movement.
4. Eagle Arms Stretch

This movement comes from yoga, and it is a masterclass in separating the shoulder blades. Many people suffer from tight shoulders simply because their scapulae—the wing-shaped bones on your back—are stuck or “glued” to their ribcage. Eagle arms force these bones to move, creating much-needed blood flow to the upper back.
Cross your right arm under your left arm, bending your elbows to stack them. Try to wrap your hands around so your palms touch—or, if that is too intense, just grab your own shoulders with opposite hands, mimicking a self-hug. Once your arms are in position, lift your elbows to shoulder height and push your hands away from your face.
You will immediately feel a significant pull between your shoulder blades. Hold for 30 seconds, then switch the crossing order of your arms. This stretch is a lifesaver after long periods of sitting, as it forces the upper back to round and then lengthen, breaking up that stiff, static posture.
5. Cow Face Arms
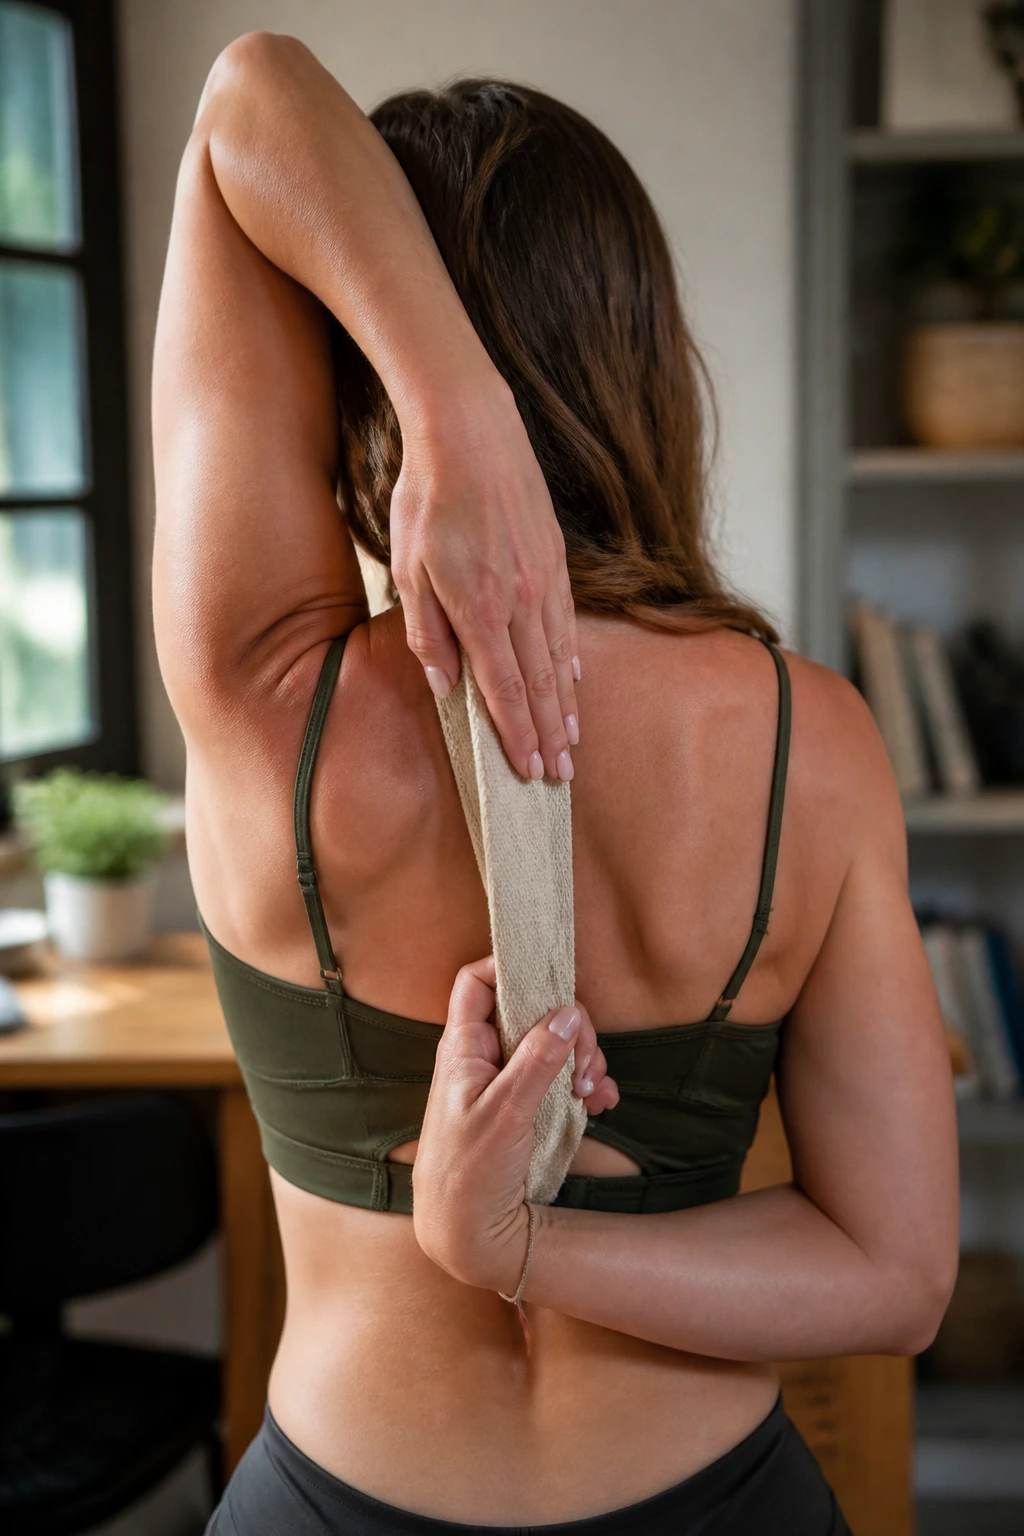
Cow face arms—or Gomukhasana—target the rotator cuff and the triceps, areas that are often neglected in standard routines. This stretch requires a bit more coordination, but it provides a deep, targeted sensation that feels incredibly satisfying once you get into the rhythm of the movement.
Reach your right arm up toward the ceiling, then bend the elbow so your right hand drops down toward the center of your back. Take your left arm, reach it behind your lower back, and try to grasp your right fingers with your left hand. If your hands do not meet, hold a towel or a strap between them.
The goal is to move your right elbow toward the ceiling while your left elbow pulls toward the floor. This creates a vertical stretch that opens up the entire shoulder complex. Warning: If you feel pinching in the shoulder joint, back off immediately. This should feel like a muscle stretch, not a sharp pain in the joint.
6. Child’s Pose with Side Reach
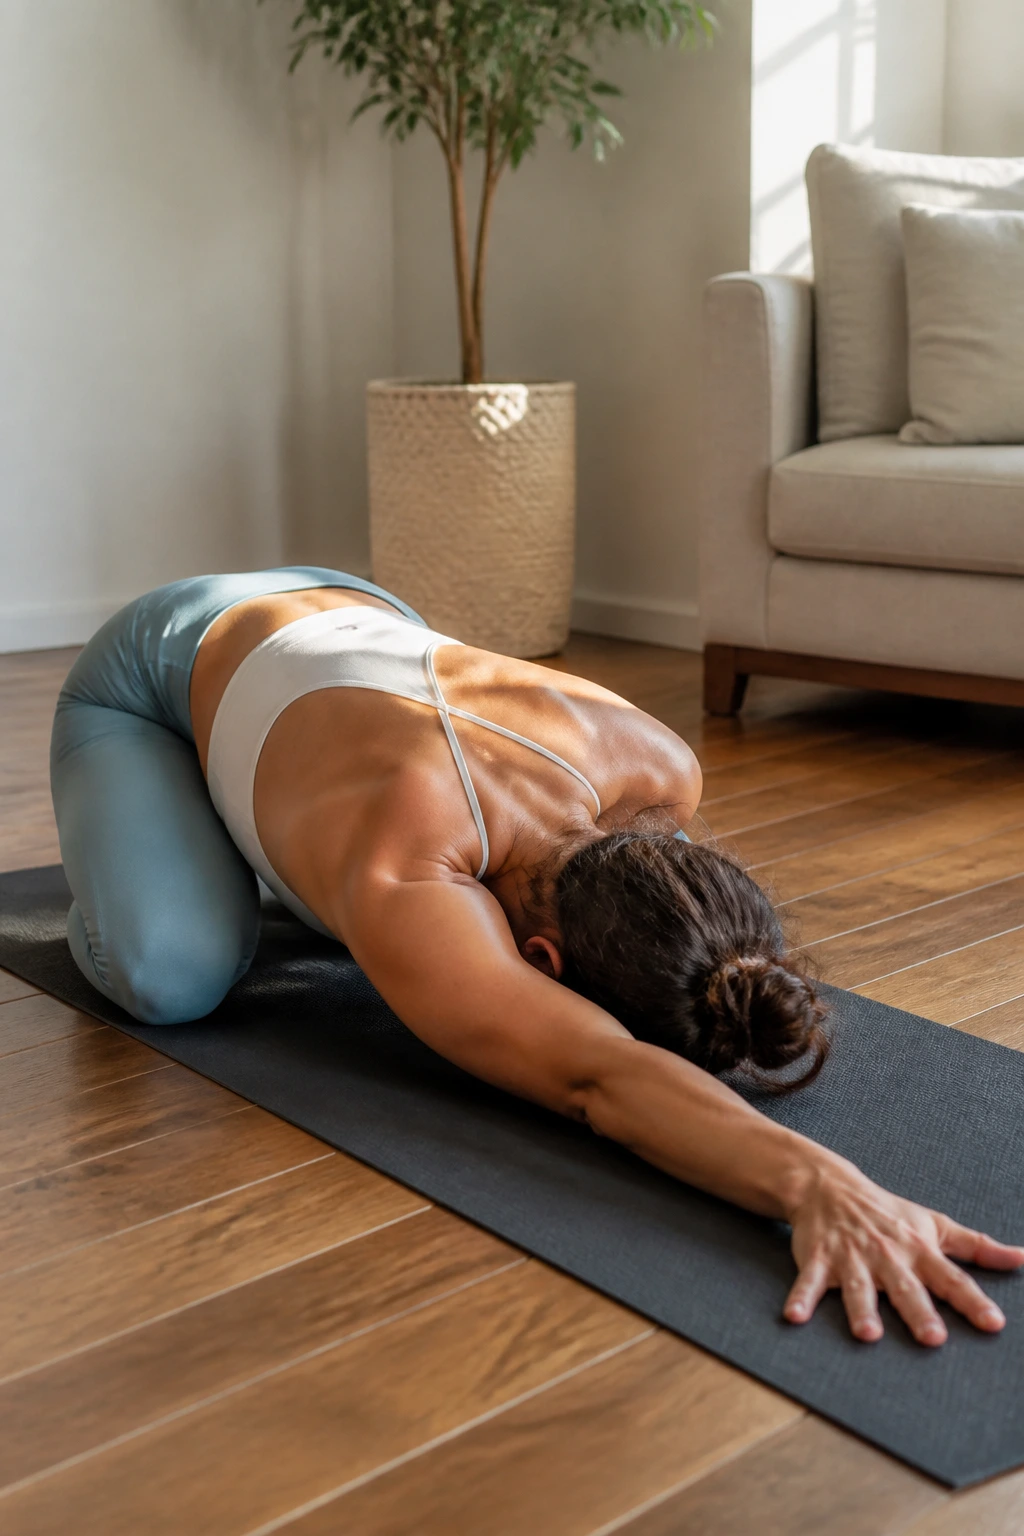
Child’s pose is a resting posture, but by adding a side-reach variation, you turn it into a powerful tool for the lats—the large muscles that run down the side of your back and attach to your shoulder. If your lats are tight, your shoulders will always feel restricted when you try to reach overhead.
Start on your hands and knees. Push your hips back until they rest on your heels, with your forehead touching the floor and your arms stretched out straight in front of you. Walk both hands over to the right side of the mat as far as you can, keeping your left hip planted firmly on your heels.
You will feel a long, satisfying stretch along your entire left side, from your armpit down to your hip. Hold for 30 seconds, then walk your hands over to the left side. Breathe into the space you are creating. This is one of the few stretches that targets the posterior chain and the shoulder girdle simultaneously.
7. Thread the Needle
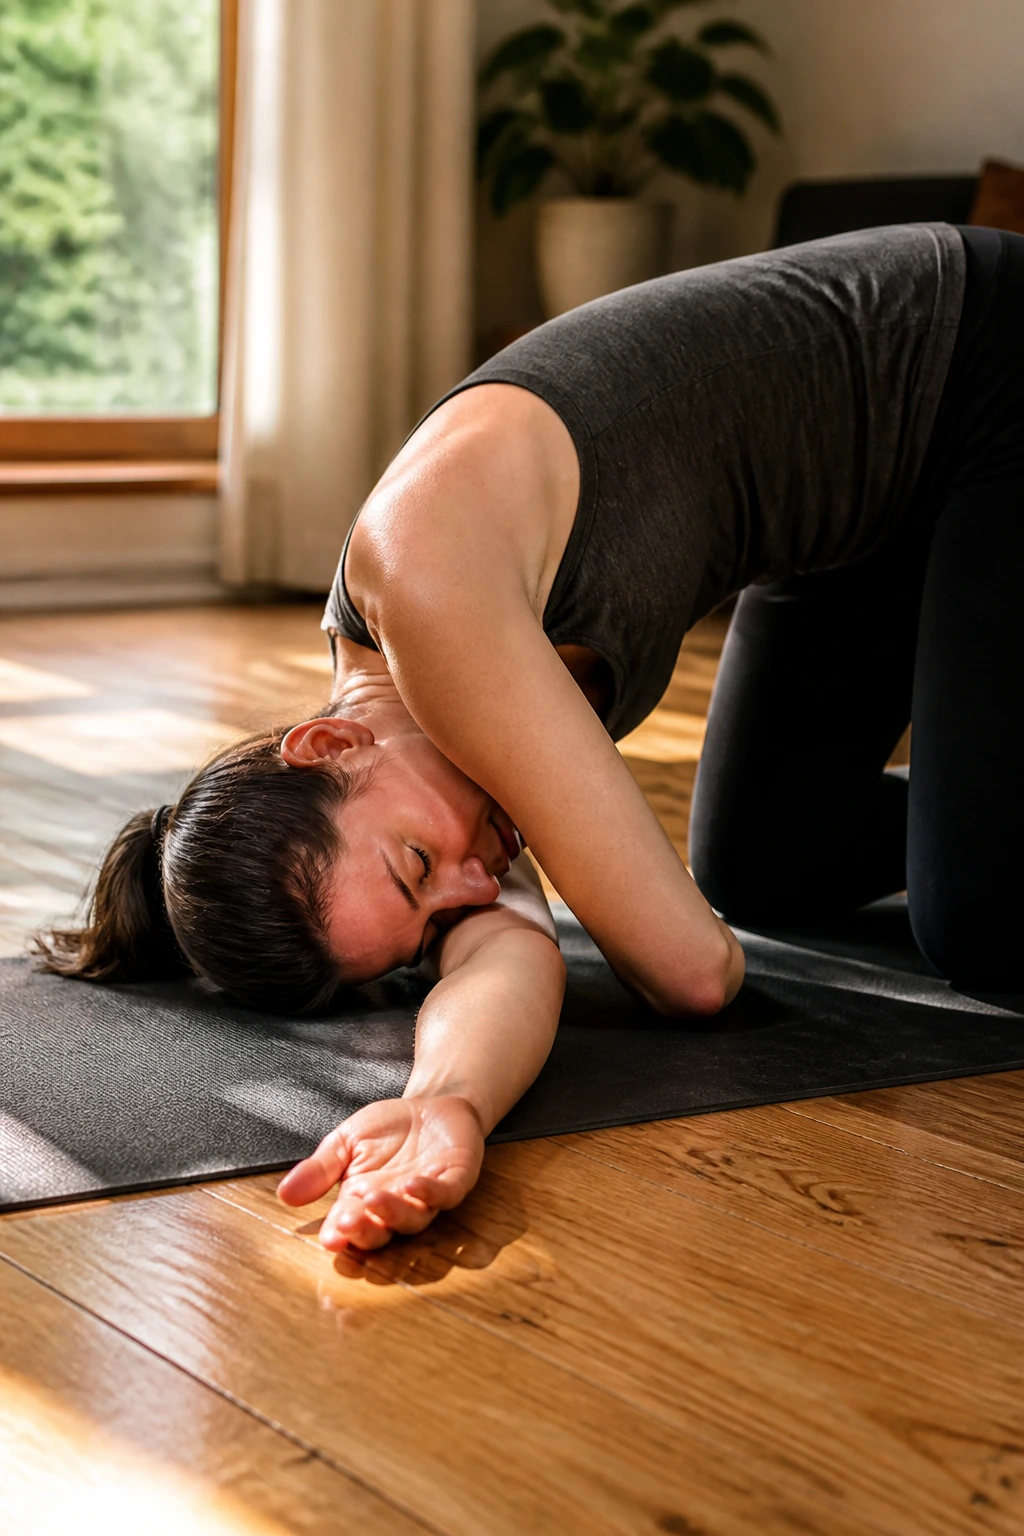
Thread the needle is a dynamic stretch that mobilizes the thoracic spine—the middle part of your back—while opening up the back of the shoulder. When the thoracic spine is stiff, the shoulders compensate by rounding forward, so keeping this area mobile is a non-negotiable part of maintaining healthy shoulders.
Start on your hands and knees in a tabletop position. Slide your right arm underneath your left arm, palm facing up, allowing your right shoulder and the side of your head to rest on the floor. Your left arm can stay planted or reach up toward the ceiling for an added twist.
Push gently into your left hand to increase the rotation. This stretch creates a gentle torque on the back of the right shoulder, helping to iron out those stubborn knots. Spend 45 seconds on each side. If you feel dizzy or unstable, adjust your knee position to be wider for a more stable base.
8. Cat-Cow Stretch
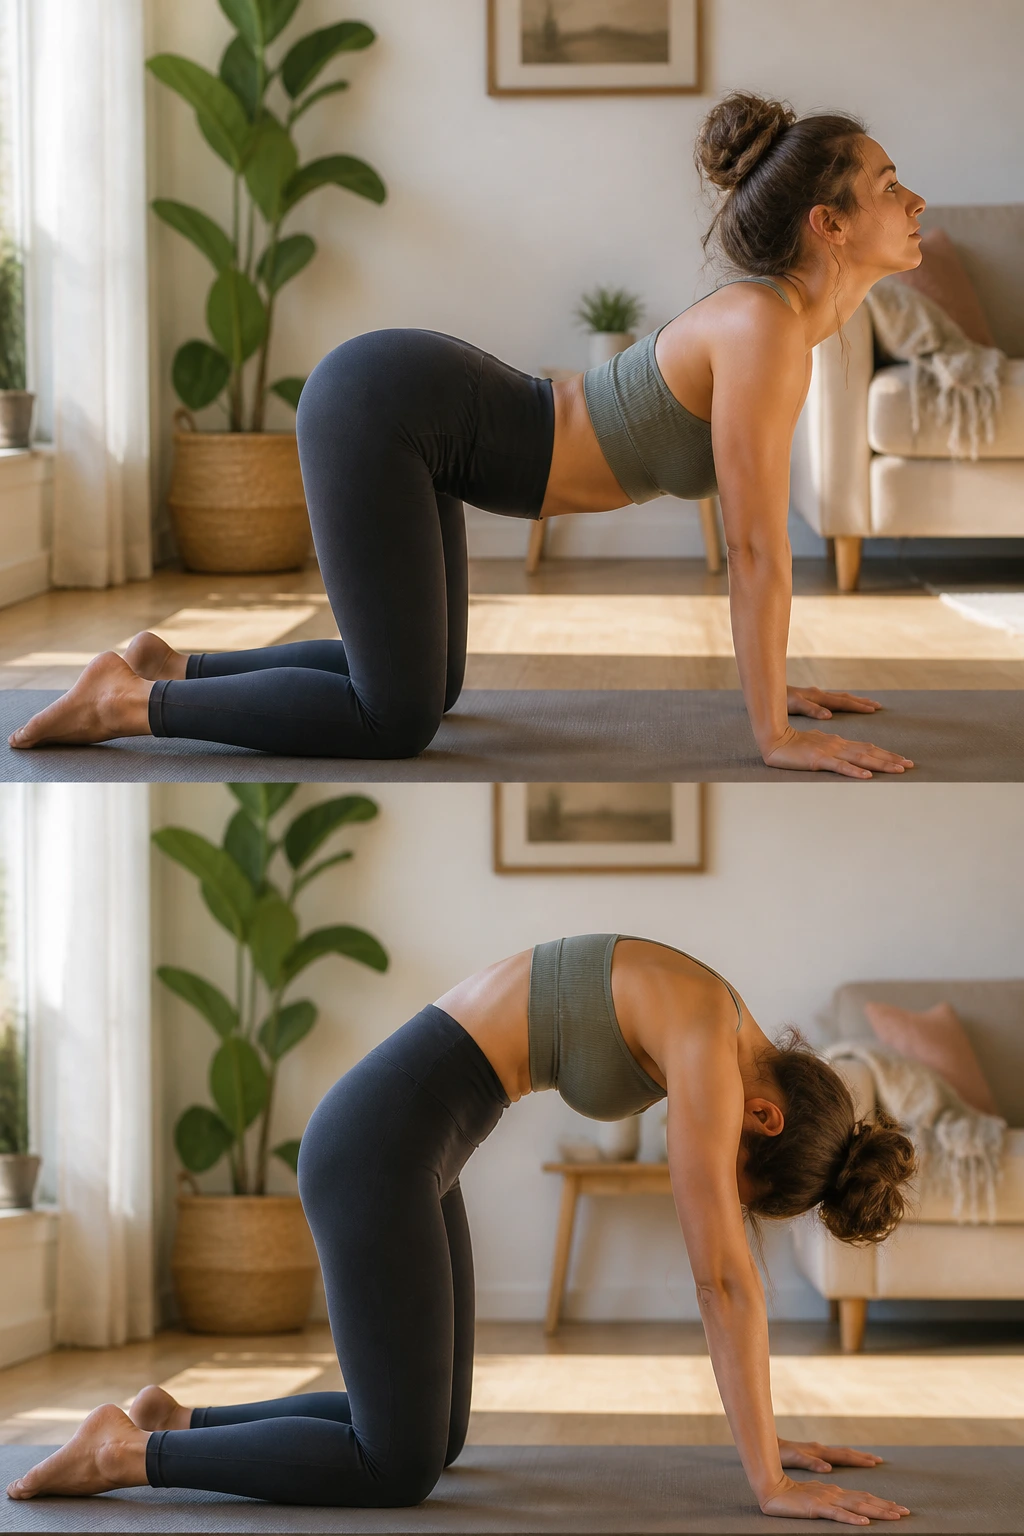
While often labeled as a core or back exercise, the cat-cow sequence is vital for shoulder health because it encourages the shoulder blades to glide over the ribcage. In a tight, sedentary state, the shoulder blades become fixed and rigid. Cat-cow teaches them to move through their full range of motion.
Get into a tabletop position with wrists under shoulders and knees under hips. As you inhale (cow), drop your belly toward the floor, lift your chin, and pull your shoulder blades together behind you. As you exhale (cat), round your spine toward the ceiling, push the floor away, and feel your shoulder blades spread apart on your upper back.
Move with your breath. Focus specifically on the shoulder movement: feeling them squeeze together, then feeling them widen. Ten to fifteen repetitions are usually enough to wake up the upper back and improve the overall fluidity of your shoulder girdle.
9. Wall Slide
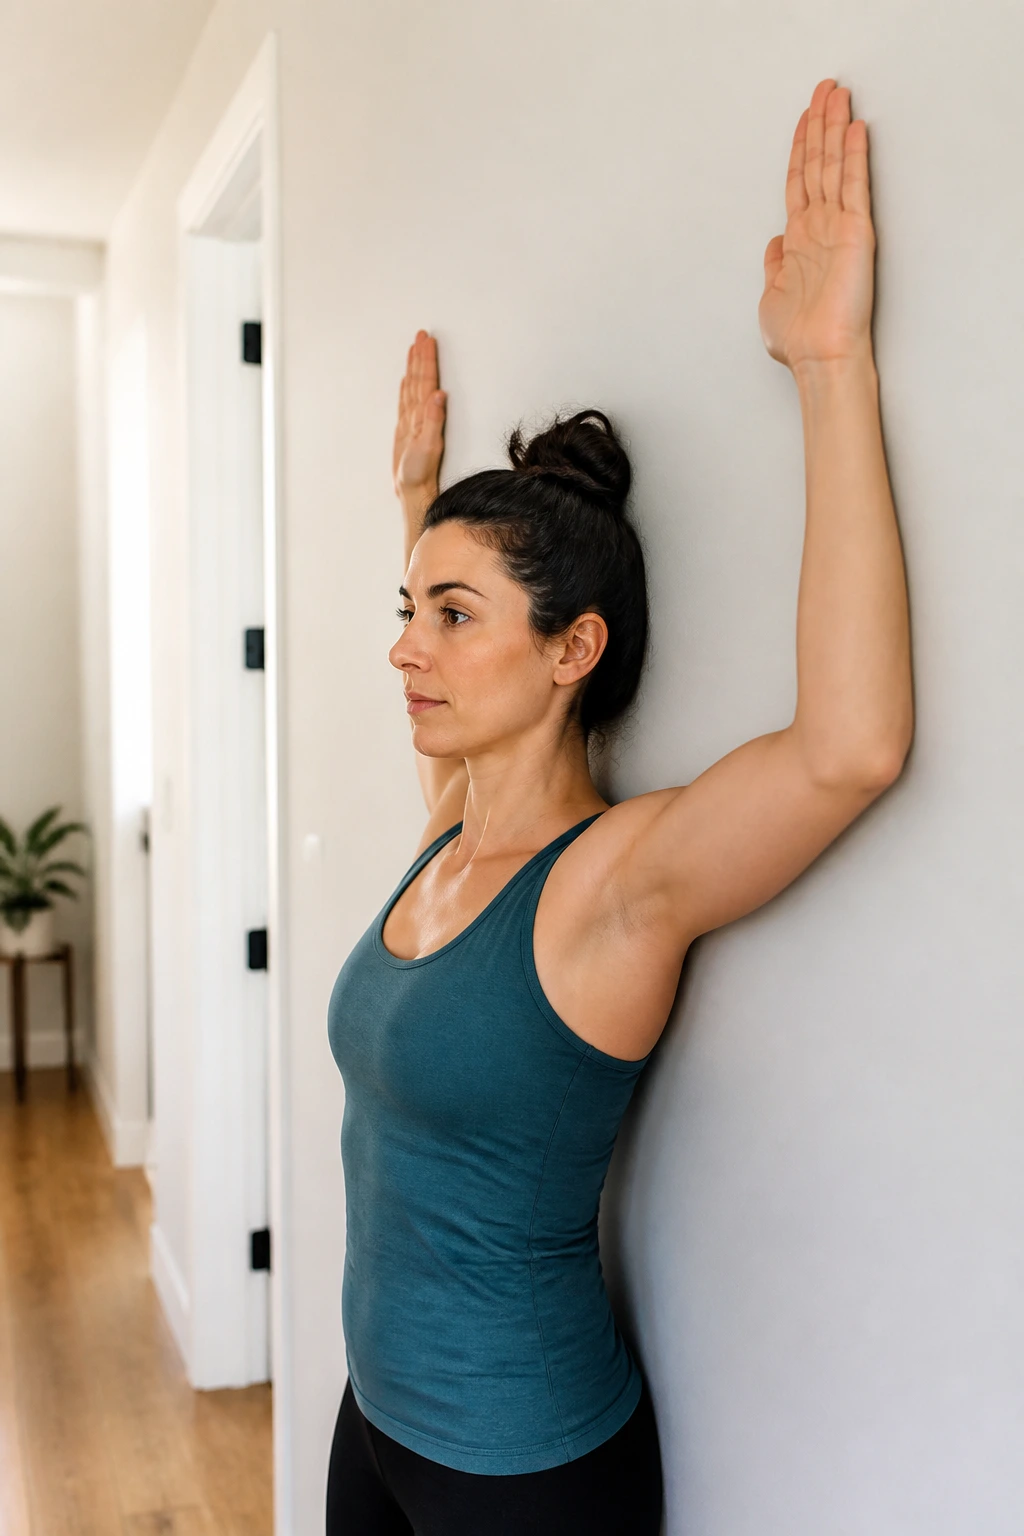
This is an active mobility drill that is arguably more effective than any passive stretch for long-term shoulder health. It teaches your body how to engage the correct muscles to keep the shoulders down while reaching up. It helps combat the tendency for the shoulders to shrug upward during overhead tasks.
Stand with your back, head, and heels against a flat wall. Bring your arms up into a “goalpost” position, with elbows and wrists touching the wall. Slowly slide your hands up the wall, trying to keep your elbows and wrists in constant contact with the surface.
You will find a point where your arms want to leave the wall—stop just before that point. Slide back down, engaging your back muscles to pull your elbows toward your ribcage. Do ten repetitions. This is not about pushing; it is about sliding and maintaining contact. It is surprisingly exhausting, which is a sign of how much your shoulders need this strength.
10. Behind-the-Back Hand Clasp

This is a deceptively simple move that forces your chest to open and your shoulders to retract. It is the perfect antidote to the “slouching at the desk” position. It requires no equipment and can be done anywhere—even standing in line for a coffee.
Stand tall with your feet hip-width apart. Reach your arms behind your back and interlace your fingers. If you cannot reach your fingers, hold a towel or a resistance band. Once your hands are connected, gently straighten your arms and pull your hands away from your lower back.
Lift your chin slightly and puff your chest out. Avoid letting your shoulders roll forward. The pull should be felt across the front of the shoulders. Hold for 30 to 60 seconds, taking deep breaths. This move is essentially the physical opposite of the posture you adopt while looking at a phone.
11. Overhead Triceps Stretch

Many people overlook the triceps when addressing shoulder tightness, but the long head of the triceps actually crosses the shoulder joint. If it is tight, it can limit shoulder mobility. This classic stretch is a simple way to lengthen that connection point.
Reach your right arm up to the ceiling, then bend your elbow so your hand reaches toward the center of your back. Use your left hand to gently push down on your right elbow, guiding it toward the floor. You should feel the stretch running along the back of your arm and into the shoulder area.
Keep your head upright—do not let it tilt forward to accommodate the arm. Maintain a tall spine, as slouching will limit the effectiveness of the stretch. Perform for 30 seconds on each side. If you feel pain in the elbow, ease up on the pressure.
12. Foam Roller Shoulder Release
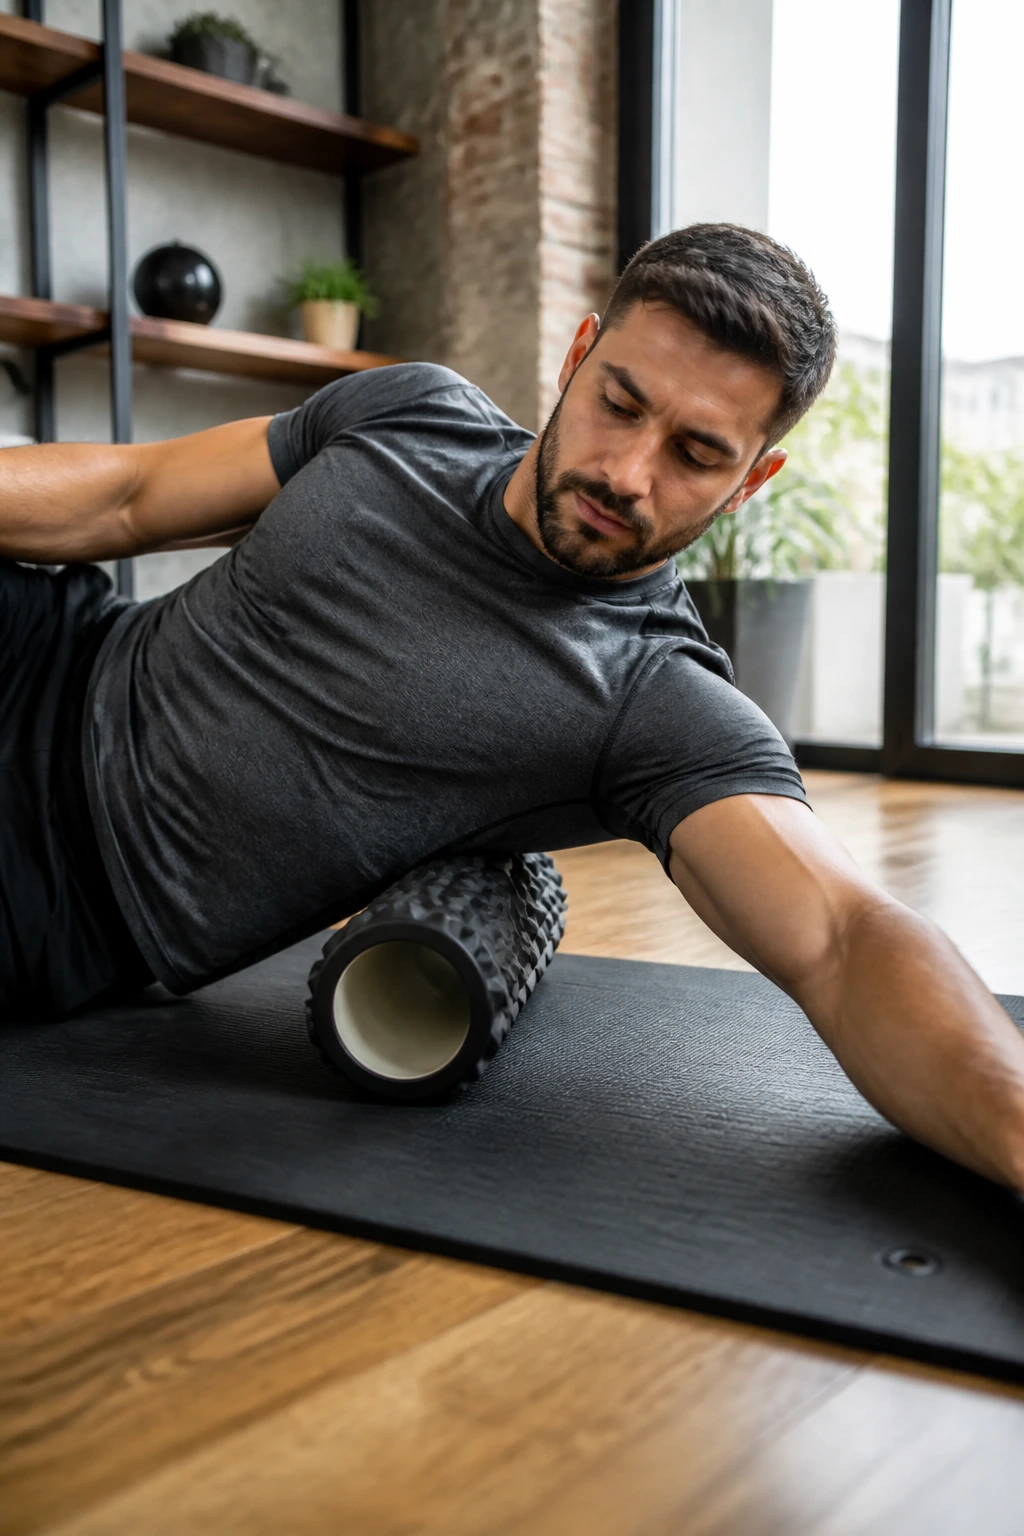
If you have a foam roller, this is the gold standard for deep tissue release. The roller acts as a mobile masseuse, breaking up adhesions in the fascia that have developed from repetitive movement or poor posture. It is intense, but the relief afterward is often immediate.
Lie on your side with the foam roller placed horizontally underneath your armpit and shoulder area. Extend your bottom arm straight out. Use your legs to slowly rock your body back and forth, allowing the roller to knead the muscles at the back of your shoulder and your lats.
Avoid rolling directly onto the bone of the shoulder joint; stay on the fleshy part of the lat and the posterior deltoid. If you find a “hot spot” that feels particularly tight, stop and rest on it for 15 seconds, taking deep breaths until you feel the muscle soften. Move slowly—this is not a race.
13. Pendulum Stretch
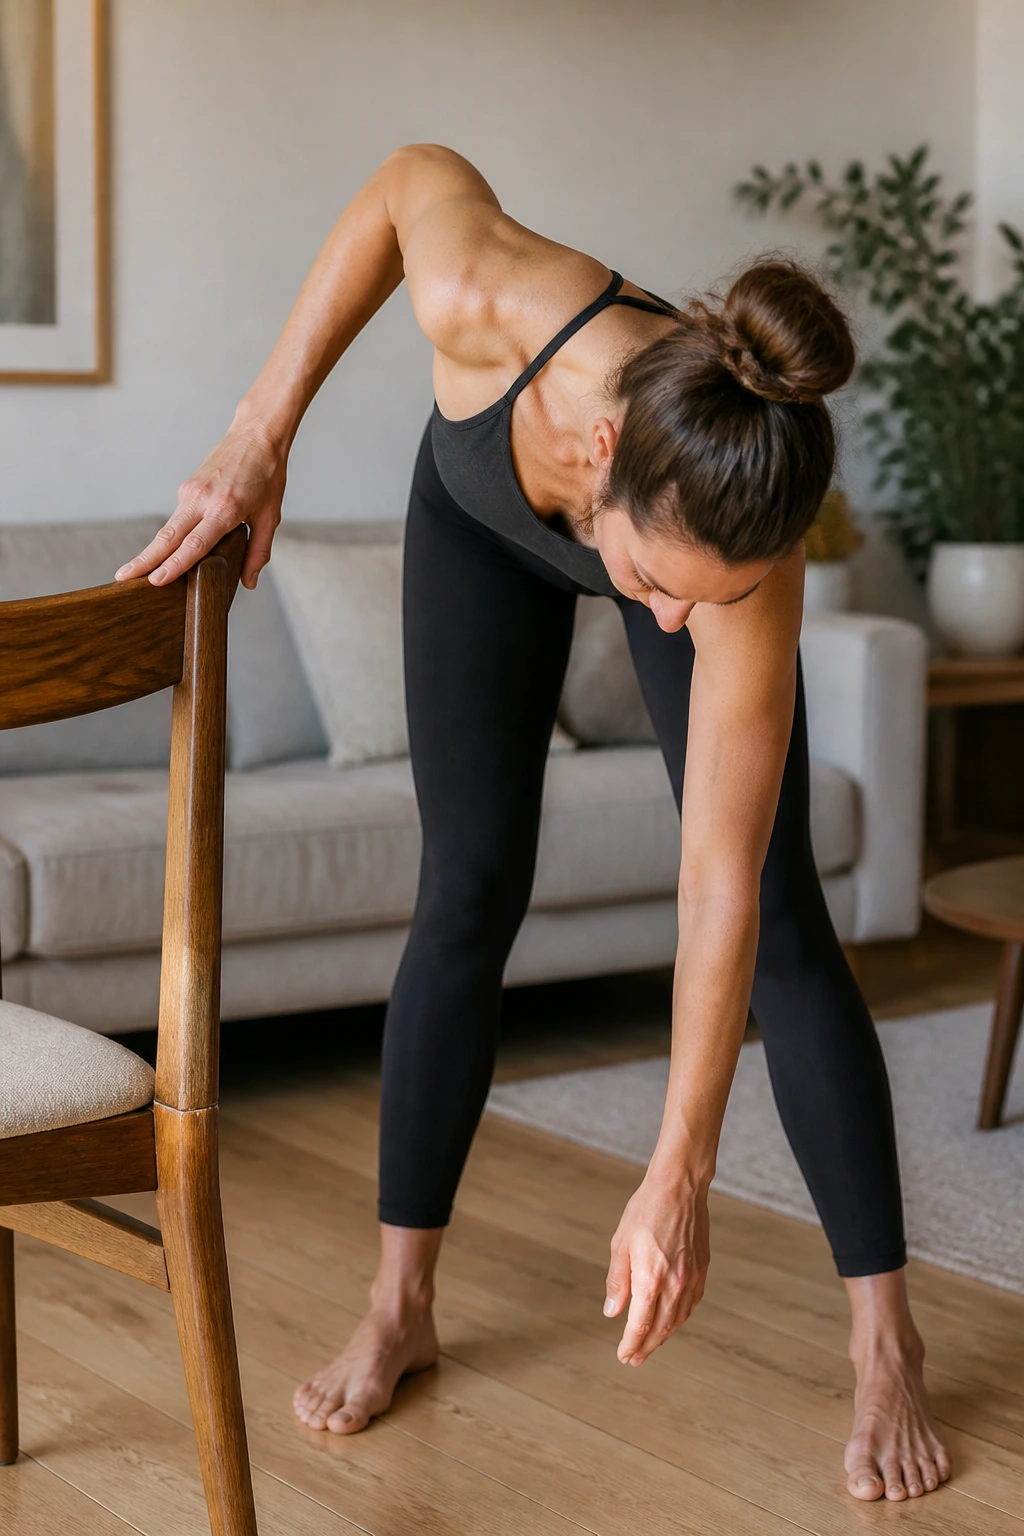
This is a gentle, low-intensity stretch often recommended for rehabilitation, but it is excellent for anyone with chronic shoulder stiffness. It uses gravity to create space in the shoulder joint, which can help relieve that deep, nagging ache that often comes with tightness.
Lean forward, placing your non-stiff hand on a table or chair for support. Let your tight arm hang completely loose toward the floor, like a dead weight. Use your body momentum to gently sway, allowing your arm to swing in small circles.
Start with small, clockwise circles, then switch to counter-clockwise. You are not using your shoulder muscles to move the arm; you are using the movement of your torso to make the arm swing. This decompresses the shoulder joint, providing a sense of relief that active stretching sometimes cannot match. Do this for 60 seconds.
14. Shoulder Rolls (Active)

Sometimes you do not need to pull or hold a position; you need to move the joint through its full range of motion. Shoulder rolls are the simplest way to reset the joint after it has been stuck in one position for a long time. It helps lubricate the joint and release the traps.
Stand or sit tall. Inhale as you aggressively shrug your shoulders up toward your ears. Exhale as you roll them back and then down, squeezing your shoulder blades together. Repeat this circular motion ten times in one direction, then reverse the direction ten times.
The key is the “back and down” phase. Most people only roll forward, which reinforces the rounded shoulder posture. By focusing on the backward, downward motion, you are actively correcting the slouch. Imagine trying to tuck your shoulder blades into your back pockets.
15. Sphinx Pose
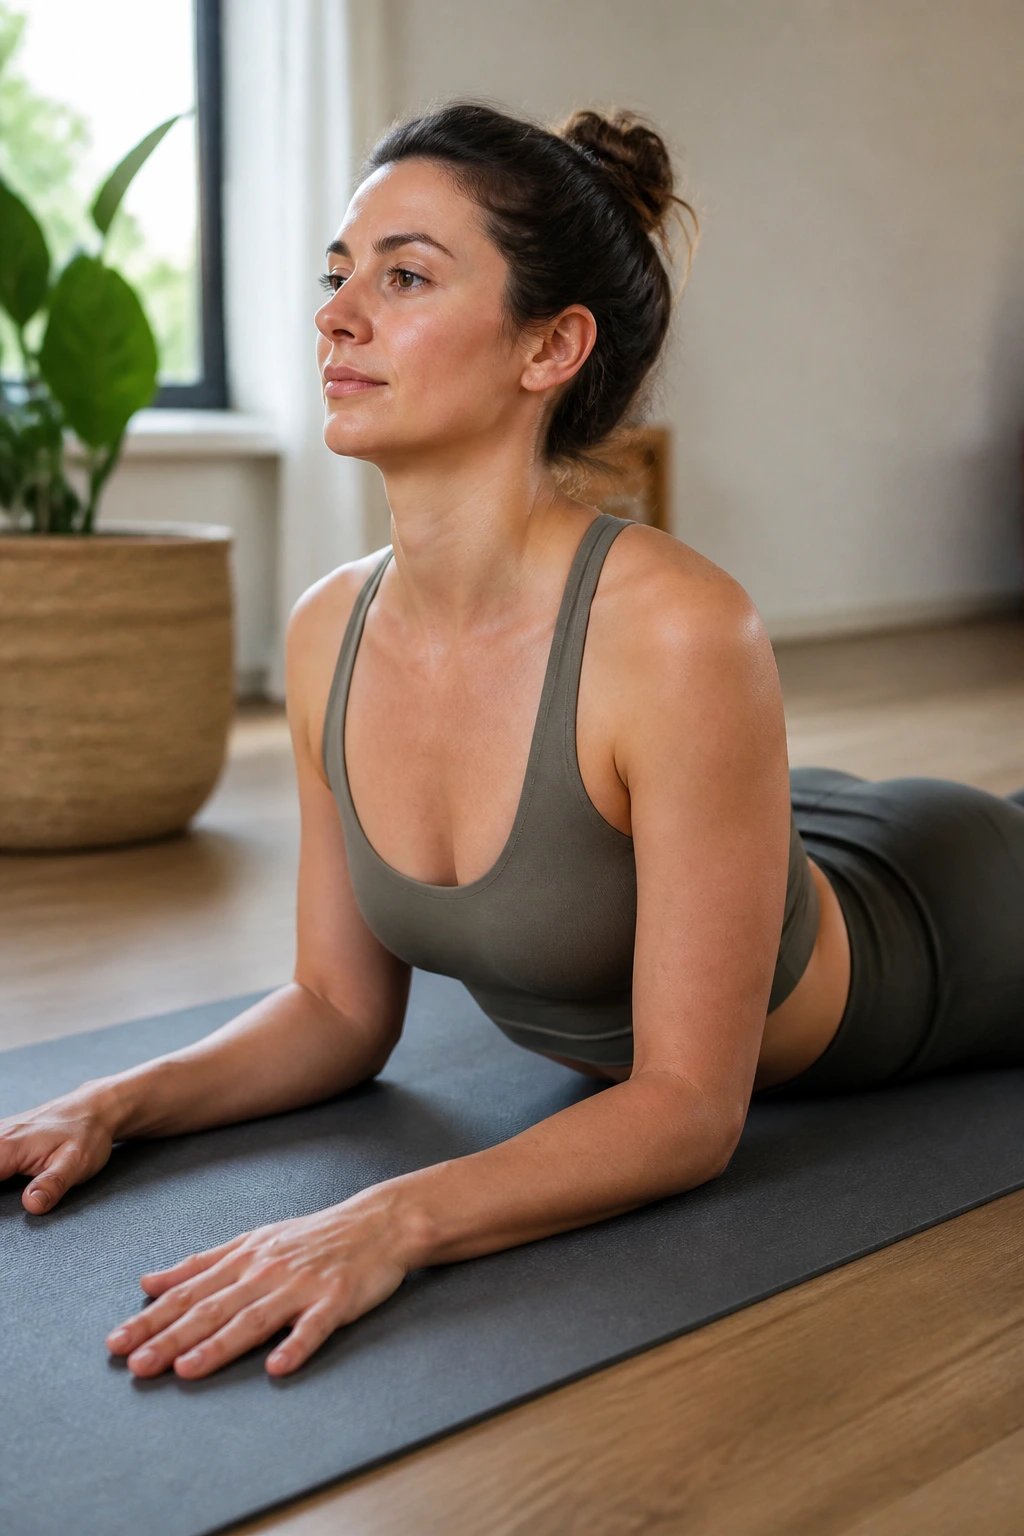
The sphinx pose is a gentle backbend that opens up the chest and shoulders without requiring the extreme extension of a full cobra or upward dog. It is an excellent way to passively stretch the anterior shoulder while lengthening the abdominal muscles.
Lie on your stomach with your legs extended behind you. Place your forearms on the floor, elbows under your shoulders. Press your forearms into the ground, lifting your chest away from the floor. Keep your shoulders down and away from your ears—do not let them creep up toward your neck.
Look straight ahead, keeping the neck long. Feel the front of your shoulders opening up. This is a subtle stretch, but it is deeply effective for counteracting the forward-rounded position. Hold for one to two minutes, focusing on relaxing your lower back and shoulders into the position.
16. Resistance Band Pull-Aparts
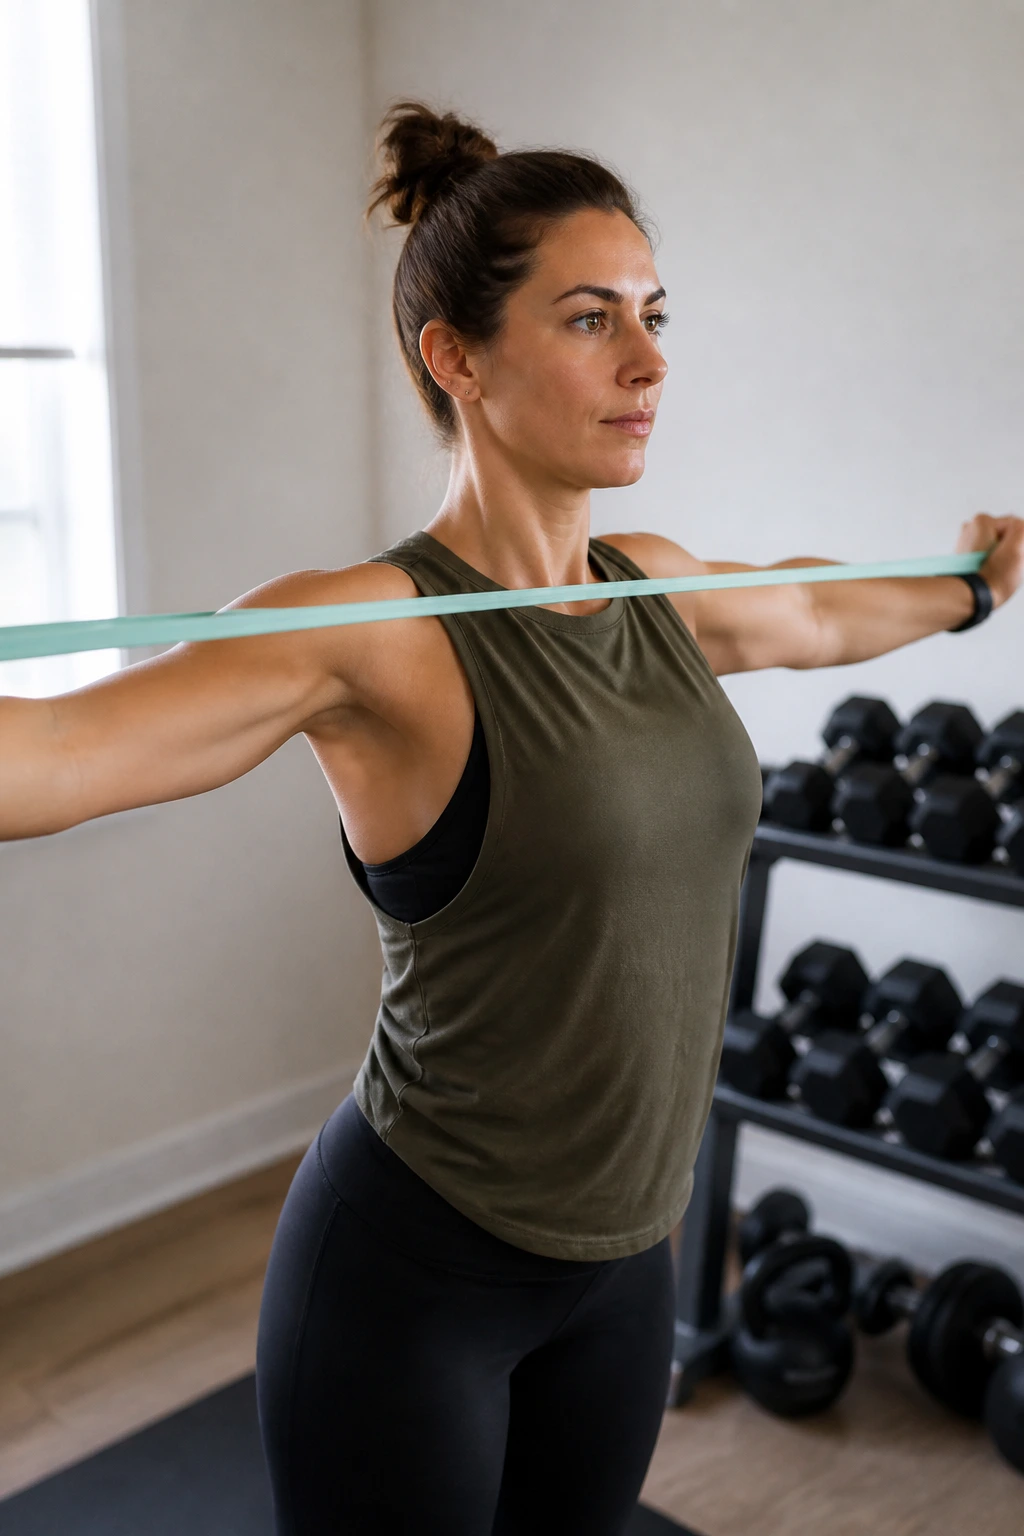
This is an active stretch that builds the muscles responsible for keeping your shoulders in the correct position. If you are constantly stiff, it is often because your back muscles are weak and “long,” while your front muscles are tight and “short.” Pull-aparts fix this imbalance.
Hold a light resistance band in front of you with both hands, arms straight. Keeping your elbows straight, pull the band apart, bringing your hands out to the sides until the band touches your chest. Focus on squeezing your shoulder blades together at the end of the movement.
Return to the starting position slowly. Do not let the band snap back; control the movement on the way in. This is not about the resistance—use a very light band. It is about the mind-muscle connection. Fifteen repetitions will have your upper back muscles firing and your shoulders feeling open and ready for action.
17. Reverse Tabletop
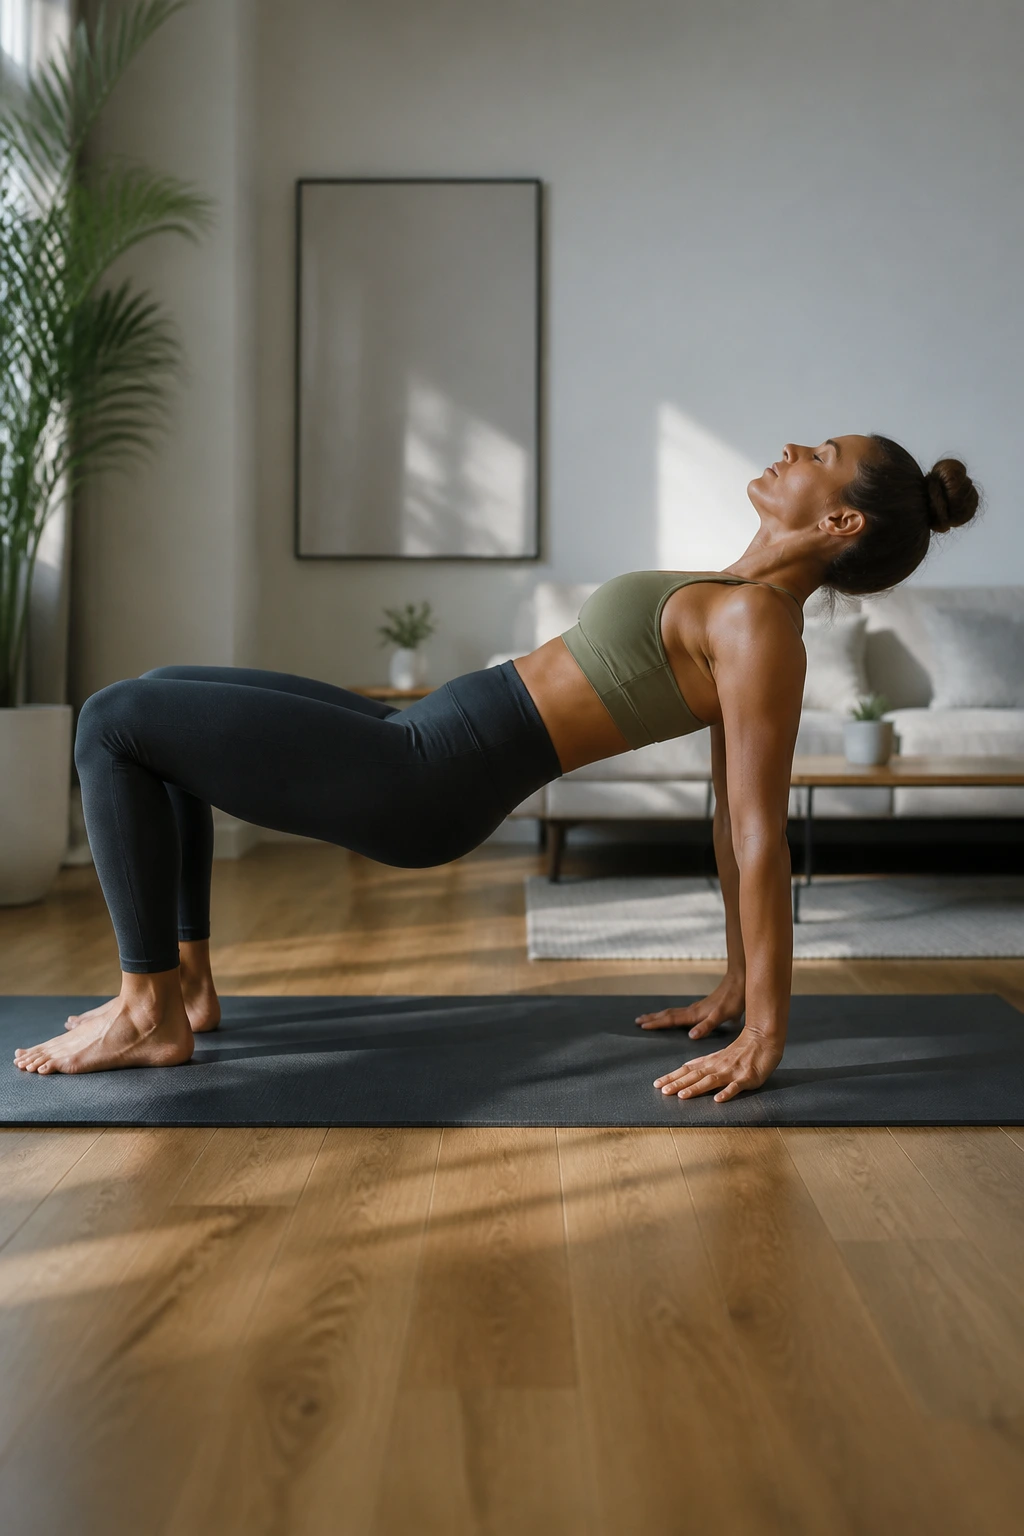
This move requires a bit of strength, but it is unmatched for opening the front of the shoulders and chest. It essentially turns your body into a bridge, forcing the shoulder joints into an extended position that is rarely reached during daily activities.
Sit on the floor with your knees bent and feet flat, about hip-width apart. Place your hands behind you on the floor, fingers pointing toward your feet. Press into your feet and hands to lift your hips toward the ceiling. Your body should form a flat line from your knees to your head.
Open your chest, let your head hang back (if your neck is comfortable), and feel the stretch across the front of your shoulders. Hold for 20 to 30 seconds. If this feels too difficult, keep your hips slightly lower, focusing on the chest-opening sensation rather than the height of the lift.
18. Sitting Forward Fold

While primarily a hamstring stretch, the seated forward fold can be adapted to provide a massive release for the upper back and shoulders. The key is in how you position your arms and how much you allow your upper body to round.
Sit on the floor with your legs extended straight out. Inhale to lengthen your spine, then exhale as you hinge at the hips to reach forward. Instead of grabbing your feet, cross your arms and grab opposite shins or ankles. Allow your head to drop and your upper back to round deeply.
As you pull gently with your arms, you will feel the space between your shoulder blades expand and the muscles in the back of your shoulders lengthen. Stay here for a full minute, breathing deeply. The weight of your head acts as a natural anchor, pulling the upper back muscles into a deep, passive release.
19. Sleeping Pigeon Arm Stretch
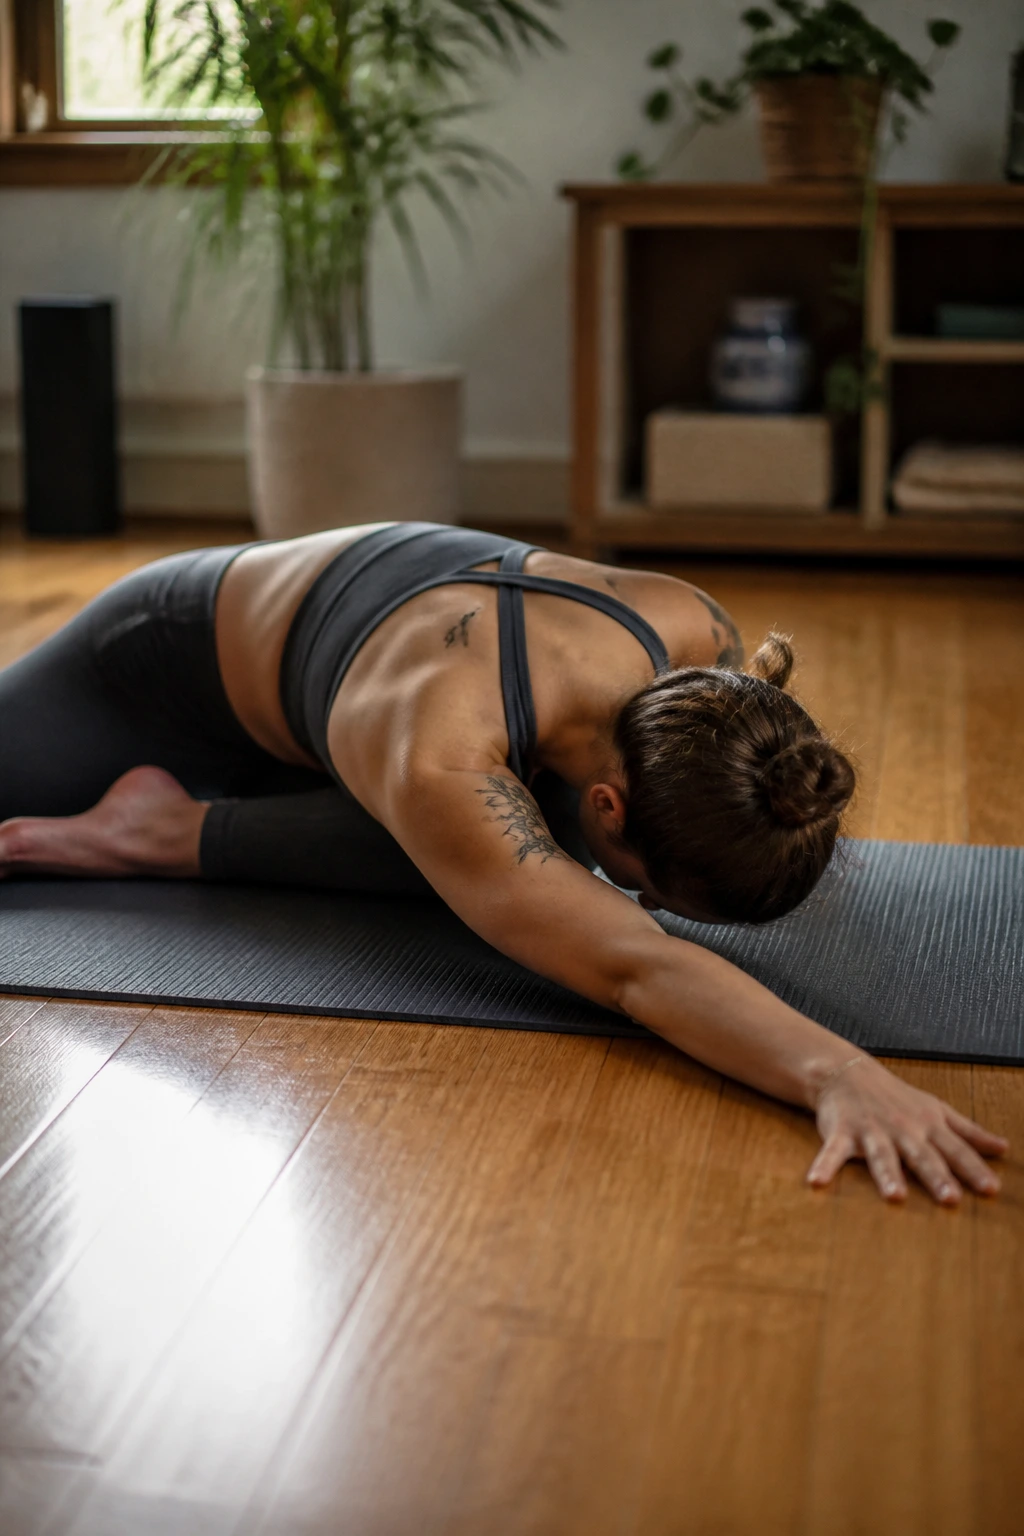
You are likely familiar with the pigeon pose for the hips, but adding an upper-body component turns it into a total-body release. This is an advanced-level stretch that combines lower-body opening with a deep thoracic and shoulder stretch.
From a pigeon pose (one knee forward, back leg extended), walk your hands out to the side of the bent knee. As you lower your torso, extend the arm closest to the bent knee out to the side, threading it underneath your chest or simply stretching it long.
This creates a complex, diagonal stretch that hits the lats and the back of the shoulder simultaneously. It is intense, so do not rush into it. Hold for 30 seconds on each side. If this feels like too much, stay in the standard pigeon pose and just focus on keeping your chest proud and shoulders down.
20. Downward Dog with Shoulder Focus
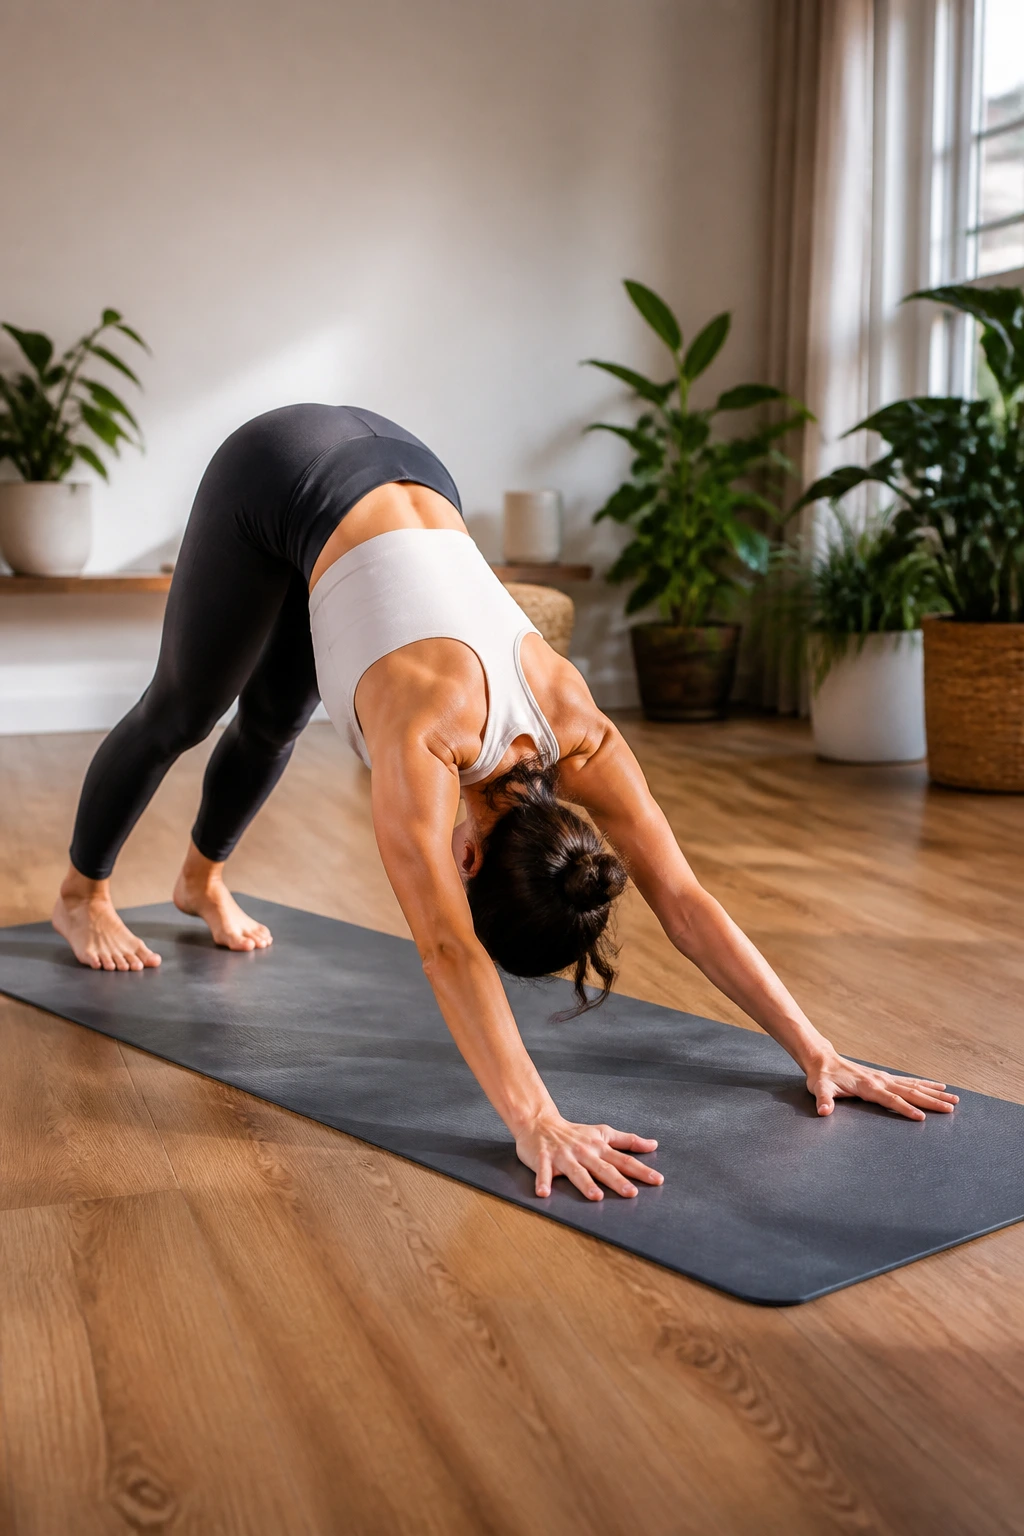
Downward dog is the quintessential yoga move, but people often do it with sloppy technique, missing the shoulder benefit entirely. When done correctly, it is one of the best ways to stretch the lats and the shoulders, especially if you have a tendency to carry tension in that area.
Start in a plank position, then push your hips up and back. The key here is not to get your heels to the floor; it is to get your chest toward your thighs. Keep your hands planted firmly, fingers spread wide. Imagine you are trying to push the floor away from you, lengthening your spine and your arms.
Rotate your armpits toward your face. This subtle external rotation of the shoulders engages the correct muscles and prevents impingement. Hold for 45 seconds. By actively pushing your shoulders away from your ears, you create a deep, sustained stretch that hits everything from the lats to the triceps.
Final Thoughts
Shoulder stiffness is rarely an acute medical crisis, but it is a consistent energy drain. It changes how you carry yourself, how you move, and eventually, how you feel when you wake up. The twenty stretches outlined here are not meant to be done all at once in one massive session—that would be overkill and potentially counterproductive.
Instead, treat these as a toolkit. Keep your favorites close by. Maybe two of them become part of your morning ritual, while another helps you reset during a lunch break or after a long drive. The goal is frequency over intensity. A three-minute stretch performed daily does infinitely more for your mobility than a thirty-minute session done once a month.
Listen to your body. If a movement feels sharp, stop. If it feels like a heavy, dull, or tight sensation that eases as you breathe into it, you are on the right track. Stiffness is just tension that has forgotten how to let go. With consistent, gentle practice, you can remind your muscles how to move freely once again. Your shoulders—and your posture—will thank you for the extra attention.
