



Most of us spend the better part of our waking hours fighting gravity while hunched over glowing screens, steering wheels, or kitchen counters. By the time the sun starts to dip, the toll is obvious: stiff necks, shoulders that feel like they are permanently attached to our ears, and a lower back that protests every time we stand up. We treat these aches as unavoidable consequences of modern life, but that is a dangerous assumption. Your body is remarkably adaptable, and with a bit of directed movement, you can reverse the slow creep of slouching.
Posture is not a rigid position you hold; it is a dynamic skill you practice. If you spend eight hours a day in a flexed, forward-leaning position, your muscles—specifically the hip flexors, pectorals, and upper traps—adapt by shortening. Meanwhile, the muscles responsible for holding you upright, like your rhomboids and glutes, become overstretched and weak. You cannot simply “sit up straight” for five minutes to fix this. You have to actively lengthen the tissues that have tightened and engage the ones that have gone dormant.
These twenty stretches serve as a toolkit for reclaiming your vertical alignment. You do not need to do all of them every single day, nor do you need a gym full of equipment. Most of these movements require nothing more than a few feet of floor space or a sturdy doorframe. Treat this like a practice of curiosity rather than a chore; pay attention to where you feel the resistance, where you feel the release, and how your body wants to move when you finally give it the space to do so.
1. Chin Tucks for Cervical Alignment
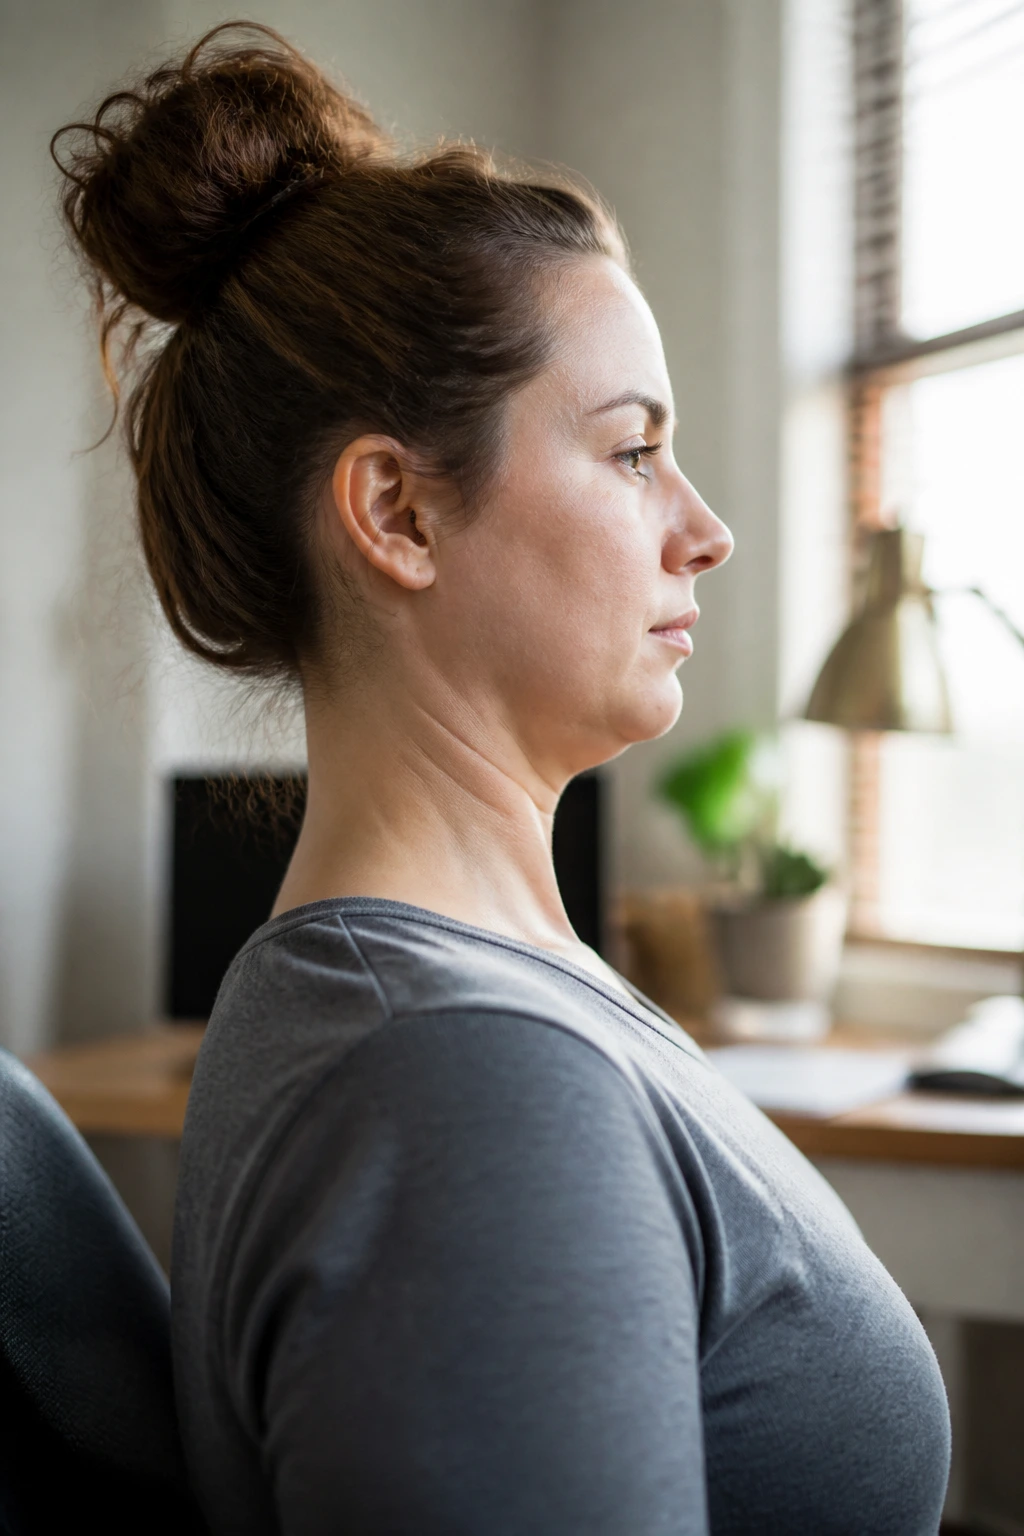
“Tech neck” is the common term for the forward-head posture that happens when we stare down at smartphones or laptops for hours. Your head is heavy—roughly ten to twelve pounds on average—and when it shifts forward by just a few inches, the force on your cervical spine increases exponentially. The chin tuck is the simplest, most effective way to reset the muscles at the base of your skull and neck.
How to Perform the Chin Tuck
Stand or sit with your spine tall, as if a string is pulling the crown of your head toward the ceiling. Without tilting your chin up or down, gently draw your head straight back, as if you are trying to give yourself a double chin. You should feel a stretch in the back of your neck. Hold this for three to five seconds, then release. Repeat this ten times.
Why It Matters
This movement engages the deep cervical flexors, which are often weak and neglected. By strengthening these muscles, you allow the larger, superficial muscles like the upper trapezius to relax. Do not force the movement; it should feel like a gentle retraction, not a strain. If you feel pain, reduce your range of motion.
2. Doorway Chest Stretch

If you are a desk worker, your pectorals are likely tight. Your shoulders round forward naturally because your chest muscles are pulling them that way. To open up your posture, you have to prioritize the front of your body before you can successfully fix the back.
The Mechanics of the Stretch
Find a doorframe and stand in the opening. Raise your arms so that your elbows are at shoulder height, placing your forearms against the doorframe. Gently step one foot forward, shifting your weight until you feel a deep, pleasurable stretch across the front of your chest and shoulders.
- Avoid arching your lower back to compensate for lack of flexibility; keep your core braced.
- Keep your gaze forward rather than letting your head poke through the doorframe.
- Hold for 30 to 45 seconds.
Focus on breathing deep into your ribcage. As you exhale, imagine your shoulders melting away from your ears. If you want to target different muscle fibers, you can adjust your elbow height—placing them slightly higher or lower on the frame will change the angle of the stretch through the pectoralis major and minor.
3. Cat-Cow Pose for Spinal Articulation
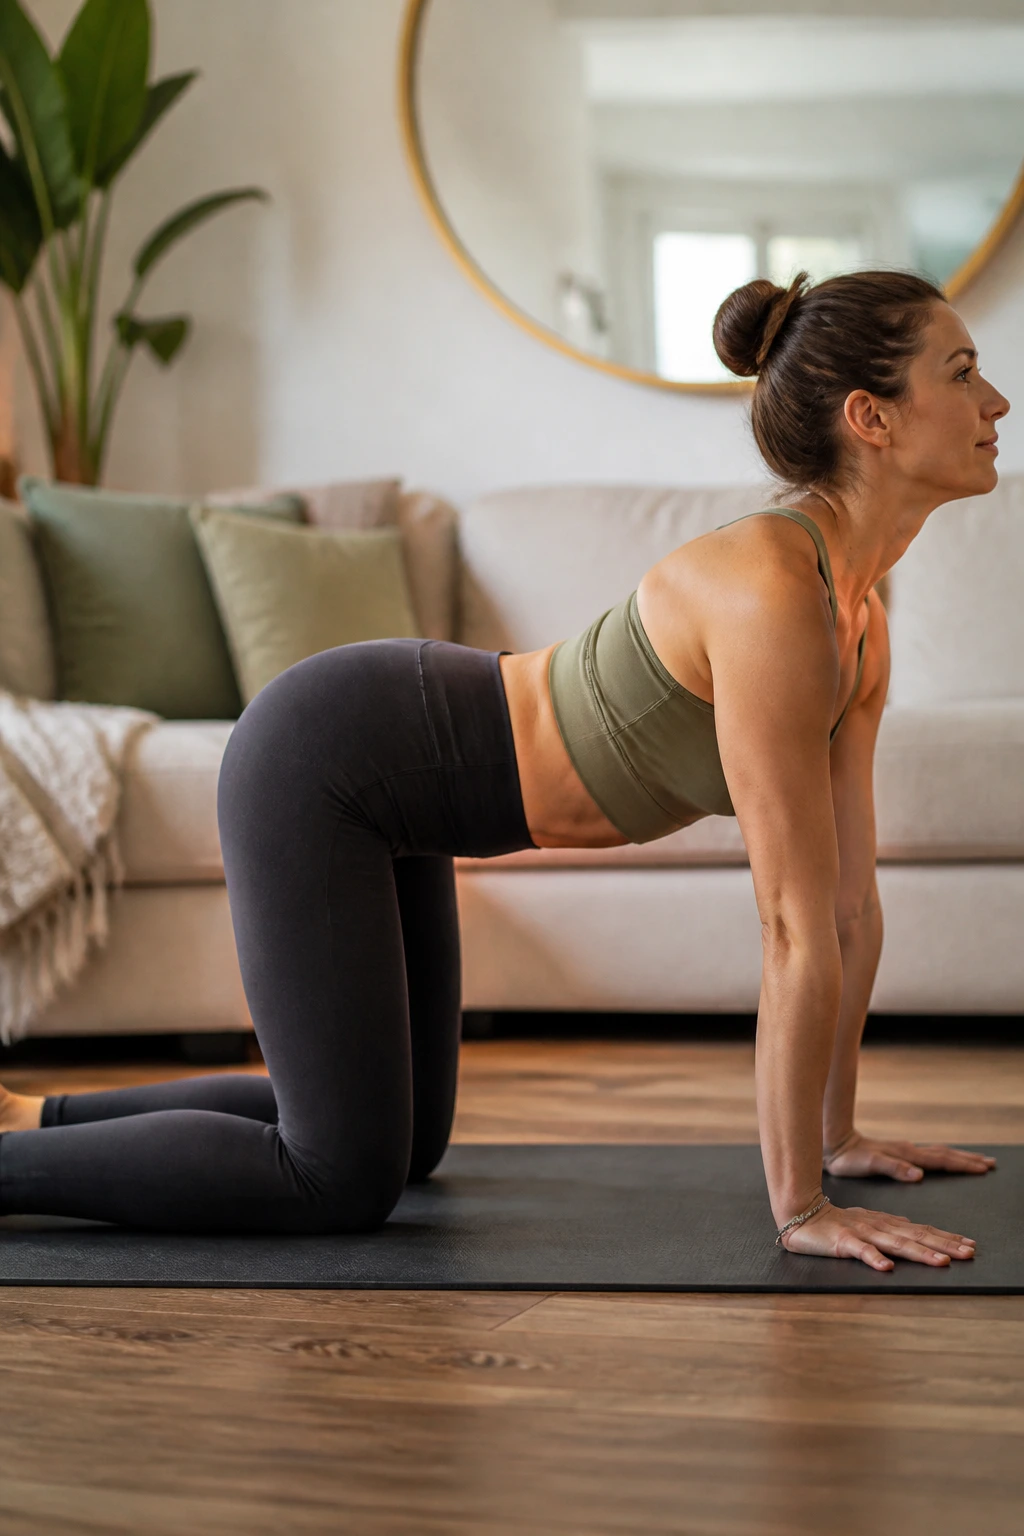
This is a classic for a reason. It is not just about stretching; it is about lubricating the joints of the spine and reminding your vertebrae how to move independently of one another. Most of us move our spines as one solid block, but for good posture, you need segmental mobility.
Start on your hands and knees in a tabletop position, with your wrists directly under your shoulders and your knees under your hips. Inhale as you drop your belly toward the floor, lifting your chin and chest to look upward—this is the Cow phase. Exhale as you round your spine toward the ceiling, tucking your chin and pelvis, pushing the floor away with your hands—this is the Cat phase.
Move slowly. This is not a race. Sync your movement with your breath. If you find a spot that feels particularly stiff—often in the mid-back—spend an extra breath there. This is essentially a massage for your spinal column, helping to reduce the stiffness that builds up after prolonged sitting.
4. Thread the Needle for Thoracic Rotation
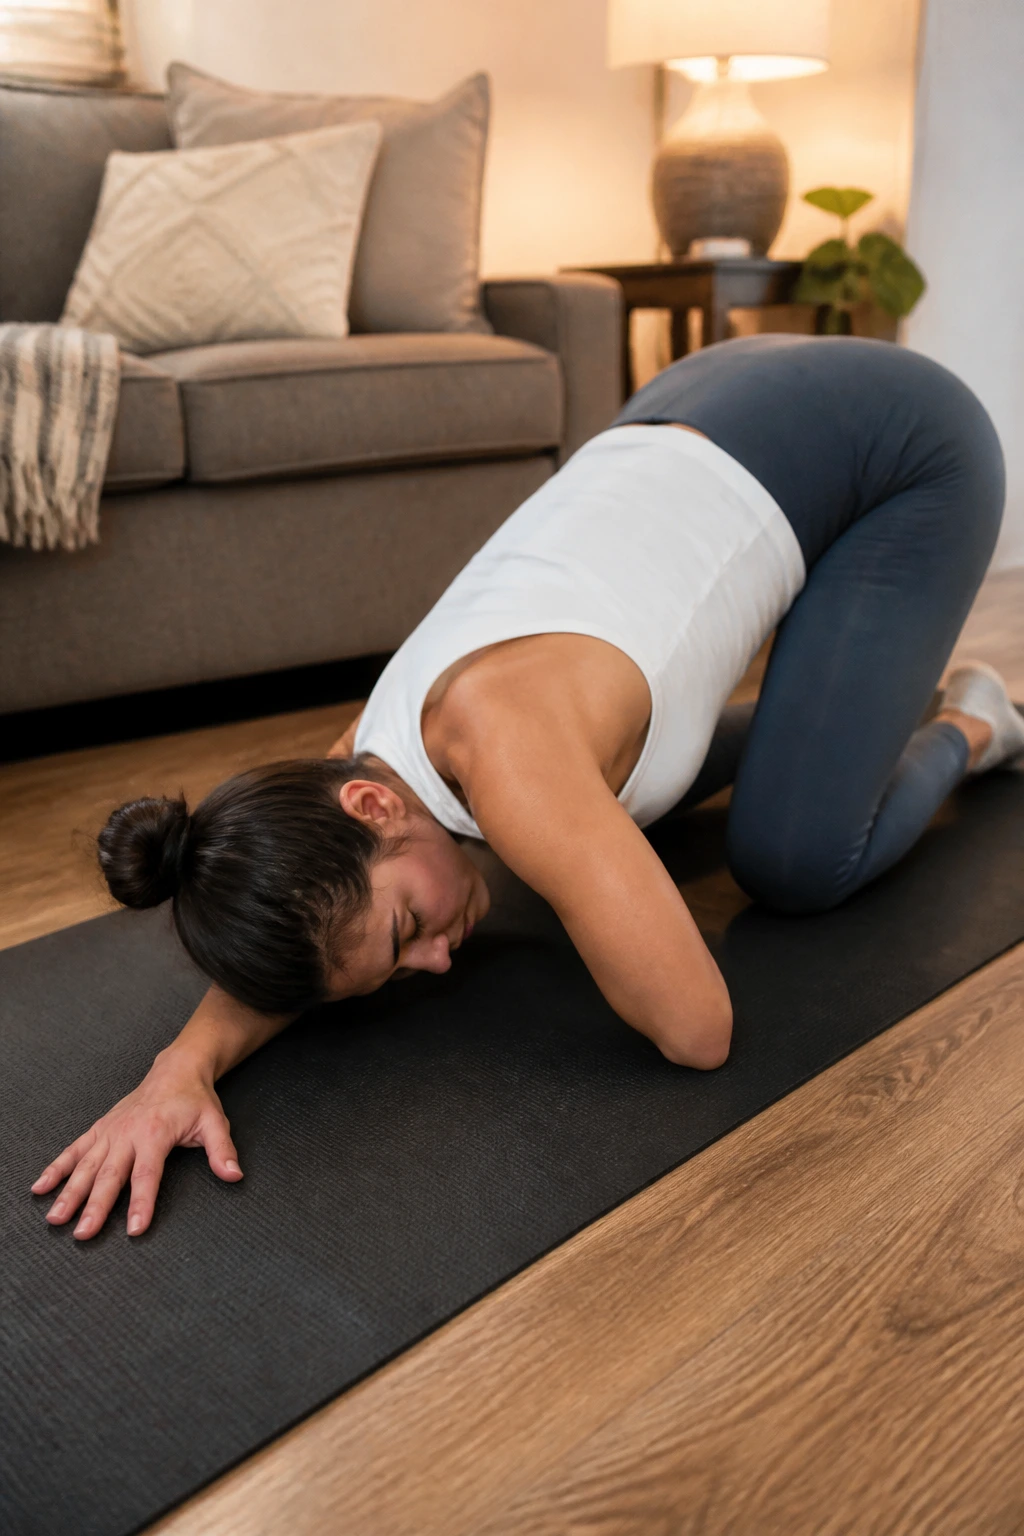
Rotation is the movement we lack most in modern, sedentary life. We walk forward, we sit forward, and we type forward. The thoracic spine—the mid-back area—needs to be able to twist to maintain healthy shoulder and neck mechanics.
From your hands and knees, reach your right arm up toward the ceiling, opening your chest. Then, “thread” that right arm underneath your left arm, resting your right shoulder and the side of your head gently on the floor. Reach your left hand forward or wrap it behind your back to deepen the twist.
You will feel this in the space between your shoulder blades. This is where most of us hold our stress. Hold for 30 to 60 seconds per side. If your shoulder doesn’t comfortably touch the floor, use a yoga block or a thick book to bridge the gap.
5. Child’s Pose for Lumbar Decompression
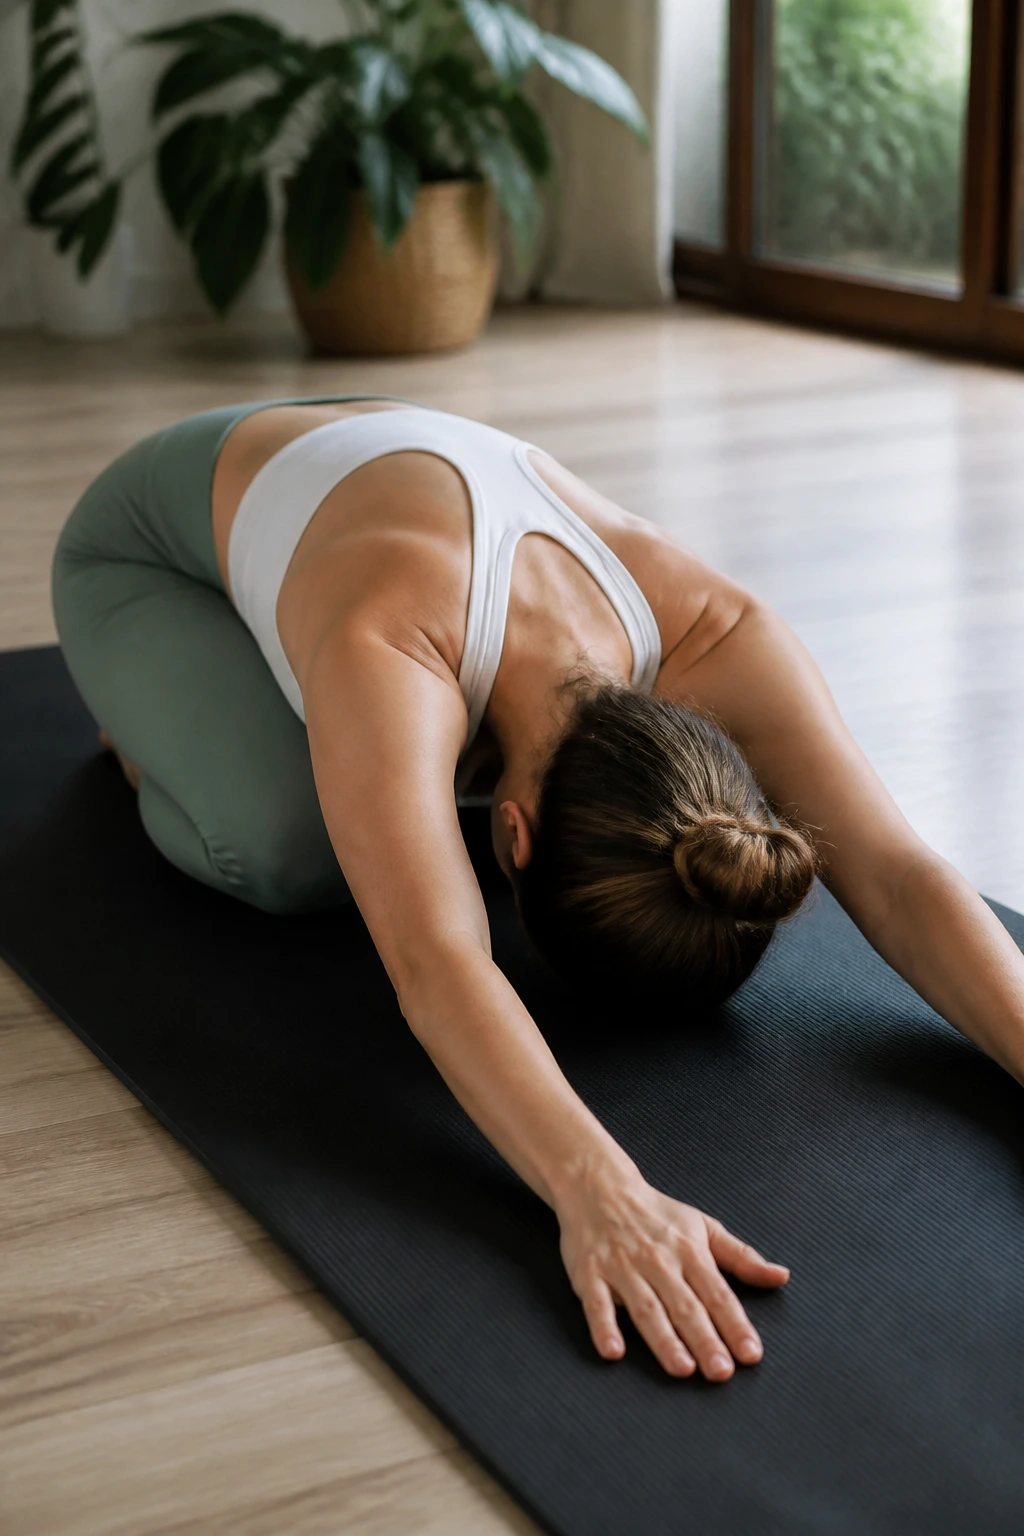
When your hamstrings and hips are tight, your lower back often takes the brunt of the load. Child’s pose is the ultimate resting position, providing a gentle traction to the lower spine while stretching the lats and shoulders.
Kneel on the floor, toes touching, and sit your hips back onto your heels. Lean forward, reaching your arms out in front of you on the floor. Let your forehead rest on the mat. If your hips are tight, keep your knees slightly wider apart to make room for your torso.
Pro tip: To get more out of this for your posture, walk your fingertips forward as far as you can while keeping your hips glued to your heels. You will feel a lengthening all the way down your sides. This is an active stretch, not just a nap. Hold for a minute, breathing into the back of your ribcage.
6. Controlled Shoulder Rolls

This is less of a stretch and more of a “reset.” We often shrug our shoulders up toward our ears when we are stressed or staring at a screen, and they stay there. We need to train the muscles to lower and stabilize the scapulae.
Stand tall with your arms relaxed by your sides. Initiate the movement by lifting your shoulders up toward your ears, then roll them back and down, pinching your shoulder blades together slightly at the bottom.
- Do not just move your shoulders in circles; think about squeezing them back into your back pockets.
- Focus on the downward phase. That is where the posture correction happens.
Perform ten slow, deliberate rolls. If you hear some clicking, that is normal, provided there is no pain. It is just your joints resetting. Do this every time you realize you have been hunched over a device for more than an hour.
7. Wall Slides for Scapular Stability
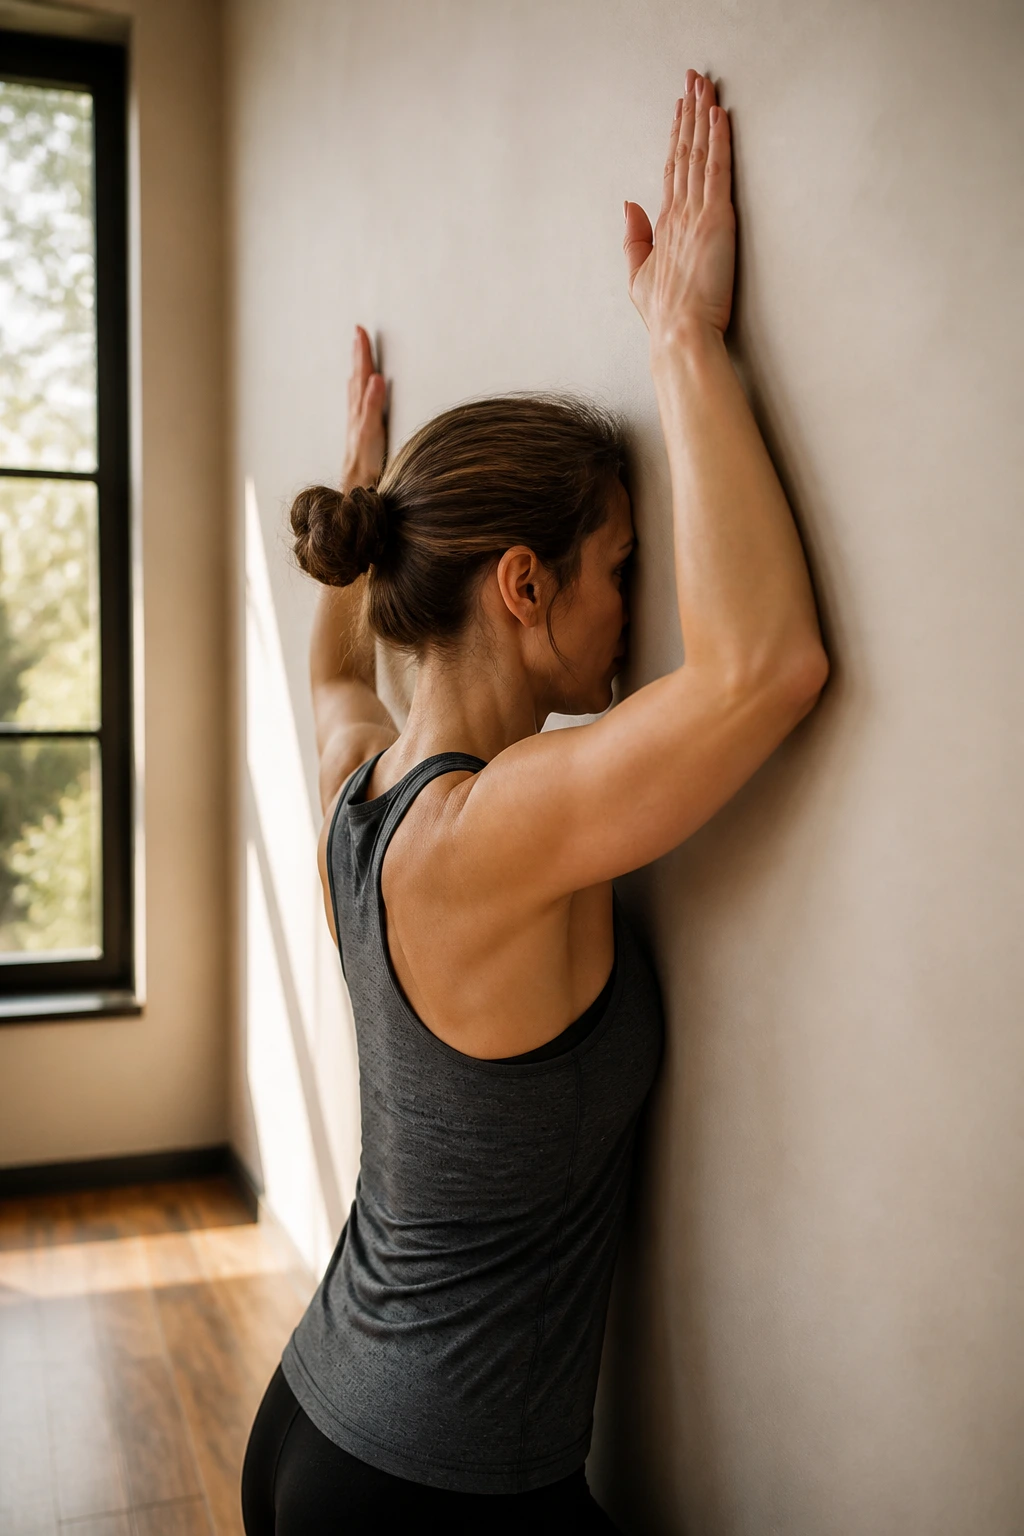
This is perhaps the single best exercise for people who work at desks. It forces your shoulders into external rotation while requiring you to engage your rhomboids and lower traps—the very muscles that keep you from slumping.
Stand with your back flat against a wall, feet about six inches away from the baseboard. Put your arms up in a “goalpost” position (elbows bent at 90 degrees), with your elbows, wrists, and the back of your hands touching the wall. Keeping those points of contact, slide your arms up as high as you can without letting them leave the wall. Then, slide them back down.
It is harder than it looks. If you cannot keep your wrists on the wall, you have found your limiting factor. That is okay. Just work within the range you have, focusing on keeping the back of your hands in contact with the wall at all times. Do 10 to 12 slow repetitions.
8. Hip Flexor Lunge for Pelvic Alignment
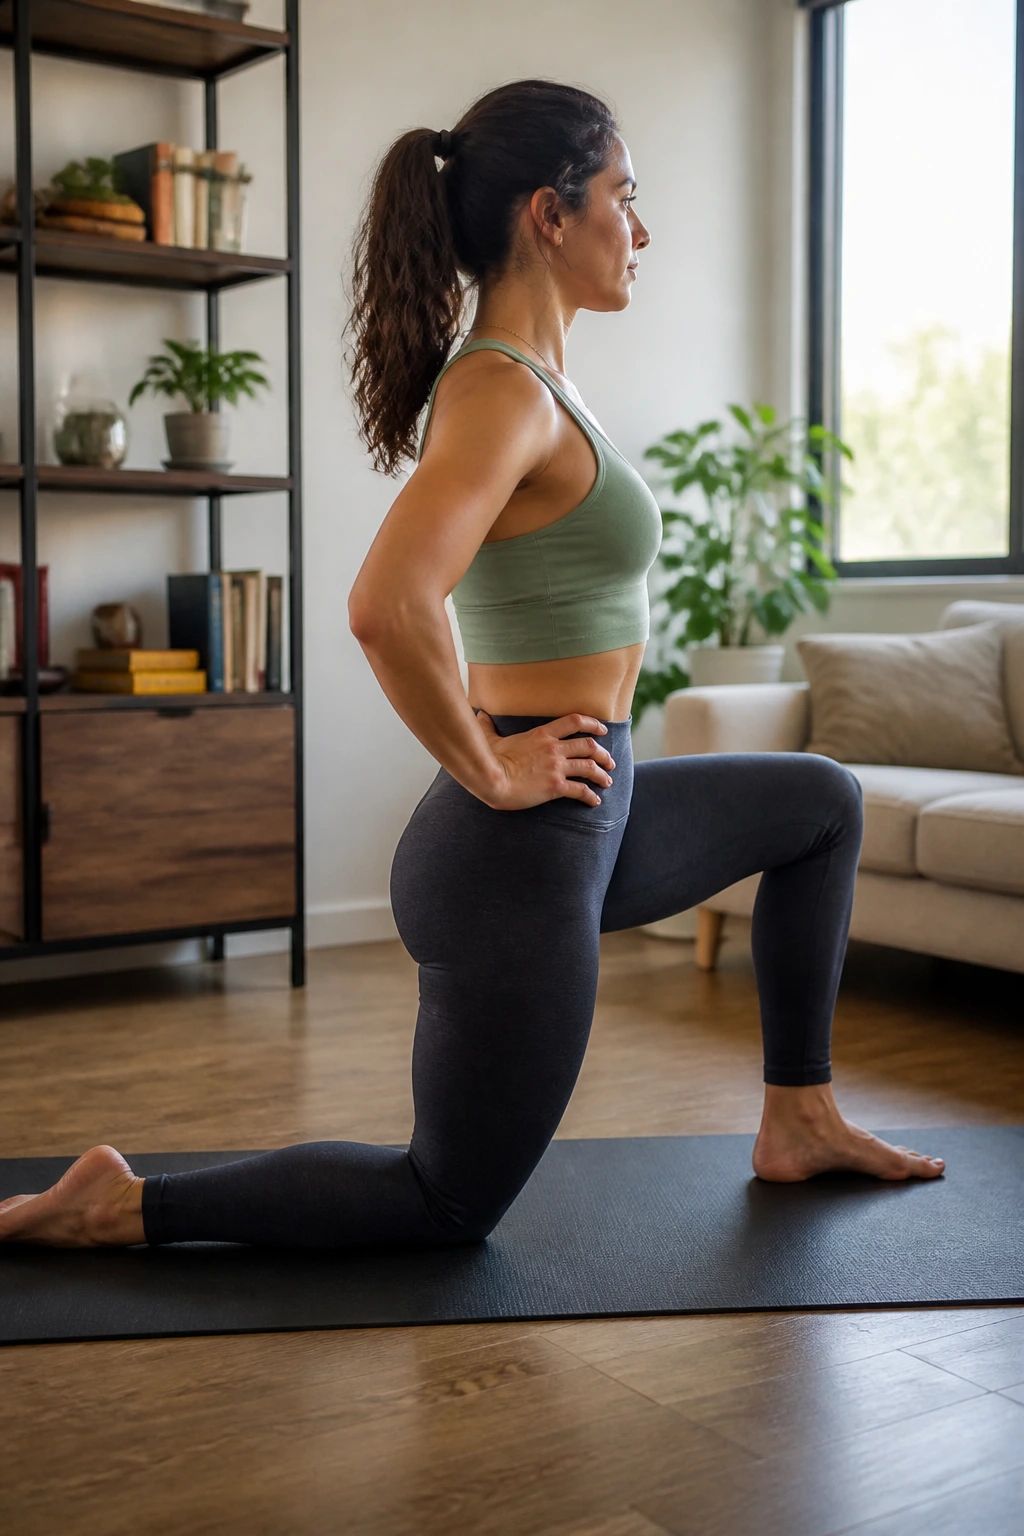
If your hip flexors are tight, they pull your pelvis forward into an anterior tilt. This causes your lower back to arch aggressively and pushes your belly forward, ruining your posture from the bottom up. You cannot have good upper-body posture if your pelvis is tipped forward.
Step into a lunge, dropping your back knee to the floor. Keep your front foot flat. Squeeze the glute of your back leg. This is the secret: if you do not squeeze the glute, you are not stretching the hip flexor. Tuck your tailbone under slightly and lean your hips forward.
You should feel a stretch in the front of the hip of your kneeling leg. Keep your torso upright—do not lean forward over your front knee. Hold for 45 to 60 seconds per side. This simple movement does more for lower back pain than almost any other corrective exercise.
9. Figure-Four Stretch for Glute Relief
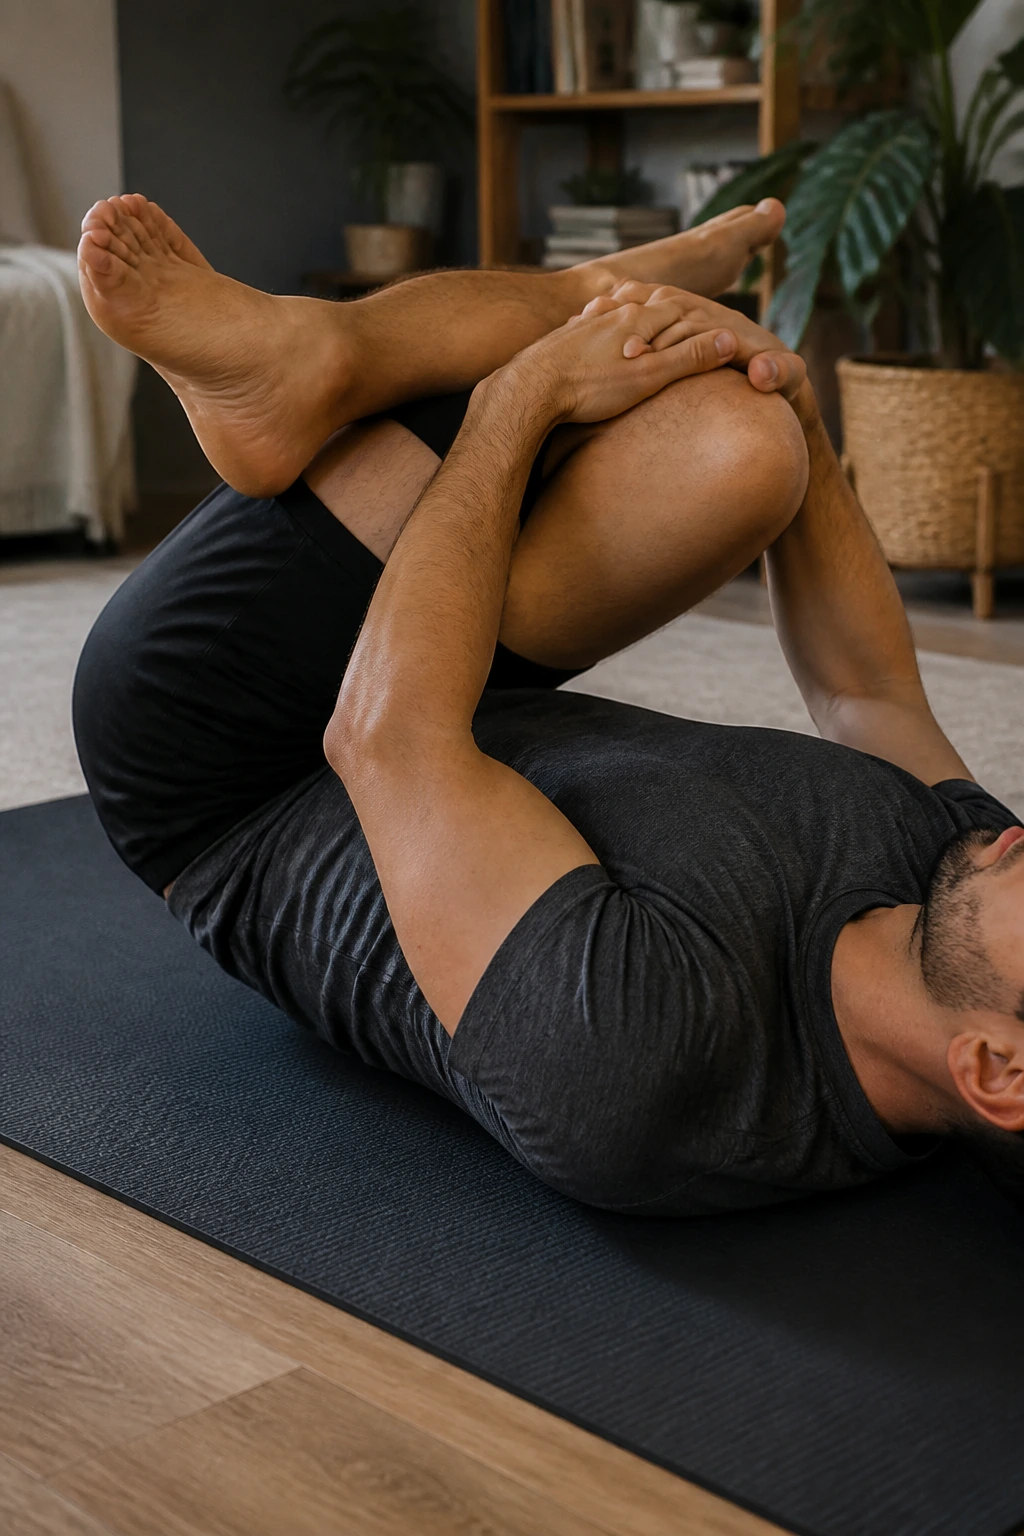
When the glutes are tight, they can cause a cascade of tension that affects the lower back and hips. This stretch is a staple in physical therapy for anyone dealing with lower-body tension.
Lie on your back with your knees bent and feet flat on the floor. Cross your right ankle over your left knee. Reach through the gap between your legs and pull your left thigh toward your chest. Keep your head and shoulders relaxed on the floor.
Listen to your body here. You should feel a deep stretch in the outer hip of the crossed leg. If you feel pain in the knee, back off. If you need more intensity, gently push your right knee away from your body with your right elbow while pulling the left leg closer. Hold for one minute per side.
10. Thoracic Extension on a Foam Roller
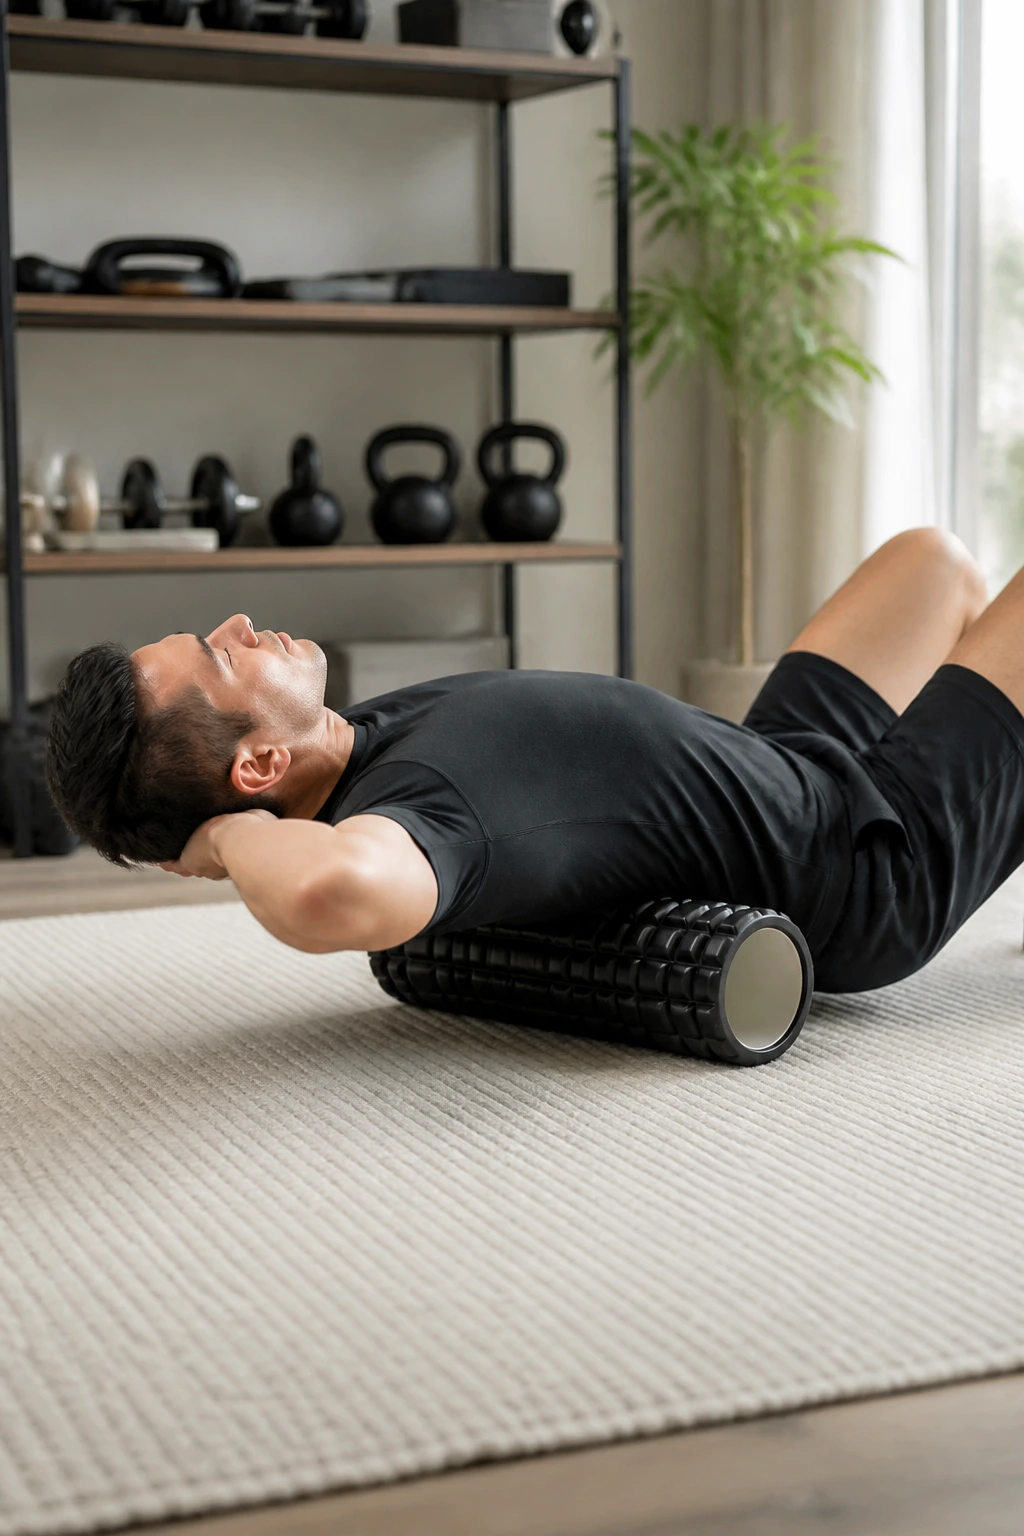
The thoracic spine is meant to rotate and extend (bend backward). When we sit, we lose that extension. Using a foam roller is a way to force your spine into a neutral, extended position.
Place a foam roller horizontally across the floor. Lie back on it so the roller is positioned directly under your mid-back (the thoracic spine—do not go too low into your lumbar). Support your head with your hands to avoid straining your neck. Keep your hips on the floor and slowly drape your upper back over the roller.
Breathe deeply. With every exhale, try to let your upper back relax further over the roller. You might hear a few pops or cracks—that is usually just the joints releasing tension. Do not roll up and down rapidly. This should be a static stretch for opening up the spine. Spend two minutes here.
11. Neck Side-to-Side Stretch

The upper trapezius and levator scapulae muscles often become tight from carrying stress in the shoulders. This stretch helps release that tension, creating the space you need for a longer, more elegant neck.
Sit or stand comfortably. Drop your right ear toward your right shoulder. To intensify the stretch, reach your left hand down toward the floor, keeping your fingers active. You will feel a stretch along the left side of your neck.
Do not pull on your head with your hand. Let the weight of your head do the work, or use your right hand to gently guide it if you really need extra pressure, but be extremely careful. Hold for 30 seconds on each side. Focus on dropping that opposite shoulder down—that is where the magic happens.
12. Forward Fold for the Posterior Chain
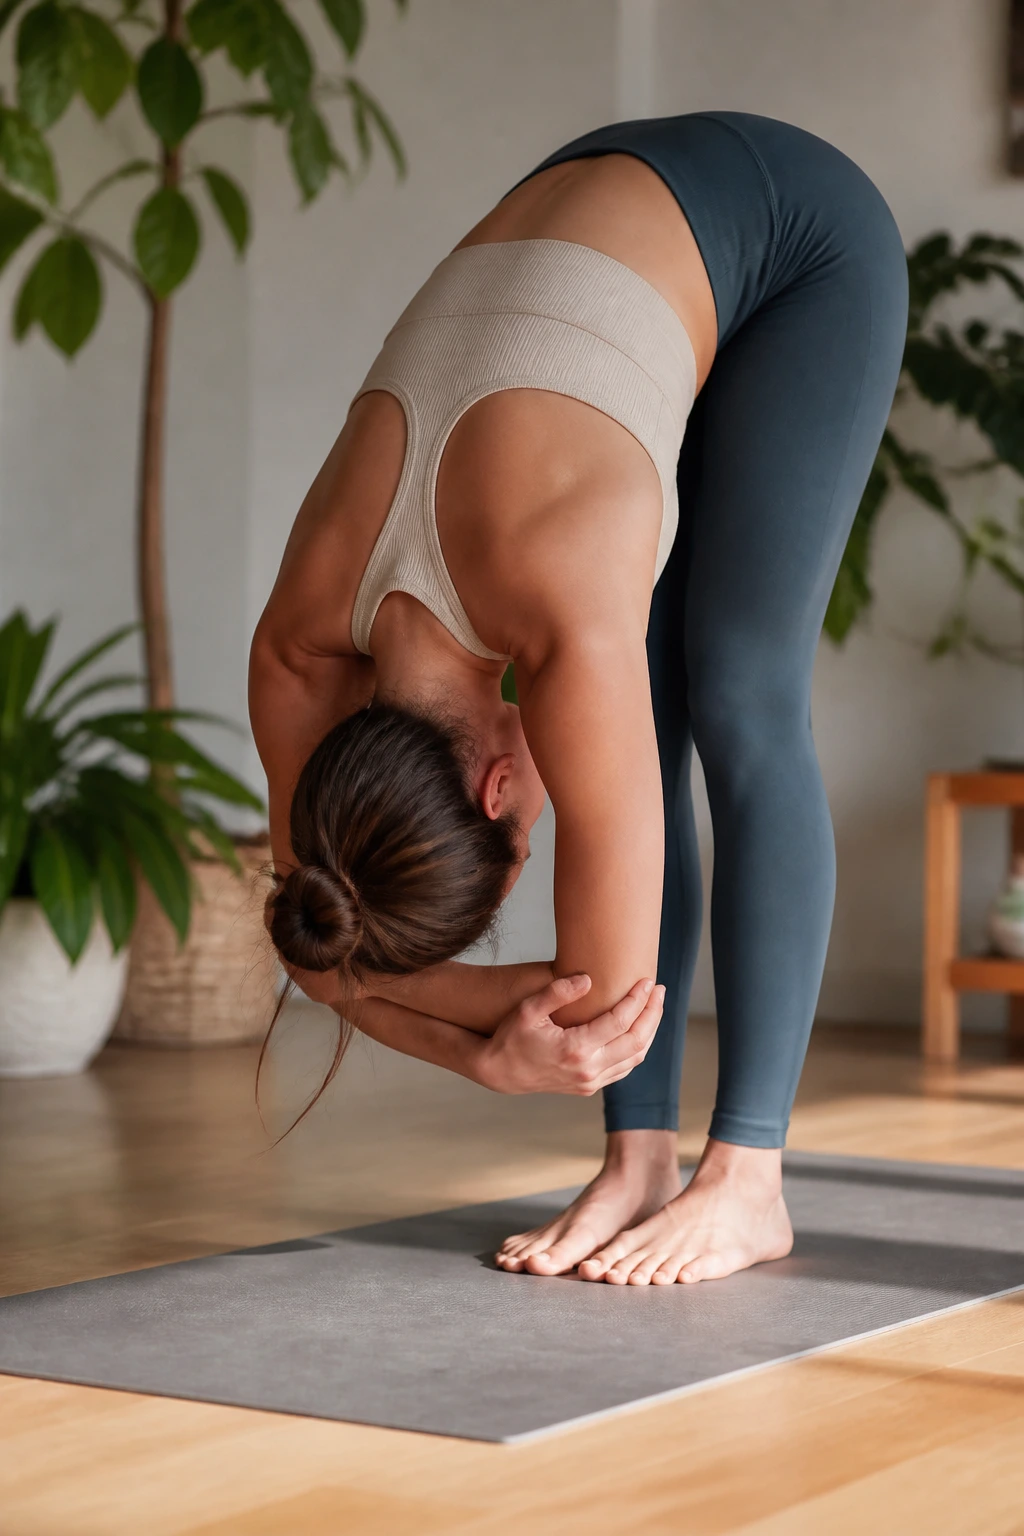
Your hamstrings are connected to your pelvis. When they are tight, they pull on your pelvis, contributing to that rounded-back posture we are trying to fix. A forward fold helps lengthen the entire posterior chain, from your heels up to your skull.
Stand with feet hip-width apart and a soft bend in your knees. Hinge at the hips, not the waist, and let your torso drape over your legs. Let your head hang heavy—do not look forward. You can hold your opposite elbows with your hands to create a little extra weight and traction for your spine.
Allow gravity to do the work. If your hamstrings are very tight, bend your knees more. This is not about touching your toes; it is about decompressing your spine. Sway gently from side to side to help release the lower back muscles. Hold for one minute.
13. Cobra Pose for Anterior Opening
We have focused a lot on the back, but opening the front of the body is equally important for posture. Cobra pose stretches the abdominal muscles and the front of the shoulders, which usually get collapsed when we hunch.
Lie face down on the floor. Place your hands under your shoulders. Press into your hands to lift your chest off the floor, keeping your elbows slightly bent and your hips firmly on the ground. Draw your shoulders away from your ears and look forward—not up, which can crunch the neck.
Engage your glutes. This protects the lower back. If you feel any sharp pain in your spine, lower yourself immediately. This is a front-body opener, not a back-bending competition. Hold for 30 seconds, breathing steadily.
14. Butterfly Stretch for Inner Hips
Posture is a full-body system. If your hips are internally rotated, your pelvis will follow, and your spine will compensate. The butterfly stretch opens the inner thighs and encourages the hips to rotate externally, which is the position we rarely find ourselves in while sitting.
Sit on the floor with the soles of your feet touching. Let your knees fall open to the sides. Hold your feet or ankles and, keeping your spine straight, gently hinge forward from the hips. Use your elbows to apply gentle pressure to your inner thighs if you need more stretch.
Do not round your back. Try to lead with your chest. If you feel like you are folding yourself into a ball, pull your feet further away from your body to decrease the intensity and prioritize the hinge. Hold for one to two minutes.
15. Cow Face Arms for Shoulder Mobility
This is a deep stretch for the shoulders and the triceps. It is particularly helpful for those who have restricted shoulder mobility, which is common in people who do a lot of repetitive overhead movements or, conversely, very little movement at all.
Reach your right arm overhead, bend the elbow, and place your palm down the center of your back. Reach your left arm behind your back and try to clasp your right fingers. If you cannot touch, use a strap, a towel, or just reach as far as you can.
The key is to keep your top elbow pointing straight toward the ceiling—do not let it flare out to the side. This opens the tight shoulder capsule. Hold for 30 seconds, then switch sides. You will likely notice that one side is significantly tighter than the other; spend more time on the tighter side.
16. Eagle Arms for Scapular Release
This stretch targets the rhomboids and the trapezius, the muscles that sit between your shoulder blades. It is a fantastic “counter-pose” to typing.
Extend your arms in front of you. Cross your right arm under your left, and try to wrap your hands so your palms touch. If that is not possible, just hold your shoulders with opposite hands and squeeze your elbows together. Lift your elbows up to shoulder height and move them away from your face.
You should feel a significant stretch in the back of your shoulders. Hold the tension for a moment, then release. This is an active stretch. As you hold, you might feel a tingling sensation—that is just blood flow returning to these chronically tense areas. Hold for 30 seconds per side.
17. Seated Spinal Twist
A gentle twist is perfect for releasing tension in the lower back and thoracic spine. It helps wring out the stiffness that accumulates during a day of sitting.
Sit on the floor with your legs extended. Cross your right leg over your left. Place your right hand behind you for support. Wrap your left arm around your right knee and gently twist your torso to the right, looking over your right shoulder.
Make sure you are sitting on both sit-bones evenly—don’t let one hip lift off the ground. Grow tall with every inhale and twist deeper with every exhale. This is about spinal rotation, not forcing your body into a knot. Hold for 30 seconds on each side.
18. Reverse Tabletop for Front Body Strength
We have talked about stretching, but sometimes posture requires a bit of activation. The reverse tabletop strengthens the back of the body while stretching the front.
Sit with your feet flat on the floor, knees bent. Place your hands on the floor behind you, fingers pointing toward your heels. Lift your hips toward the ceiling until your body forms a straight line from your knees to your shoulders.
Squeeze your glutes and press your chest upward. Do not let your head hang back if it causes neck pain; keep your gaze toward the ceiling. Hold for 15 to 30 seconds. This activates the posterior chain and forces the shoulders to pull back, which is exactly the position we need to internalize for better posture.
19. Standing Lat Stretch
The lats are massive muscles that run from your shoulders down to your lower back. When they are tight, they pull your shoulders down and forward, contributing to a hunched look.
Stand tall and reach your right arm over your head. Grab your right wrist with your left hand. Lean your body to the left while pulling gently on your right arm. You will feel a stretch all the way from your armpit down to your hip.
Keep your feet firmly planted and your core tight. Do not rotate your chest toward the floor; keep your torso facing forward. Hold for 30 seconds and then repeat on the other side. This creates space in the side body, which helps with deeper, more diaphragmatic breathing.
20. Supine Twist for Total Decompression
This is the perfect way to end your stretching routine. It is restorative, relaxing, and helps realign the spine after you have put it through the work of the other stretches.
Lie on your back with your arms extended to the sides like a “T.” Bring your knees into your chest, then drop both legs to the right side of your body. Keep both shoulders glued to the floor. If your knees don’t touch the floor, place a pillow or block under them. Turn your head to the left to complete the rotation.
Close your eyes. Let your entire body go limp. This is not a stretch to “push” into; it is a stretch to “melt” into. Hold for one minute on each side, letting your spine return to a neutral, relaxed state.
Final Thoughts
Improving your posture is not a sprint; it is an accumulation of small habits. You do not need to become a yogi or spend an hour a day on the floor to see changes. If you can pick just three or four of these stretches to do in the morning or as a quick break during your day, you will start to notice that your body feels different. You will feel taller, less restricted, and more aware of how you are holding yourself.
Consistency beats intensity every time. Doing five minutes of focused, high-quality stretching daily is worth infinitely more than a single hour-long session once a week. Listen to your body—it will tell you exactly which areas are locked up and need your attention. When you find those tight spots, stay there. Breathe into the resistance. Over time, that resistance will dissolve, and you will find yourself moving through the world with a little more ease and a little less weight on your shoulders.
