



You have probably woken up with that stiff, rusted-hinge feeling at least once. Your lower back complains when you bend to tie your shoes, or your shoulders hunch forward after a long stint at a desk, leaving you feeling like a marionette with tangled strings. We often treat flexibility as an afterthought—something to attend to only if we have extra time—but the reality is that tight tissues act like a governor on your performance. They restrict your range of motion, limit your explosive power, and increase your vulnerability to those annoying, nagging injuries that seem to appear out of nowhere.
Getting loose isn’t about becoming a contortionist; it is about reclaiming the movement patterns you were born with. When you improve your mobility, you aren’t just getting “stretchy.” You are literally teaching your nervous system that it is safe to move through larger ranges of motion without hitting the emergency brake. This requires a shift in approach. You cannot simply bounce your way into a split and expect results. It requires intentional, consistent loading and lengthening of the fascia and muscle tissue.
The following movements are not a “one-and-done” routine. Instead, view them as a menu of options to integrate into your daily life. Some are best suited for post-workout cool-downs when the muscles are warm and pliable, while others act as perfect “movement snacks” to break up sedentary blocks during your day. By committing to exploring these ranges, you start to rewrite your baseline. You move from stiff and guarded to fluid and functional, effectively oiling the joints of your daily life.
1. Toe Touch Reach
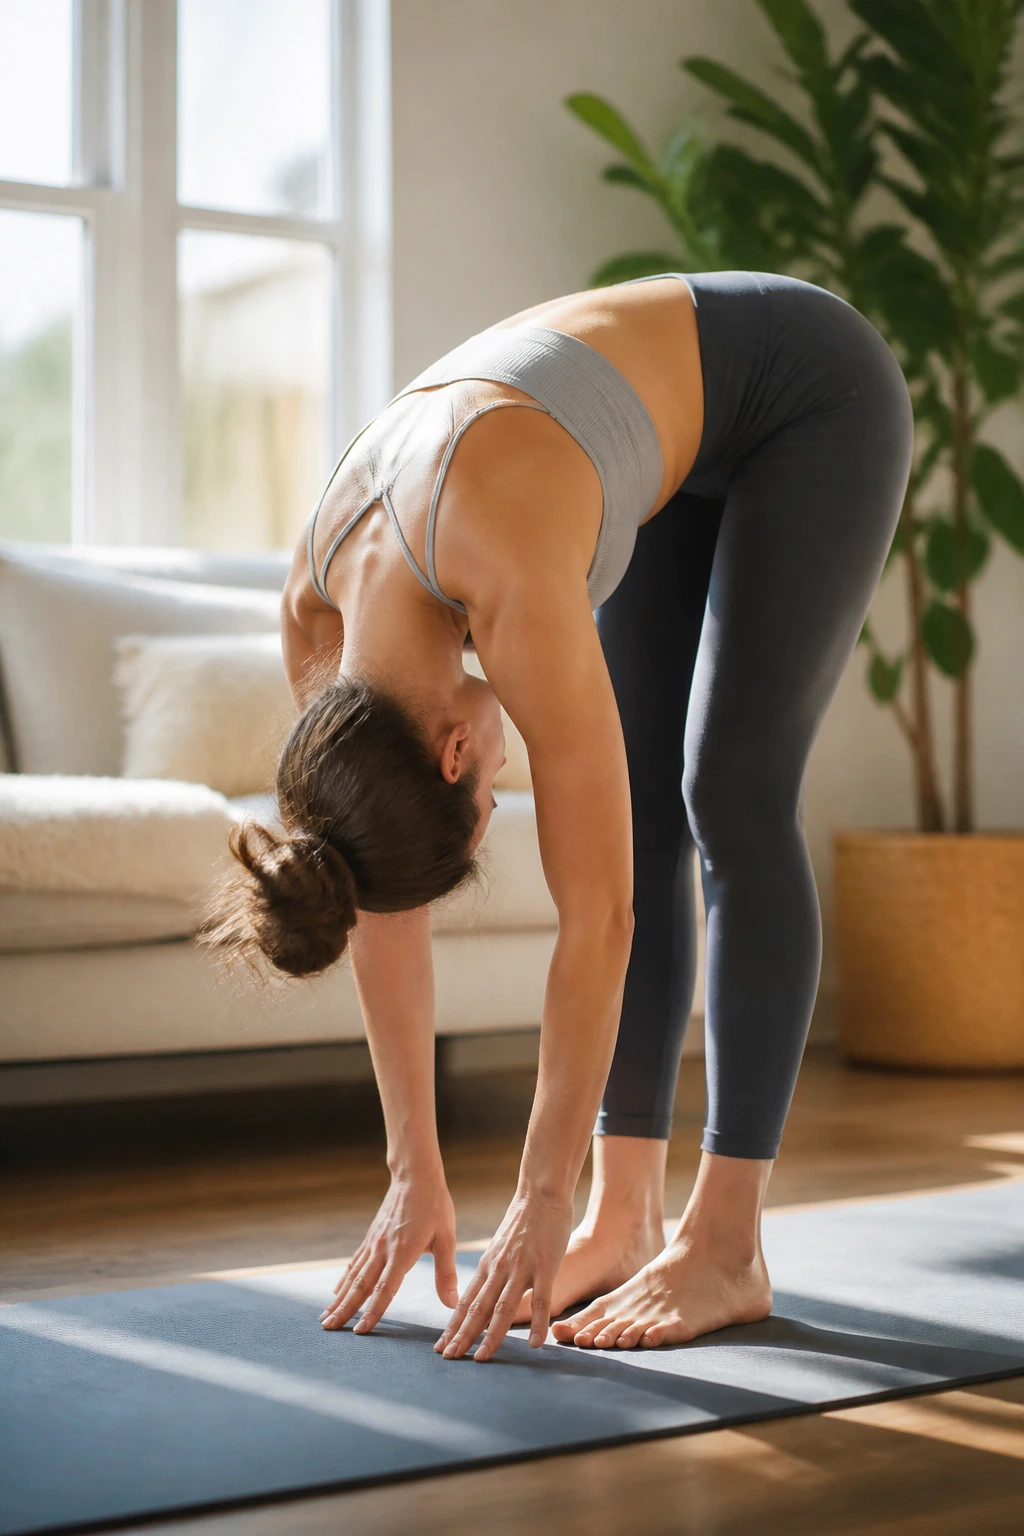
Most people approach the standing toe touch like a test of ego, trying to force their fingertips to the floor by jerking their torso downward. This is the fastest way to irritate your lower back and tighten your hamstrings further. Your nervous system detects the sudden tension and creates a protective contraction, which is the exact opposite of what you want. Instead, approach this from a place of relaxation.
The Mechanics of the Fold
Stand with your feet hip-width apart and a very slight bend in your knees. This micro-bend is critical—it prevents you from hyper-extending the joint and allows the hamstrings, rather than the tendons behind the knee, to take the load. Hinge at your hips, not your waist. Imagine your pelvis is a bucket tipping forward. As you lower your torso, keep your spine relatively neutral rather than rounding it into a C-shape immediately.
- Focus on the breath: Inhale to prepare, and as you exhale, let your head and neck hang heavy.
- The hanging weight: Use your arms to create a gentle, gravity-assisted pull.
- The cue: Think about reaching your sit-bones toward the ceiling rather than your fingers toward the floor.
Pro tip: If your hamstrings feel like steel cables, stand on a slightly elevated surface—like a sturdy book or a yoga block—to give your fingers more room to travel before hitting the floor.
2. Deep Lunge Hip Opener
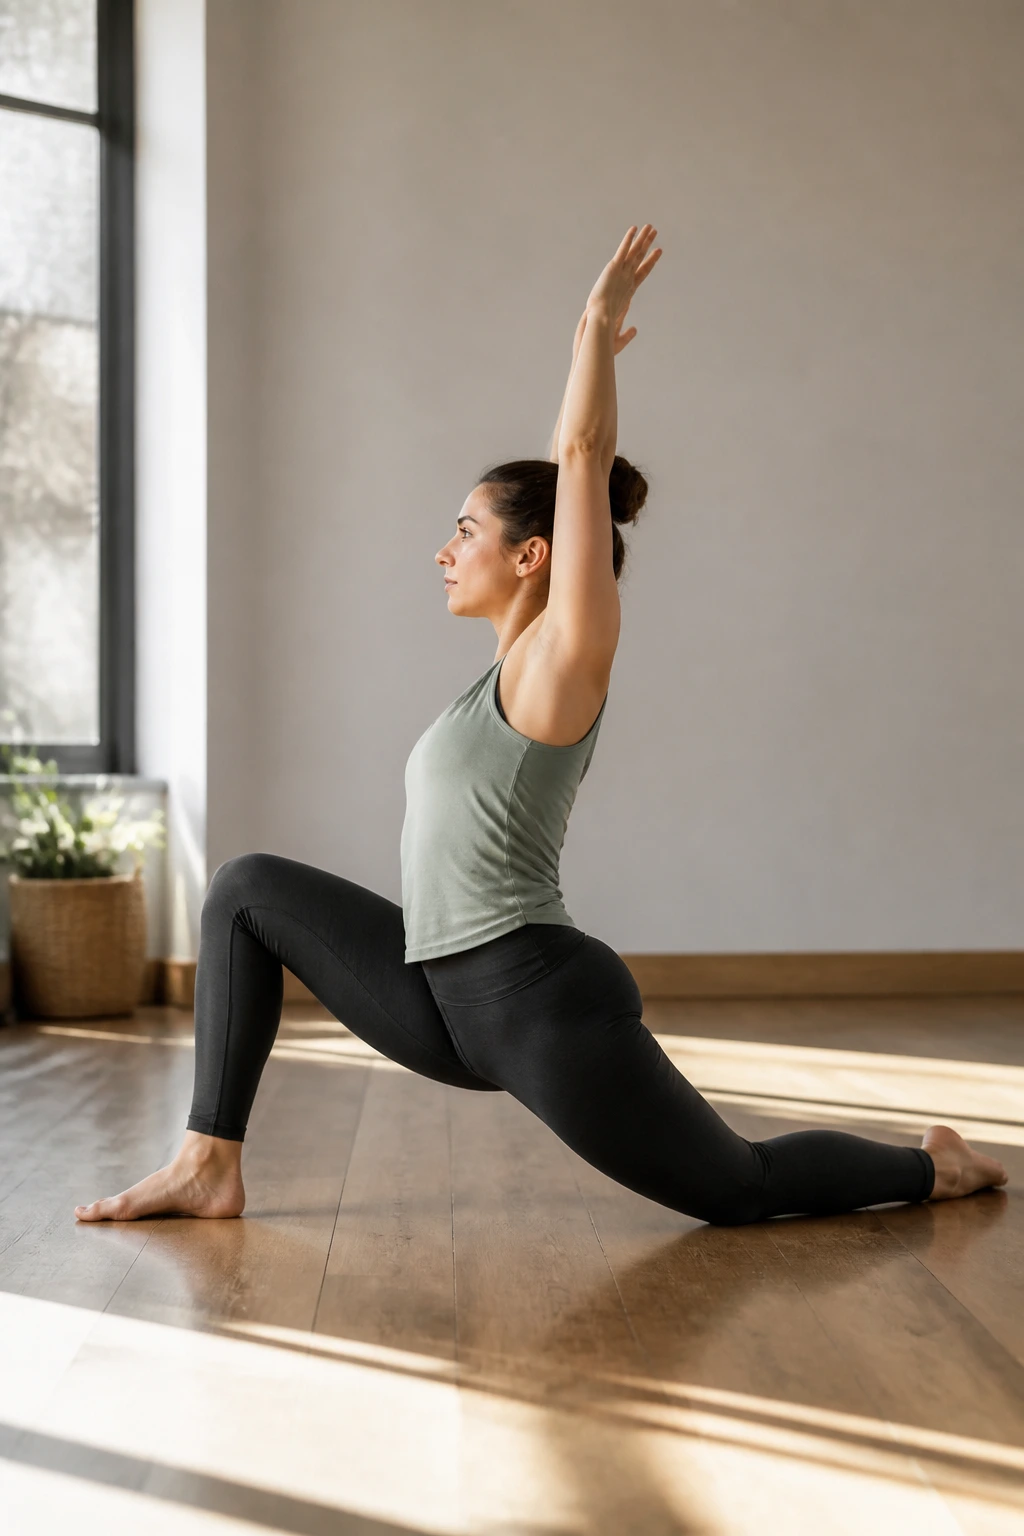
Your hip flexors spend most of the day in a shortened, contracted state. Whether you are sitting in a car, a desk chair, or a couch, these muscles are essentially “off” and tight. This constant state of contraction pulls on the pelvis, contributing to that lower back ache that feels like a persistent, dull throb. The deep lunge is your primary tool for reversing this compression.
How to Execute Properly
Step one foot forward into a wide lunge, dropping the back knee to the ground. Keep your torso upright. This is the crucial part: tuck your tailbone. If you arch your back, you are bypassing the hip flexor and dumping the load into your lumbar spine. Squeeze the glute of the back leg. That simple contraction of the glute sends a signal to the hip flexor to release—a concept known as reciprocal inhibition.
- Engage the core: Keep your ribcage stacked over your pelvis.
- Add a reach: If your balance allows, reach the arm on the same side as the back knee toward the ceiling and slightly across your body to target the oblique and psoas connection.
- Duration: Hold for sixty seconds per side, focusing on steady, rhythmic breathing rather than holding your breath through the tension.
3. Cat-Cow Spine Release
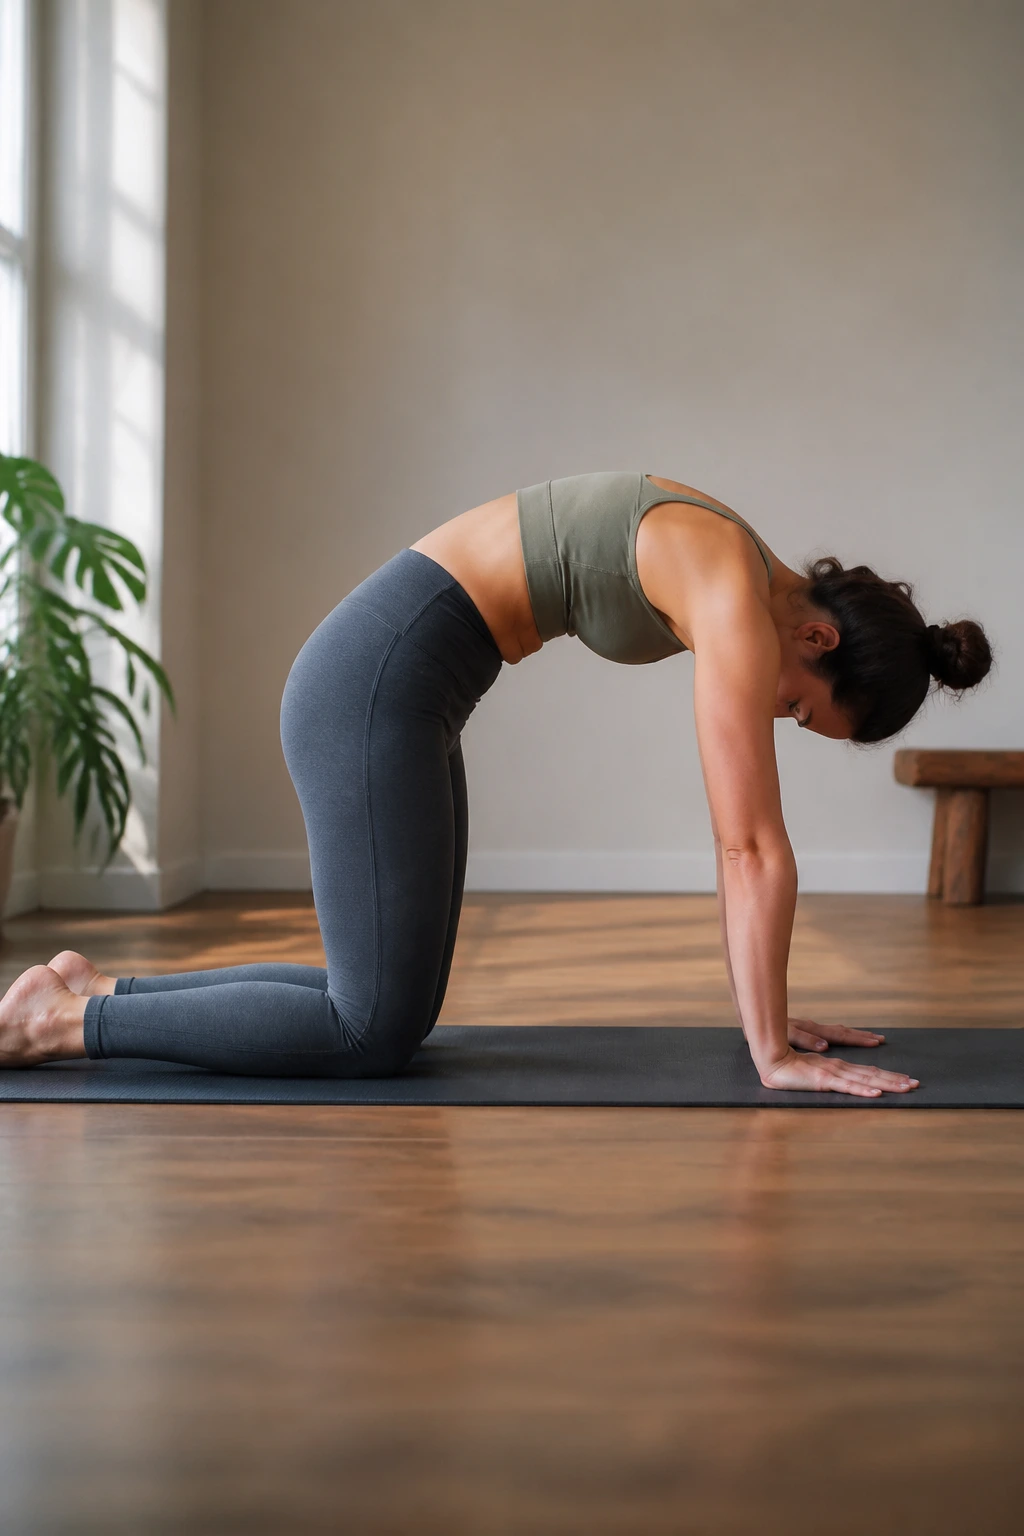
Does your back feel locked up in the morning? The cat-cow sequence is perhaps the most effective way to wake up the segments of your spine. It works on the principle of articulating each vertebra individually, moving away from the “blocked” movement where the whole back moves as one stiff rod. Get on your hands and knees in a tabletop position, with wrists directly under shoulders and knees under hips.
Finding the Rhythm
Start the “cow” movement by dropping your belly toward the floor, lifting your chest, and looking forward, creating a gentle arch. This is an inhale. Follow this with the “cat” movement: exhale, press the floor away, and round your entire spine toward the ceiling, tucking your chin to your chest. Your shoulder blades should move apart during the “cat” phase.
Most people rush this. They treat it like a cardio move, banging out twenty reps in ten seconds. Slow down. Spend three full seconds on the transition between each pose. Feel the stretch move from your tailbone, through the thoracic spine, and finally into the neck. It is not about hitting the maximum range of motion; it is about finding smooth, pain-free control in every inch of the path.
4. Pigeon Pose for Glutes
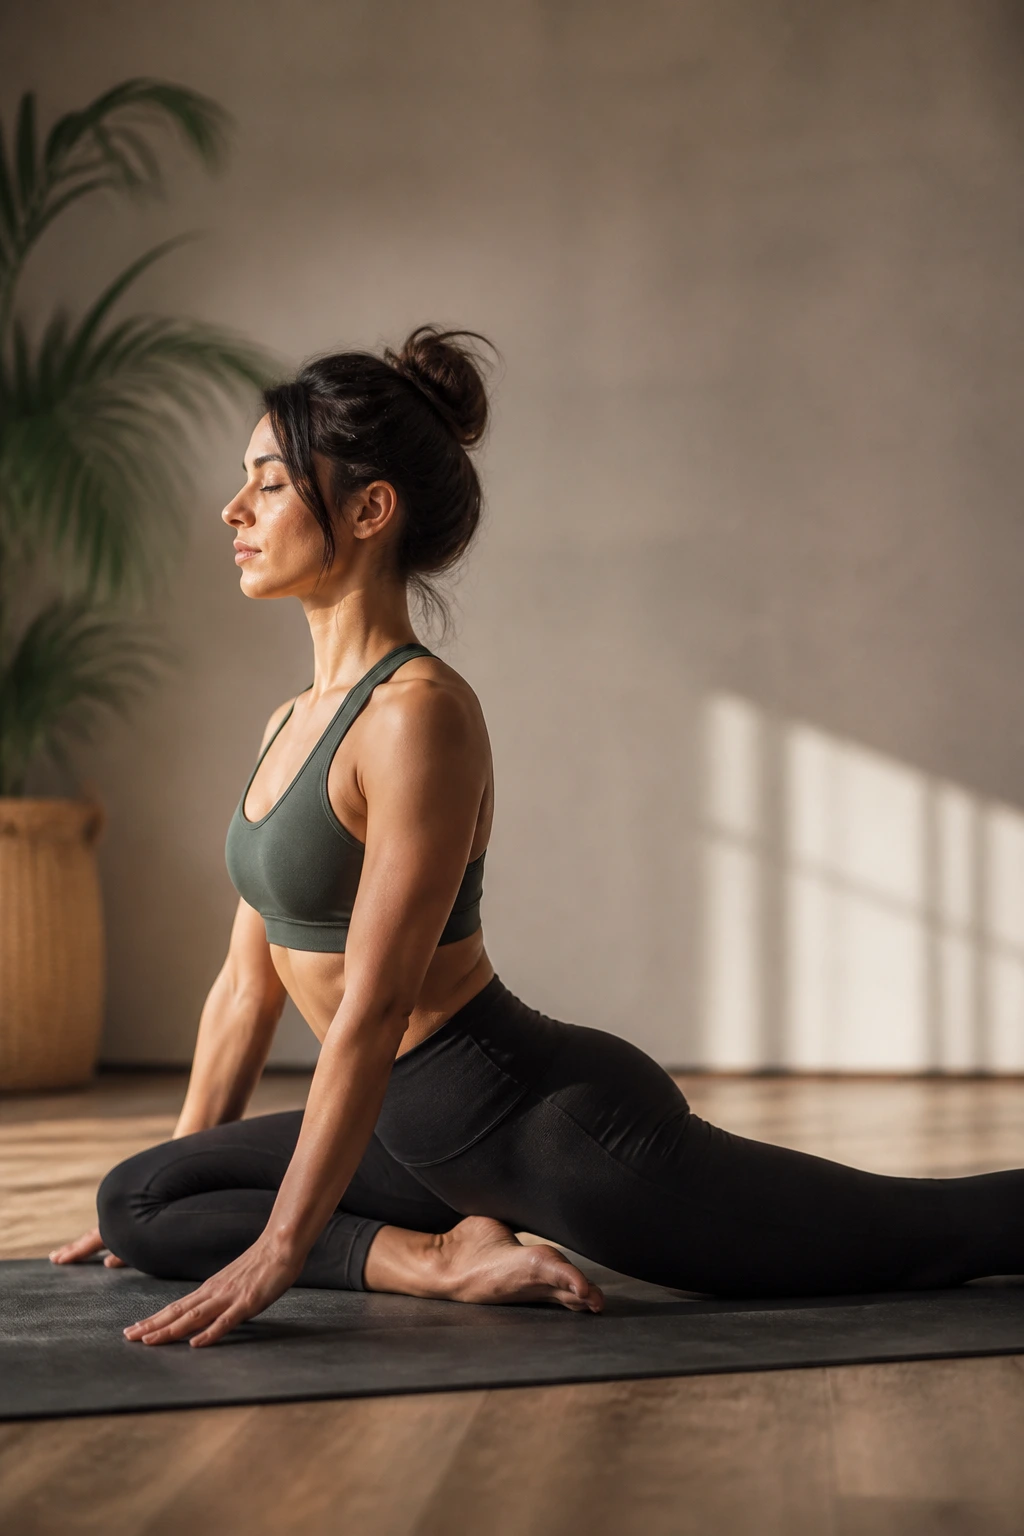
If you feel a deep, throbbing ache in your hip after a long day, the pigeon pose is your remedy. It targets the piriformis—a small, stubborn muscle buried deep under your glutes that loves to trap the sciatic nerve when it gets too tight. This pose is intense, so do not force it. You want to feel a “good” sensation of tension, not sharp or shooting pain.
Setting Up the Angle
Bring one knee forward and place it behind your wrist on the same side. The angle of your shin determines the intensity: a shin parallel to the front of the mat is the most advanced, while bringing the heel closer to your opposite hip bone makes it significantly more accessible. Extend the back leg straight behind you, ensuring your hips remain square to the front.
- Use support: Place a yoga block or a thick book under the glute of the bent-leg side if your hip is hovering far off the floor.
- Fold forward: Slowly walk your hands out, lowering your chest toward the ground.
- Watch the knee: If you feel any strain in the knee joint, stop immediately. Adjust your foot position or back off the depth of the pose.
5. Butterfly Inner Thigh Stretch
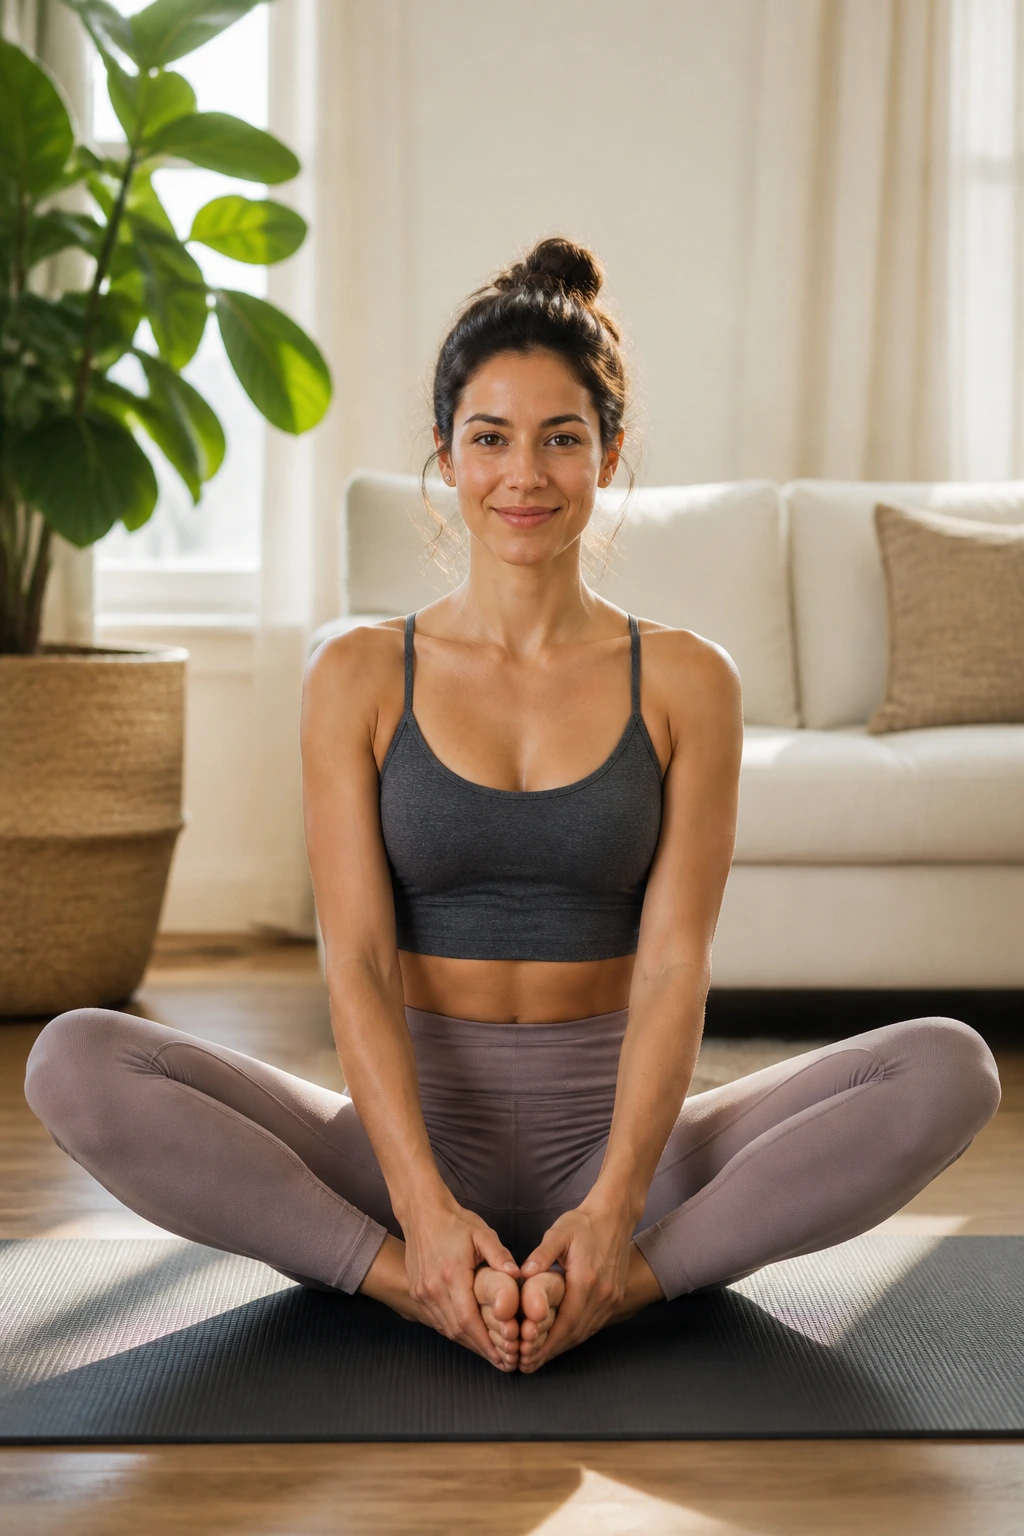
Adductor tightness is an invisible contributor to knee pain and restricted squat depth. When those inner thigh muscles are too tight, they prevent your femurs from tracking properly during movement. The butterfly stretch is a classic for a reason: it puts you in a position to let gravity do the work of opening the hips.
Sit on the floor, bring the soles of your feet together, and let your knees drop outward. Here is where most people get it wrong: they try to pull their heels into their crotch and hunch over like a turtle. Instead, keep your heels a few inches away from your body—creating a diamond shape with your legs—and sit tall. Use your hands to hold your ankles, not your knees.
The shift: Imagine you are trying to tip your pelvis forward, rather than pulling your knees toward the floor. If you sit against a wall, it helps keep your spine straight, which isolates the stretch to the hips. Gently press your knees down, but avoid bouncing. Bouncing invites muscle tears and keeps the target tissue in a state of agitation.
6. Overhead Tricep Reach
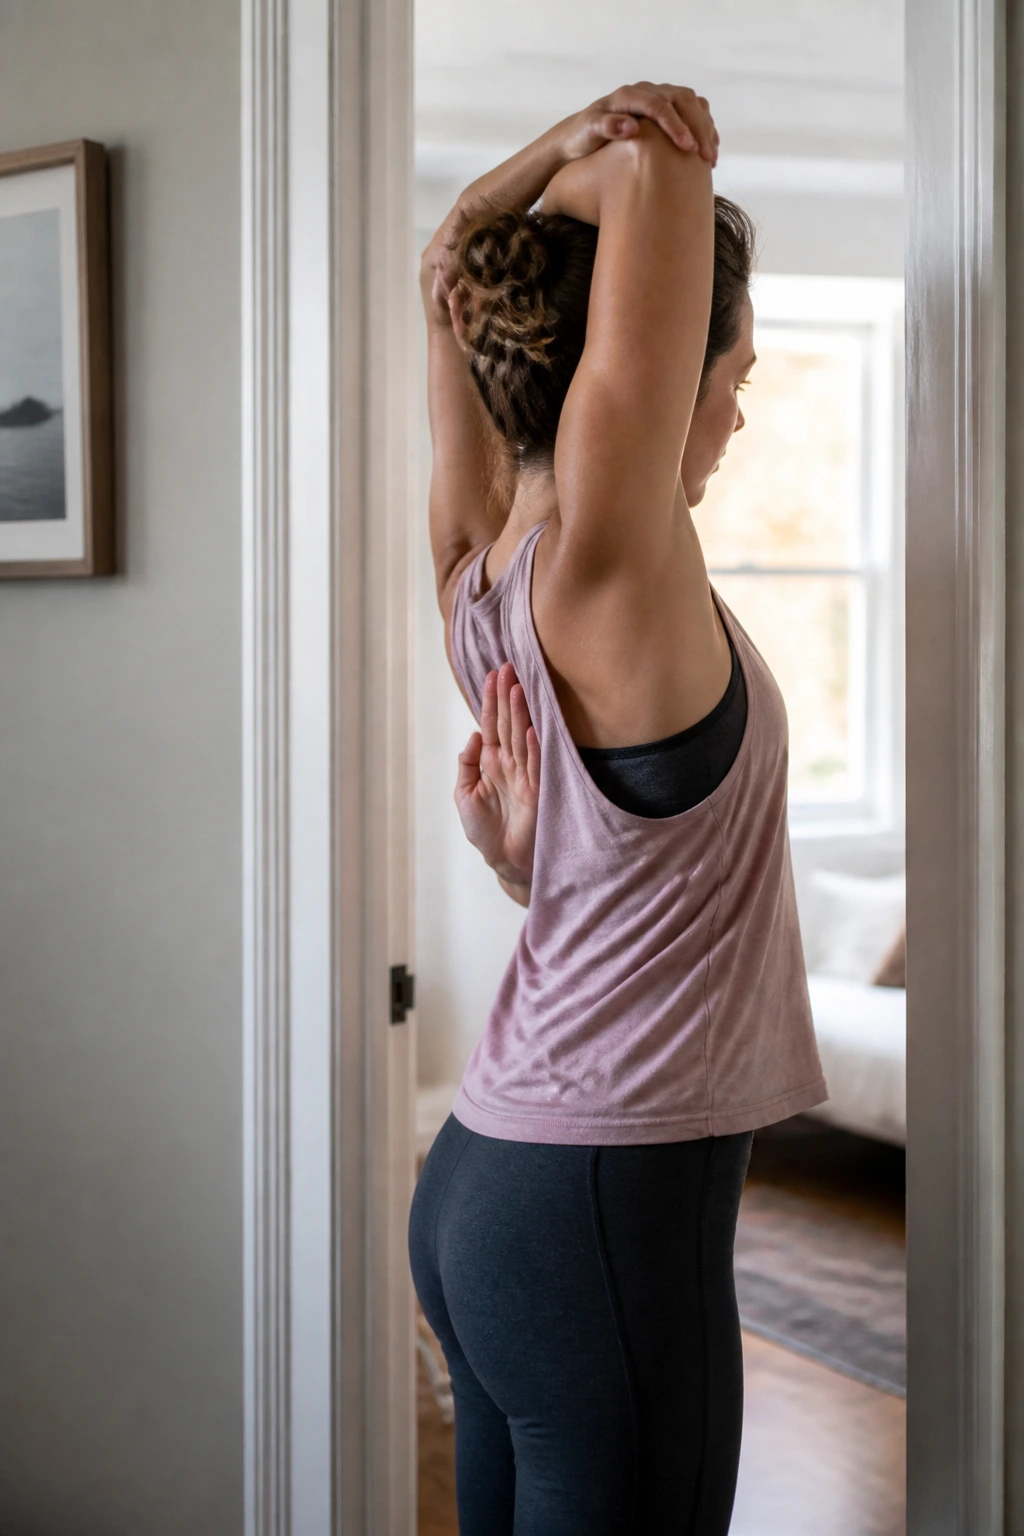
We carry a tremendous amount of stress in our shoulders and upper back. This stretch is a dual-threat move: it hits the triceps and the lats, which are large muscles that wrap around your side and connect to the humerus. When lats get tight, they pull your shoulders forward, contributing to that “slumped” posture.
To start, reach one arm overhead and bend the elbow, letting your hand rest between your shoulder blades. Take your opposite hand and gently nudge the elbow deeper toward the midline of your back. Keep your ribcage down. Don’t let your back arch to accommodate the reach. If you feel like your head is being shoved forward, push the back of your head into your arm.
This is a great movement to do while standing in a doorway or even while sitting at your desk. It resets the shoulder girdle. If you notice one side is drastically tighter than the other, spend an extra thirty seconds on the restricted side. We all have asymmetries, but you don’t want them becoming permanent fixtures of your anatomy.
7. Doorway Chest Opener
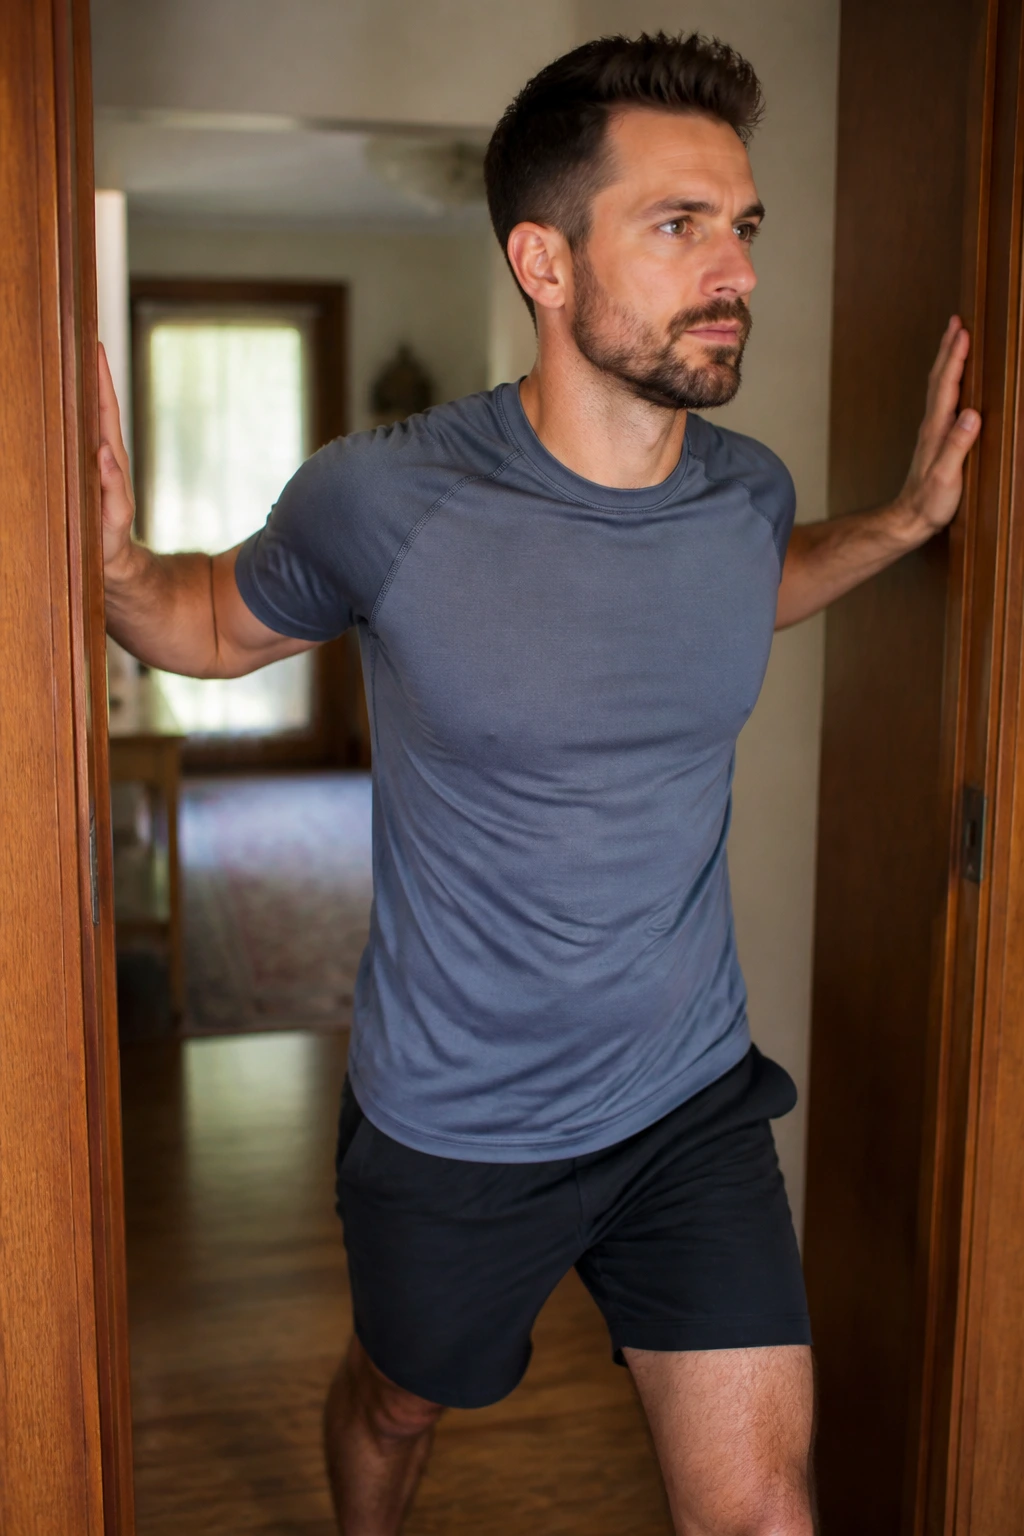
If you spend your life typing on a keyboard or driving, your pectoral muscles are essentially living in a state of permanent contraction. This creates a “rounded shoulder” appearance that makes you look smaller and less confident, not to mention the potential for impingement issues in the shoulder joint. The doorway chest opener is the antidote to the “computer hunch.”
Stand in a doorway, place your forearms against the frame with your elbows at shoulder height or slightly higher, and step one foot through the frame. You should feel a stretch across the front of your chest and into the front of your shoulders. Don’t overdo the step-through; you want a controlled pull, not a tear.
Why It Matters
- Breathing: When your chest is tight, your breathing is shallow. Opening the pectorals allows for deeper diaphragmatic breathing.
- Shoulder health: By lengthening the front, you stop the constant forward tugging on your shoulder blades, allowing them to rest back in a neutral position.
- The tweak: Experiment with changing the angle of your arms. Higher elbows hit the upper fibers; lower elbows target the middle.
8. Seated Spinal Twist
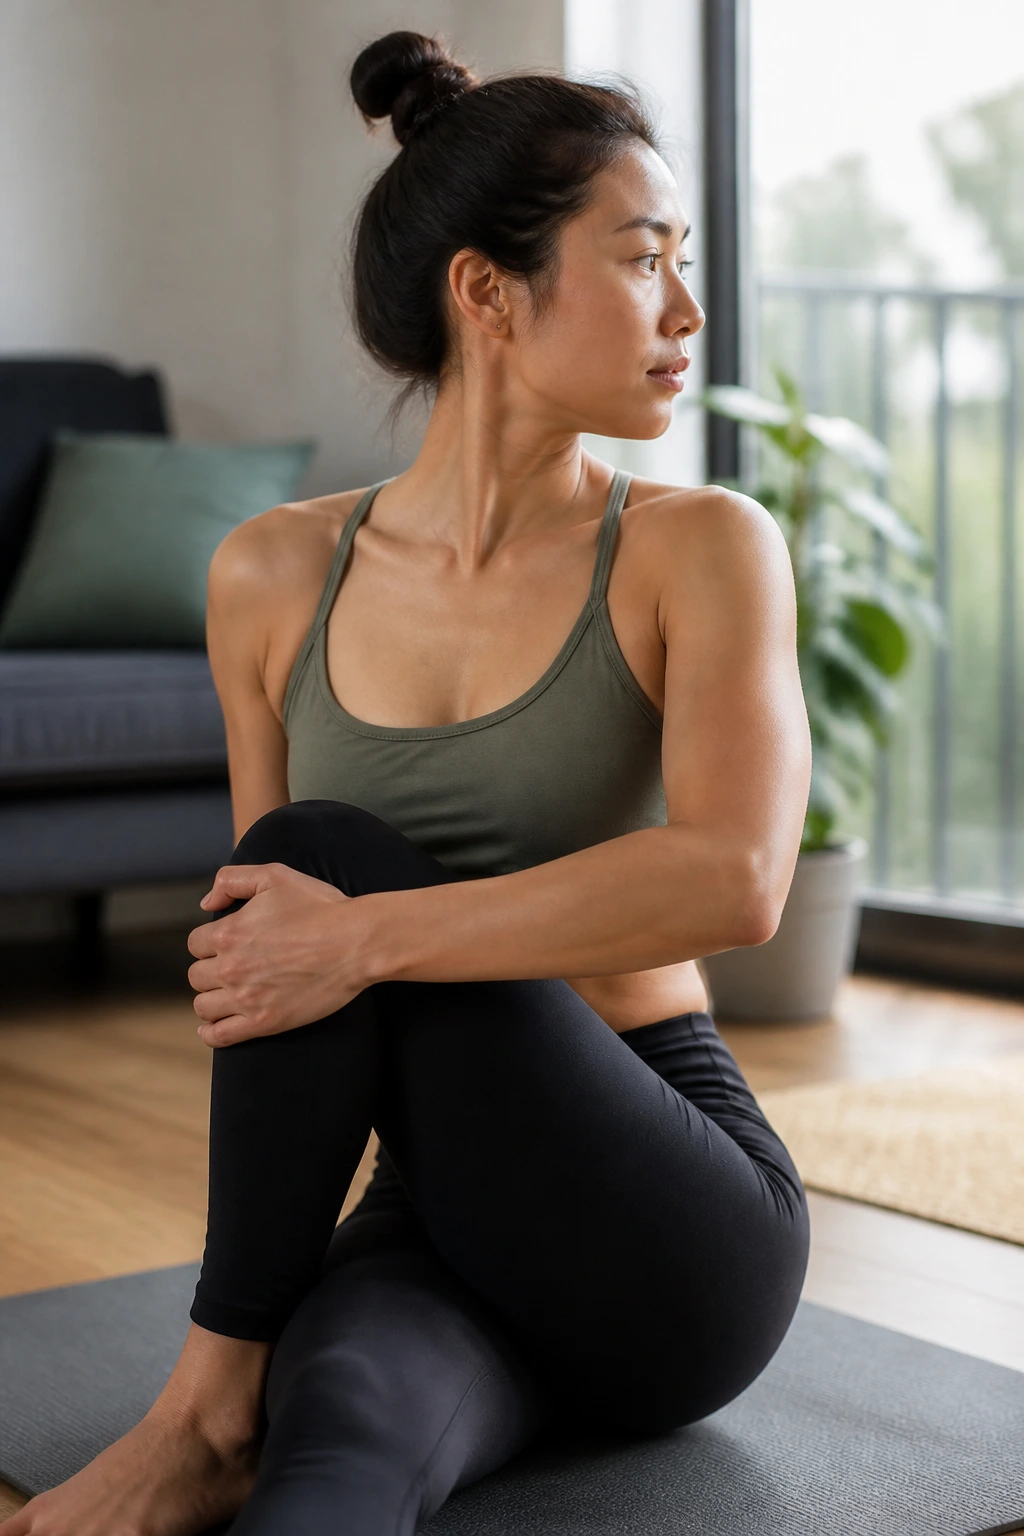
Rotation is a plane of movement that we almost completely ignore in modern exercise, yet it is essential for spinal health. The seated spinal twist provides a safe way to mobilize the thoracic spine, which is the middle section of your back. This area is notoriously stiff for most adults.
Sit on the floor with both legs extended. Cross your right foot over your left knee, planting the right foot firmly on the ground. Hug your right knee with your left arm—or if you have more range, hook your left elbow over the outside of the right knee. Place your right hand behind you for support, keeping your spine tall.
Guiding the Twist
Initiate the twist from your ribs, not your neck. Most people jerk their head around and think they are twisting, but they are just straining their cervical spine. Look over your back shoulder, but let the rotation happen through the torso. Inhale to lengthen your spine, exhale to deepen the twist. You should feel a wringing-out sensation through the abdomen and a release of tension in the mid-back.
9. Cobra Pose for Core Length
After a day of hunching over, the cobra pose is the perfect restorative movement. It isn’t just about the back; it is about lengthening the entire anterior chain—the front of the body. Lie on your stomach, legs extended behind you. Place your hands under your shoulders. Keep your elbows tucked close to your ribs—do not let them flare out like chicken wings.
The Gentle Lift
Press into your hands to lift your chest off the floor. Keep your pubic bone pressed into the mat; if your hips lift, you are moving into a deeper backbend than you might be ready for. You should feel this in your abs and the front of your ribcage. If you feel pinching in your lower back, lower yourself down.
The cue: Think about pulling your heart forward and up, rather than just crunching backward. This lengthens the spine as you extend it, which is the key to doing this safely. This pose is a reminder that flexibility is as much about front-to-back balance as it is about side-to-side range.
10. Downward Dog for Posterior Chain
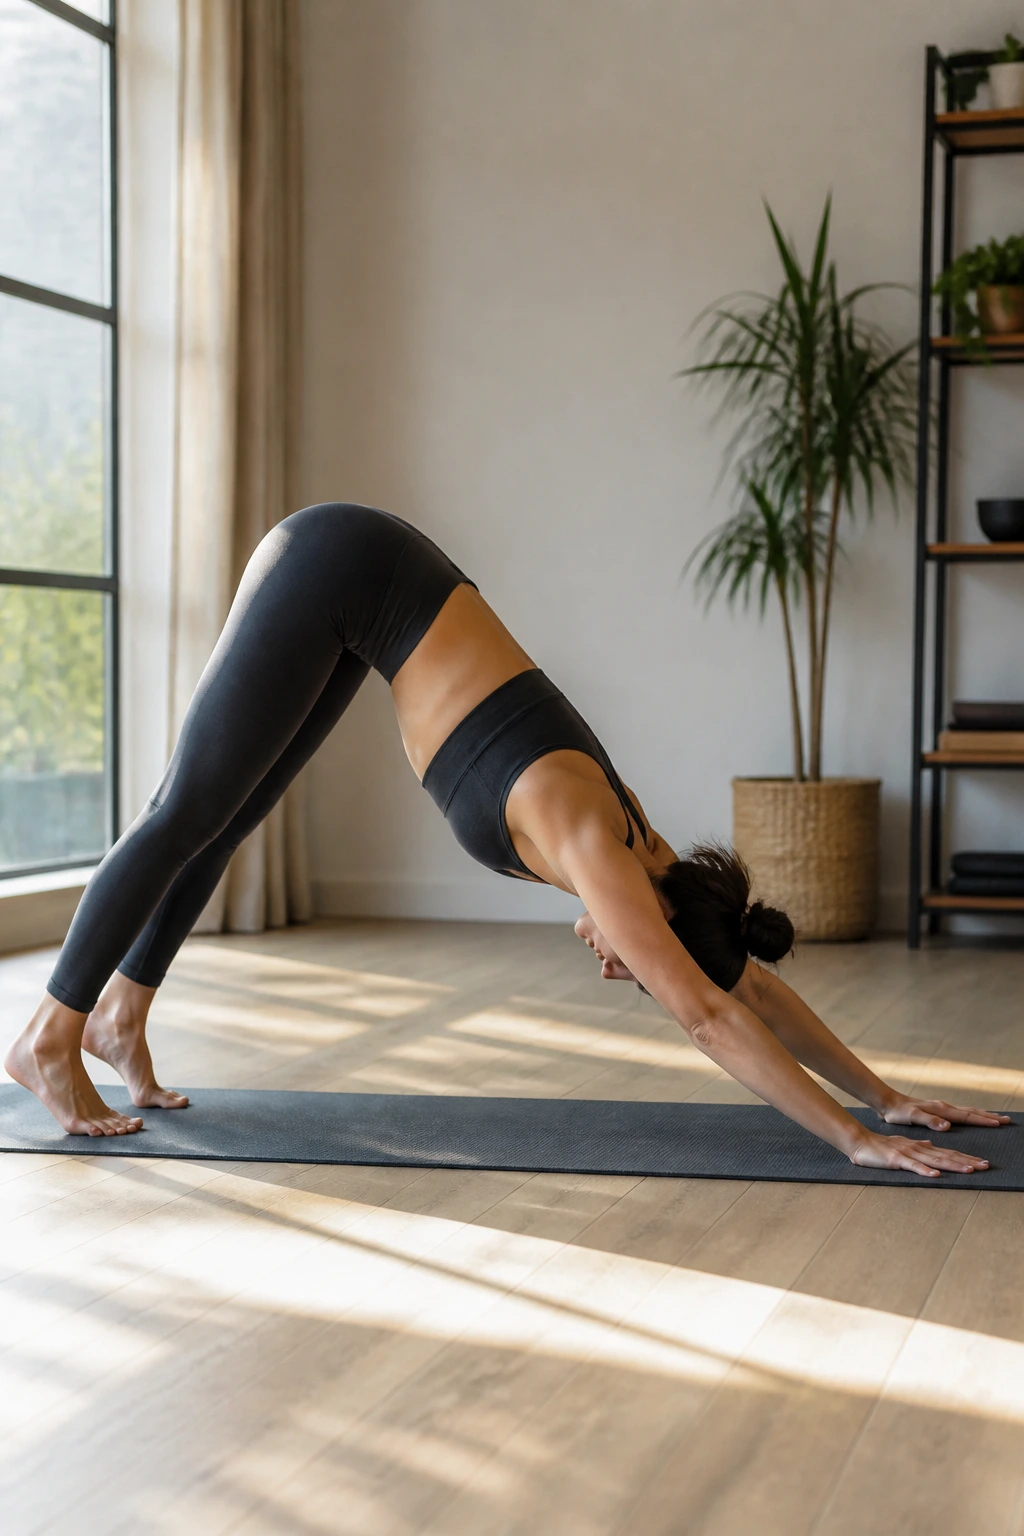
The “Down Dog” is a staple in many practices, and for good reason—it is the ultimate full-body integration stretch. It hits the calves, hamstrings, back, and shoulders all in one go. If you are a runner, this is non-negotiable.
Start on your hands and knees. Tuck your toes, lift your hips high, and press your chest back toward your knees. Imagine your body is an inverted “V.” Do not worry if your heels do not touch the floor. In fact, keep a slight bend in your knees if your hamstrings feel tight. The goal is a straight line from your wrists to your hips.
The active stretch: Peddle your feet. Bend one knee while pressing the opposite heel toward the floor. This dynamic action allows you to focus on the calf muscles, which are often the true culprit behind tight hamstrings. Press into the floor with your fingertips to take the weight out of your wrists.
11. Quad Stretch with Wall Support
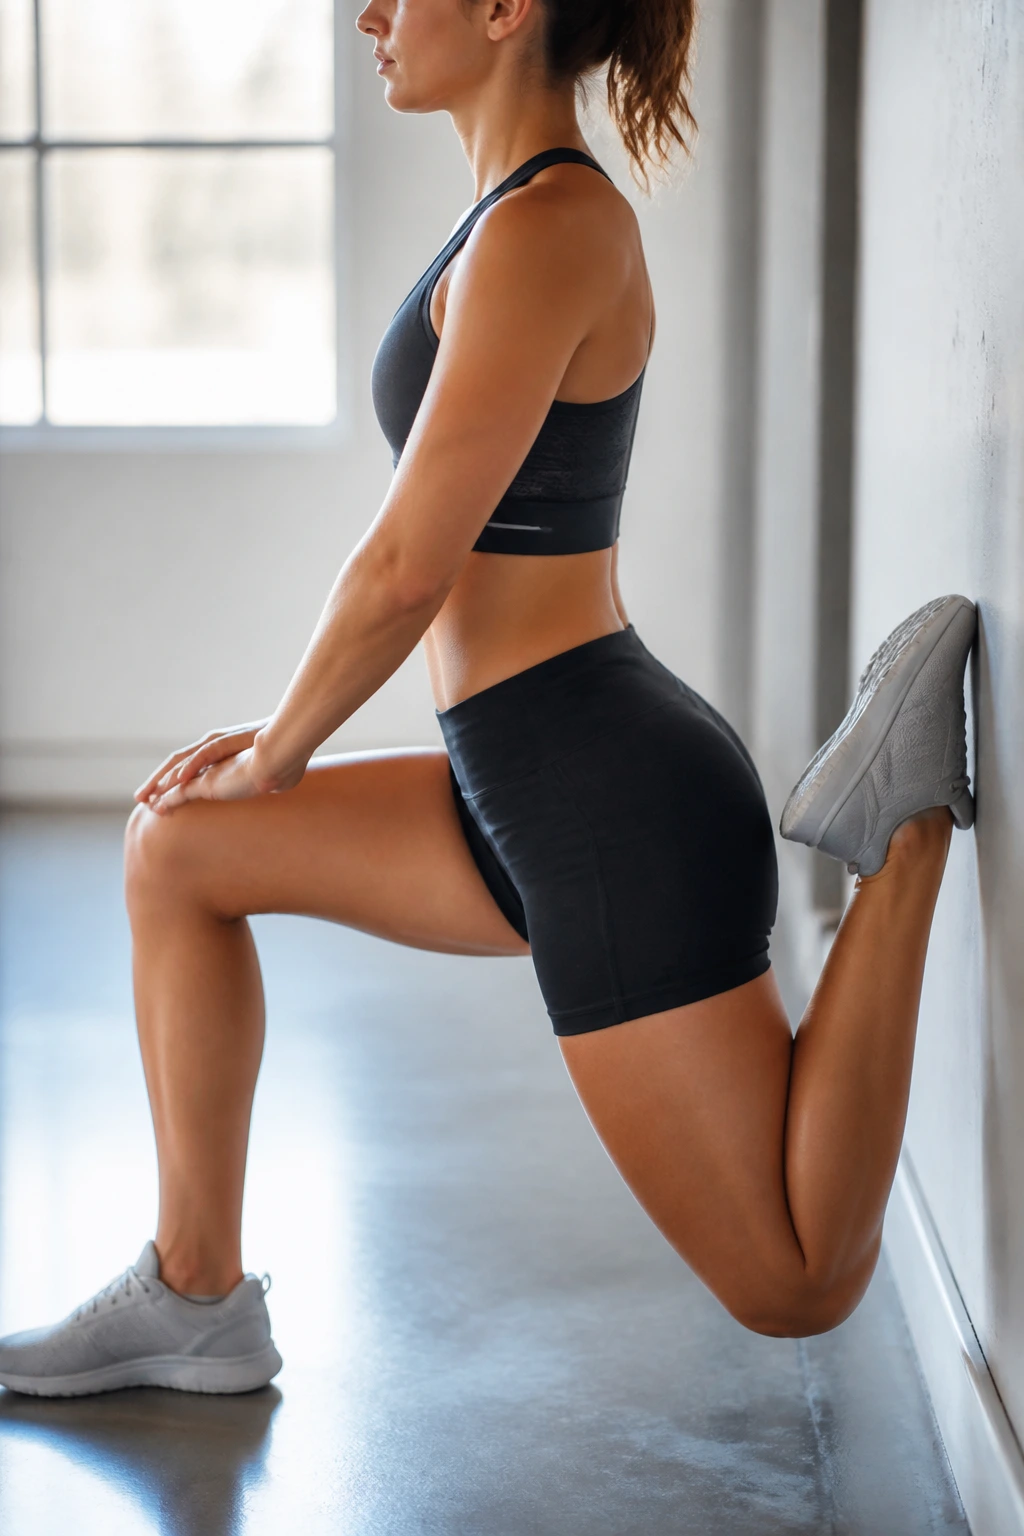
The quads are massive muscles, and when they get tight, they pull the kneecap out of its ideal alignment. You might notice a clicking or grinding in your knee during a squat; often, that is just the result of a tight quadriceps pulling on the patella. This wall-assisted stretch is far more effective than the “grab your ankle” stretch you did in high school gym class.
Find a wall and get into a half-kneeling position, with your back knee as close to the wall as possible. Your shin should be resting against the wall, vertical. Once you are stable, try to bring your torso upright. This puts the quad in a full, deep stretch.
If that is too intense, slide your knee away from the wall slightly. If it is too easy, get that knee flush against the wall. This is a game-changer for anyone with “bad knees.” Frequently, the “bad” is just “tight.” This position forces the muscle to lengthen under load in a way that standing balance stretches cannot replicate.
12. Child’s Pose for Lower Back Tension
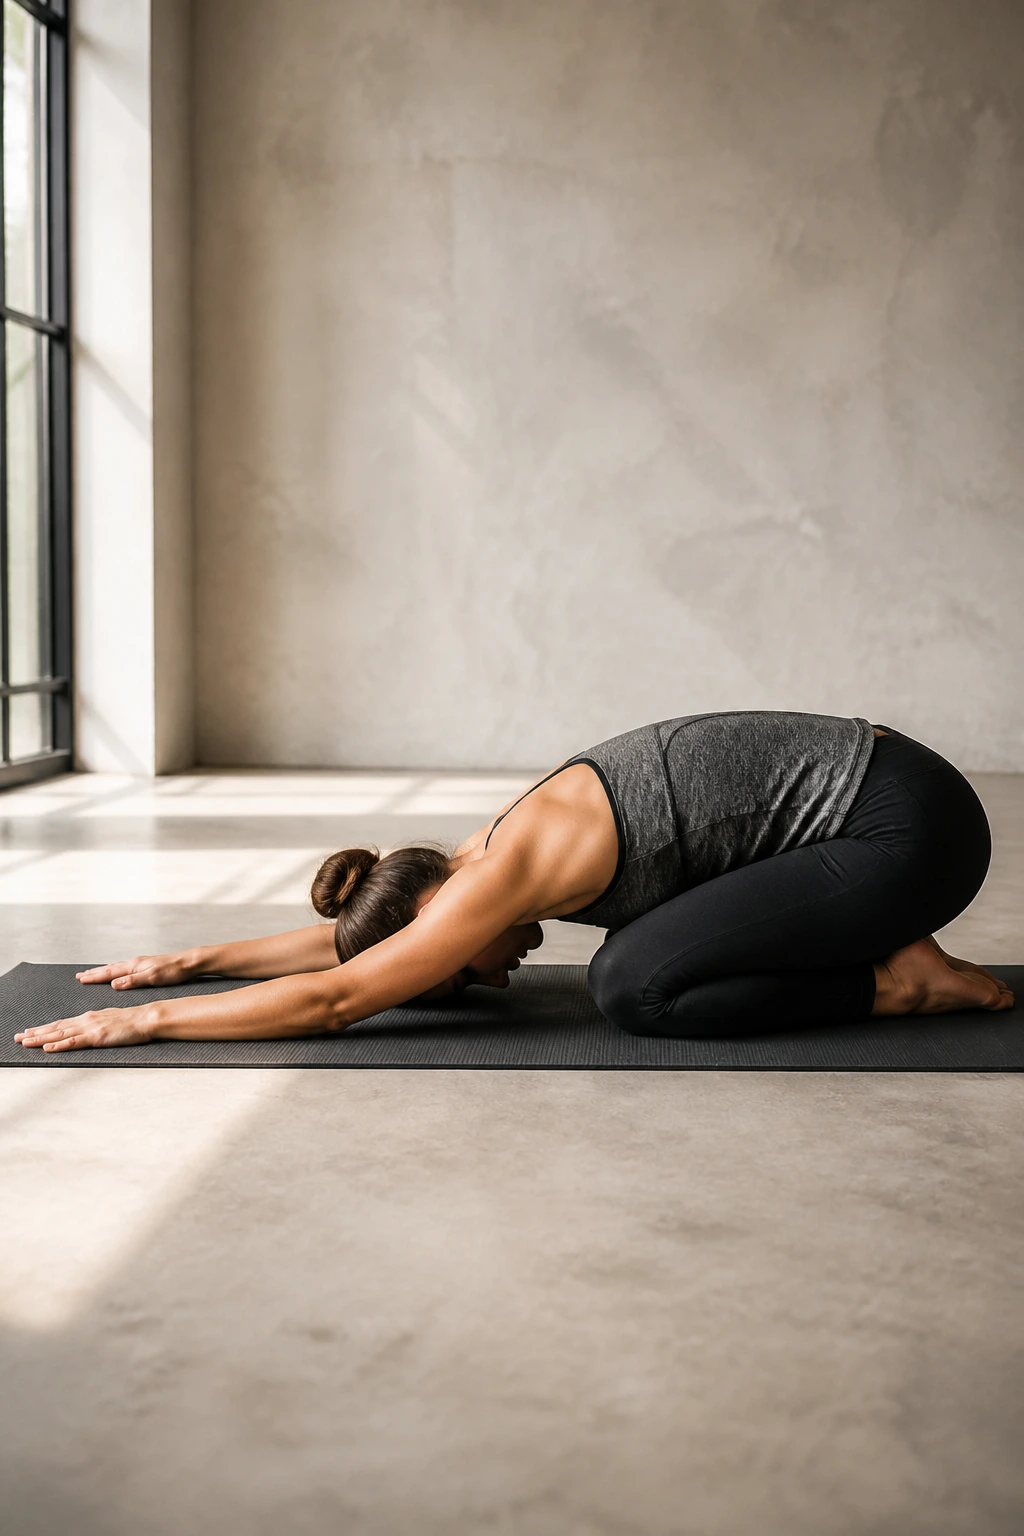
Sometimes you just need to turn everything off. Child’s pose is the ultimate decompression movement. It is not just about stretching the lats or the back; it is about calming the nervous system. Kneel on the floor, touch your big toes together, and widen your knees as far as they will go.
Reach your arms forward and sink your hips back toward your heels. Let your forehead rest on the mat. If your hips are tight, they won’t reach your heels—that is fine. The goal is to reach your fingertips away from you while simultaneously anchoring your hips back. This creates a traction effect on the spine, pulling the vertebrae gently away from each other.
Spend time here. This is the place to settle your breathing. After all the intense, active stretching, this pose signals to your body that the work is done and it is safe to release any residual tension in the erector spinae muscles along the spine.
13. Shoulder Roll and Neck Release
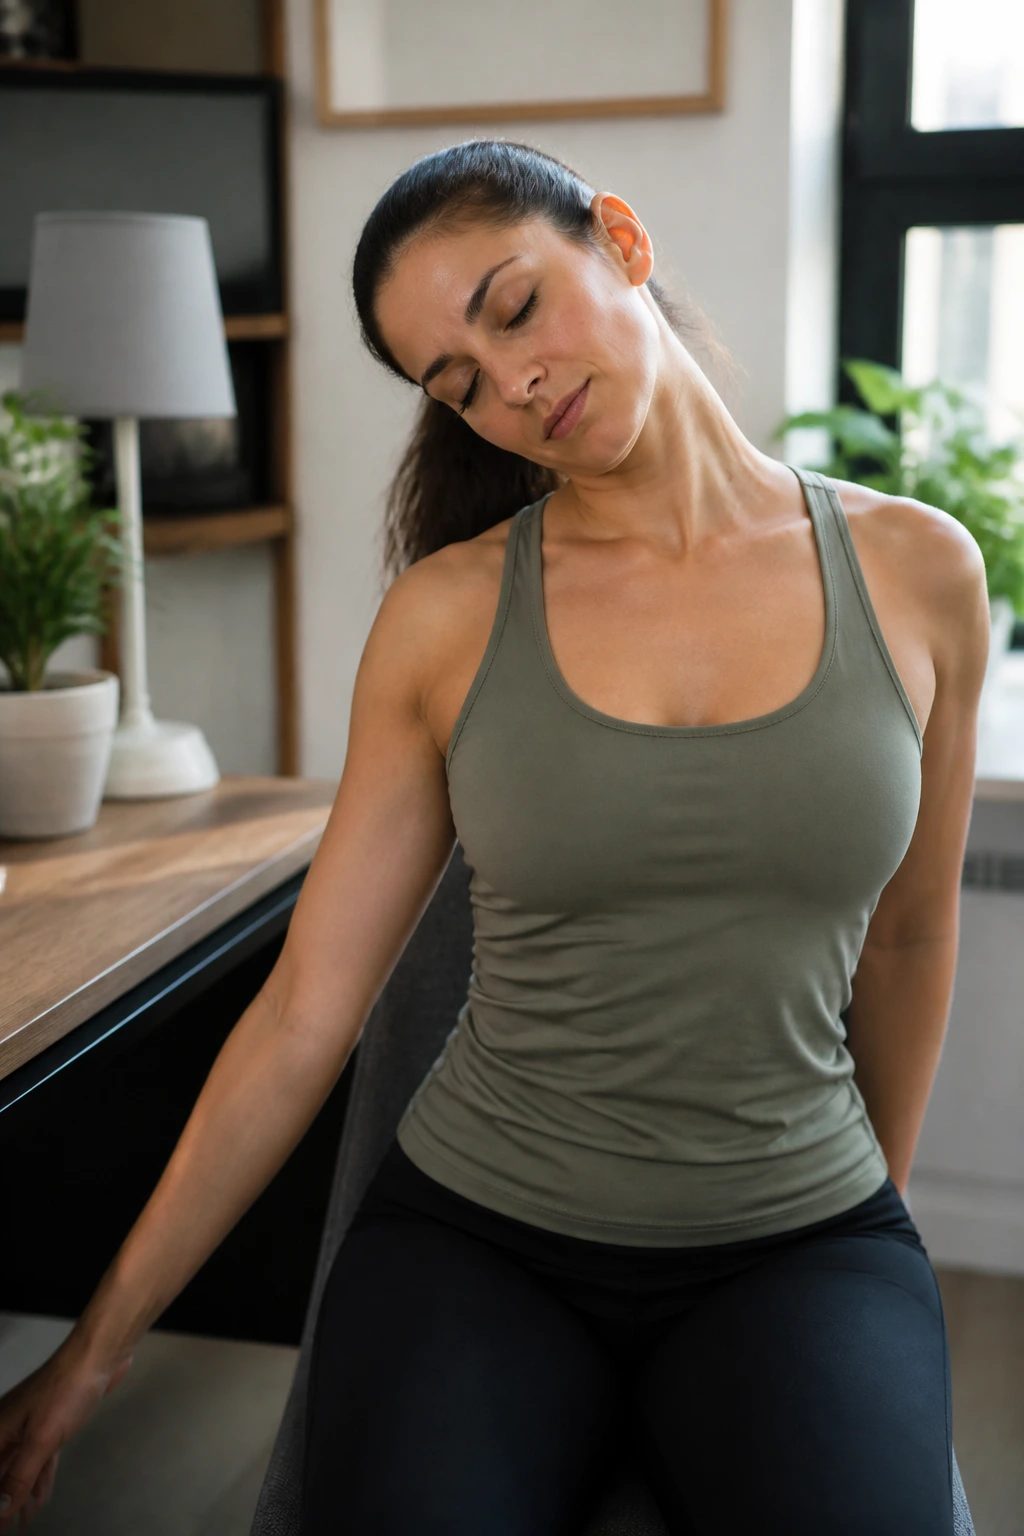
We hold an incredible amount of stress in the traps—the muscles that connect the neck to the shoulders. This causes a “shrugging” tension that persists even when we think we are relaxed. You don’t need a mat for this; you can do it anywhere.
The Neck Release
Sit or stand tall. Drop your right ear toward your right shoulder. Do not lift the shoulder to meet the ear; keep the shoulder blade depressed and actively reaching toward the floor. To increase the stretch, reach your left hand toward the floor at a 45-degree angle. You will feel a line of tension stretching from your ear all the way down to your collarbone.
- The slow roll: After thirty seconds, slowly roll your chin toward your chest and then to the other side.
- Avoid the “crack”: Do not force your head around. It is a slow, methodical release, not a forceful yank.
- Consistent maintenance: Do this throughout the day. It prevents the chronic tension that leads to tension headaches.
14. Calf Stretch on a Step
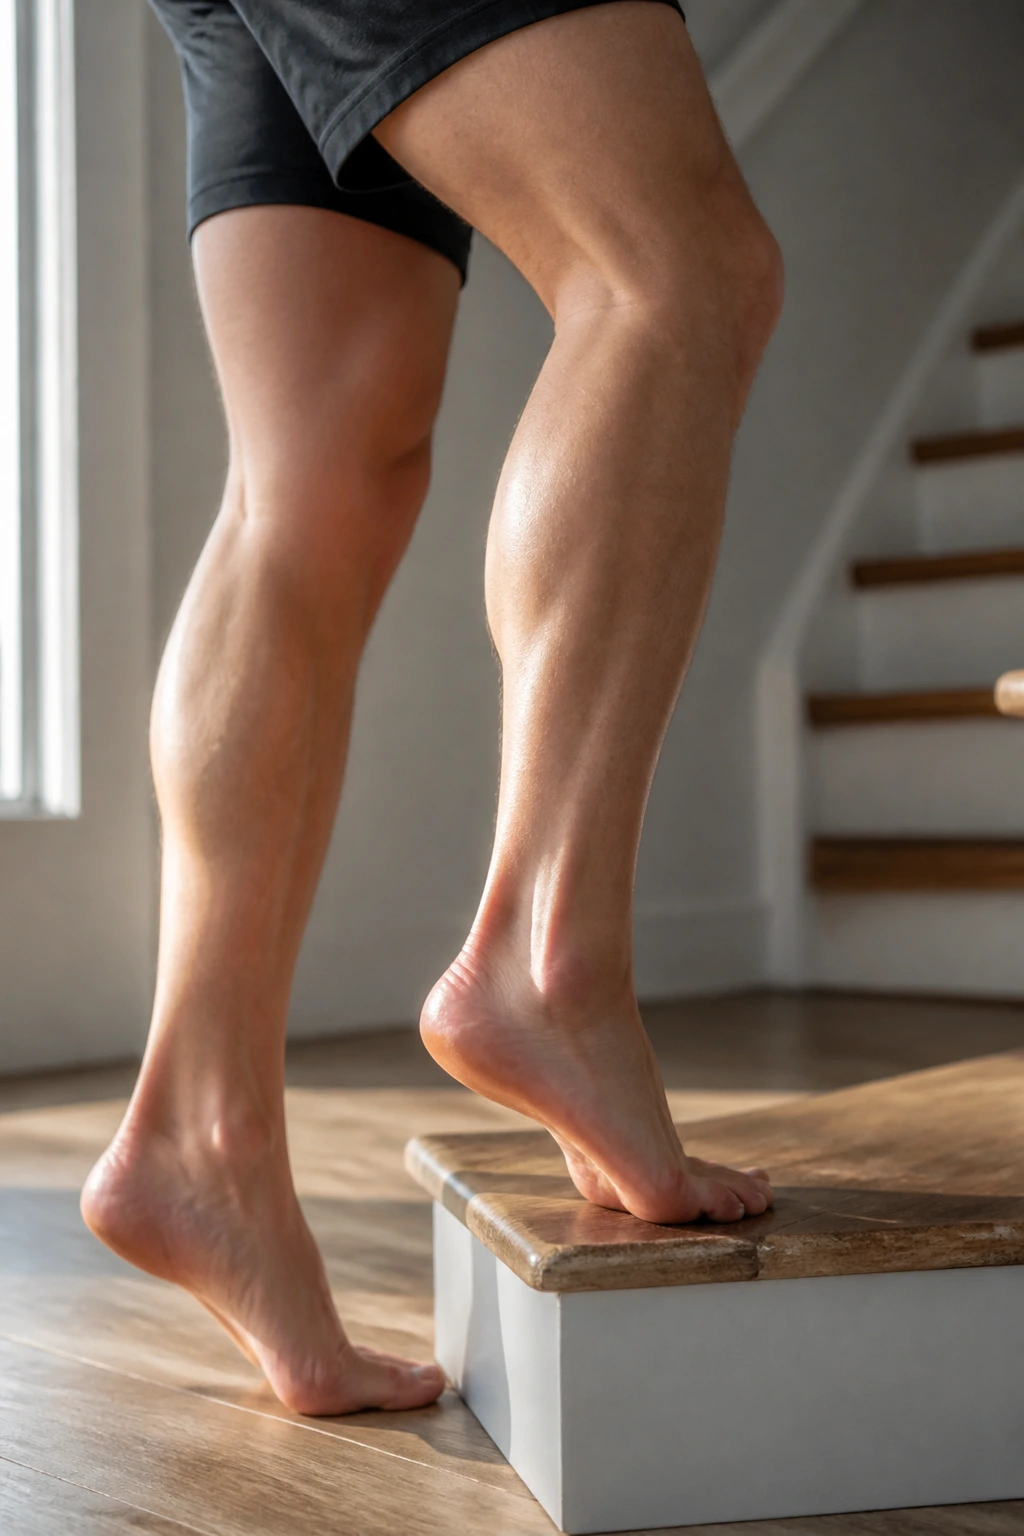
Calves are notoriously stubborn. They are built for endurance and power, meaning they have a high density of fascia that resists stretching. Using a step provides the leverage needed to actually move the tissue.
Stand on the edge of a step with the balls of your feet on the edge and your heels hanging off. Hold onto a rail for balance. Let one heel drop down, feeling the pull in the gastrocnemius (the upper part of the calf). After a minute, bend that knee slightly while keeping the heel down to target the soleus (the deeper, lower calf muscle).
This is a functional necessity. Most of us walk in shoes with a raised heel, which shortens the calf over time. By walking barefoot or doing these stretches, you counteract the shortening effect of footwear. You will notice your ankle mobility in squats and lunges improves dramatically when your calves are properly lengthened.
15. Wrist Extension and Flexion
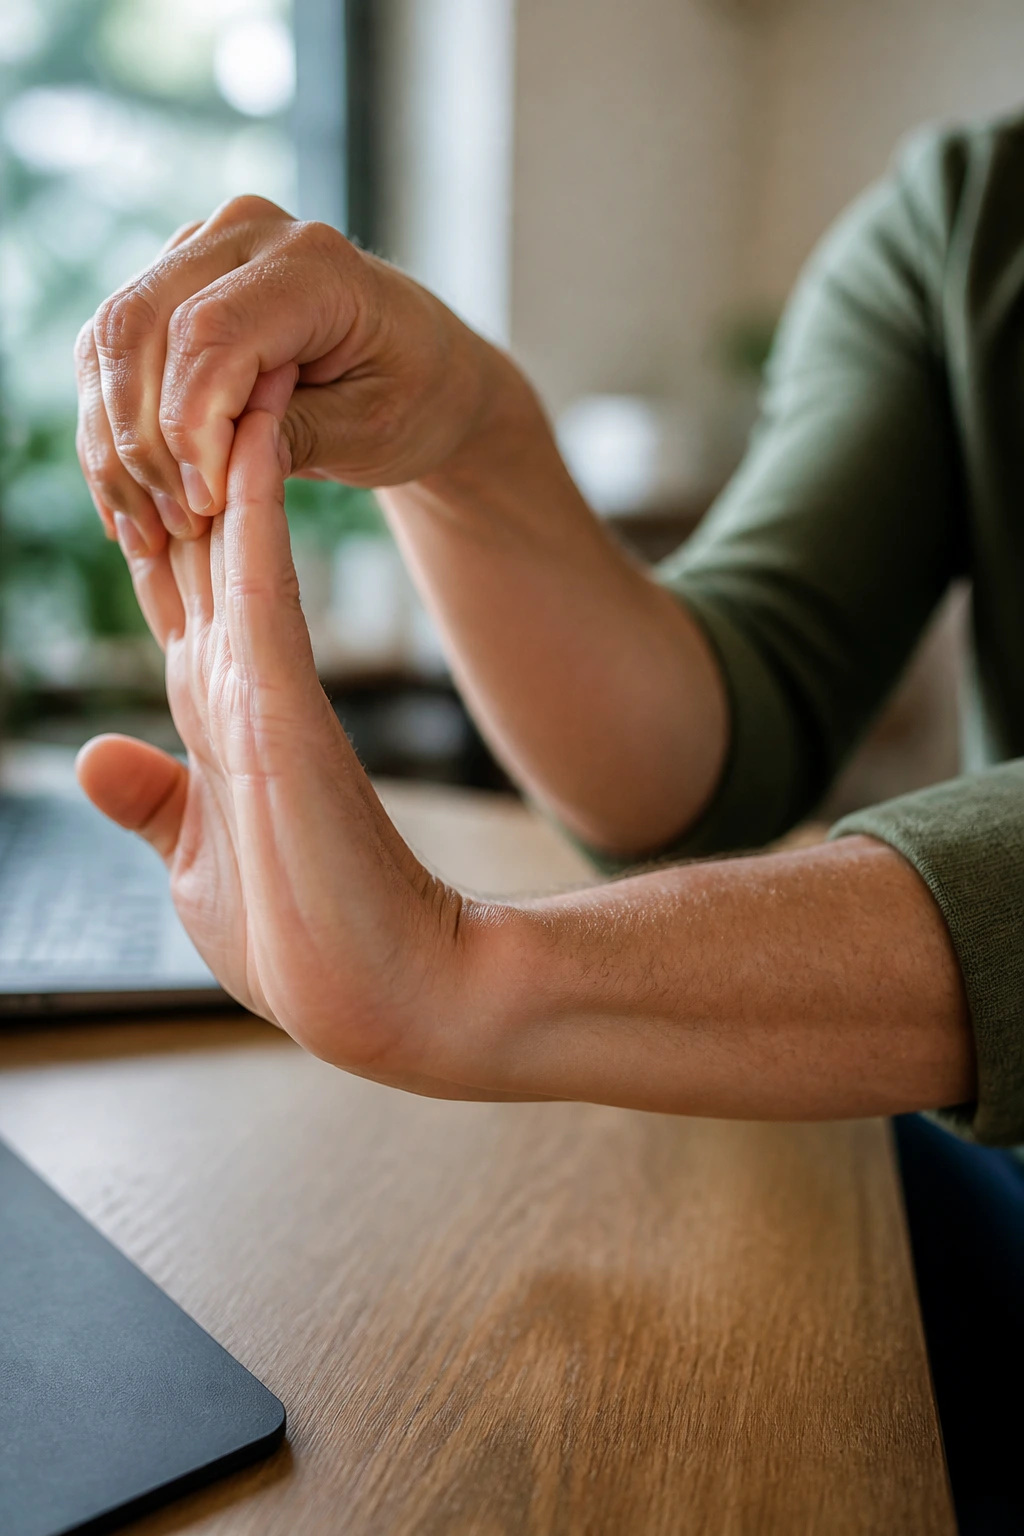
If you work at a computer, your wrists are essentially locked in a “typing” position for hours. This contributes to carpal tunnel-like symptoms and forearm tightness. Wrist health is rarely discussed until it becomes a problem, but a few minutes a week can prevent years of discomfort.
Extend one arm forward, palm facing out as if you are signaling “stop.” Use your other hand to gently pull your fingers back toward you. Then, flip the palm down, fingers pointing toward the floor, and gently pull the back of your hand toward your forearm.
Do not be aggressive here. The tendons in the wrist are delicate. You are looking for a mild stretch, not a sensation of straining. Combine this with circular motions of the wrist to lubricate the joint. If you do heavy lifting or gymnastics, this is a required warm-up protocol to keep the joint capsule healthy and mobile.
16. Ankle Circles and Dorsiflexion
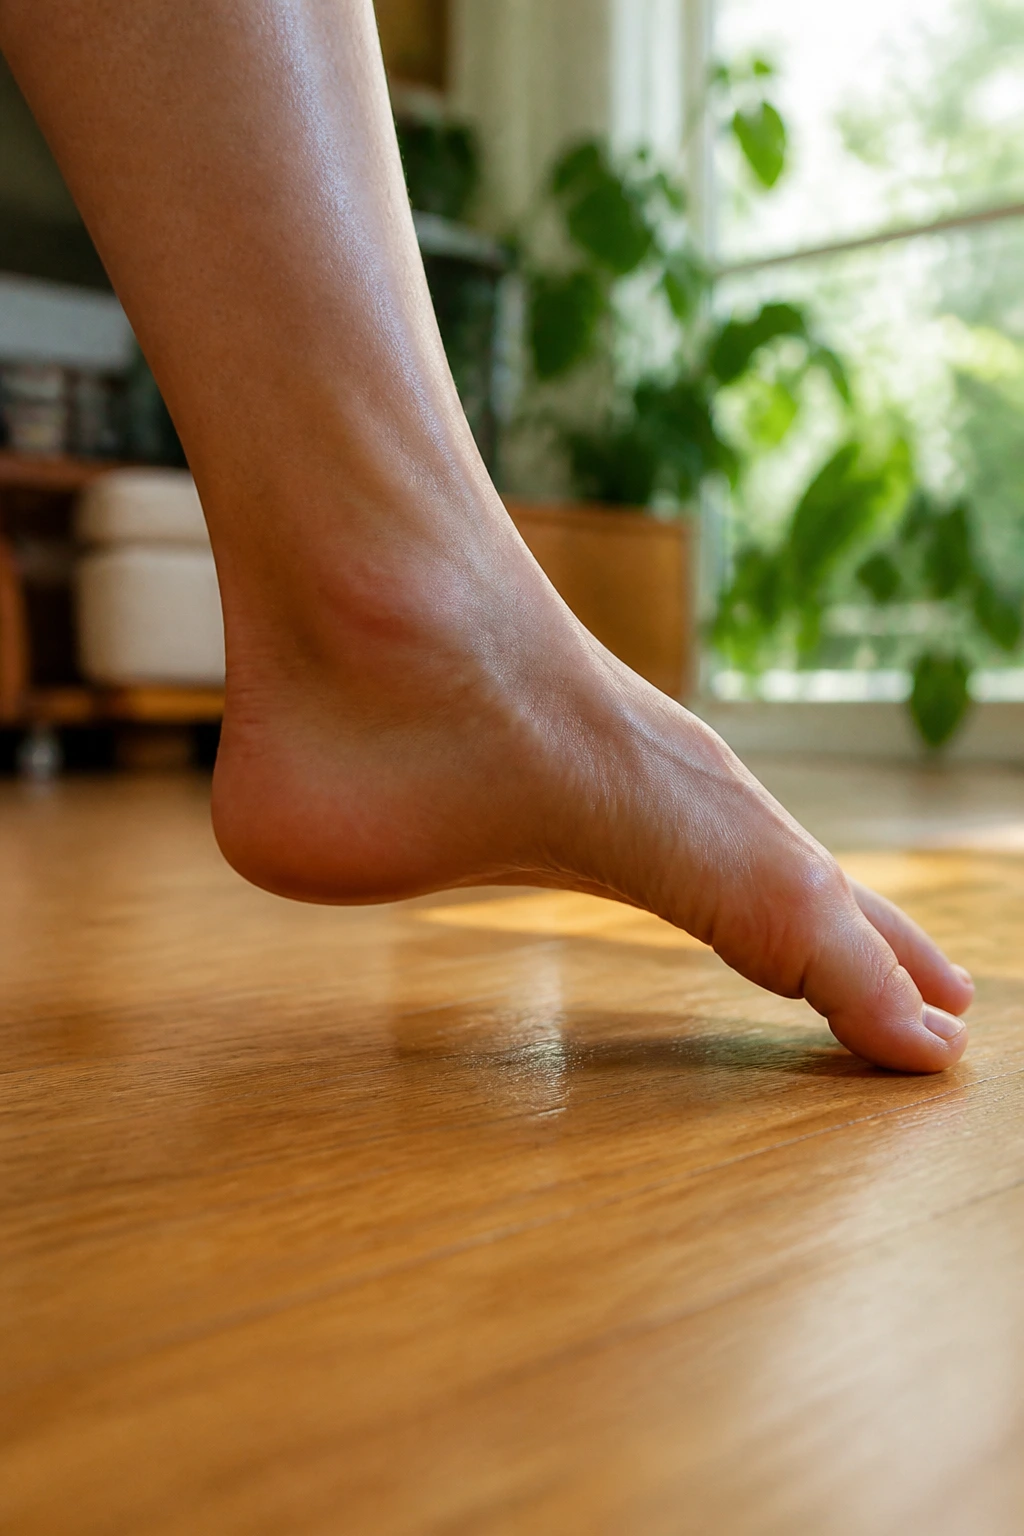
Ankle mobility is the secret gatekeeper to leg training. If your ankles are stiff, your knees take the brunt of the load. Most people think they have tight hips, but when you look at their movement, it is actually their ankles preventing them from getting low.
Sit with one leg extended and perform slow, controlled ankle circles. Draw the alphabet with your toes. This ensures you are hitting every plane of motion. Next, perform dorsiflexion: pull your toes back toward your shin as hard as you can, then point them away.
- Weight-bearing dorsiflexion: In a lunge position, drive your knee over your toe while keeping the heel firmly planted on the ground. This is the “Gold Standard” test for ankle mobility. If your heel lifts before your knee passes your toe, you need to work on this daily.
17. IT Band Foam Rolling/Stretch
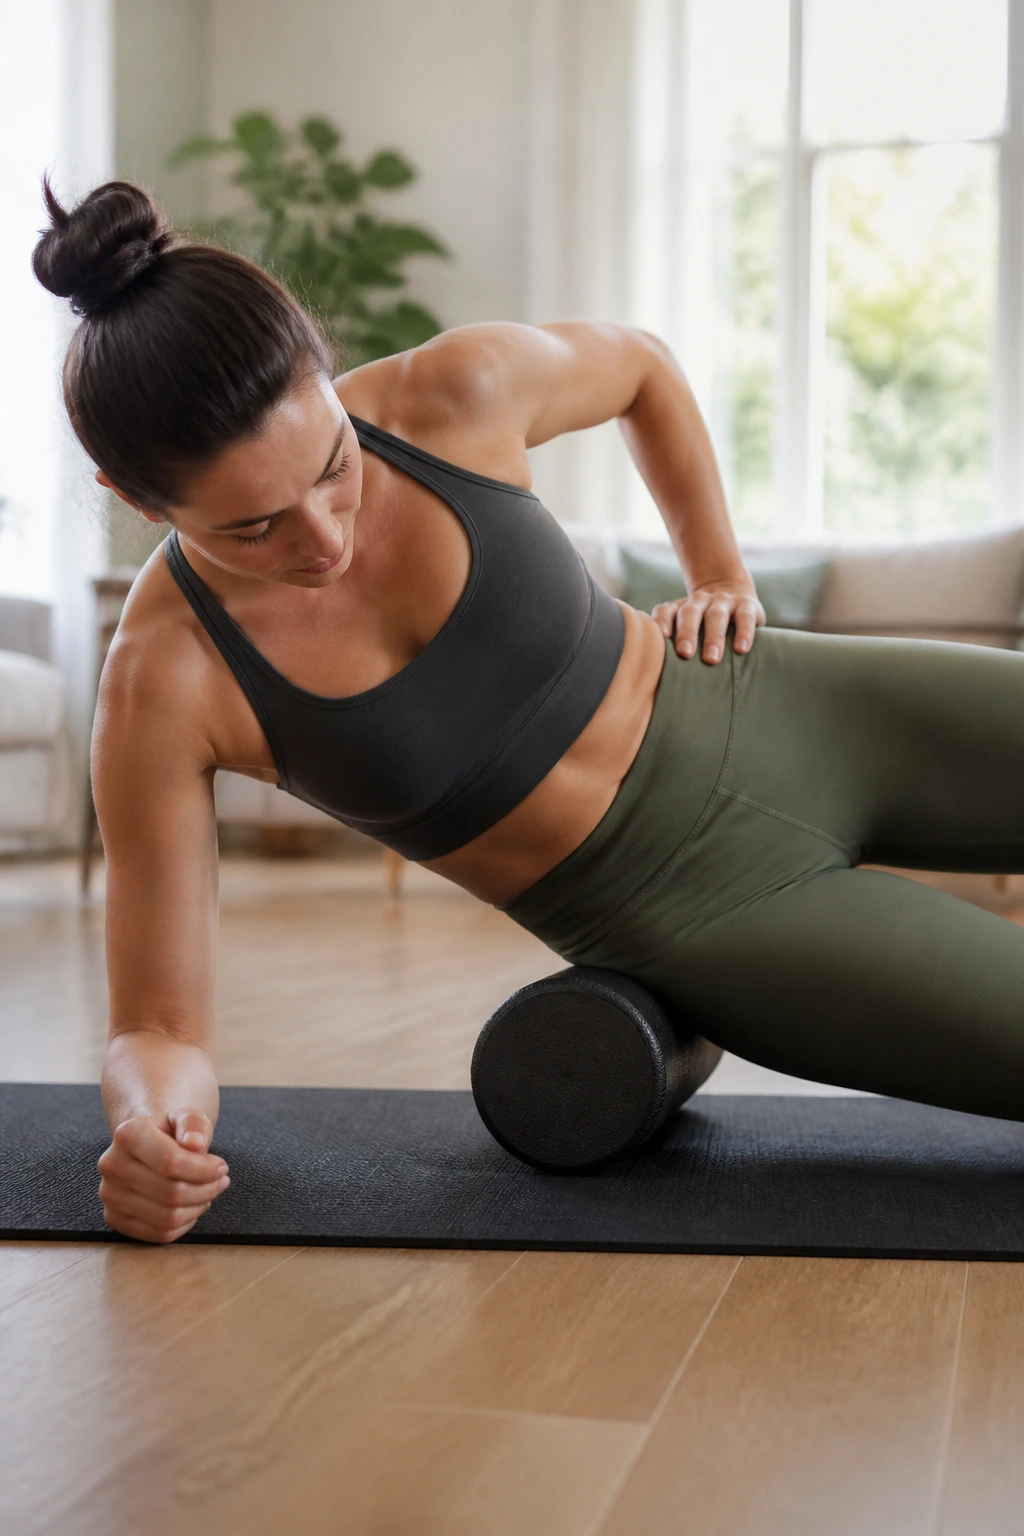
The Iliotibial (IT) band is not a muscle; it is a thick, fibrous band of connective tissue. It cannot be “stretched” in the traditional sense, but you can release the muscles that pull on it—the TFL (tensor fasciae latae) and the glutes.
Lie on your side with a foam roller under your hip. Support your weight with your forearm and the top leg. Roll slowly from the top of the hip down to just above the knee. When you hit a sensitive spot, stop and hold pressure. Do not “roll” back and forth rapidly; that does nothing for the tissue.
Be careful not to roll directly over the hip bone or the knee joint. Focus on the meaty part of the thigh and the hip. If you have sharp, shooting pain, stop. This should feel like a deep-tissue massage, not an interrogation. Releasing the hip tension here will often solve the “tight IT band” sensation better than stretching the band itself ever could.
18. Thread the Needle
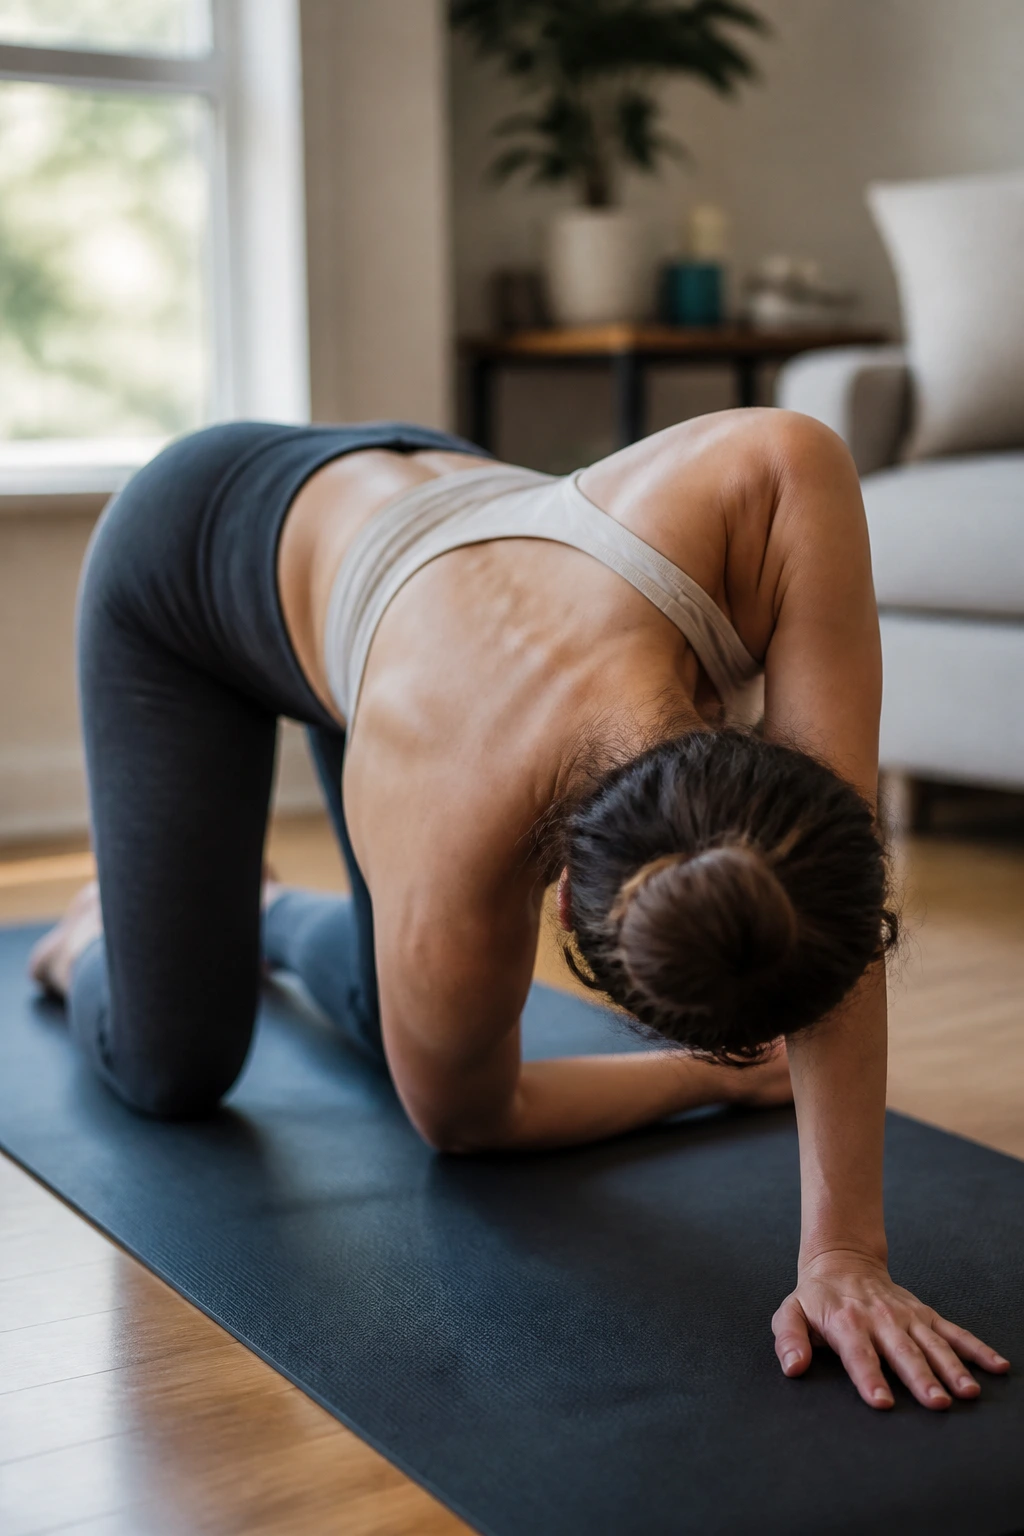
This is the ultimate move for thoracic rotation—the ability of your mid-back to twist. A stiff thoracic spine forces the lower back to overcompensate, which is why so many people get injured when they try to lift heavy things.
Start in a tabletop position. Reach your right arm up toward the ceiling, opening your chest. Then, thread that right arm under your left armpit, lowering your right shoulder to the floor. Look underneath your left arm. You should feel a deep stretch in the back of your shoulder and your mid-back.
The feedback: If you find this impossible, it is a clear sign that your upper back is frozen. Don’t be discouraged. The goal is to gain an inch of movement each week. Use your left hand to press into the floor to deepen the rotation.
19. Frog Pose for Hip Mobility
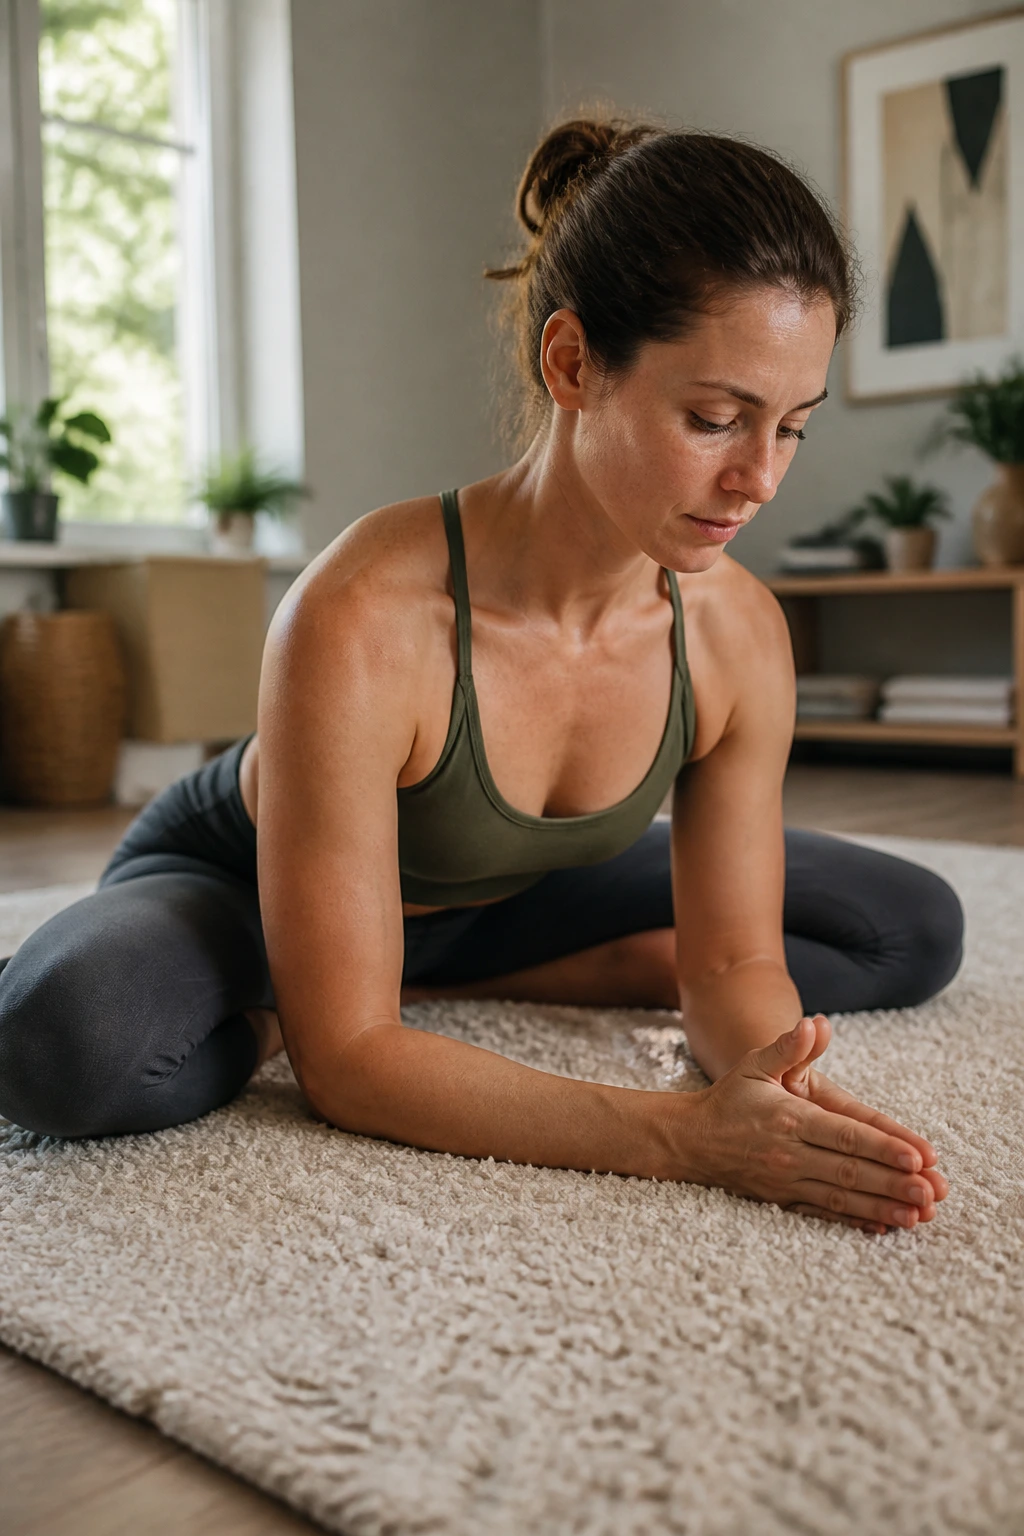
Frog pose is an intense, deep-opening movement that isn’t for the faint of heart. It is the gold standard for opening up the hips, but it requires patience. Start on your hands and knees. Slowly crawl your knees apart as wide as they will go.
Keep your feet in line with your knees, ankles flexed. Lower yourself onto your forearms. Sink your hips back toward your heels. You will feel a significant pull in the inner thighs and the hip sockets. This is not a pose to “push” into; it is a pose to “settle” into. Use your breath to signal to the hips that they can let go.
Because this pose puts pressure on the knees, do it on a soft surface—a rug, a mat, or a carpet. If you feel any sharp pain in the knees, bring your knees closer together. You are looking for a stretch in the muscle bellies, not a pinch in the joint.
20. Forward Fold with Bind
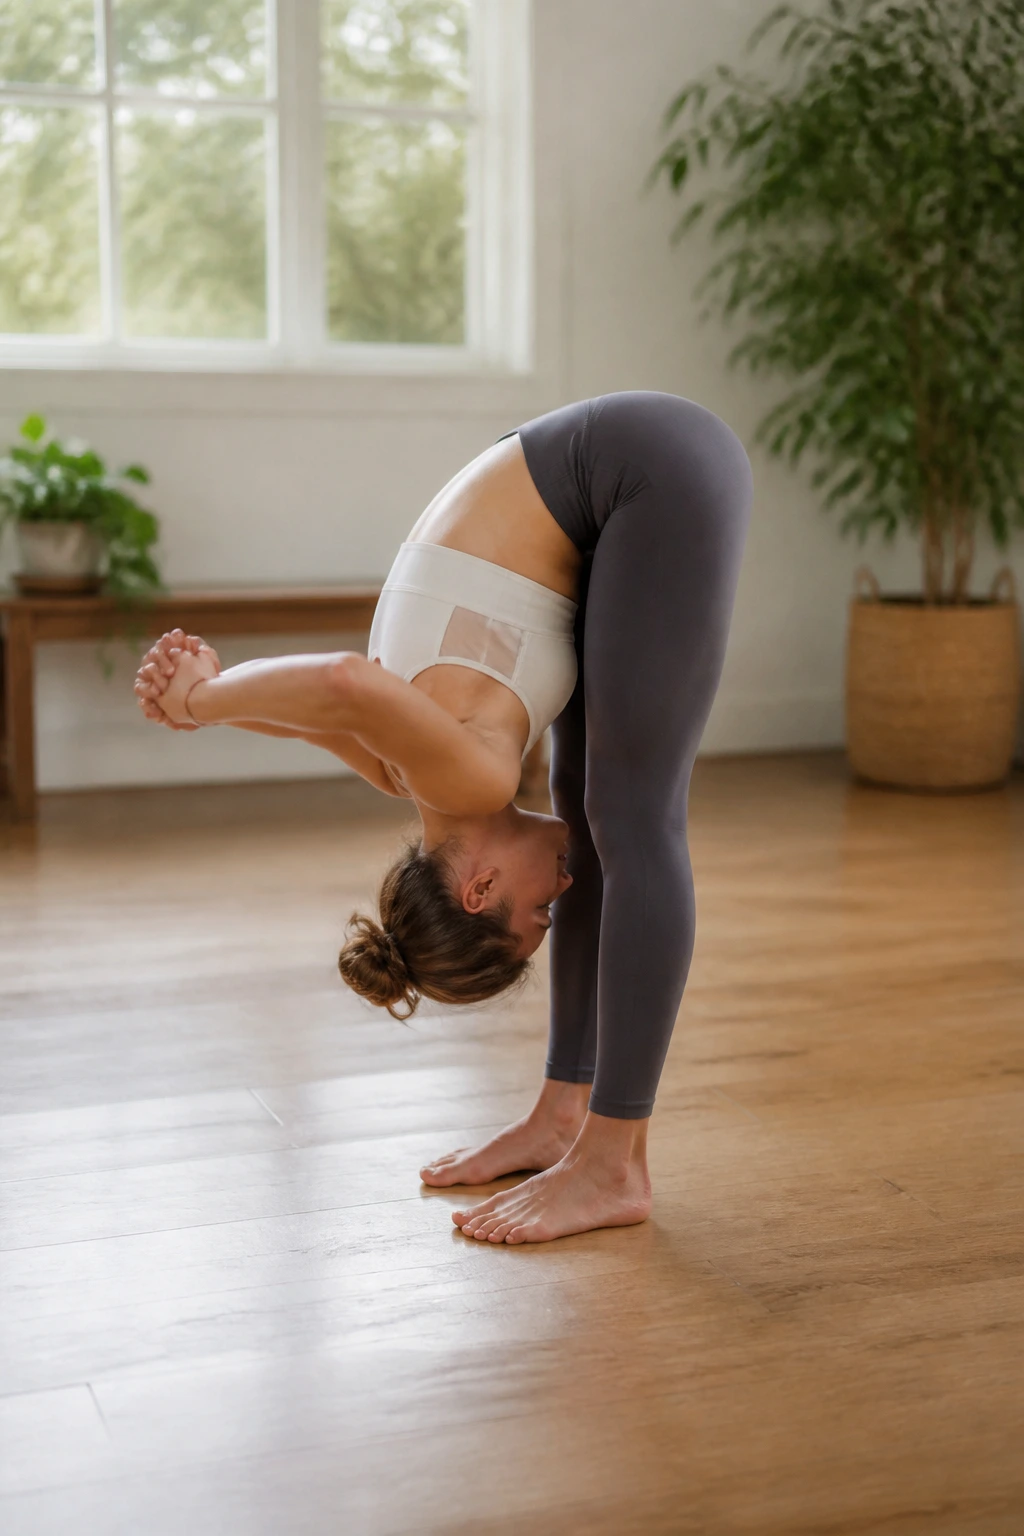
To finish off, we return to a forward fold but with a twist. Stand with feet hip-width apart. Hinge forward and interlace your fingers behind your back. Let your hands fall toward your head. This adds a chest-opening component to the hamstring stretch.
The bind of the hands forces the shoulders into a neutral position, countering the forward hunch. Let gravity pull the arms toward the floor. This provides a deep, integrated stretch across the entire posterior chain, from the heels up to the neck.
The final release: Stay here for at least one minute. When you come up, do it slowly, vertebra by vertebra. You should feel a sense of space and blood flow throughout your entire back. This is how you end a session—resetting your alignment and reminding your body what it feels like to be tall, loose, and fluid.
The Bottom Line
Flexibility is not a destination you reach; it is a standard of maintenance you perform. If you stop brushing your teeth, your teeth decay. If you stop moving through your full range of motion, your tissues stiffen. It really is that simple.
You do not need to do all twenty of these every single day. Pick three or four that target your specific areas of stiffness—perhaps the doorways for your chest, the lunge for your hips, and the cat-cow for your spine—and make them a non-negotiable part of your day, just like sleeping or eating. Over time, you will notice that you aren’t just moving better; you are moving with more confidence. Stiffness creates fear, and mobility creates freedom. Start small, stay consistent, and let your body remember what it feels like to be truly loose.
