



The sensation is unmistakable. You stand up from your chair, try to take a full step, and feel that familiar, sharp tug in your lower back or hip. Or perhaps you finish a workout, drop your weights, and realize your shoulders are locked into a hunched position, refusing to relax. Tight muscles aren’t just an annoyance; they alter how you move, how you breathe, and how you feel throughout the day. When connective tissues and fibers shorten because they stay in a contracted state for too long, your range of motion pays the price.
You do not need a yoga mat, a specialized room, or even a floor space to start unraveling that tension. Being upright offers a unique advantage for tightness, especially since most of us spend our lives in a seated position. Gravity is already working against you, but when you stretch while standing, you can leverage your own body weight and balance to get a deeper, more effective release. It requires focus and slow movement, but the results are worth the few minutes of effort.
Before you begin, remember that stretching is not a competition. You are not trying to touch your toes if your hamstrings are screaming at you. The goal is to move until you feel mild discomfort, hold it, and let the muscle lengthen over time. If you feel sharp, shooting pain, stop immediately. Back off. Your body is telling you to reset.
1. Neck Lateral Tilt

We start with the neck because it holds more stress than almost any other muscle group. When you spend hours looking at a screen or checking your phone, the trapezius and levator scapulae muscles tighten up, pulling your shoulders toward your ears. This simple move resets that posture.
How to Execute Properly
Stand with your feet shoulder-width apart and your arms relaxed at your sides. Keep your gaze straight ahead, not tilted toward the floor. Gently tilt your right ear toward your right shoulder. Do not force it. You should feel a gentle, lengthening pull along the left side of your neck. To increase the stretch, reach your left hand down toward the floor, as if you are trying to touch your knee with your fingertips.
The Critical Details
Keep your shoulders down. It is natural to shrug the shoulder toward the ear to meet the head, but doing that negates the entire stretch. Think about creating space between your ear and your collarbone. Breathe deeply. Hold this for 30 seconds on each side. If you feel any tingling in your fingers, you are pressing on a nerve—come out of the stretch immediately and adjust your angle.
2. Standing Shoulder Rolls

If you have ever felt like your shoulder blades are glued to your ribcage, this is the remedy. It is less of a static hold and more of a dynamic release. You are actively pumping blood into the joint capsule and breaking up the tension that builds between the shoulder blades.
Why This Matters
Constant sitting rounds the shoulders forward. This movement creates a cycle of weakness in the back and tightness in the chest. By rolling the shoulders, you are teaching your muscles to retract and depress, which is the “reset” position for good posture.
The Mechanics
Stand tall. Inhale as you lift your shoulders up toward your ears. Then, rotate them backward and down, squeezing your shoulder blades together as you complete the circle. Repeat this 10 times in a backward motion. Then, switch and roll them forward 10 times. Focus on the sensation of the shoulder blade sliding over the ribcage. It should feel like a massage from the inside out.
3. Standing Chest Opener
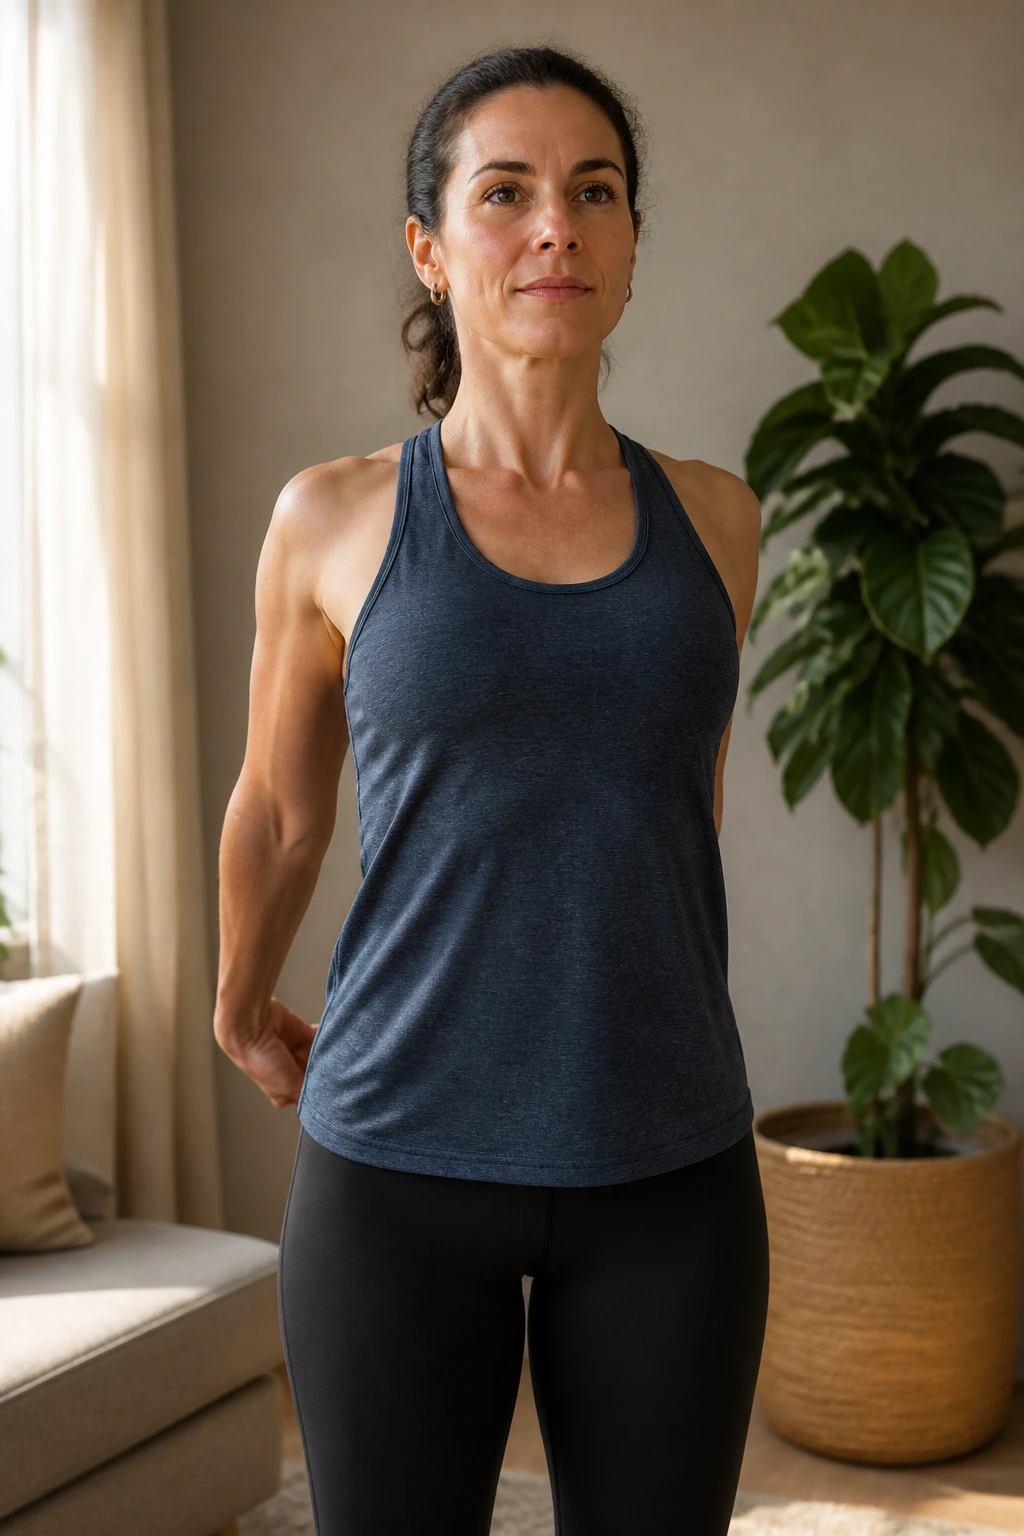
The chest muscles, or pectorals, get incredibly short from daily life. Whether you are driving, typing, or lifting weights, your arms are usually in front of you. This shortens the chest, which then rounds the shoulders and stresses the upper back. You need to open this up to breathe fully.
The Technique
Clasp your hands behind your back. If you cannot reach, grab a towel or a resistance band and hold it between your hands. Straighten your arms and gently lift your hands away from your lower back. You will feel a stretch across the front of your shoulders and your chest.
Watch for Compensation
Do not arch your lower back. This is the most common mistake. People try to get their hands higher by thrusting their hips forward and crunching their lumbar spine. Keep your core tight, ribcage down, and only move your arms as far as they will go without changing your torso position. Hold for 45 seconds while taking deep, full breaths.
4. Overhead Reach and Side Stretch
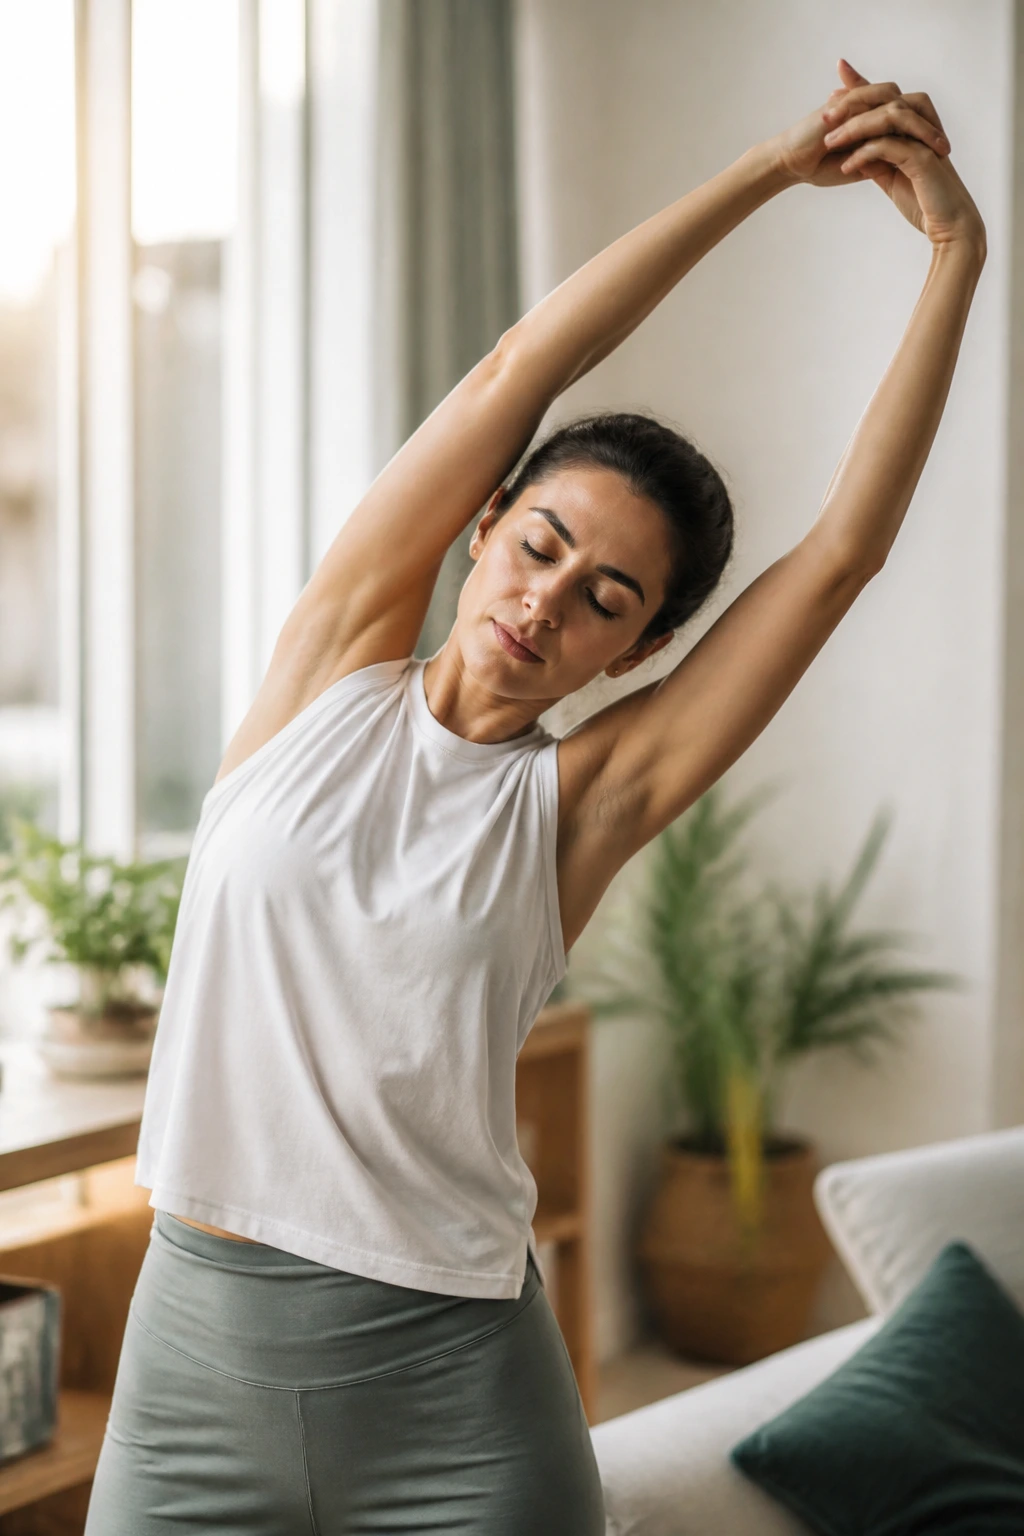
This movement targets the lats—the large muscles on your back—and the intercostal muscles between your ribs. When these are tight, it feels difficult to take a deep breath. You are essentially trying to create space in your torso.
How to Do It
Reach both arms straight up toward the ceiling. Interlace your fingers and turn your palms upward. Imagine someone is pulling you up from your wrists. Once you feel long, lean slowly to the right side while keeping your hips steady. You are trying to stretch the left side of your ribcage.
Finding the Sweet Spot
Don’t just lean over; reach out and over. It is a subtle difference, but reaching out engages the muscles more effectively than just collapsing to the side. Hold for 20 seconds, return to the center, and switch to the left. The stretch should feel like a long line from your armpit down to your hip bone.
5. Triceps Stretch
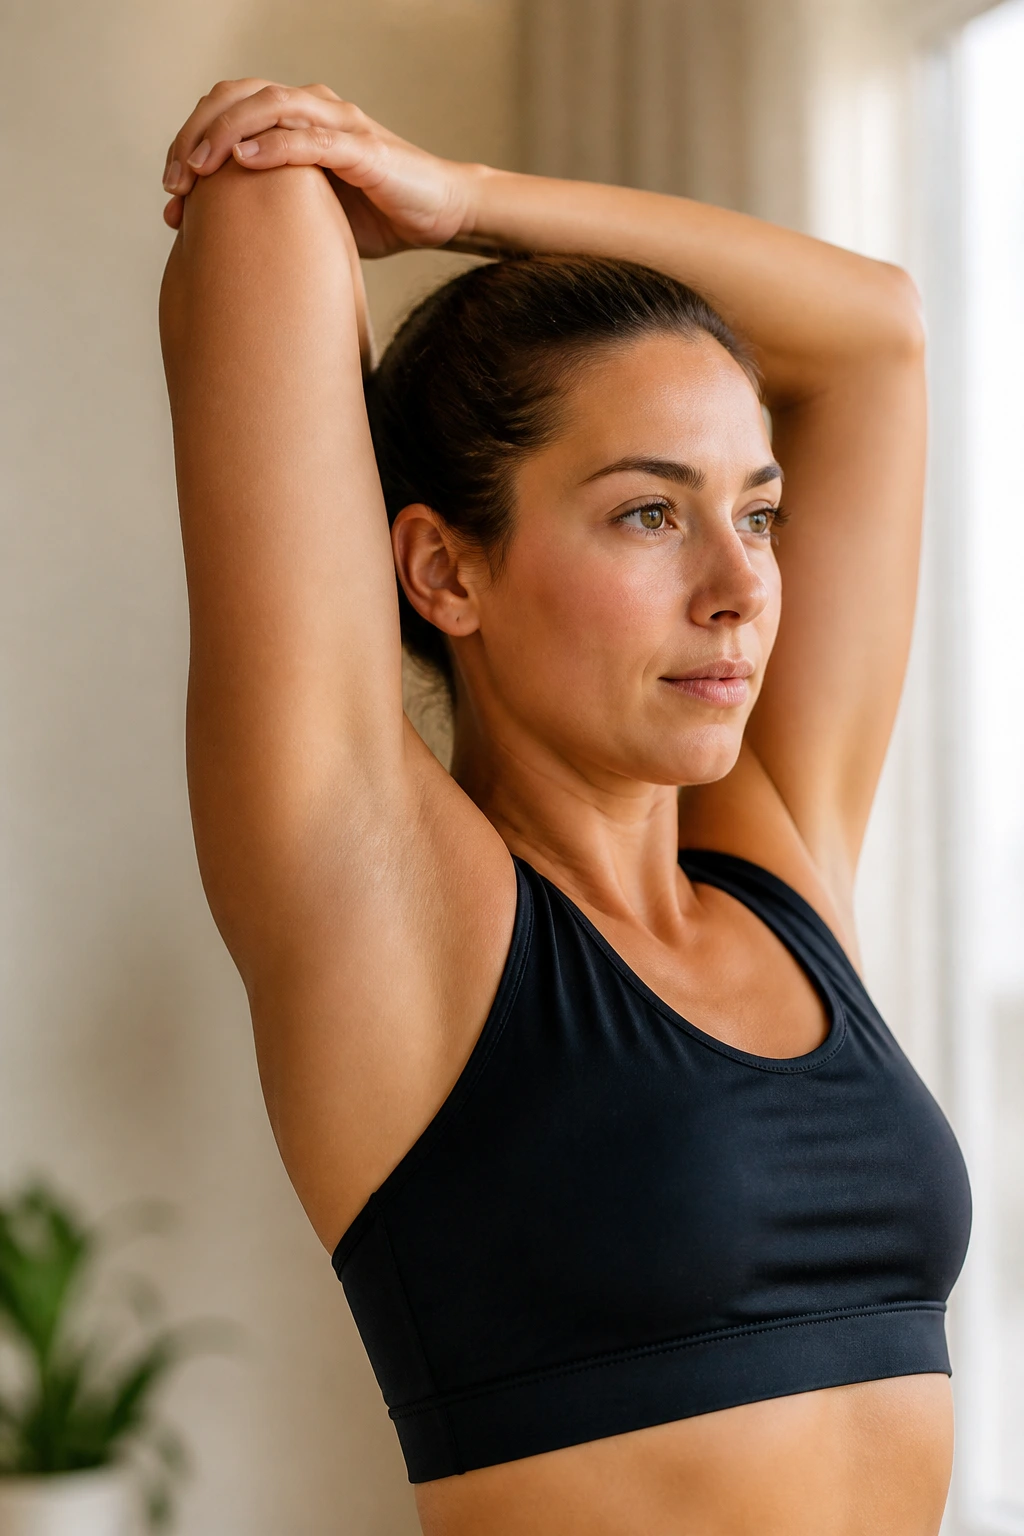
The triceps cross the elbow and attach at the shoulder. If they are tight, it can limit your ability to fully extend your arms or reach overhead comfortably. This stretch is a staple for anyone who uses their arms for repetitive tasks or heavy lifting.
The Proper Form
Raise your right arm straight up, then bend your elbow so your hand drops behind your head, reaching toward your upper back. Use your left hand to gently push the right elbow downward. You should feel the stretch running down the back of your right arm.
Pro Tip for Effectiveness
If you find that your head is getting pushed forward by your arm, push your head back into your forearm. This keeps your cervical spine neutral and ensures the stretch is happening in the triceps, not the neck. Hold for 30 seconds, then switch sides.
6. Standing Torso Twist
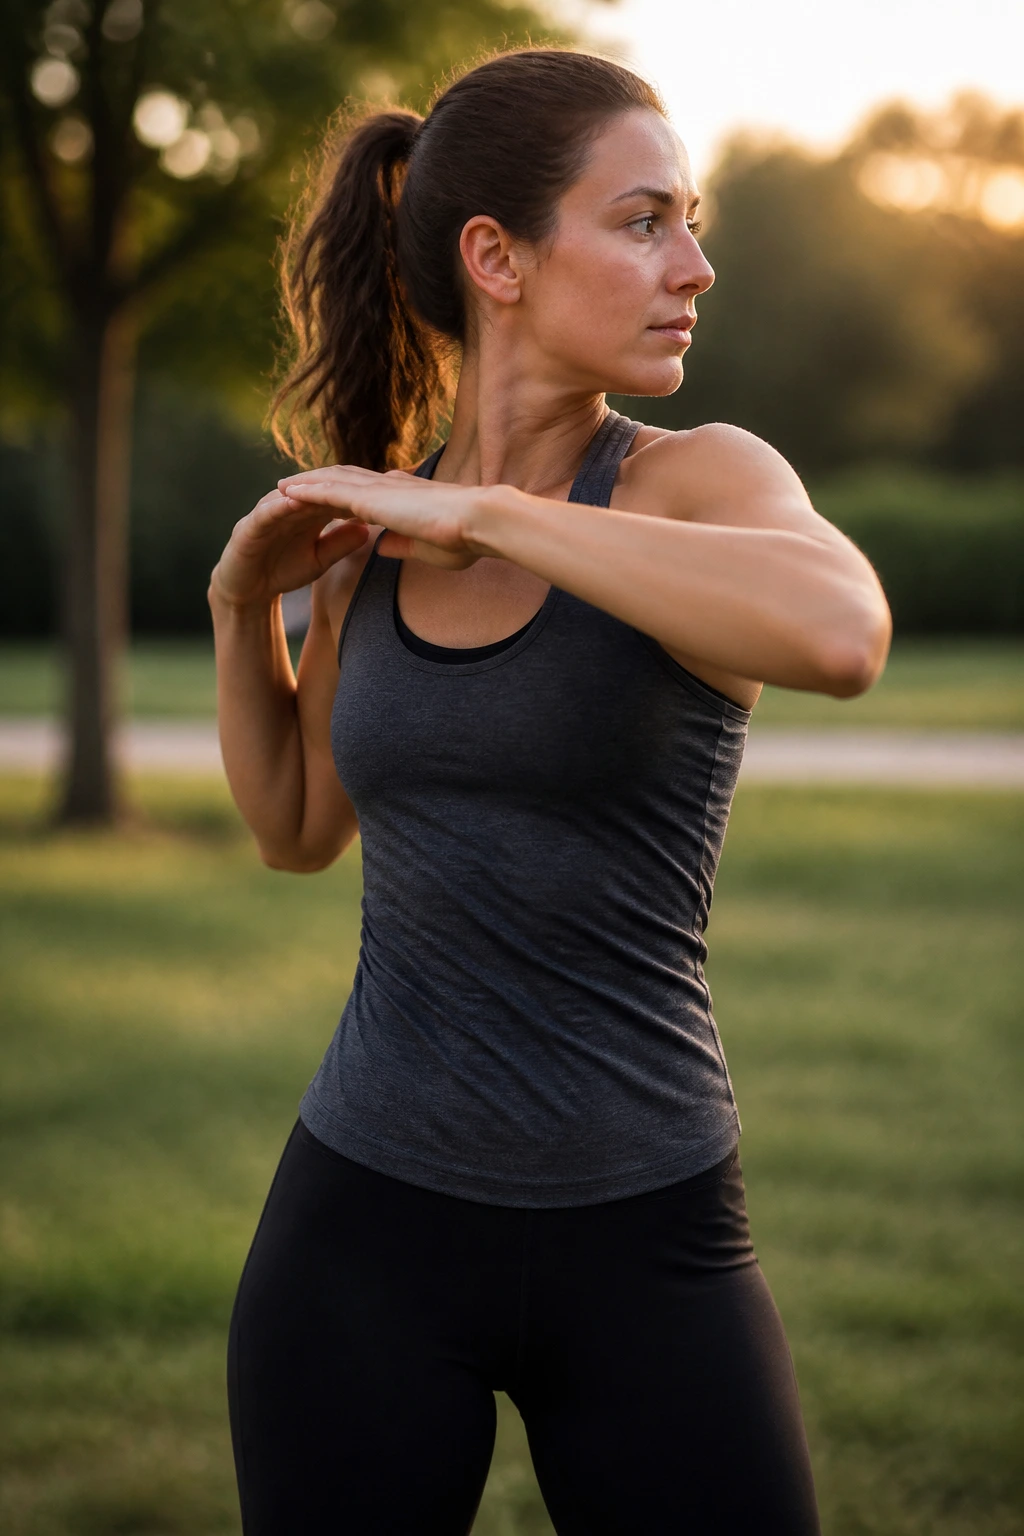
Your spine needs rotation to stay healthy. Without it, the vertebrae become stiff and the surrounding muscles tighten, leading to that “locked” feeling. A standing twist is a gentle way to mobilize the thoracic spine without putting excessive pressure on the lumbar area.
Step-by-Step
Stand with your feet wider than shoulder-width. Bring your arms up so your elbows are bent and your hands are near your shoulders—like a boxer’s guard. Keep your hips facing forward. Rotate your torso to the right, letting your gaze follow your shoulders. Then, rotate to the left.
Keeping It Safe
The key is to keep the hips stable. If your feet pivot and your hips turn with you, you aren’t twisting your spine; you’re just turning your whole body. Keep your lower body glued to the floor and initiate the movement from your mid-back. Move with a steady rhythm for one minute. This is more of a mobility drill than a static hold, so keep it fluid.
7. Standing Side Bend with Leg Cross
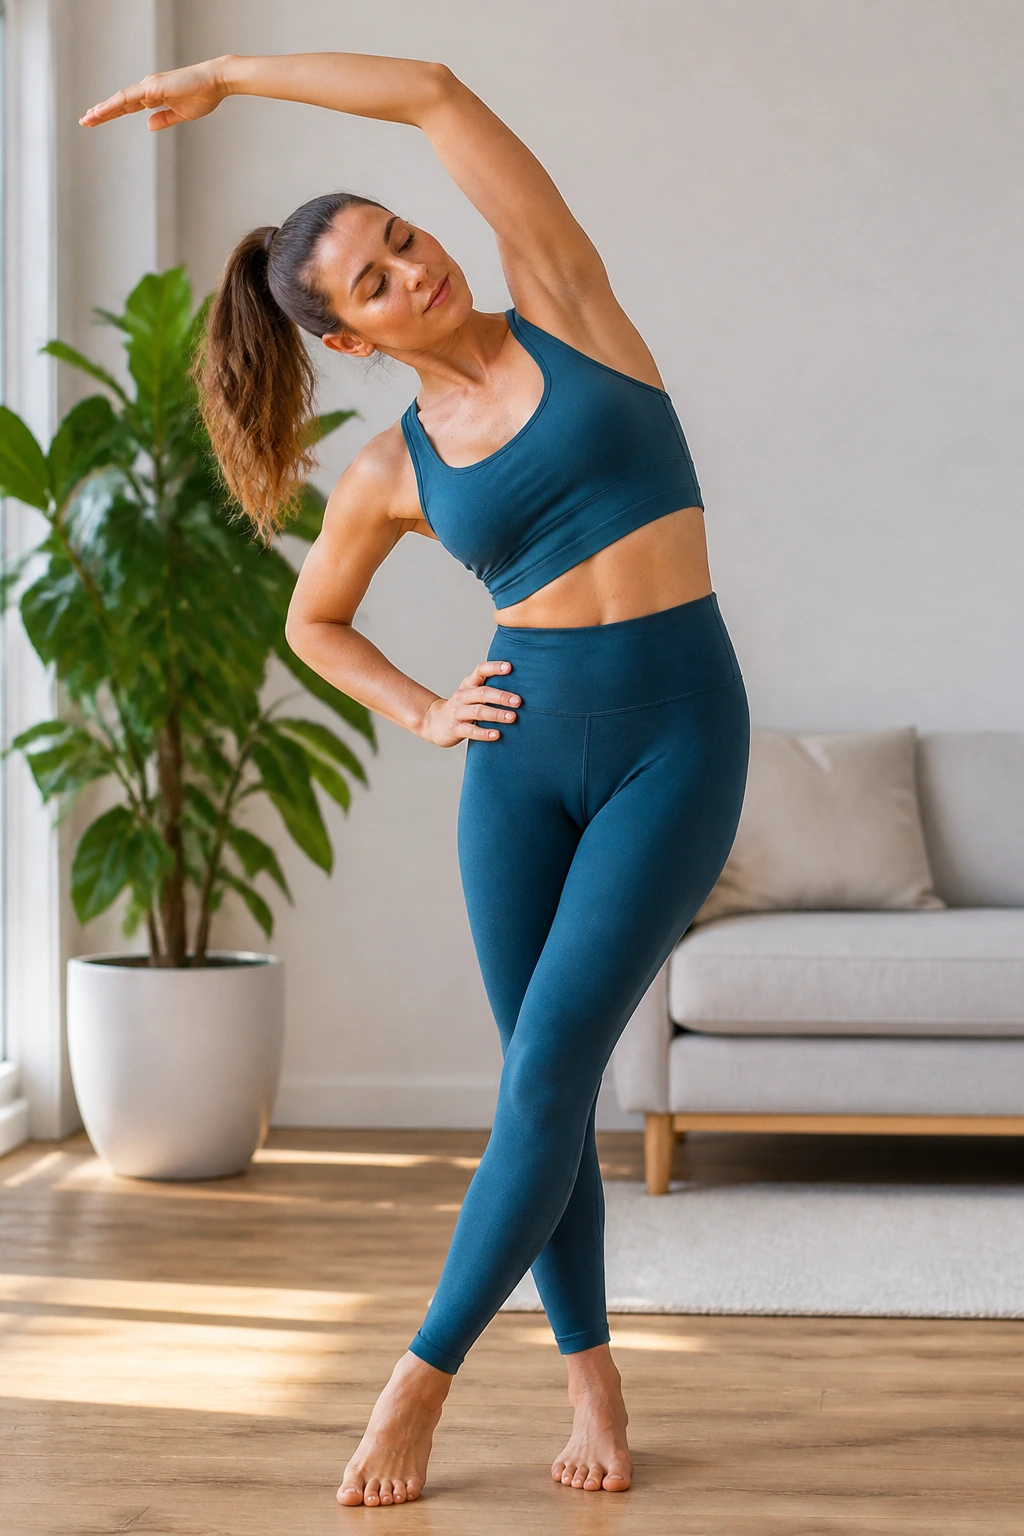
This is a progression of the simple side bend, but it adds a component of hip and IT band stretching by crossing the legs. It creates a chain of tension from the ankle up to the armpit.
How to Set It Up
Stand tall. Cross your right foot over your left foot. If you feel unsteady, keep your feet close together rather than fully crossing them. Reach your right arm over your head toward the left side. You will feel a significant pull on the outside of your right hip and down the right side of your torso.
Why This Works
The cross-legged position pulls the hip joint into a position that isolates the outer hip and the lats. It is a fantastic stretch if you sit all day, as it opens up the lateral line of the body. Hold for 30 seconds on each side. Don’t rush; let the tissues slowly give way.
8. Standing Forward Fold
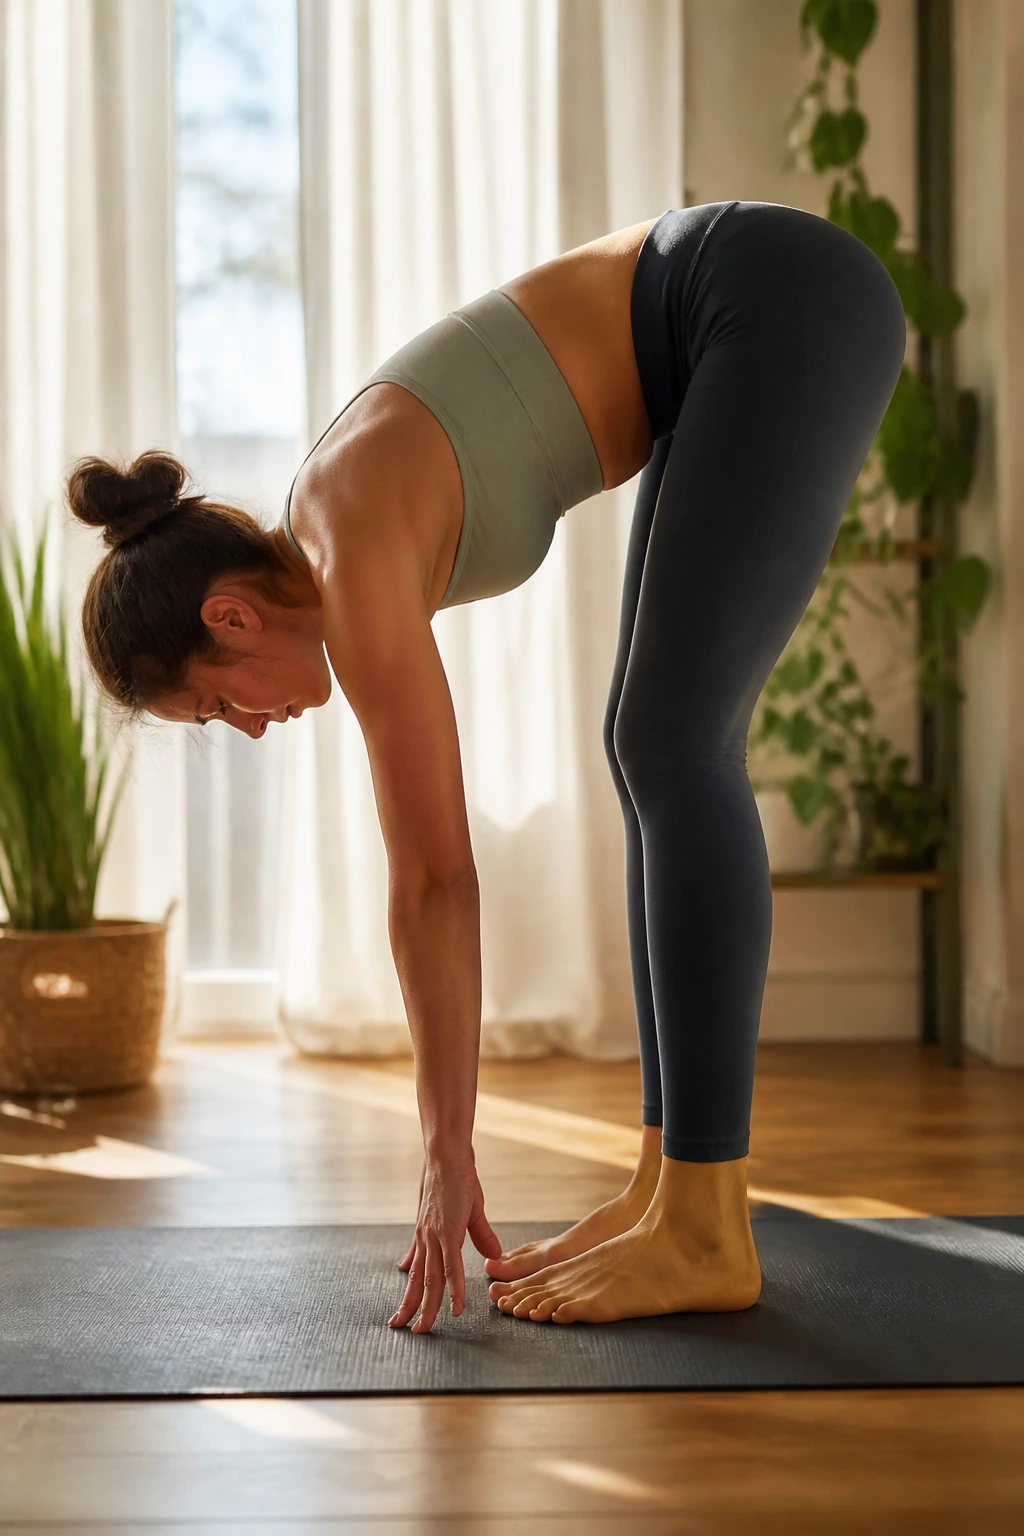
This is the classic, but most people do it wrong. They treat it as a test of finger-to-floor proximity rather than a stretch for the hamstrings. If you round your back to touch the floor, you are stretching your spine, not your hamstrings.
The Correction
Stand with feet hip-width apart. Keep a micro-bend in your knees. Fold forward at the hips, keeping your back flat. Imagine you are trying to touch your belly button to your thighs. Once you can’t go any lower without your back rounding, stop there. You can let your arms hang, or grab opposite elbows to add a little weight.
The Sensation
You want to feel this in the meat of your hamstrings, right in the middle of your thighs. If you feel it behind your knees, bend your knees slightly more. If you feel it only in your lower back, come up a few inches. Hold this for a full minute, shaking your head “yes” and “no” to release neck tension.
9. Standing Quad Stretch
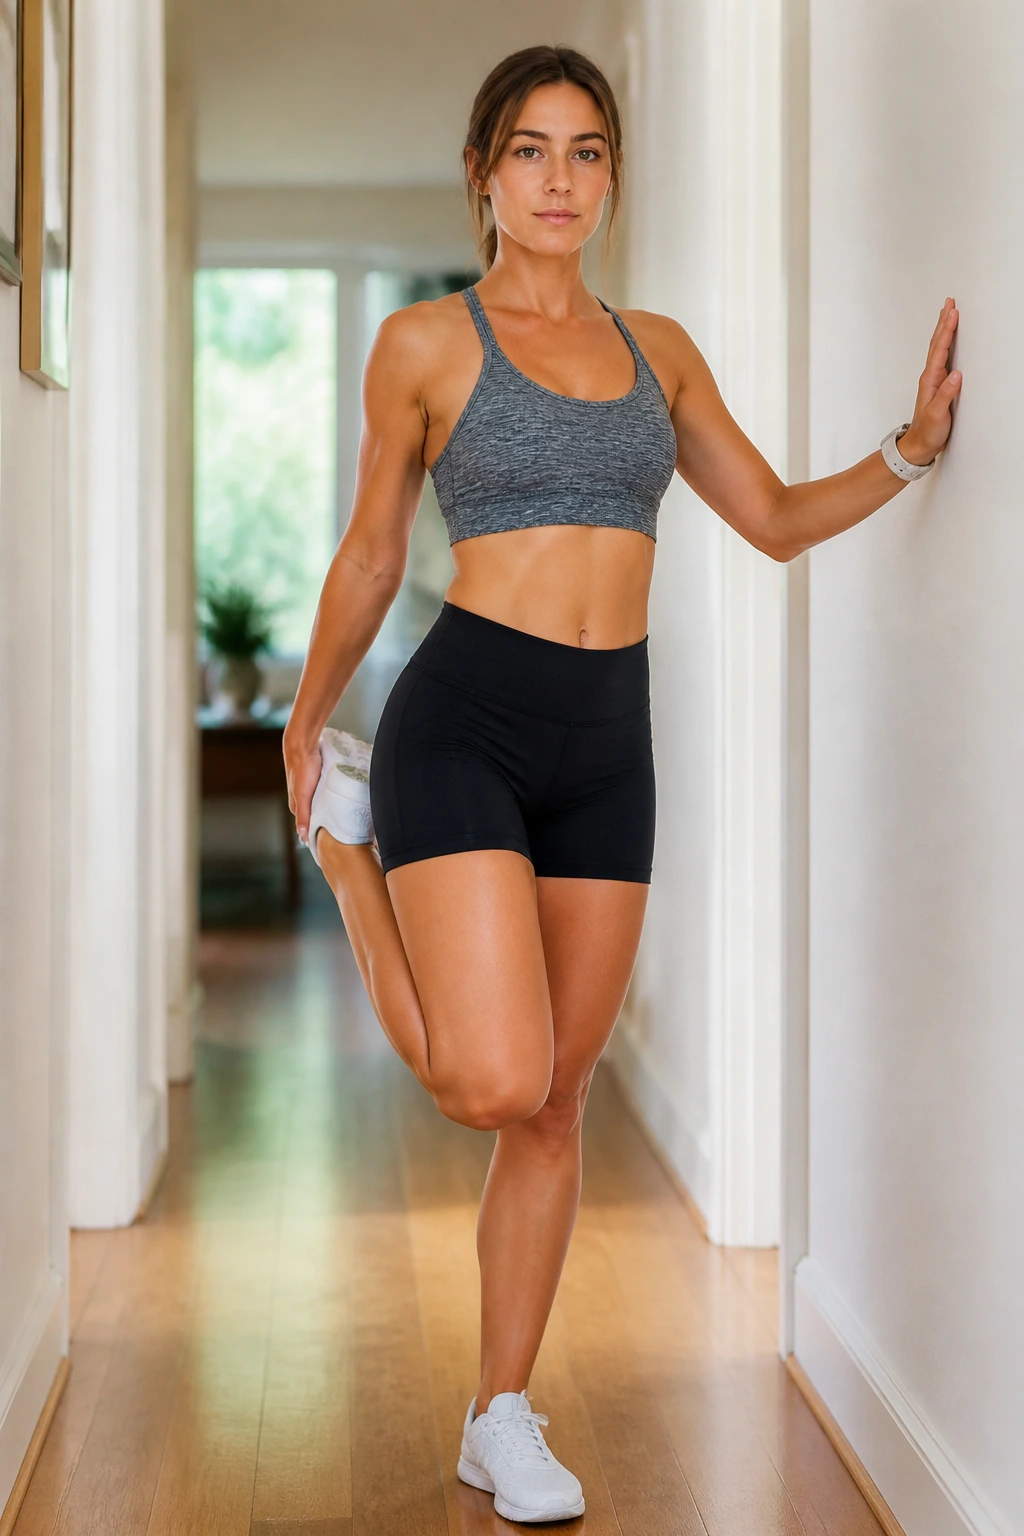
Balance is the primary challenge here. By engaging your core and standing on one leg, you are also training your stability muscles. The target is the quadriceps, the large muscles on the front of your thigh that get tight from walking, running, and sitting.
The Execution
Find a wall or a stable surface for balance. Bend your right knee and grab your right ankle with your right hand. Pull your heel toward your glute. Keep your knees close together—do not let the bent knee drift out to the side.
Avoiding the Arch
Most people arch their back to get their heel closer to their butt. Tuck your tailbone under. Imagine you are trying to push your hip bone forward while keeping your heel back. This posterior pelvic tilt is what makes the stretch intense. Hold for 30 seconds on each side.
10. Standing Calf Stretch
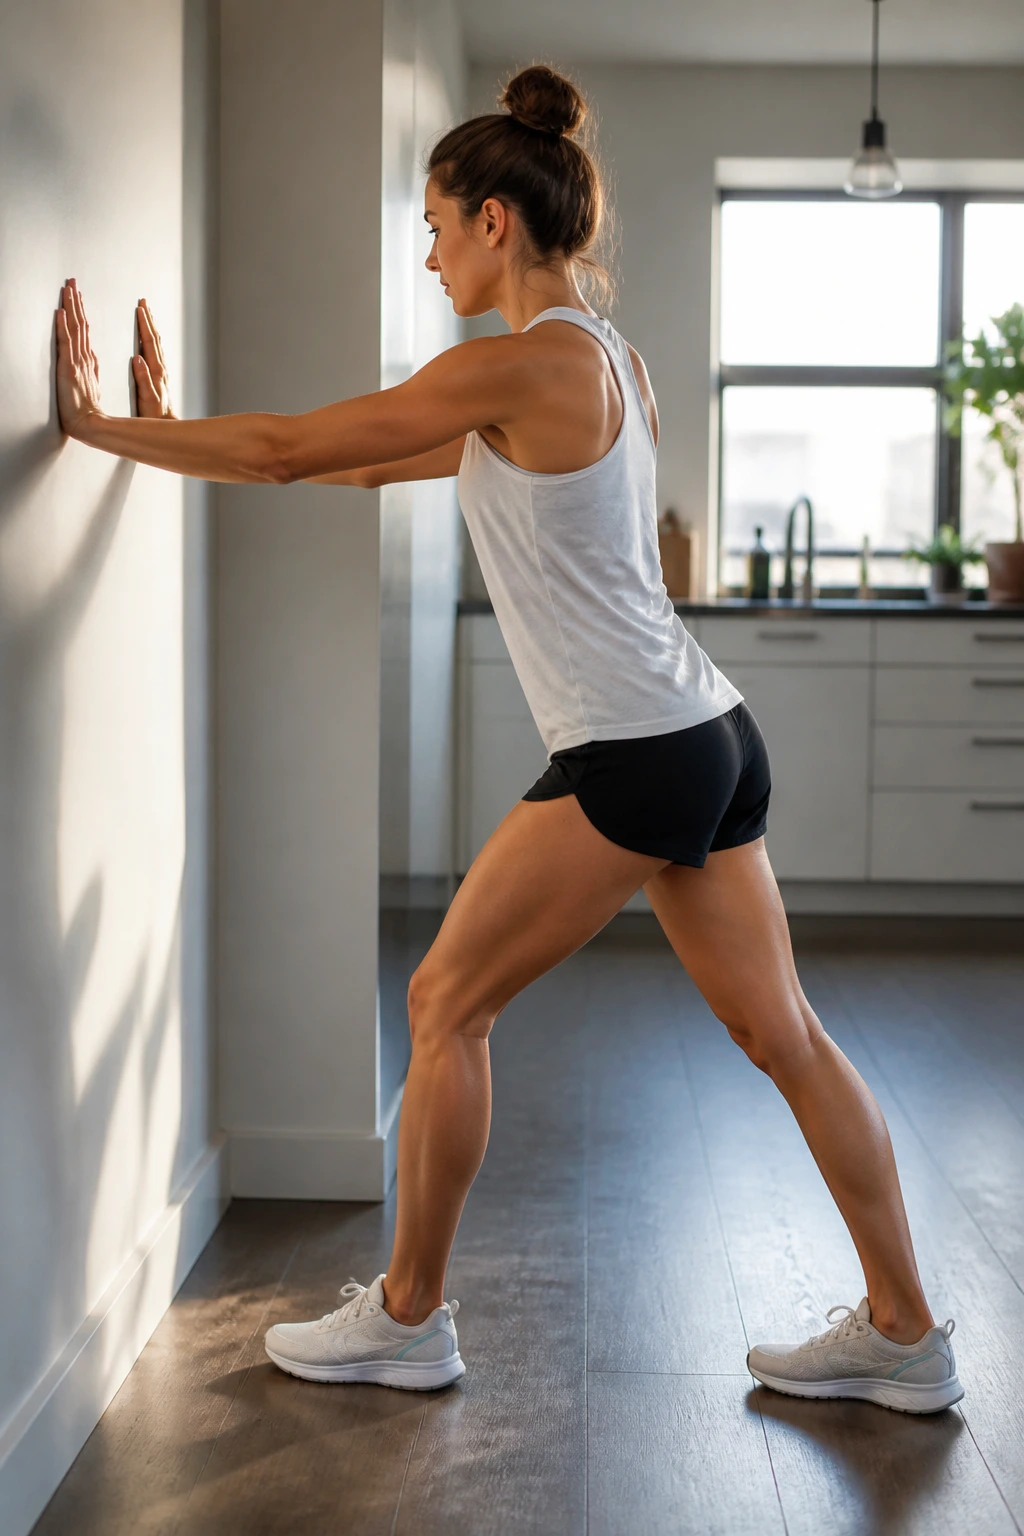
Tight calves are the silent cause of many foot, ankle, and even knee problems. They are constantly under tension, especially if you wear shoes with any sort of heel lift. Using a wall makes this stretch precise and easy to control.
The Set-Up
Face a wall. Place your hands on it at shoulder height. Step your right foot back about two feet. Keep your right heel pressed firmly into the floor. This is the non-negotiable part—if the heel comes up, the stretch is gone.
Deepening the Release
Keep your right leg perfectly straight. Lean into the wall, bending your left knee. You will feel the stretch in the right calf. If you don’t feel it, step your right foot back a few more inches. Hold for 45 seconds, then switch sides. If you want to target the deeper soleus muscle, do the same thing but put a tiny bend in the right knee.
11. Standing Hip Flexor Lunge
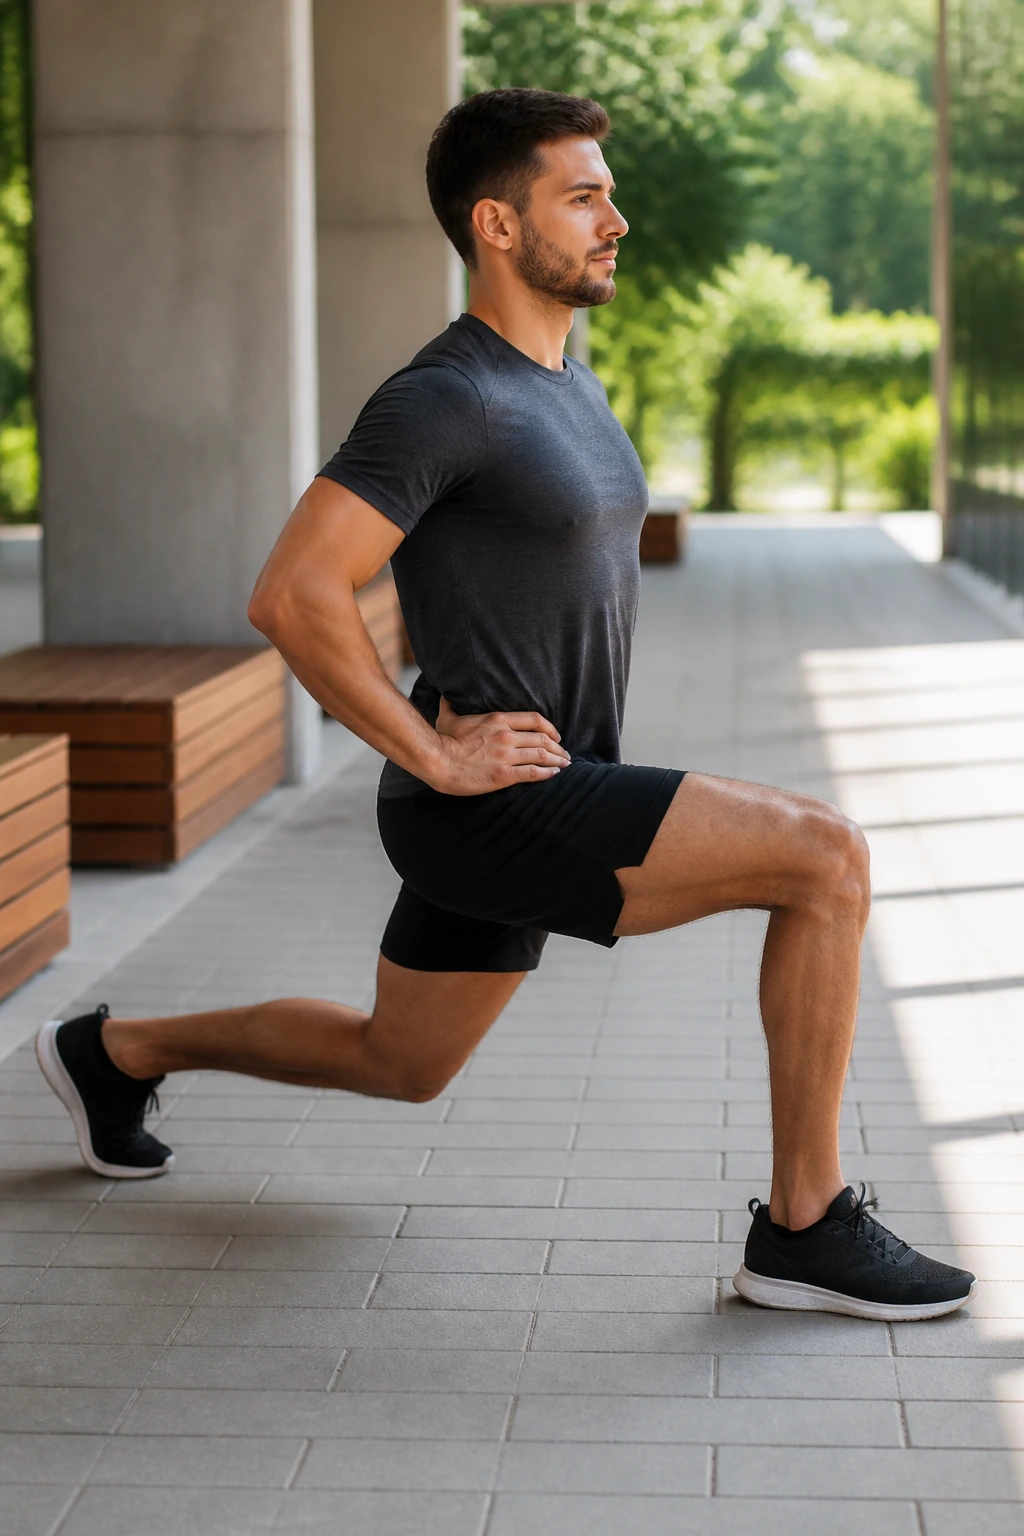
This is arguably the most important stretch for anyone who spends a lot of time seated. The hip flexors are the muscles that connect your legs to your torso; when they get tight, they pull your pelvis forward, creating a swayback posture and lower back pain.
Getting Into Position
Stand tall and take a large step forward with your left foot, but keep your back heel off the ground. Now, lower your back knee slightly, but do not touch the ground. We are staying standing. Tuck your pelvis under, squeezing your right glute.
The Secret Mechanism
The squeeze in the right glute is the key. The hip flexor is on the front; the glute is on the back. When you contract the glute, you send a signal to the hip flexor to relax. Hold this for 45 seconds. Keep your torso upright—do not lean forward over your front leg.
12. Standing Hamstring Stretch (Heel Plant)

Sometimes a full forward fold is too much, or it bothers your lower back. The standing heel plant is a safer, more controlled way to isolate one hamstring at a time while standing.
The Setup
Stand with your feet together. Step your right foot forward about six inches and rest it on the heel, with your toes pointing up toward the ceiling. Keep your left leg bent, and place your hands on your left thigh for support.
The Hinge
Hinge forward at the hips, keeping your spine straight and your chest up. You should feel an immediate stretch in the right hamstring. Because you are using your left leg as a support, you can control the intensity by how far you hinge forward. Hold for 30 seconds and switch.
13. Standing Figure-Four Glute Stretch
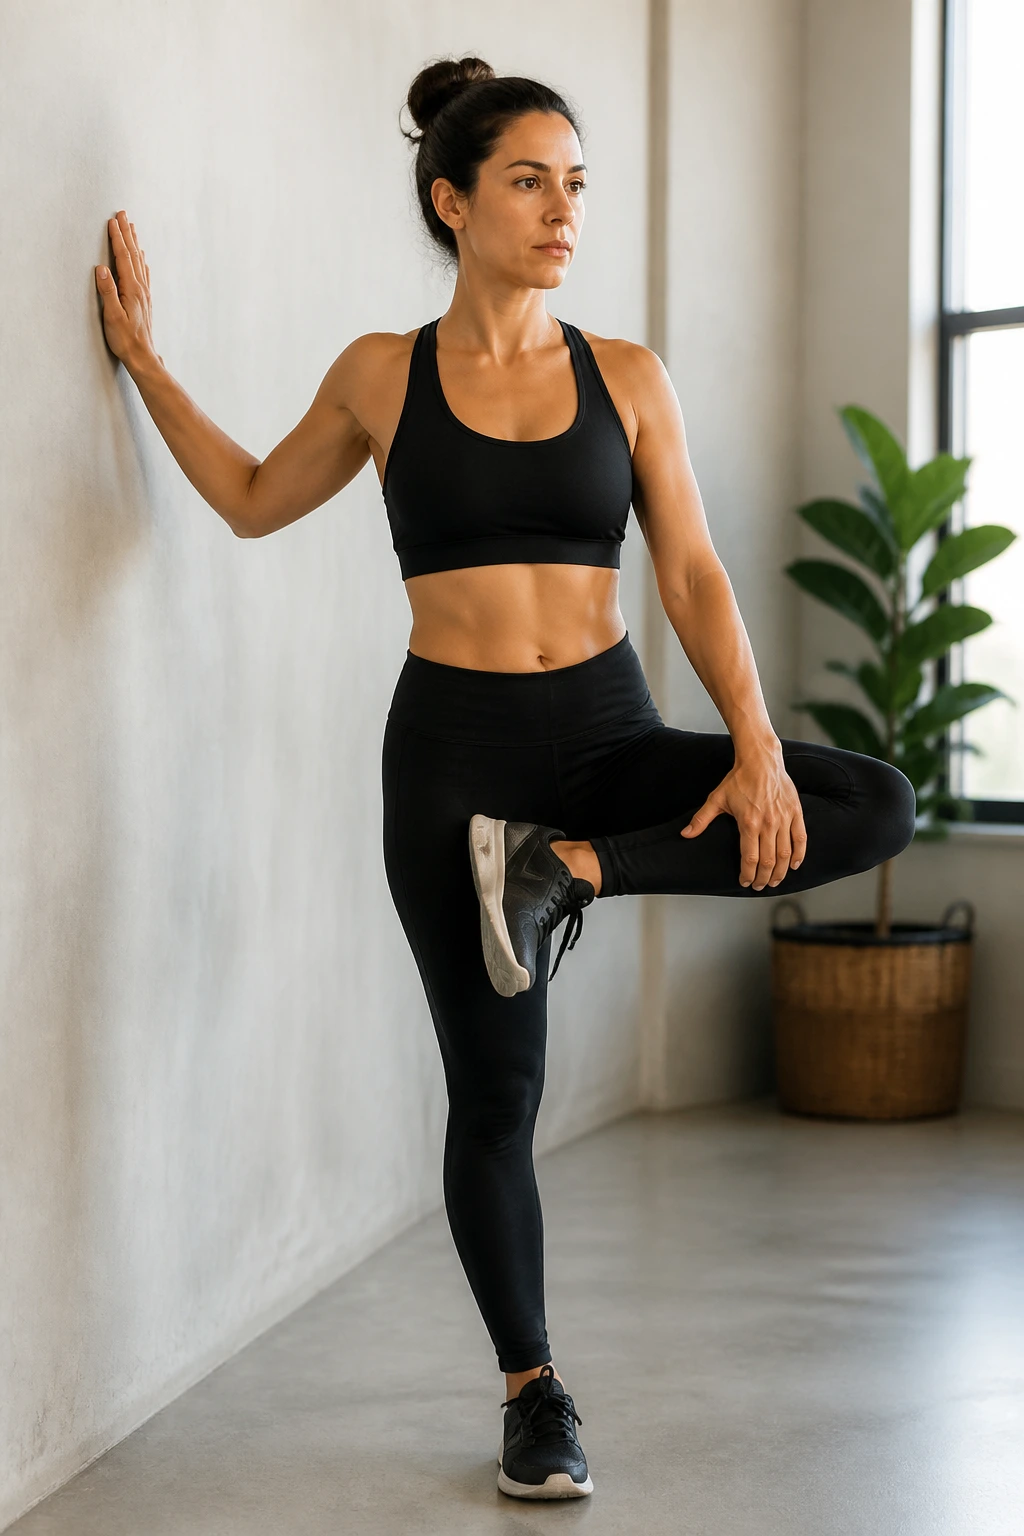
The glutes are powerful muscles, and when they are tight, they can cause sciatica-like pain and hip stiffness. The figure-four is the best way to get deep into the gluteus medius and piriformis. Doing this standing requires balance, so use a wall or a sturdy chair.
How to Do It
Stand on your left leg. Cross your right ankle over your left knee, creating a “figure four” shape with your legs. Slowly sit your hips back and down, as if you are lowering yourself into a chair. Your right knee will naturally want to push down toward the floor.
The Sensation
You will feel a deep, intense stretch in your right hip and glute. If you don’t feel much, bend your standing leg a little deeper. Keep your chest up—do not hunch over. Hold for 30 to 45 seconds. This is often the stretch that provides the most relief for people with “tight hips.”
14. Standing IT Band Stretch (Cross-Over)
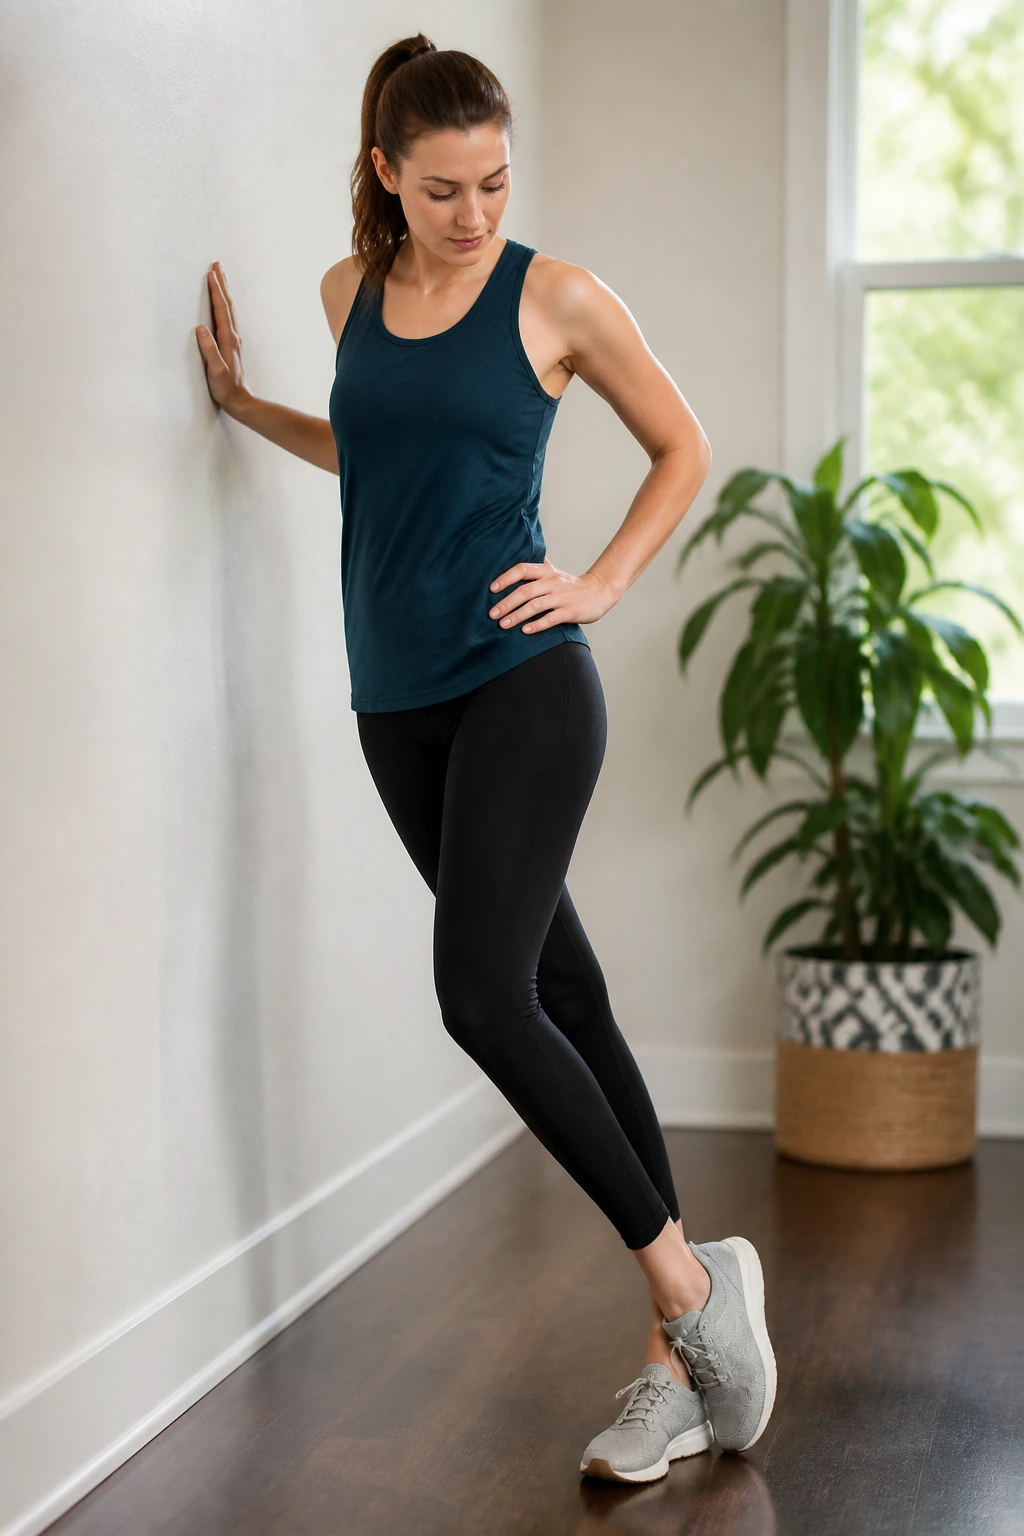
The IT band is not actually a muscle, but a thick strip of fascia that runs down the side of your thigh. When it gets tight, it pulls on the knee and the hip. It is notoriously difficult to stretch, but this crossover method is the most effective standing version.
The Movement
Stand to the side of a wall. If you are targeting your right IT band, stand with your left side to the wall. Cross your right leg behind your left leg. Now, lean your hips toward the wall until you feel the tension along the outside of your right thigh.
Why This Works
The crossing of the legs puts the IT band on tension, and the side-leaning motion puts it on a stretch. You should feel this all the way from your hip down toward your knee. It is not a gentle stretch—it can be quite intense. Hold for 30 seconds and then switch.
15. Standing Lat Stretch with Support
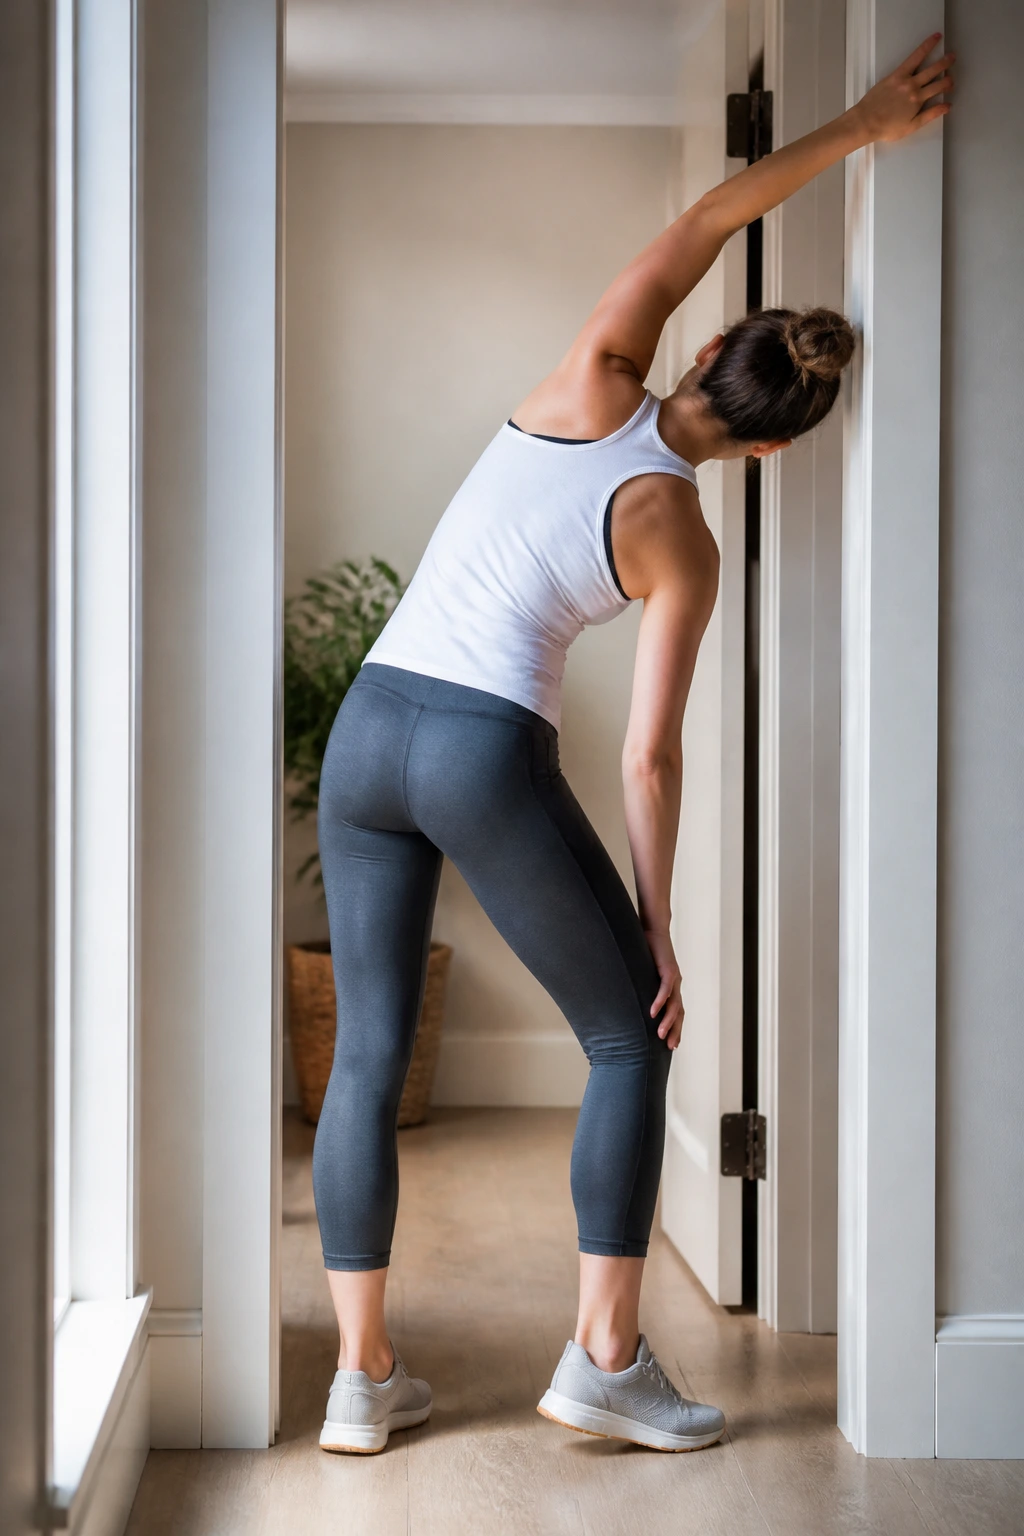
The latissimus dorsi muscles are huge, covering most of your back. They act as stabilizers. When they are tight, they restrict your overhead movement and make your back feel stiff. You need an anchor point for this—a doorframe or a sturdy pole works perfectly.
The Technique
Stand facing a doorframe. Reach your right hand up and grab the frame or a handle. Step your feet back and away from the frame. Let your body weight hang back, allowing your arm to be pulled straight.
Adjusting for Comfort
Shift your weight slightly to the left to intensify the stretch on the right side. You should feel a deep pull under your armpit and down the side of your torso. This is great for correcting a rounded posture. Hold for 45 seconds on each side, breathing into the side of the ribcage.
16. Standing Ankle Circles
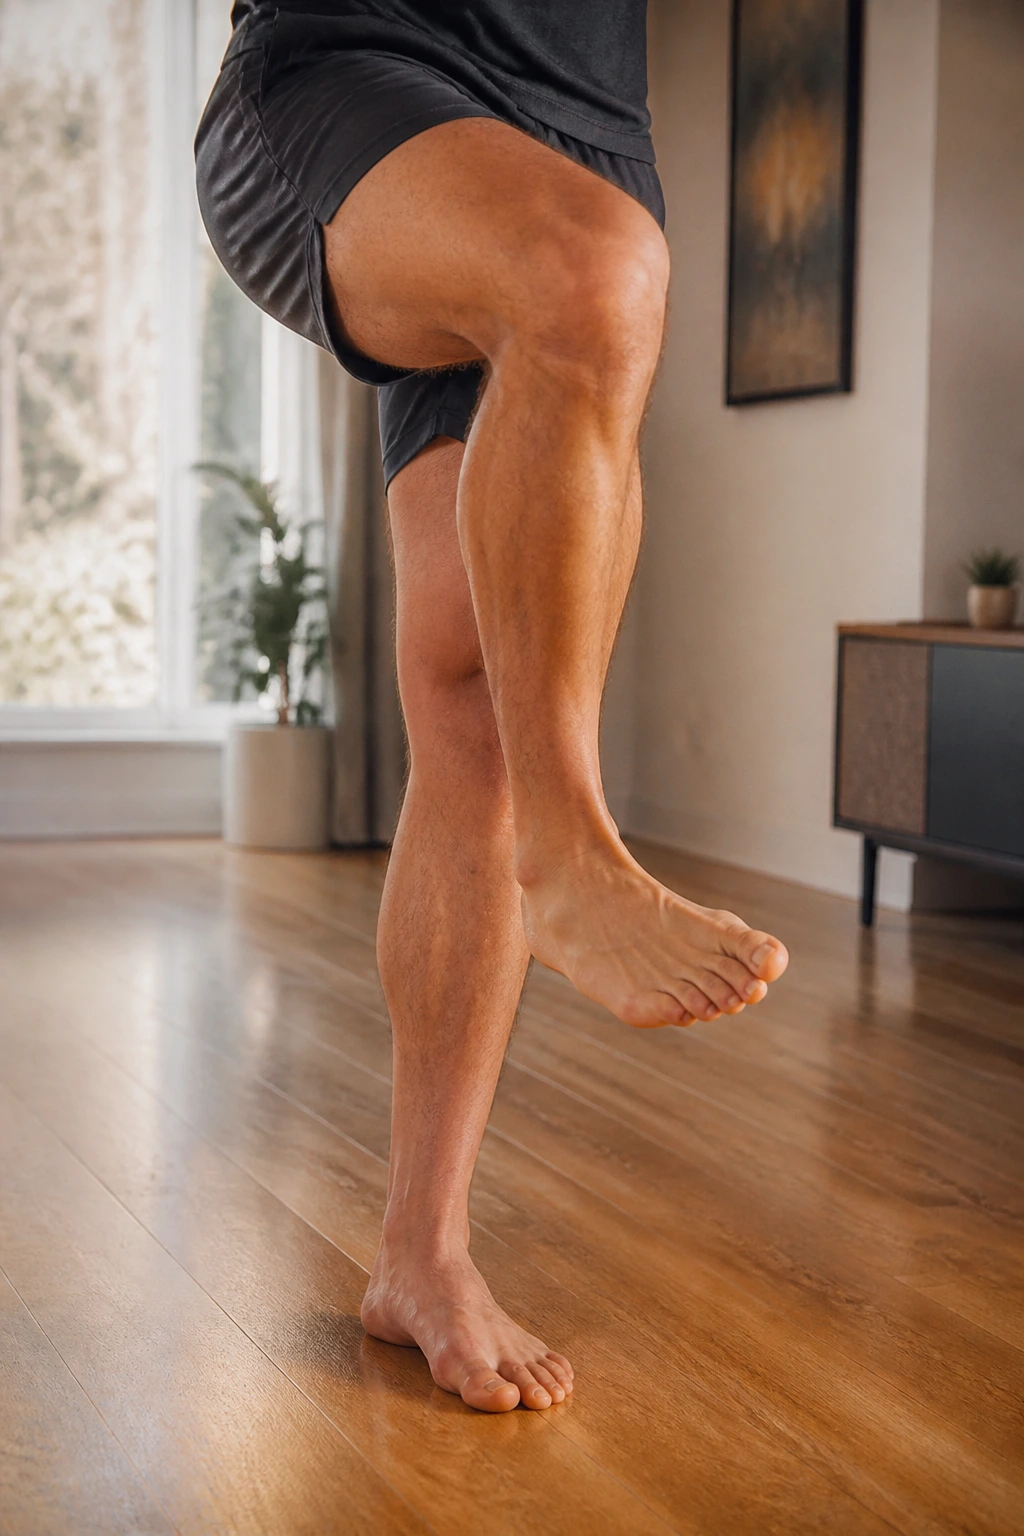
We often neglect the ankles, but they are the foundation for the entire kinetic chain. If your ankles are stiff, your body will compensate by hiking your knees or locking your hips. This is a simple mobility movement, but it is necessary.
How to Do It
Stand on your left leg. Lift your right foot slightly off the floor. Slowly rotate your right ankle in a circle. Make the circle as large as possible—think about tracing a giant clock face with your big toe.
The Frequency
Do 15 circles in one direction, then 15 in the other. Switch legs. You are working on “dorsiflexion” and “plantarflexion” here. If you hear some clicking, that is usually just tendons moving over bone—don’t worry about it unless it hurts. It helps to do this while brushing your teeth.
17. Standing Wrist Extensions
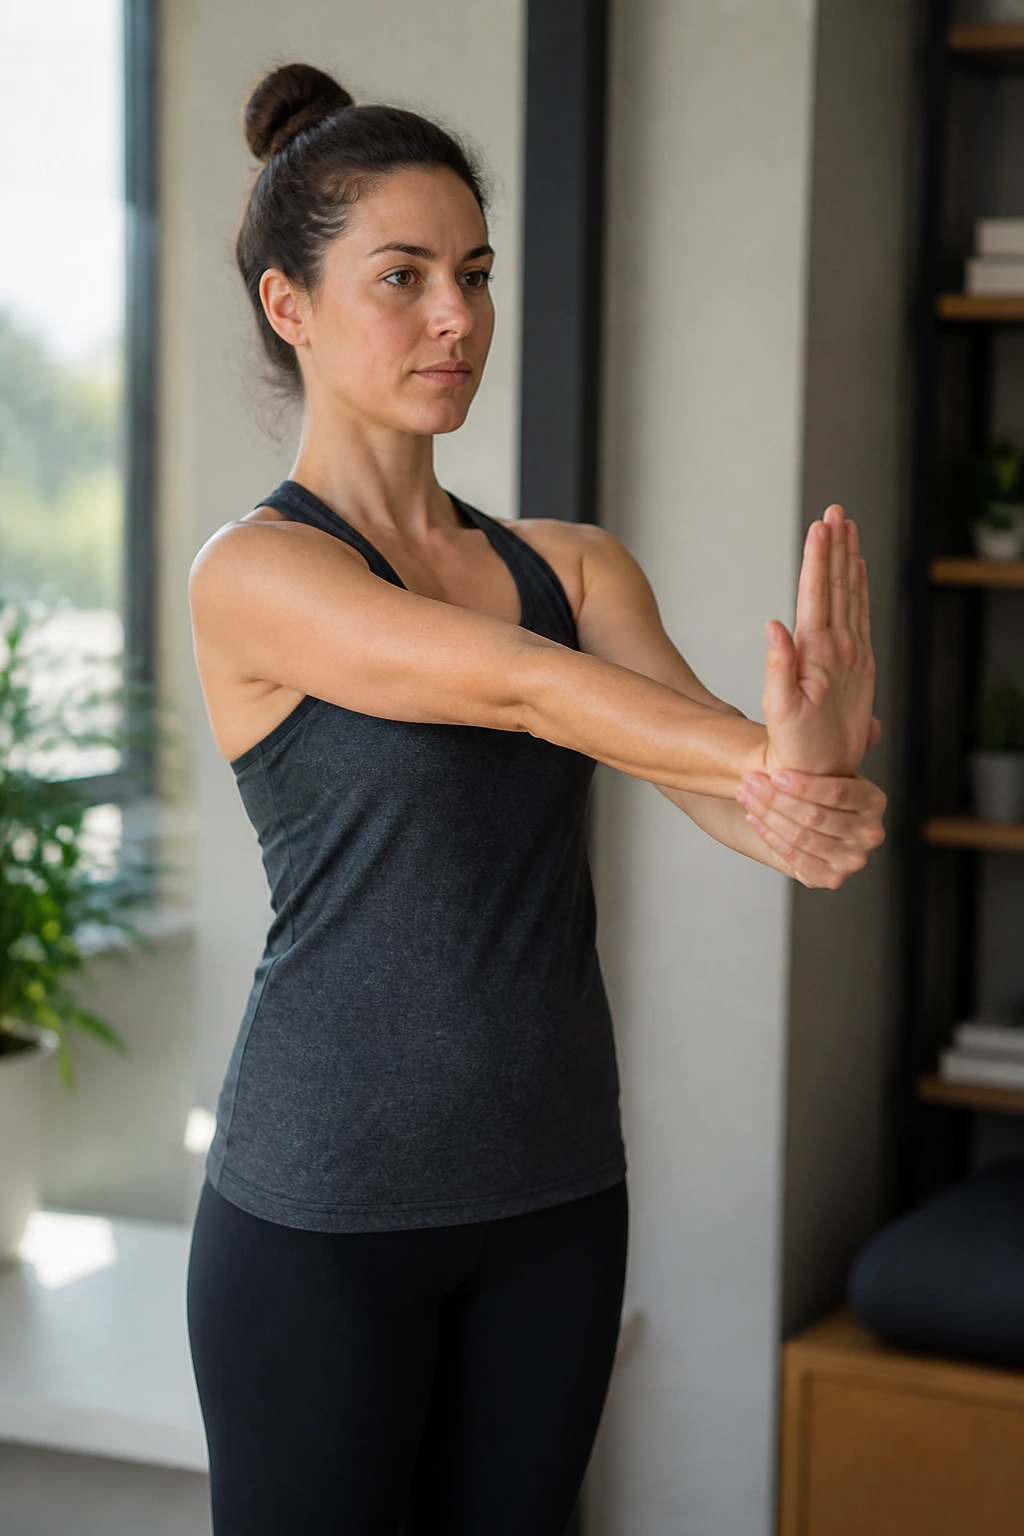
Forearm and wrist tightness are becoming common due to typing and smartphone usage. This affects your grip strength and can lead to elbow pain. This stretch can be done anywhere.
The Technique
Extend your right arm forward, palm facing away from you, as if you are signaling “stop.” Use your left hand to gently pull your right fingers back toward you. Keep your right arm straight.
The Counter-Stretch
After holding the “palm out” version for 20 seconds, flip your hand so your fingers point toward the floor, palm facing you. Use your left hand to pull the back of your right hand toward you. This hits the other side of the forearm. Repeat on both sides.
18. Standing Cat-Cow
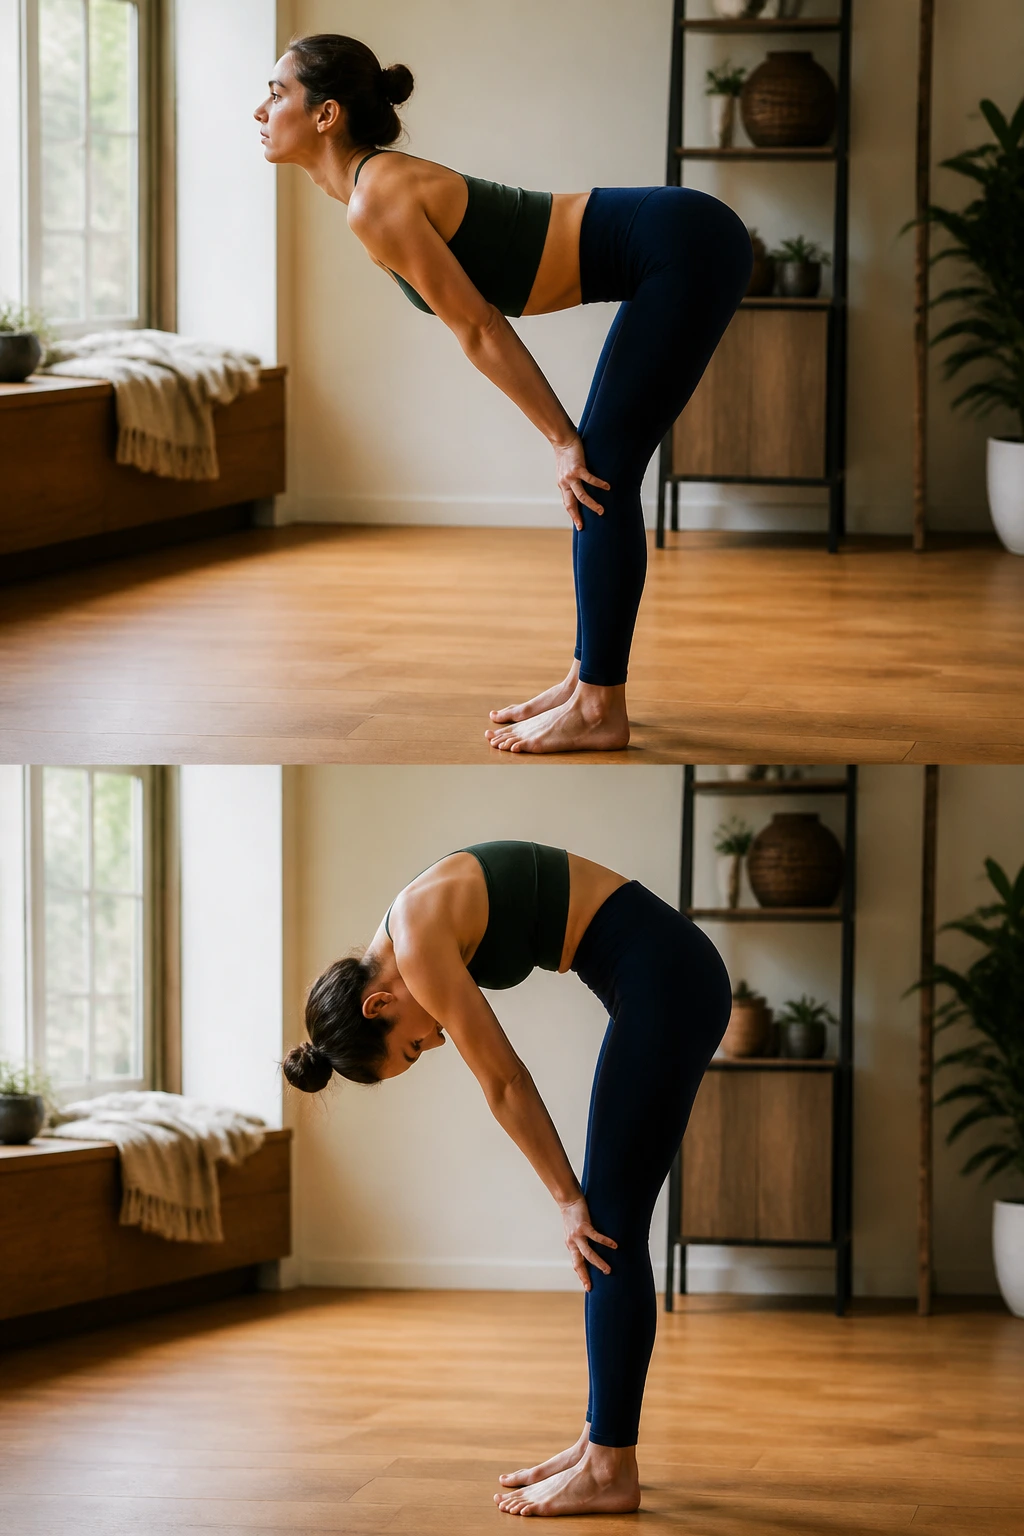
You have likely seen the Cat-Cow stretch on the floor in yoga, but doing it standing allows you to mobilize the spine without putting any weight on your wrists or knees. It is a fantastic way to wake up a stiff back after sitting.
The Mechanics
Stand with your feet hip-width apart and your knees bent. Place your hands on your knees and lean forward slightly. Inhale, drop your belly, arch your back, and look up toward the ceiling—this is the “cow” pose. Exhale, round your spine, tuck your chin to your chest, and pull your belly button in—this is the “cat” pose.
Finding the Rhythm
Move slowly. Do not just jerk your back around. Connect the movement to your breath. The transition from arch to round is where the spinal joints get the most relief. Do 10 cycles of this. It is great for decompressing the vertebrae.
19. Standing Inner Thigh (Adductor) Stretch
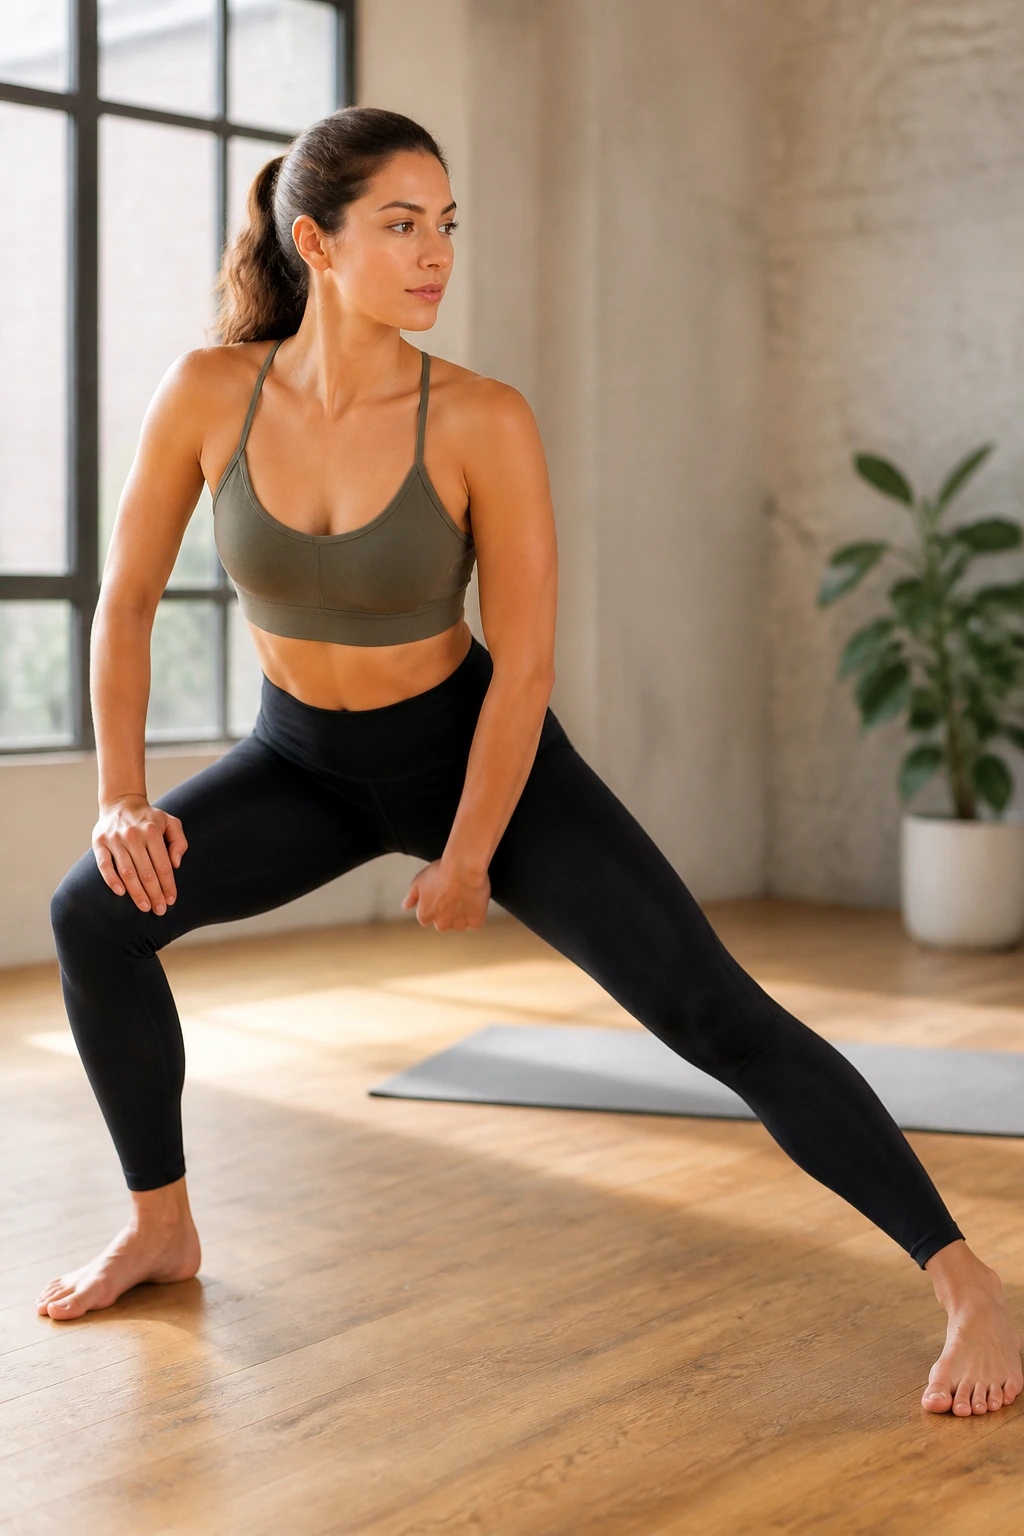
The adductors, or inner thighs, are often ignored until you try to perform a wide-stance movement and feel a “pull.” They are important for pelvic stability. A standing stretch is far more manageable than a deep floor split.
The Setup
Stand with your feet very wide, significantly wider than your shoulders. Turn your toes slightly outward. Keep your right leg straight and bend your left knee, shifting your weight onto your left hip.
The Sensation
You will feel the stretch on the inside of your straight right leg. To increase it, push your right foot firmly into the floor and keep the leg locked out. Hold for 30 seconds, then shift to the other side. This is much better for your knees than trying to do a deep, seated straddle.
20. Standing Chest and Bicep Wall Stretch
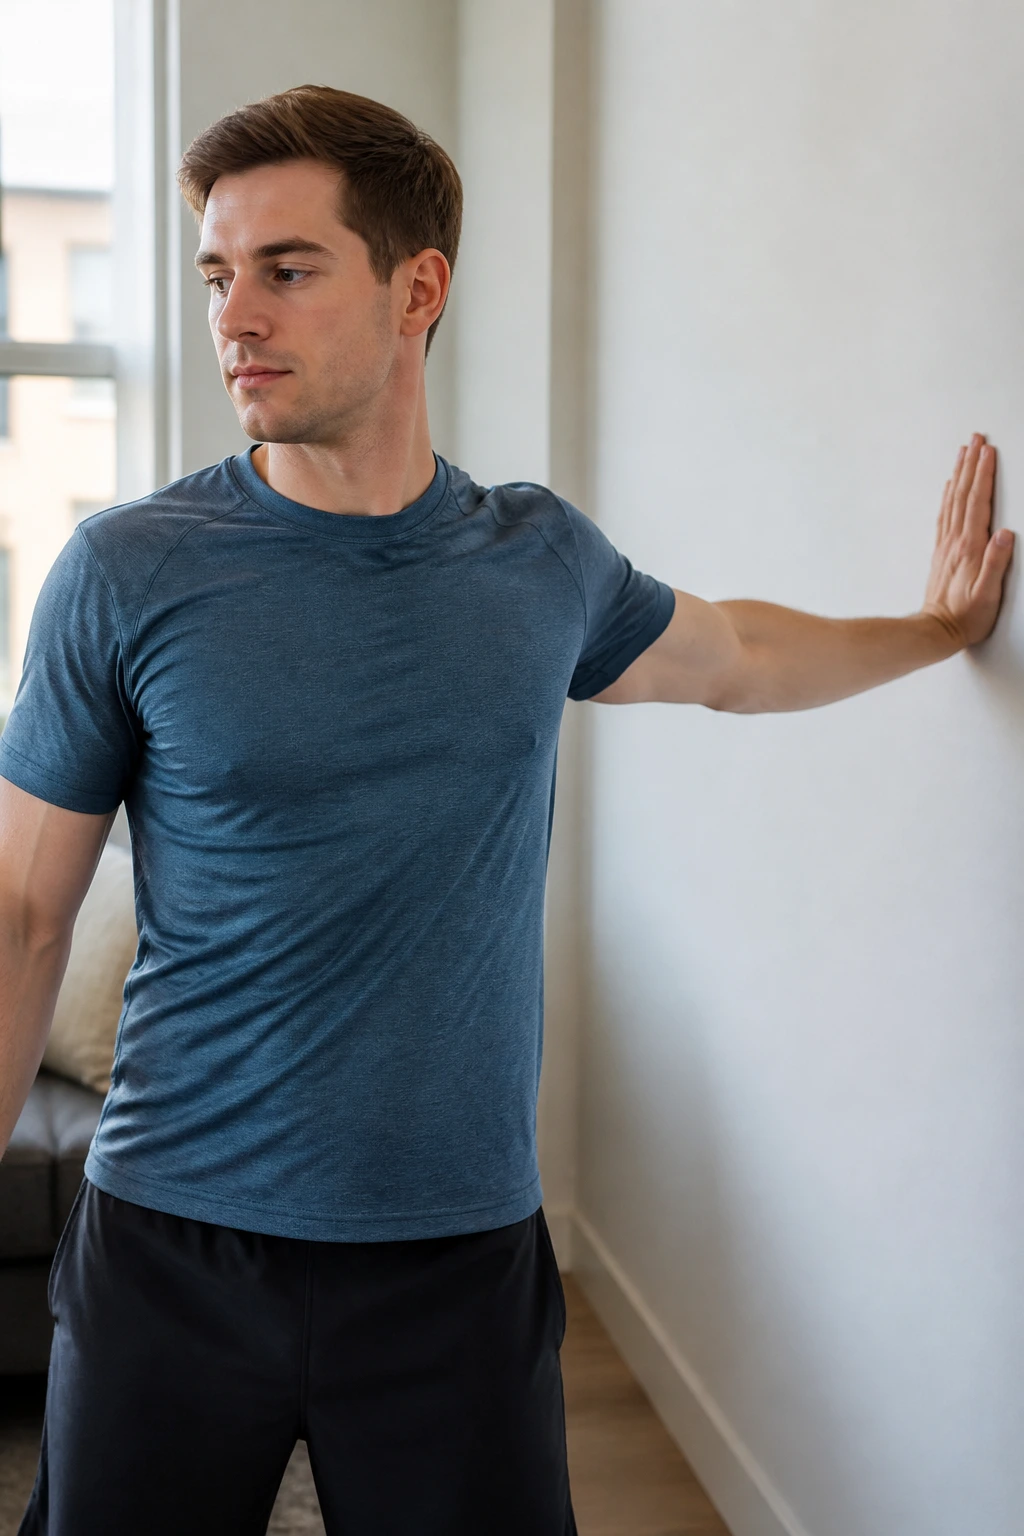
We finish with this because it is the ultimate “office worker” antidote. It targets the chest, shoulders, and the biceps, which often tighten up in tandem.
The Position
Stand next to a wall. Extend your right arm out to the side, palm flat against the wall, thumb pointing up. Your arm should be at shoulder height. Now, turn your torso away from the wall until you feel a stretch in your chest and the front of your arm.
Why This Works
The arm position on the wall puts the bicep tendon on a stretch as well as the chest. It is a very effective combo. If you want more, move your hand higher or lower on the wall to hit different angles of the pectoral muscle. Hold for 45 seconds on each side.
Final Thoughts
Consistency is the secret ingredient that most people overlook. You do not need to do all 20 of these every day. In fact, that would take too long. Pick four or five that target the areas where you feel the most stiffness. Maybe you choose the neck and shoulder rolls for the morning, and the hip flexor and hamstring stretches for the evening.
The goal is to weave these movements into the fabric of your day. Stretch while the coffee is brewing, while you are waiting for a file to download, or right after you finish your workout. Your muscles will not lengthen permanently overnight, but if you give them a gentle, consistent signal that it is safe to relax, they will respond. Listen to your body, breathe through the tension, and let go of the tightness that holds you back.
