



That dull, nagging ache at the base of your spine often feels like an uninvited guest who has decided to settle in for the long haul. You might have noticed it creeping in during the second trimester, right around the time your center of gravity began to shift, or perhaps it arrived earlier, heralded by the loosening of ligaments as your body prepared for the months ahead. It is rarely a sharp, emergency pain, but rather a constant, grinding reminder that your skeletal structure is doing a massive amount of heavy lifting. Pregnancy changes the way you move, sit, and sleep, and your lower back—the primary stabilizer for that growing weight—is almost always the first place to complain.
Most advice you find involves generic lists of “don’ts,” but very little of it addresses the specific, localized tension that makes putting on shoes feel like an Olympic event. The goal here isn’t just to stretch blindly; it is to find the specific release for the muscles that are being overstretched and the ones that are being overworked. When your belly grows, your pelvis naturally tilts forward, pulling on the lumbar spine. If you don’t find a way to counterbalance that pull, the muscles in your lower back effectively turn into tight, overworked cables.
This guide is designed to move you through the best movements to reclaim some comfort. We are focusing on stretches that are inherently safe, adaptable to your changing mobility, and—most importantly—effective at targeting the exact muscle groups that tighten up during pregnancy. You do not need a yoga studio, fancy equipment, or an hour of free time. You need a bit of floor space, a wall, and a willingness to breathe into the tight spots.
Understanding Why Pregnancy Affects Your Back

Your body is undergoing a massive physiological shift. As the uterus expands, it stretches the abdominal muscles, which inevitably weakens your core’s ability to support your spine. This leaves your back muscles to pick up the slack. To make matters even more complicated, your body releases a hormone called relaxin, which softens the ligaments in your pelvis to prepare for birth. While this is helpful for the delivery process, it makes your joints less stable in the meantime.
Think of your spine as a support beam. When your abdominal muscles are strong and intact, they act like guy-wires, holding that beam upright. As the pregnancy progresses, those guy-wires loosen. Your back muscles are then forced to contract harder just to keep you upright. This constant contraction leads to fatigue, stiffness, and that specific soreness that tends to worsen by the end of the day.
The goal of these stretches is not to “fix” your back—that is a process that happens after birth—but to manage the load. By lengthening the tight muscles and gently engaging the ones that have been neglected, you can reduce the amount of strain your spine has to absorb. It is a game of tension management. If you feel sharp, pinching, or stabbing pain, stop immediately. We are looking for the sensation of a gentle pull, like a rubber band being stretched to its comfortable limit, not a snap.
Crucial Safety Precautions Before You Stretch
Before you get down on the floor, establish a few ground rules for yourself. First, skip any movement that makes you feel dizzy or short of breath. As your uterus grows, it can compress the inferior vena cava—a major vein that returns blood to your heart—when you lie flat on your back. For many people, this becomes uncomfortable or dangerous after the first trimester. If you feel lightheaded, roll onto your side immediately.
Second, listen to your joints. Because of the relaxin we mentioned earlier, it is surprisingly easy to overstretch during pregnancy. You might find you are suddenly more flexible than you have ever been, but that flexibility comes at the cost of stability. Do not push into your maximum range of motion. Aim for about 70 to 80 percent of what you think you can do.
Finally, always have a stable point of contact. If a move requires balance, do it near a wall or a sturdy chair. Your balance will change week by week, and the last thing you want is a sudden stumble. If a stretch feels like it is pulling on your belly rather than your muscles, back off. The goal is to feel the relief in your back, hips, or legs, not to strain your abdominal wall.
1. Cat-Cow
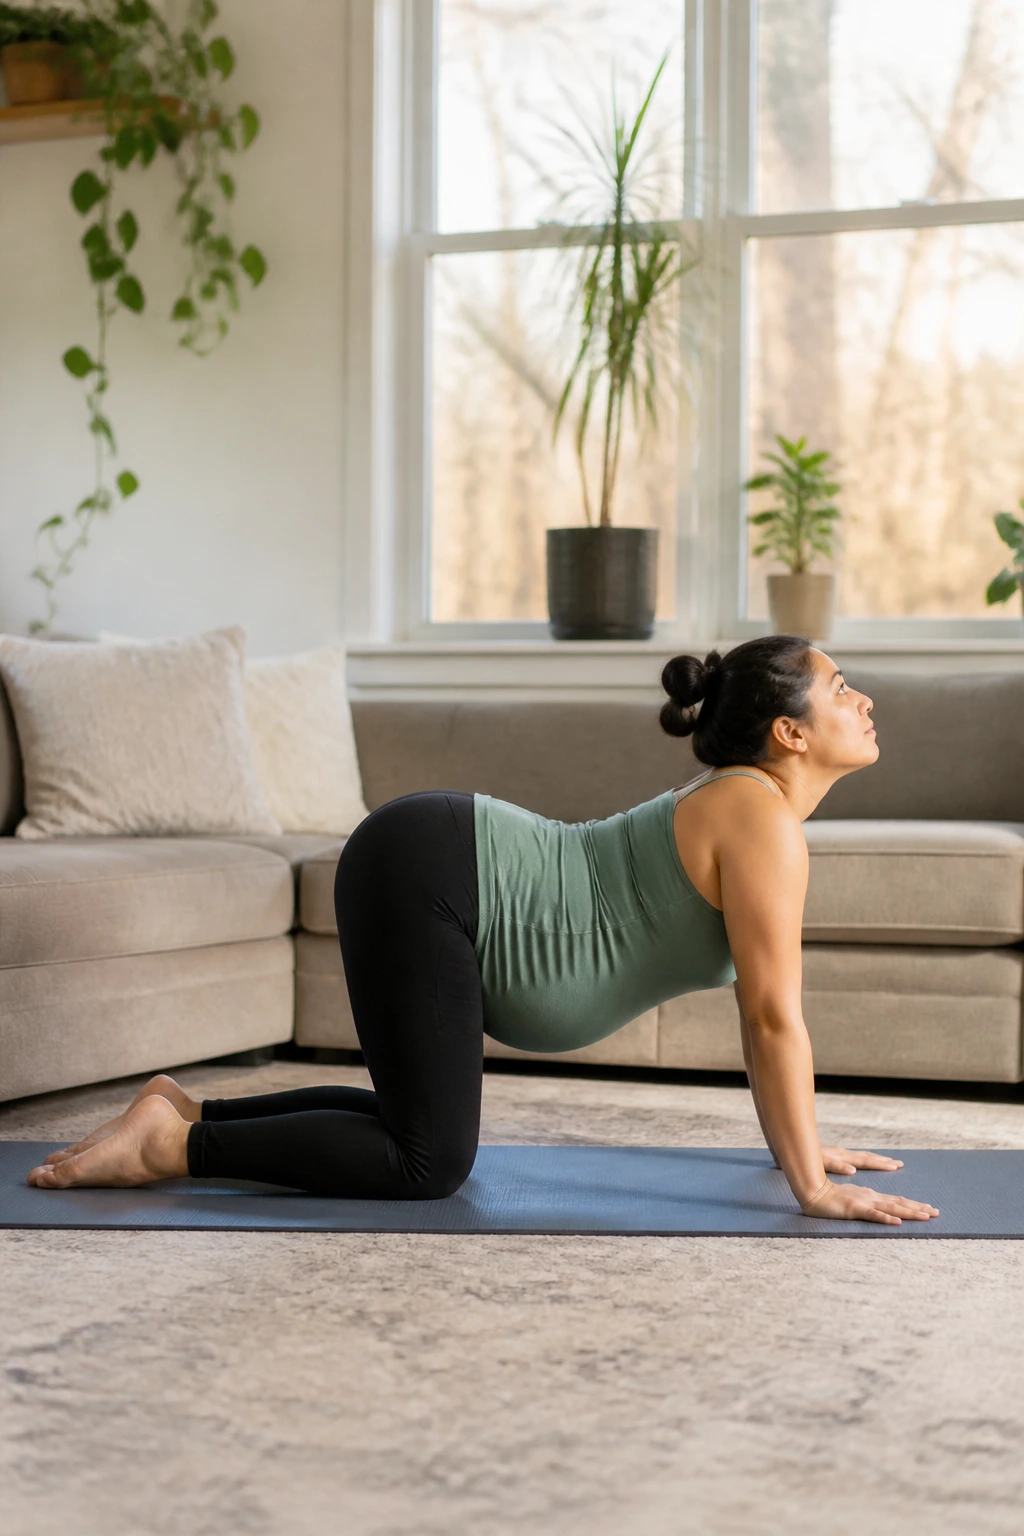
This is the gold standard for spinal mobility during pregnancy for a reason. It gently encourages the spine to articulate through its full range of motion without putting any weight on the lower back. By moving between a gentle arch and a rounded back, you are effectively “flossing” the nerves and muscles that run along your spine, helping to release built-up tension.
Why This Works
The movement facilitates fluid motion in the vertebrae. When you inhale and drop your belly, you are gently lengthening the front of the body and compressing the back, and when you exhale and round, you reverse that, stretching the muscles that have been holding you upright all day.
How to Perform the Movement
- Start on your hands and knees in a tabletop position, with your wrists directly under your shoulders and knees under your hips.
- As you inhale, drop your belly toward the floor, lift your chin, and gaze forward. Do not hyperextend your neck; keep it neutral.
- As you exhale, tuck your chin, round your upper back toward the ceiling, and gently pull your navel toward your spine.
- Move slowly. The slower you go, the more effective this becomes.
- Repeat this for 10 cycles, focusing on moving from the tailbone up to the neck.
Pro tip: If you have wrist sensitivity, you can perform this on your forearms using a sturdy bench or chair, which shifts the weight slightly but achieves the same spinal relief.
2. Child’s Pose (Wide-Knee)
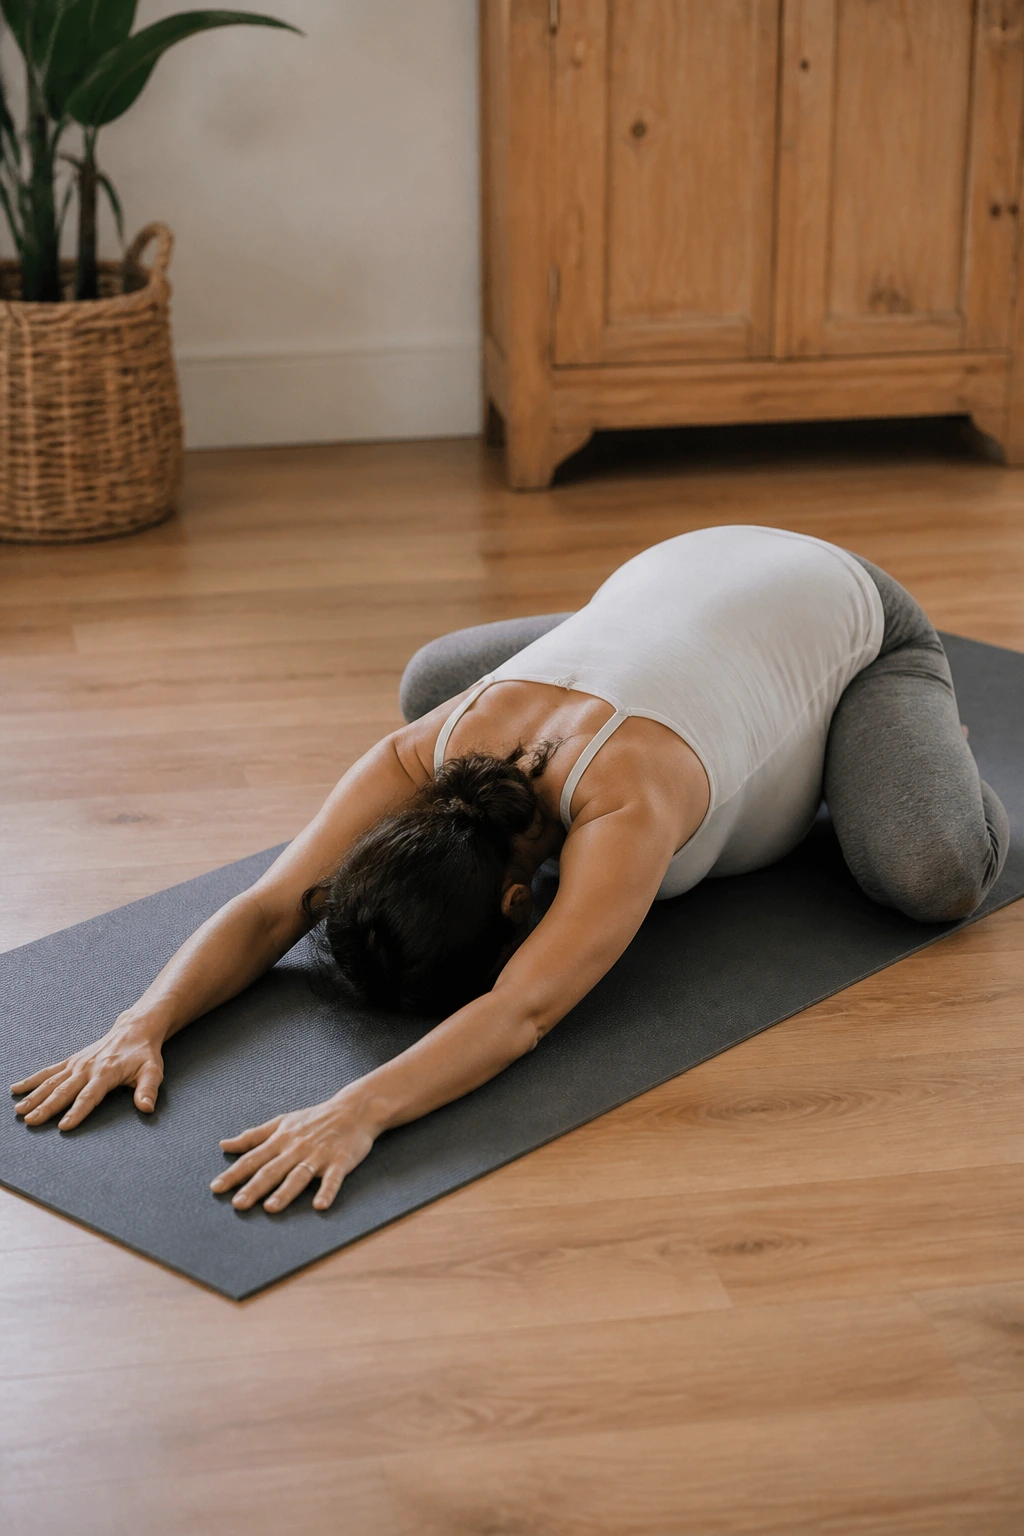
Traditional Child’s Pose can be difficult when you are further along because your belly gets in the way. The wide-knee variation is the solution. It allows you to sink your hips back, lengthening the entire lower back and opening the hips simultaneously, providing a deep sense of release.
Adjusting for Your Comfort
The beauty of this stretch is that it is infinitely customizable. You aren’t trying to squish your stomach; you are creating space for it. The wider your knees, the more space you have for your midsection to hang comfortably between your thighs.
Execution Steps
- Kneel on a soft surface, like a yoga mat or carpet.
- Bring your big toes to touch and separate your knees as wide as is comfortable for your hips.
- Slowly shift your weight back, sitting your glutes toward your heels.
- Reach your arms forward, walking your fingers out until you feel a gentle stretch in your mid-back and lats.
- Let your forehead rest on the floor, a folded blanket, or a yoga block if the floor feels too far away.
- Hold this for 60 seconds, breathing deeply into your back ribs.
If your hips feel tight, stay higher up with your hands on a couch or chair. The key is to keep the spine long, not to force your glutes all the way down.
3. Pelvic Tilts
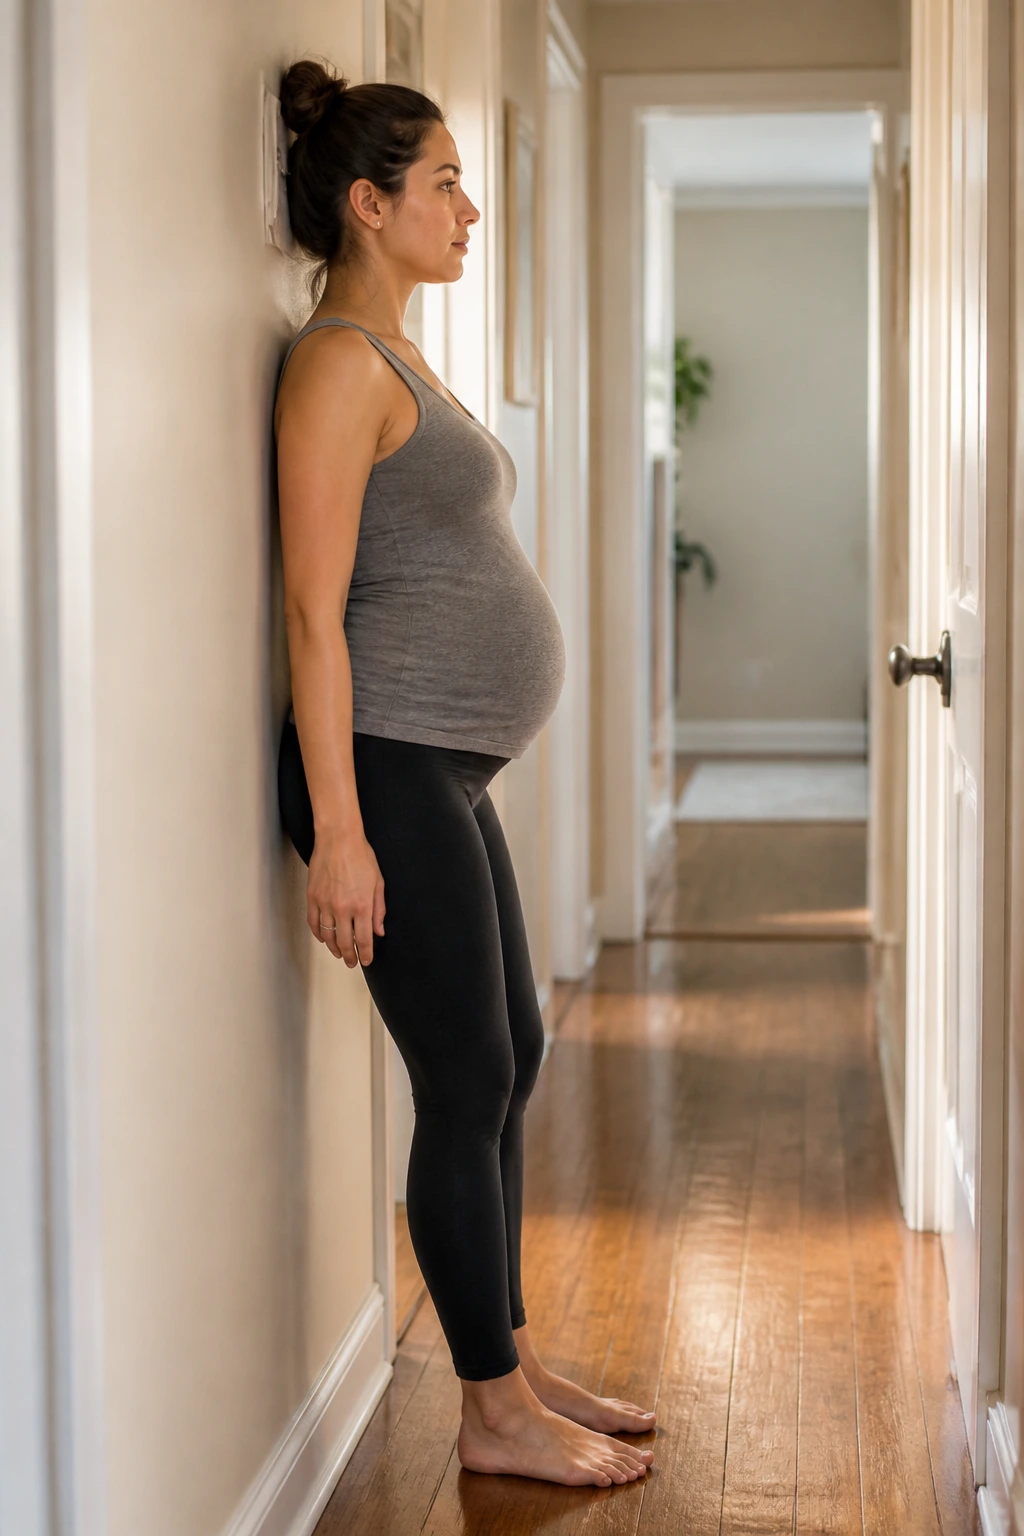
This is less of a traditional stretch and more of a subtle reset for your pelvis. It is incredibly effective for managing the “anterior pelvic tilt” that pregnancy often causes. If you feel like your lower back is stuck in a permanent arch, this move is your antidote.
The Mechanics of the Tilt
The pelvic tilt is all about engaging the deep core to counteract the forward pull of the belly. It’s a very small movement—an observer might barely notice you are doing it—but the internal sensation of lengthening the lower back is profound.
How to Execute
- Stand with your back against a wall, feet a few inches away from the baseboard.
- Your lower back will naturally have a slight gap between it and the wall.
- Inhale, then on the exhale, engage your lower abdominals and push your lower back flat against the wall.
- Hold this for 5 seconds while keeping your glutes relaxed.
- Inhale and release back to your neutral position.
- Perform 15 repetitions.
You can also do this on all fours. Start in a neutral tabletop, then exhale to tuck the tailbone under slightly, feeling your lower back round just a fraction. This is especially good for relieving the “squeezing” feeling in the lower vertebrae.
4. Wall Slides
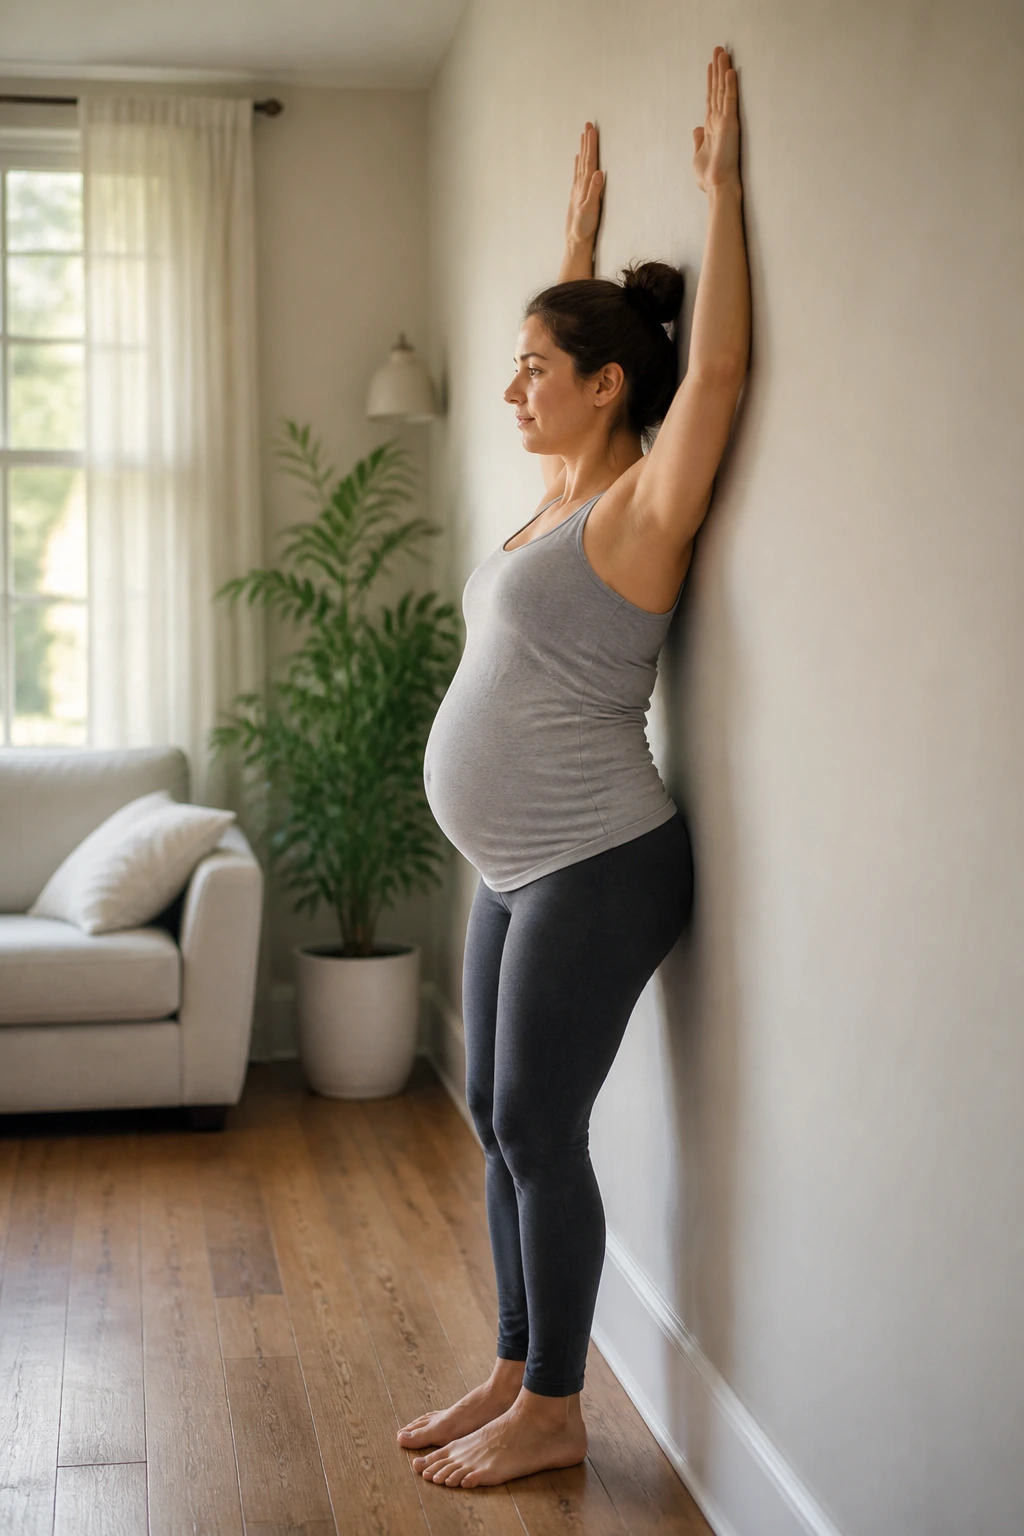
Wall slides are excellent for posture. During pregnancy, it is common for the shoulders to roll forward as the weight of the breasts and belly changes your balance. This forward roll pulls on your upper and mid-back, causing discomfort.
Why Your Shoulders Matter
Your upper back and lower back are connected in a kinetic chain. When your shoulders slump, your mid-back muscles get weak and your lower back compensates by working harder. By opening your chest and resetting your shoulders, you take some of the pressure off your lumbar region.
The Movement
- Stand with your back flat against a wall, feet about 6 inches out.
- Place your arms against the wall in a “goalpost” position—elbows at shoulder height, bent at 90 degrees.
- Ensure your elbows, wrists, and the back of your hands are touching the wall.
- Slowly slide your arms up the wall, straightening them without letting your elbows or hands leave the surface.
- Slide back down to the start.
- Do this 10 times, moving slowly.
If you cannot get your hands to touch the wall without arching your lower back, move your feet a few inches further out from the wall. This gives you more room to maintain contact.
5. Butterfly Stretch
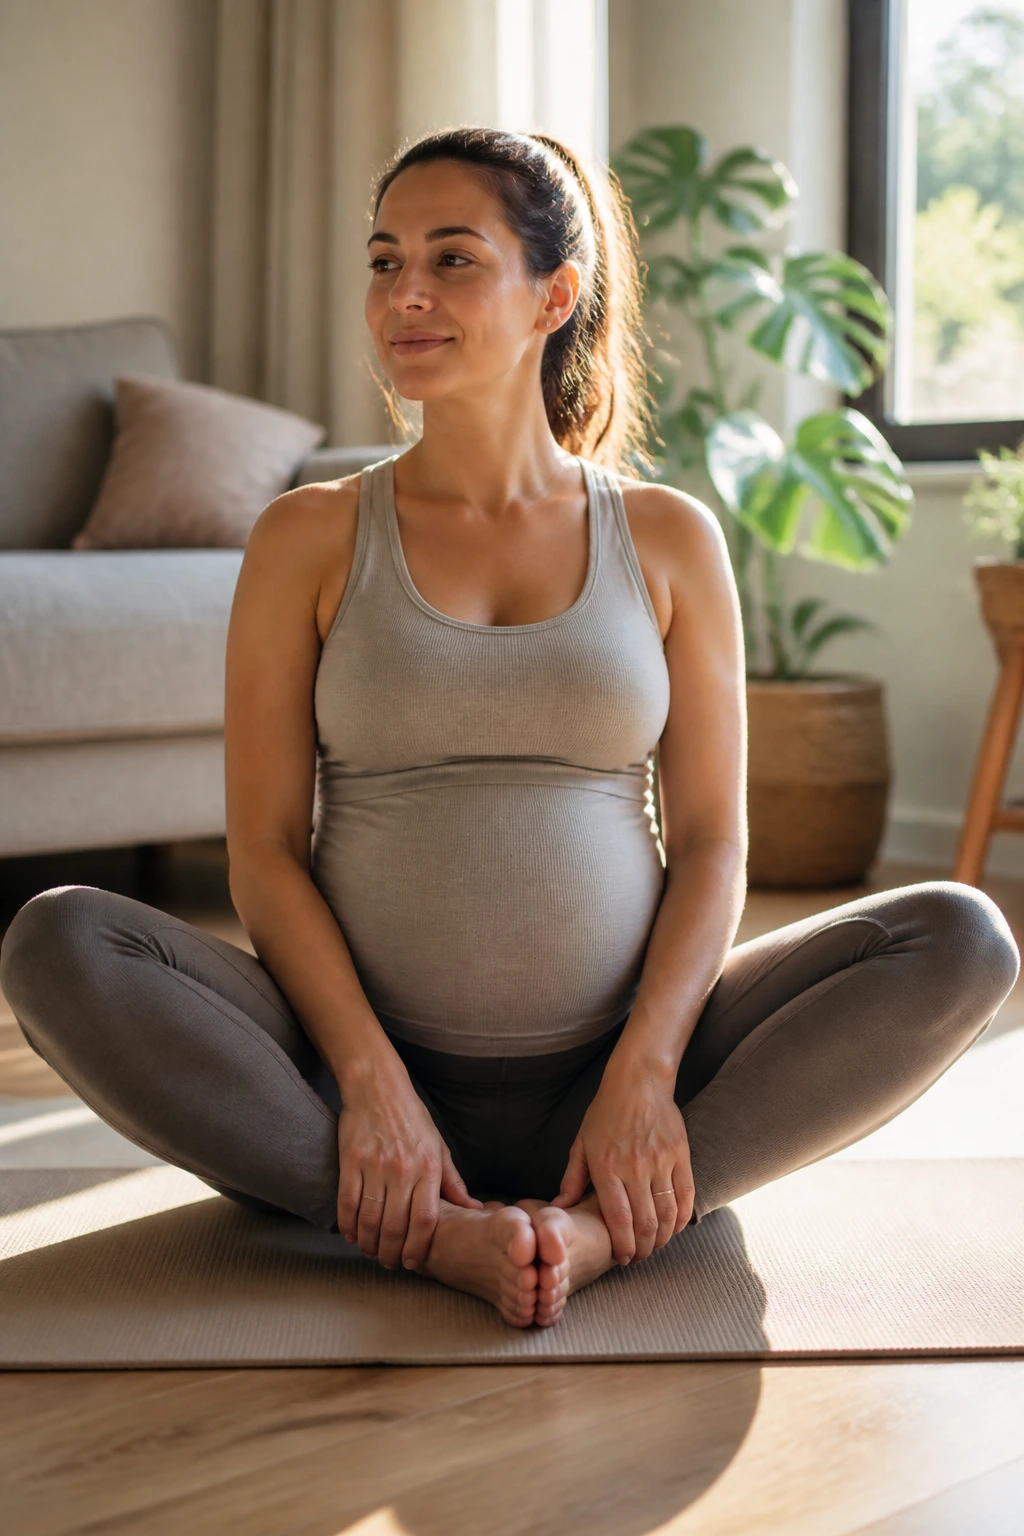
The butterfly stretch targets the inner thighs and the pelvic floor. Tight inner thighs can pull on the pelvis, creating an imbalance that resonates up into the lower back. This stretch is a staple for a reason.
Finding Your Depth
You do not need to press your knees to the floor. The goal is to relax the muscles, not to force them. If you feel like you are struggling to keep your spine straight, sit on a folded blanket or a firm cushion to elevate your hips. This simple change changes the entire angle of the stretch, making it much more comfortable for your back.
Instructions
- Sit on the floor with your feet together, knees splayed outward.
- Hold your ankles or shins.
- Sit tall, lengthening your spine as if a string is pulling the crown of your head toward the ceiling.
- Gently hinge forward from your hips—keep your back flat; do not round your shoulders.
- Hold for 30 to 45 seconds.
- You should feel this in the inner thighs and perhaps the groin.
If you find yourself hunching, you have gone too far. Come back up. The stretch is just as effective even if you barely hinge forward at all.
6. Seated Torso Twist

This is a gentle, modified twist. Crucial note: During pregnancy, you never want to force a deep, twisting rotation that squishes the midsection. Instead, think of this as a “lengthening” twist that focuses on the thoracic spine (the upper-middle back) rather than the lower back.
Why We Modify
Deep twisting is contraindicated because it can put unnecessary strain on the abdominal wall. However, a gentle rotation can do wonders for stiffness in the mid-back, which often feels like a knot between the shoulder blades.
How to do it safely
- Sit on a chair with your feet flat on the floor.
- Keep your hips square—do not let them shift or rotate with your upper body.
- Reach your right hand to your left knee and your left hand to the back of the chair.
- Gently rotate your chest toward the left, leading with your shoulder, not your head.
- Take three deep breaths, feeling your spine get taller on each inhale.
- Switch sides and repeat.
Keep the movement small. This is about ease, not a deep range of motion.
7. Chair-Supported Pigeon Pose
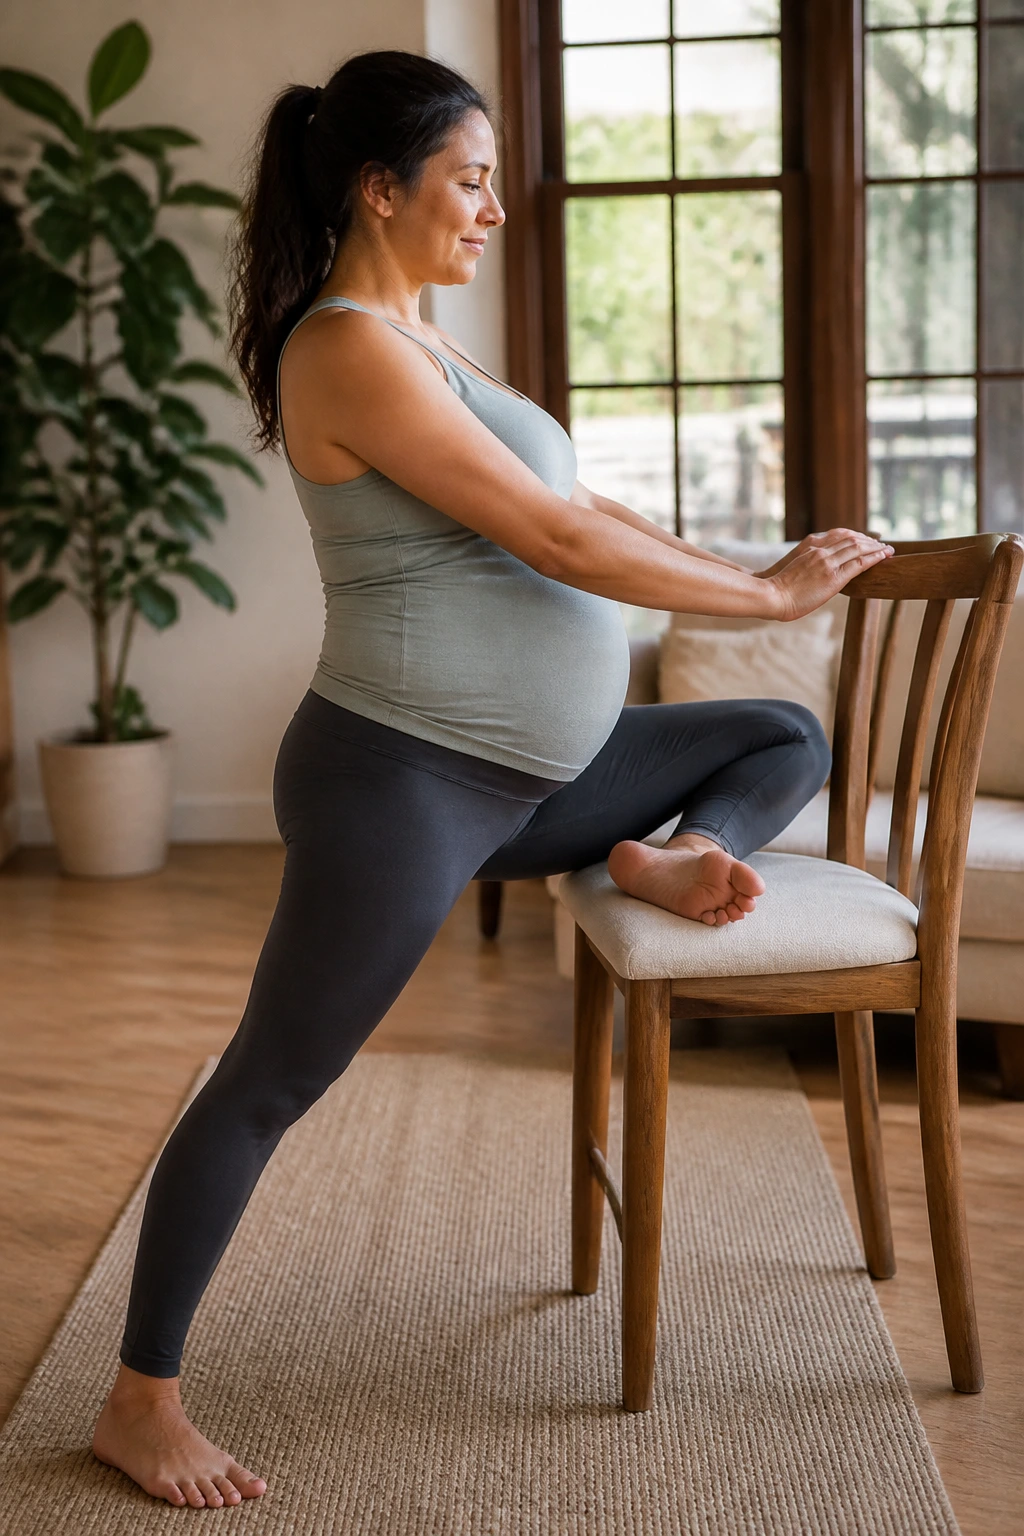
The traditional pigeon pose on the floor can be extremely difficult to get into and out of when you are pregnant, and it can put your hips in a compromised position. Using a chair or a sturdy table makes this a much more accessible and safer option.
Targeted Relief
This stretch targets the piriformis muscle—a small muscle in your glute that, when tight, often mimics lower back pain or sciatica. Relieving this muscle can significantly reduce the “shooting” pain some pregnant people feel.
Steps for Success
- Stand facing a sturdy chair.
- Lift your right leg and place your shin across the seat of the chair, with your knee bent out to the side.
- Make sure your left leg is straight and your hips are squared toward the chair.
- Keep your back straight, hinge slightly forward from the hips, and rest your hands on the chair back or seat.
- You should feel a stretch deep in the glute of the bent leg.
- Hold for 30 seconds on each side.
If you don’t have a chair, you can do this sitting on the edge of a bed, crossing one ankle over the opposite knee and gently leaning forward with a flat back.
8. Standing Hamstring Stretch
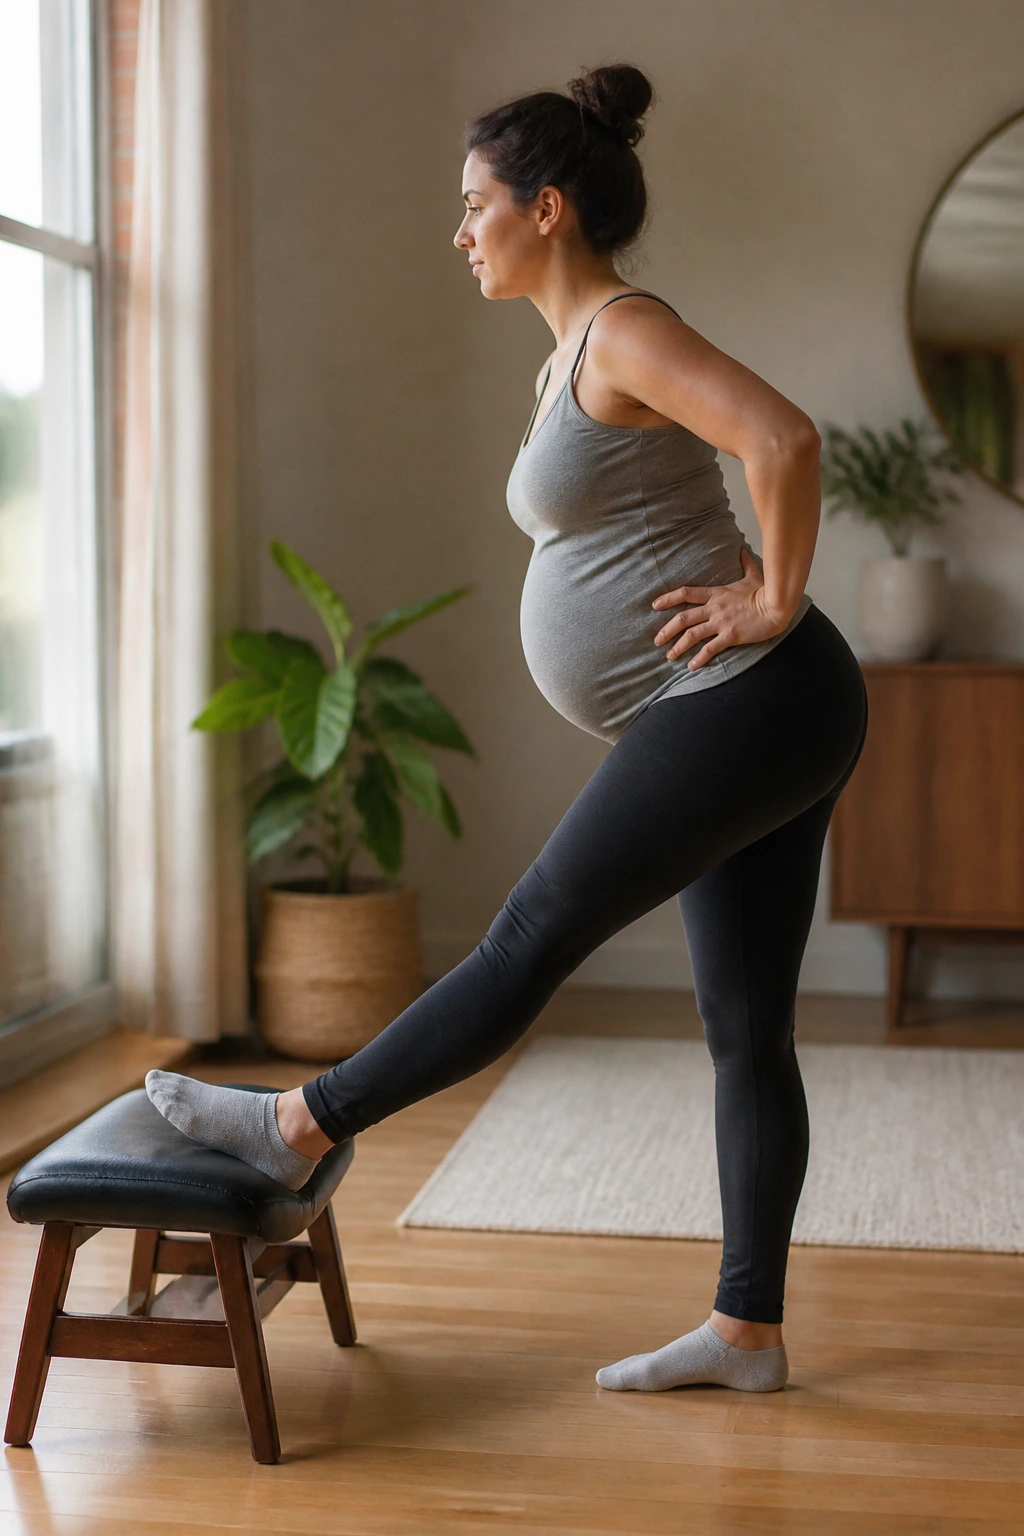
Tight hamstrings are a silent contributor to lower back pain. When your hamstrings are tight, they pull the bottom of your pelvis down, which forces your lower back to arch more aggressively. Stretching them can provide surprising relief.
The Balancing Act
The key here is safety and balance. Do not try to touch your toes if it means rounding your back or losing your balance. Use a prop—a low stool, a step, or even a sturdy box—to rest your heel on.
Execution
- Stand facing your prop.
- Place the heel of one foot on the prop, keeping that knee slightly bent. Never lock your knee.
- Keep your other foot firmly planted on the ground.
- Place your hands on your hips to keep them square.
- Lean forward slightly from the hips, keeping your spine straight.
- Hold for 30 seconds per side.
This is a gentle stretch. If you feel it behind your knee, bend the knee a little more. You want the sensation in the middle of the hamstring muscle.
9. Thread the Needle
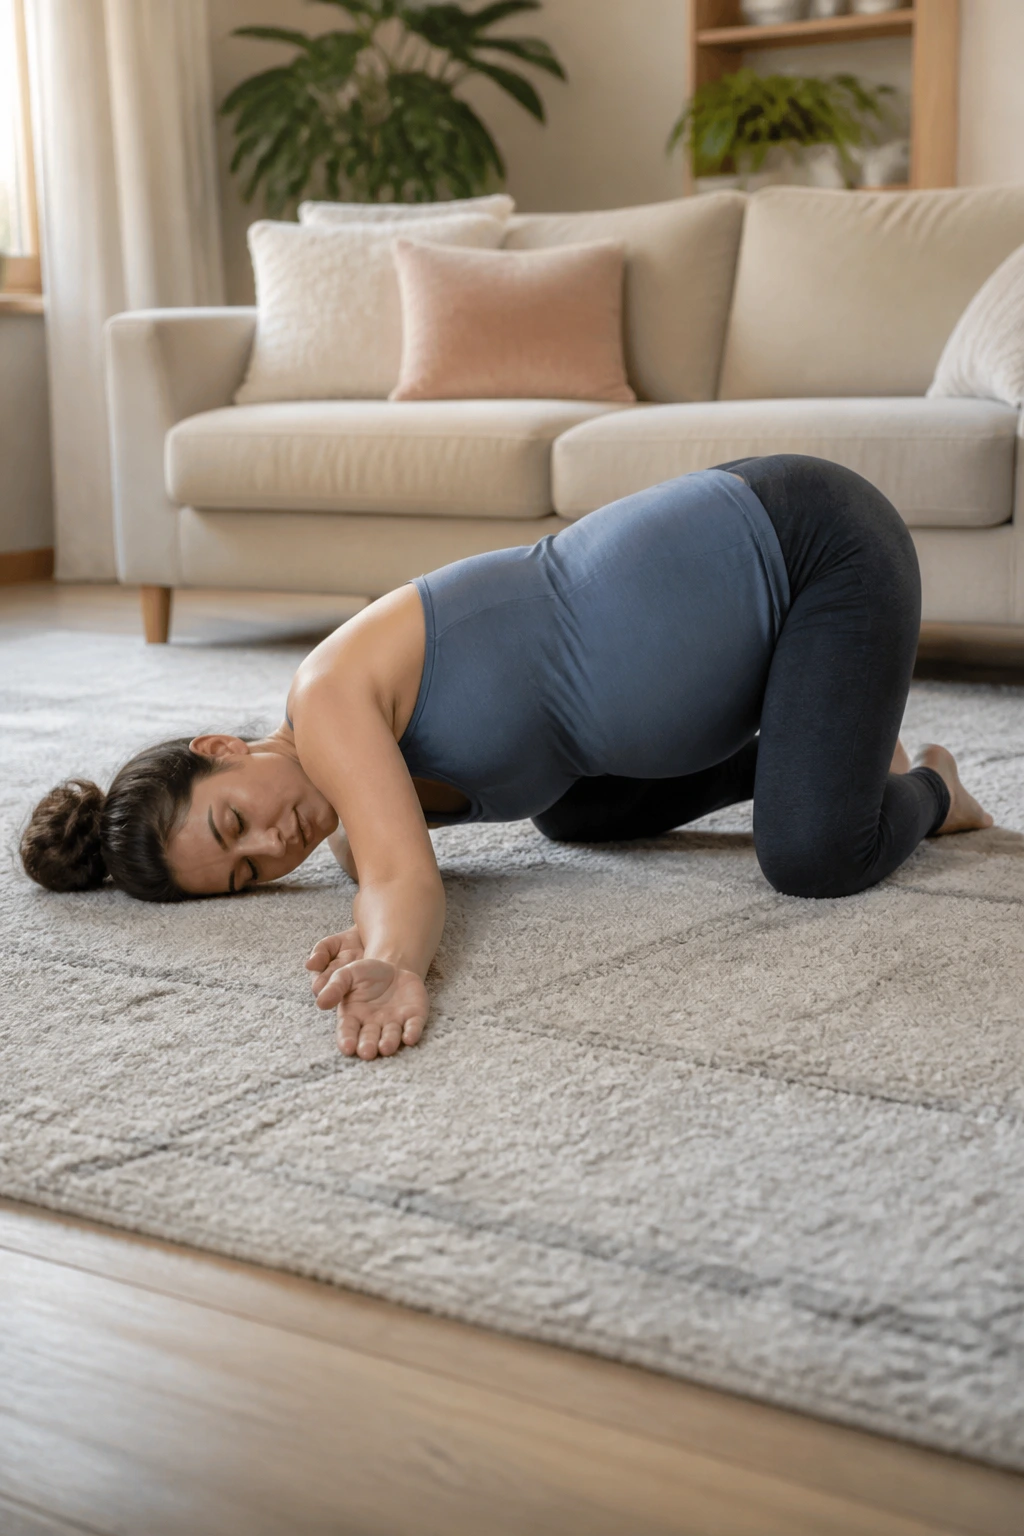
This is a fantastic stretch for the upper back and shoulders. Often, we carry tension from our daily posture into the upper back, which alters our gait and puts more strain on the lower back. This movement is great for unwinding that tension.
Why it feels good
It allows you to get weight off the lower back while isolating the thoracic spine. It provides a sense of decompression that is hard to find in standing poses.
How to move
- Come into a tabletop position on all fours.
- Slide your right arm underneath your left arm, palm facing up.
- Gently lower your right shoulder and the side of your head toward the floor.
- Keep your left hand on the floor for support, or reach it toward the ceiling if you are stable.
- Breathe into the space between your shoulder blades.
- Hold for 30 seconds, then switch sides.
If your head doesn’t reach the floor, place a pillow under your shoulder. Do not force the rotation.
10. Neck Rolls and Shoulder Shrugs
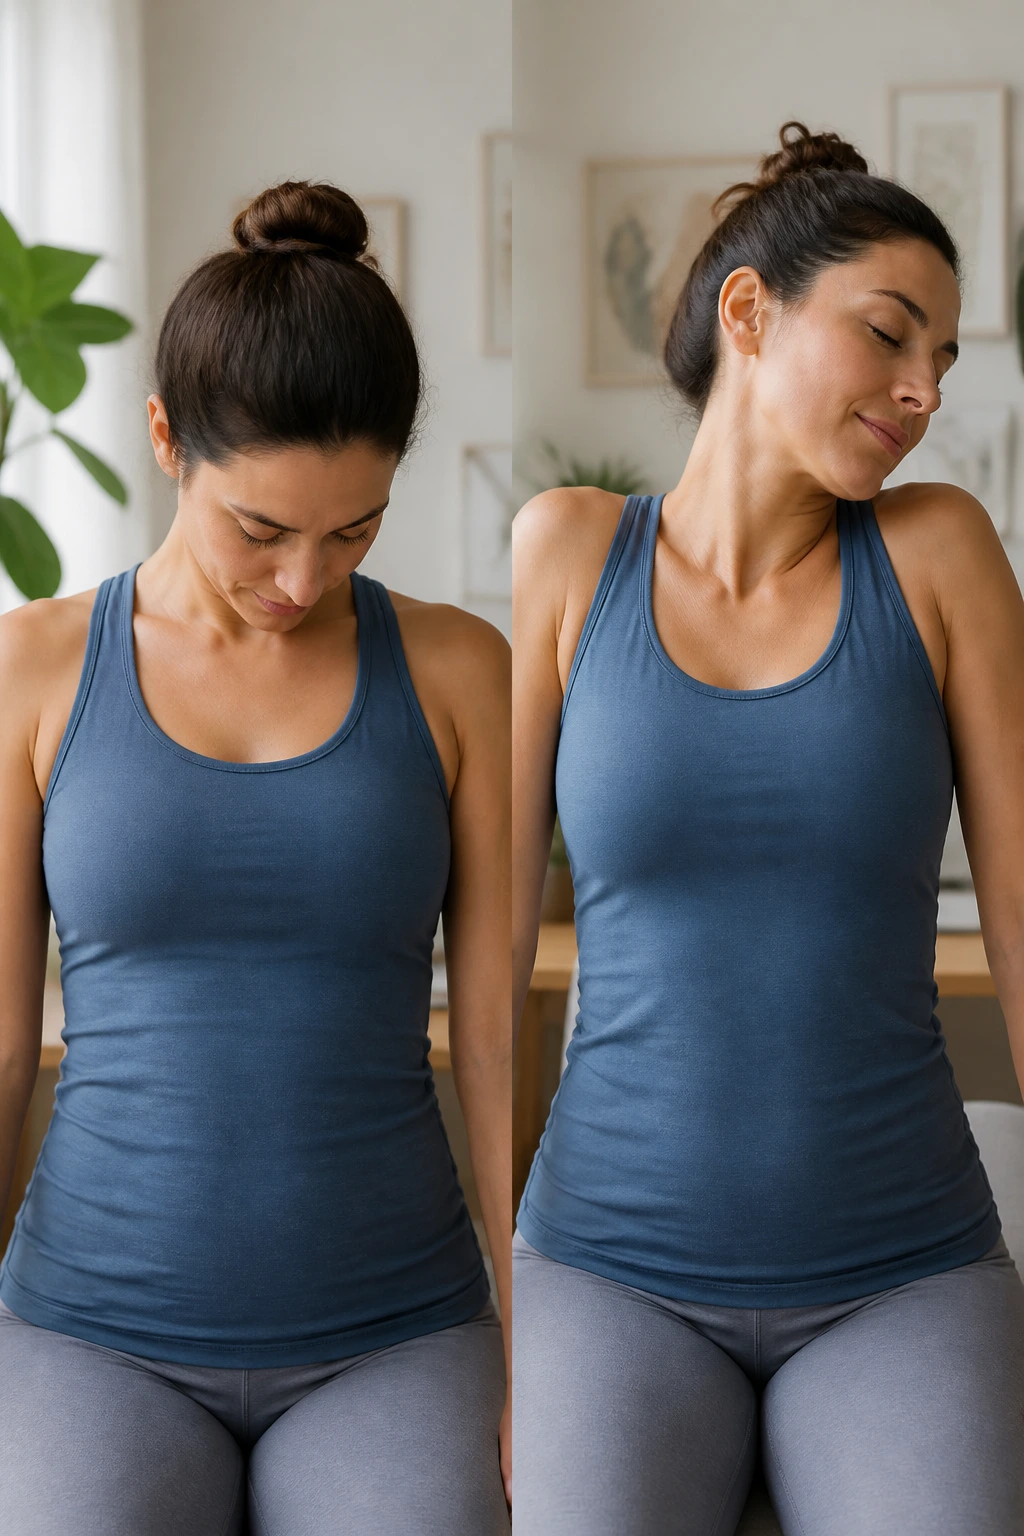
It sounds simple, almost too simple to be a “stretch,” but do not underestimate how much stress you carry in your neck and traps during pregnancy. This tension cascades down your spine, creating a chain reaction of stiffness.
Connecting the Chain
When your neck is stiff, your upper back tightens. When your upper back tightens, your posture slumps. When your posture slumps, your lower back hurts. Releasing the neck is the first step to a happier spine.
The Technique
- Sit or stand with a neutral spine.
- Drop your chin to your chest and slowly roll your right ear toward your right shoulder.
- Pause where you feel the tightness. Breathe.
- Roll back to the center and switch to the left side.
- For shoulder shrugs, inhale and lift your shoulders up toward your ears as high as you can.
- Exhale and release them down, pulling your shoulder blades together.
- Repeat 5 times in each direction.
Do this while sitting at your desk or watching TV. It takes seconds but prevents that “end-of-day” stiff neck.
11. Standing Calf Stretch
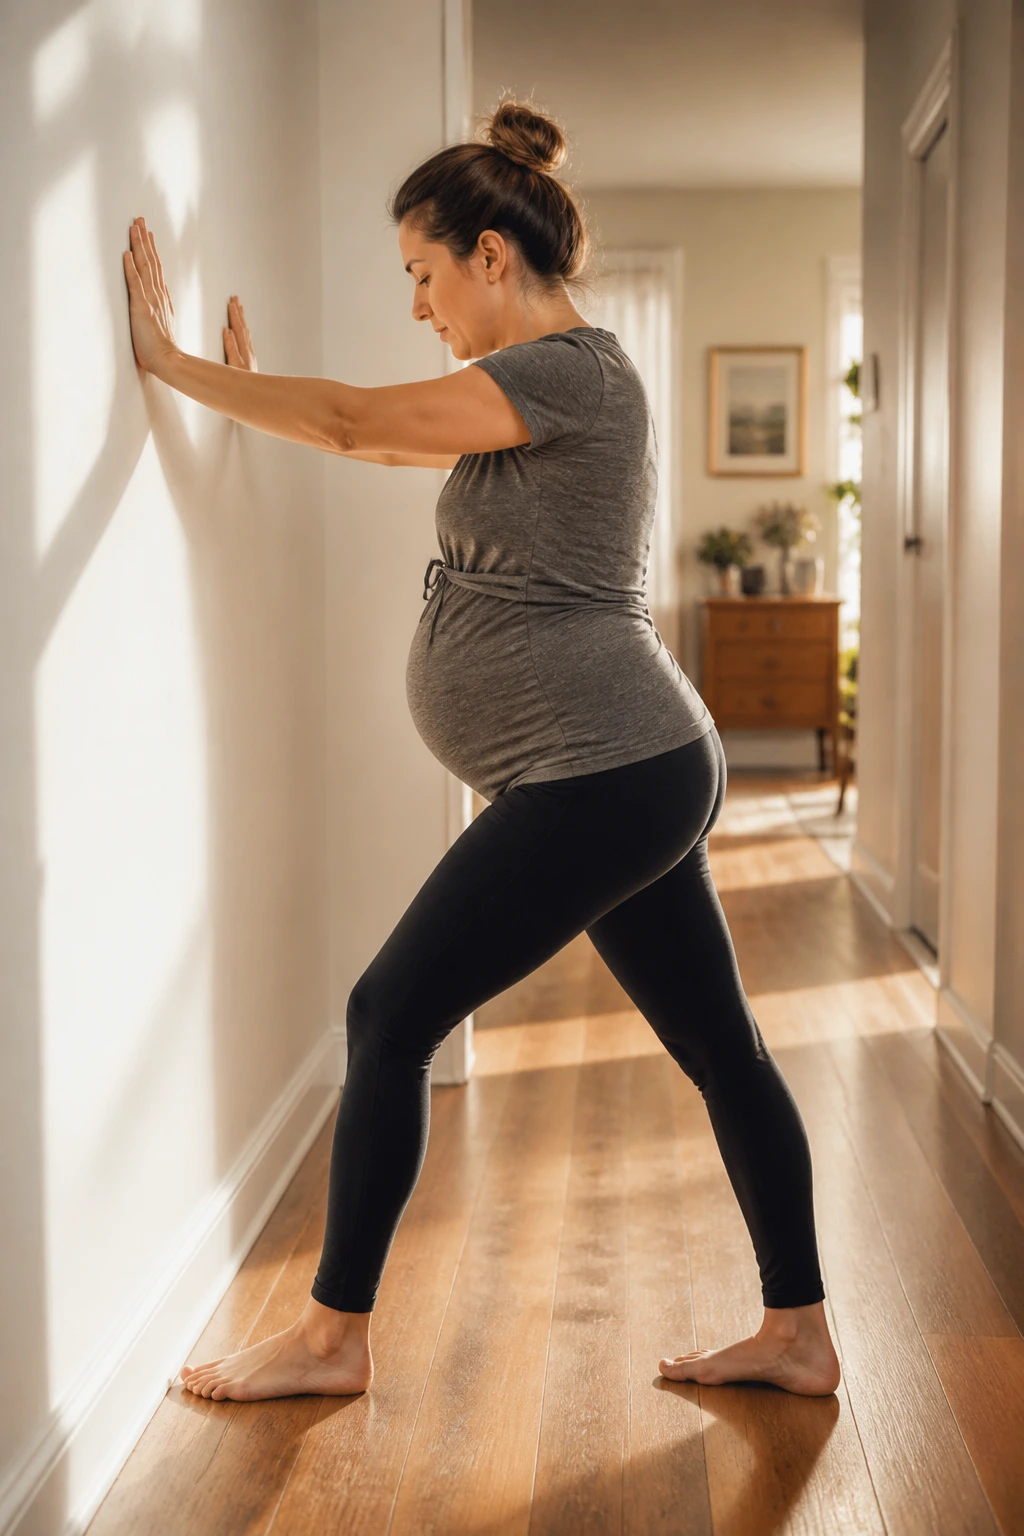
You might wonder why we are focusing on the calves for back pain. However, during pregnancy, your calf muscles often tighten up due to the extra weight you are carrying and changes in your footwear. Tight calves affect your stance, which affects your lumbar curve.
The Foundation
Your feet are the base of your entire structural house. If your calves are tight, your ankle mobility decreases, and your body compensates by shifting your pelvis. Keeping the calves loose helps maintain a more neutral pelvis alignment.
The Stretch
- Face a wall and place your hands on it at shoulder height.
- Step one foot back, keeping the heel on the ground and the leg straight.
- Bend the front knee slightly until you feel a stretch in the calf of the back leg.
- Keep the back heel pressed firmly down.
- Hold for 30 seconds per side.
If you don’t feel much of a stretch, step your back foot a little further away. Ensure your toes are pointing straight toward the wall—don’t let your foot turn outward.
12. Side-Lying Quad Stretch
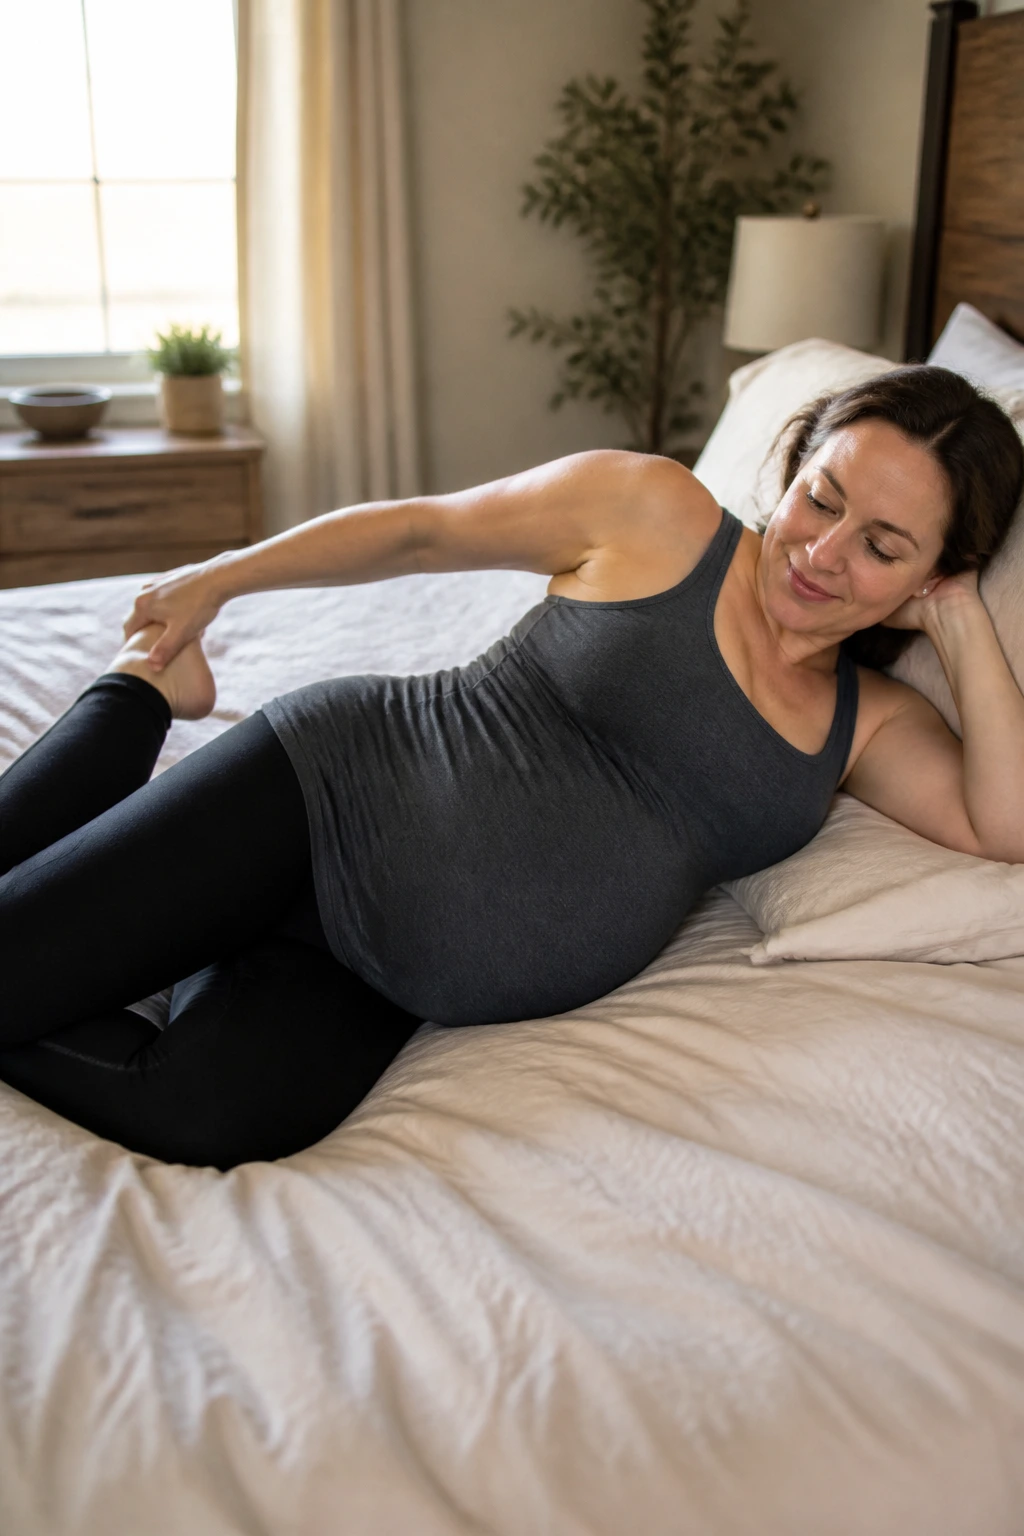
Stretching the quads can be tricky in pregnancy because the standard standing quad stretch requires balance, and the floor version puts you on your stomach. The side-lying version is the safest and most comfortable compromise.
Why the Quads Matter
Your quadriceps (the front of your thighs) can become very tight due to the anterior tilt of the pelvis. When the quads are tight, they pull the front of the pelvis down. Releasing them helps to allow the pelvis to return to a more neutral position.
How to do it
- Lie on your side, supporting your head with your arm or a pillow.
- Keep the bottom leg slightly bent for stability.
- Bend your top knee and reach back to grab your ankle.
- Gently pull your heel toward your glutes, feeling the stretch in the front of your thigh.
- Keep your knees close together—don’t let the top knee drift toward your belly.
- Hold for 30 seconds, then roll over and do the other side.
If you cannot reach your ankle, use a towel or a yoga strap looped around your foot.
13. Kneeling Hip Flexor Stretch
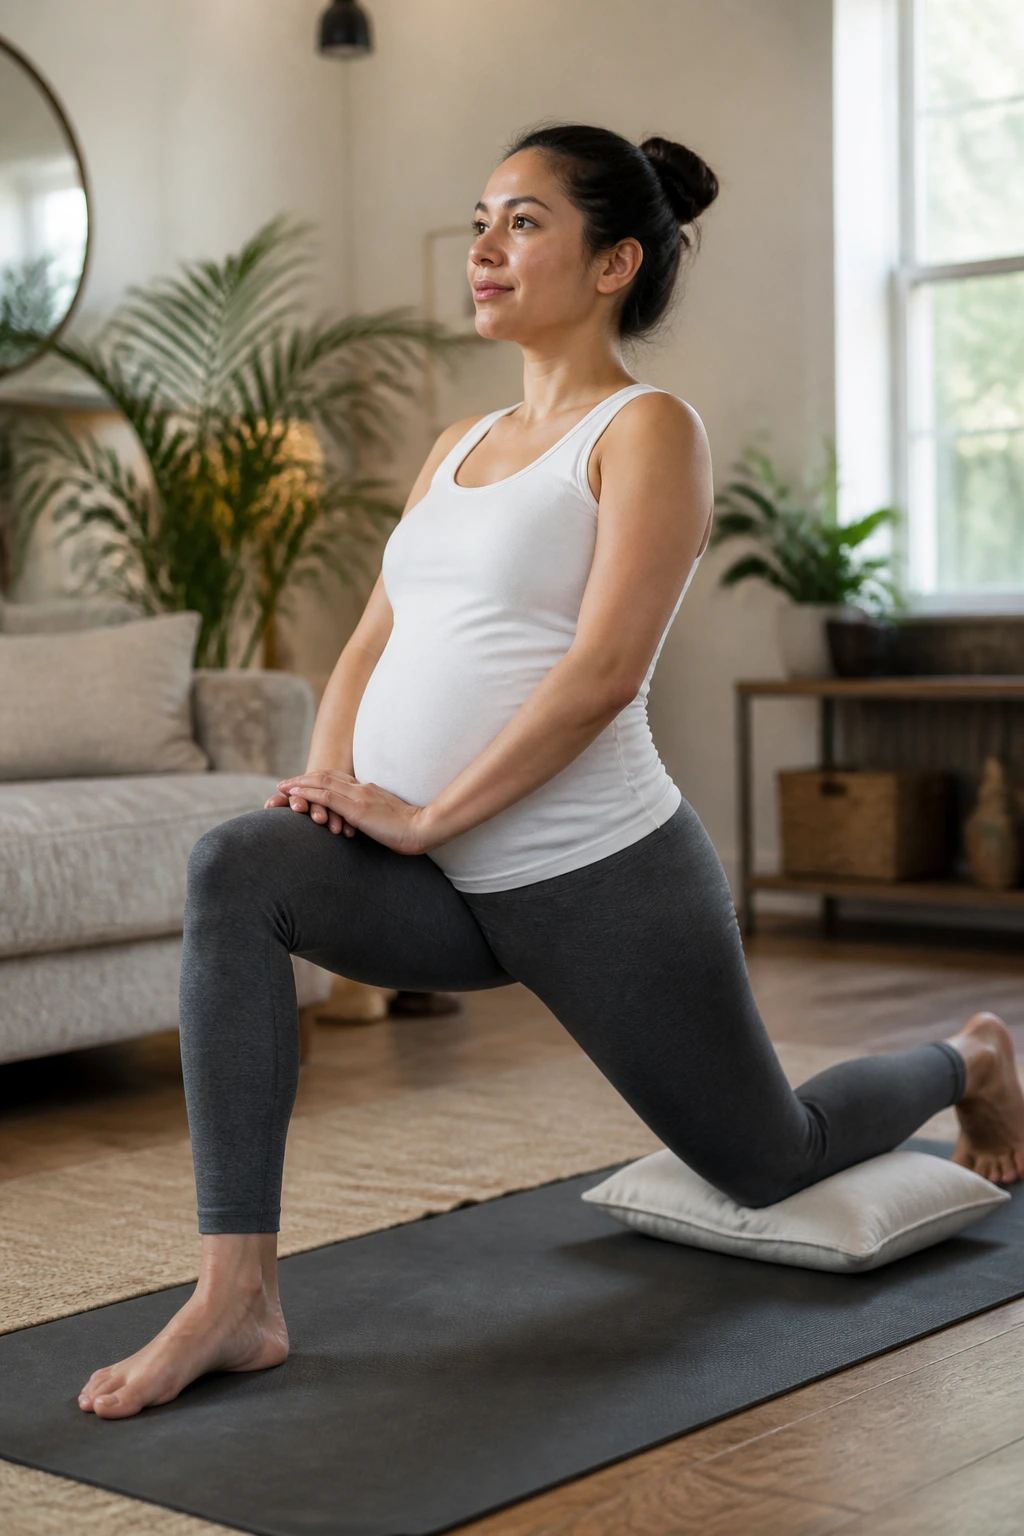
The hip flexors are the muscles that connect your legs to your torso. When you are pregnant, these muscles are essentially “on” all the time, shortening and tightening as they stabilize your shifting center of gravity.
A Deeper Release
This is perhaps the most important stretch on this list for people who spend a lot of time sitting. Sitting shortens the hip flexors, and standing during pregnancy shortens them further. This stretch is the antidote.
Execution
- Kneel on one knee, with the other foot flat on the floor in front of you (like a lunge).
- Place both hands on your front knee for stability.
- Keeping your back straight, shift your hips slightly forward.
- You should feel a stretch in the front of the hip of the kneeling leg.
- Squeeze the glute of the kneeling leg—this helps isolate the stretch in the hip flexor.
- Hold for 30 seconds, then switch.
Place a pillow under your kneeling knee to protect it. Keep your chest lifted.
14. Modified Glute Squeezes
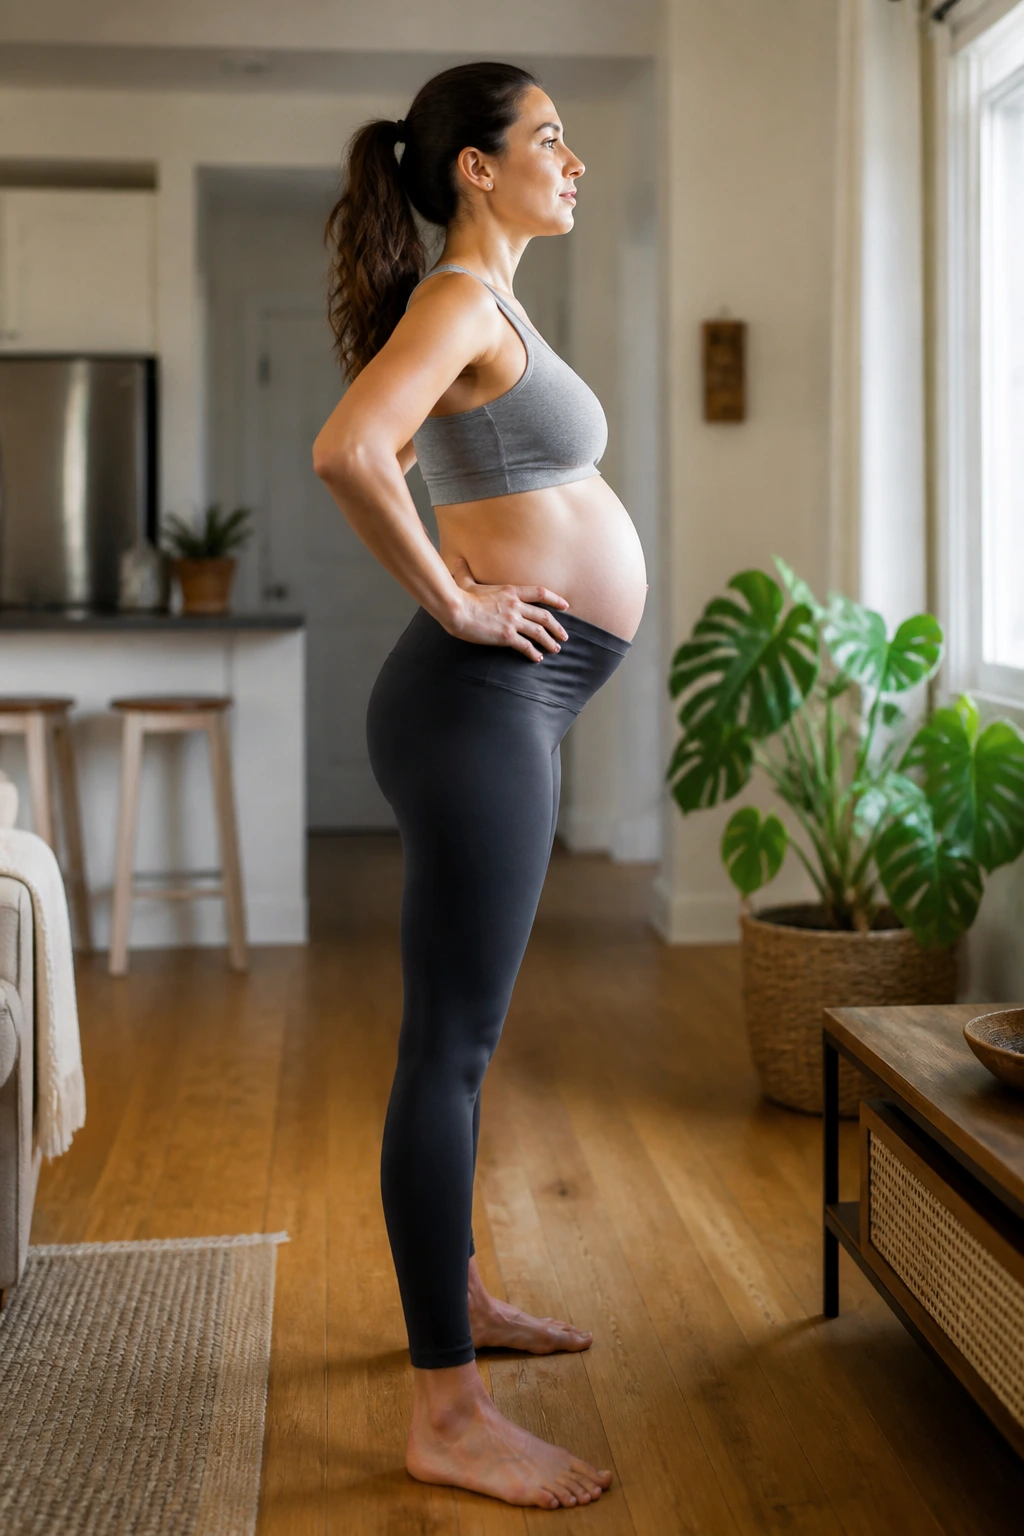
While not a “stretch” in the traditional sense, this is a vital mobility move. Weak glutes lead to a lazy pelvis, which puts direct pressure on the lower back. This move helps “wake up” the muscles that should be doing the heavy lifting.
The Activation Concept
If your glutes are weak (which happens as the belly grows and pulls the pelvis out of alignment), your lower back muscles do all the work of stabilizing your body. By activating the glutes, you are effectively telling the lower back, “You can rest now; the glutes have this.”
The Technique
- Stand or sit with your spine neutral.
- Simply squeeze your glute muscles together as hard as you can for 3 seconds.
- Release for 1 second.
- Repeat this for 20 repetitions.
- You can do this anywhere—in the grocery store line, sitting at your desk, or while waiting for water to boil.
It’s about endurance and connection. You aren’t trying to build bulk; you are trying to remind your brain to keep these muscles active.
15. Doorway Chest Opener
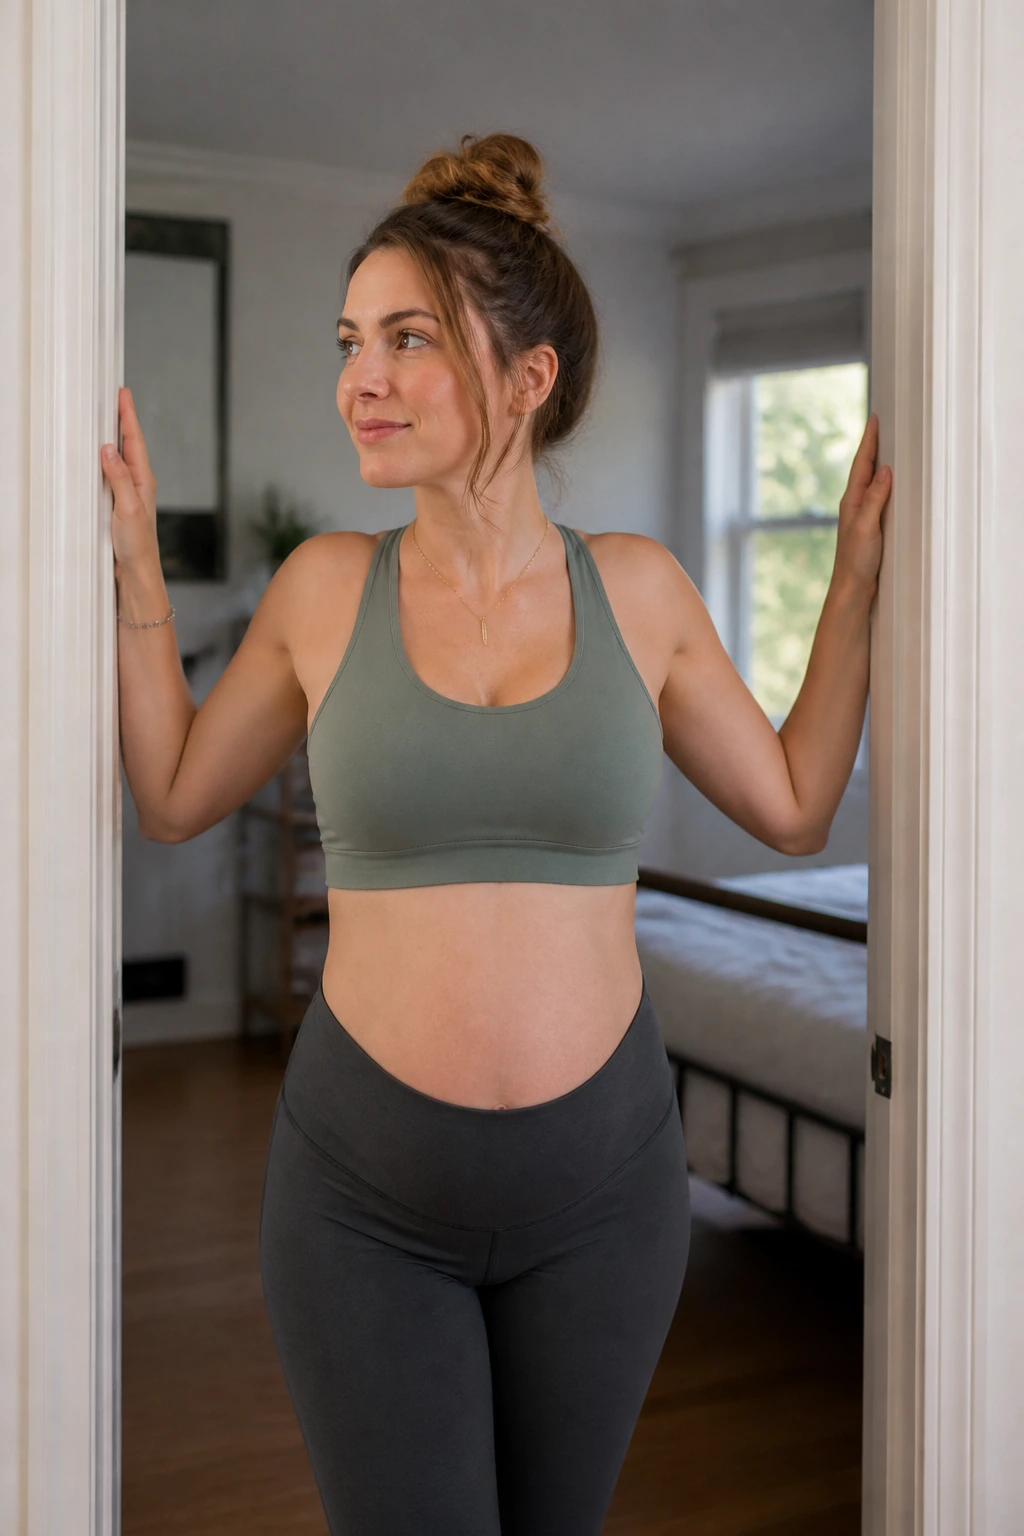
Your chest muscles, specifically the pectoralis minor, often get tight during pregnancy as your posture rounds. This pulls the shoulders forward and strains the upper and mid-back, causing a cascading effect of pain that reaches down to the lower spine.
Opening the Space
By opening the chest, you allow the shoulders to retract naturally. This creates a more “stacked” posture where the spine supports the weight better, rather than the muscles having to compensate for a slumping frame.
Steps
- Stand in a doorway.
- Place your forearms on the doorframe, with your elbows at shoulder height.
- Gently step one foot forward, leaning your chest into the doorway until you feel a stretch across your chest.
- Keep your back straight—do not arch your lower back.
- Hold for 30 seconds.
If you feel a pinching sensation in the front of your shoulders, lower your elbows slightly.
16. Eagle Arms
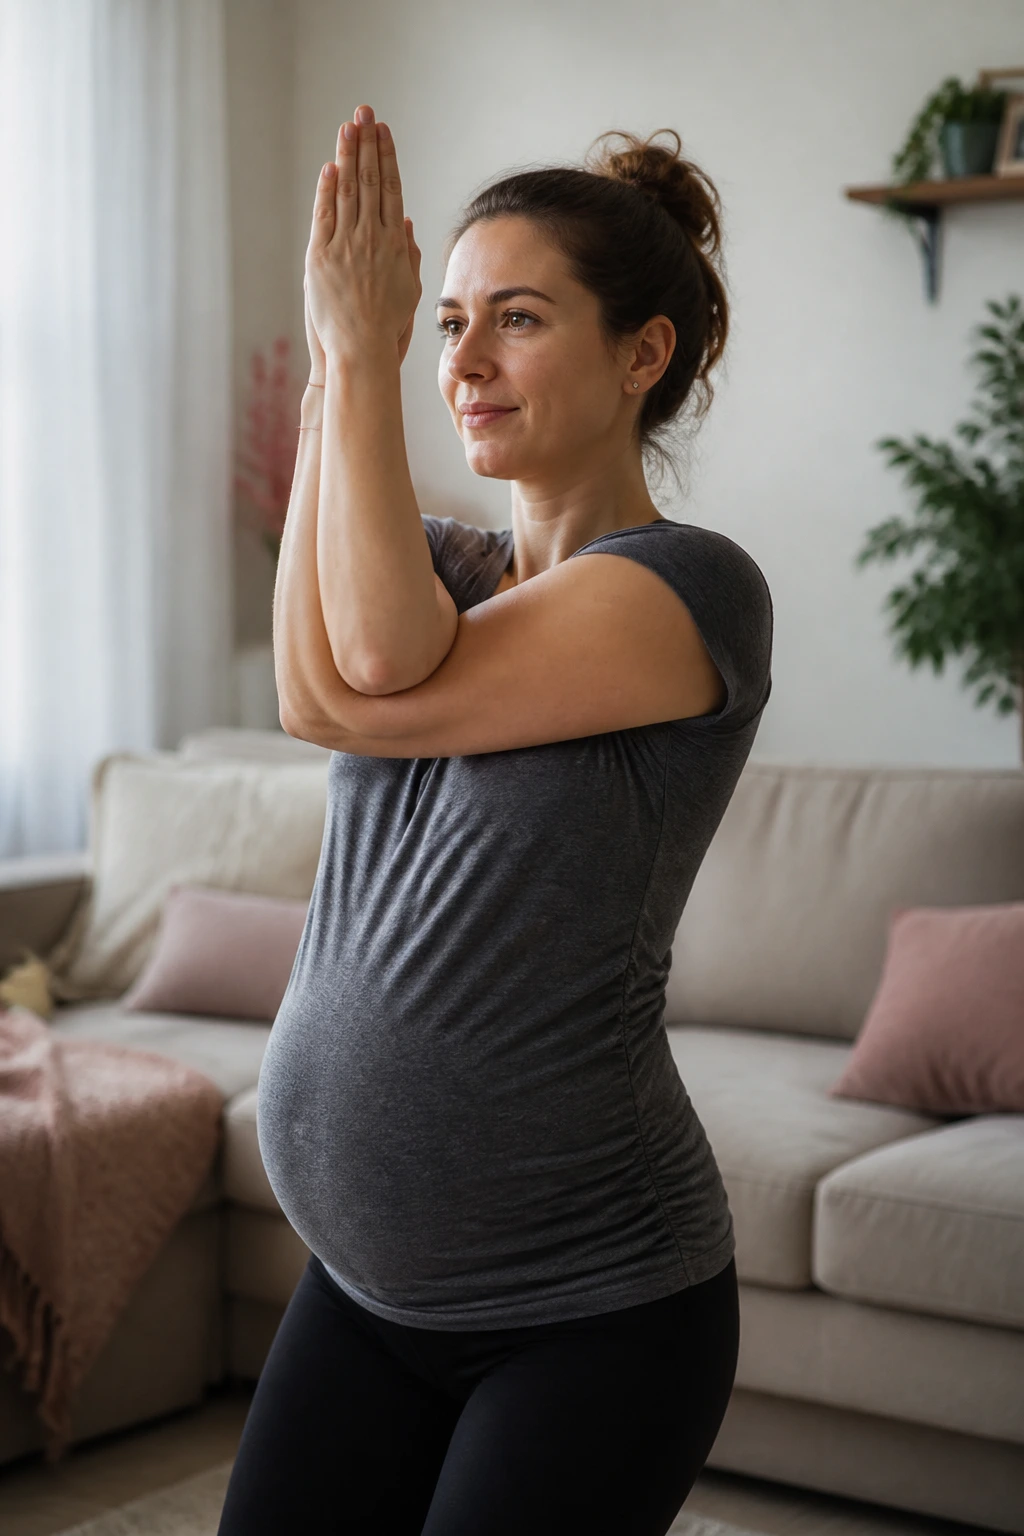
You don’t need to be a master yogi to get the benefits of this one. Eagle arms target the rhomboids and the space between the shoulder blades, which is a common site of “pregnancy hunch” tension.
Why it matters
The muscles between your shoulder blades are constantly stretched thin as your chest collapses inward. This stretch reverses that, creating space and relief in the mid-back, which helps balance the load distribution across your entire spine.
How to do it
- Reach your arms out to the sides.
- Cross your right arm under your left, and try to touch your palms together. If that’s too much, just grab your shoulders or touch the backs of your hands.
- Lift your elbows to shoulder height and move your hands slightly away from your face.
- You should feel a deep stretch in the upper back.
- Hold for 20 seconds, then swap your arms.
Keep your spine long. Don’t let your neck collapse into your shoulders.
17. Seated Side Stretch
Your obliques (the muscles on the sides of your core) get stretched thin during pregnancy, but they also get tight. A gentle side stretch can open up the rib cage and the space between the lower ribs and the pelvis.
Finding the Space
When you are carrying a baby, that space between your ribs and hips can feel very compressed. Stretching the sides creates a temporary sensation of “lengthening” the torso, which can be incredibly relieving for back tension.
The Movement
- Sit on a chair or on the floor.
- Reach your right arm up toward the ceiling.
- Lean your upper body to the left.
- Keep your right hip firmly grounded—don’t let it lift off the chair or floor.
- Imagine your ribs fanning open like an accordion.
- Hold for 20 seconds, then switch sides.
Don’t hold your breath. Breathe into the side of your ribcage.
18. Tabletop Bird-Dog (Modified)
This is a stability exercise that also helps elongate the back. It is excellent for “resetting” the spine after sitting for long periods. If you are very far along, you can skip the leg extension and just focus on the arm extension.
The Balance Component
The act of balancing forces your deep stabilizing muscles to engage, which provides a sense of strength. Strength is just as important as flexibility for back pain relief.
Instructions
- Start in a tabletop position.
- Simultaneously extend your right arm forward and your left leg backward, keeping them parallel to the floor.
- Don’t lift too high; you want a straight line from your fingertips to your heel.
- Engage your core—keep your back flat as a table.
- Hold for 5-10 seconds, then return to center.
- Switch to the left arm and right leg.
- Do 5 repetitions per side.
If balancing is too much, just extend the arm. If that’s too much, just extend the leg. Do what your body allows.
19. Supported Squat
The deep squat is a natural position for the human body, but it can be hard to maintain as your belly grows. Using a wall for support makes this accessible and safe, and it’s arguably the best position for opening the pelvis and stretching the lower back.
The Pelvic Opener
This isn’t just for the back; it’s a fantastic hip opener. By keeping your back against the wall, you ensure you aren’t leaning forward, which puts the focus on the hips and lower back, not your knees.
How to execute
- Stand with your back flat against a wall, feet hip-width apart.
- Slowly slide down the wall until you are in a comfortable, low squat position.
- If your heels come off the floor, keep your feet wider or don’t go down as deep.
- Rest your hands on your thighs or keep them by your sides.
- Stay here for 30-60 seconds.
- Use the wall to push yourself back up to standing when you are done.
This feels counterintuitive, but your lower back will thank you for the release.
20. Wall Press (Upper Back Release)
This is a simple, effective way to combat the “text neck” and rounded shoulders that plague many of us, pregnant or not. It helps realign the upper back, which takes the burden off the lower vertebrae.
Why the upper back holds the key
When the upper back is aligned, the head sits squarely over the shoulders, and the weight is distributed evenly. This prevents the lower back from having to act as a fulcrum for an unbalanced upper body.
How to do it
- Stand facing a wall, about a foot away.
- Place your palms flat against the wall at shoulder height.
- Lean into the wall, keeping your heels on the ground.
- Push your chest through your shoulders, creating a gentle stretch in the upper back.
- Keep your gaze neutral—don’t look up or down.
- Hold for 20 seconds.
It is a subtle movement, but you should feel the muscles between your shoulder blades engaging and lengthening.
When to Call Your Doctor

While back pain is a standard part of the pregnancy experience for most, there is a clear distinction between musculoskeletal discomfort and something that requires medical attention. You know your body better than anyone else. If your pain is accompanied by fever, vaginal bleeding, or if you feel pain when you urinate, contact your healthcare provider immediately.
Furthermore, if the pain is localized to one side of the lower back and radiates down into the leg, or if you experience numbness or tingling in your legs or groin, this could be a sign of something more significant, such as a disc issue or significant nerve compression. Do not attempt to “stretch through” this type of pain. Your doctor can assess whether you need physical therapy or other interventions.
Always remember that as you move through your trimesters, your body is changing rapidly. What felt good at 16 weeks might feel uncomfortable at 32 weeks. There is no shame in dropping a stretch from your routine if it no longer serves you. Trust your intuition—if a movement doesn’t feel right, skip it.
Simple Daily Habits to Reduce Back Strain
Stretching is only half the battle. If you spend your day reinforcing the habits that cause the pain, the stretches will only be a temporary fix. Look at your daily ergonomics. When you sit, do you have lumbar support? A simple rolled-up towel placed behind your lower back can provide the support your chair lacks.
Also, consider how you stand. Many pregnant people lean back to compensate for the belly, which locks the knees and arches the lower back. Try to keep a “micro-bend” in your knees throughout the day. This simple change allows the glutes and core to engage, which takes the pressure off the lumbar spine.
Finally, think about your sleep position. Sleeping on your side with a pillow between your knees is almost mandatory by the second trimester. The pillow prevents your top leg from dragging your pelvis down, which keeps your hips stacked and your spine neutral. It might seem like a small thing, but it makes a massive difference in how your back feels when you wake up.
The Best Tools for Prenatal Comfort
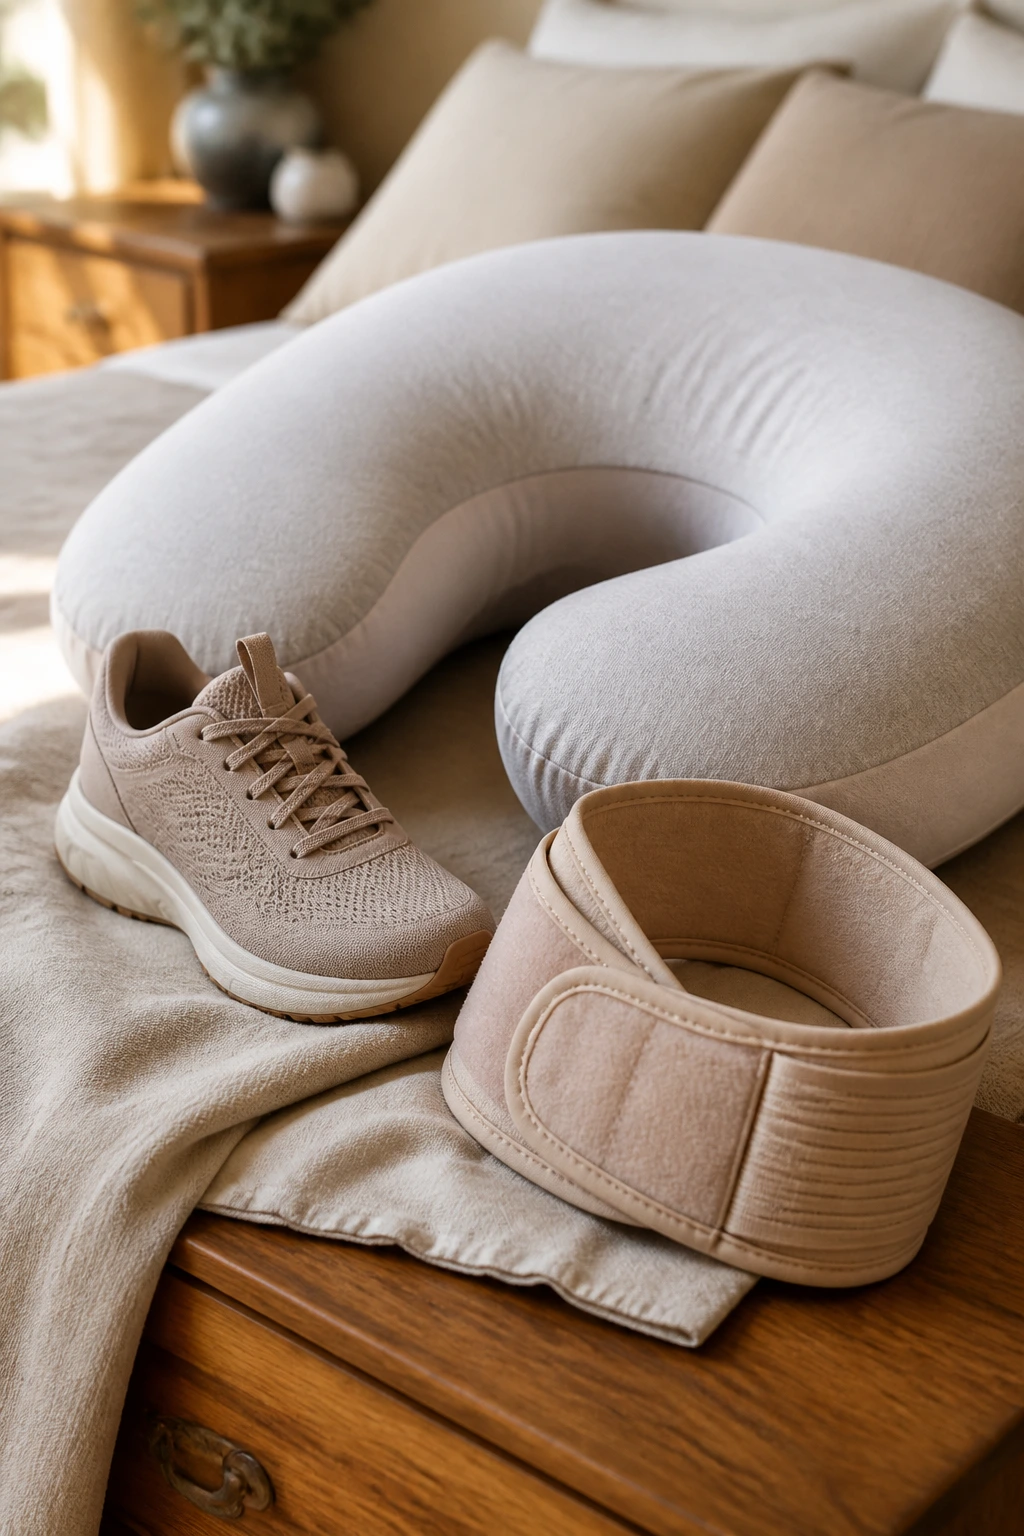
You do not need an expensive gym membership, but a few low-cost tools can make a world of difference. A pregnancy pillow, for example, is not just a marketing gimmick; it provides the support that your back craves during the hours you are resting. It keeps your spine aligned, which prevents the morning stiffness that many people experience.
Another game-changer is a high-quality, supportive shoe. Pregnancy loosens the ligaments in your feet, often causing them to spread. This changes your arch support and foot strike, which translates directly into back pain. If your feet hurt, your back will hurt. Investing in supportive footwear with good arch support is an investment in your back health.
Lastly, consider a prenatal support belt. While not a tool for stretching, it acts as an external core, supporting the weight of your belly and taking the load off your lower back. It can be a massive relief during walks or long periods of standing. Use these tools in conjunction with your stretching routine to create a comprehensive approach to back health.
Final Thoughts
The back pain you are experiencing is a sign of the incredible work your body is doing. Your skeleton is shifting, your ligaments are softening, and your muscles are adapting to accommodate new life. It is not a failure of your body; it is a profound testament to its capability.
Be patient with yourself. Some days, you will feel limber and capable; other days, every movement will feel like a chore. That is normal. Take these stretches one at a time, listen to the cues your body gives you, and never feel like you have to force progress. Your only goal is to find a little bit of space, a little bit of ease, and a little bit of relief. You are doing the hard work, and you deserve to feel as comfortable as possible while doing it.
