



The difference between finishing a heavy session and feeling wrecked the next day is often a few quiet minutes on the floor. Not the flashy stuff. Not another set. Just the kind of post workout recovery stretches for lifters that calm down the hips, chest, lats, and ankles before they lock up into that stiff, half-bent walk nobody enjoys.
A lot of lifters skip stretching because they think it’s optional fluff. I get the instinct. Heavy training matters more than touching your toes. But after squats, deadlifts, pressing, rows, and carries, your body is already warm, your tissues are already loaded, and your range of motion is often a little smaller than you want it to be. That is the sweet spot. Static stretching works best when you’re warm and trying to restore motion, not when you’re cold and trying to impress someone with a deep hamstring fold.
The catch is that stretching after lifting should feel specific, not random. A chest stretch after bench day makes sense. A hip flexor stretch after squats makes sense. Yanking your neck around because a wellness video told you to “open energy channels” does not. Keep it boring, breathe, and stay honest about the difference between a useful stretch and a joint that’s asking you to stop.
Start with the chest and shoulders. If your upper body is pulled forward after pressing, everything else tends to feel a little off, from your rack position to your overhead reach.
1. Doorway Pec Stretch for Bench-Day Recovery
Your chest gets short and stiff fast. Heavy benching, dips, push-ups, and even long sets of incline pressing all keep the pecs under tension, and that forward pull shows up later as rounded shoulders and a cranky front delt. A doorway pec stretch is one of the simplest post workout recovery stretches for lifters because it targets the exact spot that tends to get squeezed tight.
Why This Stretch Helps
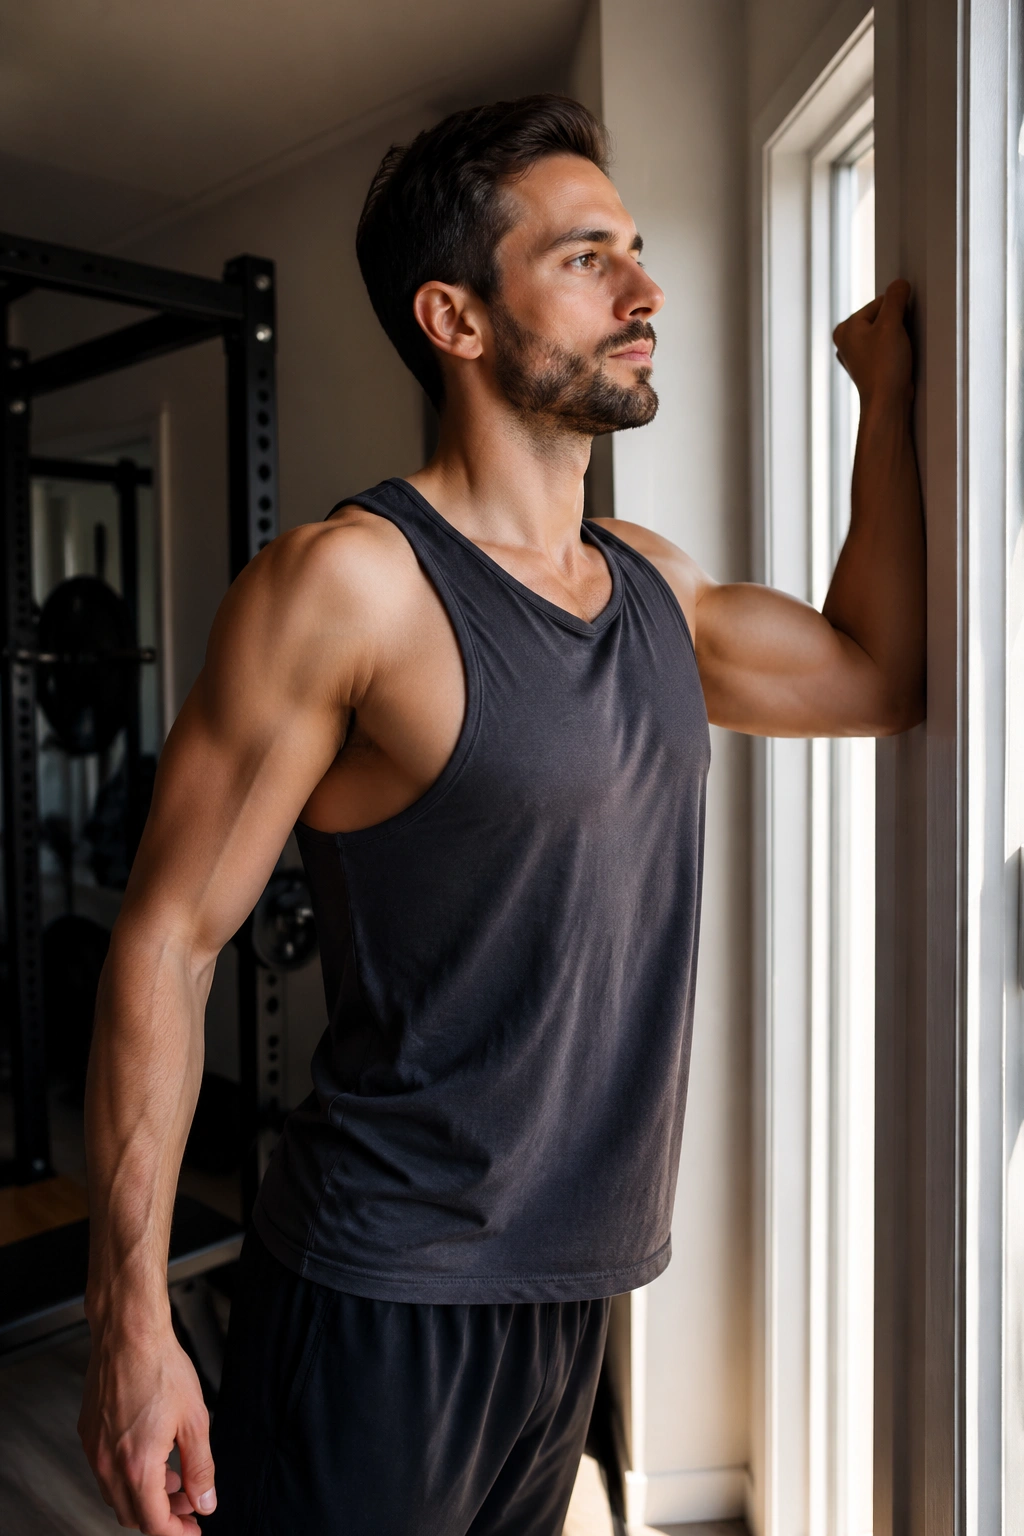
Stand in a doorway, place your forearm against the frame with your elbow at about shoulder height, and step through until you feel a stretch across the front of the chest and shoulder. Do not crank your torso forward. The point is a mild, steady pull, not a drama contest with the door frame.
Hold for 20 to 30 seconds on each side, then switch arms. If your shoulders feel jammed after pressing, try two rounds instead of one. Keep your ribs down and your neck relaxed. A lot of people overarch their lower back here and miss the chest entirely.
- Forearm on the door frame, elbow around 90 degrees
- Step through slowly until the stretch lands across the pec, not the shoulder joint
- Keep the shoulder blade from shrugging up toward your ear
- Breathe into the chest for 3 to 5 slow breaths
Tip: If the stretch feels too sharp, lower your elbow a few inches. That small change often turns an irritating tug into a useful one.
2. Half-Kneeling Hip Flexor Stretch for Squat Days
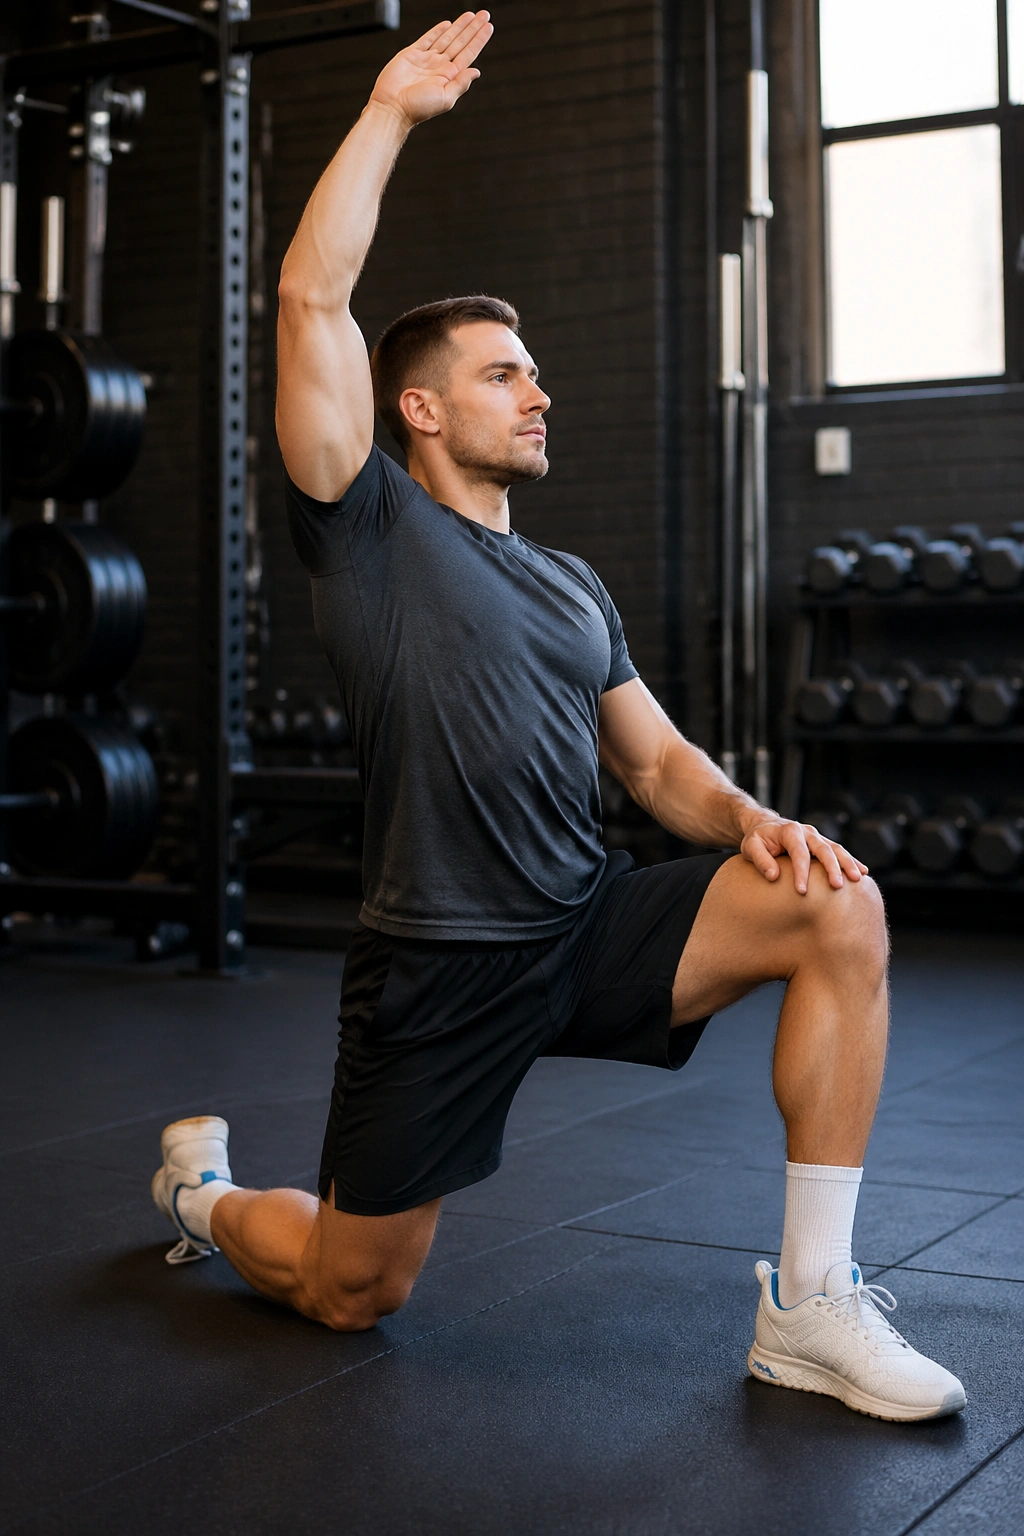
Why do the front of your hips feel like tight cables after squats and lunges? Because they are doing a lot of work. Hip flexors shorten every time you sit, brace, hinge, and drive out of the hole, so a half-kneeling stretch can feel like instant relief when it’s done well.
How to Set It Up
Drop one knee to the floor, plant the front foot flat, and gently tuck the pelvis under by squeezing the glute on the kneeling side. That last part matters more than most people think. If you skip it, you’ll just dump into your lower back and call it a stretch. That’s not the same thing.
Now shift your body forward only a few inches. You should feel the front of the hip on the down-knee side lengthen, sometimes right where the thigh meets the pelvis. Keep your torso tall. A light reach overhead with the same-side arm can help, but don’t turn it into a side bend circus.
What You Should Feel
The stretch should live in the front of the hip, not the lower back and not the knee. If your lower back starts pinching, step back a little and re-tuck the pelvis. If your front knee hurts, pad it with a folded mat or towel.
Hold 30 to 45 seconds per side, and don’t rush the exit. Coming out too fast can make the hip feel weirdly tighter. That happens more often than people admit.
3. Seated Hamstring Fold for Deadlift Recovery
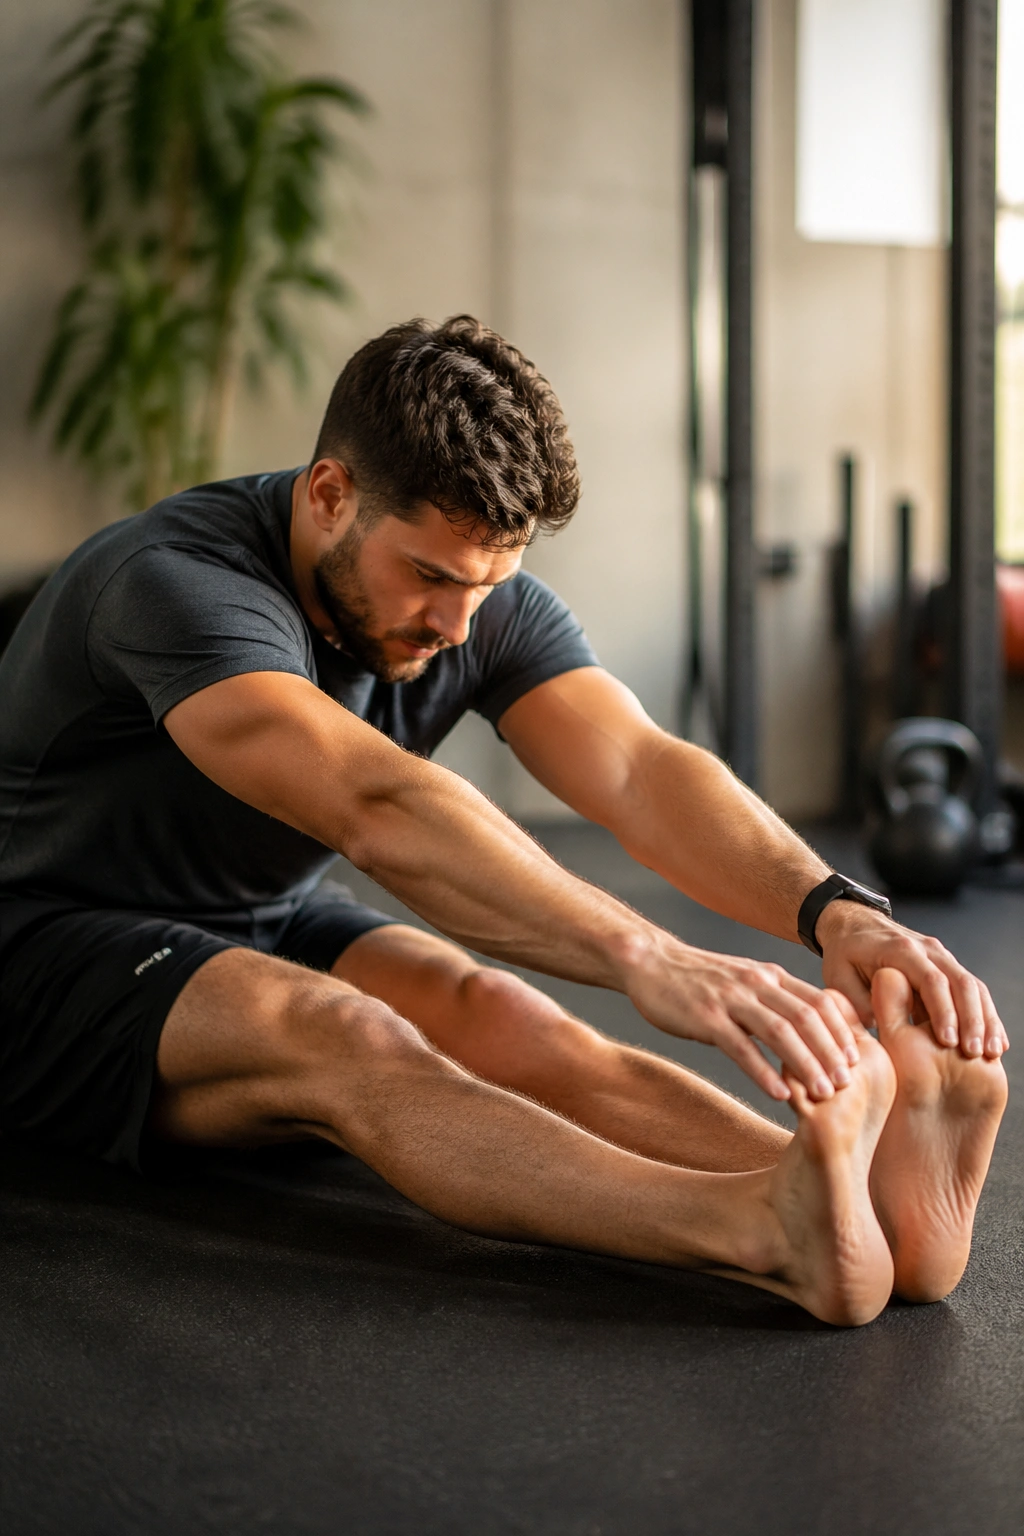
After deadlifts, a lot of lifters do the same thing: they stand up, bend at the waist, grab their toes, and round their backs like they’re trying to fold themselves into a suitcase. I’ve done it. It feels productive. It’s also the fastest way to turn a hamstring stretch into a spine stretch you did not mean to do.
Keep the Hinge, Not the Round
Sit on the floor with one or both legs extended, then tip forward from the hips with a long spine. A tiny bend in the knees is fine. In fact, it’s often better. The goal is to feel the stretch through the back of the thighs, not to prove how far your hands can reach.
If you’ve pulled heavy from the floor, this stretch can feel especially good after your hamstrings and adductors have been hammered. Hold for 20 to 30 seconds, breathe slowly, and reset once or twice if the first round feels too guarded.
- Sit on a folded towel if your pelvis rolls backward easily
- Keep toes pointed up for a stronger stretch
- Soften the knees if the tug is too intense
- Stop if you feel nerve-y tingling behind the knee
Use this cue: think “chest forward” instead of “head down.” That small mental shift keeps the stretch in the right place.
4. Child’s Pose with Side Reach for Tight Lats
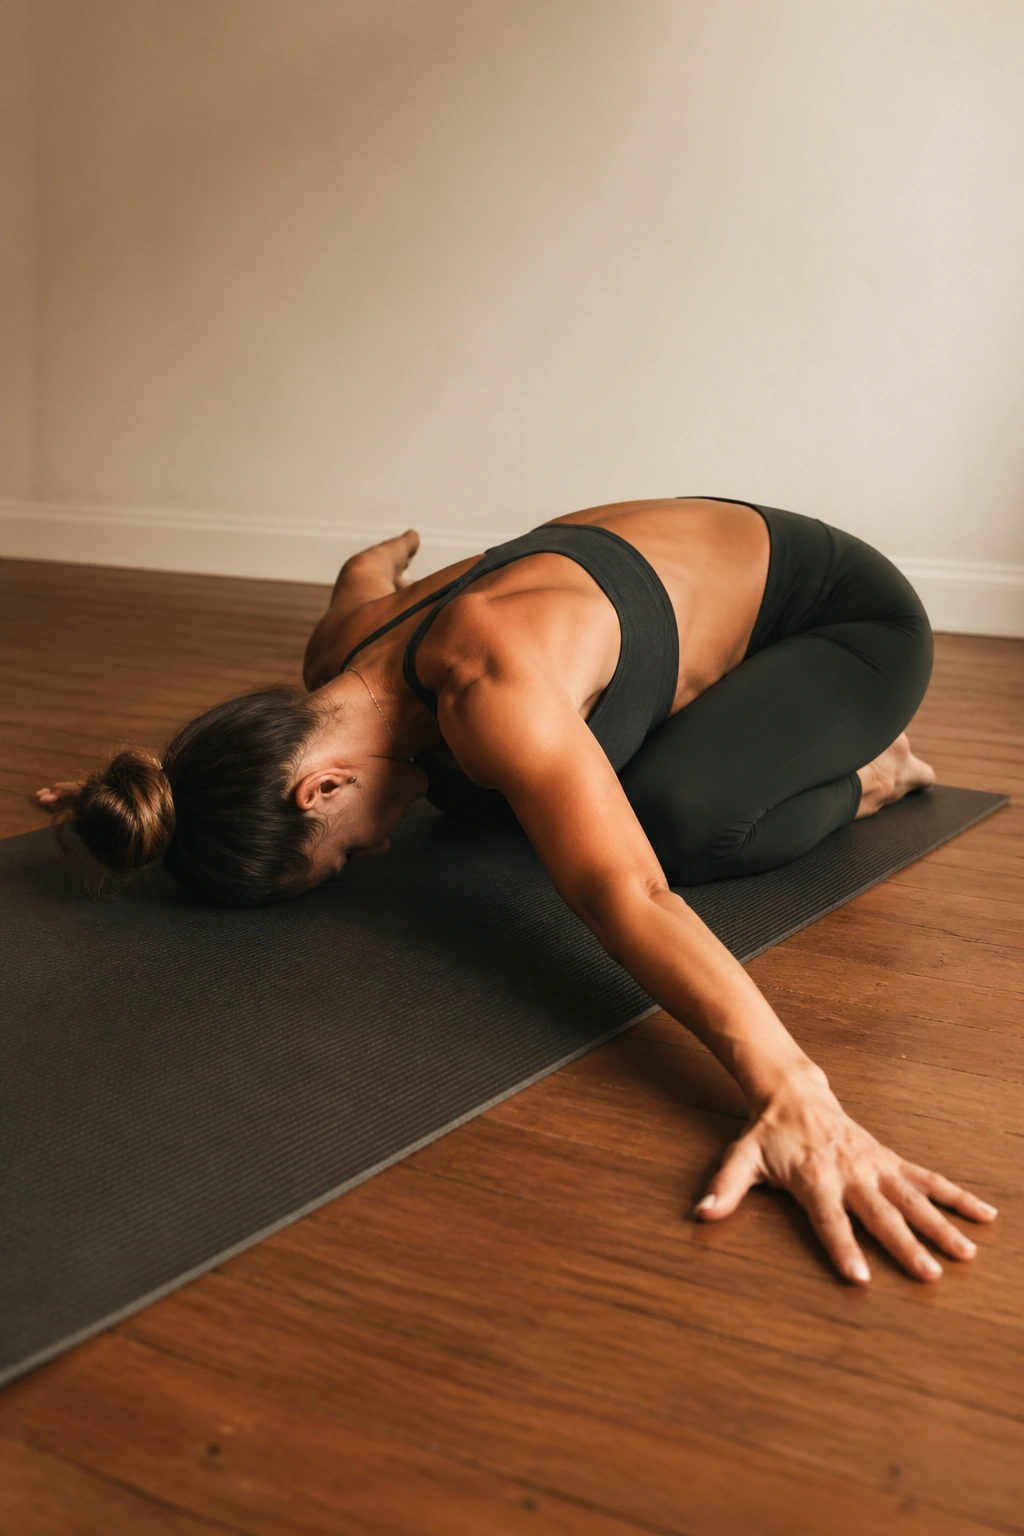
The lat stretch is sneaky. Most people think of it as an upper-back thing, but the lats tie into the ribs, shoulder, and even the way your torso braces under a bar. After pull-ups, rows, deadlifts, and overhead work, they can feel like thick bands under your armpits.
Child’s pose with a side reach opens that area without forcing the shoulder into an ugly angle. Start on your hands and knees, then sit your hips back toward your heels. Walk both hands a little to one side and breathe into the side of the ribs. You’ll usually feel the stretch travel from the armpit down the side of the torso.
A plain child’s pose is fine. This version is better when your lats are the thing that feels glued down. If your overhead press gets sticky because your arms won’t quite track overhead, this stretch can help restore that overhead line a bit before your next session.
Why the Side Reach Matters
The side reach changes the line of pull. Instead of just folding the spine, you get more length through the lat, teres area, and side rib cage. That matters for lifters who spend a lot of time locking down their ribcage under load.
Take 3 slow breaths to one side, then shift to the other. Keep the elbows soft. If your lower back starts doing the work, walk the hands farther out and let the hips stay heavy.
5. Figure-Four Glute Stretch for Hip Rotation
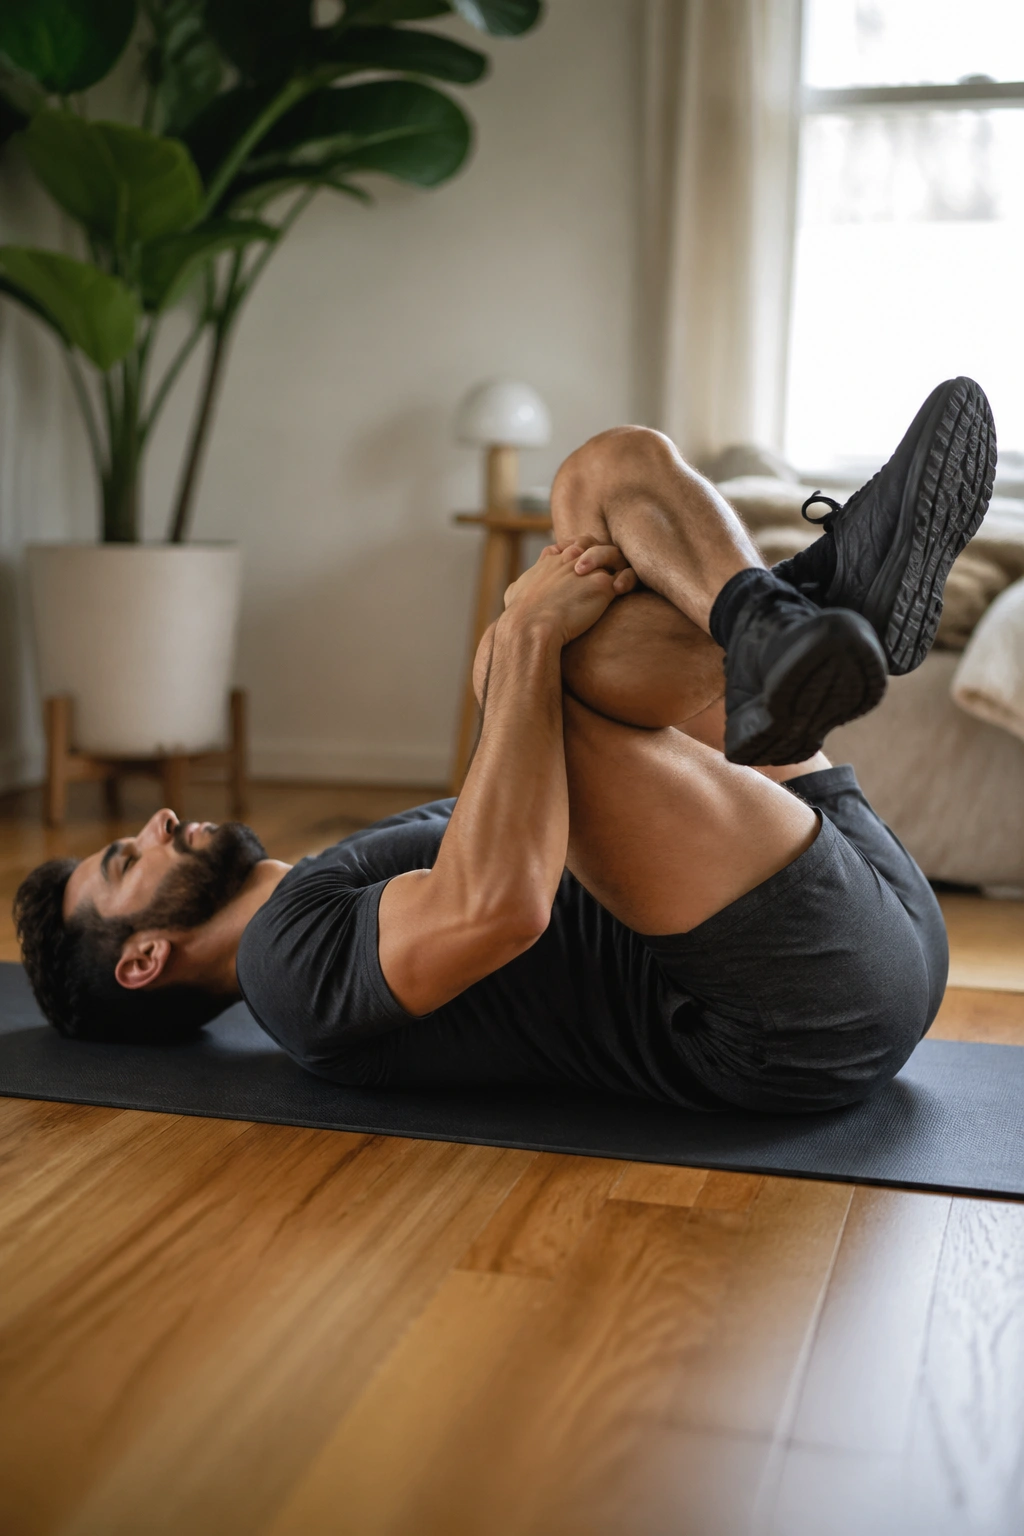
This one gets used a lot, and for good reason. The figure-four stretch hits the glute max and the deeper rotators that help your hips turn cleanly under load. It’s especially handy after squats, lunges, split squats, and any day where your hips feel stuck in one position.
Unlike a generic seated stretch that turns into a hamstring tug, the figure-four version isolates the back of the hip more cleanly. Lie on your back, cross one ankle over the opposite knee, then pull the uncrossed thigh toward your chest. Keep the foot on the crossed leg flexed. That small detail helps protect the knee and makes the stretch feel steadier.
You should feel it in the outside and back of the hip, not in the knee joint. If it lands in the knee, back off and adjust the angle.
Who Benefits Most
- Lifters who squat deep but feel pinched in the hips afterward
- Anyone whose glutes feel numb or cramped after deadlifts
- People who sit a lot between sessions
- Anyone who wants a gentler hip opener than a full pigeon pose
Hold each side for 30 seconds, or a little longer if the hips feel stubborn. I like this one late in a session because it doesn’t ask much from the lower back. It just opens the hip, and that’s enough.
6. Couch Stretch for Quads That Feel Like Steel Cables
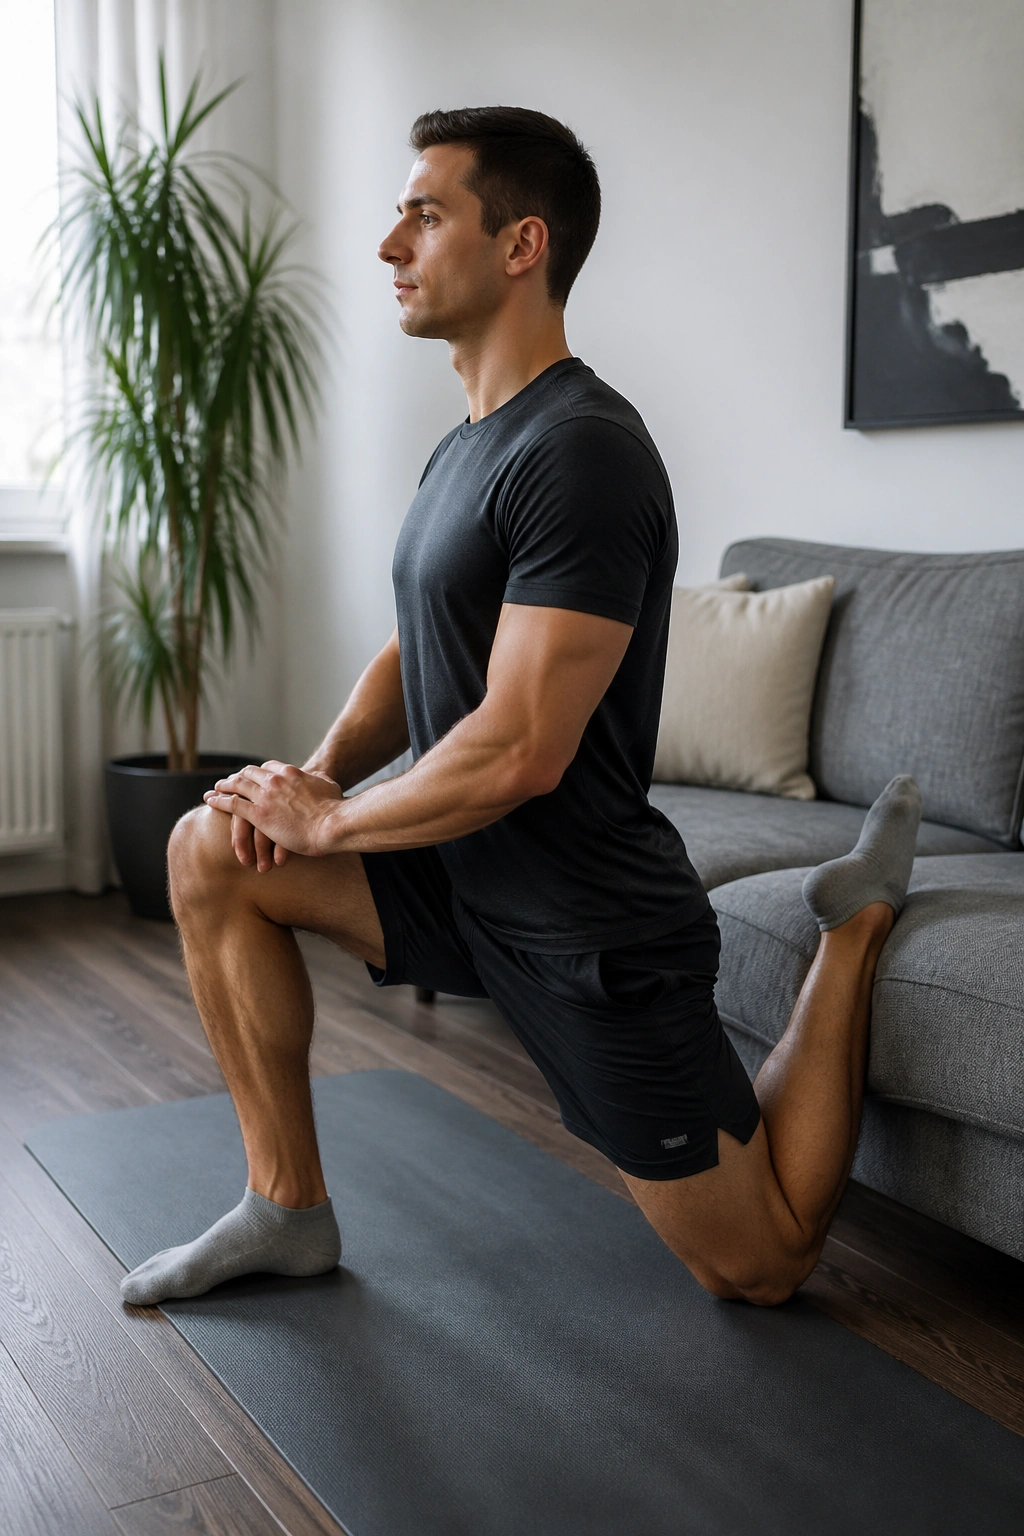
The couch stretch is the one people avoid because it tells the truth. It doesn’t hide behind a nice easy sensation. It digs into the quad and the front of the hip, and if you spend your weeks under a barbell, that’s probably where the stiffness lives.
The Setup Matters More Than the Pain
Set one knee near a wall or the side of a couch, shin pointing up, with the top of the foot against the surface behind you. Bring the other foot in front into a lunge position. Then squeeze the glute on the kneeling side and lift the torso tall. If your lower back arches hard, the stretch gets sloppy.
This one often feels brutal on the first breath. That’s normal. It should ease after a few slow exhales. If it stays sharp in the knee or feels like a joint pinch, stop and pad the knee better. A folded mat, towel, or folded sweatshirt can save the whole thing.
Two Mistakes That Ruin It
The first is letting the pelvis tilt forward and dumping everything into the low back. The second is trying to sit too close to the wall too soon. Both turn a useful quad stretch into a pain contest.
Stay in it for 20 to 40 seconds per side. If you’re coming off hard squat volume or front squats, this one is worth doing near the end of the session, when the quads are warm and a little cooked.
7. Standing Calf Stretch for Ankles That Won’t Bend
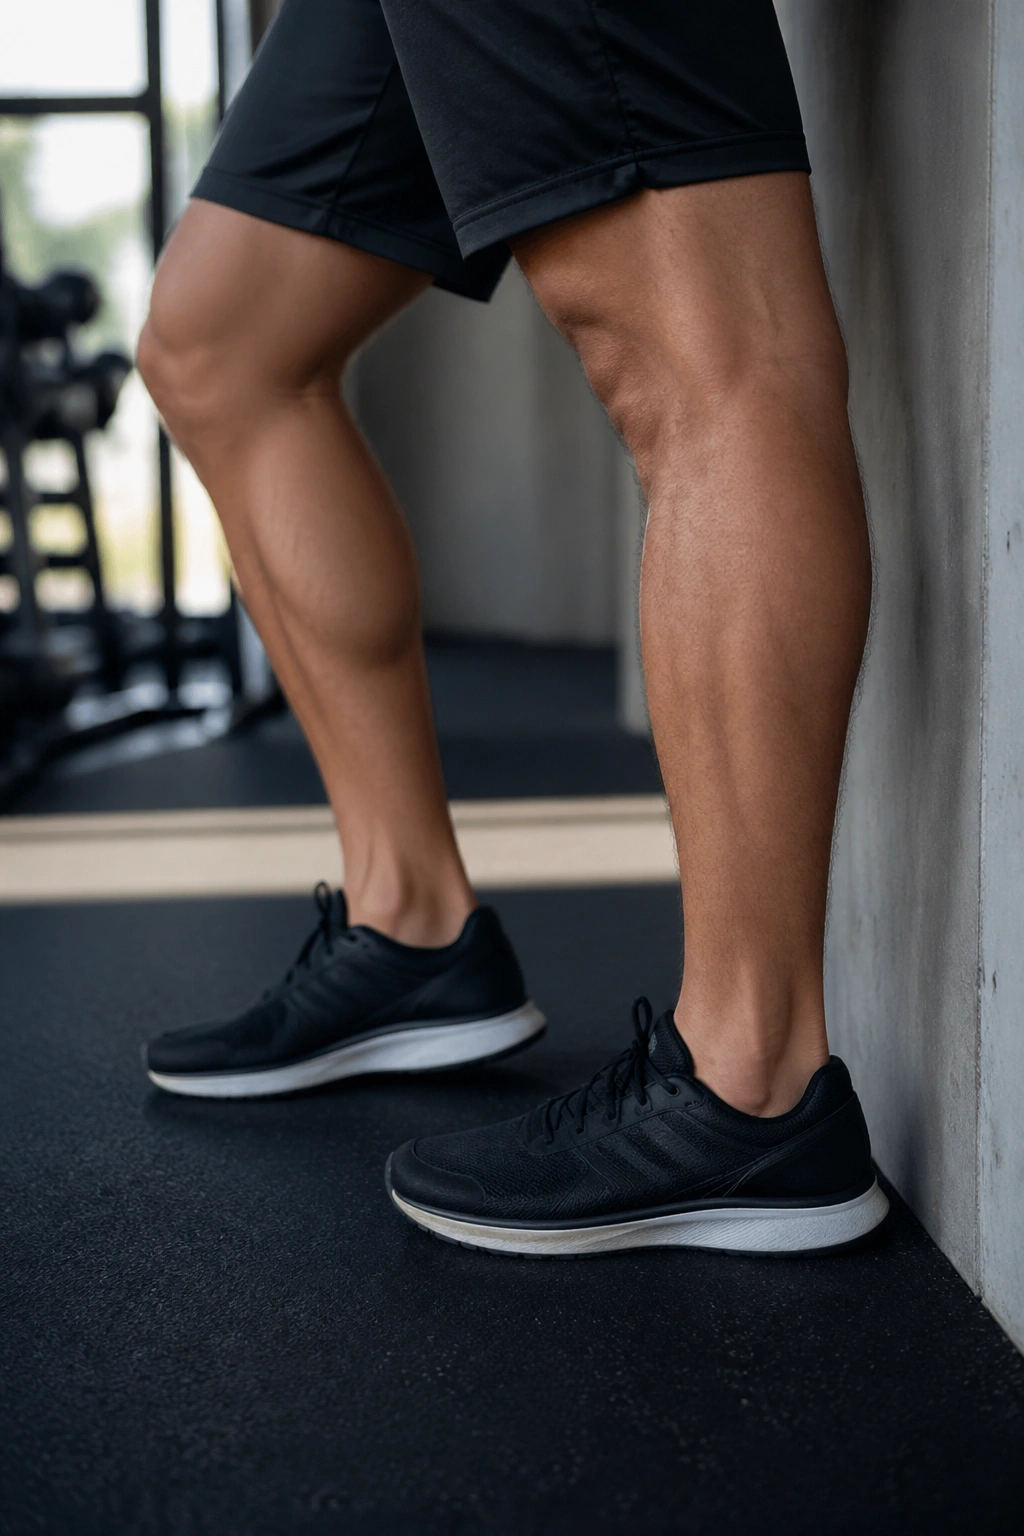
Calves get ignored until they cause trouble. Then suddenly your squat depth feels weird, your heels lift, and your ankles act like they were made of old rubber. A standing calf stretch can help clear that up, but only if you know which part of the calf you’re trying to hit.
Straight-Knee vs Bent-Knee
With a straight back leg and the heel driven into the floor, you’ll feel more of the gastrocnemius, the bigger calf muscle that crosses the knee. Bend the back knee a little and the stretch shifts lower, into the soleus, which matters a lot for ankle bend during squats and lunges.
That split is useful. If you only do one version, you miss half the picture. A lot of lifters stay stiff in the lower calf because they never bend the knee while stretching it.
- Straight knee: more upper calf
- Bent knee: more lower calf and ankle mobility
- Heel stays down in both versions
- Forward pressure should be slow and mild
Hold each version for 20 to 30 seconds per side. A wall works fine. A slanted board works too, but don’t force the foot into a huge angle right after leg day. Small, repeatable stretches tend to win here.
8. Thread-the-Needle Stretch for Upper Back Stiffness
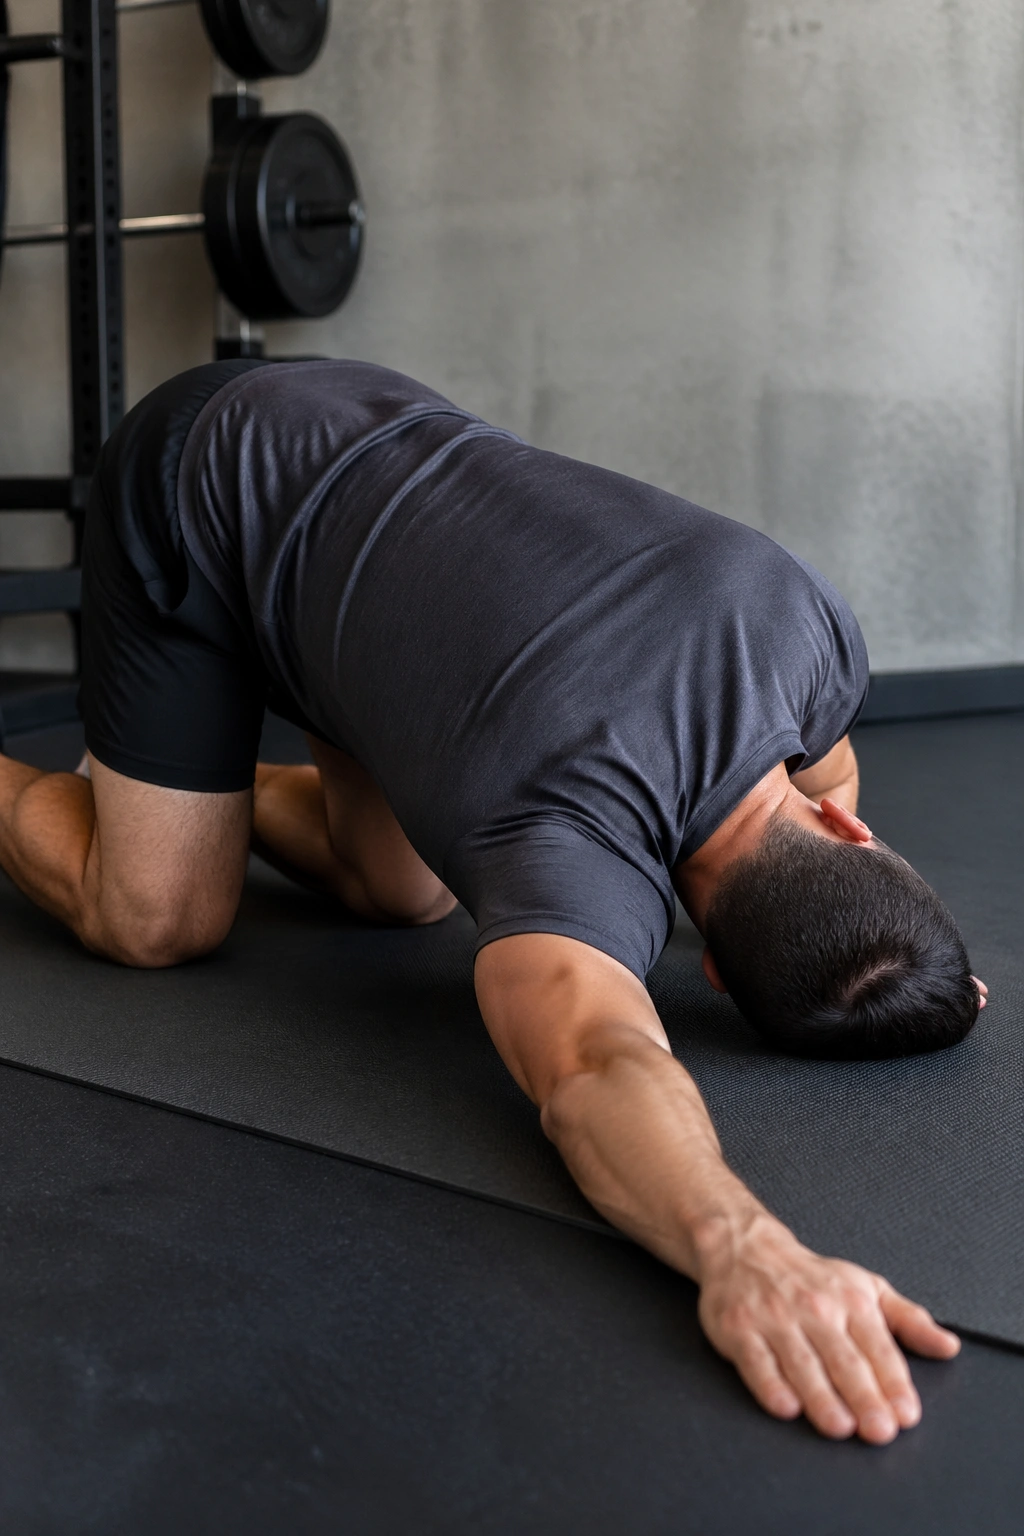
After rows, pull-downs, and benching, the upper back can feel locked in place. Thread-the-needle is one of those stretches that looks almost too simple, and then you do it and realize your mid-back has been holding a silent grudge.
Start on hands and knees. Slide one arm under the other arm and lower the shoulder and head toward the floor, then rotate gently until the upper back opens. Keep the hips stacked over the knees if you can. If your lower back twists hard, you’re cheating the stretch and handing the job to the wrong area.
A lot of lifters need thoracic rotation more than they realize. A stiff upper back makes it harder to get into a stable rack position, and it can make pressing feel stuck. This stretch helps the ribcage and shoulder blade move a bit more cleanly.
What to Watch For
- The stretch should land between the shoulder blade and spine
- Your neck should stay loose
- Breathe into the side of the rib cage
- Don’t jam the shoulder into the floor
Take 3 slow breaths on each side, then switch. If one side feels much tighter, stay there for an extra round. Bodies are rarely symmetrical, and the stronger side usually lies about it.
9. Overhead Triceps and Lat Reach for Pressing Days
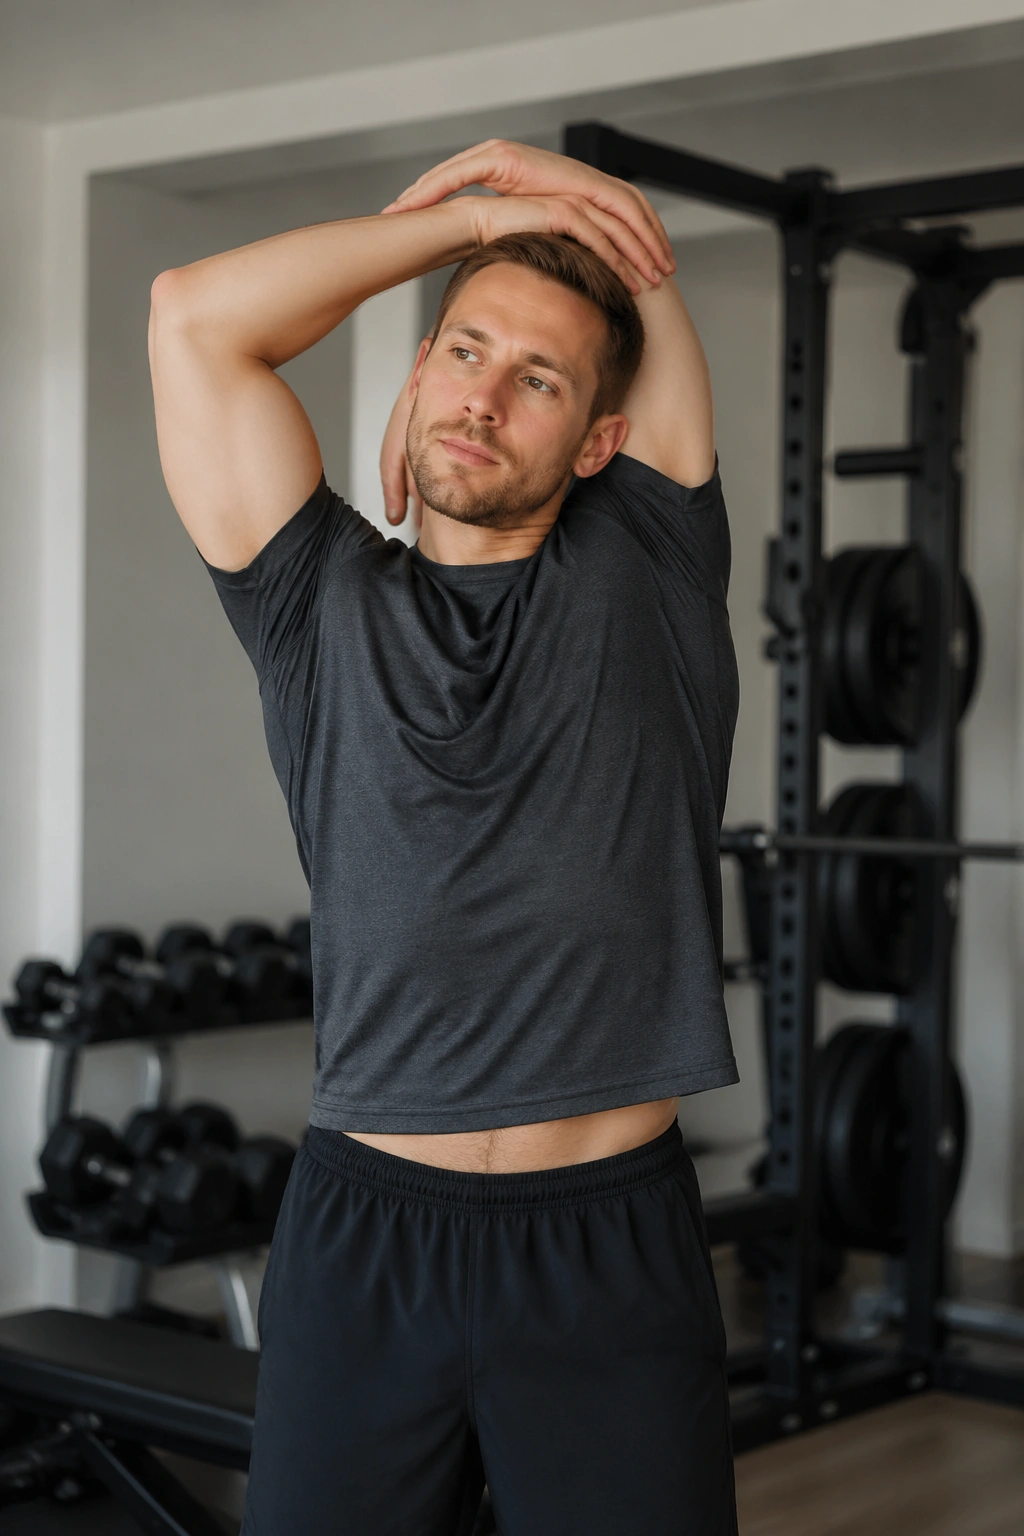
This stretch is a little more than a triceps opener. It also loosens the long head of the triceps and the top edge of the lat, both of which can get cranky after overhead pressing, pull-ups, and heavy rows. If your arms feel glued overhead, this is a good place to start.
Stand or kneel tall, bring one elbow overhead, bend it so your hand drops behind your head, and gently press that elbow back with the opposite hand. Then add a tiny side lean away from the stretched arm. That side lean is what usually shifts the tension into the lat and the side of the torso instead of just the back of the arm.
The stretch should feel long, not sharp. If you get a pinch in the shoulder, reduce the range and keep the elbow a little farther forward. A lot of people try to force the arm straight up and then wonder why the joint complains. Bad trade.
This one works well after pressing because the triceps, especially the long head, cross the shoulder joint. When that area is tight, overhead movement can feel compressed. Give it 20 to 30 seconds per side and breathe through the ribs.
A small note: if your elbows have been irritated by skull crushers or close-grip bench work, go lighter here. You want a stretch, not a twinge.
10. 90/90 Hip Hold for Rotating Hips
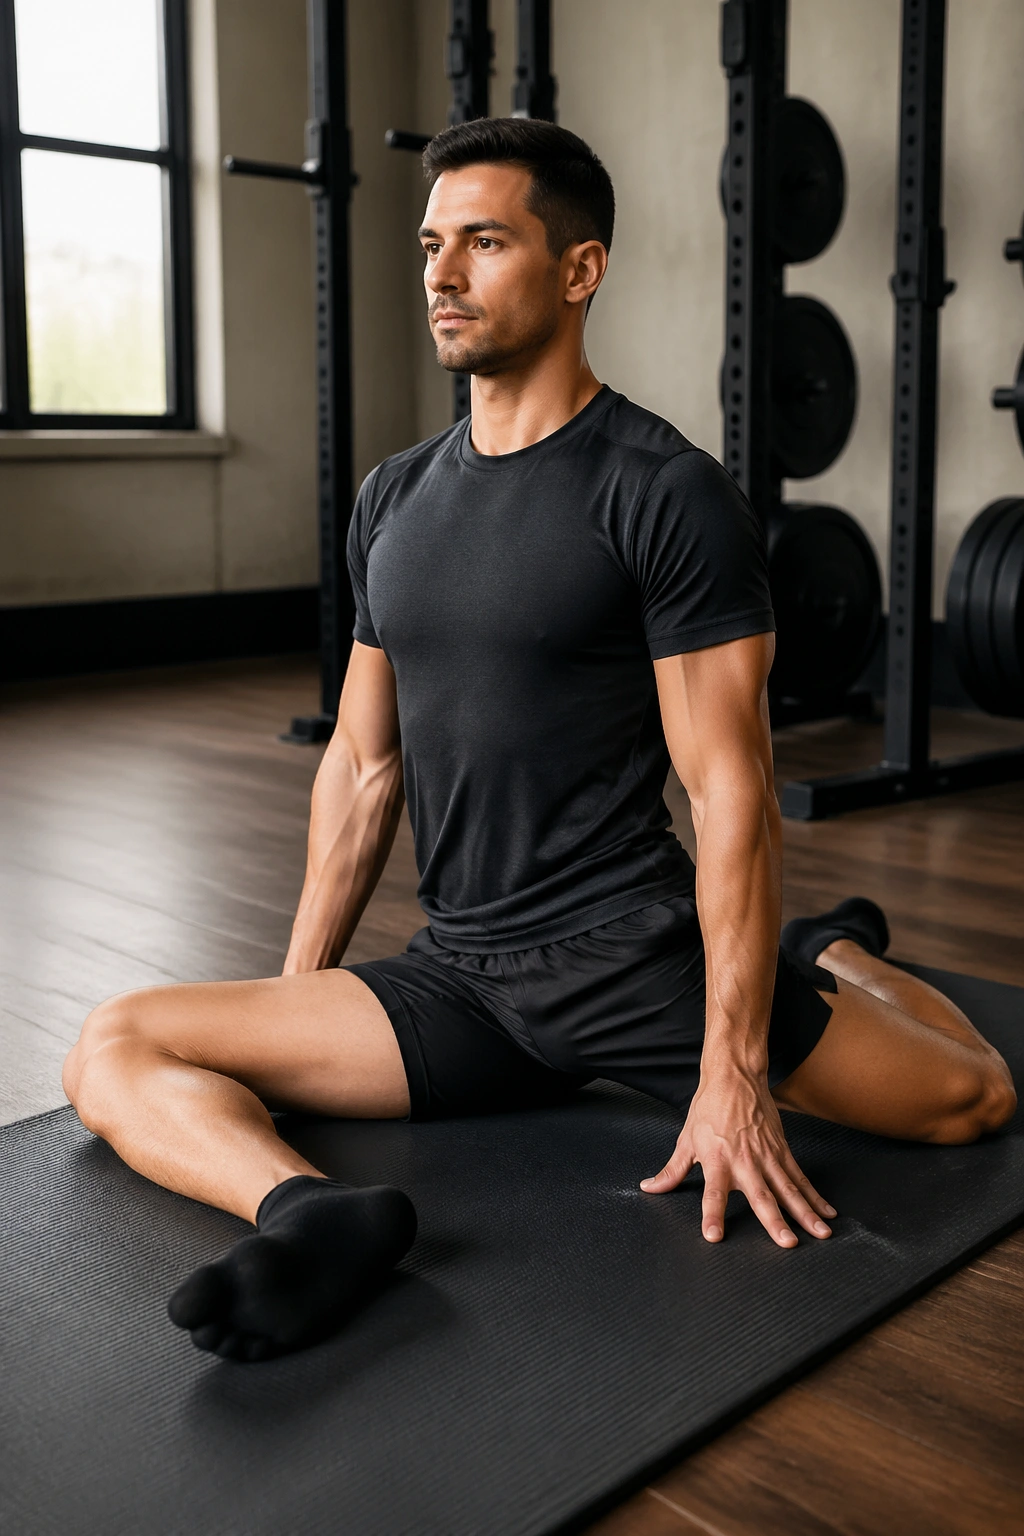
If your hips feel like rusty hinges, the 90/90 hold gives you a cleaner way to work both directions of hip rotation without forcing anything. One leg sits in front at roughly 90 degrees, the other folds behind at another 90. That setup hits external rotation on one side and internal rotation on the other, which is more useful than people expect after lower-body lifting.
Why It Feels Different from a Regular Stretch
A lot of static stretches only pull on one line. The 90/90 hold lets you notice which hip is lazy, which one is jammed, and which side is doing all the stealing during squats or split squats. You’re not trying to crush yourself into the floor. You’re trying to sit tall and let the hips settle.
If you want more stretch, lean forward over the front shin. If you want a gentler version, stay upright and just breathe. Both are valid. The more upright option is often better after a heavy day because it doesn’t overcook the lower back.
How to Make It Useful
- Sit on a pad or folded towel if the floor feels too harsh
- Keep both sit bones as grounded as possible
- Hold for 20 to 30 seconds per side
- Switch sides without rushing
A small twist of the torso over the front leg can help, but keep it subtle. This is not a battle to touch your chest to the shin. It’s a clean, controlled hip reset.
11. Wrist Flexor and Extensor Stretch for Barbell Work
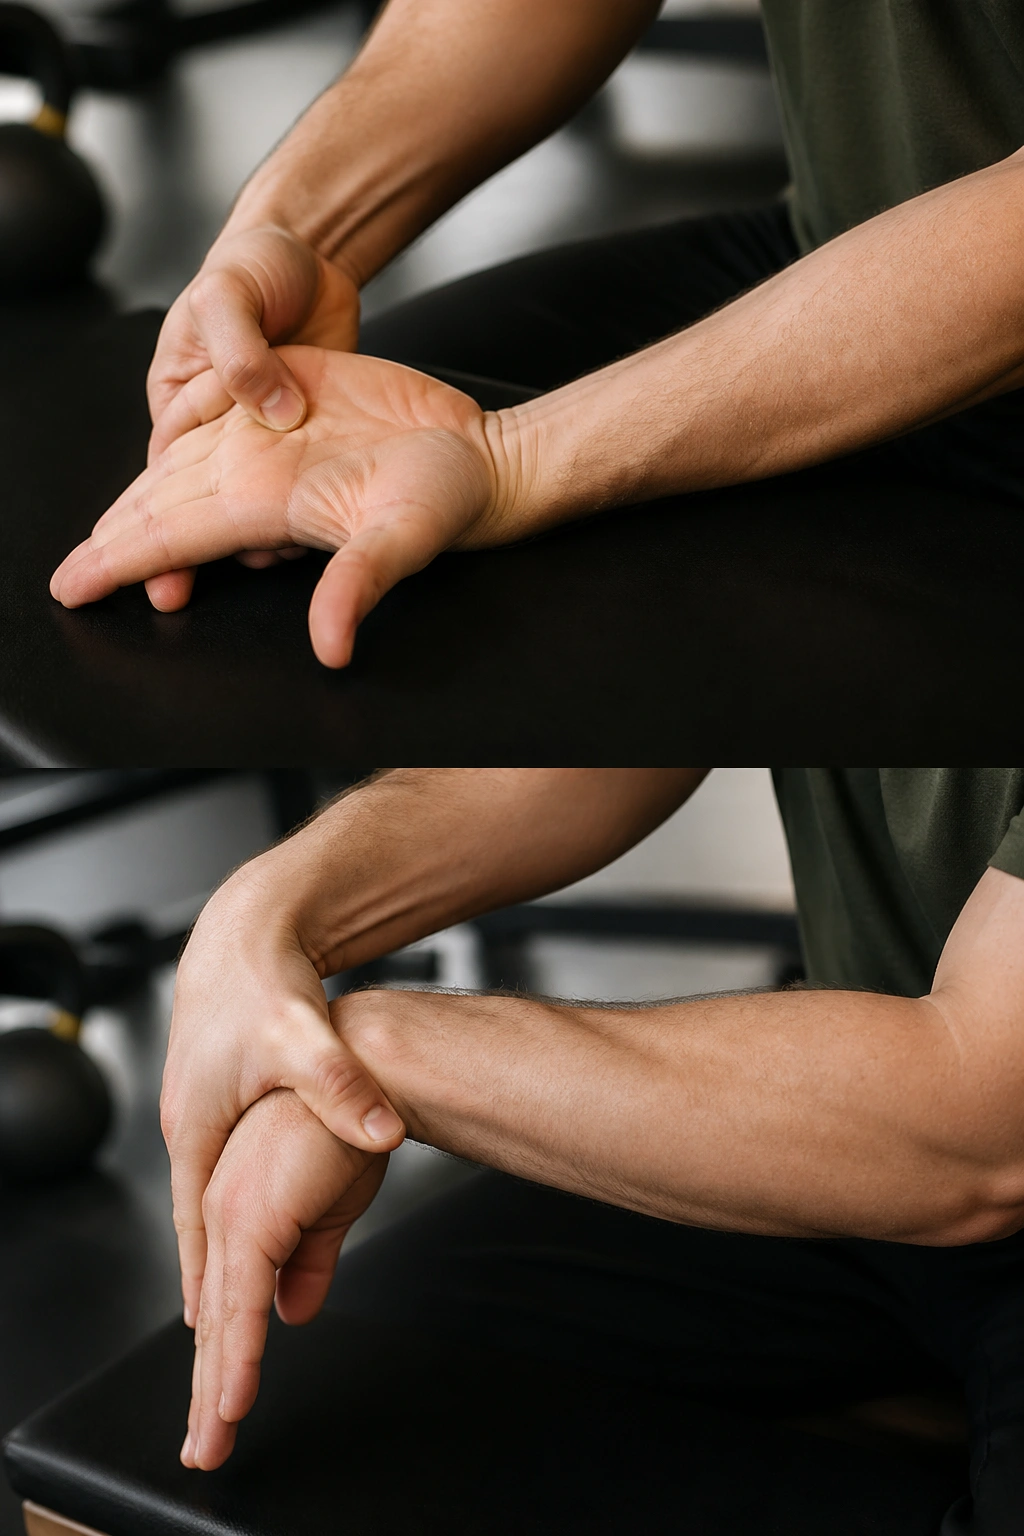
Wrists take more punishment than most lifters admit. Front rack positions, cleans, push-ups, barbell curls, pressing, and even heavy holds all load the forearm tissues. If your wrists ache after training, a simple flexor and extensor stretch can keep the whole chain from tightening up.
The Two-Sided Approach
Extend one arm in front with the elbow straight, palm up, and gently pull the fingers back with the other hand. That hits the wrist flexors. Then flip the palm down and pull the fingers toward you to stretch the extensors. Both matter. Skipping one side is how people end up with forearms that feel balanced only in theory.
Keep the pressure light. Wrist stretches are small stretches. They work best with gentle tension and steady breathing, not with a hard yank that sends the whole forearm into a flinch.
Best Times to Use It
- After front squats or cleans
- After pressing sessions with lots of barbell volume
- After high-rep push-ups or burpees
- After long gripping work like farmer’s carries
Hold each position for 15 to 20 seconds. That may sound short, but the wrist area does not need a marathon. It needs a few clean reps of tension and release. If your hands get numb or tingling starts, stop. That is not the stretch talking anymore.
12. Supine Spinal Twist for a Full-Body Downshift
Need one stretch that helps everything unwind at once? The supine spinal twist is a good place to finish because it does more than tug on the low back. It lets the spine rotate, the hips soften, and the breathing slow down, which is exactly what you want after a hard session.
Lie on your back, bring one knee across the body, and let it drop toward the opposite side while keeping the shoulder blades heavy on the floor. Extend the opposite arm out to the side if that feels good. Keep the movement gentle. The twist should feel like a release, not like you’re wringing out a towel.
This stretch is especially nice after days when your bracing was intense. Heavy squats, deadlifts, carries, rows — they all ask the trunk to stay rigid. A twist at the end gives the body a clean signal that the work is over. Not every stretch has to chase a sore muscle. Some of them are about turning the whole system down a notch.
Where to Place It in Your Routine
Use it near the end of your stretch sequence, after the bigger hip, chest, or lat work. Hold each side for 20 to 40 seconds, breathe slowly through the nose if you can, and let the exhale get a little longer than the inhale.
If one side feels tighter, stay there a touch longer. But don’t force the knee to the floor. A controlled twist is enough. That’s the part many lifters miss. They think more pressure means more recovery. Usually it just means more guarding.
A good post-lift stretch session doesn’t need to be fancy. It needs to target the places your training actually loads, stay calm, and leave you feeling a little looser on the walk to the car. If you pick only three on a busy day, start with the hips, chest, and lats — the areas that change how the rest of your body moves.
