



You know that specific type of soreness—the kind that makes walking down a flight of stairs feel like a high-stakes athletic event. Your quads are screaming, your calves are tight, and every movement is a stiff, awkward reminder of the intensity you pushed through yesterday. We call it Delayed Onset Muscle Soreness, or DOMS, but when you’re in the middle of it, you don’t care about the science. You just want to move without wincing.
Self-myofascial release, the technical term for foam rolling, has become a staple of modern recovery protocols. It isn’t just about massaging the muscle; it’s about signaling the nervous system to down-regulate, improving blood flow, and physically breaking up the adhesions that form between your muscles and the fascia that encases them. When you roll, you’re essentially manually releasing that stuck, crunchy tissue so your muscles can slide against each other the way they were designed to.
The biggest mistake most people make is rolling through these areas as if they’re using a rolling pin on dough—fast, mindless, and overly aggressive. You aren’t trying to flatten the muscle. You’re trying to find the “hot spots,” the areas of tension where the tissue feels restricted, and sink into them. It should be uncomfortable, sure, but it should never be agonizing. If you’re holding your breath, clenching your jaw, or if the pain is sharp and radiating, you’re doing too much. Back off, breathe, and let the tool do the work.
1. The Deep Calf Release Routine
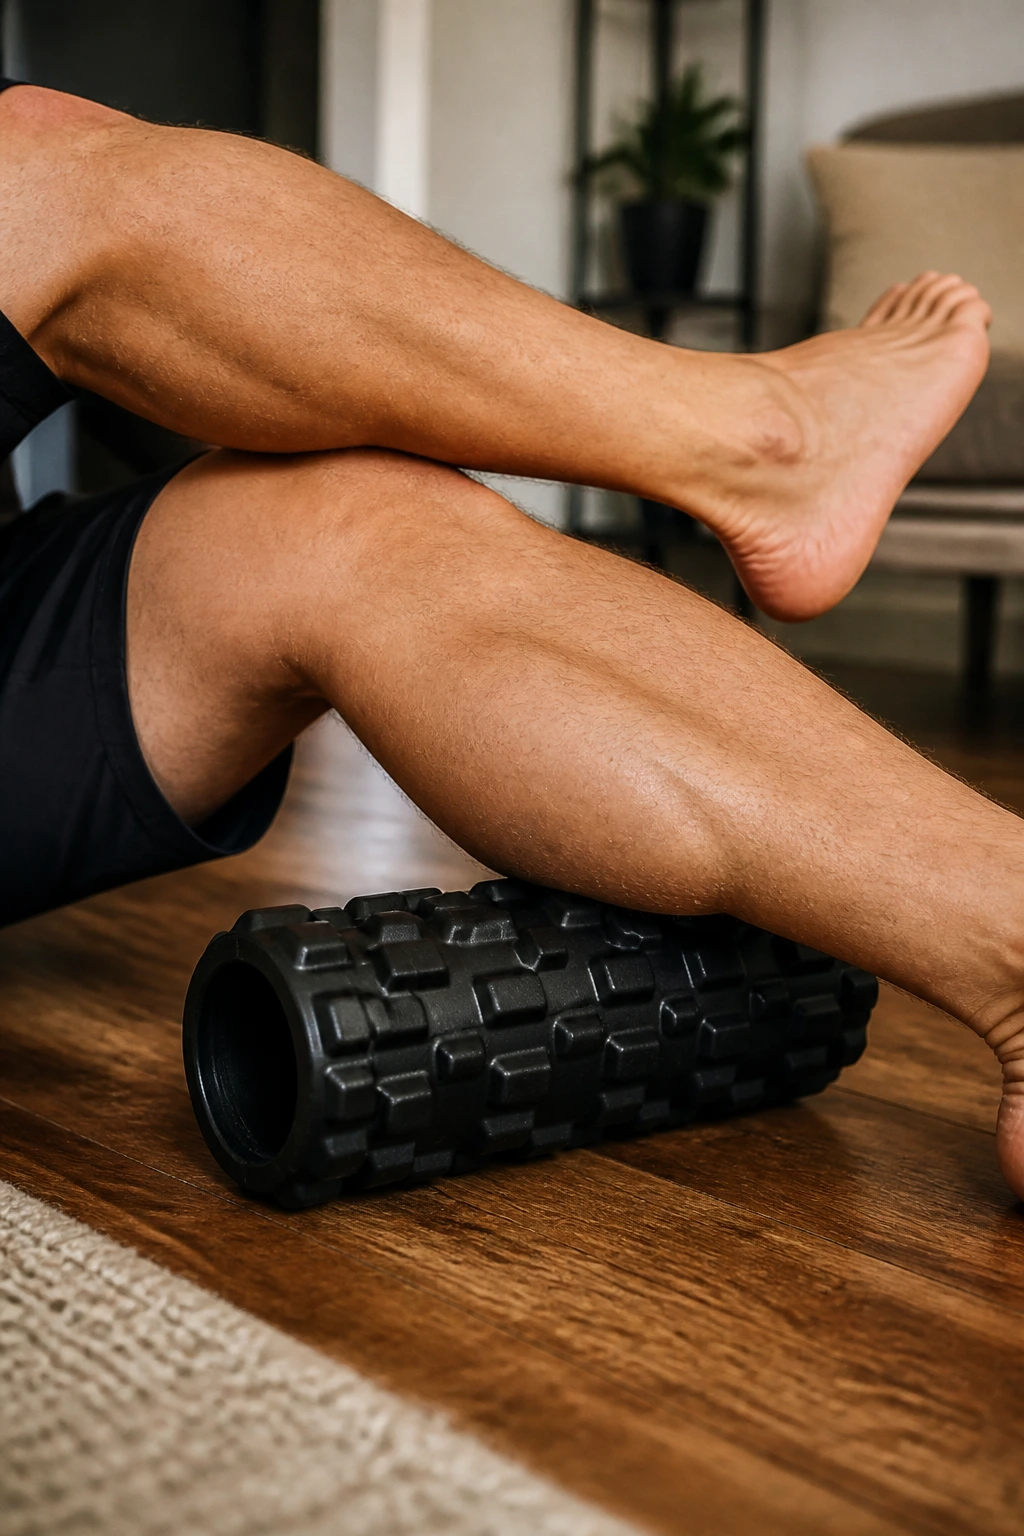
Your calves take a beating, whether you’re a runner logging miles or someone who spends hours on their feet. The gastrocnemius—that meaty part of the calf—often gets knotted up, which directly limits ankle mobility and puts extra stress on your knees.
To target this, sit on the floor with your legs extended. Place the roller under one calf, just below the knee. Cross the other leg over the top to add weight; this is the key to getting deep enough into the tissue. Lift your hips slightly, push through your hands, and slowly scan from just below the knee down to the ankle. When you find a spot that feels like a bruise, stop.
The Micro-Movement Technique
Once you’re on that tender spot, don’t just sit there. Flex and point your foot ten times. This moves the muscle fibers against the roller, forcing the tissue to release more effectively than static pressure ever could. Rotate your foot inward and outward, too. The calves are multi-directional, and you need to hit them from every angle to get real relief.
Pro tip: If the roller is too firm, try using a tennis ball or a lacrosse ball for the calves. The smaller surface area can target those tiny, stubborn knots that a standard foam roller simply glides right over.
2. Hamstring Lengthening Sequence
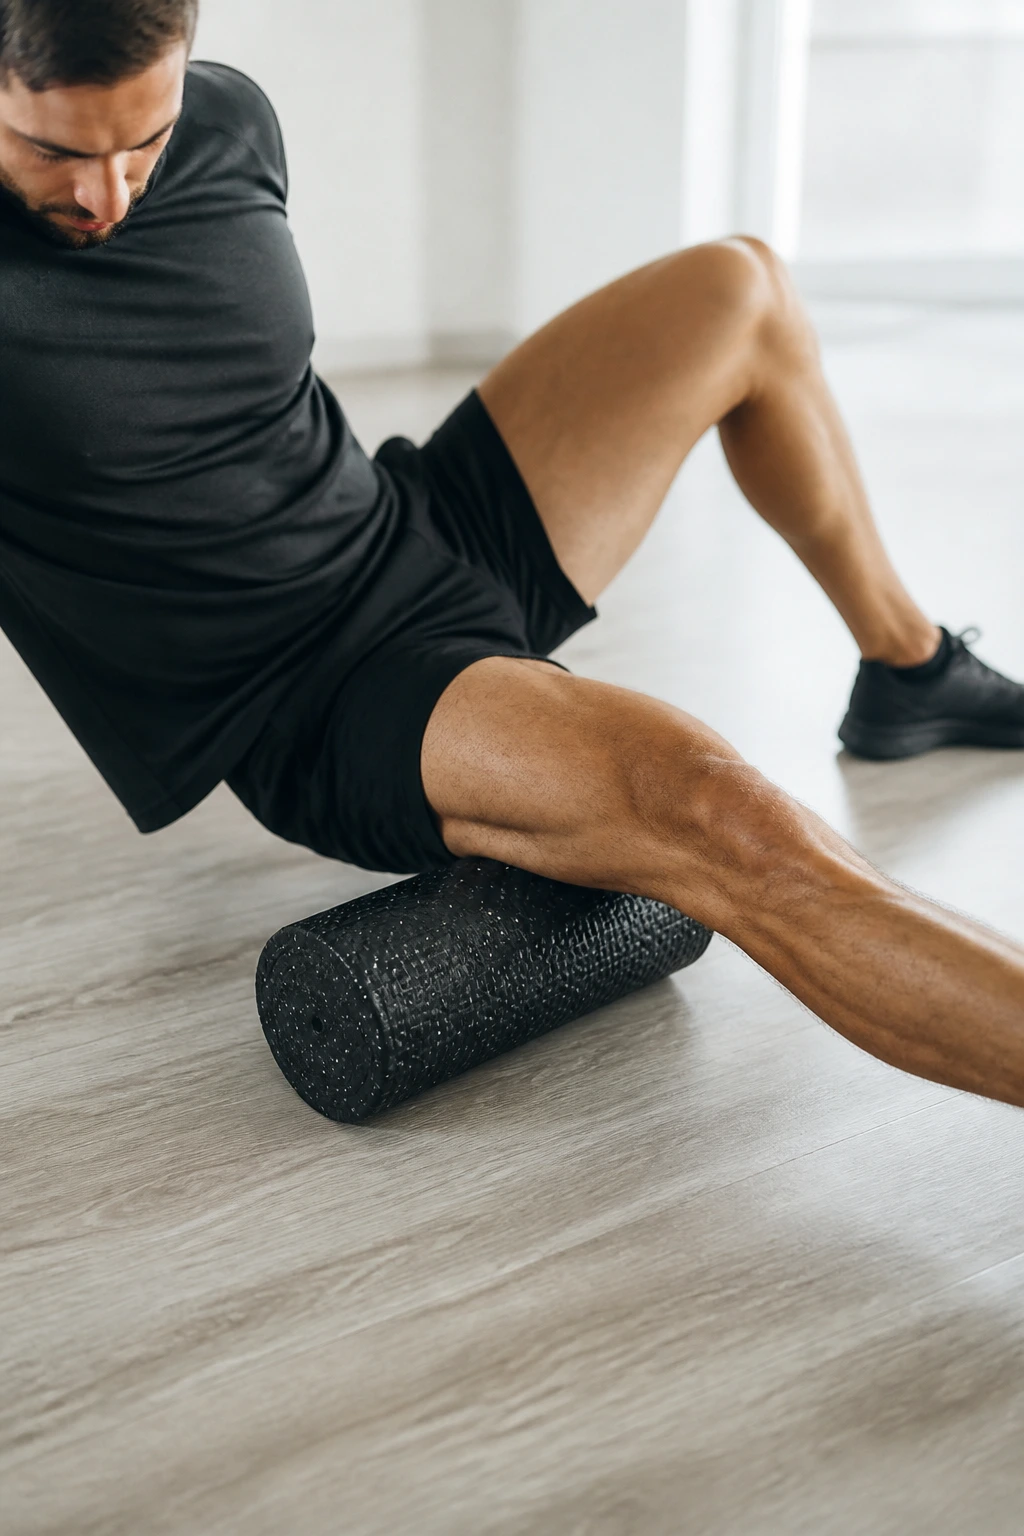
Tight hamstrings are the classic culprit behind lower back pain. When these muscles are chronically short, they pull on your pelvis, which then forces your lumbar spine to compensate. You can stretch your hamstrings until you’re blue in the face, but if the fascia is stuck, the tension will remain.
Place the roller under the mid-thigh of one leg. Keep the other leg bent with the foot flat on the floor to stabilize your body. Lift your hips and roll from just above the knee to just below the gluteal fold. Never roll directly behind the knee joint. That area is full of nerves and blood vessels that don’t take kindly to heavy, direct pressure.
The Shift-and-Rotate Method
Instead of staying perfectly parallel, angle your leg slightly outward to hit the outer hamstring (biceps femoris), and then angle it inward to target the inner hamstrings (semitendinosus and semimembranosus). Spend about 60 seconds on each side. If you hit a spot that makes you gasp, stay there. Breathe deeply—deep belly breaths—until you feel the muscle yield beneath the pressure. It’s a game of patience, not power.
3. Quadriceps Prone Release
This is usually the most intense routine for most people. The quads are massive, powerful muscles that get extremely tight, especially if you do a lot of squatting, lunging, or running. If your quads are tight, your knees will feel it.
Get into a plank position with the roller underneath both thighs. You can do one leg at a time if you need more pressure. Start just above the knee and work your way up toward the hip crease. Keep your core tight—don’t let your lower back sag into an arch. That arch is a recipe for back pain, not recovery.
Troubleshooting the Tension
If you find that the pressure is too much, shift your weight more onto your elbows and keep your knees on the floor. As you get more comfortable, you can lift your knees off the ground and put your full body weight into the roller. Do not roll over the kneecap. Just like the back of the knee, the kneecap (patella) is an anatomical structure that needs to be avoided. Focus on the meaty part of the thigh, and once you get near the hip, don’t rush. The area right where the quad meets the hip bone is often where the most significant restriction lives.
4. The IT Band “Pain Cave”
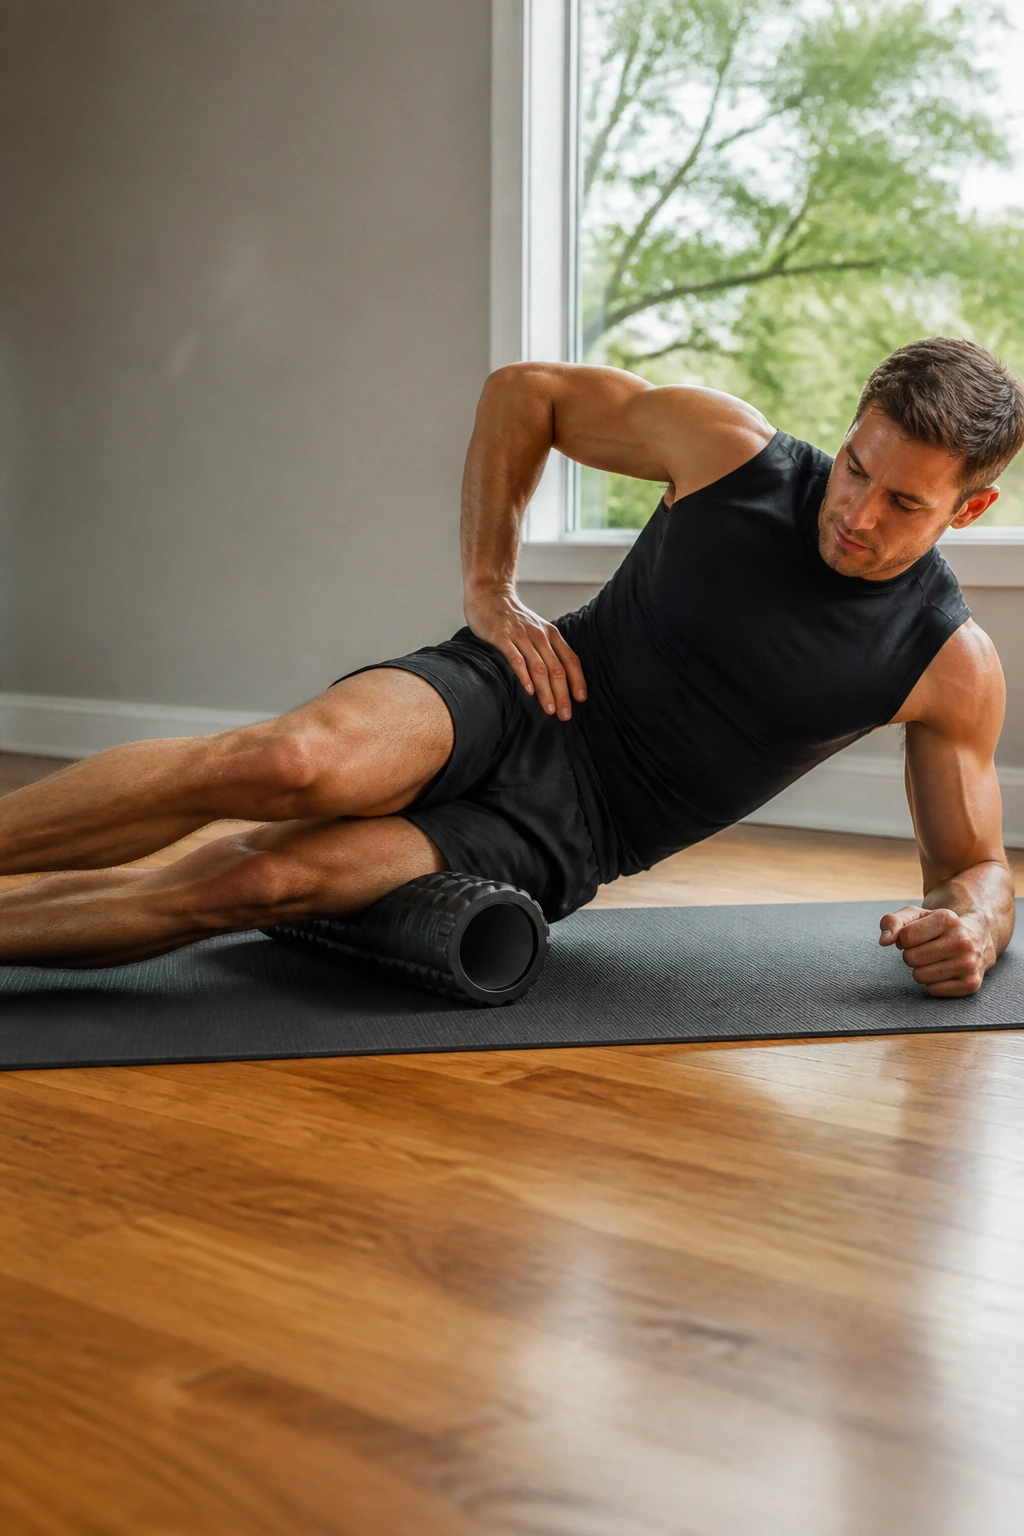
The Iliotibial (IT) band is a thick strip of connective tissue that runs down the outside of your thigh. Contrary to popular belief, you cannot actually “stretch” or “roll out” the IT band itself, as it’s dense, non-contractile tissue. However, you can roll the muscles that attach to it—the tensor fasciae latae (TFL) at the hip and the vastus lateralis (the outer quad).
Lie on your side with the roller just below your hip bone. The bottom leg is straight, and the top leg is bent, with that foot placed on the floor in front of you for support. Roll slowly from the hip down toward the knee.
Avoiding the Bone
The common mistake here is rolling all the way down to the knee joint. Don’t do that. Stop a few inches above the knee. The tissue down there is very sensitive. By focusing on the mid-thigh and the hip, you’ll loosen the tension that’s pulling on the IT band, which is exactly what you need. If this feels too intense, lean your body weight forward slightly, so you’re rolling more on your quad than the direct side of your leg.
5. Gluteal Figure-Four Roll
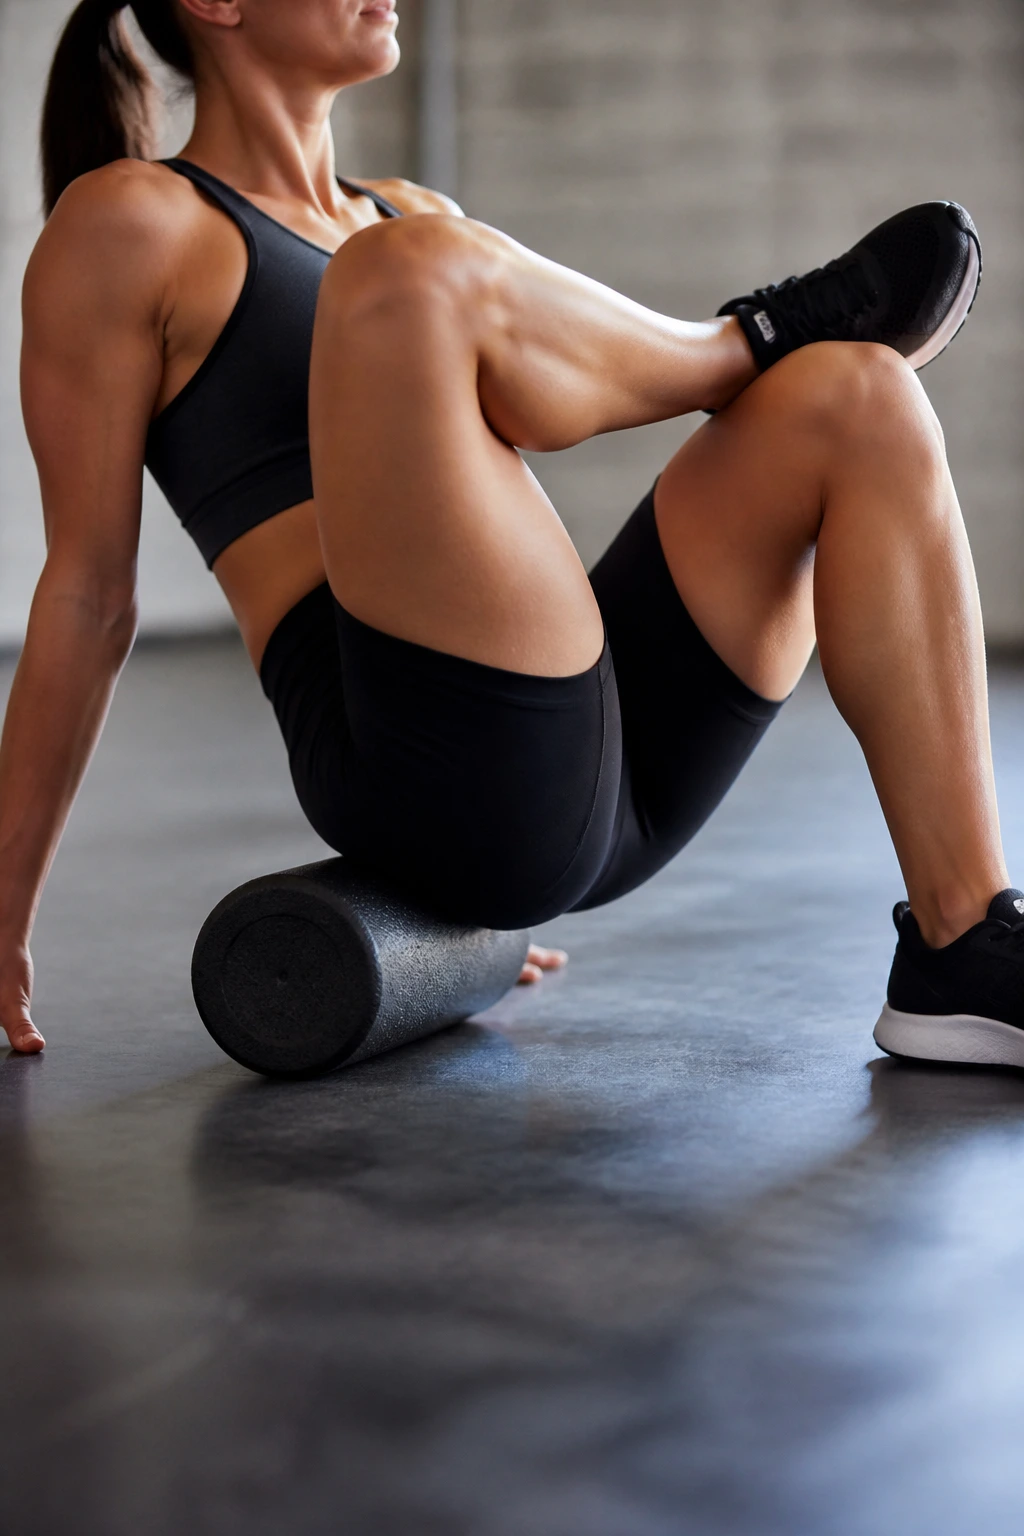
Your glutes are the powerhouse of your lower body, and they get hit hard in almost every gym movement. If you sit at a desk all day, they’re likely also tight and underactive. Rolling them out is essentially required maintenance for anyone who wants to avoid hip and back issues.
Sit on the roller with your knees bent. Cross your right ankle over your left knee—this is the figure-four position. Lean your weight onto the right glute. Roll back and forth, focusing on the meaty part of the buttock, avoiding the actual tailbone.
Finding the Piriformis
The piriformis is a small muscle deep under your glutes that often traps the sciatic nerve. When you’re in that figure-four position, you’re exposing that muscle. If you feel a sharp, “electric” sensation, move slightly off that spot. You aren’t looking for nerve pain; you’re looking for muscular dull-ache tension. Once you find it, hold the pressure. It’s common for the glutes to be one of the most tender areas, so take your time and don’t rush the process.
6. Thoracic Spine Extension
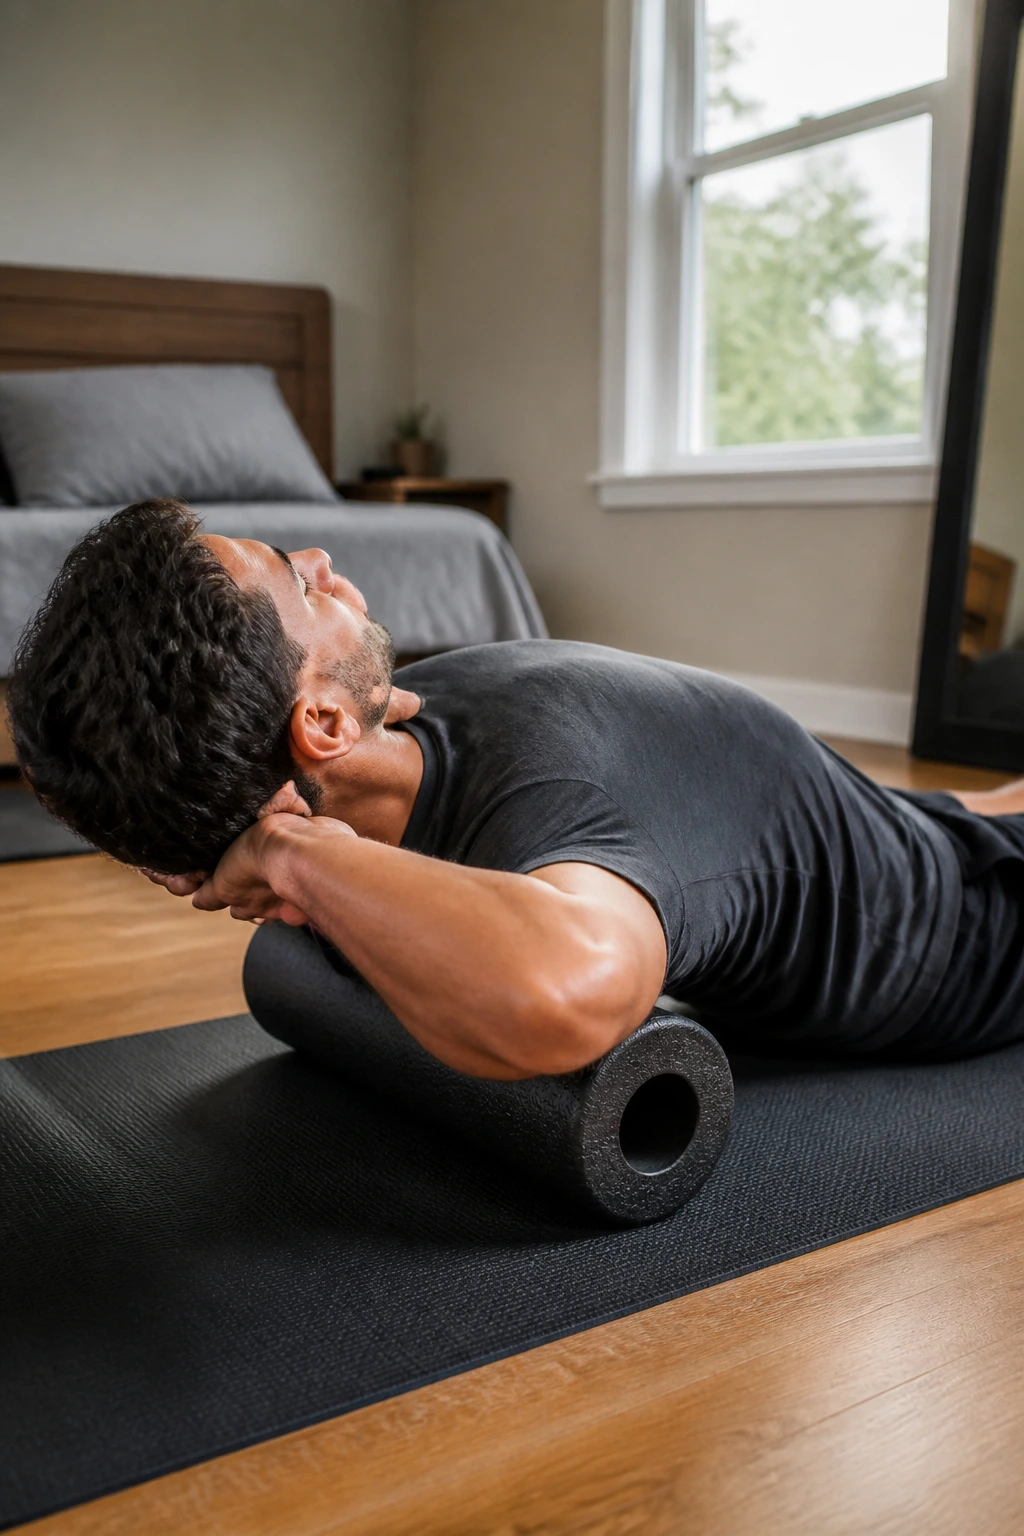
If you spend your day hunched over a laptop or steering wheel, your thoracic spine—the upper and middle back—is likely rounded forward. This routine is designed to force that spine back into extension.
Lie on your back with the roller placed horizontally across your mid-back, right at the bottom of your shoulder blades. Support your head with your hands—do not pull on your neck. Keep your butt on the floor, and slowly lean your upper back over the roller. You aren’t rolling back and forth here; this is a mobilization technique.
The Breath-Hold Strategy
As you lean back, exhale fully. Imagine you are trying to drape your ribcage over the roller. Hold this for five seconds, then return to neutral. Inch the roller up an inch or two toward your shoulders and repeat. Do this all the way up to the top of your shoulder blades. This is one of the most effective ways to counteract “desk posture” and open up your chest, making it easier to breathe deeply.
7. Latissimus Dorsi Mobilization
The lats are huge muscles that run from your armpit down to your lower back. When they get tight, they pull your shoulders forward and restrict your overhead range of motion. Most people completely neglect the side of their back, but this routine is a game-changer.
Lie on your side with the roller under your armpit. Your bottom arm should be extended overhead, palm up. Use your top hand to help control your movement. Roll gently from the armpit down to the mid-ribcage.
Why This Area Matters
You will likely feel a lot of sensitivity here, especially if you do pull-ups, rows, or any overhead pressing. This area is full of nerves and lymphatic tissue. If you feel numbness or tingling, stop immediately and reposition. You want to stay on the muscular tissue. This routine is especially useful for athletes who feel restricted when reaching their arms straight overhead. Loosening the lats often gives you an instant “unlock” in shoulder mobility.
8. Pectoral Wall-Roll
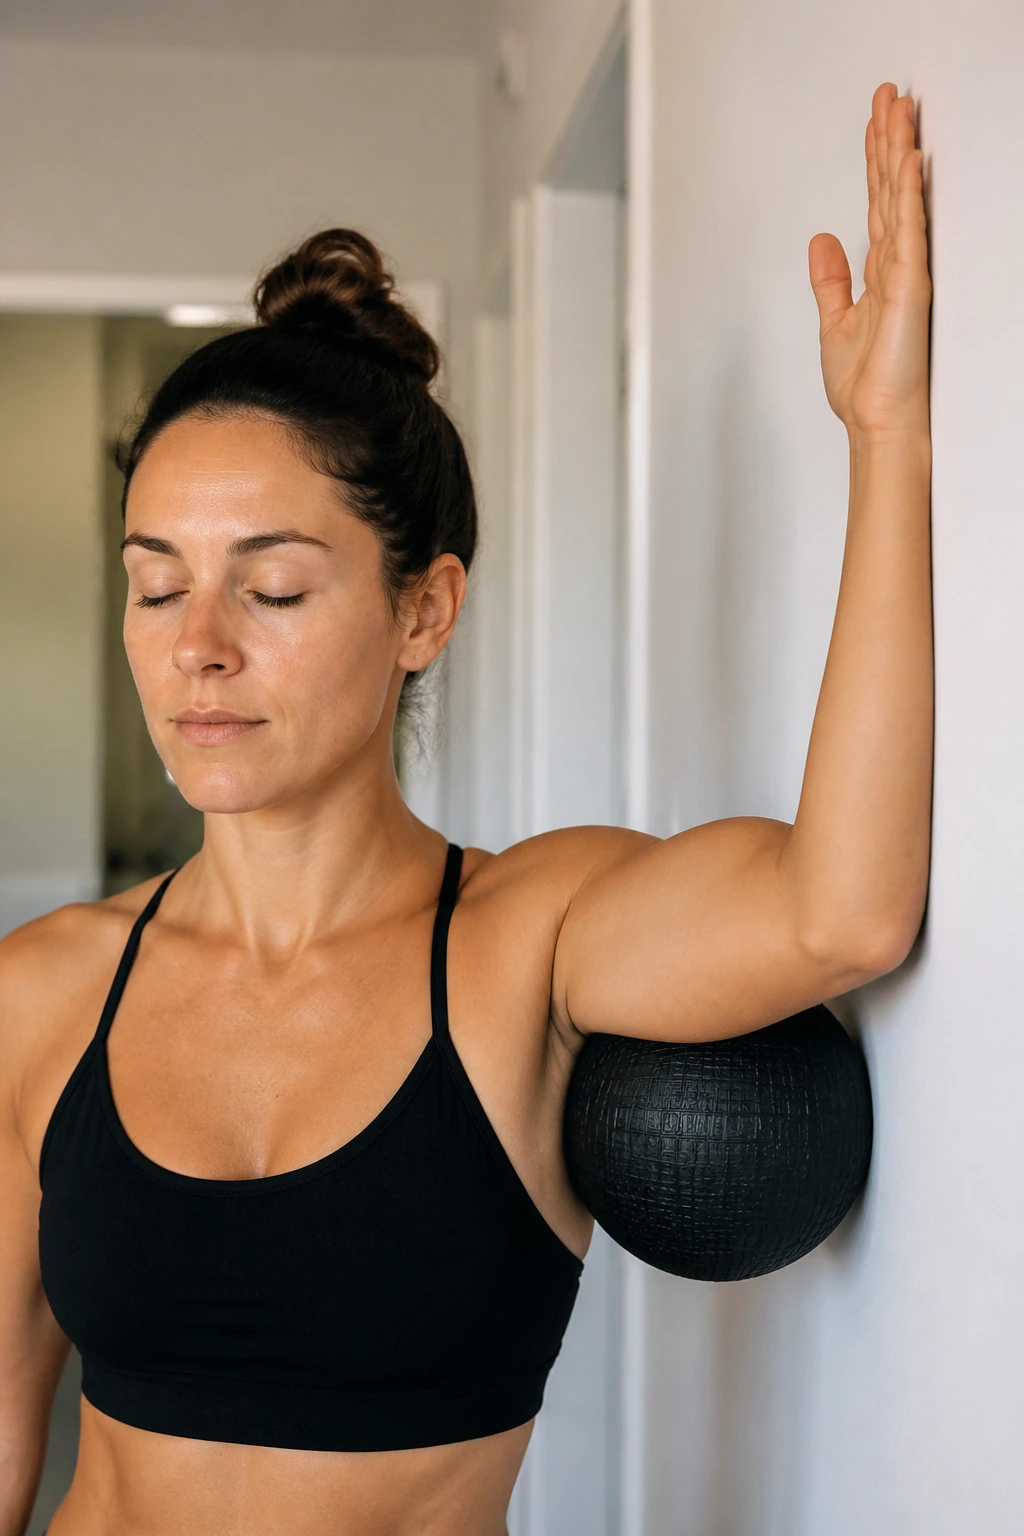
Most of us have tight chest muscles from forward-leaning posture. While you can roll your chest on the floor, doing it against a wall is much easier to control and arguably more effective for targeting specific trigger points.
Stand facing a corner or a door frame. Place the roller (or a lacrosse ball) between your chest and the wall. Position it right where the muscle meets your shoulder joint. Lean into the roller and slowly move your body to roll the tissue.
Arm Positioning for Maximum Release
To get a deeper release, keep your arm raised at a 90-degree angle, or slowly move your arm from your side up to overhead while you apply pressure. This movement stretches the fibers of the pec while the roller provides sustained pressure. It’s an active release technique that hits the fascia directly. If you have “rounded shoulders,” do this for two minutes a side—you’ll feel the difference immediately.
9. Adductor (Inner Thigh) Release
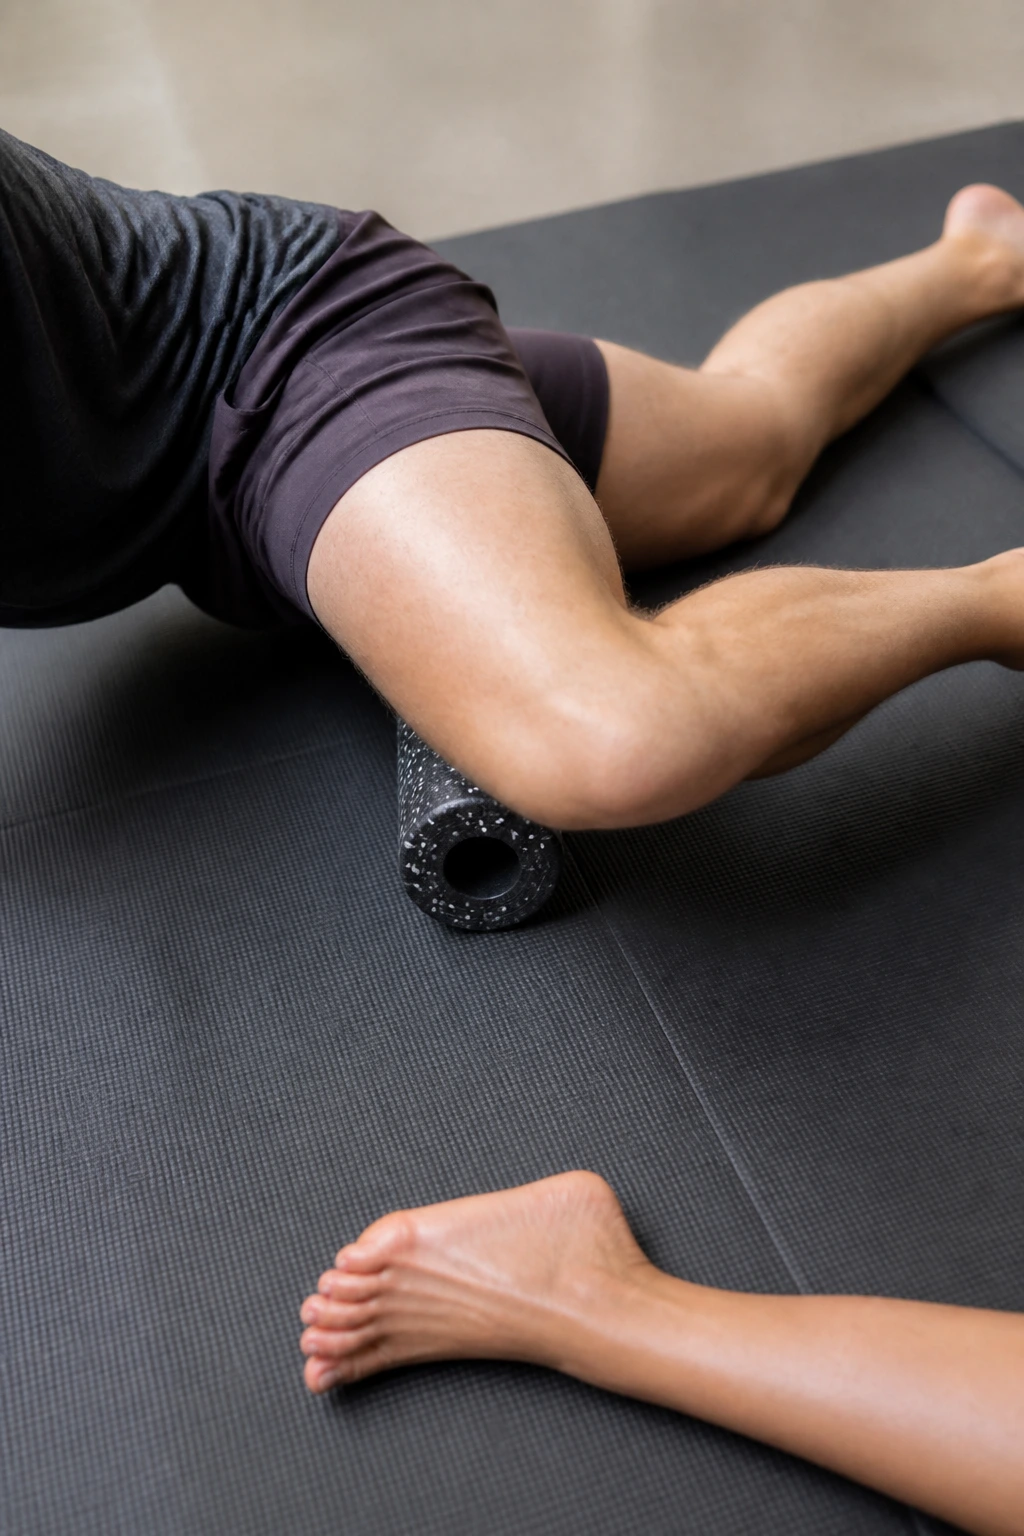
The inner thighs are often tight, which can pull the pelvis out of alignment and cause knee pain. This is an awkward one to do, but it’s absolutely worth the trouble.
Lie on your stomach. Bend one leg out to the side—like a frog leg. Place the roller horizontally under your inner thigh, close to the groin. Slowly move your body so the roller travels down toward the knee.
The “Frog” Technique
Keep your foot on the floor and try to relax your inner thigh muscles completely. If you engage them, the roller will just slide over them. The key here is to let the weight of your leg sink into the roller. If you’re at a gym, don’t worry about looking ridiculous. Everyone who knows anything about recovery knows that the inner thigh roll looks weird but feels incredible afterward. It’s one of those “hurt so good” areas.
10. Anterior Tibialis Shin Routine
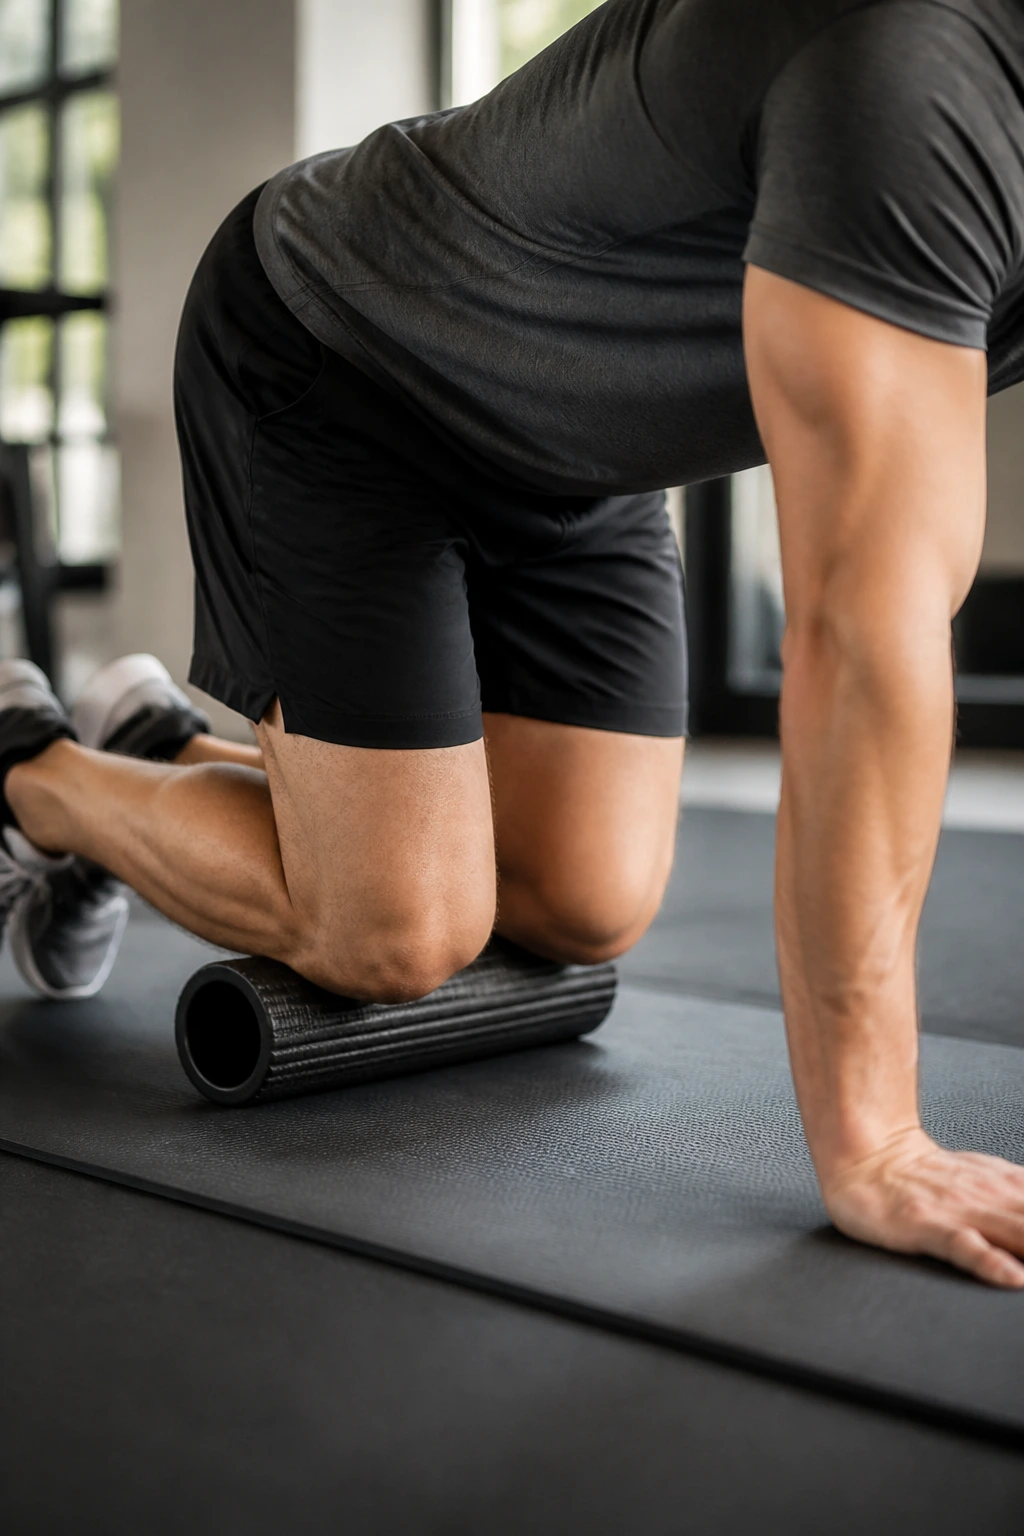
Shin splints are a nightmare for runners and active people. The anterior tibialis is the muscle running along the outside of your shin bone. When this gets tight, it creates immense tension in the lower leg and ankle.
Get on your hands and knees. Place the roller under your shins, just below the knee. You’ll be in a kneeling position with the roller supporting your weight. Lean forward slightly and slowly rock back and forth, rolling the muscle along the side of the shin bone.
Being Careful with Bone
Do not roll directly on the sharp edge of the tibia (the shin bone). That’s just painful and useless. Angle your legs slightly outward so the roller hits the fleshy part of the shin. This can be very tender, so go slowly. If you find a knot, stay there and perform slow ankle circles. This helps to break up the restrictive tissue that contributes to that burning sensation you get when walking or running.
11. Plantar Fascia Foot Massage
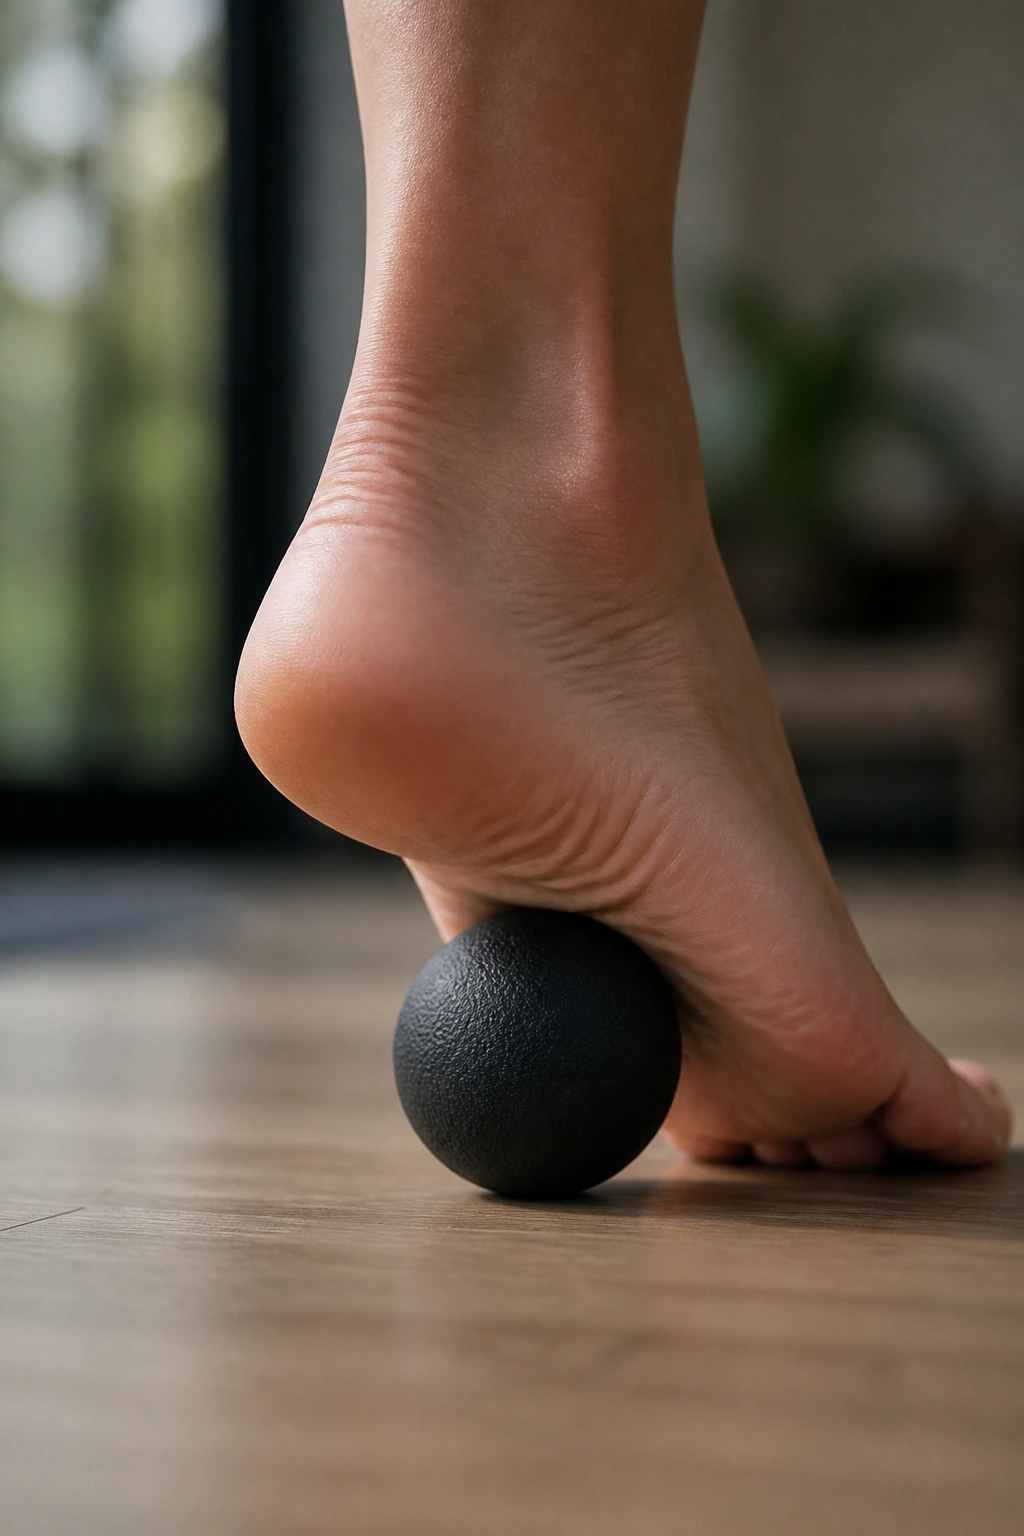
Your feet are the foundation of your entire movement system. If the small muscles and the fascia on the bottom of your feet are tight, it can cause pain all the way up to your hips. You don’t need a standard foam roller for this—a lacrosse ball, a tennis ball, or even a frozen water bottle works best.
Stand up and place the ball under the arch of your foot. Apply as much pressure as you can tolerate. Start at the heel and roll toward the toes.
The Toe-Curl Technique
When you hit a particularly tight spot, stop and curl your toes over the ball. This engages the plantar fascia and forces a deeper release. Roll the entire bottom of the foot, including the fleshy part under the big toe. Do this for two minutes per foot. It sounds like a luxury, but for anyone on their feet all day, this is a form of medical intervention for your body.
12. Upper Trap Tension Release
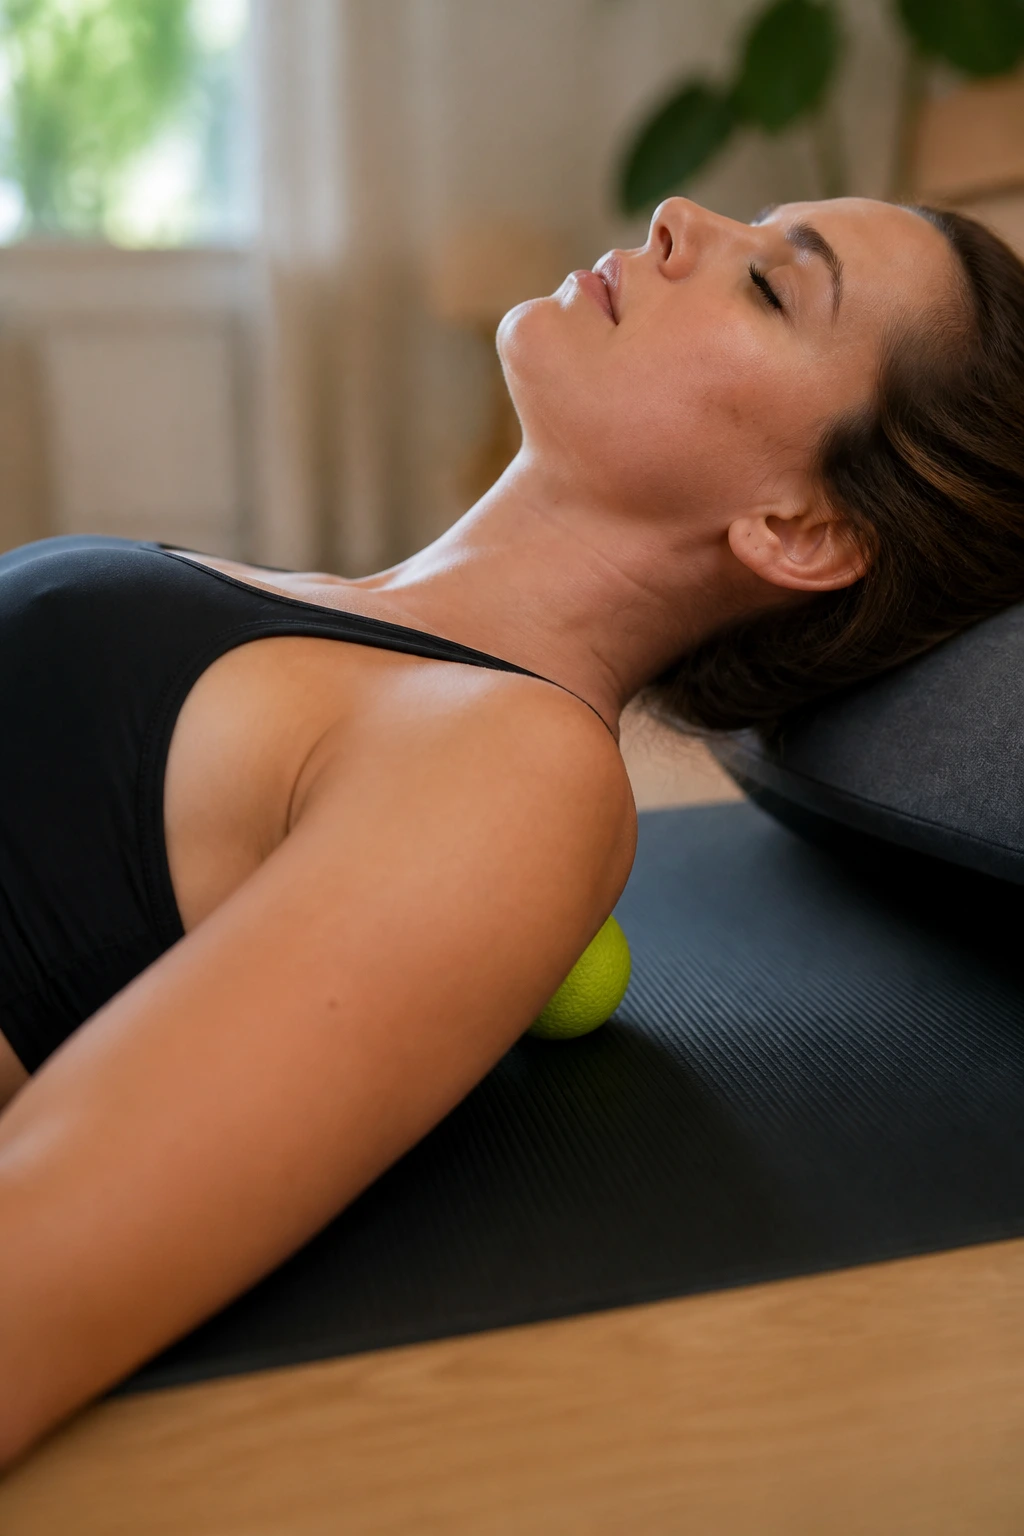
We carry our stress in our traps—the muscles that connect our neck to our shoulders. If you are chronically stressed, you are likely shrugging your shoulders without realizing it. This routine requires a smaller tool, like a tennis ball, because a standard foam roller is too wide.
Lie on your back with the ball positioned between your shoulder blade and your spine, specifically in that top meaty area. You can do this against a wall if getting on the floor is too much.
The “Nod” Technique
Once the ball is in position, slowly nod your head “yes” and shake it “no.” This moves the neck muscles against the pressure of the ball, which helps to untie the knots that contribute to tension headaches. If you feel any sharp pain radiating into your arm or up into your skull, move the ball. You are looking for muscle tightness, not nerve compression.
13. Scapular Mobilization
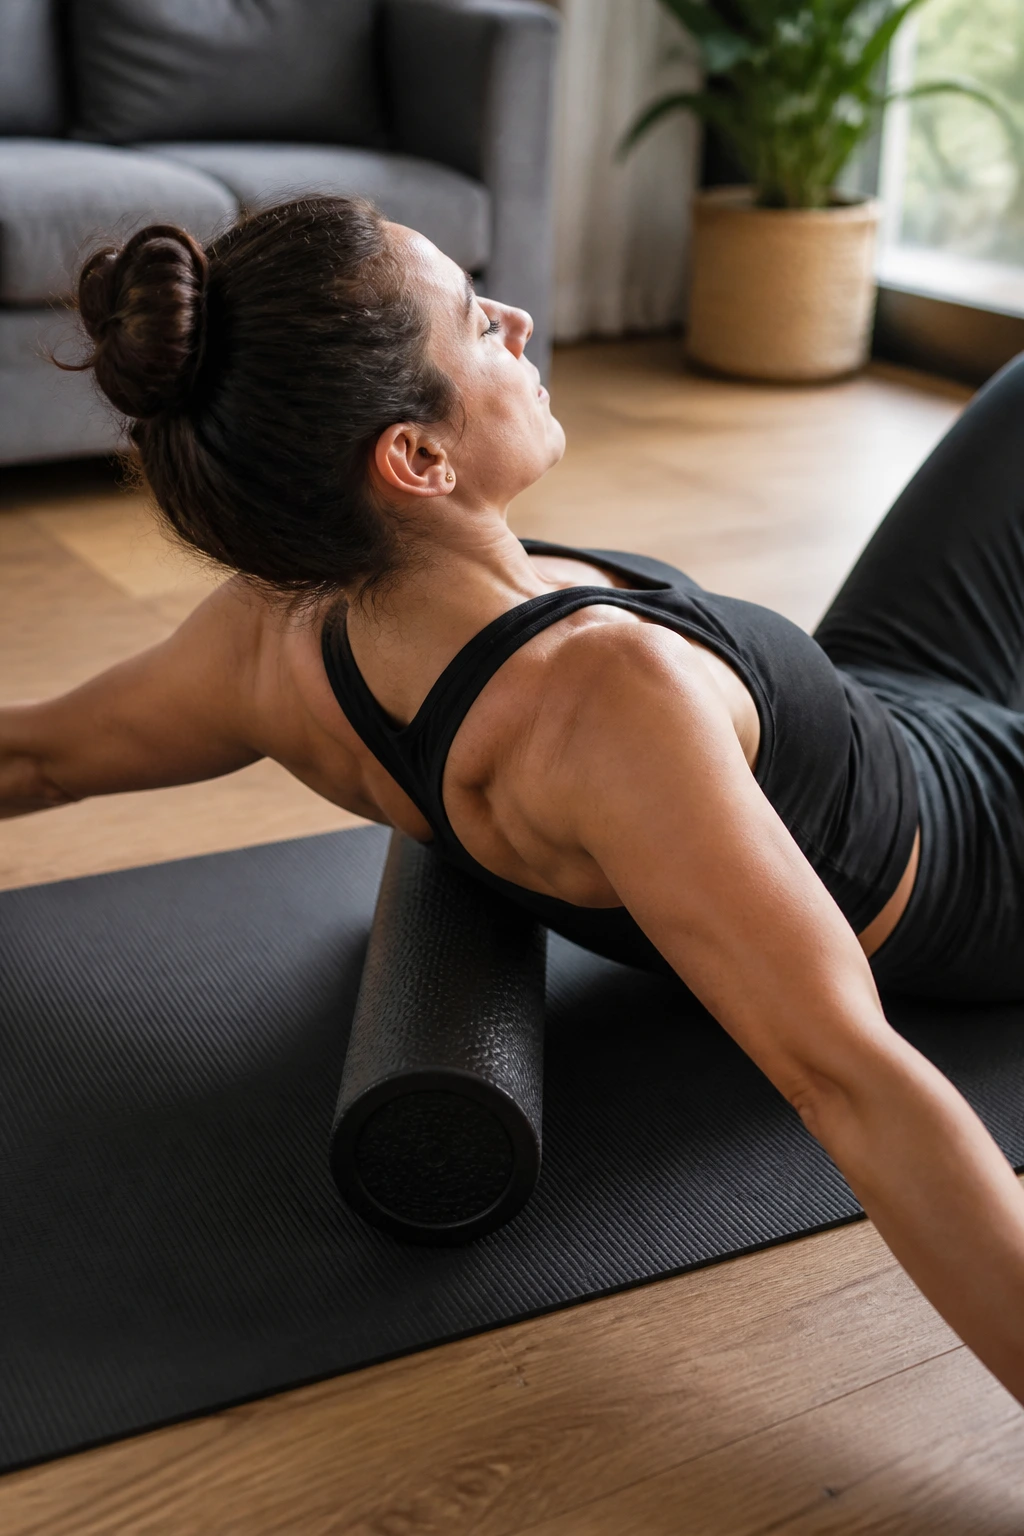
Your shoulder blades (scapulae) should move freely against your ribcage. When they get “stuck,” you lose power in your upper body movements and develop bad posture. This routine uses the roller to gently pry them loose.
Lie on your back, knees bent, with the roller vertically along your spine—from your tailbone to your head. This is a balance challenge. Now, open your arms wide into a T-shape. Reach your hands toward the ceiling, then pull your shoulder blades together behind you, trying to pinch the roller with your shoulder blades.
Active vs. Passive
This isn’t really a “rolling” movement; it’s a mobility drill. By lying on the roller, you are creating a stable base to move your scapulae against. Do 15 repetitions of “punching” the ceiling and then squeezing the blades back. This wakes up the muscles responsible for scapular retraction, which are almost always weak in people who sit at desks.
14. Hip Flexor Crescent Lunge
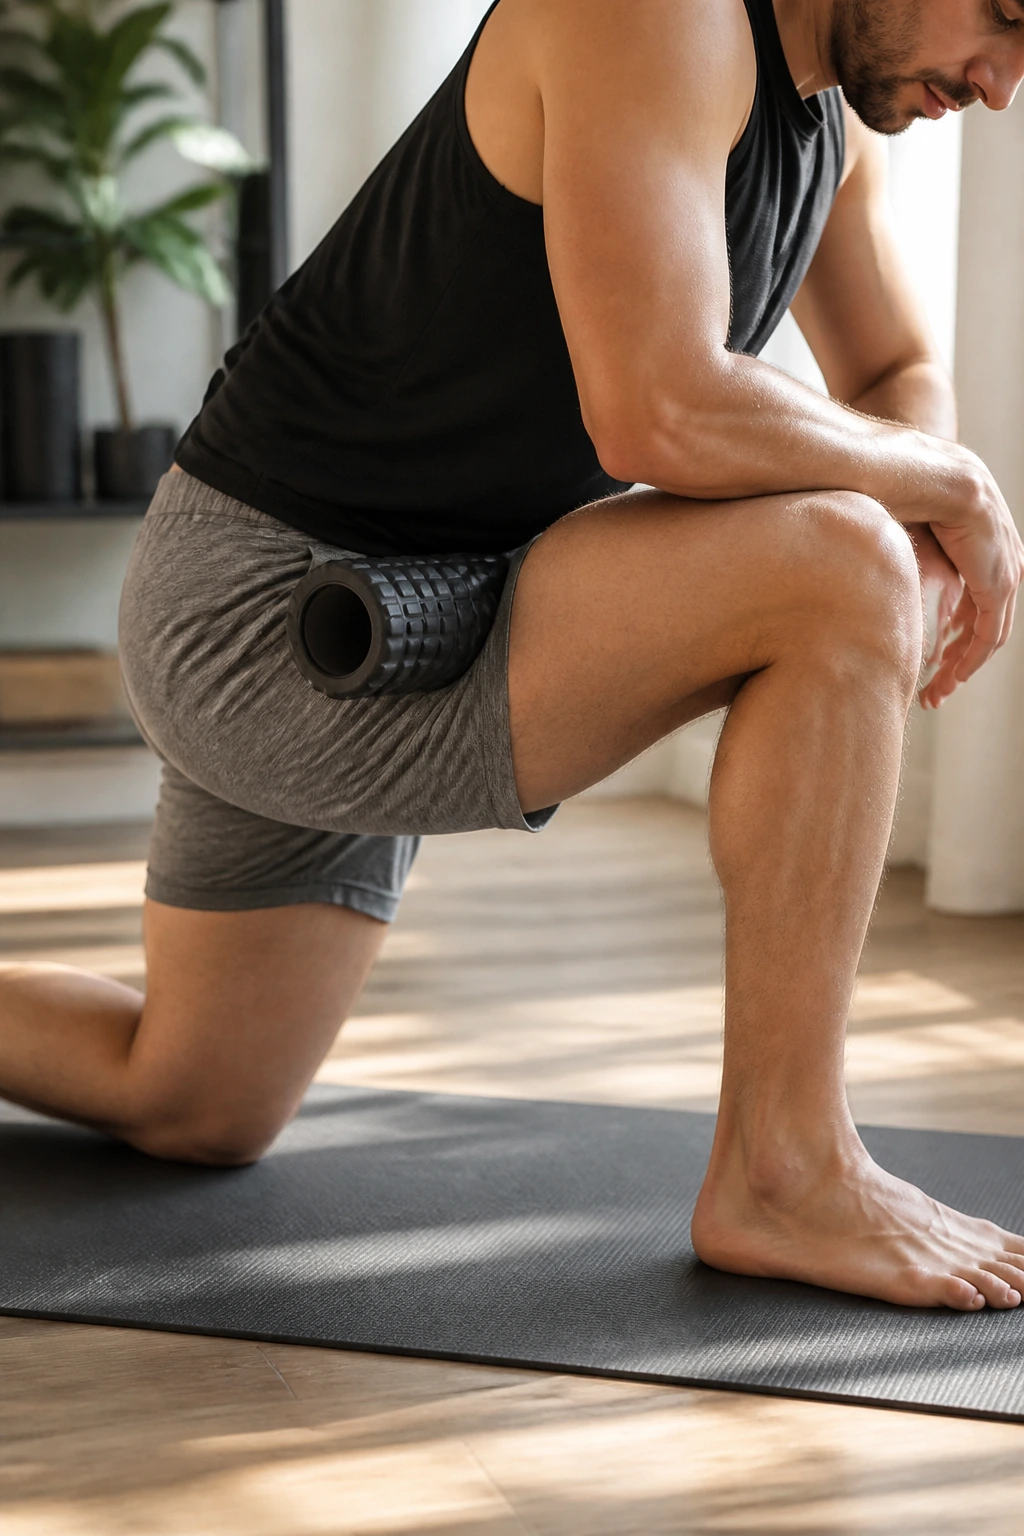
Tight hip flexors are the bane of the modern athlete. When they are tight, they keep your pelvis in a constant anterior tilt, which creates a permanent arch in your lower back. This routine hits them harder than almost any static stretch.
Start in a half-kneeling position with one knee on the floor. Place the roller horizontally in the crease of the hip of the kneeling leg. Slowly lean your torso forward, putting your weight into the roller.
Breathing into the Hip
This is an intense position. You are effectively sandwiching the psoas and iliacus muscles between your thigh and the roller. As you exhale, try to let your hips sink lower toward the floor. Don’t arch your back to compensate—keep your glute squeezed on the kneeling side. Squeezing the glute helps to reciprocally inhibit the hip flexor, allowing it to relax and lengthen under the pressure.
15. Oblique and Ribcage Side-Roll
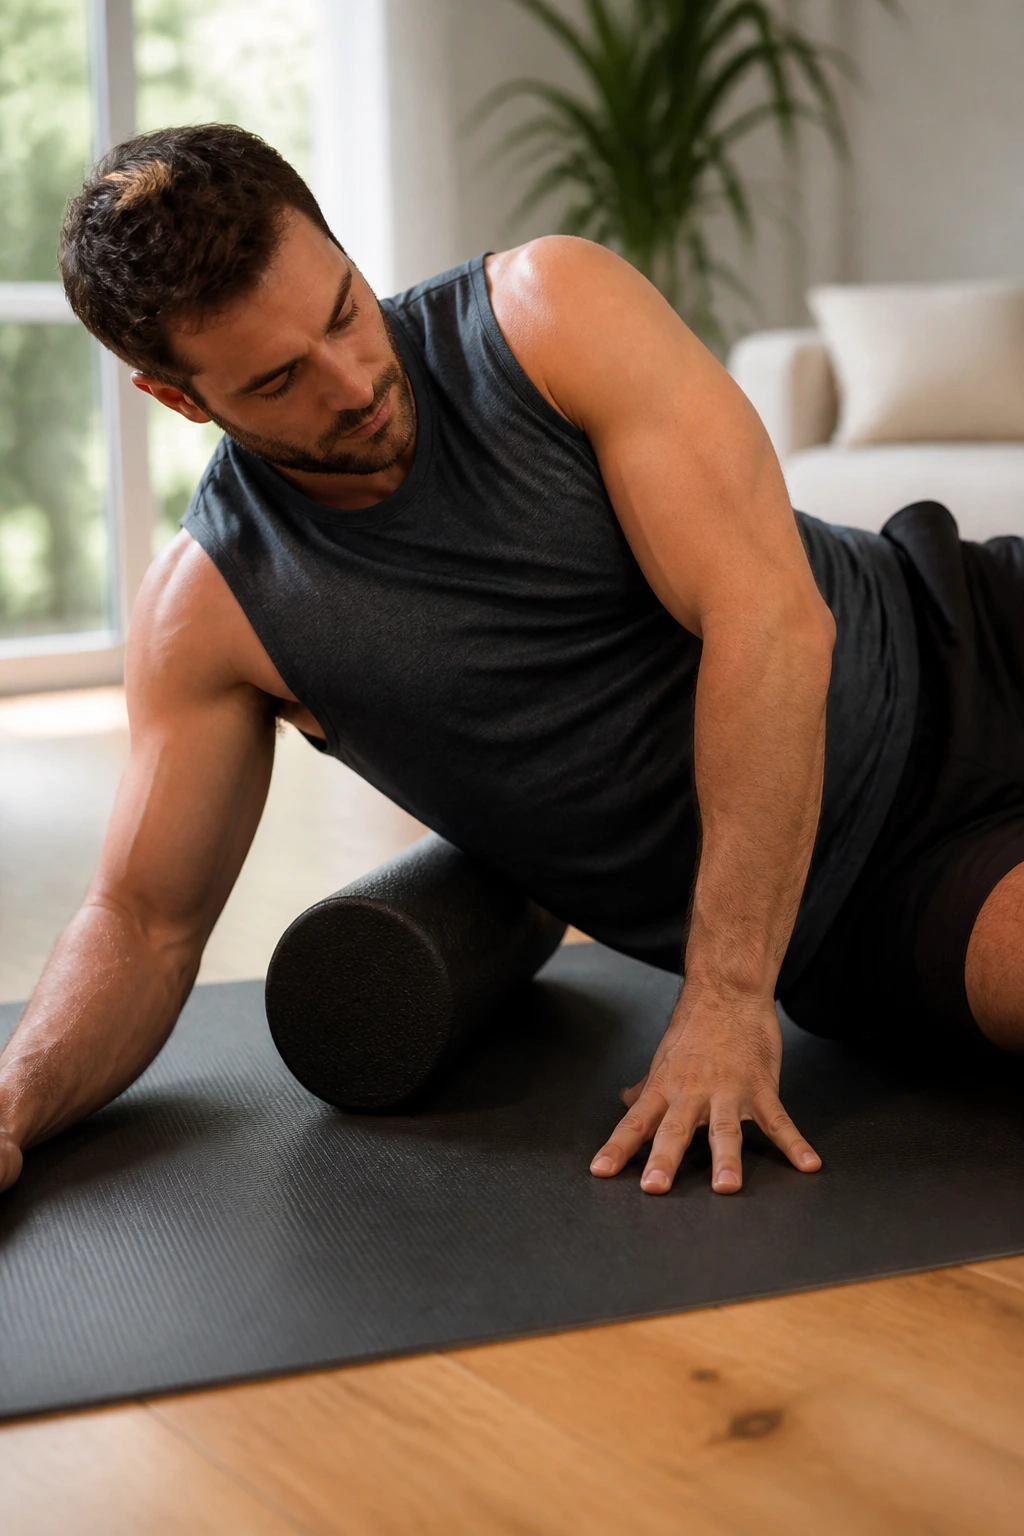
Most people forget about the side of their torso. The obliques and the intercostal muscles (between your ribs) get tight from rotational movements, lifting, and even just heavy breathing during workouts.
Lie on your side with the roller under your ribcage. Extend the bottom arm and place the top hand on the floor for stability. Roll slightly forward and backward, staying on the soft tissue between your armpit and your hip bone.
Controlled Breathing
Because you are rolling over your ribs, this can feel quite tender. Focus on slow, rhythmic breathing. As you inhale, expand your ribcage into the roller. This gives you a deep, internal massage of the intercostal muscles that you can’t hit any other way. It sounds simple, but this routine can significantly improve your ability to take a full, deep breath.
16. Erector Spinae Alignment
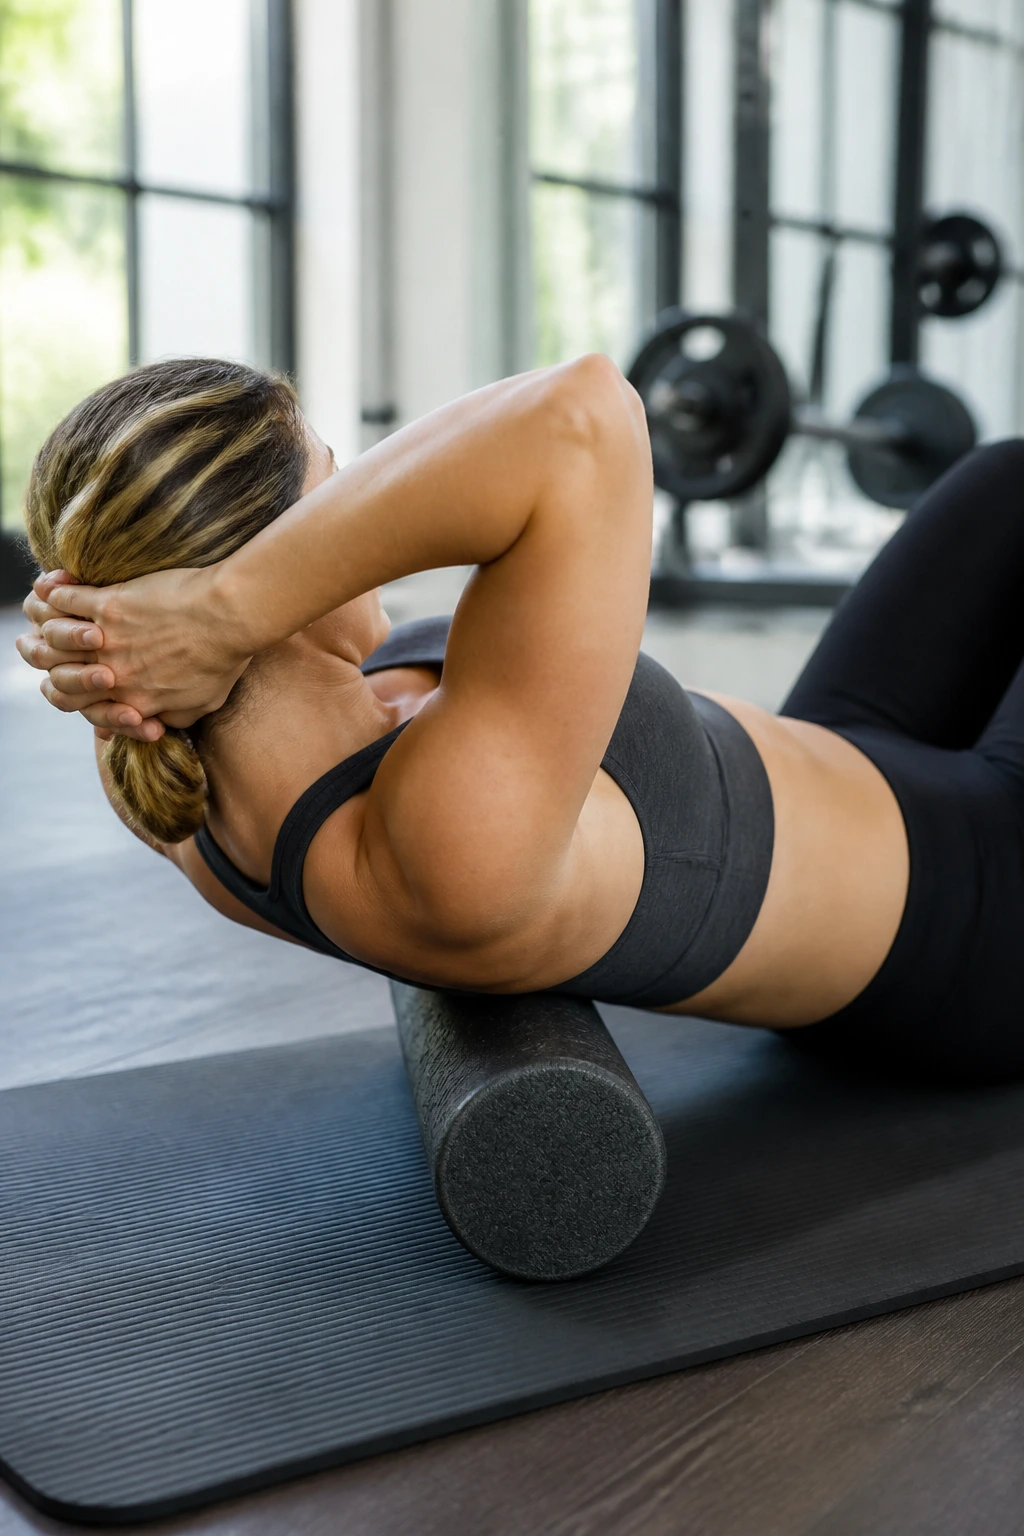
This is not for rolling the lower back. I need to be clear: never aggressively roll your lumbar spine (the lower back without ribs). It has no structural support and will just cause more pain. Instead, use this routine to target the long muscles that run alongside your spine.
Lie on your back with the roller placed vertically along your spine, or horizontally in the mid-back where the ribs are. If you have a two-ball tool (a peanut), that is better here.
The “No-Man’s Land” Rule
Place the roller so it is beside your spine, not directly on the bony protrusions (the vertebrae). You want to be on the thick muscle that runs parallel to the spine. Slowly move up and down, inch by inch. If you feel your spine “pop” or crack, that’s just mobilization—but don’t force it. This routine is about gentle alignment and tension relief, not spinal manipulation.
17. Triceps Extension Release
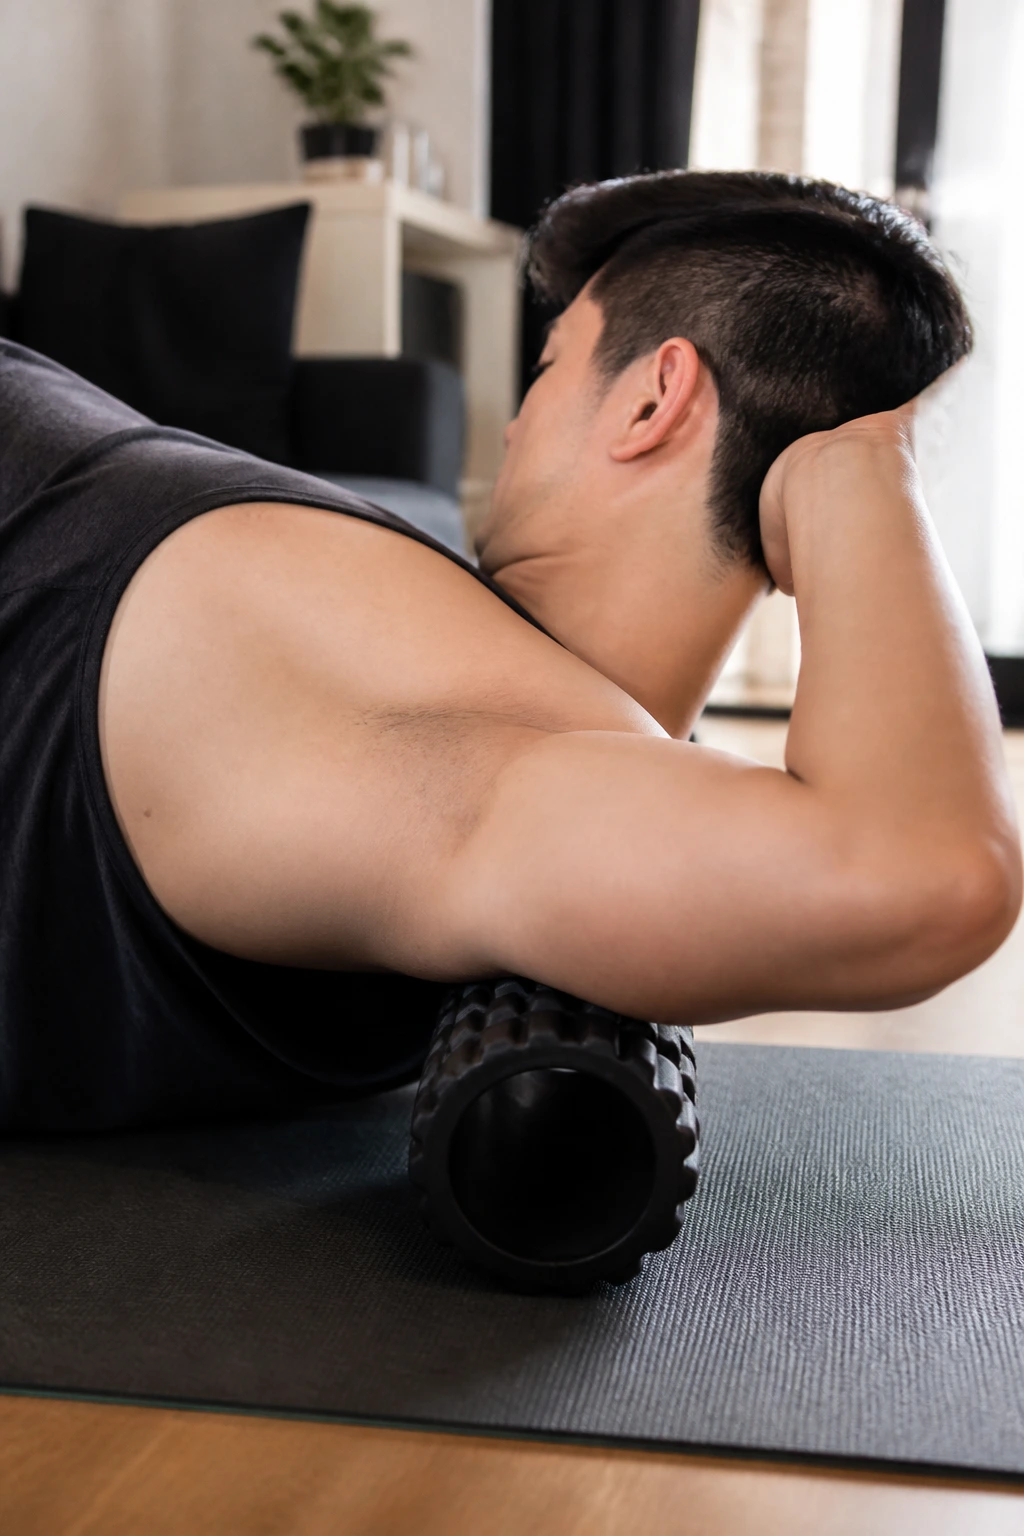
If your elbows hurt after doing overhead triceps extensions or bench presses, it’s usually because your triceps are tight and pulling on the joint.
Lie on your side. Place the roller under your upper arm. Your arm should be bent, hand behind your head. Roll from the elbow up toward the shoulder.
Triceps Movement
Once you find a tight spot, straighten your arm and then bend it back. This movement—moving the arm through range of motion while applying pressure—is the gold standard for freeing up the triceps. Do this for both the long head and lateral head of the triceps. You’ll notice immediately that your elbow feels less “gummy” and more fluid after spending just a minute on each side.
18. Deltoid and Shoulder Cap
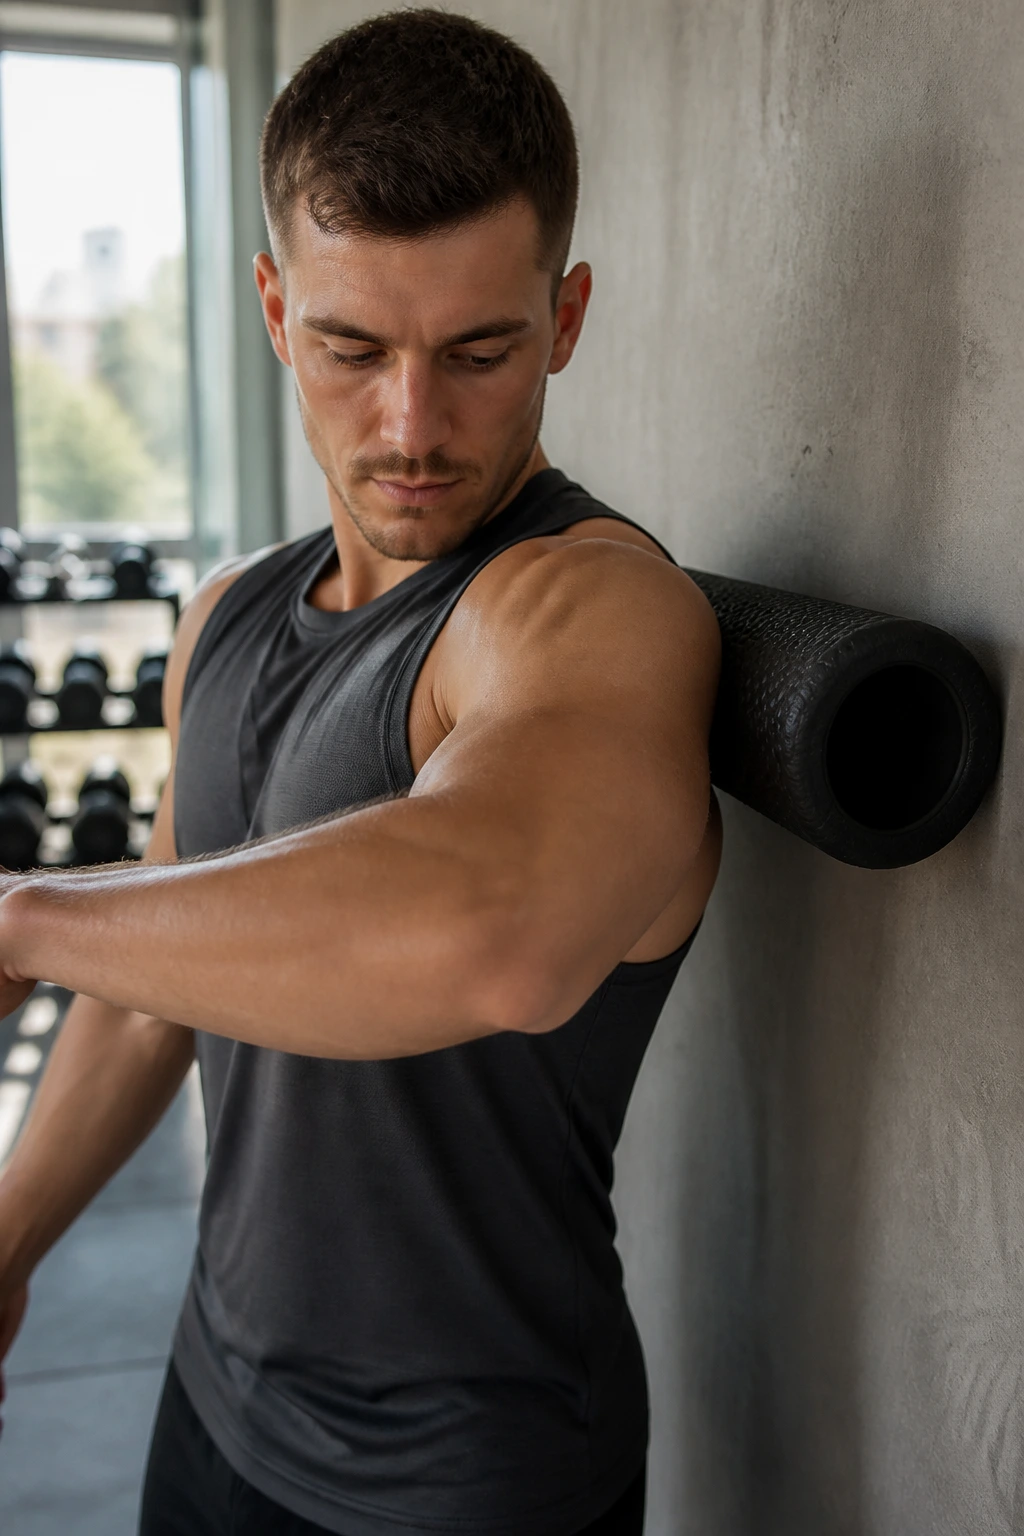
The front of the shoulder gets extremely tight from push-ups and bench pressing. This routine is best done against a wall, as it allows for the most precision.
Place the roller (or a ball) against the wall at shoulder height. Press the front of your shoulder into it. Lean your body weight forward.
Cross-Fiber Friction
Instead of just rolling up and down, move your arm across your chest, like you are trying to touch the opposite shoulder. This creates cross-fiber friction. You are moving the muscle fibers across the ball, which is much more effective for breaking up adhesion than just rolling in one direction. Be very careful here—there are many small nerves in the shoulder. If you feel any sharp radiating pain, back off immediately.
19. Soleus Deep Calf Routine
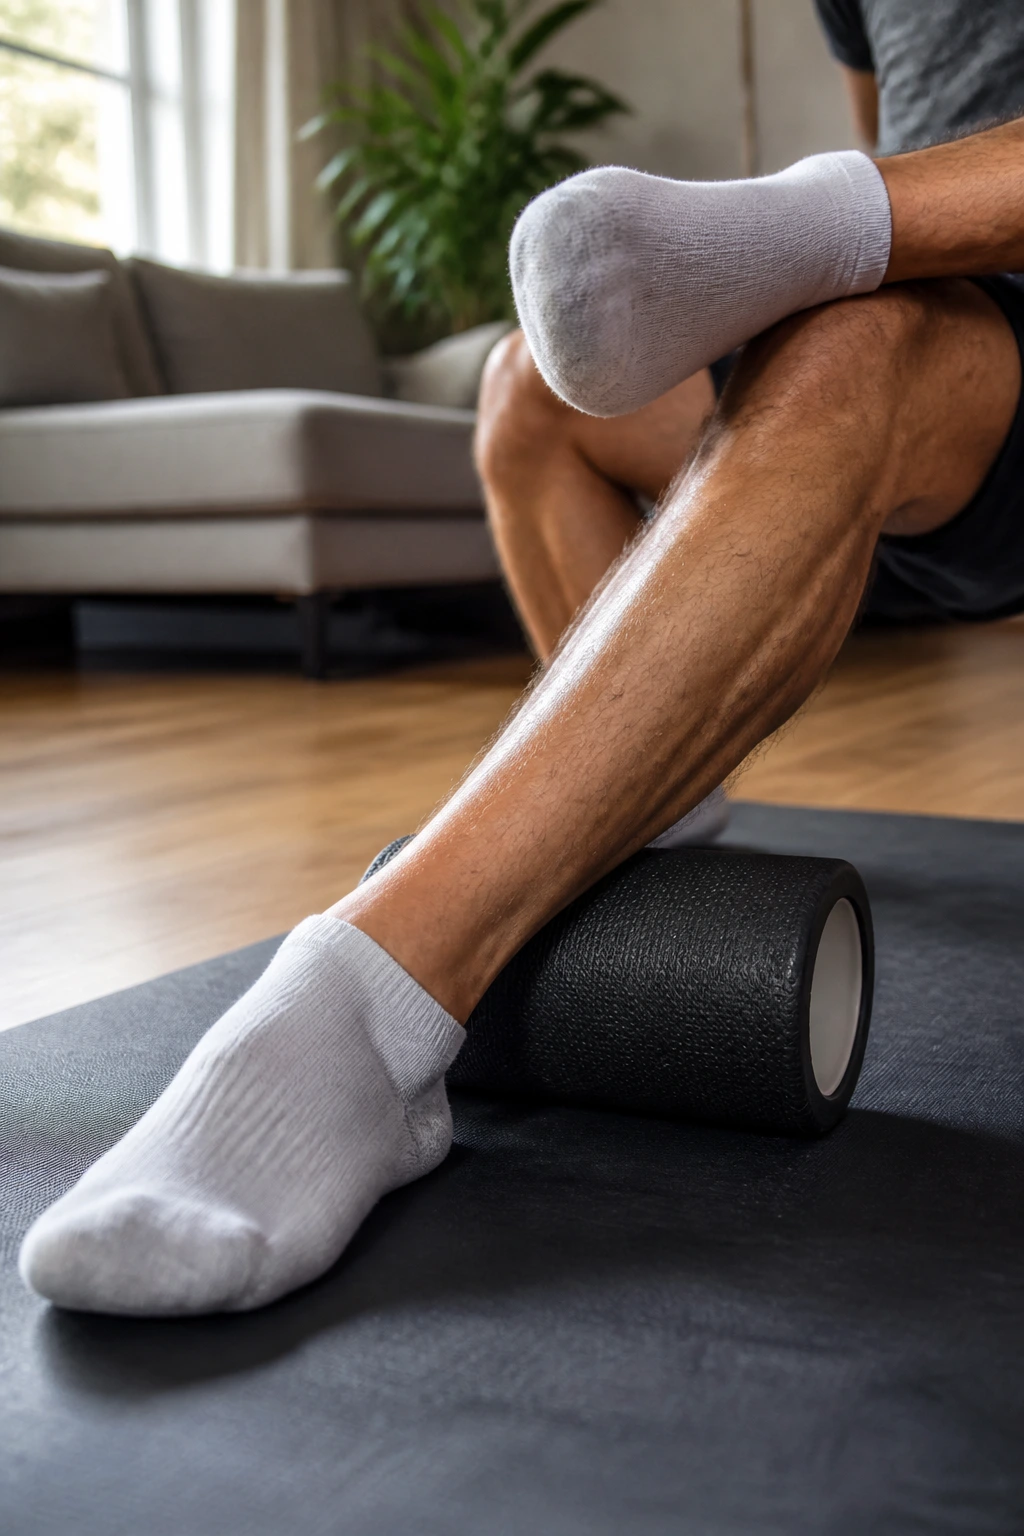
The soleus is the lower, deeper calf muscle that sits under the gastrocnemius. It’s responsible for endurance and standing stability. When the soleus is tight, it feels like a heavy, dull ache in the lower leg.
Sit on the floor, legs extended. Place the roller under your calf, lower down than you did for the gastrocnemius routine. This is the area just above your Achilles tendon.
The Weight-Bearing Difference
Because the soleus is a deep muscle, it requires significant pressure to reach. Cross your other leg over the top and lift your hips. This is intense. If you’ve been running or standing on concrete, this might be the most painful routine in the list—but also the most necessary. Work slowly. Don’t rush into the Achilles tendon itself; keep the pressure on the muscle belly.
20. The Full Body Integration Flow
The last routine isn’t a single area—it’s a flow. After you’ve targeted the specific spots, you need to integrate them. Spend two minutes doing a slow, controlled flow from your calves, to your hamstrings, to your glutes, to your upper back.
Don’t stay on any one spot for more than three seconds. Use this as a “system flush.” It’s about increasing systemic circulation and telling your nervous system that the work is done and it’s time to switch from “fight or flight” (sympathetic) mode to “rest and digest” (parasympathetic) mode.
The Final Reset
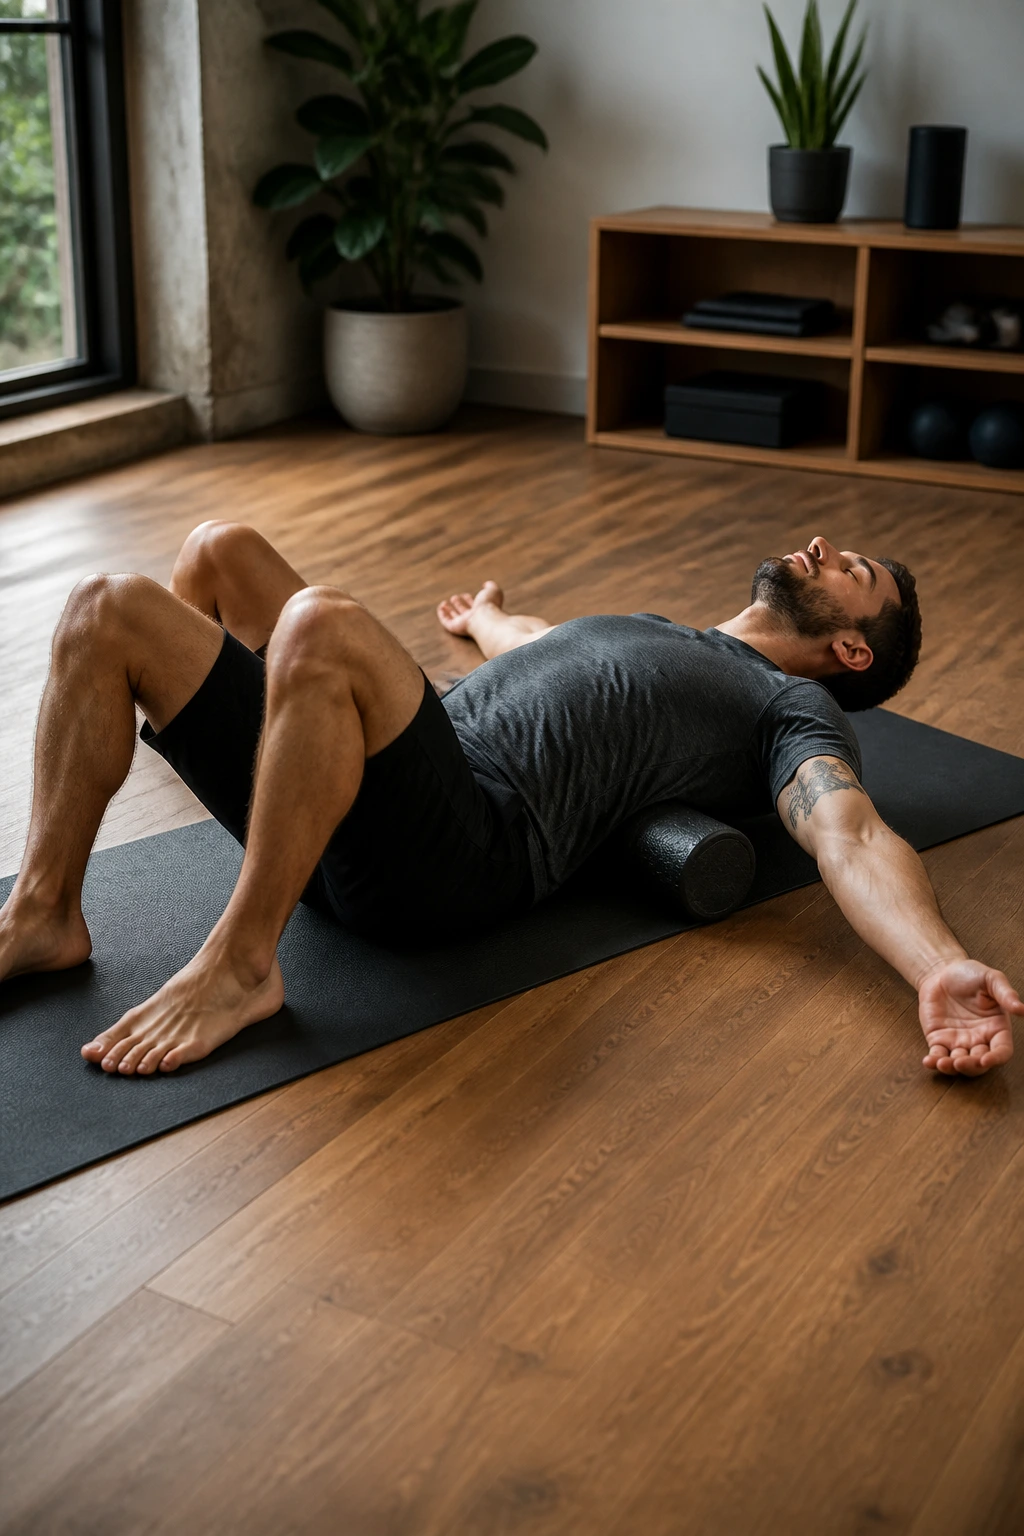
Finish this flow by lying flat on the floor with the roller under your mid-back (thoracic), arms spread wide, eyes closed, and just breathe. Five minutes of stillness here, after you’ve worked the tissues, is often the most productive part of the entire routine. It anchors the changes you’ve just made and prepares your body for actual recovery.
The Recovery Mindset
Foam rolling is not a magic pill, and it isn’t going to fix a training program that is inherently flawed. If you are constantly sore, you need to look at your volume, your sleep, and your nutrition before you blame your fascia. Rolling is simply a tool—a highly effective one, but a tool nonetheless.
Don’t treat this like a chore you have to “get through.” If you do it with that mindset, you’ll rush, you’ll hurt yourself, and you’ll get zero benefit. Treat it as a chance to reconnect with your body. Learn where you’re tight. Learn which sides are compensating for others. The more you pay attention to the feedback your body gives you during these routines, the better you’ll get at preventing injuries before they ever happen. Stay consistent, stay patient, and let your body recover on its own terms.
