



If you have ever felt a dull, nagging ache in your lower back after a few hours of sitting, you already know the story. Your hips are likely the culprit. We spend so much of our waking life in a flexed position—stuck in chairs, hunched over keyboards, or driving—that our hip flexors inevitably shorten and tighten. This doesn’t just make you feel stiff when you finally stand up; it pulls on the pelvis, affects your gait, and can create a ripple effect of tension that travels all the way up the spine.
Loosening these joints isn’t just about flexibility for the sake of it. It’s about restoring the natural, fluid range of motion that your body is supposed to have. When your hips are open, your lower back can relax, your glutes can actually engage properly, and that “locked up” feeling in your pelvis starts to fade. You do not need expensive equipment or a yoga studio membership to make progress. You just need a bit of floor space and a willingness to be uncomfortable for a few minutes at a time.
These movements are designed to be accessible, regardless of whether you are a runner looking to improve your stride or an office worker trying to undo the damage of a sedentary day. Some will feel gentle, others will be intense, and a few might test your patience. The trick is to breathe through the sensation rather than fighting it. Muscle fibers don’t release tension when you tense up; they release when you signal safety to your nervous system.
1. Butterfly Stretch
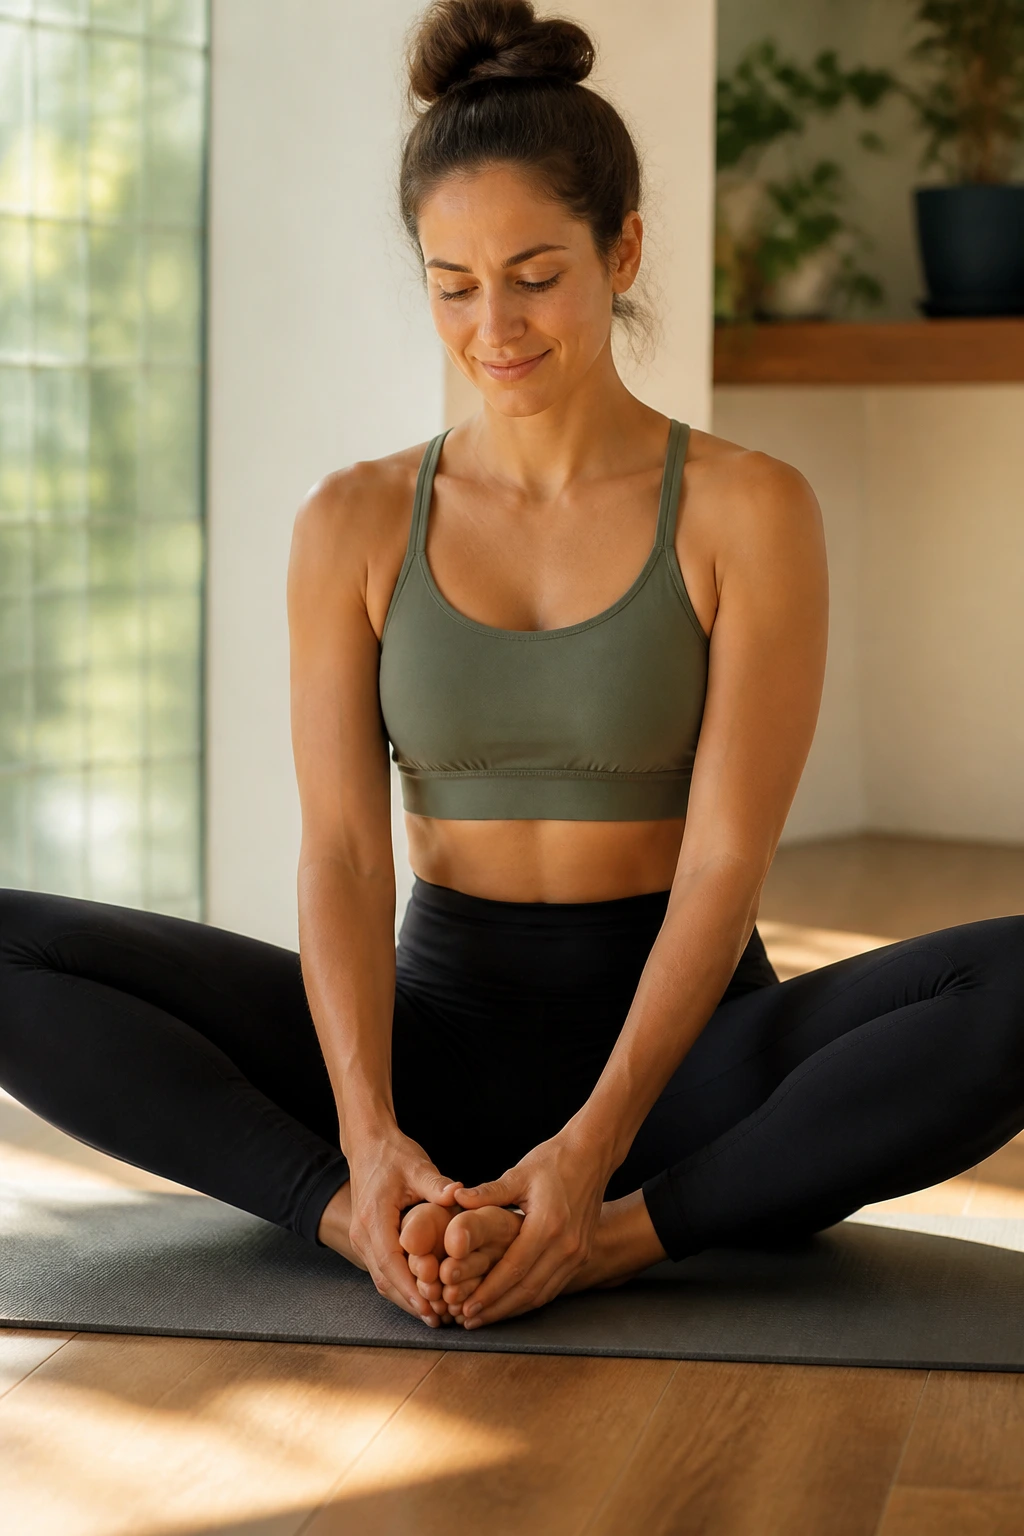
The classic butterfly stretch is the gold standard for opening up the inner thighs and adductors. By sitting with the soles of your feet touching and knees splayed wide, you allow gravity to do the heavy lifting. It is one of the most effective ways to counteract the inward rotation that happens when you sit for extended periods.
How to Get the Most Out of It
- Sit tall with your spine elongated to prevent slouching.
- Use your elbows to gently apply downward pressure on your inner thighs—never the knees—to encourage a deeper release.
- If your back rounds, try sitting on a folded blanket or a block to elevate your hips; this often fixes the issue instantly.
Pro tip: Do not bounce. Bouncing triggers the stretch reflex and can actually cause the muscle to tighten up to protect itself. Keep it static and slow.
2. Pigeon Pose
Pigeon pose is often the most requested—and most feared—movement for people with tight hips. It focuses heavily on the external rotators, specifically the piriformis and the glutes. When done correctly, it feels like a total release of the deep-seated tension that gathers in the back of the hip socket.
If you struggle with the full expression of the pose, do not force it. You can achieve the same benefit by keeping your front shin parallel to the front of your mat if you are flexible, or tucked closer to your groin if you are not. The key is to keep your hips square to the ground. If you feel like you are rolling onto one hip, place a pillow under the side that is lifting off the mat. This small adjustment allows your muscles to relax instead of firing to keep you balanced.
3. Lizard Pose
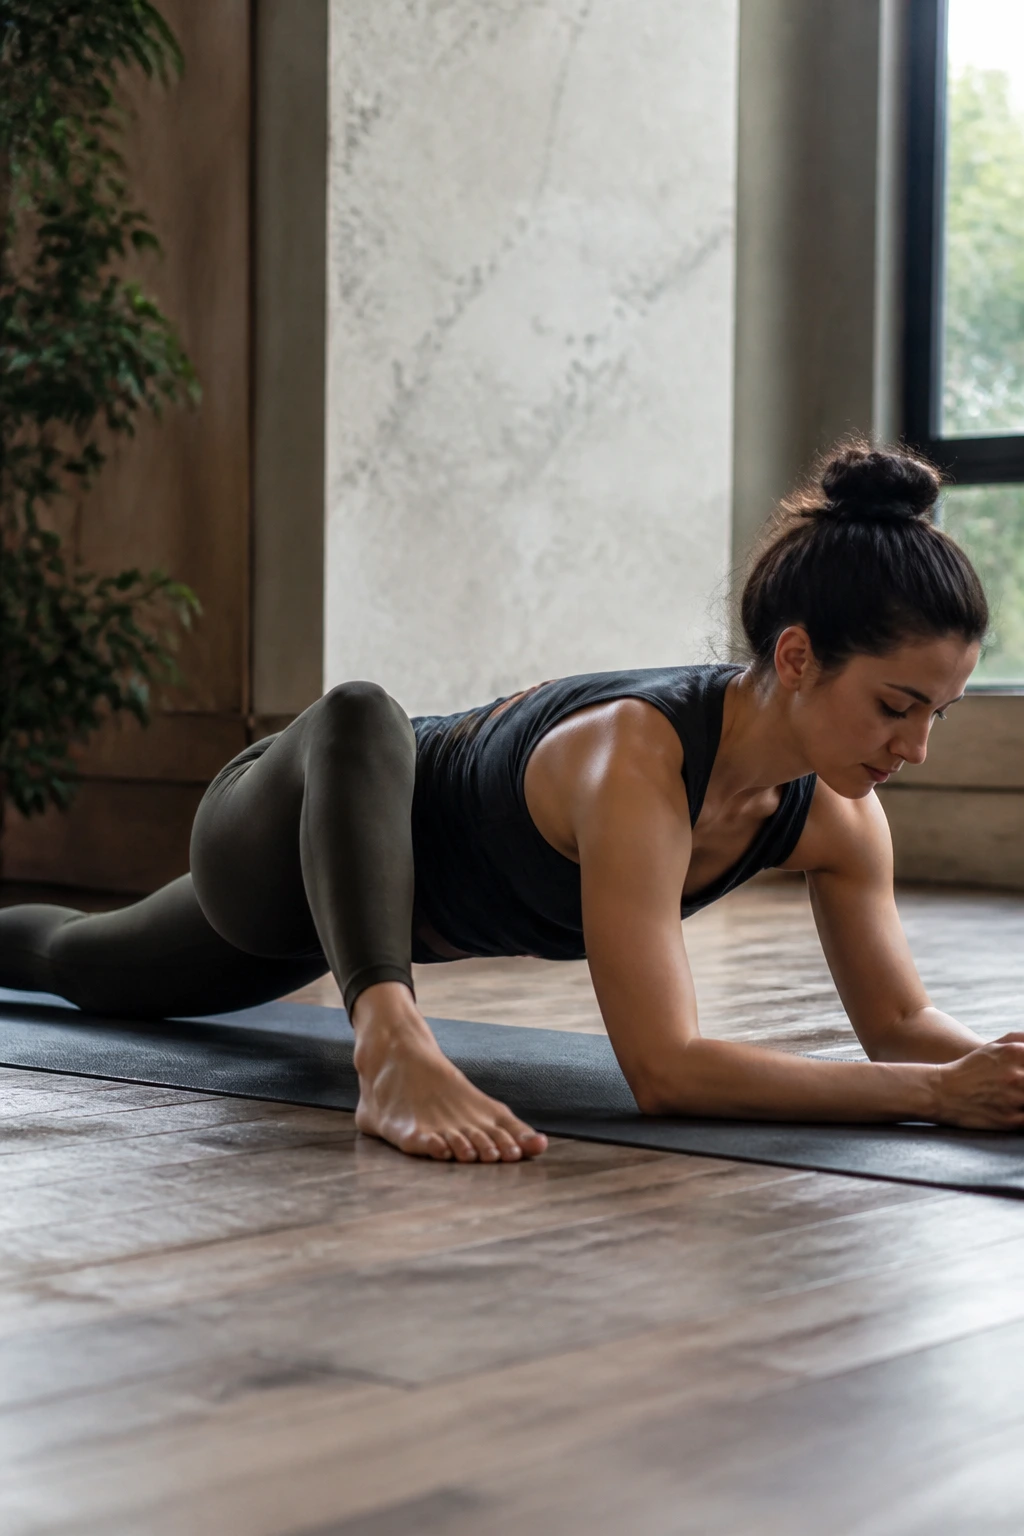
Lizard pose is a deep, lunging variation that targets the hip flexors and the groin simultaneously. It is significantly more intense than a standard runner’s lunge because it requires you to bring your torso down toward the floor, forcing the hip joint into a deeper range of flexion and external rotation.
Most people find they can start on their hands, but the real magic happens when you can lower down onto your forearms or even a block. If lowering your chest feels impossible, don’t worry about it. Stay on your palms and focus on lengthening your spine forward, reaching the crown of your head away from your back heel. You will feel this right in the front of the back leg’s hip—the psoas muscle—and the inner groin of the front leg.
4. Frog Pose
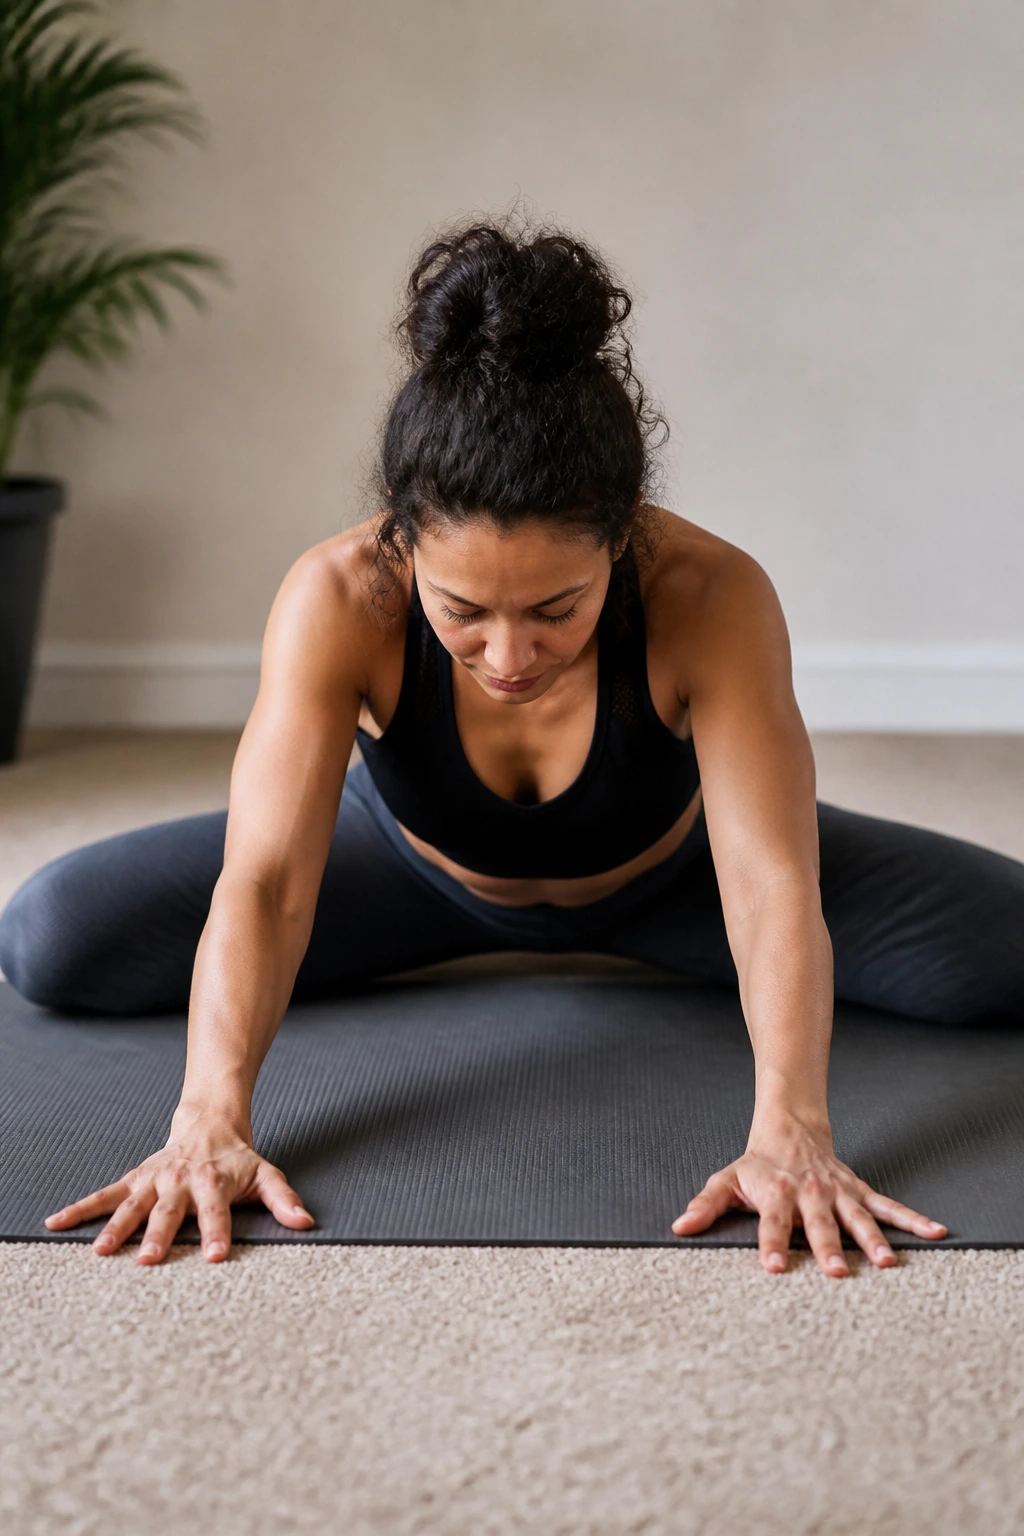
Be prepared: this one is not for the faint of heart. Frog pose is arguably one of the deepest adductor stretches available. You get on your hands and knees and slide your knees out as wide as possible, keeping your feet in line with your knees. This forces the hips into a position they rarely see in everyday life.
Why It Works
- It provides a sustained, deep stretch to the inner thigh muscles.
- The weight of your own pelvis provides the necessary force to open the hips without needing to pull or tug.
- It helps align the pelvic floor and releases tension held in the deep pelvic tissues.
Warning: If you have knee issues, place a thick mat or a blanket under your knees. This position can be hard on the joints if you are on a hard surface.
5. Supine Figure-Four Stretch
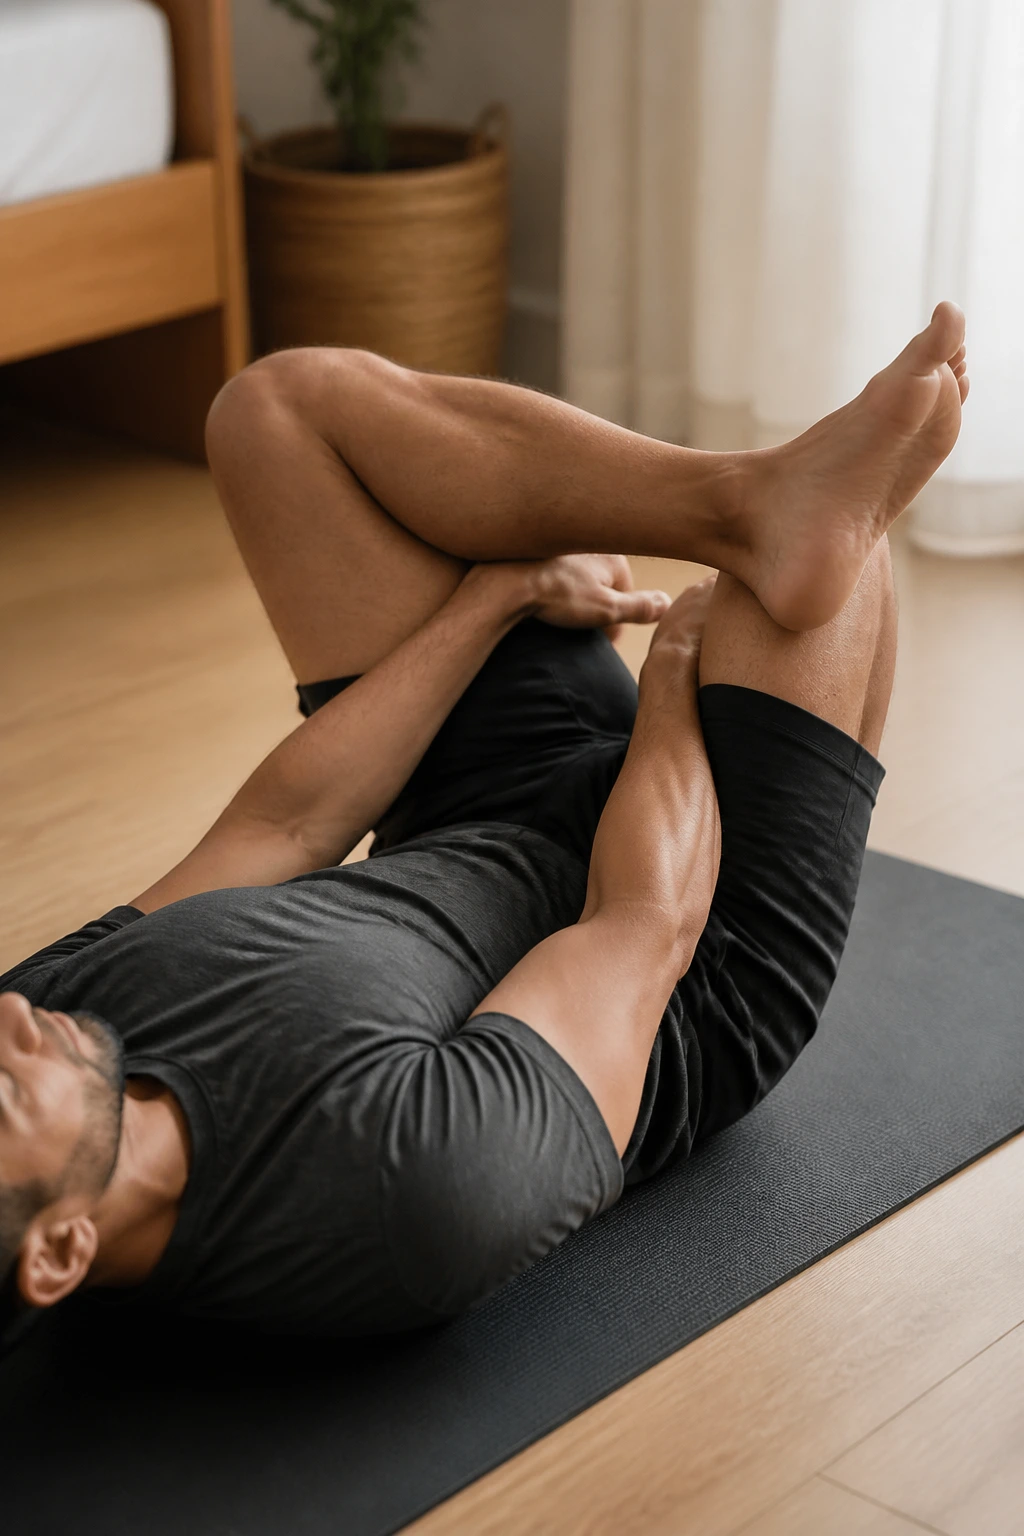
If you want a hip-opener that you can do while watching television or winding down before bed, this is your best option. Lying on your back removes the element of balance, allowing you to focus entirely on the sensation in your glute and outer hip.
Cross your right ankle over your left knee while lying flat on your back. Reach through and grab the back of your left thigh, pulling it gently toward your chest. You will instantly feel a deep stretch in the right glute. Keep your head and shoulders flat on the floor; if you find yourself craning your neck, you are pulling too hard. The stretch should be felt in the hip, not the lower back.
6. Low Lunge
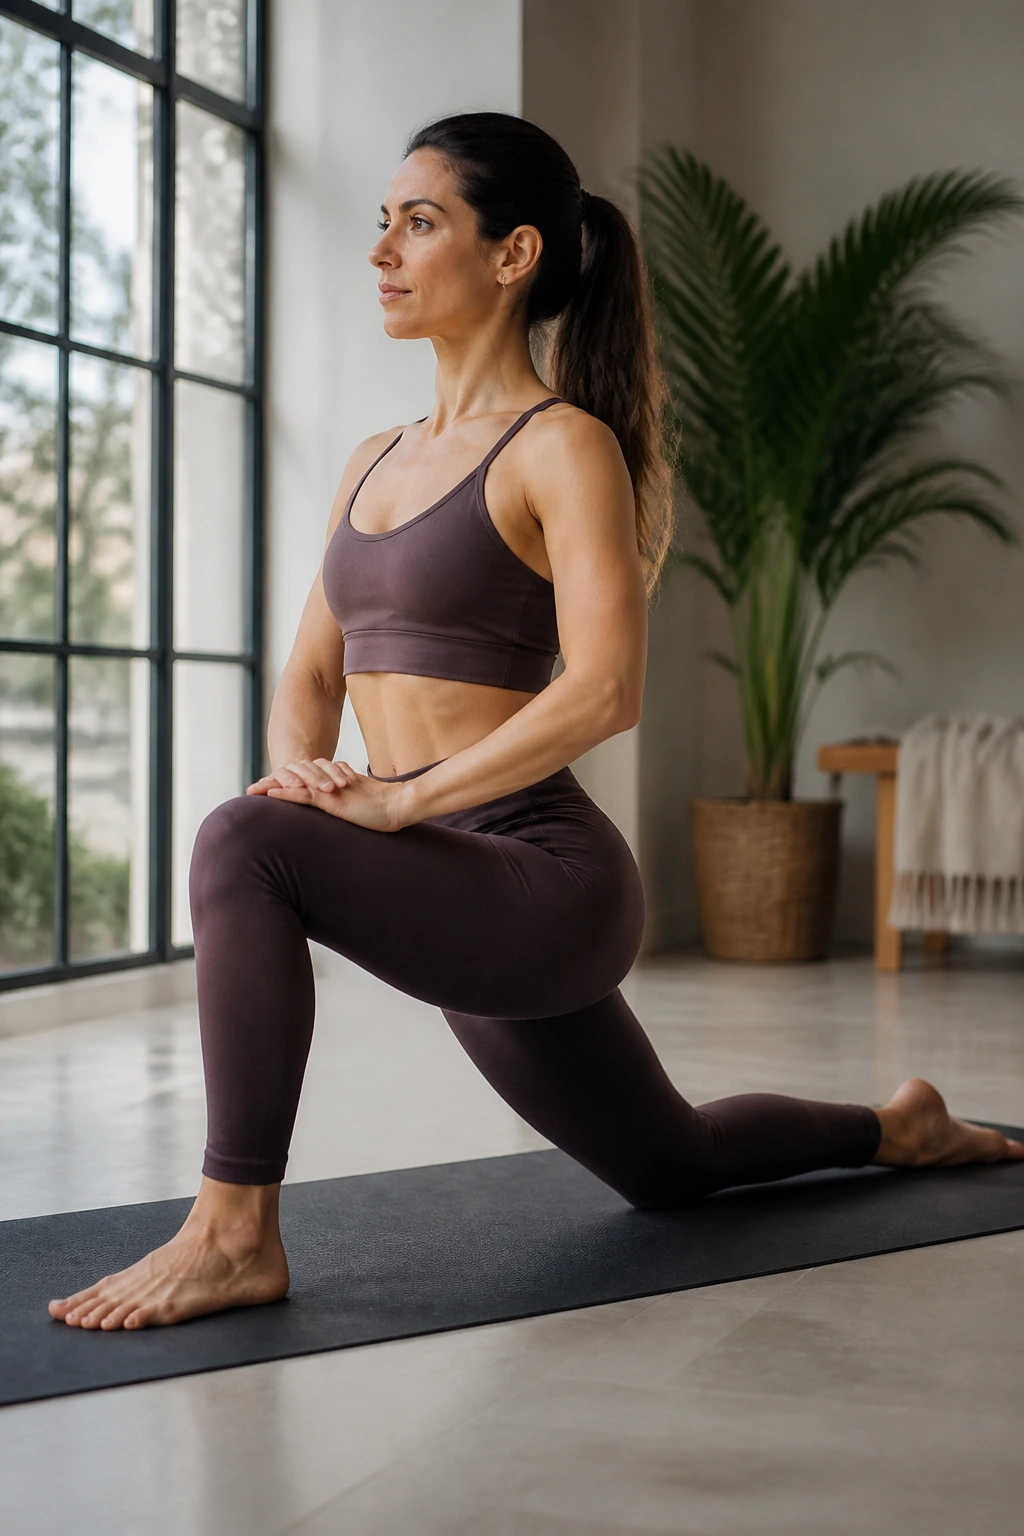
The low lunge is essential for anyone who spends too much time sitting. When you sit, your psoas—the major muscle that connects your spine to your legs—shortens. A low lunge stretches this muscle back out.
Unlike a high lunge, you drop your back knee to the ground. Keep your torso upright. You aren’t just lunging forward; you are tucking your tailbone under. This tiny adjustment changes everything. By engaging your glutes and tucking the pelvis, you prevent your lower back from arching excessively and shift the stretch directly into the front of the hip.
7. Wide-Legged Forward Fold
This movement hits the inner thighs (adductors) and the hamstrings, both of which are intimately connected to how tight your hips feel. Stand with your feet significantly wider than your shoulders, toes pointed forward or slightly inward. Hinge at the hips—not the waist—and fold forward.
You should feel a lengthening through the back of your legs and deep into the pelvic area. Let your head hang heavy. If your hamstrings are tight, don’t try to lock your knees. A micro-bend in the knees will actually allow your pelvis to tilt more effectively, giving you a better stretch in the hips than if you force your legs straight.
8. Cow Face Pose
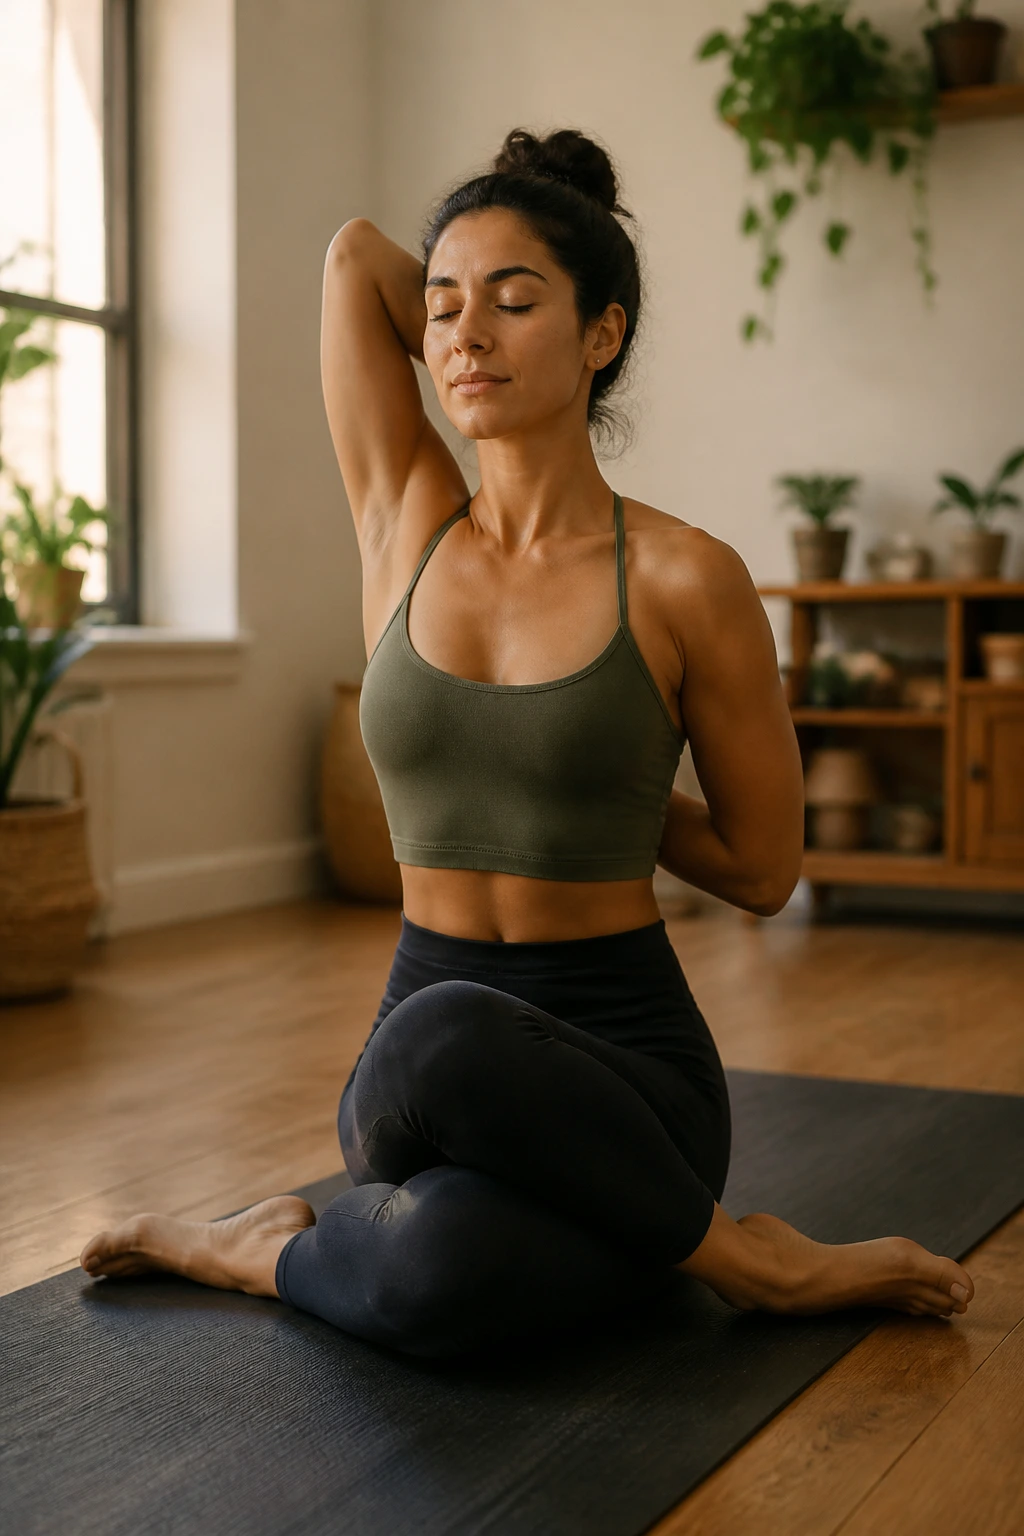
This pose—known as Gomukhasana—is a double whammy for external rotation. You stack your knees on top of each other while seated, with your feet splayed out to the sides. It is incredibly challenging for many people, especially those with tight glutes.
If stacking the knees feels impossible, simply cross your legs at the shins and lean forward. The goal is the same: to create space in the outer hip and the gluteus medius. Breathe deeply. This position can feel quite intense, and the tendency is to hold your breath. Do not fight the pose; just let your weight settle into the floor.
9. Happy Baby Pose
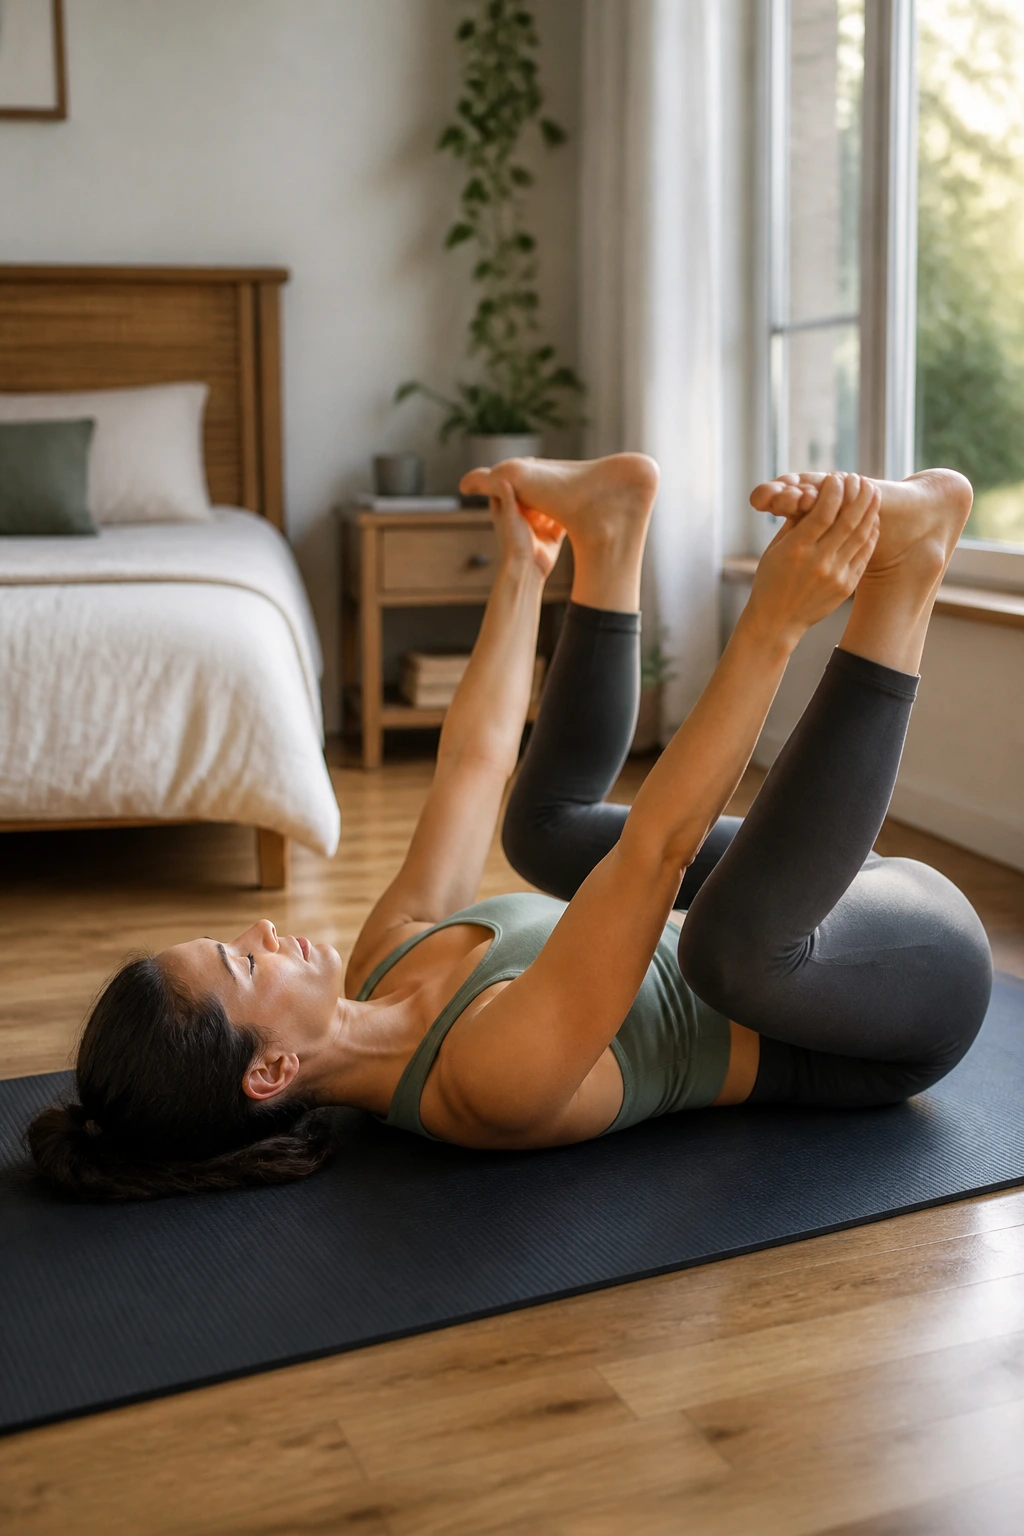
Happy baby is as effective as it is silly-looking. Lying on your back, you grab the outer edges of your feet and pull your knees toward your armpits. It is essentially a wide-legged squat, but with the support of the floor.
It allows you to open the hips without the strain of supporting your body weight. You can rock gently from side to side to massage your lower back against the floor while simultaneously getting a deep stretch in the groin and the inner hips. It is the perfect restorative end to a workout or a long day.
10. Garland Pose
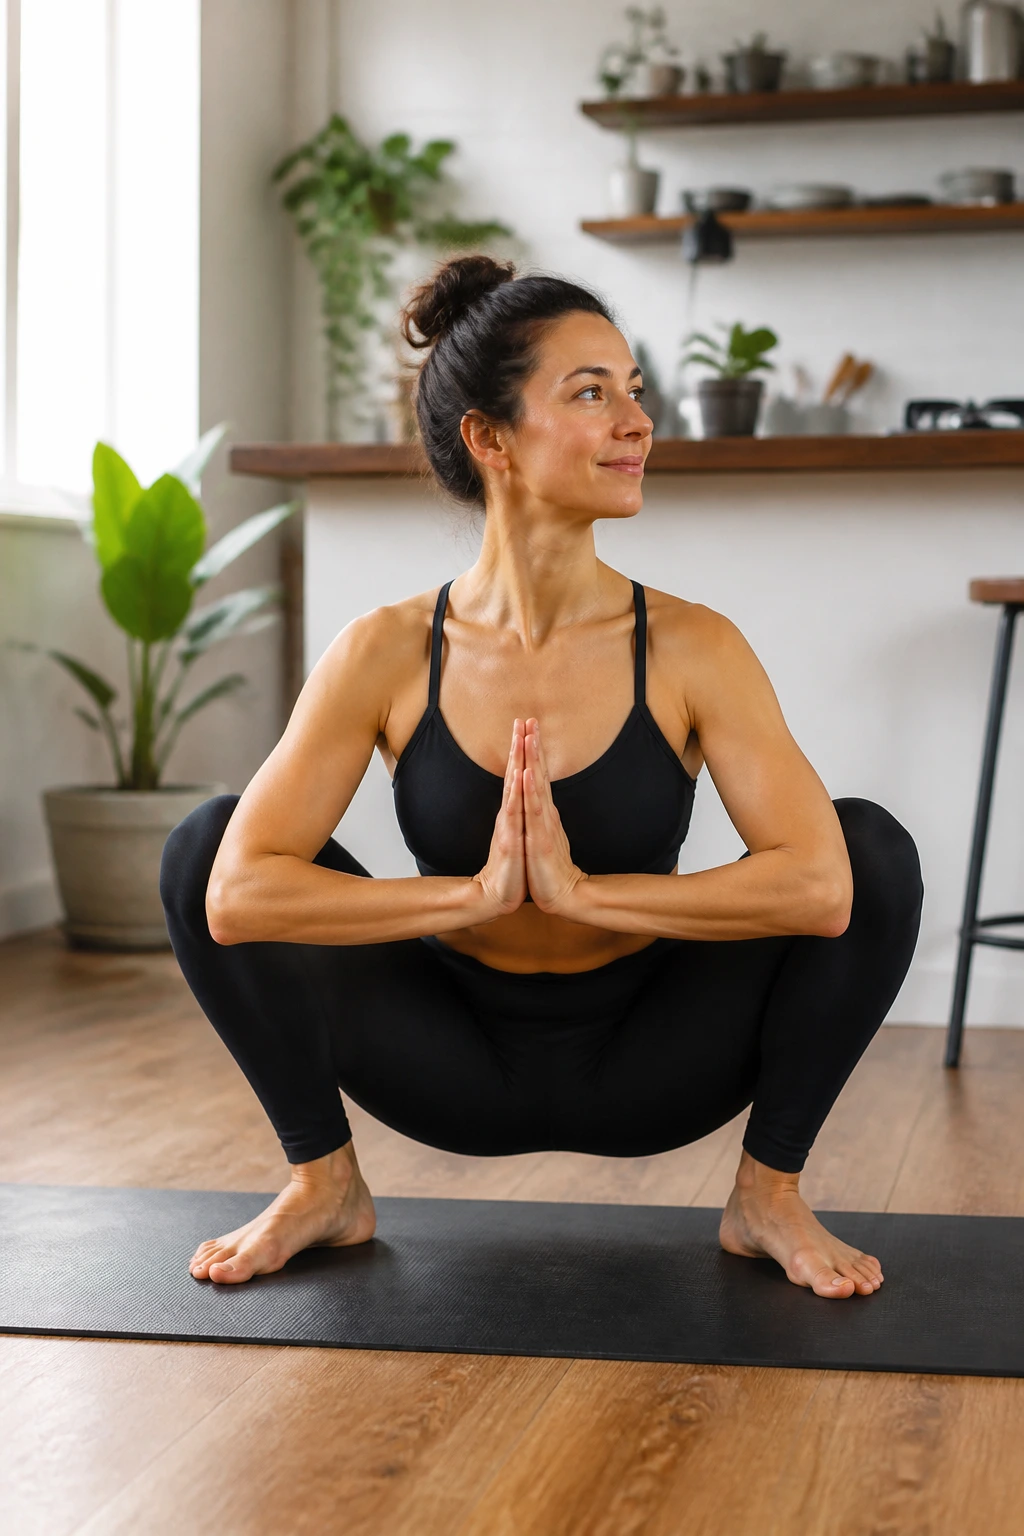
Known as Malasana in yoga, this is a deep squat. It is how humans sat for millennia before the invention of the chair. Dropping into a deep squat, with your heels on the ground and your hips below your knees, provides a full-range stretch for the entire hip complex.
How to Achieve a Proper Squat
- If your heels lift off the ground, place a rolled-up towel or a yoga mat under them.
- Use your elbows to press your knees outward, deepening the stretch.
- Keep your chest lifted; do not let your back collapse.
Pro tip: Practice this while brushing your teeth or waiting for the coffee to brew. Consistency is better than intensity here.
11. Reclined Bound Angle Pose
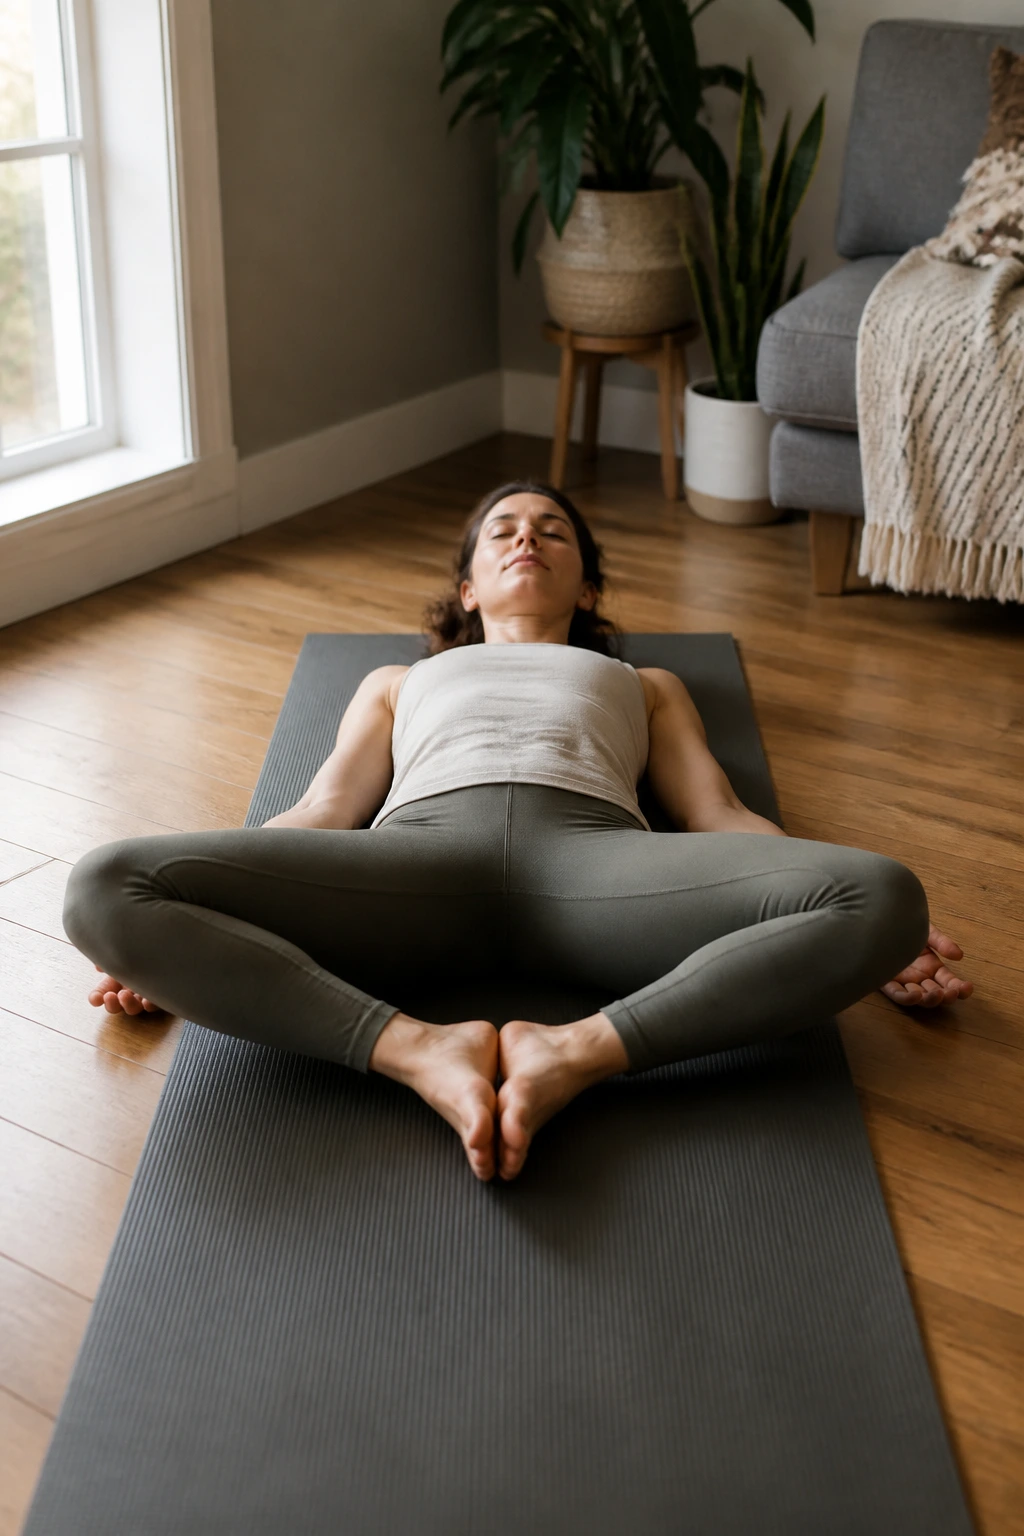
This is the passive, relaxing cousin of the seated butterfly stretch. Lying on your back with the soles of your feet together and knees falling open, you allow gravity to do the work. It is excellent for relaxing the nervous system, which in turn helps the hips let go of tension.
Many people find that they can hold this for several minutes without fatigue. It is a fantastic pose for resetting the pelvic tilt and allowing the inner thighs to stretch without any active effort. If your knees feel unsupported, place a small pillow or block under each knee.
12. Runner’s Lunge
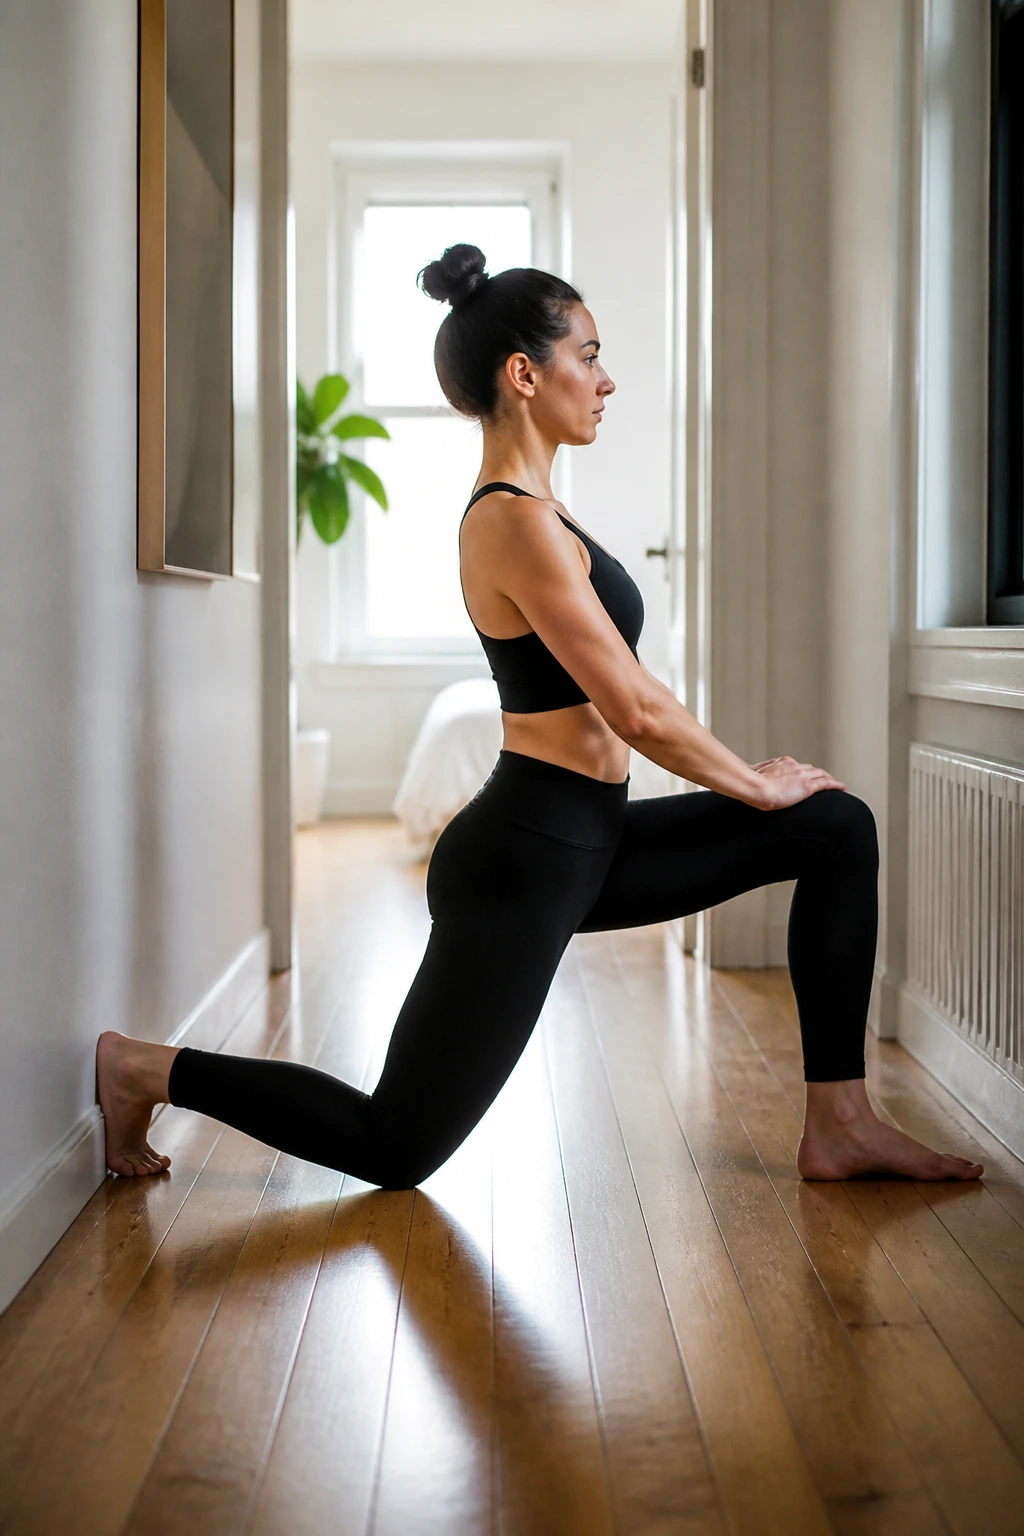
The runner’s lunge is similar to a low lunge but keeps the back knee lifted. This requires more balance and strength, which means your hips are actively working while they are being stretched. It builds stability while lengthening the hip flexor of the back leg.
Keep your front knee stacked directly over your ankle. If your knee drifts forward, you are putting unnecessary strain on the joint. Reach your back heel toward the wall behind you. You want to feel a straight, clean line of energy from your heel to your head.
13. Gate Pose
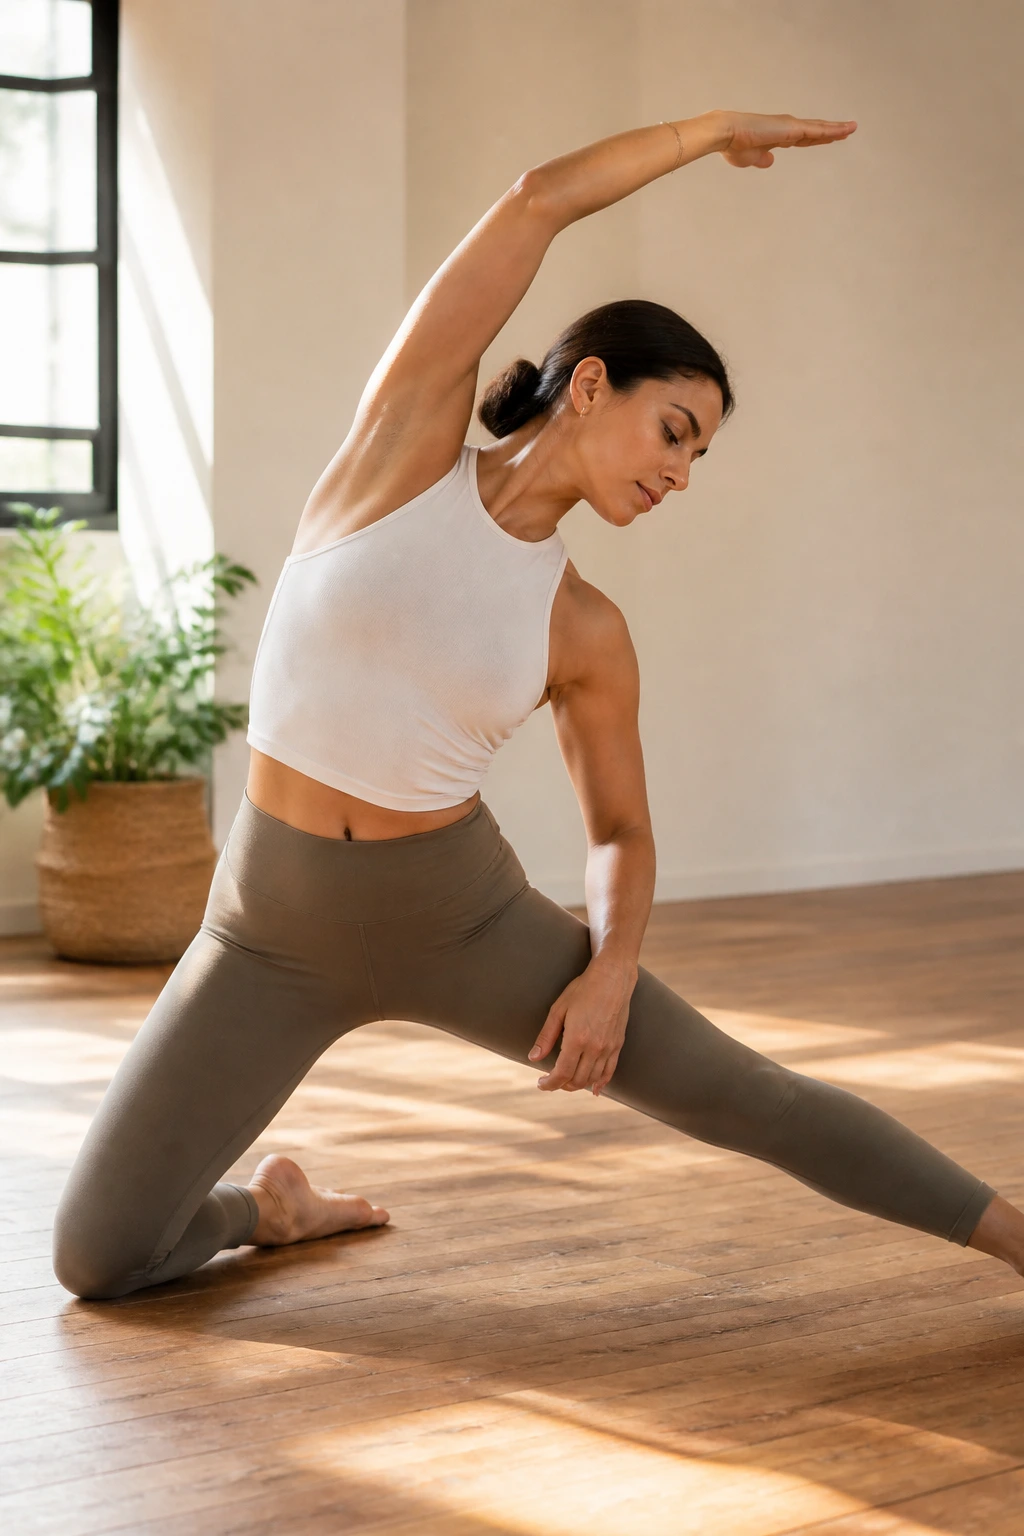
Gate pose stretches the inner thighs and the side body. Kneeling on one knee, you extend the other leg out to the side. You then lean your torso over the extended leg.
Because this stretch includes a lateral lean, it opens up the hip in a different plane of motion than the forward-moving lunges. It helps loosen the muscles surrounding the hip joint that often get neglected. You will feel this right through the groin and up the side of your torso.
14. Seated Hip Cradle
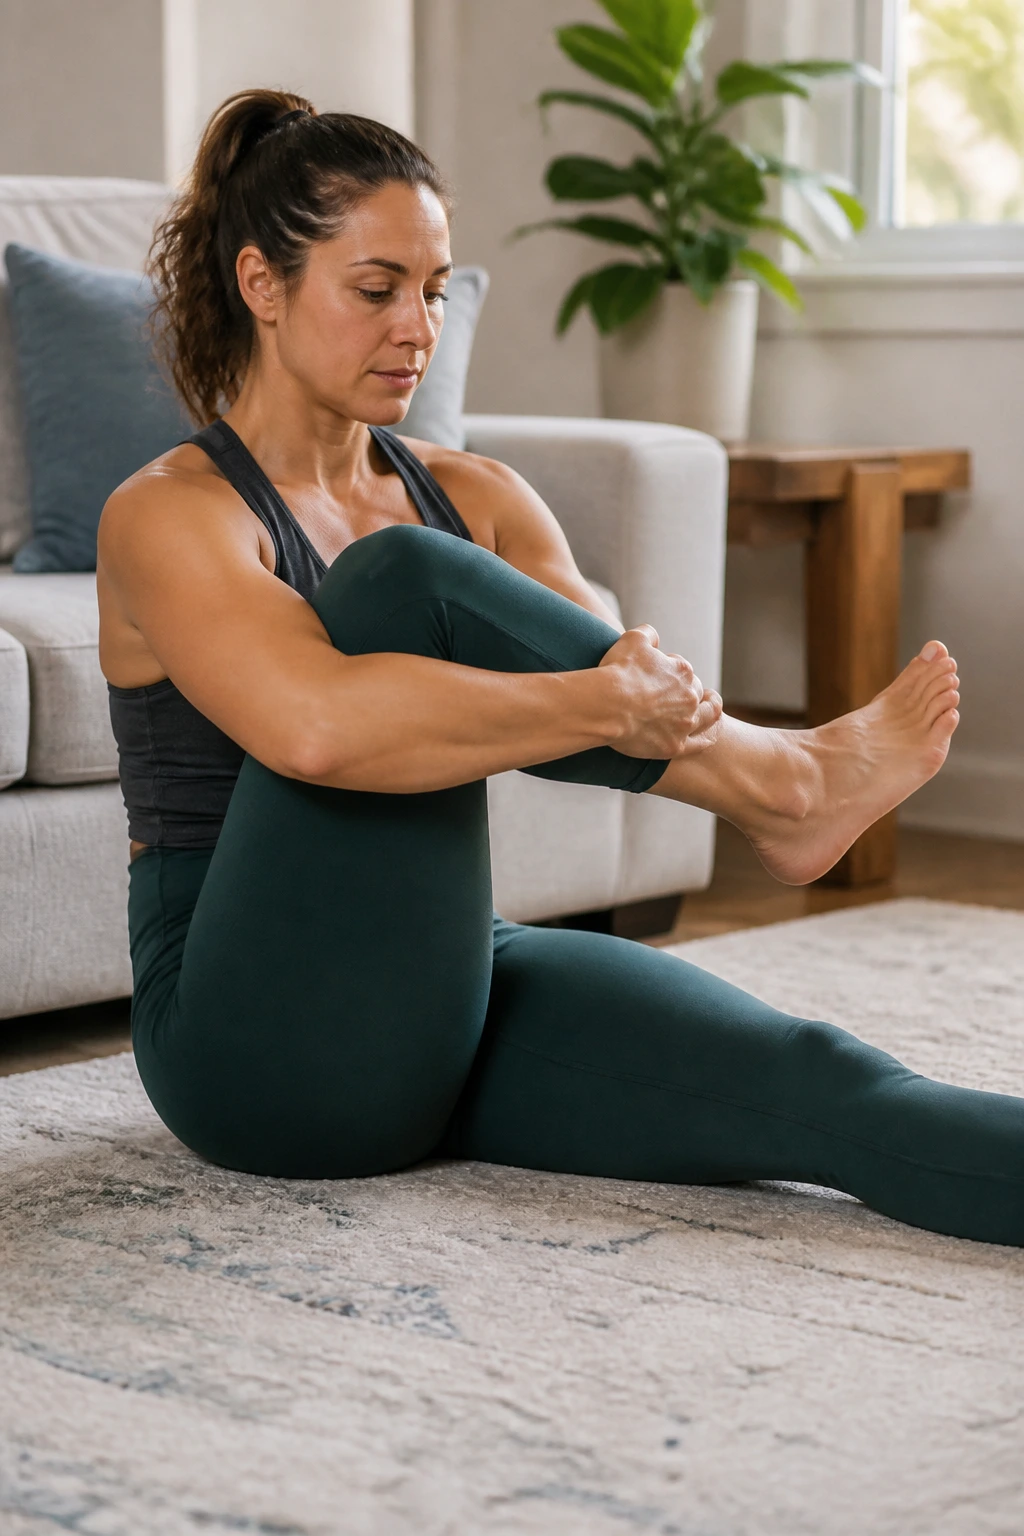
This move targets the outer hip and glute by mimicking the action of rocking a baby. Sit on the floor and lift one leg, cradling the shin in your arms. Pull the leg toward your chest, keeping the shin parallel to the floor.
Rock the leg side to side. You are looking for the sweet spot in the glute that feels tight. Once you find it, hold it there. This dynamic movement is excellent for loosening the piriformis—a small muscle deep in the buttock that can cause significant hip and leg pain if it becomes too tight.
15. Kneeling Hip Flexor Stretch
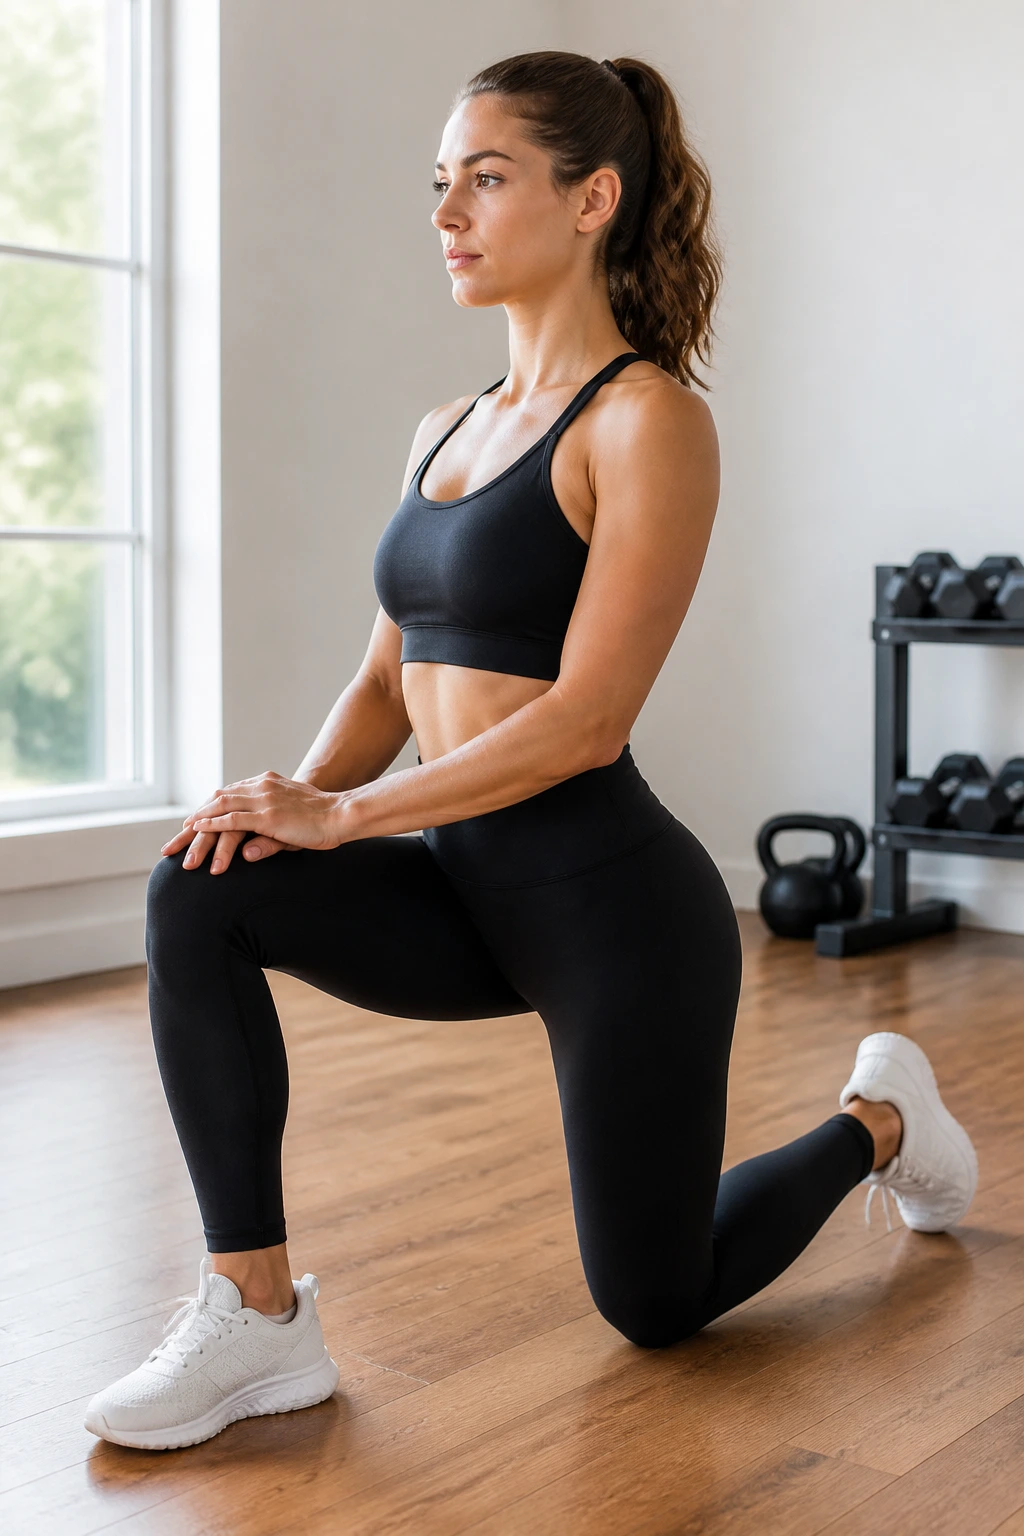
This is a focused stretch for the psoas. Kneel on one knee, with the other foot flat on the floor in front of you. Shift your weight forward, but—crucially—maintain an upright torso and tuck your pelvis.
If you lean forward with a swayed back, the psoas will not get the stretch it needs. You want to keep the pelvis neutral. Imagine you are trying to push your hip bones forward while keeping your ribcage stacked directly over them.
16. Standing Side Lunge
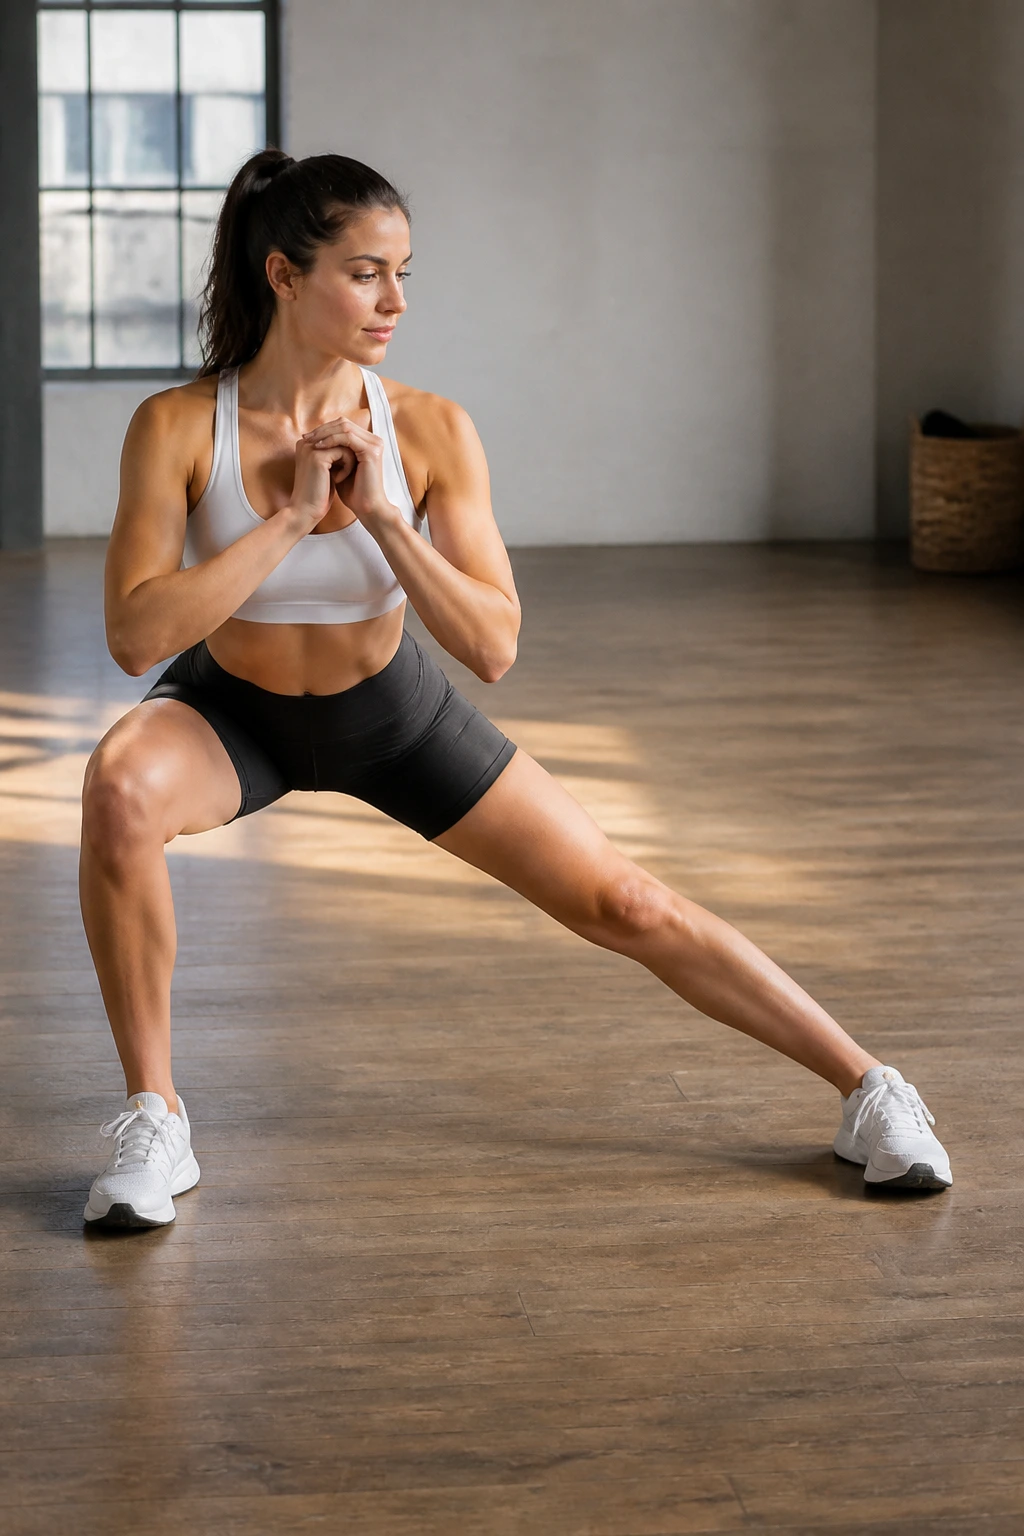
Often called a Cossack squat, the side lunge moves the hips into lateral flexion. Stand with your feet very wide apart. Shift your weight to the right, bending the right knee while keeping the left leg straight.
This is a “working” stretch. As you sink into the lunge, you will feel a deep, intense stretch in the inner thigh of the straight leg. It is one of the best ways to prepare for activities that require side-to-side movement, such as sports or agility work.
17. Fire Log Pose
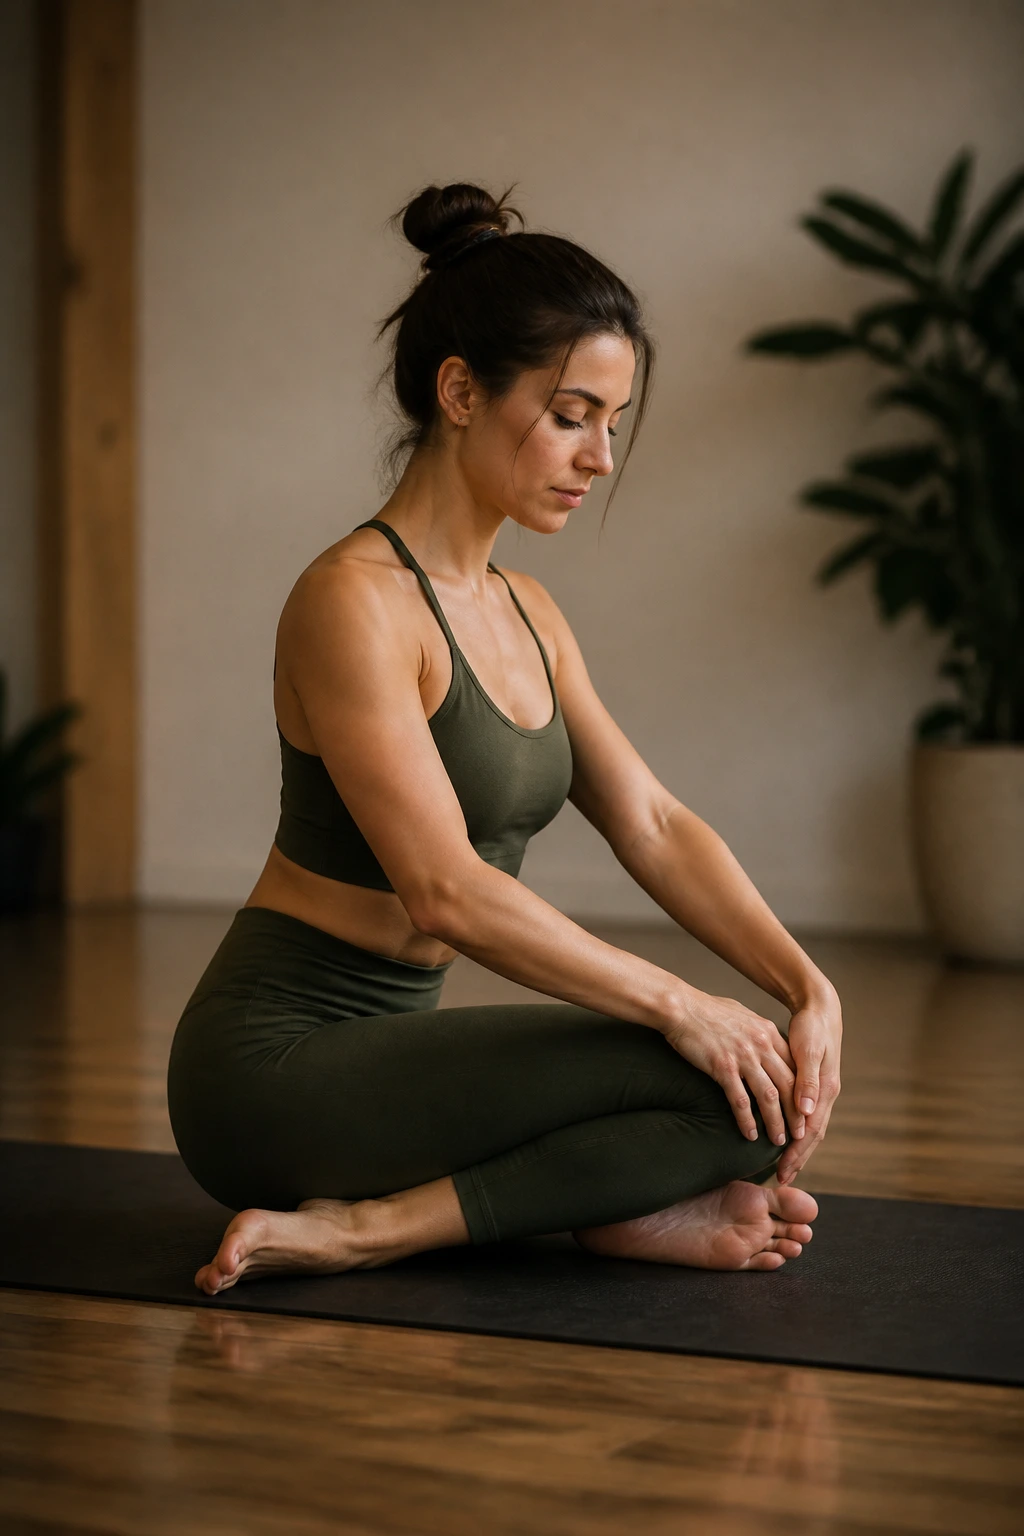
This is the “advanced” version of an external rotation stretch. You sit with your legs bent, stacking one shin directly on top of the other, like logs in a fire. Your ankles should be aligned with your knees.
Most people will have a significant gap between their top knee and bottom foot. That is perfectly normal. Simply resting in this position provides an intense opening for the hips. If you want to increase the intensity, gently hinge forward from the hips with a flat back.
18. Lizard Pose with Quad Stretch
This takes the standard lizard pose and adds a quad-stretching component. Once you are in your lizard lunge, reach back with your hand and grab your back foot. Pull the heel toward your glute.
This is a two-for-one deal. You are stretching the front of the back leg (quads and hip flexors) while maintaining the deep hip-opening benefits of the lizard pose. It is a very demanding position, so only attempt this if you are already comfortable in a standard lizard lunge.
19. Pigeon Pose on Chair
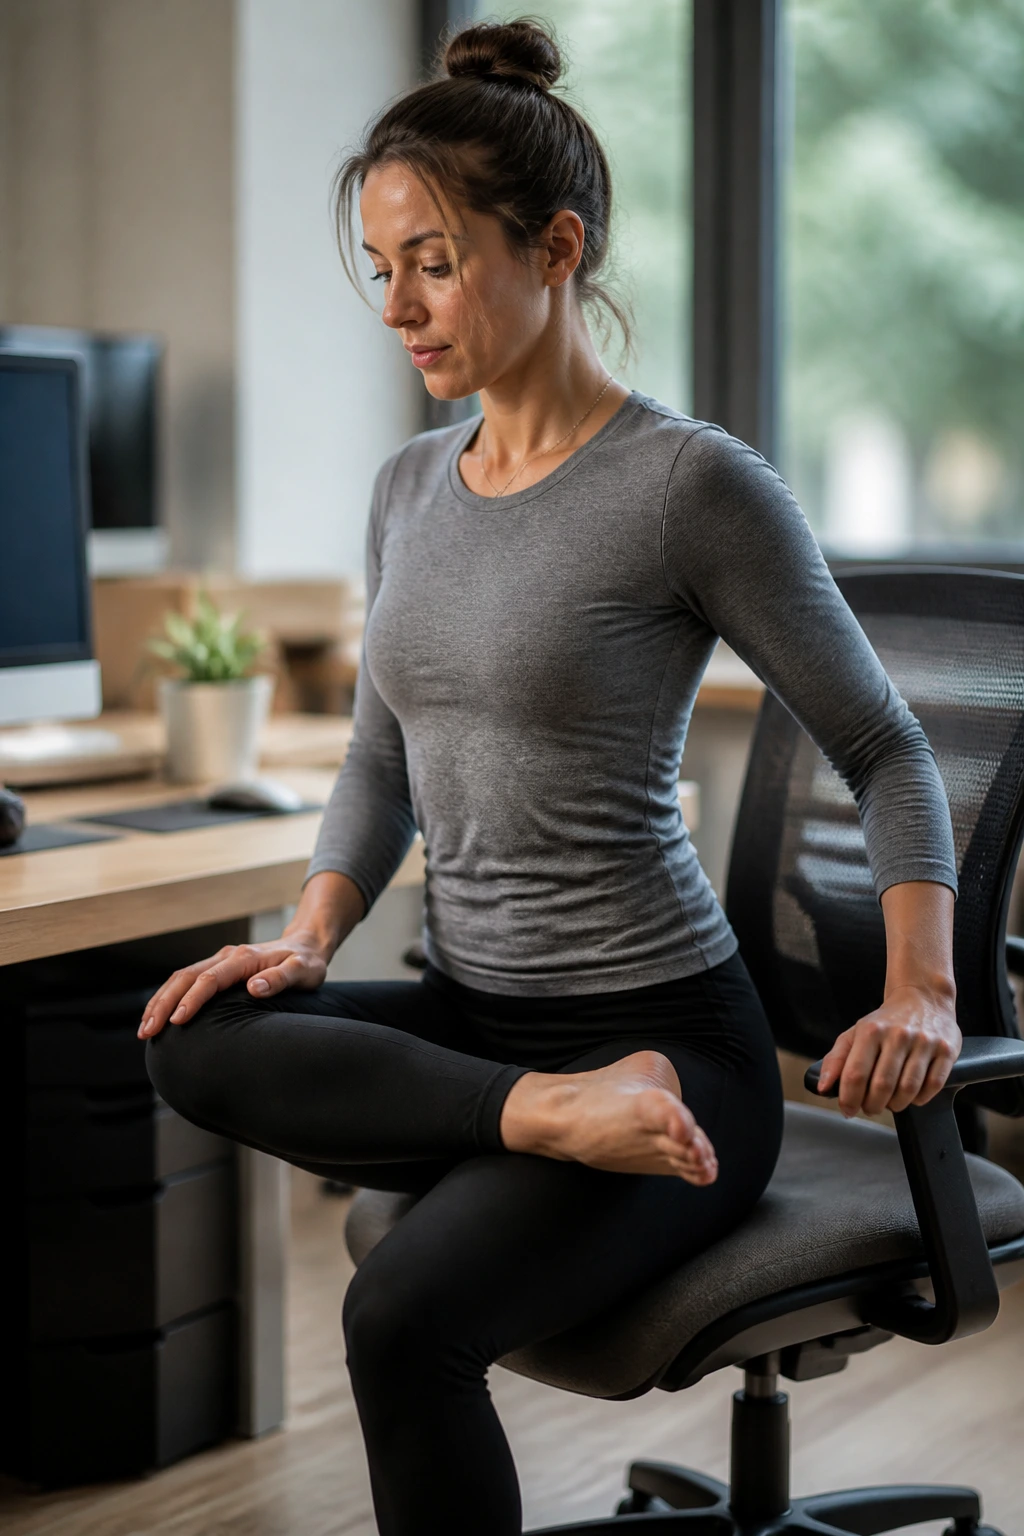
Tight hips don’t always mean you have the mobility to get on the floor. Pigeon pose on a chair is a game-changer for office workers. While seated, cross your right ankle over your left knee, creating the figure-four shape.
Keep your back straight and hinge forward slightly at the hips. You will feel an immediate stretch in the right glute and outer hip. It is discreet enough to do at your desk, and you can hold it for a few minutes while you answer emails.
20. Bridge Pose with Hip Variation
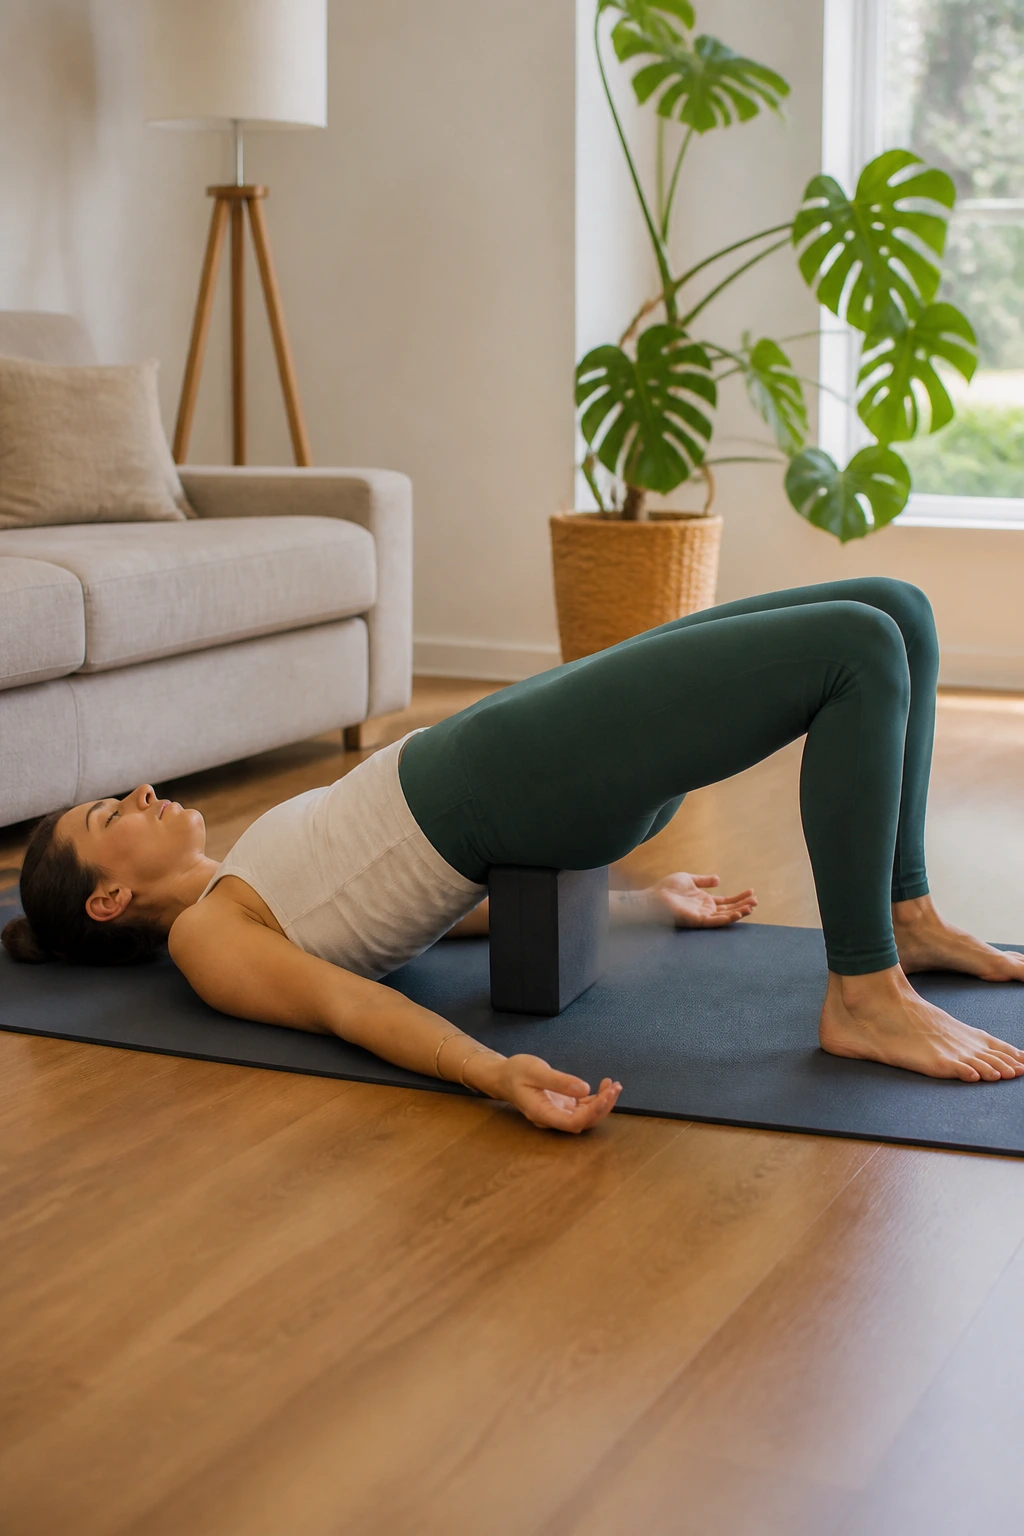
Bridge pose is primarily a glute and back strengthener, but it also opens the hip flexors. Lie on your back, knees bent, feet flat. Lift your hips toward the ceiling.
To make this a hip-opener, focus on driving the hips up and tucking the tailbone. You will feel a strong stretch across the front of the hips. If you want to target the hip flexors more specifically, you can place a block under your sacrum for a “supported bridge,” which allows you to relax into the stretch for a longer duration.
21. Sleeping Swan
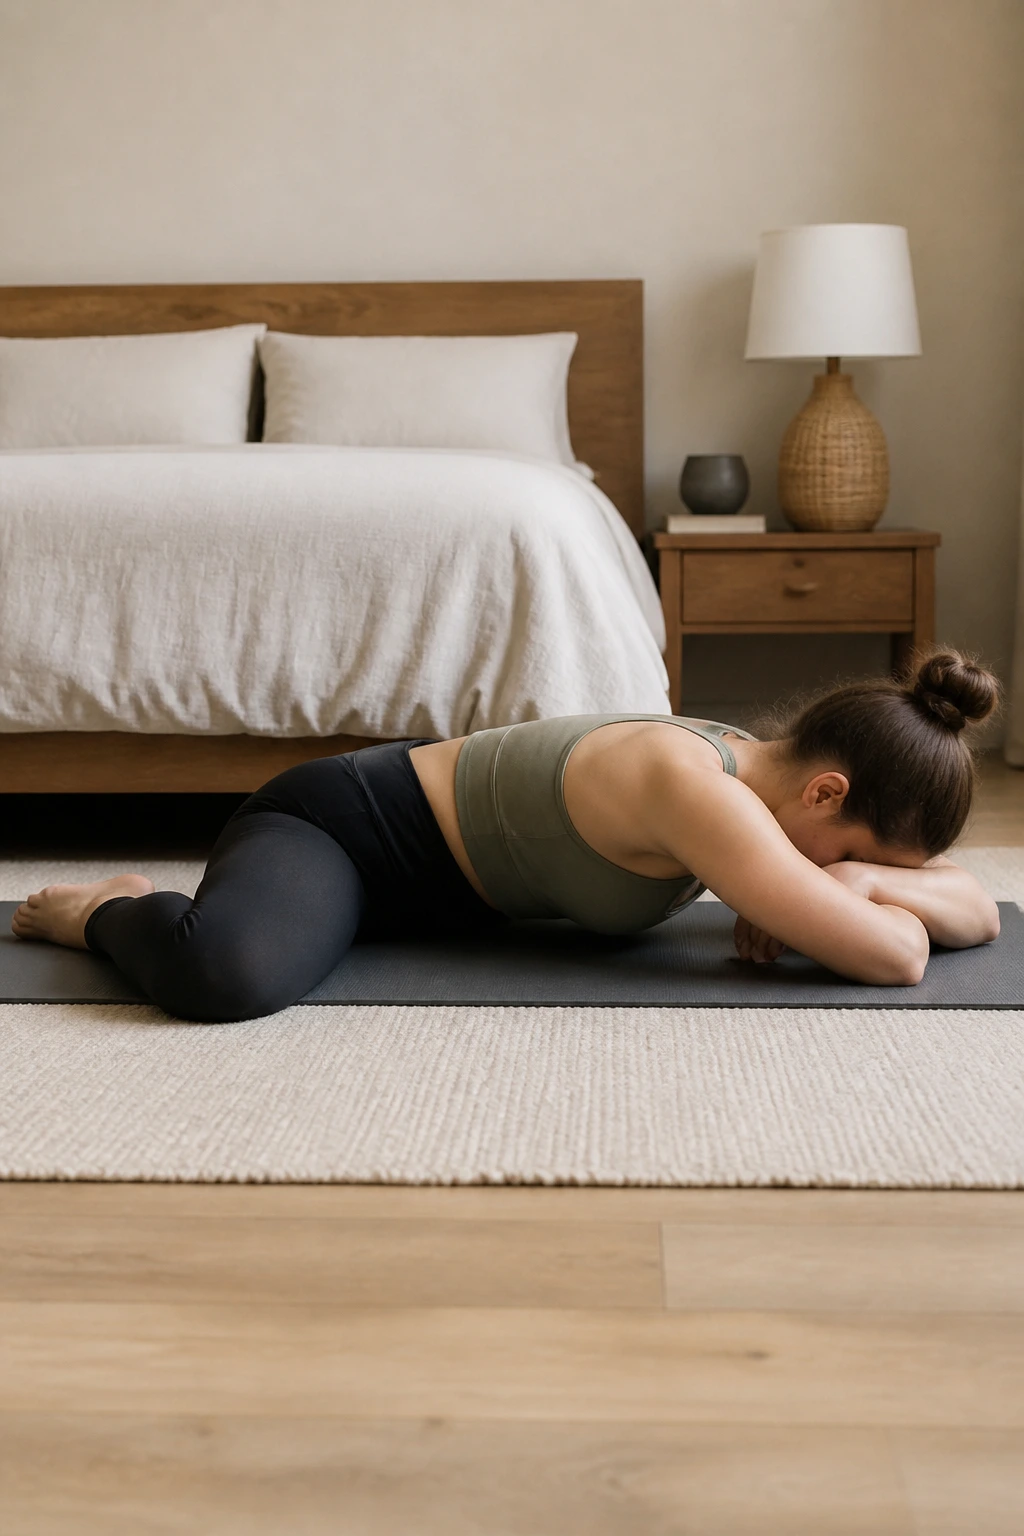
Sleeping swan is a variation of the pigeon pose where you surrender completely. After finding your pigeon position, lower your chest all the way to the floor, resting your forehead on your hands or a block.
The key here is to let go of any remaining tension in your glutes. When you allow your body weight to press into the floor, you enter a deeper phase of the stretch. This is a classic “yin” style hold, intended to be kept for three to five minutes to allow the connective tissues, not just the muscles, to release.
22. Single Leg Extension (Standing)
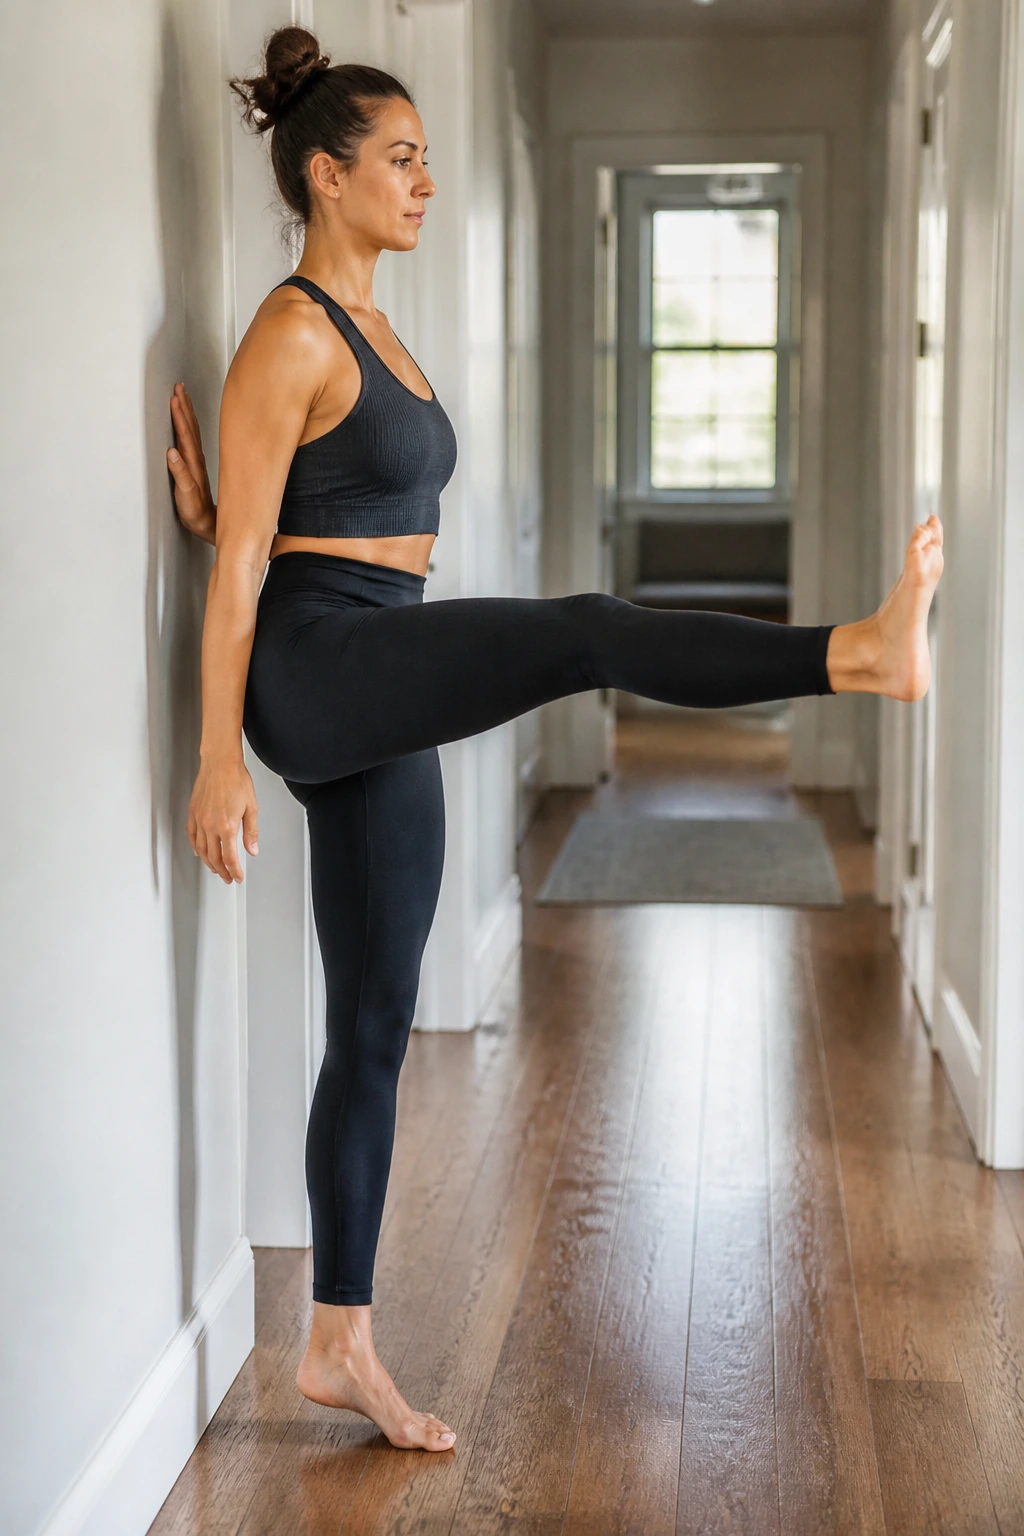
This movement helps with balance and hip mobility. Standing near a wall for support, pull one knee toward your chest, then slowly extend that leg straight out in front of you.
The focus here is on keeping the standing leg stable and the pelvis level. By moving the hip through this range of motion, you are working on the strength and flexibility of the hip flexors. It is a gentle, active stretch that is perfect for a warm-up.
23. Half Moon Pose
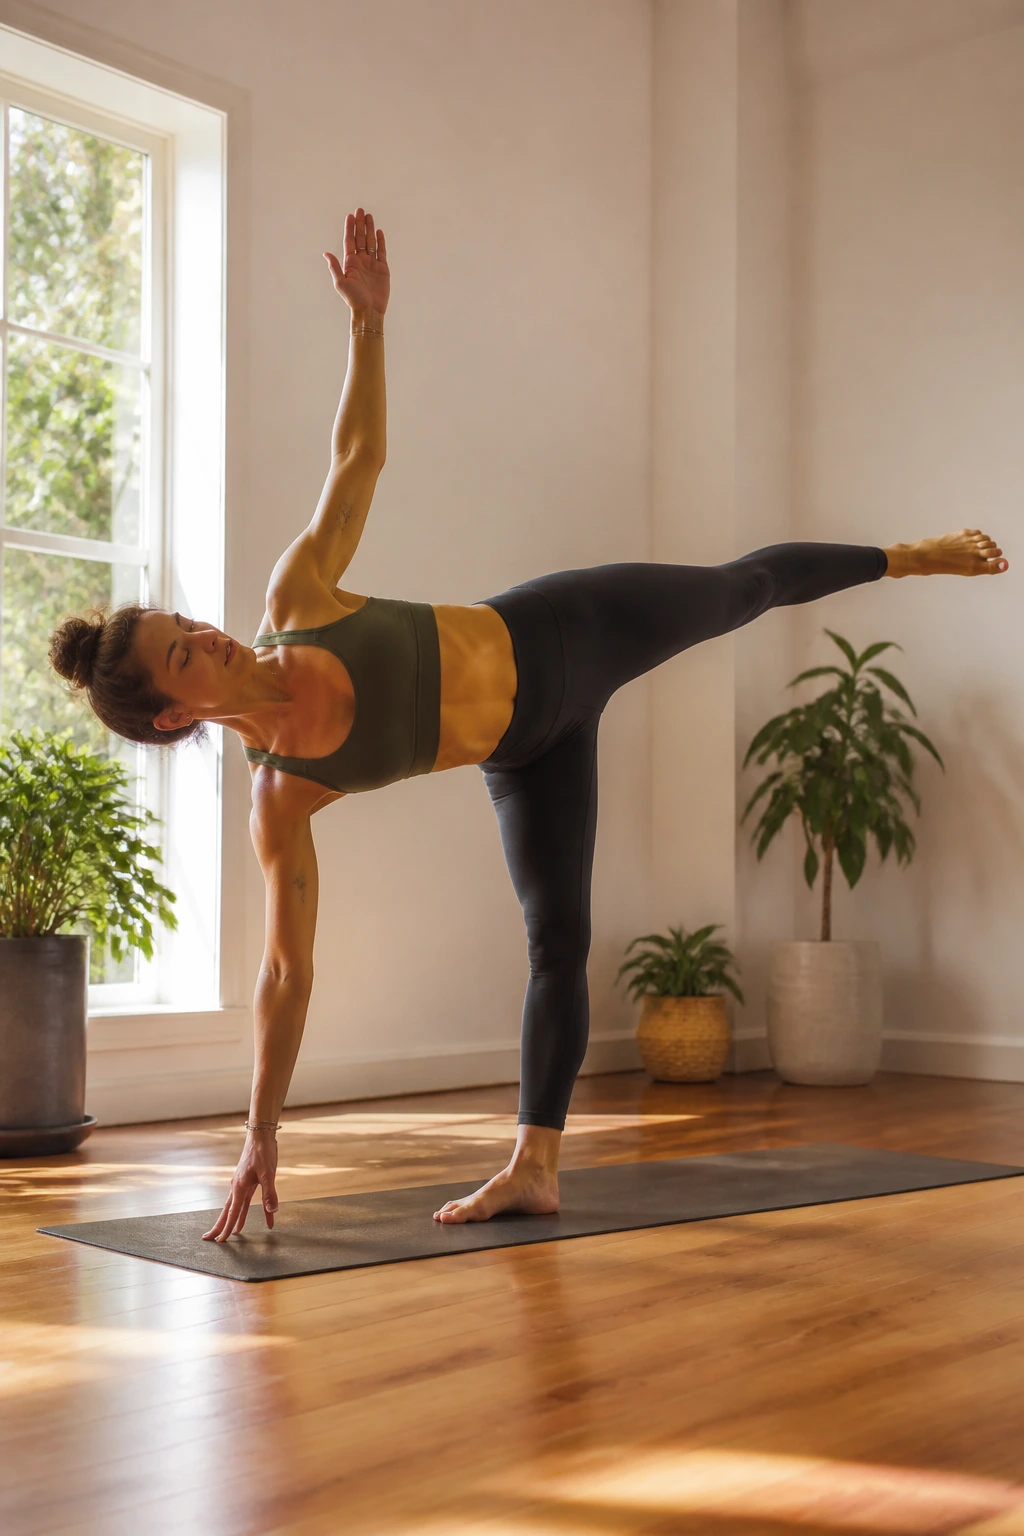
This is a balancing pose that requires openness in the hips. Stand on one leg and hinge forward, extending the other leg back behind you while rotating your torso and hips to the side.
The top hip needs to stack directly over the bottom hip. This external rotation, combined with the balance requirement, makes it a very active hip opener. It strengthens the stabilizing muscles around the hip while forcing the joint into a position of openness.
24. Supported Butterfly Pose
Similar to the reclined bound angle, this is the supported version of the butterfly. Sit with your soles together, but place blocks or books under each knee.
By supporting the knees, you remove the “threat” of a sudden pull or strain, allowing your inner thighs to relax completely. You can sit in this position while reading or meditating. It is an excellent way to accumulate time-under-tension for the adductor muscles without overworking them.
25. Wall Straddle
This is the ultimate “lazy” stretch. Lie on your back with your butt against a wall and extend your legs straight up the wall. Then, let your legs fall open into a wide V-shape.
Gravity does all the work. You don’t have to engage a single muscle. Because your back is fully supported by the floor, your hips can safely reach their maximum range of motion. It is a fantastic way to end a day, especially if you have been standing for a long time.
Final Thoughts
Consistency is more important than intensity when it comes to hip mobility. You will see much better results by doing five minutes of stretching every single day than by trying to force a deep, hour-long session once a week. Your hips took months or years to become this tight, and they will take time to loosen up.
Pay attention to how your body feels after each session. If you feel a sharp, pinching sensation—especially in the front of the hip—back off immediately. That is your joint, not your muscle, and you do not want to force it. Instead, focus on finding a sensation of “stretching” in the fleshy parts of your muscles. Listen to that signal, breathe into it, and remember that flexibility is a practice, not a destination.
