



Stepping into a weight room without warming up is like trying to start a cold car in the dead of winter and immediately flooring the gas pedal. You might get moving, but the engine is going to protest, and over time, you’re just begging for a breakdown. We have all seen the person who walks in, drops their bag, and immediately throws two plates on the bar for a set of squats. Their movement is stiff, their range of motion is limited, and they are essentially forcing their nervous system to go from zero to sixty without any prep time. You can do better than that.
Warming up isn’t just about “getting the blood flowing” or a vague notion of safety. It is a calculated process of priming your central nervous system, lubricating your joints with synovial fluid, and reminding your brain how to recruit the right muscles for the heavy lifting ahead. When you skip this, you are leaving strength on the table. A proper warm-up creates a bridge between your sedentary daily life and the high-intensity demands of a heavy workout. It turns on your core, opens up your tight hips, and wakes up your shoulder stability. When you finally hit that first warm-up set with the bar, you shouldn’t feel like you are fighting your own body—you should feel like a finely tuned machine ready to move weight.
The following movements are designed to be integrated into your routine. You do not need to do all twenty every single time; that would take longer than the workout itself. Instead, treat this list like a menu. Pick three to four movements that address your specific “sticking points”—those tight hips, that rounded thoracic spine, or those grumpy shoulders—and make them a non-negotiable part of your pre-workout ritual.
1. Arm Circles

Most people treat arm circles as a joke, casually swinging their arms around while looking at their phone. Stop that. To actually get value out of this, you need to treat it like a serious shoulder mobility drill. Stand tall with your feet shoulder-width apart and reach your arms out to the sides, forming a “T” shape.
The Technique That Matters
Make your arms stiff as if you are trying to push against the walls on either side of you. Start by drawing small circles with your fingertips. Gradually increase the size of the circles until you are making massive, sweeping arcs. The goal here isn’t just movement; it is about control. Focus on keeping your palms facing down throughout the entire rotation. After 20 seconds, reverse the direction. You should feel a deep, burning sensation in your deltoids and a distinct opening in your chest. If you are just flopping your arms around, you aren’t doing the work. Tightness is the goal here, not speed.
2. Leg Swings
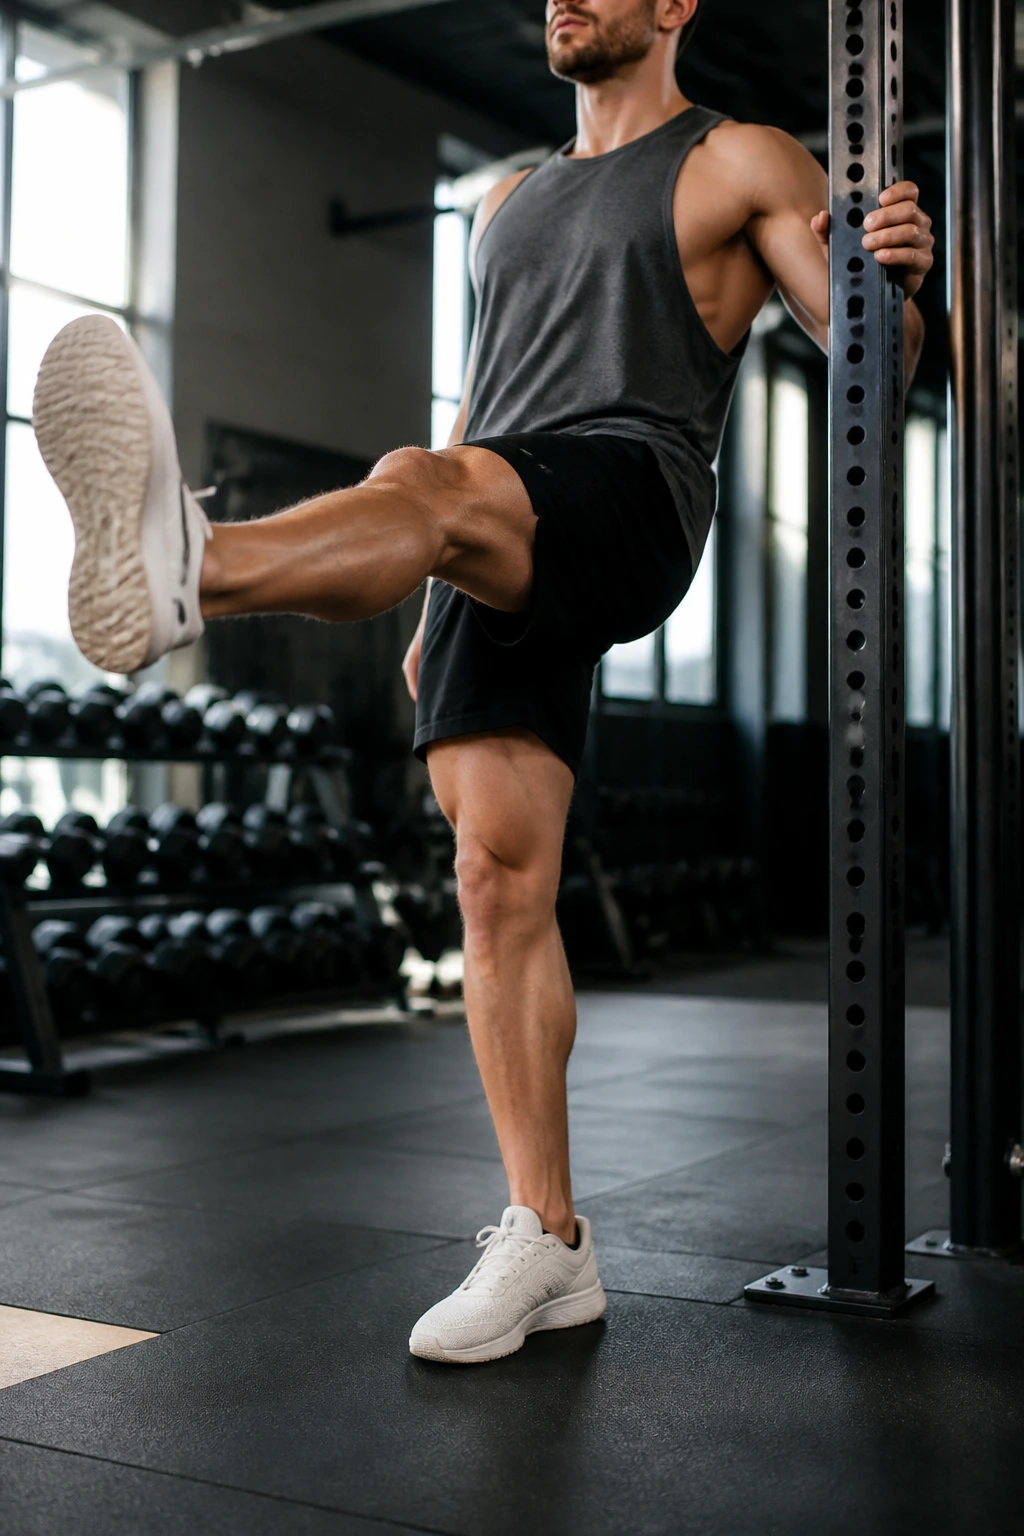
If you have spent the last eight hours sitting at a desk, your hip flexors are likely locked up tighter than a drum. Leg swings are the antidote. Find a squat rack or a sturdy pillar to hold onto for balance. You don’t want to be fighting for stability while you are trying to loosen up your hips, so use the support.
Unlocking the Hip Joint
Start by swinging one leg forward and backward, keeping your torso perfectly upright. Do not lean forward as your leg goes back; if you do, you are just arching your lower back rather than moving the hip joint. You want to feel a gentle stretch in the front of your hip at the peak of the backswing and a little tension in your hamstring at the front. Do 15 reps on each side. Then, turn sideways to the post and swing your leg across your body in a side-to-side motion. This helps open up the adductors and abductors, which are usually incredibly stiff in lifters who spend a lot of time in a seated position.
3. Cat-Cow Stretch
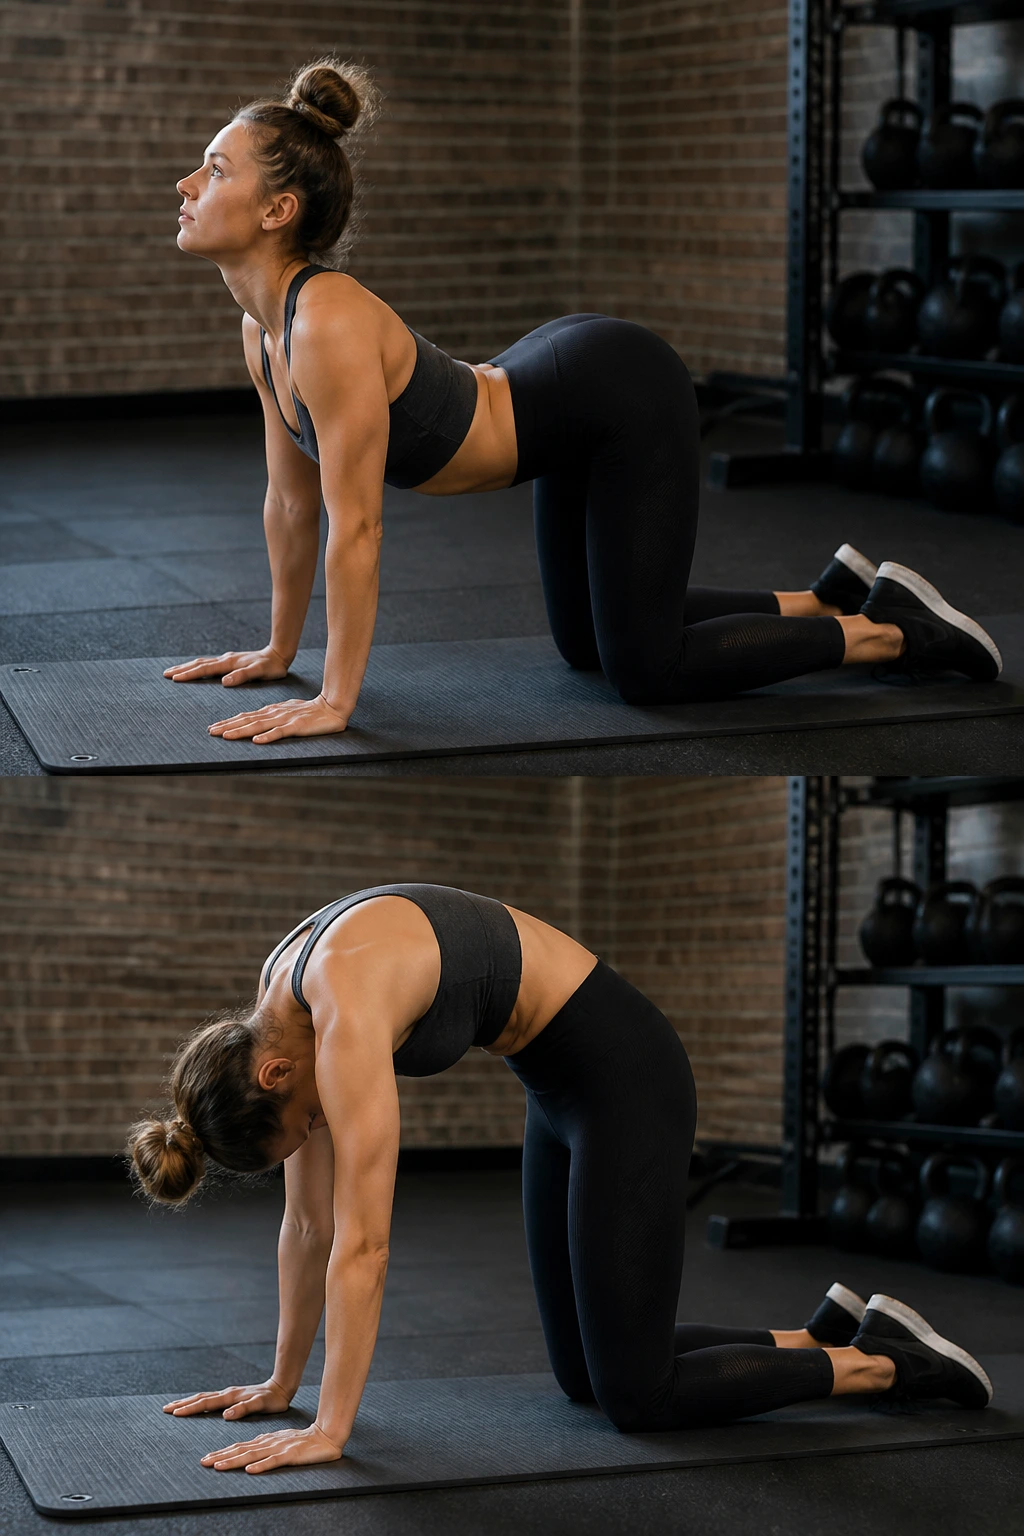
This is a classic for a reason, but it is often butchered. The cat-cow isn’t just about moving your spine; it is about spinal segmentation. Get on all fours with your hands directly under your shoulders and your knees under your hips. This is your starting point.
Finding the Rhythm
Inhale and drop your belly toward the floor, lifting your chin and chest to look at the wall in front of you. This is the cow position. Exhale and tuck your chin, rounding your back toward the ceiling like a frightened cat. Don’t just move your lower back; try to articulate every single vertebrae one by one. Imagine you are a string of pearls being arched and then pulled tight. Do this slowly. If you rush through it, you aren’t getting the benefit of the spinal lubrication. Aim for 10 slow, controlled repetitions. If you hear a few pops in your back, don’t panic; that is usually just the joints decompressing.
4. Bird-Dogs
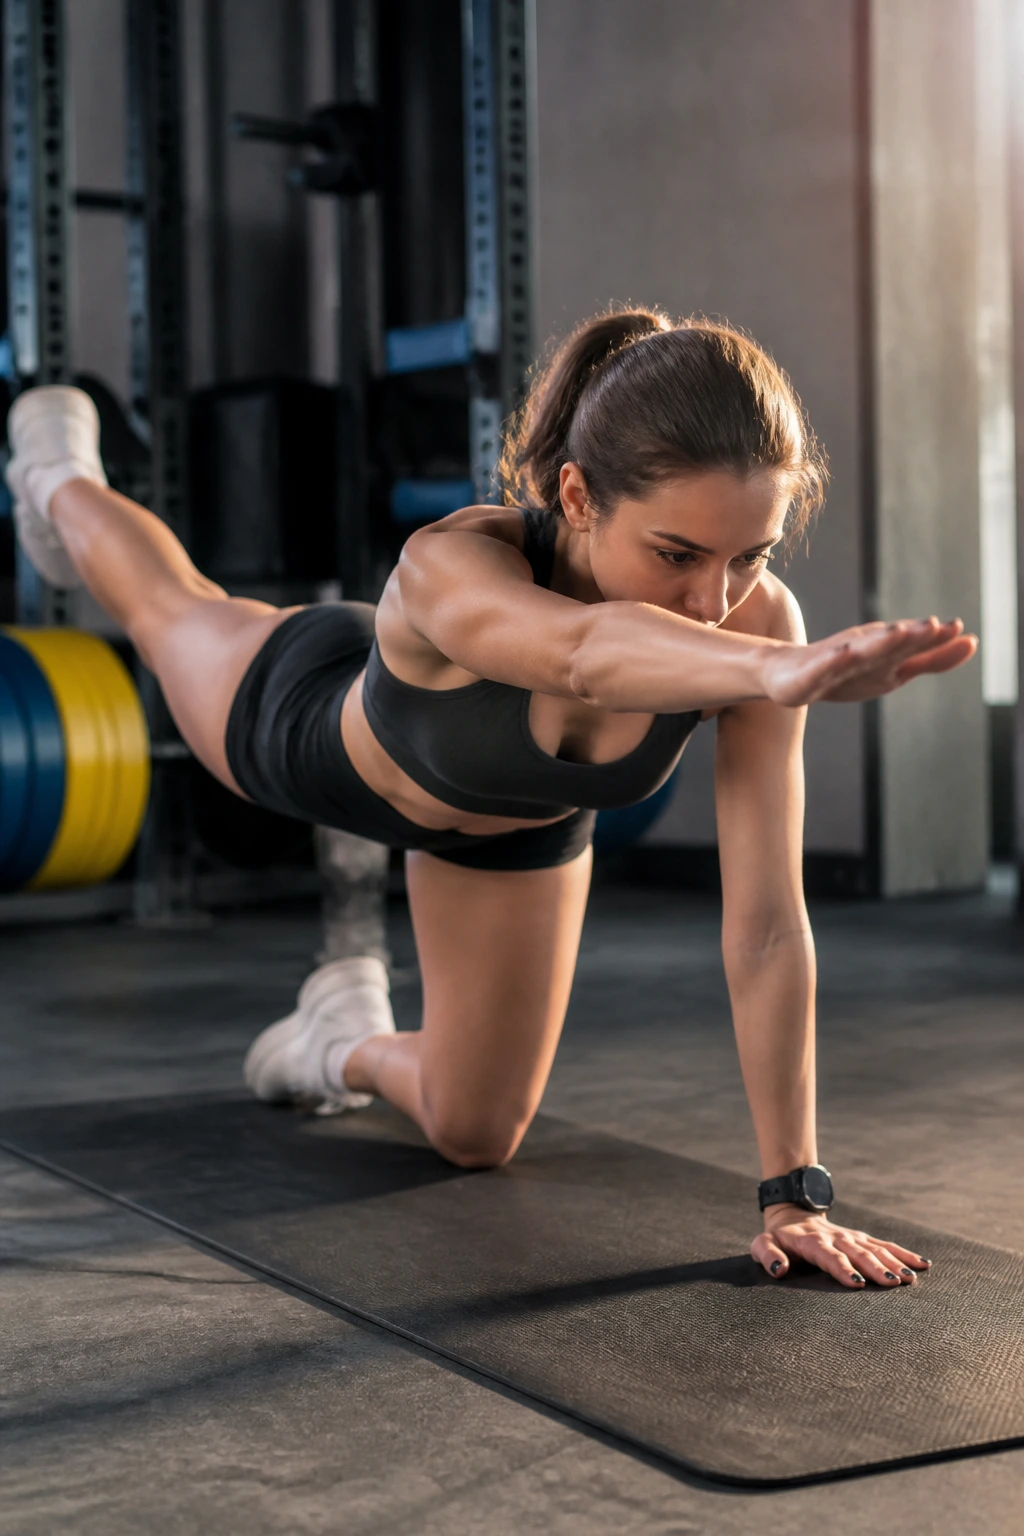
We talk a lot about core stability, but rarely do we actually train it before we start lifting. The bird-dog is the absolute gold standard for teaching your core to resist rotation and stay solid while your limbs move. It is a high-reward, low-risk movement that demands focus.
The Secret to Real Stability
Get on your hands and knees. Simultaneously reach your right arm forward and your left leg backward. Here is where the magic happens: you must keep your hips square to the floor. If your left hip tilts open, you have failed the drill. Pretend you have a glass of water balanced on your lower back. If you tilt, the water spills. Hold the extension for three seconds, squeezing your glute as hard as you can. Return to the starting position with total control. Switch sides. Do 10 reps total. This simple move does more for your bracing than ten minutes of crunches ever will.
5. Bodyweight Squats
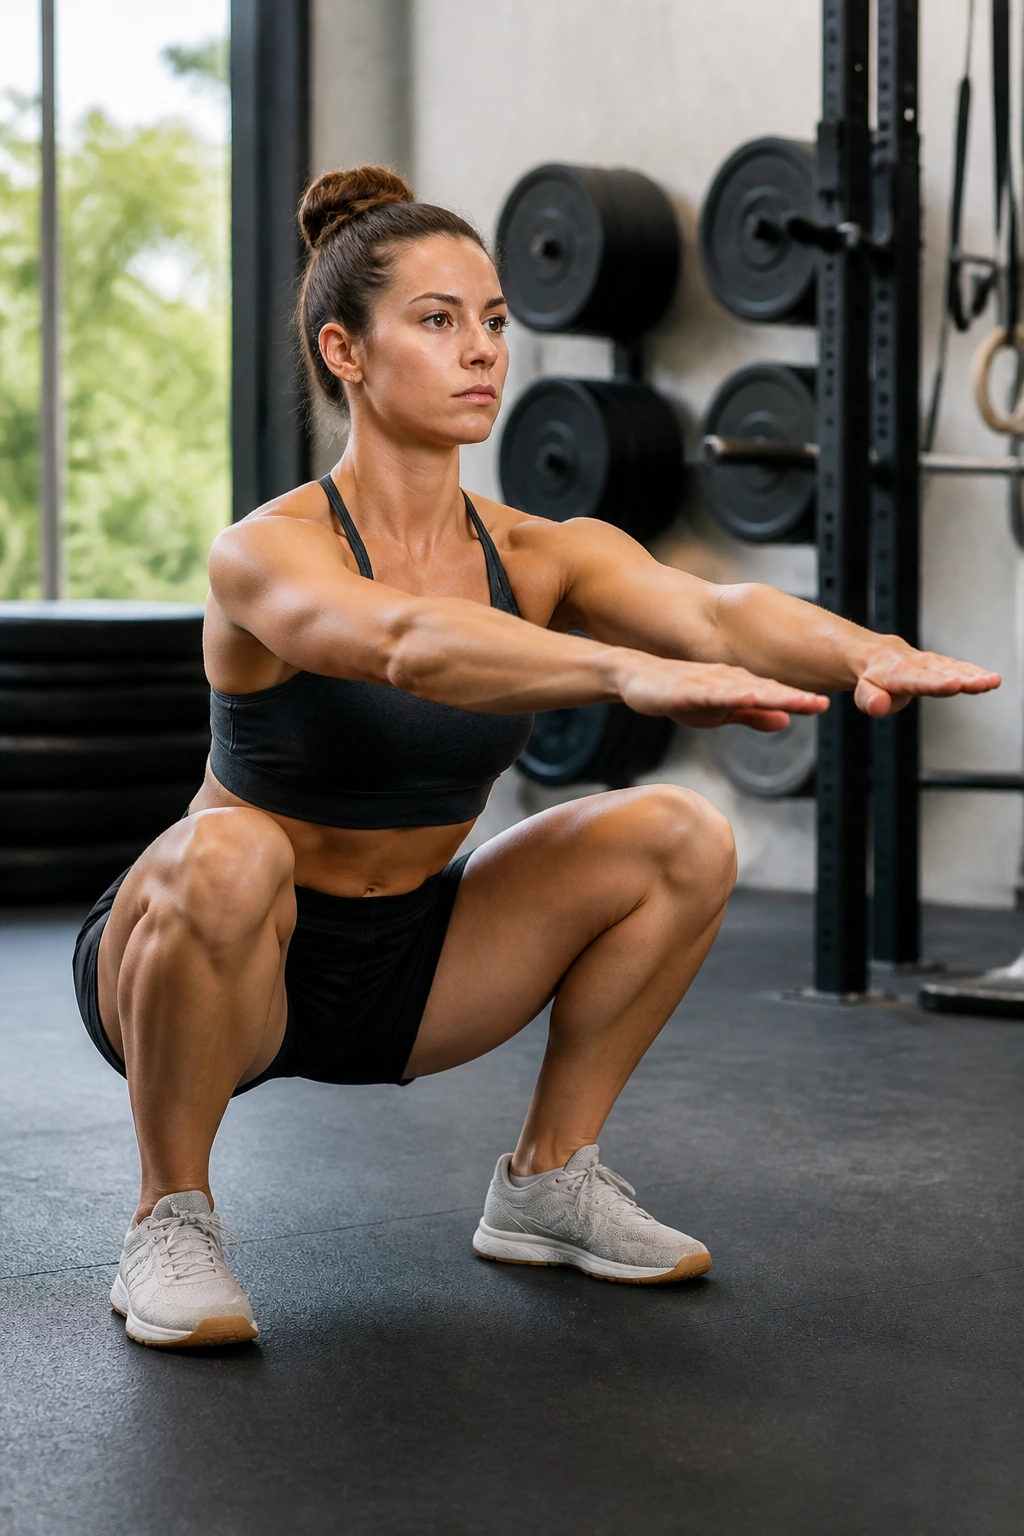
Yes, you need to squat before you squat. It sounds redundant, but the goal here is to find your groove. Don’t just dive down into a bottom position. Use these to check your mechanics for the day. Are your ankles tight? Is your back feeling stiff?
Refining the Bottom Position
Stand with your feet slightly wider than shoulder-width. Lower yourself slowly, taking a full three seconds to reach the bottom. Once you are deep, don’t immediately bounce back up. Spend two seconds in the hole, pushing your knees out with your elbows. This is a dynamic stretch for the hips and a chance to verify that your heels stay firmly planted on the floor. If your heels are lifting, your ankles are tight, and you need to spend more time here. Do two sets of 10. By the second set, your stance should feel more natural and your depth should be easier to hit.
6. Glute Bridges
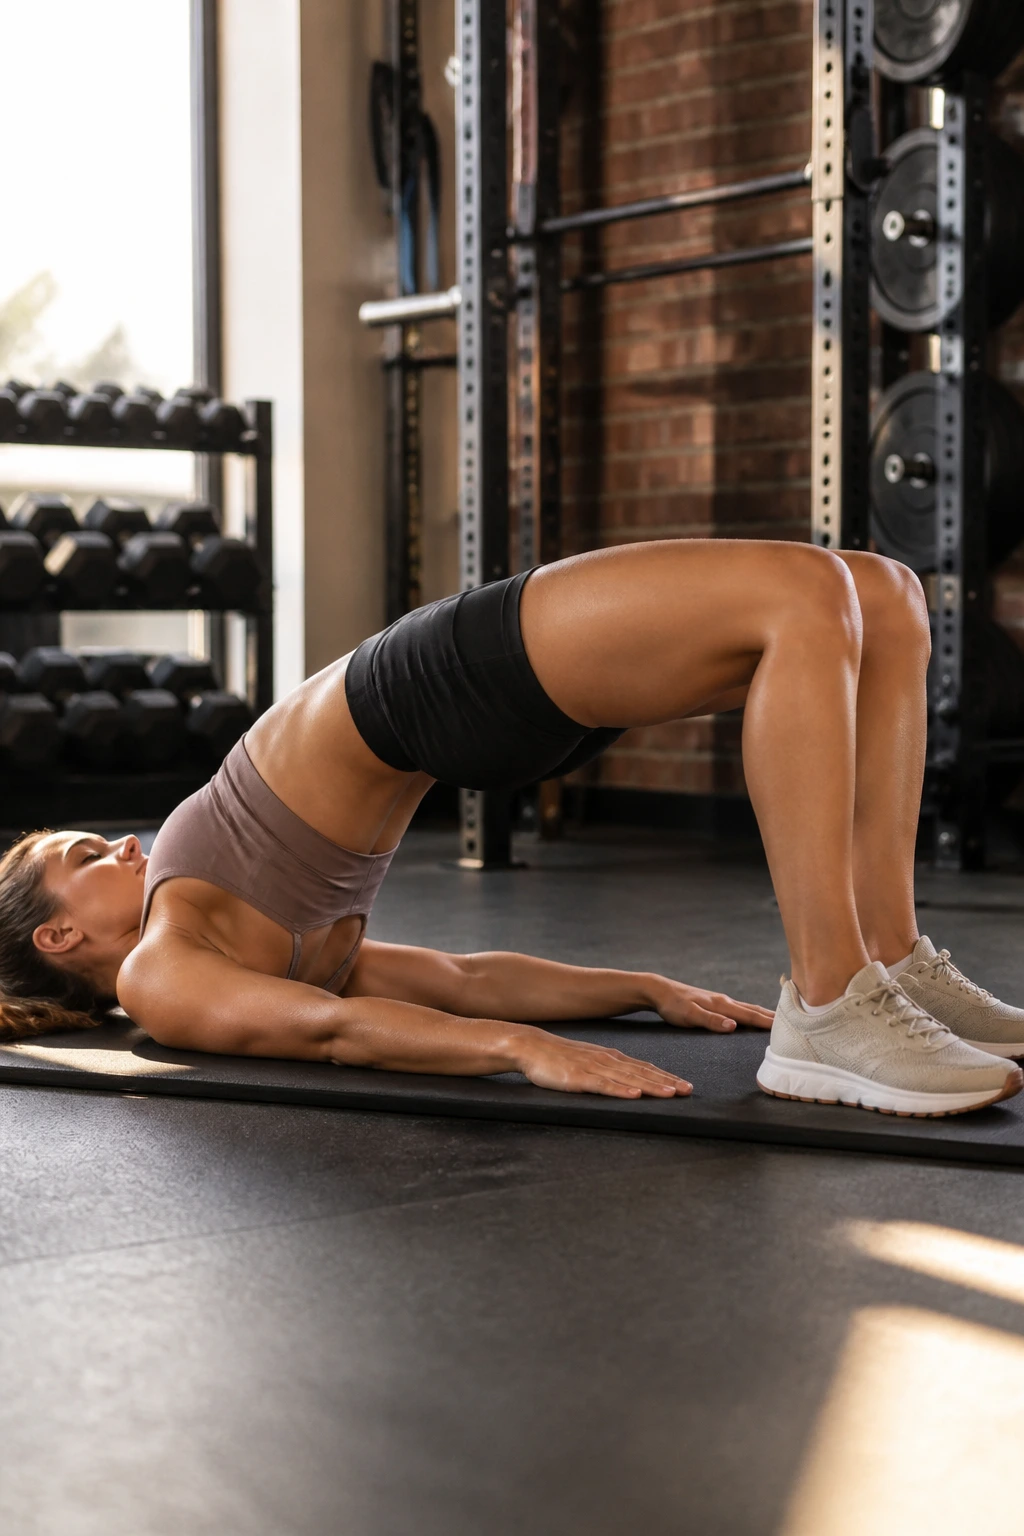
Your glutes are the primary movers for almost every major lift—deadlifts, squats, and even Olympic variations—but they are notorious for “sleeping” after a day of sitting. Glute bridges are the wake-up call. Lie on your back, knees bent, feet flat on the floor.
Establishing the Mind-Muscle Connection
Drive through your heels to lift your hips toward the ceiling. Squeeze your glutes at the very top. Do not use your lower back to get the height; if you feel it in your lumbar spine, you need to adjust your pelvic tilt. Tuck your tailbone slightly—think about pulling your belly button toward your ribs—to engage the core before you lift. Hold the squeeze for a full second at the top. Perform 20 reps. You should feel a distinct pump in your glutes. If you aren’t feeling it there, walk your feet closer to your glutes or further away until you find the sweet spot.
7. Inchworms
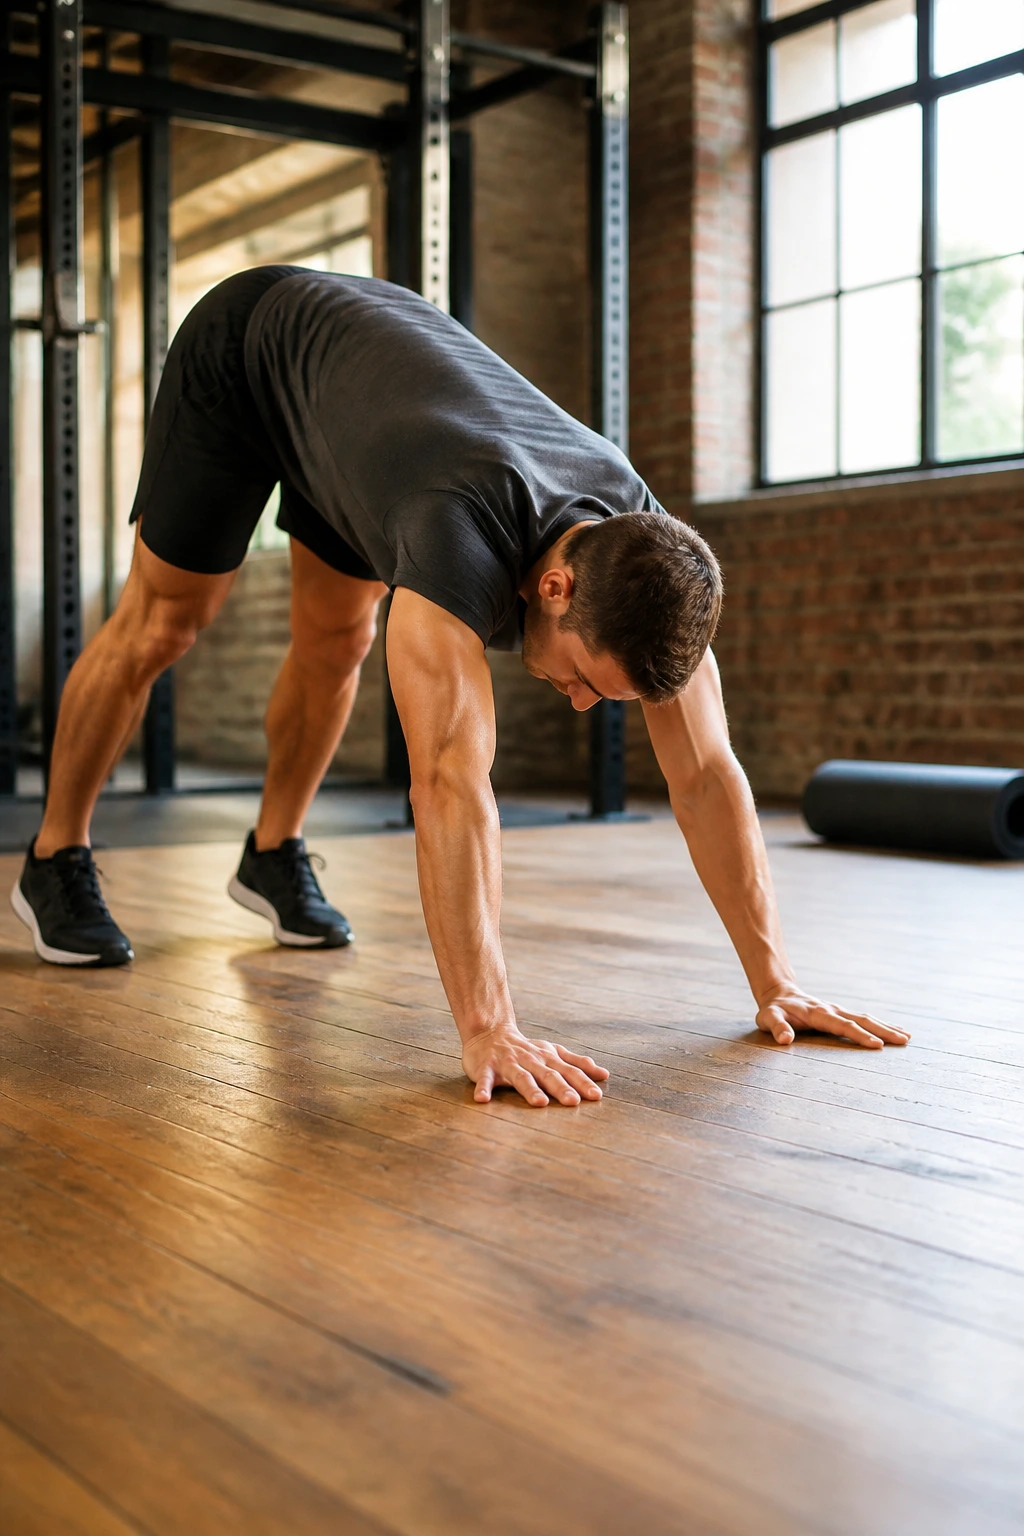
This is a total-body movement that stretches the posterior chain while waking up the shoulders. Start standing, then hinge at the hips to place your hands on the floor in front of you. This will immediately stretch your hamstrings.
The Walk-Out Protocol
Walk your hands out one by one until you are in a perfect plank position. Ensure your body is a straight line from your head to your heels. Pause for a second—squeeze your quads and your abs. Then, walk your feet toward your hands, keeping your legs as straight as possible. If you cannot touch your toes, keep your knees slightly bent, but prioritize the stretch. This isn’t a race. It is about waking up the hamstrings, the lower back, and the shoulder stabilizers simultaneously. Do 8 reps, and you will feel significantly more limber.
8. Thoracic Spine Rotations
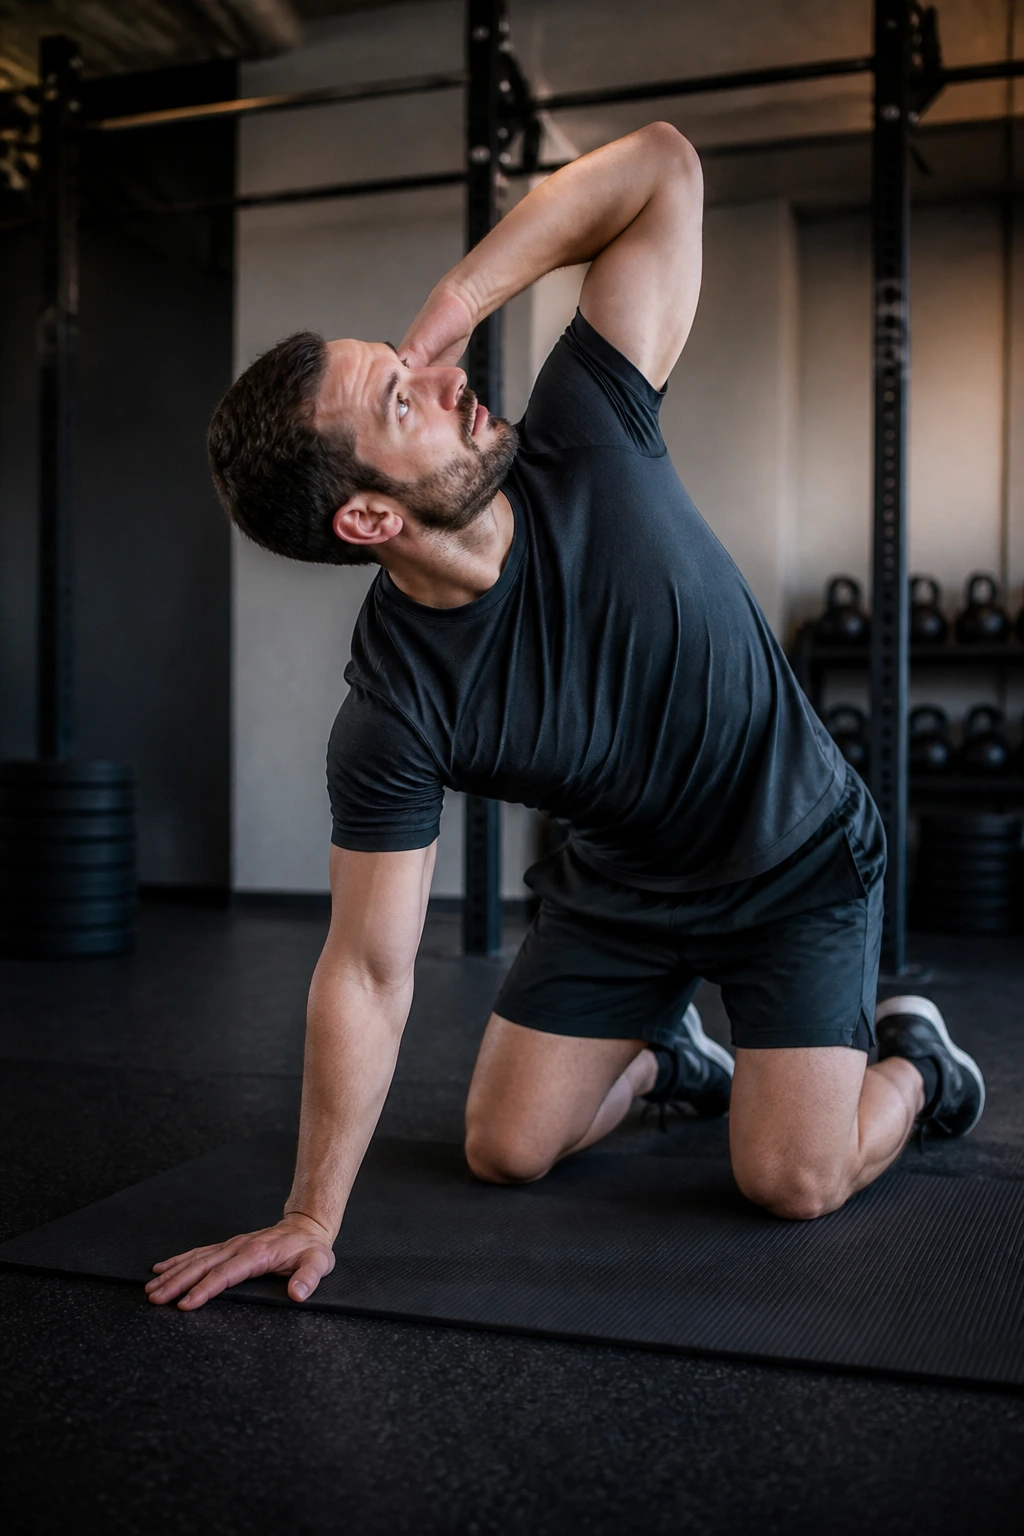
If your upper back is stiff, your bench press, overhead press, and deadlift will all suffer. The thoracic spine—the part of your back between your shoulder blades—is meant to rotate. When it gets locked up, your lower back has to compensate, and that is a recipe for injury.
The Quadruped Twist
Get on your hands and knees. Place one hand behind your head, pointing your elbow out to the side. Now, rotate your elbow down toward the opposite wrist, then rotate it upward toward the ceiling, following it with your eyes. Really try to open your chest up to the sky. Do not just wave your arm around; push your supporting hand into the floor to stabilize your shoulder. Perform 10 reps on each side. You will notice that one side usually feels much stiffer than the other. That is normal, but make sure to give the stiffer side a little extra love.
9. Band Pull-Aparts
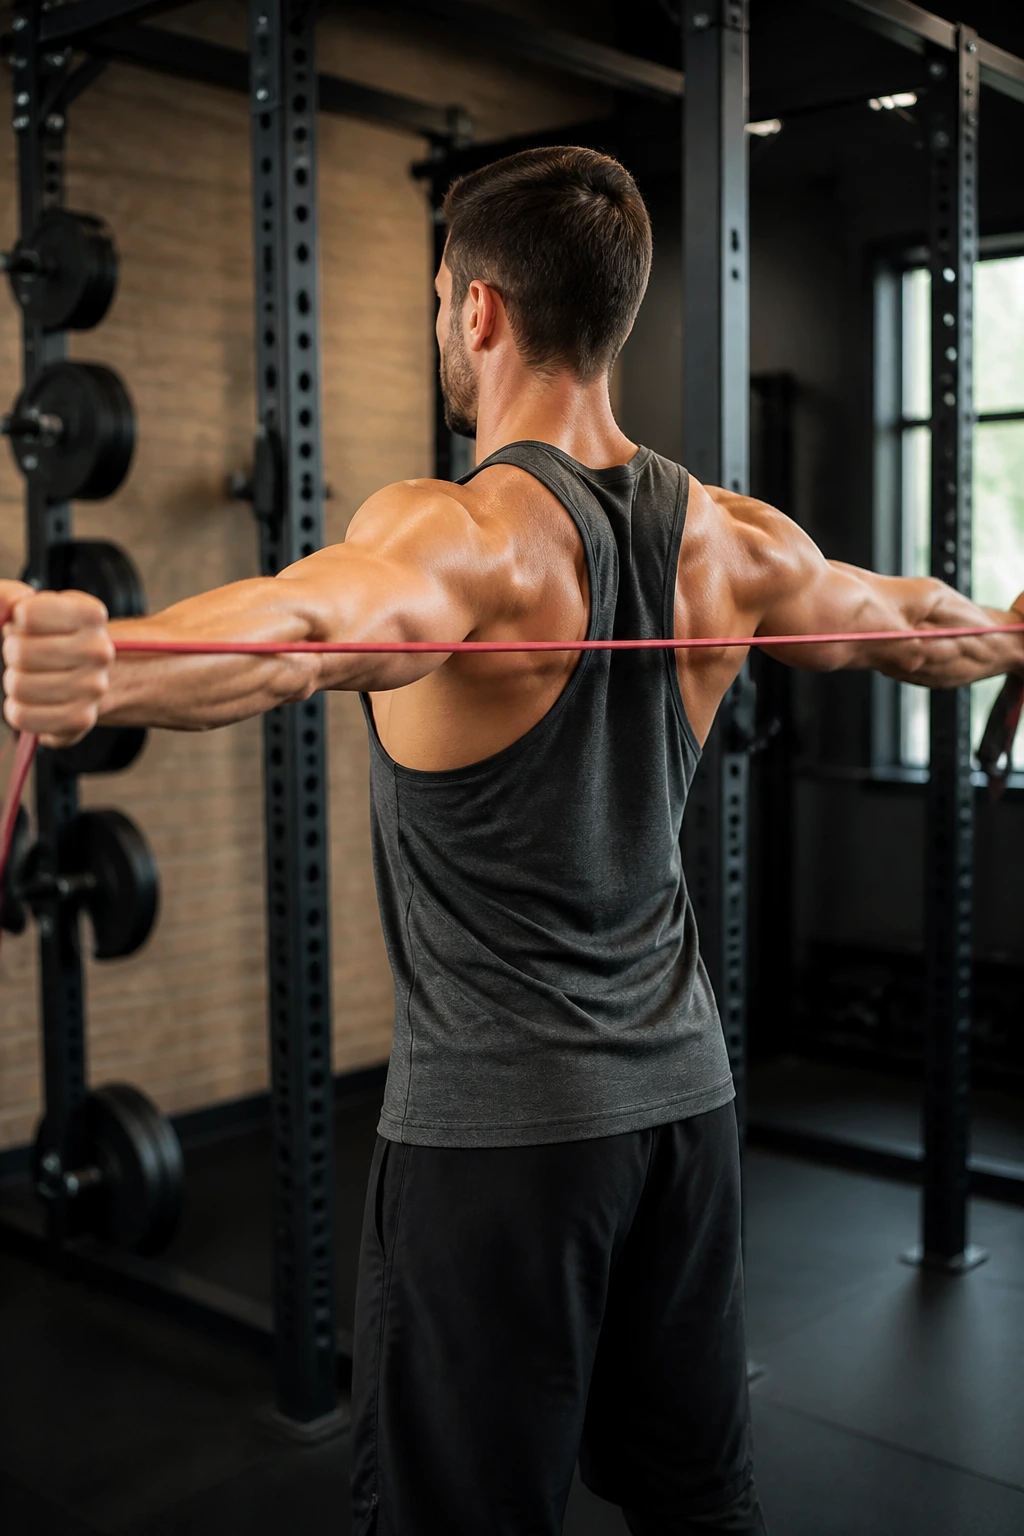
This is the holy grail for shoulder health. If you only do one thing on this list, make it this. Take a light resistance band and hold it in front of you with both hands, arms straight.
The Proper Mechanics
Keep your elbows locked. Pull the band apart by retracting your shoulder blades—imagine you are trying to squeeze a pencil between them. Do not let your shoulders shrug up toward your ears. The movement should come entirely from your upper back, not your traps. Bring the band all the way to your chest, pause for a second, and return with control. Do not let the band snap back; the eccentric, or lowering, phase is where the strengthening happens. 3 sets of 15 will make your shoulders feel invincible.
10. Side Lunges
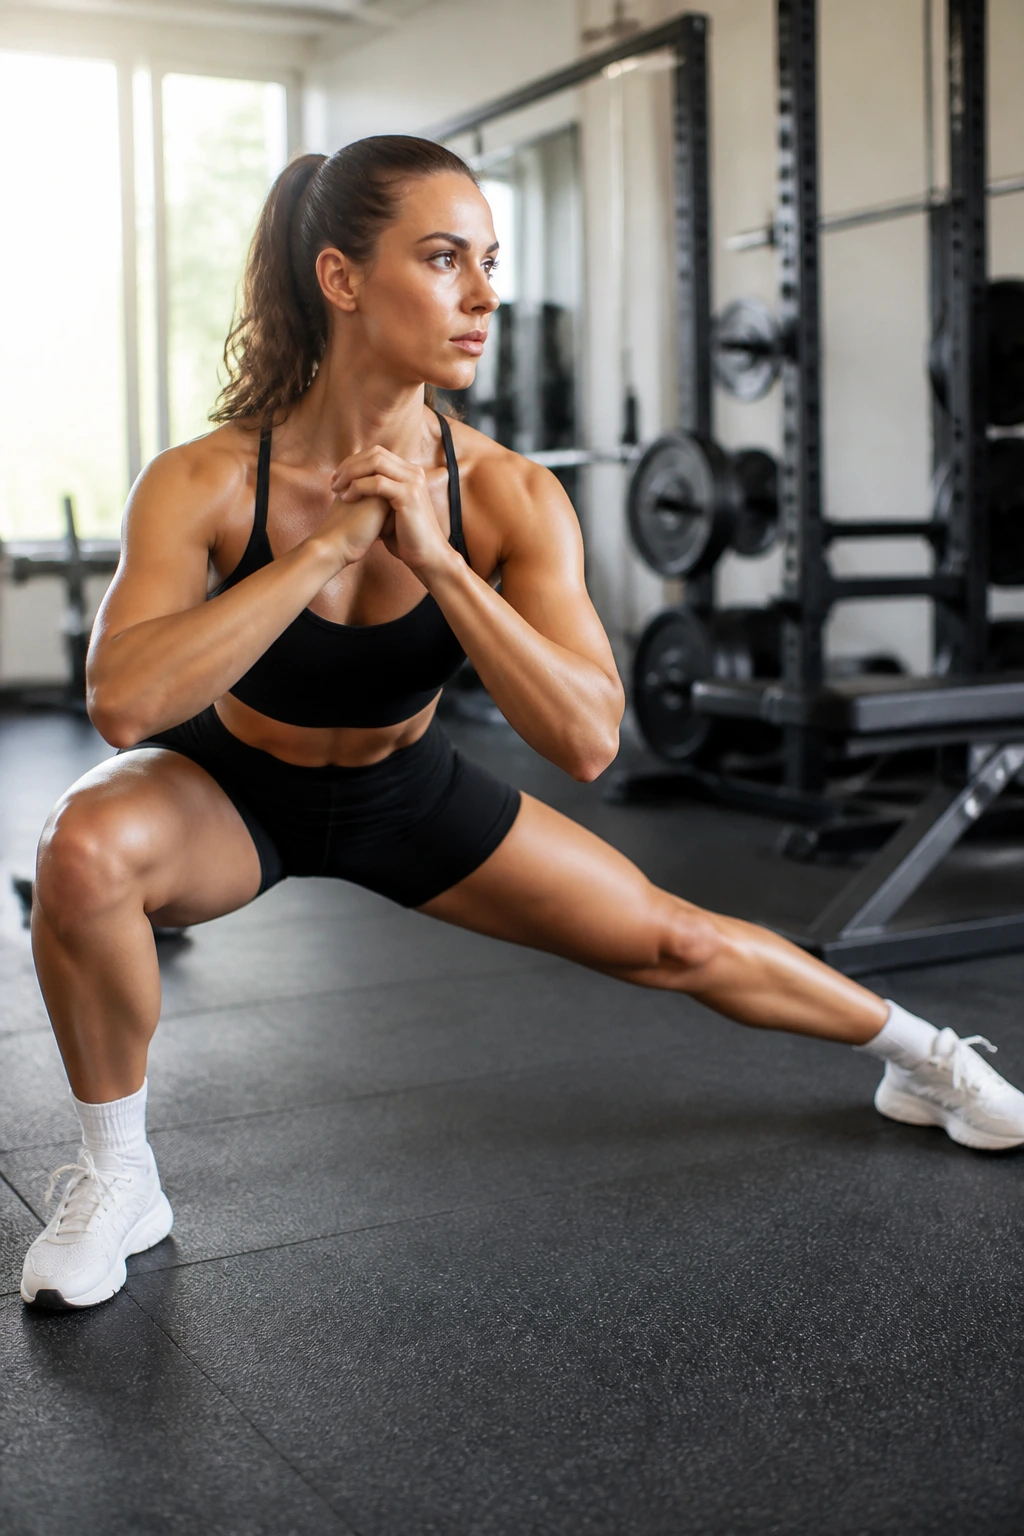
Front-to-back movement is easy, but side-to-side movement often gets neglected in the weight room. Side lunges expose exactly how tight your adductors (inner thighs) really are. Start with a wide stance, much wider than your squats.
Opening the Adductors
Shift your weight onto one leg, bending that knee while keeping the other leg perfectly straight. Drive your hips back as if you are trying to sit down on a chair behind you. Keep your chest up and your weight on your heel. You should feel a deep stretch in the inner thigh of the straight leg. Alternate sides for 10 reps total. This is crucial for anyone who squats or deadlifts, as it helps prevent groin strains and improves your ability to “sit” into your heavy lifts without your knees caving in.
11. Plank-to-Down-Dog
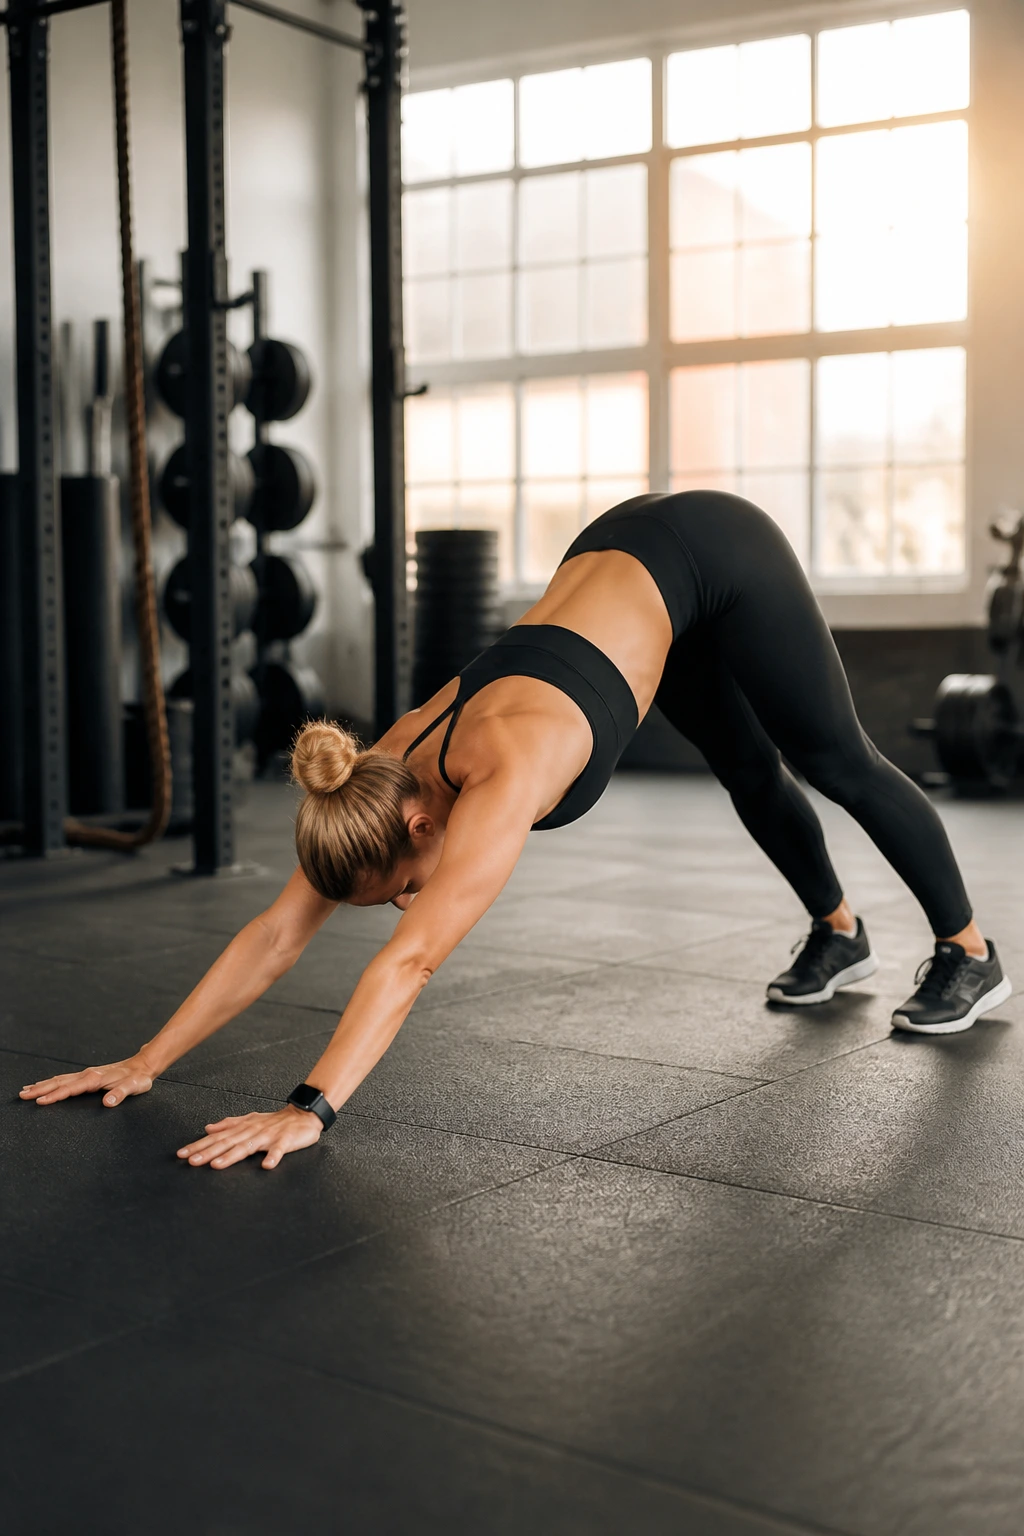
This movement combines core stability with a massive posterior chain stretch. It is essentially an active yoga transition that keeps your blood moving. Start in a high plank position, hands under shoulders, core tight.
The Dynamic Flow
Push your hips back and up toward the ceiling, driving your heels down toward the floor to mimic the downward dog yoga pose. You want a massive stretch through your calves and hamstrings. Hold it for a breath. Shift back into the plank, squeezing your abs so your hips don’t sag. The goal is to move smoothly between these two positions. Do not go too fast. The transition is where the real value lies, as it forces your muscles to switch from lengthening to stabilizing. 12 reps should leave you feeling warmed up and ready.
12. Hip Circles
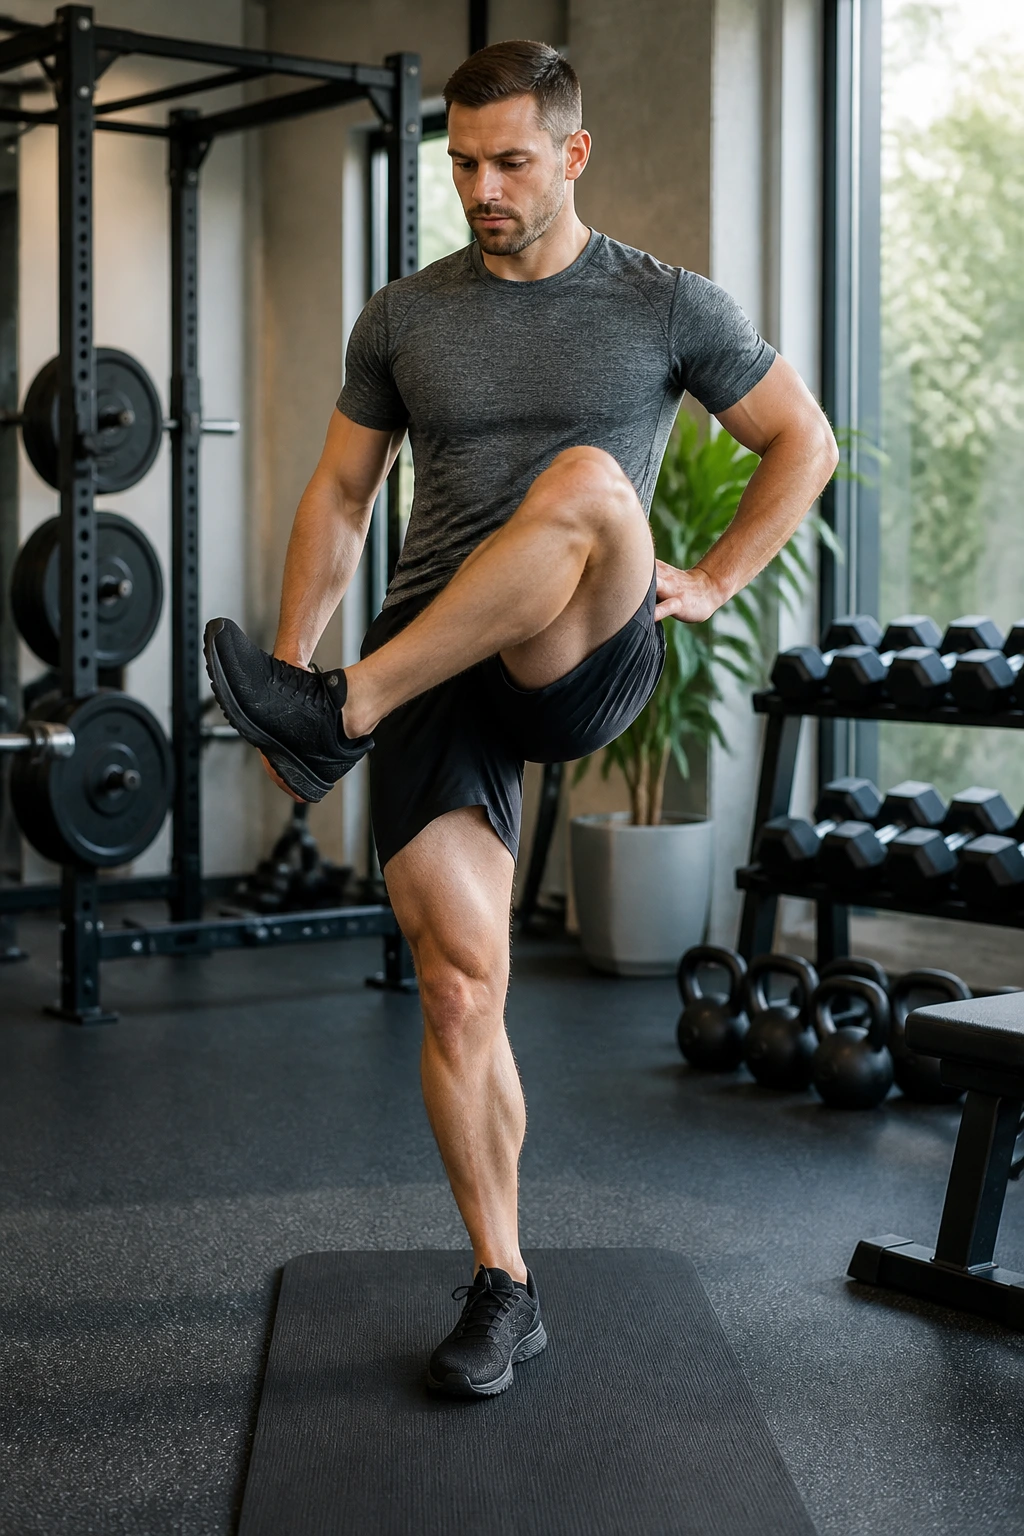
Sometimes, the simplest movements are the best. This is essentially a giant hip rotation that lubricates the ball-and-socket joint of your hip. Stand on one leg—hold onto something for balance if you need it.
Finding the Full Range
Lift your other knee to hip height. Bring it out to the side, rotate it back behind you, and return to the center. Imagine you are trying to step over a tall fence. Try to keep your pelvis level while you do this. If your hips are rocking all over the place, decrease the range of motion until you can control it. Do 10 circles forward and 10 circles backward per leg. This is incredibly effective for anyone who feels “pinching” in their hips during squats, as it helps create more space in the joint capsule before you load it with weight.
13. World’s Greatest Stretch
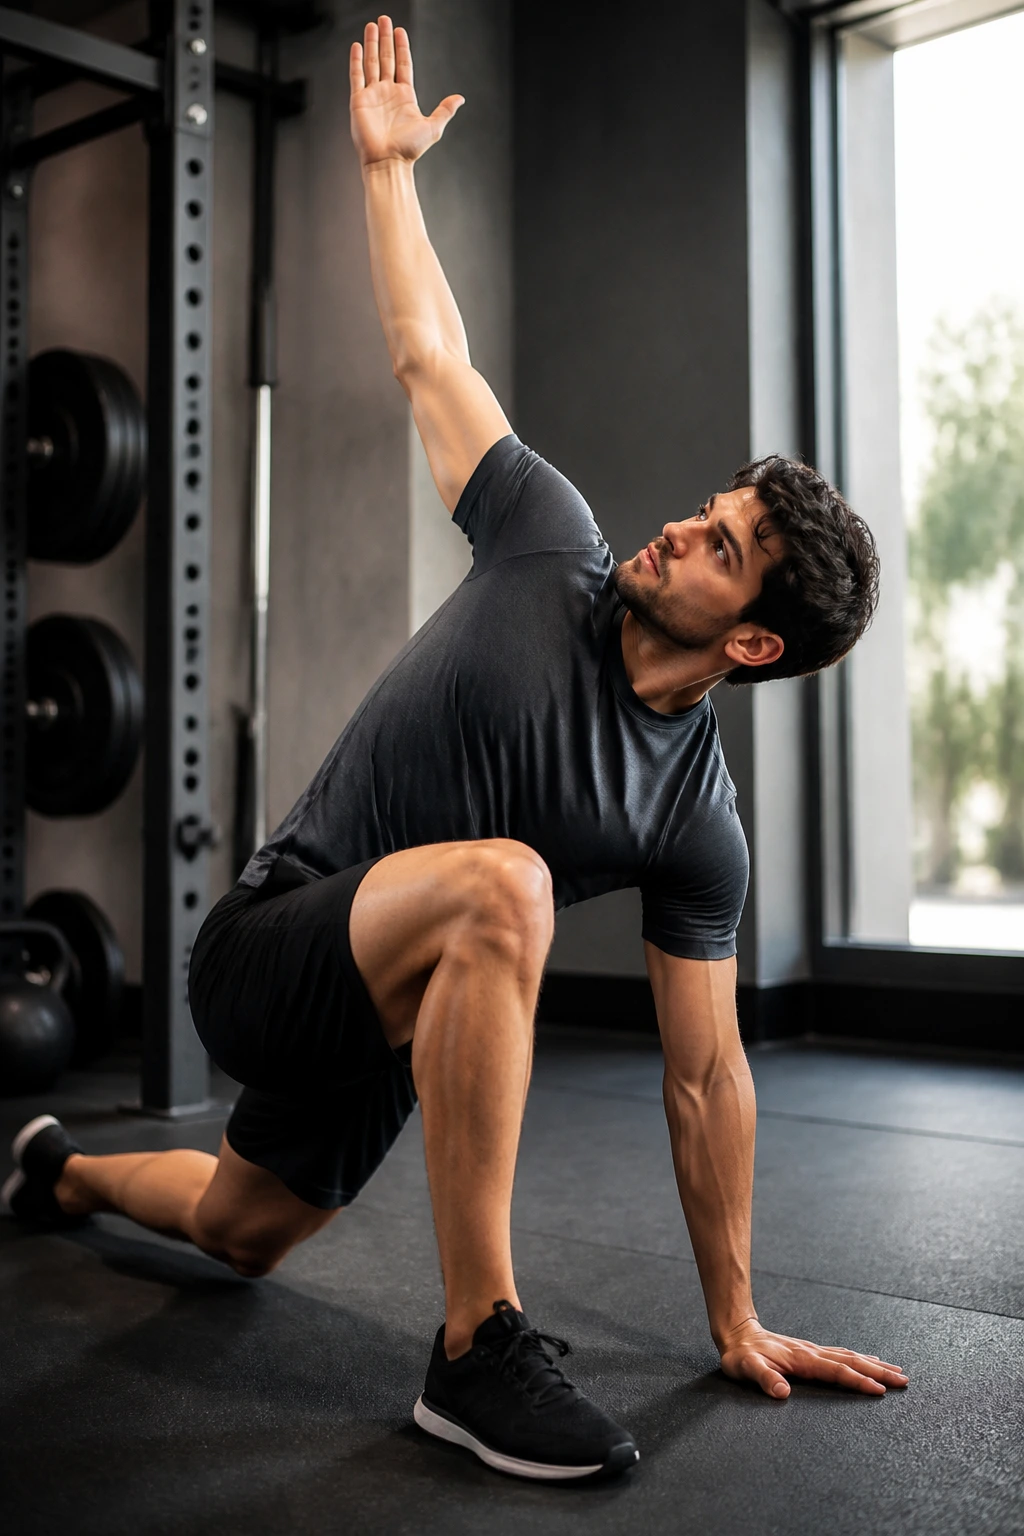
There is a reason this is called the “World’s Greatest.” It hits the hamstrings, hip flexors, thoracic spine, and groin all at once. Start in a deep lunge position with your right leg forward and your left knee off the ground.
Executing the Sequence
Place your left hand on the floor inside your right foot. Now, take your right arm and reach it toward the ceiling, twisting your torso. You should feel a deep stretch in your upper back and your front hip. Bring your right hand back down and place it on the outside of your right foot. Now, rock your hips back, straightening your front leg to stretch the hamstring. Return to the lunge and repeat. Do 5 reps on the right, then switch to the left. It feels awkward at first, but once you master the flow, it is the best bang-for-your-buck movement on this list.
14. Banded Face Pulls
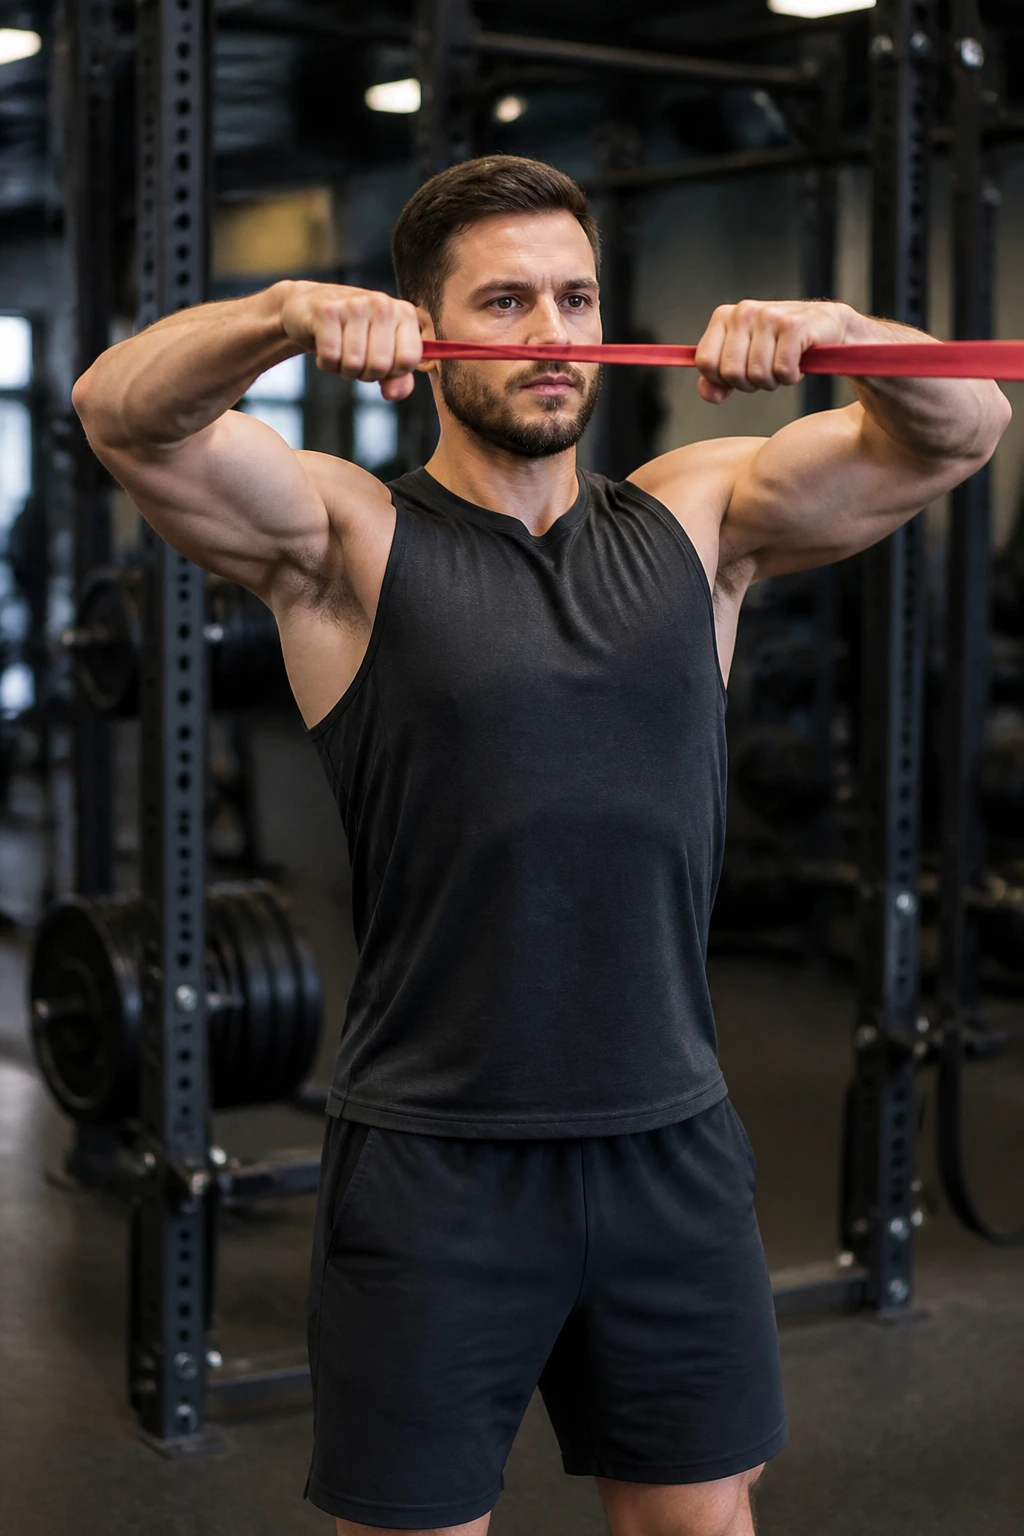
If you have access to a cable machine or a heavy band, face pulls are mandatory for anyone who benches or overhead presses. Attach the band to a post at head height. Grab it with an overhand grip, arms extended.
Targeted Shoulder Health
Pull the band toward your forehead, pulling your elbows high and wide. As you pull, externally rotate your hands so your thumbs point toward the ceiling. Your shoulder blades should be pinching together as if you are trying to tuck them into your back pockets. This targets the rear delts and the external rotators of the rotator cuff—the tiny muscles that keep your shoulders from falling apart under heavy weight. Do 3 sets of 15. The burn in your rear delts will be intense, but your shoulders will thank you later.
15. Scapular Push-ups
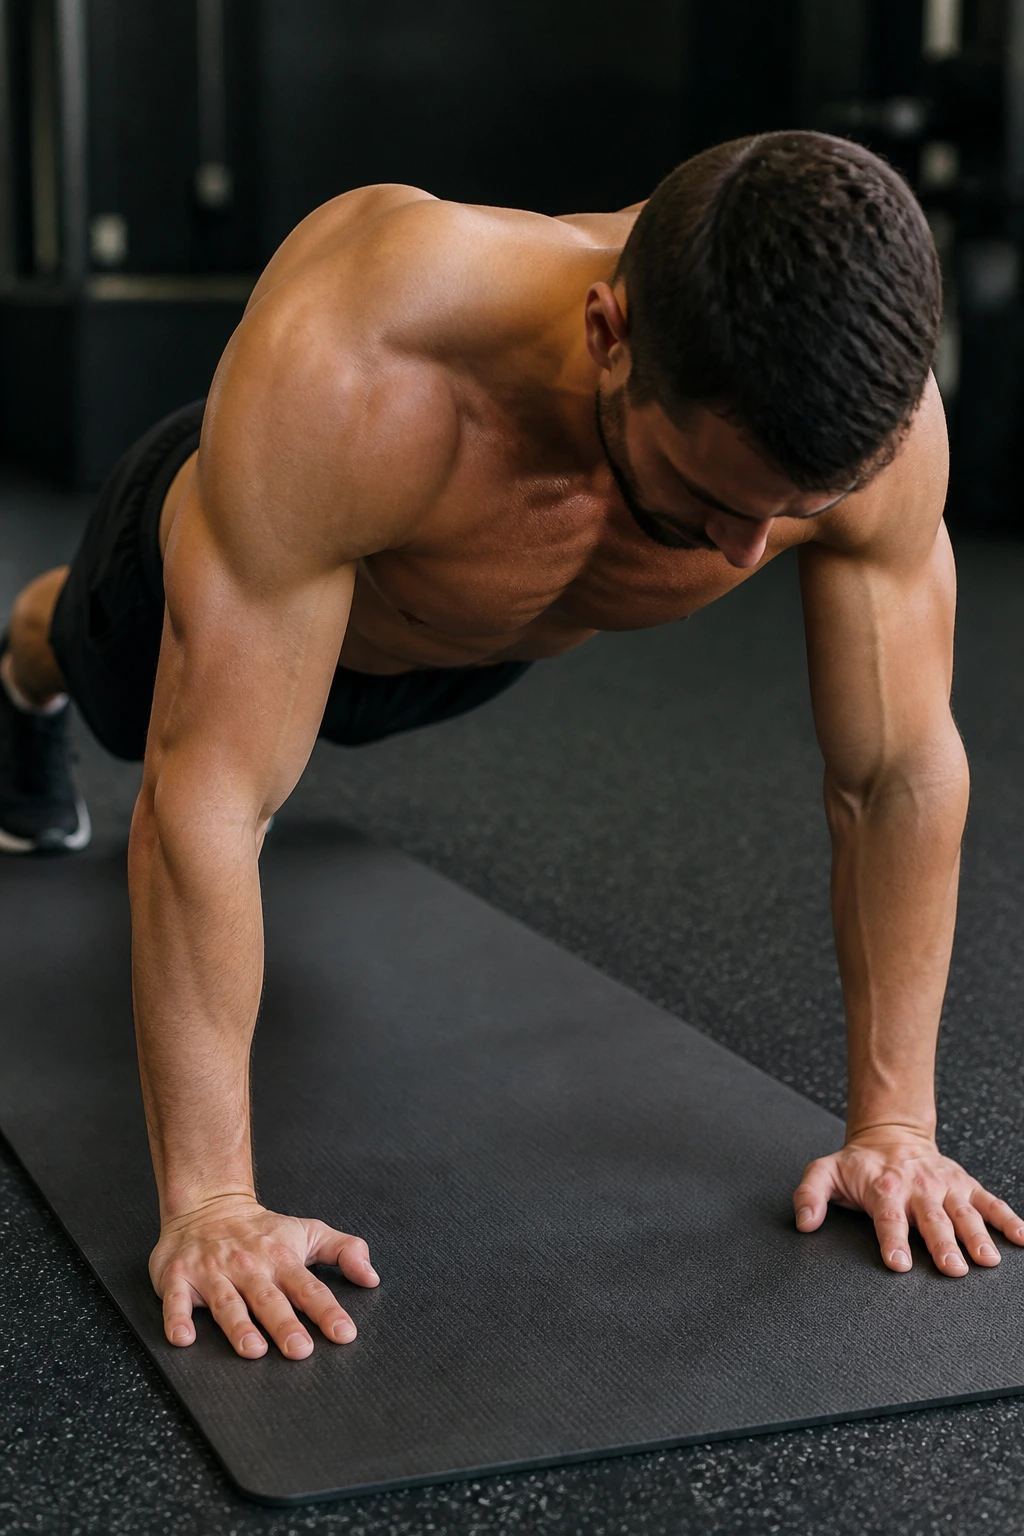
Most people don’t know how to move their shoulder blades independently of their arms. This movement teaches you exactly how to do that, which is critical for bench press stability. Get into a push-up position, but keep your arms perfectly straight.
Learning the Scapular Glide
Without bending your elbows, let your chest sink toward the floor by bringing your shoulder blades together. This is retraction. Then, push the floor away as hard as you can, rounding your upper back by spreading your shoulder blades apart. This is protraction. You are only moving your shoulder blades, not your elbows. This small movement is the secret to a stable pressing base. If you can master this, you will have a much easier time keeping your back tight under a heavy barbell. 15 reps of these is plenty.
16. Cossack Squats
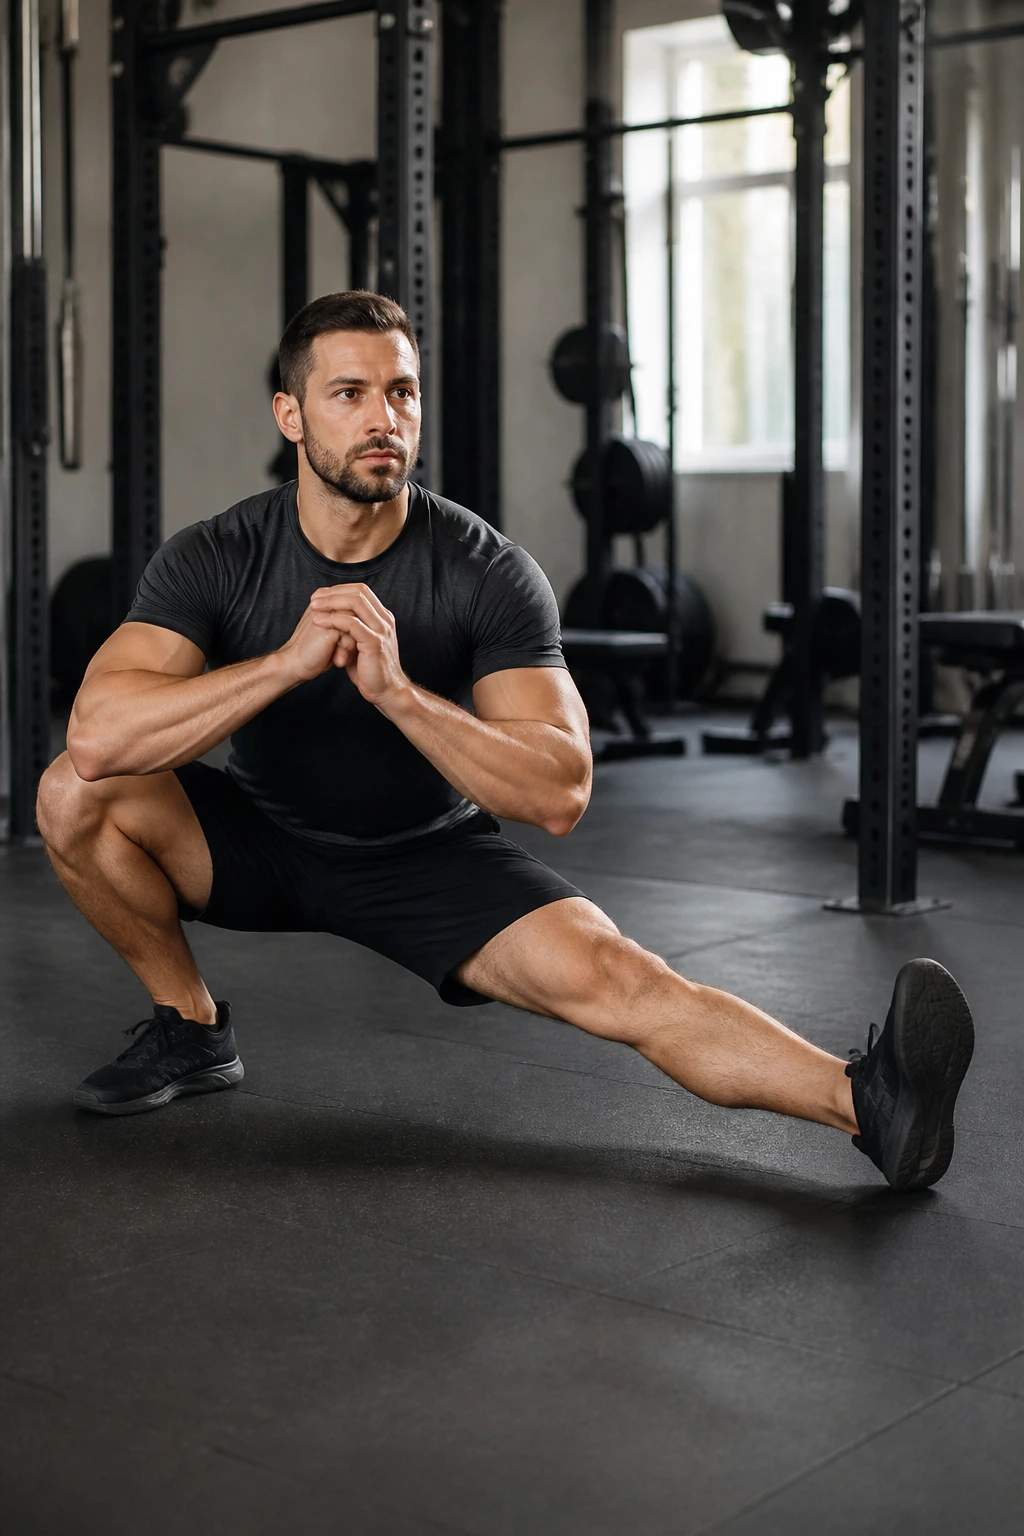
This is a more advanced version of the side lunge. Instead of just shifting your weight, you are squatting down as deep as you possibly can on one leg. Start with a very wide stance.
The Depth Challenge
Shift your weight to one side and sink as deep as you can. Keep your heel on the floor of the working leg. Turn the toe of the non-working leg toward the ceiling so your foot is flat. Your chest should remain tall—don’t collapse forward. This is brutal for hip mobility. If you cannot get deep, use a light weight held in front of you as a counterbalance, or hold onto a rack. This drill is fantastic for exposing weaknesses in your ankle mobility and hip stability. Start with 5 reps per side. It is humbling, but effective.
17. Reverse Lunges with Twist
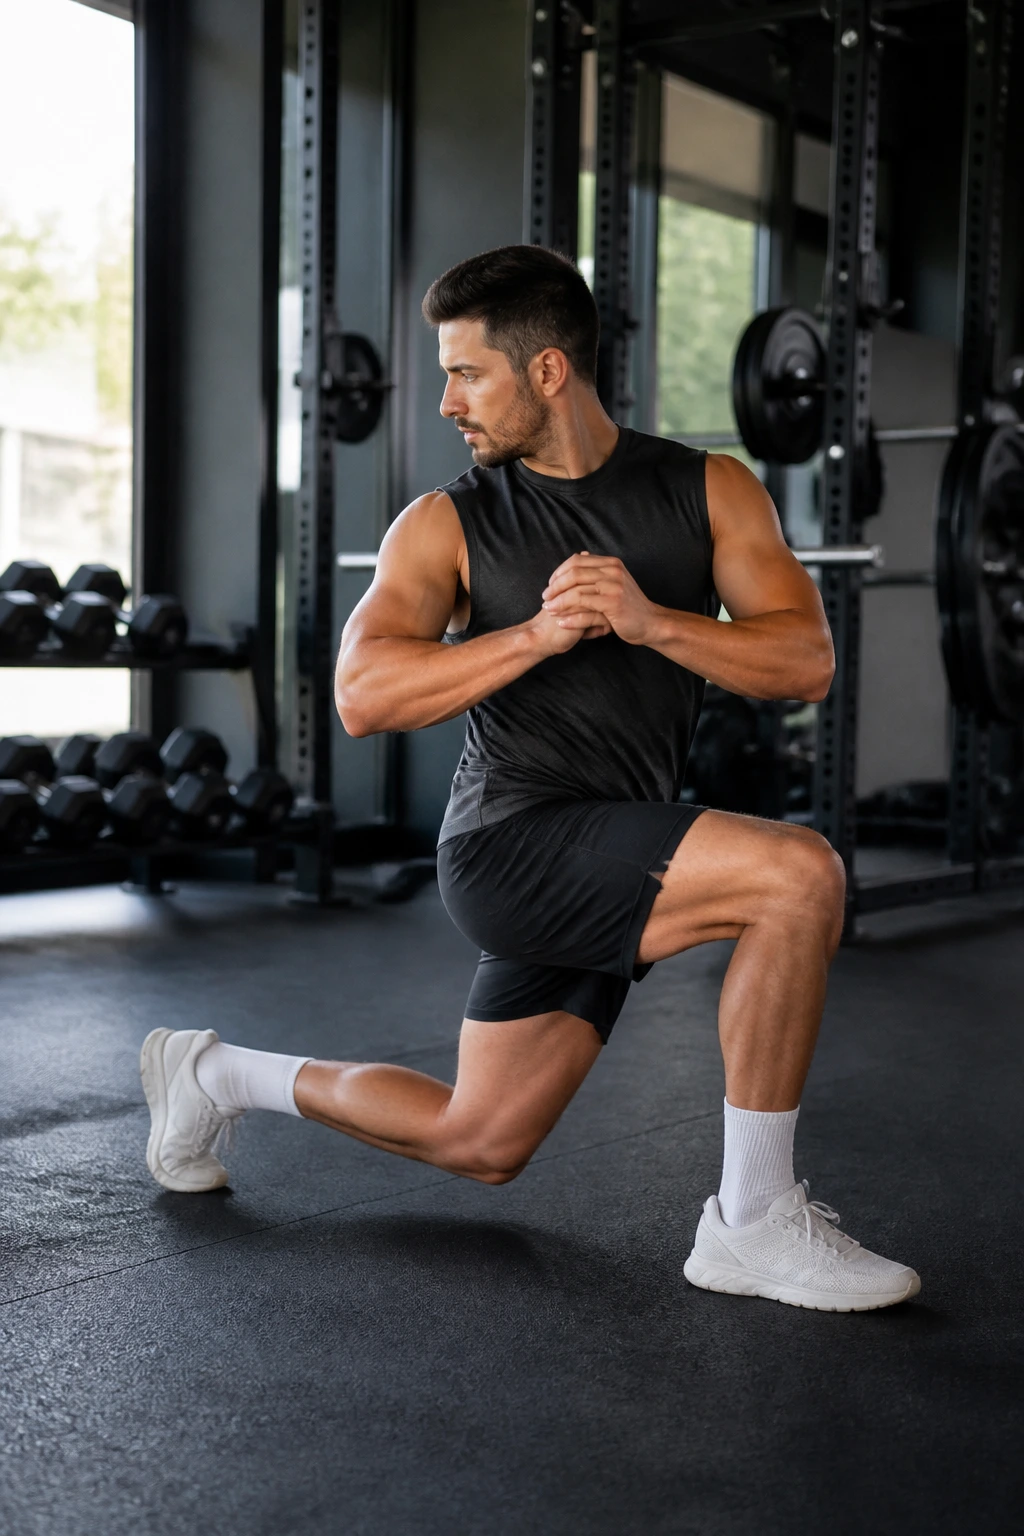
Forward lunges can be tough on the knees, but reverse lunges are much friendlier. Adding a torso twist turns this into a dynamic core and hip opener. Step back into a deep lunge.
Adding the Rotation
As you step back, twist your torso toward the front knee. If your right leg is forward, twist to the right. Keep your front foot flat and your core braced. This adds a component of rotational stability, which is how you actually move in the real world. Many lifters are great at moving in straight lines but terrible at handling rotational forces. This drill bridges that gap. Do 10 reps per side. The twist also helps mobilize the mid-back while you are in a vulnerable, stretched position.
18. Dead Bugs
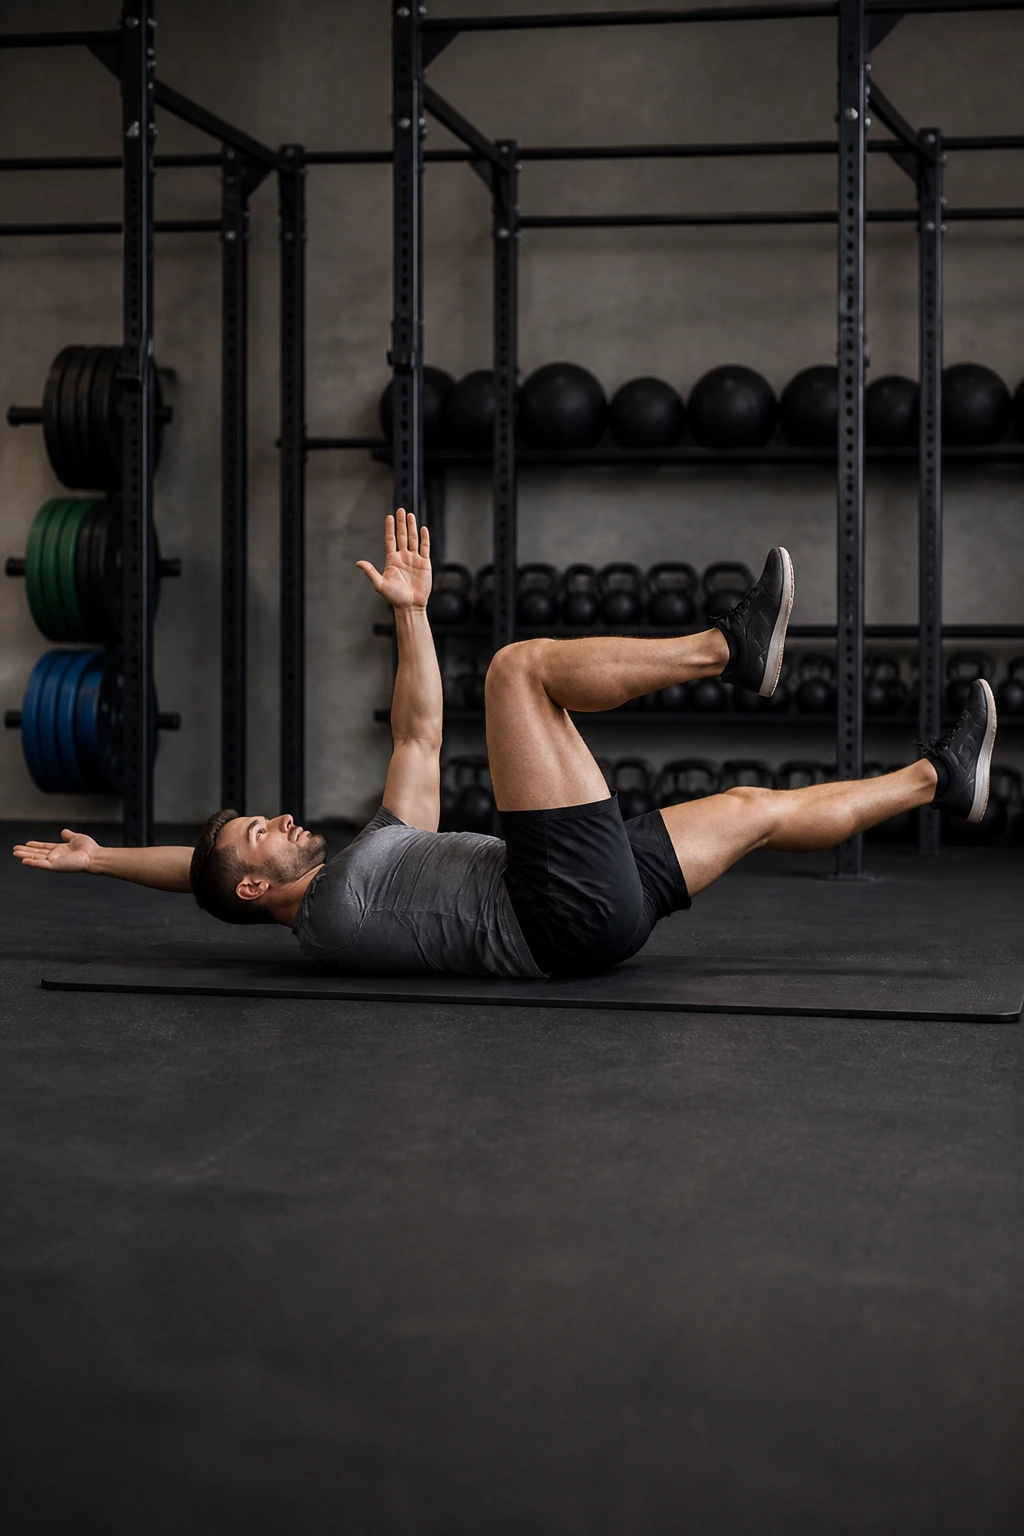
If you want to understand what a “braced core” feels like, the dead bug is your teacher. Lie on your back, arms extended toward the ceiling, legs in the air, knees bent at 90 degrees. This is the starting position.
The Bracing Masterclass
The goal is to keep your lower back pressed firmly against the floor. If it arches, you have failed. Slowly lower your right arm behind your head and extend your left leg forward, keeping them just an inch off the ground. Your opposite arm and leg stay perfectly still. Return to center and switch. It sounds simple, but keeping your lumbar spine flat while your limbs move is genuinely difficult. Do 10 reps per side. By the end, your abs should be shaking. This is the kind of core engagement you want before you unrack a heavy barbell.
19. Shoulder Pass-Throughs

Using a broomstick, a light PVC pipe, or an empty barbell, you can mobilize the entire shoulder girdle. Hold the bar with a very wide grip—wider than you think you need. Keep your arms straight.
Gradual Progression
Slowly bring the bar over your head and behind your back. If your elbows bend, your grip is too narrow; widen it. If your shoulders feel like they are going to pop, widen it even more. Once you can pass the bar behind your back comfortably, move your hands slightly closer until you find that sweet spot of resistance. Do not force it. The goal is to gradually stretch the chest and shoulders. 10 to 15 slow repetitions will make your upper body feel significantly more open. This is a staple for overhead lifters who need to get into a good pressing position.
20. Jump Rope
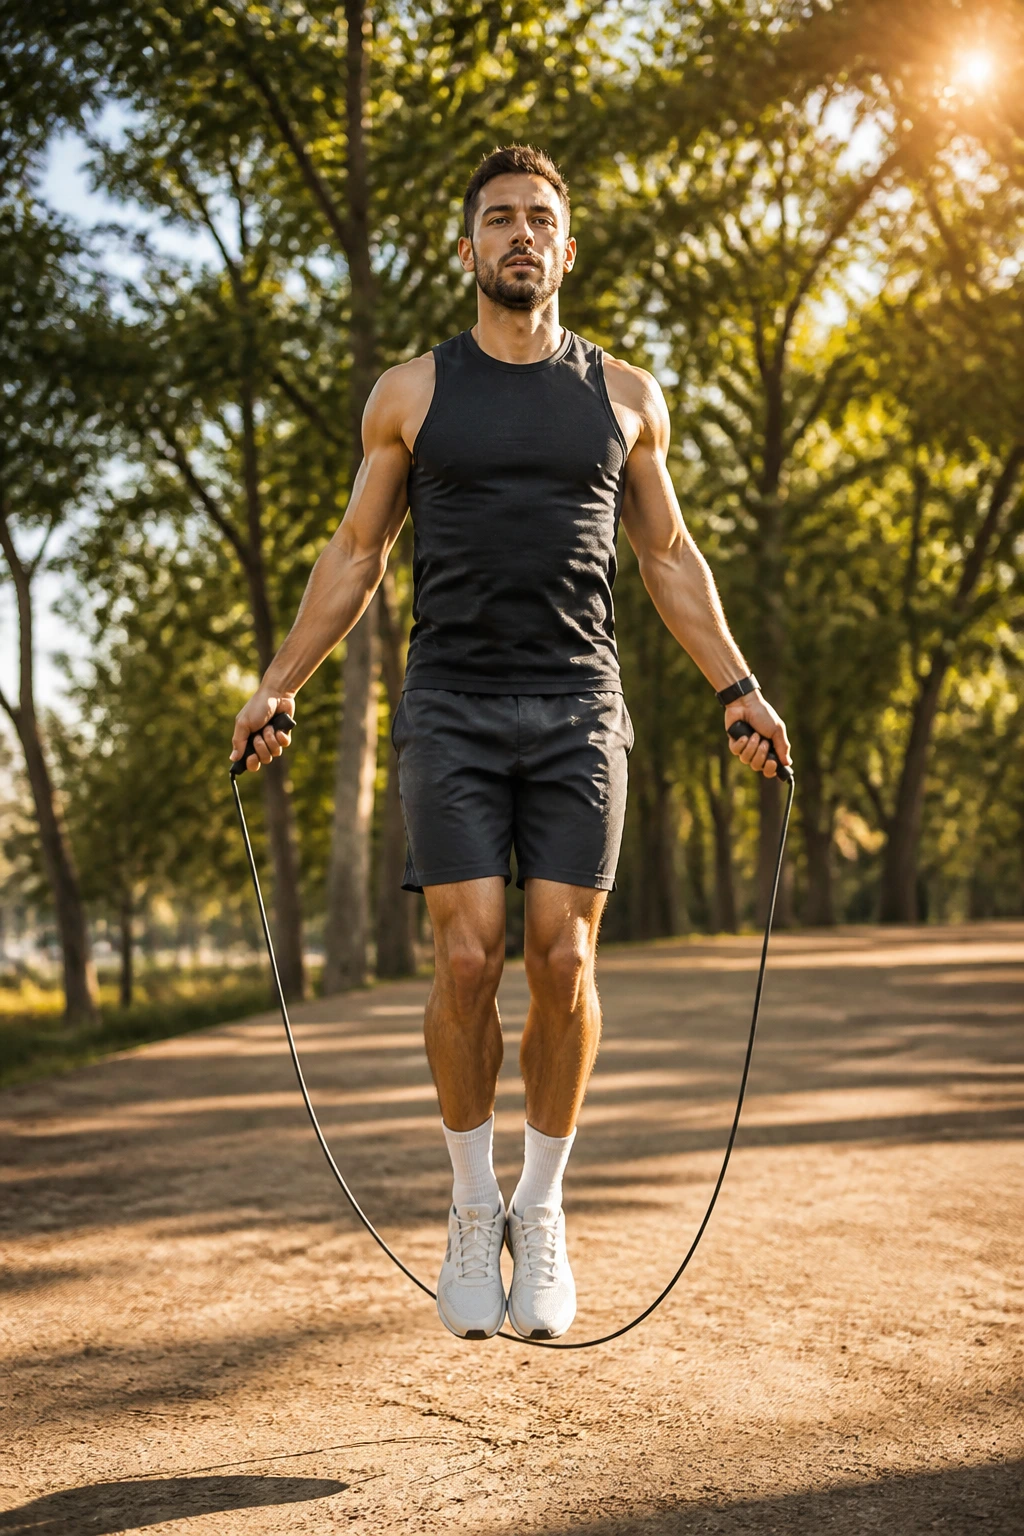
Sometimes, the best warm-up is the one that gets your heart rate up and clears your head. Three minutes of jump rope is better than ten minutes of walking on a treadmill. It requires rhythm, coordination, and a bit of agility.
Why It Beats the Treadmill
When you jump, you are constantly landing on the balls of your feet, which primes your calves and ankles for the force production needed in lifting. It also forces you to stay upright and keep your core tight, which is exactly the posture you want when you are under a bar. Don’t worry about double-unders or fancy tricks; just keep a steady, rhythmic pace. If you mess up, just reset. By the time the three minutes are up, you should be slightly out of breath and mentally locked in. It is a simple, no-nonsense way to ensure you are physically and mentally ready to work.
Final Thoughts
The key to a successful warm-up is to stop viewing it as a chore and start viewing it as part of your performance. If you walk into the gym and do these movements, you are signaling to your body that it is time to work. You are lubricating the joints, waking up the nervous system, and correcting those daily postural imbalances.
Pick the ones that make you feel the “best” kind of discomfort—the ones that feel like you are actually removing a restriction. If your shoulders are your weak point, stick with band pull-aparts and thoracic rotations. If your squat feels stiff, prioritize the Cossack squats and glute bridges. You do not need to overthink this. Just move with intention, keep your focus sharp, and treat your body with the respect it deserves before you start moving heavy iron. Your longevity in the weight room depends entirely on how well you prepare the vessel that moves the weight.
