



The first mistake most people make with belly fat is doing endless crunches and expecting their waist to shrink from that alone. A solid list of at home belly fat workouts for beginners has to start with the truth: you cannot spot-reduce fat from your stomach, but you can use smart home workouts to burn more calories, build muscle, tighten your midsection, and make fat loss more likely over time.
That matters because beginners usually do one of two things. They either jump into punishing workouts that leave their knees aching and their motivation flat, or they go too gentle and never get their heart rate high enough to make the session count. The sweet spot sits in the middle: short, repeatable sessions built from moves you can do on a rug, next to a couch, with a chair, or on a single stair.
Form matters more than people think. If your lower back starts barking during ab work, or your neck takes over during crunches, the move is not helping much. A cleaner setup fixes that more often than some flashy “fat-burning” trick. Keep your ribs down, breathe out on effort, and move with control before you chase speed.
Use these workouts as building blocks. Pick 4 to 6 of them, work for 30 to 40 seconds, rest for 20 seconds, and repeat 2 to 4 rounds. On days when your energy is low, do two rounds and call it honest work. On better days, keep going.
1. Marching in Place to Start Belly Fat Workouts at Home
If you are new to exercise, start here.
Marching in place looks almost too basic, which is exactly why people underrate it. Done with purpose, it warms your hips, wakes up your core, raises your heart rate, and gets your breathing under control without pounding your joints. For beginners carrying extra belly weight, that low-impact start is not a compromise. It is smart training.
What makes this one useful
Drive one knee up at a time until your thigh reaches about hip height, or as close as you can manage without leaning back. Swing your arms hard enough that your shoulders join the work. Keep your ribs stacked over your hips and land softly on the balls of your feet, not with a heel-heavy thud.
Quick setup notes
- Work for 45 to 60 seconds at a brisk pace.
- Keep your hands moving from chest level to hip level, not tiny swings at your sides.
- Exhale every 2 to 4 steps to keep your midsection engaged.
- If balance feels shaky, slow the pace before you cut the knee lift.
A lot of beginners hold tension in the neck during standing cardio. Drop your shoulders. Loosen your jaw. You should feel heat building in the legs and lungs, not strain climbing into your traps.
Best use: put this at the front of any beginner circuit, or use it between floor moves to keep your heart rate from dropping.
2. Step Jacks Instead of Full Jumping Jacks
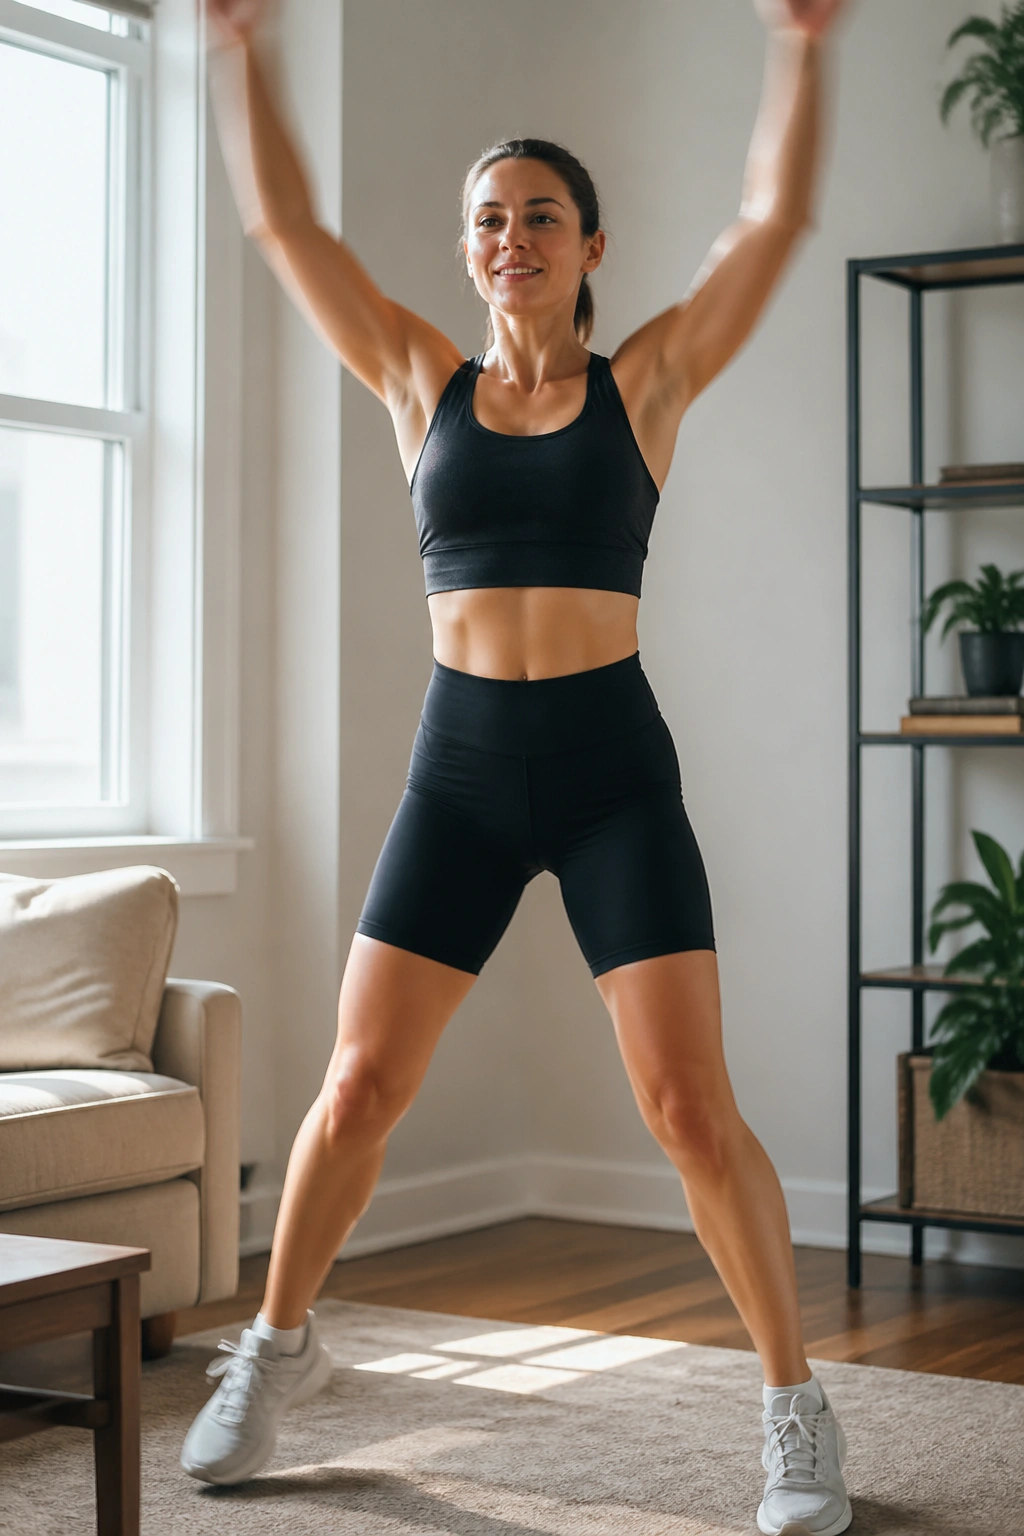
Step jacks do more work than they get credit for.
A full jumping jack asks for timing, ankle stiffness, and enough confidence to leave the floor. Step jacks keep the same arm pattern and side-to-side leg action, yet one foot stays grounded at all times. That makes them easier on sore knees, heavy legs, and apartment floors—three things beginners deal with more than fitness videos admit.
Start standing tall. Step your right foot out while both arms sweep overhead, then bring the foot back in as the arms come down. Switch sides. Keep the tempo quick enough that your breathing picks up by the 20-second mark, though not so quick that your torso starts rocking side to side.
Use 30 to 50 seconds per round. If you want more from it, add a shallow squat each time your feet come together. If you want less impact, keep the step shorter and lift your arms only to shoulder height.
One small fix changes the move. Land with a soft knee. Locked-out legs turn step jacks into a stiff shuffle, and you lose the smooth rhythm that makes them useful as beginner cardio.
3. Standing Crossbody Knee Drives
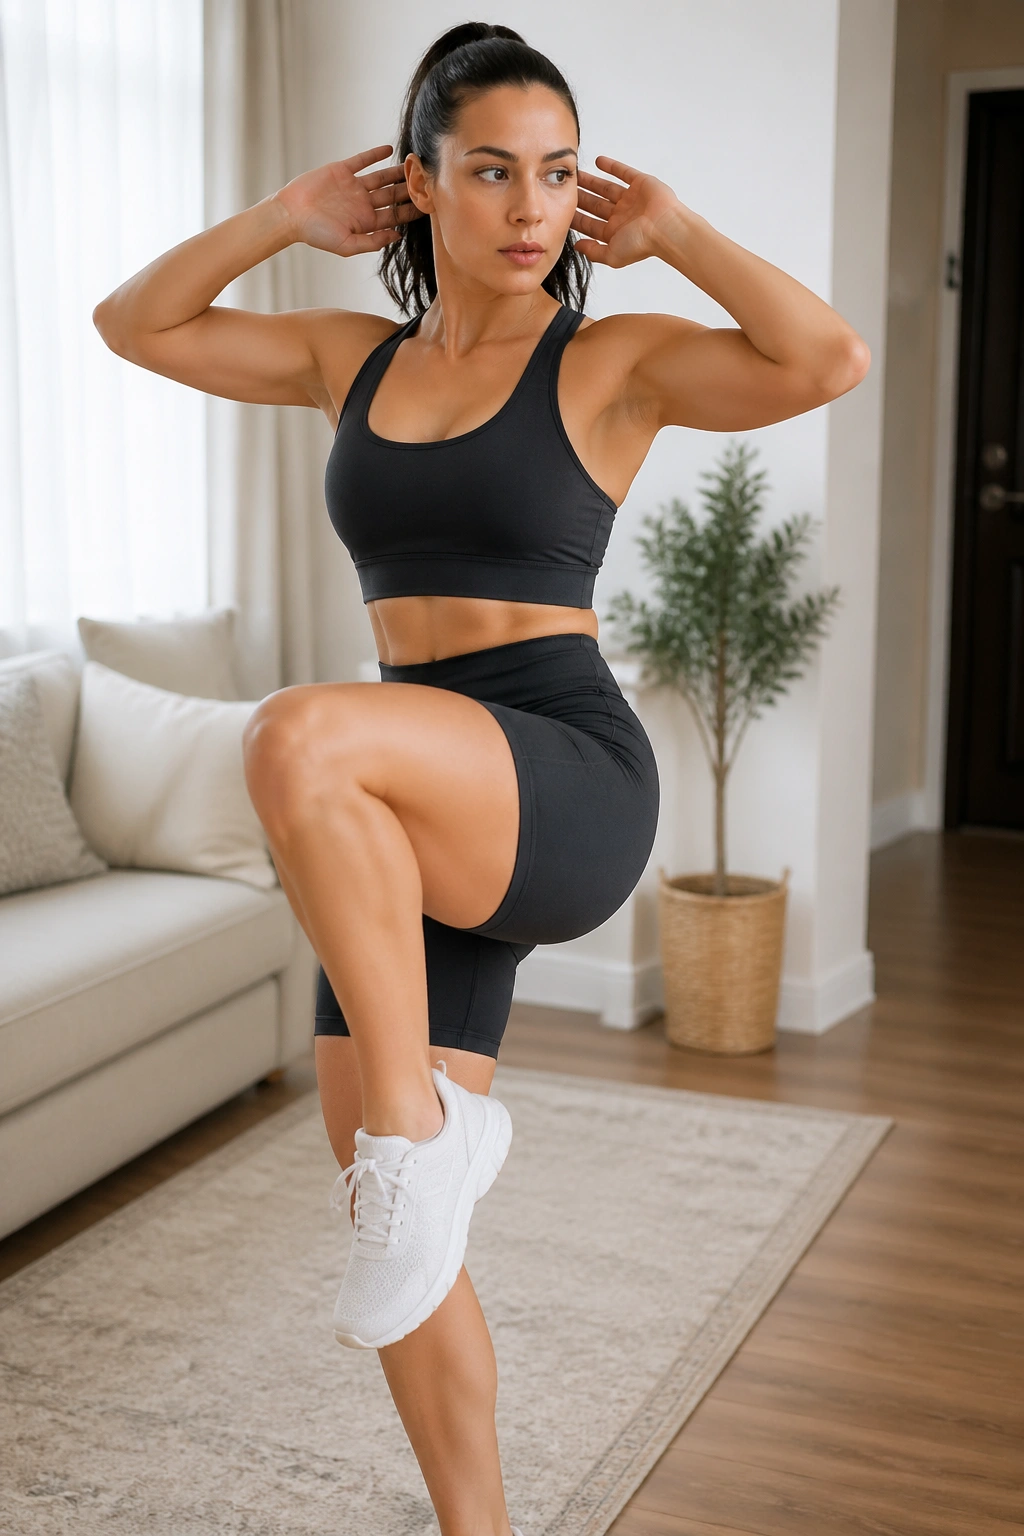
Why use a standing ab move when floor work seems more direct?
Because beginners often lose core tension on the floor, then compensate with the neck or hip flexors. Crossbody knee drives solve part of that problem by teaching the midsection to brace while you are upright, balancing, and moving. That is how your core works in normal life anyway.
Stand with your feet hip-width apart and your hands lightly behind your head. Lift your right knee toward your left elbow as you rotate your ribs—not by yanking your elbow down, but by tightening the side of your waist. Return to center and switch sides. The movement should feel crisp, not floppy.
You will also notice a cardio benefit once you speed it up. Belly fat workouts work better when they mix core control with total-body effort, and this move does both without any equipment.
Make each rep count
Aim for 12 to 16 reps per side or 40 seconds nonstop. Pause for half a second when the knee comes up. That tiny hold stops momentum from stealing the work.
If balance is a mess on day one, touch one hand to a wall. No shame in that. Clean reps beat wobbly ones every time.
4. Squat to Front Reach
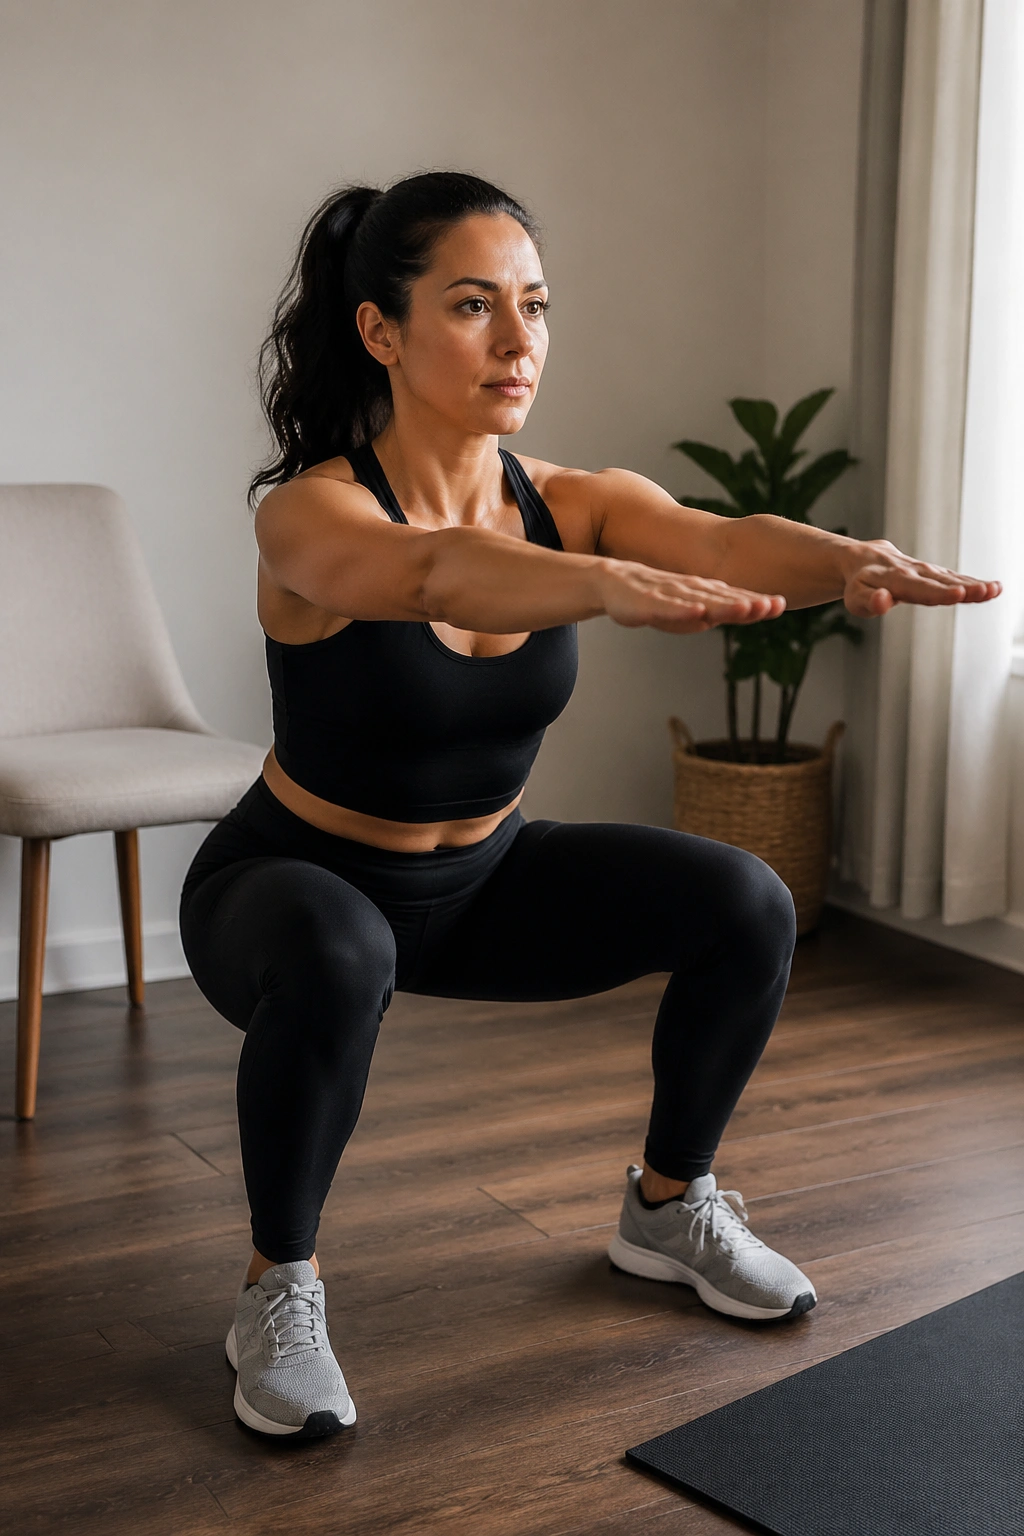
One common beginner story goes like this: you squat once, tip too far forward, feel it in your low back, and decide squats are not for you. Usually the fix is not to skip the move. It is to clean up the pattern.
The squat to front reach is a plain bodyweight squat with your arms reaching forward as you sit back. That reach acts like a counterbalance. It helps you keep your chest lifted, your weight centered over the middle of the foot, and your core switched on.
Here is the basic pattern:
- Stand with feet about shoulder-width apart.
- Reach both arms forward at shoulder height.
- Sit your hips back as if aiming for a chair behind you.
- Stop when your thighs are parallel to the floor, or higher if your knees or hips ask for it.
- Stand up by pushing the floor away and squeeze your glutes at the top.
Try 10 to 15 reps or 30 seconds of smooth squats. Breathe in on the way down. Breathe out as you stand. If your heels lift, widen your stance a little and think “hips back” sooner.
The payoff is bigger than the move looks. Squats train your largest lower-body muscles, and those muscles cost energy to work. That matters when fat loss is the goal.
5. Stair Climb Intervals for a Belly Fat Workout Boost
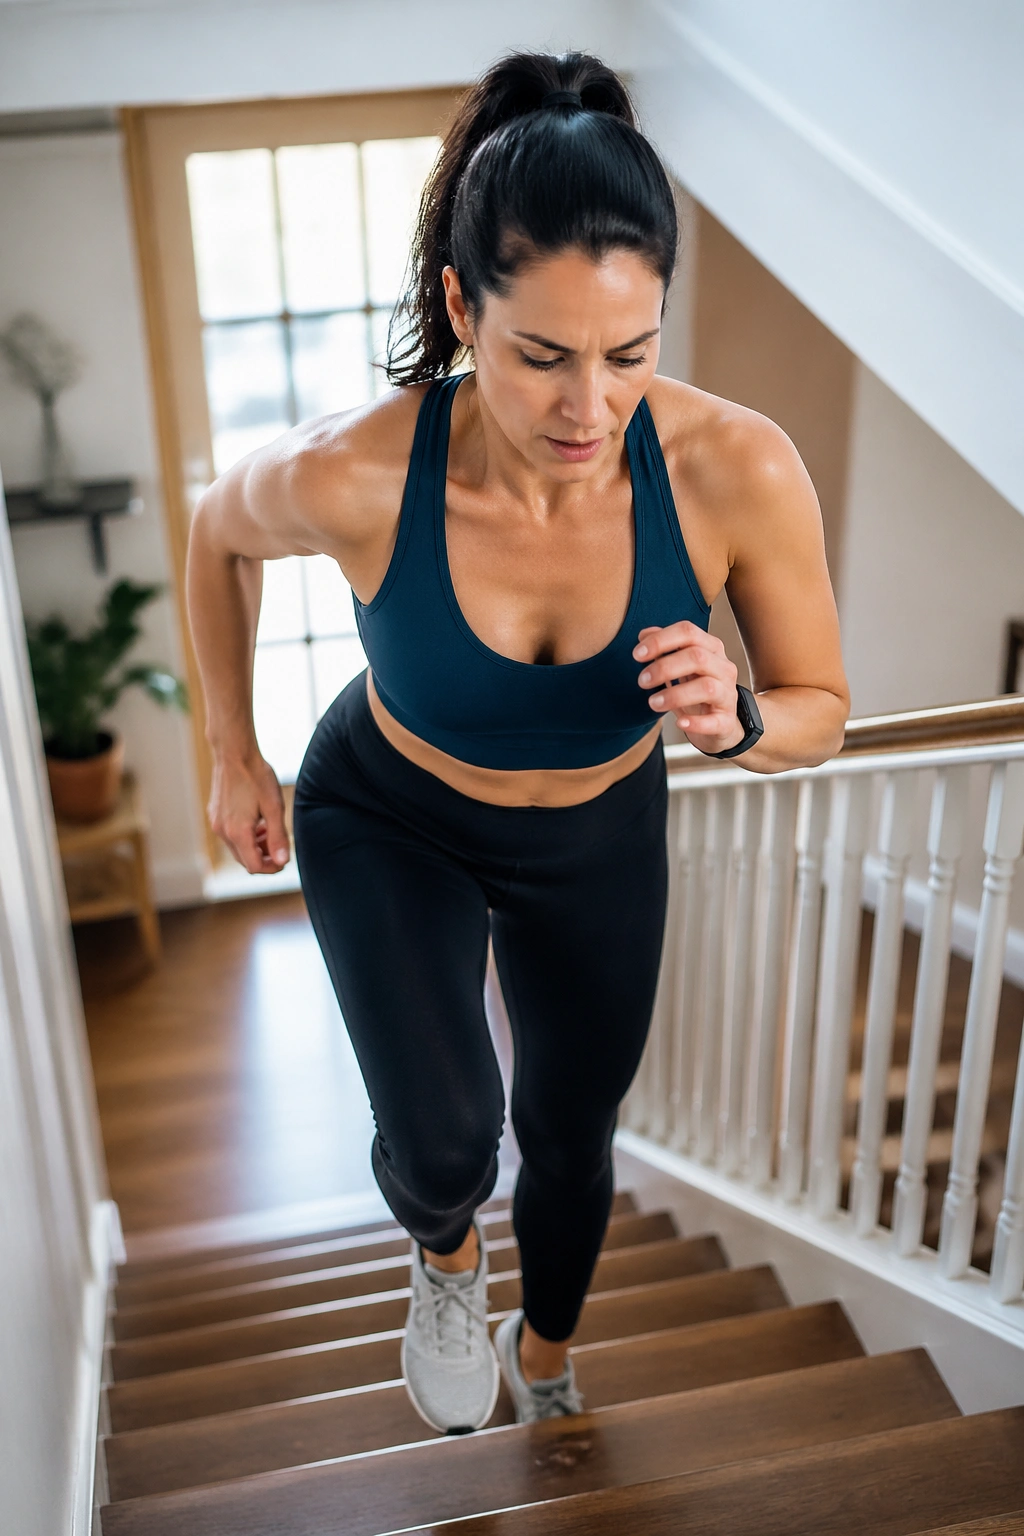
No treadmill? One flight of stairs is enough.
Stair intervals are one of the best calorie-burning tools hiding in plain sight. You are lifting your body weight against gravity with every step, which means your legs, lungs, and heart all get pressed into service fast. Belly fat does not come off because stairs target your stomach; it comes off because harder full-body effort increases total energy burn.
Walk up at a strong pace for 20 to 40 seconds. Come down slowly and carefully for recovery. Rest another 15 to 20 seconds if needed, then repeat for 6 to 10 rounds. Hold the rail if balance or confidence is not there yet. You are training, not auditioning for anything.
Short steps help. So does keeping your chest slightly forward, almost like you are climbing into the hill rather than leaning away from it. If you start skipping steps, be honest about your control. Most beginners do better stepping on each stair, especially once breathing gets heavy.
Sweat arrives fast here. So does leg fatigue.
That is fine, though stairs can sneak up on your calves. If those tighten, spend 30 seconds after each set with your heel dropped off the bottom stair for a stretch. Small detail, big difference.
6. Shadow Boxing Rounds
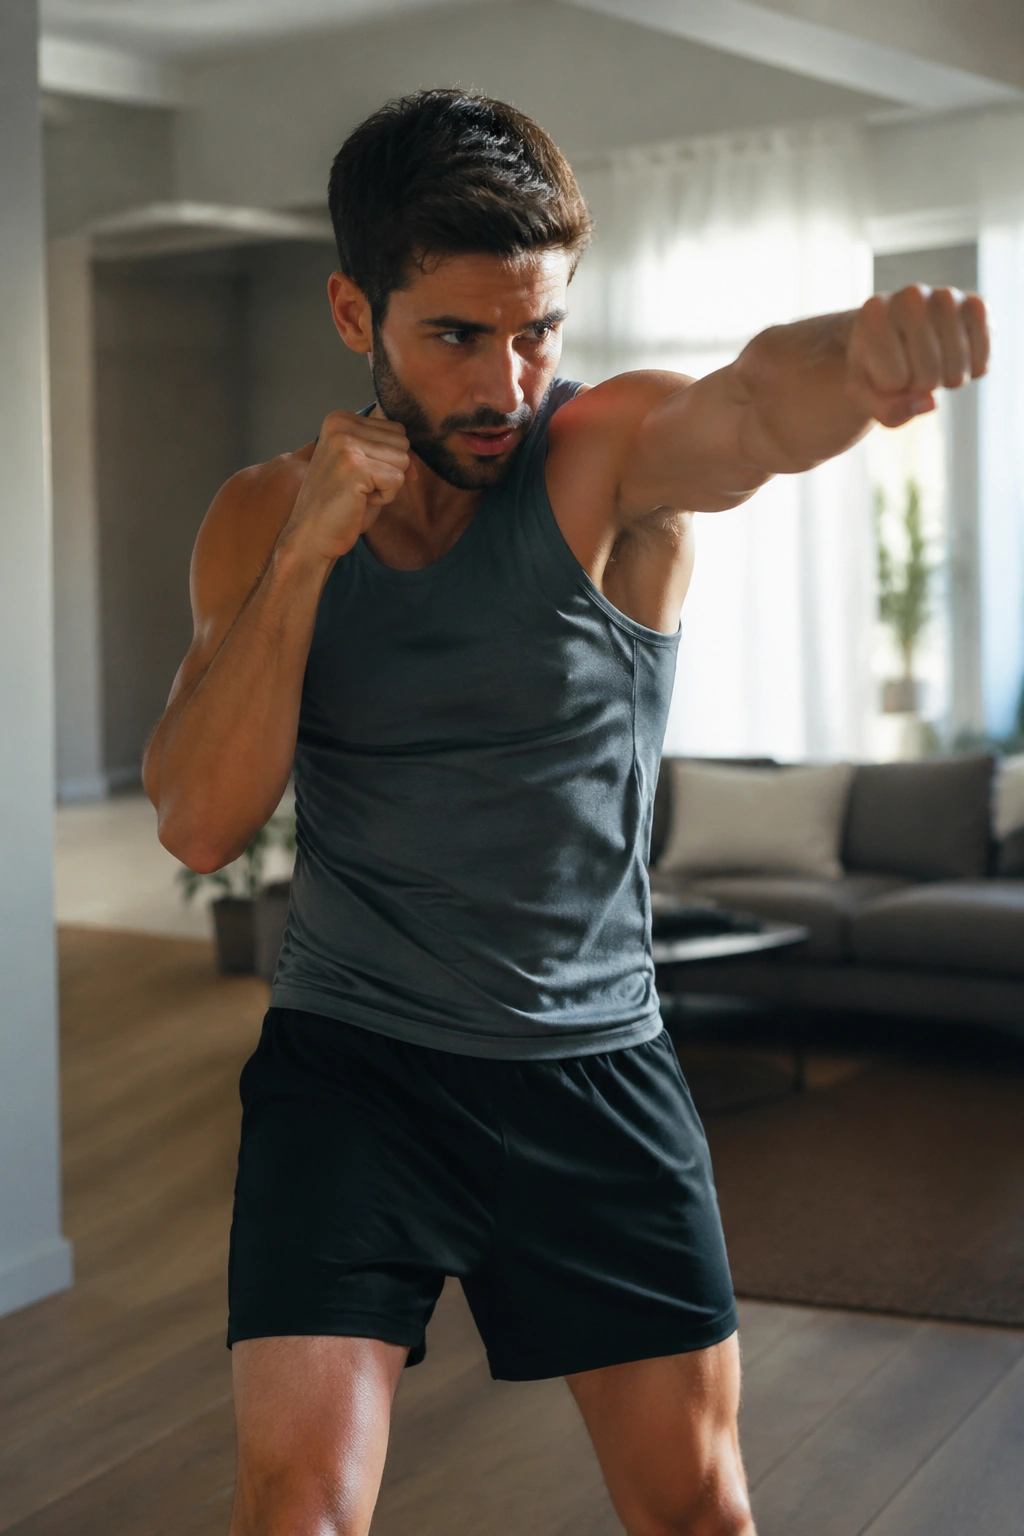
Unlike steady walking, shadow boxing spikes your heart rate in short waves and keeps your upper body busy the whole time. That matters if you want a home workout that feels athletic without asking you to jump, crawl, or get on the floor.
Stand with one foot slightly forward, knees soft, hands up near cheek level. Throw a jab with the front hand, a cross with the back hand, then bring both hands straight back to guard. Add hooks once the first two punches feel clean. Twist through the ribs and hips, but do not let the low back do all the rotation.
Who gets the most from this? Anyone who gets bored doing standard beginner cardio. Punching gives your brain a job. You move with intent, you breathe harder, and the rounds pass faster.
A good beginner round looks like 20 seconds of jab-cross combinations, 20 seconds of free punches, then 20 seconds of active footwork. Rest for 30 seconds, then repeat 3 to 5 times. Make the exhale sharp on each punch—short, quick breaths keep your abs engaged better than mouth-open gasping.
One more thing: keep the fists loose until impact range, even though there is no bag. Clenched hands from the start make your shoulders burn too early.
7. Speed Skater Step-Taps
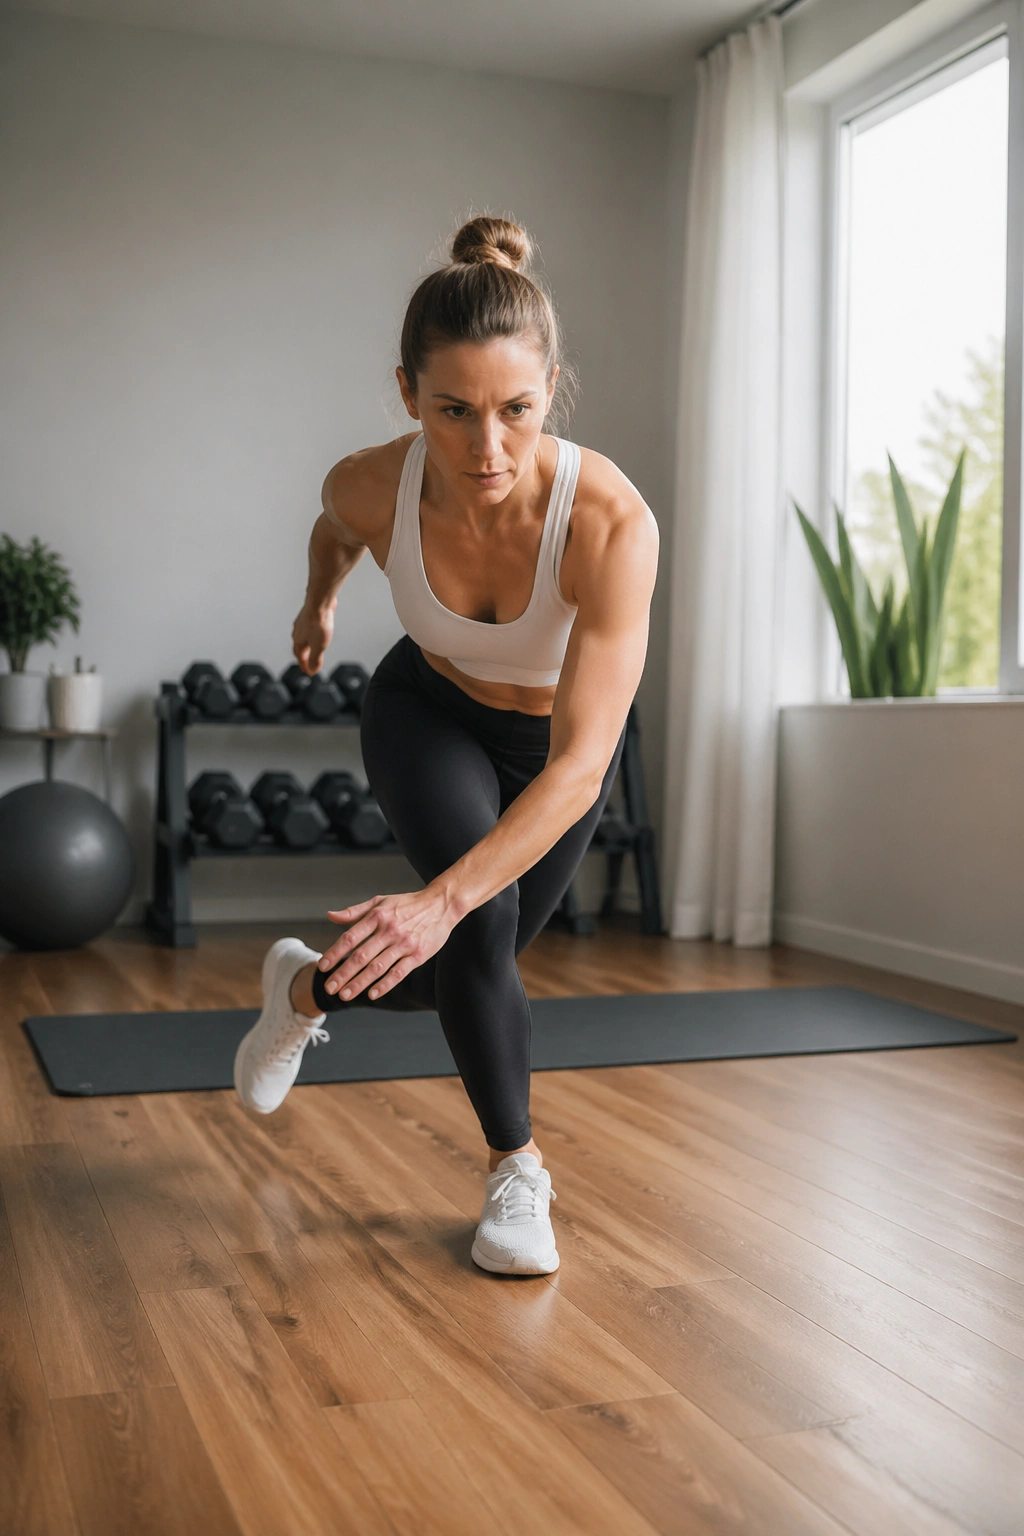
If standard side-to-side cardio feels awkward, speed skater step-taps are a cleaner way in.
Rather than leaping from one leg to the other, you step wide to one side, tap the trailing foot lightly behind you, then switch. Add an arm reach across your body, almost like you are reaching toward the outside of the front knee. That cross-body action wakes up the hips, glutes, and obliques in one move.
Why the side-to-side pattern helps
Beginners spend too much time moving only forward and backward—walking, sitting, standing, maybe a few squats. Lateral movement trains your hips in a different plane, which helps with balance and knee control. It also makes your home workouts feel less repetitive.
Fast cues that fix the move
- Step wider than feels natural at first.
- Keep the chest angled slightly forward, not upright and stiff.
- Let the back foot tap the floor lightly; do not dump weight into it.
- Work for 30 to 45 seconds.
Your glutes should feel the load. If your knees do, shorten the step and sit your hips back more. That usually cleans it up within a round or two.
Use it when: you want cardio that is quiet, low-impact, and a little less monotonous than marching.
8. Glute Bridge March
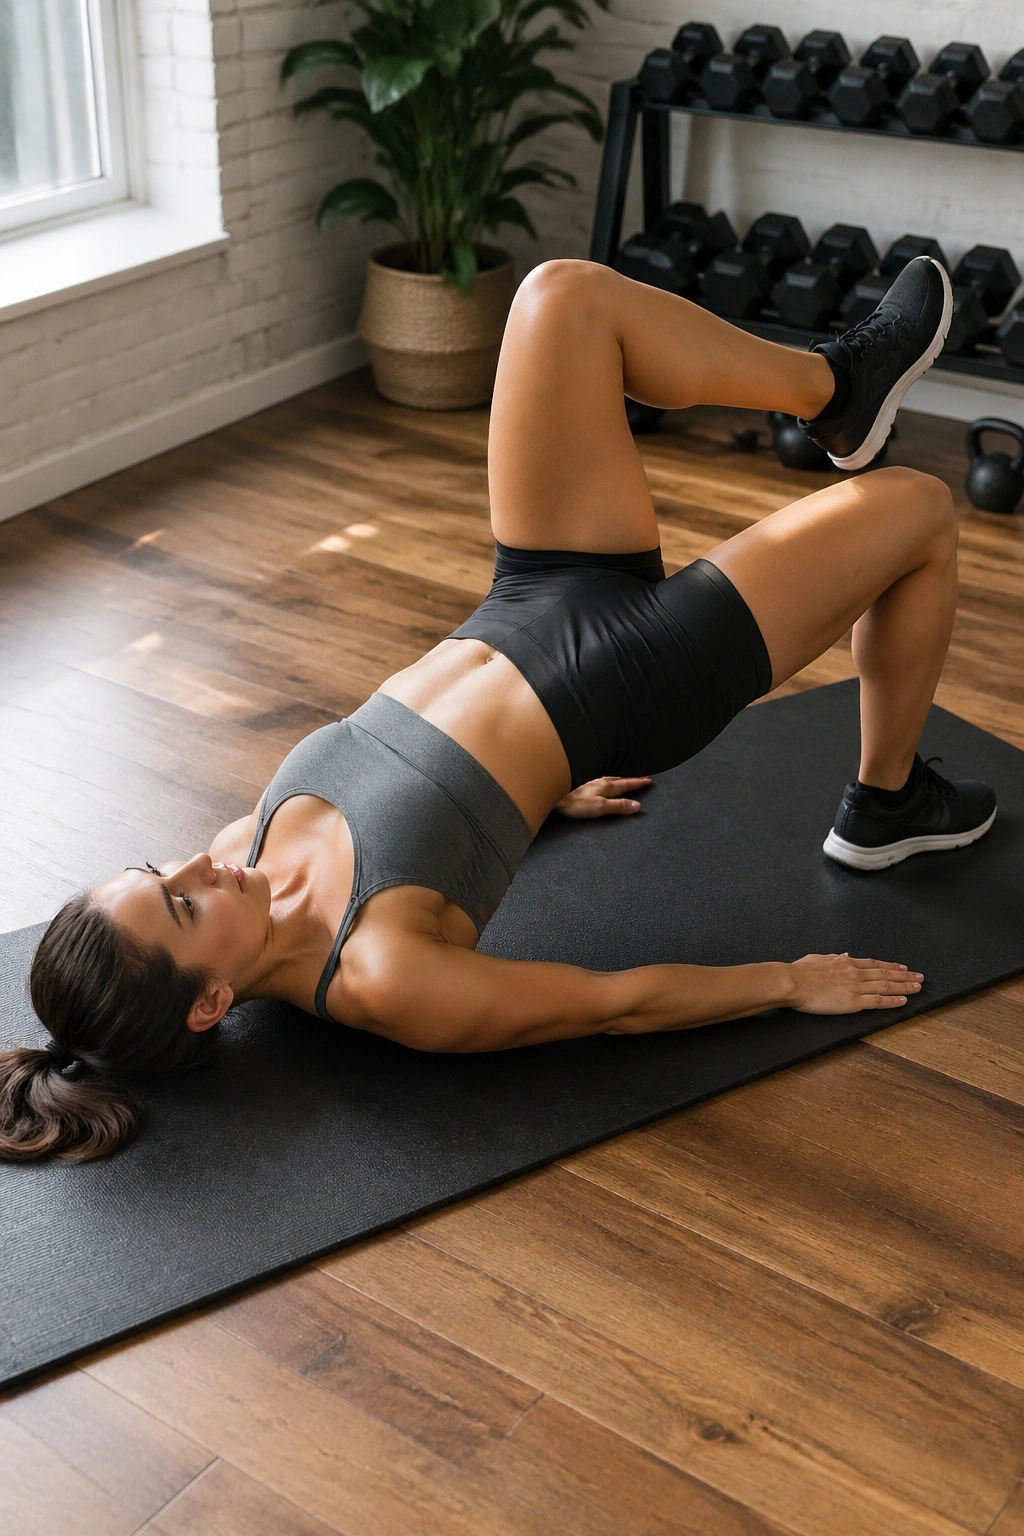
This move looks easy until you try to keep your hips level.
Lie on your back with knees bent, feet flat, and heels about 8 to 12 inches from your glutes. Press through your heels and lift your hips until your body makes a straight line from shoulders to knees. From there, pick up one foot a few inches, set it down, then lift the other. That alternating march turns a plain bridge into a serious core drill.
The reason it belongs in a belly fat routine is not that it burns huge calories on its own. It teaches your trunk to resist rotation while your legs move, and that skill carries into walking, stair climbing, planks, and daily movement. A stronger, steadier core lets you do the calorie-burning moves better.
Try 8 to 12 marches per side while keeping the pelvis still. If one hip drops every time you lift a foot, lower your hips a little and make the march smaller. Better a shorter range with control than a high bridge that wobbles all over the place.
You should feel glutes, hamstrings, and lower abs. If the low back dominates, pull your ribs down and tuck the pelvis a touch before you lift.
9. Dead Bug With Slow Leg Drops
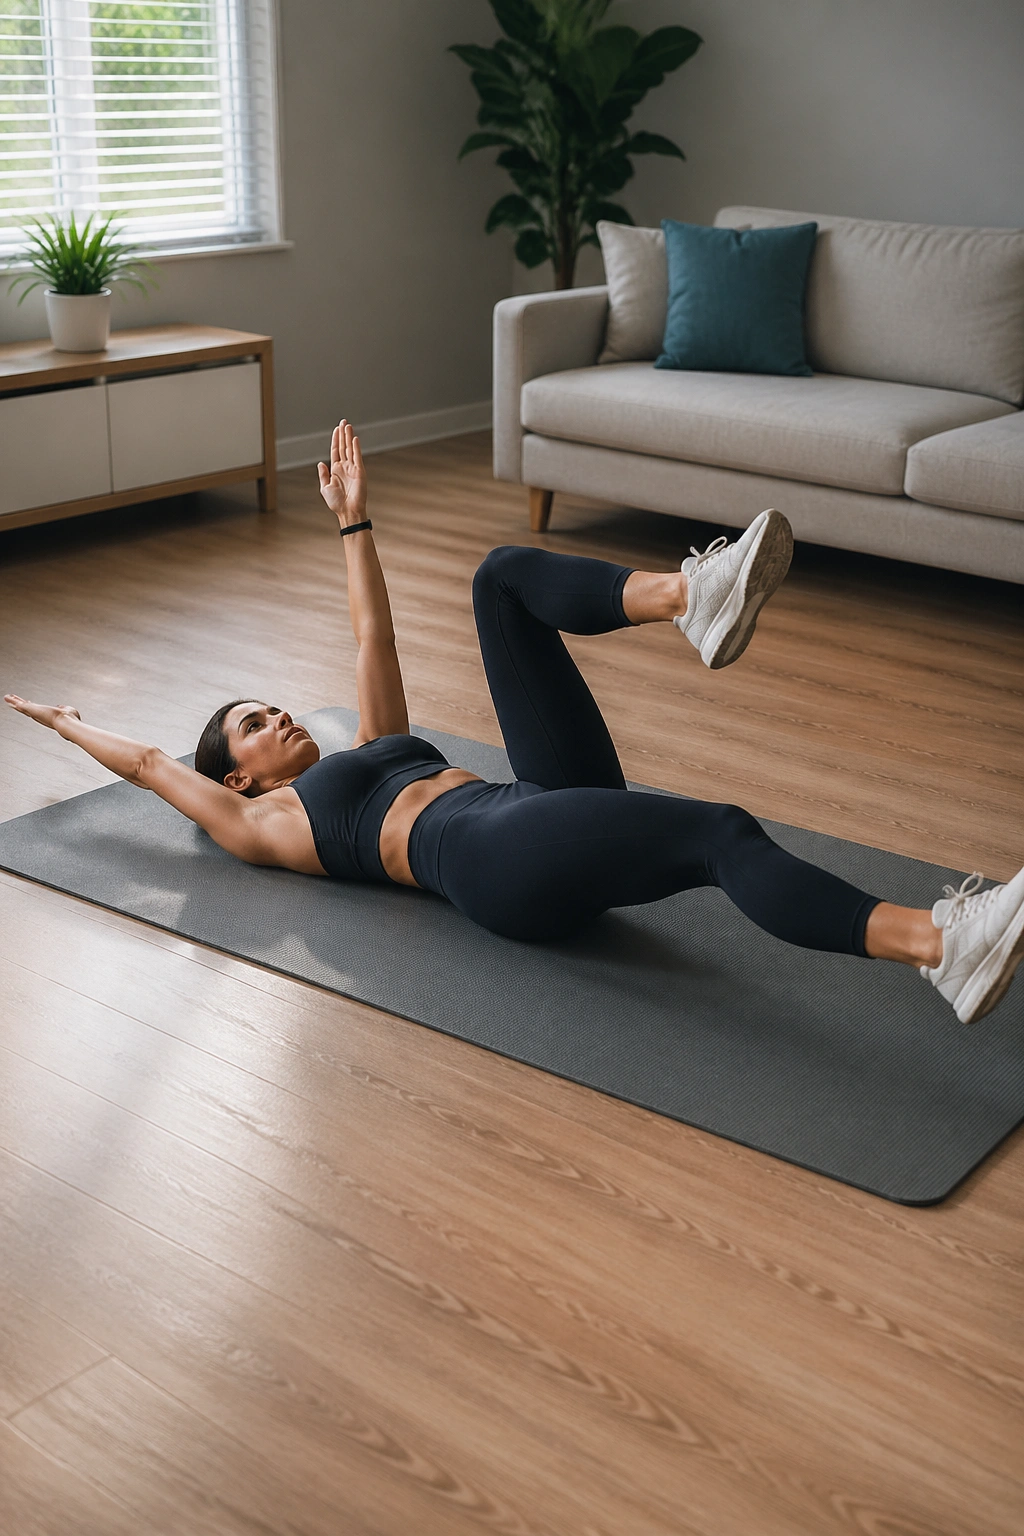
Why do trainers keep coming back to the dead bug?
Because it teaches one of the hardest beginner skills: moving your arms and legs without letting your lower back arch off the floor. That matters more for your waistline than people think. Not because the move melts belly fat by itself, but because it builds the kind of core control that protects your back and makes stronger training possible.
Start on your back with both arms pointed to the ceiling and both knees bent at 90 degrees over your hips. Press your low back gently into the floor. Lower your right heel toward the floor while the left arm reaches overhead. Return, then switch sides. Move slowly enough that you could stop halfway without wobbling.
A cleaner way to feel it
Put your fingertips on the lower ribs before the first rep. As the leg drops, those ribs should not flare upward. If they do, shorten the range. That is not “cheating.” That is proper scaling.
A set of 6 to 10 reps per side is plenty when the form is honest. You will know you are doing it right when the abs feel like they are working from the inside out, not when your neck is straining.
10. Heel Taps on the Floor
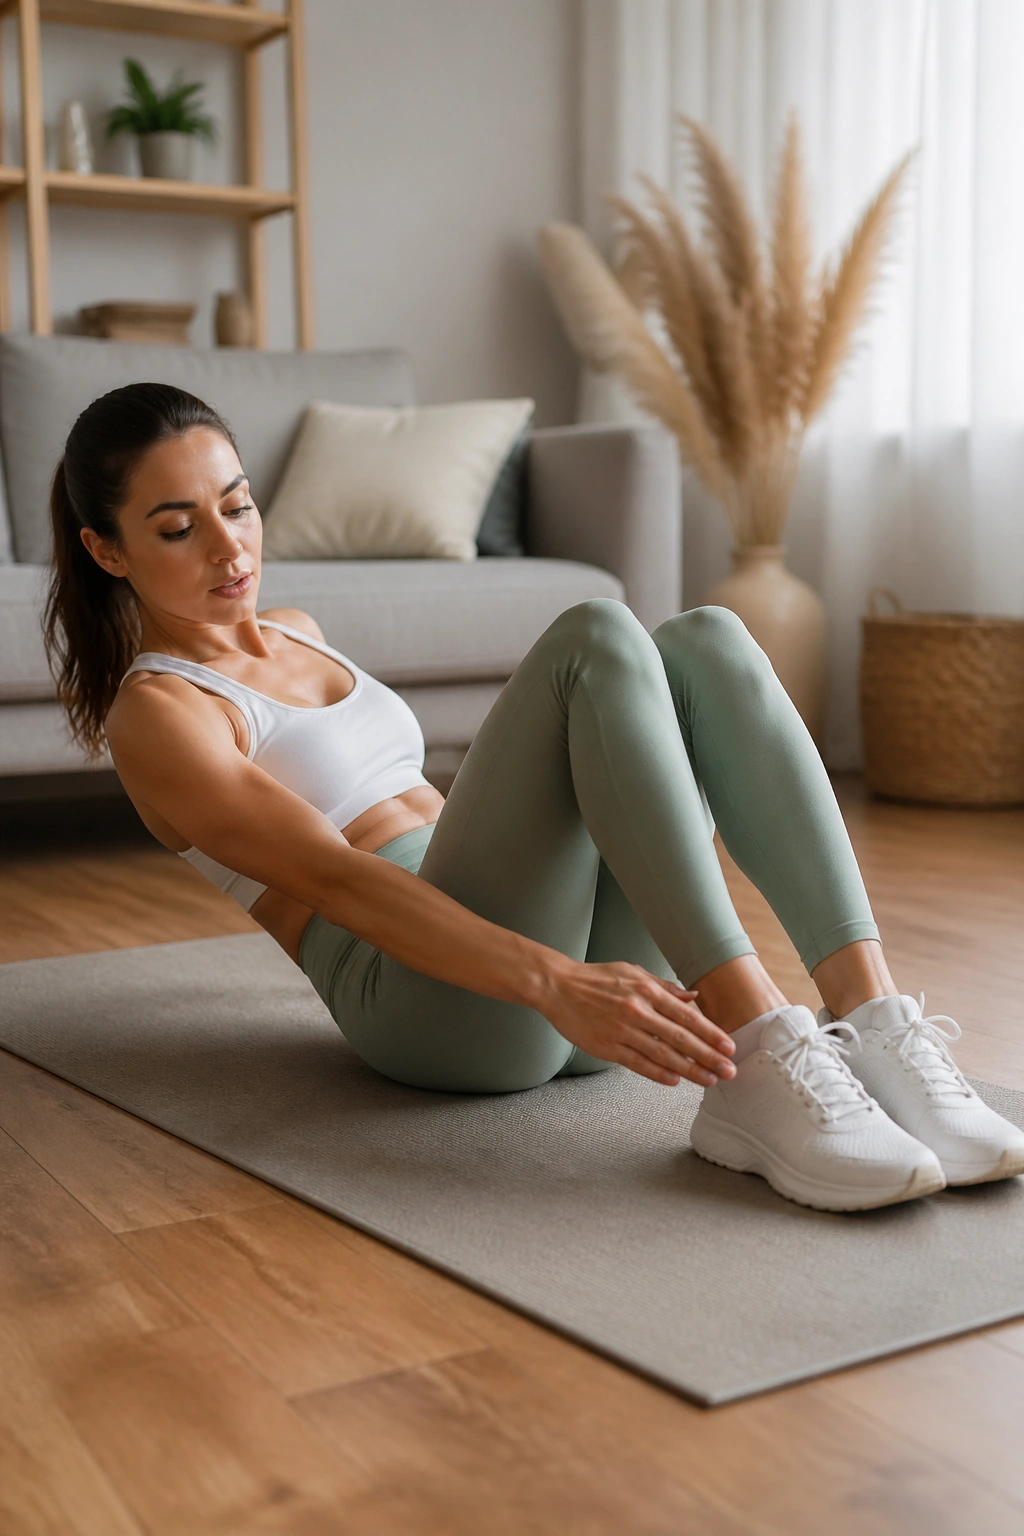
People chase flashy ab moves and skip heel taps because they look almost too tame. Then they try a slow set with clean form and feel the sides of the waist light up.
Lie on your back with knees bent and feet flat, placed a little wider than hip width. Lift your head and shoulders a few inches off the floor, arms by your sides. Reach your right hand toward your right heel, come back through center, then reach left. Keep the movement short and controlled.
A few details matter here:
- Keep your chin slightly tucked, as if holding a small orange under it.
- Reach from the ribs, not by swinging the arms.
- Stay lifted for 20 to 40 seconds.
- Plant both feet the whole time.
Beginners often crank the head too high, which drags the neck into the exercise. Lift only enough for the shoulder blades to hover. That is enough. The burn should sit along the obliques and upper abs, with breathing getting short by the end of the set.
This one fits nicely after a cardio move because it lets your legs rest while your core keeps working.
11. Reverse Crunch
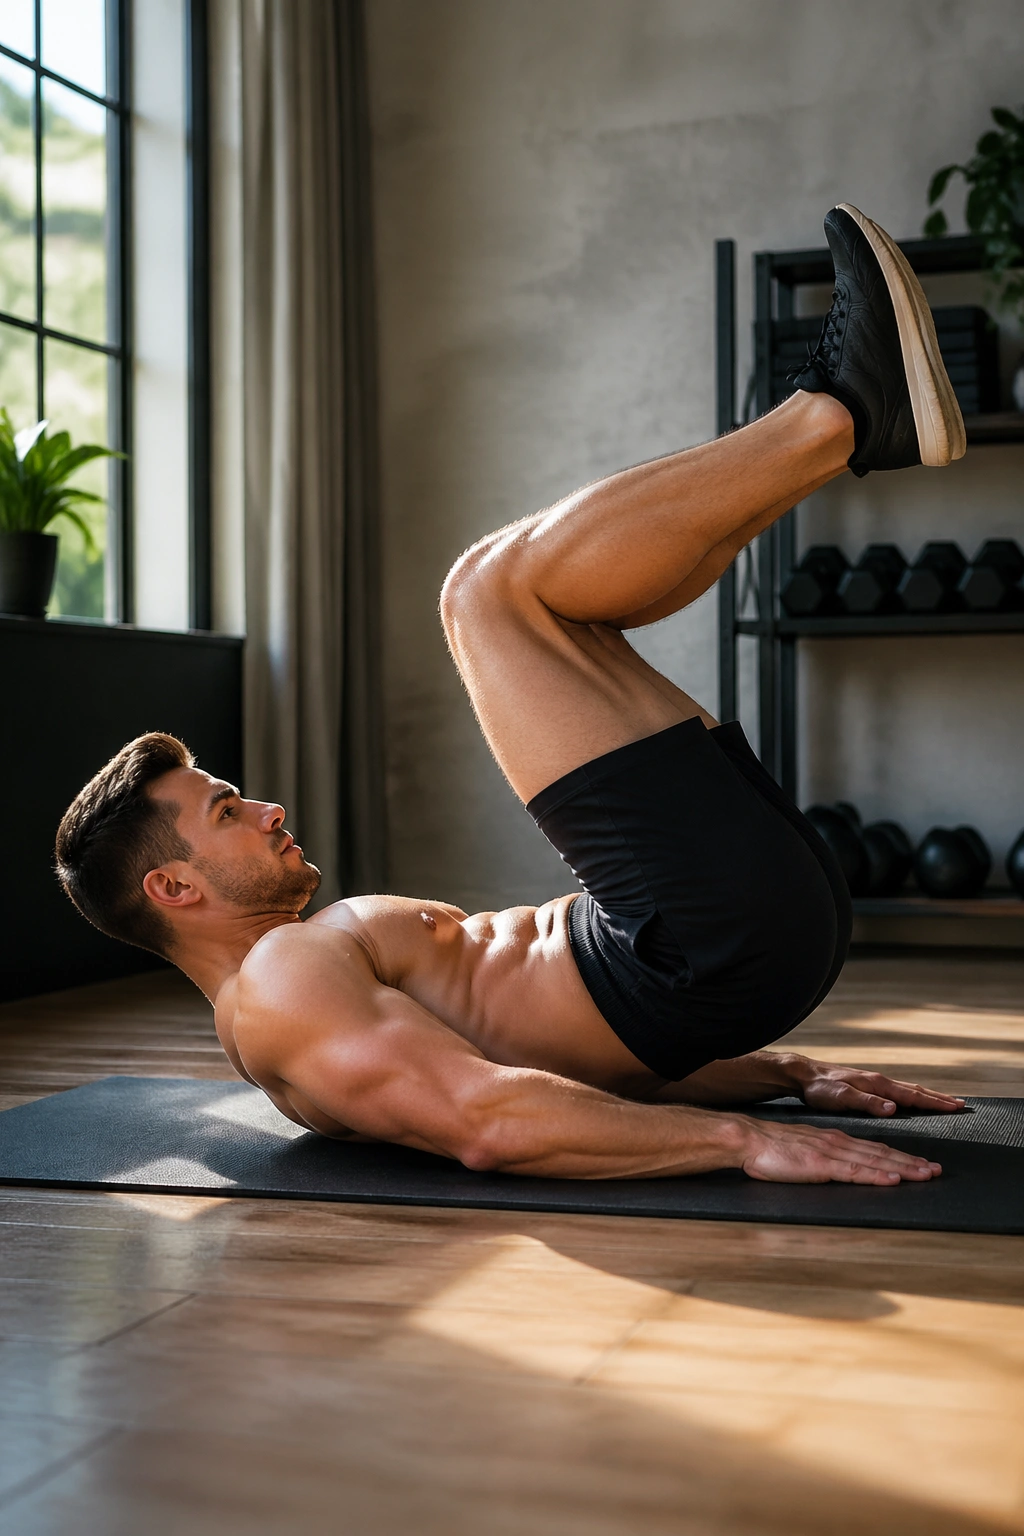
A reverse crunch is one of the few beginner ab moves I will defend all day, provided it is done with control. Most people turn it into a swinging hip fling. That version uses momentum, not muscle, and your lower back usually lets you know.
Set up on your back with knees bent and shins parallel to the floor. Hands can press lightly into the floor beside you. Pull your knees toward your chest, then curl your tailbone off the floor by an inch or two. That is the whole lift. Lower down slowly until the knees return over the hips.
Small is fine here—better, actually. The lower abs kick in when the pelvis curls, not when the legs fly overhead. Think of rolling your zipper toward your ribs, then unrolling one vertebra at a time on the way down.
Go for 8 to 15 reps. Exhale during the curl. If the low back feels pinchy, stop lowering the knees so far between reps. If your feet swing, slow down enough to remove the momentum.
When reverse crunches are clean, they are one of the better floor moves for beginners who want stomach work without a pile of neck strain.
12. Seated Knee Tucks on the Edge of a Chair
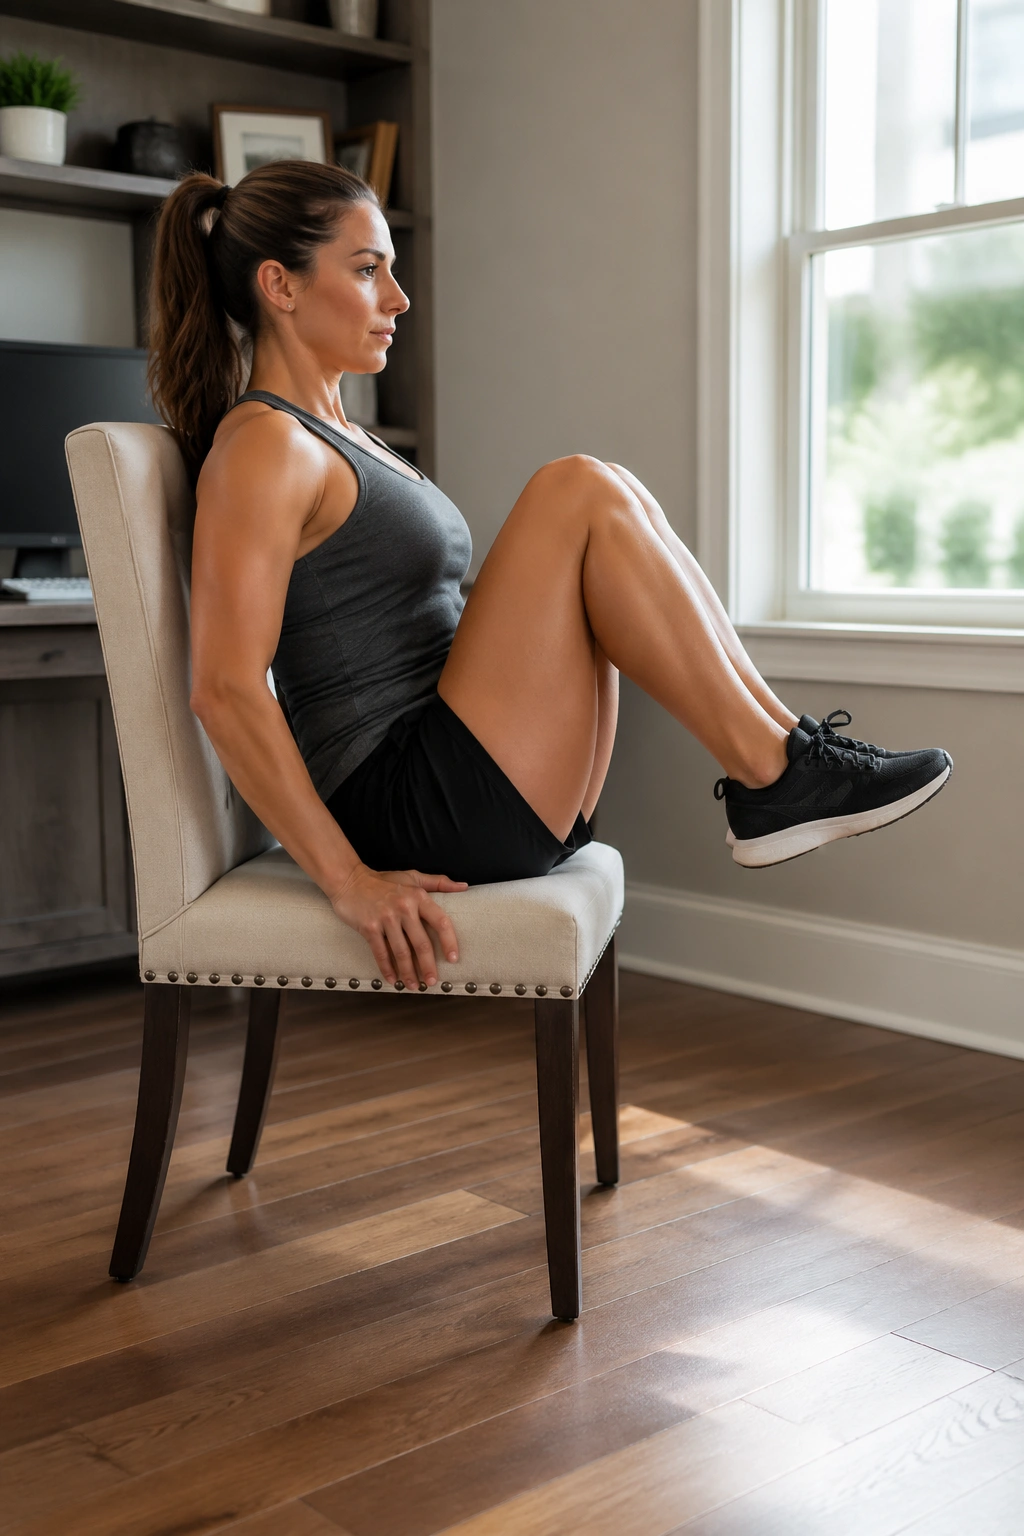
Unlike reverse crunches, seated knee tucks keep you upright and make it easier to learn the “brace and pull” pattern without lying on the floor. That makes them handy for beginners who struggle getting down and up, or for anyone sneaking in a quick set between other tasks at home.
Sit on the front edge of a sturdy chair or bench. Grip the sides lightly. Lean back a little, keeping your chest open, then pull both knees toward your chest as your torso folds toward them. Extend the legs back out without locking the knees.
Who is this best for? People who feel standard crunches in the neck or those who want a low-space move they can do in socks next to a desk, couch, or dining chair. It is also a good bridge exercise between easy floor core work and harder plank variations.
Start with 10 to 15 reps. If the hip flexors take over, make the knee pull smaller and think about bringing the bottom of your rib cage toward the pelvis. Keep the chair planted on a non-slip surface. Wobbly furniture turns this into a bad idea fast.
13. High Plank Shoulder Taps
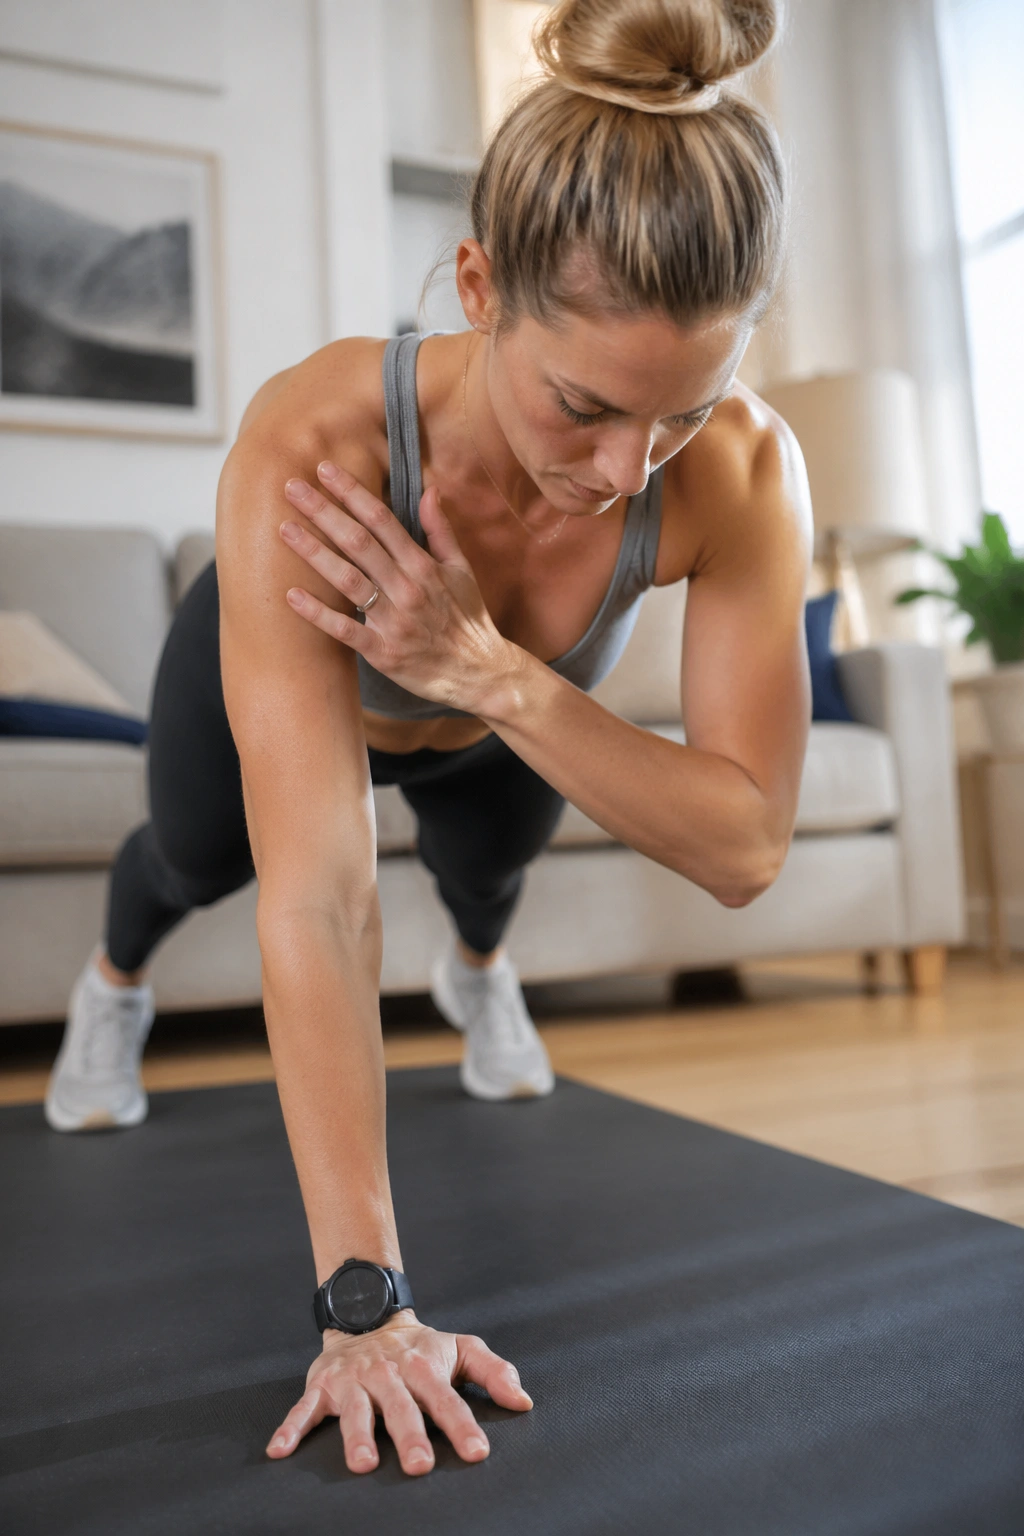
Planks are useful. Shoulder taps make them honest.
Get into a high plank with hands under shoulders and feet set wider than hip width. From there, tap your left shoulder with your right hand, place it back down, then switch sides. The goal is not speed. The goal is to keep your hips from rocking like a metronome.
Where beginners usually go wrong
Most people put the feet too close together. That narrow base turns the move into a balance trick instead of a core exercise. Widen the stance first. You can always make it harder later.
Better rep targets
- Start with 10 taps per side.
- Or work for 20 to 30 seconds.
- If full plank is too much, place your hands on a couch, bed frame, or countertop.
Shoulder taps train anti-rotation, which means your trunk has to resist twisting while one arm leaves the floor. That is gold for beginners. It carries into carrying groceries, climbing stairs, and moving faster during cardio without your torso flopping around.
Quick form fix: squeeze your glutes. That one cue often stops the hip sway within seconds.
14. Incline Mountain Climbers for a Tougher Belly Fat Workout
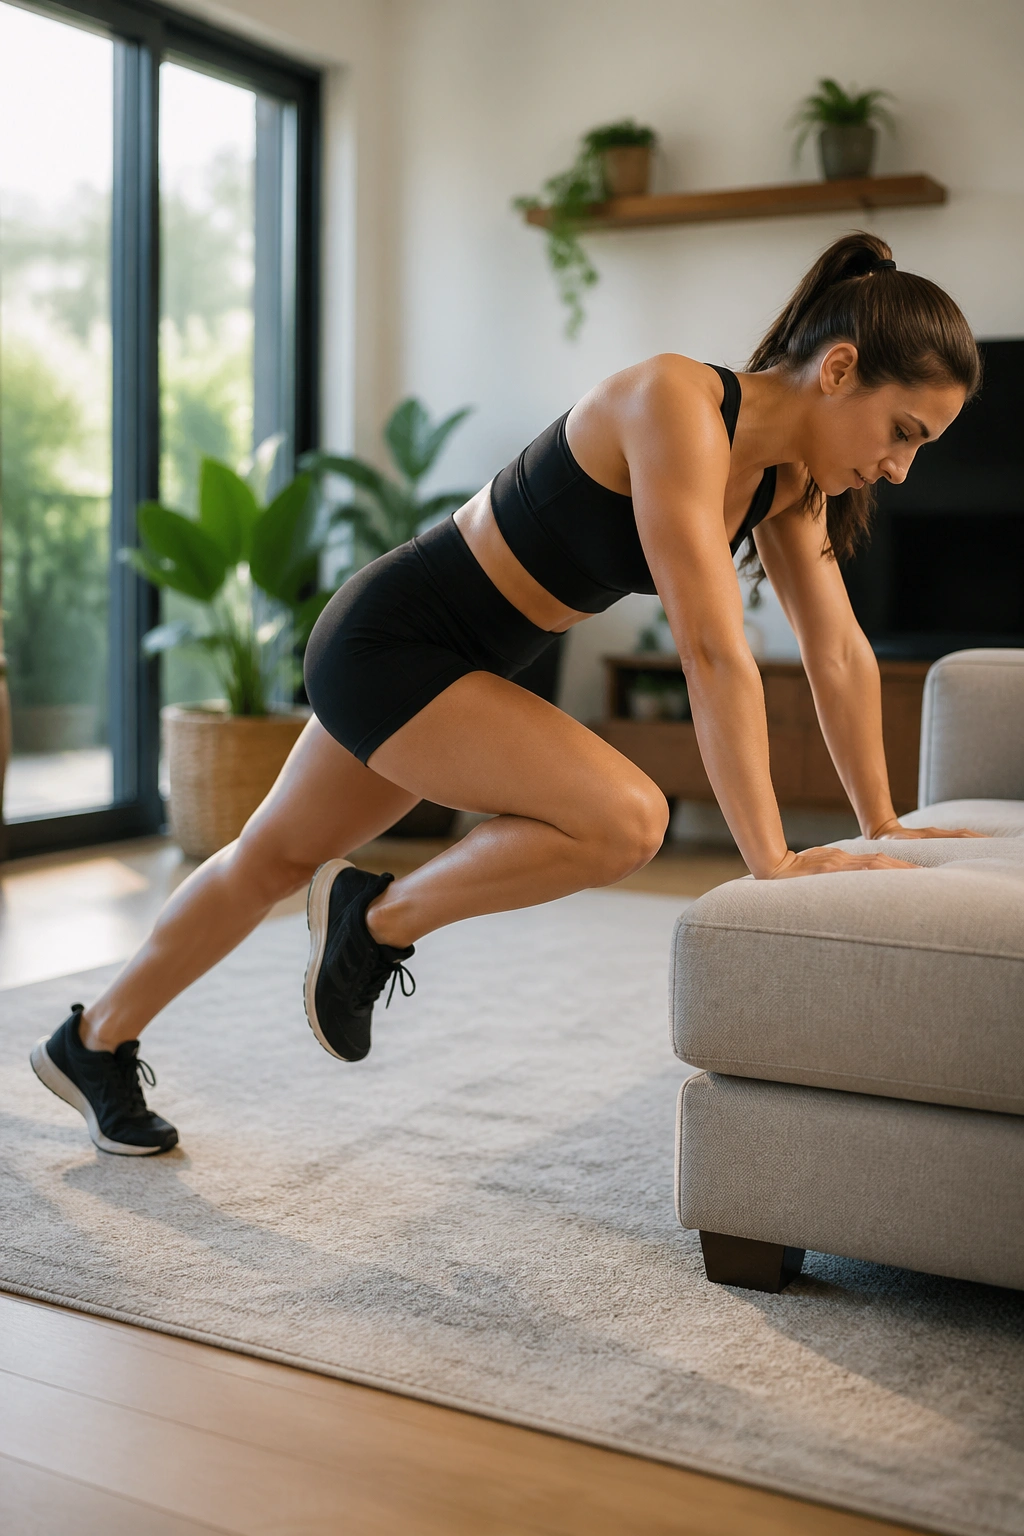
Mountain climbers get cleaner when you raise your hands.
The floor version can be too much too soon. Wrists complain, shoulders fatigue, and the core disappears under a blur of sloppy knee drives. Put your hands on a couch, bench, sturdy ottoman, or even the seat of a locked chair, and the move becomes far more usable for beginners.
Set your body in a straight line from head to heels. Drive one knee toward your chest, return it, then switch. Keep the pace quick but controlled—more like fast steps than frantic sprinting. You are still after a cardio effect, but you want the plank position to stay intact.
Try 20 seconds of work, rest 20 seconds, and build up to 40 seconds over a few weeks. If your shoulders drift behind your wrists, walk your feet back a little. If the hips rise high, slow down.
This belongs in a belly fat circuit because it blends core bracing with steady calorie burn. You are not isolating the stomach. You are teaching the whole body to work hard while the midsection stabilizes under load. That combination has more carryover than another set of rushed crunches.
15. Bear Plank Hold
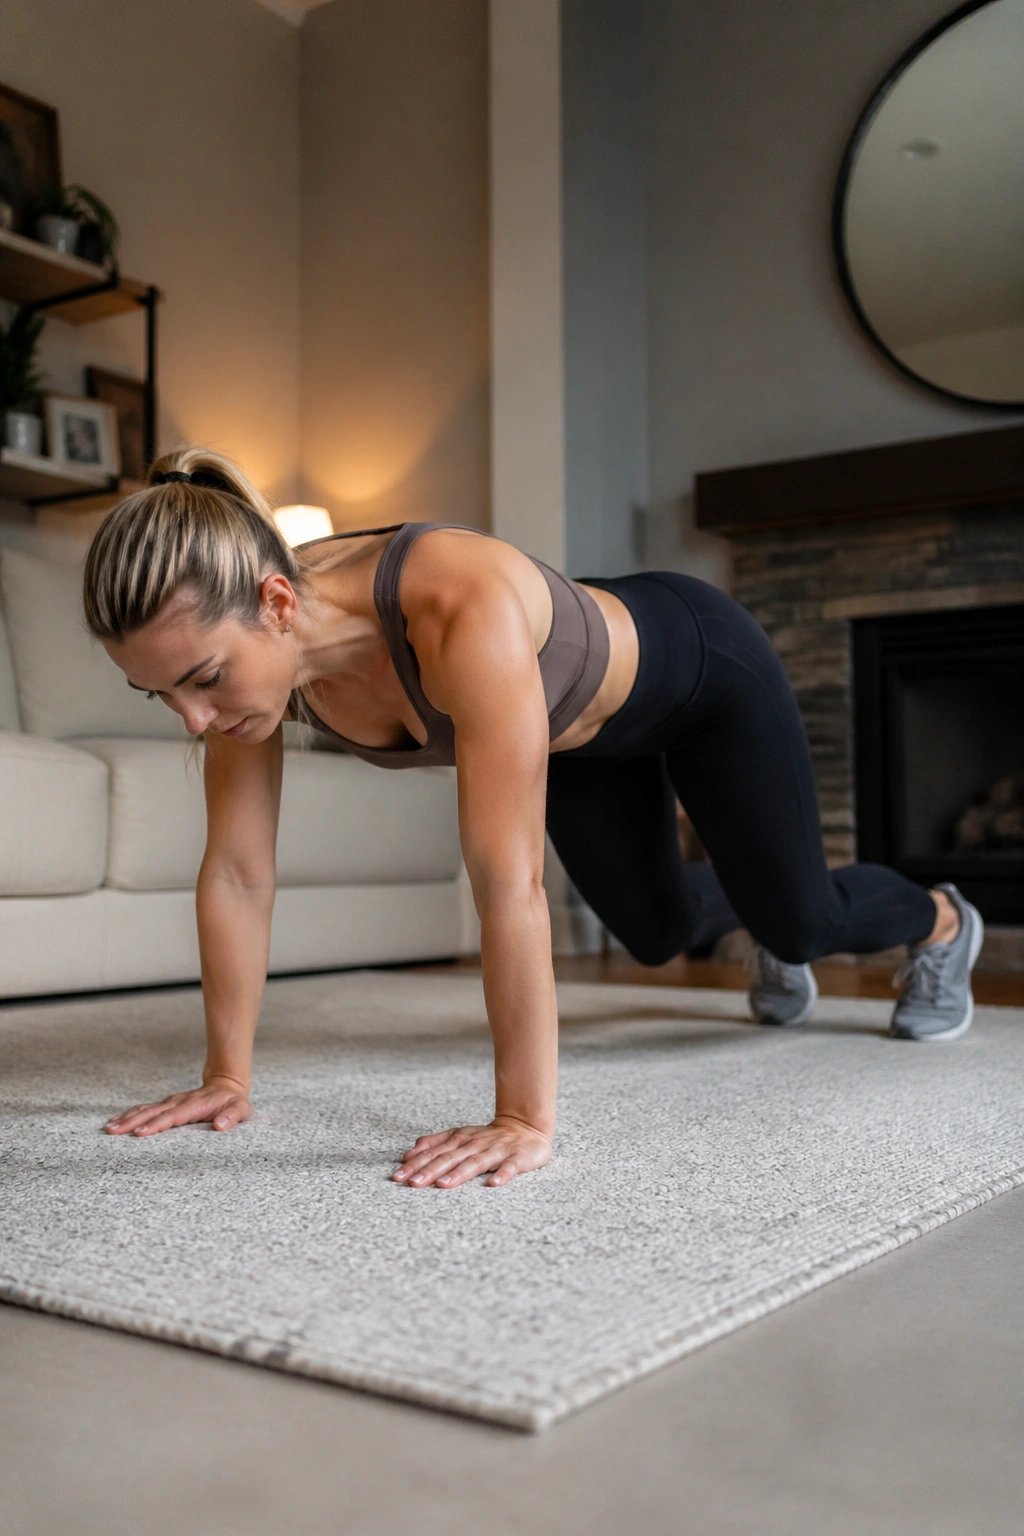
Why hover your knees two inches off the floor when you could do a standard plank?
Because the bear plank humbles people—in a good way. Hands under shoulders, knees under hips, toes tucked, then lift the knees just 1 to 2 inches off the ground. Your back stays flat, your head neutral, and your belly pulls in without sucking up toward the ceiling.
The short lever makes it friendlier on the shoulders than a long plank, but the demand on the core can feel sharper. You will notice it fast in the lower abs, deep trunk muscles, and even the quads.
How to make the hold cleaner
Think about pushing the floor away. Breathe in through the nose for 3 seconds, out through the mouth for 4 seconds. Slow breathing keeps people from panicking and popping the hips up.
Sets can be short. 15 to 25 seconds is enough at the start. If your back rounds like a Halloween cat, raise the knees a hair and reset. If your knees touch down every five seconds, that is still a set—rest briefly and continue until the timer ends.
16. Walkout to Plank
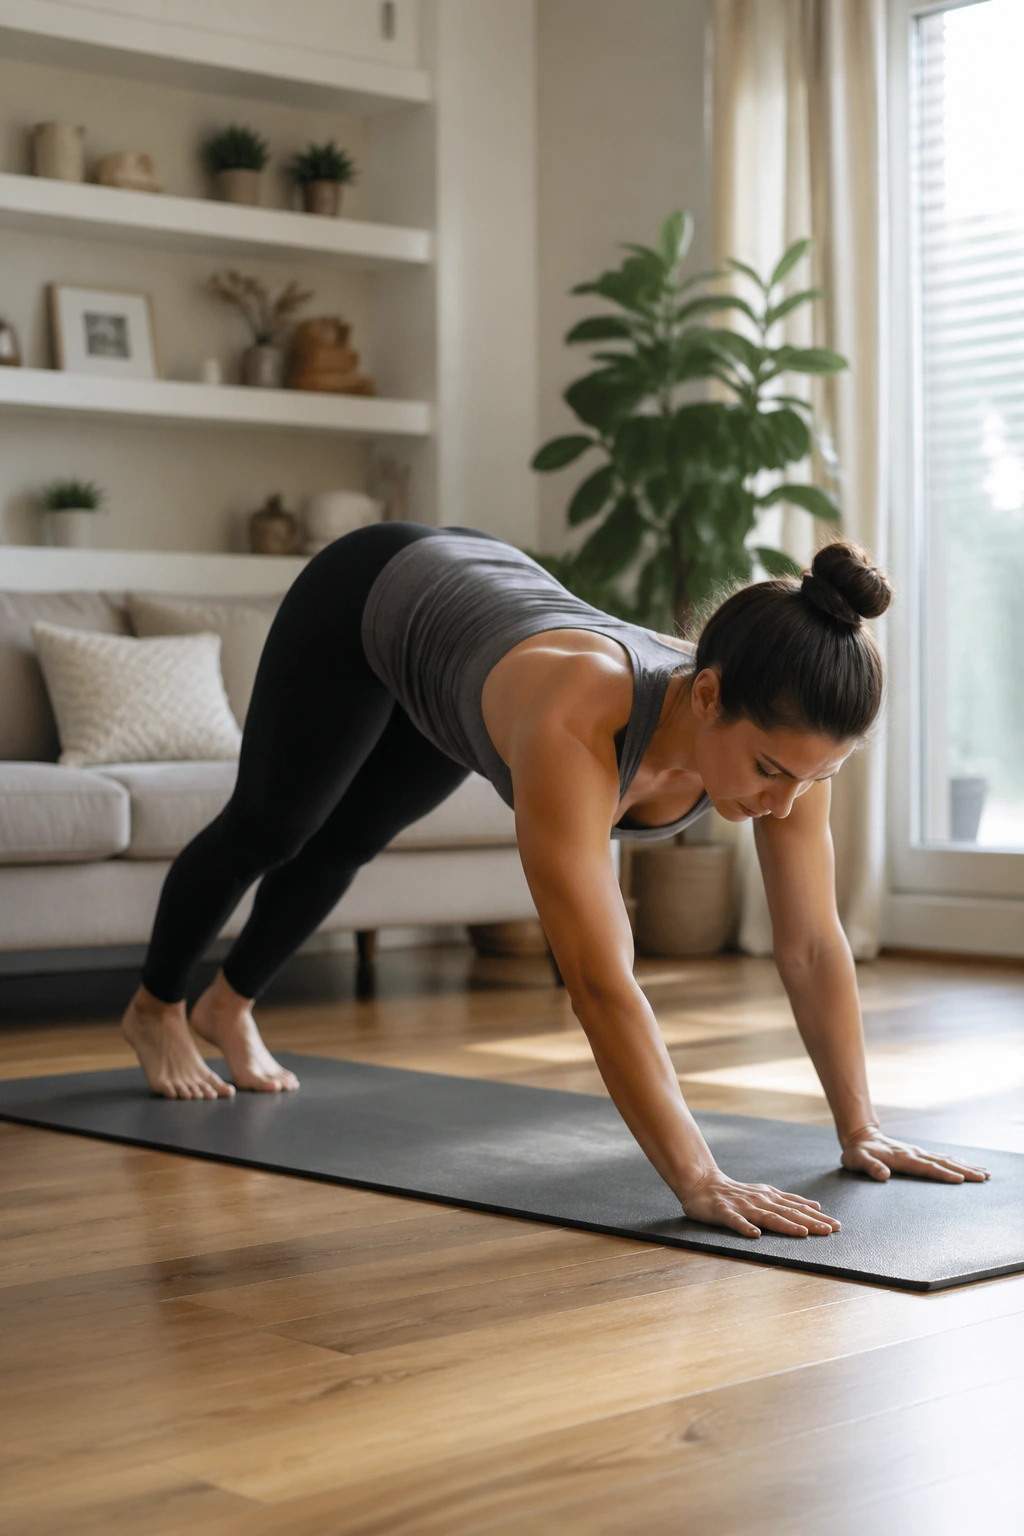
Picture the move: you are standing, you hinge down, walk your hands forward, hit a plank, then walk them back and stand tall. That is the walkout. No jumping. No gear. A surprising amount of work.
Walkouts train hamstring flexibility, shoulder stability, core tension, and body awareness all at once. They also bridge the gap between simple standing exercises and floor training. For beginners, that bridge matters.
Here is the rhythm that works:
- Stand with feet hip-width apart.
- Hinge at the hips and place your hands on the floor or on yoga blocks.
- Walk the hands forward until you reach a high plank.
- Pause for 1 second.
- Walk back and stand.
If the floor feels too far away, bend your knees more on the way down. If the wrists complain, use fists or an elevated surface. Aim for 6 to 10 reps with a steady pace. One trap to avoid: do not let the lower back sag in the plank. Hit the position, brace, and move on.
Walkouts are sneaky. By rep seven, your shoulders, abs, and lungs are all working.
17. Bicycle Crunch
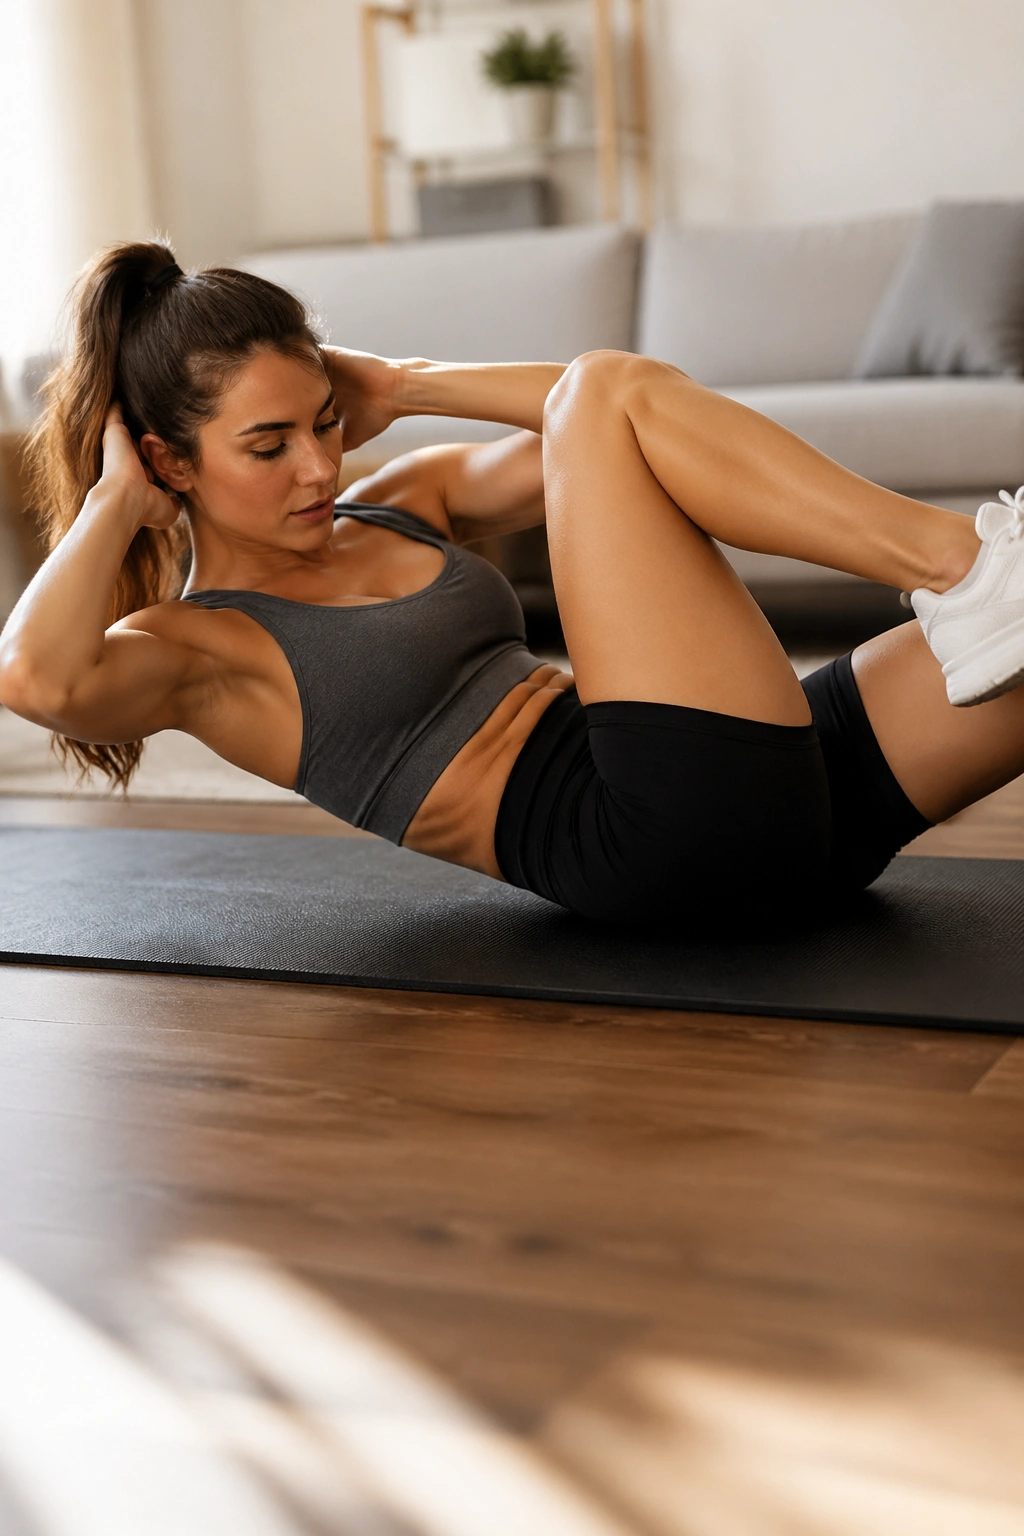
The bicycle crunch has a bad reputation because most people rush it. They yank the neck, fling the elbows, and pedal the legs like they are trying to win a race. Slow the move down and it becomes far more useful.
Lie on your back with hands supporting the head lightly. Lift your shoulder blades off the floor. Bring one knee in while rotating your rib cage toward it, then switch sides. The straight leg should extend long, though not so low that your lower back lifts. Think rotate and reach, not flap and twist.
A slower bicycle crunch builds tension across the rectus abdominis and the obliques at the same time. That makes it one of the better bodyweight options when you want your midsection to work hard in a short set. Keep the elbows wide. If they fold inward, the chest closes and the neck starts doing too much.
Try 8 to 12 slow reps per side. Count “one-one-thousand” as you rotate, then switch. If your lower back peels off the floor, keep the extending leg higher. No medal is handed out for hovering it an inch from the ground.
18. Chair-Assisted Reverse Lunges
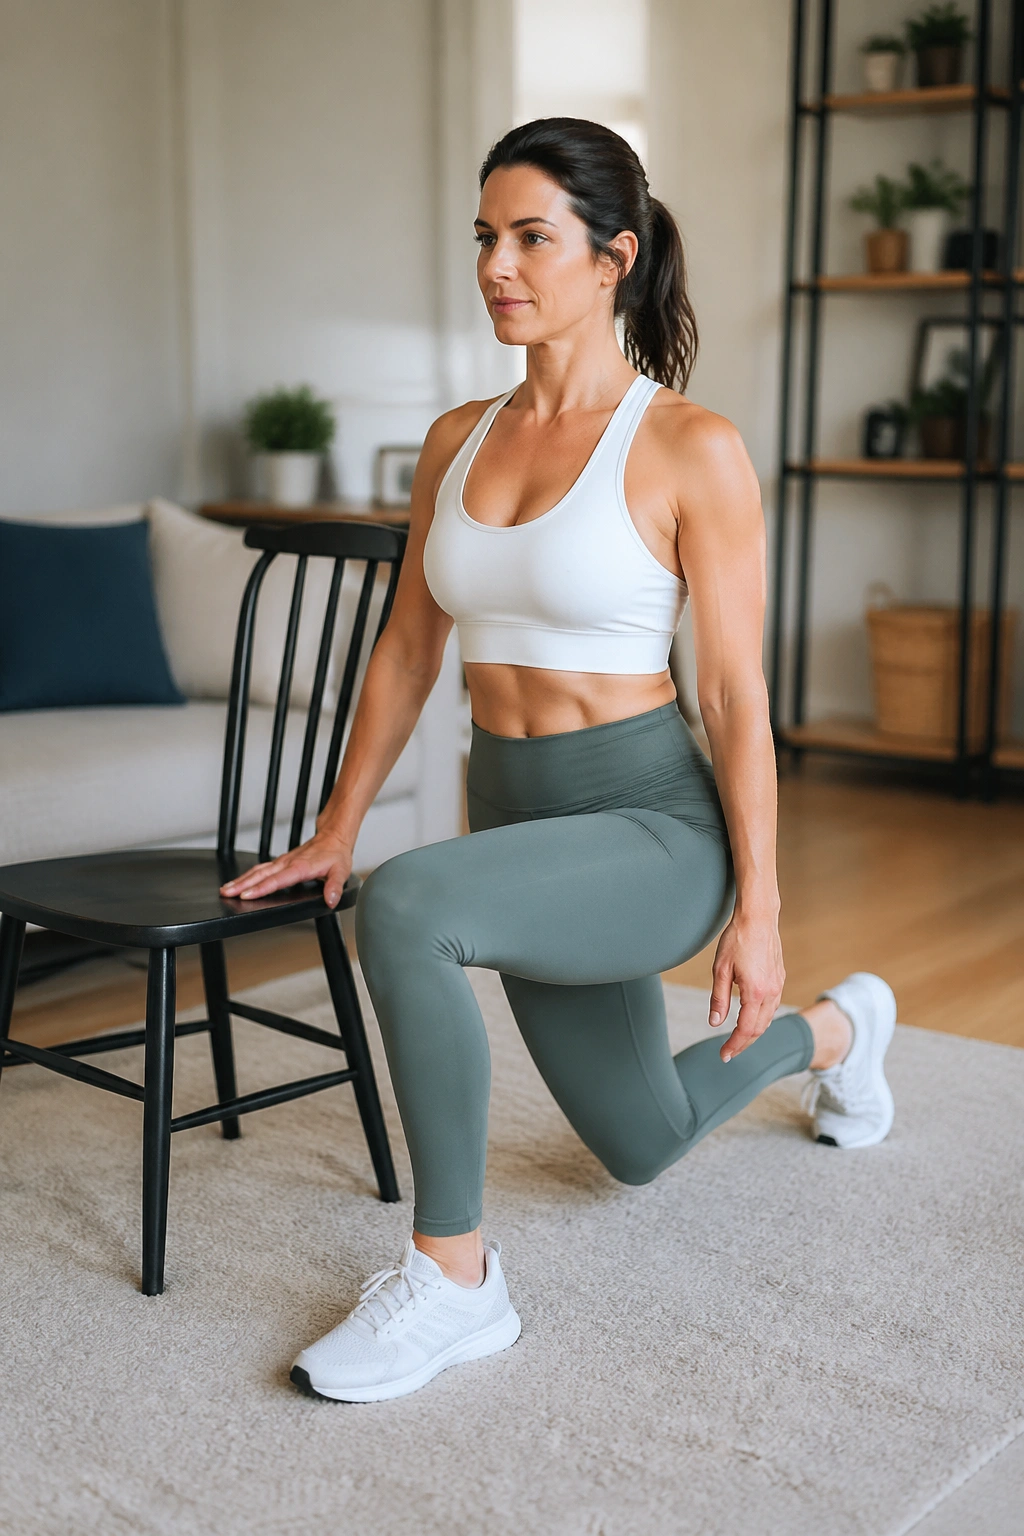
Unlike forward lunges, reverse lunges tend to be kinder to beginner knees because the step goes backward and the front shin can stay more upright. Add a chair for balance and the move becomes one of the best lower-body tools in a home fat-loss routine.
Stand tall with one hand on the back of a sturdy chair. Step one foot behind you and lower until both knees bend, then push through the front foot to return. Keep most of your weight over the front leg. The rear foot is there for support, not the main work.
Who should lean into this one? Anyone who wants stronger legs and glutes without doing endless squats, plus anyone who loses balance during split-stance work. A stronger lower body lets you climb stairs faster, walk longer, and handle harder circuits later.
Start with 8 to 10 reps per side. If the range feels shaky, lower only halfway. If the front knee caves inward, press it gently toward the little-toe side of the foot. That one cue fixes more than you would think.
19. Side Plank From the Knees
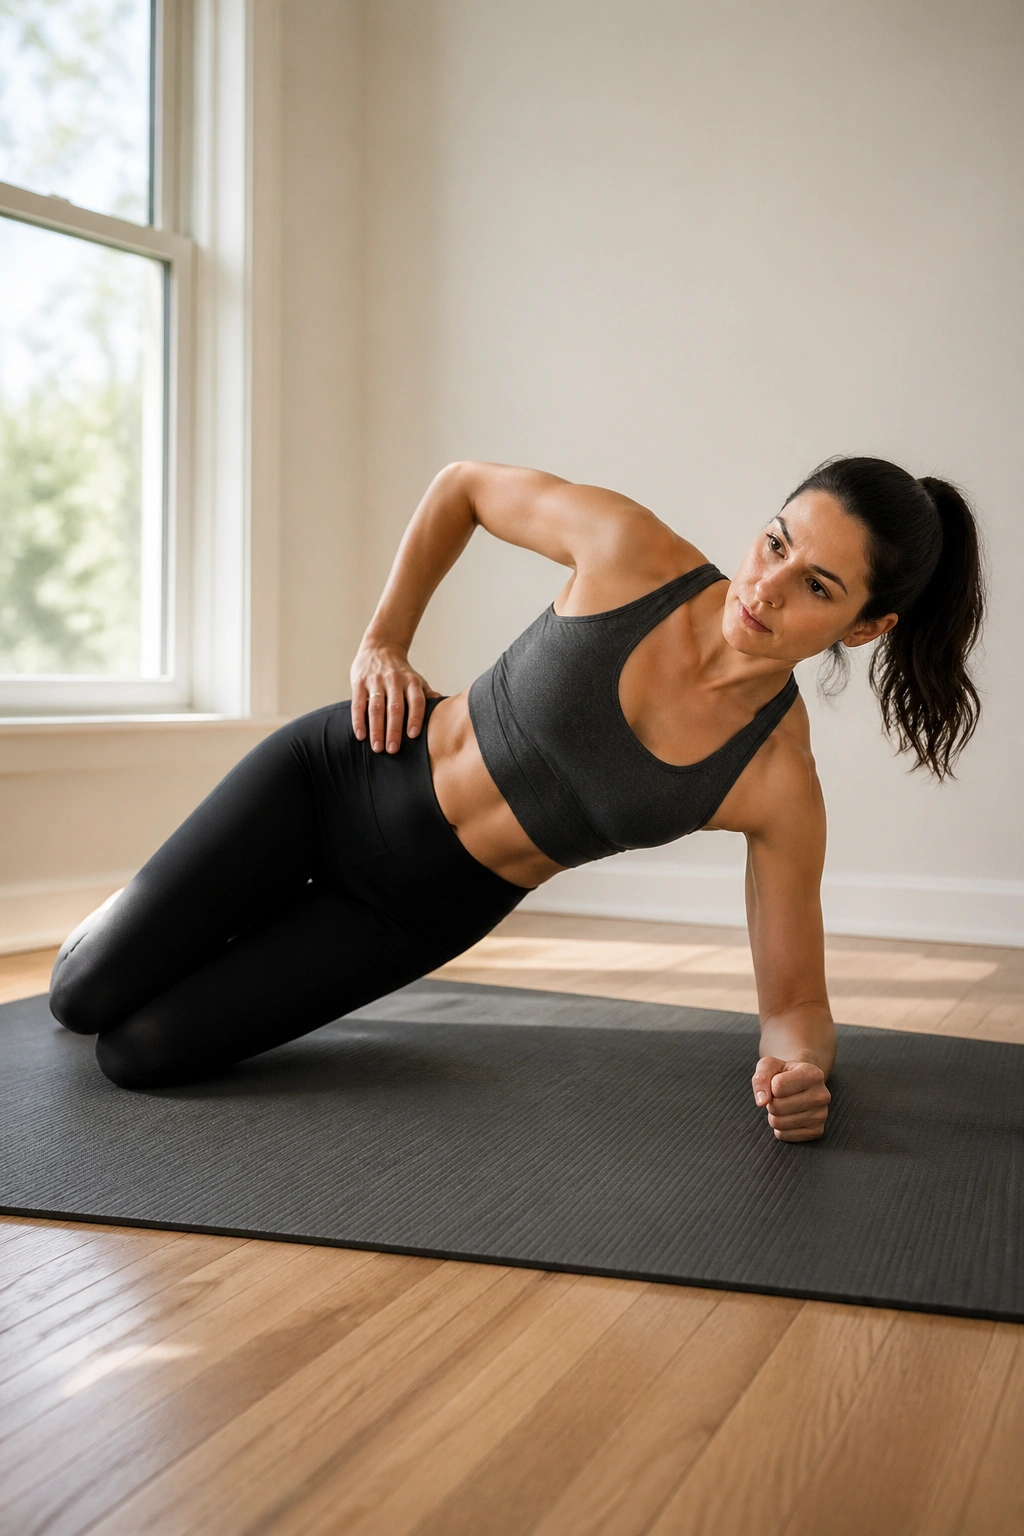
The side plank from the knees is one of those moves people skip because it looks like a regression. Fine. Skip it, and you miss one of the cleanest beginner ways to train the obliques, hips, and shoulder all in one hold.
Set up on one forearm with the elbow under the shoulder. Bend your knees and stack them behind you. Lift your hips until your body makes a straight line from head to knees. The top hand can rest on the hip or reach to the ceiling.
What this hold is teaching
Your side waist has to brace. Your bottom shoulder has to stabilize. Your glute on the underside has to stay awake. Those jobs matter in walking, running, and keeping your trunk steady during faster cardio.
Make the hold harder without getting fancy
- Hold for 20 to 30 seconds per side.
- Add a top-leg lift for the last 5 seconds.
- Or thread the top arm under the ribs once every 3 seconds for a tiny rotation challenge.
Do not let the bottom shoulder shrug up to your ear. Press the floor away and keep space around the neck. You want a firm line through the side body, not a crumpled pose.
Best spot in a workout: near the end, when you want focused core work without more jumping or stepping.
20. Beginner Burpee to a Chair
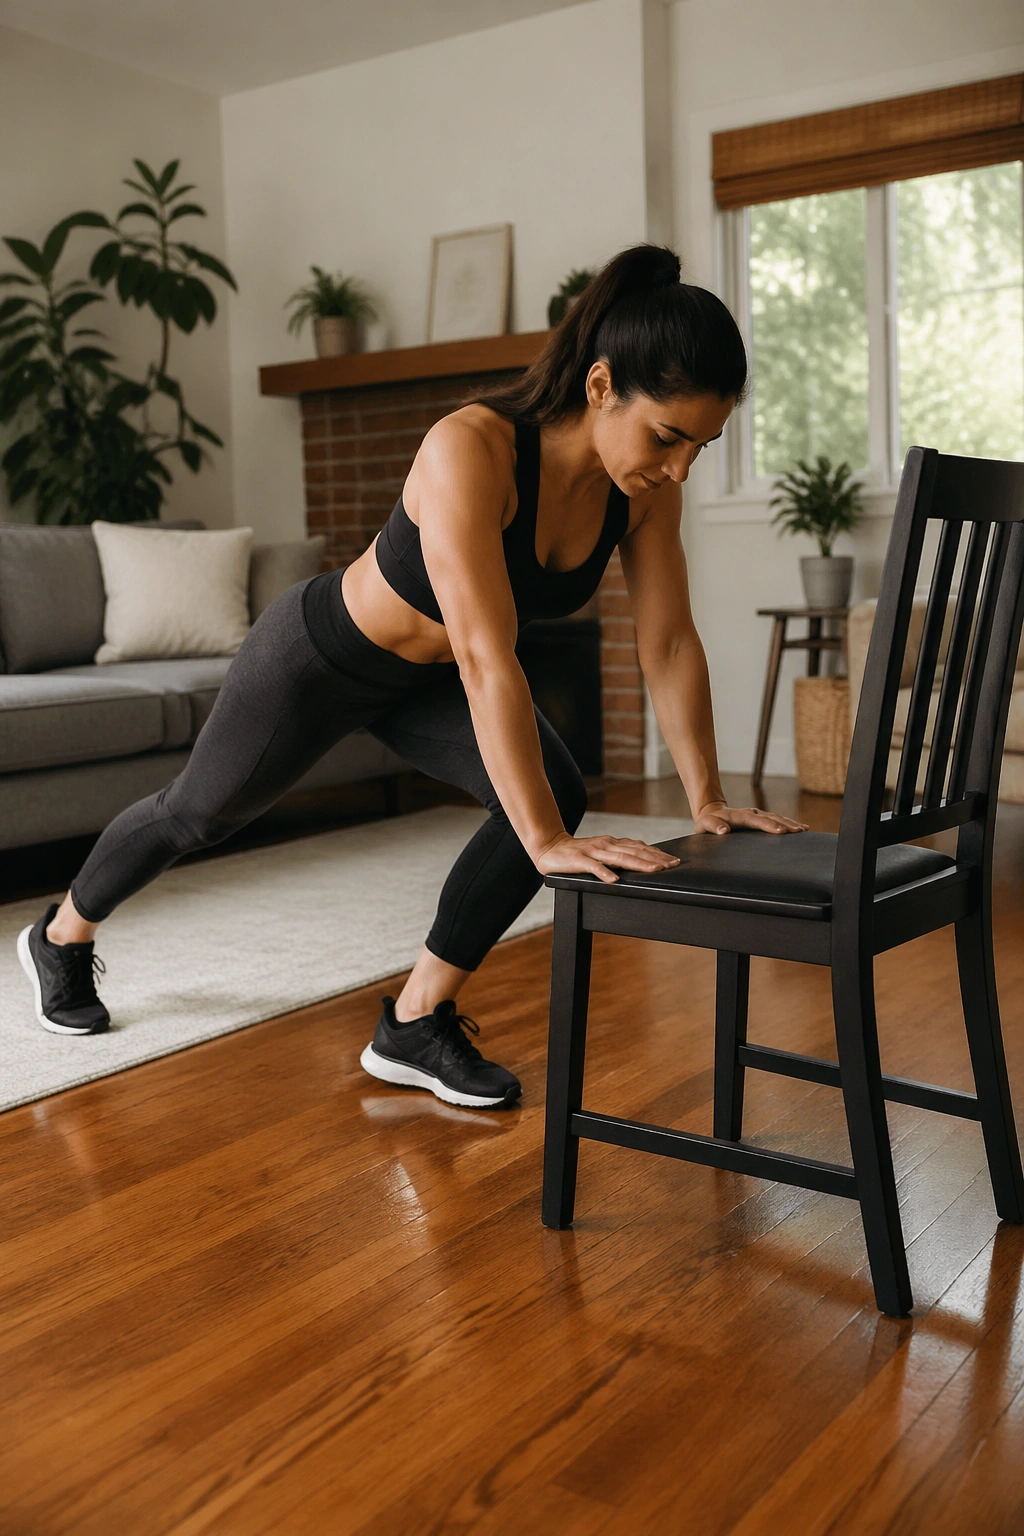
Burpees do not need a jump or a floor flop to be effective.
A beginner burpee to a chair strips the move down to what matters: squat, brace, step back, step in, stand up. Put your hands on the seat of a sturdy chair or bench, not on the floor. That change saves the lower back, shortens the range, and keeps the movement accessible.
Start standing a foot or so behind the chair. Hinge down and plant both hands on the seat. Step one foot back, then the other, until you reach an incline plank. Step both feet back in. Stand up tall. Add a calf raise at the top if you want a little extra without impact.
This is a full-body finisher. Legs, chest, shoulders, core, lungs—everybody clocks in. Use 20 seconds on, 30 seconds off for 4 to 6 rounds. If the stepping pattern feels clumsy, slow it down until the sequence is smooth. Speed can come later.
A clean chair burpee is more useful than a chaotic floor burpee done with a rounded spine and held breath. Keep your chest proud as you stand, breathe out when you hit the plank, and do not rush the last few reps. That is where form usually falls apart.
Final Thoughts
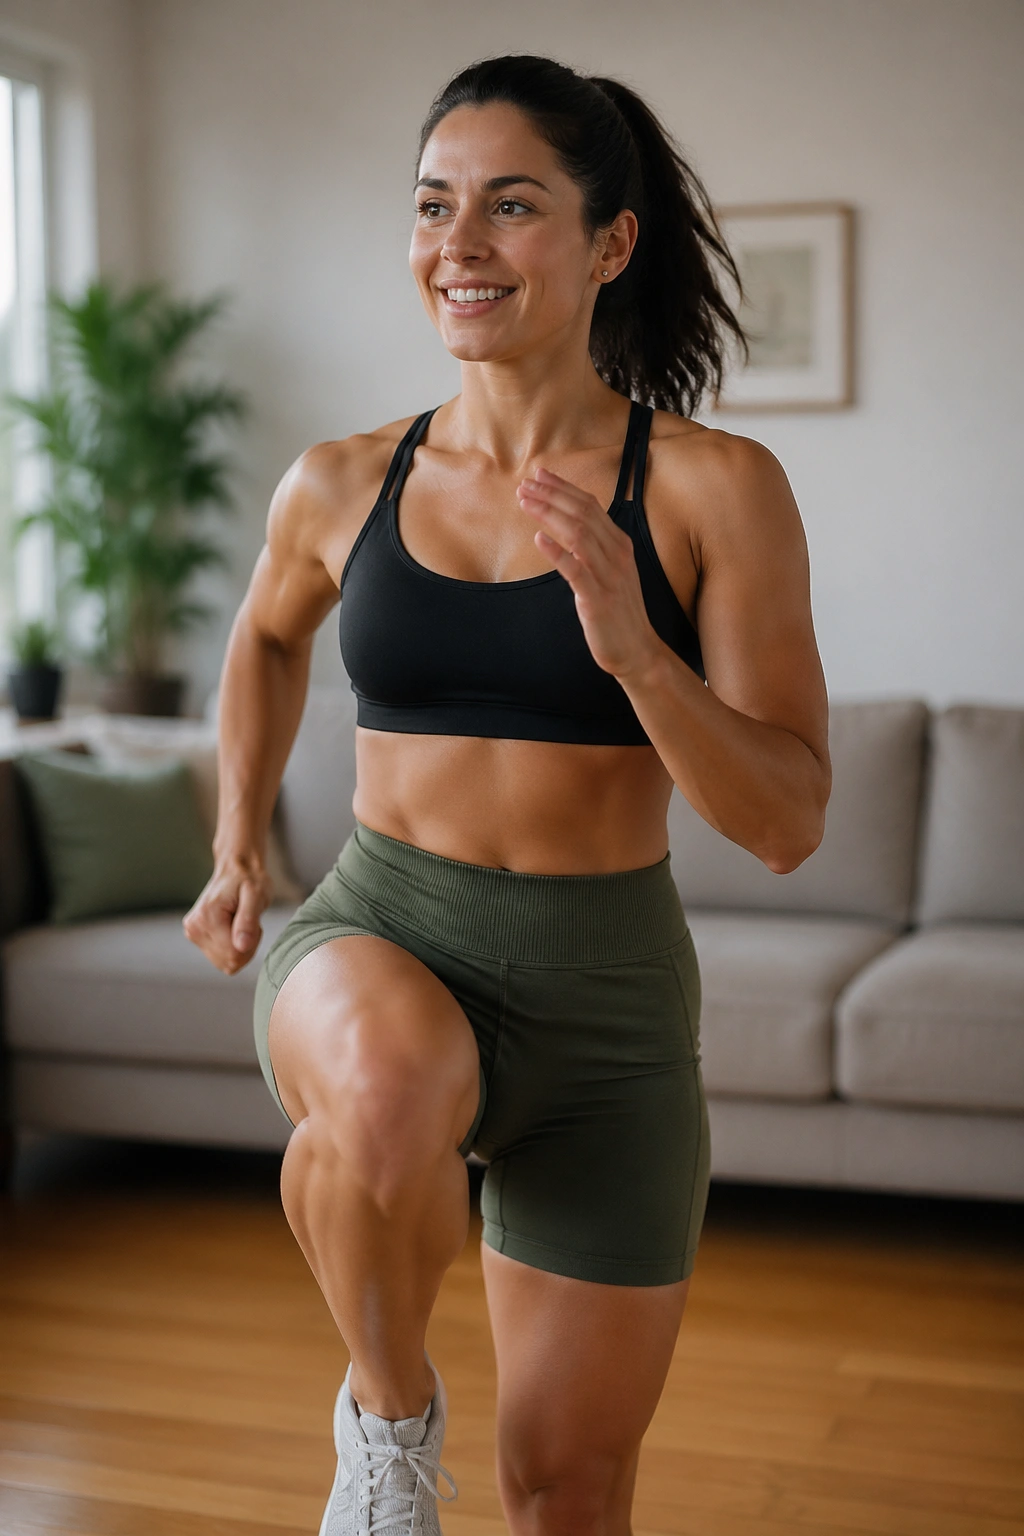
If your goal is to lose belly fat, do not build your week around ab exercises alone. Build it around consistent movement, short home workouts you can repeat, a few strength-based moves for the legs and hips, and enough cardio to leave you breathing hard for stretches of time.
Pick 4 to 6 workouts from this list and keep the session to 15 to 25 minutes. That is long enough to matter and short enough to repeat. A sample beginner circuit could be marching in place, step jacks, squat to reach, glute bridge march, incline mountain climbers, and side plank holds.
One last note, because it matters: chase consistency, not soreness. If you can finish a session and still walk up the stairs without cursing your life choices, you are in the right zone. Keep stacking those sessions, tighten up your food habits, and the changes around your waist start to make a lot more sense.
