



Some of the best recovery work looks almost boring. A slow fold, a long exhale, a little floor time — that’s often what an overworked body wants after lifting, running, riding, or spending hours hunched over a laptop. Recovery yoga sequences work because they lower the noise level without asking your joints or nervous system to perform on command.
Not aggressive. Not flashy. Just useful.
On an active rest day, the goal is not to “earn” a stretch or sweat through tightness. It’s to keep things moving enough that your hips, calves, spine, and shoulders stop feeling welded in place. The right sequence can do that in 8 to 20 minutes, which is enough to matter and short enough that you’ll actually do it.
The trick is picking the right flow for the kind of soreness you have. Tight quads want something different from a stiff upper back. Cranky feet do not need the same work as a low back that’s been bracing all week. Start with the kind of sequence that makes your exhale longer than your inhale, and let the rest follow.
1. Breath-and-Bolster Recovery Yoga for Sore Hips and a Busy Nervous System
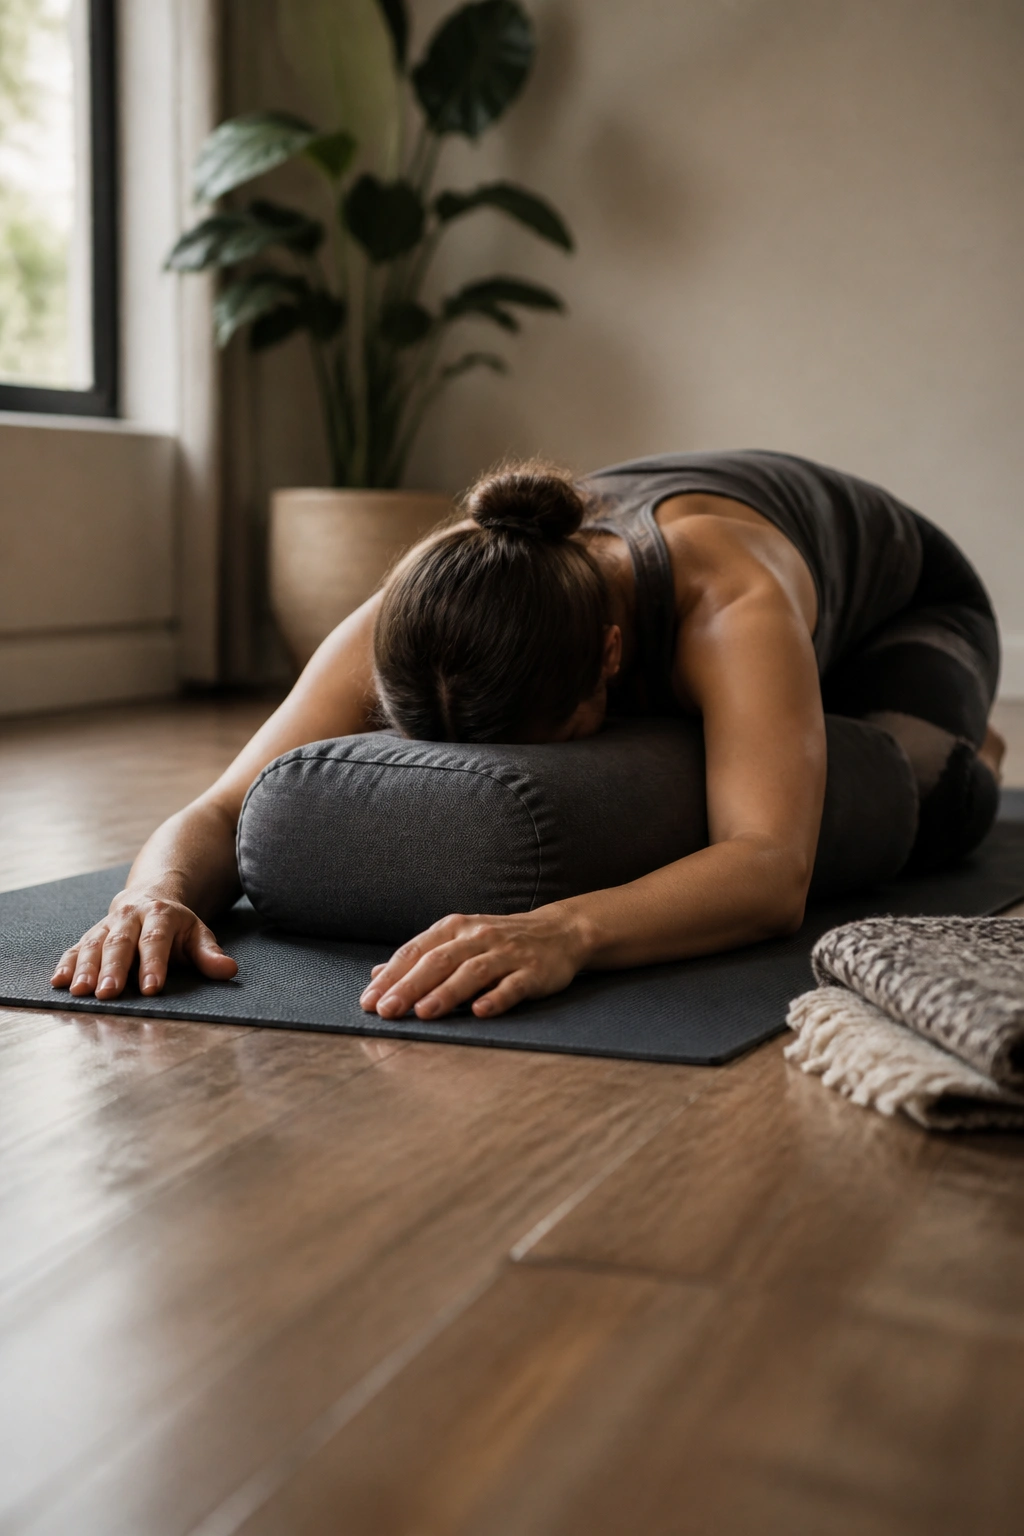
When your whole body feels wound up, start on the floor. A bolster, a folded blanket, or even a firm couch cushion can turn a basic recovery yoga sequence into something your system actually accepts instead of resists.
I like this one after hard lower-body sessions because it does a sneaky amount of work without looking like much. The supported shapes let the hip flexors soften, the ribs move, and the jaw unclench. That last part matters more than people admit.
Why It Works on Heavy Days
The sequence is simple: supported child’s pose, reclined knees-to-chest, and a gentle supine twist. Hold each position for 5 to 8 slow breaths. If your breathing is loud and ragged, stay a little longer.
- Child’s pose with a bolster under your chest: 5 breaths
- Knees hugged in, then small side-to-side rocks: 6 to 8 rocks
- Supine twist, knees stacked or supported by a pillow: 30 to 45 seconds per side
Pro tip: If your hips feel pinchy, bring your knees wider and shorten the hold. Recovery is supposed to downshift the body, not argue with it.
2. Couch Stretch to Half Split for Front-of-Hip Relief
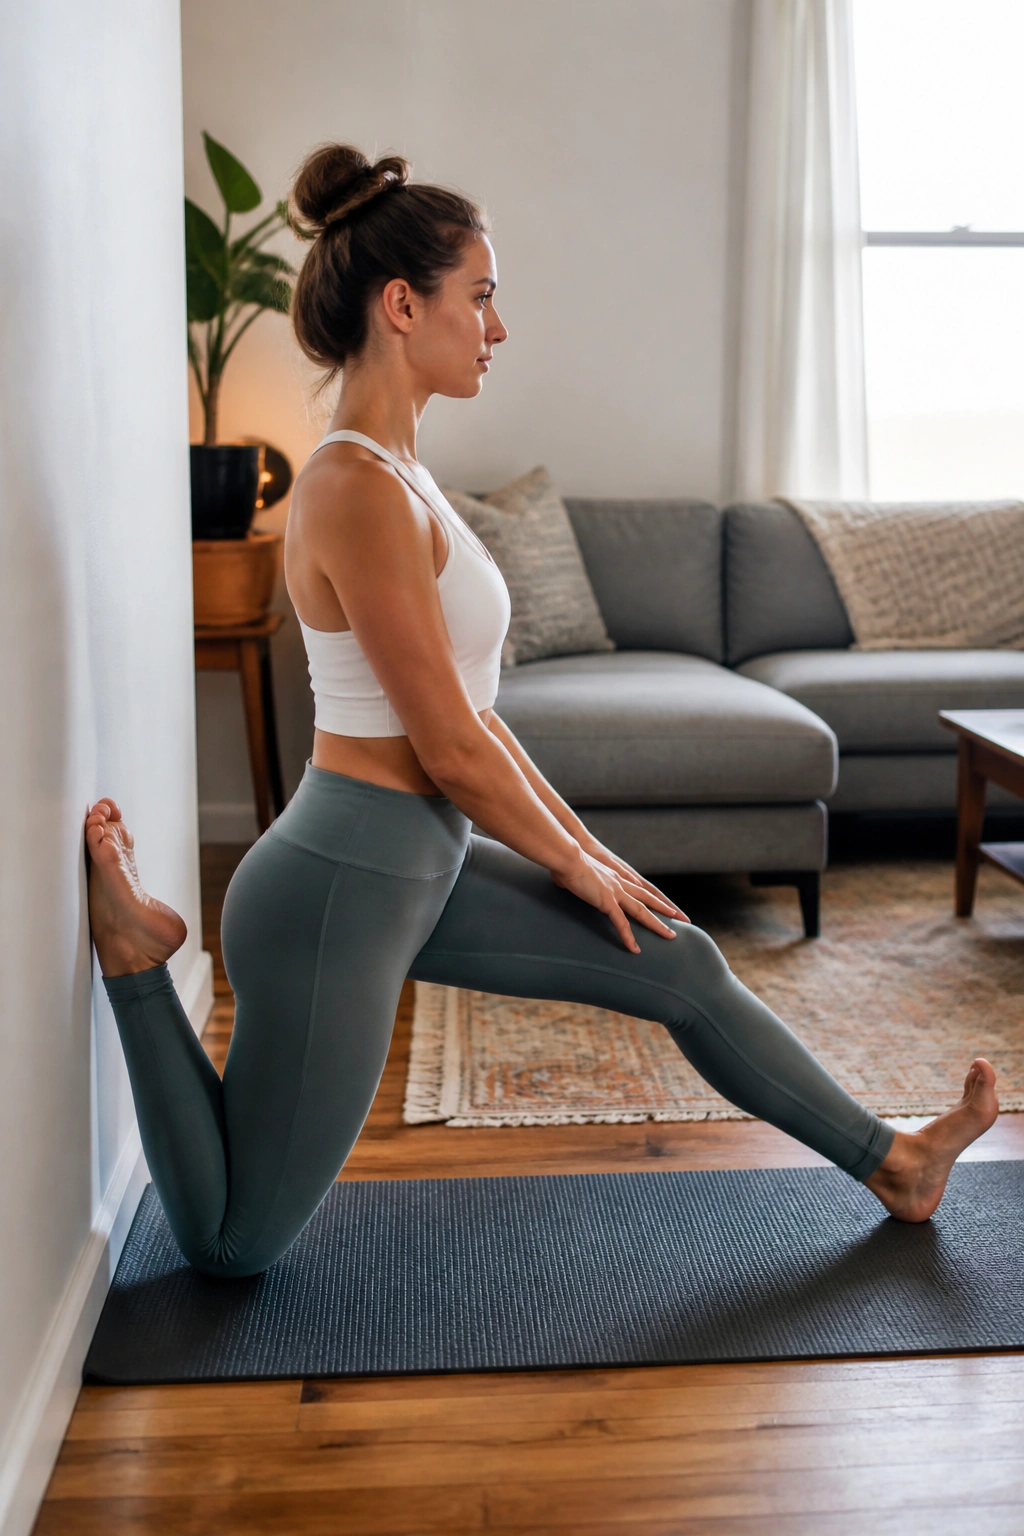
Tight hip flexors can make your whole stride feel shorter. If you run, cycle, climb stairs, or sit all day, this pair earns its keep fast.
The couch stretch opens the quad and the front of the pelvis, then the half split lets you lengthen the back leg without cranking on the low back. That combination matters. One pose alone usually misses the whole picture.
Start with your back shin on a wall or couch, front foot forward, and squeeze the glute of the kneeling leg. That little pelvic tuck changes everything. Without it, people usually dump into the low back and call it a stretch.
Then shift into half split with your hands on blocks or the floor. Keep a soft bend in the front knee if the hamstring complains. Thirty to 45 seconds per side is enough for most people, and two rounds is plenty on a rest day.
The best cue I know here is simple: pull the ribs up and in, then breathe low into the belly. If the front of the hip opens and the low back stays quiet, you’re in the right place.
3. Supine Figure-Four Release for Glutes That Won’t Let Go
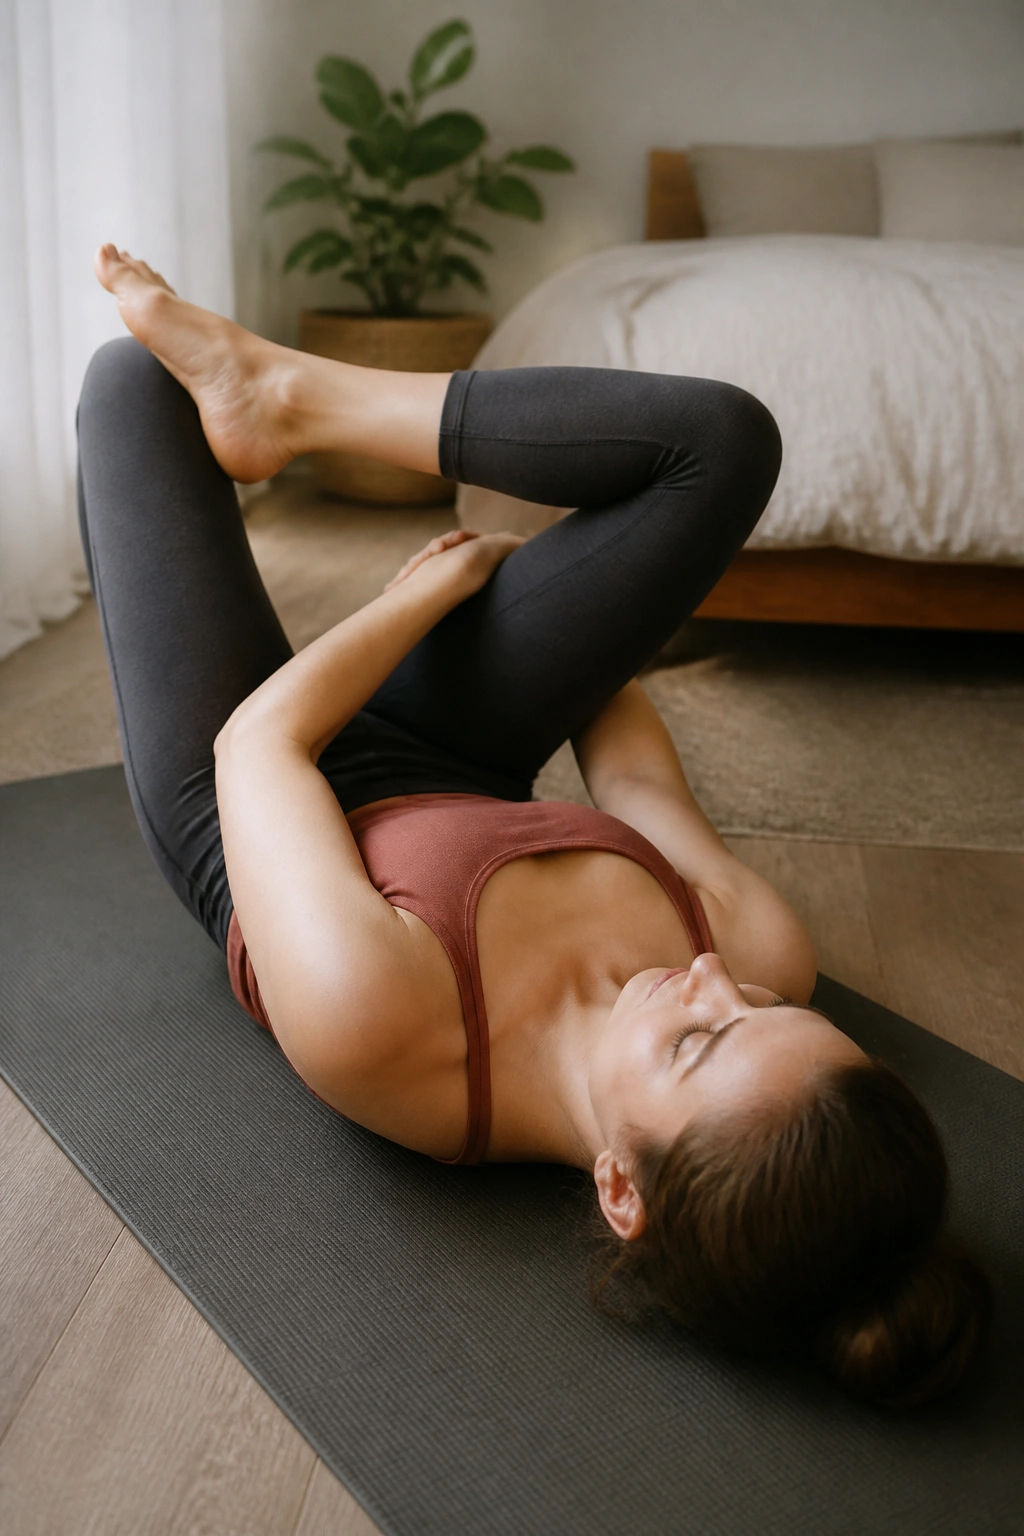
Why does a shape this small matter so much? Because glutes that feel “tight” are often guarding, not actually short. The supine figure-four gives you a way to work around that without making your body brace harder.
Lie on your back, cross one ankle over the opposite thigh, and draw the leg in only until you feel the stretch in the outer hip. If you pull so hard that your neck tightens, you’ve gone too far. That’s a bad trade.
How to Use It After Squats or Cycling
- Set up with both feet on the floor first.
- Cross the ankle, then reach behind the hamstring or use a strap.
- Hold for 5 slow breaths.
- Add tiny ankle flexes if the outer hip feels sticky.
- Switch sides and compare them honestly.
A strap is worth keeping nearby. Hands tend to yank harder than they need to, and yanking makes the lower back join the conversation. If the hip joint itself feels pinchy, back off and widen the knee angle a little.
This sequence is one of my favorites for post-workout recovery because it’s calm but not passive. You’re not forcing range. You’re reminding the glute complex that it can let go without getting into a fight.
4. Cat-Cow to Thread-the-Needle for a Stiff Upper Back
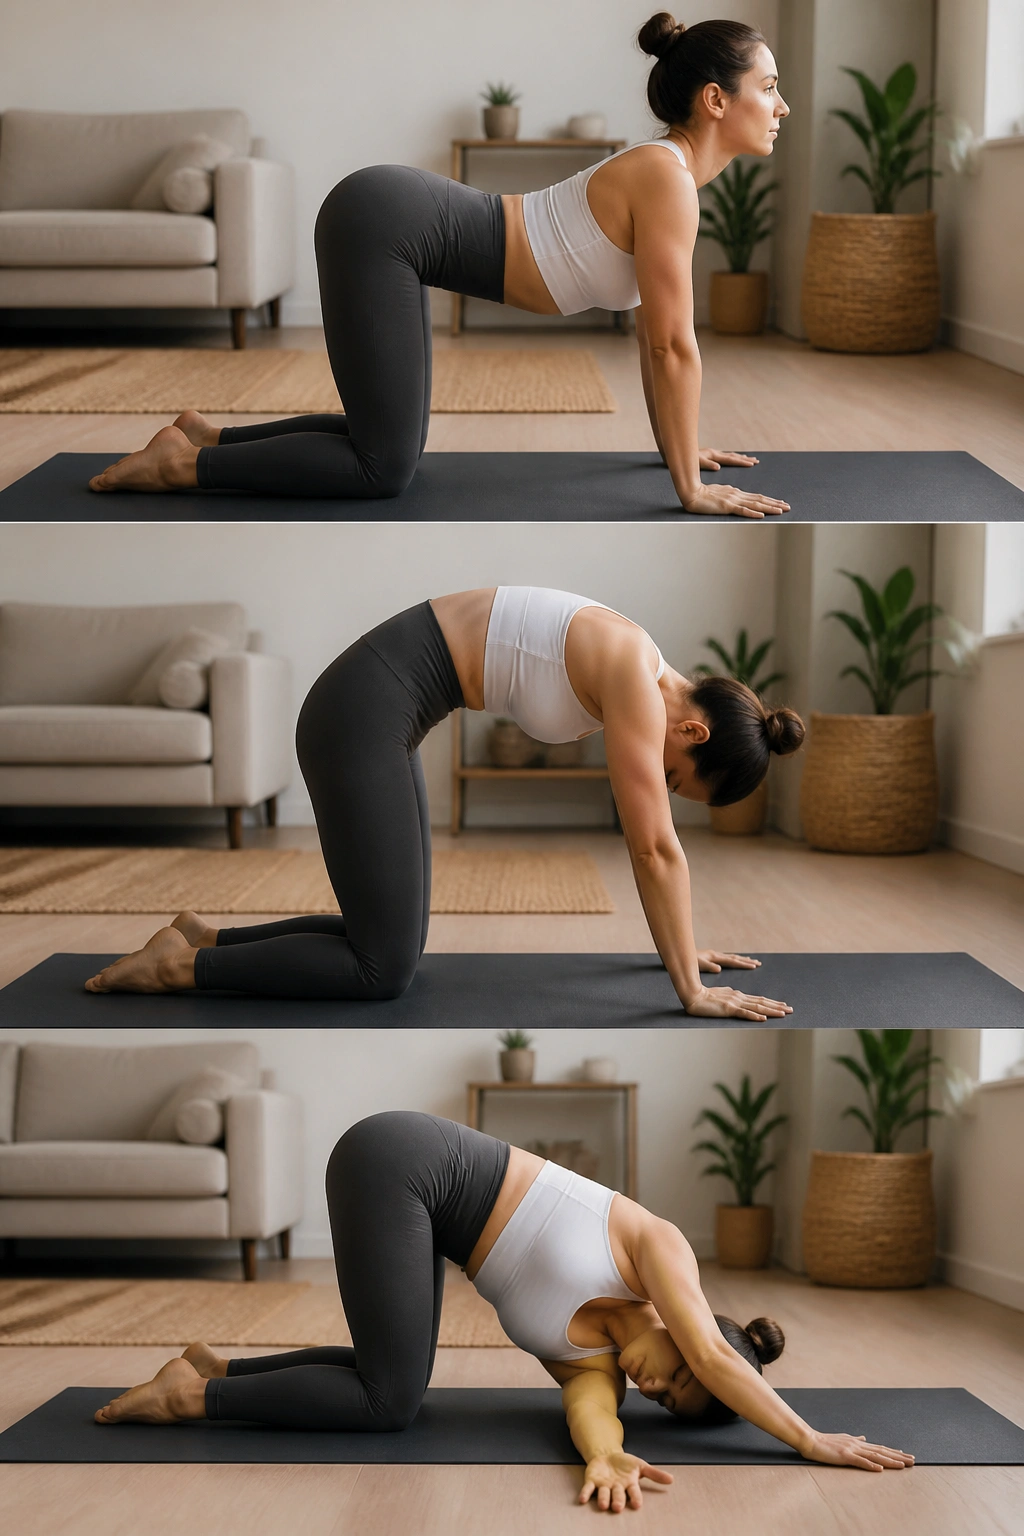
A stiff upper back after pressing, paddling, or desk work can make everything feel bigger than it is. Breathing gets shallow. The neck starts helping where it should not. Shoulders creep toward your ears. It’s annoying, and the fix is often a gentle spine sequence done with patience.
Cat-cow warms the whole rib cage, then thread-the-needle gives you a controlled rotation that doesn’t ask your low back to twist like a corkscrew. That distinction matters. The low back is not built for big, sloppy rotation.
The Flow
- Cat-cow for 6 to 8 rounds, moving slowly with the breath.
- Thread-the-needle on each side for 4 to 5 breaths.
- Return to neutral and take one long exhale before switching sides.
Keep your hands under your shoulders and your knees under your hips. If your wrists are cranky, drop to forearms for the thread or use a folded mat. Small adjustments like that make the sequence sustainable.
This is one of those recovery yoga sequences that feels even better on the second round than the first. The ribs start to move. The upper back stops acting like a brick. Then the neck usually relaxes, which is the part most people notice first.
5. Down Dog Pedal and Calf Melt for Tight Lower Legs
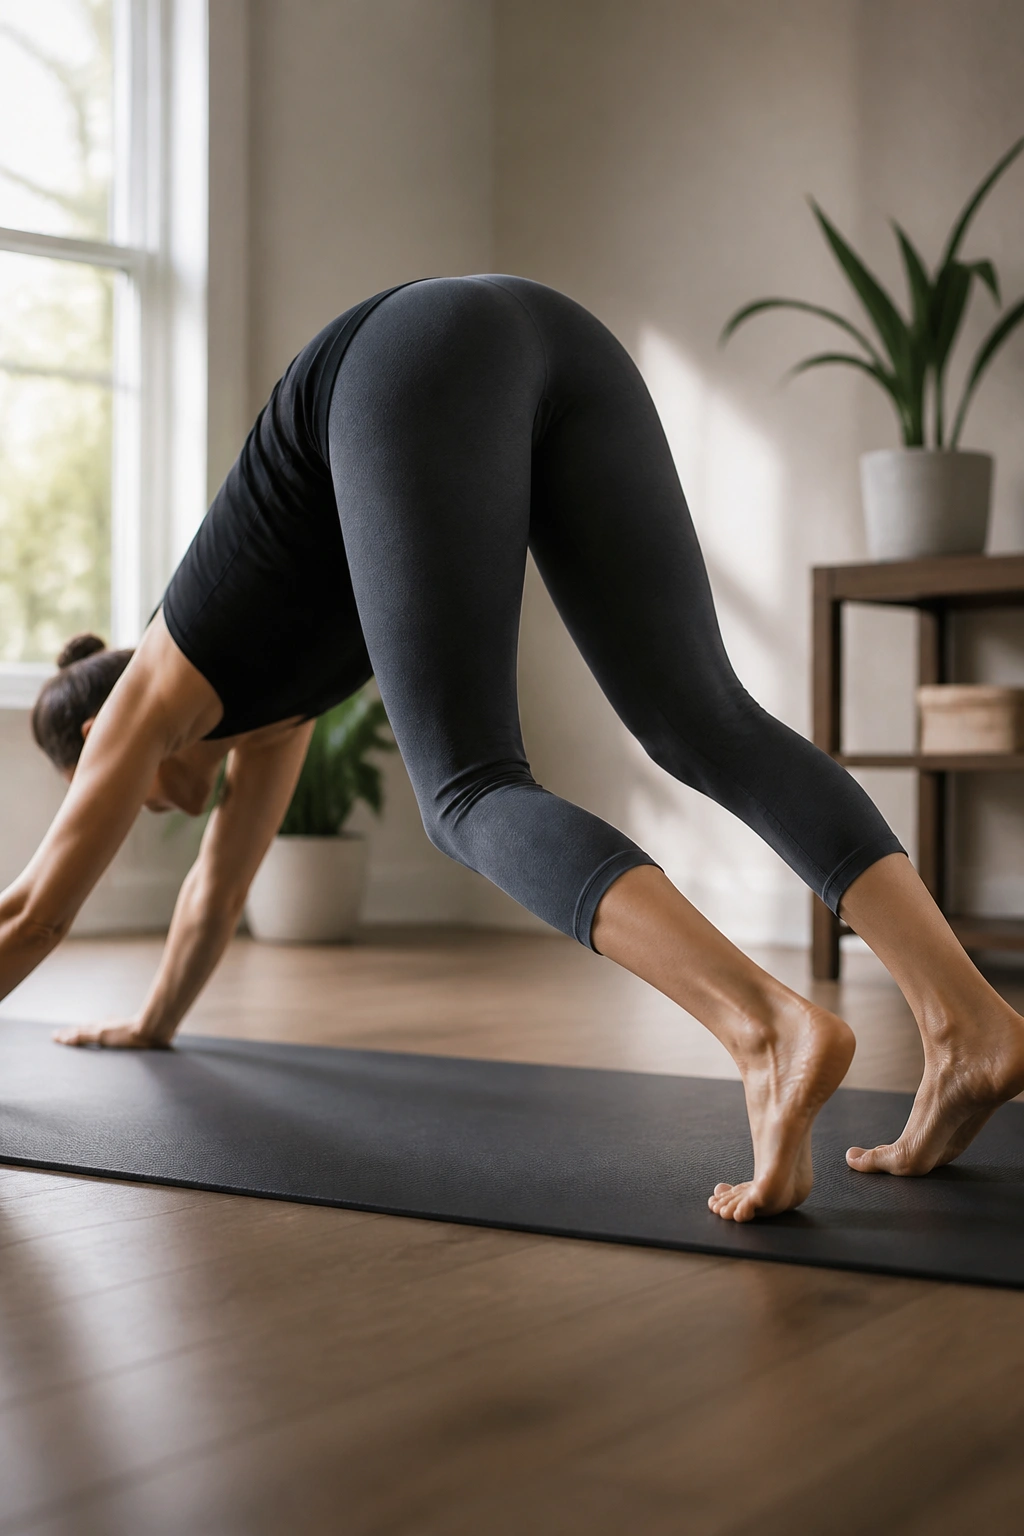
Not every recovery yoga sequence needs to go straight at the hips. Sometimes your calves are the loudest thing in the room, and they’ll keep pulling on your ankles, knees, and even your feet until you deal with them.
Downward dog is the obvious choice, but the small details matter here. Bend one knee, press the opposite heel toward the floor, then switch slowly. That alternating pedal creates a little pump through the lower leg that static stretching alone does not give you.
If your wrists hate down dog, use a wall. Hands on the wall at hip height, one foot back, and one heel pressing down while the other knee bends. Same idea. Far less drama.
Stay for 30 to 60 seconds, then come out and shake the legs once before repeating. Two rounds is plenty. If one calf feels much tighter, give it the first turn and keep the second round shorter on that side.
The best part is how fast this one changes the way you walk. Heels feel less heavy. Ankles feel less bossy. And on a rest day, that tiny change can be the difference between moving well and moving like you’re wearing wet boots.
6. Low Lunge to Half Split for Front-of-Leg Recovery
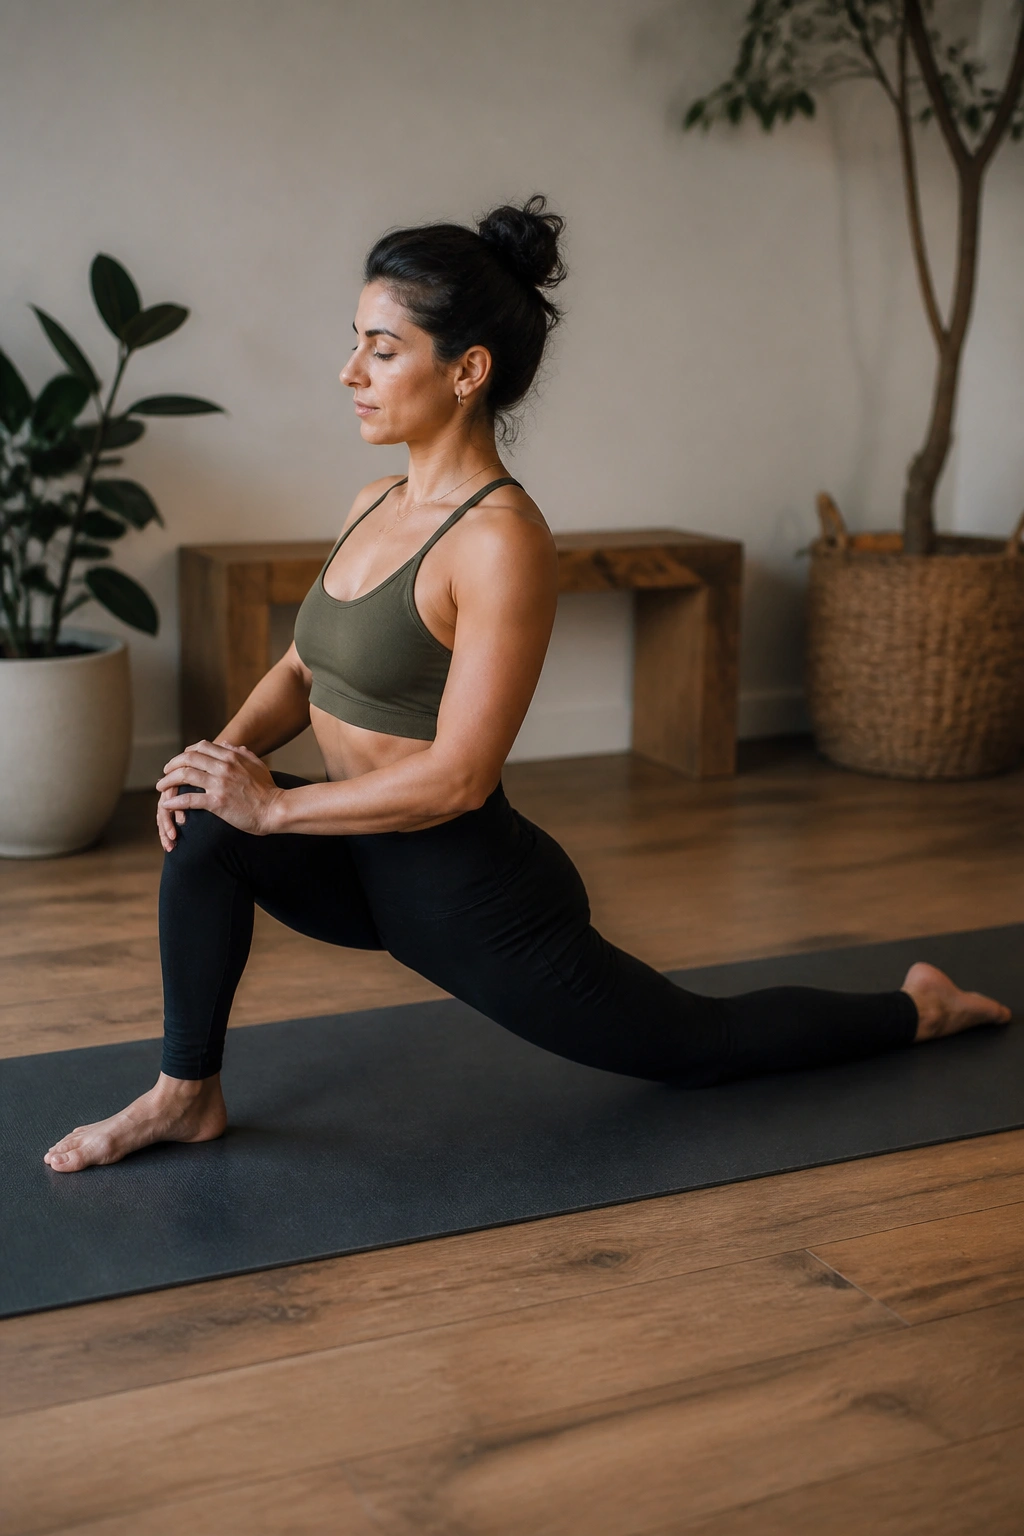
I keep coming back to this pairing after runs and jump sessions because it hits two places that like to team up: the front of the hip and the back of the thigh. One without the other usually leaves the whole line irritated.
Start in a low lunge with the back knee down and a block under each hand if you need support. Then tip your weight back into half split, sending the hips over the back knee and lengthening the front leg. That little shift is the whole sequence.
The Small Detail That Changes It
The pelvis stays quiet. If you dump forward in the lunge or round hard in half split, the stretch turns messy fast. Keep the ribs stacked over the hips as much as you can. That keeps the work where you want it.
- Low lunge: 3 to 4 breaths
- Half split: 4 to 5 breaths
- Repeat the pair once on each side
A blanket under the back knee can save the day on hard floors. So can blocks under the hands. I’d rather see you use props well than pretend you’re tough and spend the next morning sore in the wrong places.
This one feels especially good after intervals, hill work, or a long stair-heavy day. The body likes the contrast. Bend. Extend. Bend again. Done well, it feels like giving the front line of the leg permission to breathe.
7. Supported Bridge and Reclined Twist for a Quiet Low Back
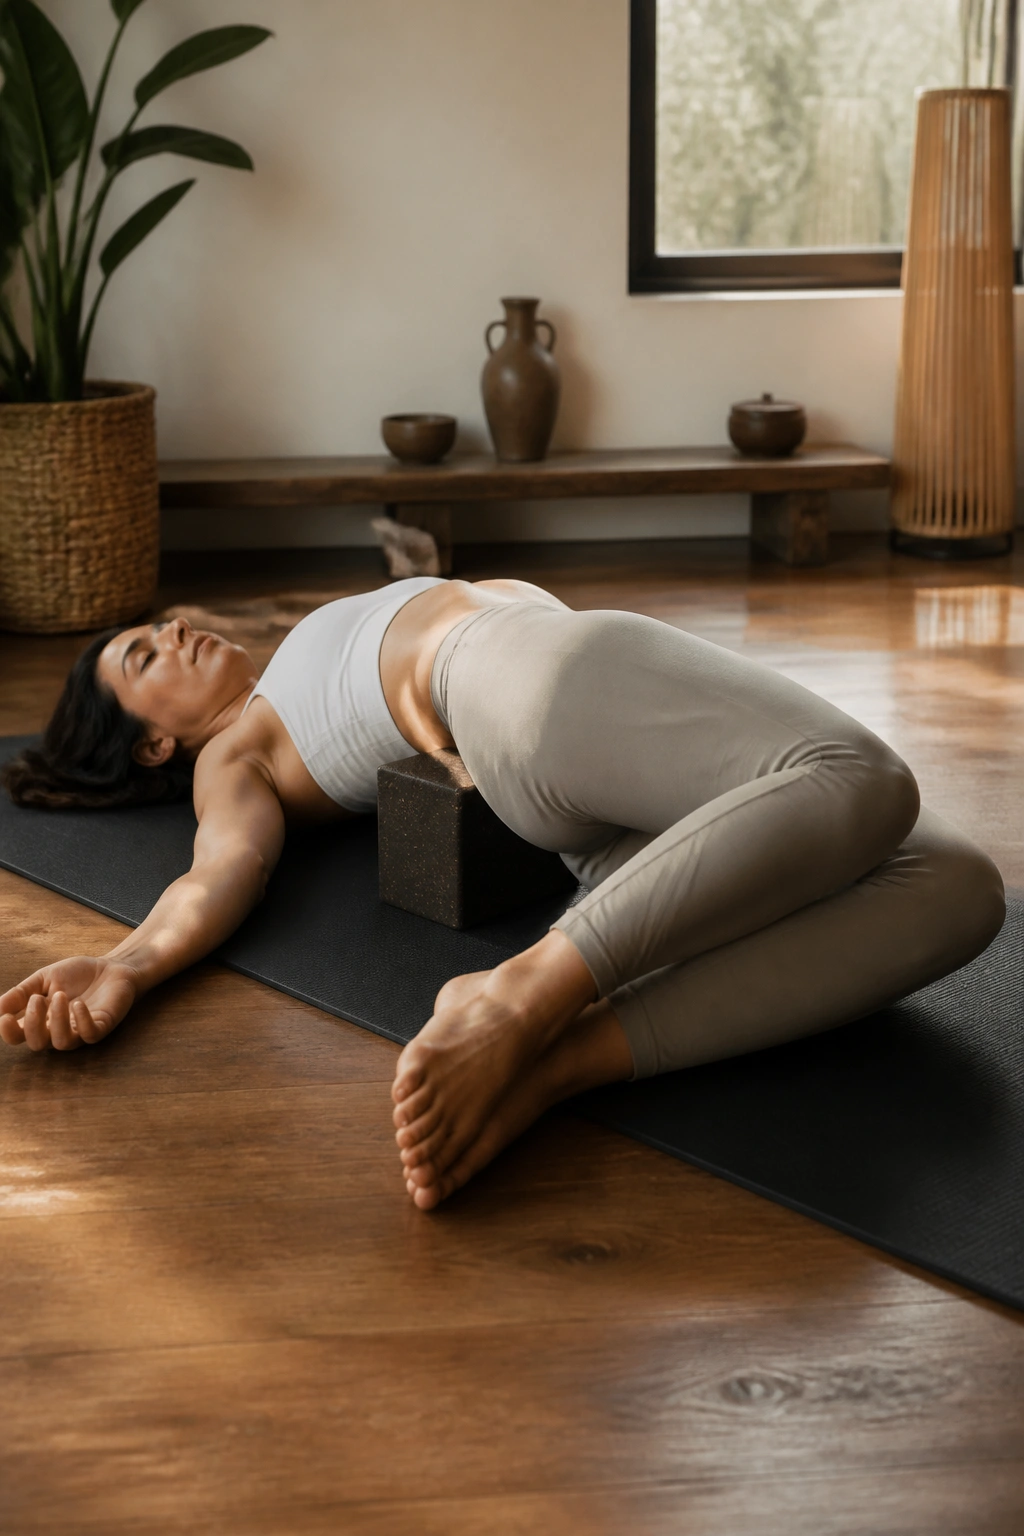
A harder stretch is not always a better recovery tool. In fact, when the low back is cranky, the smartest move is often support, not intensity.
Supported bridge does a neat thing: it lets the front of the hips open while the spine stays mostly passive. Slide a block under the sacrum, settle your weight into it, and let the chest stay soft. Then pair it with a gentle reclined twist to finish the job without yanking on the spine.
What to Watch For
If the block feels too high, lower it. If the low back arches hard, move the feet a little farther away. You want a sense of length, not a sharp pinch near the beltline.
Hold the supported bridge for 1 to 3 minutes. After that, take one side of the twist for 4 or 5 breaths, then switch. Keep the knees stacked or use a pillow between them if rotation feels rough.
This sequence is especially useful after deadlifts, heavy carries, or any day when your trunk has spent hours bracing. It is calm work. No heroics. The body often settles faster when you stop trying to impress it.
8. Legs-Up-the-Wall for Heavy Feet and a Racing Mind
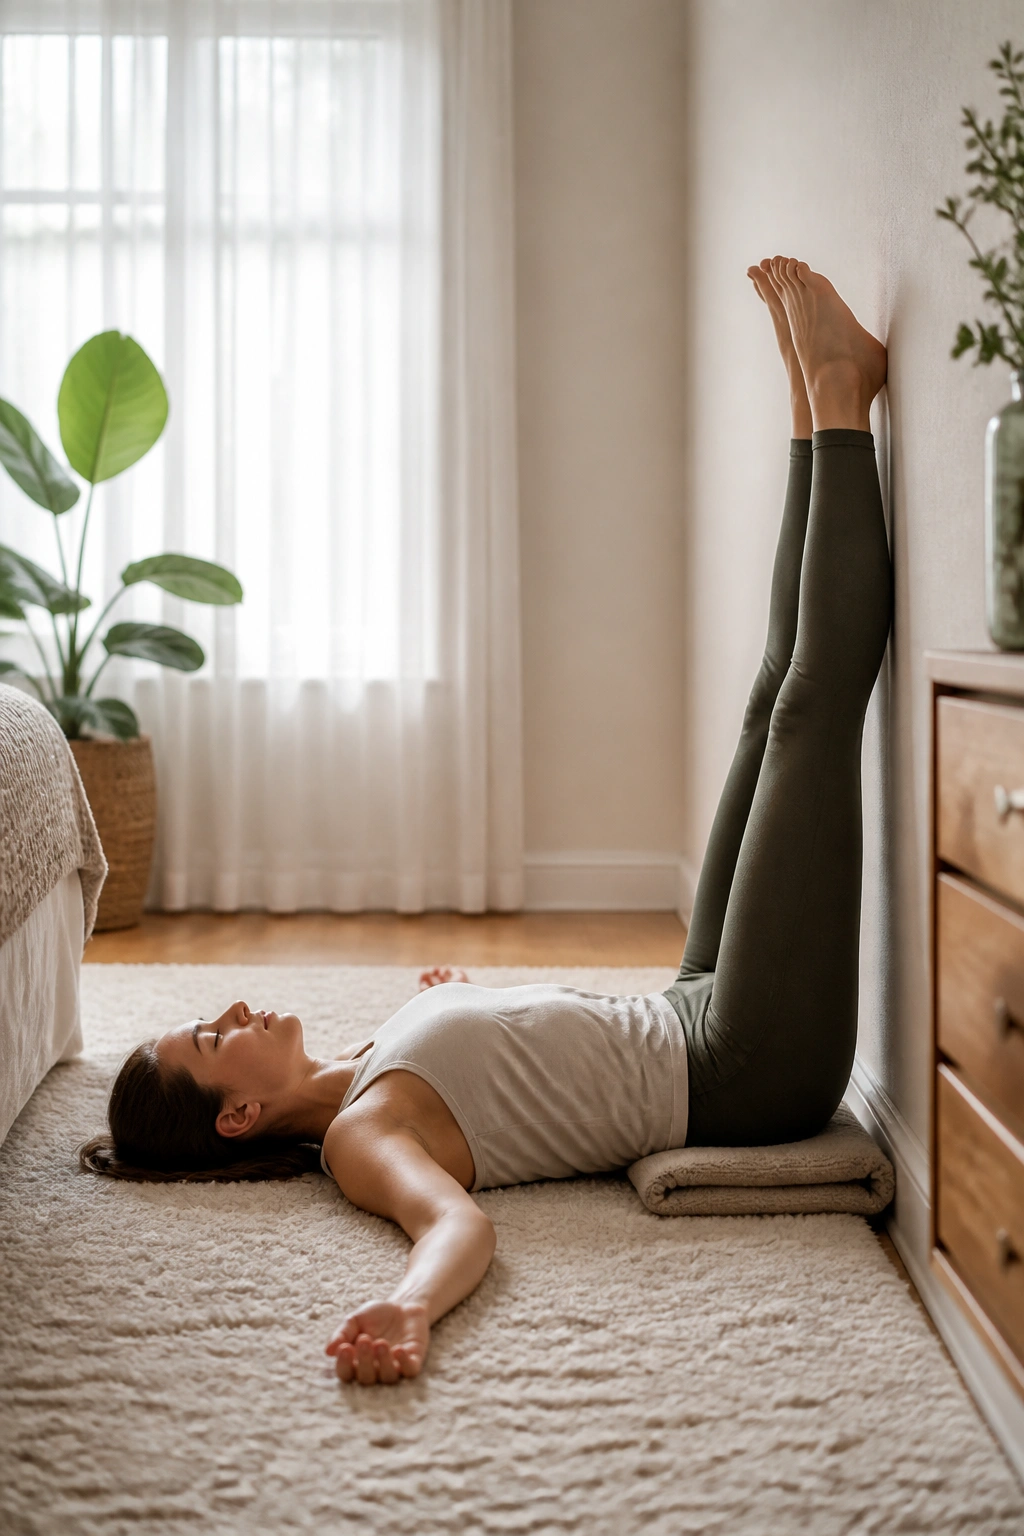
The wall does most of the work here, which is part of the appeal. Slide your hips close enough to the wall that your legs can rest up it without strain, tuck a folded blanket under the pelvis if that feels better, and let your feet go slack.
The sensation is oddly good. The calves get a break. The ankles stop carrying your weight. Breathing slows because there is nothing to chase, nothing to hold, nothing to brace against. After a long day on your feet, that matters.
Stay here for 5 to 10 minutes if you can. If your hamstrings tug too hard, move a few inches farther away from the wall. If your lower back feels flat and grumpy, add a cushion under the hips.
This is one of the easiest recovery yoga sequences to pair with longer exhales. Try breathing in for a count of 4 and out for a count of 6. You do not need to make it fancy. The point is to let the body get boring for a minute.
And that can be hard. People want more from recovery than lying on the floor. But on active rest days, the floor often knows more than the ego does.
9. Lizard to Half Pigeon for Outer-Hip Drag
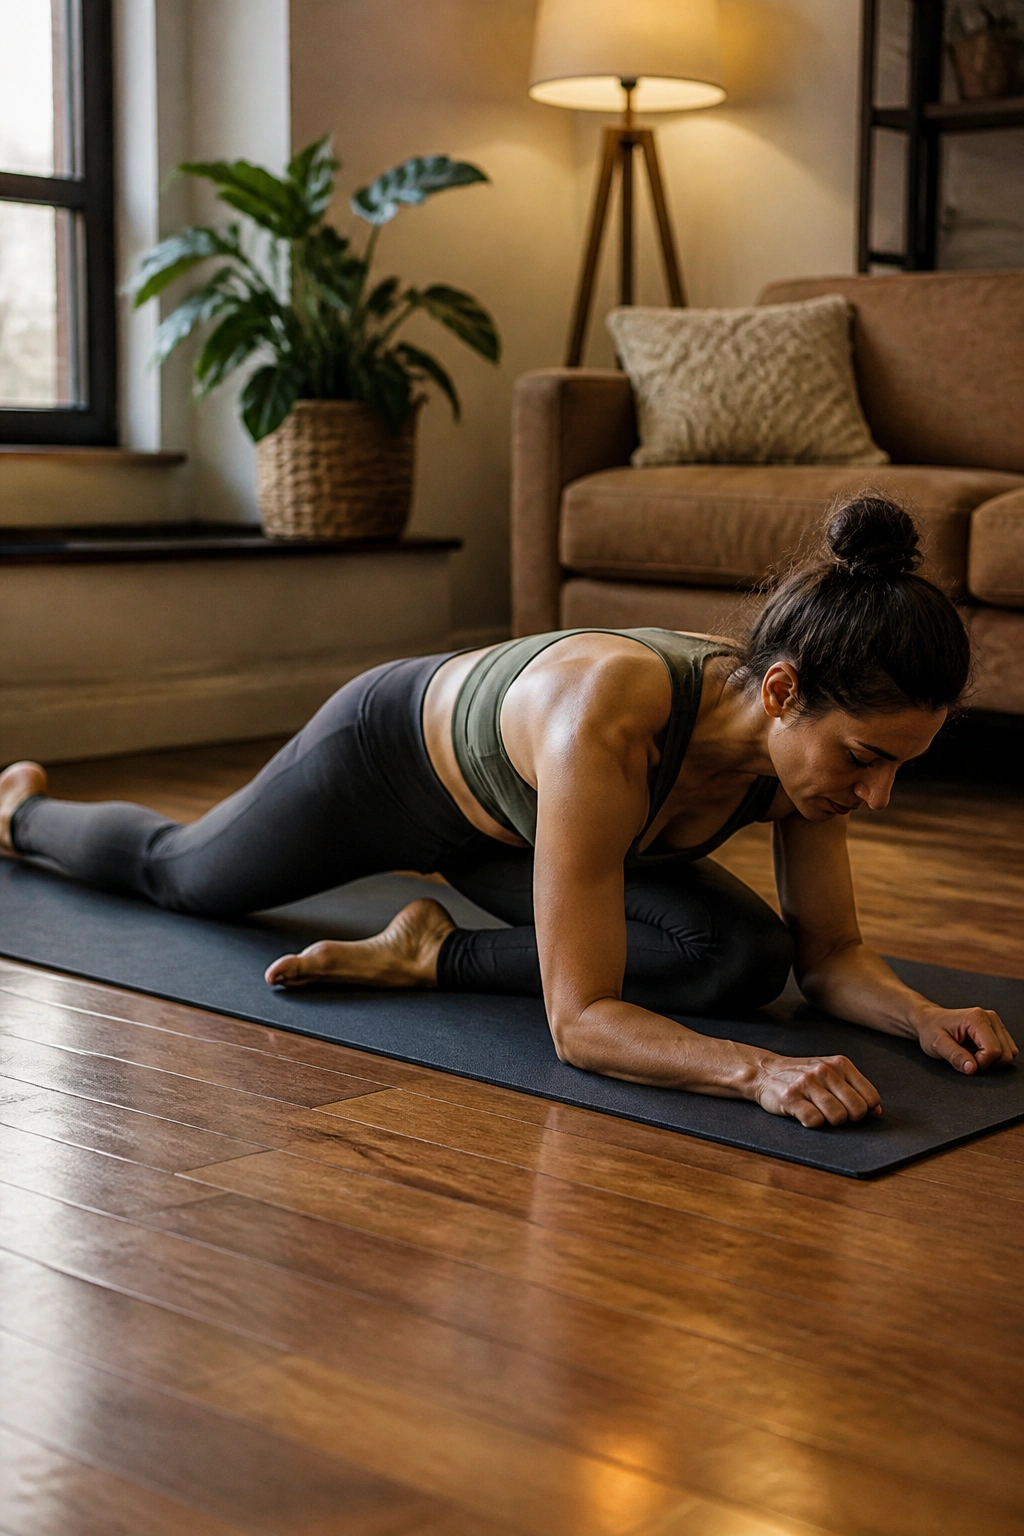
What if the outer hip is the real problem, not the hamstring? That’s usually where I go when walking feels clunky and the glute medius area has turned into a lump of resistance.
Lizard pose gives you a deeper angle into the groin and hip capsule, while half pigeon shifts the load toward the outer glute. Used back to back, they make a more honest pair than either one alone. One can be plenty; two is usually better.
A Practical Way to Run It
- Lizard with back knee down: 3 breaths
- Optional forearms down only if the neck and low back stay calm
- Half pigeon: 5 breaths on each side
- Keep a folded blanket under the hip if the front of the pelvis floats off the floor
Do not force the back leg straight in lizard if that pulls the low back into a deep arch. And do not sink hard into pigeon just because it looks like a bigger stretch. The best version is the one that lets you breathe through the side ribs.
This is a strong choice after long rides, tempo runs, or lower-body strength work. The outer hips can get sneaky-tight, and they often need a little patience before they feel normal again.
10. Seated Forward Fold with a Strap for the Back Line
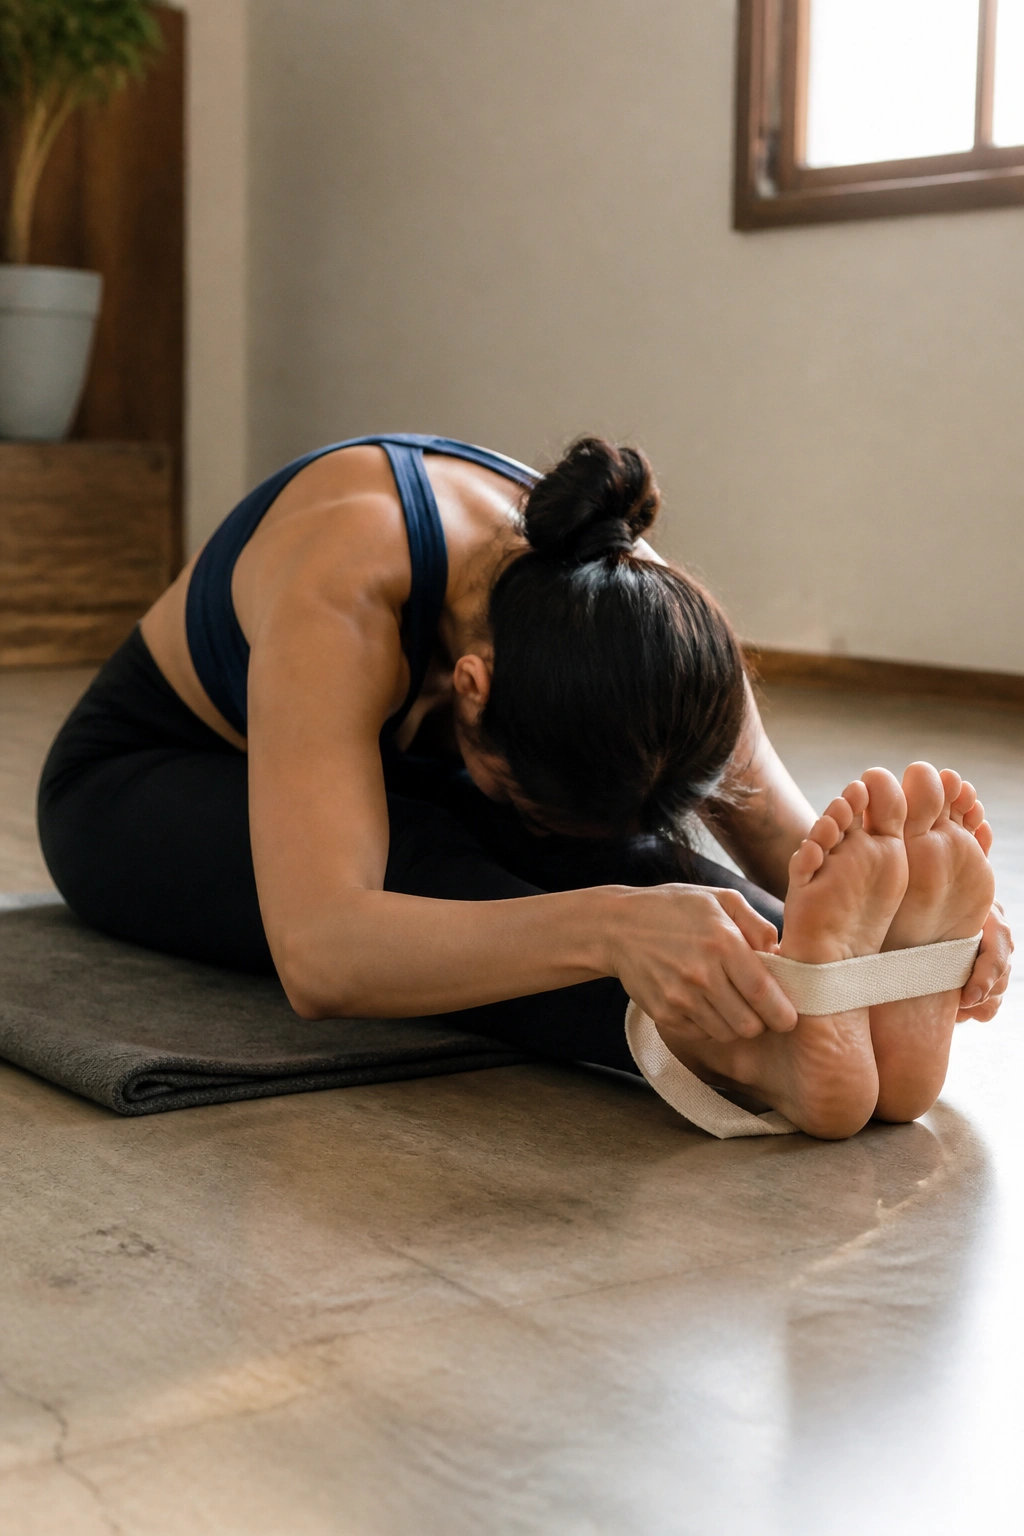
The hamstrings do not care how badly you want a deeper fold. They care about load, breath, and whether your pelvis is allowed to tilt without drama.
Sit on a folded blanket, loop a strap around the feet, and bend the knees enough that the spine can stay long. Then fold from the hips, not from the neck. That part is huge. A rounded back is not the same thing as a useful stretch.
How I’d Set It Up
A few quick rules make this sequence better:
- Sit high enough that the pelvis tips forward easily.
- Keep the knees soft.
- Pull the strap until the shoulders stay down.
- Hold 4 to 6 breaths, then come out slowly.
If you feel a sharp pull behind the knee, back off. That tends to be nerve tension, not the kind of stretch you want to chase on a rest day. A little bend in the knee usually fixes more than people expect.
This is a good choice when the whole back line feels packed tight after lifting or sprinting. It is also one of the better recovery yoga sequences for people who hate floor twisting but still want a real hamstring release. Plain. Useful. No theatrics.
11. Sphinx to Child’s Pose for a Stiff Back That Needs Both Ends
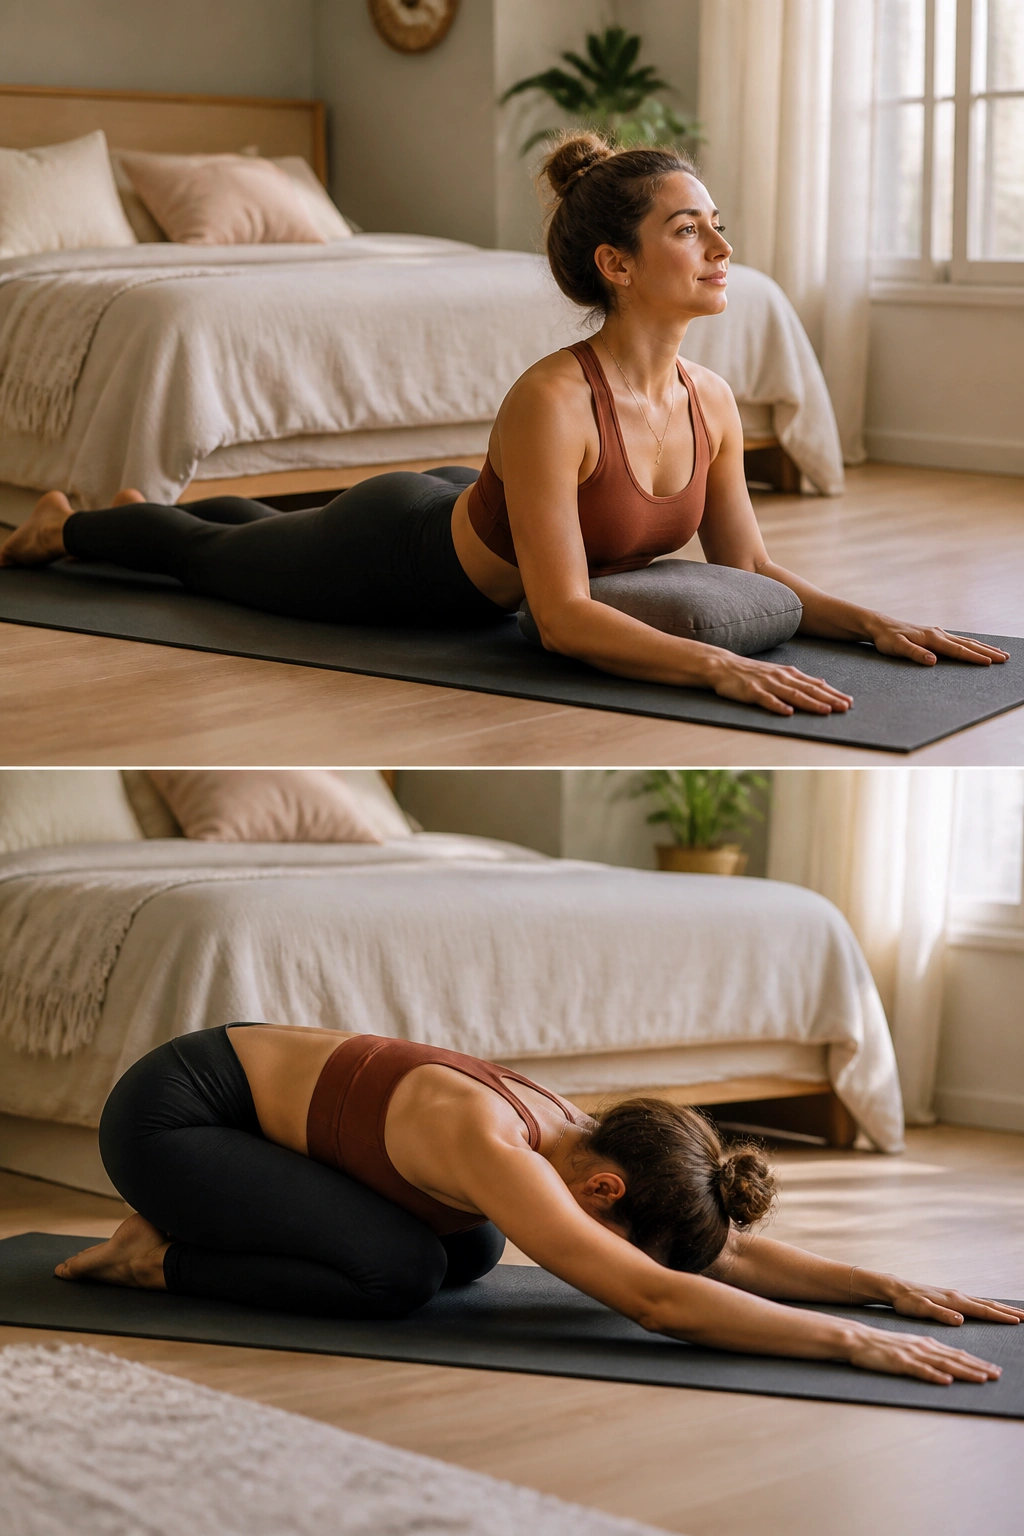
A back that feels locked up usually does not want only flexion or only extension. It wants both, gently, without the threat of a hard end range.
Sphinx pose gives the spine a mild opening through the front of the body. Child’s pose gives the opposite. Moving between them teaches the back that it can change shape without bracing. That’s the real trick.
I like to stay in sphinx for 4 or 5 breaths, keeping the elbows a little ahead of the shoulders so the low back does not overwork. Then I melt back to child’s pose for the same count. Two rounds is enough for most bodies.
One-sentence truth: if sphinx hurts, skip it.
A soft prop under the ribs or forearms can make a huge difference. So can widening the knees in child’s pose if your hips complain. The sequence should feel like a conversation, not an argument, and if your spine keeps asking for less, listen.
12. Happy Baby and Wind-Relief Rocks for the Lower Belly and Sacrum
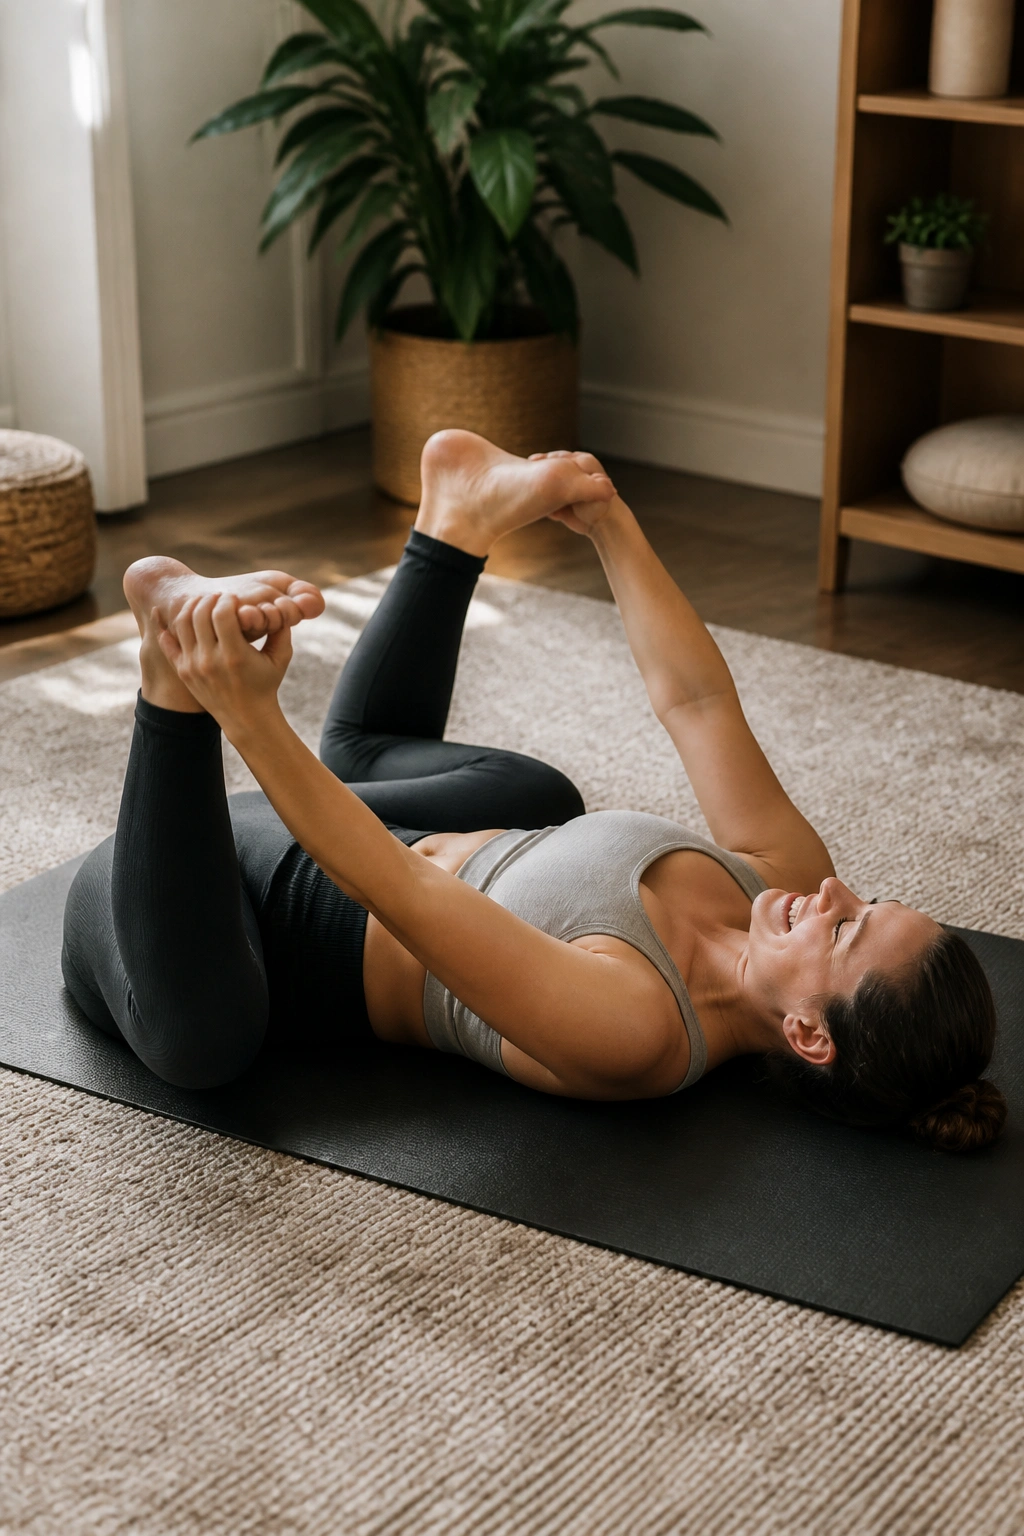
There’s a reason people grin when they hit happy baby the right way. It opens the inner thighs, softens the low back, and takes a little pressure out of the sacrum without making you work for it.
The version I like best is unglamorous. Grab the outside edges of the feet or the backs of the thighs, keep the shoulders heavy, and rock side to side for a few breaths. That rocking matters more than people think. Static shapes can be nice. Gentle motion usually feels better.
Then bring the knees toward the chest and let them drift a little wider, almost like a loose wrap. Breathe into the belly, especially the lower part. The torso gets to stop holding itself in a tall posture for a minute.
If your neck hates it, keep the head down. If the groin grabs, hold behind the thighs instead of the feet. Small changes. Big difference. This is the kind of recovery yoga sequence that pays off after long sitting, heavy squats, or any day when the pelvis feels compressed from every angle.
13. Side-Lying Open Book for a Stiff Rib Cage and Tight Shoulders
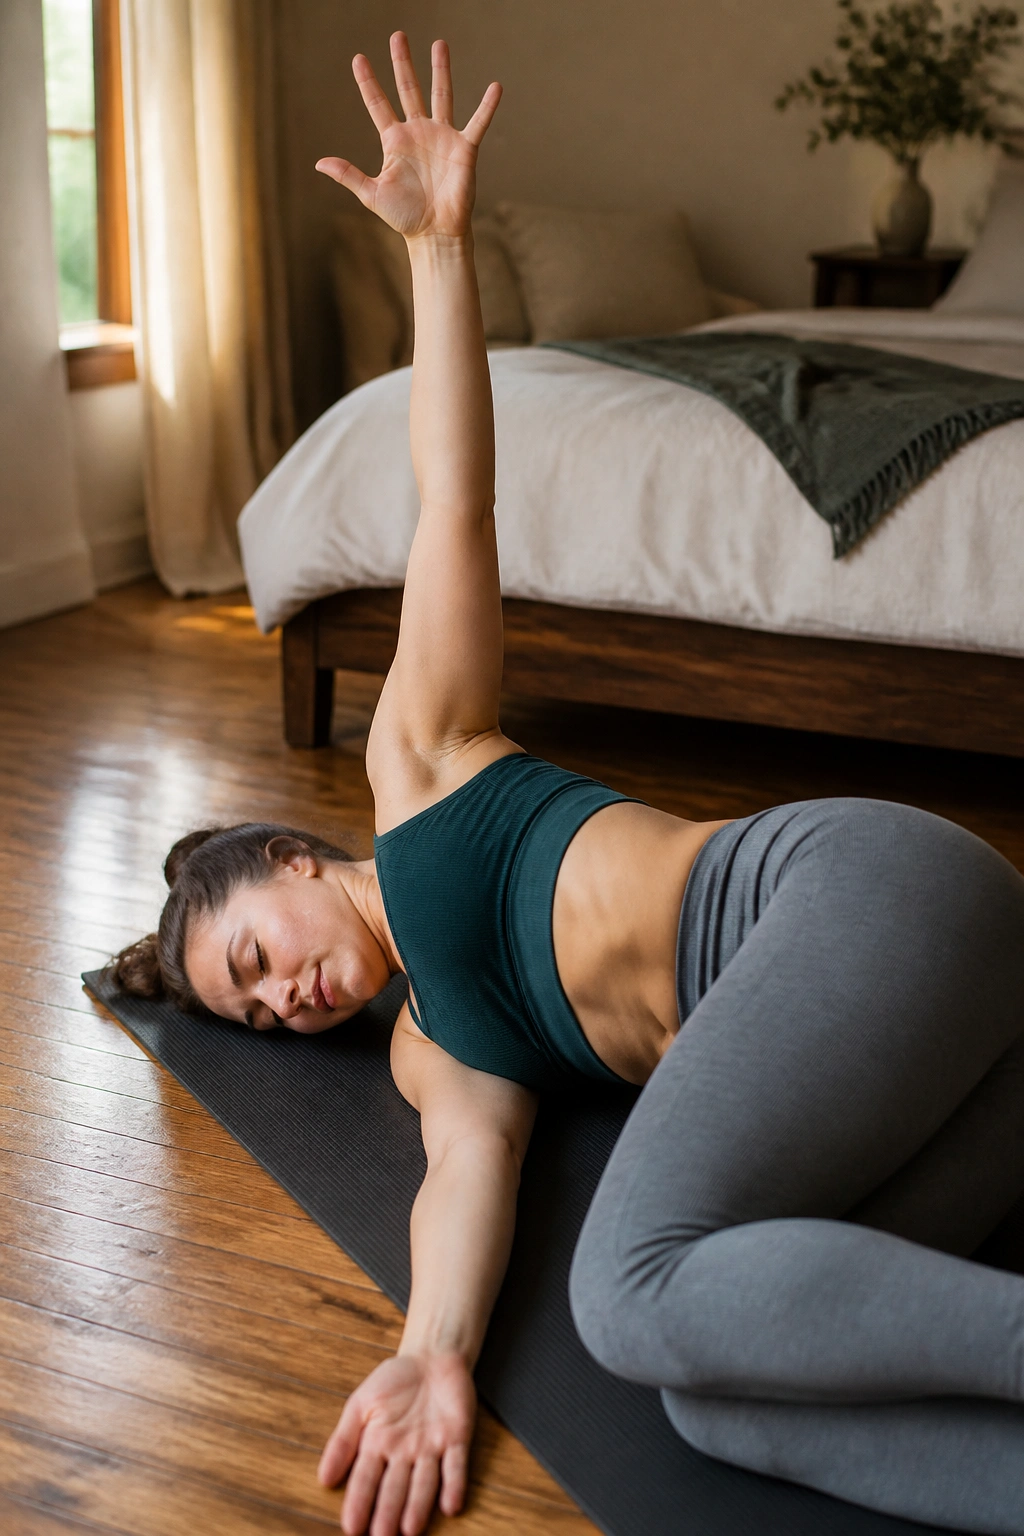
If overhead work makes your ribs feel locked, stop forcing the shoulders and move the rib cage instead. That’s the cleaner fix.
Lie on your side with knees stacked, arms straight in front, then open the top arm across the body in a slow arc until the chest turns toward the ceiling. Keep the knees heavy so the twist comes from the upper body, not the lumbar spine. That’s the whole point.
How to Breathe Into It
Take a full inhale as the arm opens, then a long exhale when you settle. Four or five rounds on each side is enough. If the shoulder feels jammed, bend the elbow a little or place a pillow under the top arm.
The side-lying version is easier on the neck than kneeling twists, and it’s usually kinder after push day or swimming. Add one slow shoulder sweep after each open book if the scapulae feel sticky. No need to push range for the sake of range.
This is one of those recovery yoga sequences that looks mild and works far more than it should. The rib cage starts to move. The breath gets bigger. The shoulders stop trying to do all the twisting by themselves.
14. Standing Wall Roll-Down When the Floor Is Not an Option
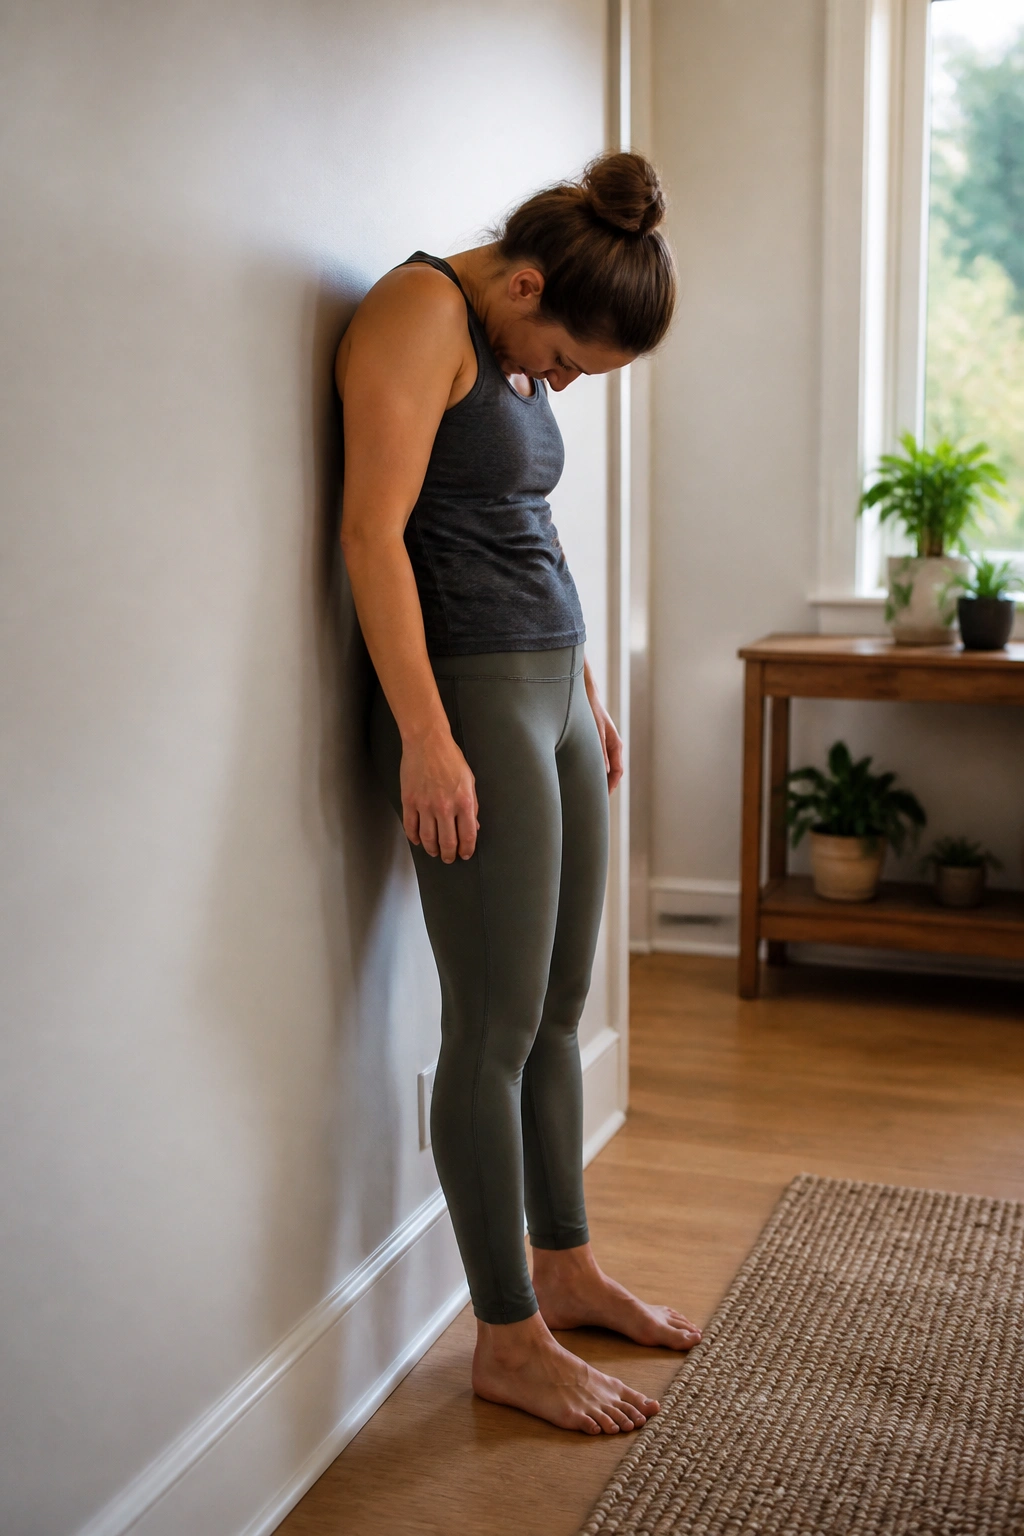
Sometimes the most useful recovery work happens when you are nowhere near a mat. A wall, a little space, and 3 minutes are enough.
Stand with your back near a wall, feet hip-width apart, and slowly roll your spine down one segment at a time. Let the head be the last thing to go. Then hang there for a breath or two before stacking back up. That alone can reset a tired back better than a half-hearted stretch on the floor.
Quick Wall Sequence
- Slow roll-down: 3 reps
- Calf stretch with one foot behind the other: 30 seconds per side
- Chest opener with forearms on the wall: 4 breaths
- Standing side reach: 3 breaths per side
The nice part is the wall keeps you honest. You cannot cheat by flinging your arms around or diving into a deep fold. You have to move slowly, and slow is the point.
I use this one on active rest days when I know I’ll skip the mat if the first step feels too big. The wall lowers the friction. That matters more than perfect form when you are trying to stay consistent.
15. Runner’s Lunge to Twisted Crescent for a Gentle Cooldown
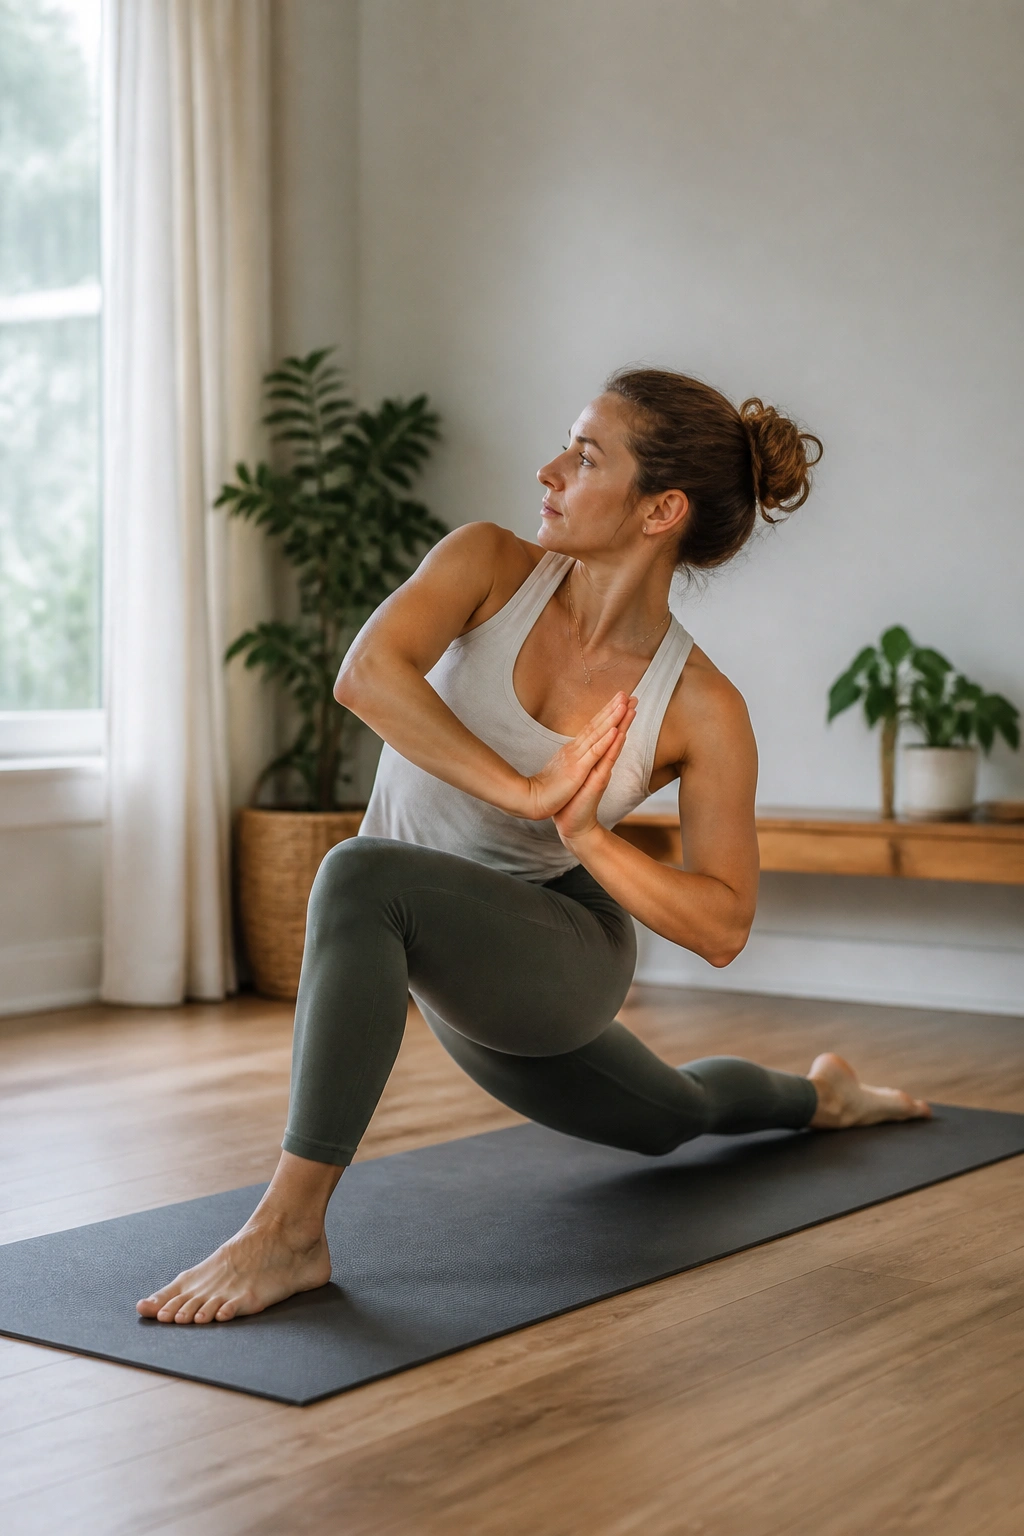
Can a standing flow still count as recovery yoga? Absolutely, if the pace is slow and the range stays modest.
Runner’s lunge opens the hip flexor while twisted crescent gives the torso a little rotation without dumping into the low back. The key is to keep the front knee soft and the twist small. Recovery work should feel like you could stay there all day if you had to.
From a high lunge, lower the back heel if that feels steadier, then bring one hand to the front thigh and the other to prayer or to a block. Twist from the ribs, not from the knee. Hold for 3 breaths, return to center, and switch sides.
This sequence works well after intervals, court sports, or any workout where your heart rate spiked and your hips got tight at the same time. It’s still movement. It’s just movement with brakes.
A small warning: if you’re already wobbly, use a wall or keep the back knee down. Balance work is not a requirement for recovery. It’s just balance work.
16. Kneeling Quad and Foot Release for the Parts That Get Ignored
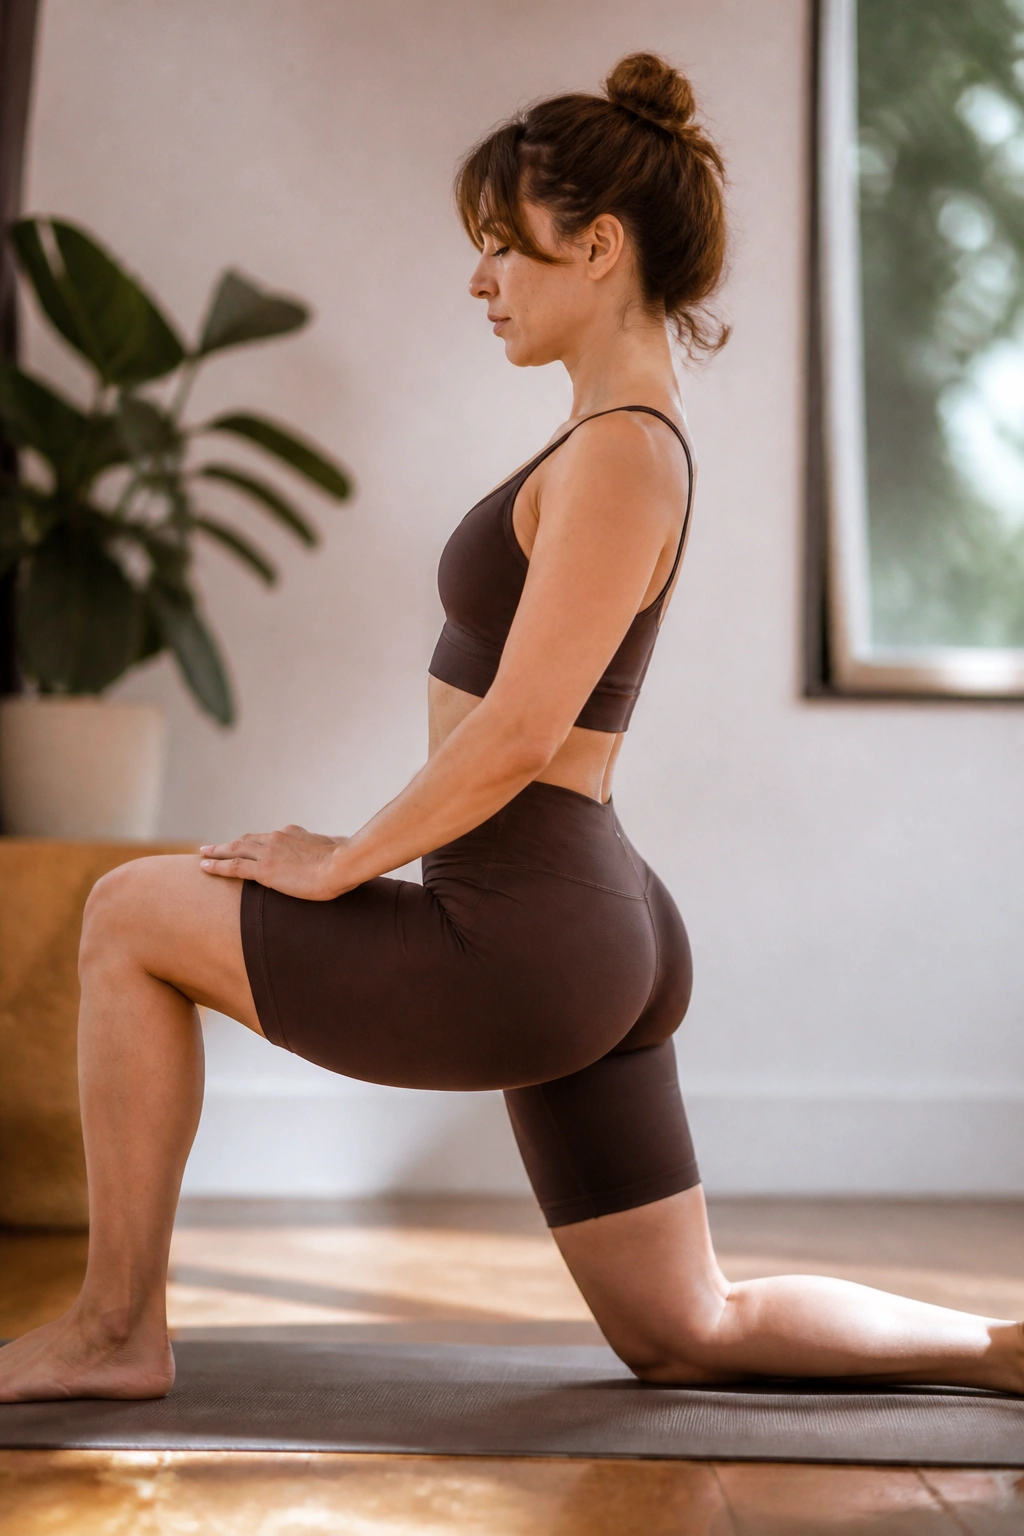
The feet get ignored until they’re mad. Same with the quads, especially the lower half near the knee, which takes a beating during lunges, jumps, and hill work.
Start kneeling with one foot behind you and the top of the foot on the floor. If that already feels like enough, stay there. If not, gently tuck the toes and shift your hips back an inch or two. That tiny change wakes up the front of the ankle and the shin in a way most people never do.
A Simple Order That Works
- Untucked kneeling quad stretch: 4 breaths
- Tucked-toe kneel: 3 breaths
- Gentle ankle circles: 5 each direction
- Toe spread or foot massage: 30 seconds
Use a folded towel under the knee if the floor is hard. And if the kneeling position makes the knee itself ache, do the foot work standing instead. There is no prize for suffering on a rest day.
This is a sleeper sequence. Not glamorous. Not dramatic. But if your shoes feel tight, your calves feel noisy, or the fronts of your thighs are pulling on every step, it earns its place fast.
17. Supine Core Reset for Tired Bracing Muscles
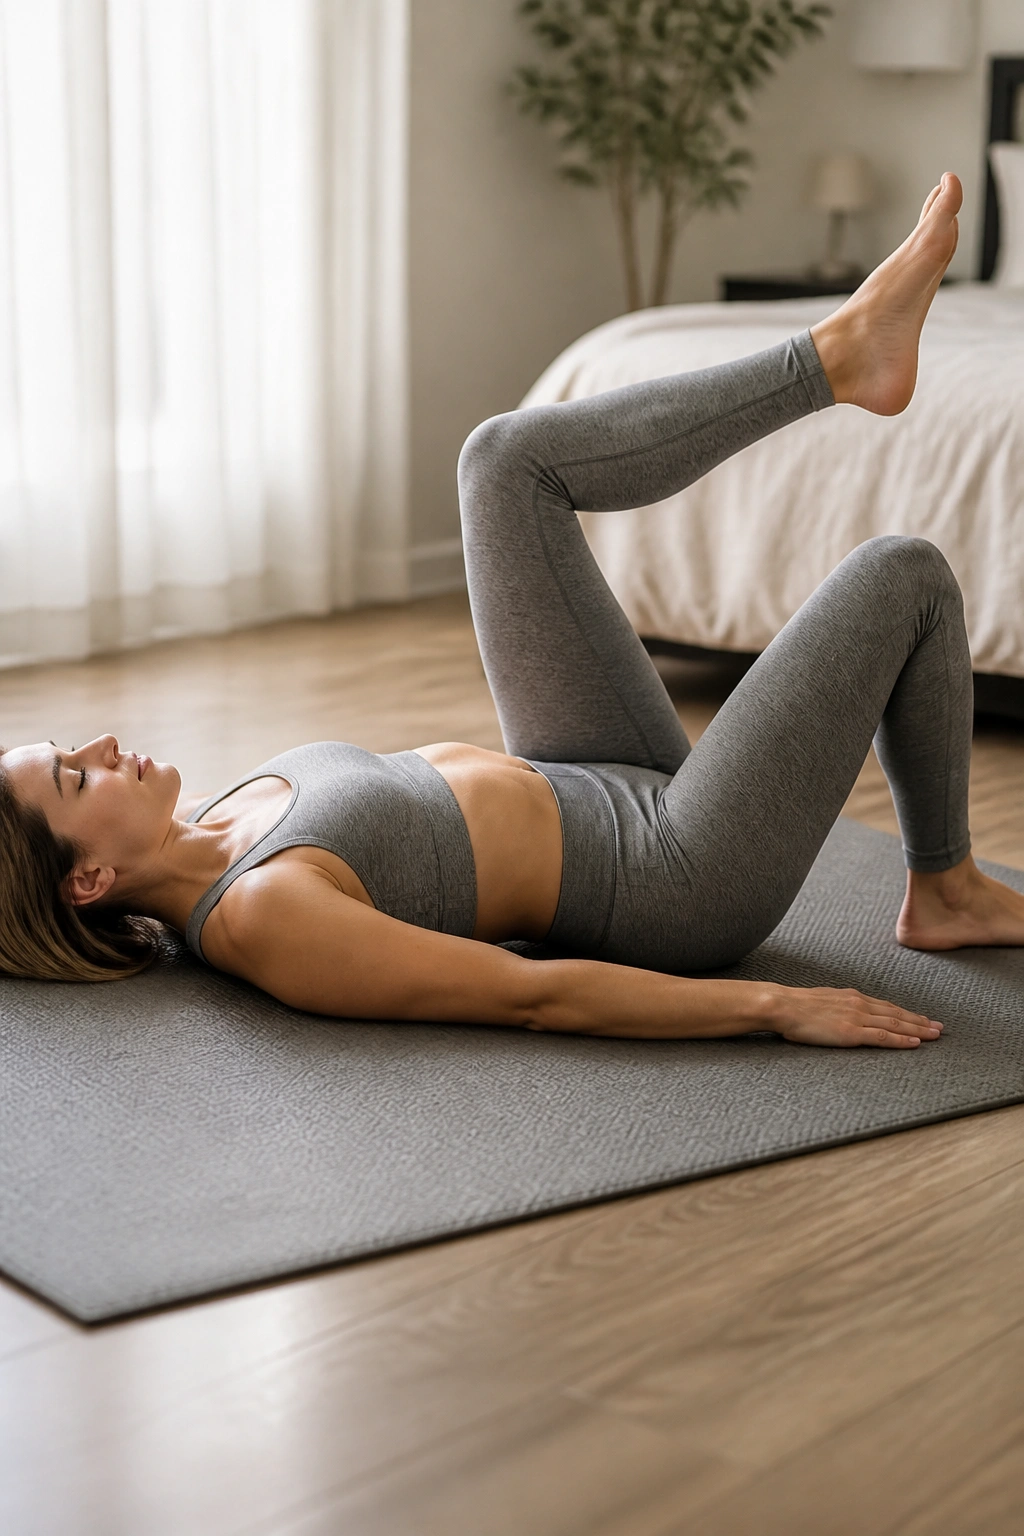
Your core can be sore without needing more core work. In fact, after heavy lifting or long runs, what it often needs is the opposite: a chance to stop bracing.
Lie on your back with knees bent and feet on the floor. Take a few breaths into the sides of the ribs, then bring one leg at a time into tabletop if that feels easy. From there, do slow knee drops, tiny marches, or a dead-bug reach with almost no load. The work should feel light enough that your neck stays quiet.
What Not to Do
- Don’t crunch hard.
- Don’t hold your breath.
- Don’t chase shaking.
A set of 5 to 6 slow reps is enough for each pattern. The point is not to “train” the abs. It’s to reconnect them with breathing and let the pelvis settle. That can be surprisingly calming after a day of heavy compressive work.
This sequence belongs on active rest days when your trunk feels more armored than strong. It brings the body down a notch without turning the session into a nap. Which, honestly, is a good trade.
18. Savasana and Box Breathing for the Last Five Minutes of Recovery
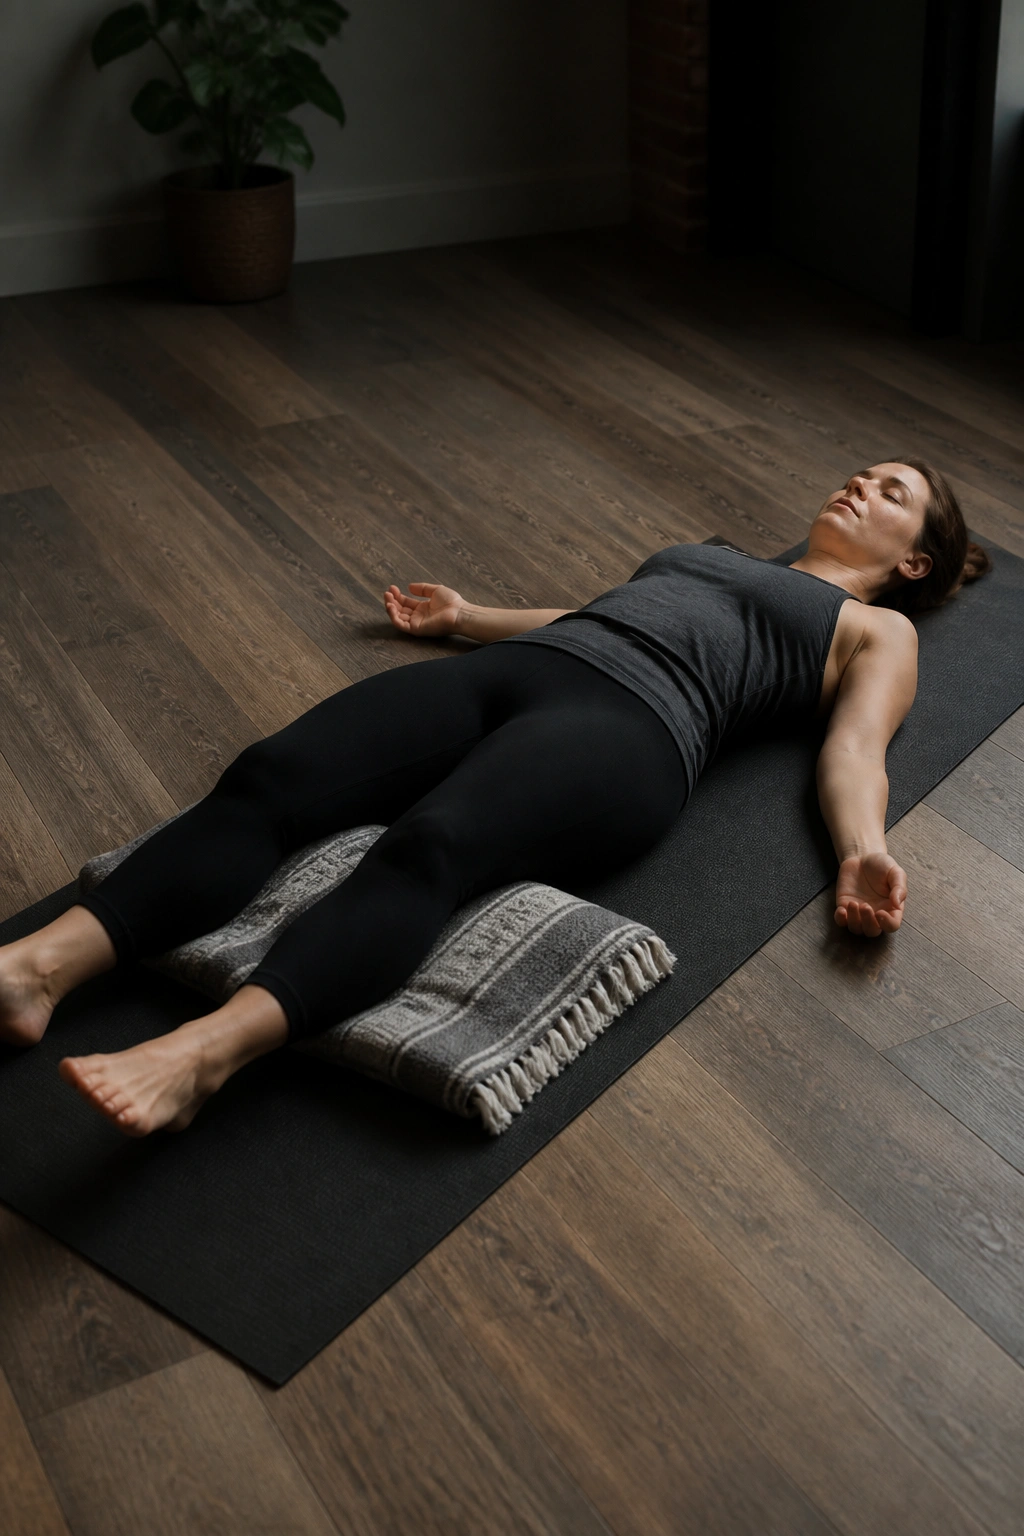
The body often wants the simplest thing at the end: lie down and stop managing itself. Savasana does not look like work, but after a full recovery yoga session, it ties the whole thing together.
Settle flat on your back with a blanket under the knees or a bolster under the calves if that feels better. Then breathe in for 4, hold for 4, out for 4, hold for 4. If that feels too rigid, drop the holds and simply make the exhale longer than the inhale. The shape matters less than the downshift.
One-sentence answer: this is where the nervous system usually catches up.
I like a dim room, a flat pillow, and no music with a beat. If your mind keeps trying to plan dinner or answer messages, that’s normal. Bring it back to the floor, the weight of the body, the sound of the exhale. Done well, this final piece makes the earlier poses land better.
Some people skip the ending because it feels too quiet. That’s usually the part they need most.
The Bottom Line
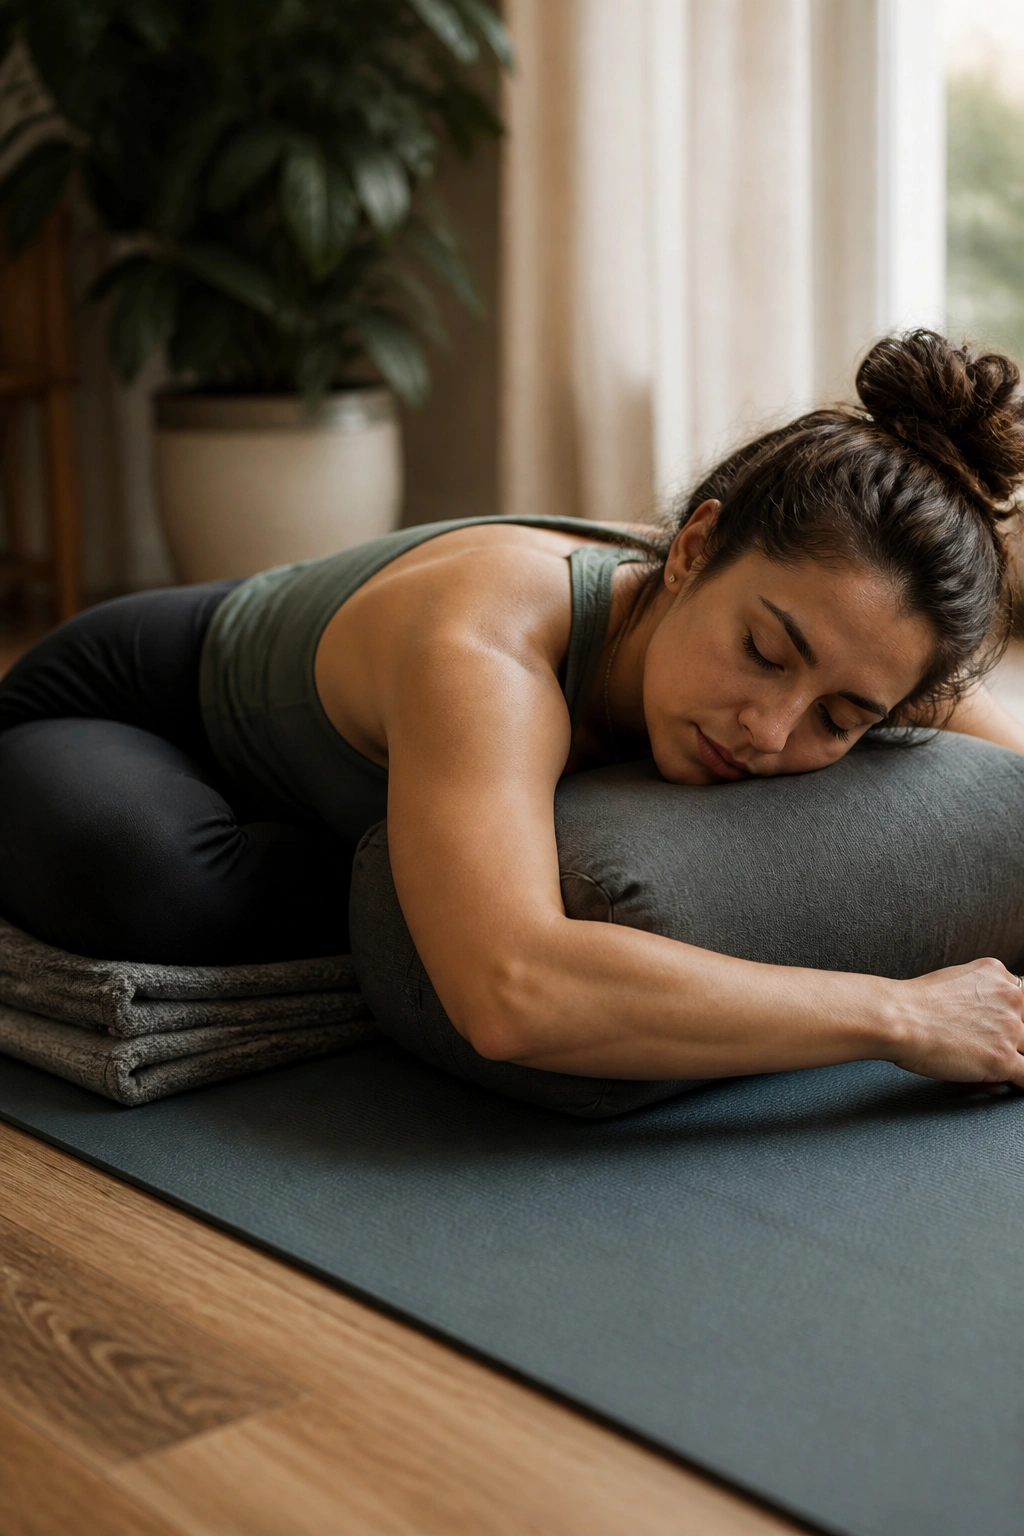
Active rest days work best when the recovery yoga sequence matches the problem, not just the mood. Tight calves want different attention than a cranky upper back. A stiff front hip does not need the same answer as a jammed sacrum.
Keep a small rotation handy. One sequence for the hips. One for the spine. One for the nervous system. That’s enough to cover most of the reasons a body feels tired without turning rest day into another workout.
And if you only have 6 minutes, take them on the floor. The body usually notices that choice fast.
