



The obsession with having a defined midsection is often misdirected. People spend hours doing crunches, hoping that endless repetition will carve out abdominal muscles, yet they often overlook the actual function of the core. Your core is not just the six-pack muscles you see in the mirror. It is a complex system involving the deep stabilizers, the obliques, and the muscles supporting your spine. If you want a tighter midsection, you need to train for stability, tension, and functional strength, not just for the burn.
Building a core that actually looks tight and holds everything in place requires a shift in perspective. You have to move away from purely superficial movements and toward exercises that force your muscles to engage under tension. It is about learning how to brace, how to rotate with control, and how to prevent movement when you are being challenged by external force. Most of the time, the secret to a tighter core is not doing more reps; it is doing the reps with better intent.
This approach works because it trains the transverse abdominis—that deep, corset-like muscle that acts as a natural weight belt. When that muscle is weak, your belly tends to push outward regardless of how much body fat you have. The following exercises are designed to wake up those deep stabilizers, build real-world strength, and change the way your body carries itself. There is no fluff here, just the movements that actually force your core to do its job.
1. Dead Bug
The dead bug is perhaps the most underrated exercise for abdominal control. It looks like you are just lying on the floor waving your arms and legs around, but when done with true precision, it is incredibly demanding. The goal is to keep your lower back pressed firmly into the floor for the entire duration of the movement. If your back arches, you have lost the engagement, and the exercise is no longer targeting your deep core.
The Mechanics of the Move
Start by lying on your back with your arms extended toward the ceiling and your knees bent at a 90-degree angle, hips directly over your torso. This is your starting position. From here, slowly lower your right arm behind your head while simultaneously extending your left leg straight out. Stop just before your heel touches the ground. Keep your ribcage knitted down—don’t let it flare up. Return to the starting position with control and switch sides.
Why It Actually Works
This is an anti-extension exercise. Your core’s job is to resist the urge of your spine to arch when your limbs are moving away from your center of gravity. Most people struggle with this because their hip flexors are tight, which pulls the lower back off the floor. Fight that pull. Keep your movements slow. If you can do this exercise quickly, you are doing it wrong. The tension should be consistent from the first rep to the last.
2. Bird Dog
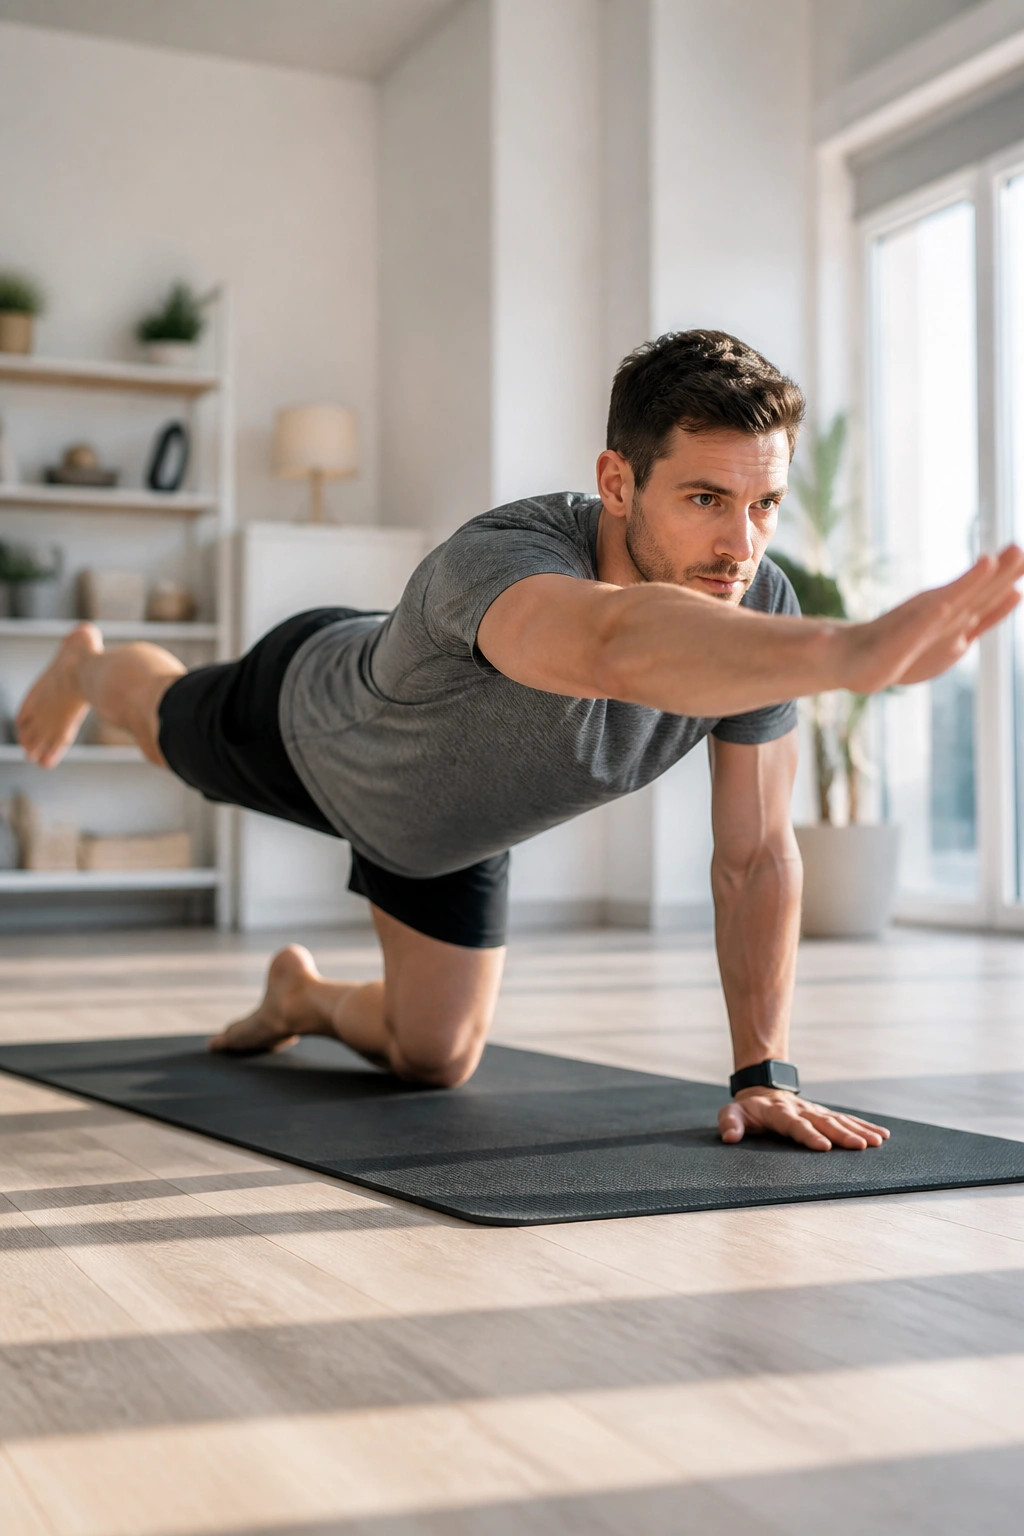
Stability is often misunderstood as simply holding a plank, but the bird dog teaches you how to balance your body while under load. It is a fundamental movement for spine health. You will find that this helps with back pain as much as it tightens your midsection.
Mastering the Setup
Get onto all fours with your hands directly under your shoulders and your knees under your hips. Your back should be flat, like a table. Extend your right arm forward and your left leg backward at the same time. Crucially, do not rotate your hips or shoulders to reach further. Your goal is to reach long, not high. Imagine someone is pulling your hand and your heel in opposite directions.
The Subtle Details
Keep your gaze on the floor, not the mirror. Lifting your head too high puts strain on your neck and changes the alignment of your spine. Hold the full extension for three seconds, really squeezing the glute of the extended leg and the shoulder of the extended arm. Return to center. Switch sides. If you are wobbling like a jelly, you are doing it right—just keep fighting for that balance.
3. Plank with Shoulder Taps
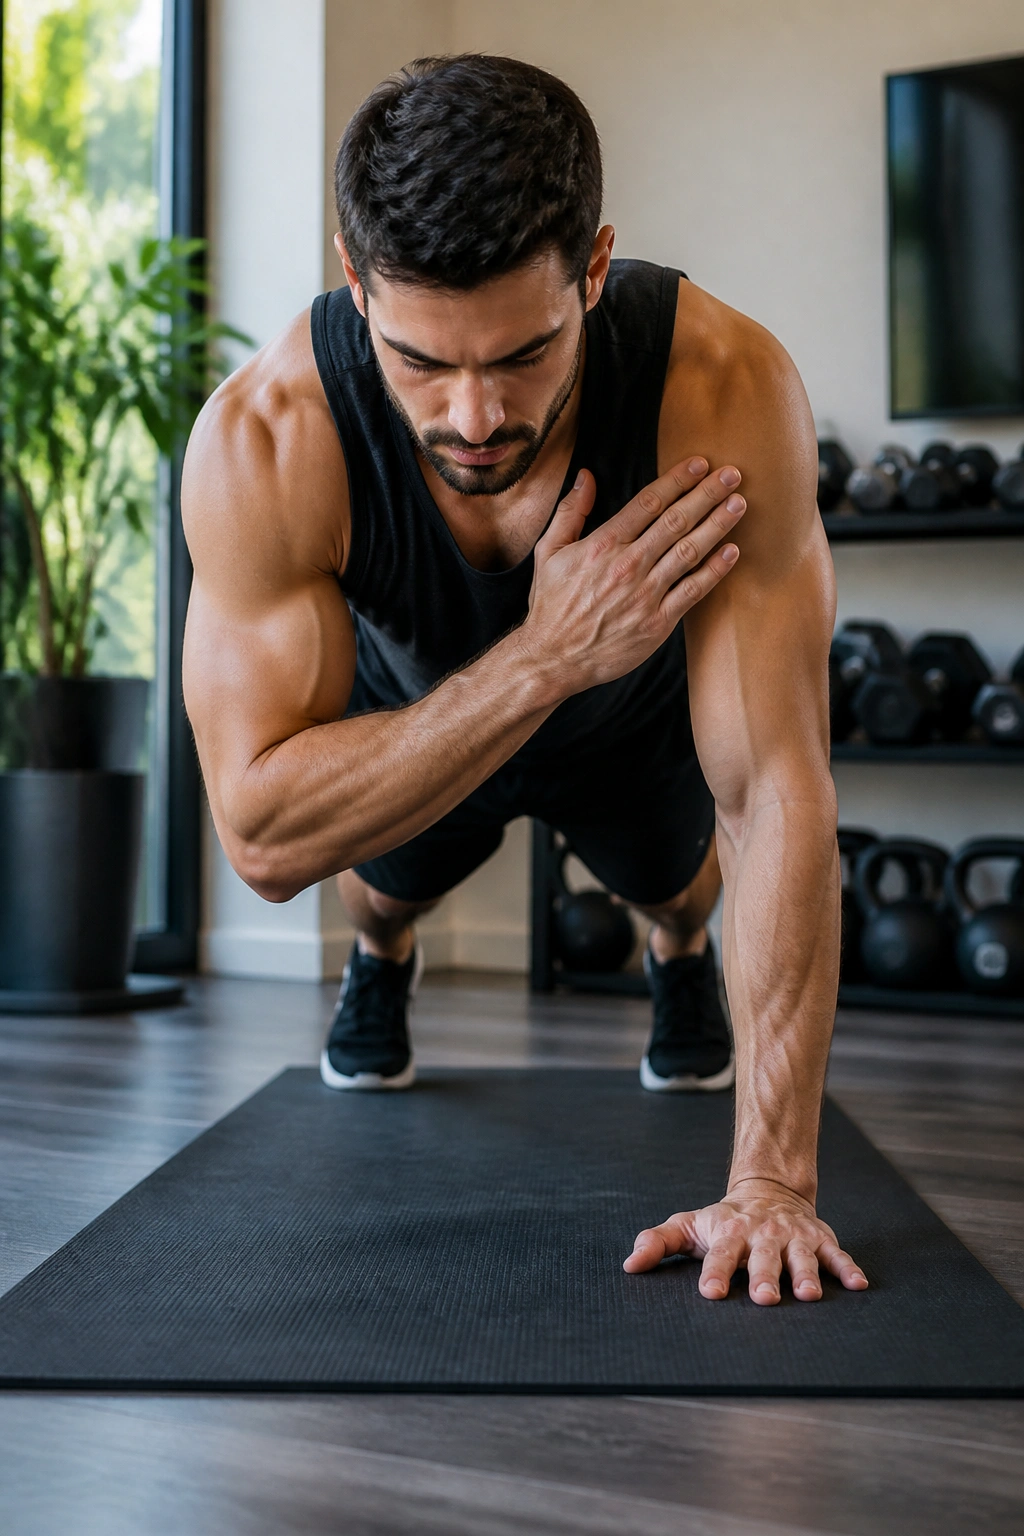
We have all done a basic plank, and if you have been training for a while, you know that a static plank can eventually lose its effectiveness. It becomes an exercise in boredom rather than an exercise in intensity. Shoulder taps introduce an element of anti-rotation that changes the game entirely.
How to Execute Properly
Set yourself up in a high plank position, hands under shoulders, feet slightly wider than hip-width apart. This wider stance provides the base of support you need. Now, lift one hand off the floor and touch your opposite shoulder. Place it back down and repeat with the other side. The rule here is simple: your hips must not shift. Not even an inch.
Common Pitfalls to Avoid
If your hips are swinging side to side like a pendulum, you have effectively turned off your core stabilizers. The core’s job is to prevent that rotation. To fix this, tighten your glutes and push the floor away from you. Think about shrinking the distance between your ribcage and your pelvis. You might feel the need to move fast to get it over with, but moving slowly is significantly harder and more effective.
4. Hollow Body Hold
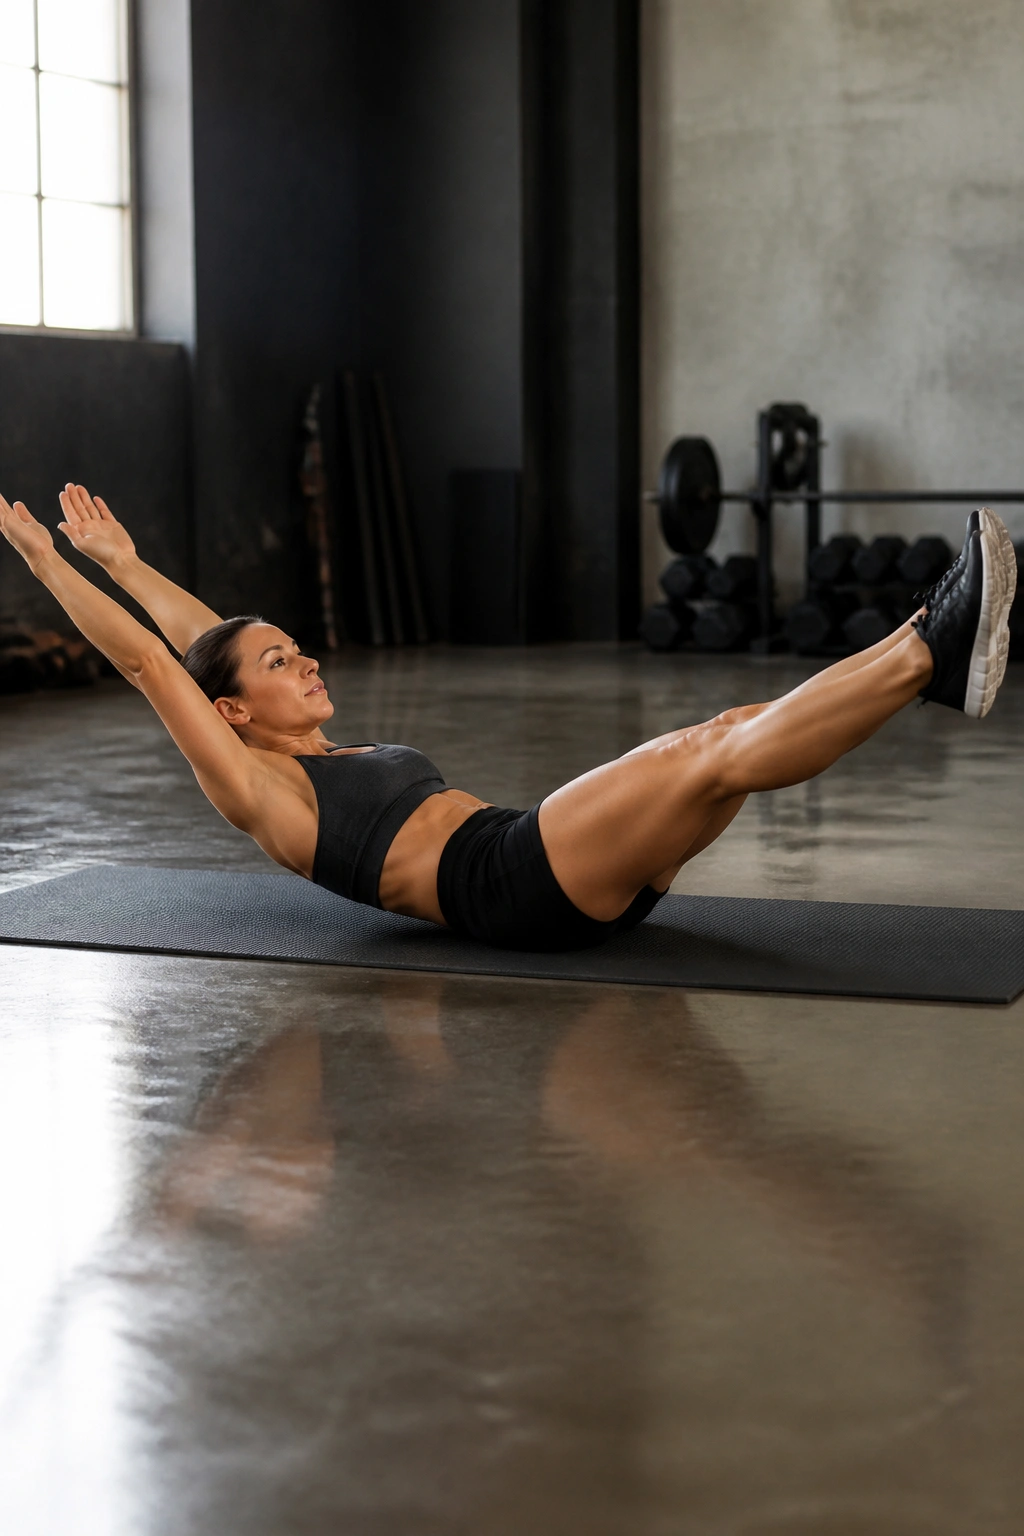
If you want to feel your deep abdominals shaking, the hollow body hold is the answer. It is a staple in gymnastics for a reason: it creates a rigid, unbreakable core. It forces your entire body into a banana shape, requiring constant tension from your abs.
The Form Check
Lie flat on your back. Extend your legs straight out and your arms over your head. Now, lift your shoulder blades and your legs off the floor simultaneously. You should only be touching the floor with your lower back. That contact is non-negotiable. If you cannot keep your lower back down, bend your knees or bring your arms to your sides.
Why This Is Different
Most ab exercises focus on movement—curling or crunching. This is an isometric exercise, meaning the muscle is working hard without changing length. You are training your abs to maintain tension under stress. Hold this for 20 to 30 seconds. It will feel like an eternity, but that is exactly where the tightening happens. Do not hold your breath. Keep breathing, even when it burns.
5. Hanging Leg Raises
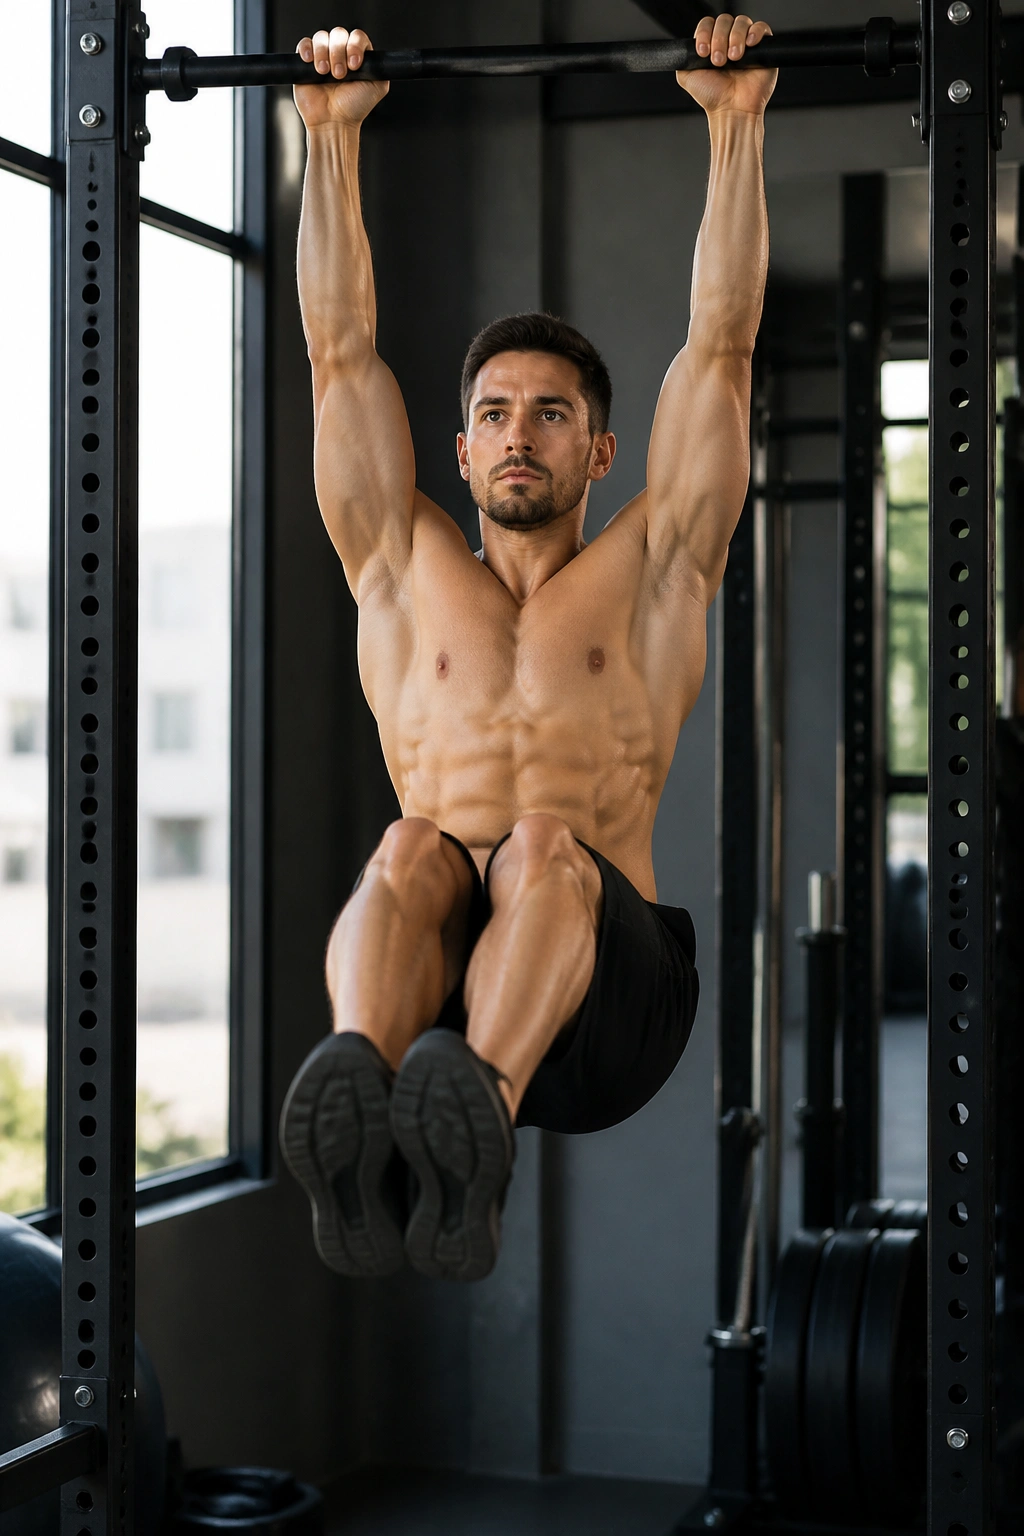
This is the gold standard for targeting the lower abs, which are notoriously difficult to isolate. You cannot “spot reduce” fat, but you can certainly build the muscle underneath so that when you lean out, the definition is there.
The Hanging Secret
Find a pull-up bar and hang with your arms fully extended. The biggest mistake people make here is using momentum. They swing their legs to get them up. That swinging kills the ab work. Instead, focus on tilting your pelvis. Think about curling your pubic bone up toward your chin. Your abs should be doing all the heavy lifting, not your hip flexors.
Advancing the Movement
If doing strict leg raises is too difficult, start with knee raises. The goal is to bring your knees as high as possible, ideally past parallel. As you get stronger, straighten the legs. If you find your body swinging, put your back against a wall. This prevents you from using momentum and forces you to rely entirely on abdominal strength to lift your legs.
6. Russian Twists
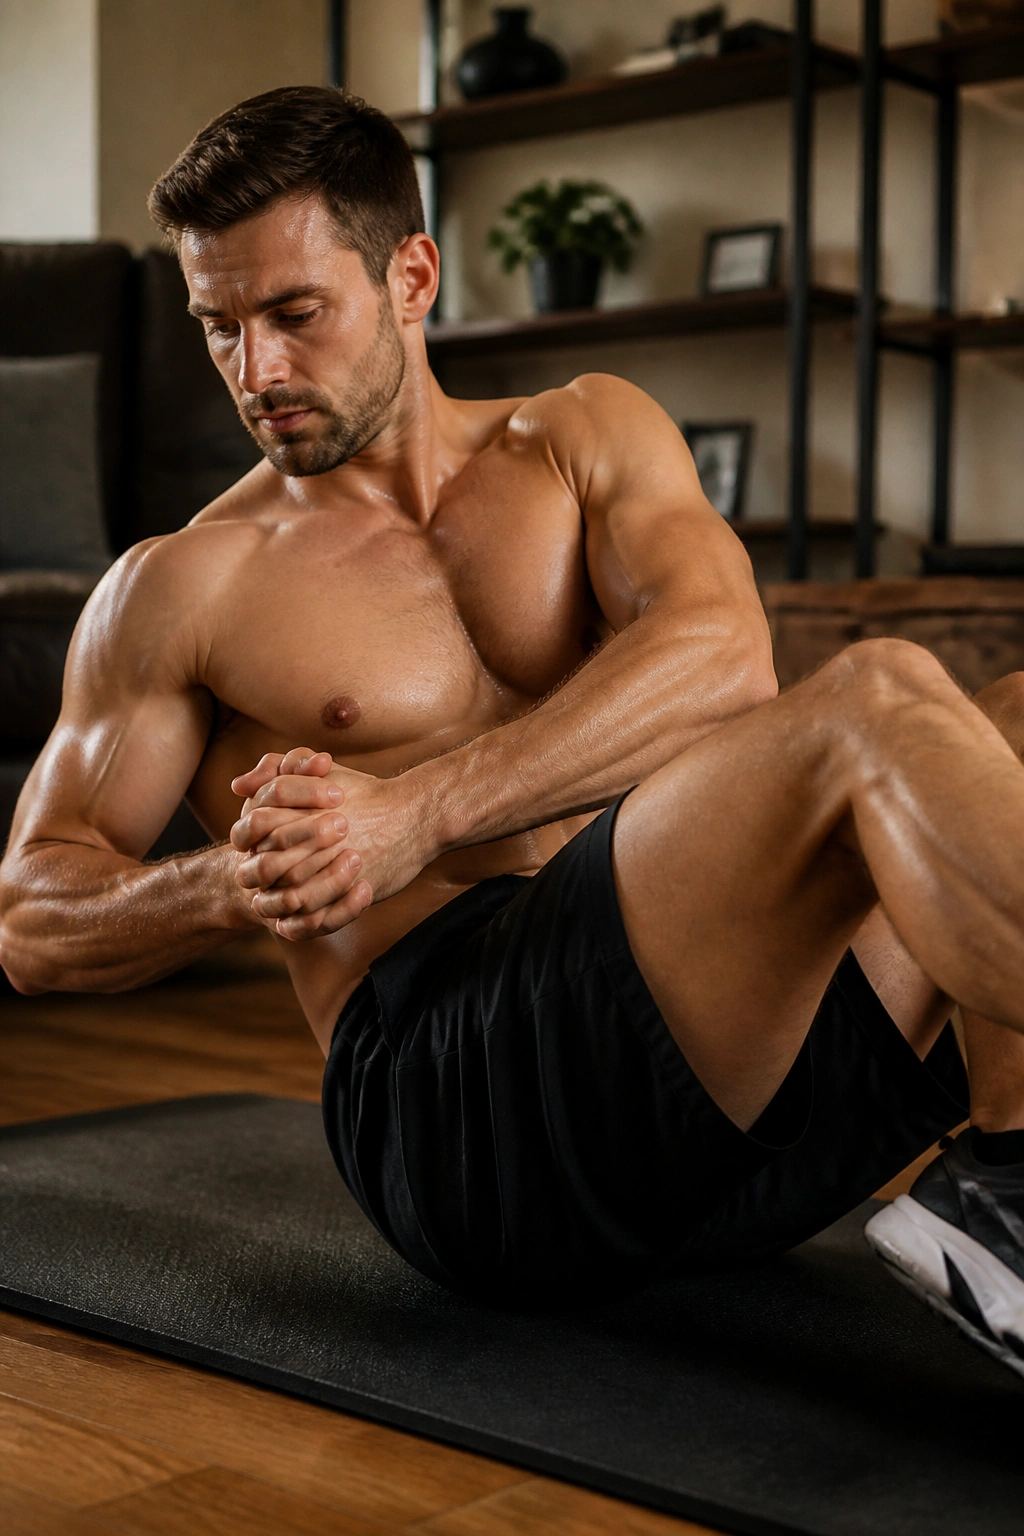
Obliques are the muscles that give your waist that cinched appearance, and rotational work is how you train them. The Russian twist is highly effective, provided you do it with control rather than just swinging your torso.
Setup and Execution
Sit on the floor with your knees bent and feet lifted slightly off the ground. Lean back about 45 degrees so your abs are already engaged. Clasp your hands together or hold a weight—a medicine ball or even a heavy water bottle works. Twist your torso from side to side, bringing your hands toward the floor on either side of your hips.
The Truth About Rotation
Do not let your knees sway back and forth. Your legs should be statues. The movement comes entirely from the mid-back and obliques. Follow your hands with your eyes; this naturally encourages the full range of motion. If you feel this in your lower back rather than your sides, you are leaning too far back or moving too fast. Sit up a bit straighter and slow the tempo down.
7. Pallof Press
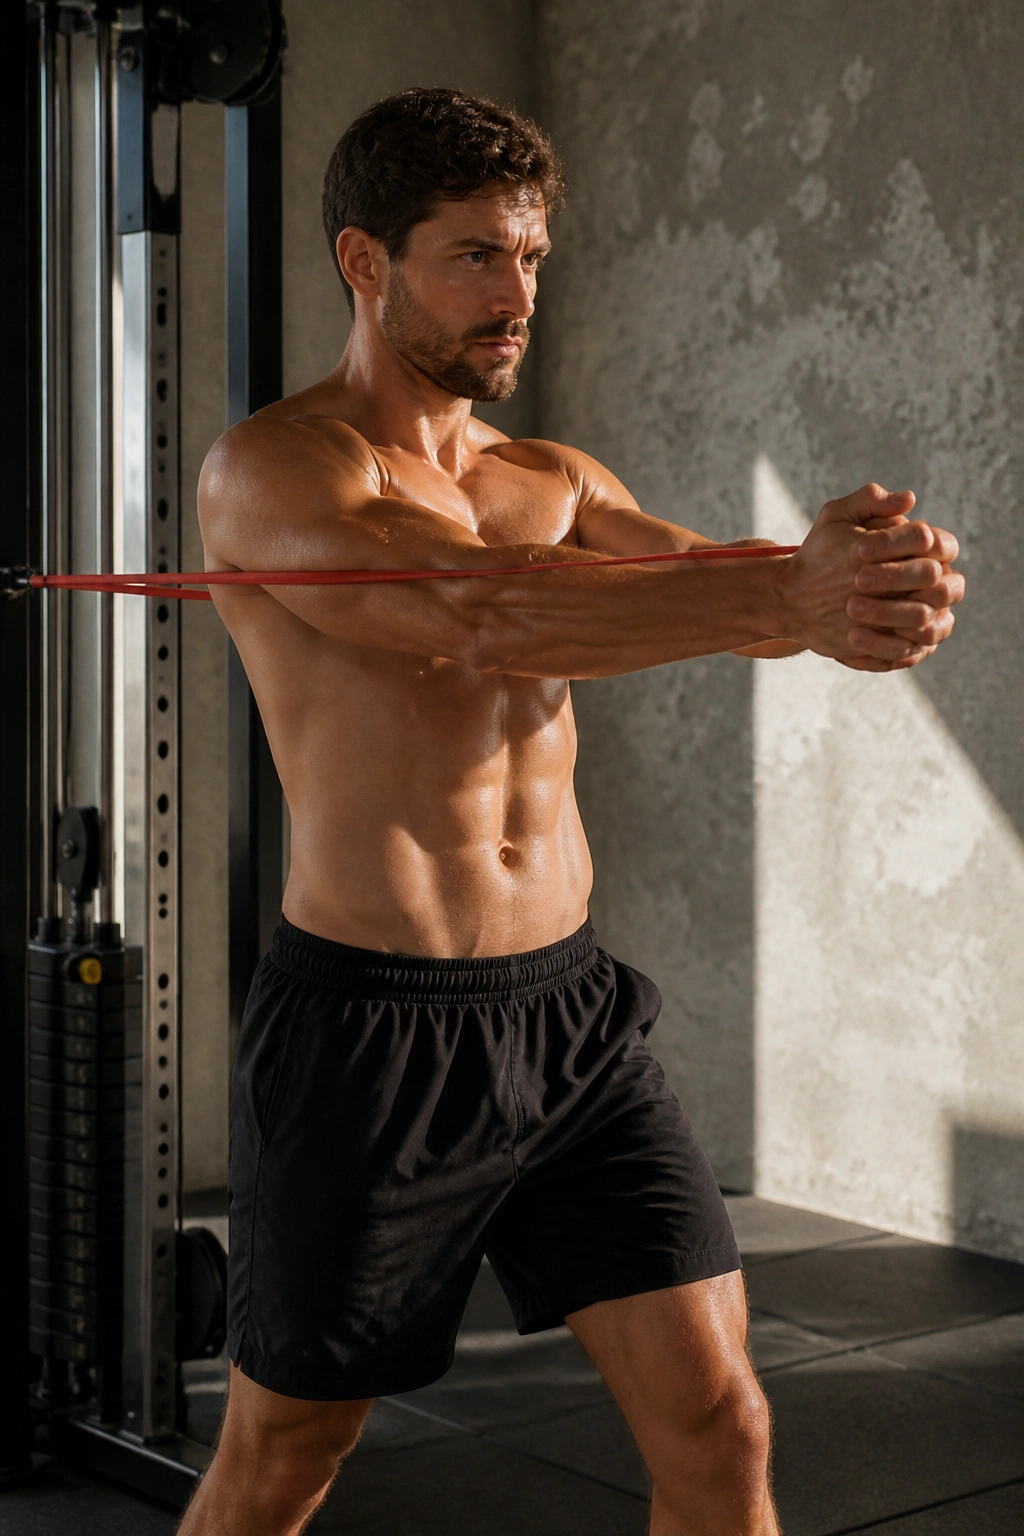
This is the ultimate anti-rotation exercise. You do not see this in many commercial gyms because it requires a cable machine or a resistance band, but it is one of the most effective ways to build a “bulletproof” core.
Positioning
Stand perpendicular to the cable machine or the anchor point of your band. Hold the handle with both hands at your chest. Step away from the anchor point until there is significant tension on the band. Your goal is to stand firm and press your hands straight out in front of you. The band will try to rotate your torso toward the anchor point. Do not let it.
The Focus
Your core should resist the rotational force entirely. Hold the position with your arms extended for a few seconds. If you find yourself leaning or twisting, you need to tighten your glutes and core harder. This teaches your body to remain rigid even when external forces are trying to move it. It is arguably the best exercise for protecting your spine while developing deep abdominal strength.
8. Mountain Climbers
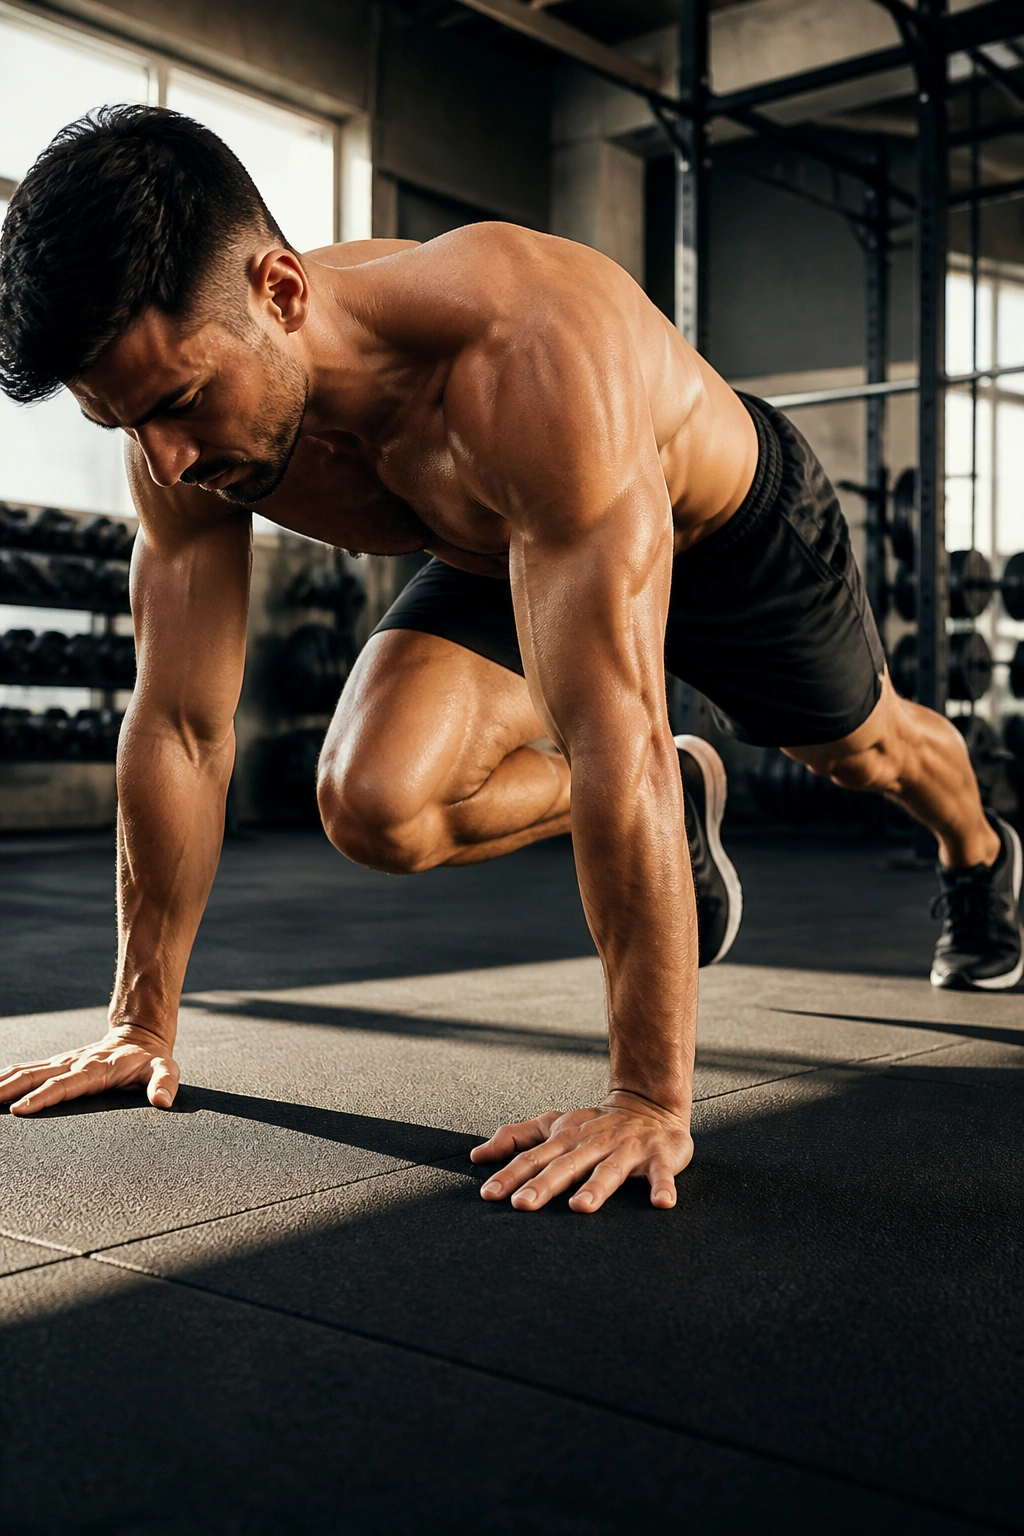
While many core exercises are slow and controlled, mountain climbers add a metabolic component. They force your core to stabilize while your limbs are moving rapidly, which is a very different challenge than a static hold.
The Technique
Get into a push-up position. Drive one knee toward your chest, then switch, driving the other knee in while the first one goes back. The key is to keep your hips level. Do not let your butt bounce up toward the ceiling. Your torso should be as still as a plank of wood; only your legs should be moving.
Increasing the Intensity
Focus on bringing the knee to the opposite elbow. This twist engages the obliques much more effectively than just bringing the knee straight up. Go for speed, but only if you can maintain the form. If your hips start to bounce, you are moving faster than your core can handle. Slow down, regain the stability, and then pick up the pace again.
9. Bicycle Crunches
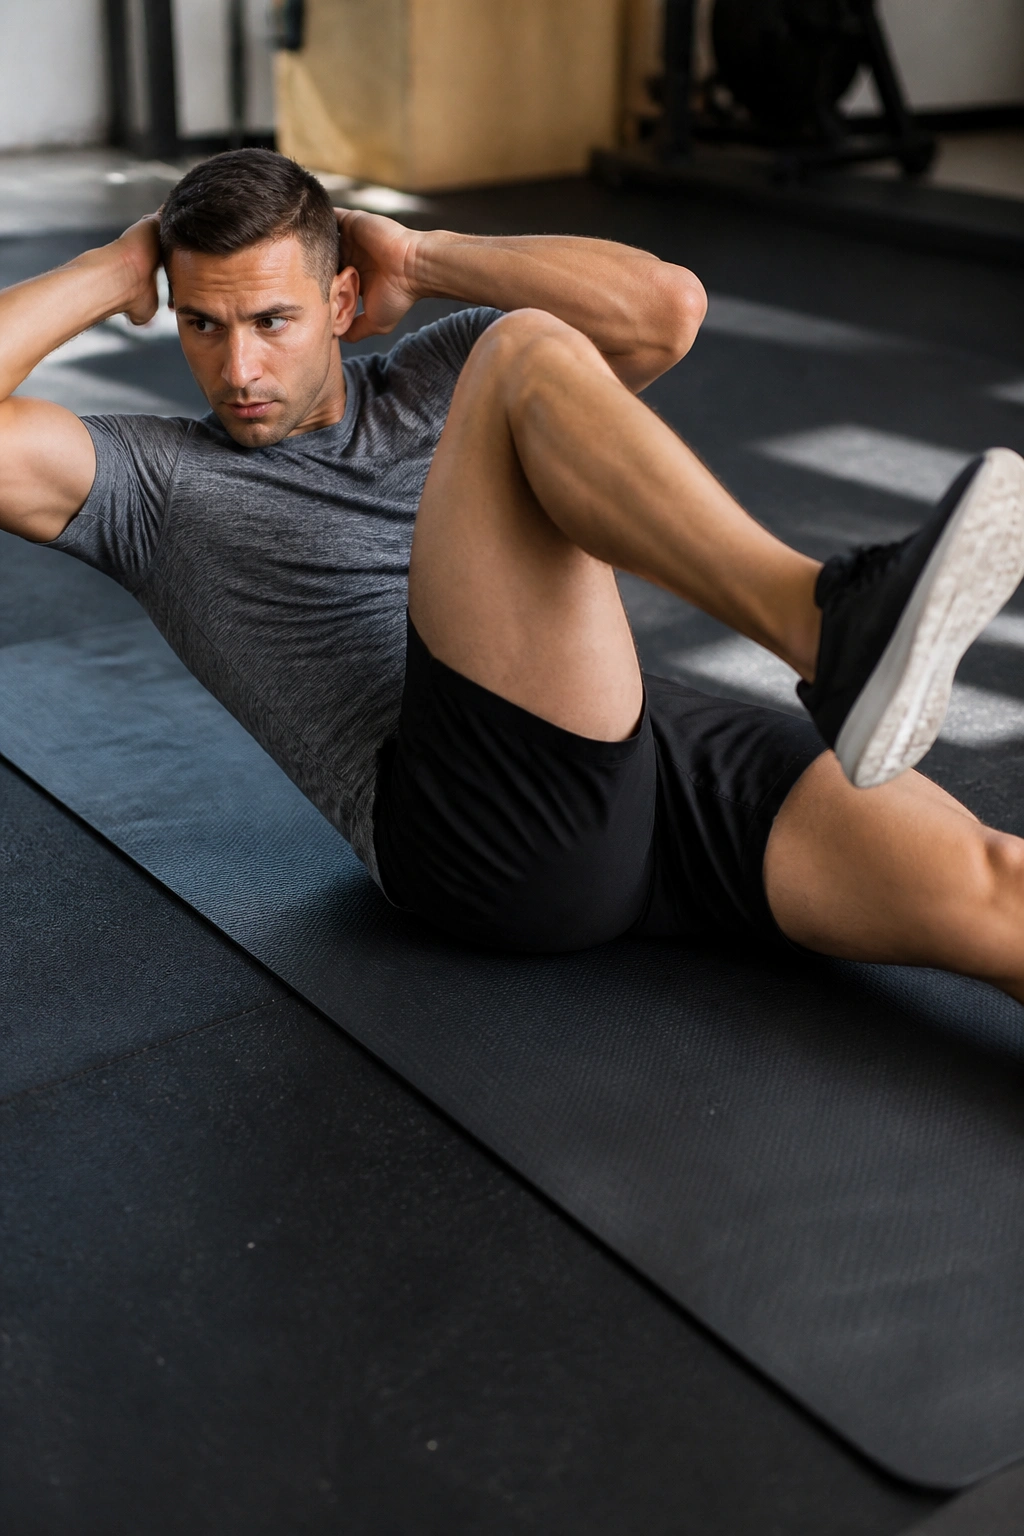
The bicycle crunch is often treated as a throwaway exercise that people do at the end of a workout, but that is a mistake. When done with intent, it hits the rectus abdominis and the obliques harder than almost any other crunch variation.
Why Quality Matters
Lie on your back, hands behind your head—but do not pull on your neck. Lift your shoulder blades off the floor. As you bring your right elbow to your left knee, fully extend the right leg. The straighter the leg, the harder the abs have to work to keep your spine stabilized. Pause at the top of the movement. Really touch that elbow to the knee.
Avoiding the Speed Trap
Most people treat this like a race. They pedal their legs frantically. Stop that. The slow, controlled version is where the magic happens. Aim for a two-second pause at the peak of the contraction on each side. By the time you hit ten reps, your core will be screaming. If you can do 50, you are definitely doing them too fast.
10. V-Ups
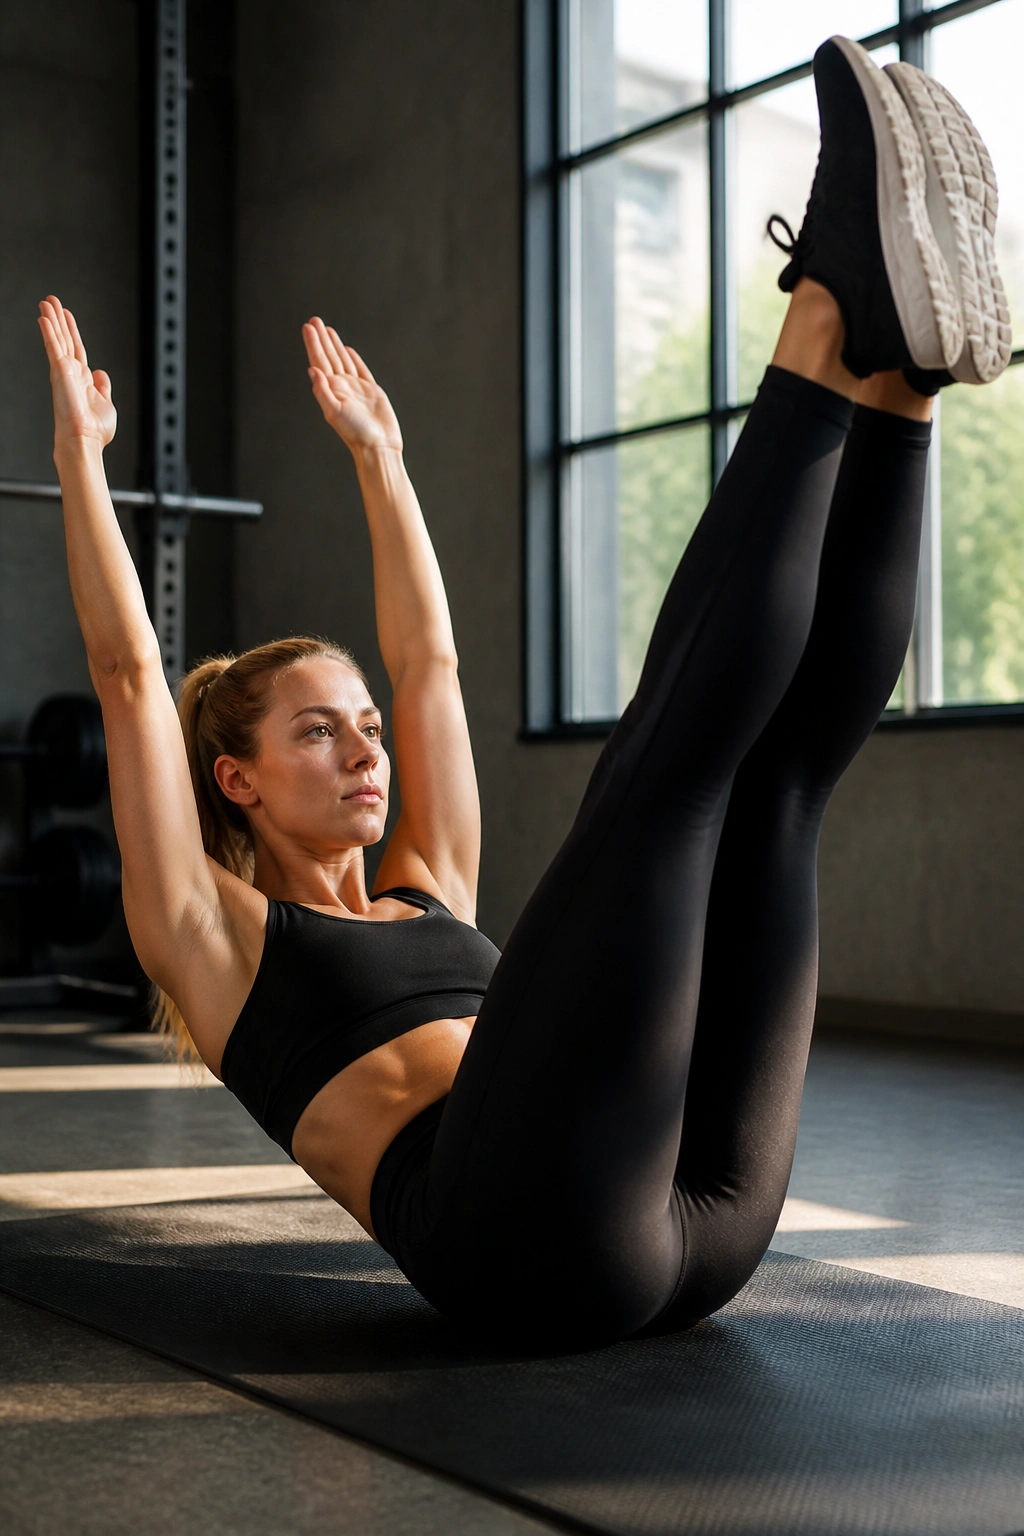
V-ups are the more aggressive, compound cousin of the dead bug. They combine an upper-body crunch with a lower-body leg raise, requiring your entire abdominal wall to fire at once to meet in the middle.
The Execution
Lie flat with arms overhead and legs extended. In one smooth motion, lift your arms and legs to touch your toes in the air. Your body should form a “V” shape. Lower back down with control. Do not just flop back to the floor. The descent is just as important as the ascent.
Troubleshooting
If you cannot touch your toes, aim for your shins. If you find yourself using momentum by whipping your arms forward, try holding your arms across your chest instead. This removes the assistance and puts all the pressure on your abs. This exercise is meant to be difficult. If it feels easy, you are likely not extending your body fully at the bottom of the movement.
11. Glute Bridges with Marches
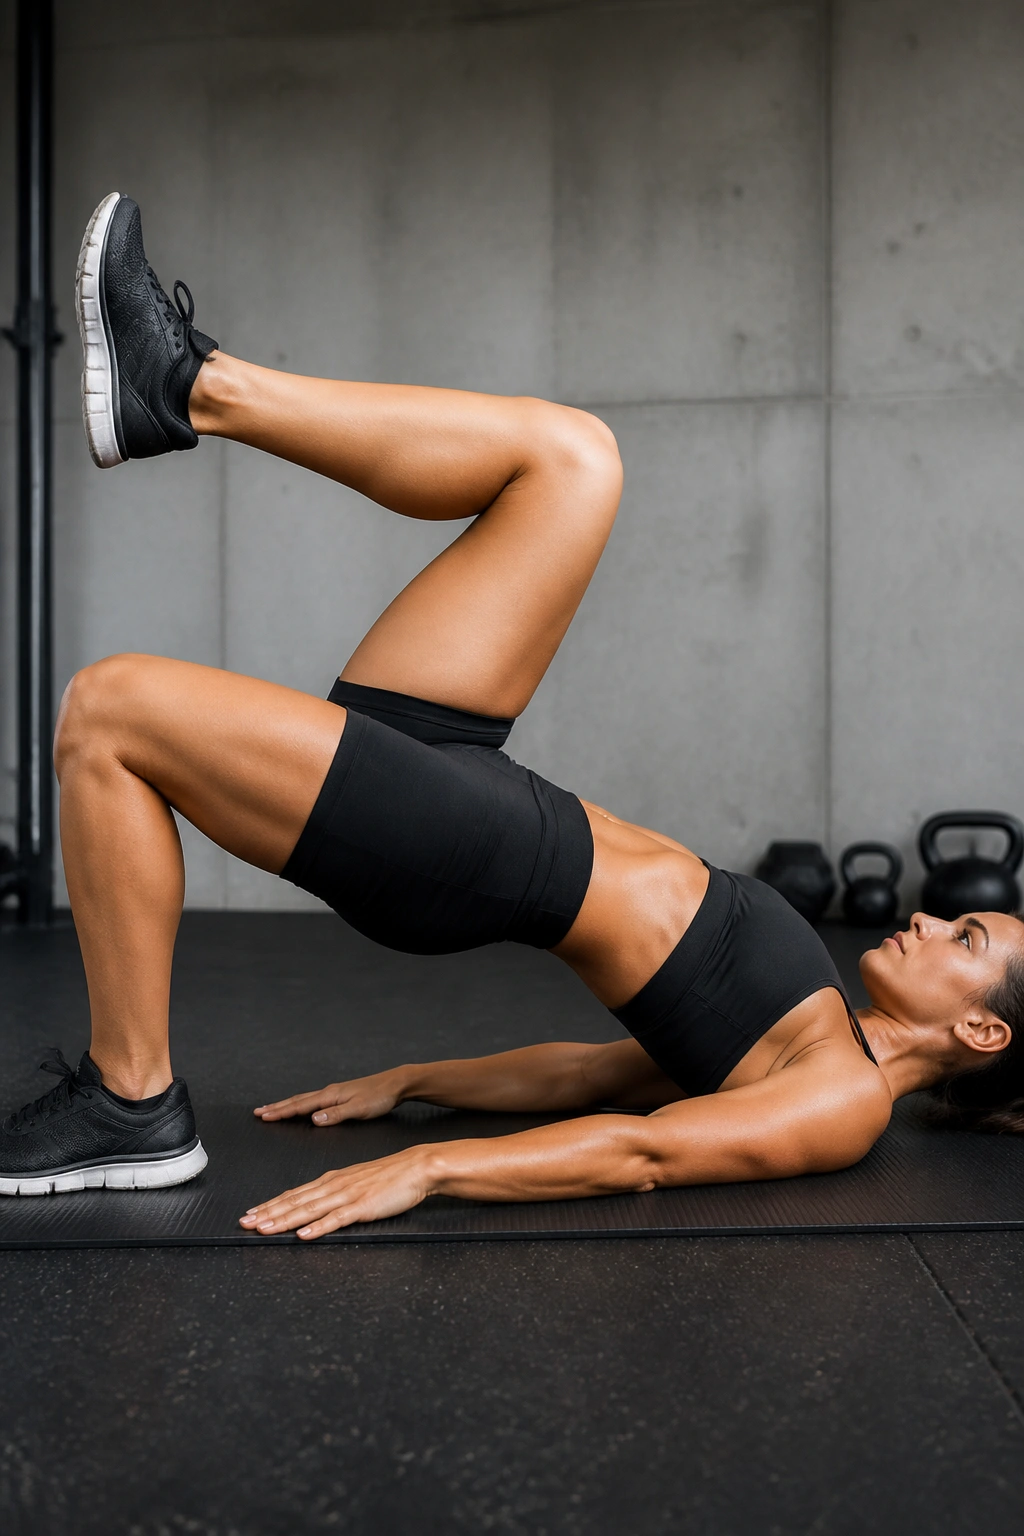
The core is not just the front of the body. Your glutes are the foundation of your core stability. When your glutes are weak, your lower back takes the load, which often leads to that “pooch” look as your pelvis tilts forward.
The Setup
Lie on your back, knees bent, feet flat on the floor. Lift your hips into a bridge position, squeezing your glutes hard. Once you are stable, lift one foot off the ground, bringing your knee toward your chest. The challenge is to keep your hips completely level. Do not let one hip drop when you lift the leg.
The Core Connection
Your obliques and deep abs have to fire to keep your hips balanced while you march. It is a subtle movement, but you will feel it deep in the lower abdominals. If your hips sag, put the foot down, reset your glutes, and try again. It is better to do five perfect marches than twenty sloppy ones.
12. Side Planks with Dips
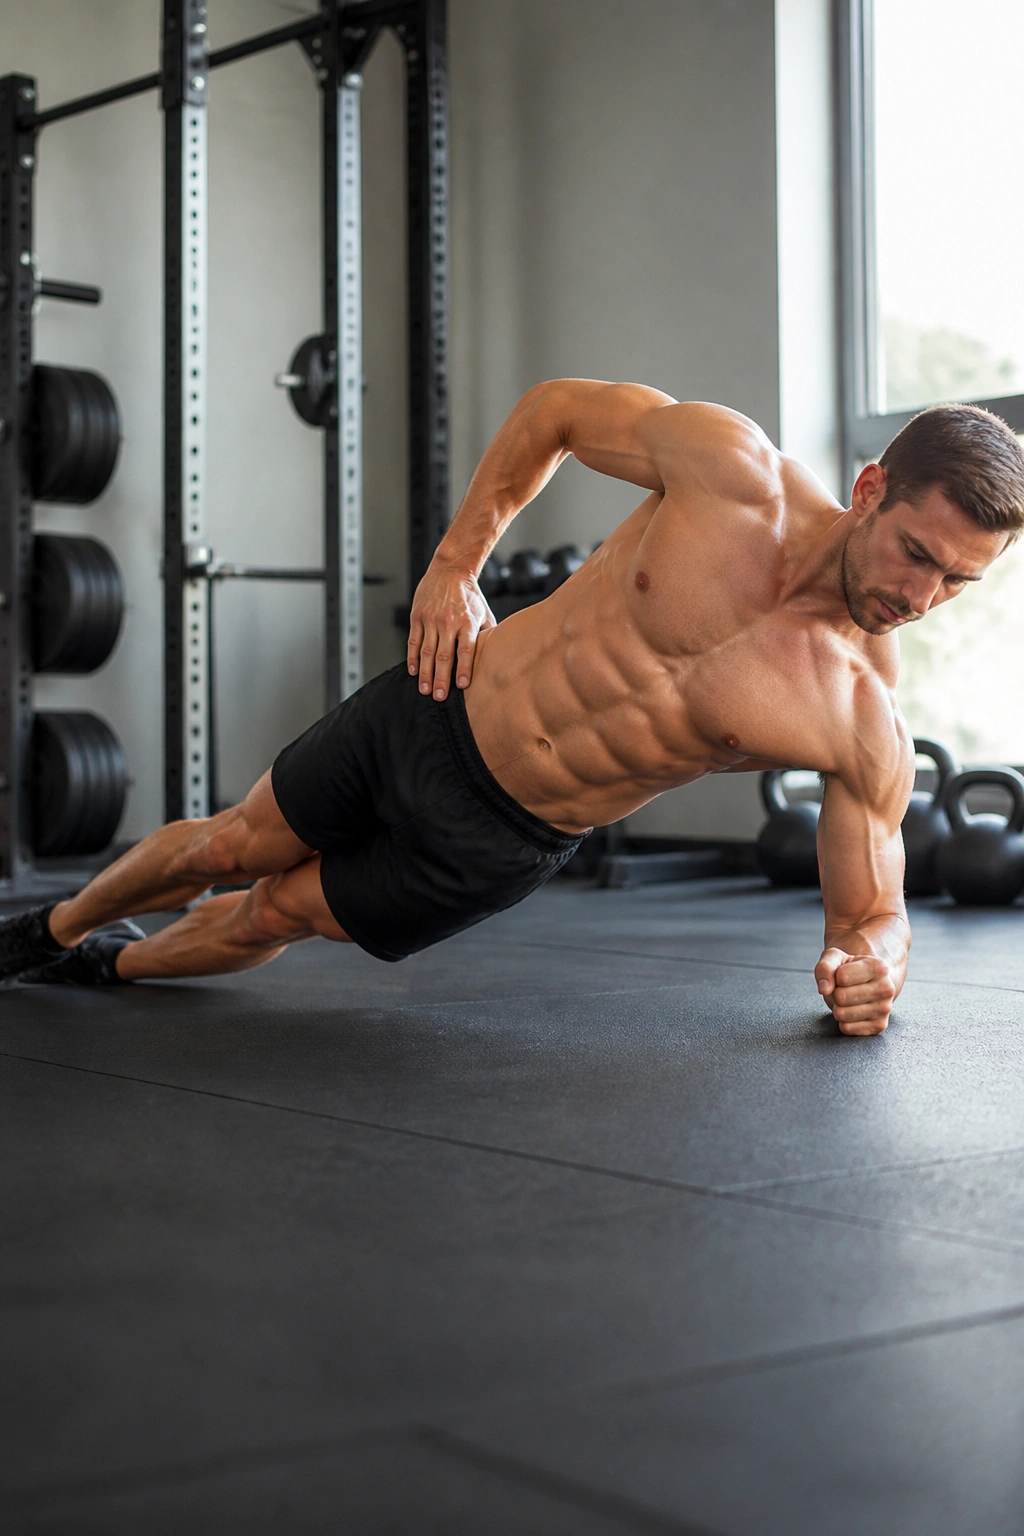
The side plank is the bread and butter for the obliques, but adding a dip elevates the difficulty significantly. It turns a static exercise into an active one, forcing the side of your body to handle the full load of your torso.
How to Do It
Get into a side plank on your forearm. Stack your feet. Lift your hips until your body forms a straight line. From this position, lower your hip toward the floor—just tap it—and then drive it back up, squeezing the oblique at the top. This is the dip.
The Common Mistake
Don’t just “drop” your hip. You should lower it with control and drive it up with power. If your shoulder starts to hurt, check your form. Make sure your elbow is directly underneath your shoulder. If it is too far out, you are putting unnecessary strain on the joint. These burn, and that is normal. Embrace the shake.
13. Cable Woodchoppers
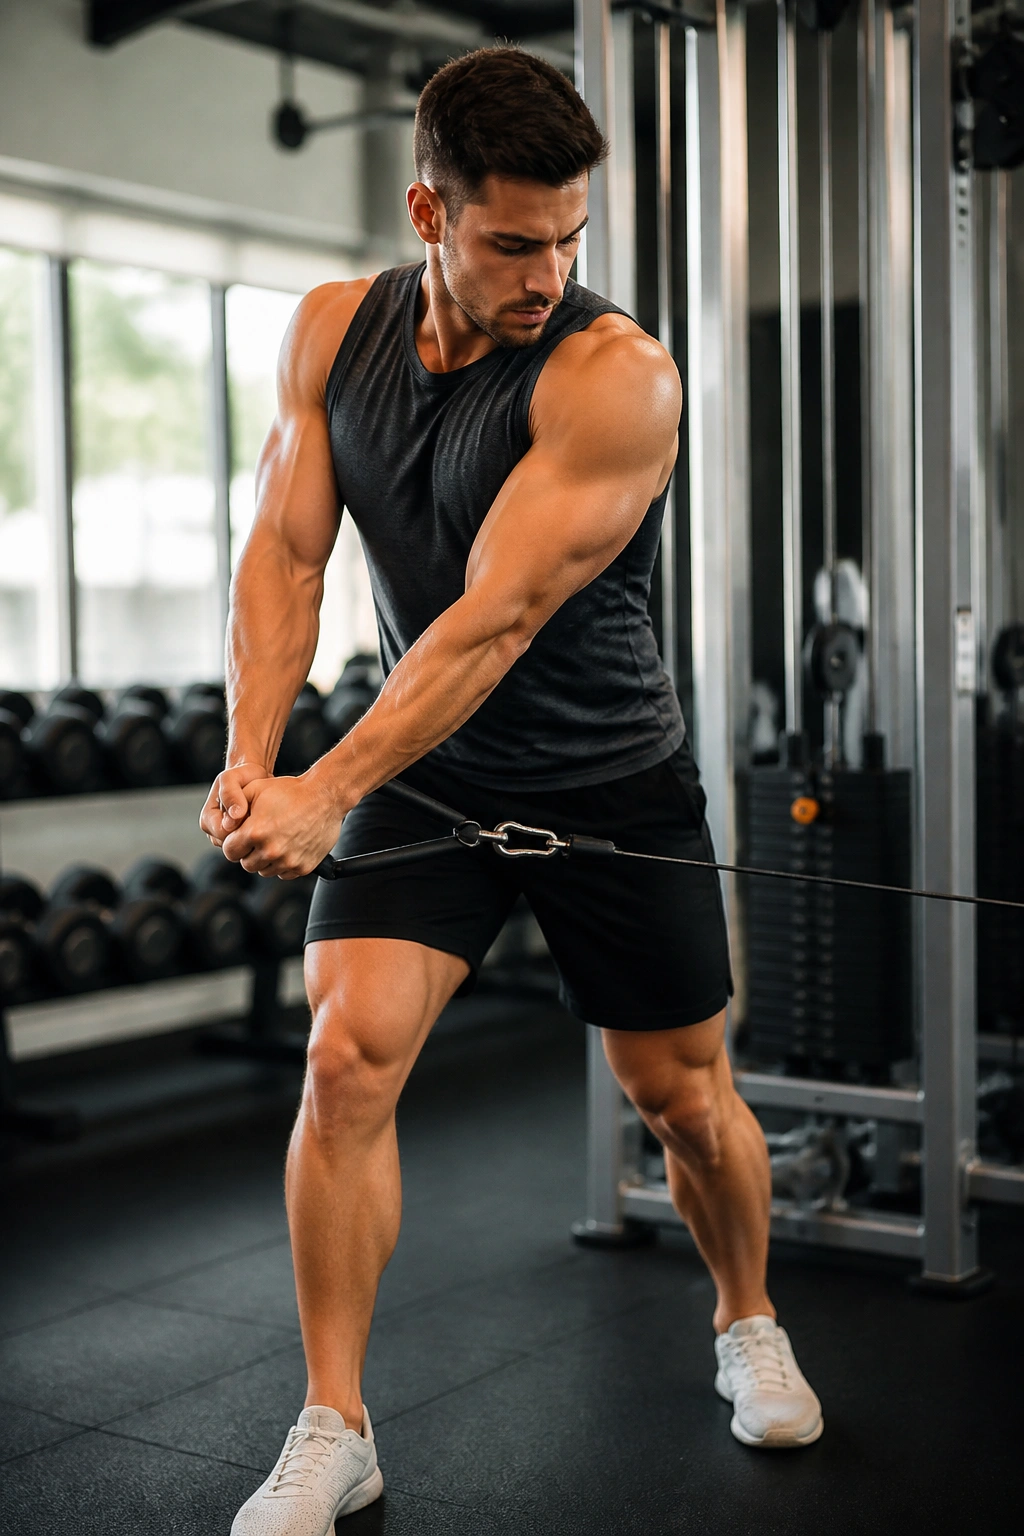
Rotational power is essential for a functional, strong core. The cable woodchopper is the king of this movement. It mimics the motion of swinging an axe or throwing something across your body.
The Setup
Set a cable machine pulley to a high position. Stand perpendicular to the machine, feet shoulder-width apart. Grab the handle with both hands. Pull the cable down and across your body, ending at the opposite hip. Your core must rotate, but your feet should stay firmly planted.
The Secret Sauce
Do not use your arms to pull the weight. Your arms should stay relatively straight, acting as levers. All the movement should come from your torso twisting. If you don’t have a cable machine, you can use a resistance band anchored to a sturdy point. The tension should be present throughout the entire motion. If you feel it in your lower back, you are likely rotating too far or using your lumbar spine instead of your core muscles.
14. Bear Crawls
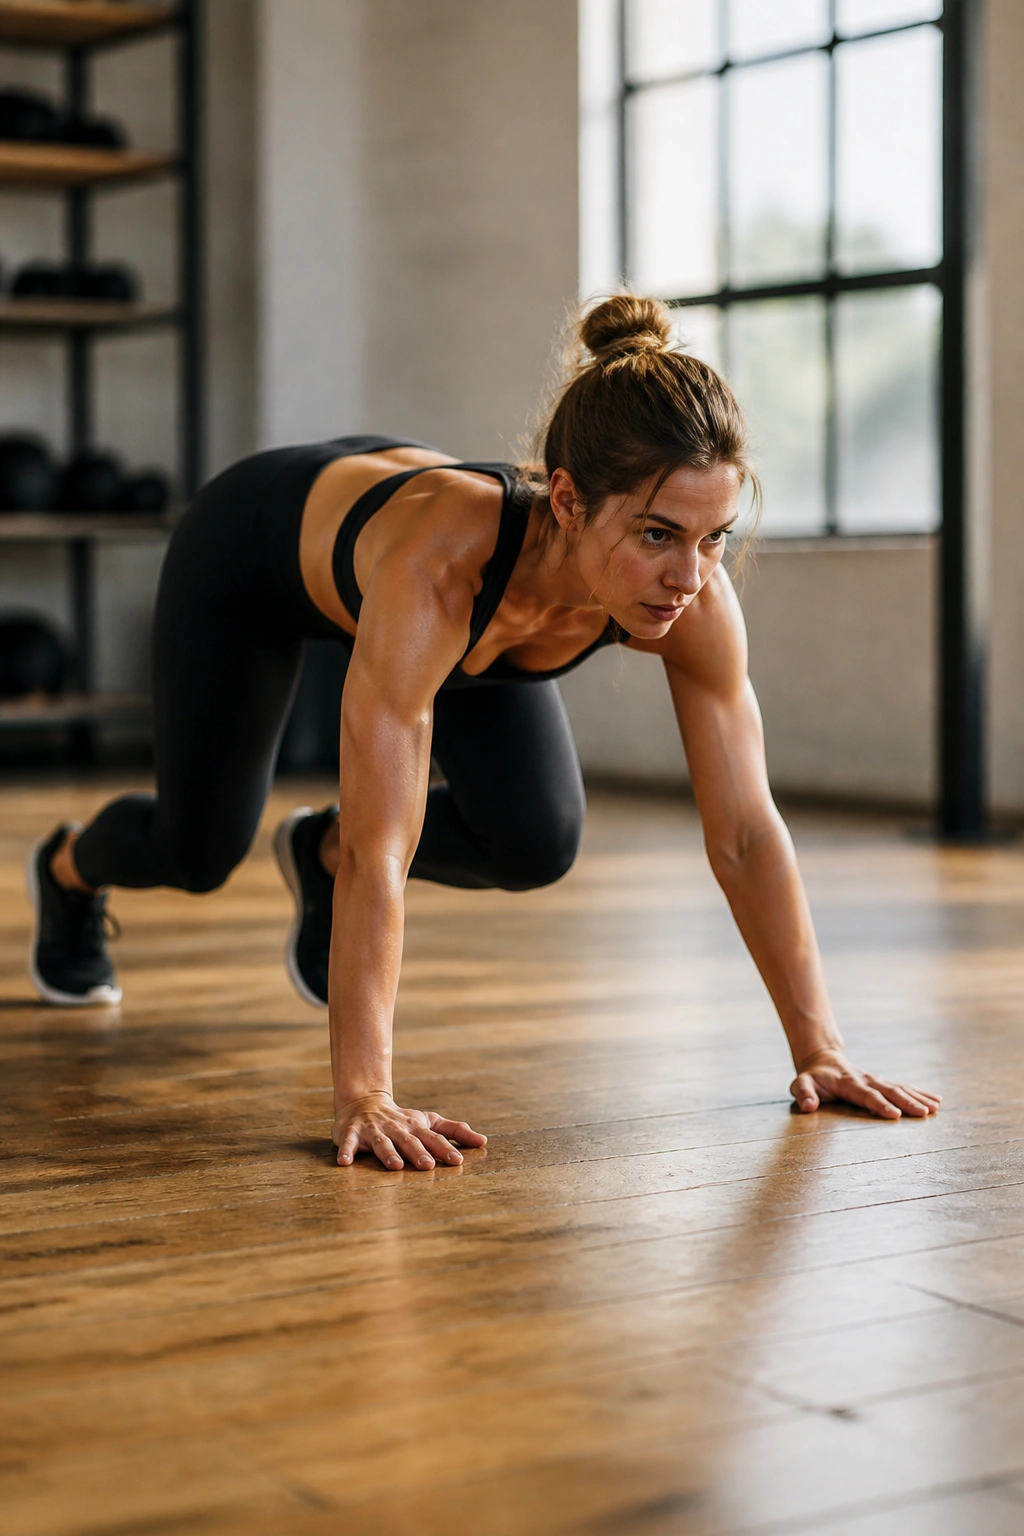
This is an integrated stability move that hits the entire core wall. It forces your coordination and requires your abdominals to lock your spine in place while your limbs crawl along the floor.
How to Execute
Get on all fours. Lift your knees just an inch off the floor. Keep your back flat—do not let your butt go up into the air. Move your right hand and left foot forward at the same time, then the left hand and right foot. Crawl forward for a set distance, then go backward.
Why It’s Effective
The constant shifting of weight forces your core to constantly re-stabilize. If you rotate your hips, you lose the core engagement. Keep the movement small and controlled. Think “stealthy.” The less your torso moves, the more your abs are working to keep you solid. It is a full-body conditioning tool, but the focus remains squarely on the midsection.
15. Ab Wheel Rollouts
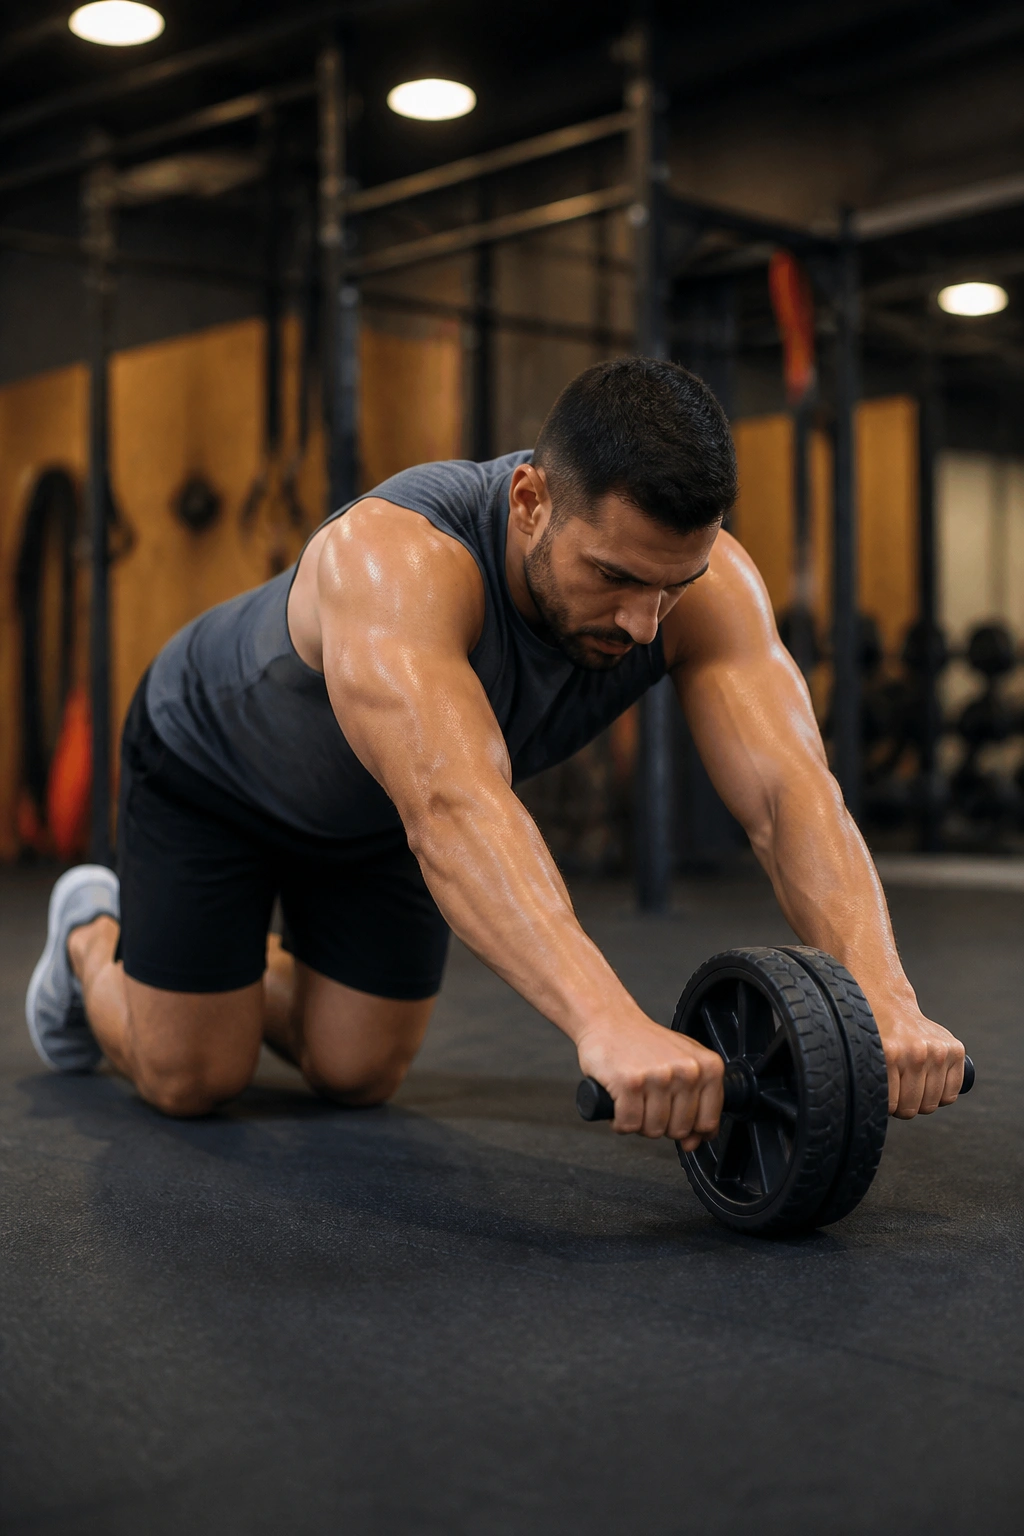
This is advanced, so do not rush into this if you are a beginner. It is a brutal test of anti-extension. The ab wheel forces your core to stop your body from collapsing into an arch as you extend outward.
The Progression
If you are new to the ab wheel, start on your knees. Roll out as far as you can while keeping your back rounded (think of tucking your tailbone). If you feel your lower back arch, stop immediately—that is your limit. The goal is to get all the way to a flat position without losing your core tension.
Pro-Tip
Use a wall as a stopper. Roll out until the wheel touches the wall, then pull back. This lets you practice the movement without fear of overextending. As you get stronger, move further away from the wall. This is arguably the most effective tool for building “six-pack” strength, but it is also the easiest to mess up if you have poor form.
16. Leg Lowers
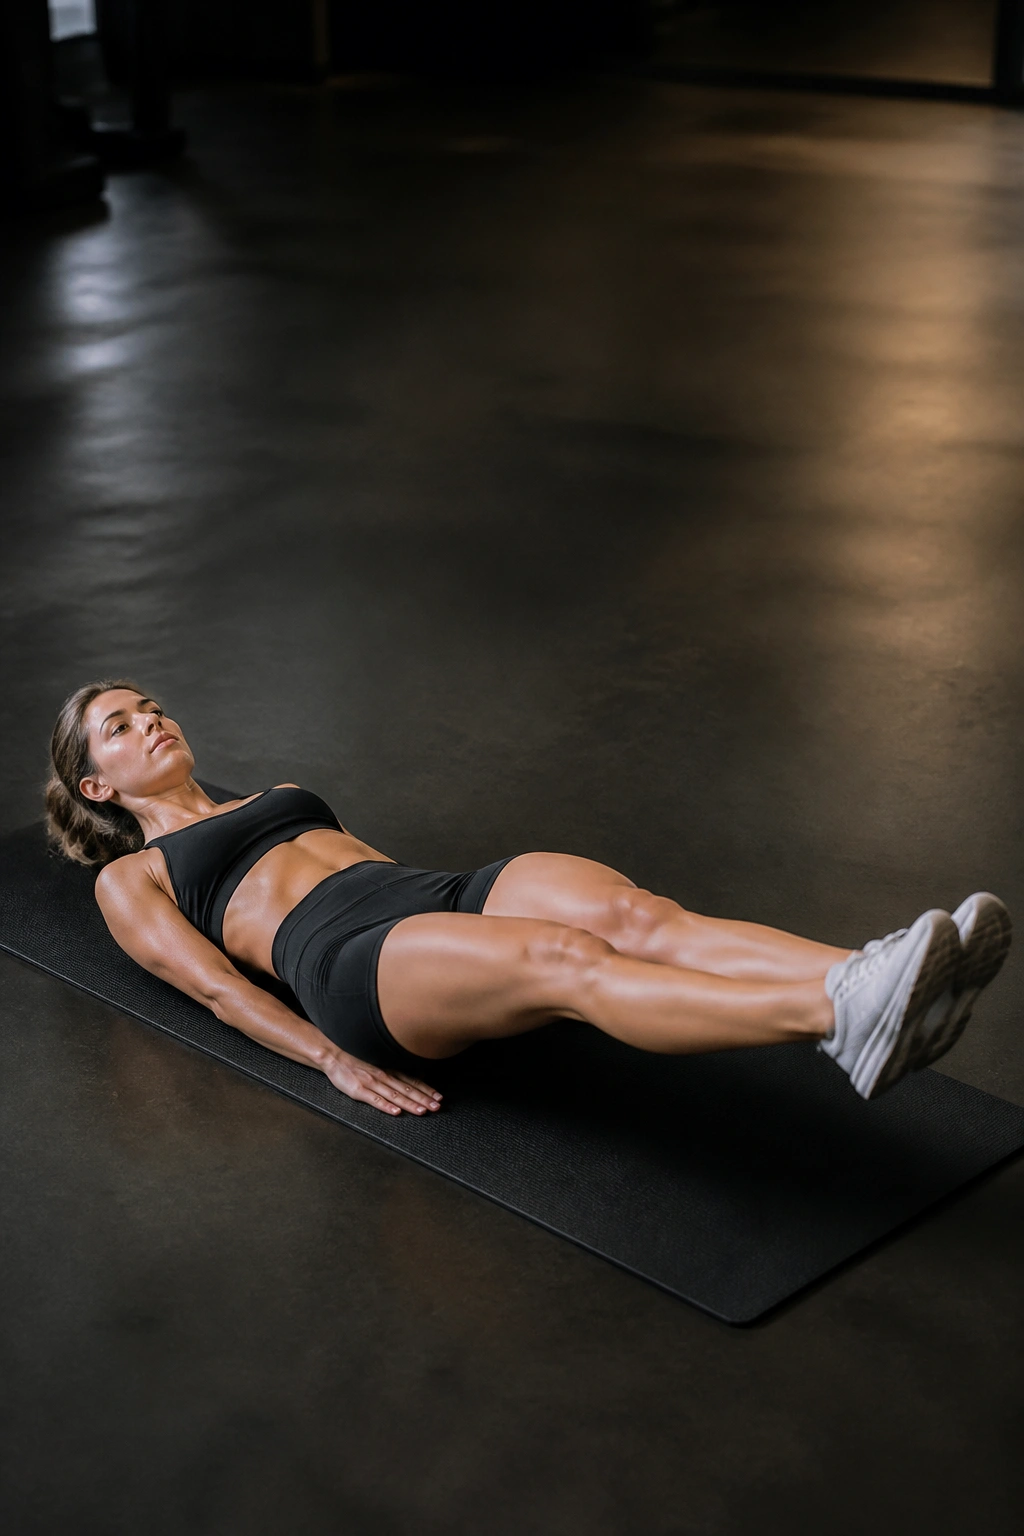
This is a variation of a leg raise, but the focus is on the eccentric (the lowering phase). Most people have strength to lift their legs but lack the control to lower them slowly, which is where the real work happens.
The Technique
Lie on your back, legs straight up in the air at a 90-degree angle. Place your hands by your sides or under your hips for support. Slowly lower your legs toward the floor. The key is to keep your lower back glued to the mat. The moment your back arches, you have gone too low. Reset and try again.
The Focus
Go slow. Count to three on the way down. Your abs should be working overtime to fight gravity. When you get close to the floor, hold for a second, then bring your legs back up. It is not about how many you do; it is about how slowly you can lower your legs without your back peeling off the ground.
17. Superman Holds
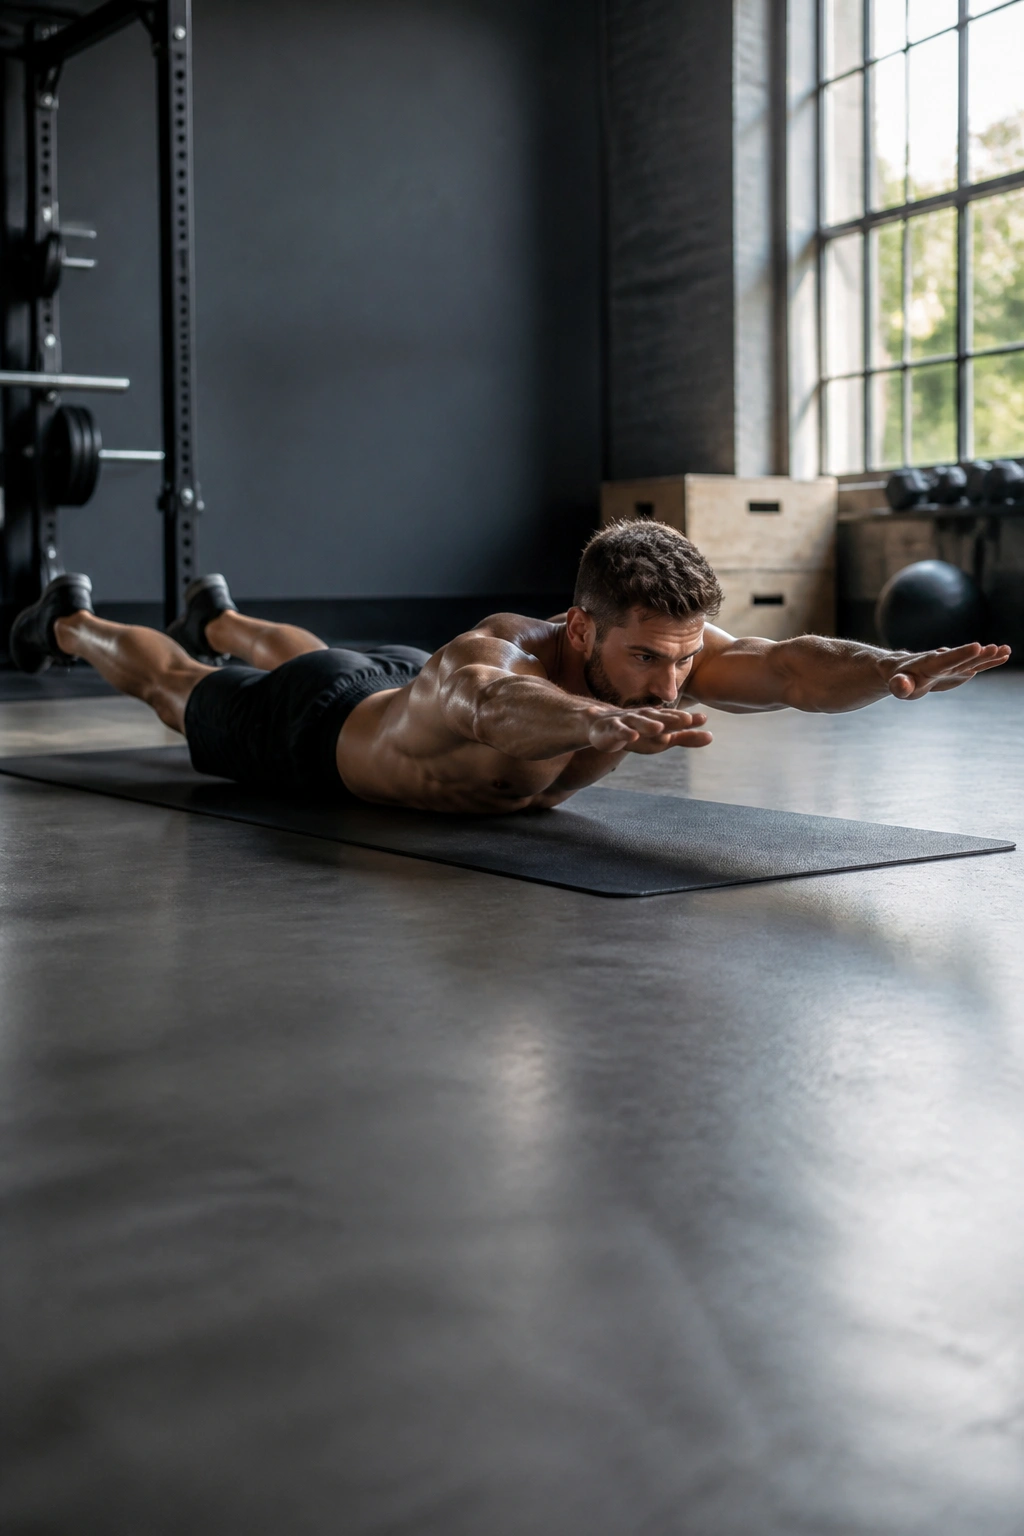
You cannot have a strong front if you ignore the back. The superman hold targets the lower back and posterior chain, which acts as the counterbalance to your abs. A tight core requires a strong, supportive back.
The Move
Lie face down on the floor, arms extended in front of you. Simultaneously lift your arms and your legs off the ground. You should look like you are flying. Hold this position, squeezing your glutes and lower back muscles. Do not hold your breath.
Why This Matters
If you only train your abs, you create an imbalance that pulls your shoulders forward and causes postural issues. The superman hold corrects this by strengthening the muscles that keep you upright. It is a static hold, but it feels like a workout. Aim for 30-second holds, resting in between. It helps create a balanced, strong physique.
18. Turkish Get-Ups
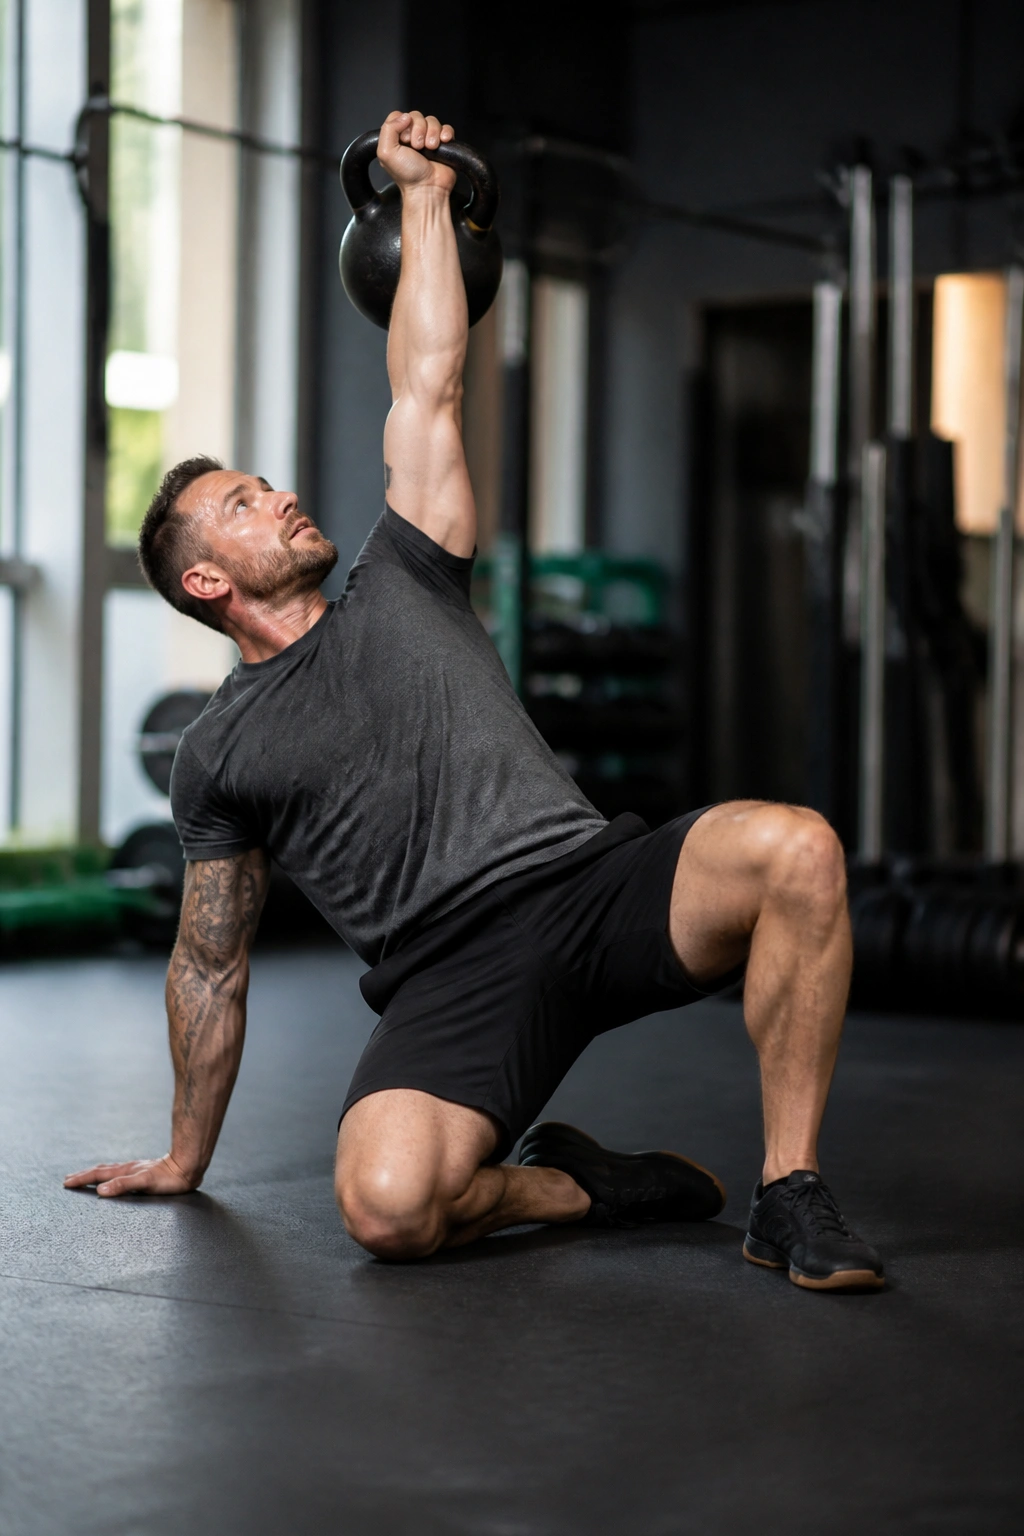
The Turkish get-up is the ultimate total-body core exercise. It requires balance, stability, strength, and mobility all at once. It is a complex movement, so learn it with no weight first.
The Step-by-Step
Lie on your back, holding a weight (like a kettlebell or dumbbell) in your right hand, arm extended toward the ceiling. Bend your right knee. Use your left arm to help you sit up, then push your hips up into a bridge, sweep your left leg under you, and stand up. Reverse the process to get back down.
The Core Requirement
Your core is firing during every second of this movement to keep the weight stable above your head. You have to stabilize your shoulder, your spine, and your hips all simultaneously. Because it is so complex, do not try to rush this. Focus on the transition between each position. It is the best exercise for teaching your body to move as a single, coordinated unit.
Final Thoughts
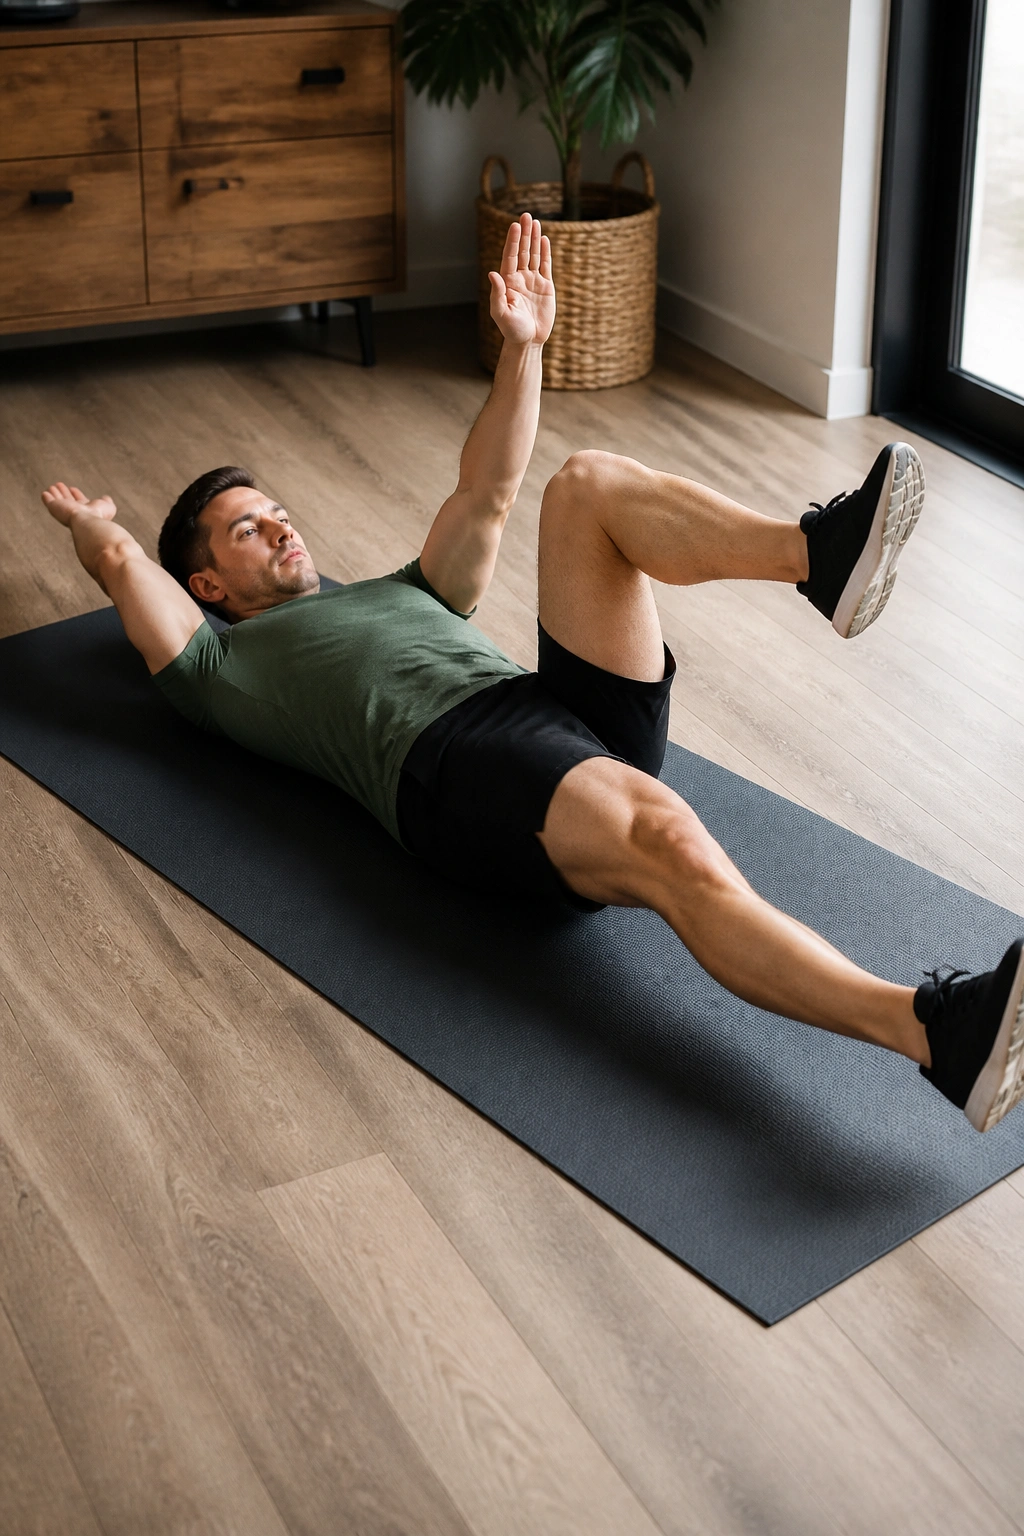
Consistency beats intensity every single time. It is better to have a ten-minute core routine that you actually do four days a week than a massive, grueling hour-long session that you do once and then avoid for the rest of the month. Your core is a muscle group that recovers relatively quickly, meaning it can handle frequent work.
Listen to your body. If you feel pain in your lower back during any of these movements, stop. That is a signal that your deep core is not yet strong enough to support the load of the exercise, and you need to regress to a simpler version. There is no shame in starting with basic dead bugs or knee-only planks. Everyone has to start somewhere, and the only way to build true core strength is to build it properly from the foundation up.
Focus on the quality of your movement, not the quantity of your reps. When you stop chasing the burn and start chasing control, your core will naturally start to tighten up. It is about how well you can hold yourself together, not how many crunches you can knock out. Stick with the fundamentals, challenge yourself appropriately, and give your body the time it needs to adapt and build that internal stability.
