



The sensation of slumping into a chair—shoulders rounding forward, neck crane-like, peering at a screen—is one of the most physically damaging habits we cultivate in the modern age. Your body isn’t designed to hold a static position for eight hours straight. Over time, those muscles in your chest tighten, while the muscles in your back weaken, creating a physical imbalance that eventually manifests as chronic neck pain, lower back aches, and that unmistakable slouch.
Fixing this doesn’t require a gym membership or a massive time commitment. It requires undoing the tightness and firing up the muscles that keep you upright. Yoga provides a specific, reliable way to address these postural imbalances by targeting the chest, the hip flexors, the core, and the thoracic spine. You do not need to be a flexible gymnast to see results. You just need to show up on your mat consistently.
The following poses are chosen specifically to counter the “desk hunch.” They focus on opening the front body—which gets chronically tight—and strengthening the back body, which gets chronically weak. Treat this not as a workout to “burn calories,” but as a daily maintenance routine for your skeletal structure.
1. Mountain Pose (Tadasana)
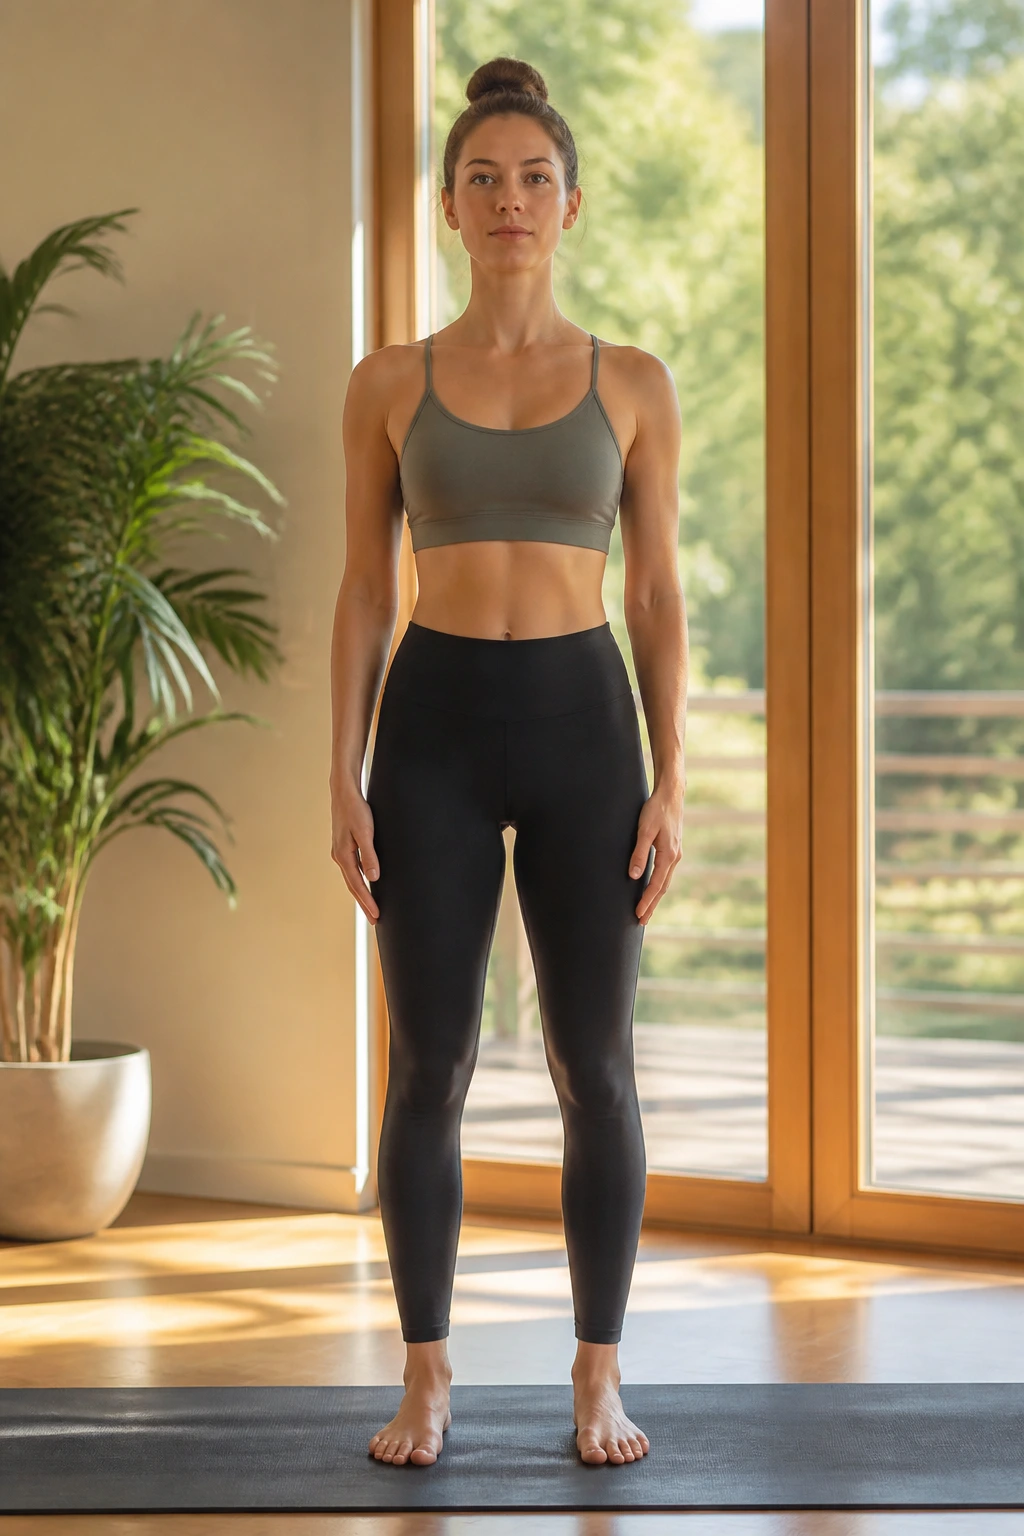
It looks like standing. That is the trap. Most people stand with locked knees, a tucked pelvis, and collapsed arches, which does nothing for posture. Tadasana is an active, engaged stance that resets your relationship with gravity. When done correctly, it is exhausting because you are constantly making micro-adjustments to stay perfectly aligned.
The Anatomy of the Stand
Stand with your big toes touching and heels slightly apart. Lift your toes and spread them wide before placing them back down, creating a solid base. Engage your quadriceps to lift your kneecaps, but—and this is crucial—do not lock your knees back. Keep a soft micro-bend. Your tailbone should drop slightly toward the floor, not tucked aggressively, but creating a neutral spine.
Draw your shoulder blades down your back, away from your ears. Imagine a string pulling the crown of your head toward the ceiling. Hold this for ten full breaths, focusing entirely on elongating the spine. If you feel like you are standing “taller” by the end of the minute, you are doing it right.
2. Cat-Cow Pose (Marjaryasana-Bitilasana)
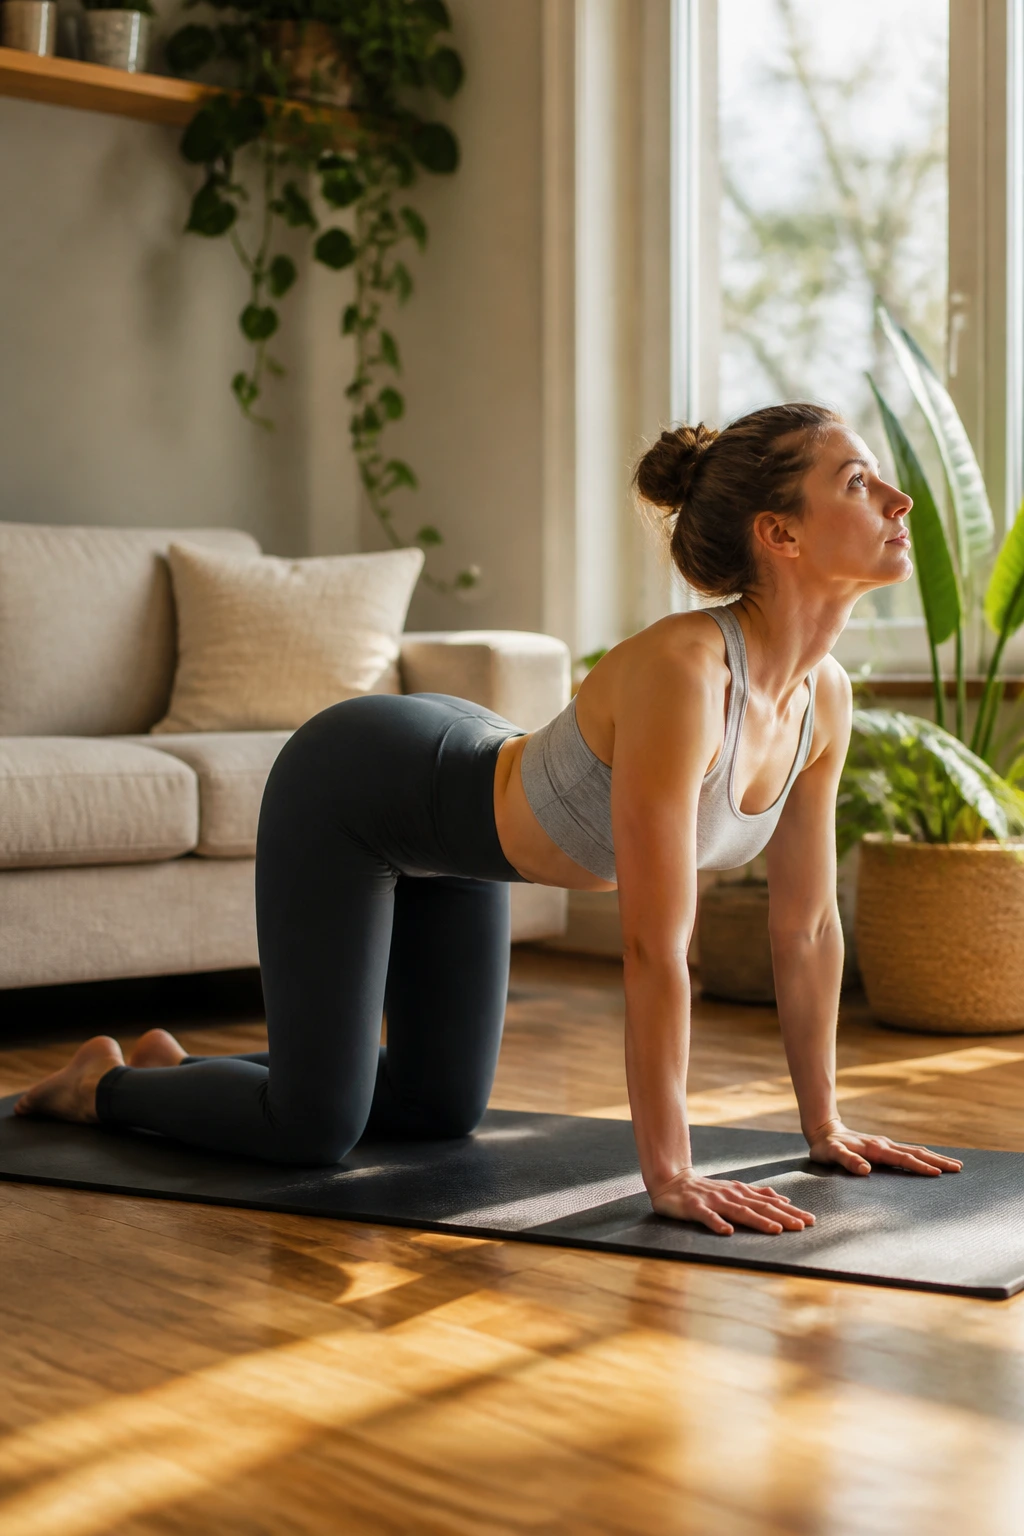
This is the gold standard for spinal mobility. If your spine feels like a rusted hinge, this is the lubricant. It coordinates breath with movement, forcing your back to move through its full range of flexion and extension.
Start on your hands and knees in a tabletop position. Your wrists should be directly under your shoulders, and your knees under your hips. On the inhale, drop your belly toward the floor, lift your chin and chest, and gaze upward—this is Cow. On the exhale, draw your belly button to your spine, round your back like an angry cat, and drop your head—this is Cat.
Pro tip: Do not just move your neck. The movement should start at the tailbone and ripple up the spine. The neck is just the final stop in the chain. Keep this slow and deliberate. Ten rounds will feel like a massage for your vertebrae.
3. Forward Fold (Uttanasana)
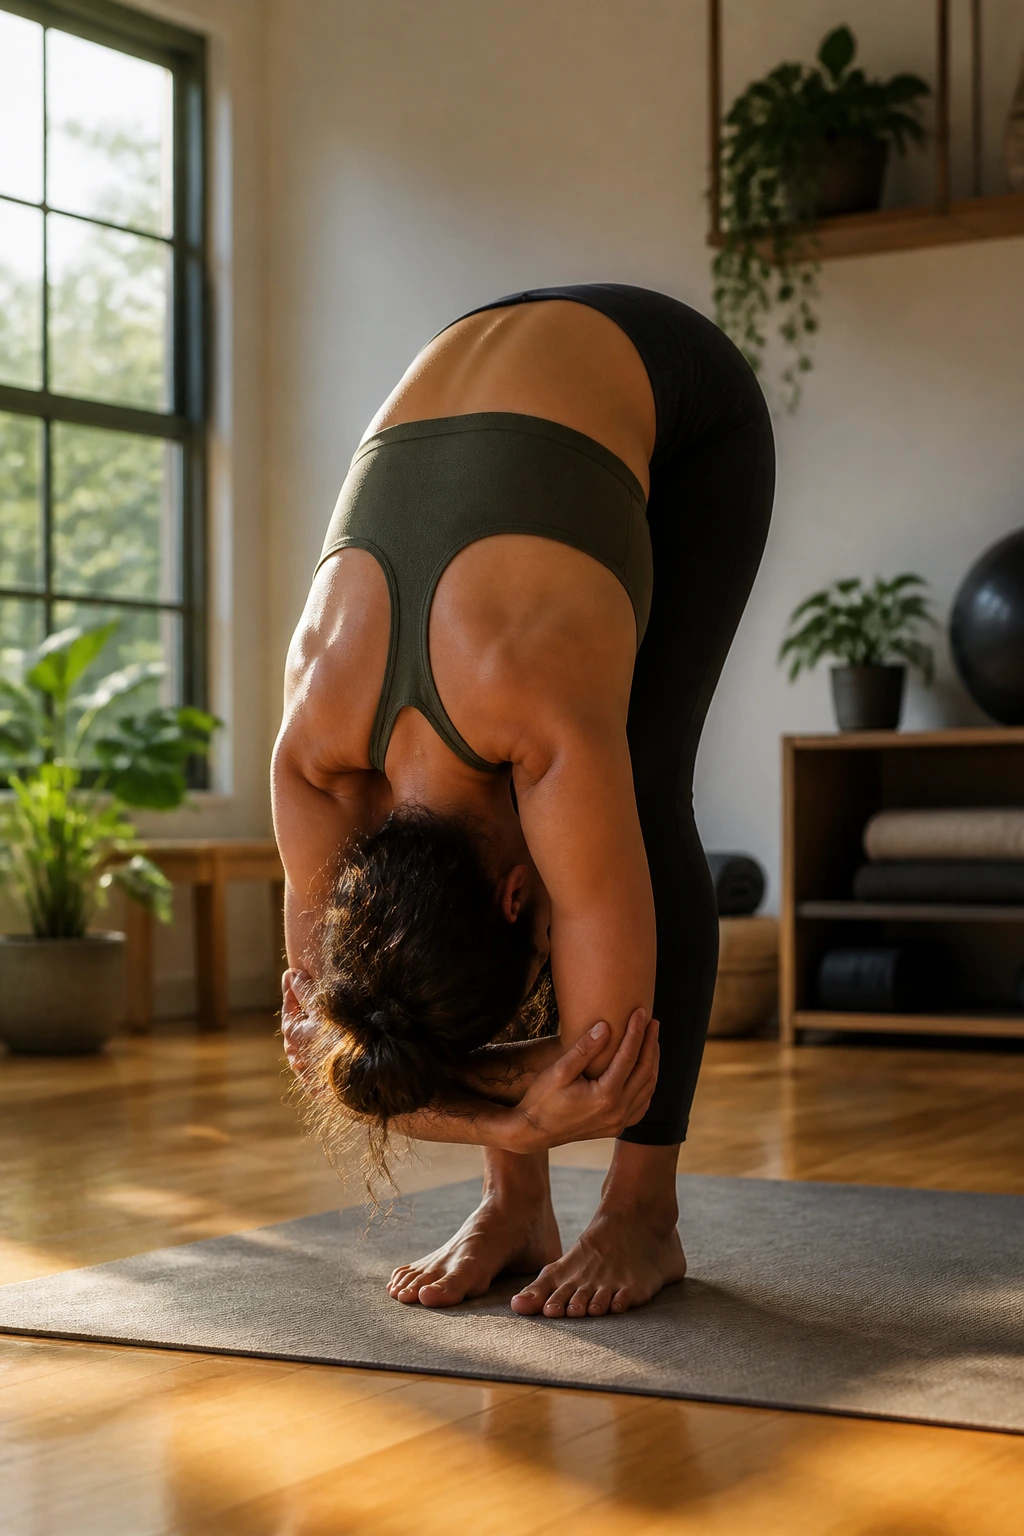
We spend our days with our hip flexors in a shortened position—sitting. This puts immense tension on the lower back. A forward fold is one of the most effective ways to release the hamstrings, which are often the culprit behind lower back pain.
Stand in Mountain Pose, exhale, and hinge at your hips—not your waist—to fold forward. If your hamstrings are tight, bend your knees deeply. You want your torso to drape over your thighs. Let your head hang heavy, shaking it “yes” and “no” to release neck tension.
Why it matters: Gravity does the work here. By letting your torso hang, you create space between your vertebrae. If you have “text neck” or chronic upper back stiffness, use this time to consciously relax the trapezius muscles. Reach for opposite elbows to add a bit of weight, deepening the stretch.
4. Cobra Pose (Bhujangasana)
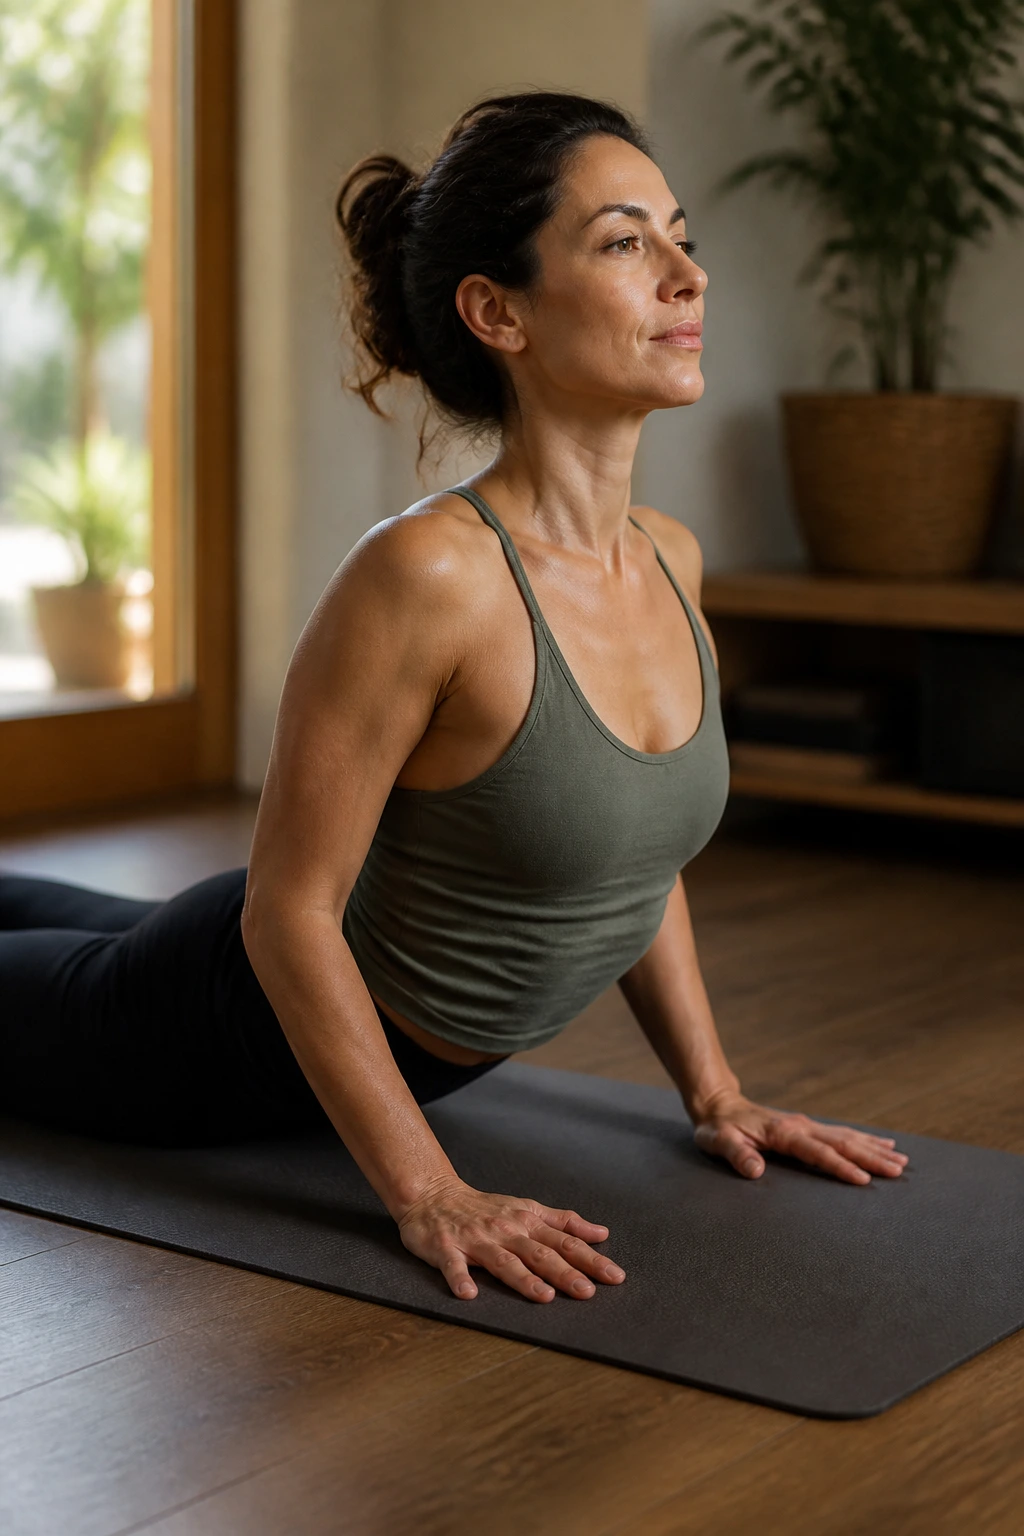
The “desk slump” shortens the pectoral muscles and rounds the upper back. Cobra pose acts as the direct antidote. It is a gentle backbend that focuses on the thoracic spine—the middle part of your back that most people lose the ability to extend.
Lie on your stomach with your legs extended, tops of your feet pressing into the floor. Place your palms under your shoulders with elbows hugging your ribcage. As you inhale, use your back muscles—not just your arms—to lift your chest off the mat. Keep your gaze forward, not up, to avoid crunching your neck.
What to watch for: Do not push so high that your lower back crunches. The goal is to lengthen, not to jam the vertebrae together. If you feel pinching in your lower back, lower your chest. Keep your shoulders rolled back.
5. Downward-Facing Dog (Adho Mukha Svanasana)
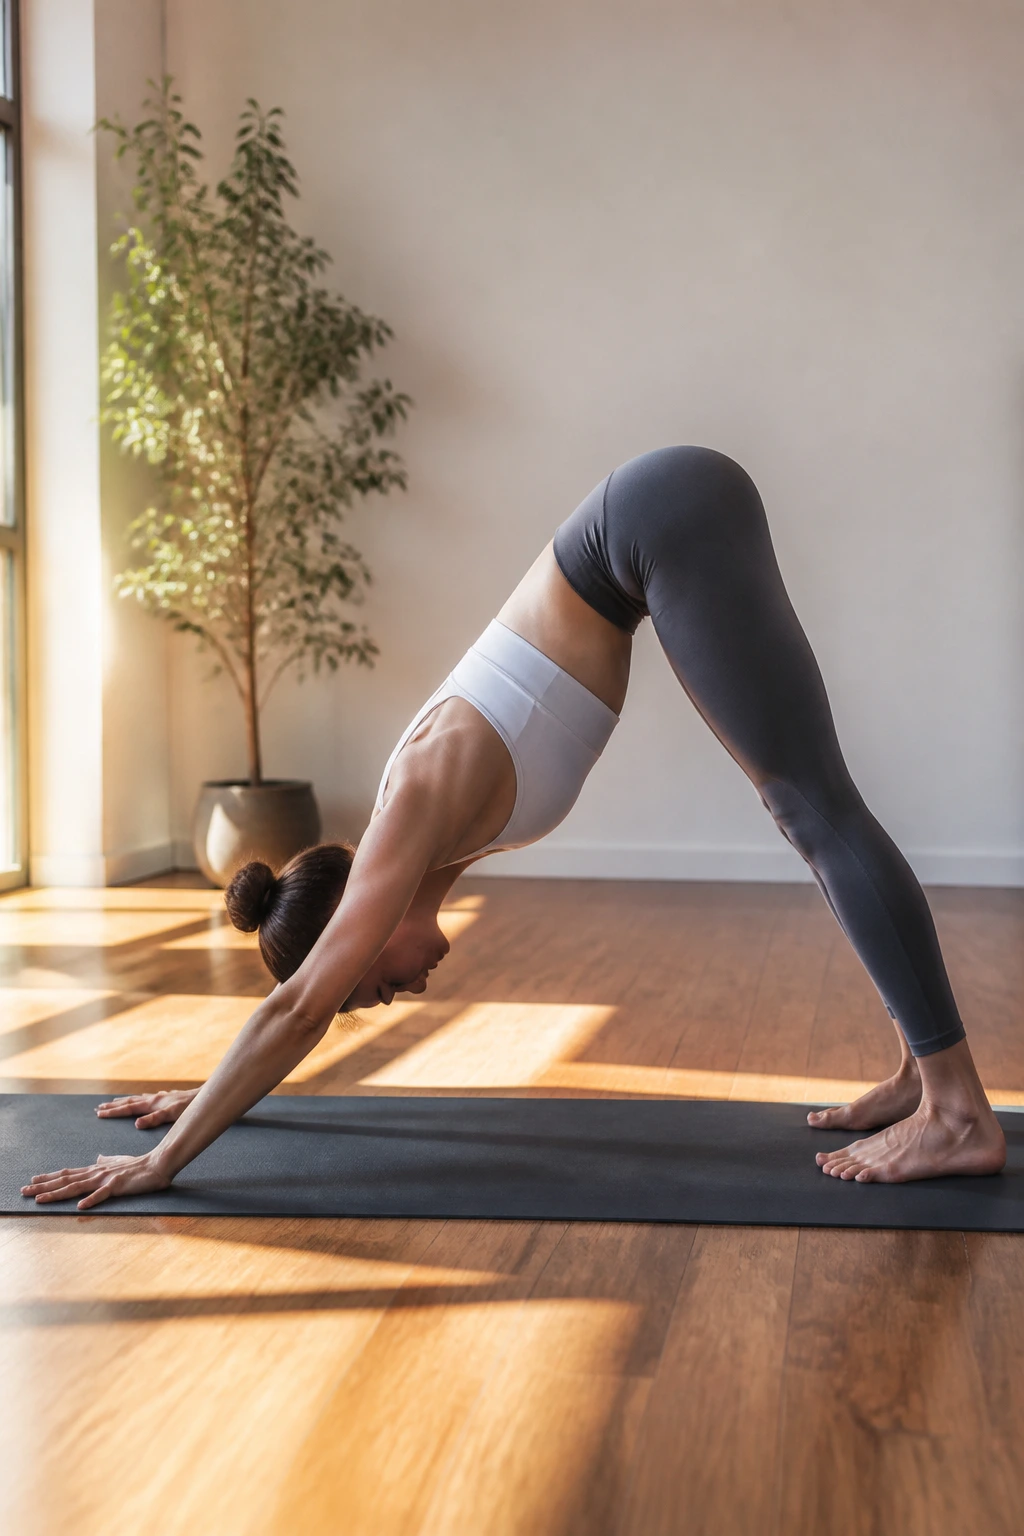
This is the ultimate reset button. It strengthens the shoulders, stretches the hamstrings, and lengthens the entire back body. However, it is frequently done poorly, which robs you of the postural benefits.
From your hands and knees, tuck your toes, lift your hips high, and press your chest toward your thighs. Your body should form an inverted “V” shape. Spread your fingers wide and press through the index finger and thumb to take pressure off your wrists.
The common mistake: People prioritize getting their heels to the floor, which causes their back to round. Do the opposite. Bend your knees as much as you need to get your spine perfectly straight. A straight spine in Downward Dog is worth more than a dozen with rounded backs.
6. Locust Pose (Salabhasana)
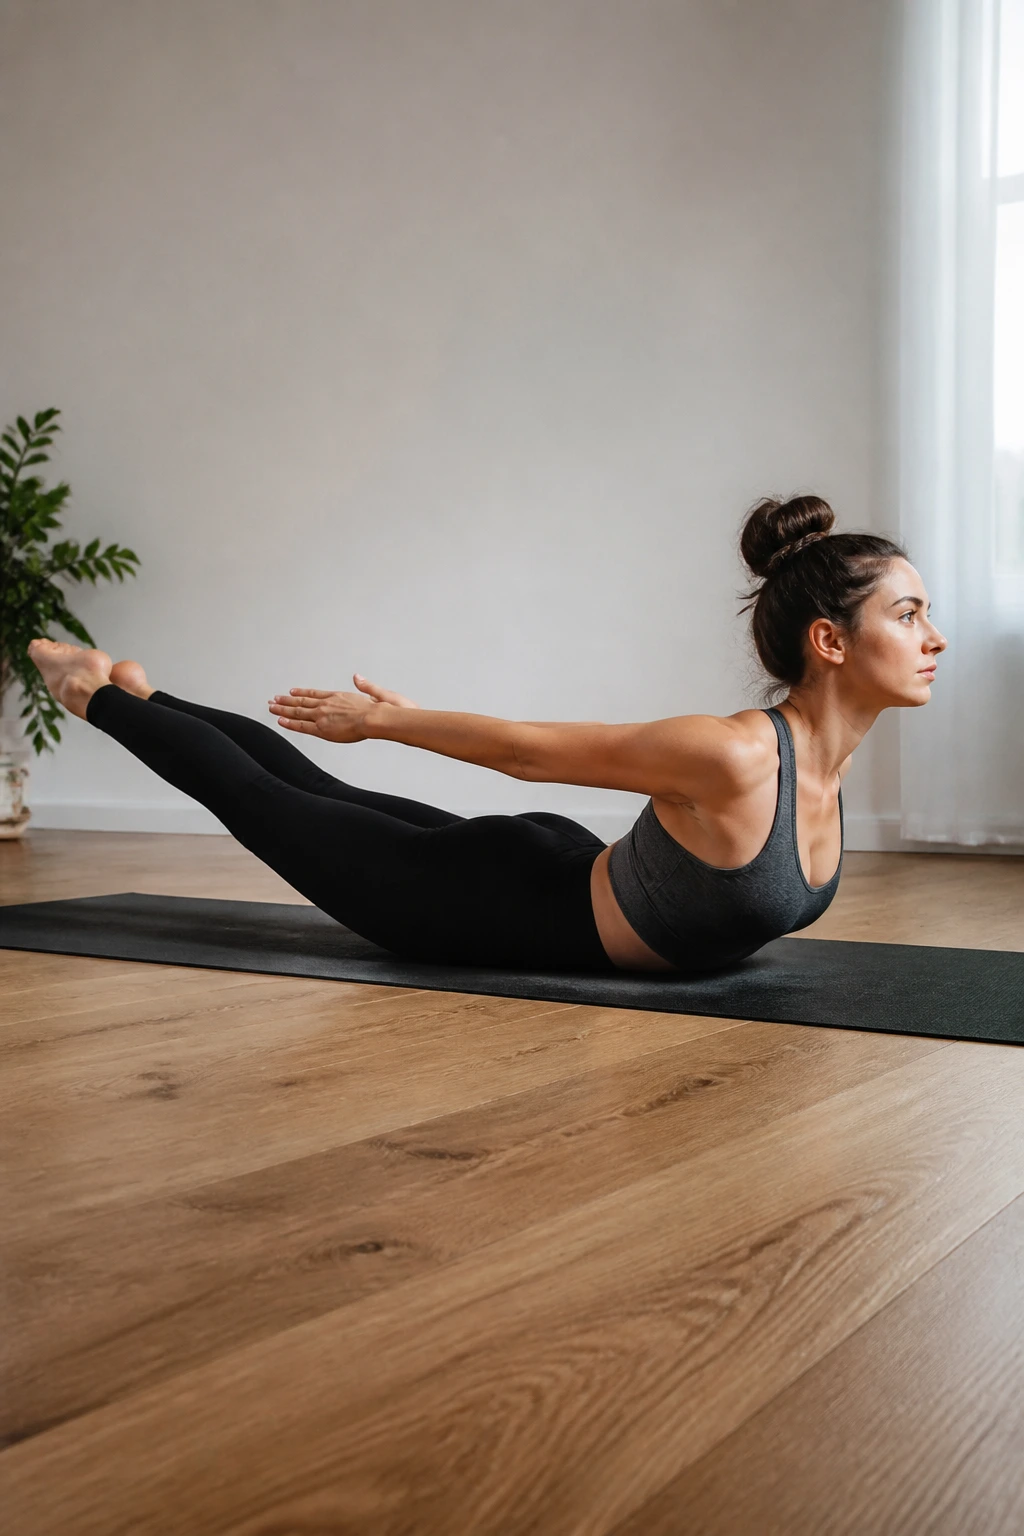
If you want to fix rounded shoulders, you must strengthen the muscles between your shoulder blades. Locust pose is essentially an isometric exercise for your entire posterior chain—your hamstrings, glutes, and the erector spinae muscles that run along your spine.
Lie on your belly with your arms alongside your body, palms facing down. On an inhale, lift your head, chest, arms, and legs off the floor simultaneously. You should be balancing on your hip bones and lower belly. Reach your fingers toward your toes to engage your lats.
Think of it this way: You are trying to lift your heart forward and up. Keep your gaze at the top of your mat to keep the back of your neck long. Hold for three to five breaths. It’s a deceptively simple movement that builds the endurance needed to sit tall at a desk.
7. Bridge Pose (Setu Bandhasana)
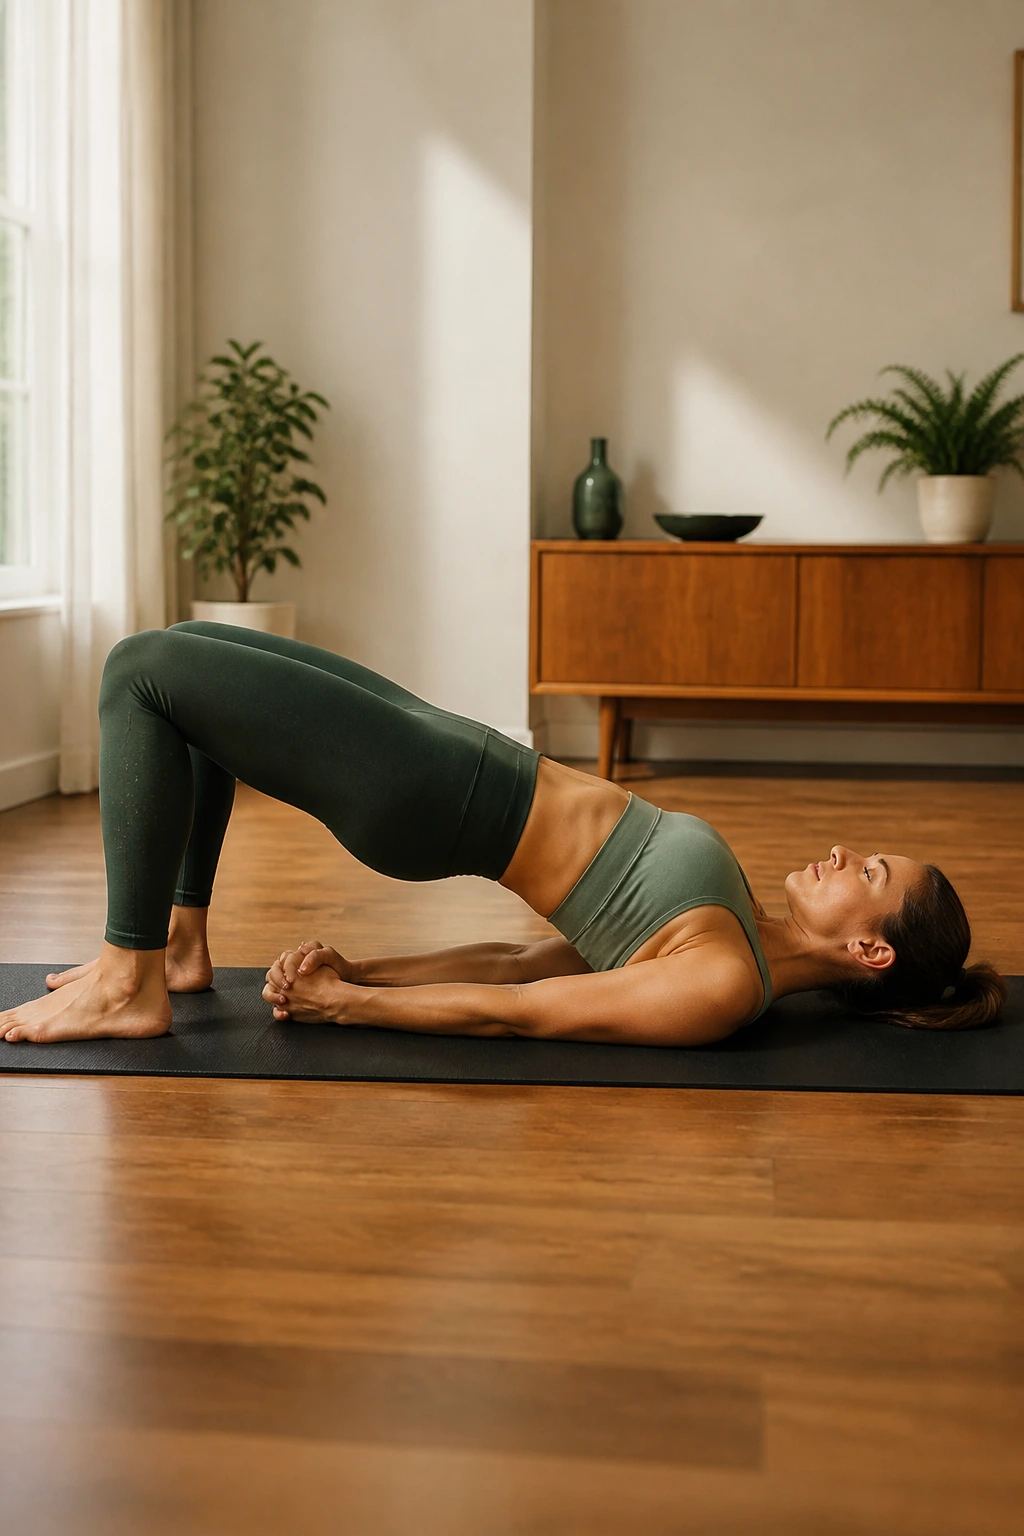
Most of us have what physical therapists call “gluteal amnesia”—our glutes have forgotten how to fire because we sit on them all day. Bridge pose wakes them up while opening the chest and front hips.
Lie on your back with your knees bent and feet flat on the floor, hip-width apart. Position your feet close enough that you can graze your heels with your fingertips. Press into your feet and arms to lift your hips toward the ceiling. Interlace your fingers under your back and shimmy your shoulders underneath you.
Why this helps: It engages the glutes and opens the hip flexors. If you struggle with lower back pain, this is a therapeutic pose. Focus on keeping your knees tracking forward, not splaying out to the sides.
8. Child’s Pose (Balasana)
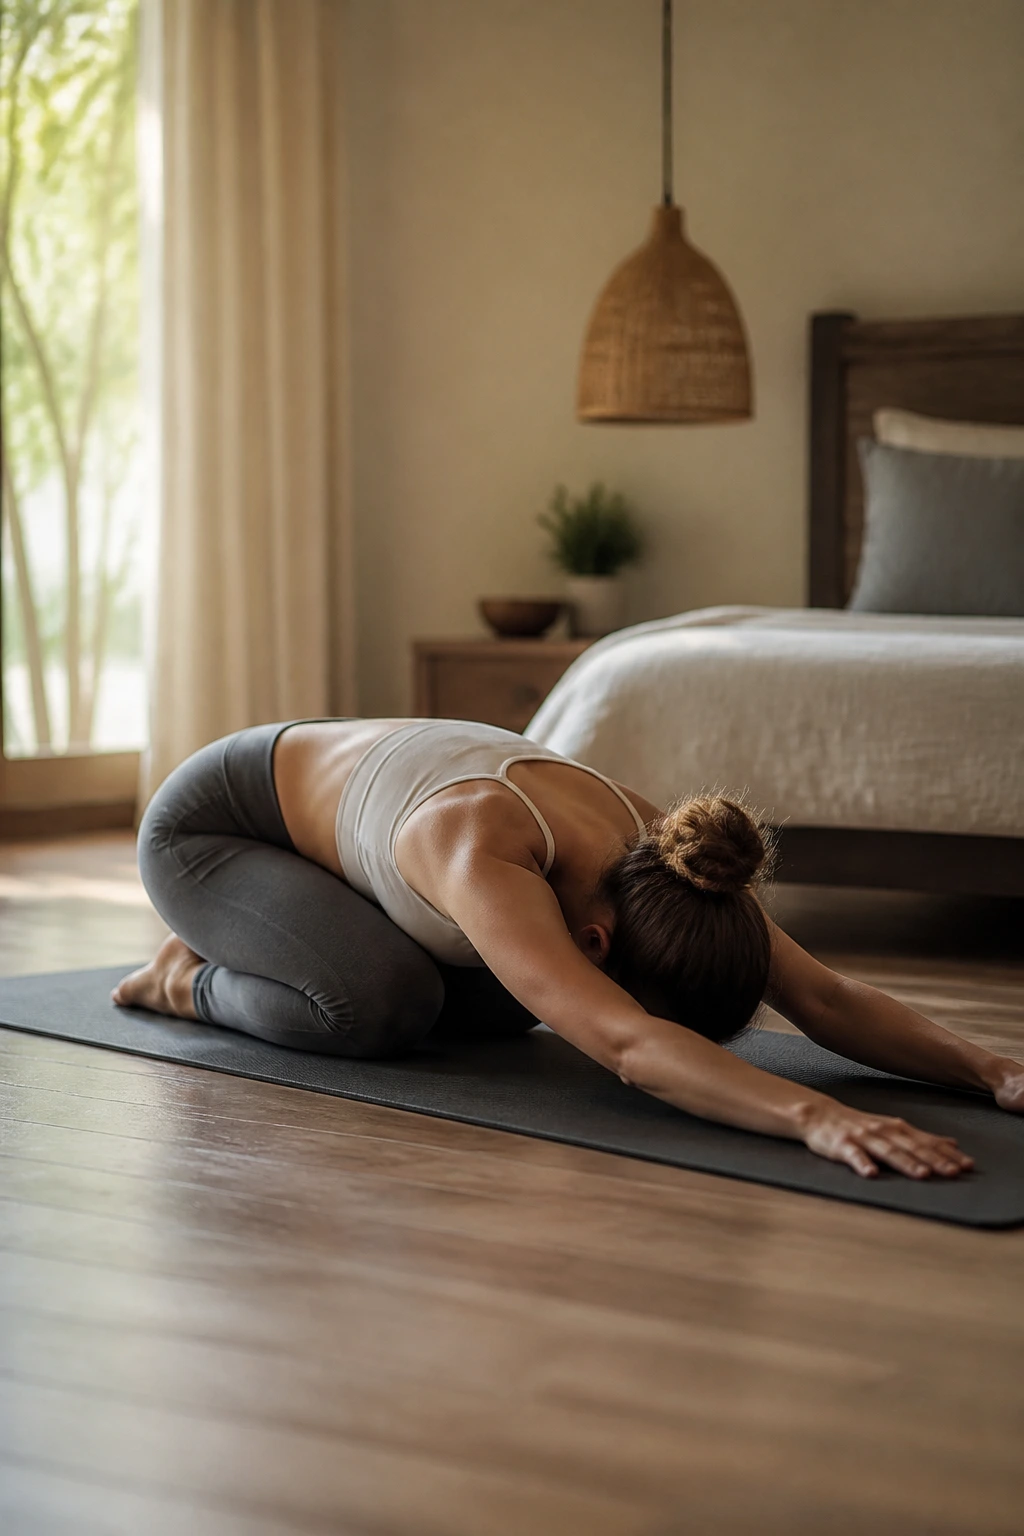
We need rest, but we also need a passive stretch for the lower back. Child’s pose is the perfect restorative bridge between active poses. It allows the spine to decompress and the shoulders to release.
From a kneeling position, touch your big toes together and separate your knees wide. Exhale and sink your hips back toward your heels. Extend your arms forward on the mat, resting your forehead on the floor.
Pro Tip: If your hips don’t reach your heels, use a blanket or a block between your hips and heels. The goal is to feel the sensation of your spine lengthening. Let your breath expand into your back ribs, creating a sensation of internal space.
9. Camel Pose (Ustrasana)
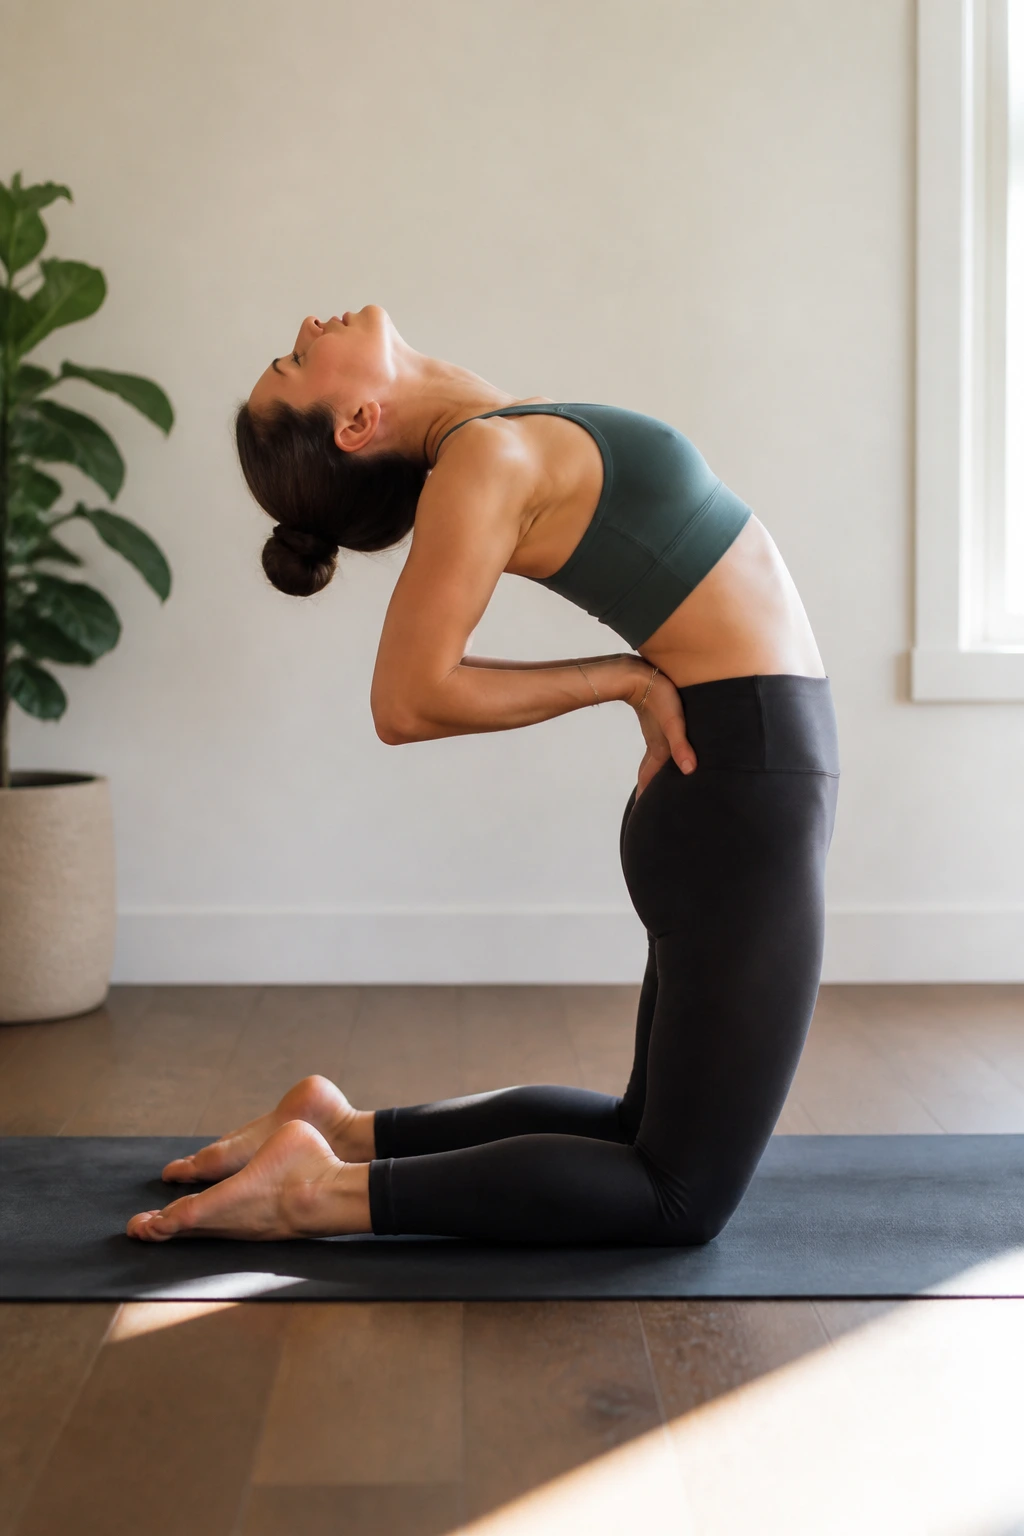
This is a deeper heart-opener. If you feel like your chest is permanently caved in from laptop work, Camel will challenge that rigidity. It’s an intense pose, so treat it with respect.
Kneel on the mat with knees hip-width apart. Place your hands on your lower back, fingers pointing down toward your glutes. Draw your elbows toward each other behind you—this creates the chest opening. Gently begin to lean back, lifting your sternum toward the ceiling.
Listen to your body: You do not need to reach for your heels. Keeping your hands on your lower back provides support. Only reach back if your chest remains lifted and your neck feels completely safe. This pose forces the ribs to expand and the shoulders to retract.
7. Warrior I (Virabhadrasana I)
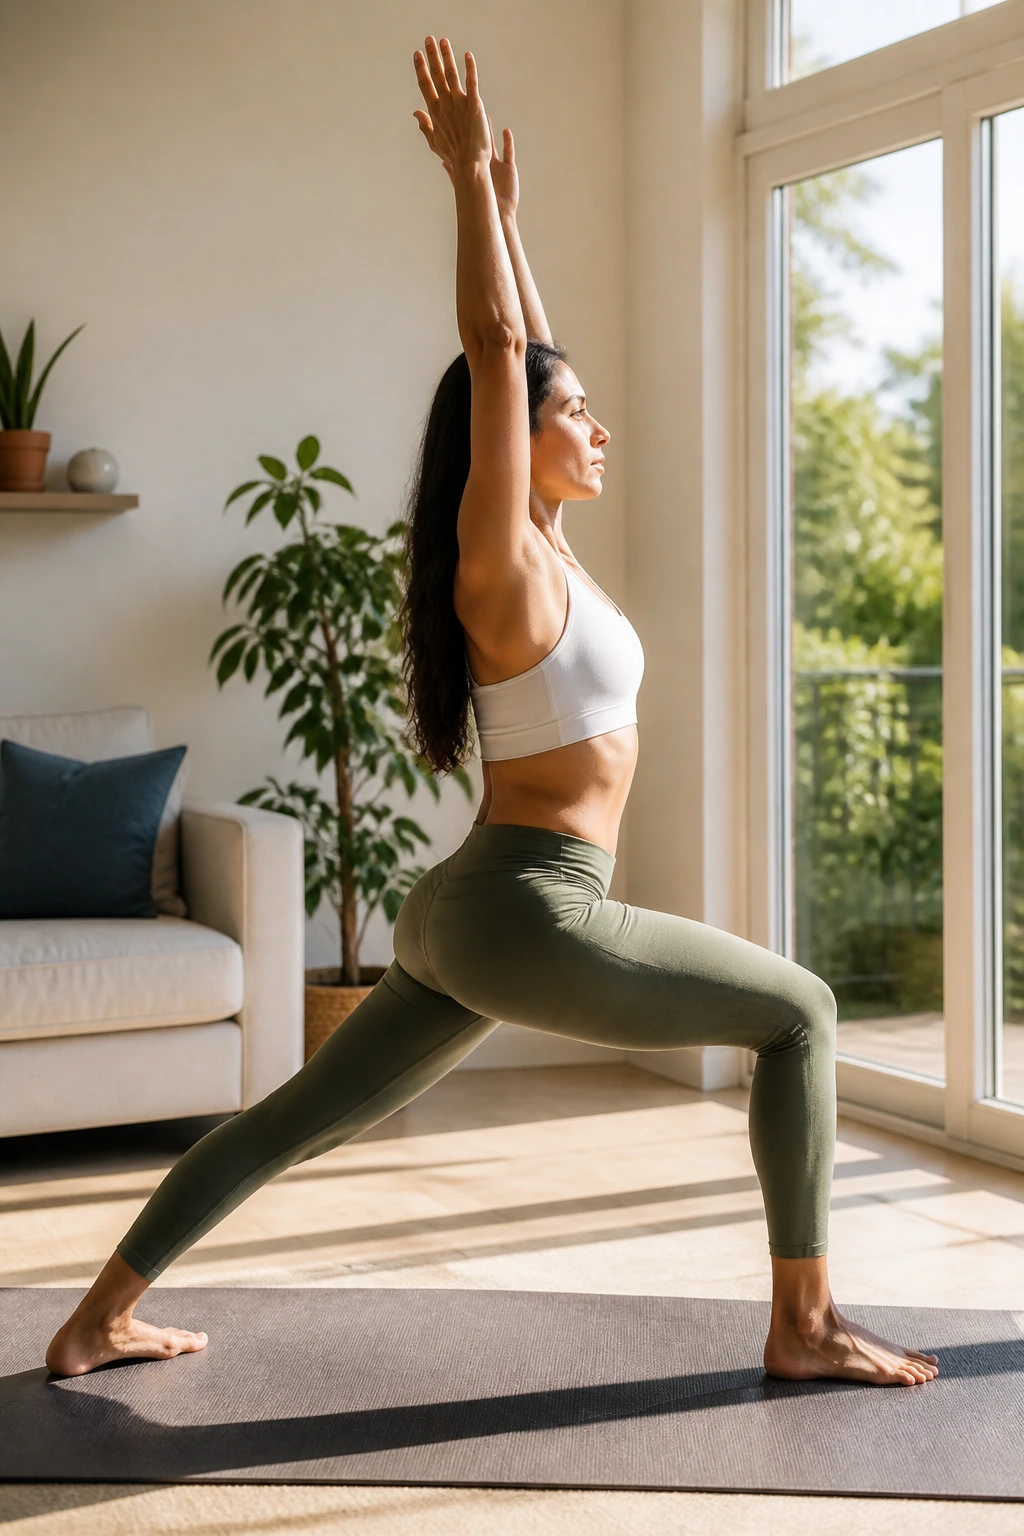
This pose builds stability in the legs and opens the chest, but it requires a very specific alignment to be effective for posture. It challenges your balance and your ability to maintain a neutral pelvis.
Step one foot back and turn it out at a 45-degree angle. Keep your hips square to the front of the room. Bend your front knee until it is stacked over your ankle. Lift your arms straight up, keeping your shoulders down.
The postural benefit: Warrior I is a fantastic stabilizer. It forces you to engage your core to keep your torso upright. Most people lean forward; resist that. Keep your shoulders stacked directly over your hips. It’s a test of whether you can hold your torso tall while your legs are working hard.
11. Thread the Needle (Parsva Balasana)
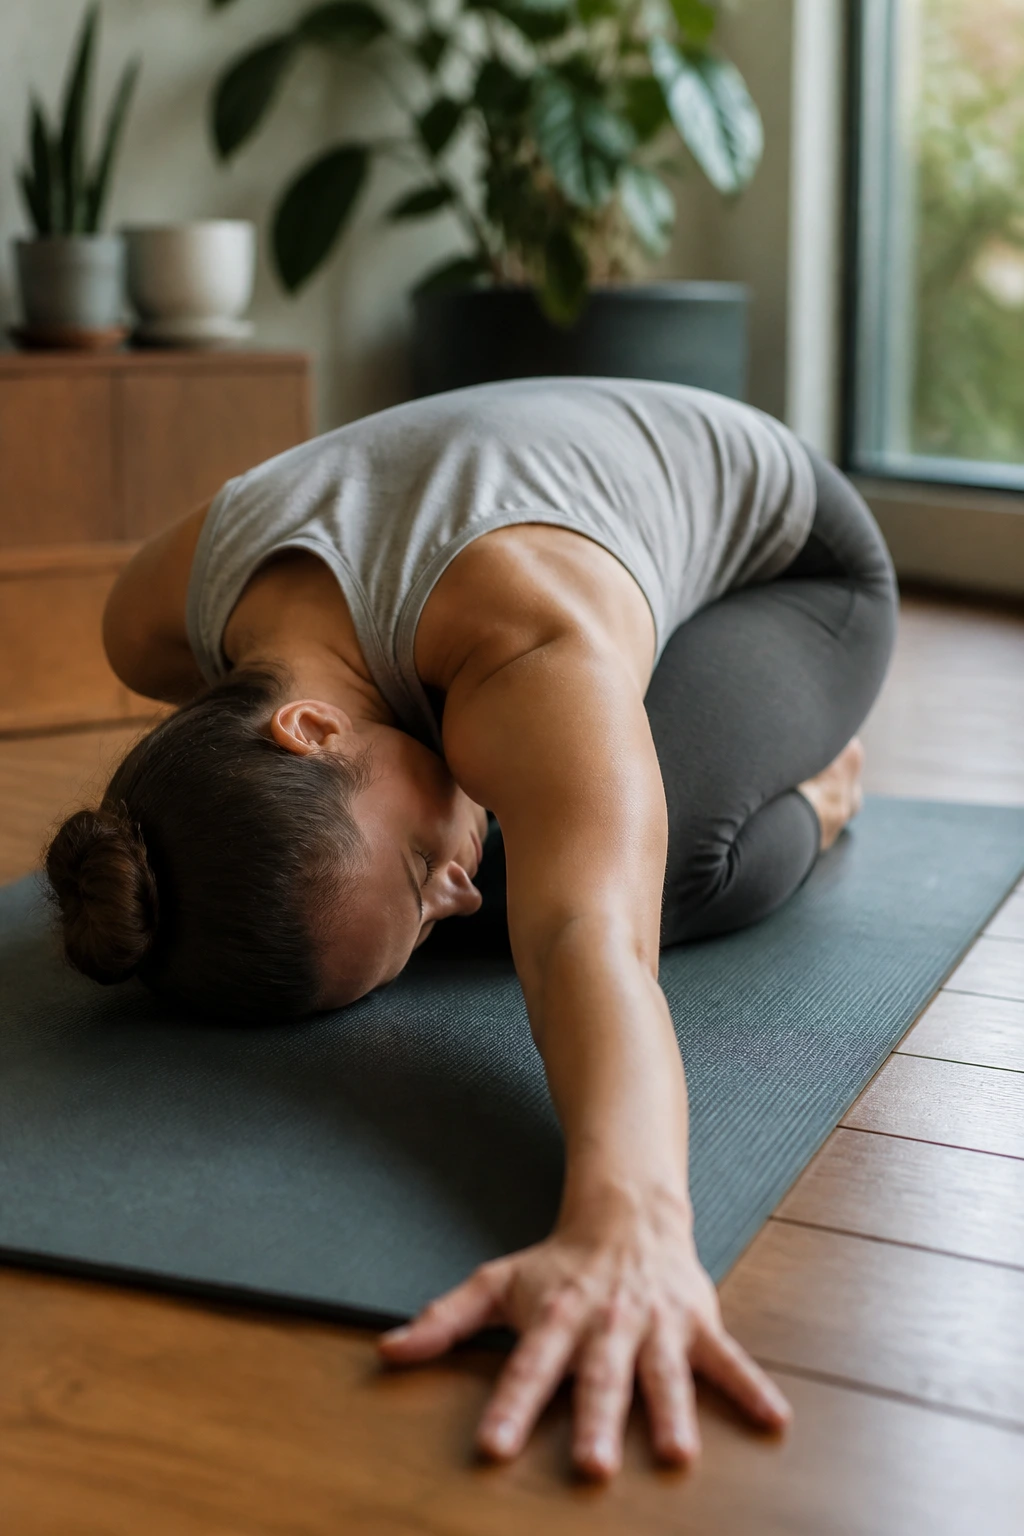
Shoulder tightness is often localized in the back of the shoulder joint and the upper back. This pose provides a deep stretch that is hard to access elsewhere.
Start in tabletop. Slide your right arm underneath your left arm, resting your right shoulder and the side of your head on the floor. Walk your left fingertips forward for a deeper stretch. Breathe into the space between your shoulder blades.
The sensory check: You should feel this deeply in the upper back. If it feels like a pinch, back off. This is one of the best poses to do after a long day of typing, as it specifically targets the rhomboids and the posterior deltoids.
12. Sphinx Pose (Salamba Bhujangasana)
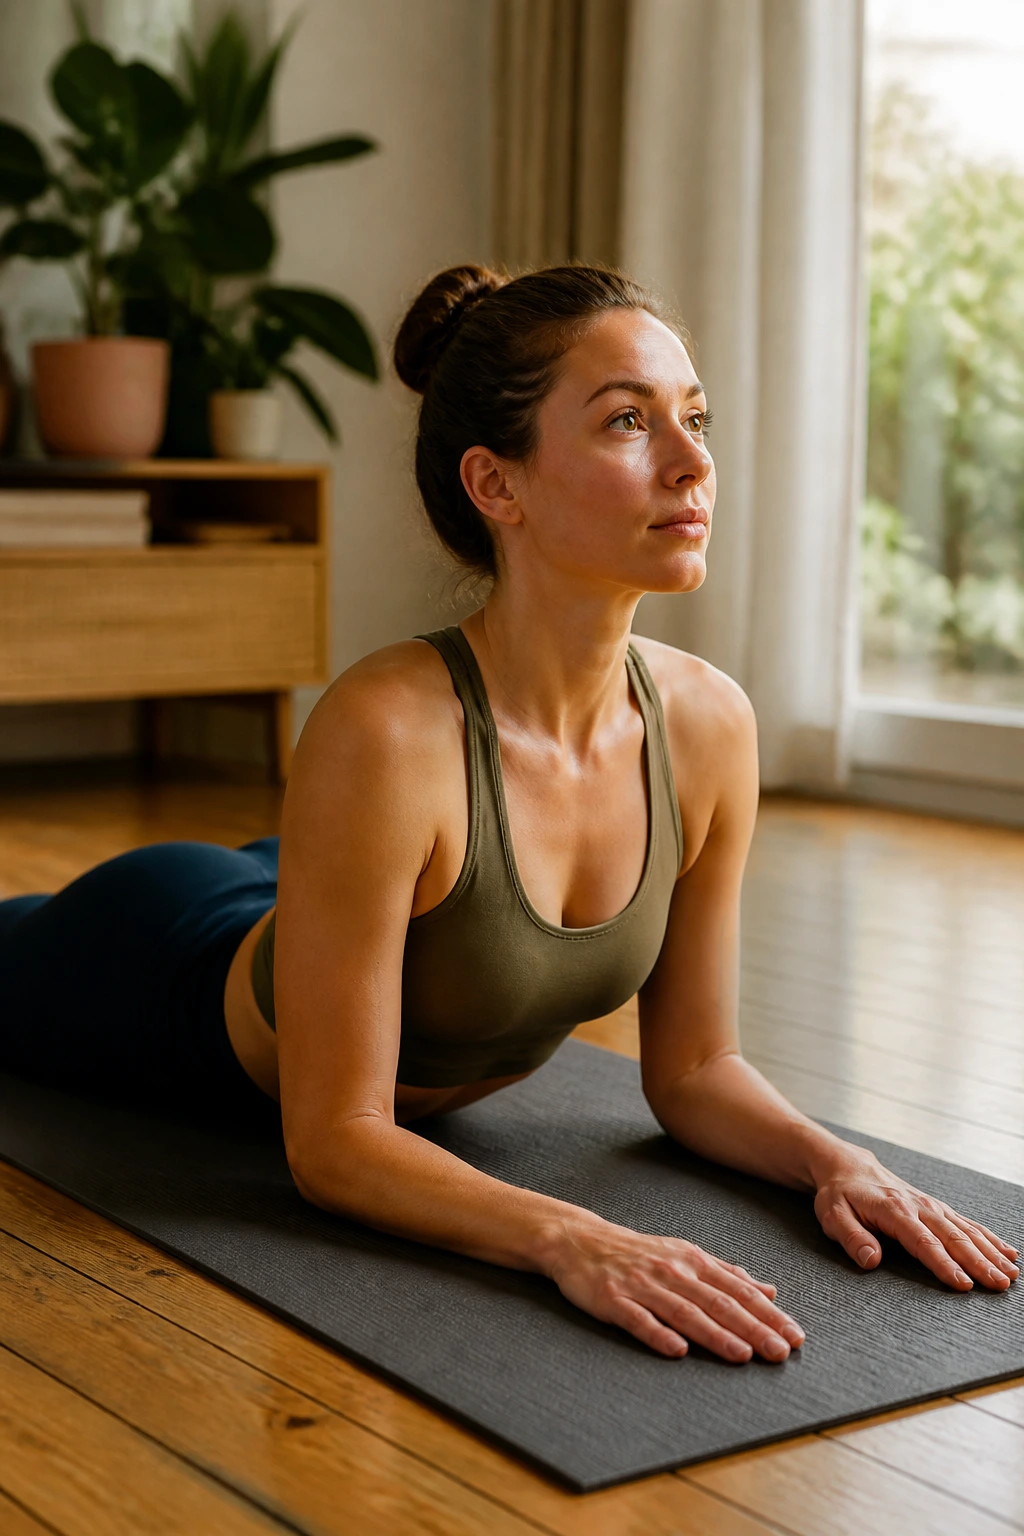
If Cobra felt like too much, Sphinx is your alternative. It is a milder backbend that allows you to hold the stretch for longer, which is vital for realigning fascia that has become tight over years of slouching.
Lie on your stomach. Prop yourself up on your forearms, with elbows directly under your shoulders. Press your forearms into the floor to lift your chest. Spread your fingers wide.
Why it works: It forces you to actively pull your chest forward through your “gates” (your arms). It is a passive-active stretch. You aren’t just collapsing into your lower back; you are actively using your forearms to create length in the thoracic spine.
13. Seated Spinal Twist (Ardha Matsyendrasana)
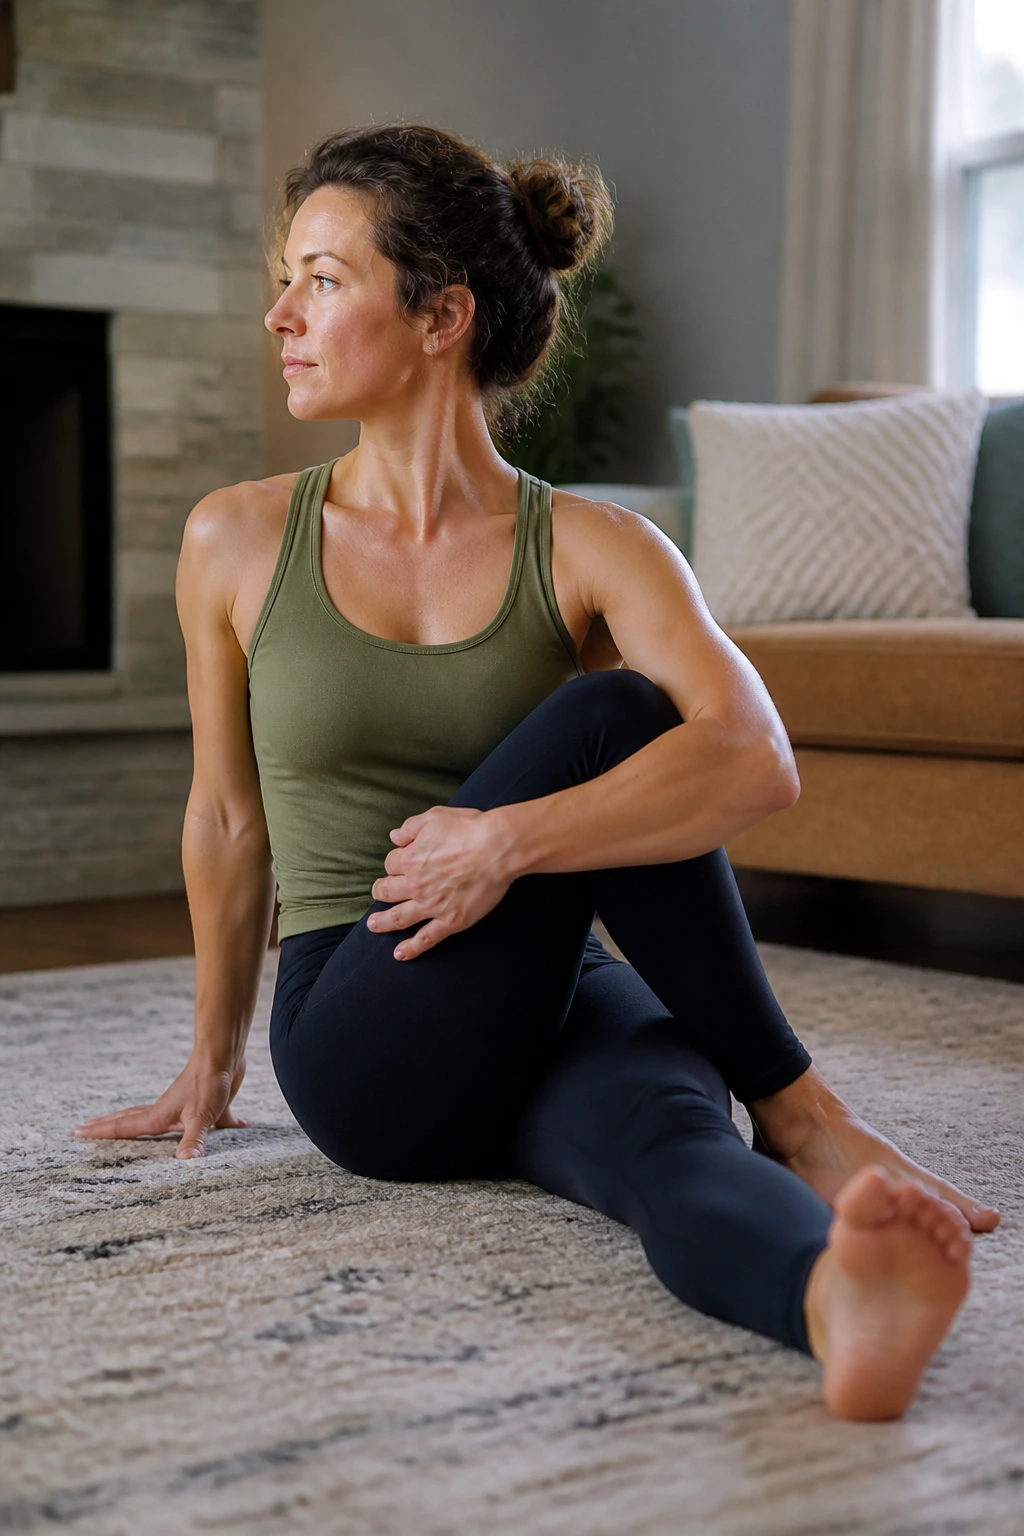
Twisting is essential for spinal health. Our spines are meant to rotate, but we rarely rotate them in our daily lives, leading to stiffness. This pose gently wrings out the torso and encourages the spine to lengthen.
Sit with your legs extended. Cross your right foot over your left knee. Hug your right knee with your left arm and place your right hand on the floor behind you. Inhale to lengthen your spine, exhale to twist.
Focus: Do not force the twist from your neck. The rotation should come from the belly and the mid-back. Keep both sit-bones on the floor. If one hip lifts, you’ve gone too far.
14. Plank Pose (Phalakasana)
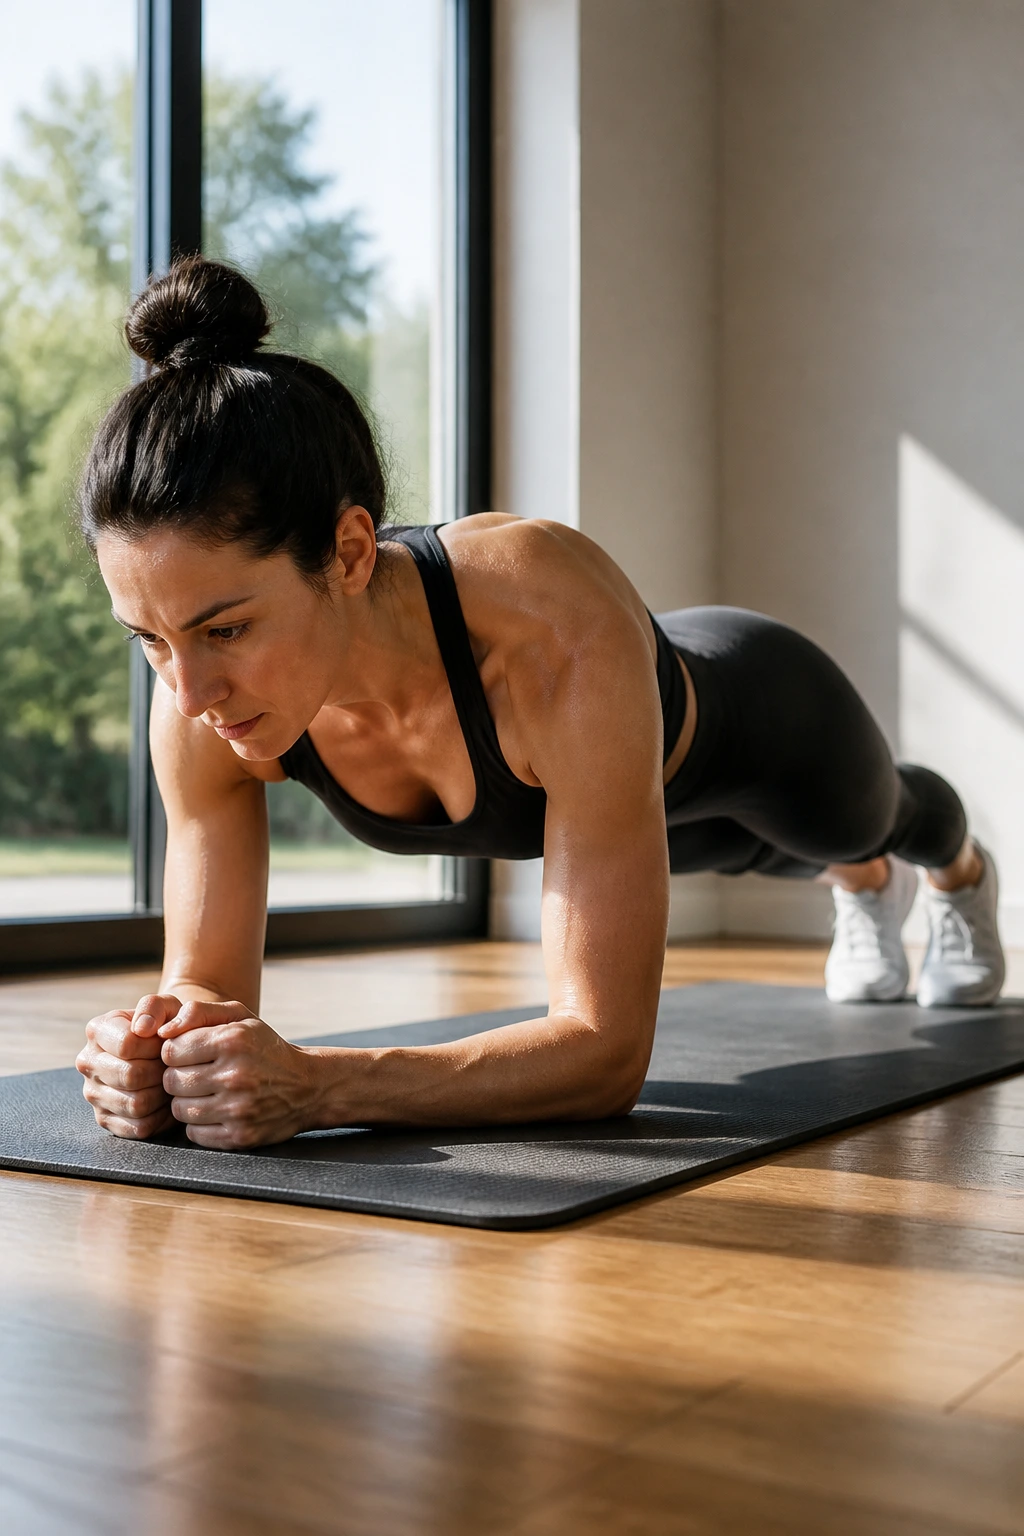
You cannot have good posture without a strong core. When your core is weak, your lower back takes the brunt of the load, causing you to arch or slump. Plank is the fundamental test of your core engagement.
From all fours, step your feet back and straighten your legs. Your body should form a straight line from heels to head. Push the floor away from you—do not let your chest collapse between your shoulder blades.
The secret: Engage your glutes. Seriously, squeeze them. Squeezing your glutes protects your lower back and ensures your abs are doing the work. If your hips start to dip, you are finished. Lower your knees. Better to do 15 seconds of perfect form than a minute of sagging form.
15. Side Plank (Vasisthasana)
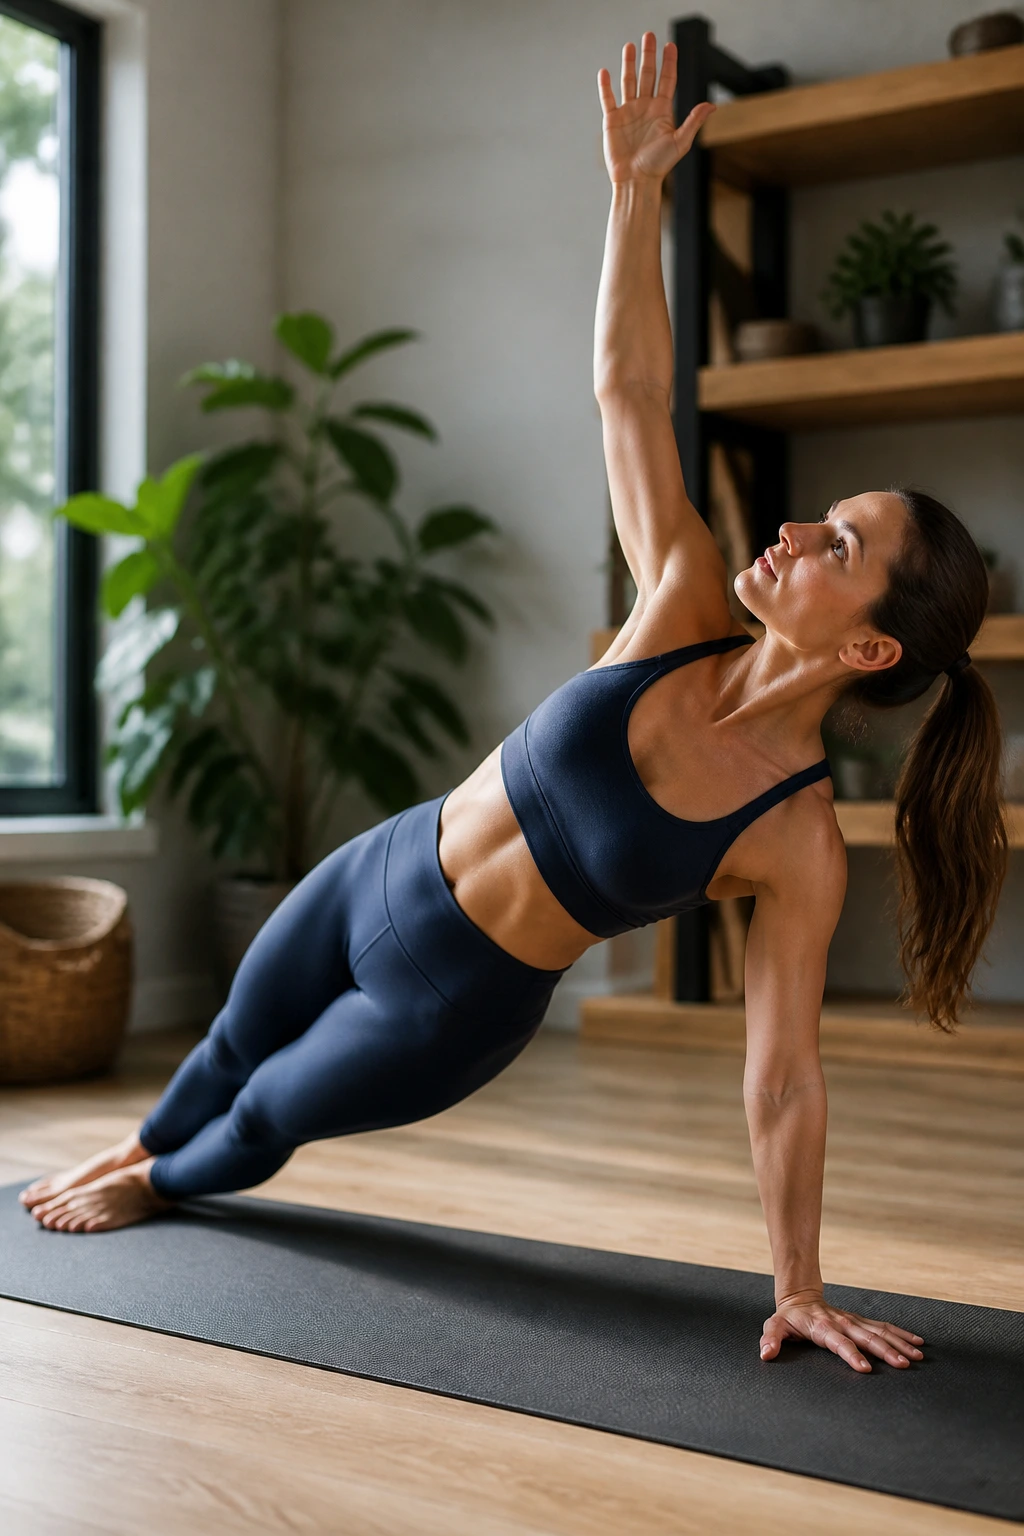
Posture isn’t just front-to-back; it is also side-to-side stability. Side planks target the obliques, which are crucial for keeping the spine from leaning or crunching to one side.
From a standard plank, roll onto your right side, stacking your feet. Reach your left arm to the ceiling. Keep your hips lifted—do not let them drop toward the mat.
Why it’s vital: We rely heavily on the front of the body. The side body is often neglected. A strong side plank helps create the stability needed to keep the spine perfectly vertical throughout the day, preventing that “leaning” habit many of us develop while sitting.
16. Boat Pose (Navasana)
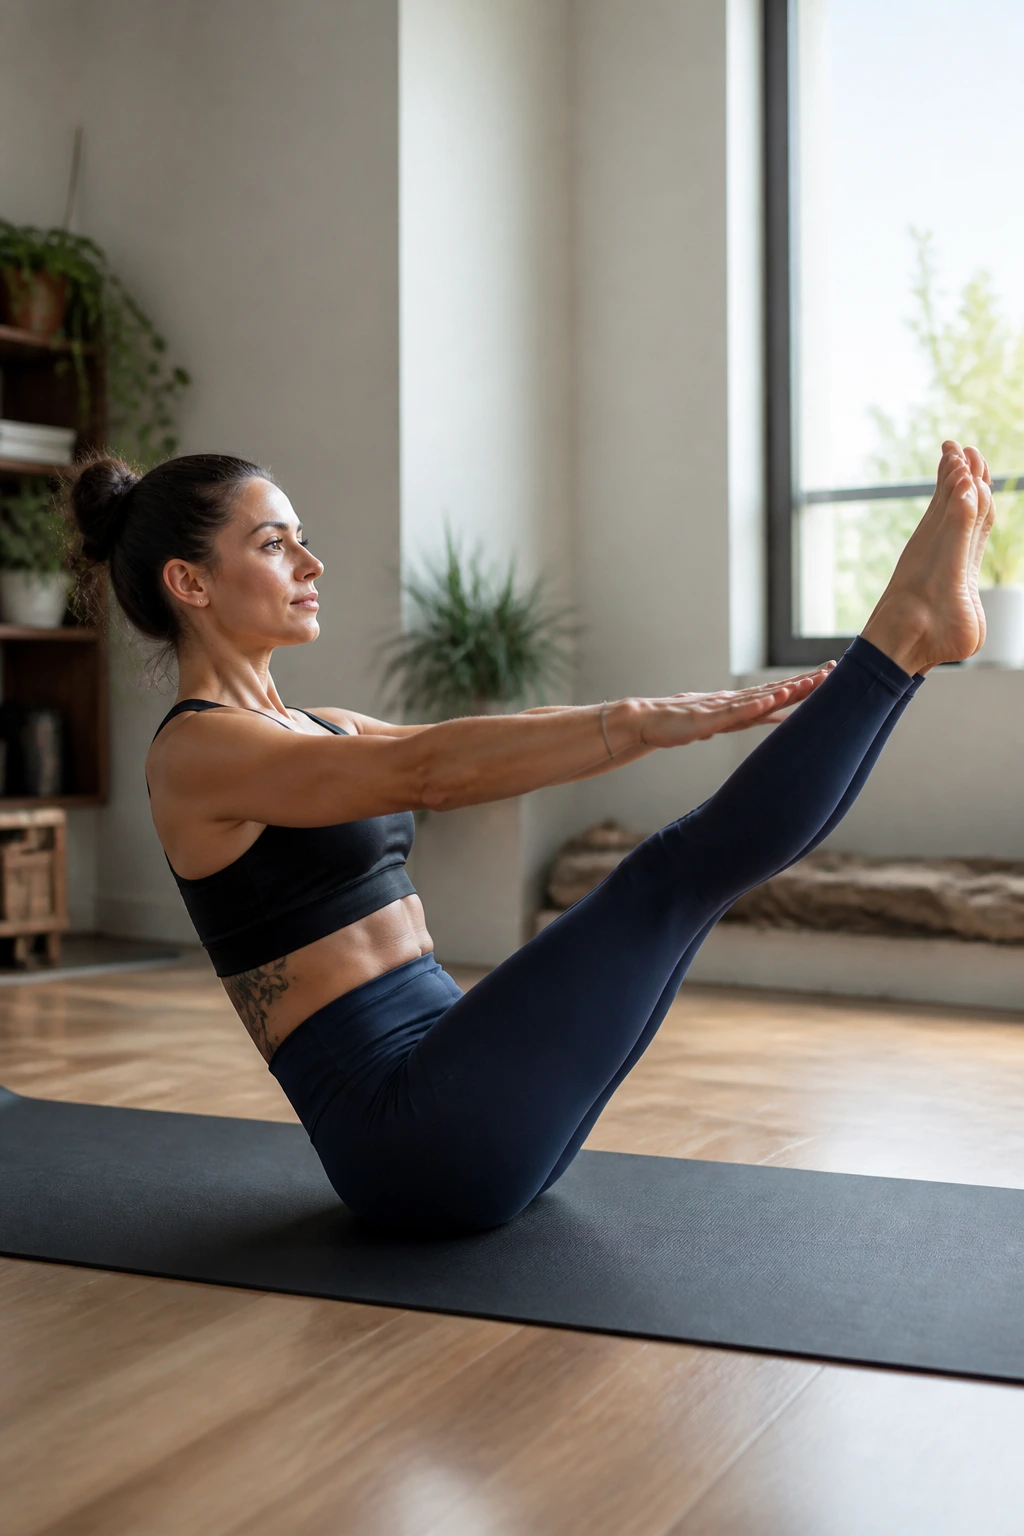
Boat pose demands total core integration. It strengthens the hip flexors and the abdominals, which are the two muscle groups that, when strong, prevent the pelvis from tilting forward.
Sit on your sit-bones, lean back slightly, and lift your feet off the floor. Extend your legs if you can, or keep your knees bent. Reach your arms forward parallel to the floor.
The Challenge: Keep your chest lifted. If you round your back, you are missing the point. If you start to shake, that is good. That’s your deep core waking up. Hold for five breaths, lower down, and repeat three times.
17. Pigeon Pose (Eka Pada Rajakapotasana)
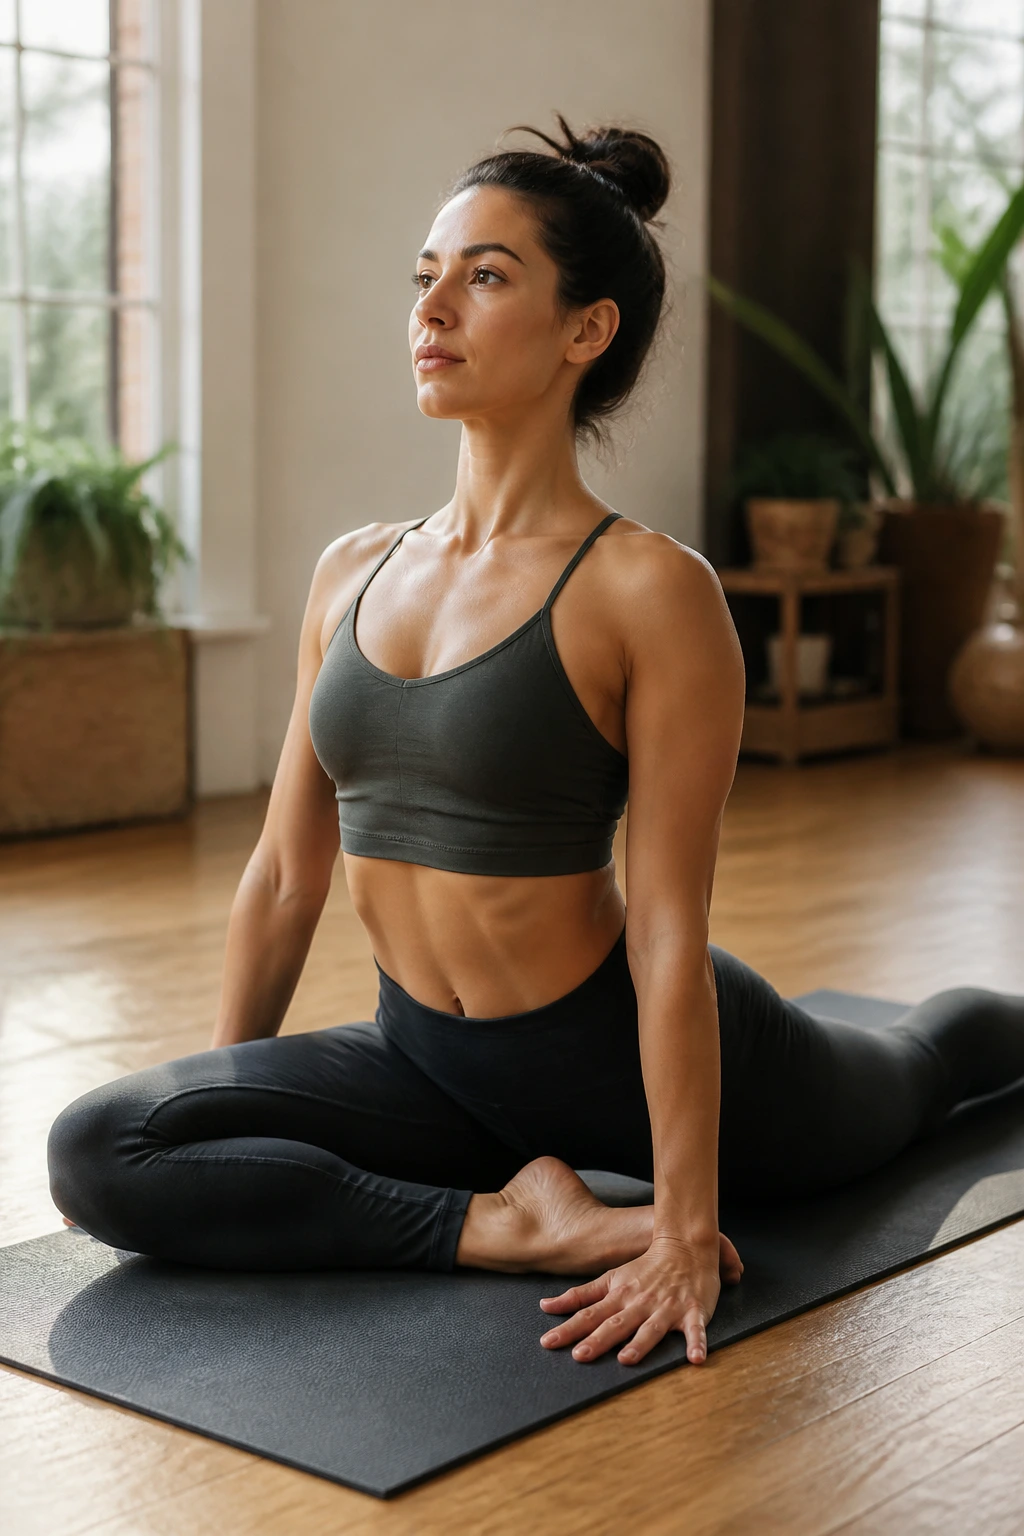
Tight hips pull on the lower back. It is a domino effect. When your hip flexors are tight, they tug on your pelvis, which creates an arch in your lower back. Pigeon pose is the remedy.
From Downward Dog, bring your right knee forward and place it behind your right wrist. Slide your left leg back. Keep your hips square to the front. Fold forward if your hips allow.
Note: If this hurts your knee, do it on your back instead (known as “Figure Four”). The benefit for the hips is the same, but the safety for the knee is higher. A happy hip flexor is the first step toward a happy lower back.
18. Happy Baby (Ananda Balasana)
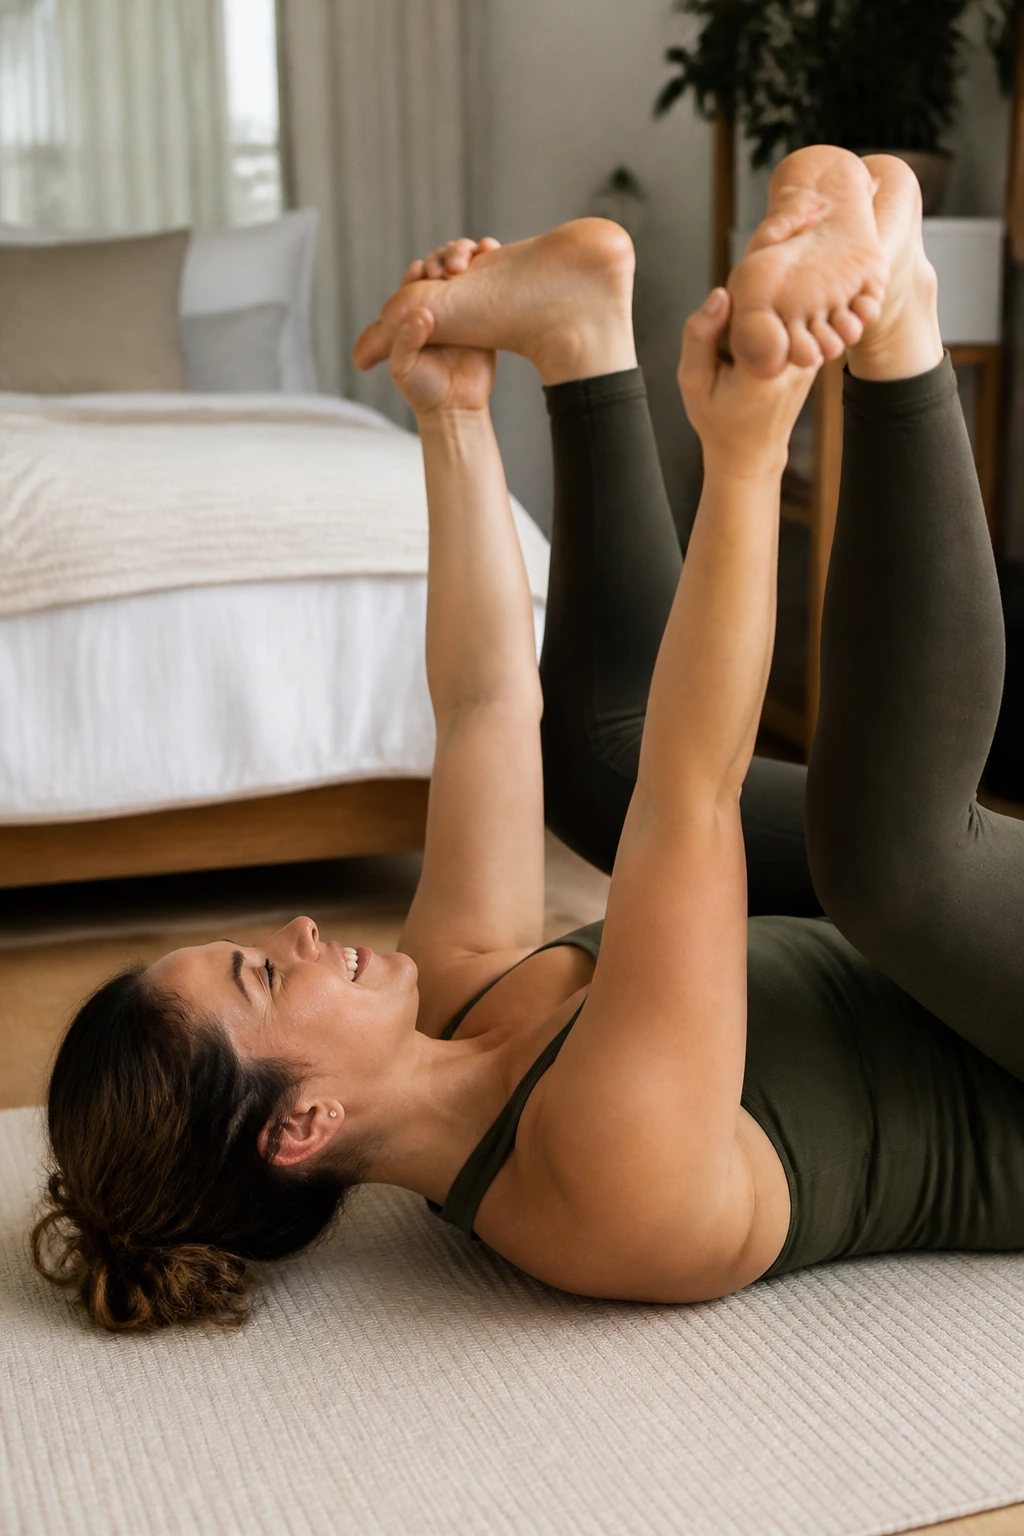
This is a deep release for the pelvic floor and inner thighs. It feels silly, but it is one of the most effective ways to counteract the effects of chair sitting.
Lie on your back, grab the outer edges of your feet, and pull your knees toward your armpits. Keep your sacrum—the triangular bone at the base of your spine—glued to the floor.
The sensation: You should feel a deep, gentle stretch in the hips. Rock side to side to massage the lower back muscles against the floor. This is a great way to “un-stick” the hips after a long day.
19. Legs Up the Wall (Viparita Karani)
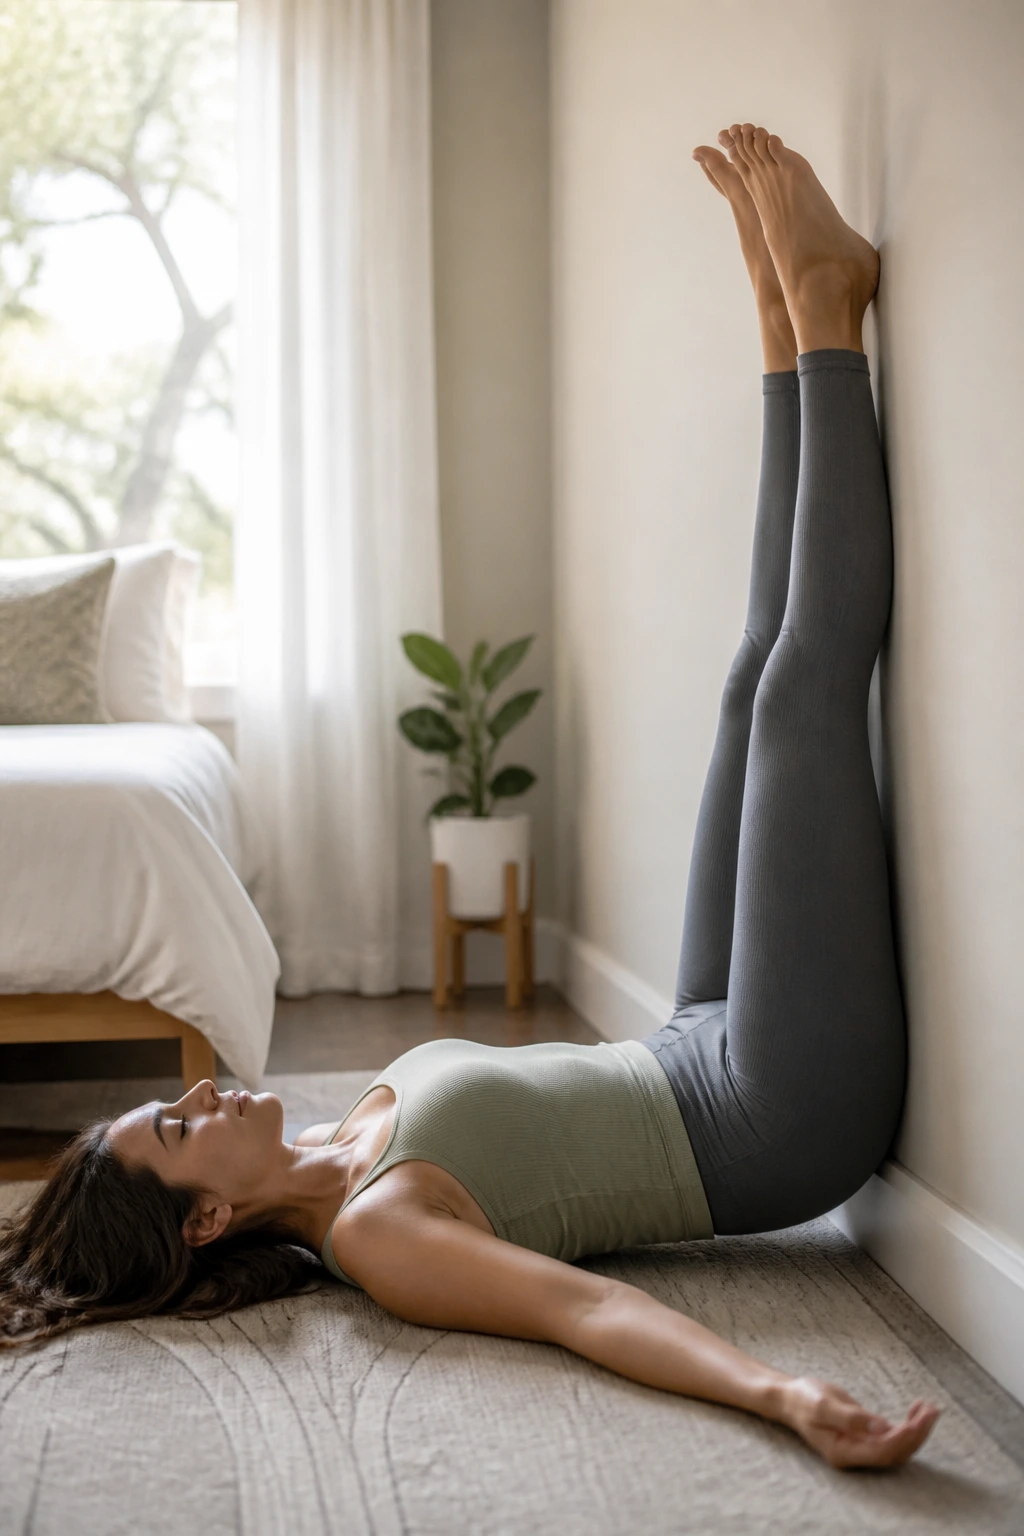
This is the ultimate recovery pose. It requires zero effort and provides immense benefits. It reverses the flow of circulation and allows the lower back to flatten completely against the floor.
Sit sideways against a wall and swing your legs up. Lie back. That’s it. Let your arms rest by your sides. Stay here for five minutes.
Why it works: It creates an environment where your spine can be perfectly neutral, with no muscular effort required. If you have been on your feet all day or sitting all day, this resets the blood flow and lets the lower back muscles finally, truly relax.
20. Corpse Pose (Savasana)
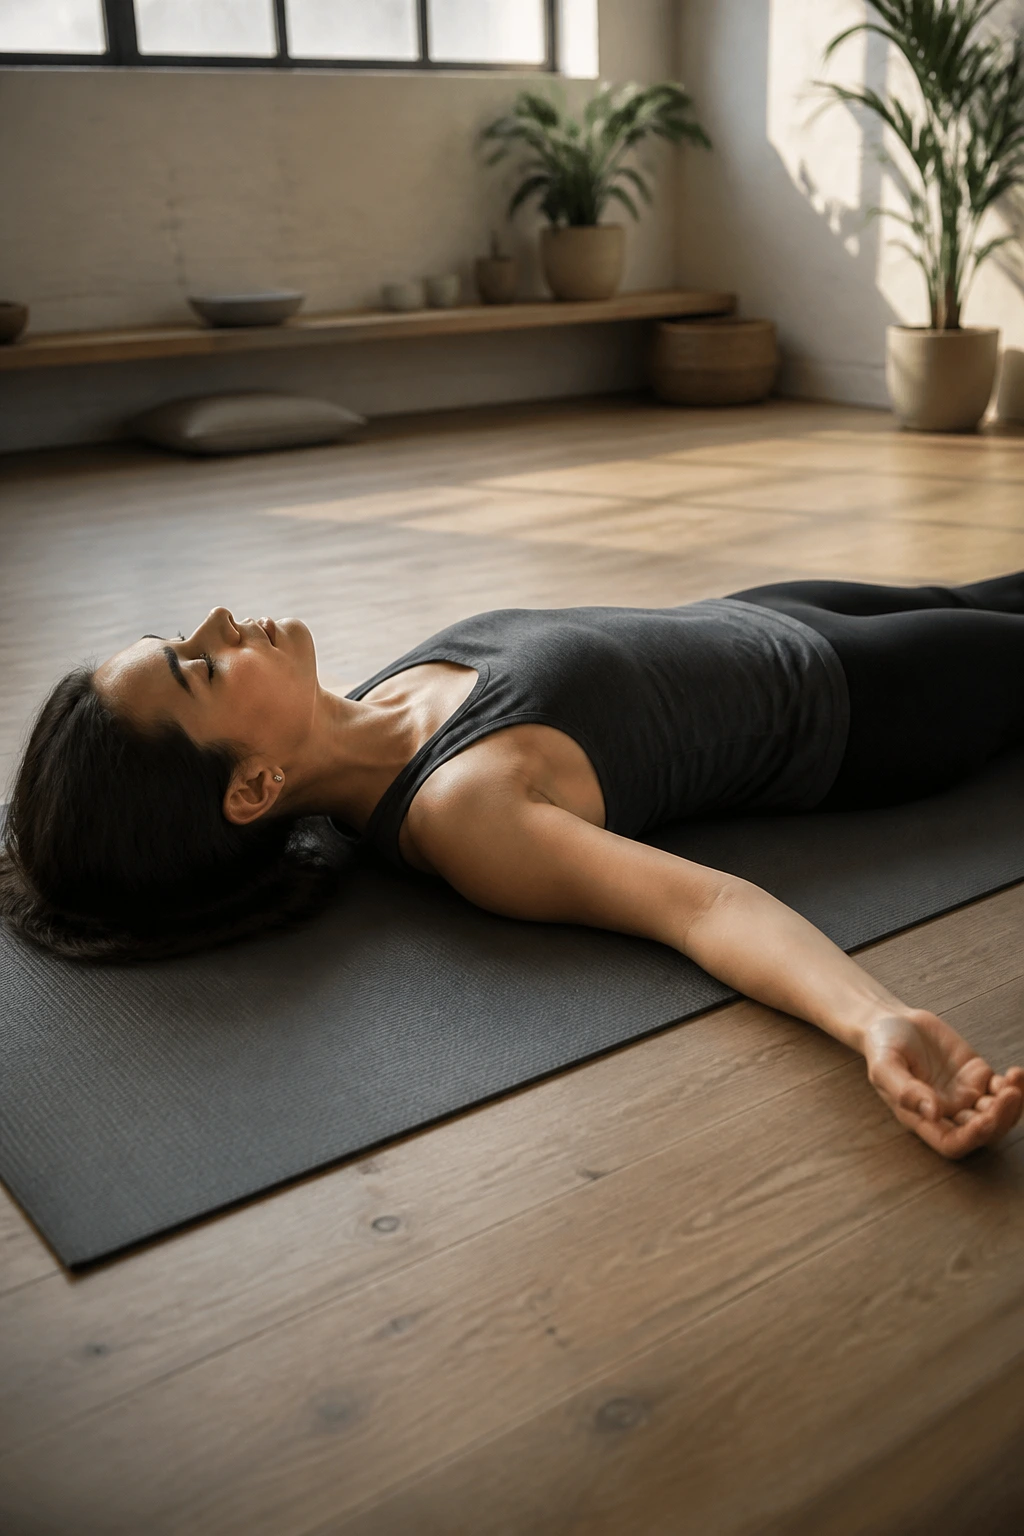
It is the easiest pose, and the one people skip the most. Savasana is where the integration happens. You have spent this time opening, stretching, and strengthening. Now you must let the nervous system reset.
Lie flat on your back. Let your feet flop open. Tuck your shoulder blades under to open your chest one last time. Close your eyes. Do not try to move.
The Goal: Total relaxation. Notice if you are still holding tension in your jaw, your forehead, or your shoulders. Actively let it go. This pose teaches your body what “neutral” actually feels like, which is the baseline you need to return to throughout your workday.
21. Ragdoll Pose
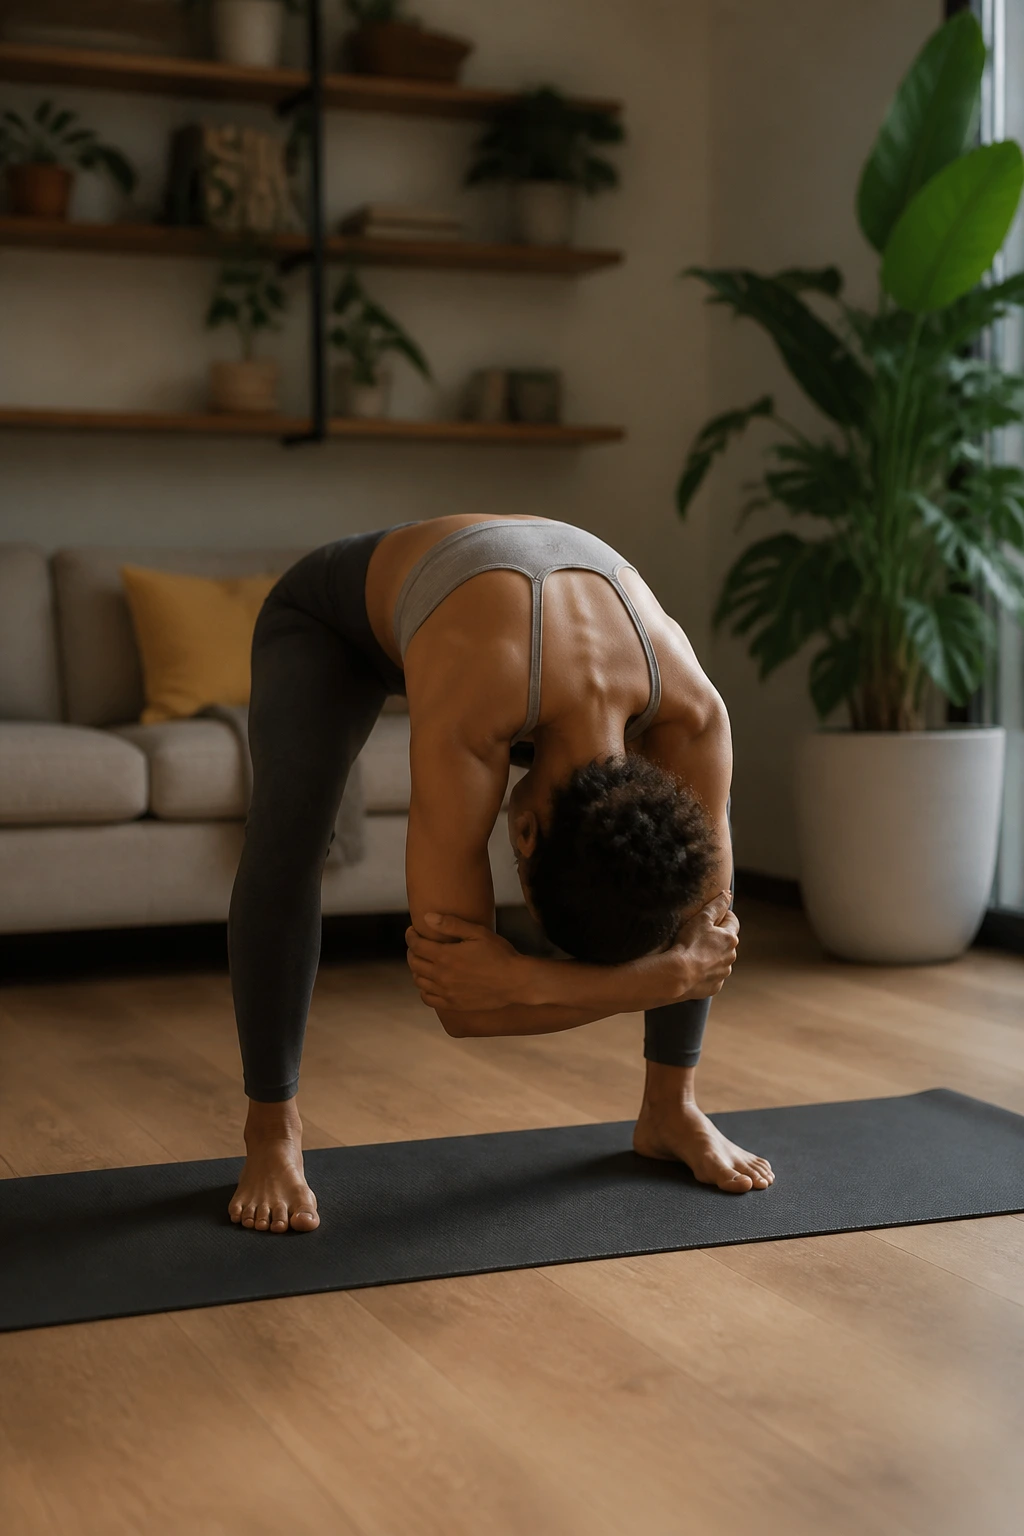
Sometimes you need a deeper release than a standard forward fold. Ragdoll is essentially an Uttanasana with a focus on the shoulders and upper back.
Stand with feet wider than hip-width. Fold forward. Bend your knees, but make it a generous bend—chest resting on thighs. Grab opposite elbows. Instead of just hanging, actively pull the elbows toward the floor.
Why this hits differently: The wider stance provides more stability, allowing you to relax the back muscles even more deeply. By pulling the elbows down, you create traction in the thoracic spine—the area most affected by screen slouching.
22. Warrior II (Virabhadrasana II)
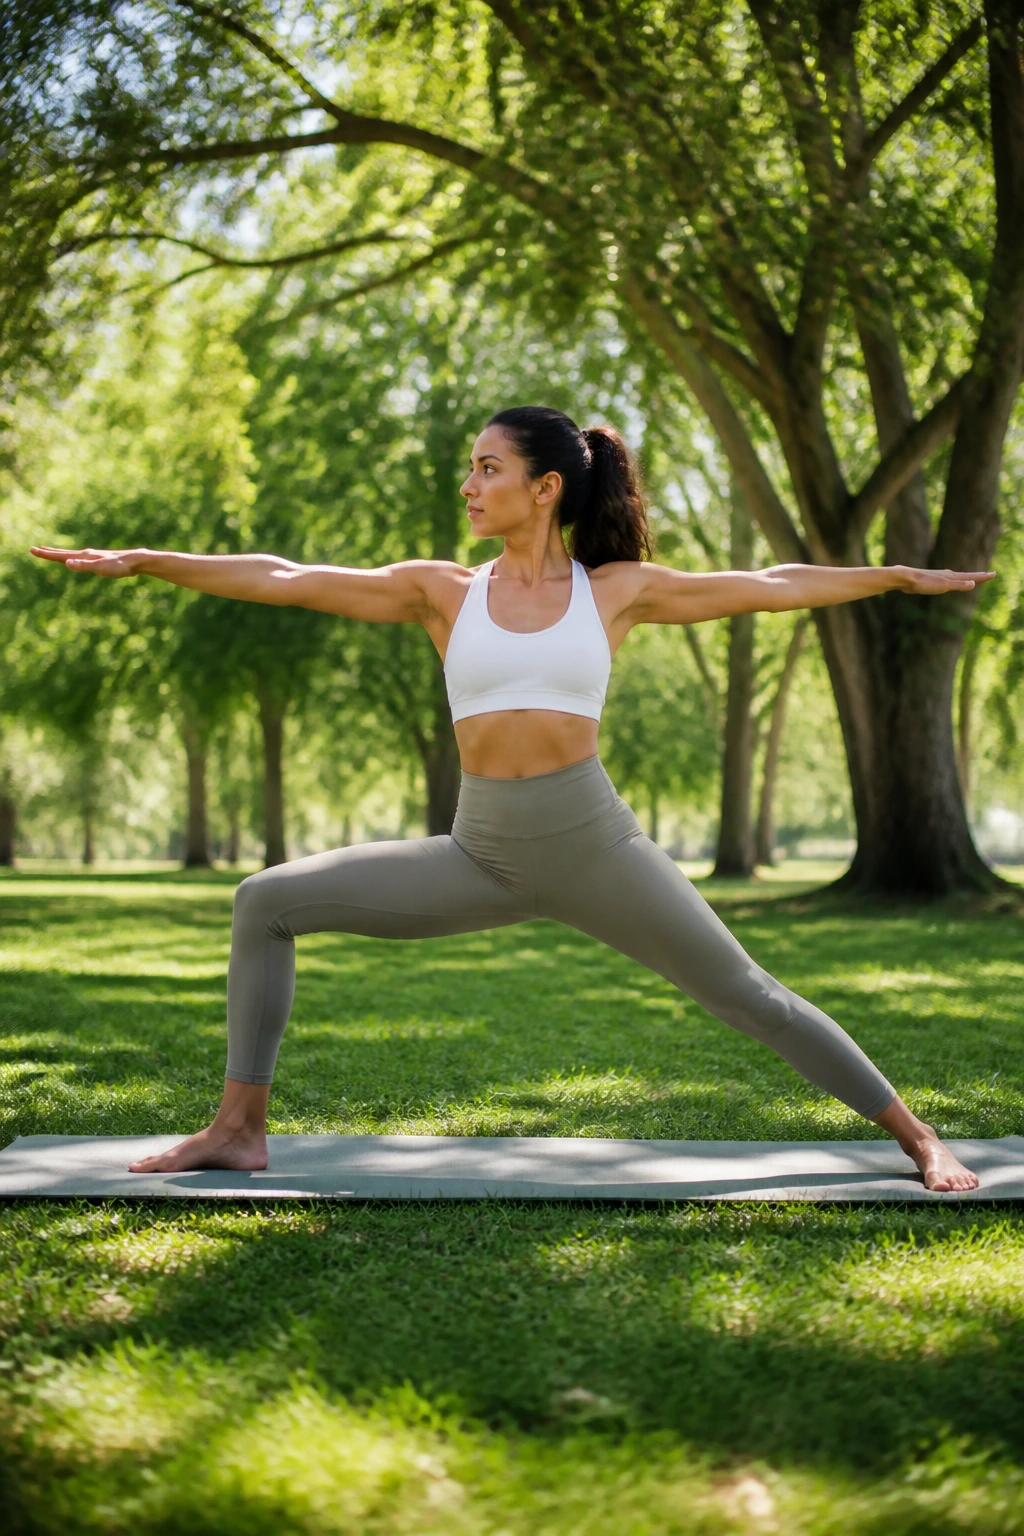
Warrior II builds the endurance required to hold a posture. While it looks like a leg exercise, it is actually a core and shoulder stabilizer.
Step your feet wide apart. Turn your right foot out 90 degrees. Bend your right knee. Reach your arms out to the sides, parallel to the floor. Keep your shoulders directly over your hips—don’t lean toward the front foot.
The key detail: Look over your front hand. Often, people let their shoulders creep up to their ears. Consciously pull them down. You are building the muscle memory to keep your shoulders relaxed while your body is under tension.
23. Seal Pose (Variation of Sphinx)
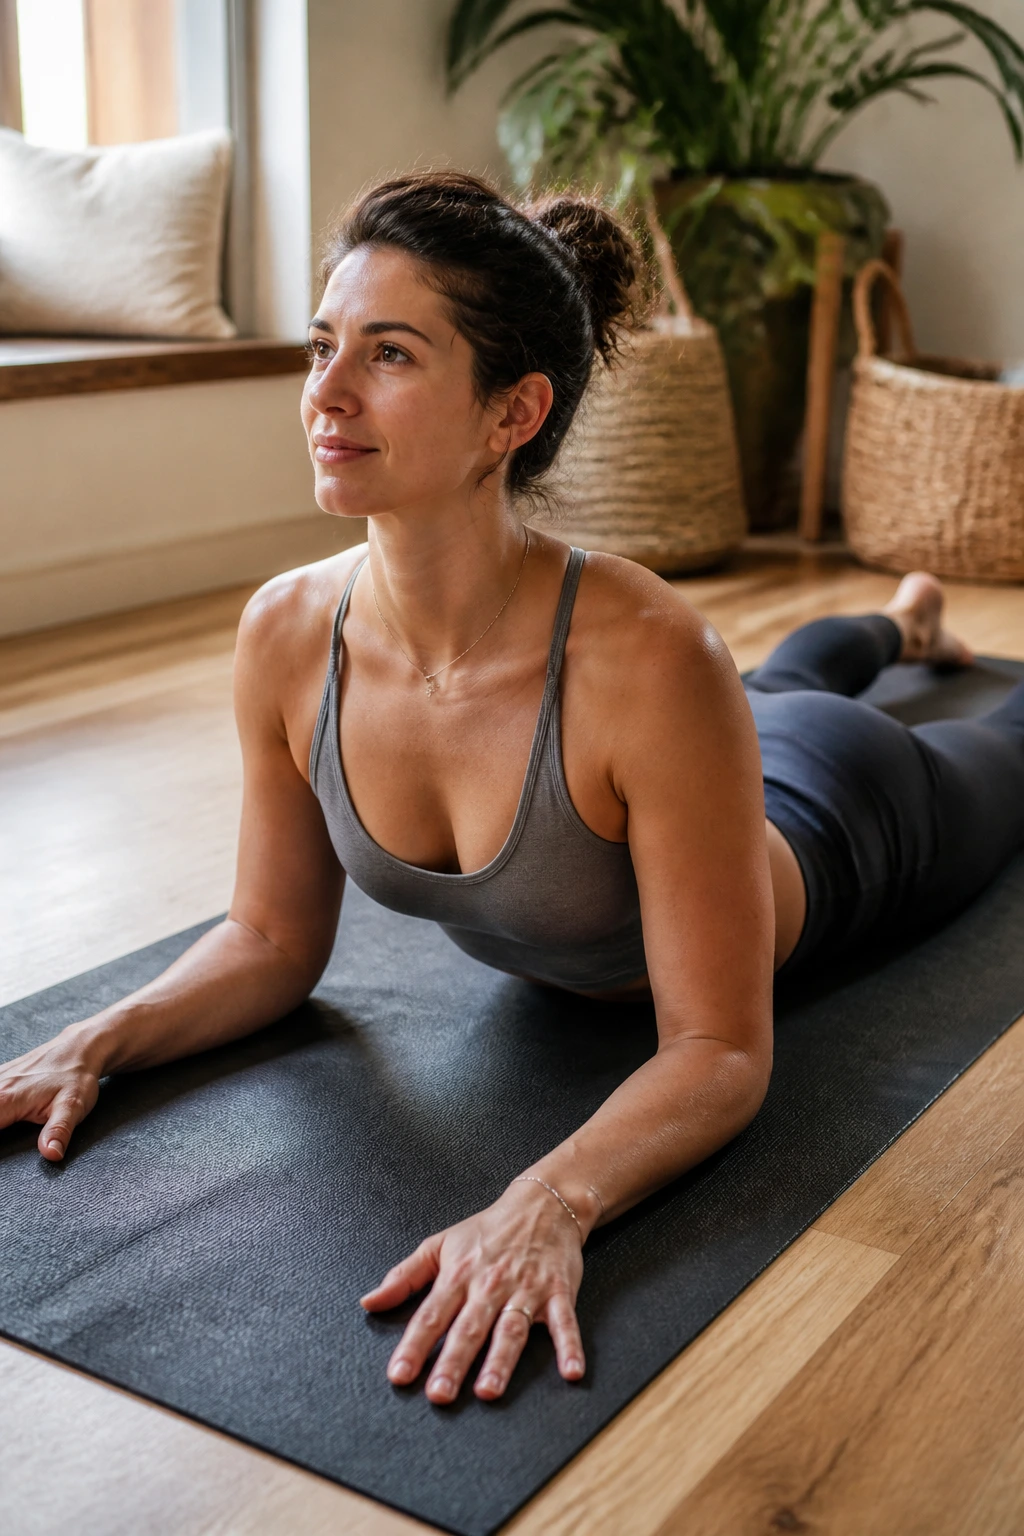
If Sphinx felt good but you want a deeper spinal stretch, try Seal Pose. It is simply a wider-legged, straighter-armed version of Sphinx.
Lie on your belly. Place your hands further out to the sides and straighten your arms, lifting your chest higher. Walk your legs slightly wider.
The difference: This creates a deeper arch in the lower back and a more significant stretch in the abdominals. If you have been hunched over, the abdominals are likely tight. This pose stretches that front line of fascia, allowing you to stand taller.
24. Puppy Pose (Uttana Shishosana)
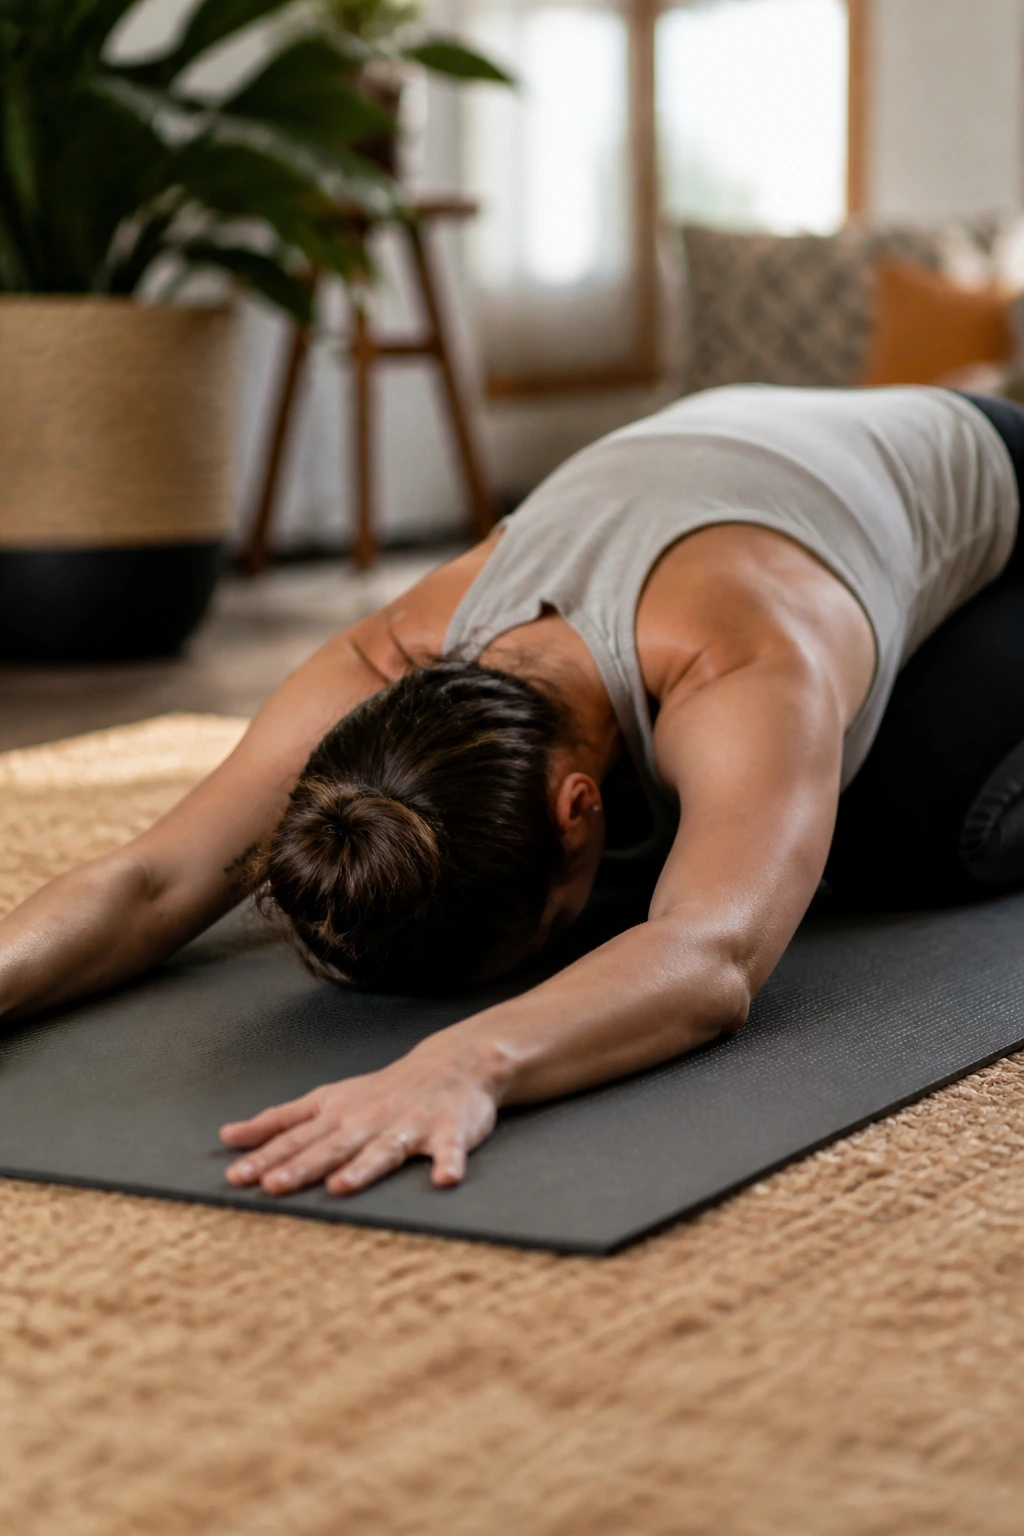
Puppy pose—or Extended Puppy—is the bridge between Child’s Pose and Downward Dog. It is incredible for the upper back and shoulders.
Start in tabletop. Walk your hands forward but keep your hips stacked high over your knees. Drop your chest toward the floor, keeping your forehead on the mat.
Why it’s effective: It’s a dedicated shoulder opener. In Downward Dog, you are weight-bearing. In Puppy, you are not, which allows the muscles to relax into the stretch more fully. It’s perfect for someone who feels “stuck” in the upper back.
25. Cow Face Arms (Gomukhasana Arms)
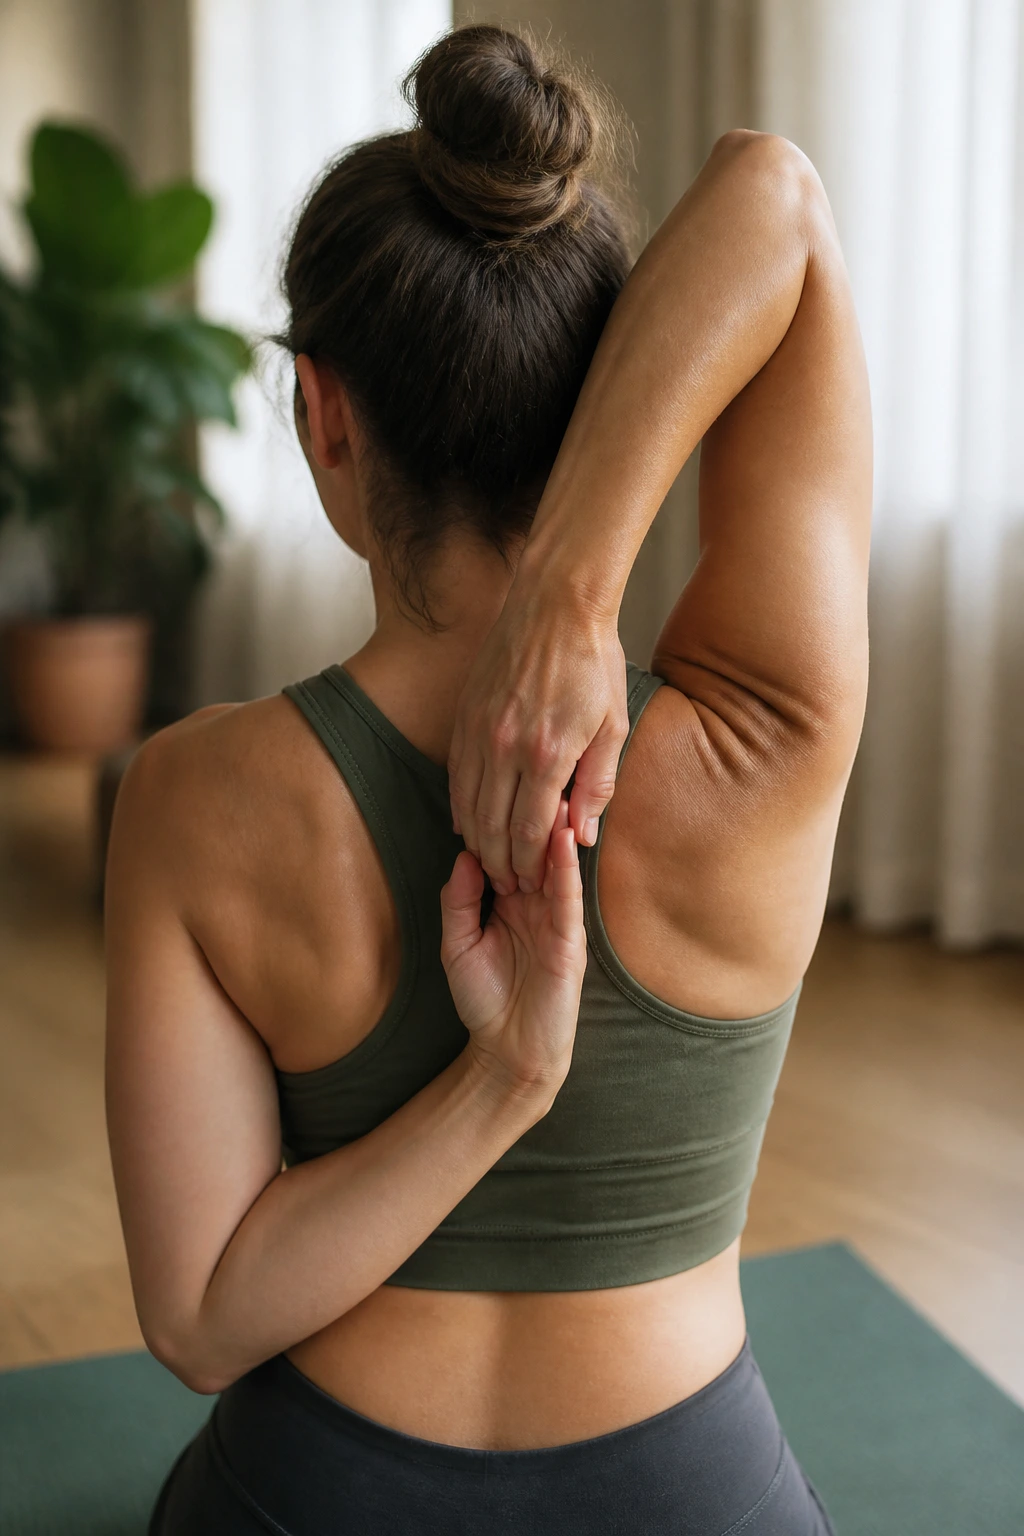
You don’t need the full seated pose to get the postural benefit. The arms are the key. This pose specifically opens the chest and stretches the tight rotator cuff muscles.
Reach your right arm up, bend the elbow, and drop your hand down the center of your back. Reach your left arm behind your back and try to clasp your fingers. If you can’t touch, hold a towel or a strap between your hands.
The crucial cue: Keep your head pressing back into your right arm—don’t let your neck move forward. This opens the front of the chest, which is usually closed off, while stretching the shoulder. It is the antithesis of the “desk hunch.”
The Bottom Line
Good posture is not a static destination; it is a moving practice. You do not just “fix” it once and carry on. Your body adapts to the positions you put it in the most. If you spend eight hours a day in a rounded shape, you must spend at least a few minutes—even if it is just ten—moving in the opposite direction.
You do not need to do all 25 of these poses every single day. That would be an exhausting hour-long session. Instead, pick three or four that target your specific areas of tightness. If your shoulders are the problem, prioritize the chest openers like Camel and Cobra. If your lower back aches, focus on the hip openers like Pigeon and Cat-Cow.
The goal is consistency, not intensity. A five-minute routine done every day is vastly superior to a perfect hour-long session done once a month. Pay attention to how you feel when you stand up from your desk. If you feel rigid, move. If you feel slumped, open. Your body is a conversation—make sure you are the one doing the talking.
