



A stubborn lower belly does not usually need more punishment. It needs better timing, better breathing, and a core that knows how to stop dumping pressure into the low back.
Crunches alone miss the point. So do endless high-speed ab routines that leave your hips tight, your neck sore, and your stomach looking exactly the same when you stand up.
Lower belly pooch workouts for women work best when they do three things at once: train the deep core, improve posture, and raise your heart rate enough to support fat loss across the whole body. That last part matters. A stronger midsection can make the lower stomach sit flatter, but the layer of body fat over it changes only when your overall habits change too.
And there’s another wrinkle people skip over. A belly that looks “lower” is often helped or worsened by pelvic tilt, bloating, weak glutes, and the way you breathe under effort. That’s why the best moves are not always the flashiest ones. They’re the ones that make your ribs stack over your pelvis and keep your spine from arching like a cat at the wrong moment.
1. Posterior Pelvic Tilt Hold
This one looks almost too easy. It isn’t.
The posterior pelvic tilt hold teaches your body where “neutral” actually is, and that matters because a lot of lower belly pooch is made to look worse when the pelvis tips forward and the low back arches. Lie on your back with your knees bent, gently tuck your tailbone, and press your lower back into the floor without jamming it down. You should feel your lower abs switch on, not your hip flexors taking over.
What it should feel like
- Lie on the floor with knees bent and feet flat.
- Exhale fully so your ribs soften down.
- Gently flatten your low back into the mat.
- Hold for 10 to 20 seconds.
- Repeat 6 to 8 times.
The goal is control, not force. If your glutes are clenching hard or your breath gets choppy, ease off and shorten the hold.
I like this move as a warm-up before almost anything else. It teaches the body to stop letting the belly flare outward every time you move your arms or legs. Small move. Big payoff.
2. Dead Bug With Slow Exhale
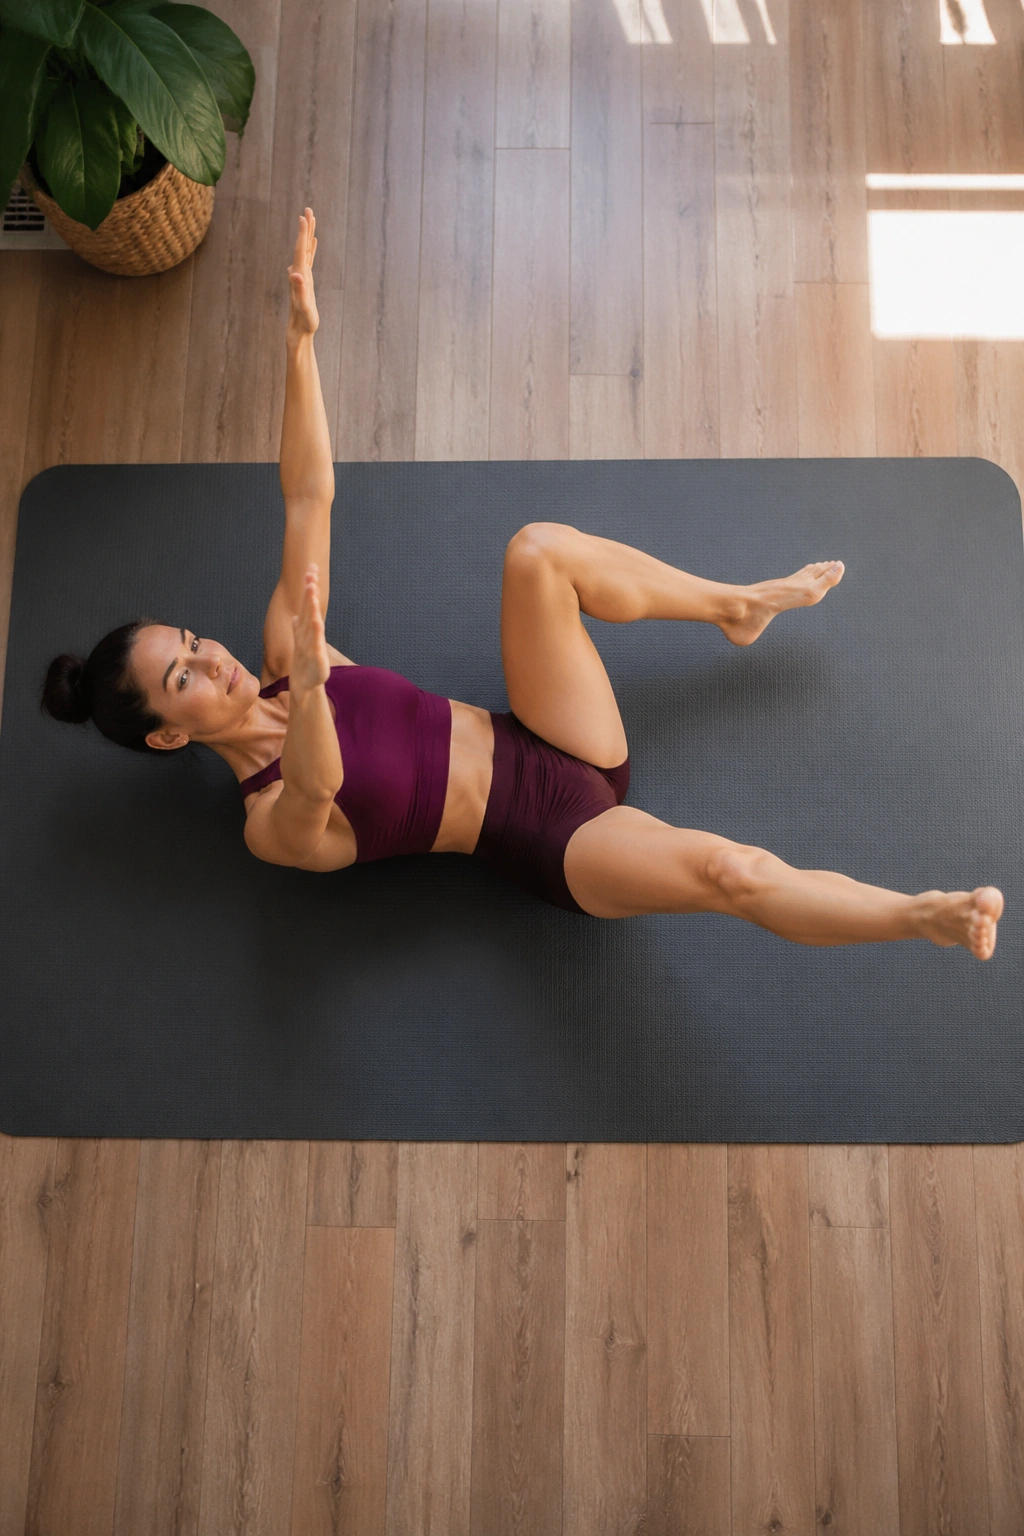
If I had to hand someone one floor exercise for a stubborn lower stomach, I’d start here.
The dead bug is an anti-extension drill, which is a fancy way of saying it trains your torso not to arch when your arms and legs move away from each other. That is exactly the problem a lot of people have when they try to flatten the lower belly. They move the limbs, the back pops up, and the abs never get the message.
Keep your knees over your hips, arms straight up, and move opposite arm and leg slowly. The exhale matters more than people think. Blow the air out as the leg extends, and let your ribs stay soft instead of flaring.
Slow beats hard here. Fast dead bugs tend to turn into chaos, and chaos is not core training.
A good starting dose is 6 to 8 reps per side for 2 to 4 rounds. If your low back starts lifting off the floor, shorten the range of motion before you chase more reps. That tiny adjustment usually makes the exercise ten times better.
3. Reverse Crunch With Curl-Under Finish
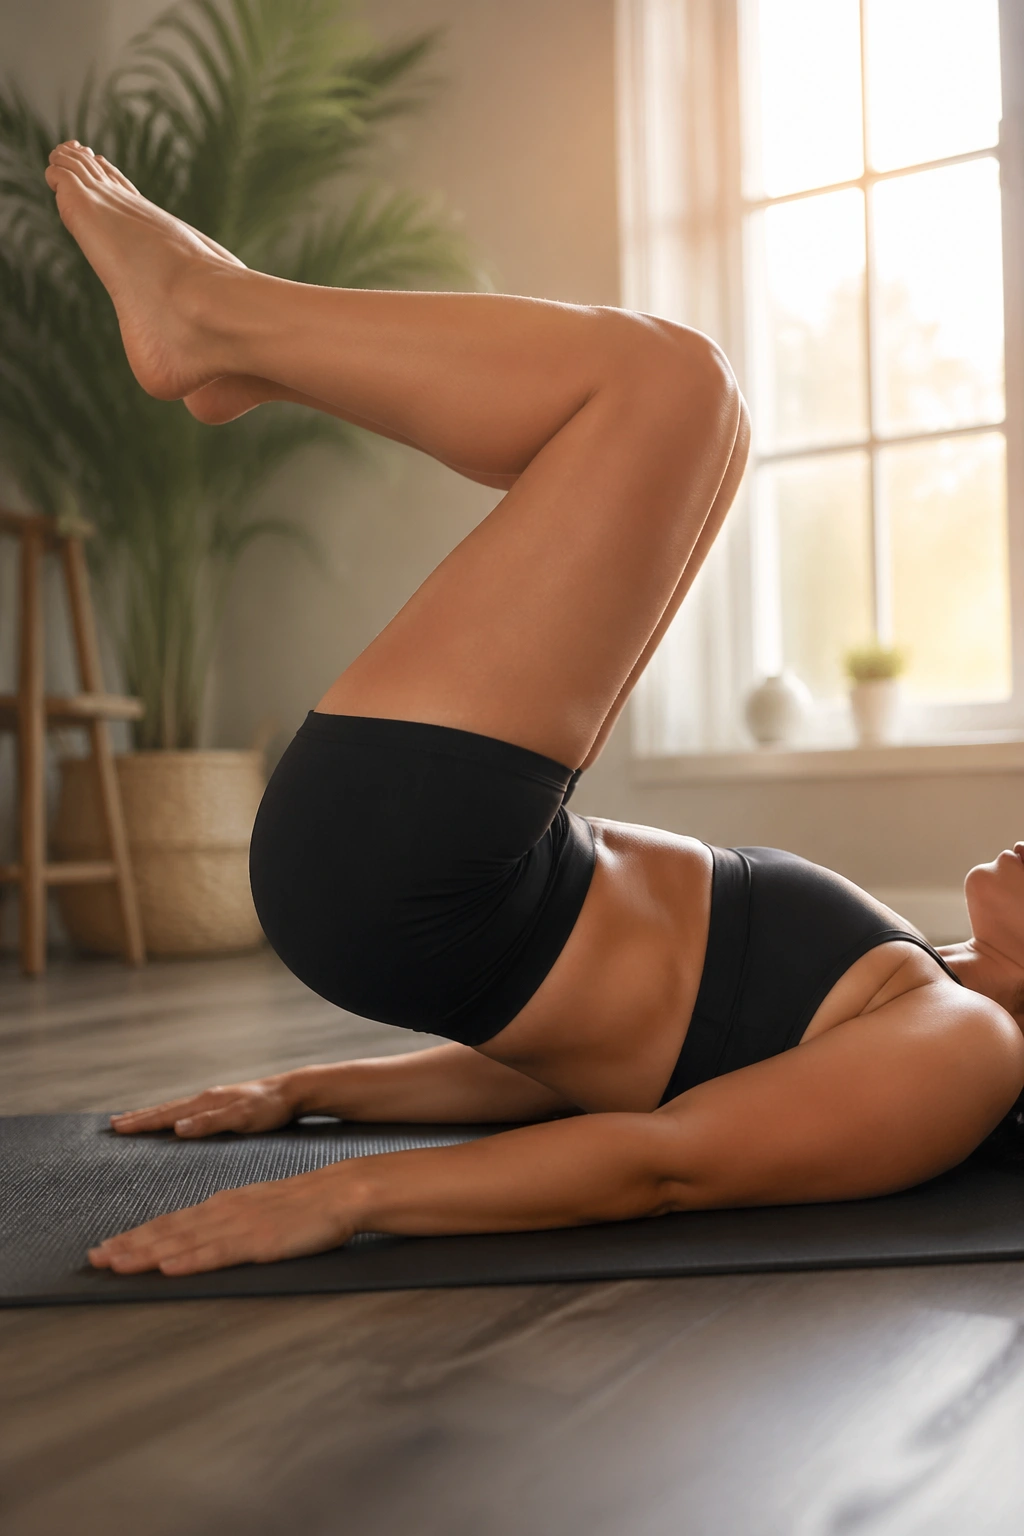
Why does the reverse crunch work when endless sit-ups don’t?
Because it asks the pelvis to move, not just the chest. That curl-under motion is where the lower abs actually show up. If you fling your legs and swing your hips, you’re mostly stealing work from momentum. If you roll the tailbone up toward the ceiling with control, the lower belly has to stay engaged.
The part that matters
Start with knees bent at about 90 degrees and thighs stacked over the hips. As you lift, think about drawing your knees toward your ribs and then curling the pelvis up a few inches. The movement is small. That’s the point.
- Keep your hands on the floor for support if needed.
- Lift the hips only 1 to 2 inches.
- Lower slowly for a 2- to 3-count.
- Stop before the low back starts to arch.
A reverse crunch done well feels clean and tight, almost like zipping the front of your torso together. Done badly, it turns into a leg swing. If you feel hip flexors more than abs, you’re going too high.
4. Heel Taps for a Quiet Lower Belly Burn
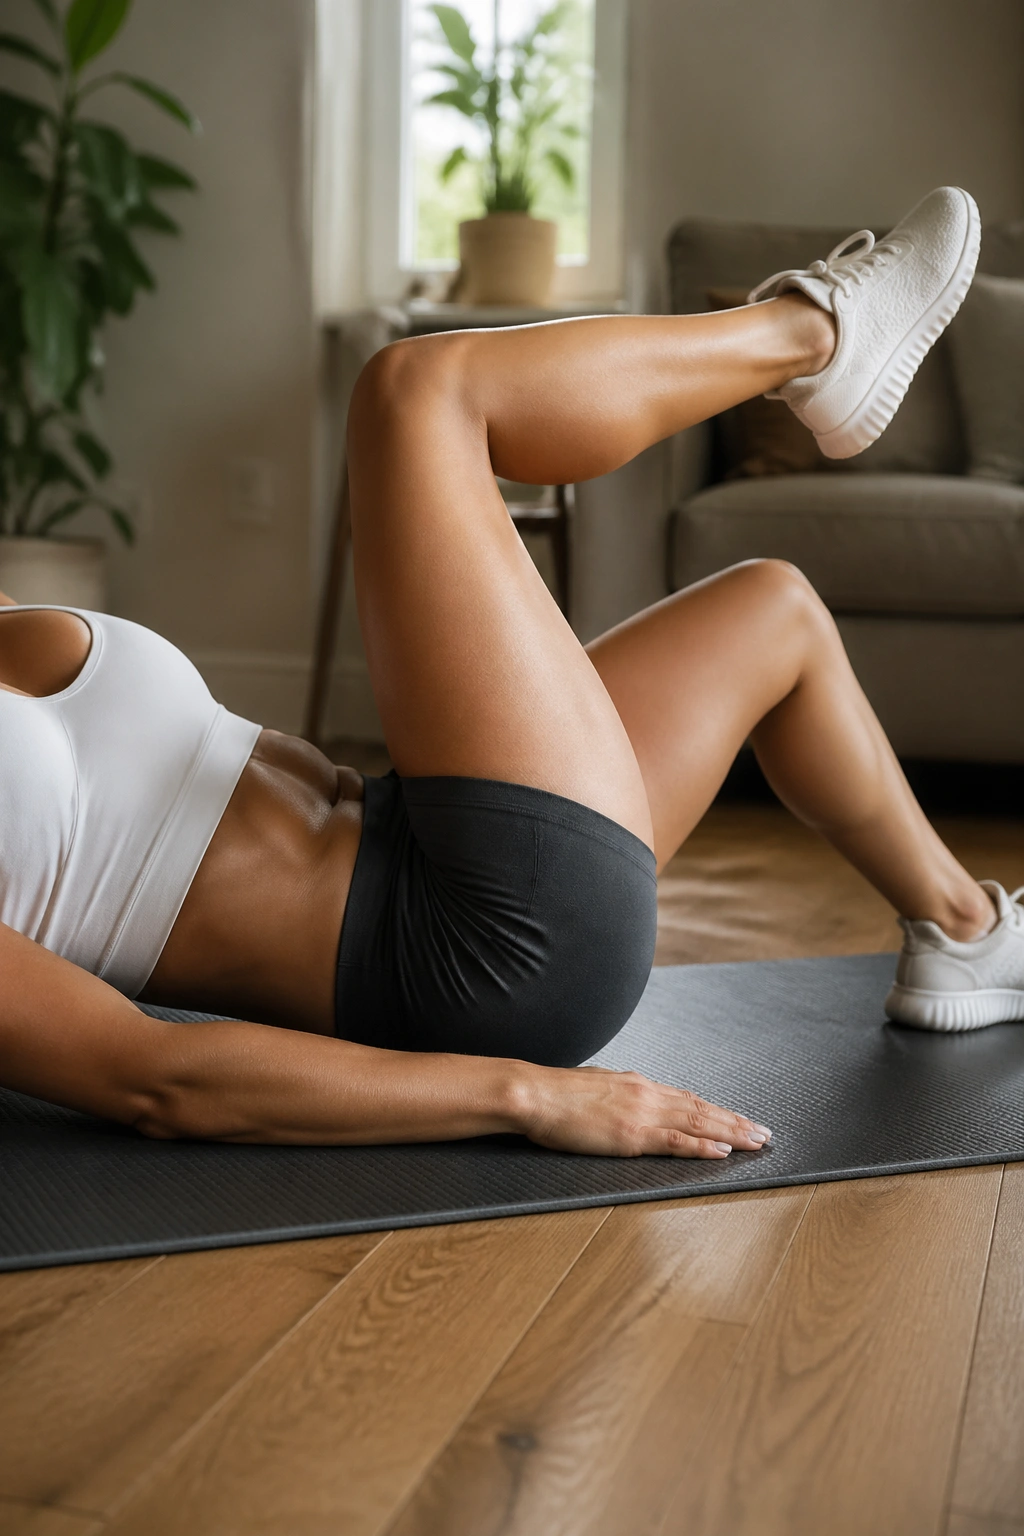
Heel taps are the kind of move that looks harmless until the last 10 seconds.
Lie on your back with your knees in tabletop, then tap one heel to the floor and bring it back. Keep your lower back heavy on the mat and your ribs from popping up. The lower belly has to stay braced the whole time, which is why this one burns in a sneaky, annoying way.
A lot of people rush heel taps and start bouncing. That turns the drill into noise. Slow taps make the difference.
Try this version
- 10 taps per side.
- Rest 20 seconds.
- Repeat 3 rounds.
- Move only as far as you can while keeping your back flat.
A small range is fine. A smaller range with good control is often better, especially if you’re just starting out or coming back after a break. If the back arches, the movement stops helping.
I like heel taps as a finisher because they expose sloppy core control fast. Not glamorous. Very useful.
5. Bent-Knee Leg Raises
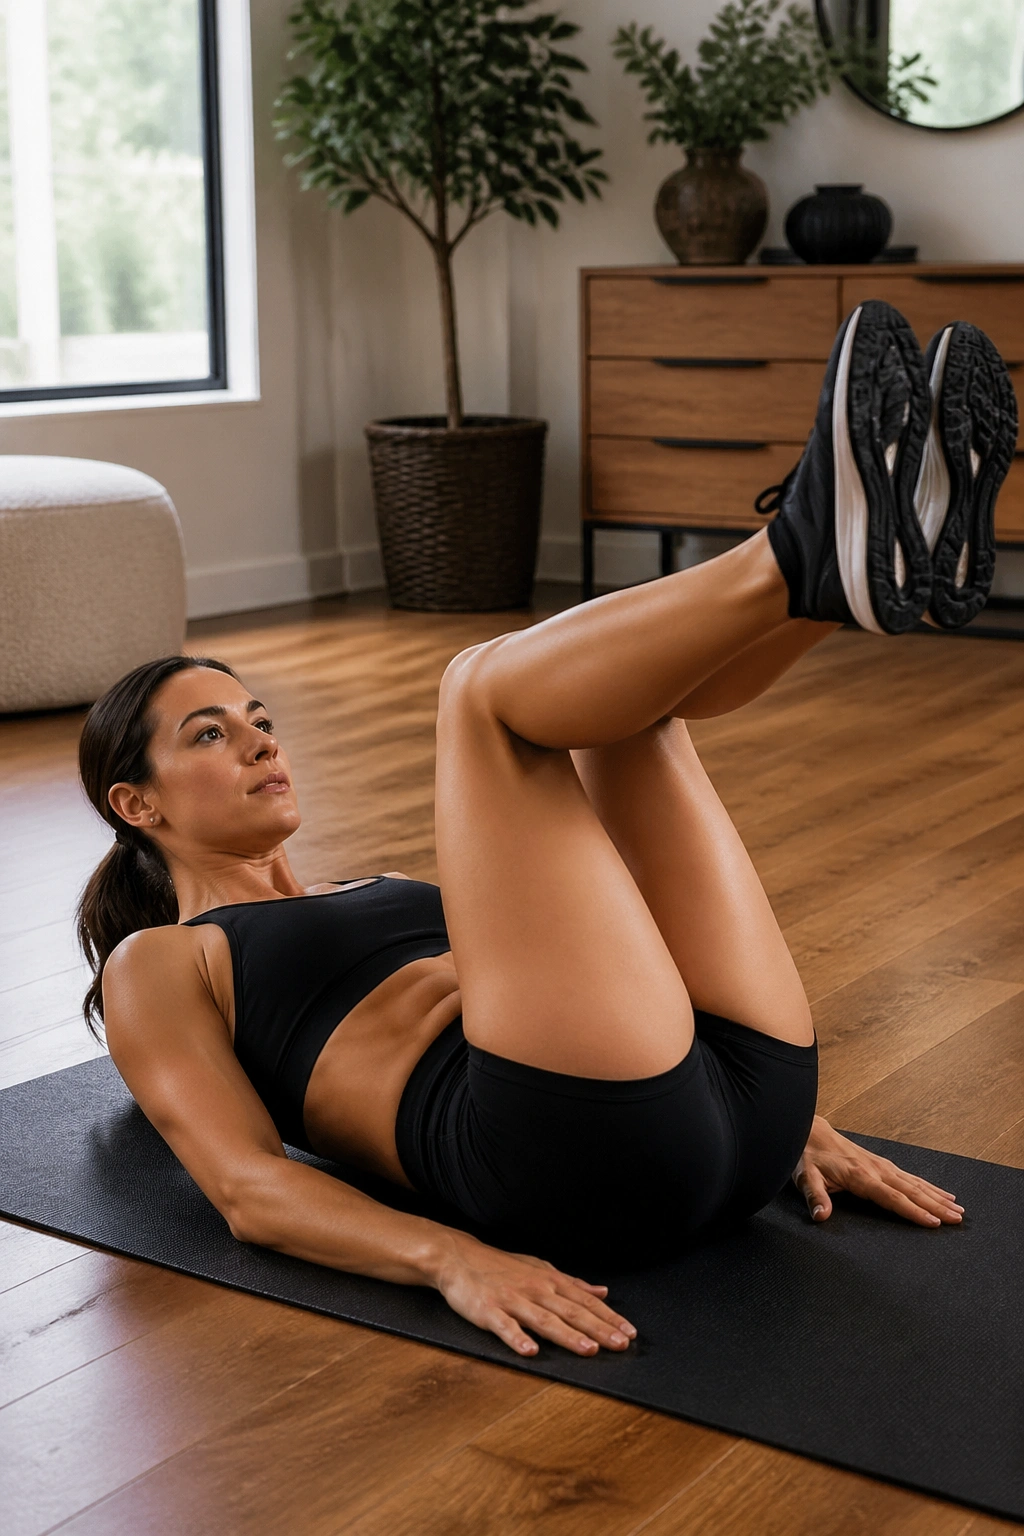
Straight-leg raises get all the attention, but bent-knee leg raises are often the smarter move.
Why? Because the shorter lever makes it easier to keep the pelvis tucked and the low back from lifting. That means the lower abs can do the work without the hips taking over and without the spine getting cranky. If you’ve ever tried full leg raises and felt them in your hip flexors more than your stomach, this is the cleaner option.
Start with your knees bent and feet together. Lift the legs until your thighs hover over the hips, then lower with control until the heels are just above the floor. Do not chase a huge range. The lower you go, the easier it is to lose the brace and arch the back.
Three sets of 8 to 12 reps is a solid place to begin. If you want more challenge, slow the lowering phase to 3 seconds. That tiny change makes the exercise feel brutally honest.
And yes, honest is the word. This move will tell you fast whether your core can keep the pelvis steady. If it can’t, the fix is not more reps. It’s less range and better control.
6. Hollow Body Hold
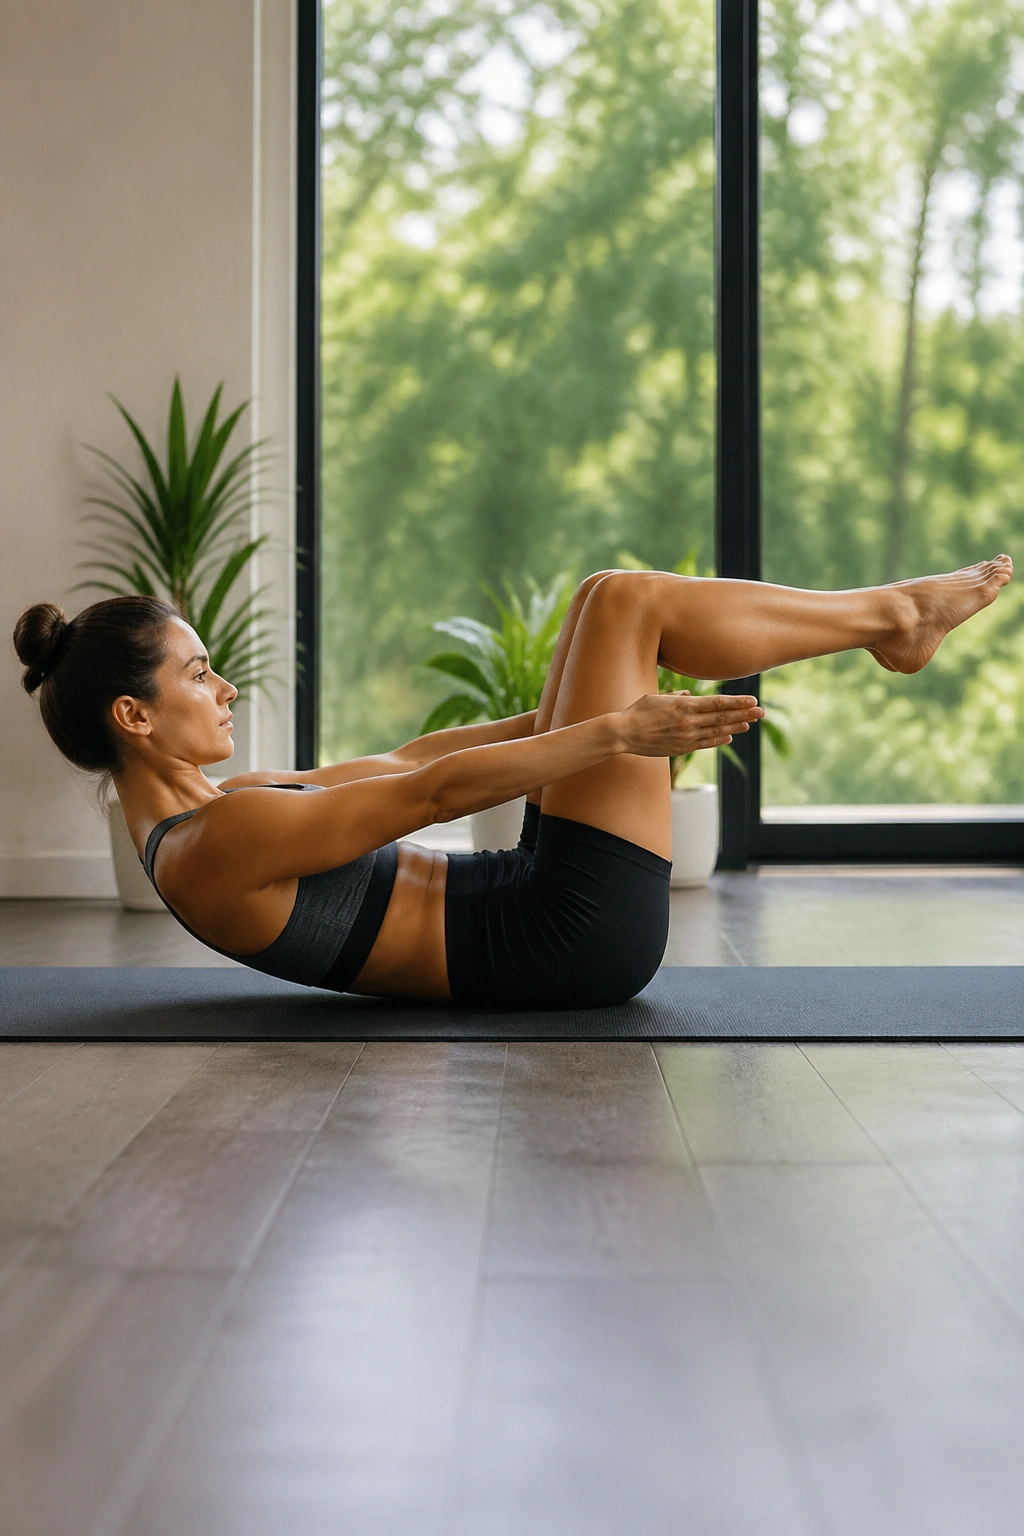
The hollow body hold is where the lower belly gets serious.
Unlike crunches, which bend the spine over and over, the hollow hold trains your core to resist extension. That means you learn to keep the rib cage down and the lower back from popping off the floor when your limbs lengthen. It is one of the best bodyweight drills for a flat-looking midsection because it teaches tension in a way the mirror can actually reflect.
Start tucked if you need to. Knees bent, arms reaching forward, low back pressed into the floor. If that feels solid, extend one leg at a time. Full hollow holds are tough, and there is no prize for rushing into them before your body is ready.
Progress it or regress it
- Tuck hold: knees bent, arms forward.
- One-leg extend: one leg straight, one bent.
- Full hollow: both legs extended, arms overhead.
Hold for 10 to 20 seconds at first. Build toward 30 seconds before you chase longer times. The moment your back arches, the rep is over.
This is one of those exercises that gets better the more patient you are. Annoying? Yes. Worth it? Also yes.
7. Plank Knee Tucks
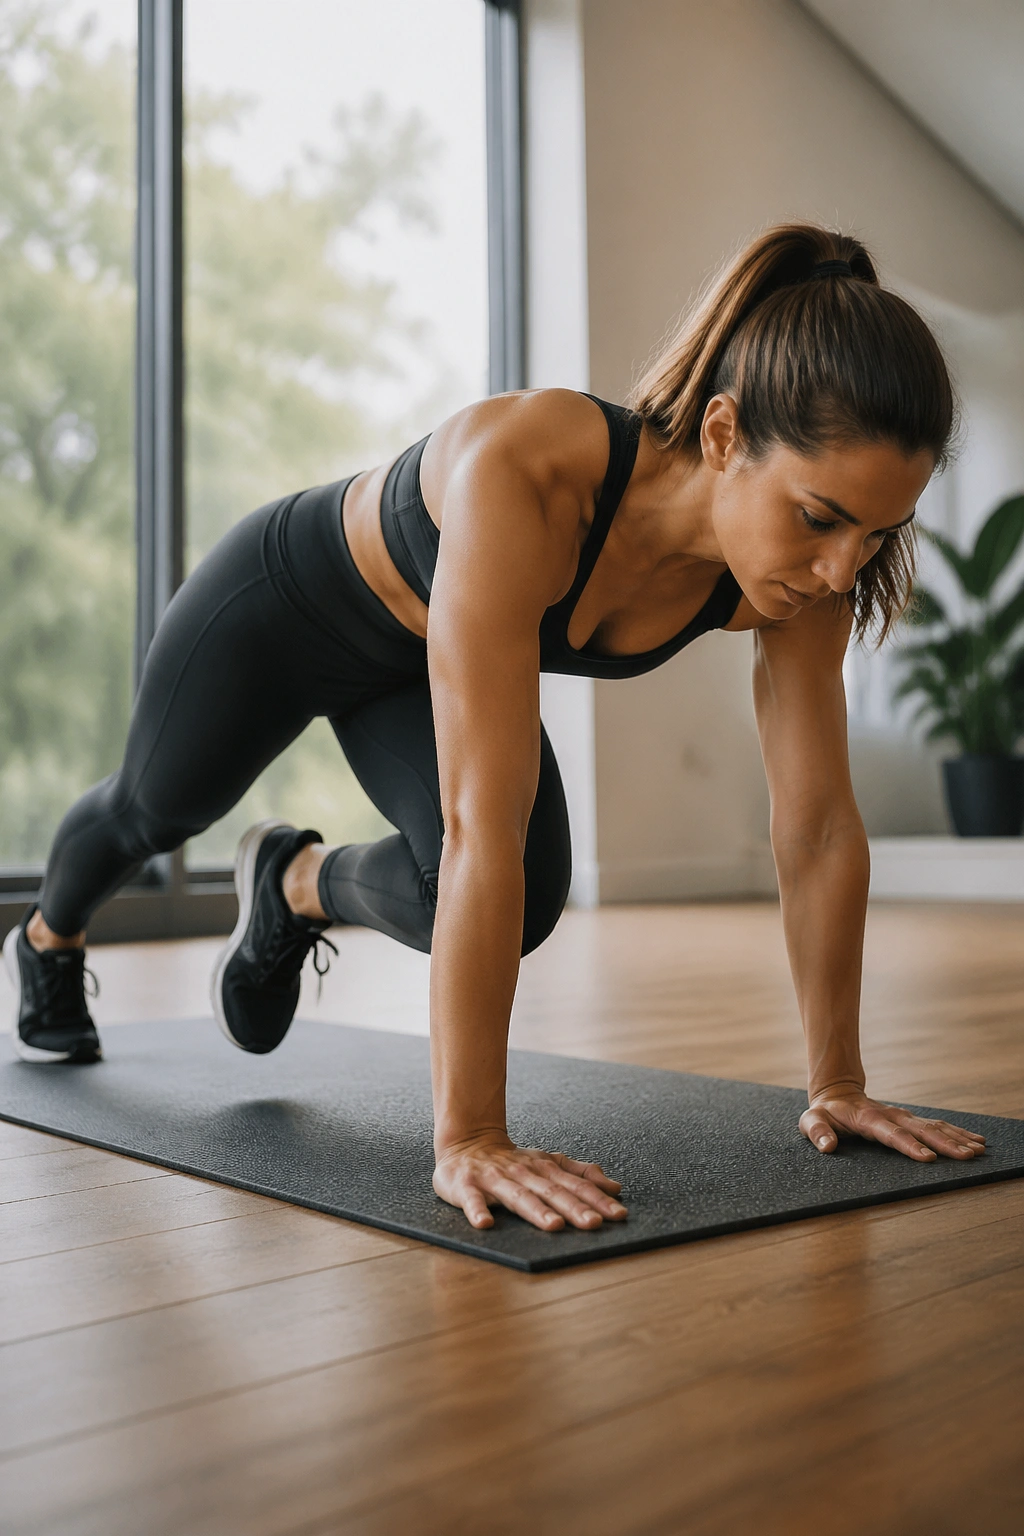
A plank knee tuck gives you two wins at once: core work and shoulder stability.
You start in a high plank, then bring one knee toward the chest while keeping your hips low and quiet. The point is not to sprint. The point is to stop the torso from wobbling while the legs move. That anti-rotation challenge is gold for the lower belly because the whole midsection has to stay braced, not just the front.
Best form cues
- Shoulders stay over wrists.
- Head stays long, not dropped.
- Knee comes under the body, not out to the side.
- Hips stay close to plank height.
- Each rep should look smooth, not jerky.
If your wrists hate planks, use forearms or put your hands on dumbbells. If your hips shoot up, shorten the range. Tiny knee drives with good control beat giant sloppy ones every time.
I use this move when someone wants more challenge than a floor drill but isn’t ready for a full mountain climber blur. It sits in the middle. Harder. Cleaner. Better than it looks.
8. Slow Mountain Climbers
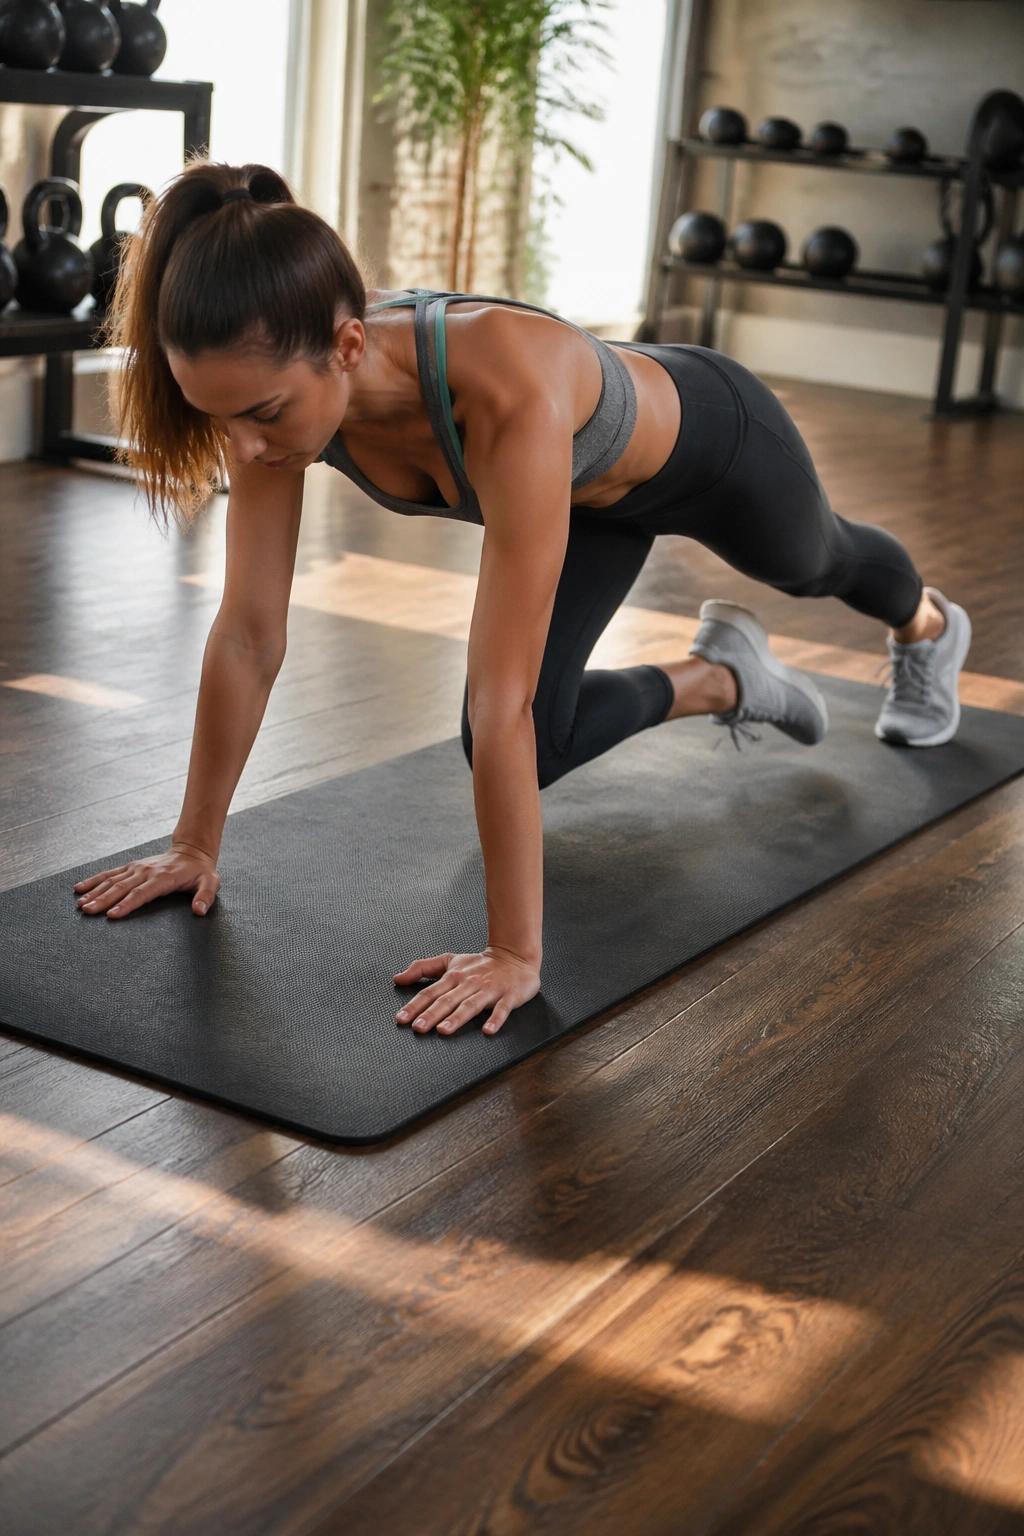
Fast mountain climbers get messy fast. Slow ones are the real core drill.
Bring one knee in at a time from a strong plank, but do it with control. Hold the body line. Keep the shoulders steady. Think of sliding the knee forward under the torso rather than slamming it toward the chest. The slower speed makes the lower abs brace harder, and the heart rate still climbs if you keep moving for 20 to 40 seconds.
One-sentence truth: fast is usually sloppy.
This version also treats your hips and shoulders more kindly than the frantic gym-floor kind. That matters if your low back tends to complain or if your form falls apart once you get winded. Start with 3 rounds of 20 seconds on, 20 seconds off. Build to 30 or 40 seconds only when you can keep the plank shape.
The nice part is that it works as both core training and conditioning. You do not need to separate those things so cleanly.
9. Bicycle Crunches Done the Right Way
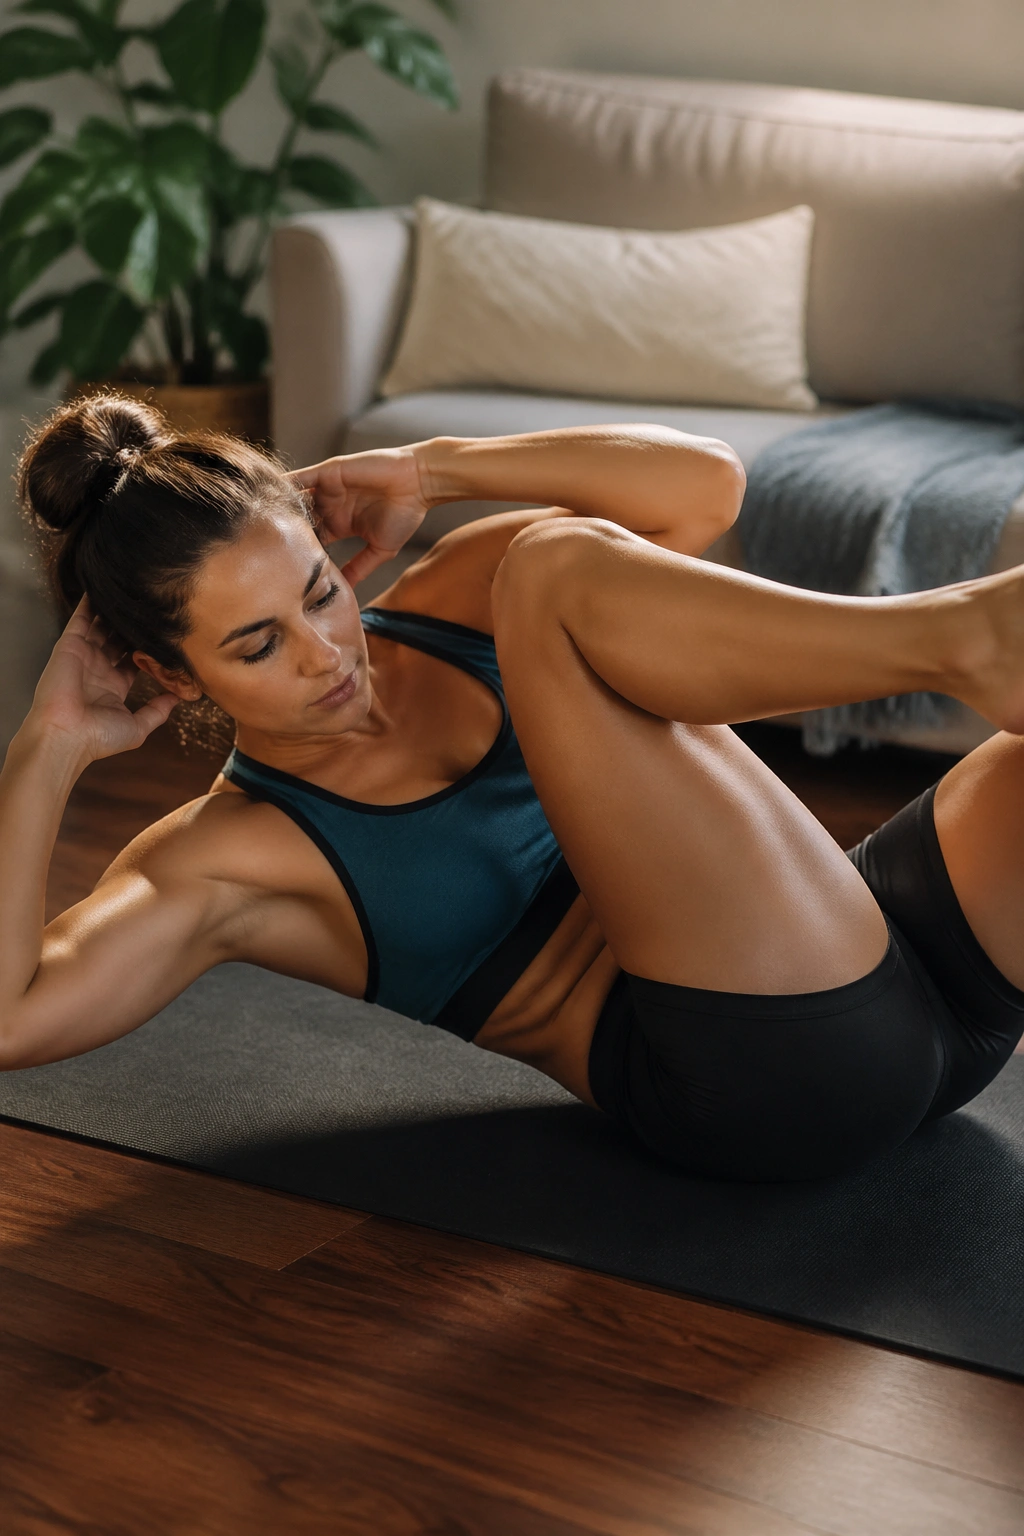
Why do bicycle crunches get such mixed reviews?
Because most people do them like they’re trying to win a race in the middle of a bad song. The neck pulls, the elbows fly, and the twisting comes from the shoulders instead of the ribs. Done that way, they’re noisy and not all that useful. Done slowly, they hit the obliques and lower abs in a much better way.
How to slow it down
Keep your hands light behind your head, not locked in place. Bring one knee in as the opposite shoulder rotates toward it, then switch with control. The goal is rib cage rotation, not elbow hunting. Your torso should twist a little; your hips should not wobble all over the place.
- Keep the lower back close to the floor.
- Exhale on each twist.
- Move at a pace where you can feel the abs.
- Stop if your neck gets tight.
If you like counting, 8 to 12 reps per side is enough. More is not always better here. Cleaner reps beat a bigger number.
10. Bird Dog Reaches
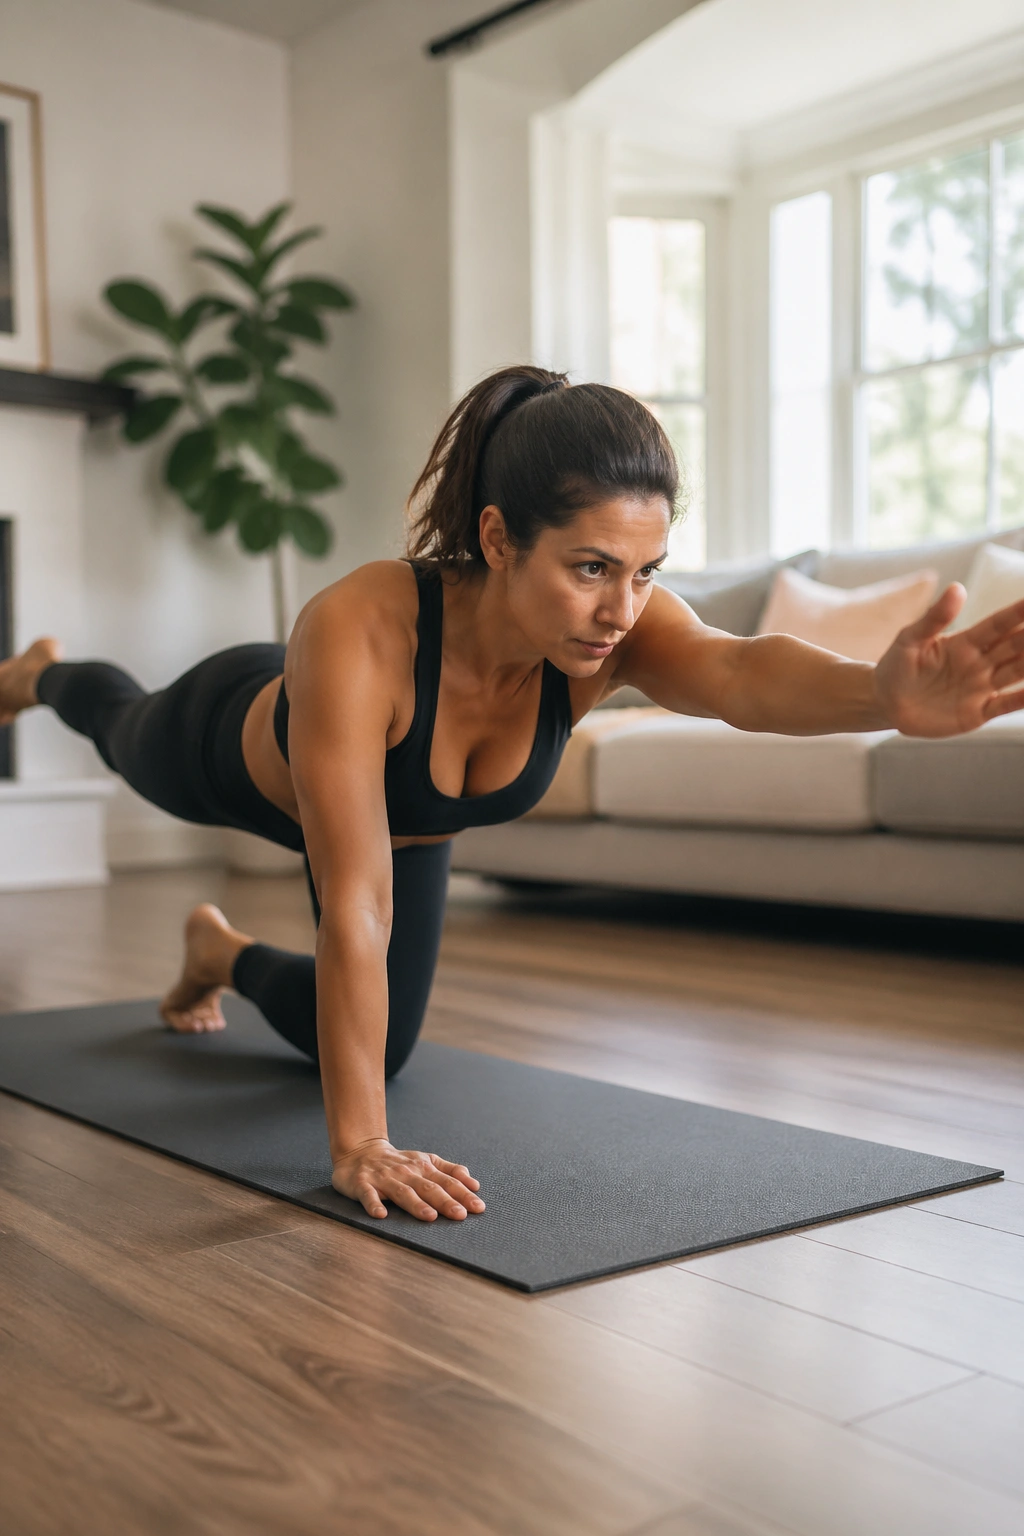
The bird dog is boring in the best possible way.
It teaches the body to stay still while opposite limbs move, and that is a skill a lot of people are missing. If your lower belly sticks out more when you stand, walk, or reach overhead, this drill helps retrain the trunk to stop overdoing the arch-and-sway pattern. It also gives the glutes some work, which matters more than people like to admit.
You start on hands and knees, then reach one arm forward and the opposite leg straight back. Keep the hips level. Do not let one side of the pelvis tilt open. The movement should feel long and controlled, like you’re stretching the floor away from you without collapsing your spine.
No burn? Fine. That’s not the point. Bird dog is a reset move, and those are worth their weight in gold when the front of the waist feels stuck.
Try 6 to 10 reps per side, pausing for 2 seconds at full reach. Slow, steady, calm. Very little flash. Plenty of value.
11. Glute Bridge March
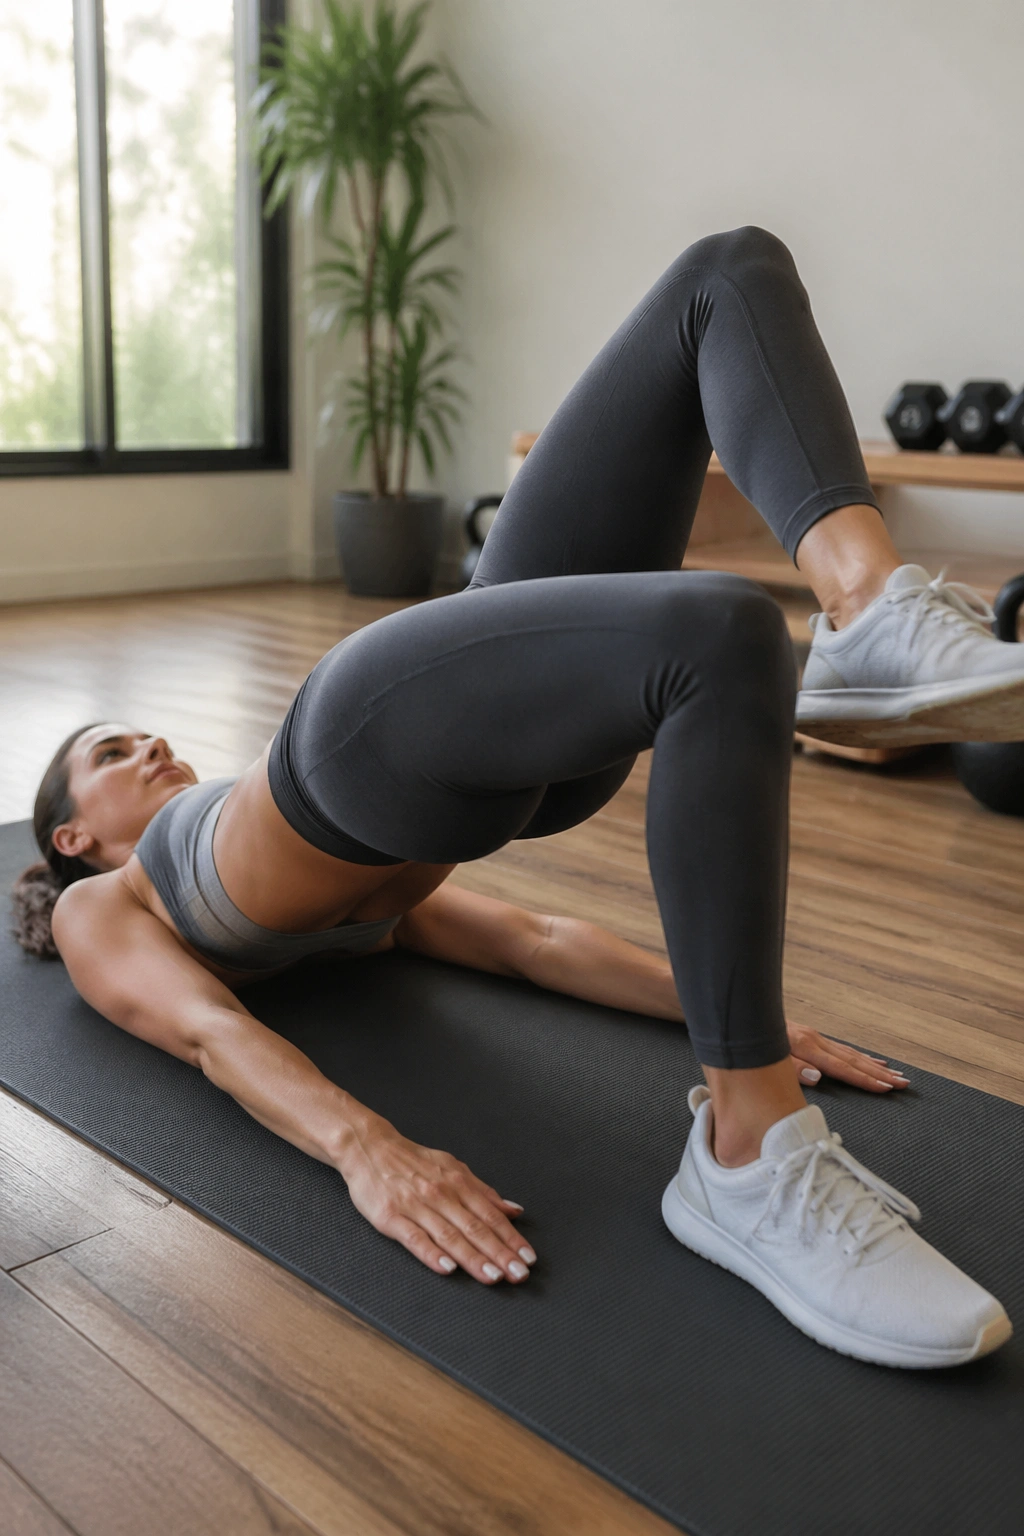
A weak backside can make the front of the body look softer than it needs to.
That’s why the glute bridge march belongs on this list. When the glutes do their job, the pelvis has a better chance of staying level instead of tipping forward and making the lower belly push out. The bridge also wakes up the hamstrings and teaches the core to keep the trunk steady while the legs alternate.
Lie on your back, feet flat, and lift into a bridge until your hips are in line with your knees and shoulders. Then lift one knee a few inches without dropping the hips. Switch sides slowly. The pelvis should stay level like a tray of water you don’t want to spill.
What to watch for
- Don’t overarch the back.
- Keep the ribs down.
- March only as high as you can control.
- Stop if the hips twist side to side.
Two to three rounds of 8 to 10 marches per side work well. If the hips start sagging, lower the bridge and clean it up.
This one is a favorite because it looks simple and hits a lot of common weak spots at once.
12. Side Plank Hip Dips
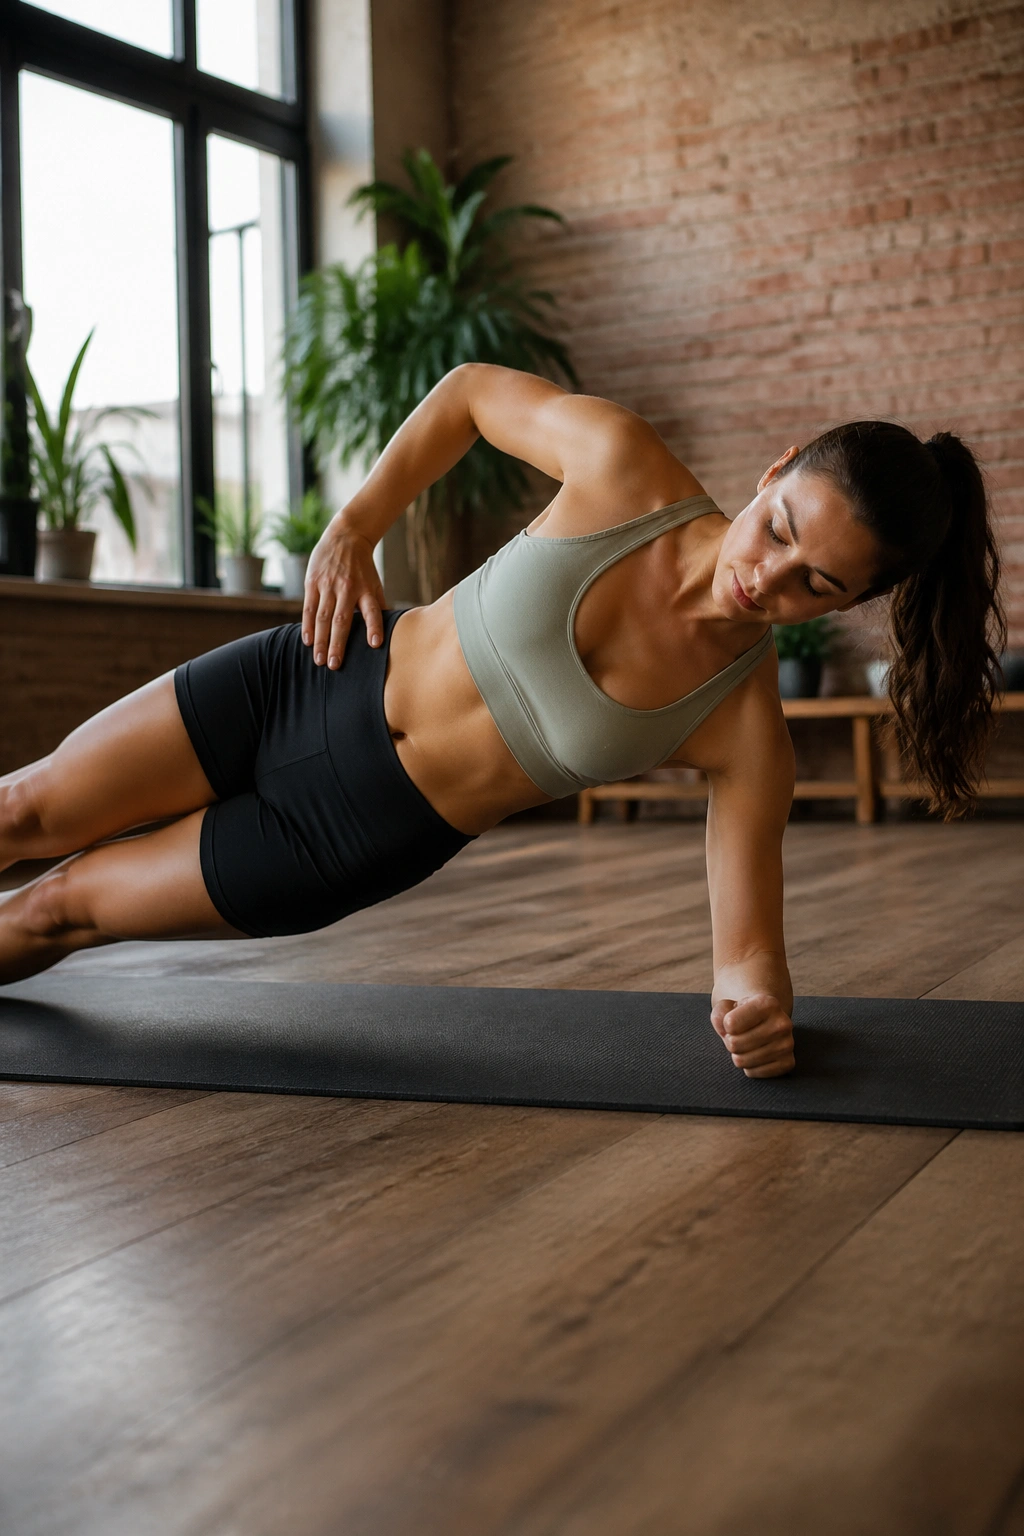
Side plank hip dips are the move people avoid until they need them.
Unlike a straight side plank, the dip adds a little motion and makes the obliques work harder through a short range. That matters for lower belly pooch because the sides of the torso help keep the waist from feeling loose when you stand, twist, or carry things. It is not just about looking narrower from the front. It is about holding shape from every angle.
Start from the forearm and feet, or drop the bottom knee if full side planks are too much. Lower the hip a few inches, then lift it back up. Small range. Clean shape. No collapsing into the shoulder.
Progressions that make sense
- Knee-down side plank dip
- Full side plank dip
- Top-leg lifted side plank dip
Pick the version where you can keep your top shoulder stacked and your neck relaxed. That stack is the whole game. If your torso folds, the exercise is too hard right now.
I like this one because it punishes cheating in a very honest way. There is no hiding in it.
13. Standing Knee Drives
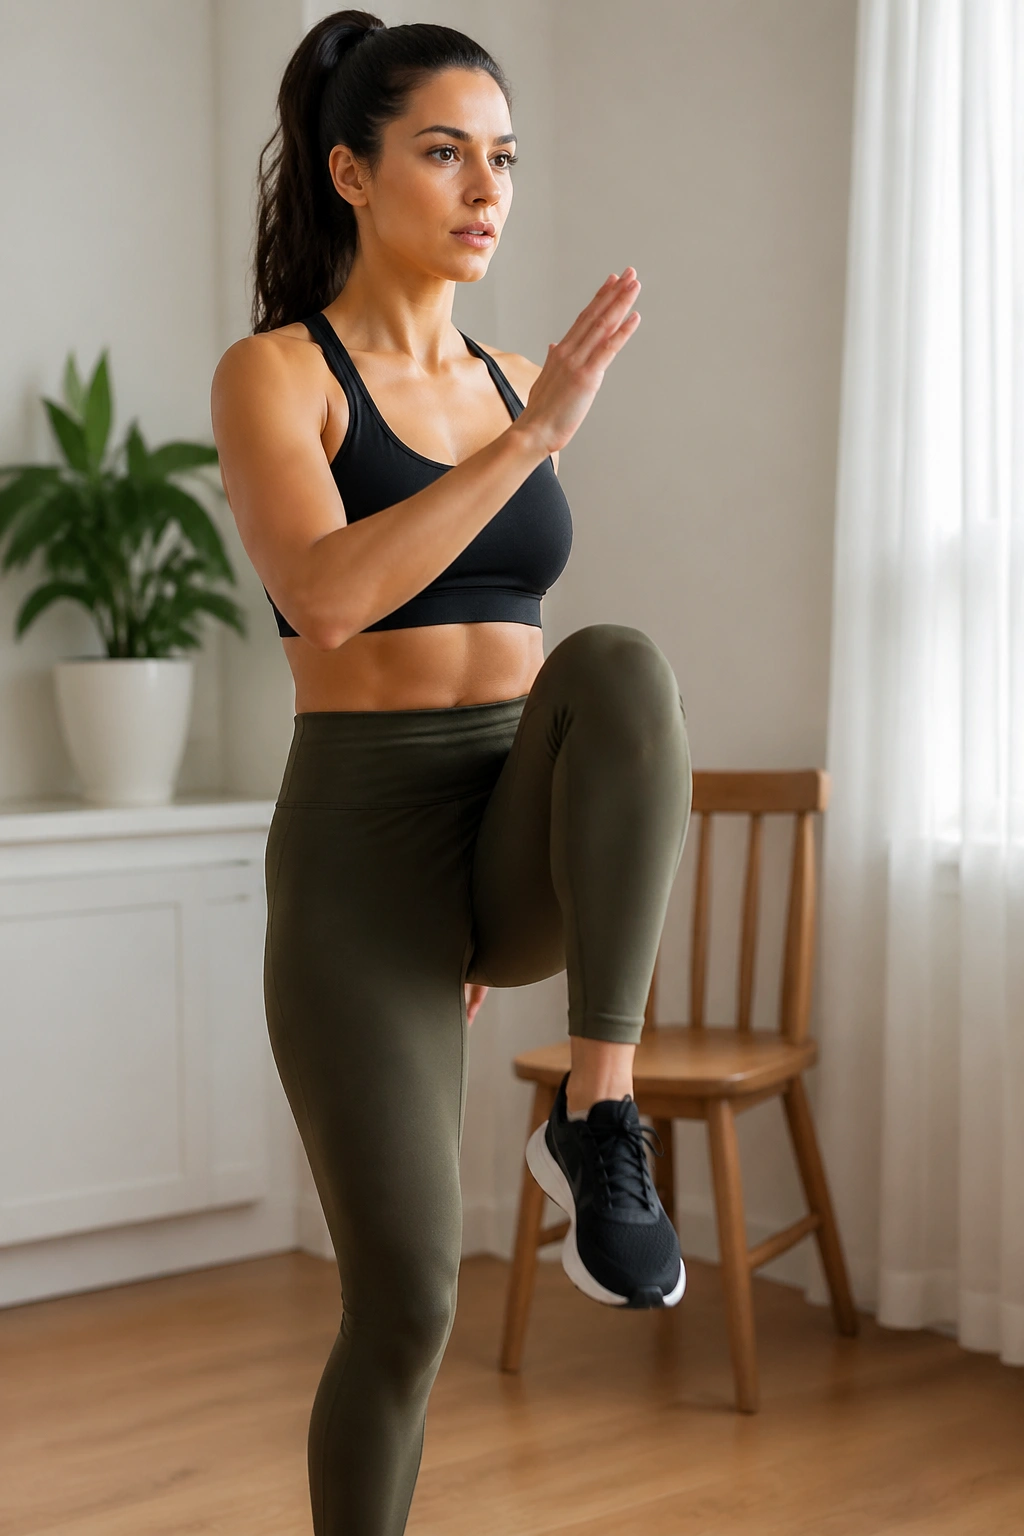
Not everybody wants to live on the floor.
Standing knee drives are a good answer when you want core work that feels more natural and less punishing on the wrists or low back. Stand tall, brace your middle, and drive one knee up toward your chest while the opposite arm comes forward. Keep the torso upright. Do not lean back to fake the motion.
The best cue is simple: tall spine, tight belly, smooth exhale.
A clean version looks like this
- Hold a wall or chair if needed.
- Lift one knee to hip height or as high as you can control.
- Pause for one beat at the top.
- Lower without dropping into the standing hip.
- Switch sides for 30 to 45 seconds.
This move works well as a warm-up or a cardio-core interval. It’s also a good reminder that a flatter-looking lower belly is not only about floor crunches. Sometimes it’s about teaching the body to stay stacked when you are upright, which is where life actually happens.
14. Squat to Knee Drive
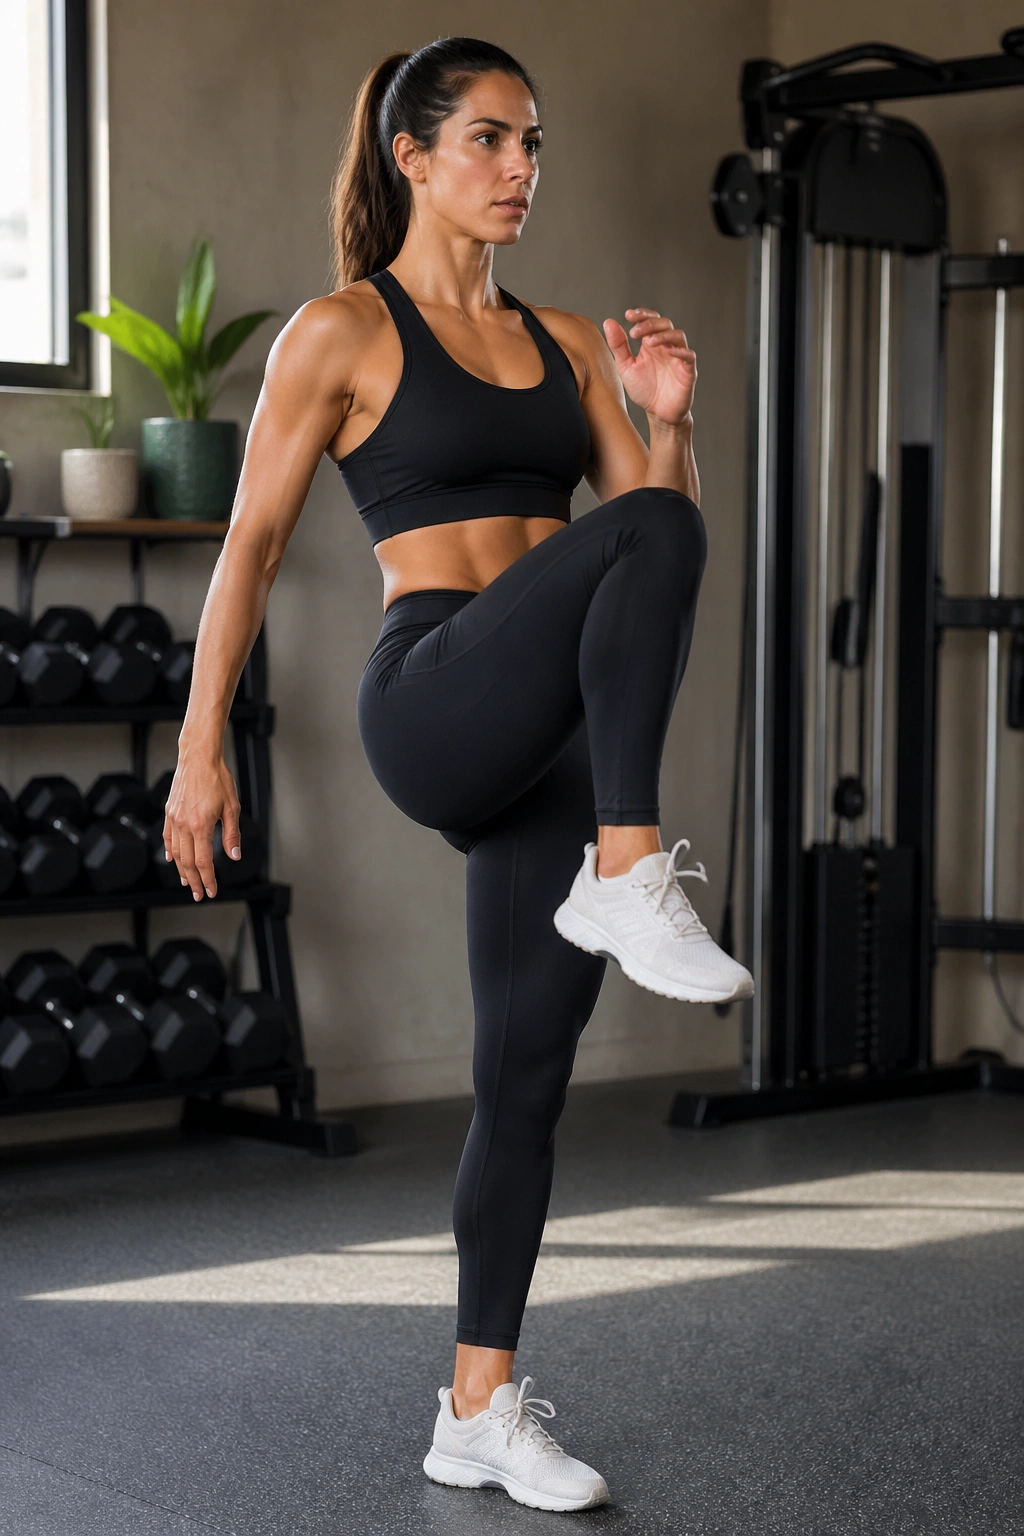
This one earns its place because it blends lower-body work with core control.
Drop into a squat, stand up with force, then drive one knee upward. That transition teaches the trunk to stay steady while the legs do something powerful, which is useful if your goal is body recomposition and a tighter-looking waist. You burn more energy than you would lying on the floor, and the core still has to stop the torso from wobbling.
Keep your feet planted in the squat. Push through the whole foot as you rise. Then bring the knee up without leaning backward like you’re trying to show off. Short, controlled, crisp. That’s the version you want.
If you’re building a circuit, 8 to 12 reps per side is enough. Rest 20 to 30 seconds between rounds. Quality drops fast when people turn this into a speed drill.
I’d pick this over a thousand random crunches if the real goal is fat loss plus a more athletic waistline.
15. Slow Burpees
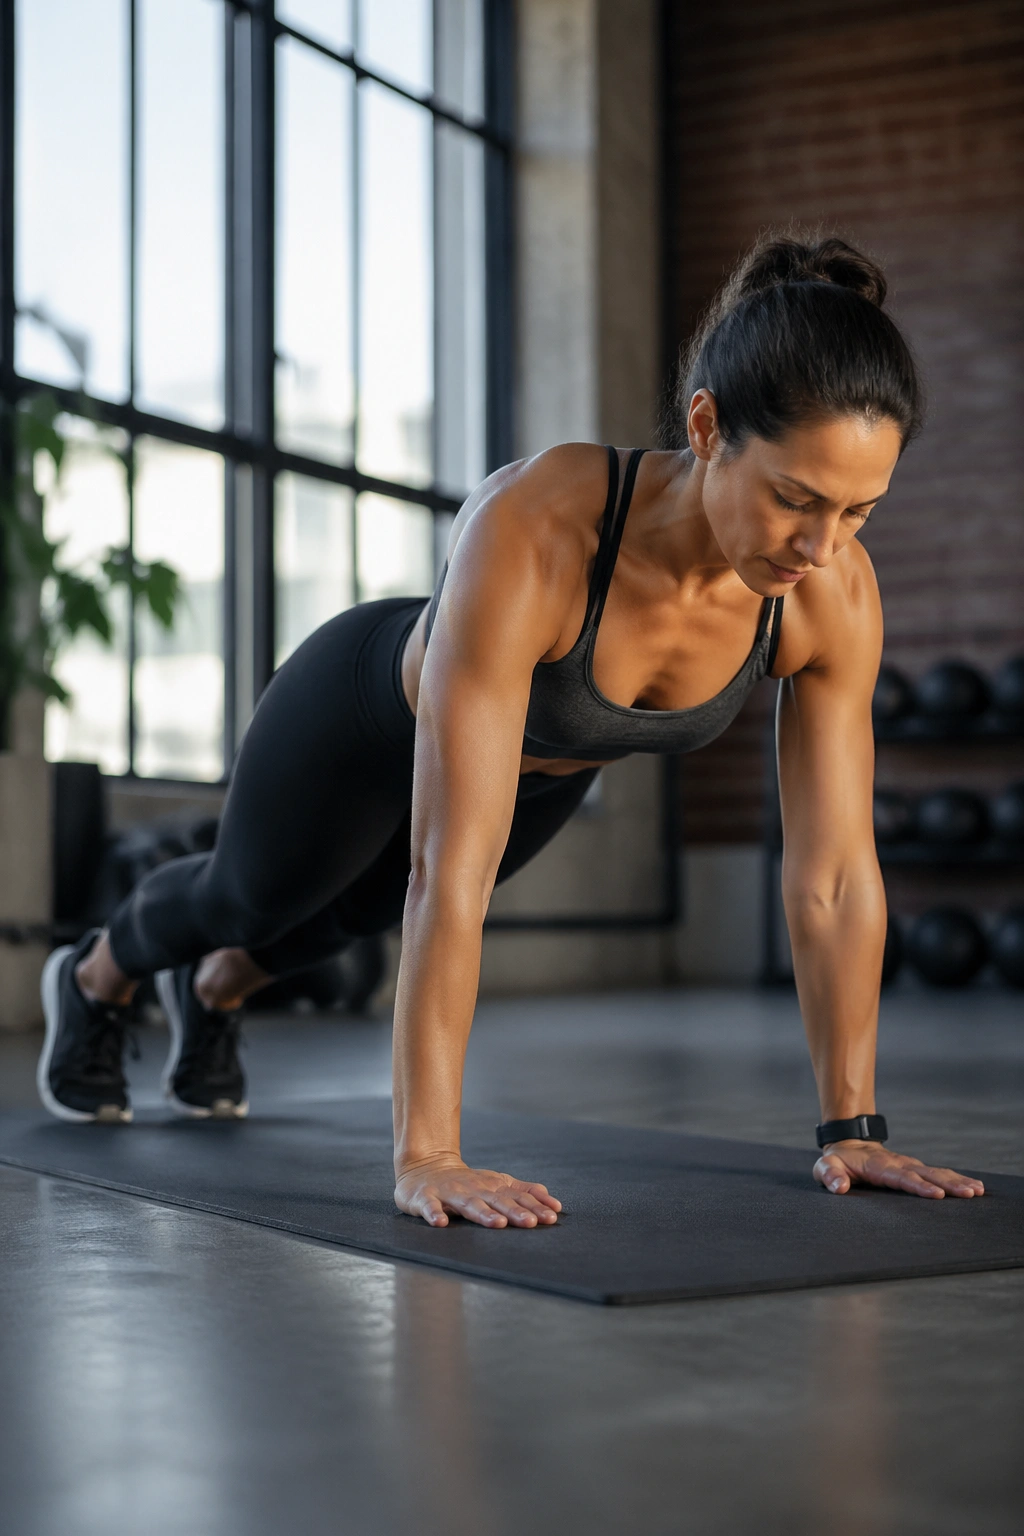
Slow burpees are much kinder than the punishing version people dread.
You can step back instead of jumping, skip the push-up, and still get a strong full-body hit that raises your heart rate and forces your core to stay engaged. That matters because lower belly pooch is not only a strength issue. It’s also about overall energy use, and burpees, even the slow kind, help there.
Safer ways to do them
- Step back into plank instead of jumping.
- Skip the push-up if your back sags.
- Step forward one foot at a time.
- Stand tall before the next rep.
You want the torso to stay braced through the plank phase, not collapse into the floor. If your low back caves in, strip the movement down. There is no prize for suffering through bad form.
A simple interval is 20 seconds on, 40 seconds off, for 6 to 8 rounds. That’s plenty. Slow burpees should feel athletic, not sloppy.
16. Pilates 100s
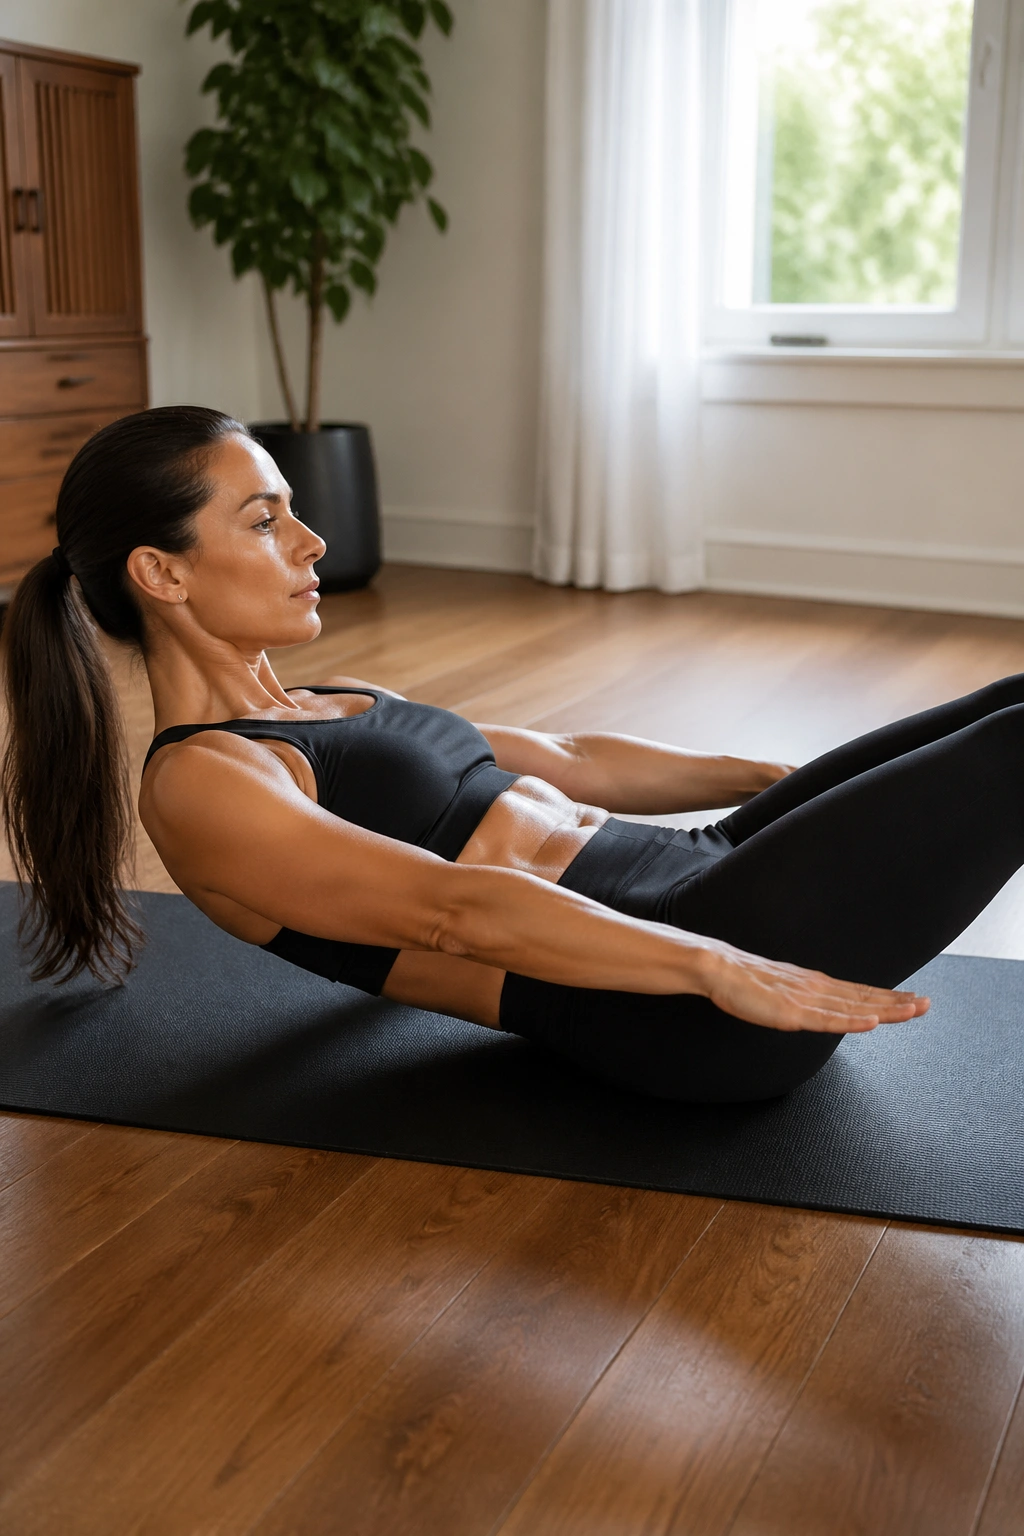
The Pilates 100 is famous for a reason, and it’s not just the name.
It teaches deep-core endurance through breathing and tension, which is a fancy way of saying you learn to hold your trunk together while your arms pulse and your legs stay fixed. The belly has to stay drawn in without you sucking your stomach so hard that the breath turns weird. That balance is what makes this move useful.
Start with your knees bent if your back arches when your legs go long. Pump the arms up and down in small motions while breathing in for 5 counts and out for 5 counts. Do that for 10 cycles. The whole thing adds up to 100 arm pumps.
How to keep your neck relaxed
- Keep the chin slightly tucked.
- Look toward your thighs, not the ceiling.
- Raise the head only if the neck stays easy.
- Bend the knees if the low back lifts.
This is a classic because it teaches endurance, not just tension. Endurance matters when your core has to hold itself together for a full day, not five seconds.
17. Flutter Kicks
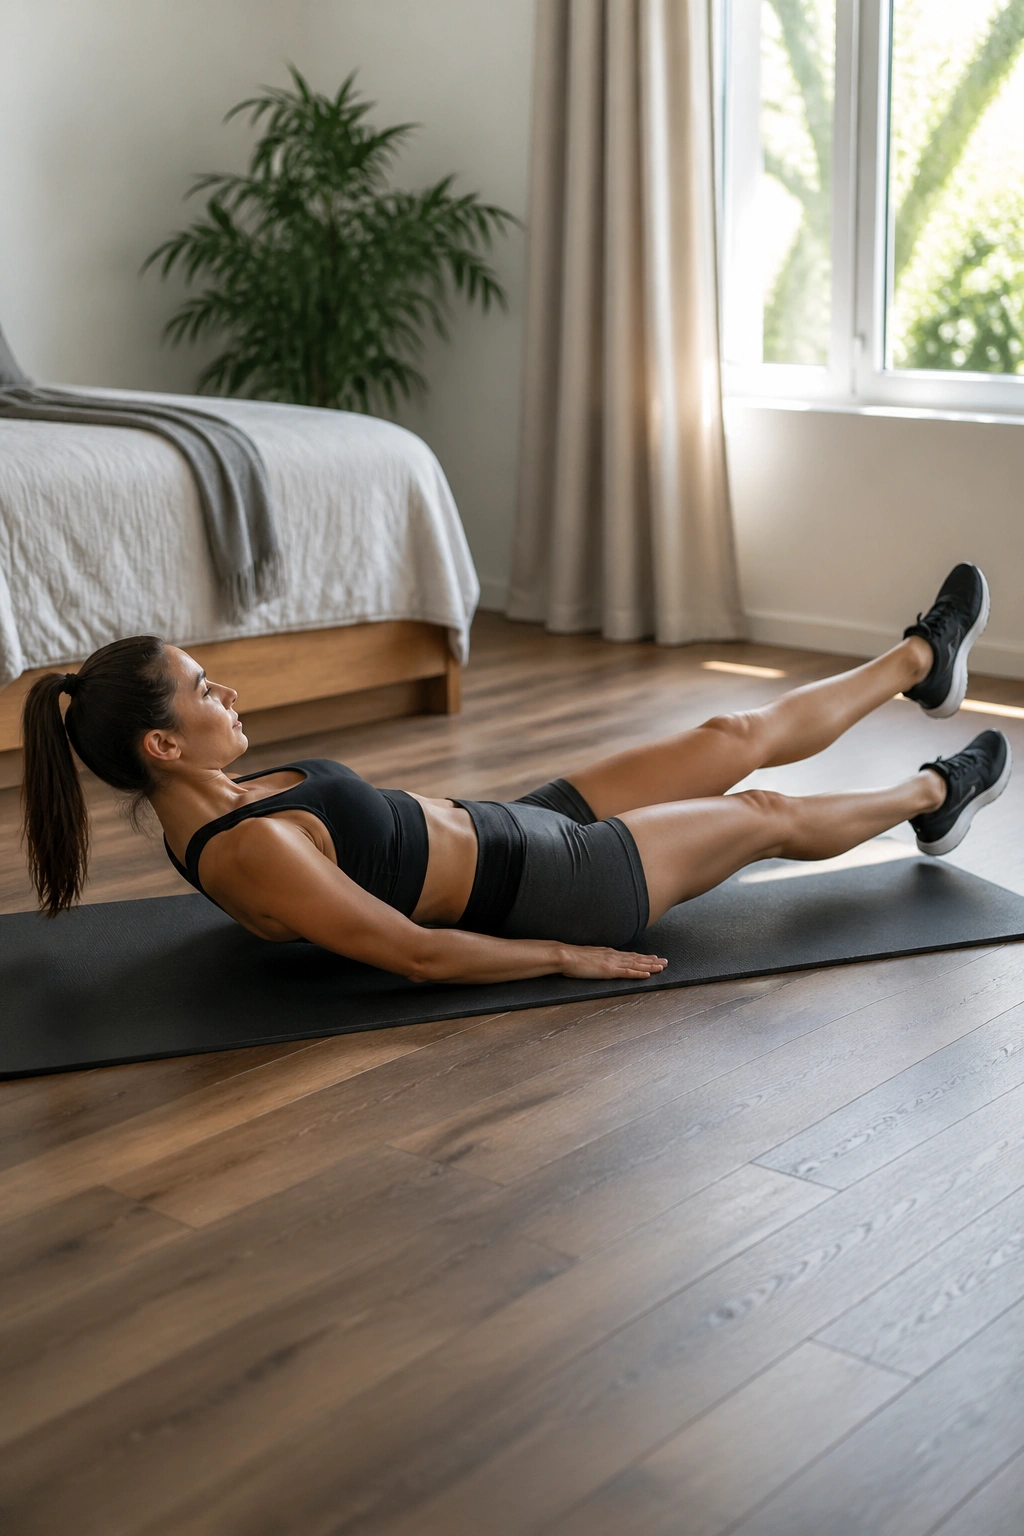
Flutter kicks are tiny, and that is exactly why they hurt.
Lie on your back, press your lower back down, and kick the legs in short alternating motions a few inches off the floor. If the range gets big, the hips start to rock and the lower abs stop working well. Small kicks are the whole point. Bigger is worse here.
A lot of people feel these in the hip flexors first. That usually means the legs are too low, the back is arching, or the pace is too frantic. Raise the legs a little, shorten the kick, and slow down until the belly takes over.
Better setup
- Hands under the hips if needed.
- Knees slightly bent for support.
- Kick for 20 to 30 seconds.
- Rest 20 seconds.
- Repeat 3 to 5 rounds.
This is one of those moves that looks simple on paper and turns mean in practice. Good. That means it’s honest.
18. Suitcase Carry
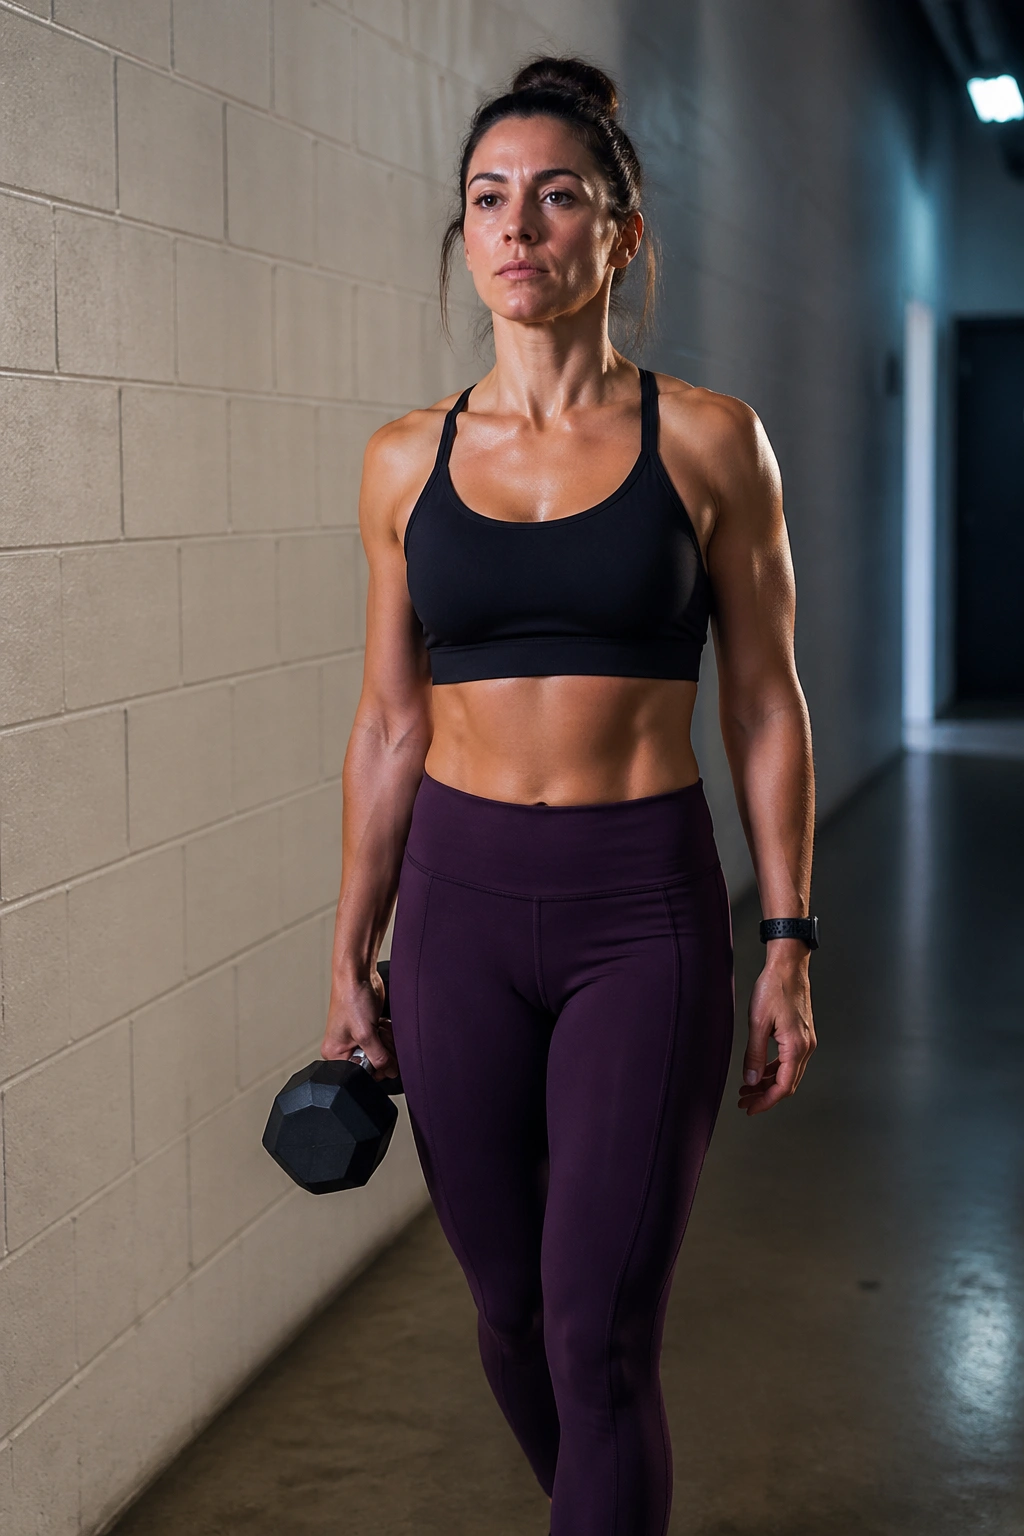
If you want a lower belly workout that feels more like real life, this is it.
Hold one heavy dumbbell or kettlebell on one side and walk without leaning toward the weight. That single-side load forces your obliques and deep core to stop your torso from tipping, and that anti-lateral-flexion work is fantastic for posture. A waist that holds itself upright tends to look firmer, even before you’ve lost much body fat.
The carry also has a nice side effect: it makes you stand taller. Shoulders settle. Ribs come down. The whole front of the body stops slumping forward so much.
How to carry it
- Pick a weight that makes your side want to dip.
- Walk 20 to 40 seconds per side.
- Keep your ribs stacked over your hips.
- Switch hands and repeat for 2 to 4 rounds.
No dumbbell? A loaded grocery bag works. A sandbag works. A heavy backpack held on one side works in a pinch. The rule is simple: resist the lean.
I love this one because it is not fancy, and it is brutally practical.
Final Thoughts
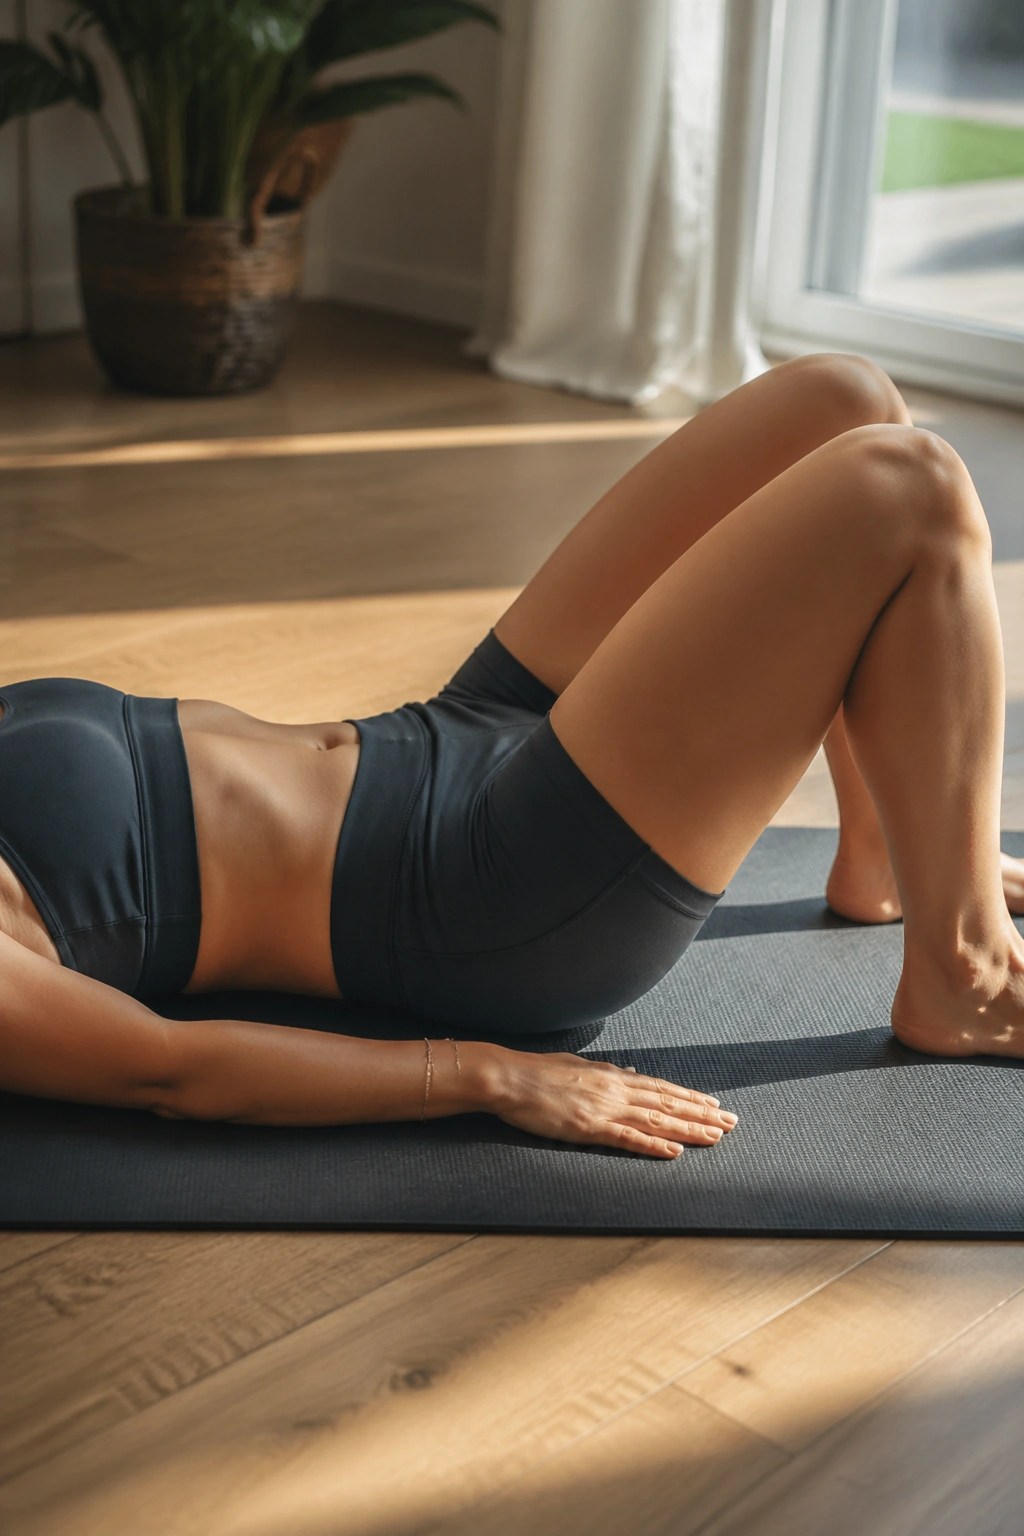
A flatter-looking lower belly rarely comes from one magic move. It comes from a mix of deep-core control, better posture, and enough full-body work to change body composition over time.
If you only remember one thing, make it this: train the core to resist movement, not just crunch up and down forever. The body changes fast when the pelvis, ribs, and glutes start working together instead of fighting each other.
Pick three or four of these moves, run them in a circuit for 12 to 20 minutes, and stay consistent long enough for the shape to change. A hold, a flexion move, and a standing move is a solid combination. Add walking and sane eating habits, and the results start to look a lot less mysterious.
